


drobinson02199
-
Posts
921 -
Joined
-
Last visited
Content Type
Profiles
Forums
Gallery
Events
Posts posted by drobinson02199
-
-
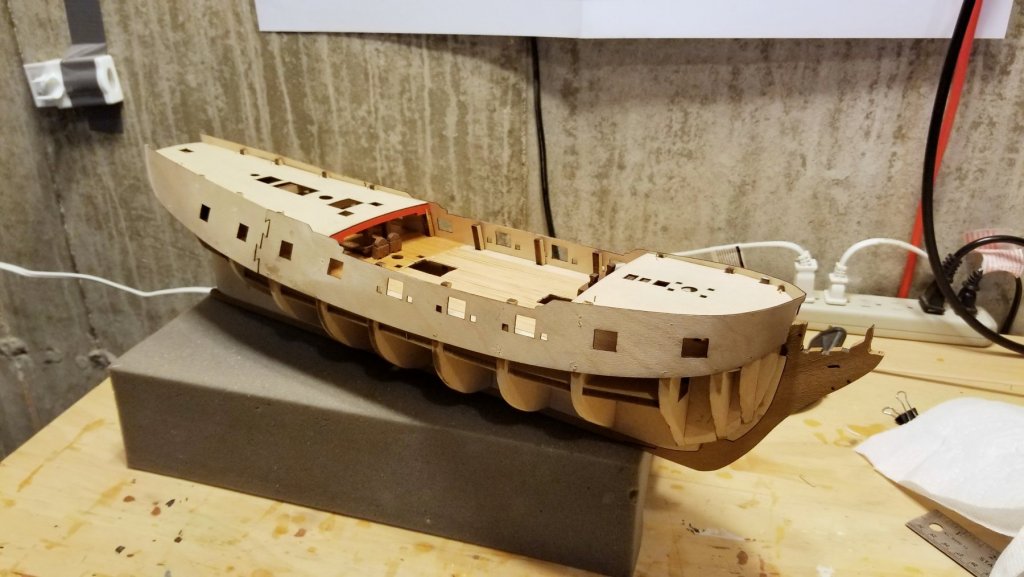
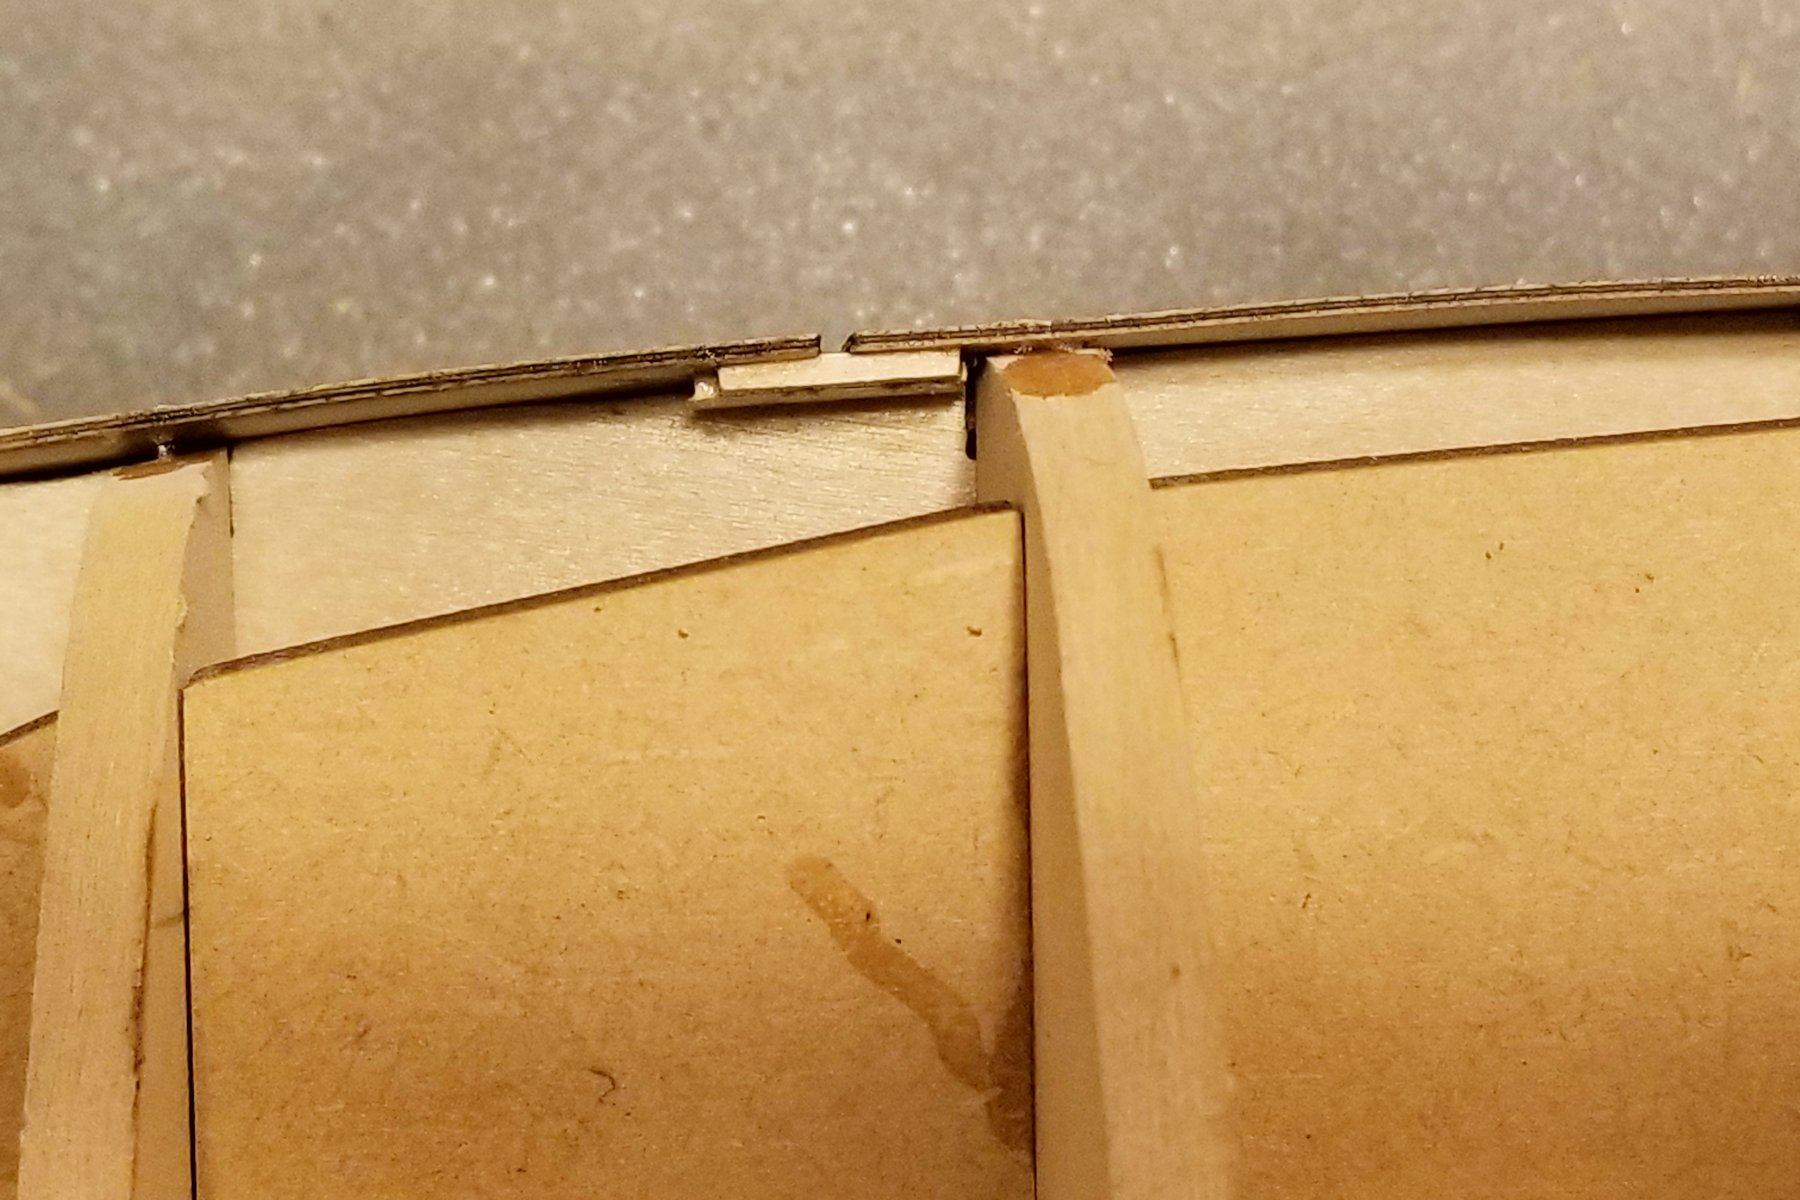
Bulwarks on and ready for first planking.
The bottom edge of the rear bulkhead was springing out where it joins the front bulkhead, so I added a small stiffener behind it. Second picture.
Mindful of advice above from Mike and Chris, I considered gluing down the top decks at this point (the instructions say to do it after both plankings). I finally decided to wait, on the off chance that while manipulating the hull so much during planking, I'd knock one of the cannon carriages loose.
Speaking of the cannon carriages: the original ones are metal with some interesting detail, while the ones supplied in the upgrade kit are wood with smooth sides. I think that's because the wood allows for the fancier cannon rigging as eyes can be installed in the carriages, but I like the look of the metal ones, so I'll use those and the simpler rigging.
Regards,
David

- Landlubber Mike and Martin W
-
 2
2
-
Looks great, Chris. You are really making progress now.
Regards,
David
- cog and popeye the sailor
-
2
-
Chris Coyle: Yes, I can see from some of the build logs on Fly that others have just done one continuous planking run, but they are on there now with fittings glued on top, so on they stay.
Chris Vossy: Speaking of materials, my Fly kit only has "natural" thread at the thickness needed for ratlines. I looked at all of the Fly pics I could find, and all show black thread, so I think I'm expected to dye the natural thread black. No way -- I bought some black thread for the ratlines.
I also agree with you about things not being mentioned or being assumed -- these instructions are a bit sketchy compared to the Revenge ones, which were magnificent. Both Chris Watton -- just different time periods.
Regards,
David
-
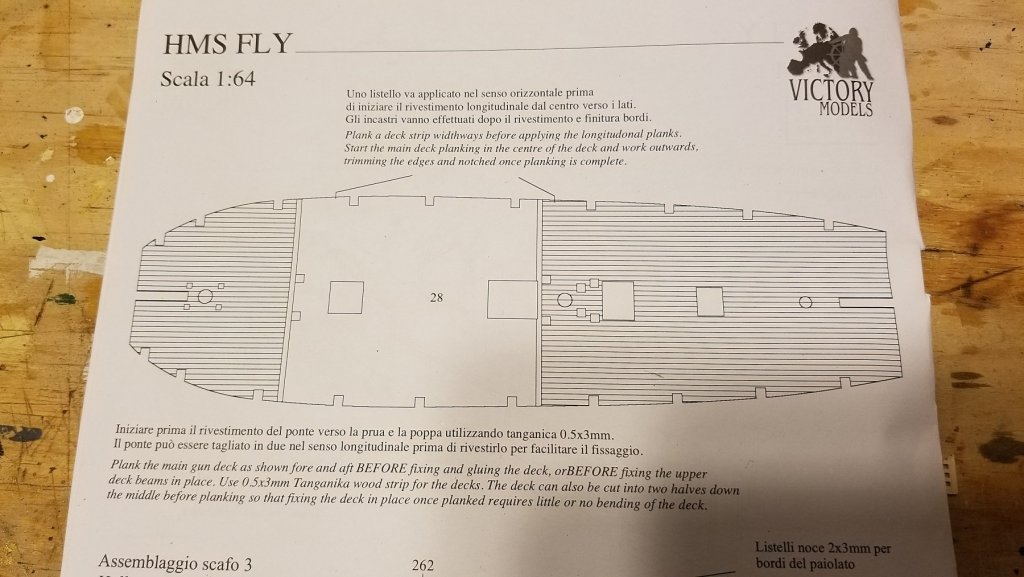
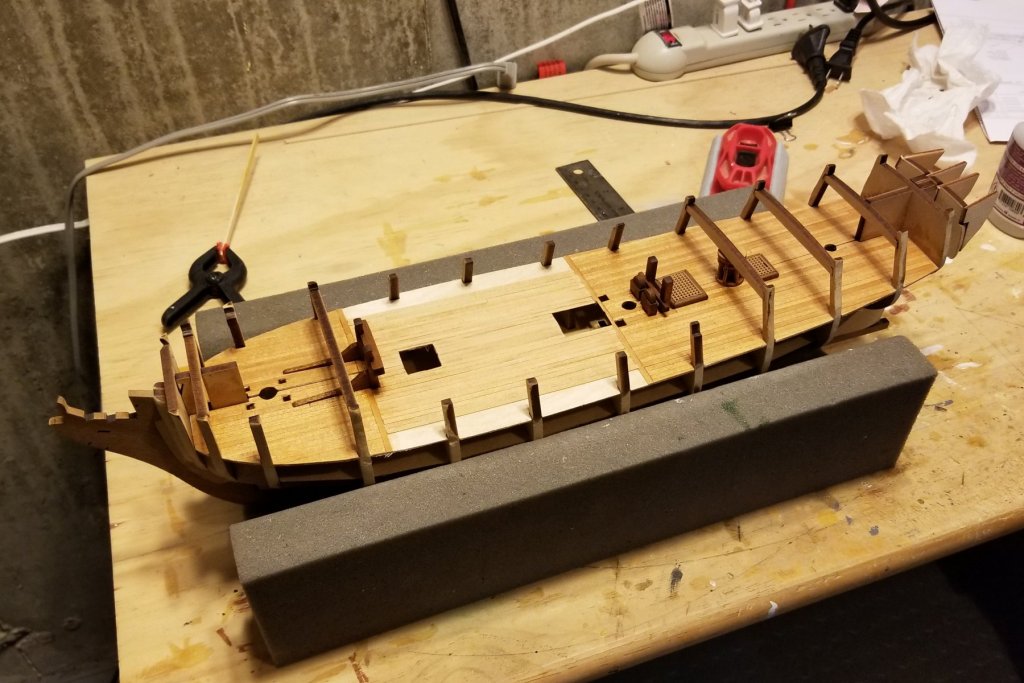
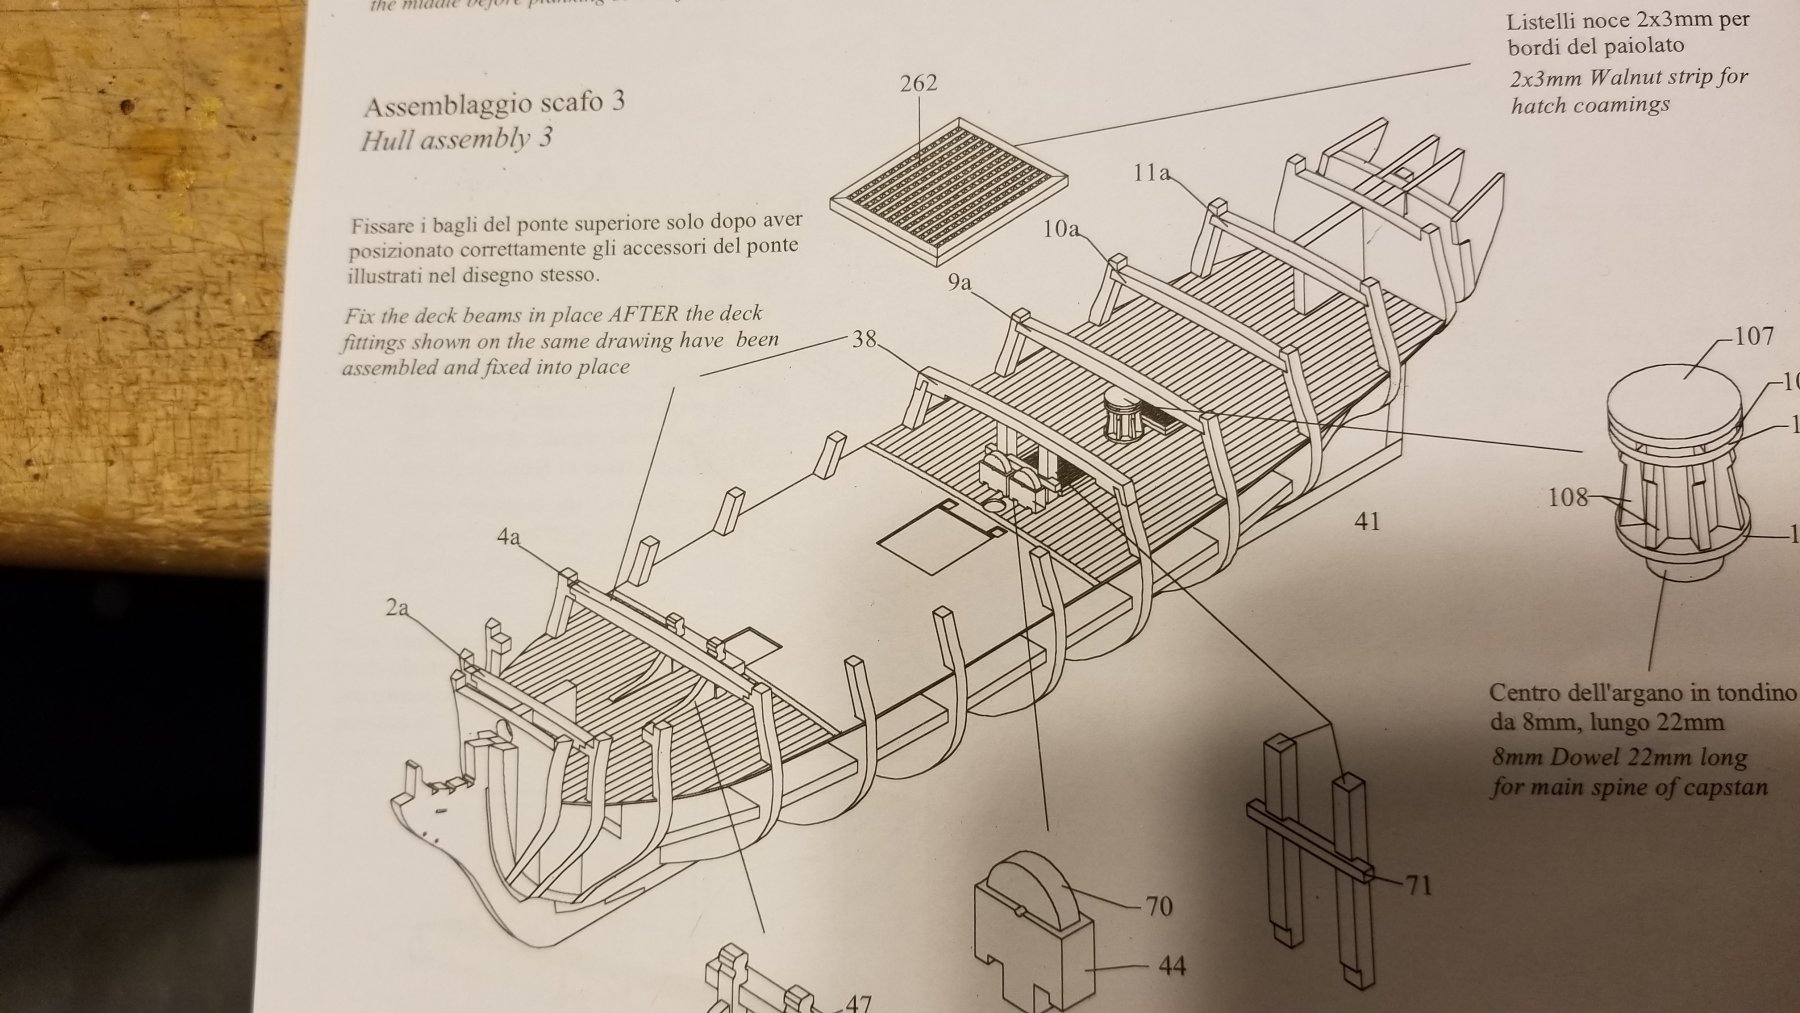
This last stage I've finished wasn't helped by the instructions. Look at the two drawings below. The first one shows how the gun deck should be initially planked, and I placed those lateral planks where indicated. Now look below, and you'll see that they have moved. The issue is that one of the deck fittings straddles the planks I installed and the center section, so as a fix I had to go ahead and plank the center portion out to just before the "tear off" bulkheads, so that I could fit that forward part across planked deck.
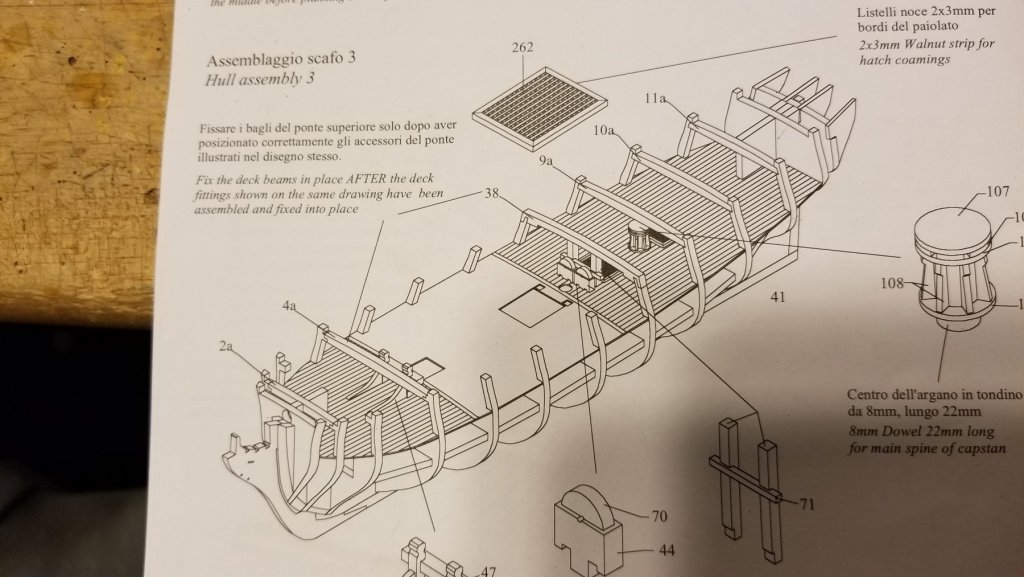
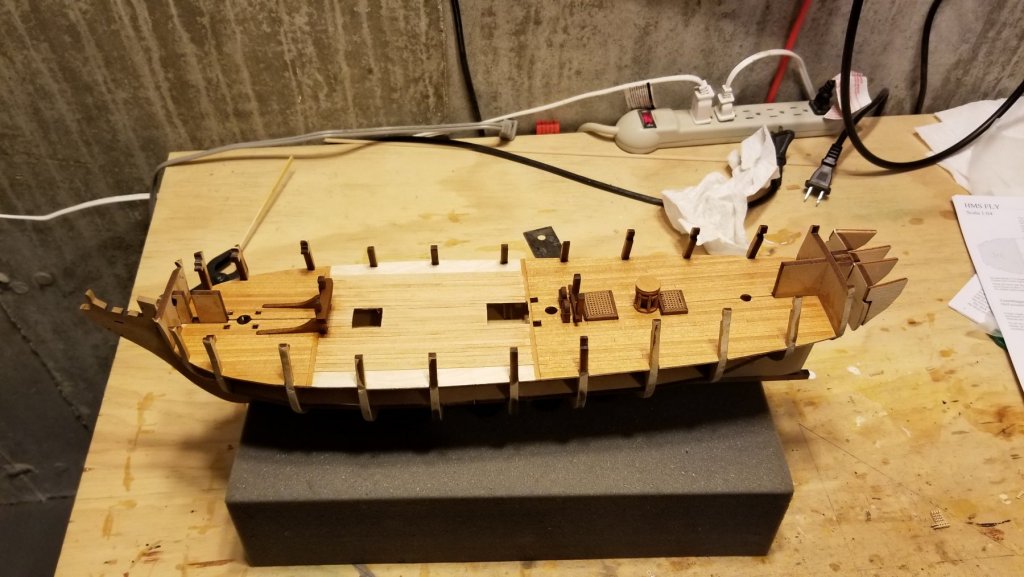
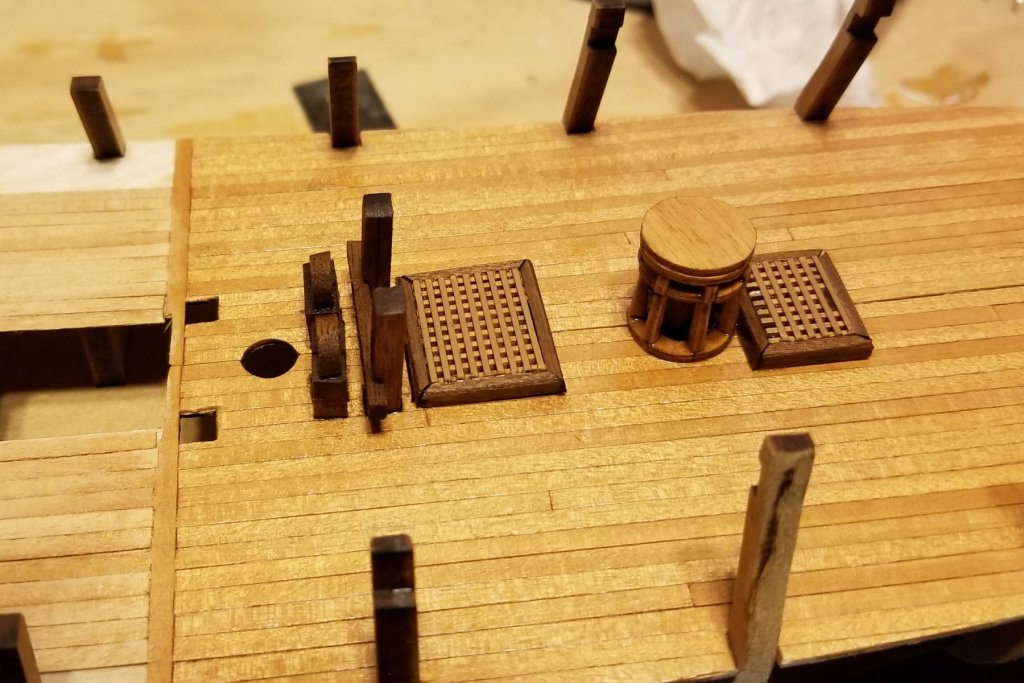
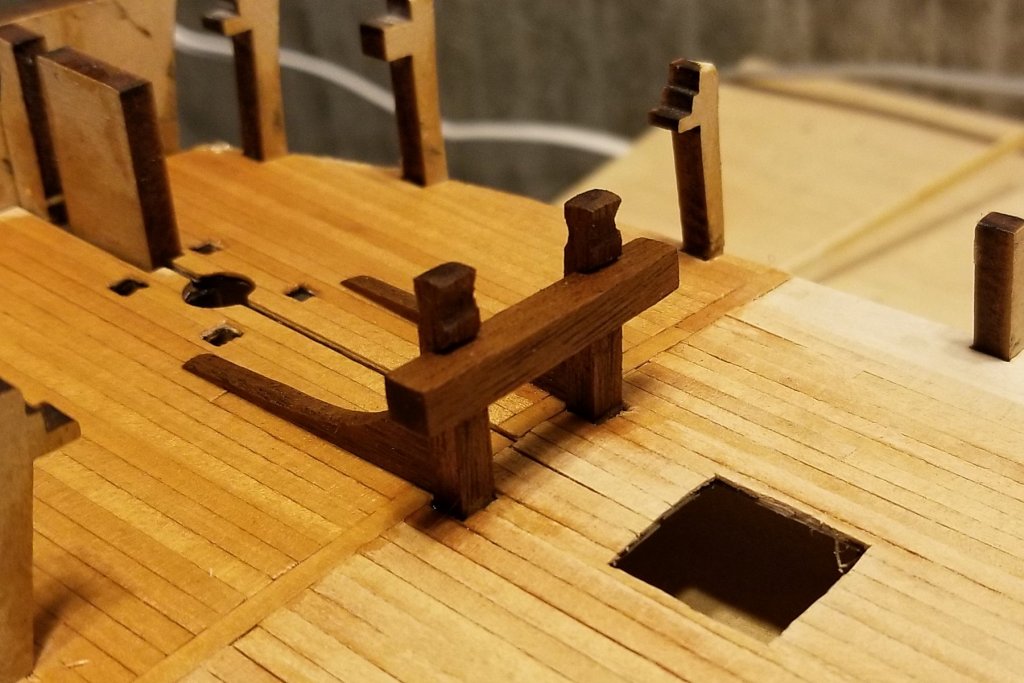
You can see it in the pictures that follow -- I haven't varnished the center section yet and won't until I finish planking it out to the bulkheads. At the end of the day, I'm fine with how this turned out, but it's an interesting inconsistency on the same page of the instructions. The final picture shows the deck beams installed.
The deck fittings I left natural -- partly because I love the look of varnished walnut, and partly because I don't want to overload the look of the boat with red fittings. The capstan you see won't be visible. I'll paint the other one on the deck above it red. You can see one of the fittings straddling old and new planking because of the way the lateral planks were drawn on the large deck diagram as noted above.
The instructions also say to cut the deck in half before planking and installing -- but mine came with the deck laser cut in two halves already. I planked them before installing. The kit must have been updated.
At the end of the day, I'm sort of glad that I ran into this issue, because if I had waited to plank the center section to the point called for in the instructions, I'd be working around the installed deck support beams, and that would be much more difficult.
I ordered some red paint on express delivery, because the red I have is too "cherry", and that is supposed to be delivered tomorrow, which is good, because I need to start painting some things red to keep going.
Regards,
David
-
-
Mike -- I love the company!
Regards,
David
- Landlubber Mike and Martin W
-
2
-
Perfect scale, Chris.
Regards,
David
- popeye the sailor and vossy
-
2
-
Chris:
I never know -- but a series of winter vacations has now come to an end, so I have more time to work on the model. I can't tell yet how complex this one will be. I know that it has fewer decks than the Revenge did. I expect to hit hull planking within a few days.
Regards,
David
-
Don:
Those hull blocks are incredibly cool!
Regards,
David
- EJ_L, Old Collingwood and CaptainSteve
-
3
-
Brilliant!
Regards,
David
- popeye the sailor and vossy
-
2
-
Looks terrific, Chris. How did you get the nails into the paddles so neatly? Looks like the angles between paddles would have been too narrow.
Regards,
David
-
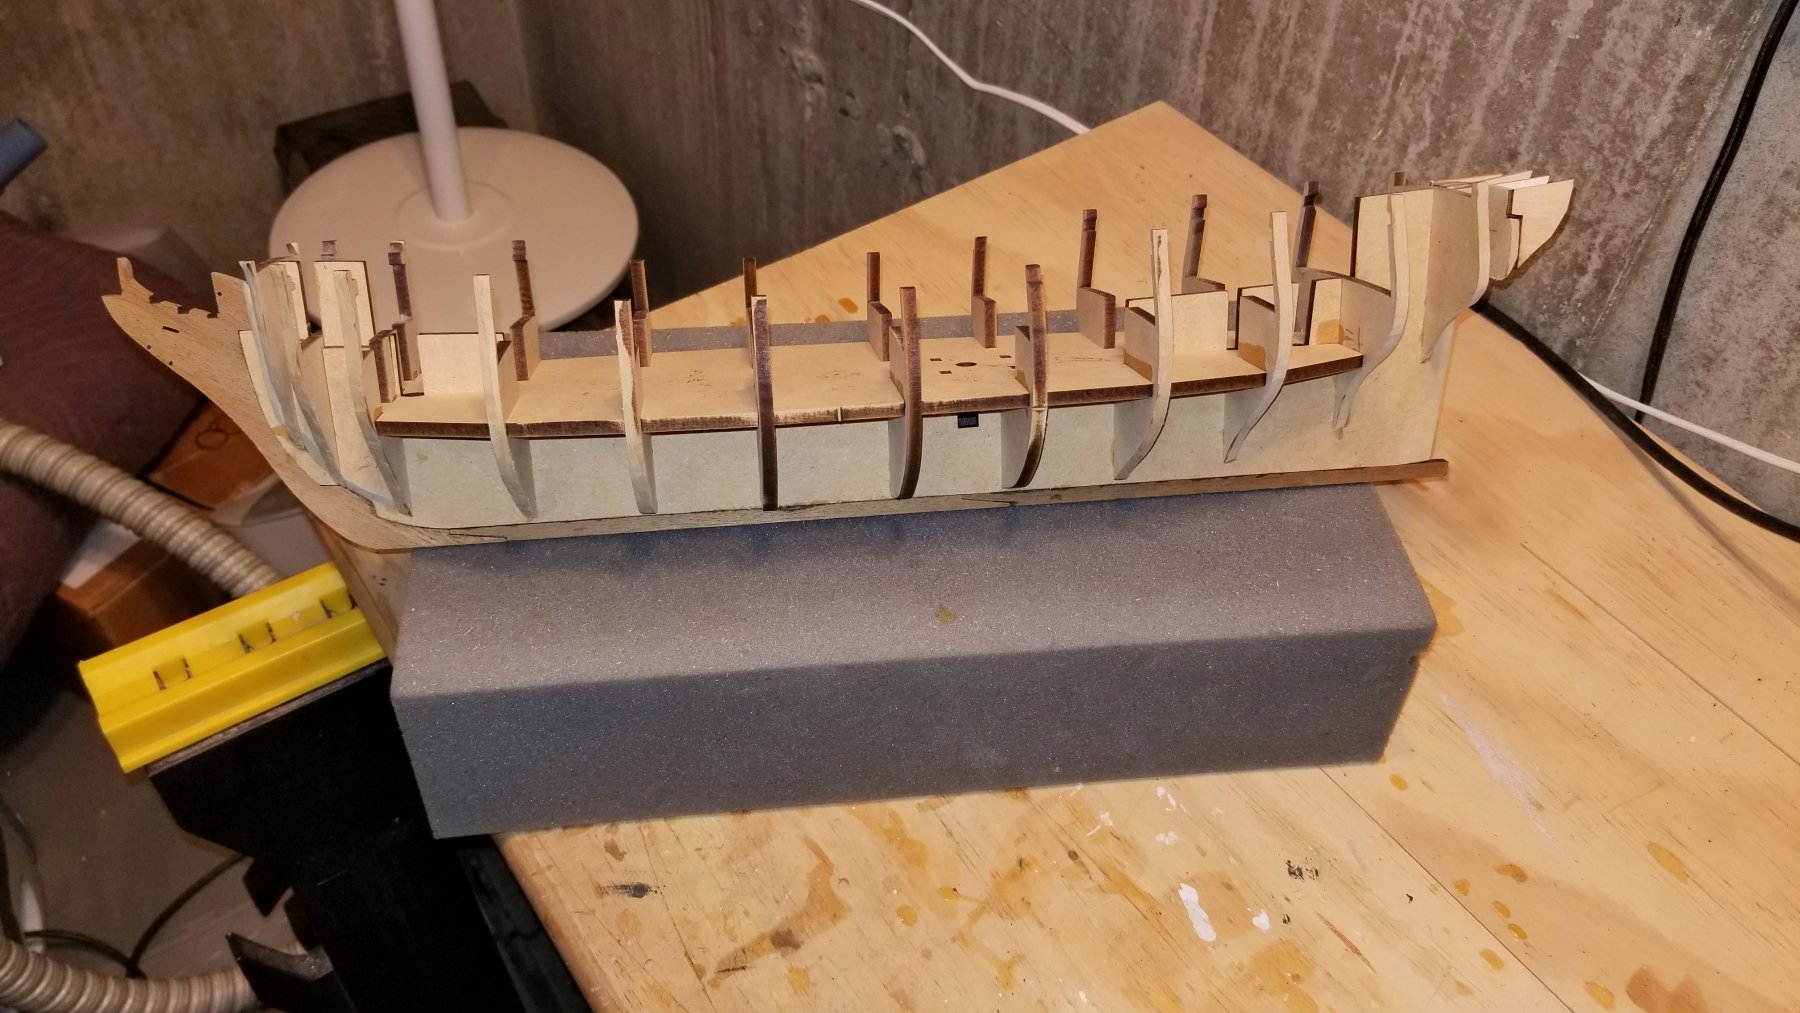
The keel and frames are done as shown below.
I thought the instruction in the manual to bevel the frames before installation was great, so dry fitted the whole assembly and used a strip of first planking wood to eyeball the curves. Then I glued in the middle three frames and popped in the deck for alignment. I use CA, so dry in no time and perfectly aligned. Then popped out the deck and beveled the next two frames on either side, testing with the strip as I went along, then gluing in those frames, and so forth.
The result is that most of the sanding is out of the way, and these frames are a lot better beveled for planking than in my other efforts where I did all the sanding after gluing everything.
The manual says that the Fly is designed for a novice-intermediate builder. Intermediate maybe, but I think a novice would have trouble given the lack of detailed pictures with the instructions.
Regards,
David

-
-
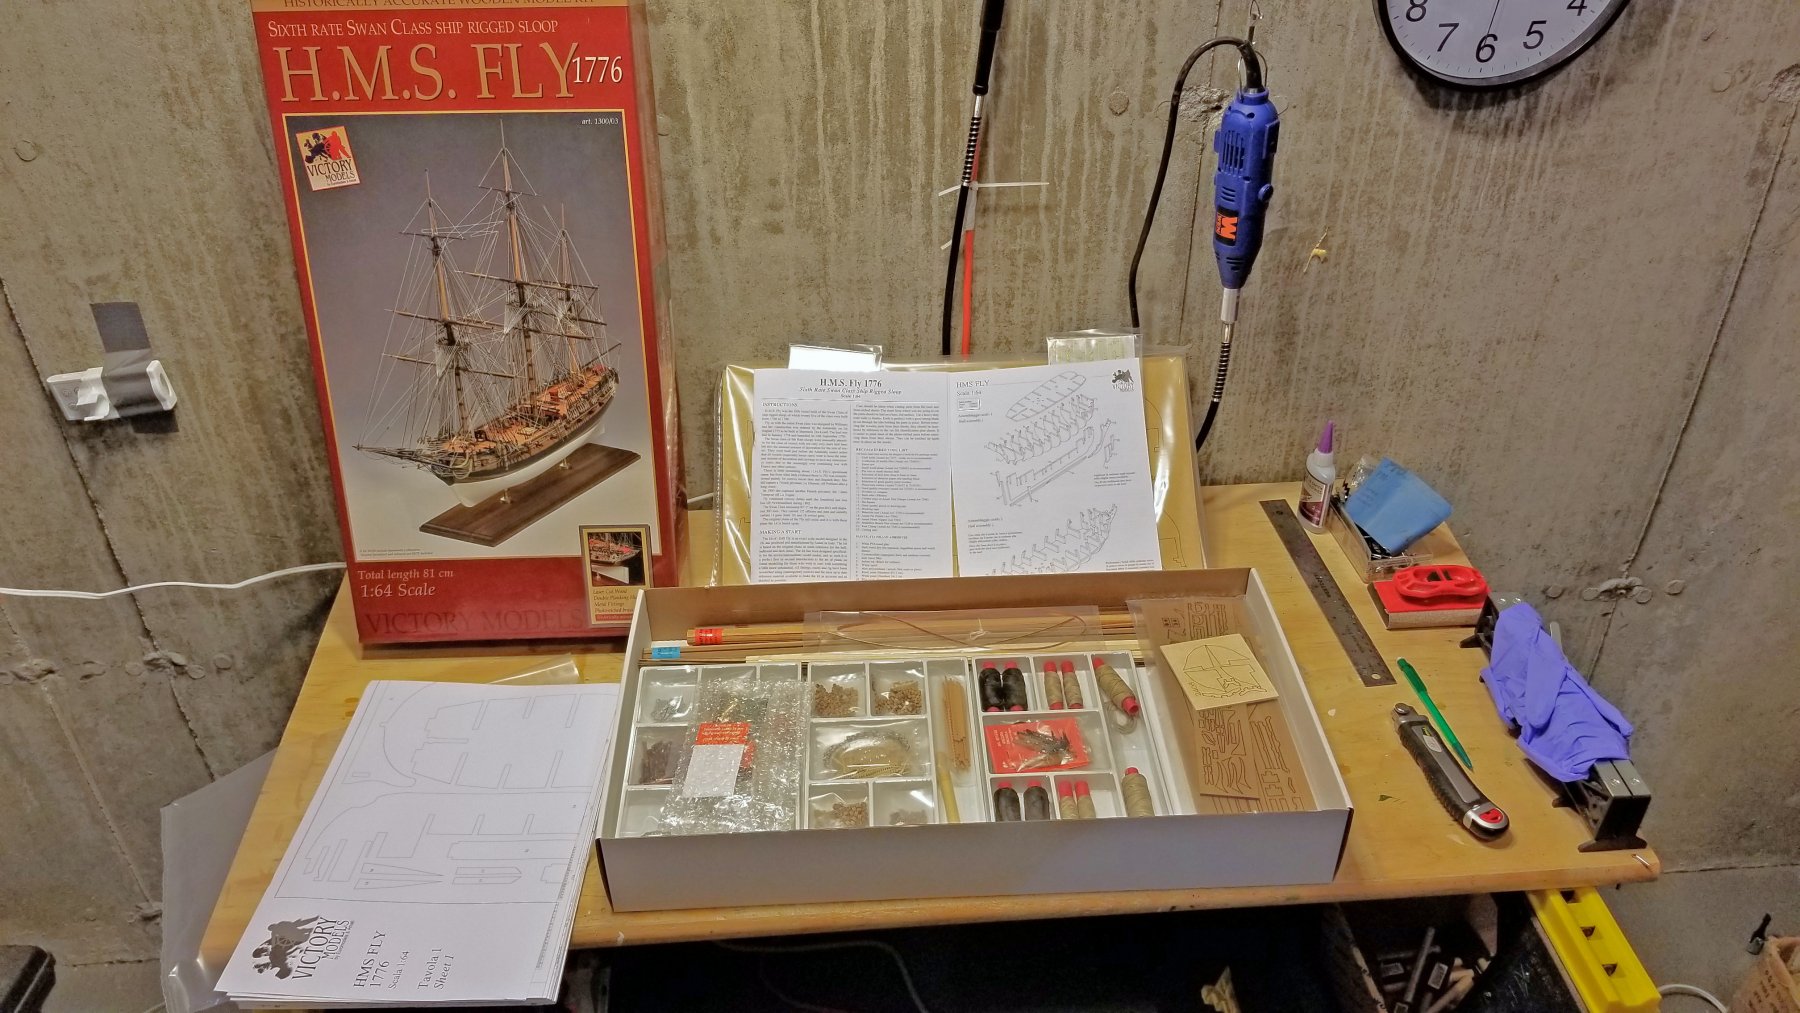
So I'm back from a couple of weeks in the sun, and ready to tackle a new project after my great experience with the Amati Heritage 46.
There have been a number of really great logs done on this ship, which are a great reference. What I can perhaps add to the party is some comments as I go on differences I encounter with this kit vs. my experience with the Revenge, which is the newest ship in the Amati Victory Models line -- the H.M.S. Fly is an earlier kit.
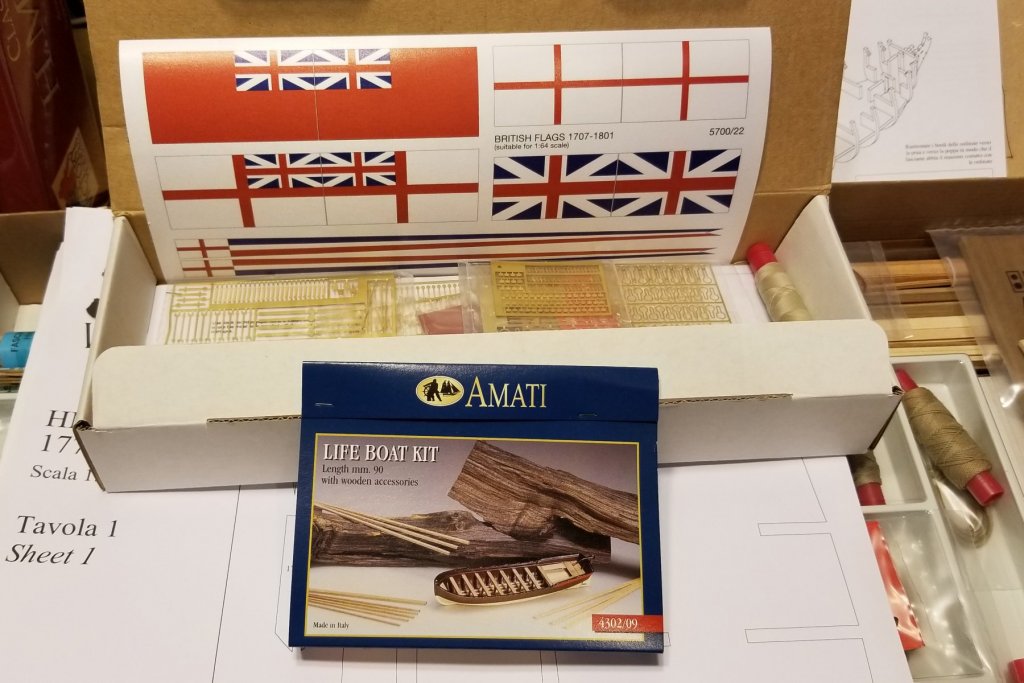
I'll begin with the obligatory "what's in the box" pictures. In addition to the usual wood and laser cut and other parts, there is an instruction book, assembly pictures, and a set of large plans. What I notice right away is that the instruction book is not as richly illustrated (and may not be as detailed) as the one that came with the Revenge was. By the way, if you are looking very closely at the first pic, you might see a brass pedestal package. Those did NOT come with the ship -- I ordered them separately and just put them in the kit box to avoid losing them. I also had to order a base separately.
The first pic is the upgrade kit, which contains more brass fittings, some flags, a lifeboat kit, and who knows what else. We'll see. Time to dig in.
Regards,
David

-
She looks great, Chris. I particularly like the staircase. Beautiful.
Regards,
David
-
Chris:
Fantastic detail work. Looks similar to planking -- never ends!

Regards,
David
-
-
Chris:
The workmanship on those stairs is really exquisite. It's almost a shame to put anything on them.
Regards,
David
- vossy and popeye the sailor
-
2
-
-
I meant to mention in my previous post: the instructions call for the cleats to be mounted on the inside of the hull before the decks go down (they are planked on separate pieces of plywood and then glued down).
The problem with this is that doing so would get in the way of inserting the well deck. It might also be that the hawse hole covers in that well deck area would also create a problem. So I held off on those steps until I had installed the well deck.
Regards,
David
-
She's amazing! Your work in hiding the wires is wonderful. The mast lighting looks great.
Regards,
David
- Old Collingwood and zappto
-
2
-
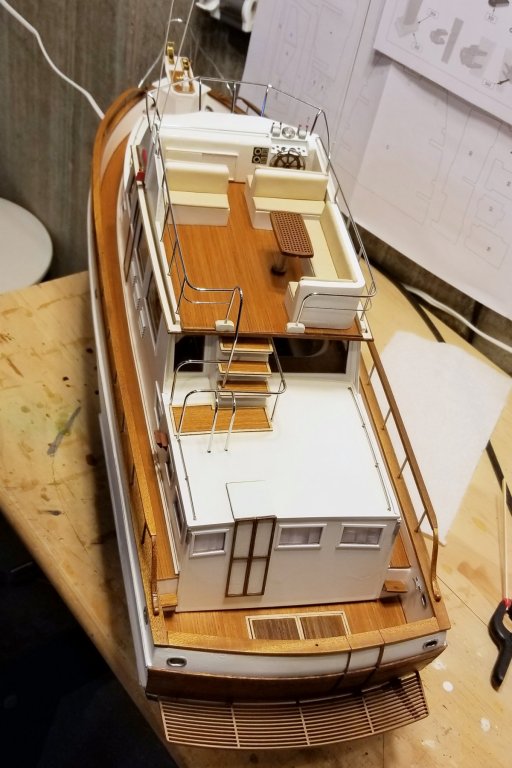
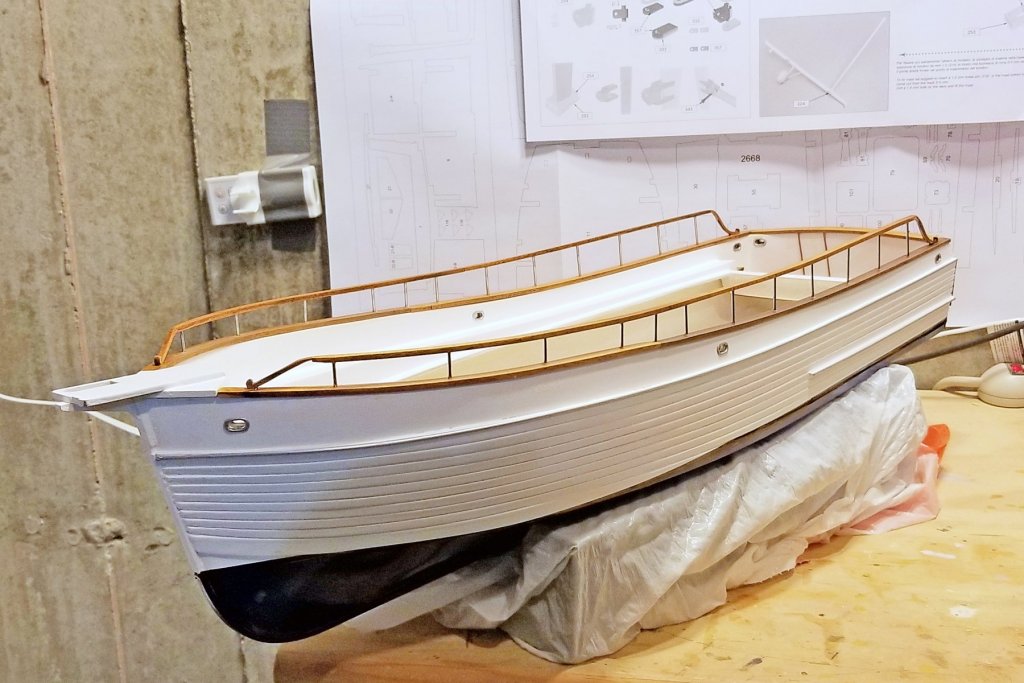
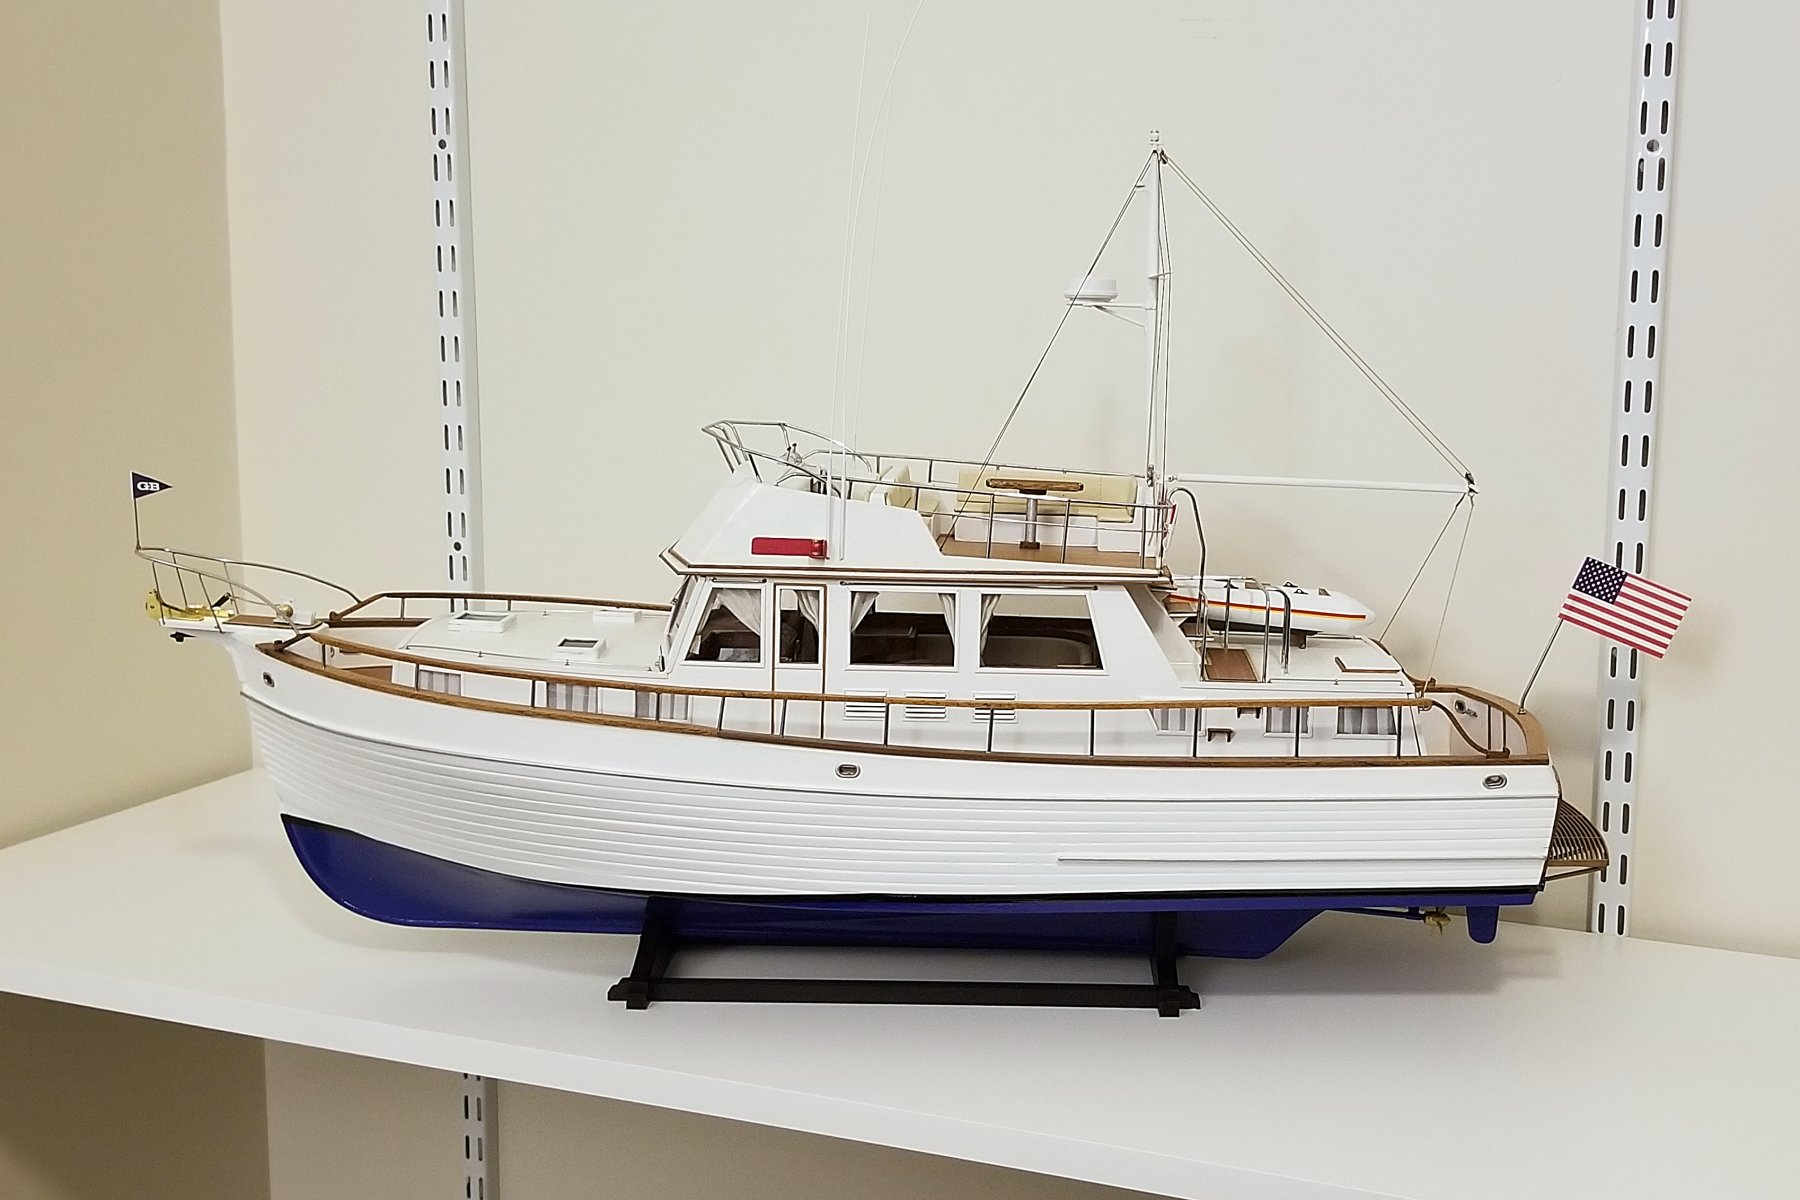
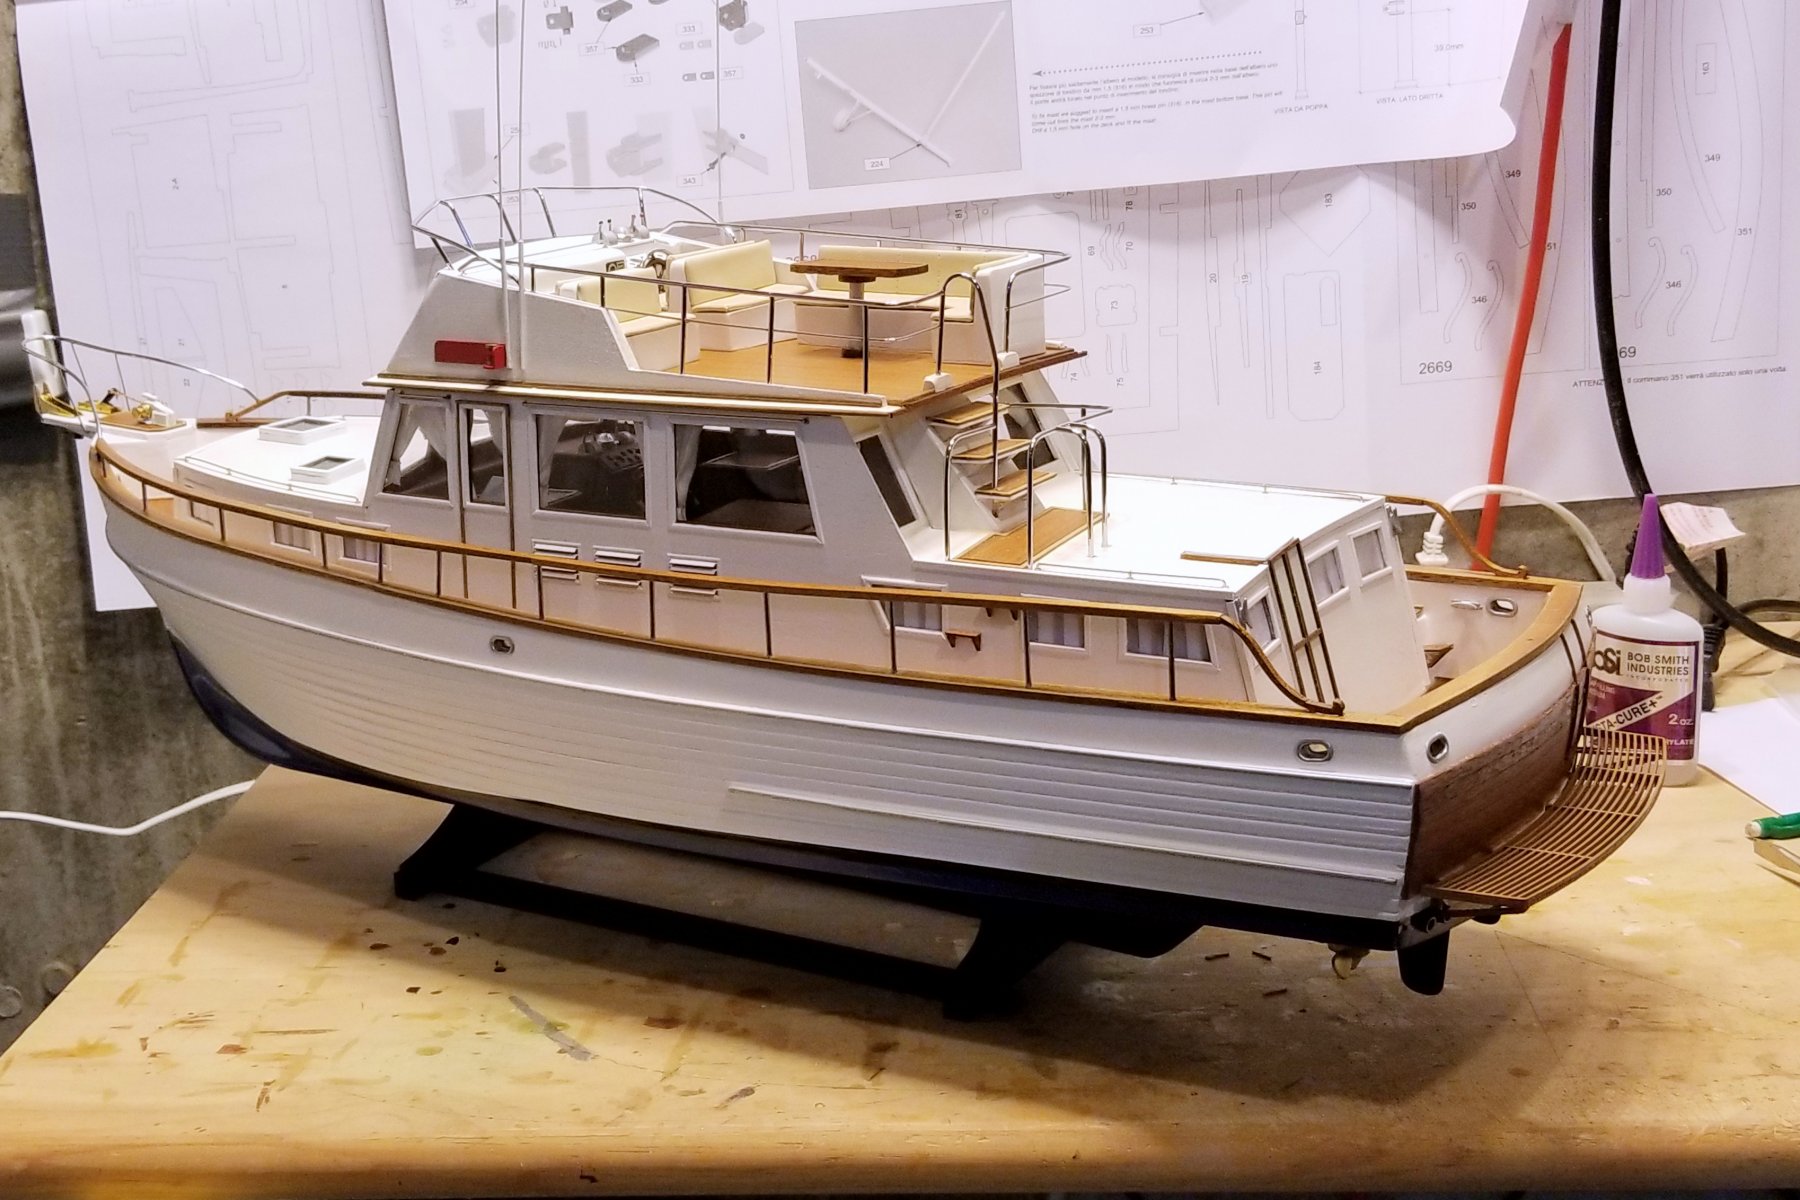
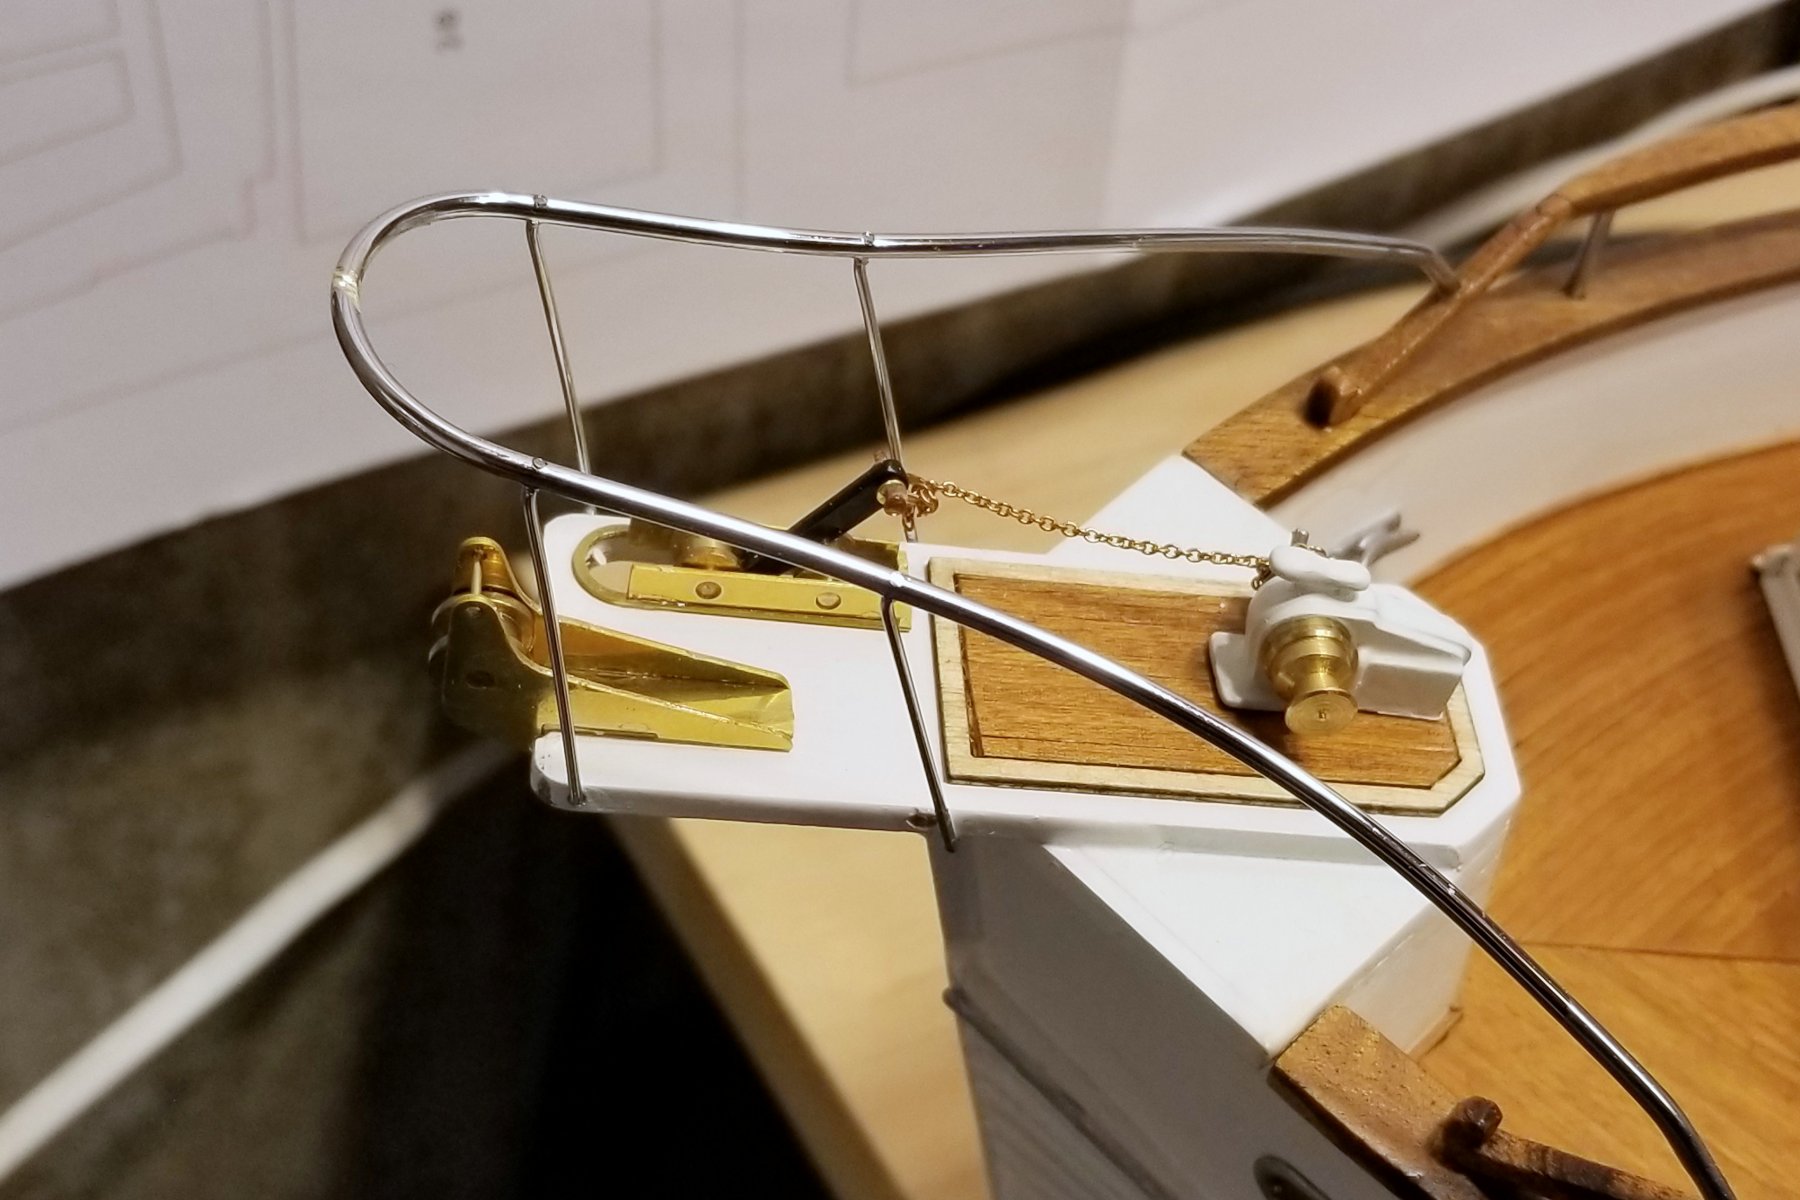
Getting close to the end now.
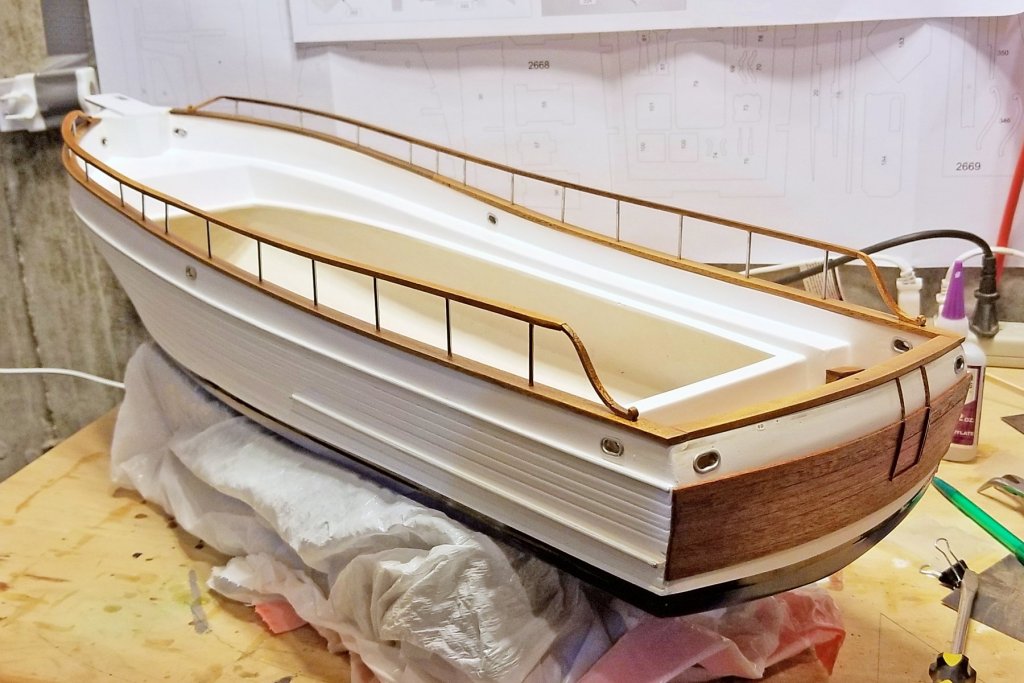
- Bow area and railing done
- Side decks installed (I'm not fast -- I did these on a pre-cut framework while I was painting the hull)
- Swim platform installed
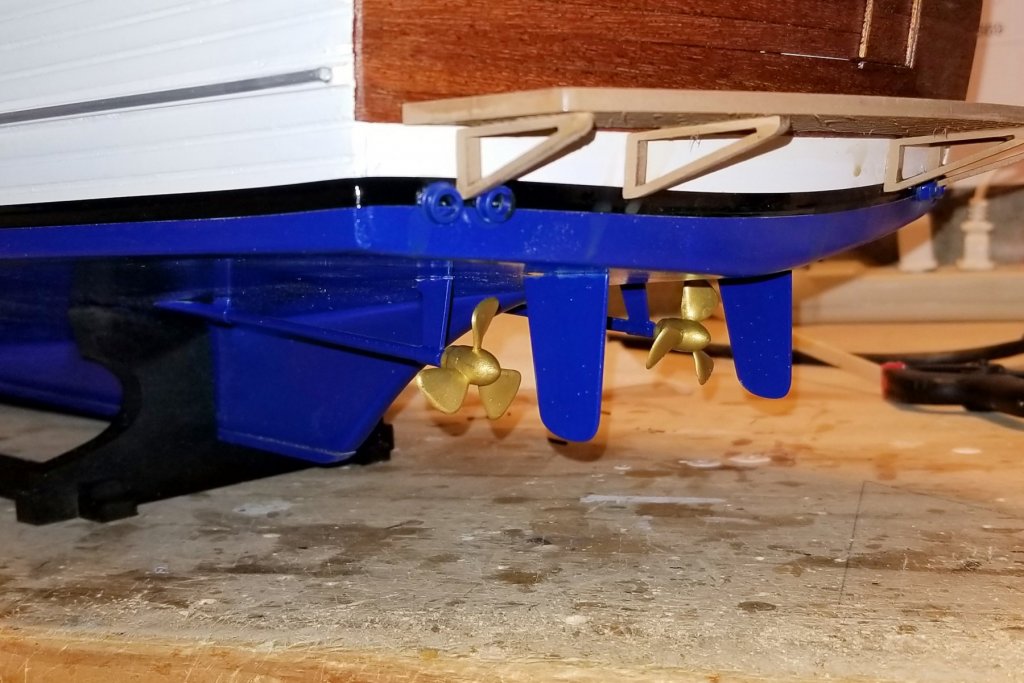
- Shafts, rudders and props installed
- Cleats installed
The lower superstructure is now permanently mounted and glued. The flying bridge is still removable and will stay that way.
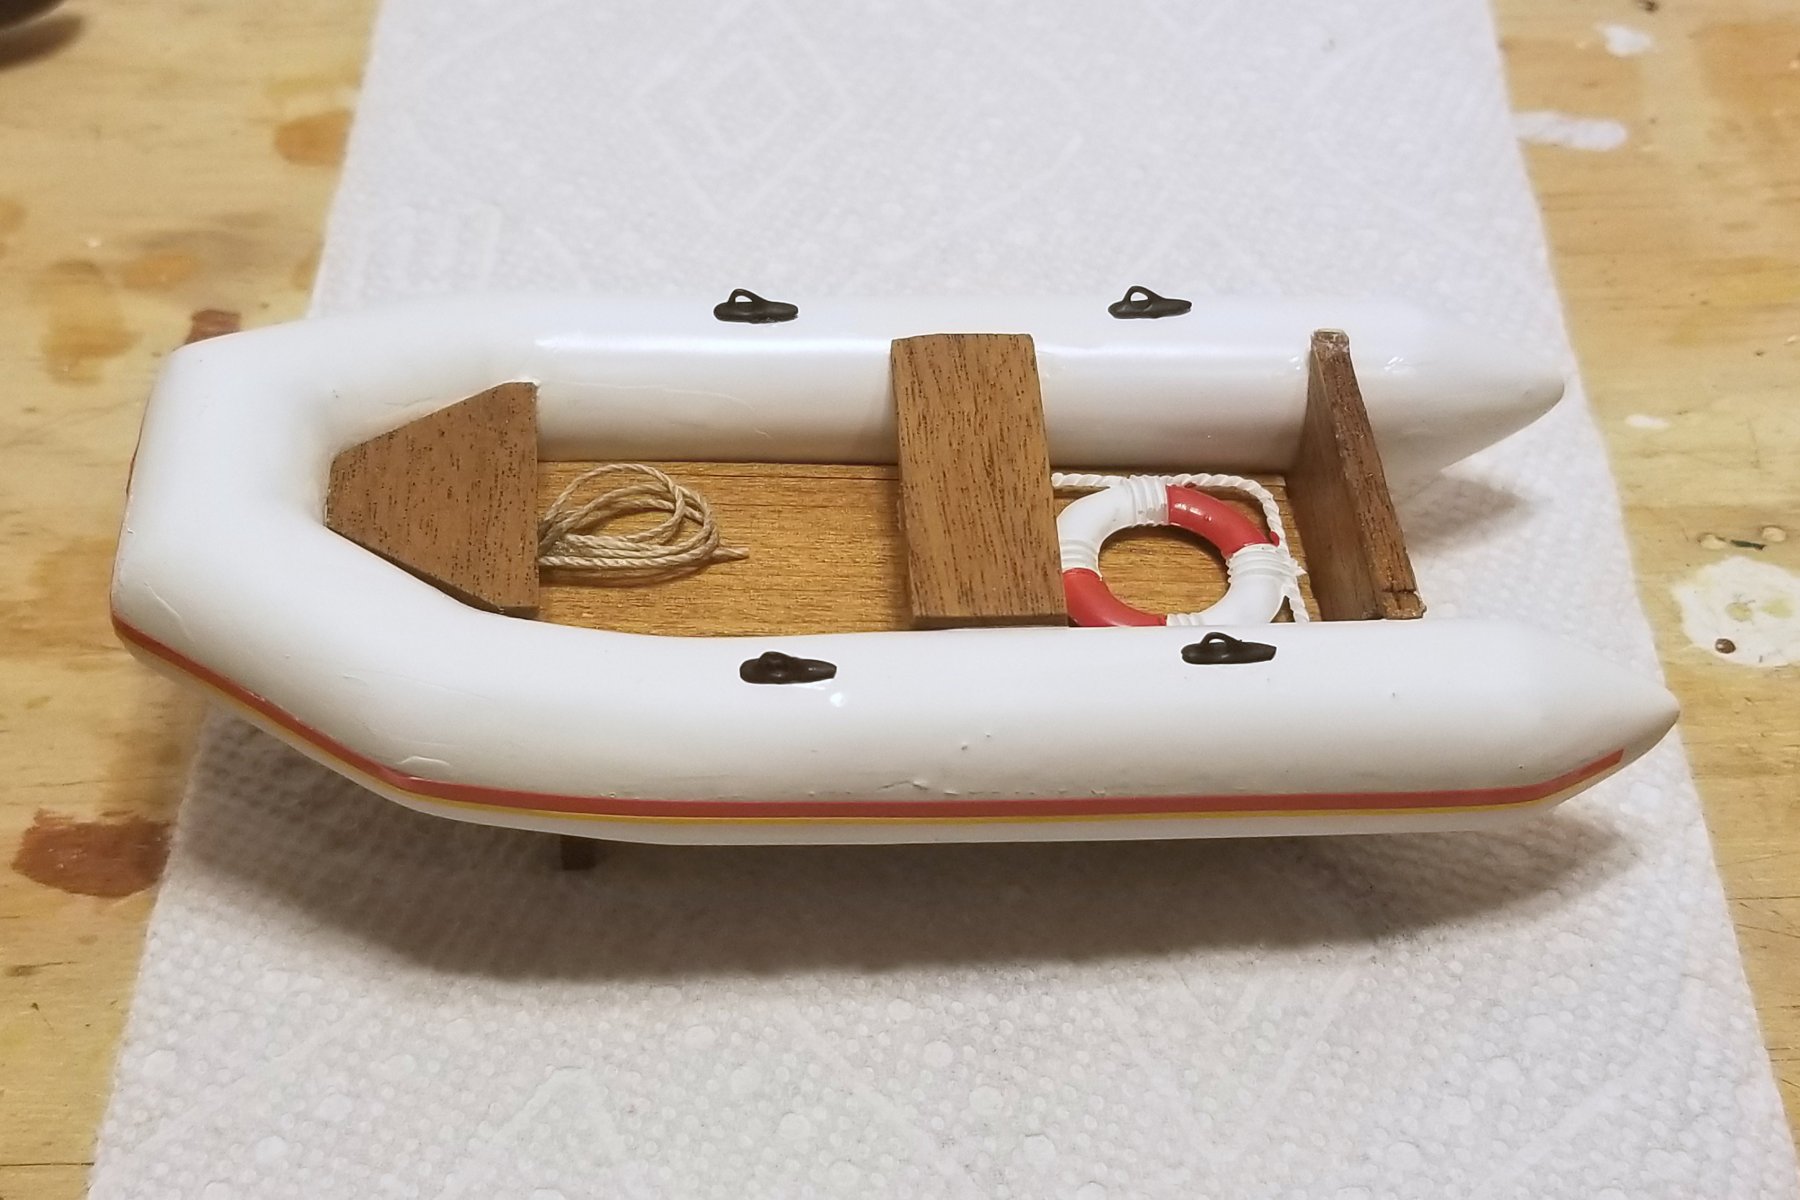
What's left: tender boat (which has some detail), and mast/boom (which looks like a detailed assembly).
Regards,
David


- glennreader, John Allen, Nirvana and 6 others
-
9
-
Chris:
The kit gets all the credit. I just bumble along.

Regards,
David
-
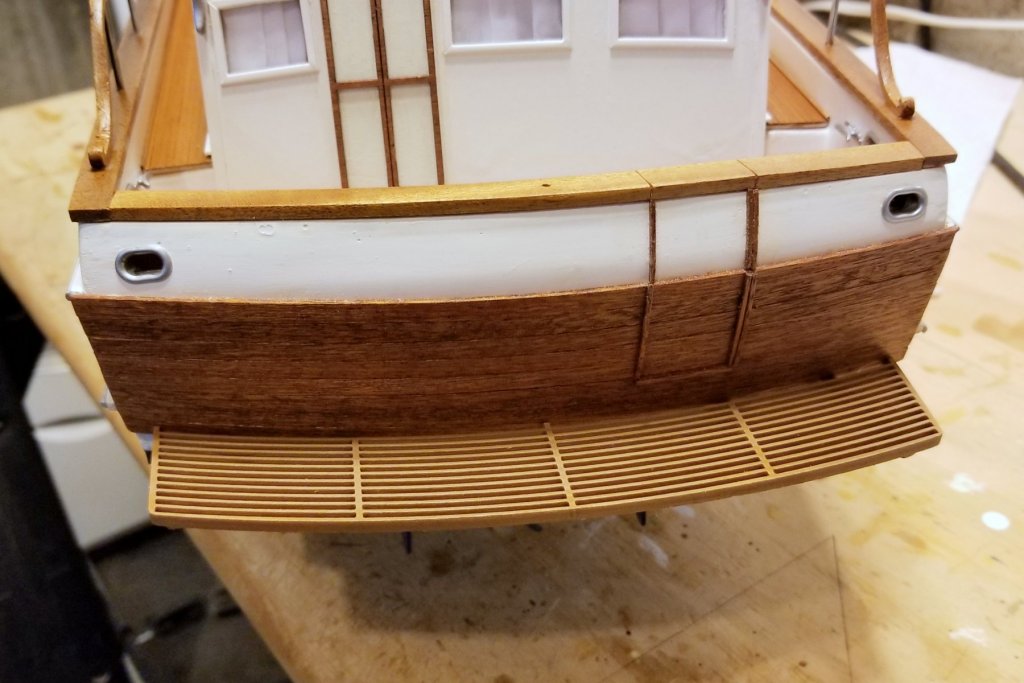
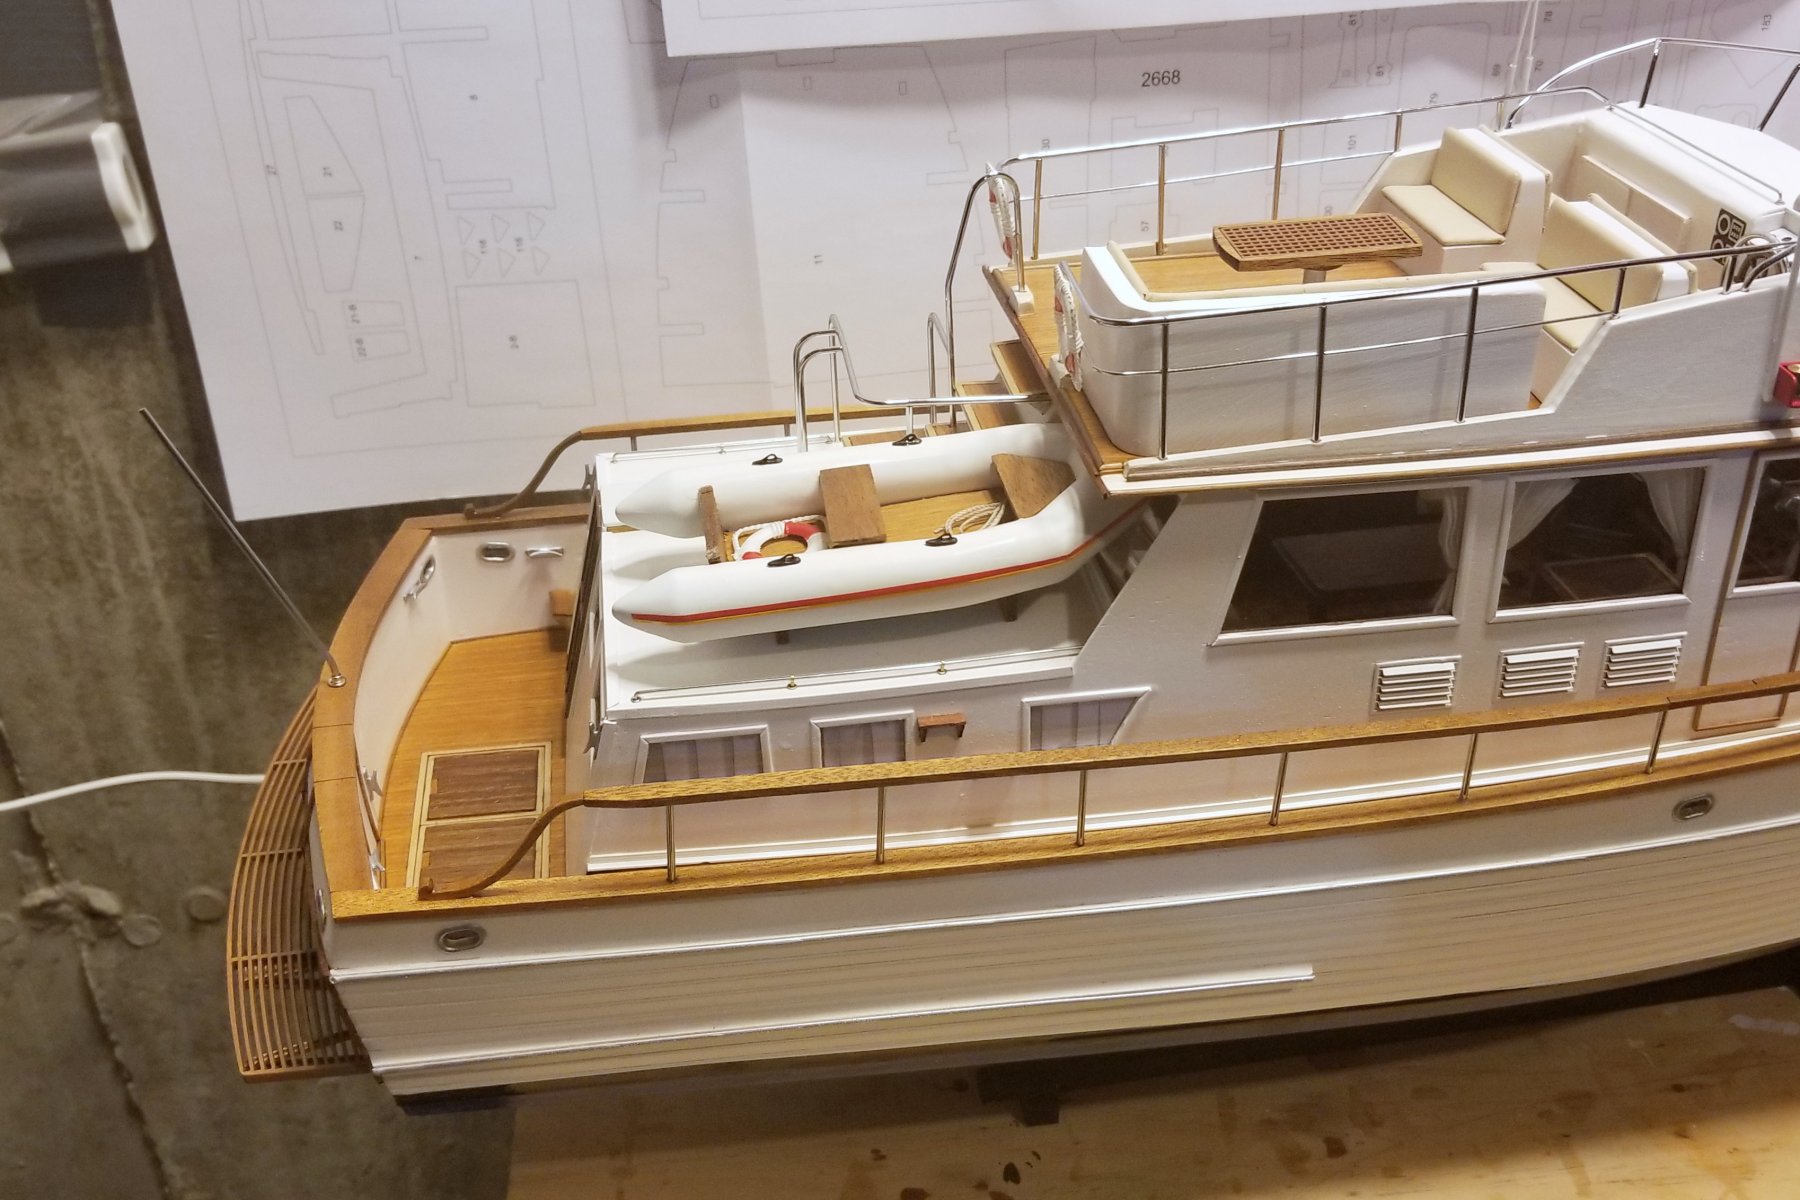
Now the side railings are installed, as well as the hawse hole covers and a bit more detail (rear door).
I'm not sure how well the pictures show it, but there are "metal" bumpers running down the top side and lower wale.
I have touch up to do on the top white part of the hull just below the rear gunwale, and elsewhere. So that discoloration will clean up.
Regards,
David
- vossy, yvesvidal and glennreader
-
3


HMS Fly by drobinson02199 - FINISHED - Victory Models - Scale 1:64 - with upgrade kit
in - Kit build logs for subjects built from 1751 - 1800
Posted · Edited by drobinson02199
First planking underway.
This is the smoothest and best-fitting first planking I've done to date, and I think the reason is that I beveled each bulkhead separately off the ship before installing it and gluing it it, testing each one with a test plank for fit. So far, things are lying nicely.
Regards,
David