


flying_dutchman2
-
Posts
1,735 -
Joined
-
Last visited
Content Type
Profiles
Forums
Gallery
Events
Posts posted by flying_dutchman2
-
-
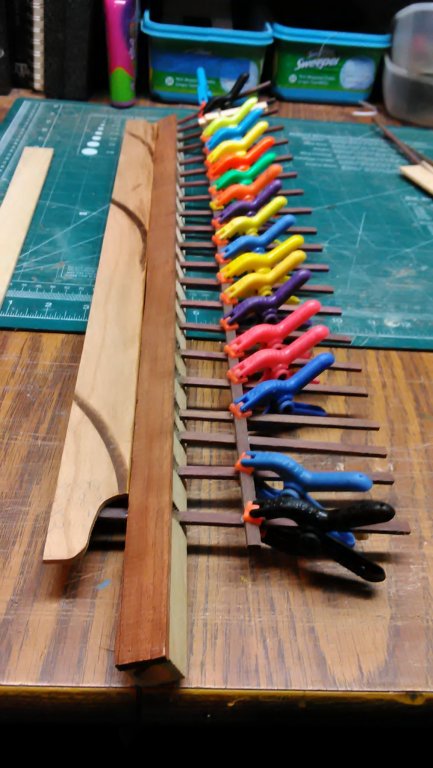
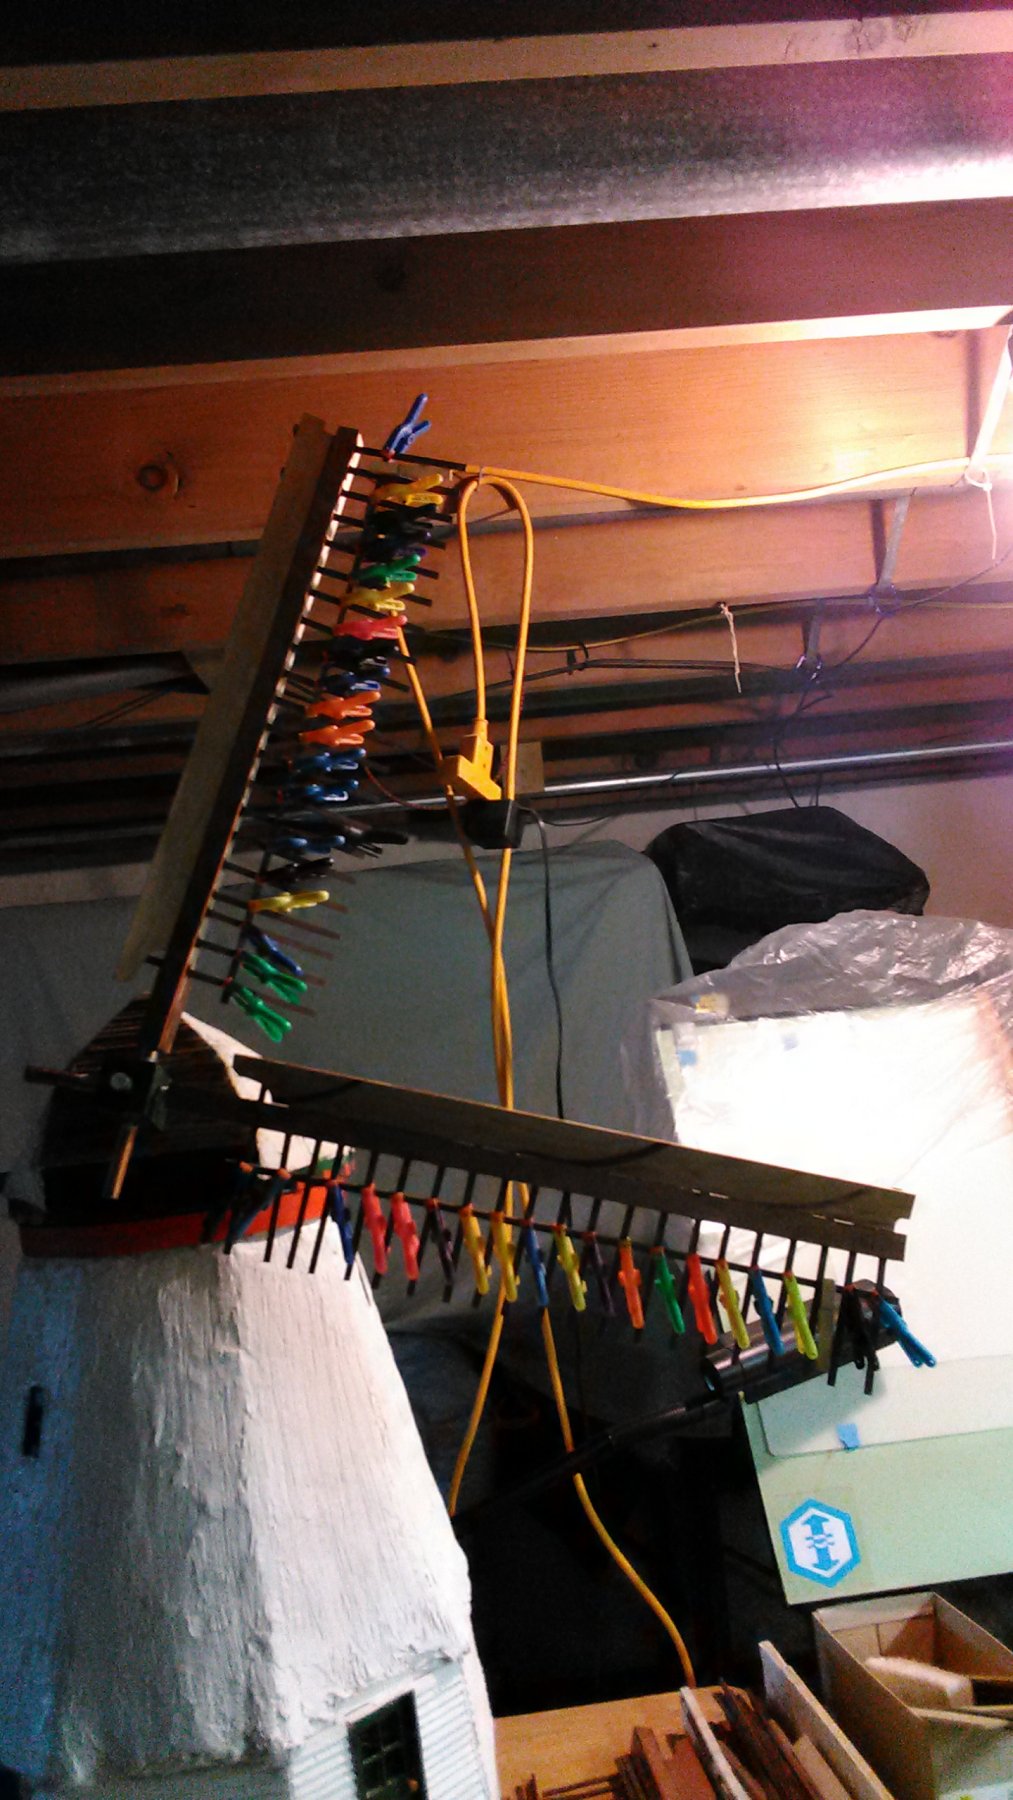
Vane one and two both have their 2nd vertical slat (zoomlat) glued on.


The Titebond III dries fast. Per instructions is to clamp for 30 minutes and longer is better. Do not stress joints for 24 hours. Not much stress here so I will add the third vertical slat.
Do it three more times to have all the vanes look alike
I have noticed that some of the horizontal slats are not straight, they are a bit on an angle. Doesn't interfere with moving in the wind but looks a bit weird.
Another major mistake I made is that the 1st and 2nd vertical slats (1st en 2de midden zoomlat) have to be in the back of the horizontal slats. The 3rd vertical slat is to be placed in front of the horizontal slat (achter zoomlat). I am making all the vanes with this mistake. Not going to redo this.
Marcus
- mtaylor, thibaultron, Elijah and 2 others
-
 5
5
-
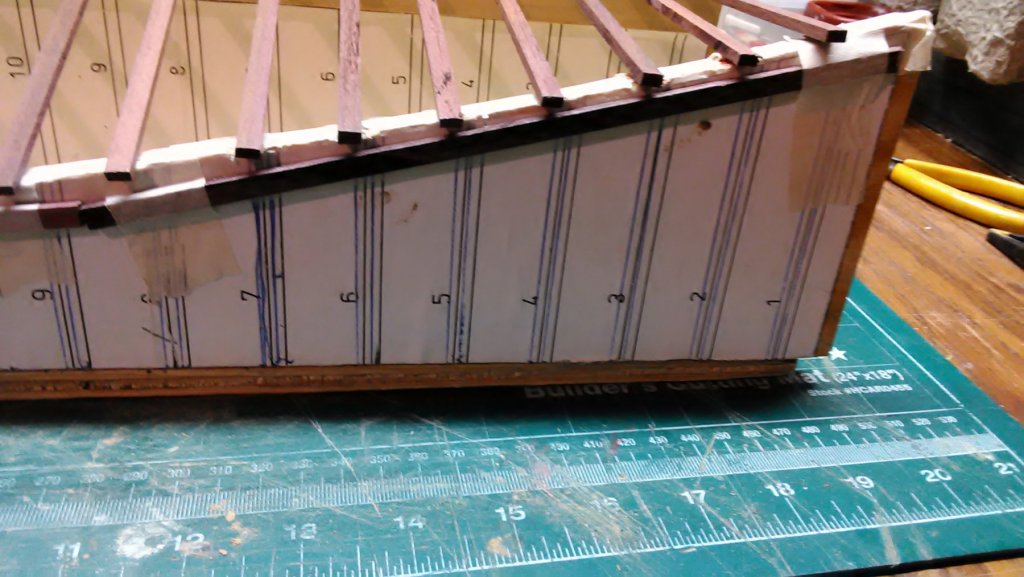
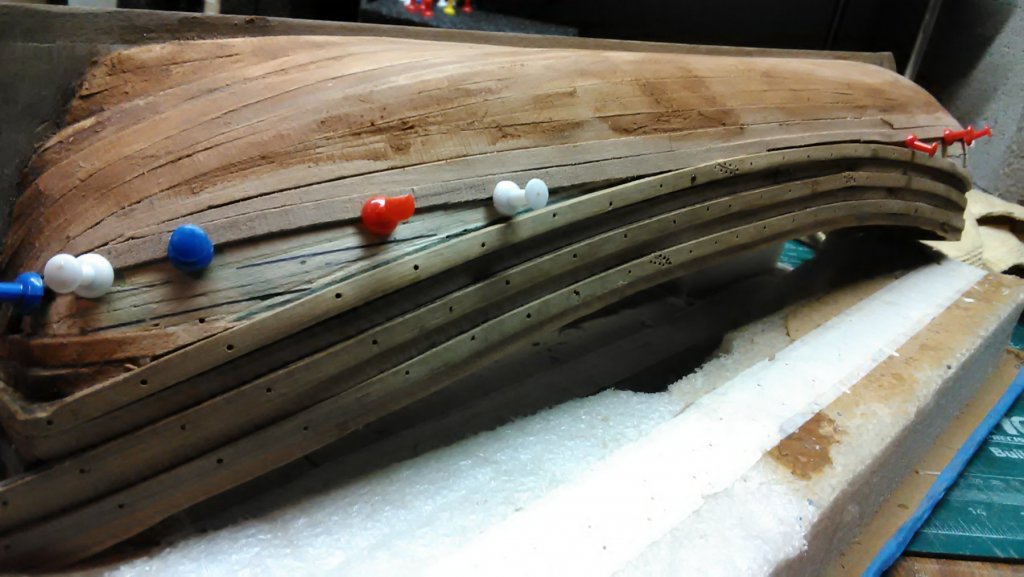
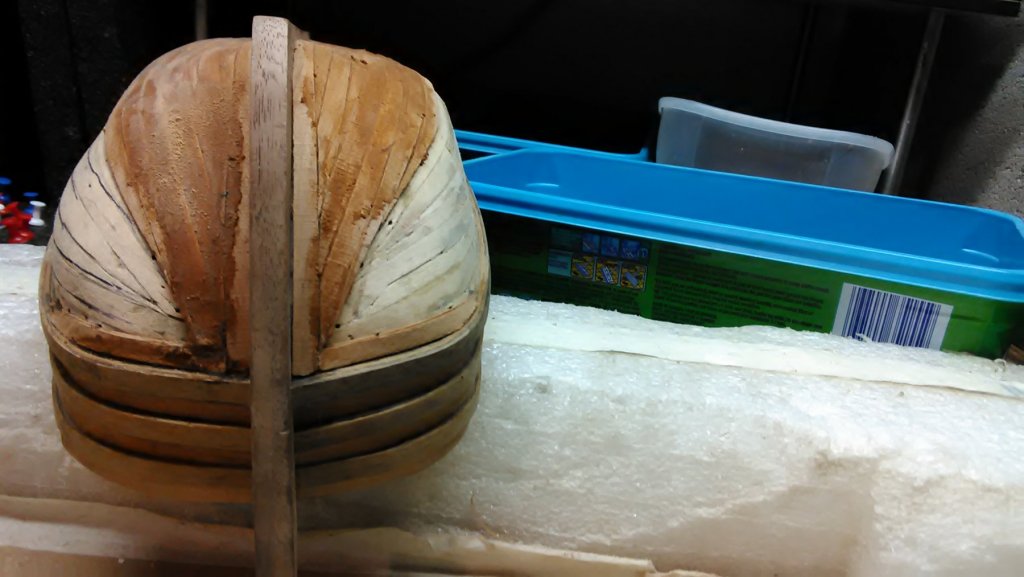
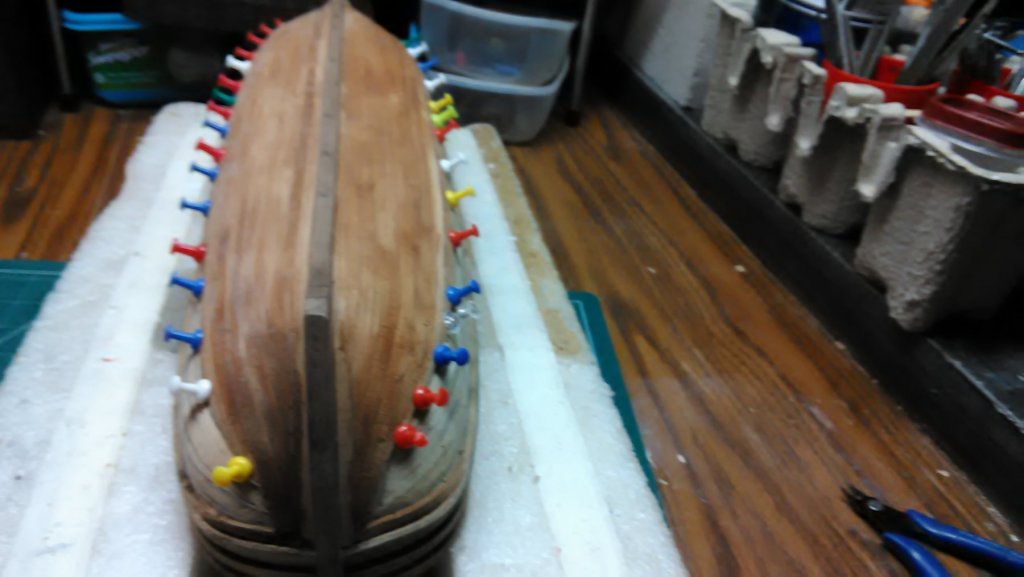
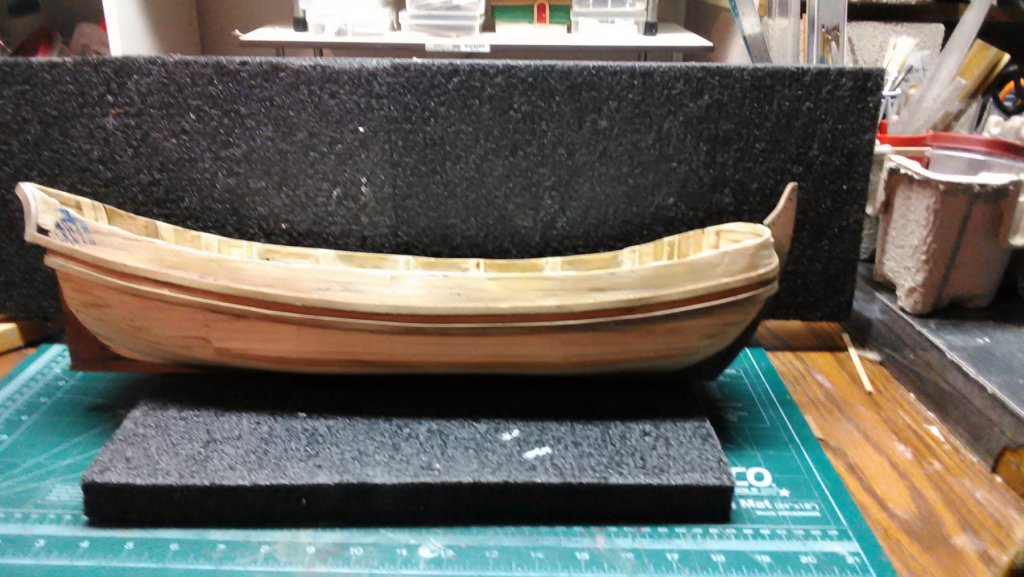
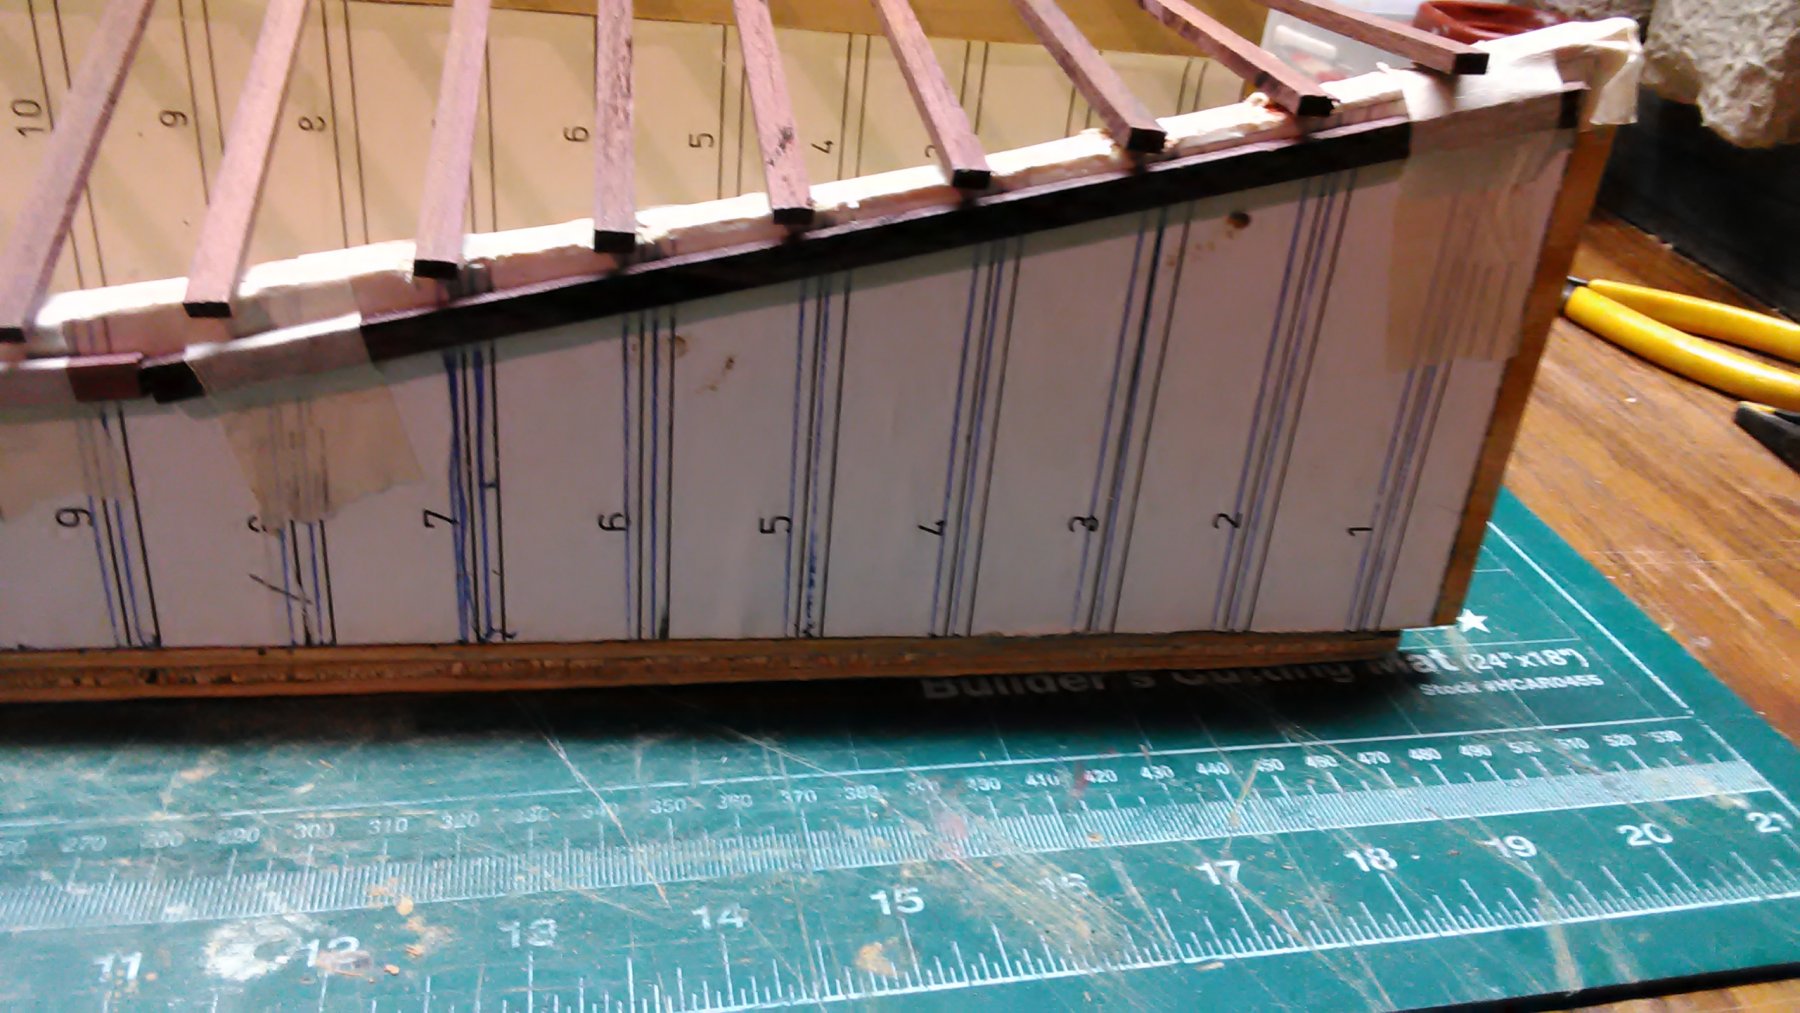
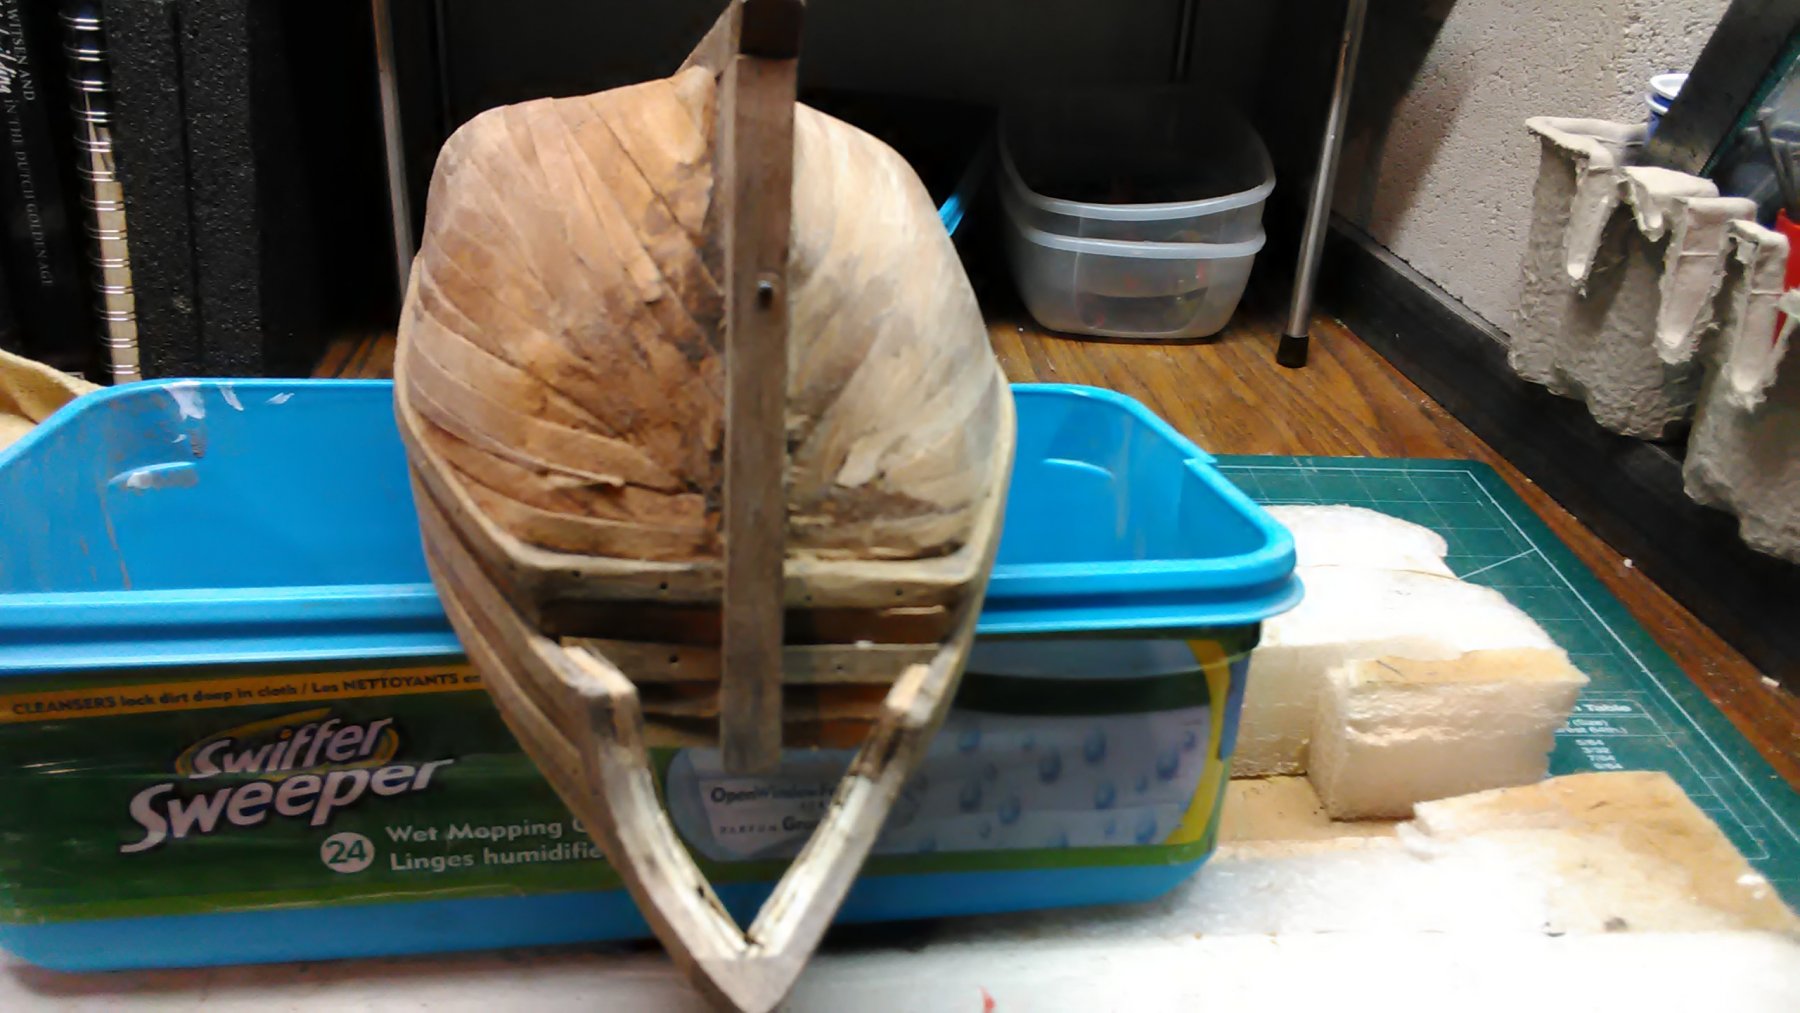
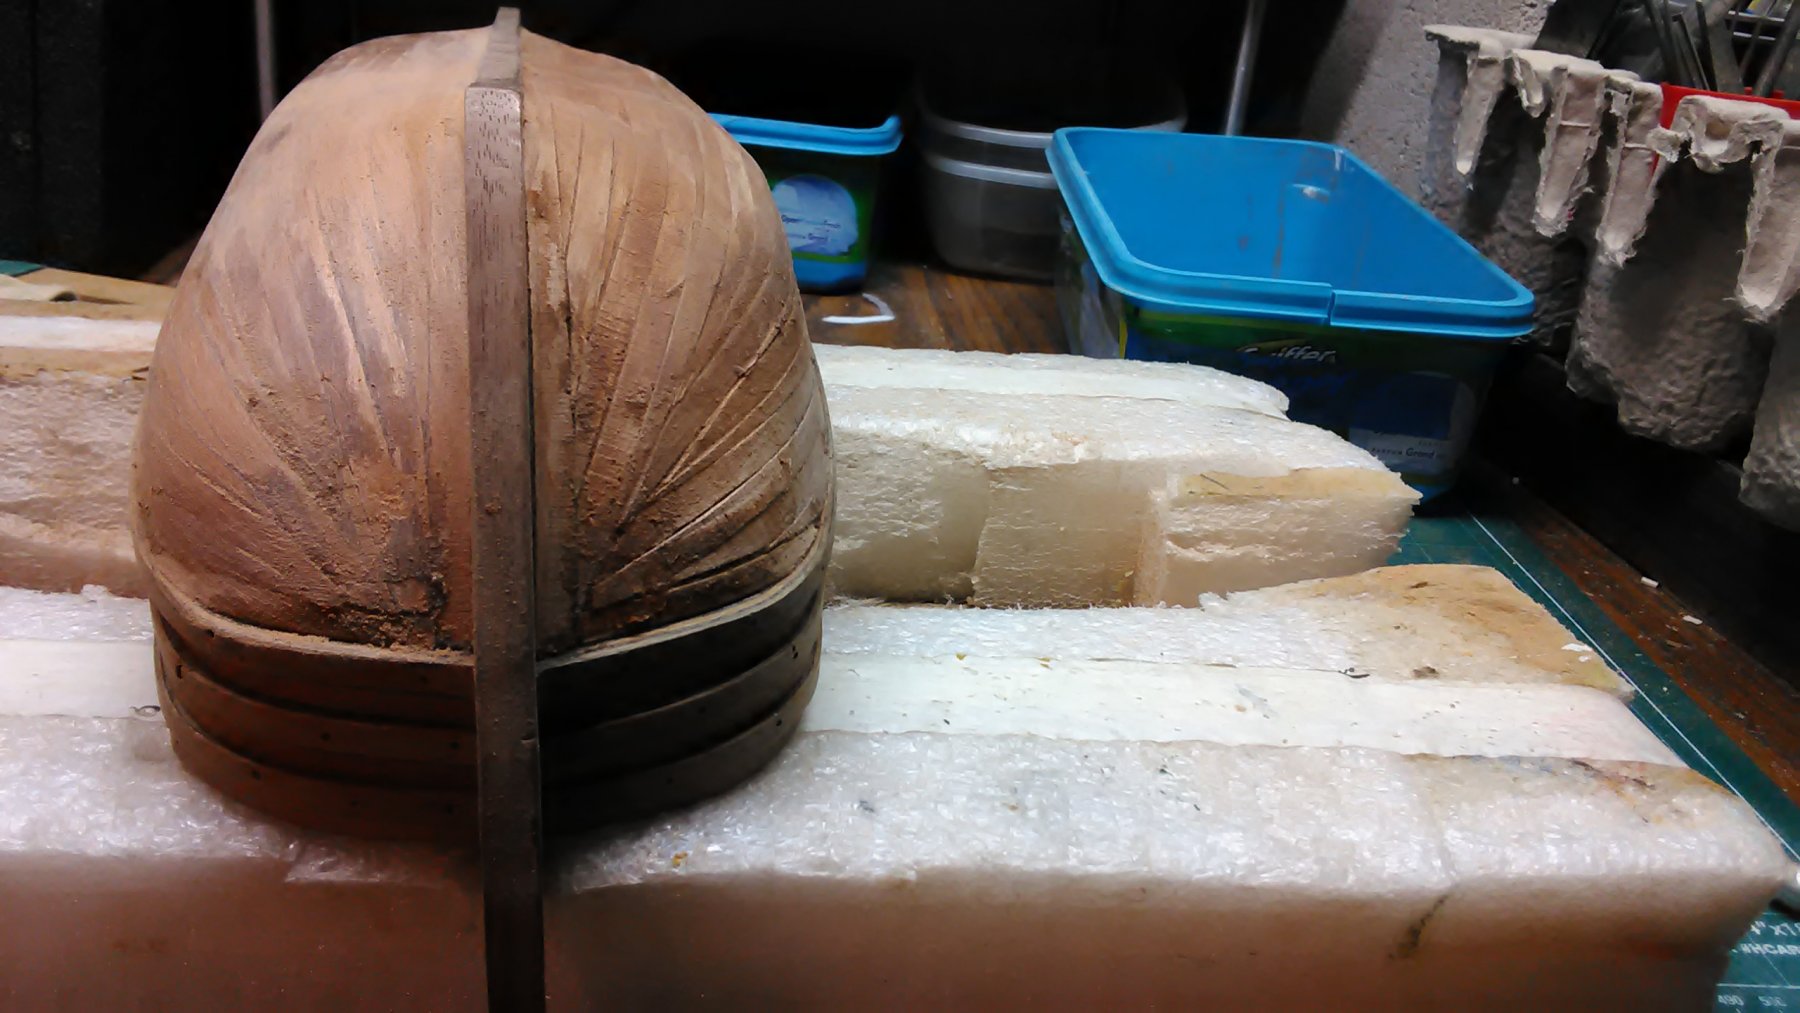
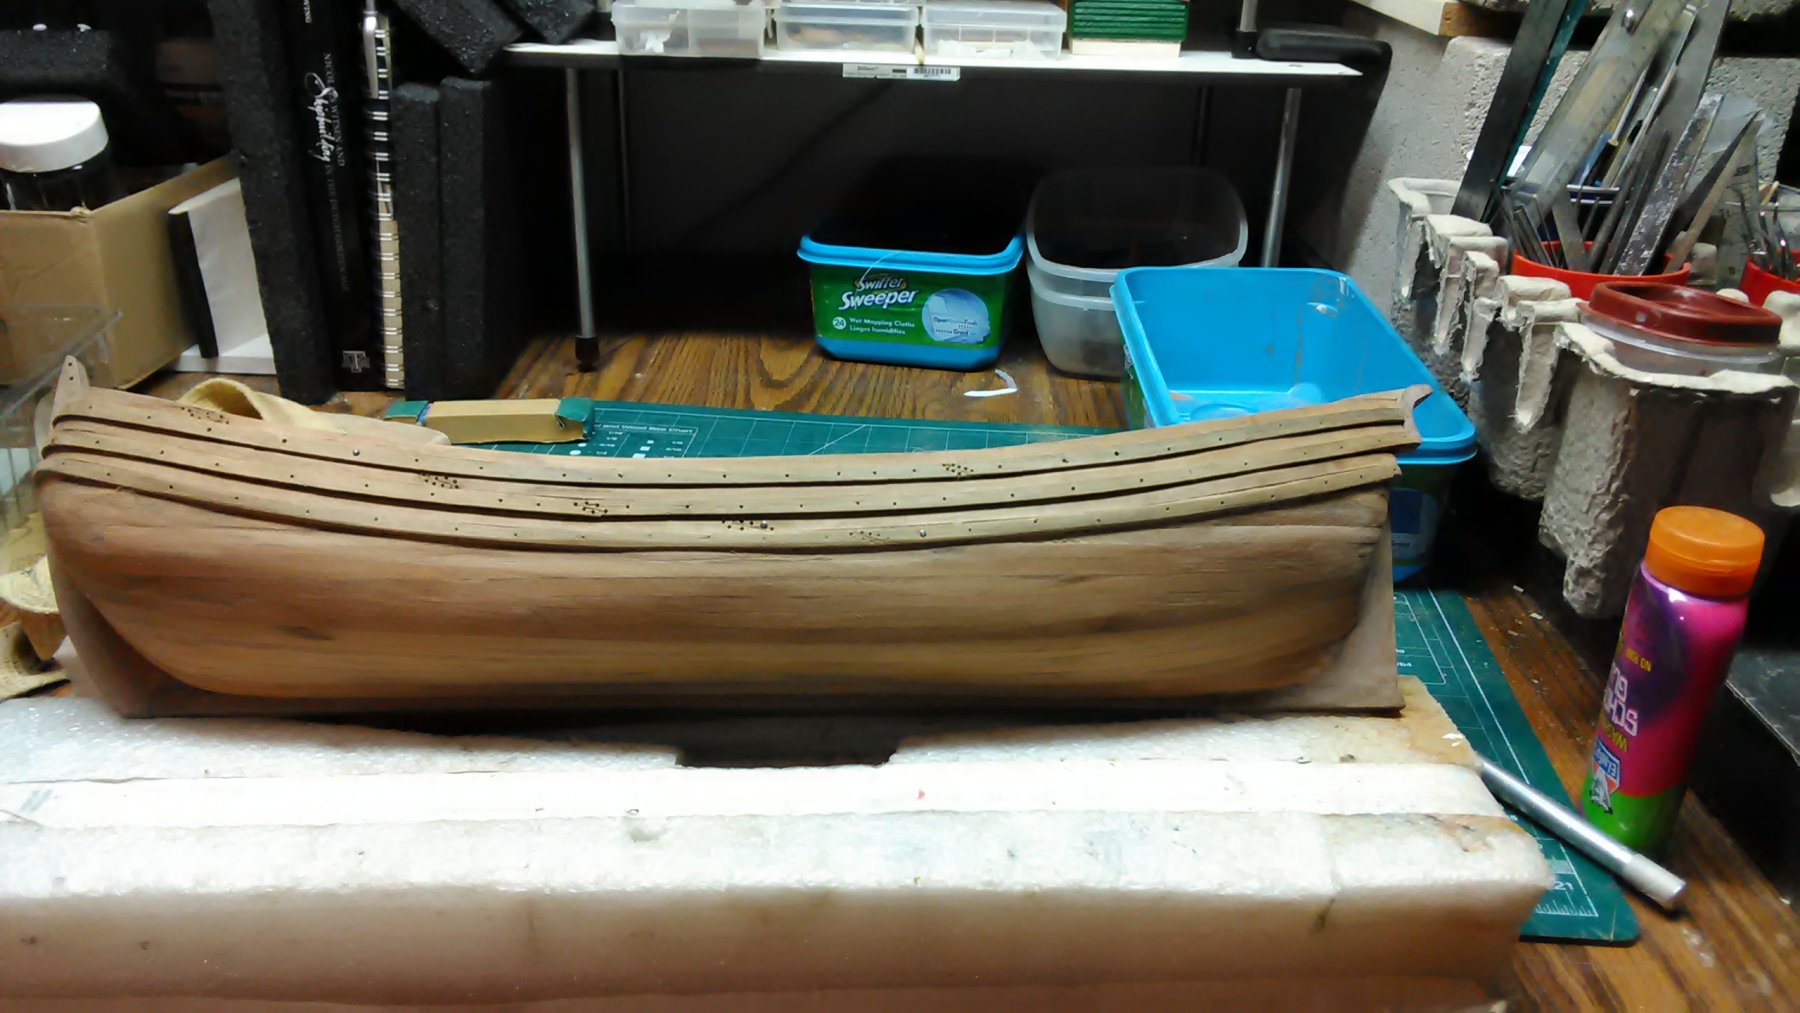
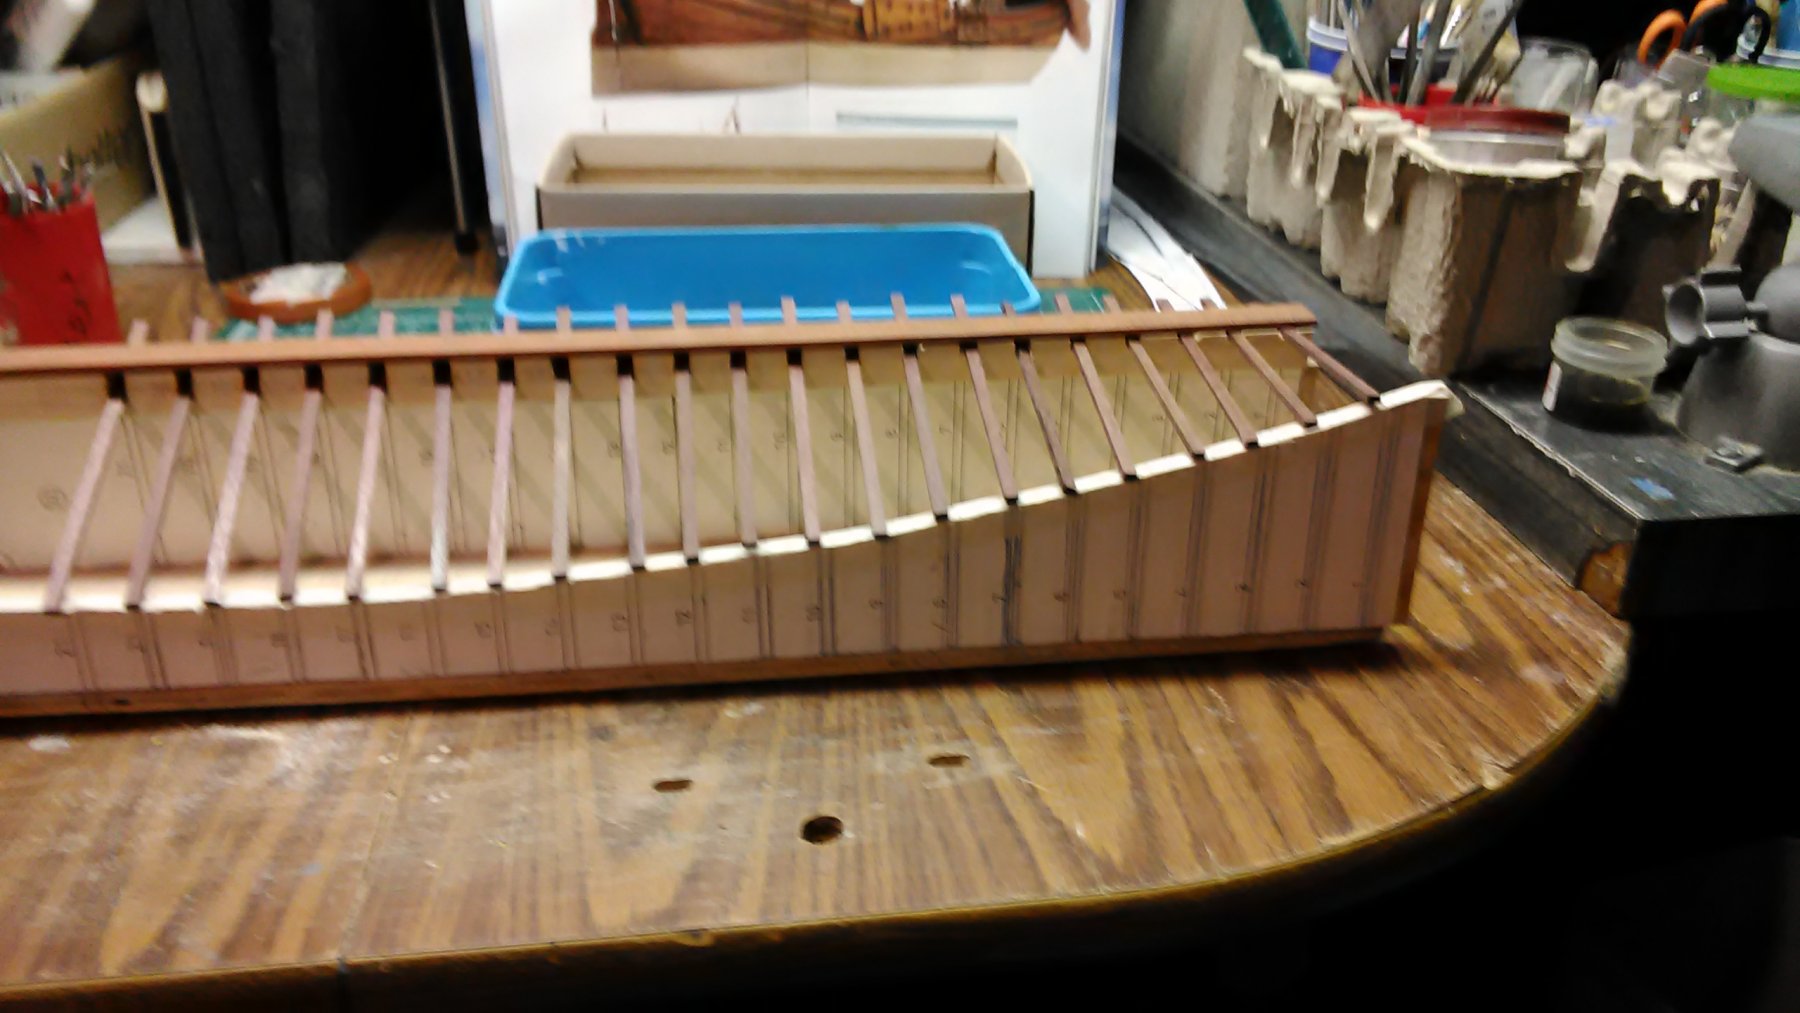
Sanding the hull is pretty much completed except for a small area on the bow.
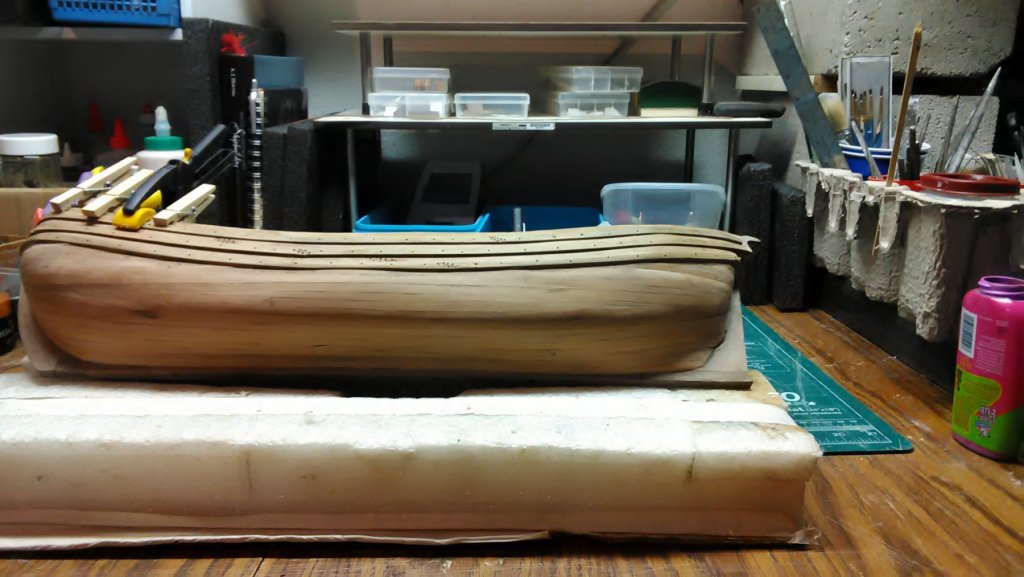
Started the inboard planking with 2-ply cherry. It will follow the curve of the wales. Some of it will dissappear below the deck as that has a much relaxer curve. Barely anything on the Boyer is straight.

The Custum cabinet maker in the town over is retiring so I was given many planks of maple, cherry and walnut. Four sheets of veneer 8' by 1' - 2-ply of 2 cherry and 2 maple. It is 0.8mm thick. So nice planking. Also picked up a combo sander. 10" disk and 3' long flat sander which can be tilted. Could have used that for the mill couple of months ago instead of the small one I have.
Marcus
-
All 4 vanes have there horizontal slats (heklatten) glued in the roedes.
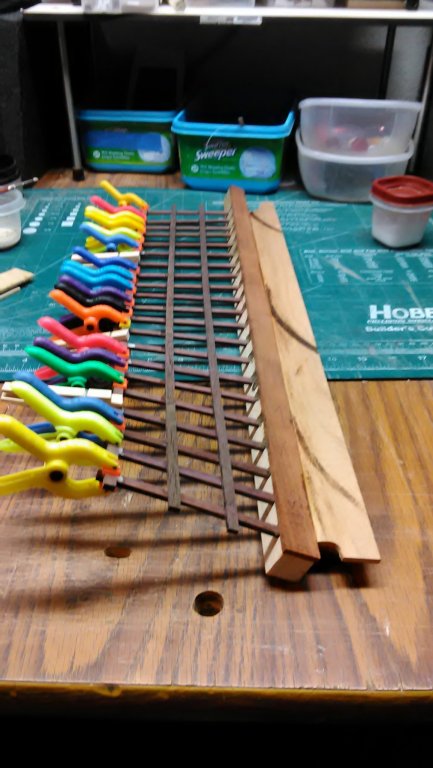
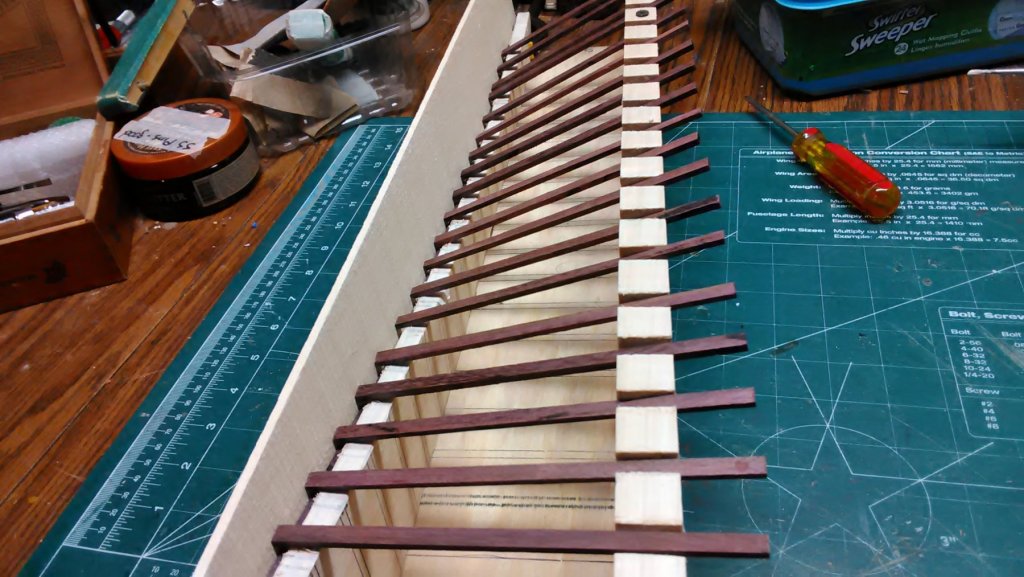
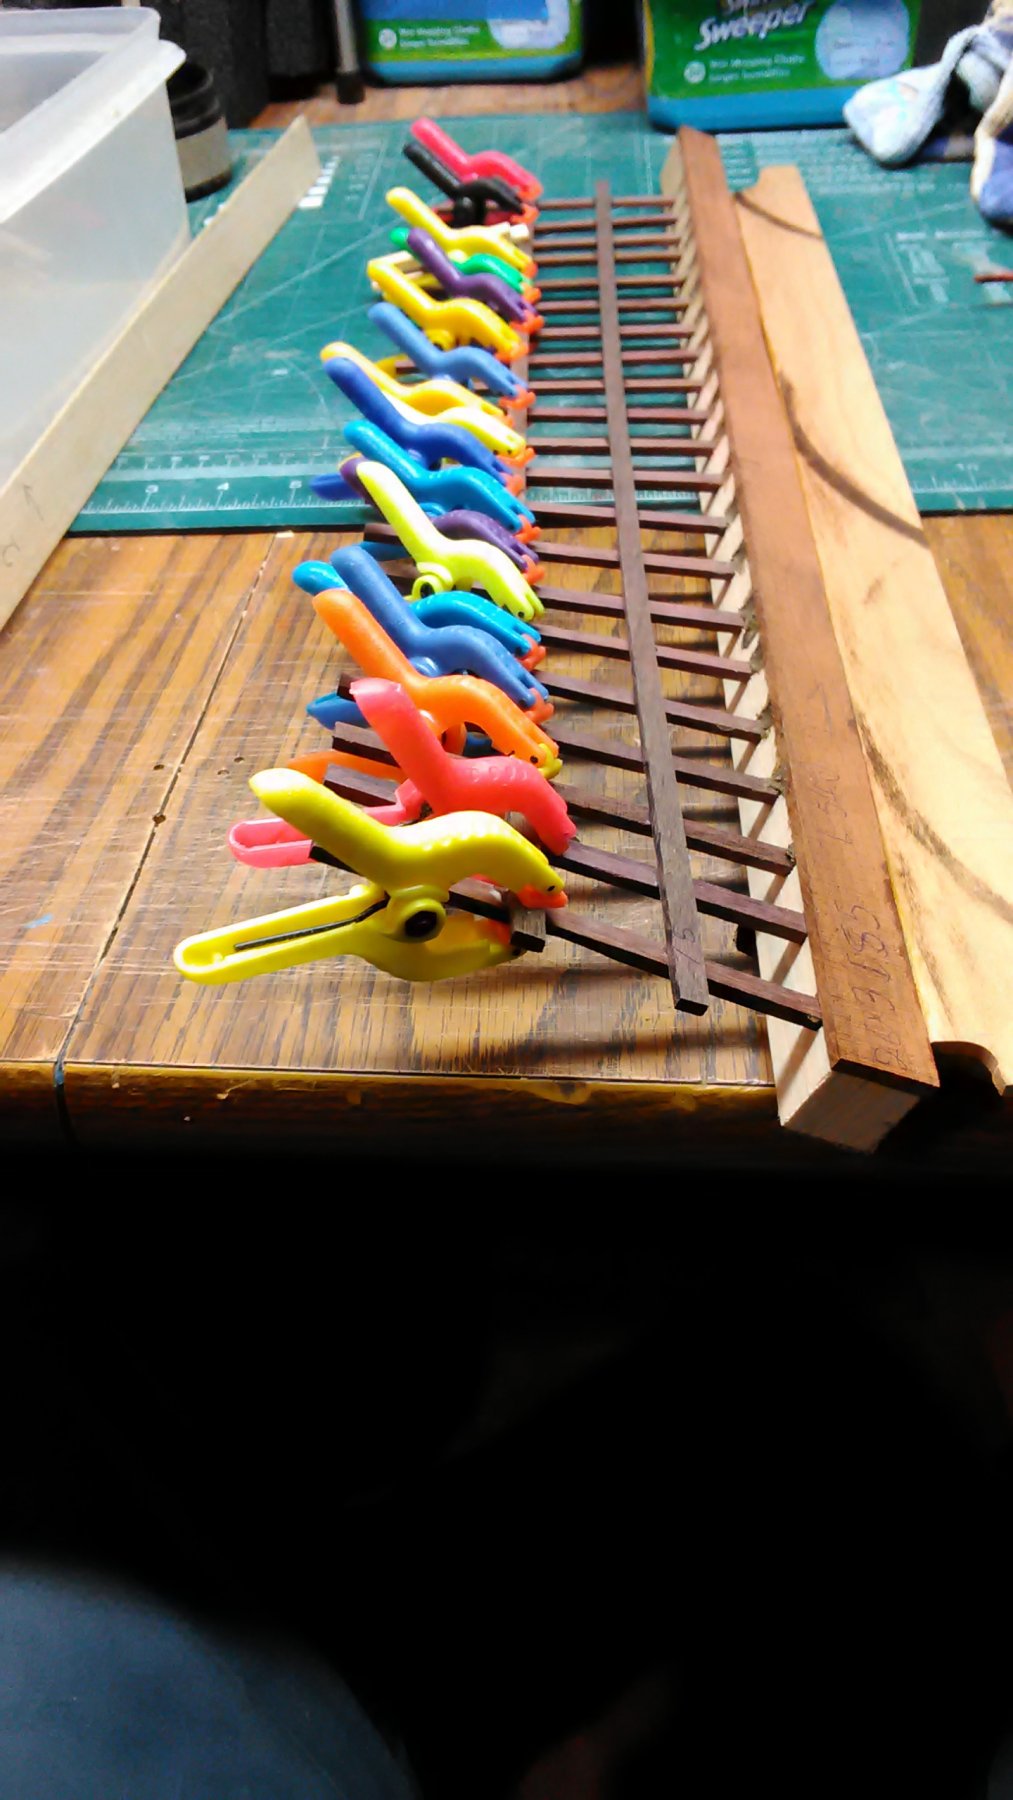
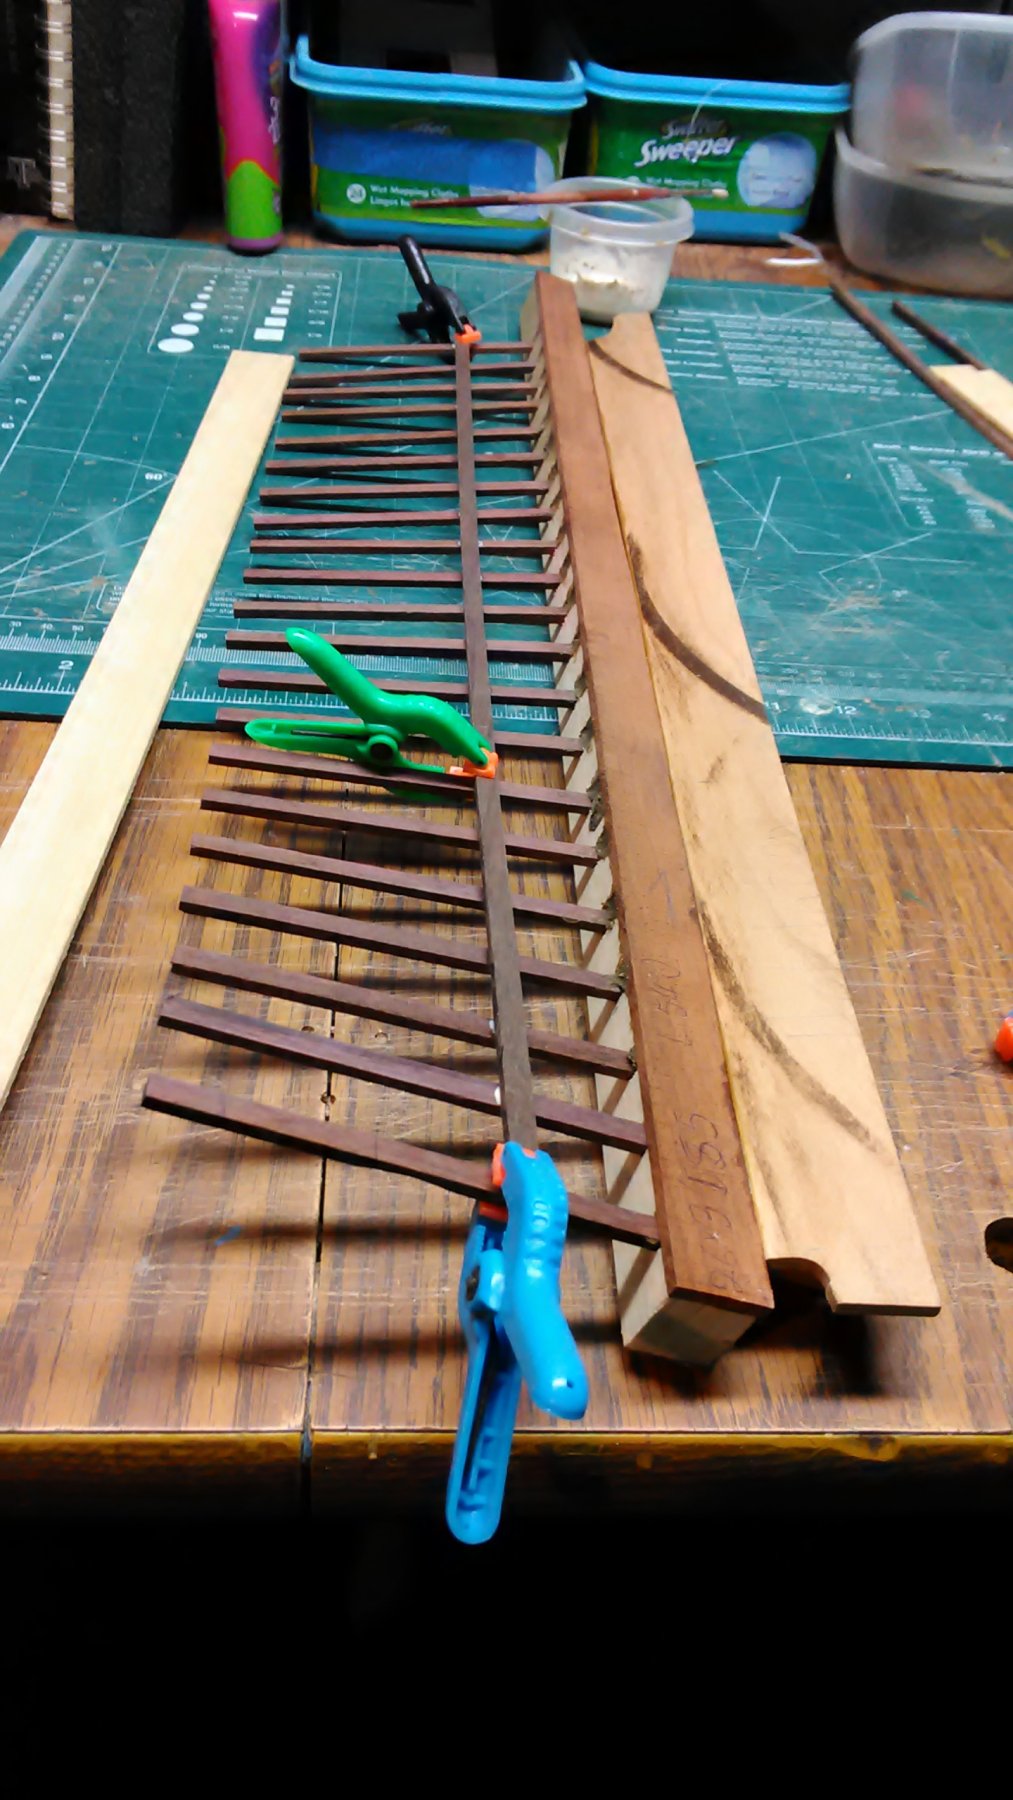
 Started by measuring the spaces of the long vertical slats (zoomlatten) by creating a template from basswood with the width of 26mm. Pencil a line using the template as a ruler.

Apply glue dots along the pencil line.
Put the template back and clamp it to a slat. This will help me by aligning the vertical slat.
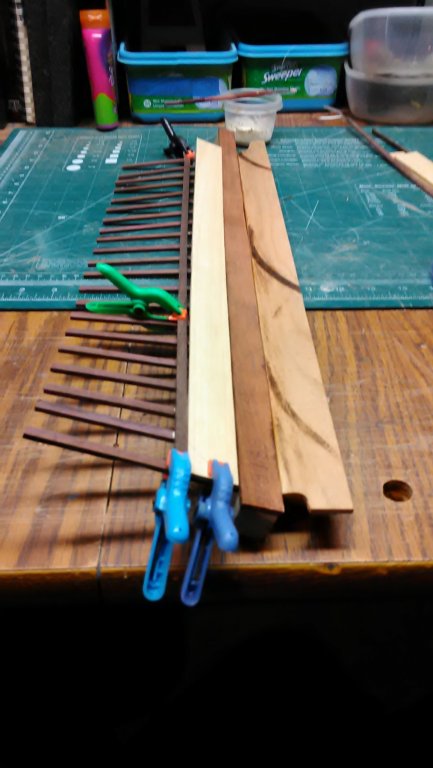
Push the vertical slat against the template and clamp to horizontal slats

Remove template.
Start clamping each section and let dry overnight.
Did the first part of 2 vanes and here they are drying.
The above is a tedious job and will take the longest to complete. Everytime I do a vertical slat (zoomlat), I will let it dry overnight.
Once they are completed I will paint some parts.
Marcus
- thibaultron, cog, gjdale and 4 others
-
7
-
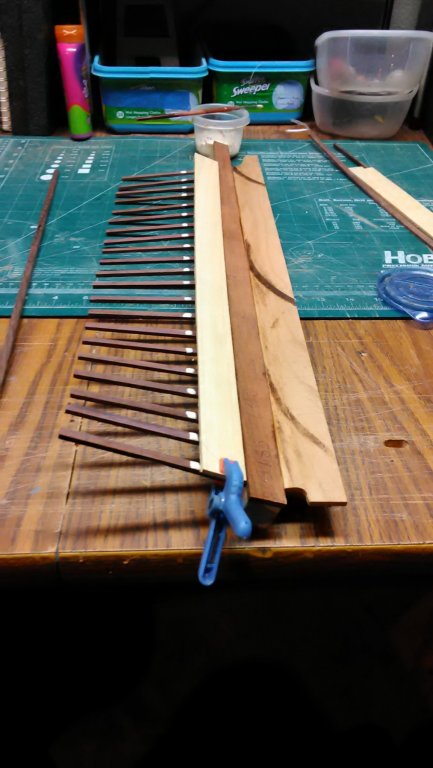
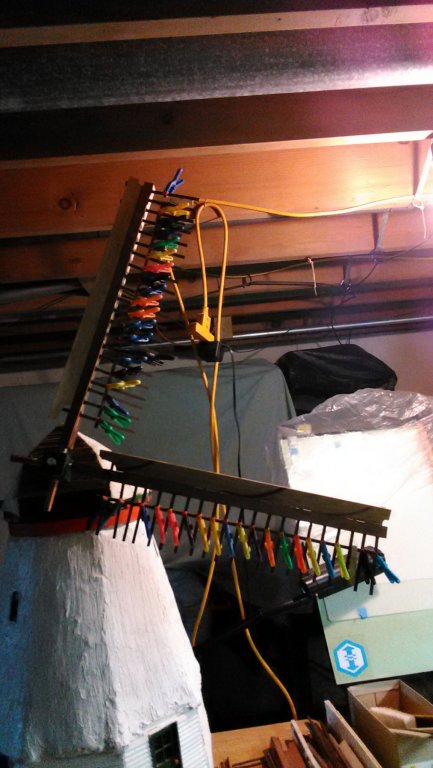
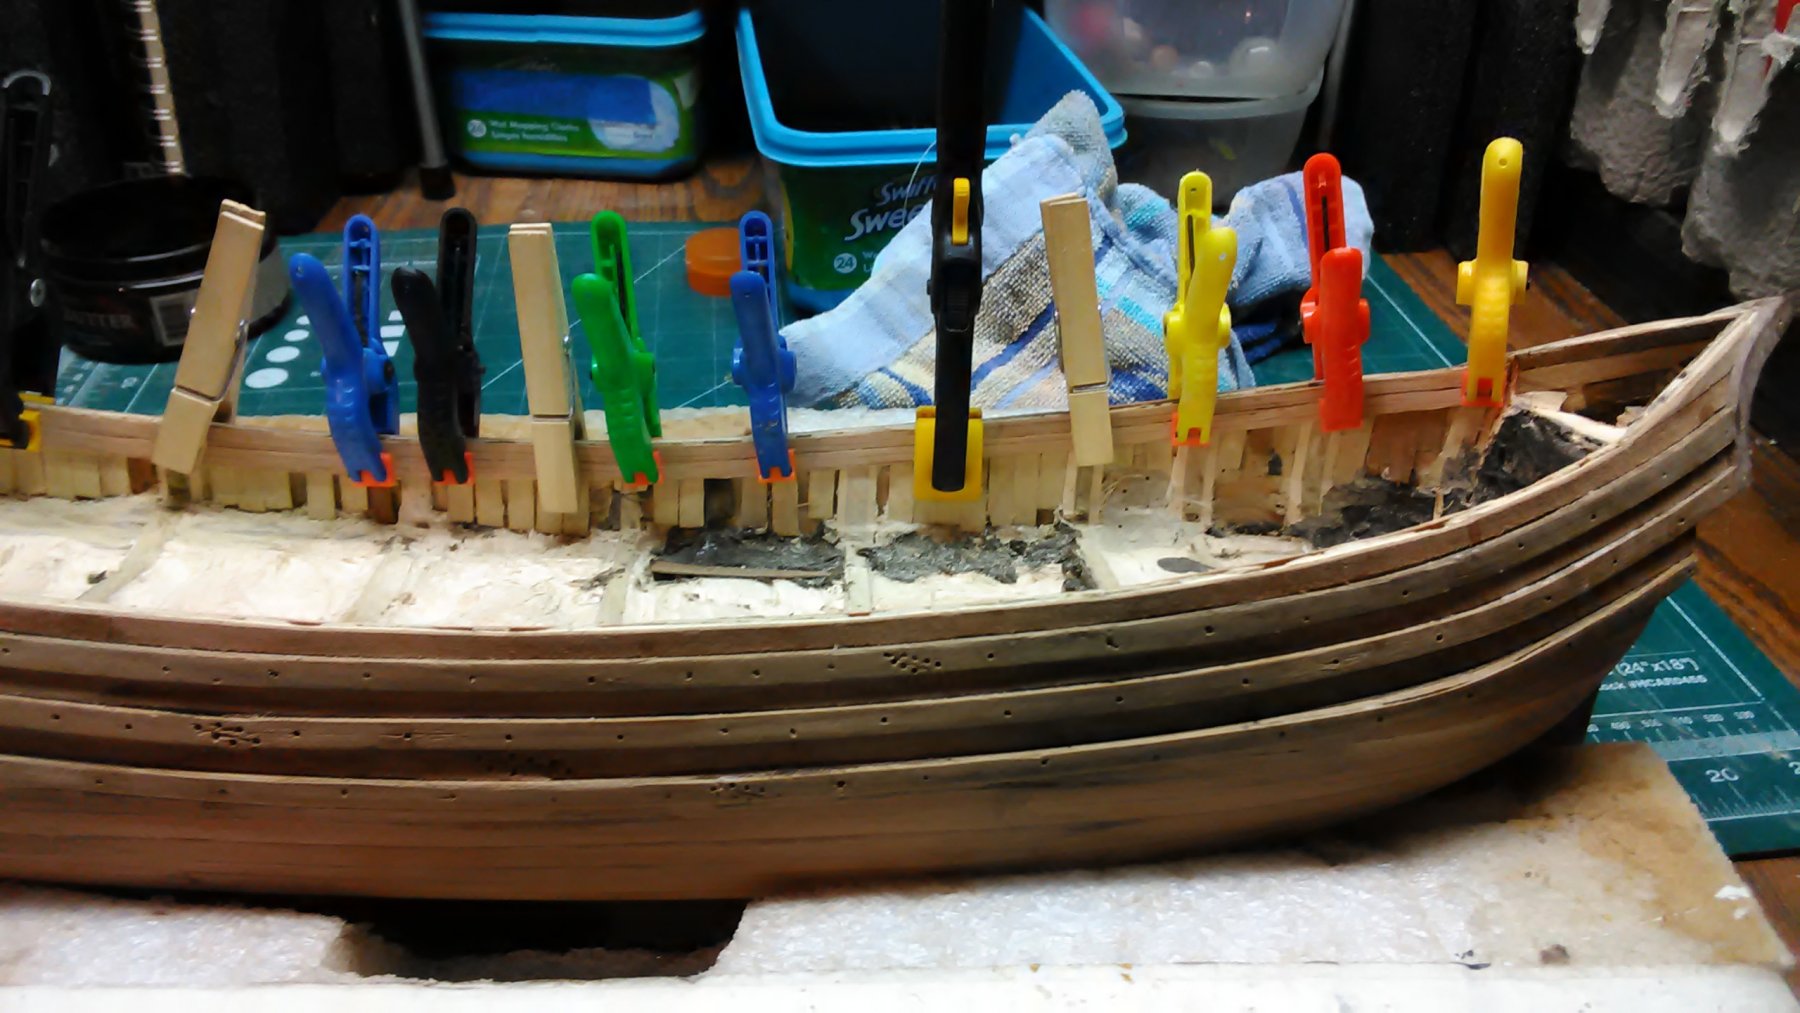
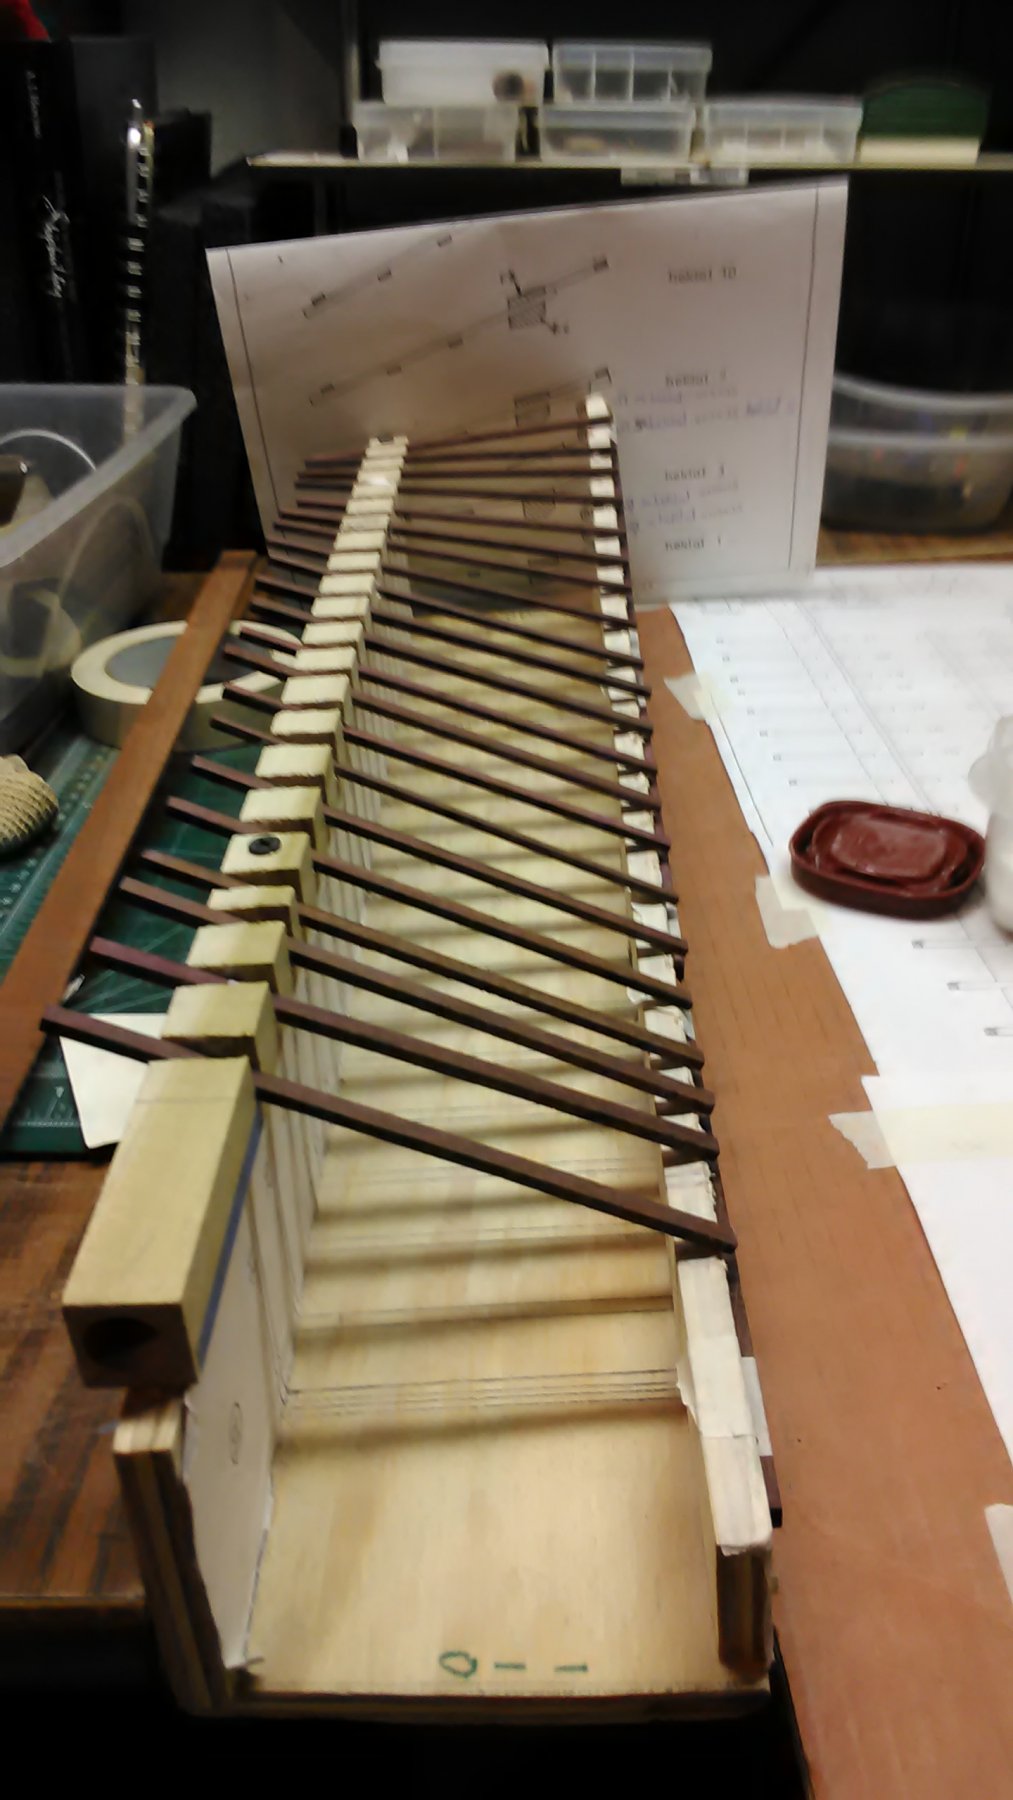
Working on the vanes in stages. When one step is done from one vane, go to the next one and do another step. As for the glue used it is Tight bond III which is waterproof. The vanes will be painted except the slats. In reality a Miller doesn't paint his slats but uses an oil base material so he can regularly check his 'ladder' (slat parts) to check for broken slats.

Here are 3 stages of assembly. From left to right. Left: Glued the slats on the roedes. Middle :
Deklat which is a strip of wood glued on top of the roede and keep slats in place. Right: glued windbord in place.
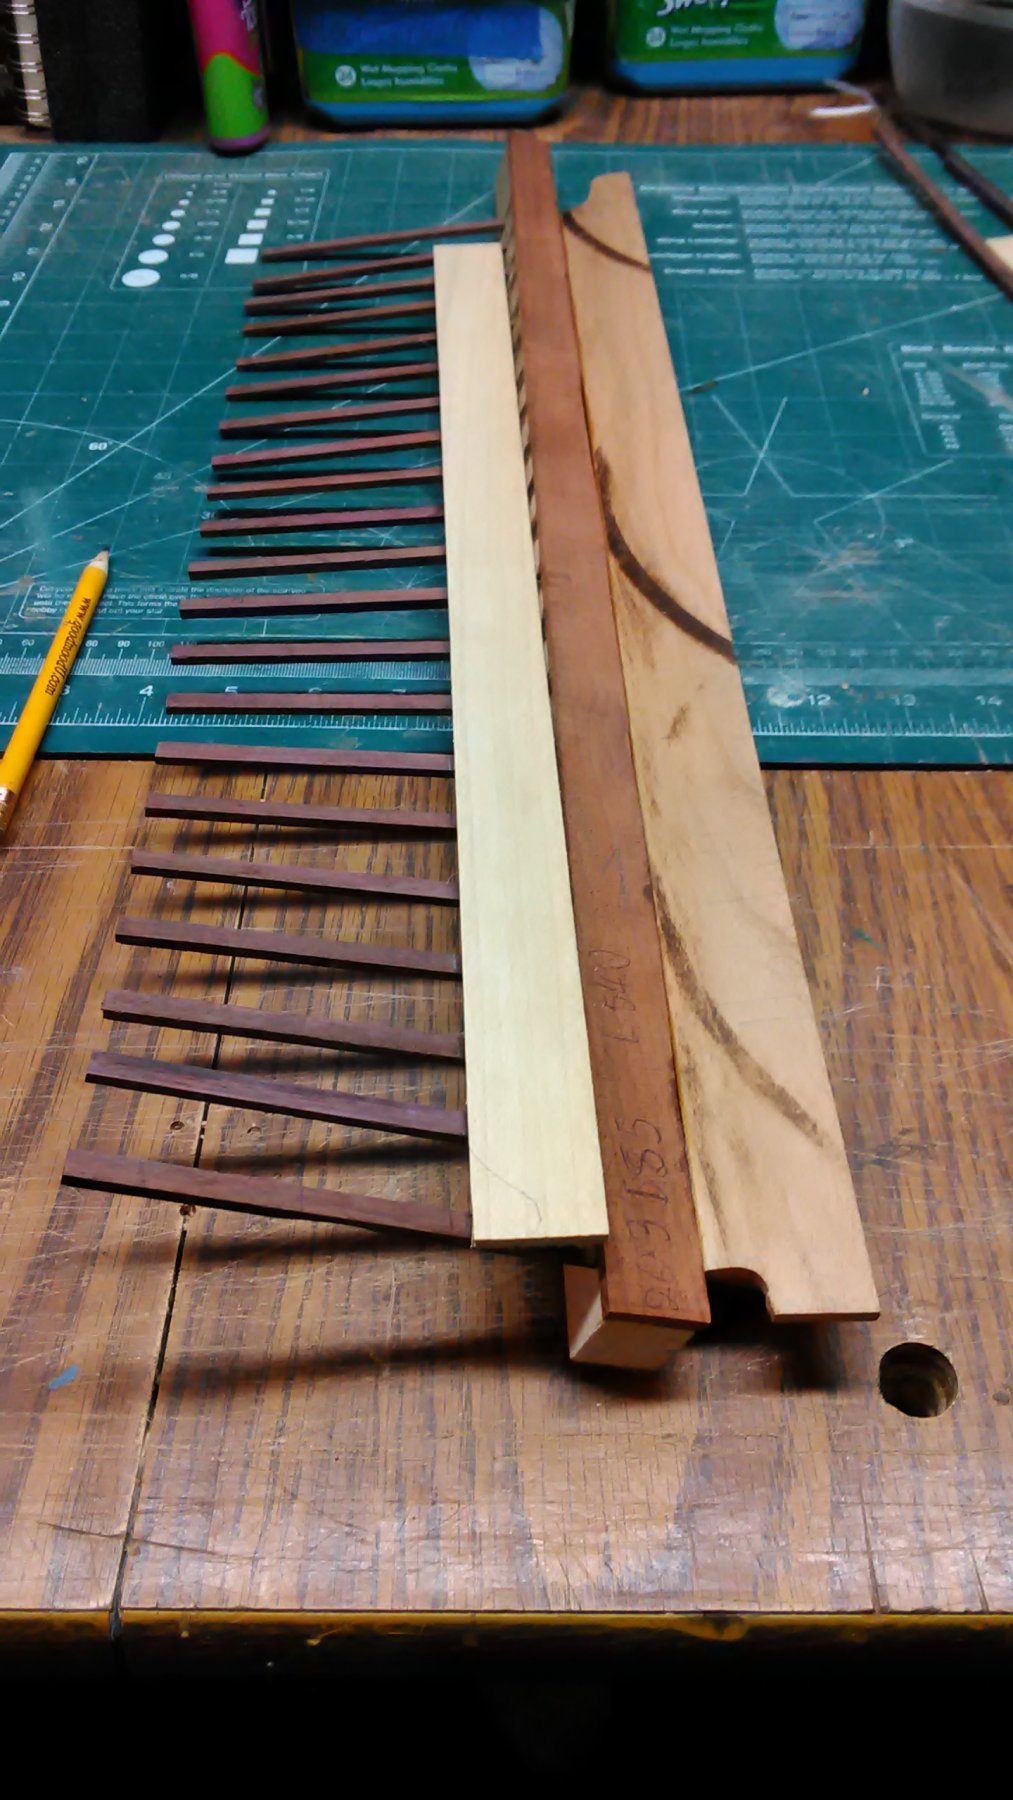
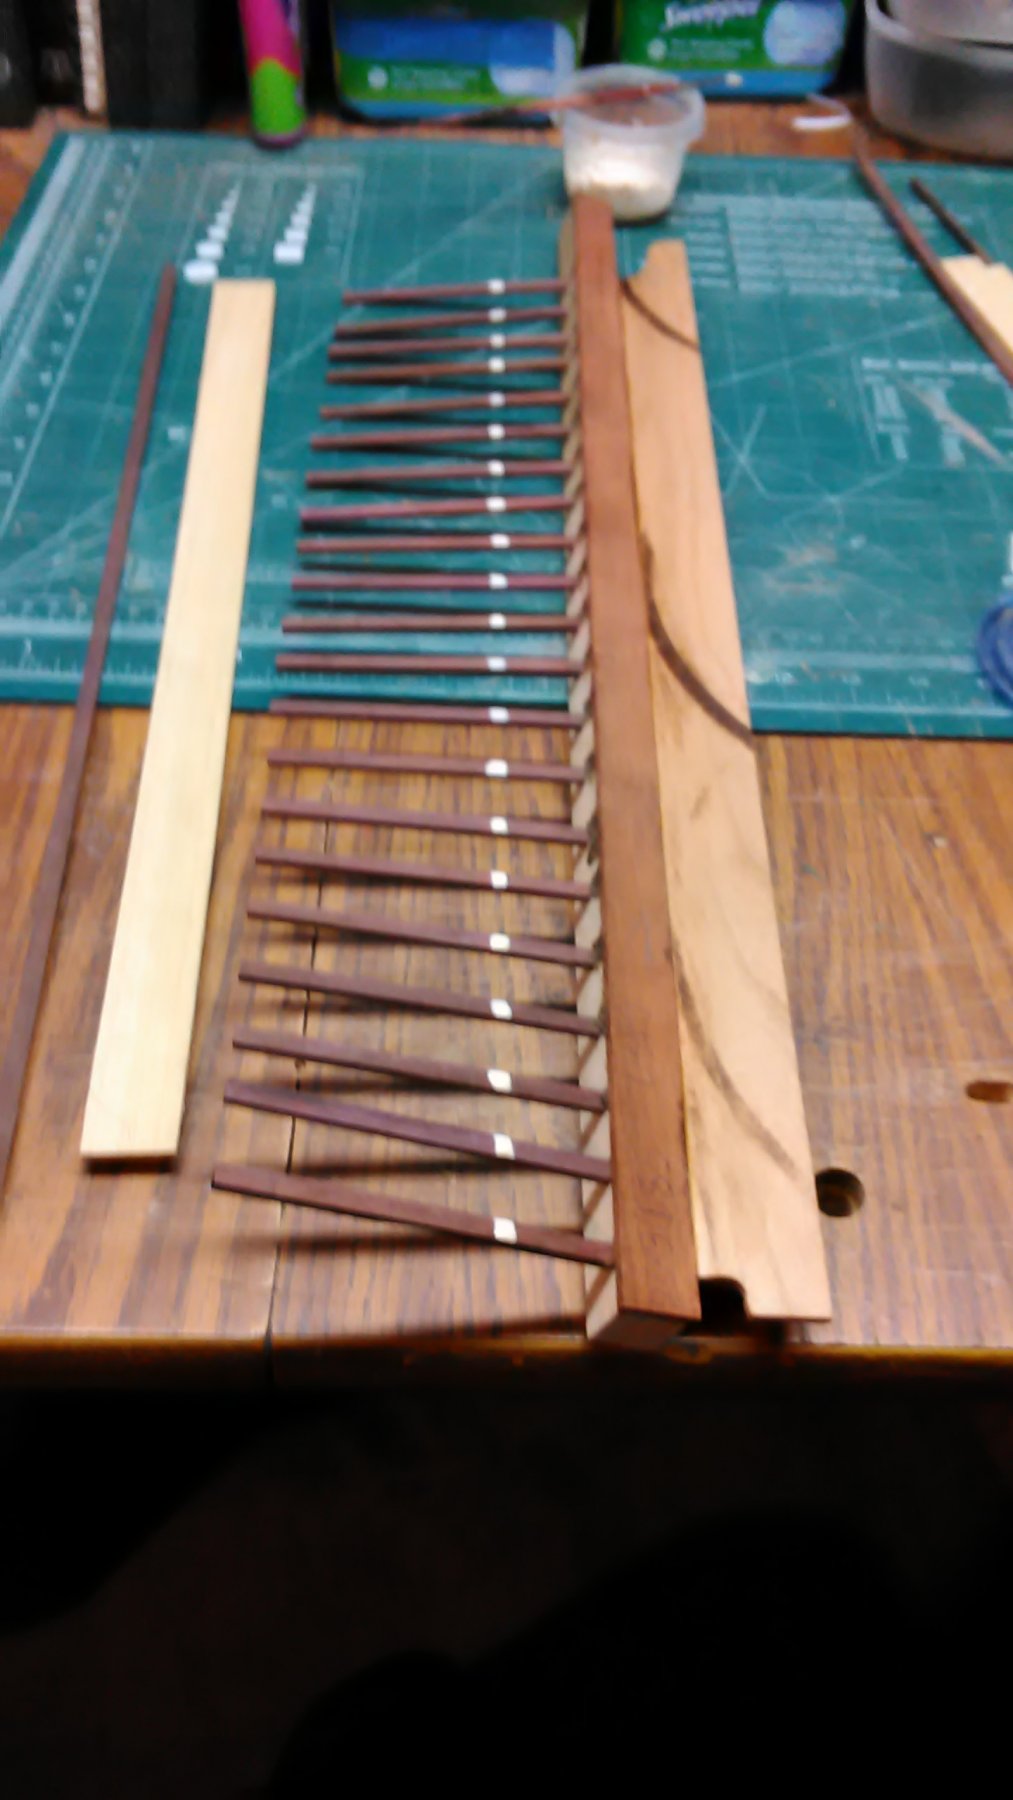
Strip of 5mm thick wood glued to the template. The slats are to end there.
Sheet of basswood clamped to the strips on the side to keep all slats aligned.

Deklat installed.

The 4 triangles, or kluften hold the windboard at the same angle as all the other slats do.
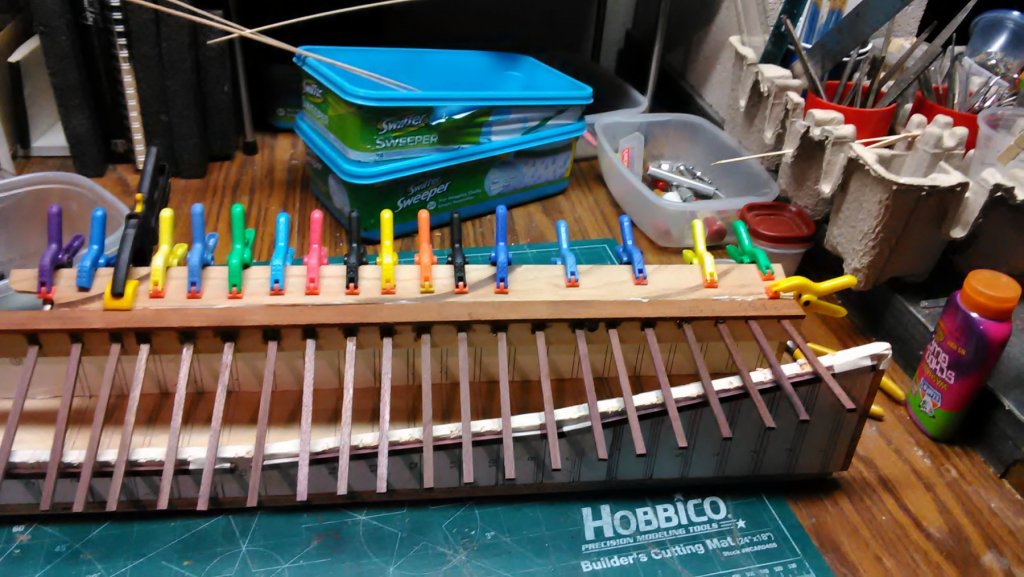
Windboard is glued and clamped.
Marcus
-
14 hours ago, cog said:
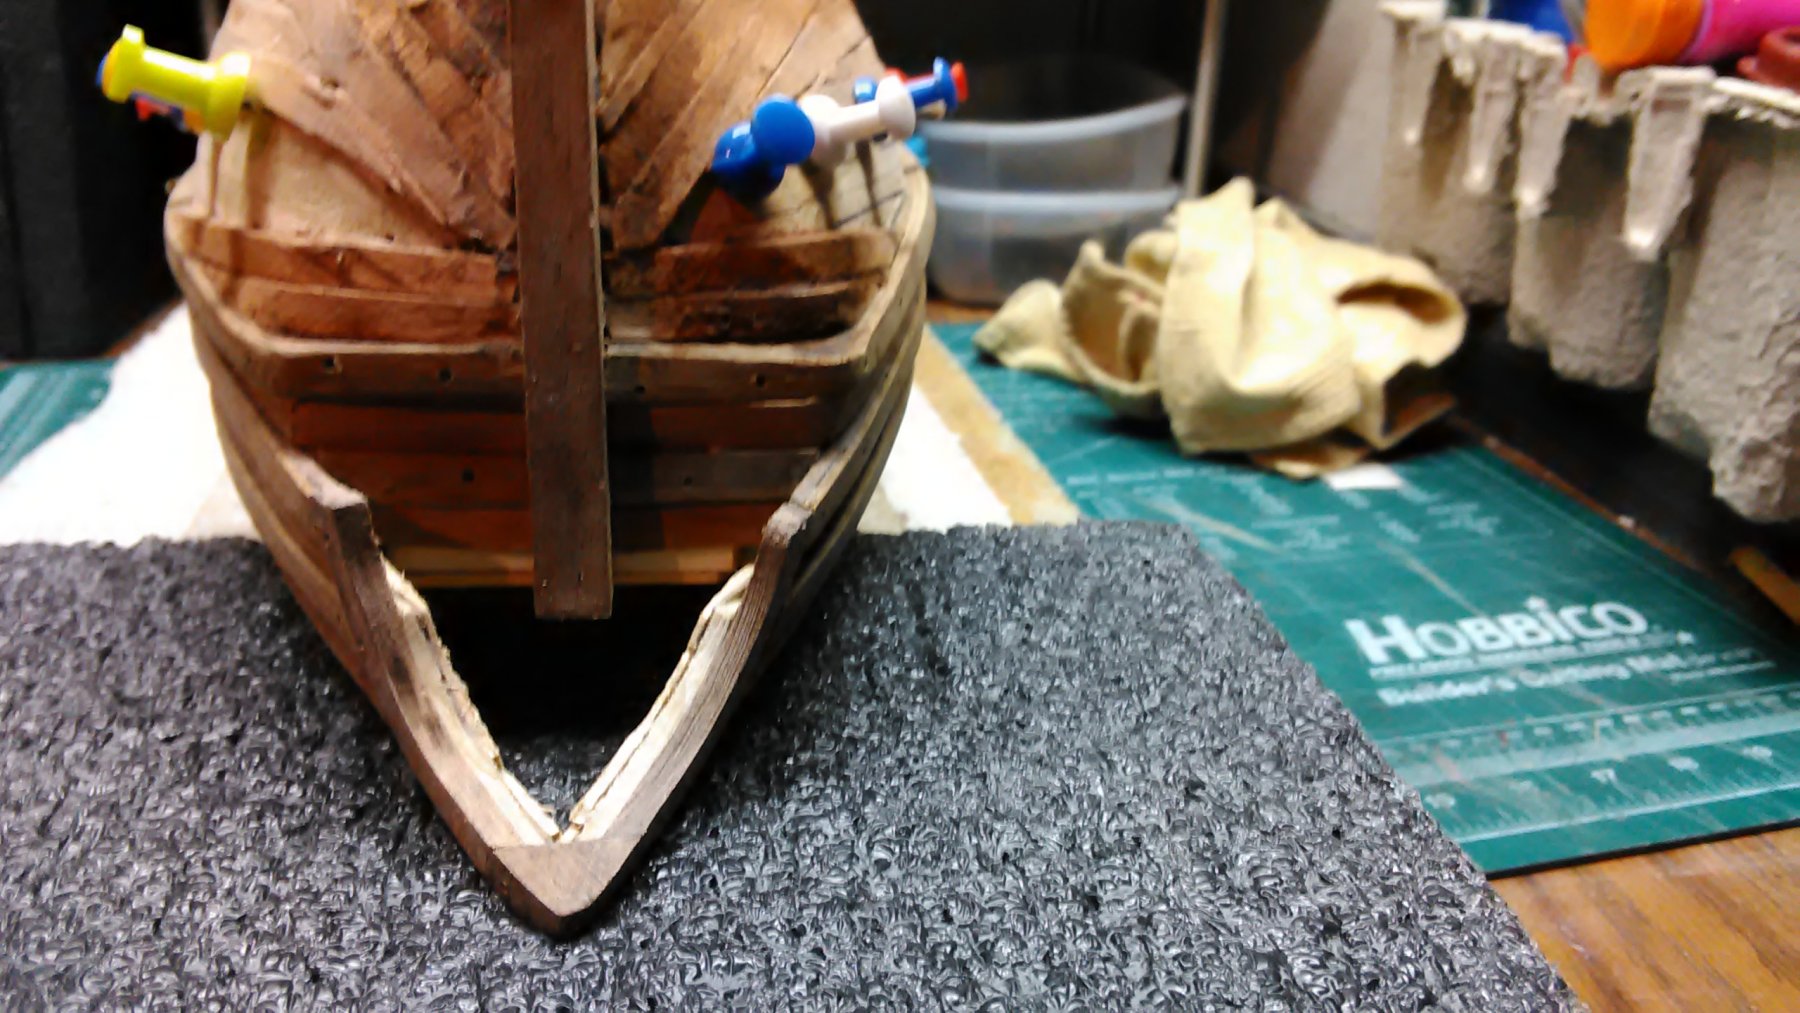
You missed a spot on the starboard side ... looks quite smooth from this side of the internet. The stern must have been hard to shape ...
Carl,
Sanding is not yet completed, but thanks for letting me know.
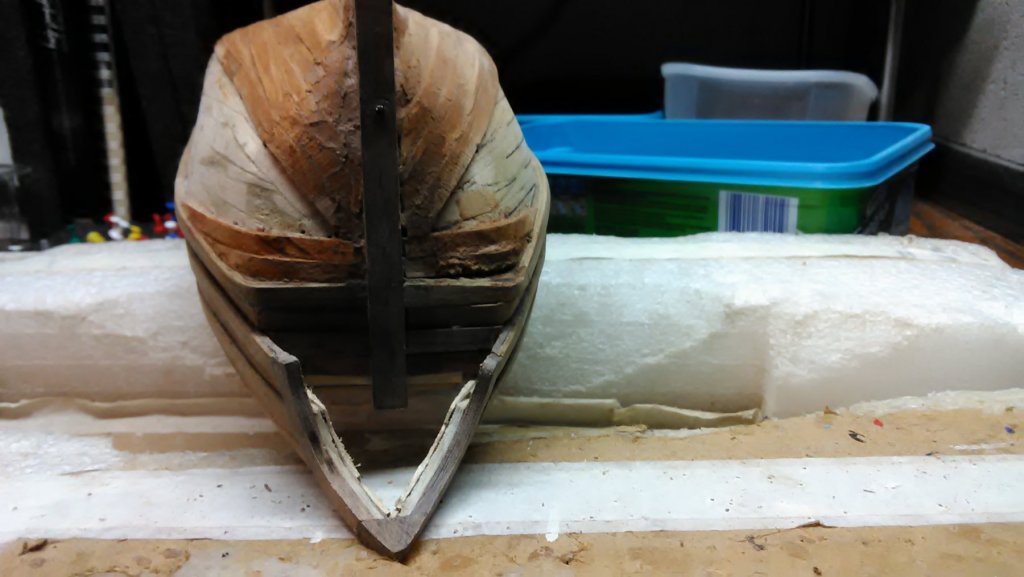
The stern was difficult to shape. The bluff bow, I have experience with (yachts, tjalk, boeier and botter).
Marcus
-
-
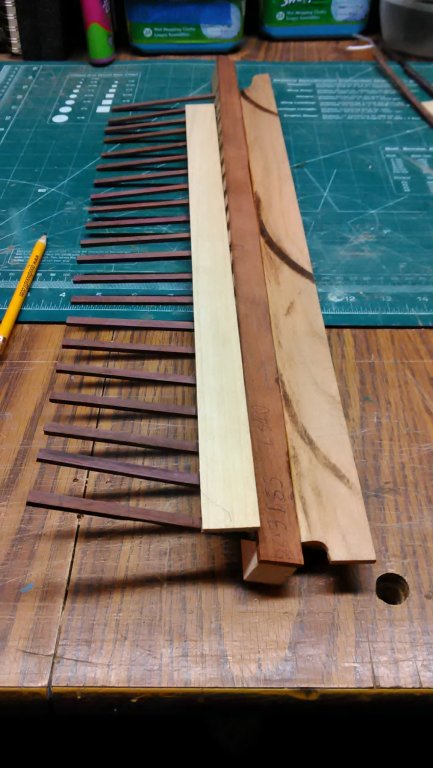
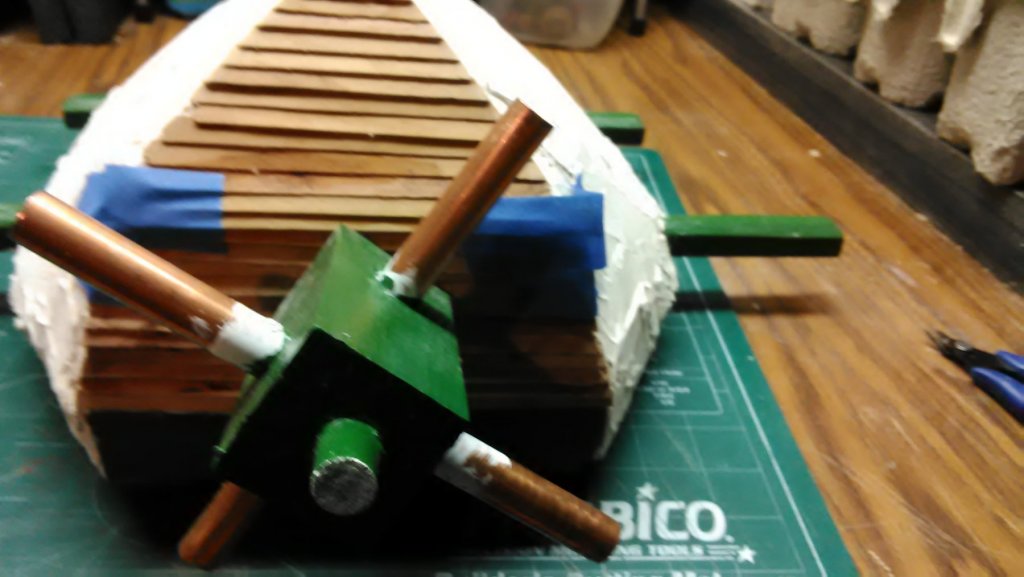
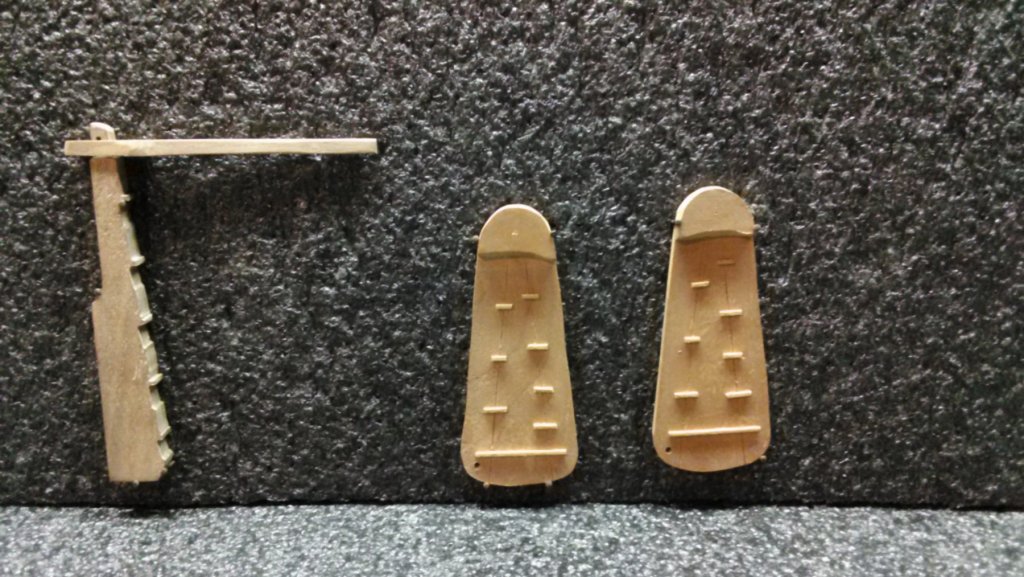
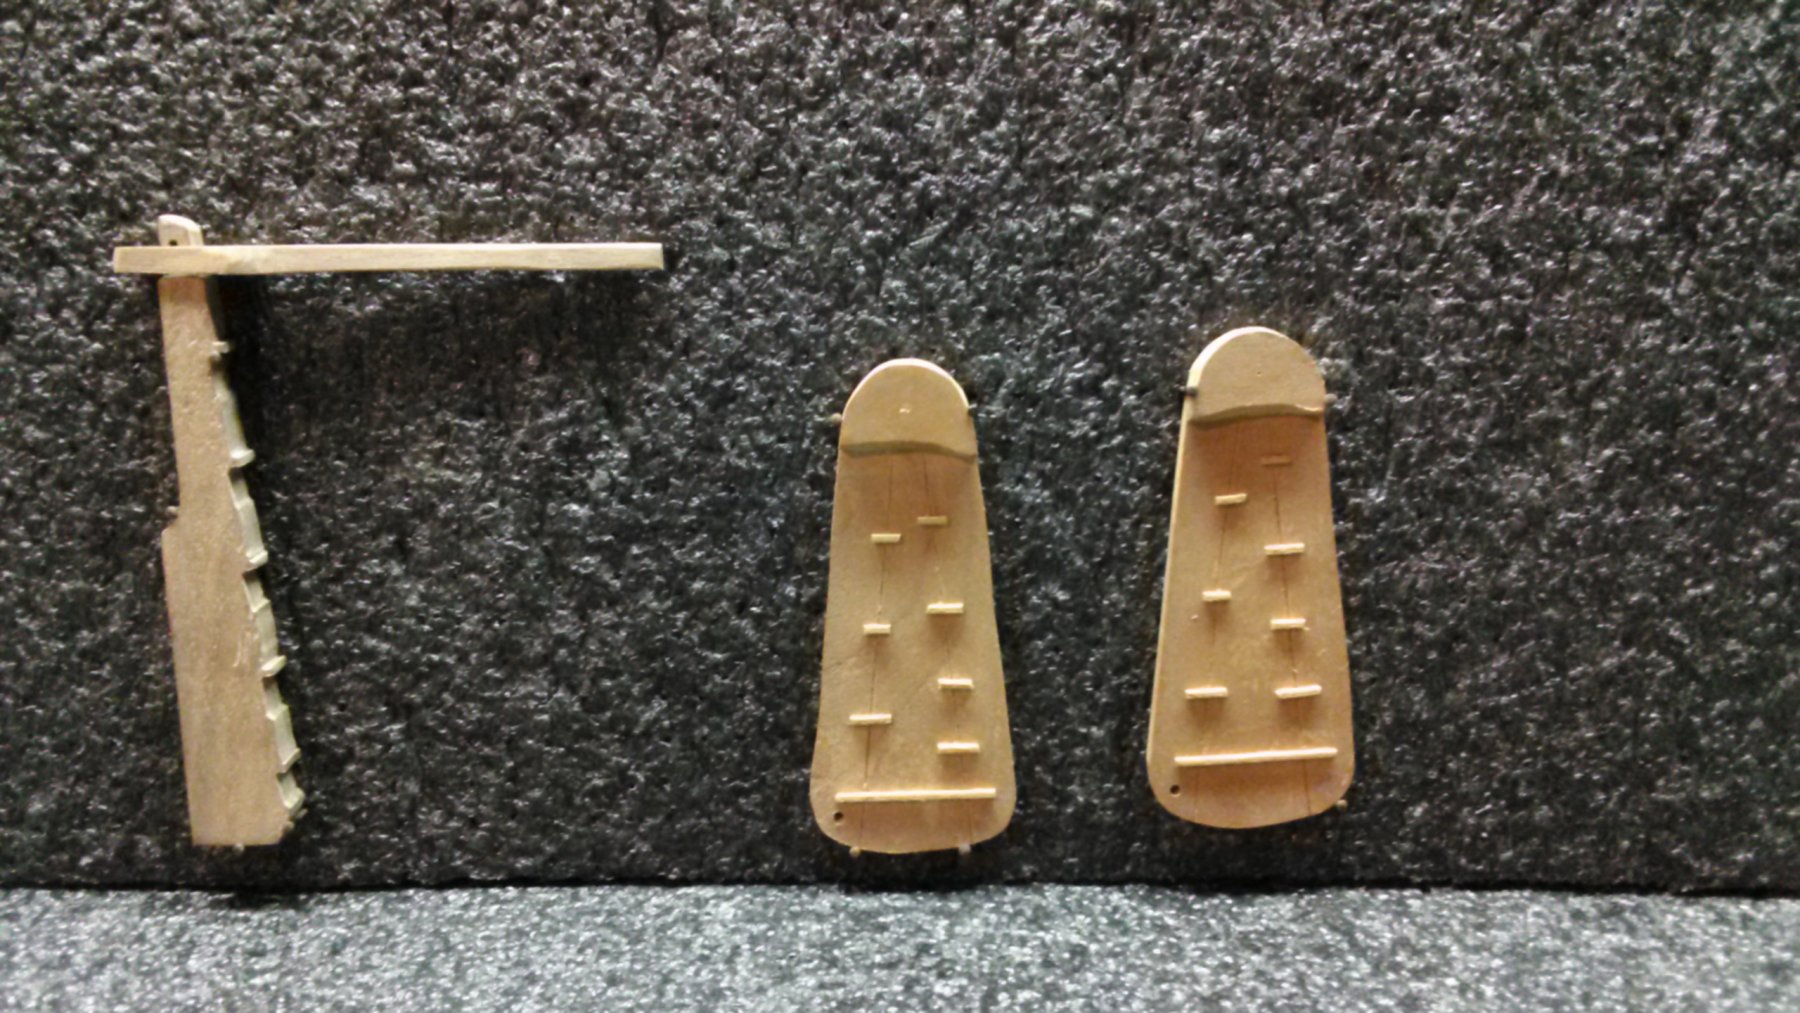
Started on the vanes and while each step needs to dry overnight I will also be working on the triangular piece (kruiwerk) which will be positioned in the back of the mill.
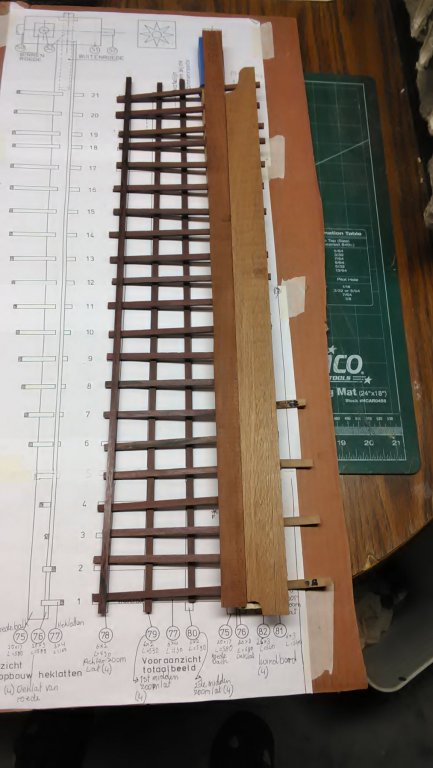
These are all the pieces that make up one vane (wiek). The 4 triangular pieces on the lower right of the picture are called 'kluften'. They hold the light brown long piece at an angle. This is part of the vane that catches the wind making the vane move in the wind.
The horizontal slats have been glued to the roedes. It will be drying overnight. Next time I will fill in the area on top of the slats with a combo of sawdust and glue.

This is to show the angles of all the slats.
Marcus
-
-
1 hour ago, amateur said:
Hi Markus,
not onlyneed the roedes the same weight, they need to have it at the same distance of the centre....
Jan,
The copper tubing in which the roedes are attached to are all 90 degrees, so I am good on that one.
I don't know about finishing her before the rain season sets in. I will be spending more time on making the vanes then building the mill structure.
Looking at her with the roedes the mill is pretty big, but then compared to the house and when she is in the garden she won't look 'that' big.
Marcus
-
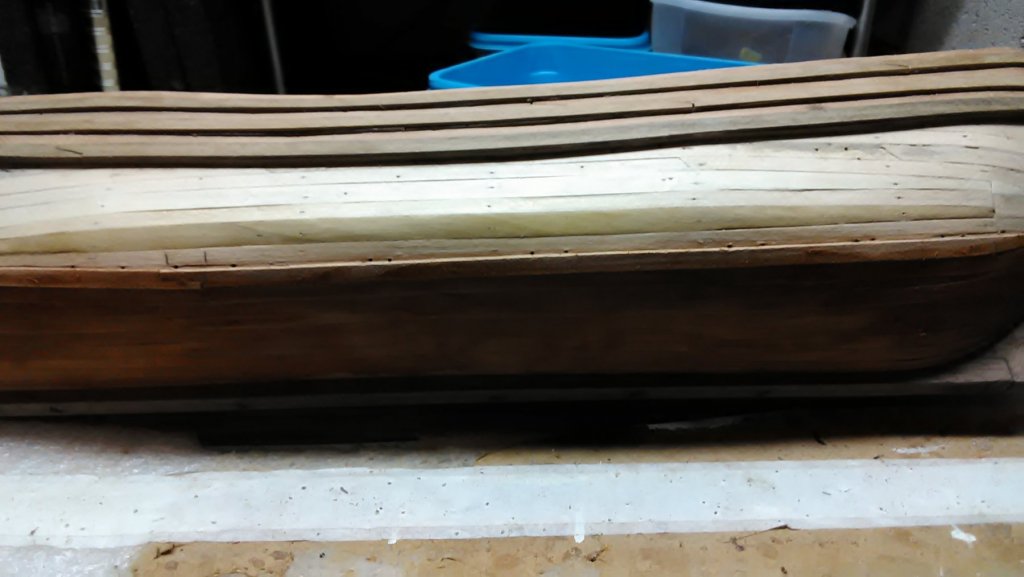
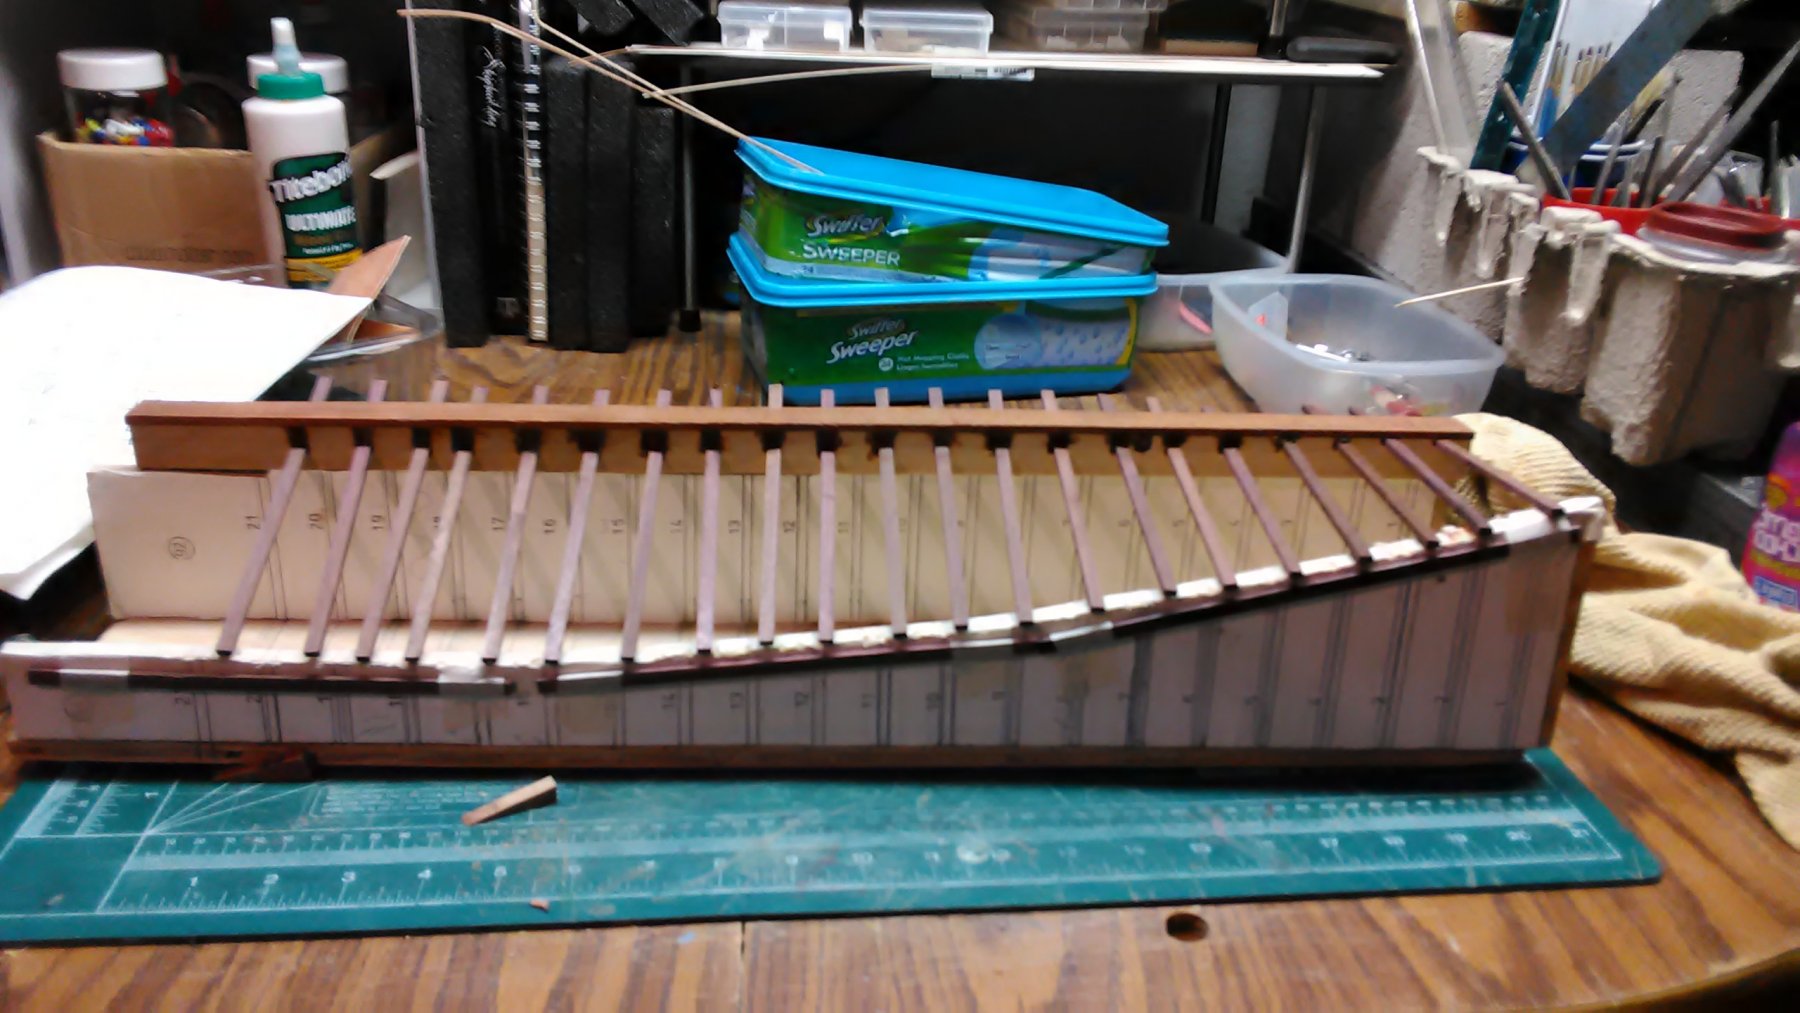
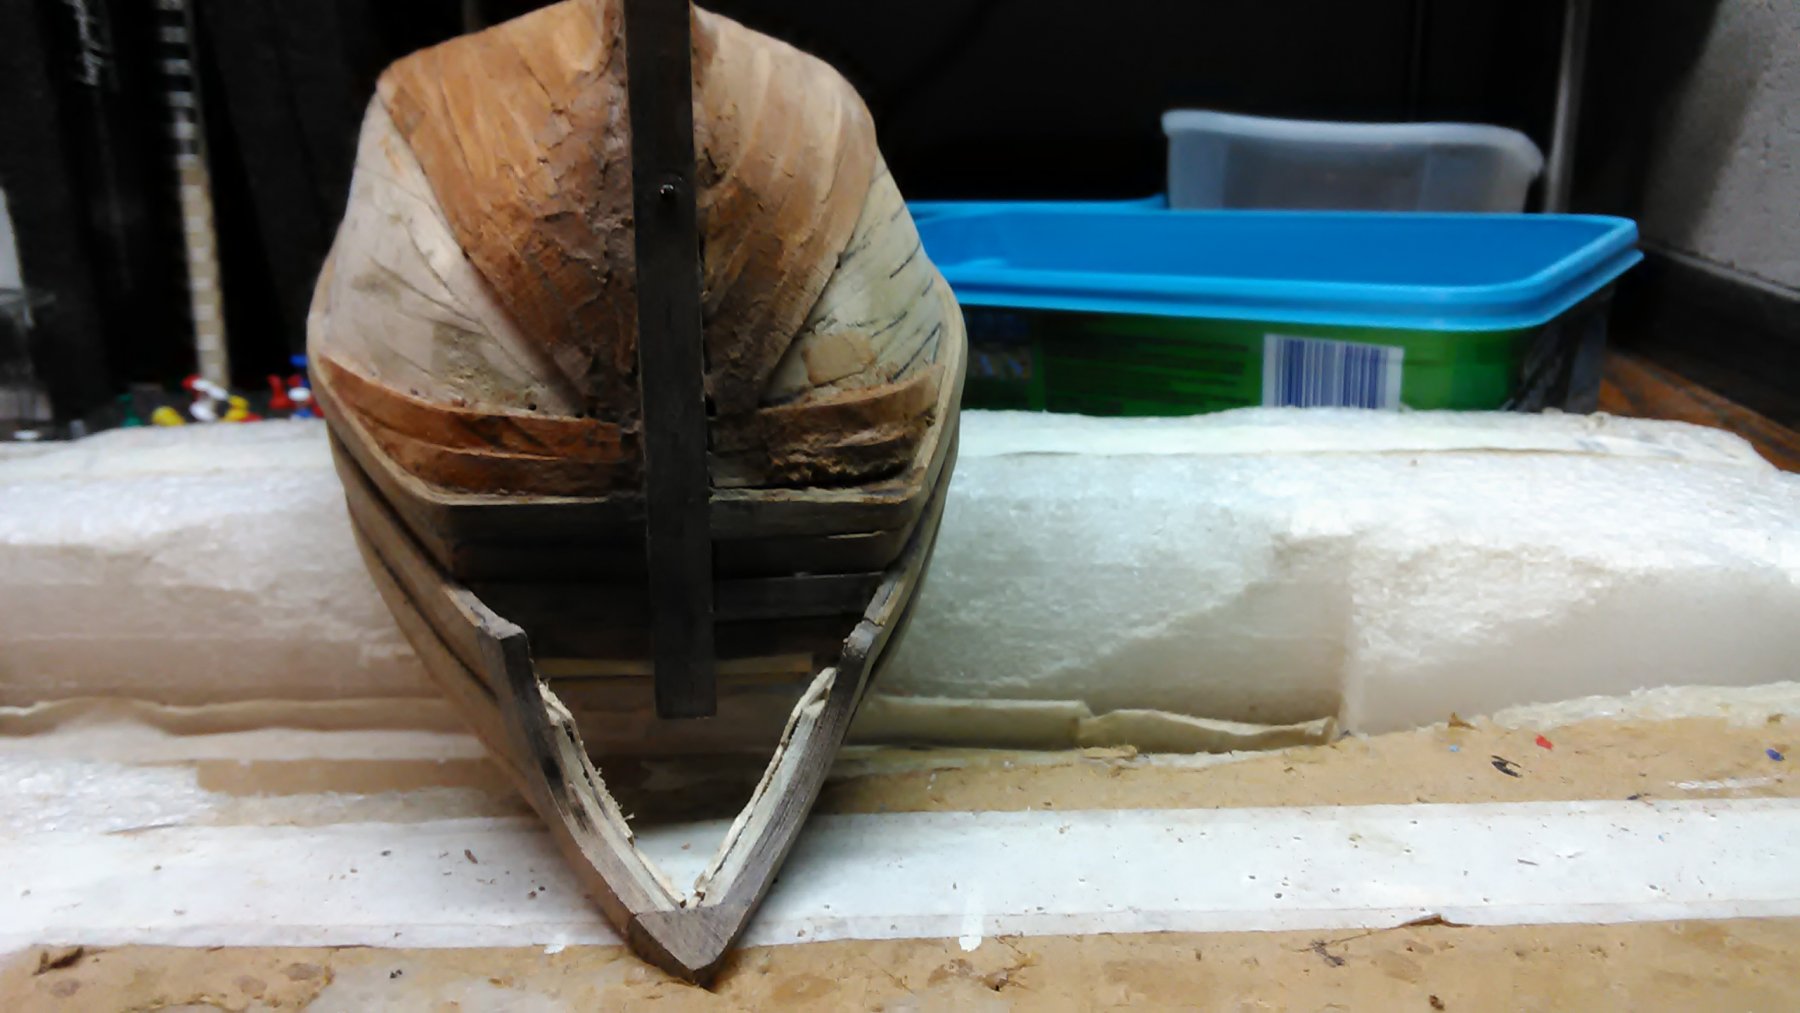
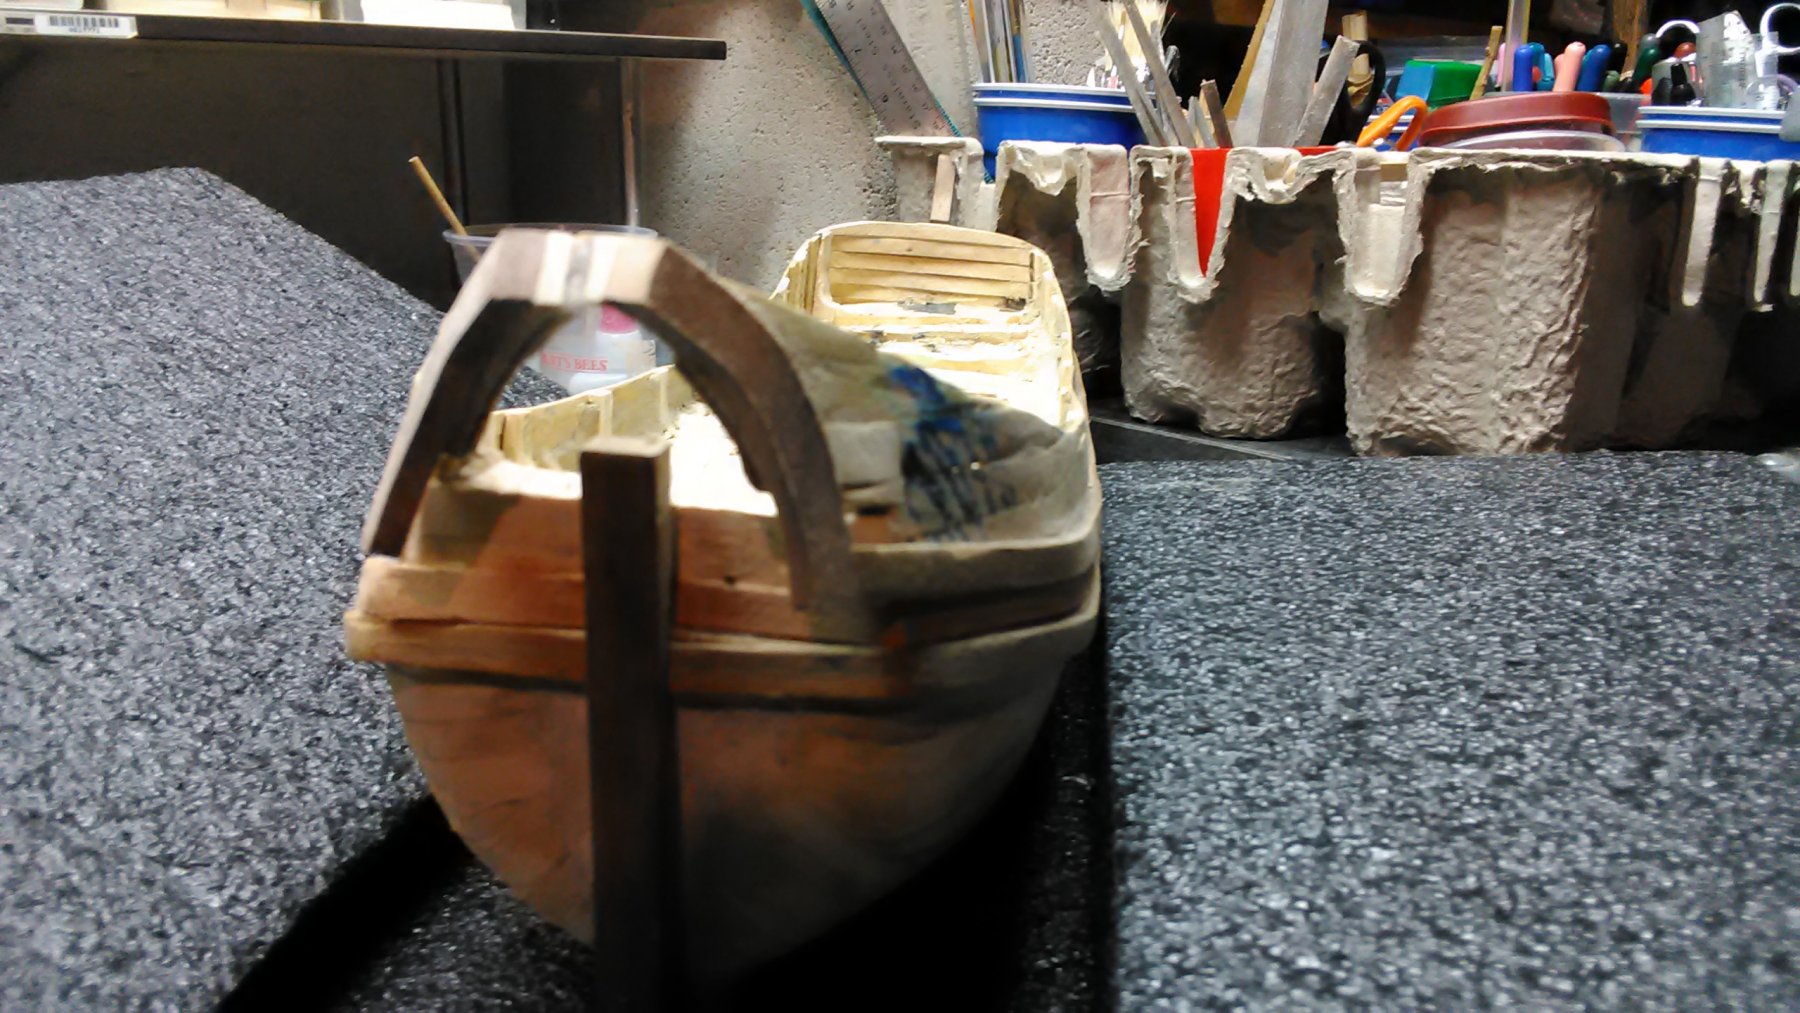
I have completed the planking up to the wales. Now comes the difficult area. I plan to use two pieces of 0.5mm thick planks glued on top of each other, which makes the thickness of all the other planks I used.
I will do this as there is some extreme bending.
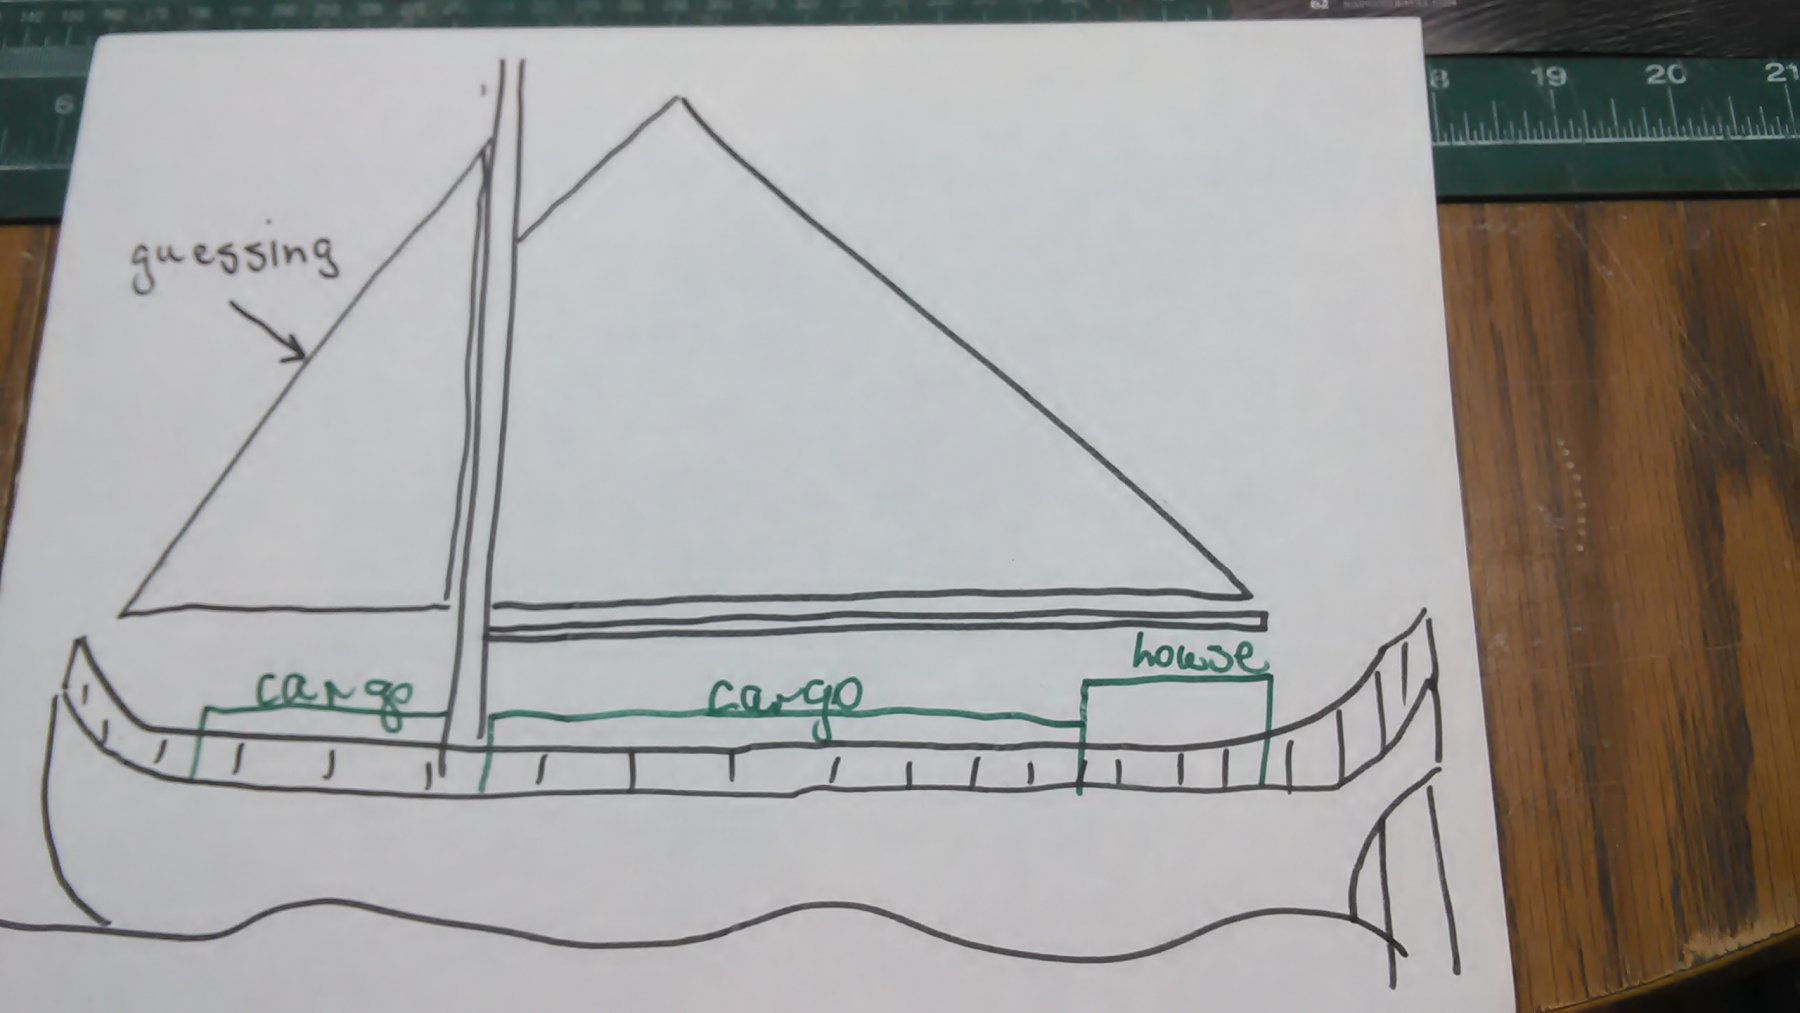
My planking of the Boyer is different to the model in the book. The model in the book follows the curve of the wales all the way to the keel. It does straighten out a bit. That stern of the model has straight planking as well.
So, it follows the curve of the whale and towards the stern it bends 90 degrees and ends up straight when it hits the rudder post. (hope this made sense).
I followed the planking as a combination of the Utrecht and from a book of the Valkenisse, by Rob Napier.
The Dutch planked there ships differently compared to the rest of the seafaring world and I am doing this in my models as well.
Marcus


-
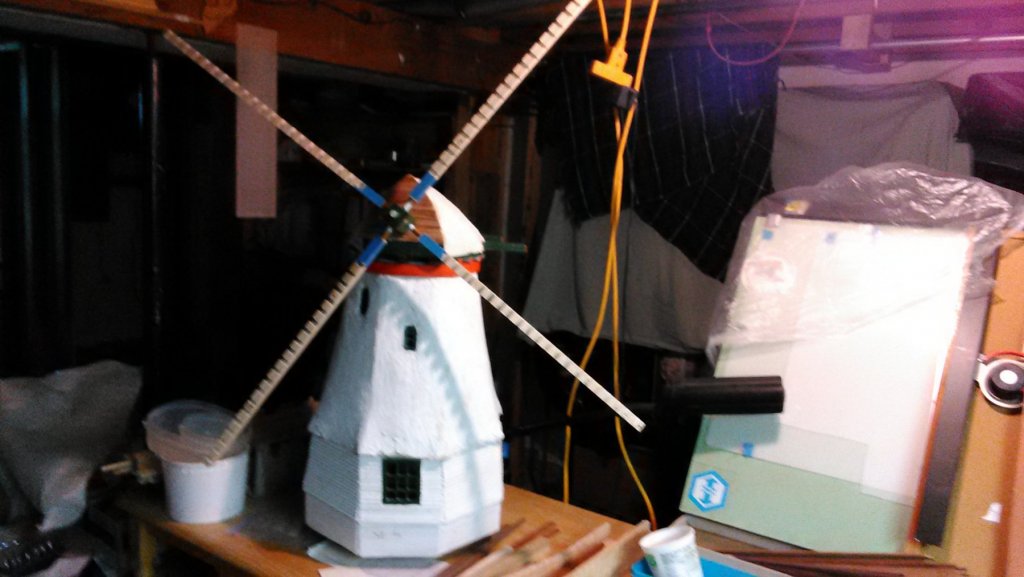
Completed drilling the holes in the roedes. Dry fitted them on the copper tubing that is part of the axle.
Next comes building the vanes one by one. The instructions mention that this process is to work slowly and wait a day everytime you finish a step for the glue to completely dry.
There is a step that I am not going to do. Two edges length wise of the roedes need to be planed. My biggest fear is that I may take off too much on them. Then the weight of the completed roedes will be different on each of them.
All 4 roedes need to be close to the same weight, so it is balanced. I have a postal scale which I will use to weigh the roedes before I am permenantly attach them to the copper tubing.
Marcus
- cog, thibaultron, Canute and 4 others
-
7
-
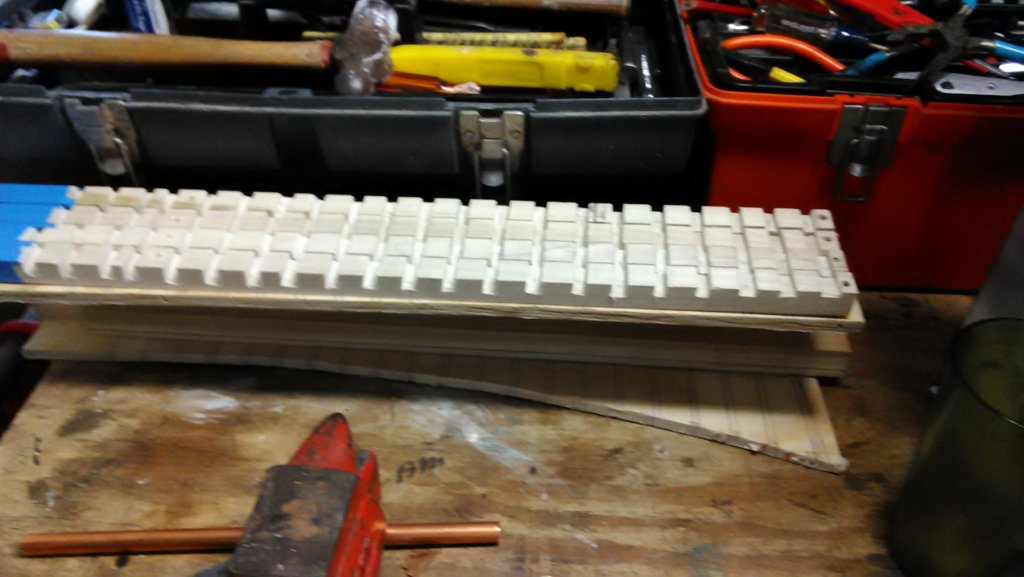
Finished all 84 angle cuts on the 4 roudes. The blue tape is to keep the wood from splitting as I still need to drill 1/2" holes into the roedes.
Once all that is done it is a matter of fitting and glueing the pieces that make up the vanes.
Also clinker built the front of the cap which will be painted green.
Still lots of paint work to do and purchase the material for making the bricks.
Marcus

-
Been doing some house projects such as resurfacing the driveway, resealing the concrete patio and just finished degreasing half of the garage. Tomorrow I will reseal it with a concrete sealer. After that I will do the other half.
Did do 2 cherry planks every day last week so the boat is coming along.
Cutting your own planks is an education. I thought I had it down but after I measured the thickness of every plank I noticed 1/2 are off by a mm. So once the hull is planked there will be a lot of sanding. Better too thick than too thin.
Marcus
-
HTH,
I have used that method as well but never for filling tiny gaps between planking.
On the Utrecht I used it to fill the gap between the deck and the frames. Made a thick paste and applied it. Also on my windmill built I used it to fill large gaps.
Thanks for the suggestion.
Marcus
-
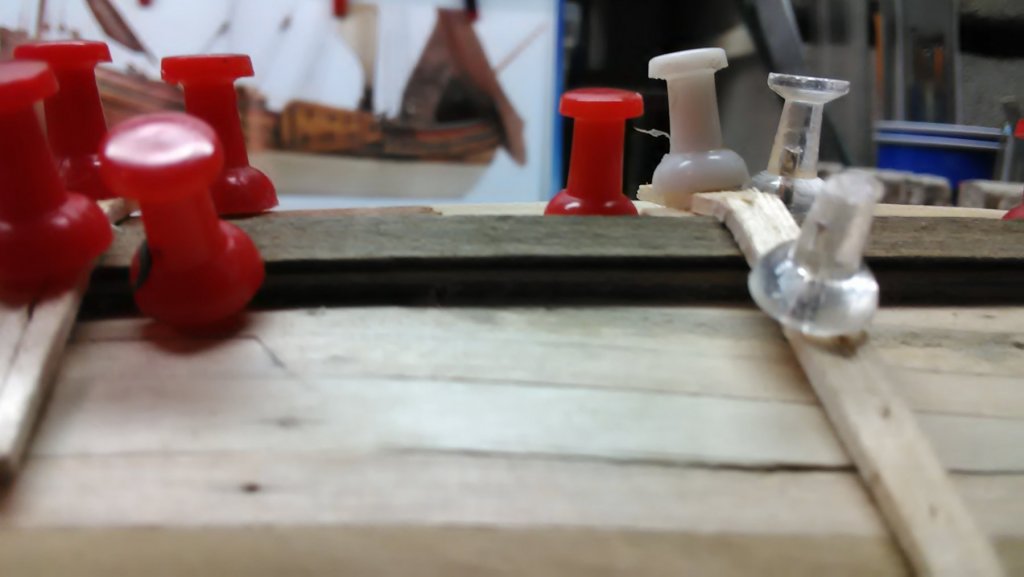
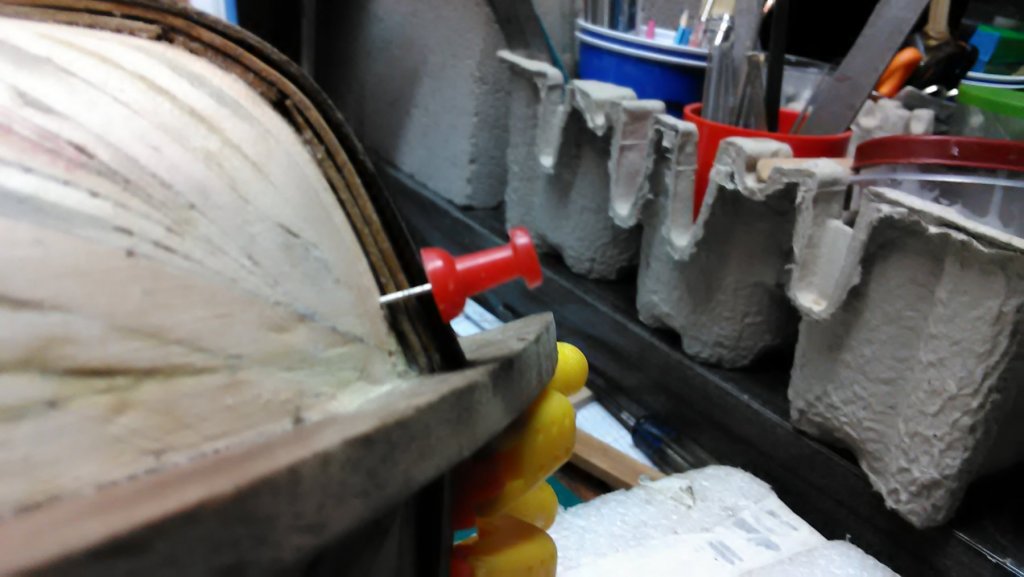
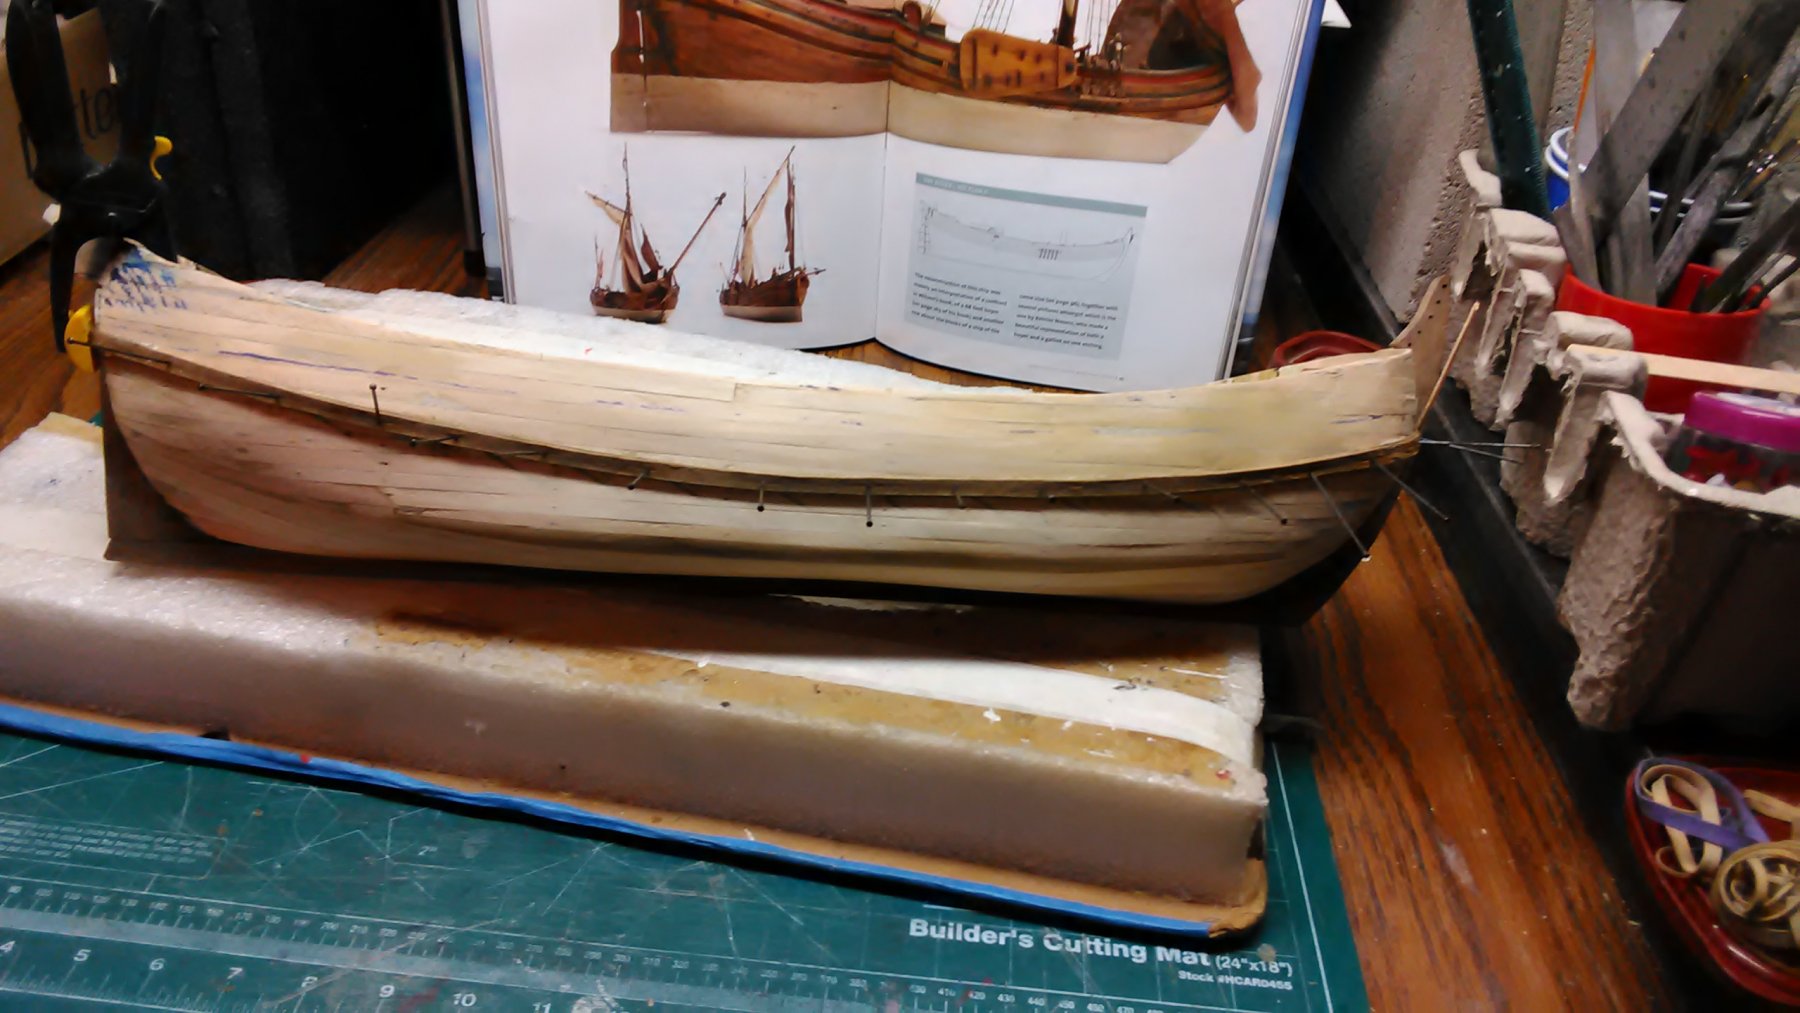
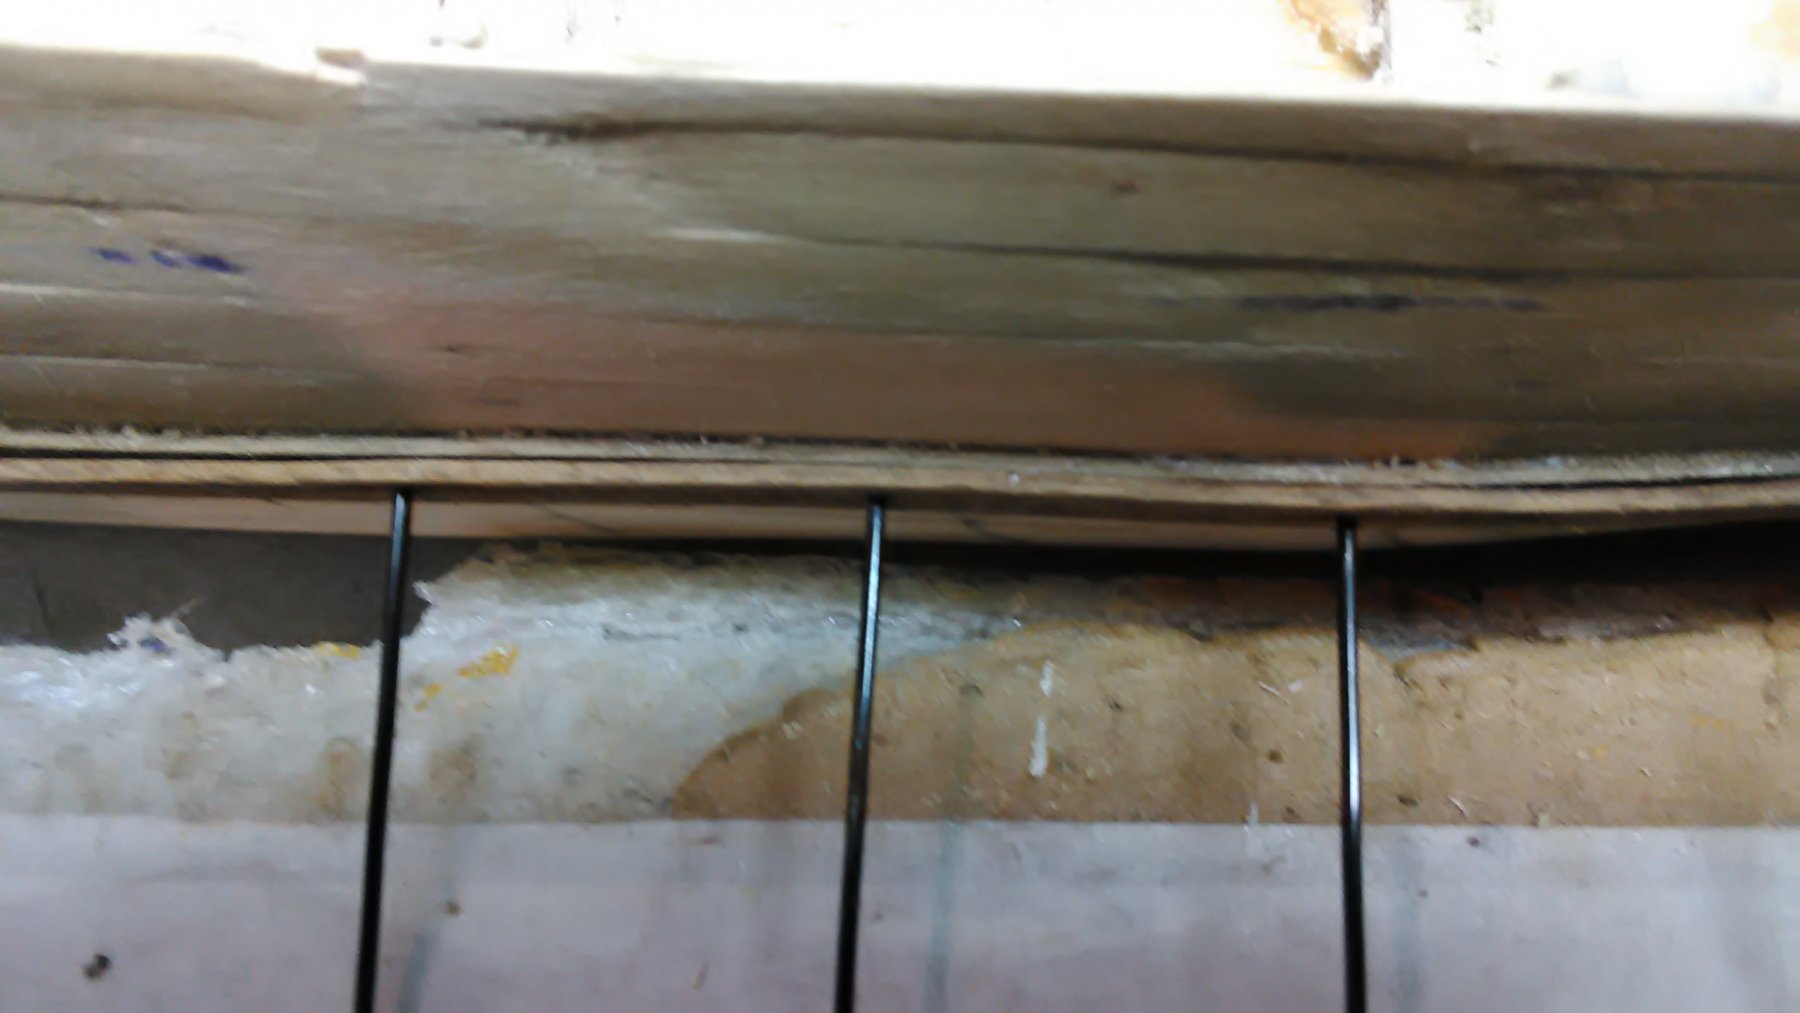
When I bend a plank to shape I use a row of clamps. It becomes a 'clamp forest'.
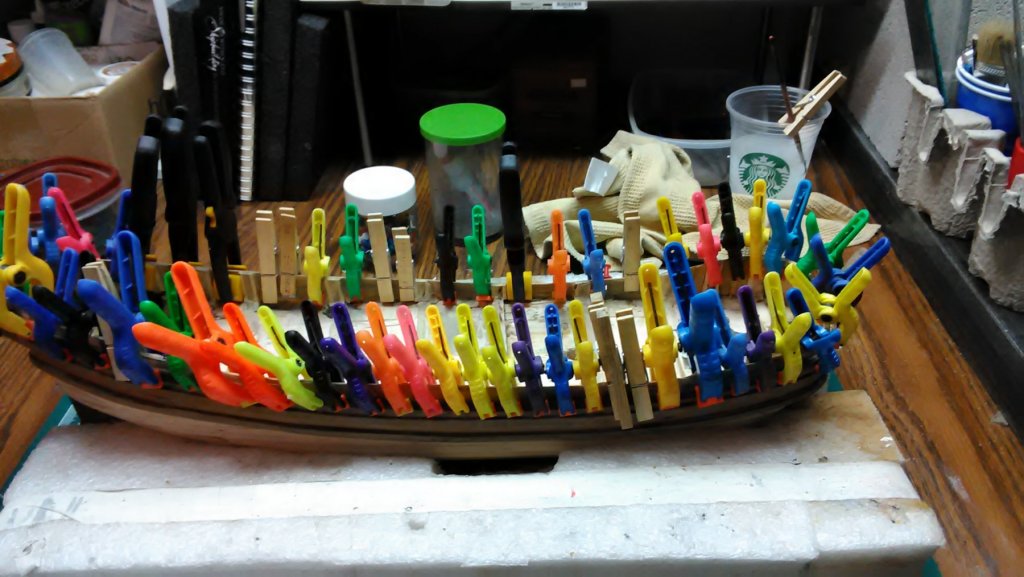
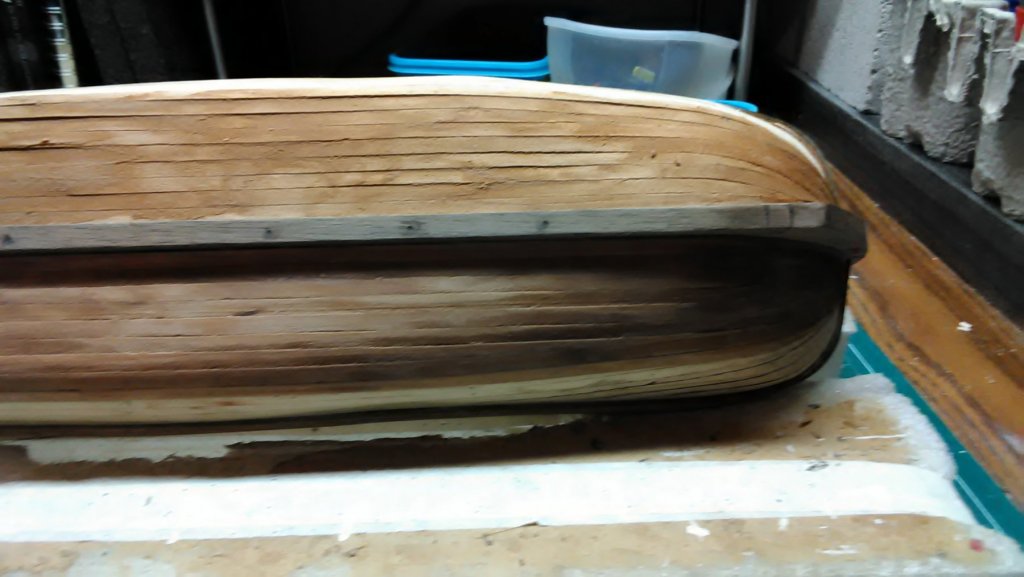
The three wales on both sides are installed with the planking in between. According to the picture in the book the blank between the lower wale and the middle wale is painted green and between the middle and the top wale is painted red

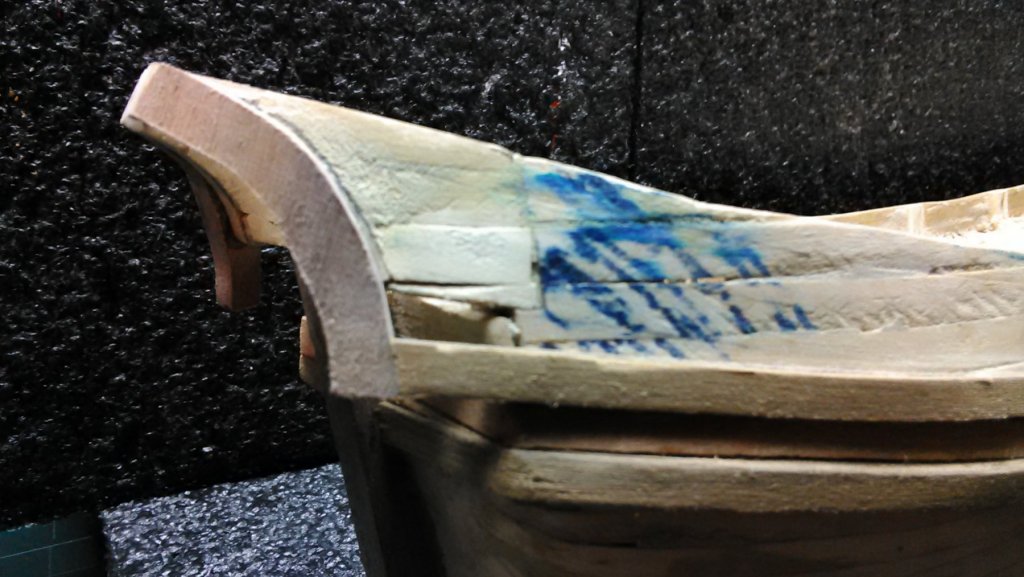
I goofed in the stern. My curved strip is too long. So the little area there, is extra. Will either add another walnut plank making a small 4th wale or a cherry plank and paint it red.
All and all I am pretty happy with the results. There are some small gaps between the planking. Not sure what to do. In the past I used to jam slivers of the same wood in it as filler is never the same color.
Suggestions are welcome.
Also created the rudder and tiller and the leeboards.
Marcus
- Landlubber Mike, GrantGoodale, G.L. and 4 others
-
7
-
Kees,
Congrats on the new job. The rivetting looks good. Your attention to all the details is amazing.
Marcus
-
Hi G. L.,
Thanks for taking the time to go to the library and take a picture of the punter. I like the model with the farmer and his cows. That is so Dutch. Dutch is my first language so that is no problem.
I am interested in the article and would appreciate if if you scanned it and emailed it to me. I'll pm you with my email.
Marcus
-
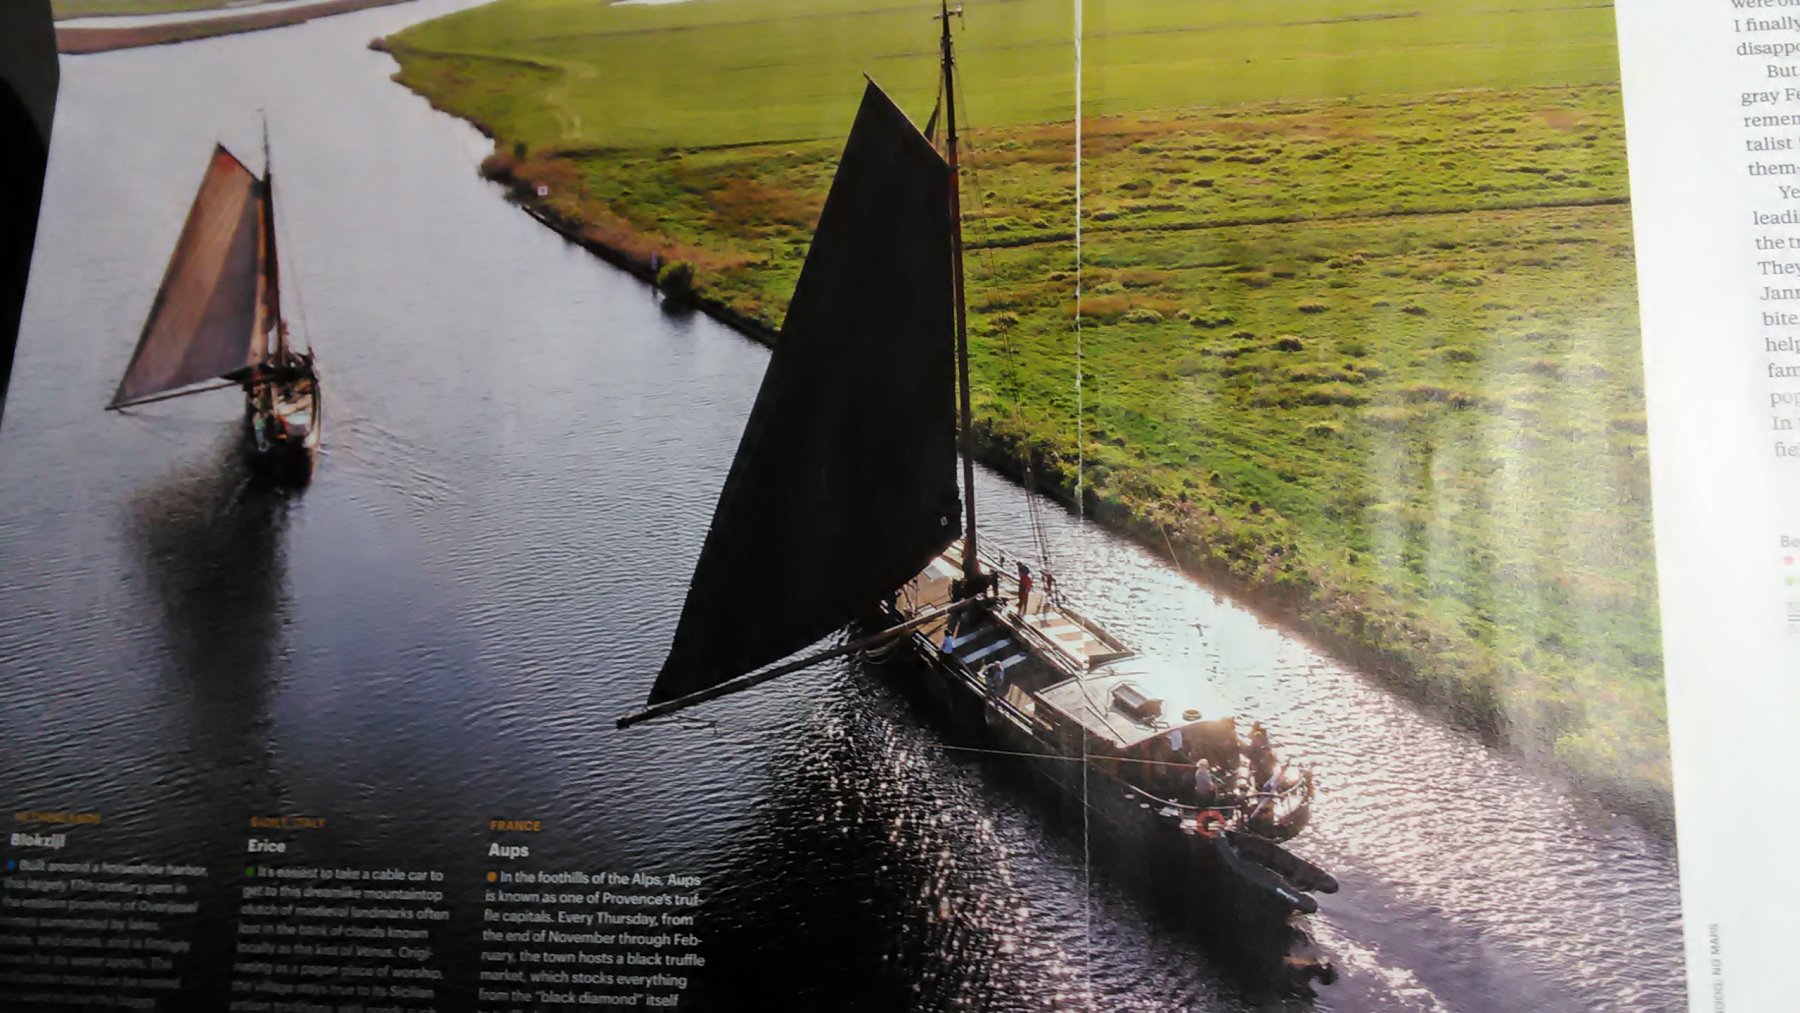
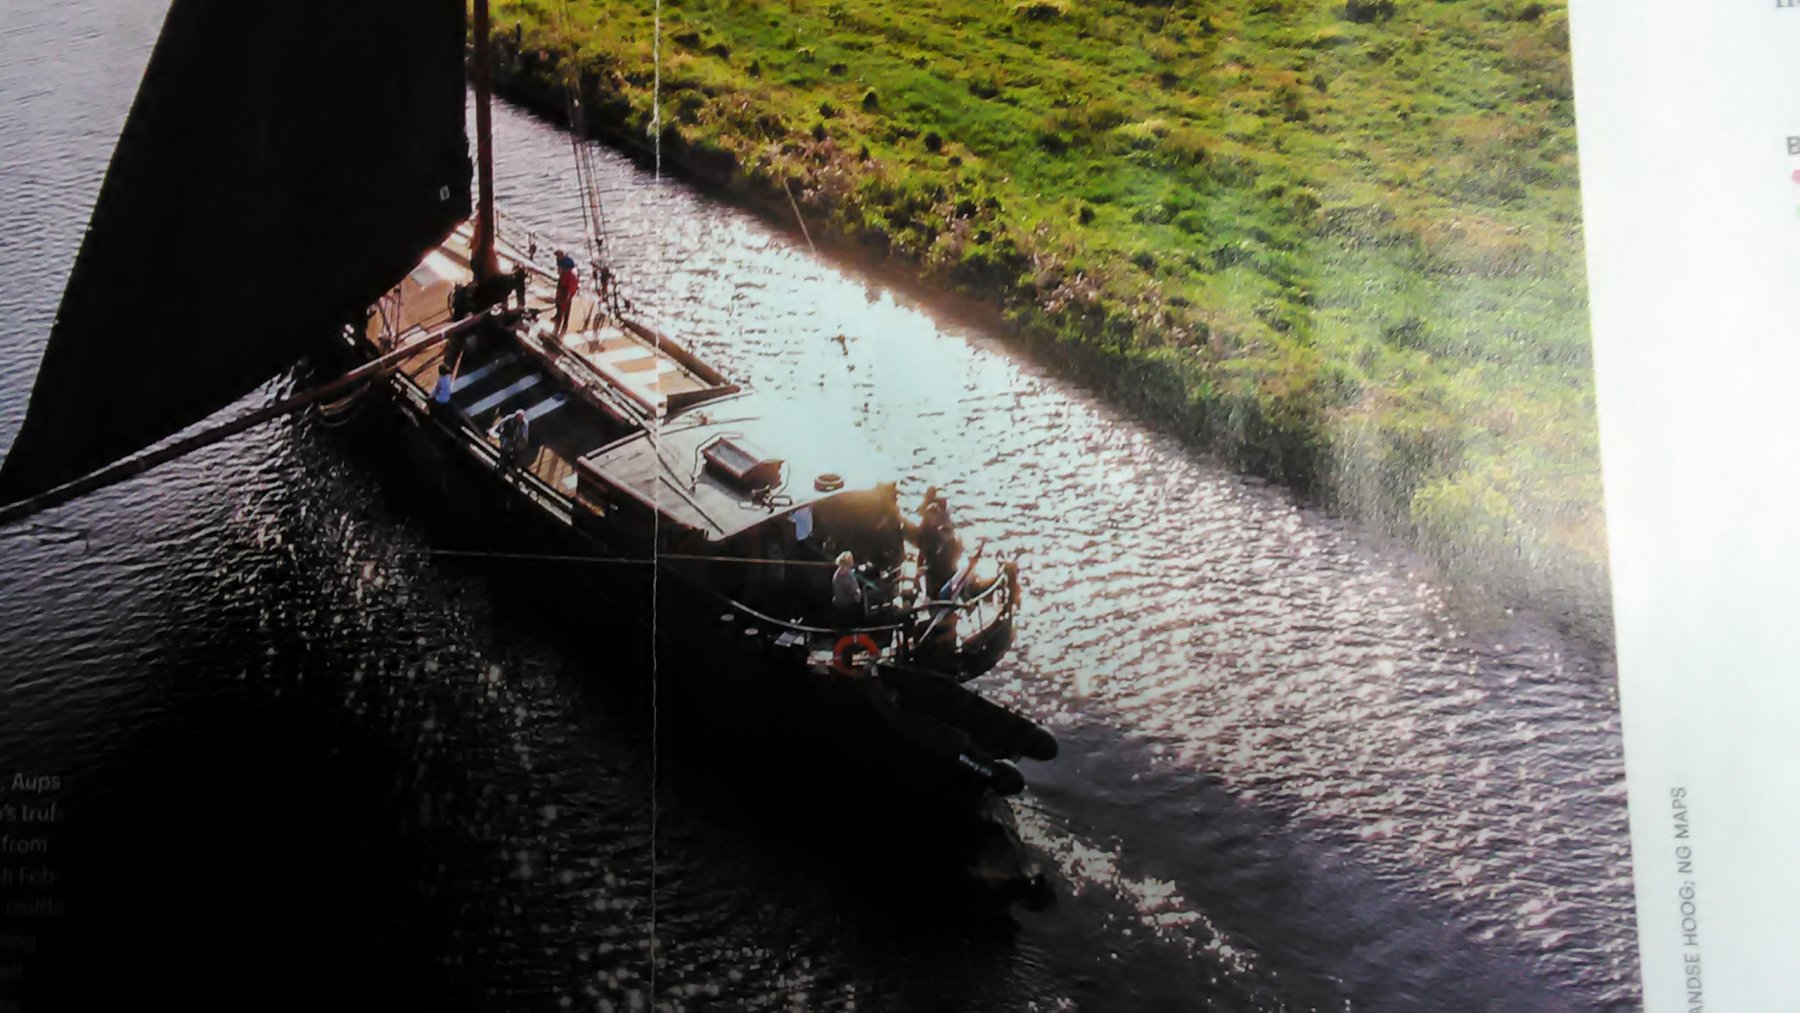
So I wonder if National Geographic made a mistake which is rare as they check their facts all the time.
The boat in my picture sure looks very different compared to yours. 😂
The picture of that ship you put in your previous post is more like it. Long ship, living quarters, large cargo area and large sails.
I am tempted to write National Geographic travel magazine and point to there mistake.
Just think, someone reads this article, goes on vacation to Blokzijl with a large family and wants to rent a punter. The rental place shows him the little boat instead of the boat from the article........
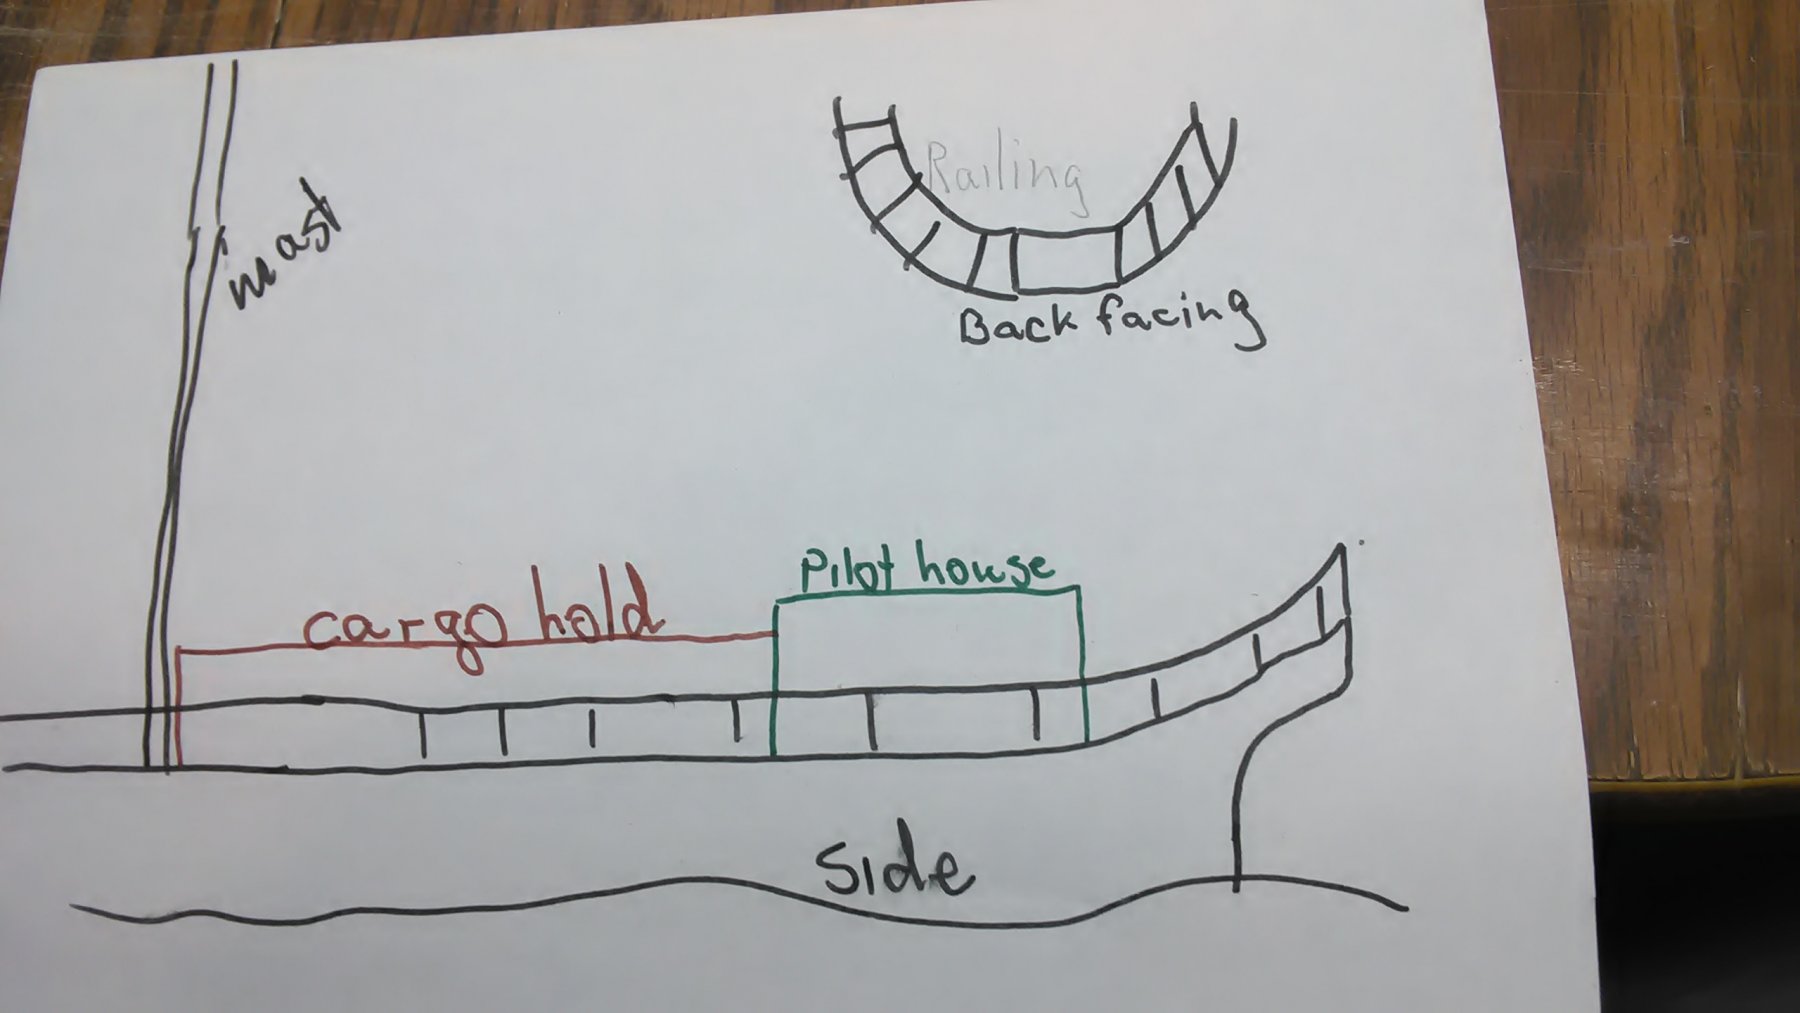
The Boyer.
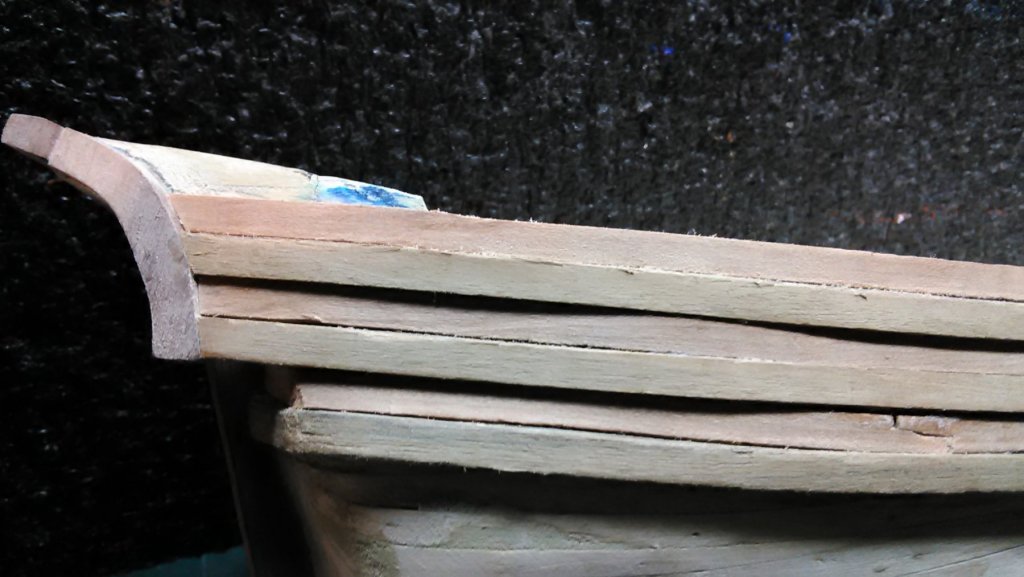
Been working on the walnut wales and the cherry planks in between the wales.
Also created the 2 curved pieces (don't know what they are called) that go on the stern. The wales are attached to it on the sides.

Where 2 planks meet I use a method I've seen on a lot of other Dutch ships. I did this with the Utrecht as well. It looks good and I assume in real life it locks into place. .

Marcus
- Omega1234, amateur, John Allen and 2 others
-
5
-
Jan,
Thanks for the clarification. Looking back to the description, here is what it says.
Blokzijl : built around a horseshoe harbor, this largely 17th century gem in the eastern province of Overijssel comes surrounded by lakes, ponds and canals, and is fittingly known for its water sports.
The local punter boats can be rented if you want to tour the boggy waterworld, and hiking routes lead through the area's Weeribben-Wieden national park.
I'll continue to search on a future date
Marcus
-
Back to the Boyer. The wales on this boat are noticeable thick so I have added a third layer. Above that layer is a strip of cherry.
The wales are a challenge but with lots of moving it slightly up or down and soaking it for more than a week in water, I can position it correctly
Marcus
-
-
-
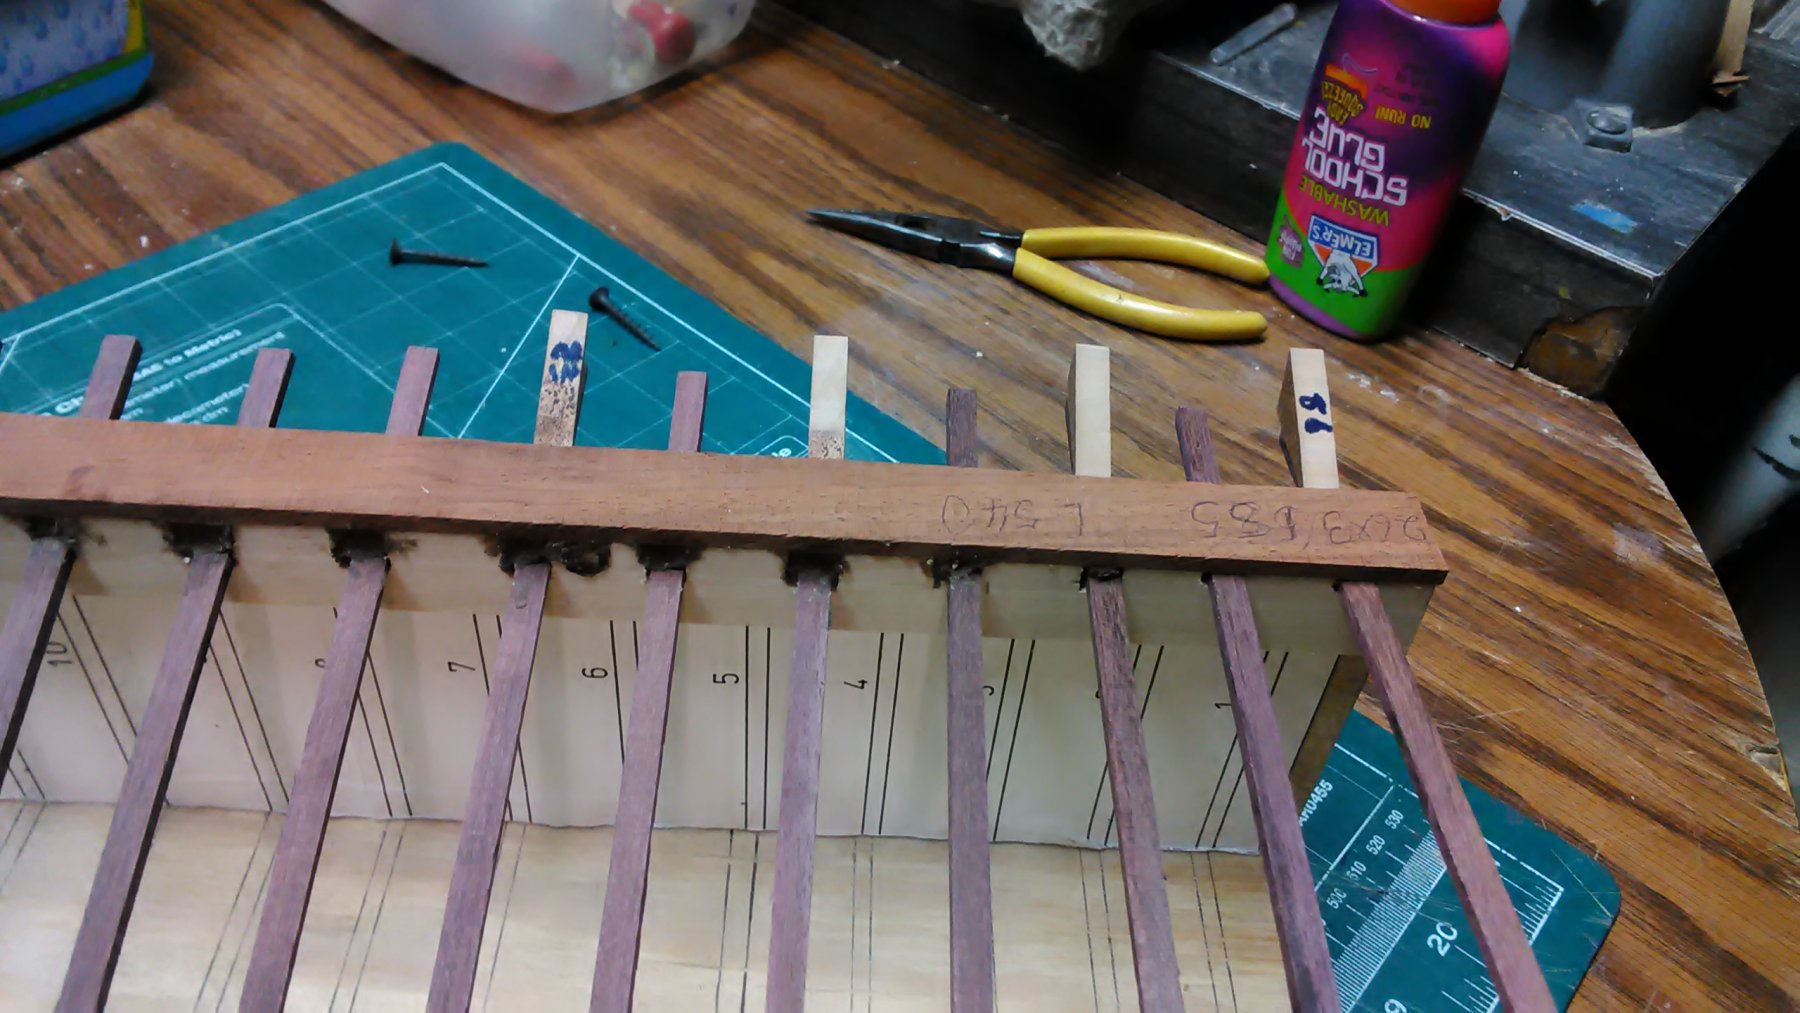
Finished all the angles on the roede. Dry fit with a deklat on top. Three more to go.
Marcus

- yvesvidal, thibaultron, amateur and 6 others
-
9
-


Eight Sided Drainage Mill by flying_dutchman2 - FINISHED - scale 1:15 - Achtkante Poldermolen
in Non-ship/categorised builds
Posted
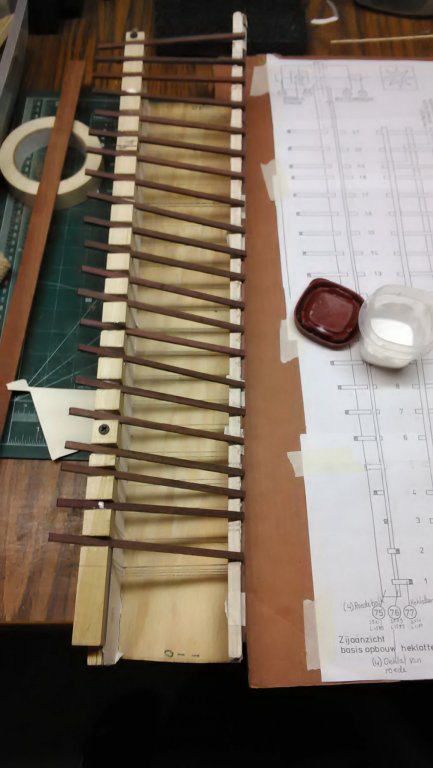
Finished putting together 2 vanes. The other 2 are almost done as well. Than need to add some filler, sand them and paint them.
The above pictures show the angle of the vertical slats (zoomlatten), on the horizontaal slats (heklatten).
Next week I will go to hobby lobby to get some more colors of acrylic paint and some dark red powder (to color the bricks).
Bricks will be created from a combination of Polyblend Sanded tile grout, Quickcrete concrete acrylic fortified and the red powder. I have already made a template and downloaded the instructions from the miniatures site. This process will be described later on this build.
Also need to get a couple of cans of Clear coat lacquer (not glossy), 1quart of grayish paint to imitate the thatch.
Marcus