Keith Black
-
Posts
6,746 -
Joined
-
Last visited
Content Type
Profiles
Forums
Gallery
Events
Everything posted by Keith Black
-
 Thanks for the update, Keith.Glad to hear he's doing well.
 -
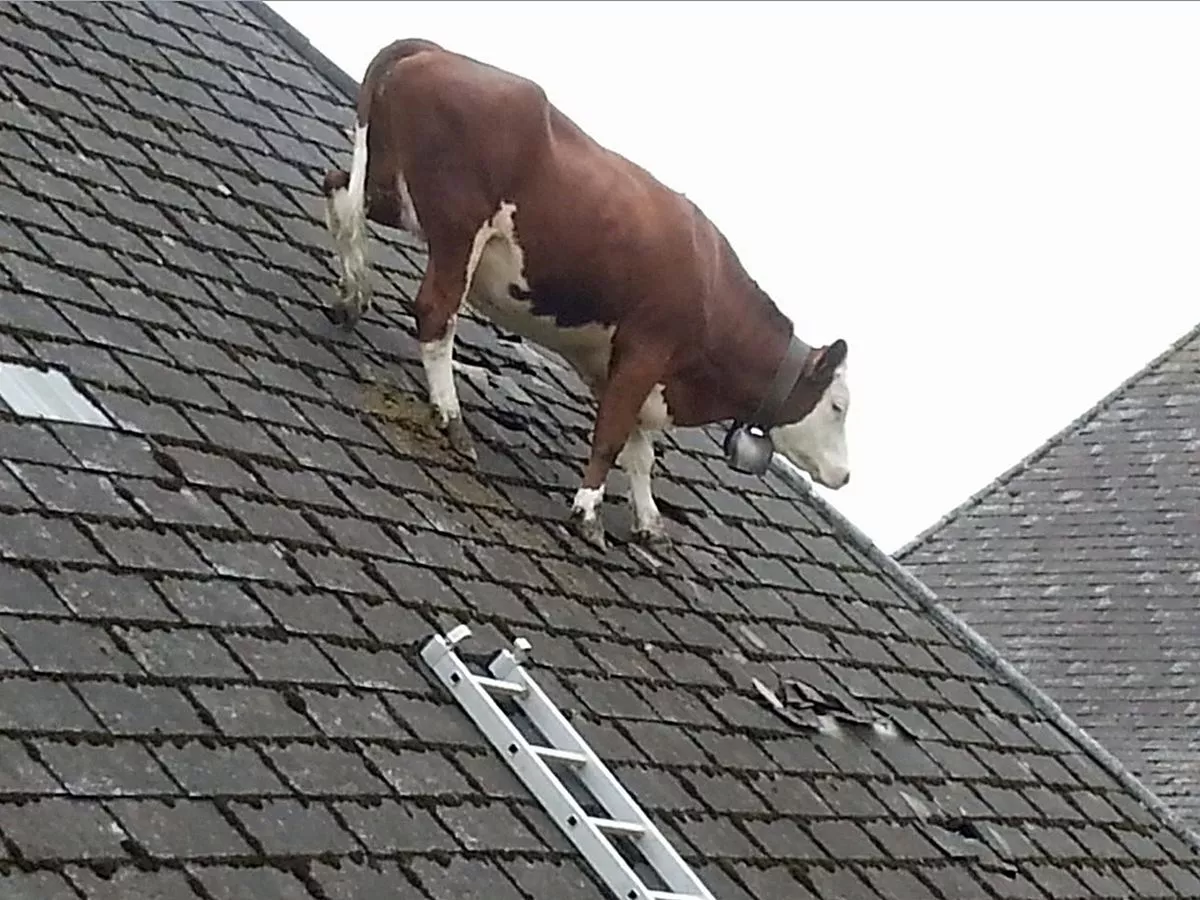
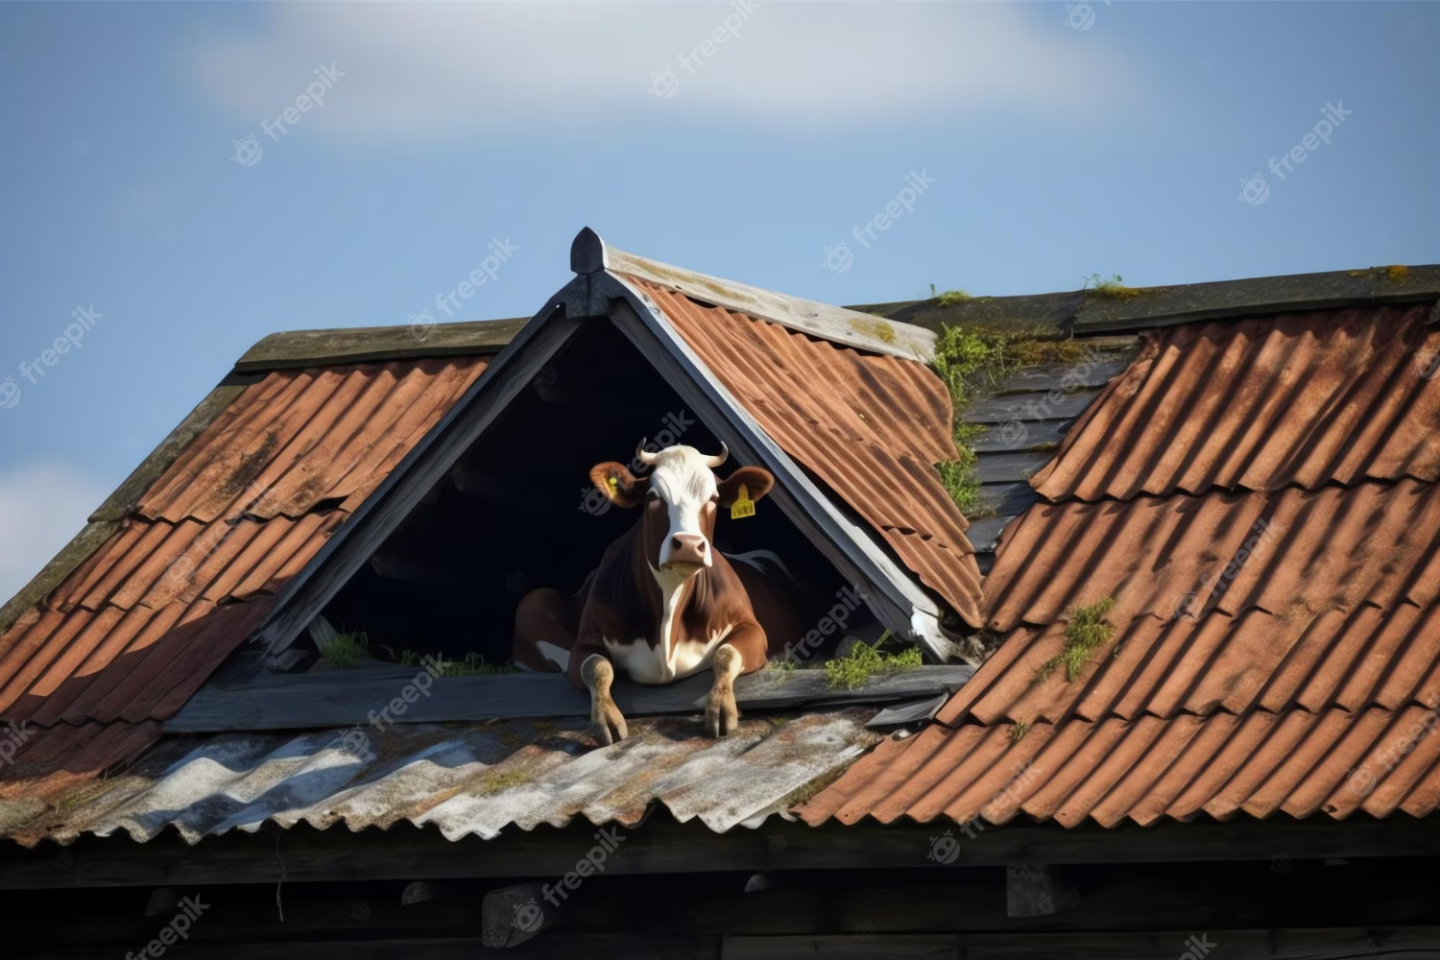
Scowts are bred for their climbing ability, some have even been known to climb ladders. They were bred specifically to act as lookouts for predators endangering the herd.
- 290 replies
-
- 6
-

-
- Quinquereme
- Finished
- (and 1 more)
-
Wishing you success with the wheel, Tom. I look forward to seeing your work.
- 347 replies
-
- 1
-

-
- Sophie
- Vanguard Models
- (and 1 more)
-
Tom, is it a single or double wheel? I agree with Ian, buying one would make life so much easier.
- 347 replies
-
- 2
-
-
- Sophie
- Vanguard Models
- (and 1 more)
-
Beth, from my experience, even using mild soap and cold water, the drawings/paint were removed from the sails. If the sails are dirty to the point of being unpresentable, IMHO, it's best to make new sails trying to match the drawings/pain as best as possible. Unpresentable sails are going to detract from a model no matter how beautifully it was crafted. There are several model ship restoration services listed by searching Google with "custom model ship sail restoration services". I wish you success in your efforts.
-
This one, Jeff? looks easy enough. https://craftysailor.com/products/ix-century-slavic-longship-1-72
-
Chris, welcome to MSW. Glad to have you aboard.
-
Glen, a piece of small diameter clear acrylic rod might work? There are a number of suppliers, I selected the link below at random. https://www.tapplastics.com/product/plastics/plastic_rods_tubes_shapes/acrylic_rods/147?srsltid=AfmBOoq7GgJLZiDwEyKjEqBr85dQKsc2ZNRCvOnsh6Erh4sJnvkKBVRq6y4
- 290 replies
-
- 2
-
-
- Quinquereme
- Finished
- (and 1 more)
-
Erik, welcome to MSW. Glad to have you aboard.
-
Jeff, welcome to MSW. Glad to have you aboard. If regards to the ship's boats being covered....often the ship's boats were used for maneuvers (earlier times not so today), drills, and to go ashore. Afterward the boats would need to dry out and would remain uncovered for a spell. Modeling a ship with the boats covered or uncovered would be correct in both cases, IMHO.
-
Paul, welcome to MSW. Glad to have you aboard.
-
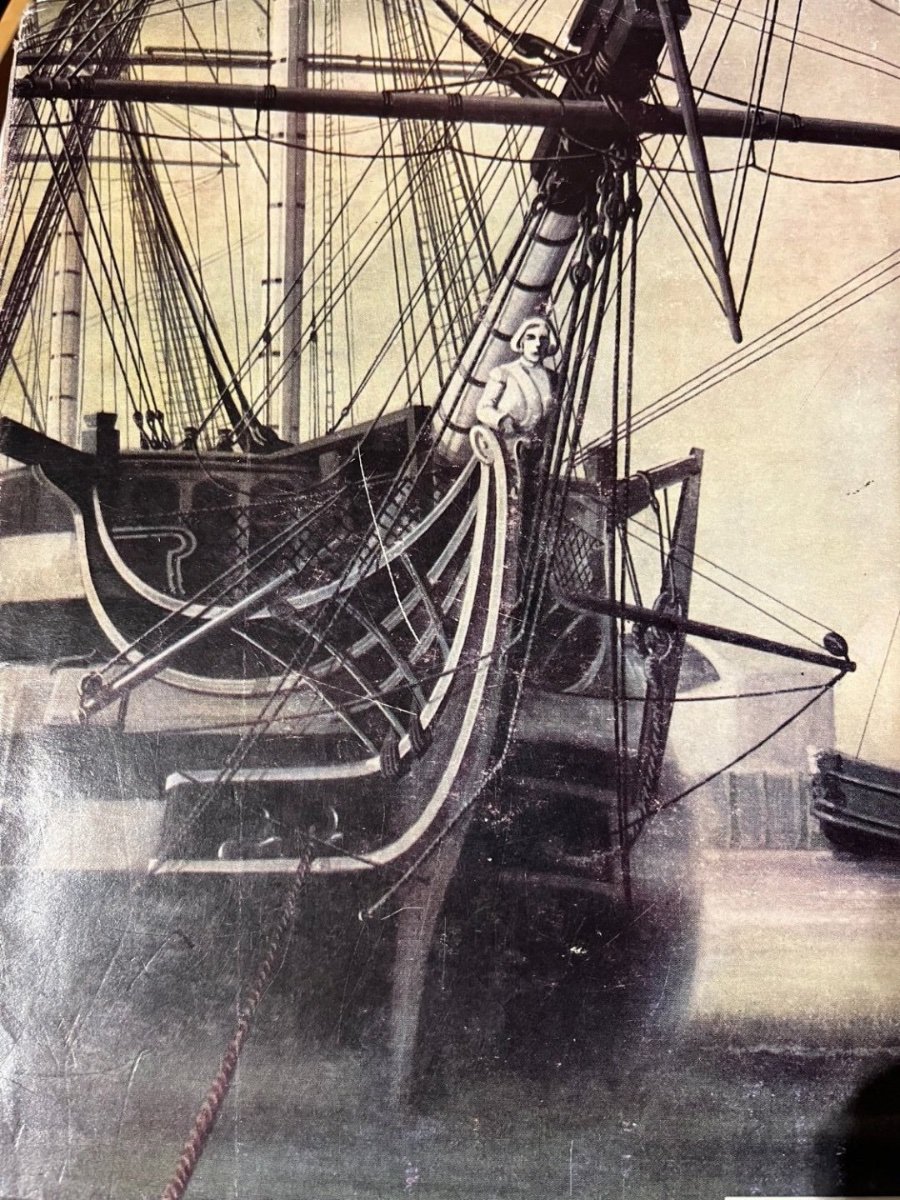
Thinking things through: Victorys bobstays
Keith Black replied to dafi's topic in Masting, rigging and sails
For easier viewing
-
A lot to be said about a good detective story.
-
Aww, fresh from being in the presence of God. What he could tell us if only he could talk. Beautiful child, congratulations to his mother and your family, Keith.
-
Well Andy, then why don't you demonstrate for us?
-
Andrew, I love MSW and I love my fellow MSW members. One of my biggest joys in life is following you guys, watching and learning.
-
Keith, I just saw that you have this build underway. Sorry for being late, catching up as we type. Looks like a lovely build.
-
And.... has your newest grandson arrived? If so what's the wee lad's name, weight, and length.
-
You may get better results by posting in the below link. https://modelshipworld.com/forum/41-traders-dealers-buying-or-selling-anything-discuss-new-products-and-ship-model-goodies-here-as-well/