Fernando E
-
Posts
242 -
Joined
-
Last visited
Content Type
Profiles
Forums
Gallery
Events
Everything posted by Fernando E
-
Hi James Looking good. I wish I had done it on my model as it looks more in keeping with what it was likely to look like. Cheers.........Fernando PS Have a great 2019!
-
Hello Rod and a hearty congratulations on completing your build....it looks beautiful! I'm even more nervous to start my Endeavour build (whenever that will be....hopefully some time this year). The fireworks were spectacular (and loud). I'm just an 8 minute stroll to the Sydney Harbour Bridge so have been viewing the fireworks since I moved to North Sydney a few years back....they never disappoint. By the way, we get two fireworks displays on the harbour each New Year....one at 9:00pm as well as the midnight one. The earlier show is classified as the "family show" so the younger kids don't have to stay up till midnight if they can't keep their eyes open till then. The fireworks at that time are just a spectacular and loud. Two shows in one night....great for us pyrotechnic nuts Have a great 2019 and a successful move to North Carolina. Cheers...............Fernando PS...I do like the lowering of the popcorn ball...had a chuckle but also liked the fact that it was simple and enjoyed by the community. Long may it last!
- 108 replies
-
- 1
-

-
- endeavour
- caldercraft
- (and 1 more)
-
Hi Antony, and a happy New Year to you! The build is coming along nicely........your work as usual is looking first rate. Cheers.................Fernando
-
Steamboats and other rivercraft - general discussion
Fernando E replied to Cathead's topic in Nautical/Naval History
Hi John, a very sad end to such an interesting vessel and its history. Cheers...... Fernando🍻- 269 replies
-
- 4
-
-
- Steamboats
- riverboats
- (and 3 more)
-
Hi James, I couldn't work it out either other than that they were trying to raise the height of the bulwarks....a bit odd though! Like Rick, I left them off and it didn't make any difference to the finished product. Cheers...........Fernando
- 241 replies
-
- 1
-
-
- mermaid
- modellers shipyard
- (and 1 more)
-
Hi Tom I'm following along as well. My kit was over 30 years old when I got it from my brother late last year. I'll be interested if there have been any changes to their kit over the years as, in particular, I found the instructions hard to follow (I am a relative newbie though so it could just be me!). Cheers.............Fernando
- 131 replies
-
- 1
-
-
- santa lucia
- panart
- (and 1 more)
-
Hi James The hull is looking good and the staining of the top layer is a great colour as well. Should look a great when put on. Cheers...... Fernando 🍻
- 241 replies
-
- 1
-
-
- mermaid
- modellers shipyard
- (and 1 more)
-
Hi Antony, great start to the build. You mentioned that you will be using many types of wood....what are you thinking of using? Cheers...... Fernando🍻
-
Hola and a warm welcome from another shipmate from "down under". Cheers..................Fernando
-
Hi James, I fitted it before the second planking and, as Rick suggests, the planking fits up nicely to the keel and the stem post. Nice finish on the first layer of planking. Cheers............Fernando
-
Hi Dave Your build is coming along very nicely. I also like the two jigs you have built for the deck planking...very useful and one I will use on future builds. Cheers...............Fernando
-
Hi James Looks a good first layer to me....once sanded it will look totally different and a good base for the second layer. Cheers.............Fernando
- 241 replies
-
- 1
-
-
- mermaid
- modellers shipyard
- (and 1 more)
-
Hello Antony I've got a front row seat and look forward to the "monster build"! Cheers...........Fernando
-
Hi Daniel Looks like I'll be following along as am keen to build this (after the Endeavour build which comes after my Perseverance build!!) Like Antony my Environmental Scientist daughter has asked that this kit be on my to do list. She has had an interest in the works of Charles Darwin so it makes sense she gets a model of the Beagle. I'm right next to Antony on the front row watching with interest. Cheers............Fernando
-
Hello Vinnie and welcome back. She's coming along very nicely indeed. I've never done a weaved mouse before but yours looked pretty good to me. I'm no doubt going to get some lots of practice when I start my Endeavour build some time in the new year. Cheers...............Fernando
-
Welcome aboard the Dave. Cheers....... Fernando🍻
-
Hi Rod Looking really nice and am looking forward to more updates. Cheers..............Fernando
-
Hi James....your planking is coming along nicely. As to using a hand plane and a vise....I started doing that and, like you, ended up with some very jagged edges so went the hobby knife and a steel ruler. It worked just as well as the wood for the first layer of planking is soft and easy to cut with a sharp blade. Don't worry too much about how the first layer of planking looks like as it will be sanded down, wood filler added where needed and will be covered by the second layer of planking The transom area can be a bit messy but once the first layer of planking is finished and sanded it does come up nicely! Looking forward to further updates. Cheers..............Fernando
-
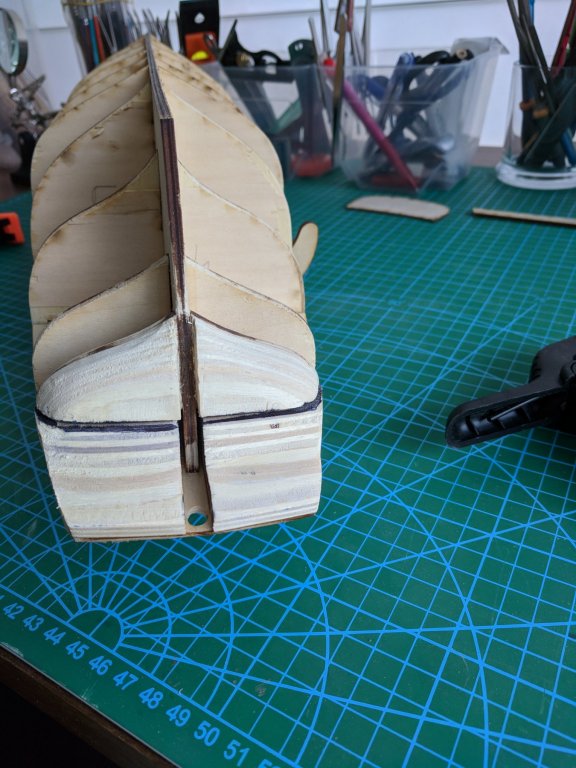
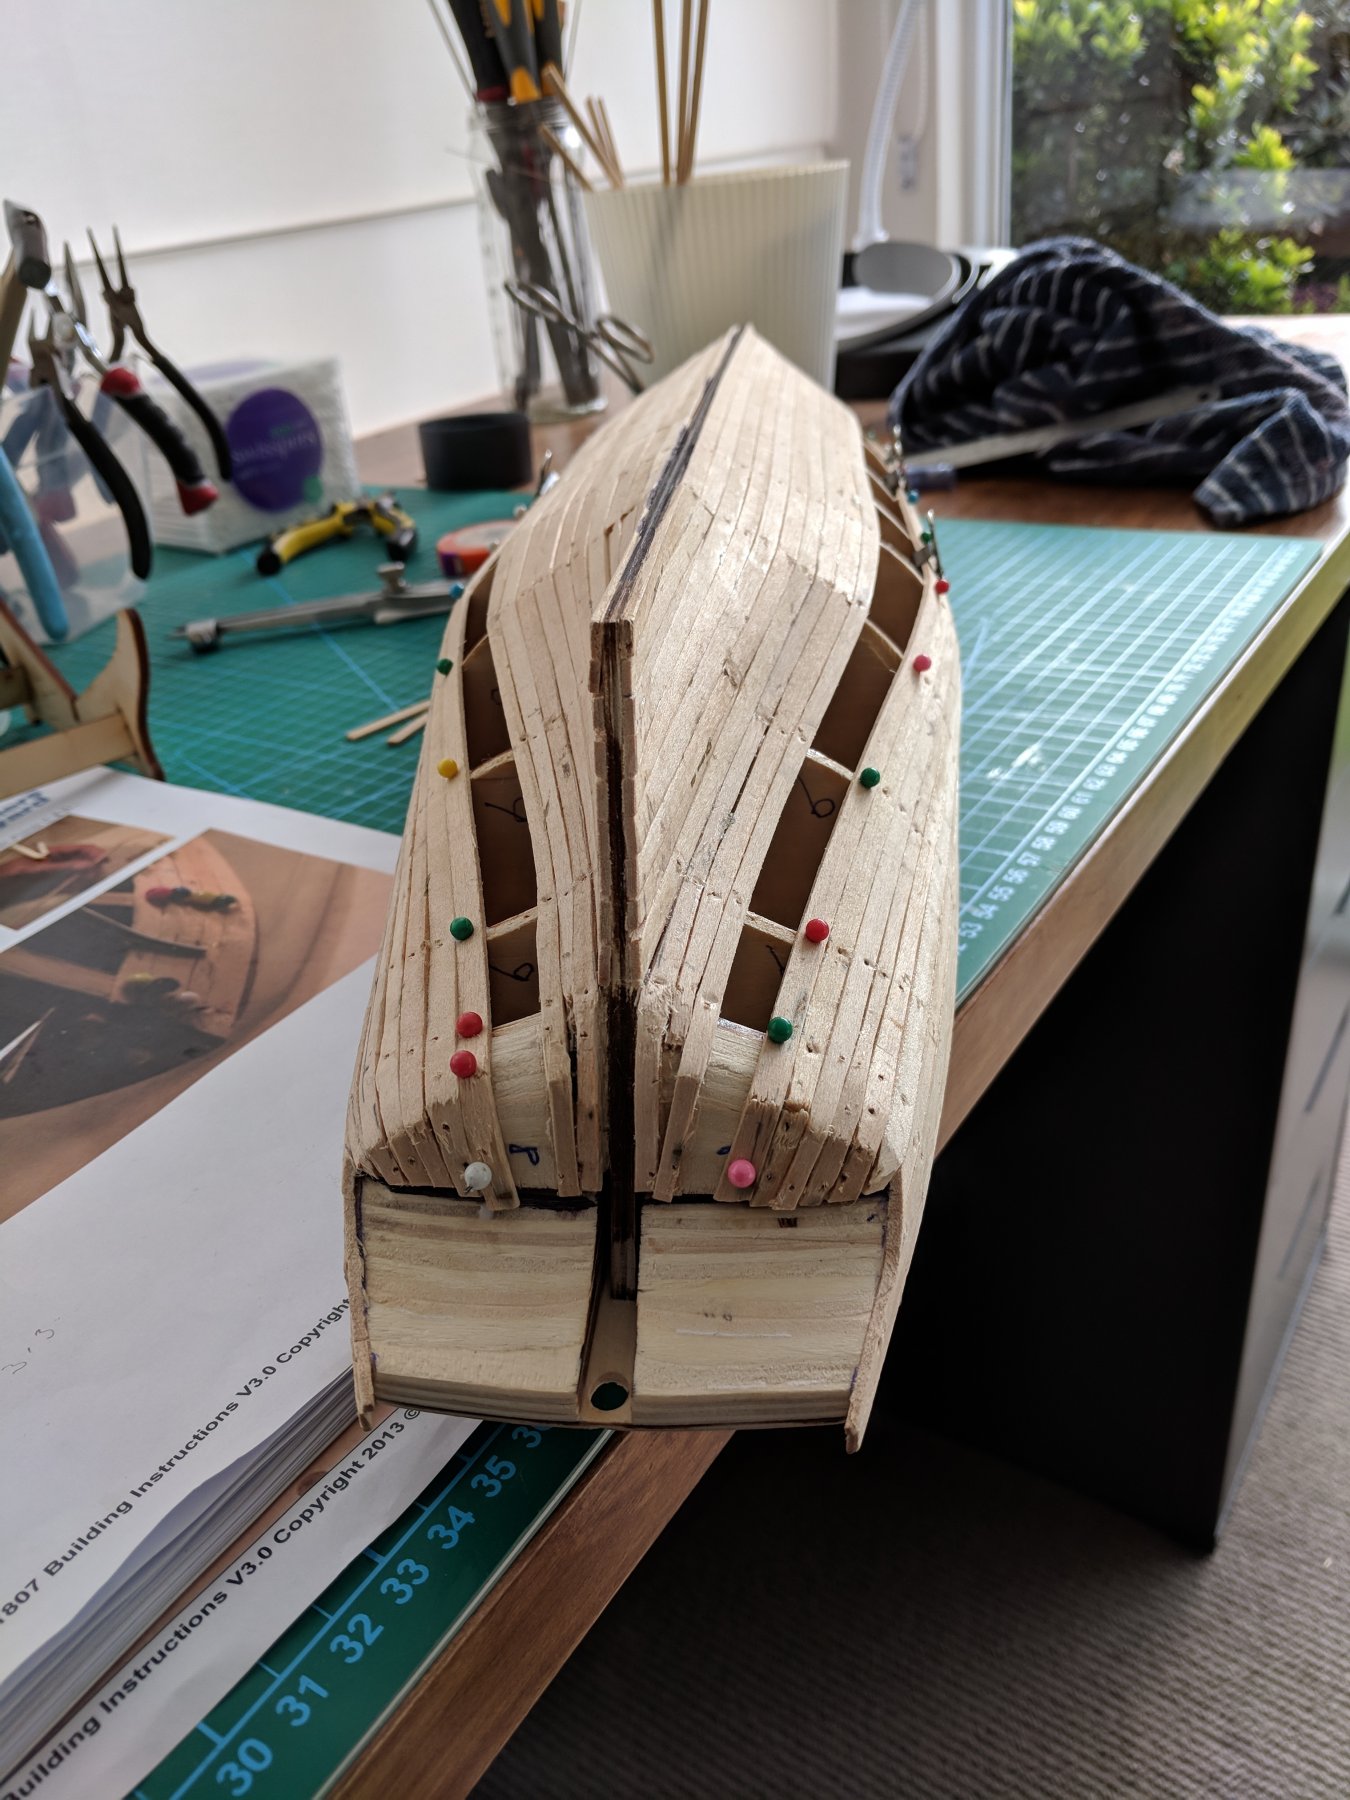
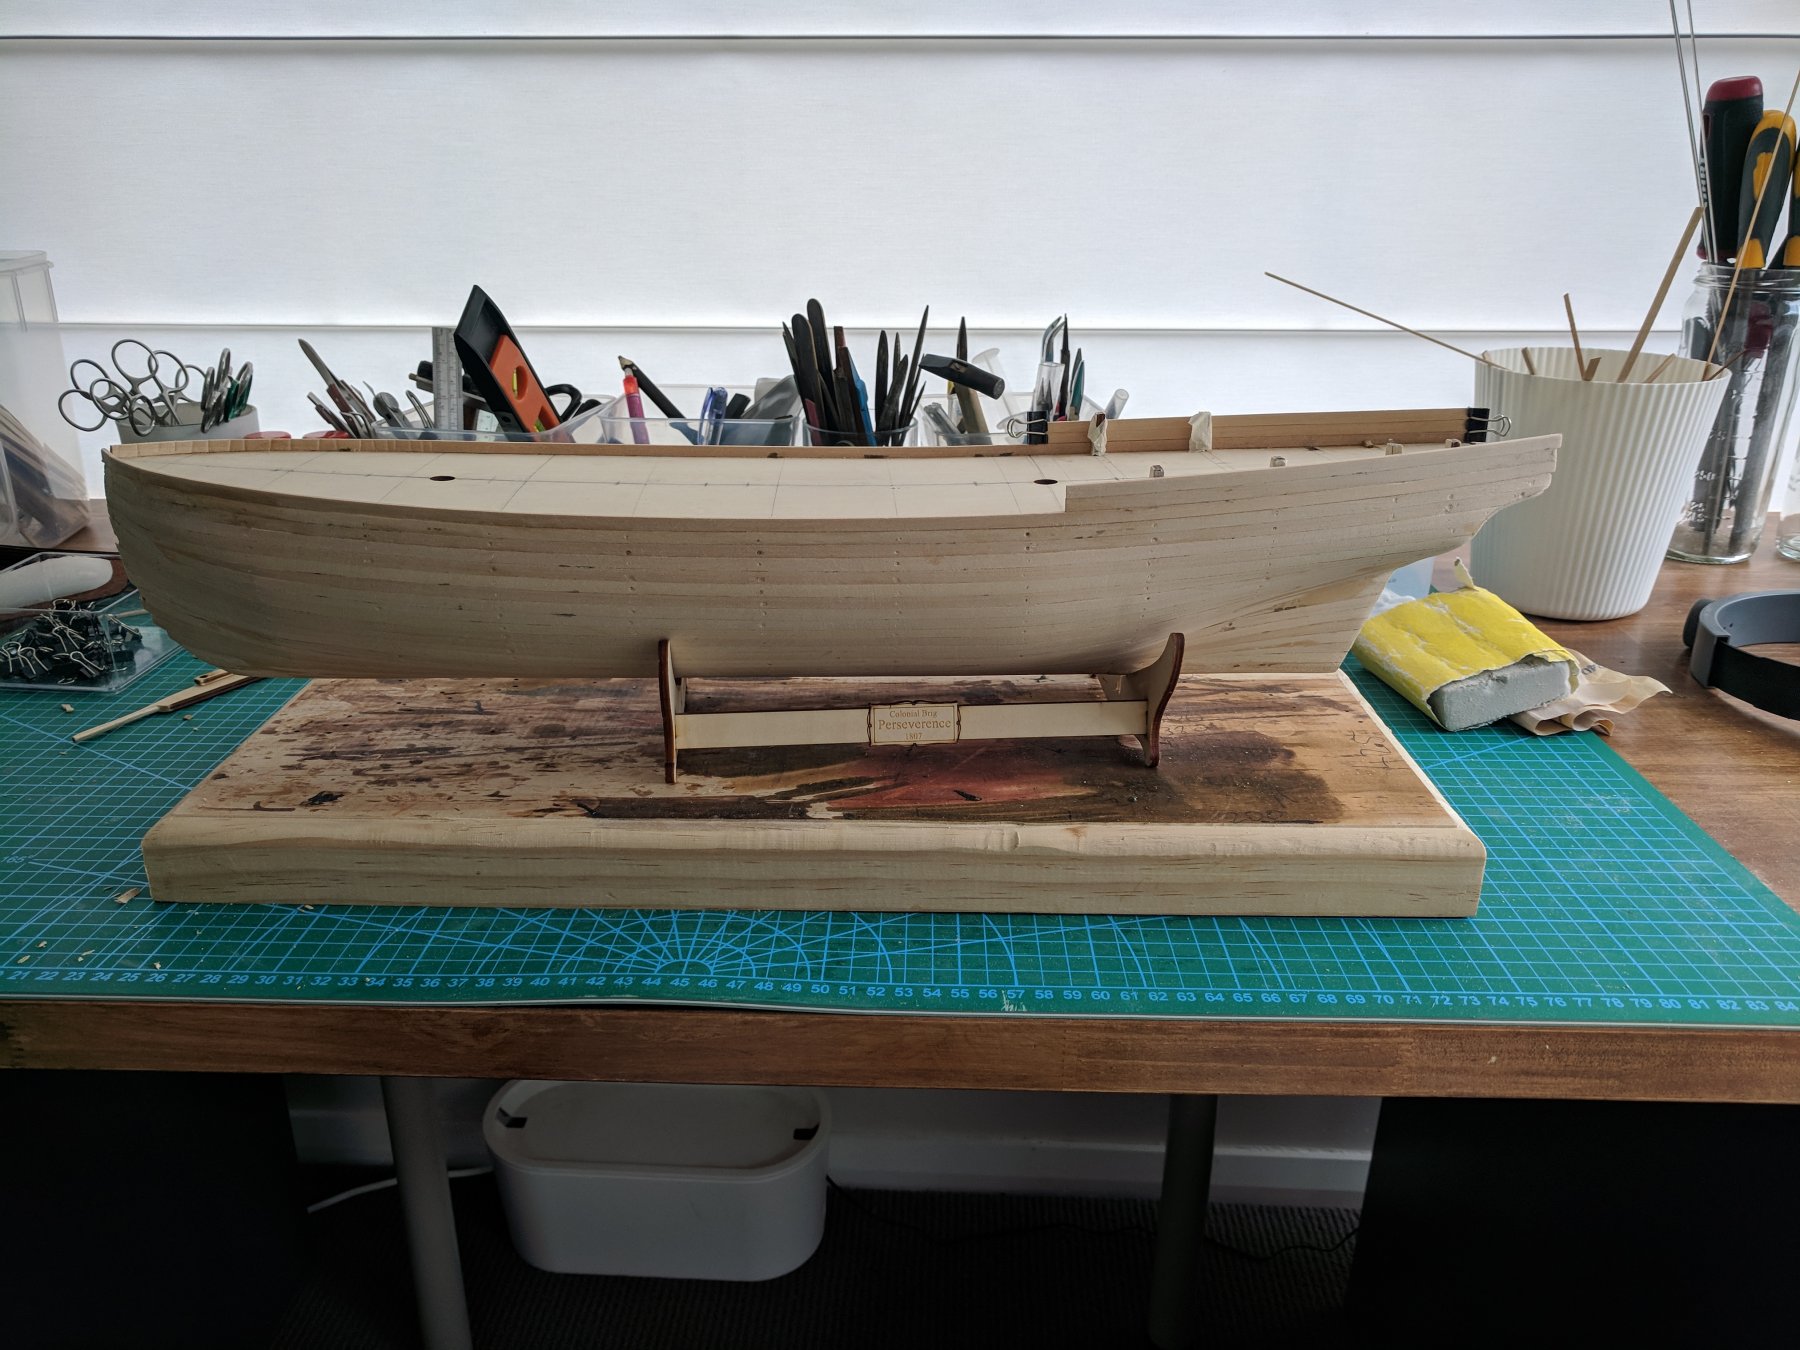
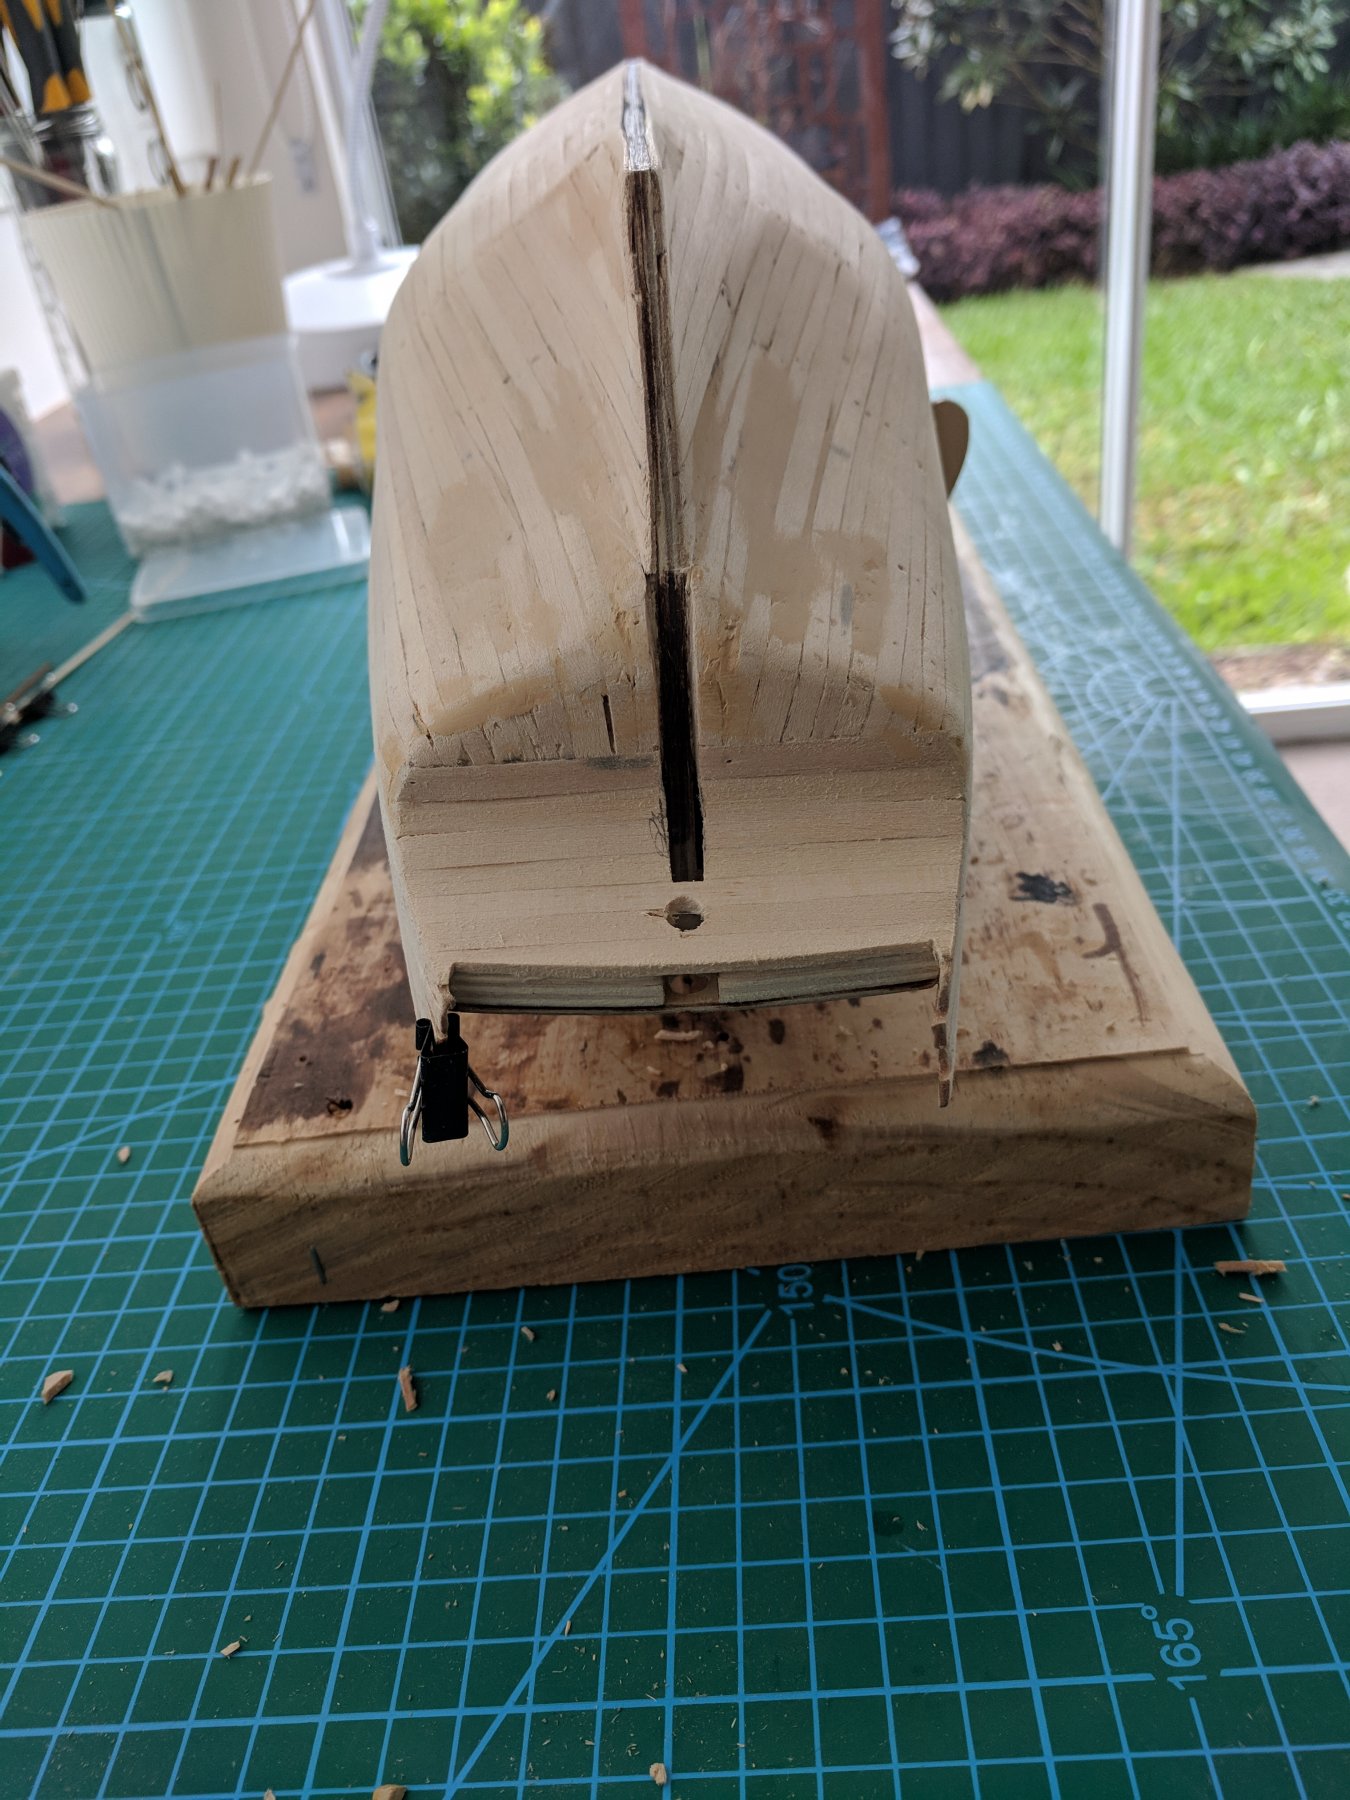
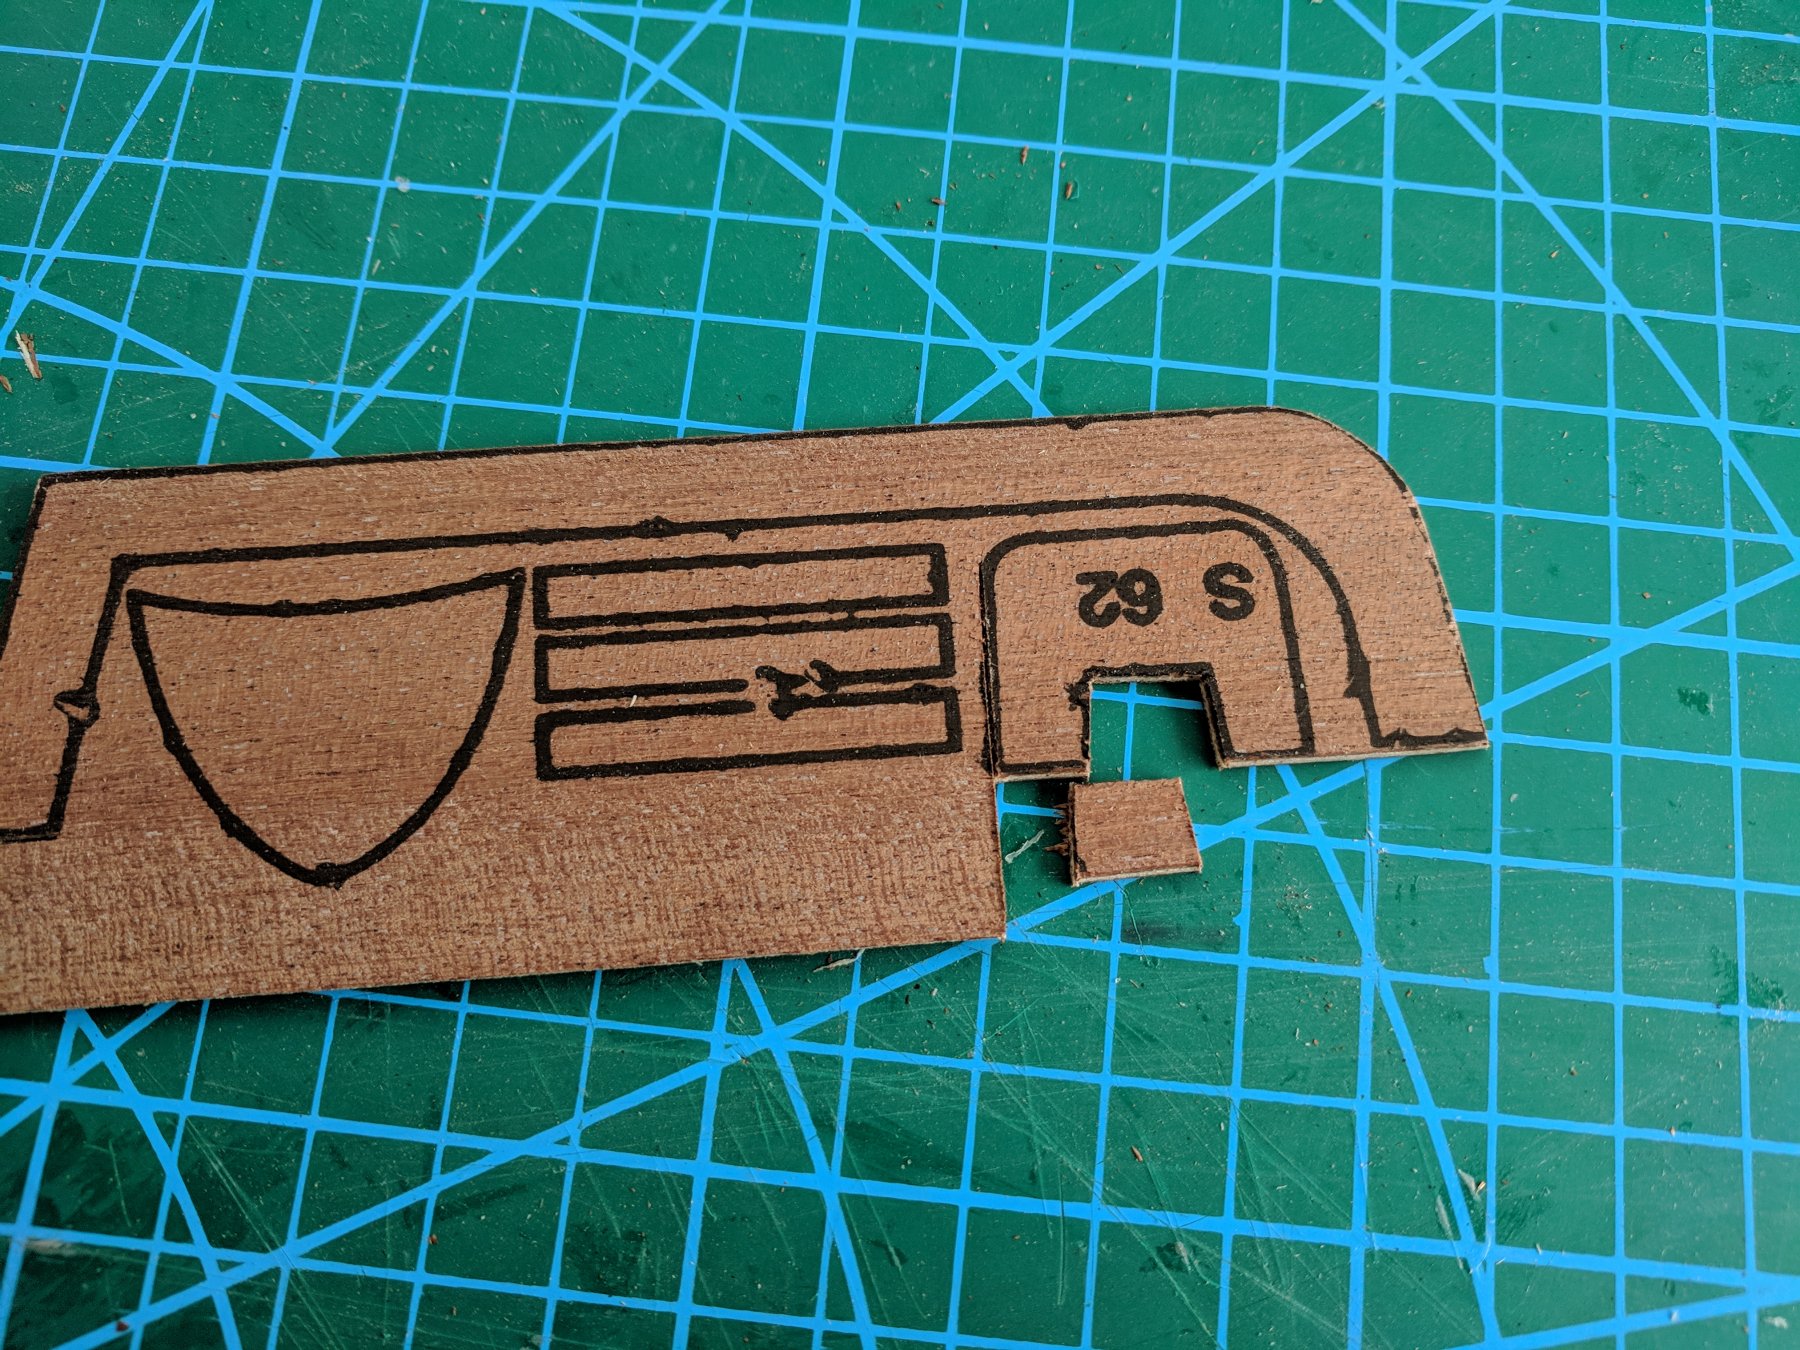
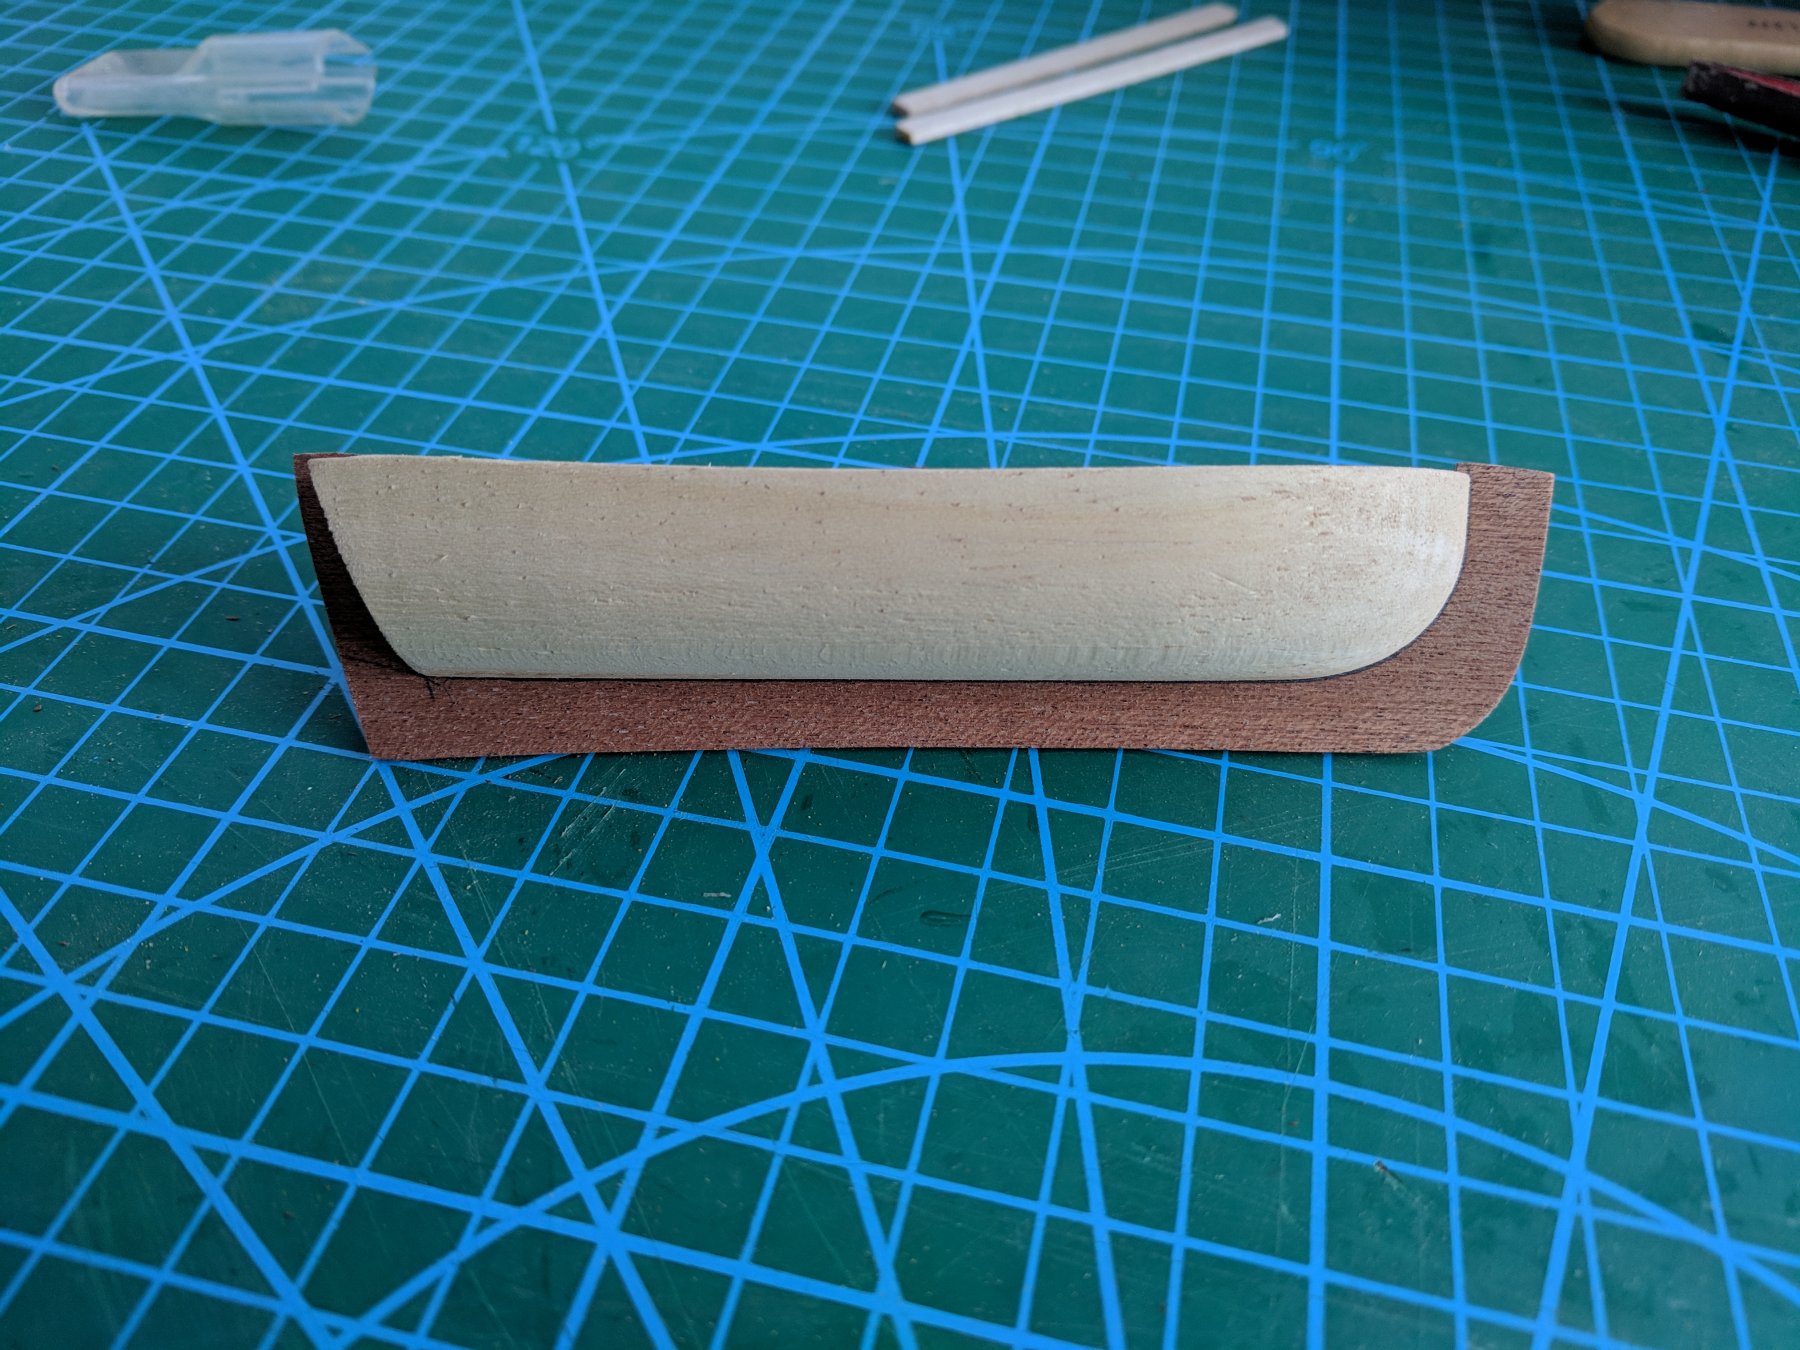
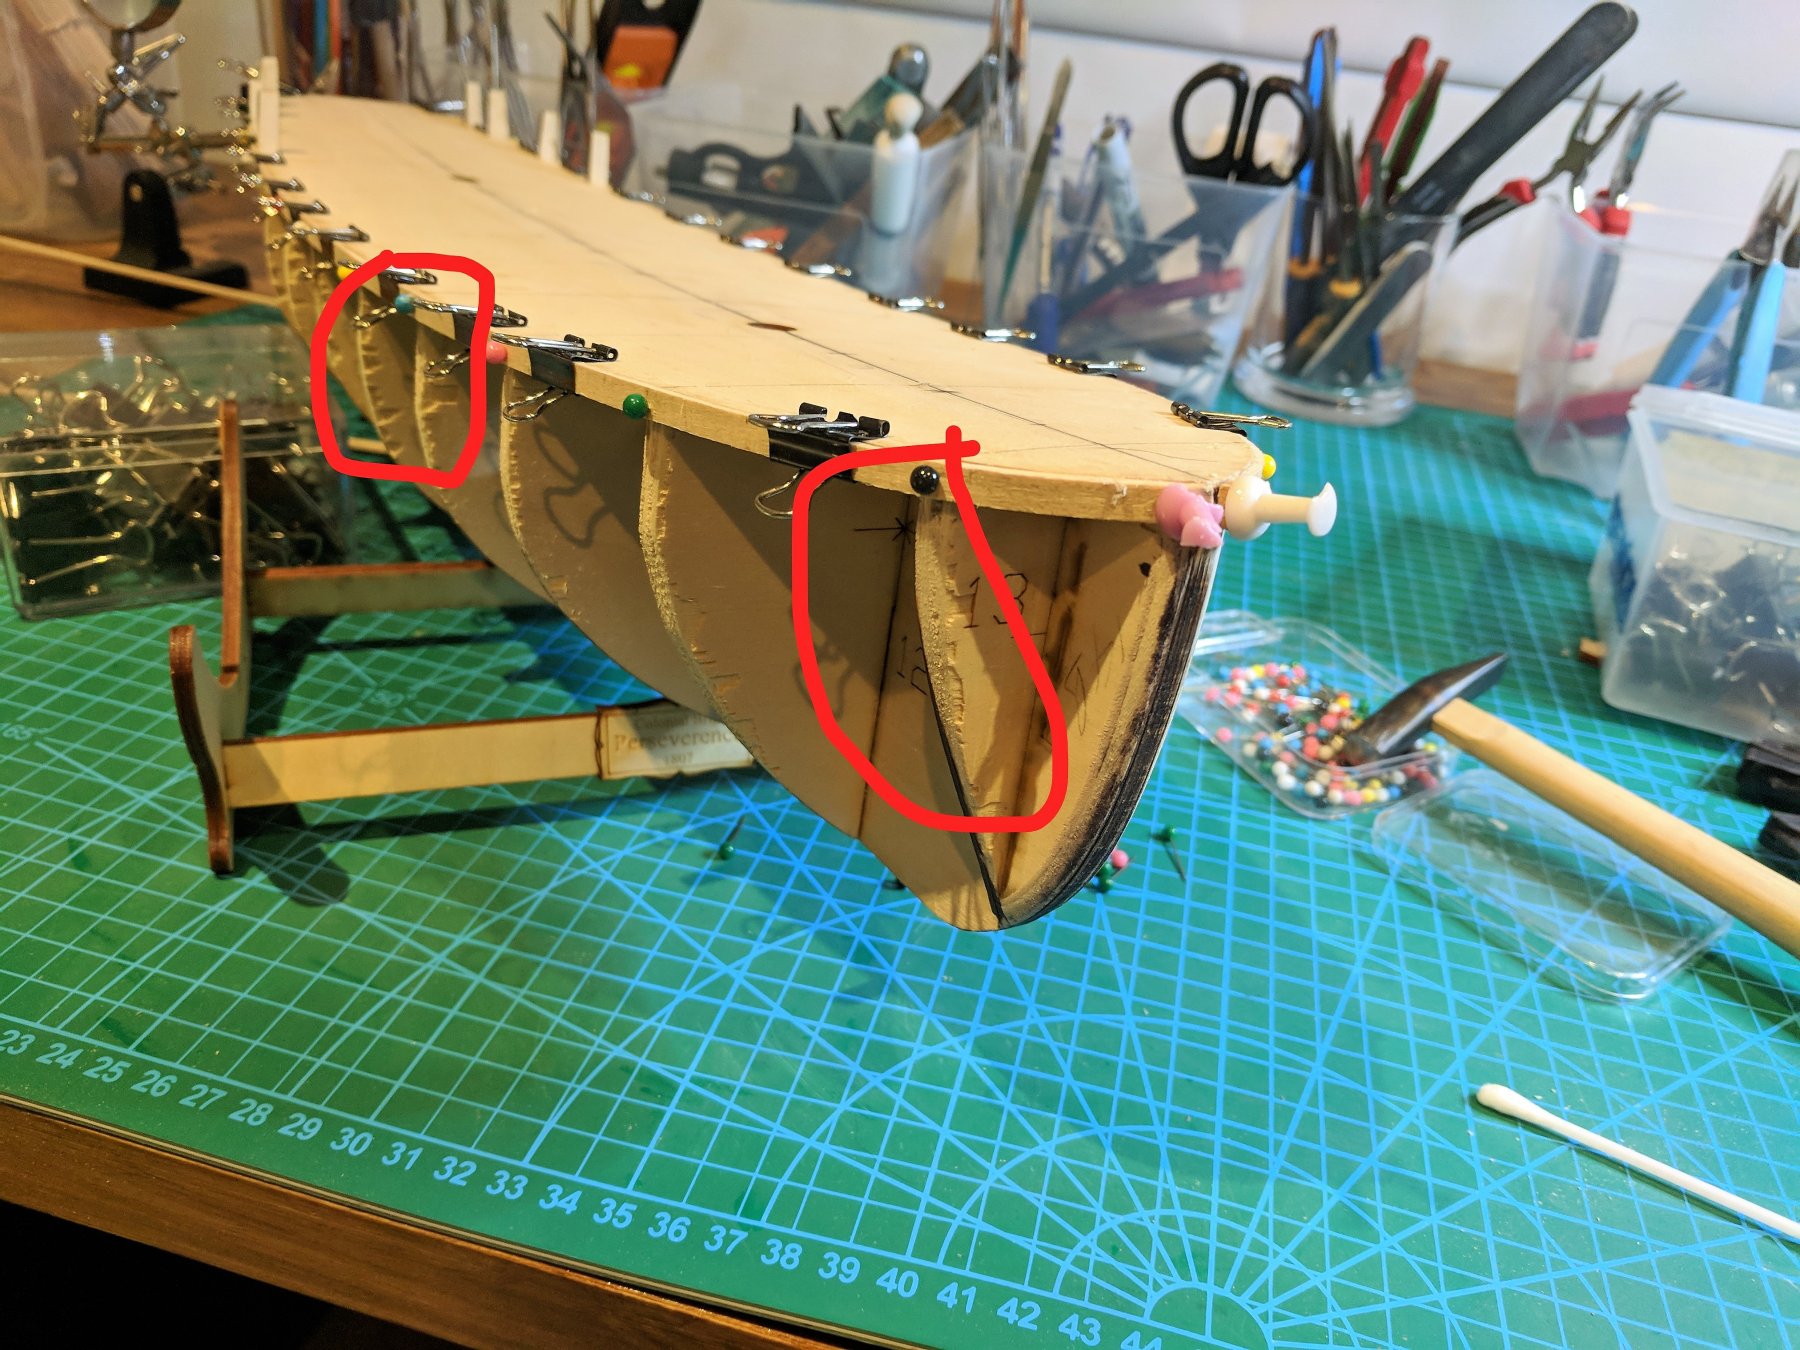
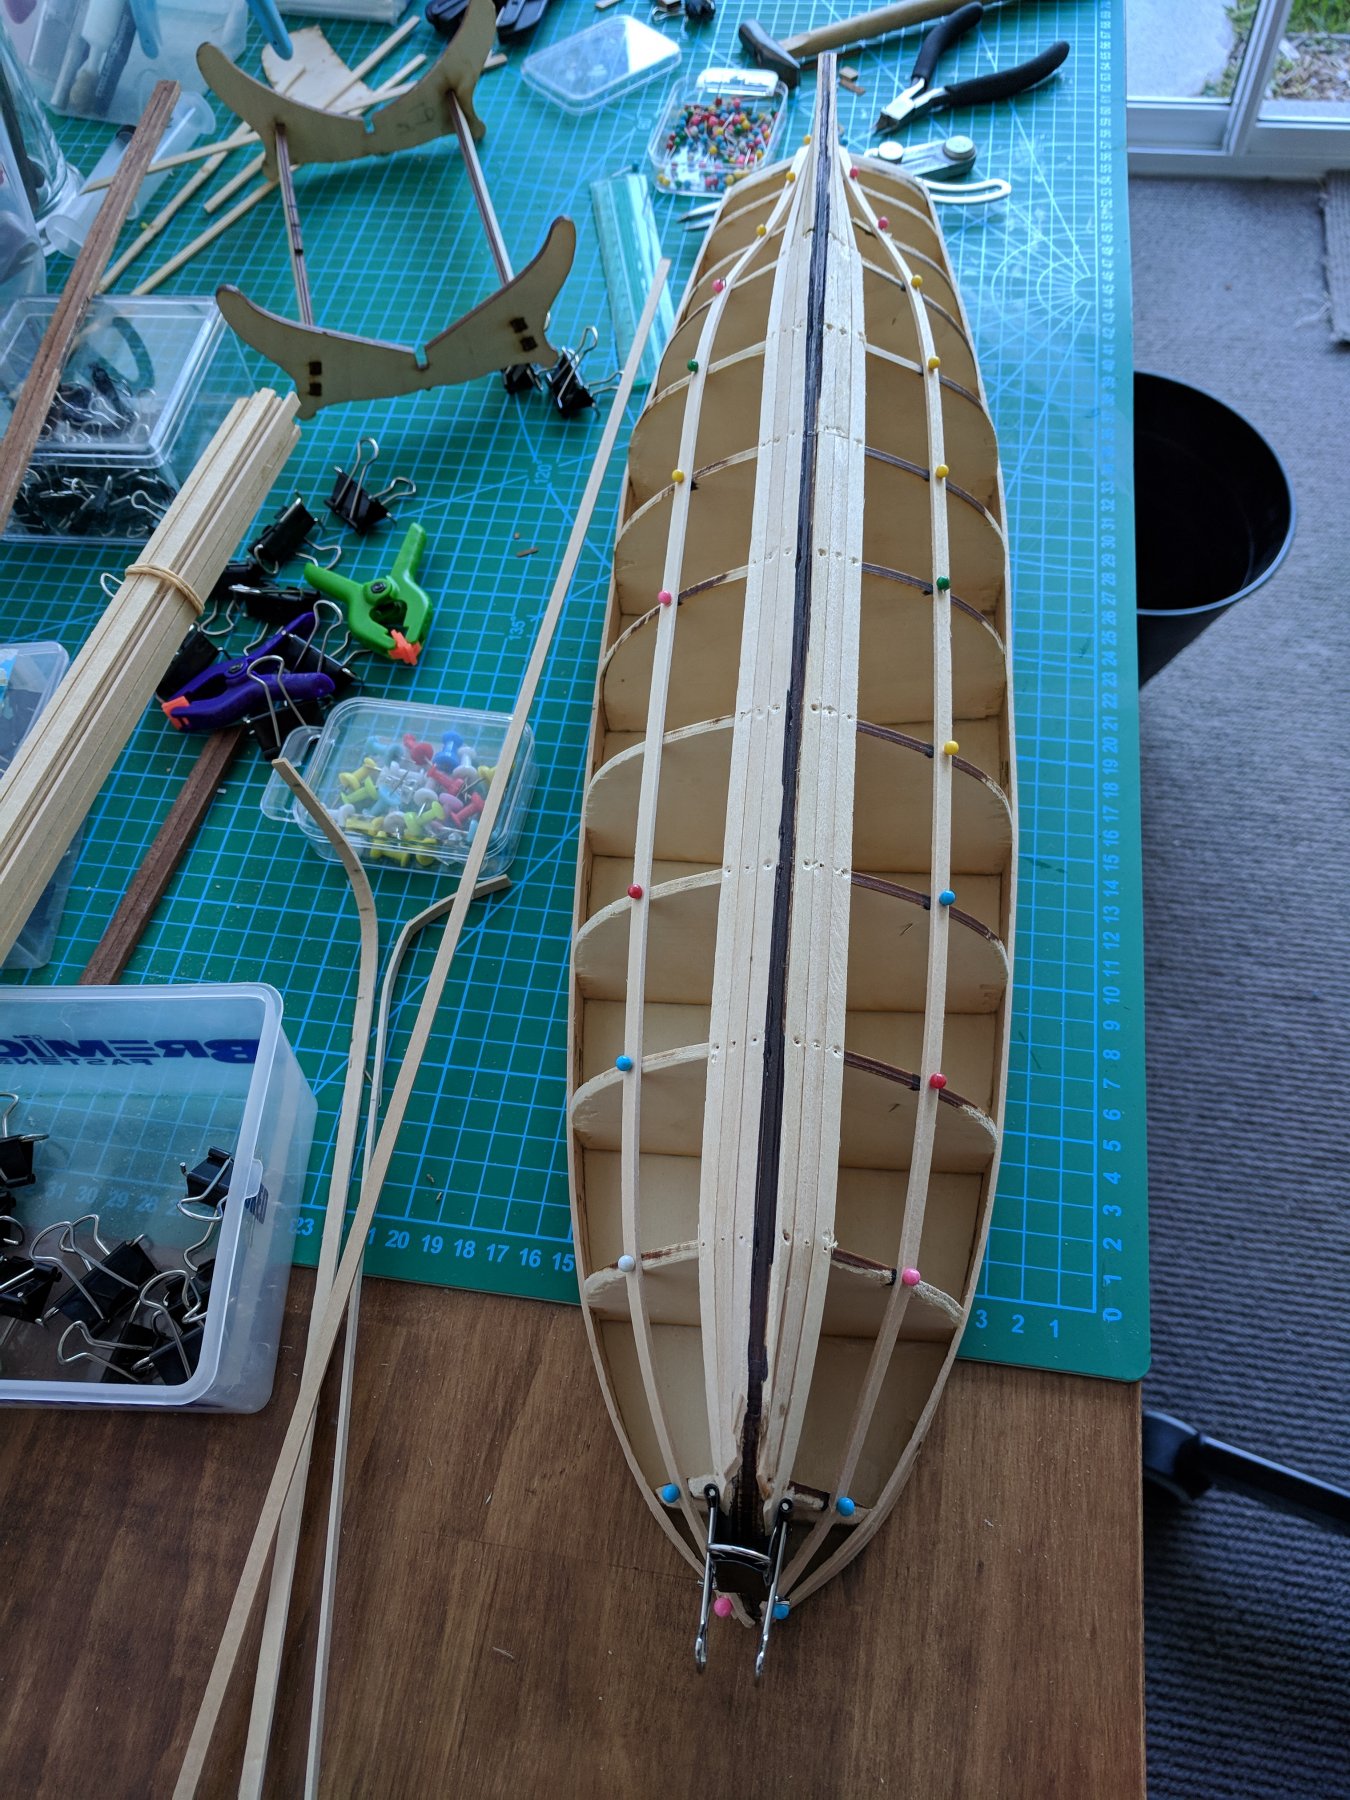
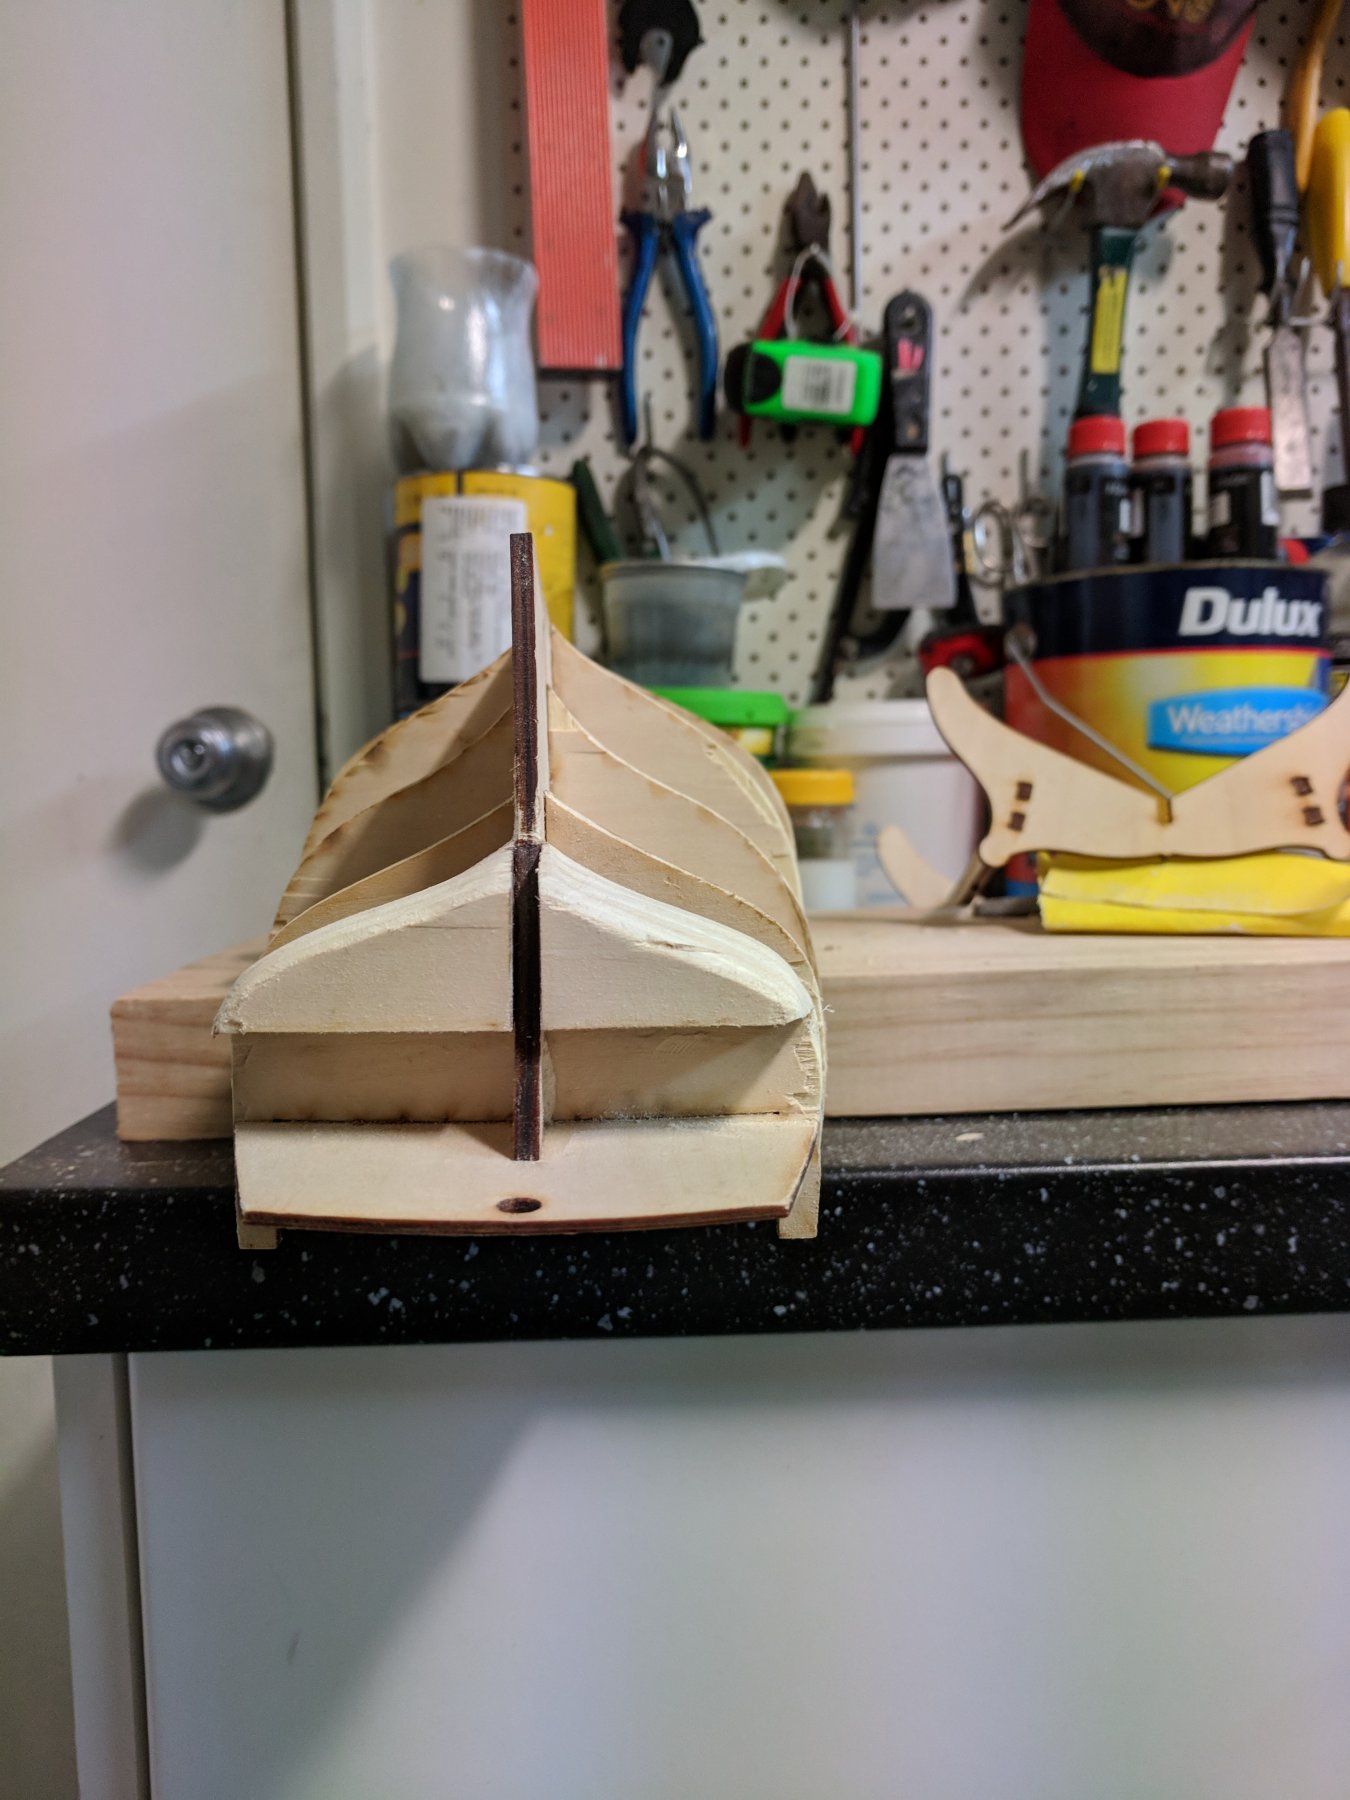
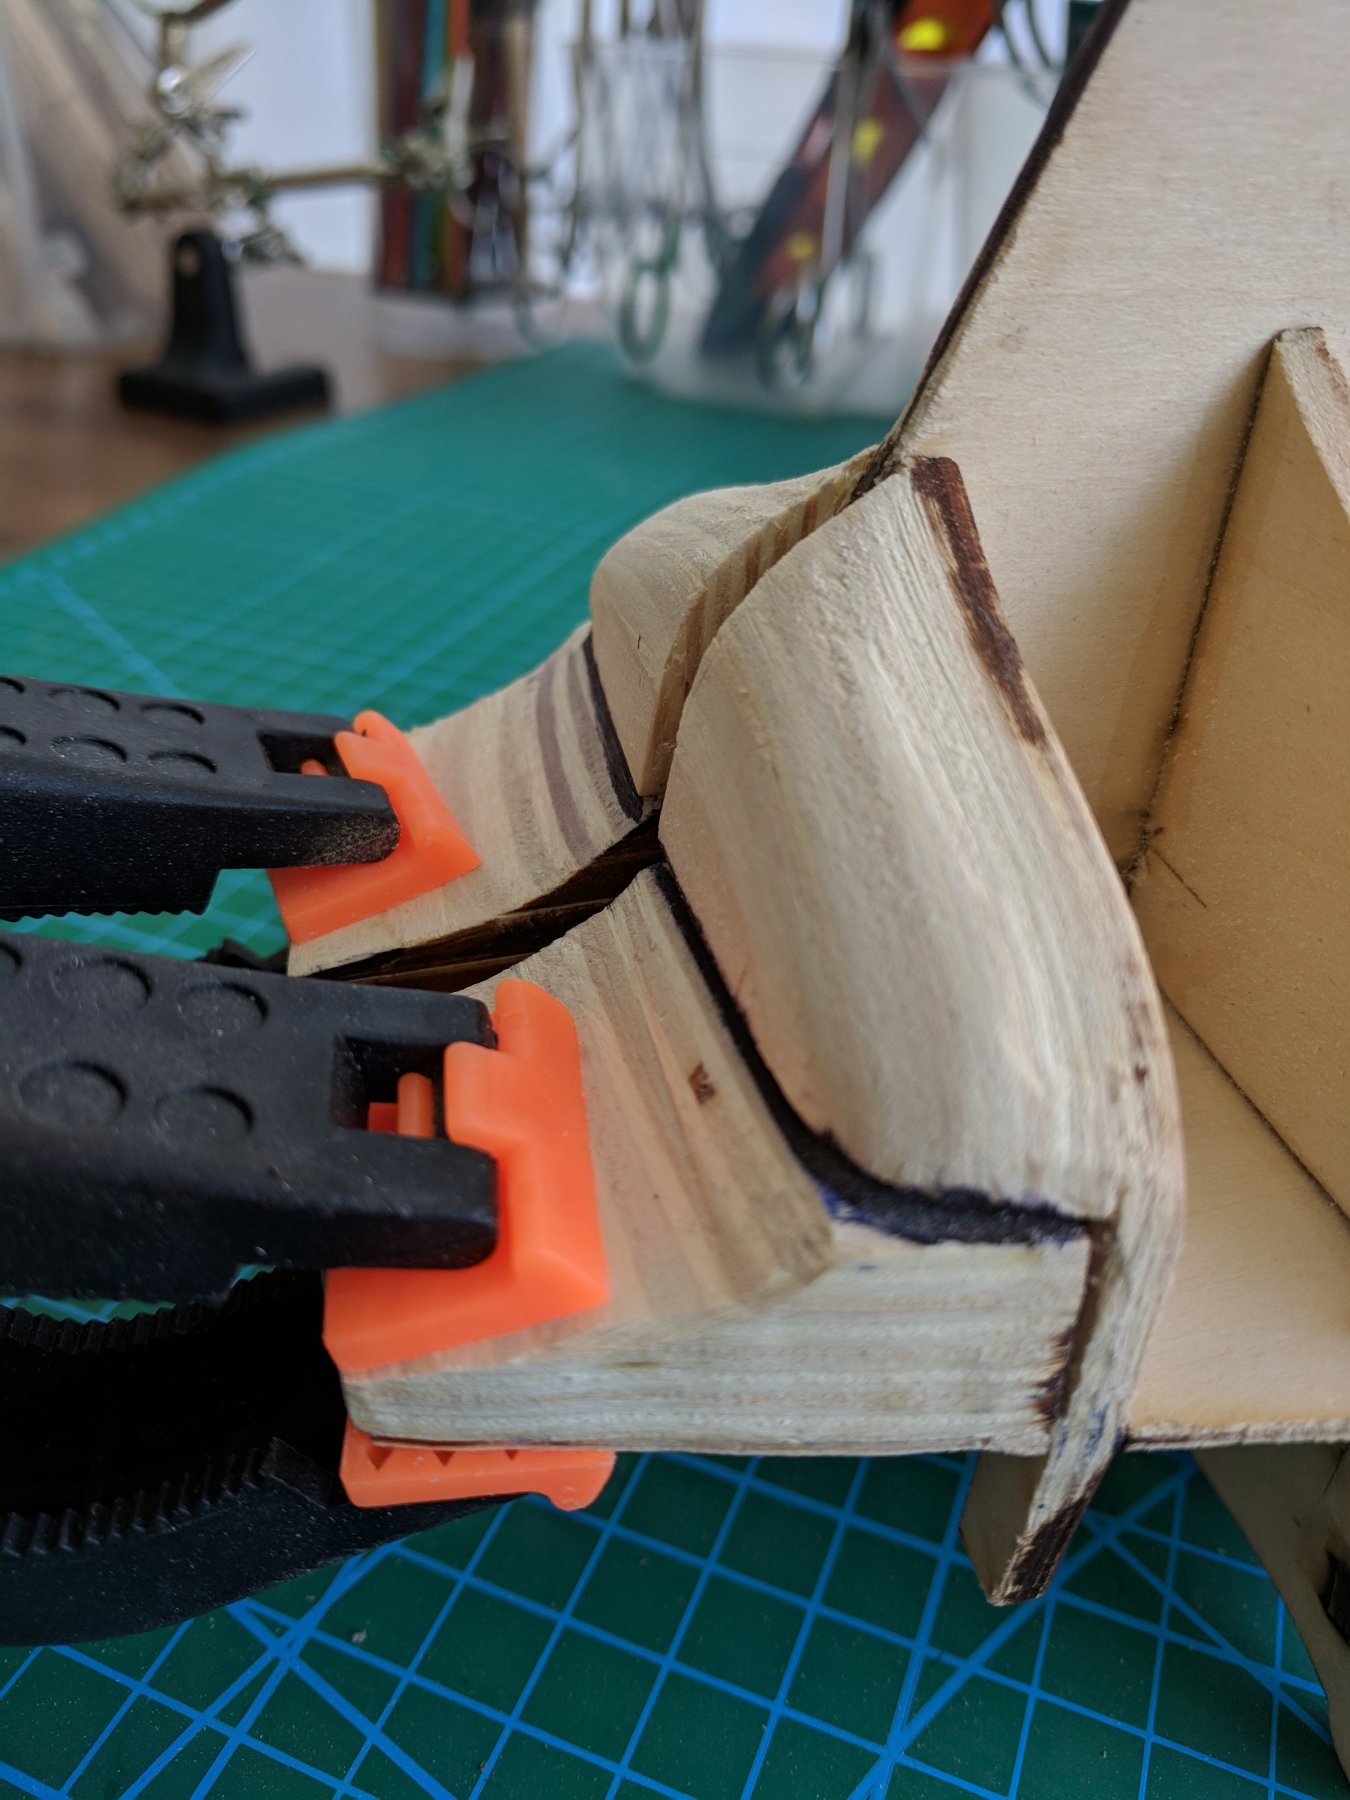
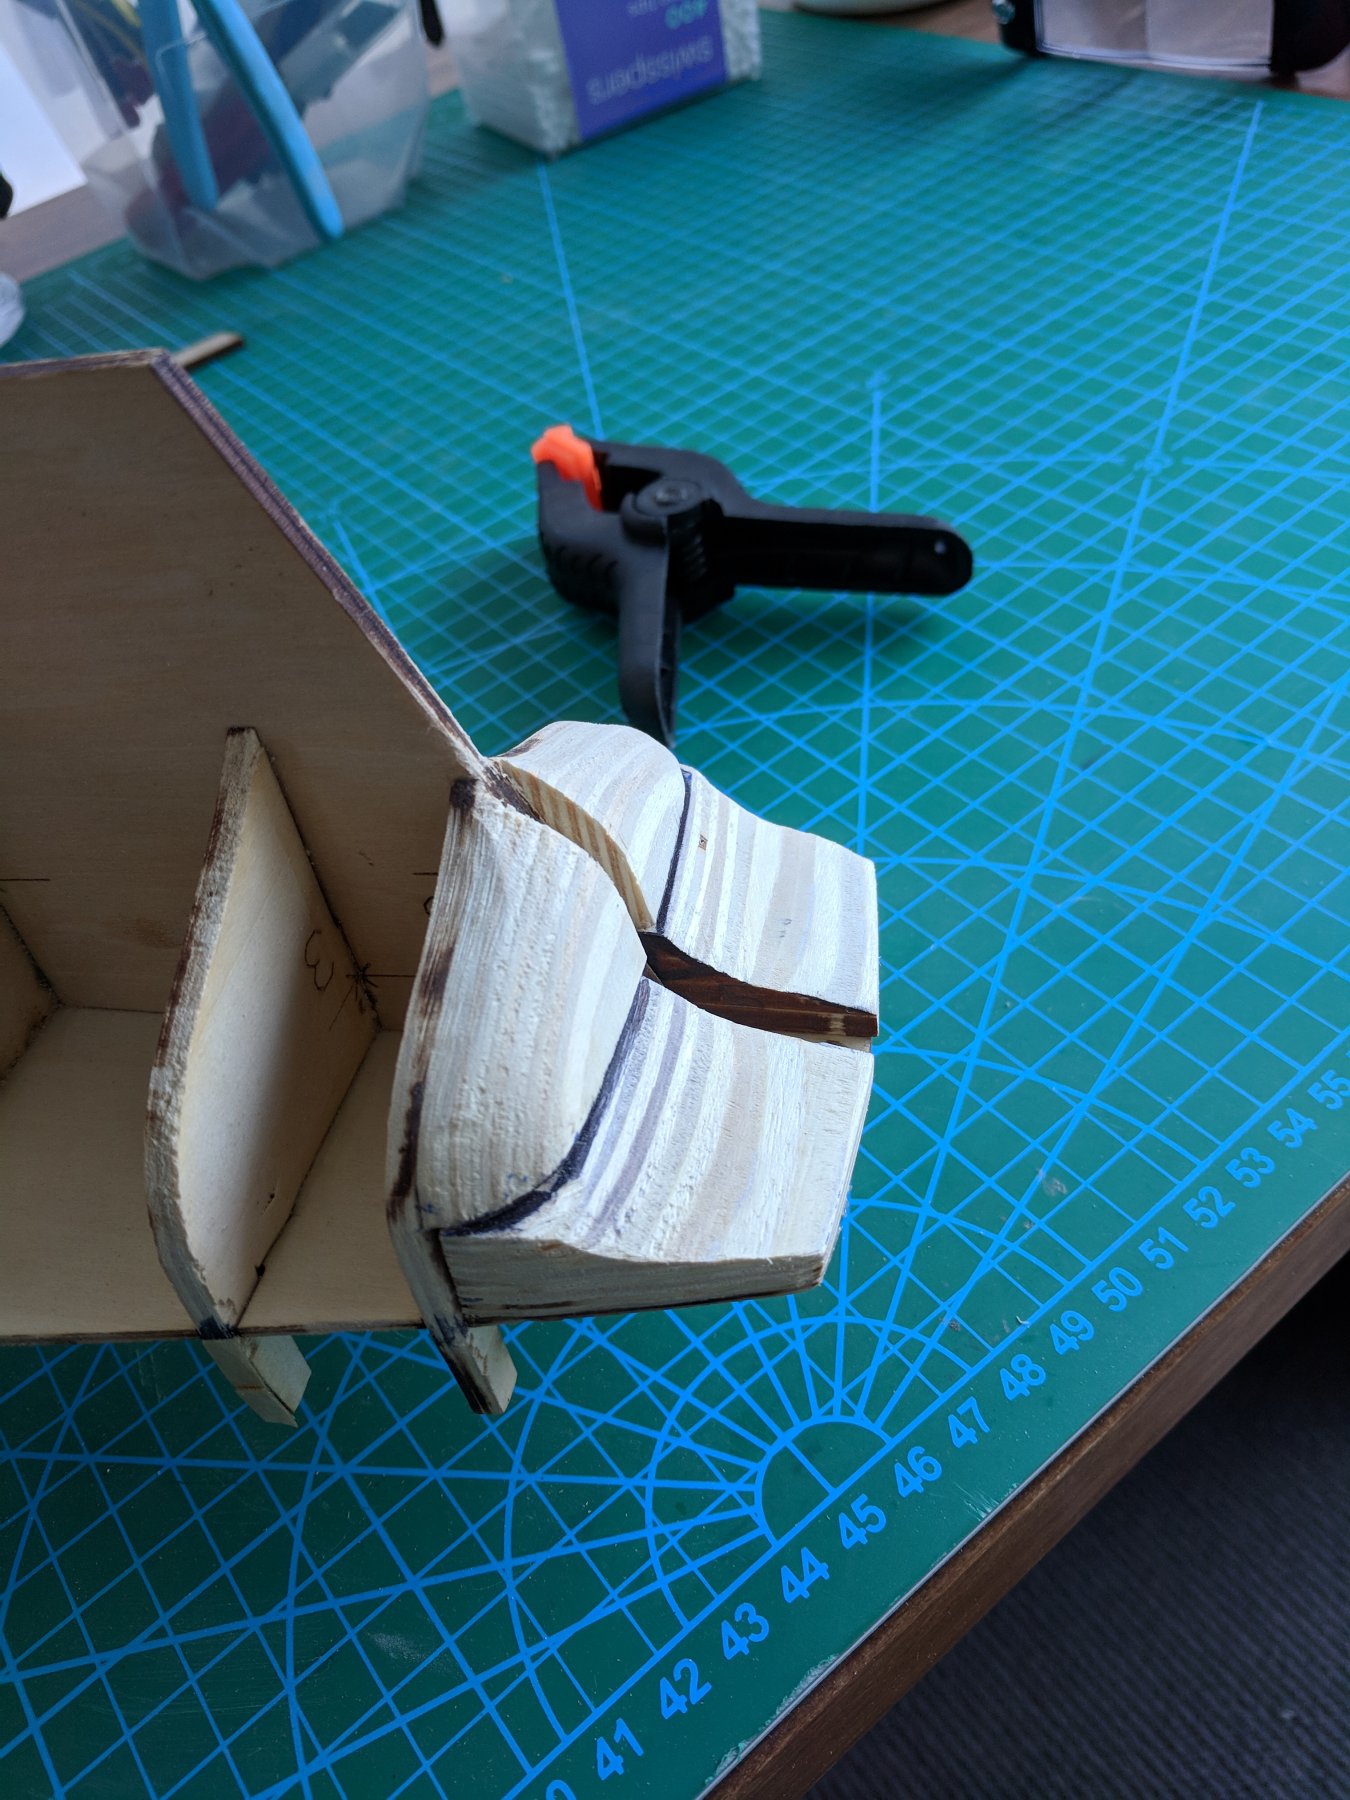
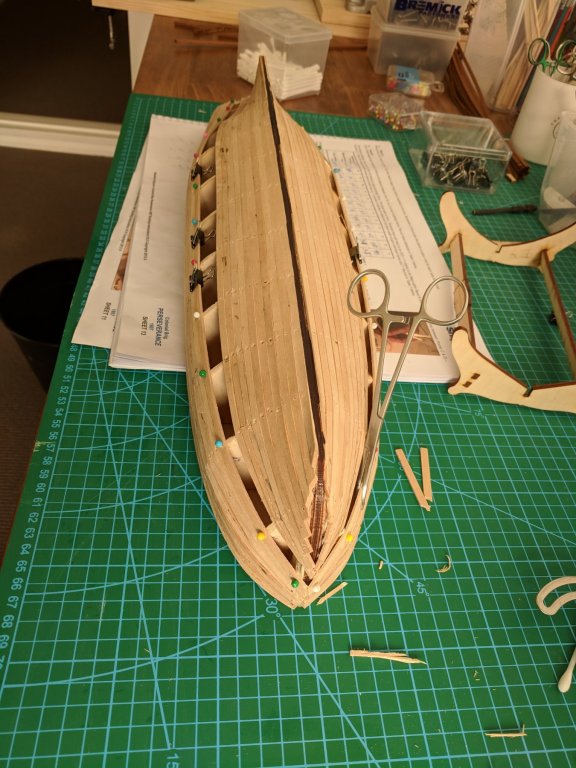
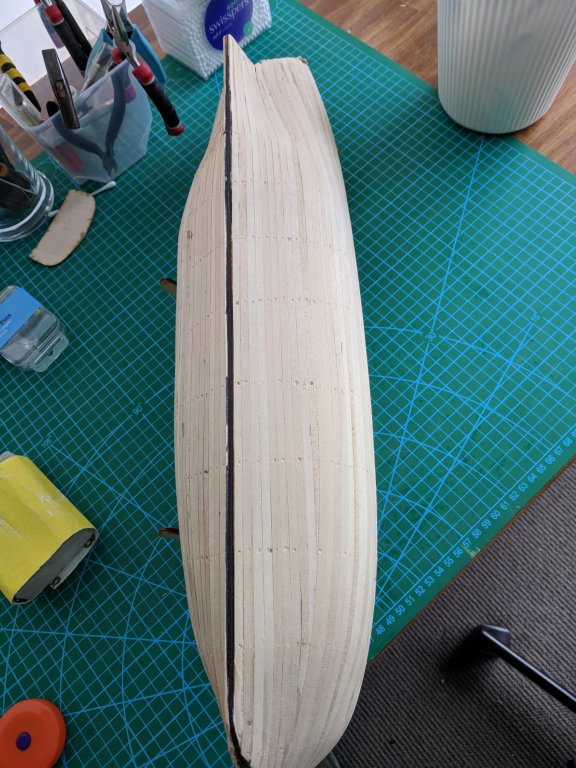
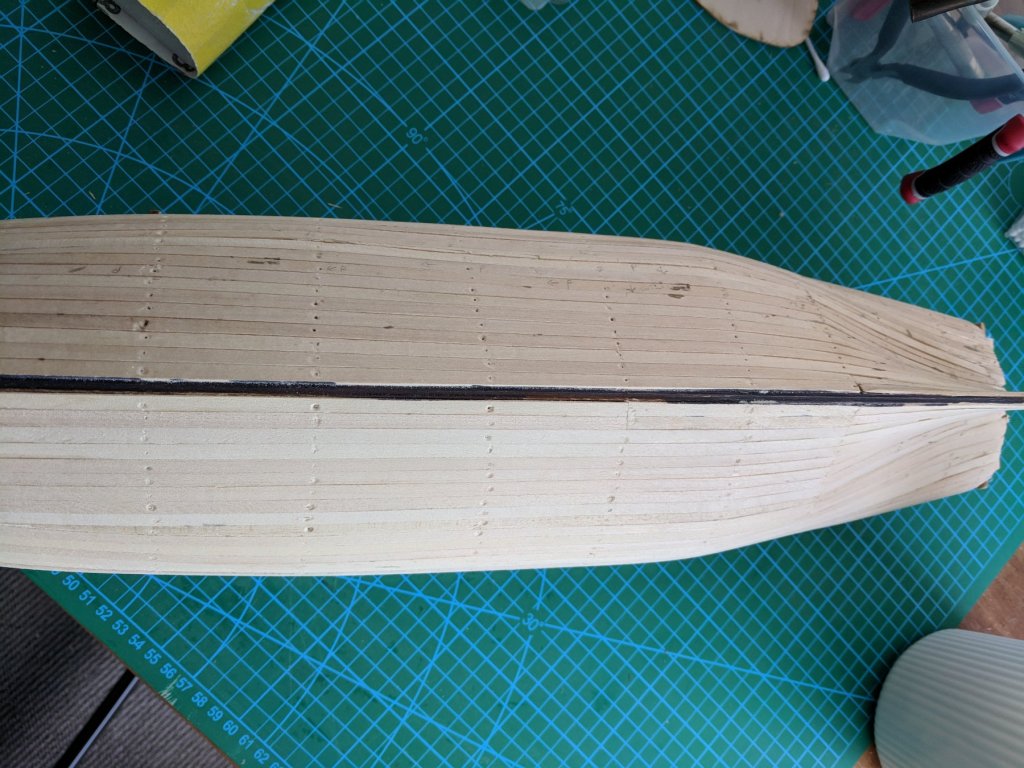
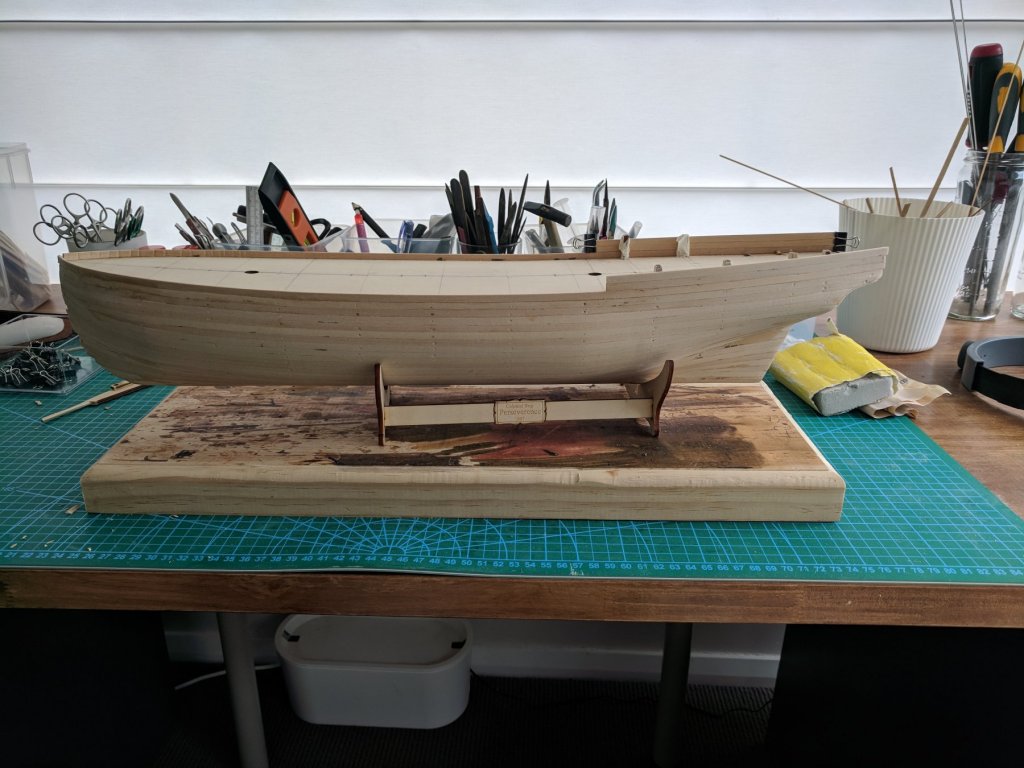
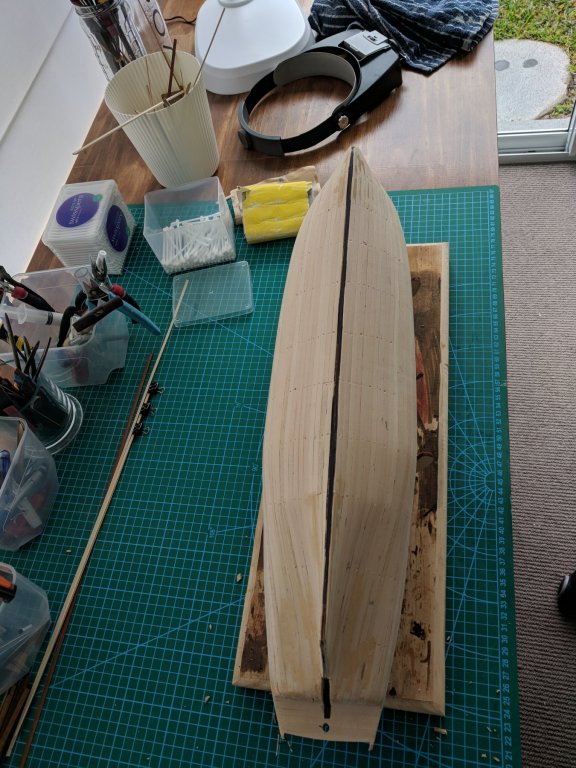
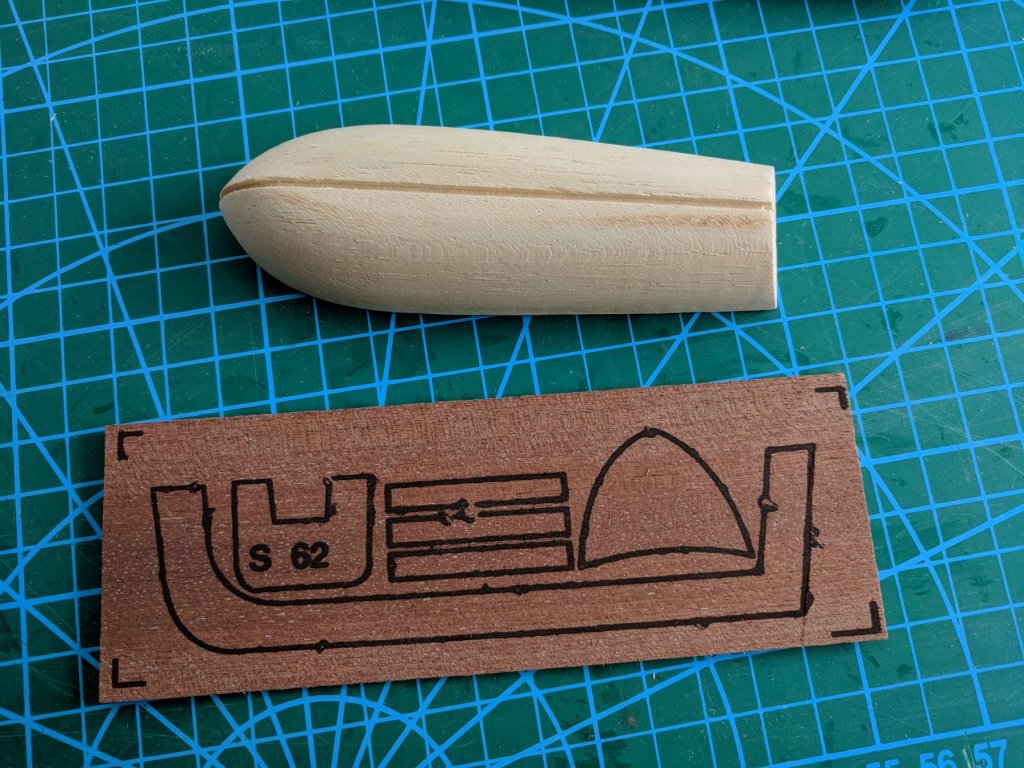
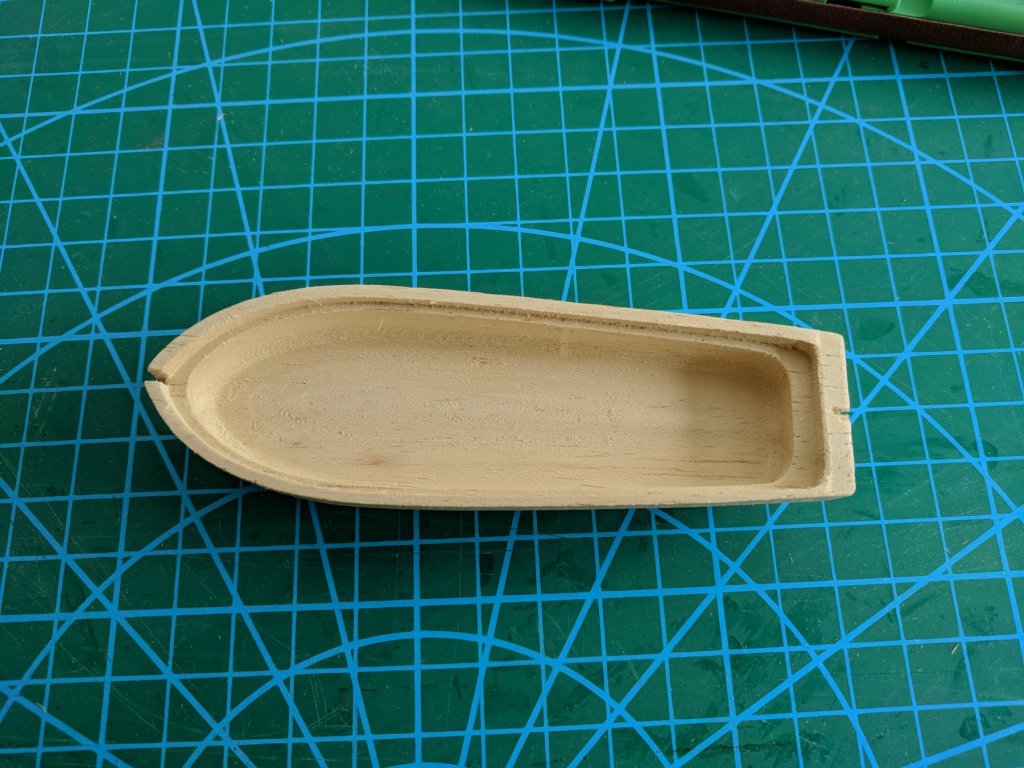
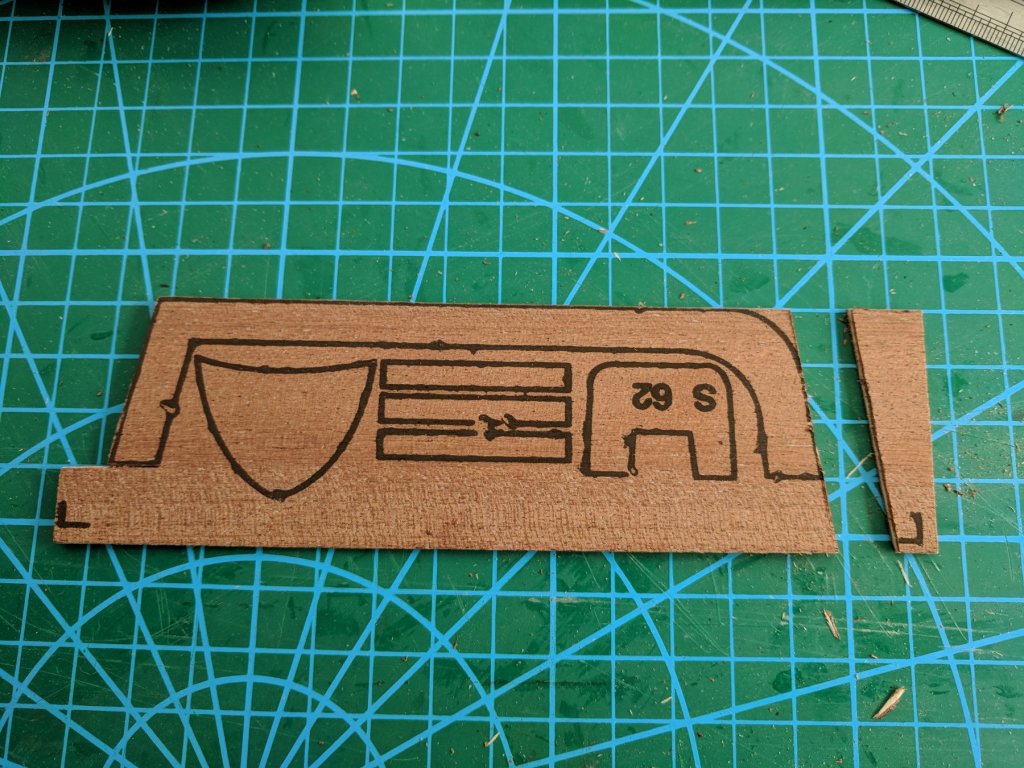
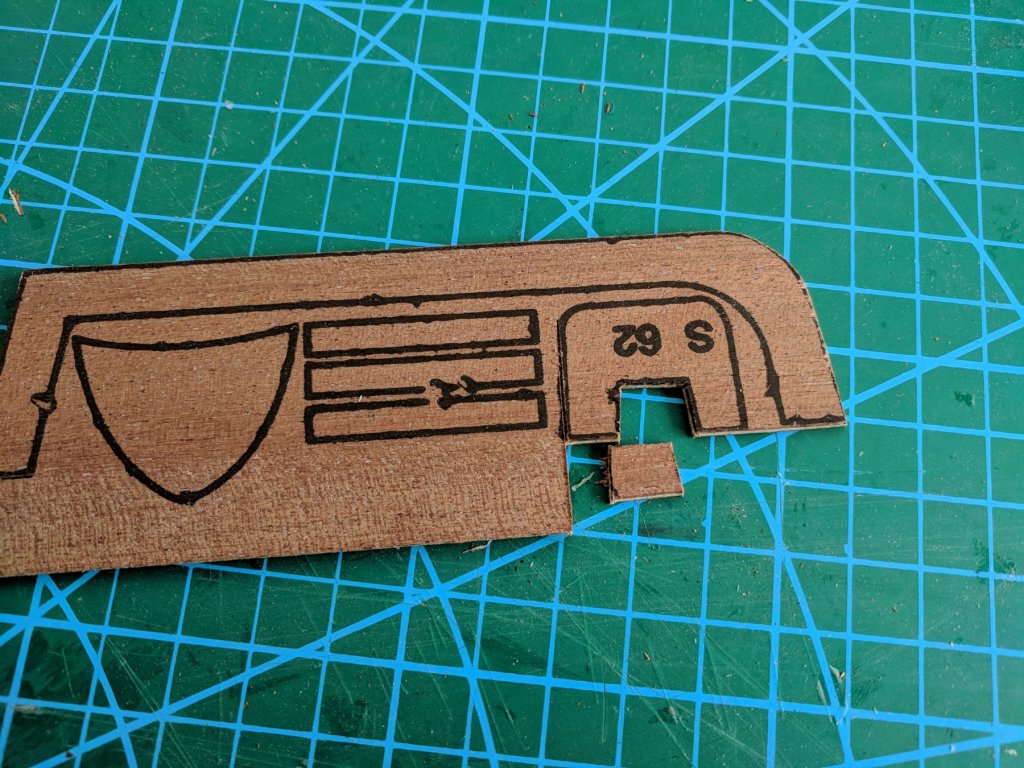
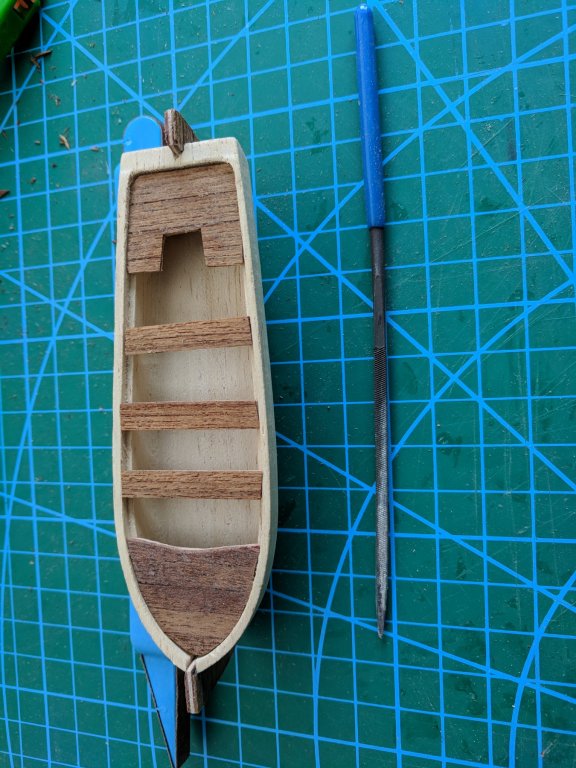
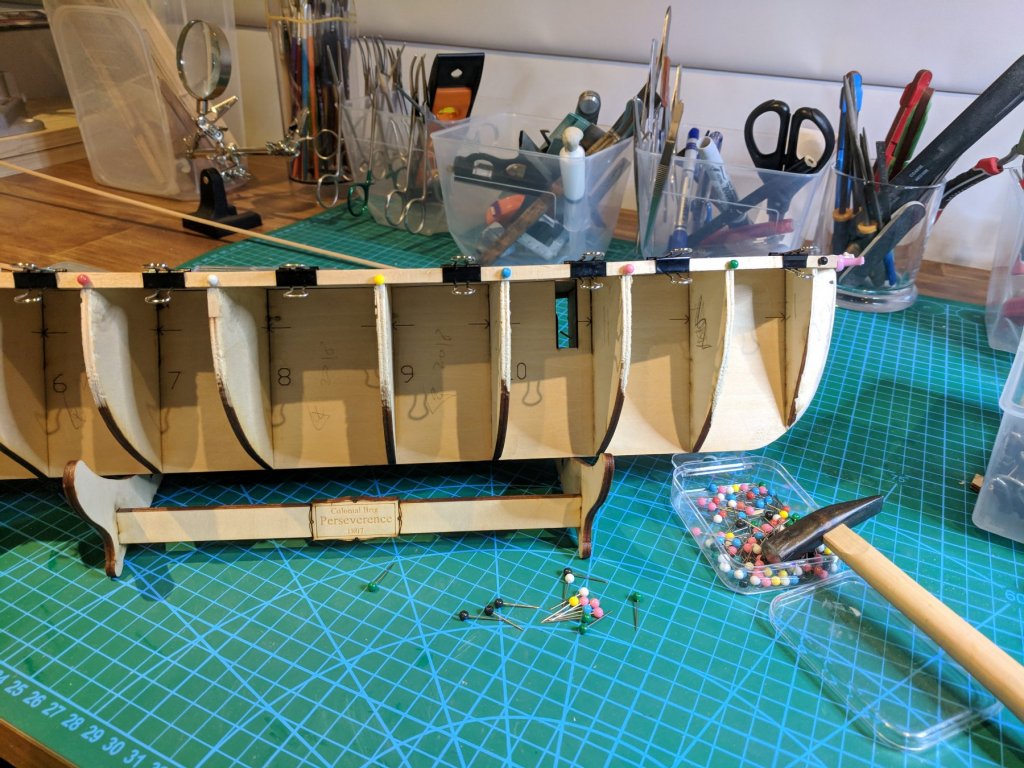
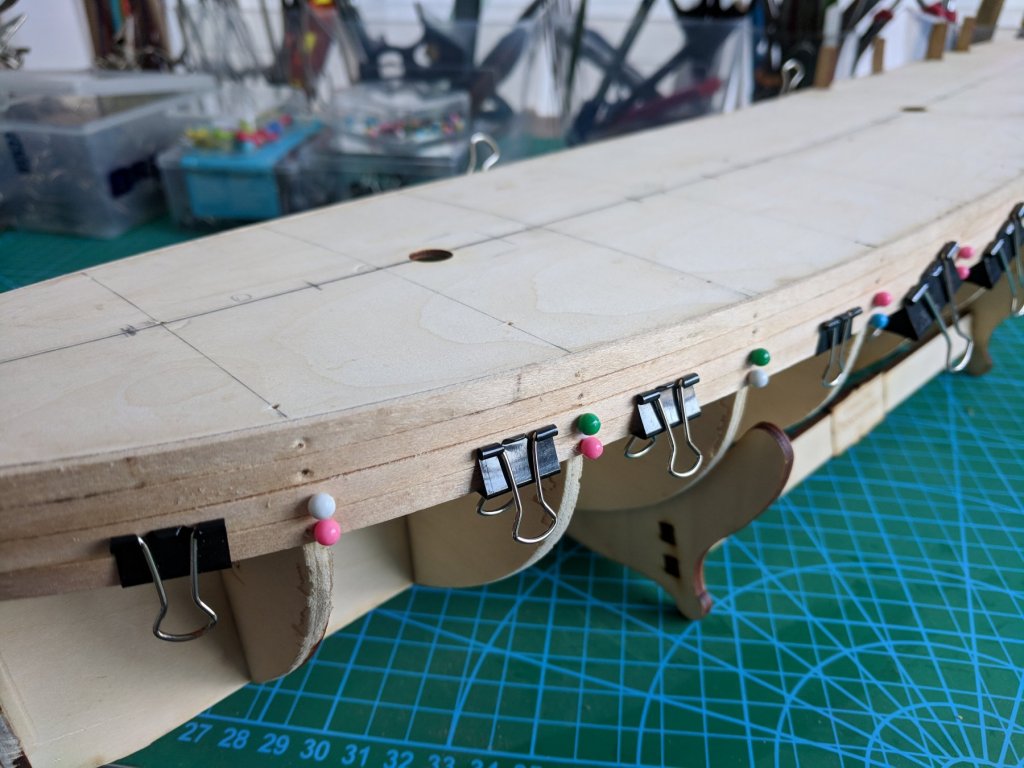
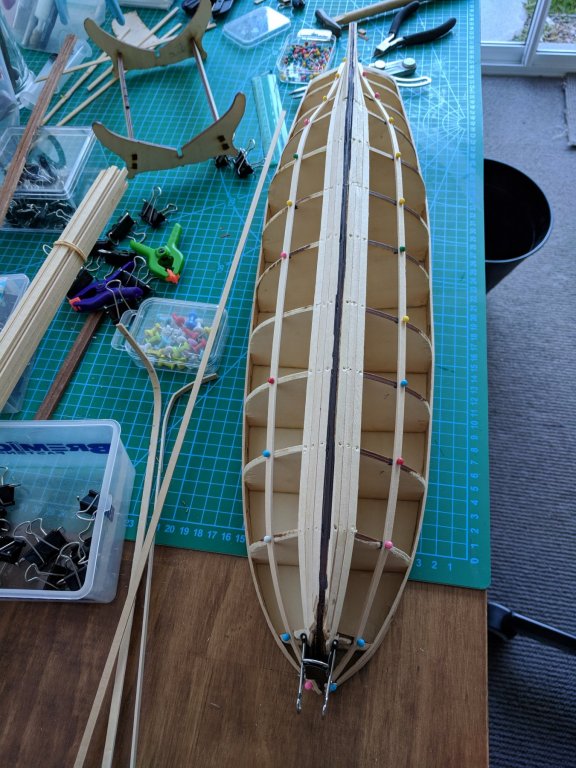
Latest instalment... The first layer of planking has been completed and although not pretty , after some wood filler and a bit of sanding the hull has come up very nicely. Surprisingly not too much filler was needed. I had originally thought that the tuck of the transom would need a bit of plank bending and a number of them did split when putting them on. It's either the wood supplied or most likely the model maker! A few photos of the current status of the build.... I've also started on one of the "jolly" boats which will be placed on the deck of the Perseverance as a break from planking. Putting it together is very straightforward , so no issues here other than cutting out the pieces as they have not been laser cut.The boat has been dry fitted at this stage as I will want to put some planking on all but the hull as this will be painted white. I will be starting on the deck planking next so will follow up with progress in the next few days. Cheers............Fernando


-
Hello James, I'm keen to follow this build as it was my first "real build " of as POB kit a couple of years back. Reading your build log made me think of a number of similar issues you are now facing with the Mermaid. Saying that, after six months of solid trial and error I finished it and was pretty happy with the results. I'm not sure how accurate the model is to the real thing (I don't think anyone does) but it does look good finished and sits on a shelf in my grandsons bedroom where hopefully in years to come he will appreciate the handiwork of his grandad (he is only 8 months so his parents are keeping it pot of harms way!) Enjoy the build as over time you'll get to see the model come together........in the meantime keep up with your build log and, like Chook, will be happy to answer any questions you may have. Cheers..............Fernando
-
Stunning workmanship! Cheers..........Fernando
-
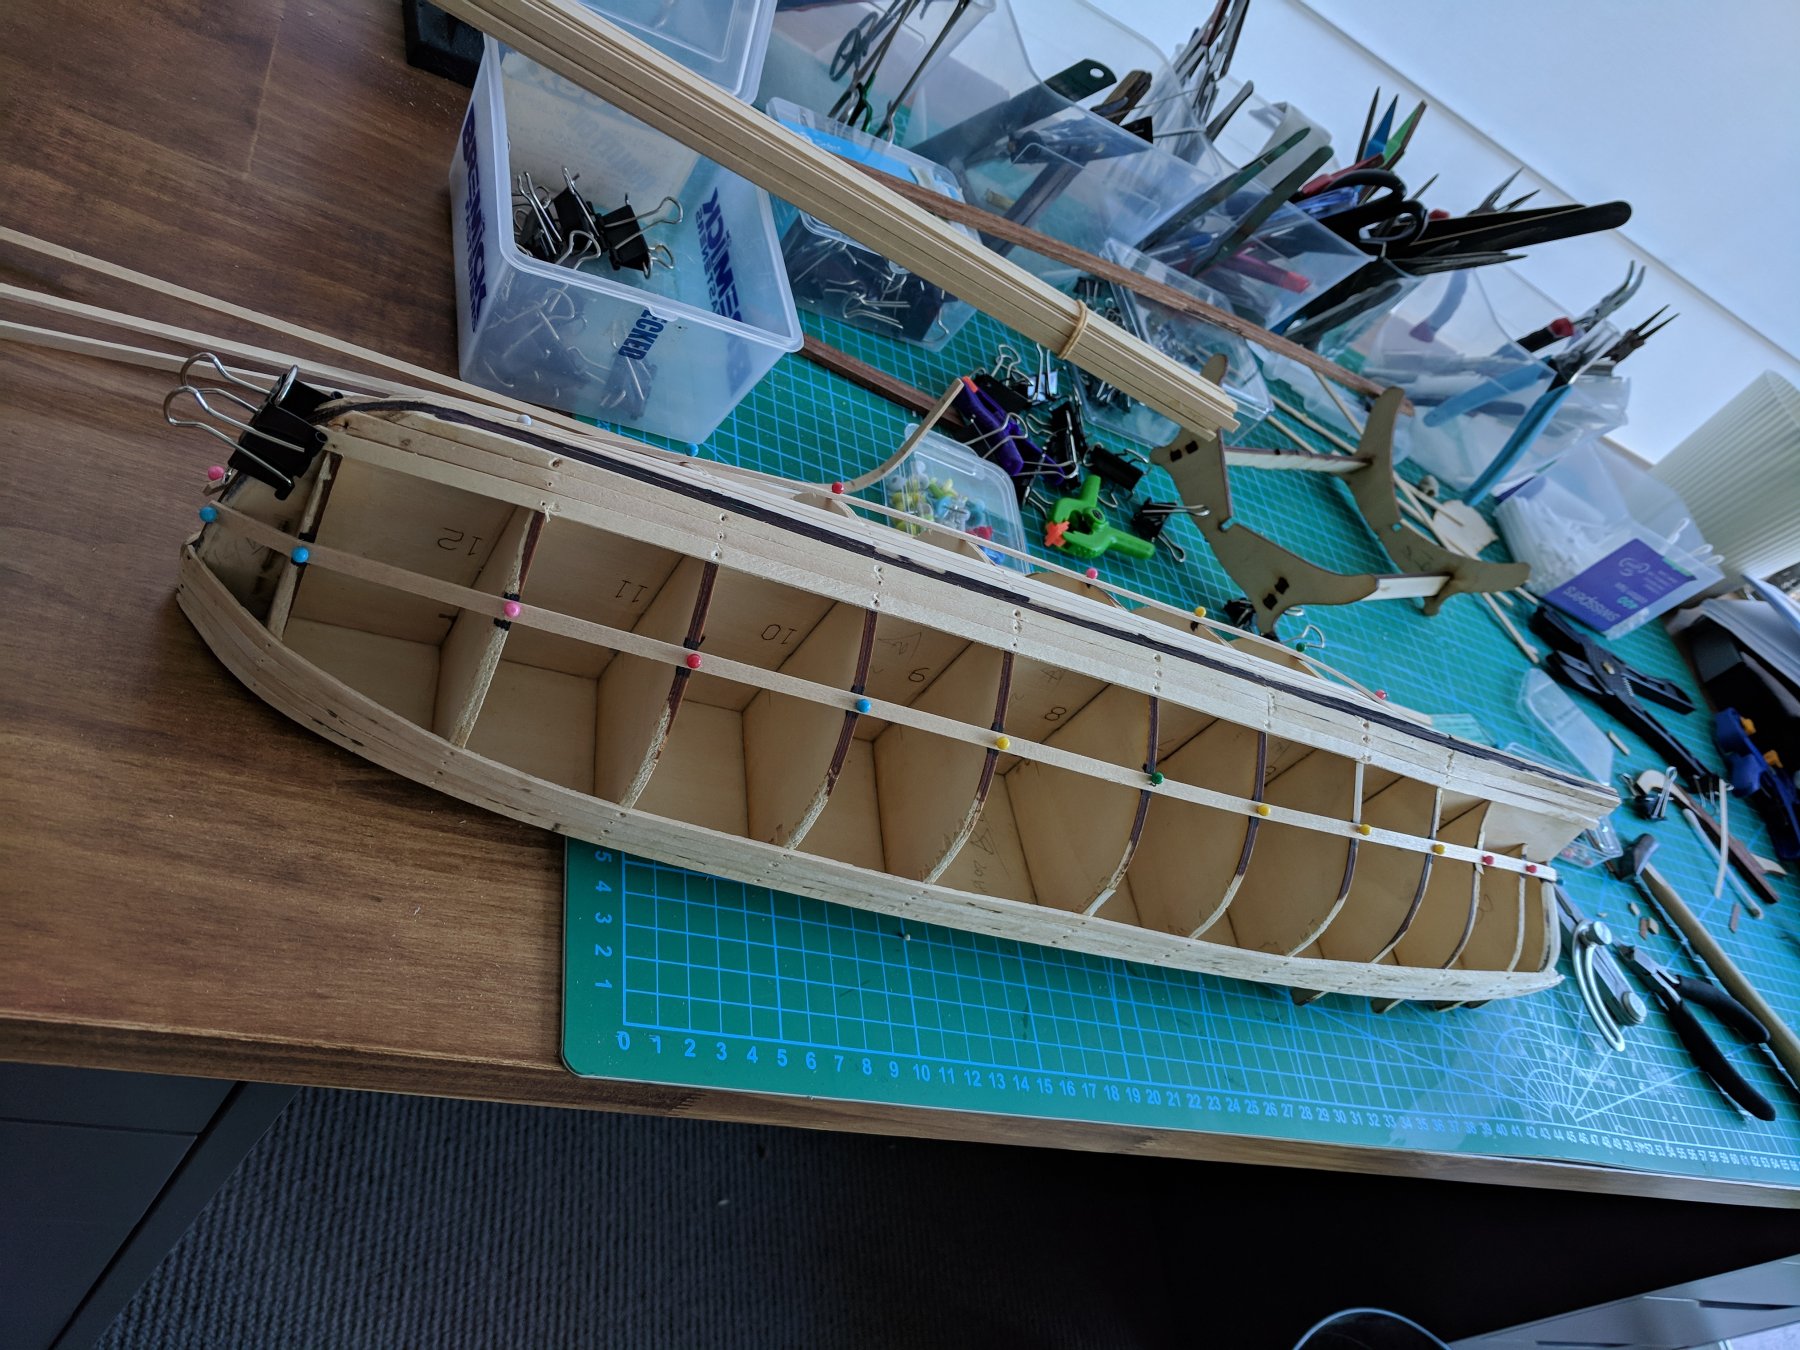
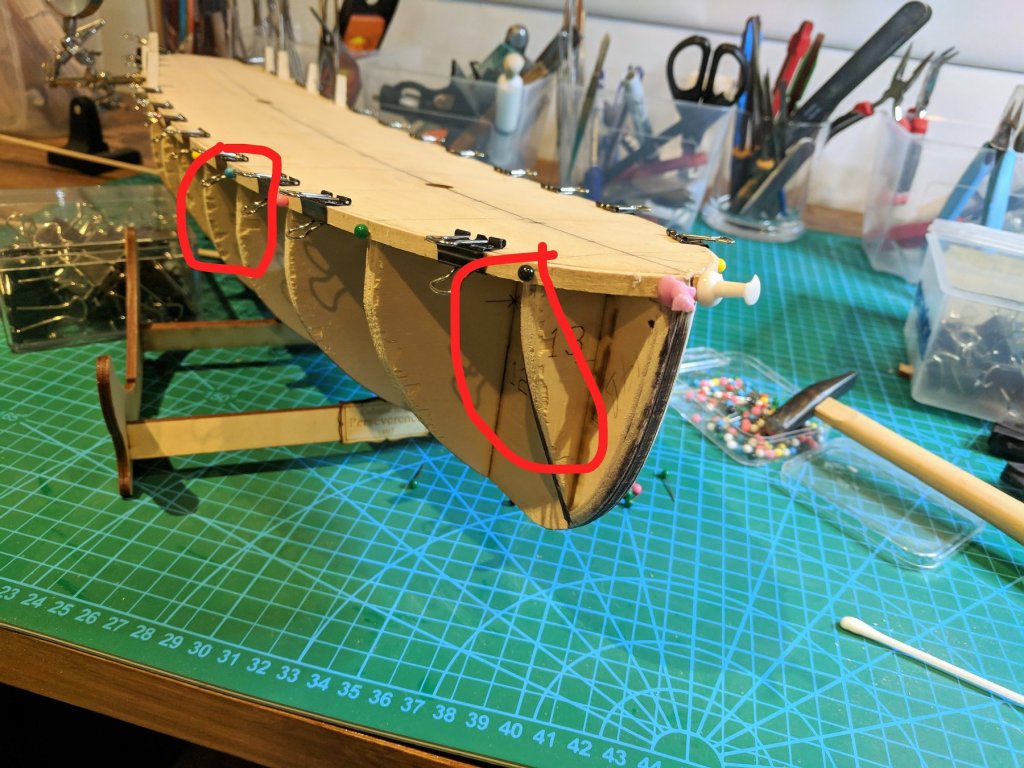
Another update. Started on the first layer of planking and so far so good. No real issue but then again have not yet done the curves in the tuck of the transom. You can see that the plywood on the bulkheads were really starting to fall apart....very annoying but at least they will be hidden under two layers of planking. If time permits I hope to move quickly on finishing the first layer so that I can "enjoy " putting on the second layer then move on to the more enjoyable deck furniture! More to follow soon (hopefully!) Cheers...........Fernando


-
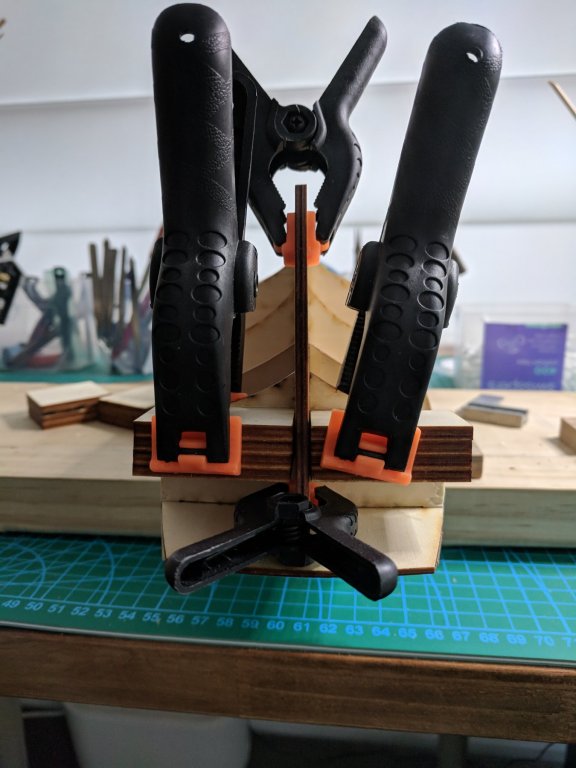
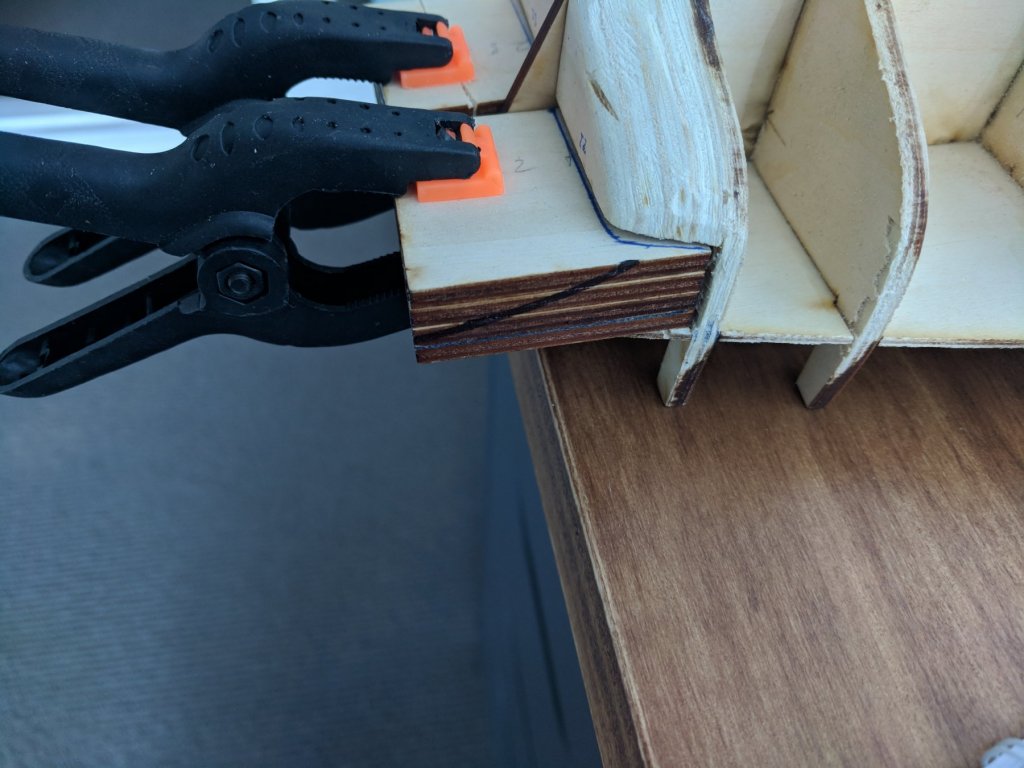
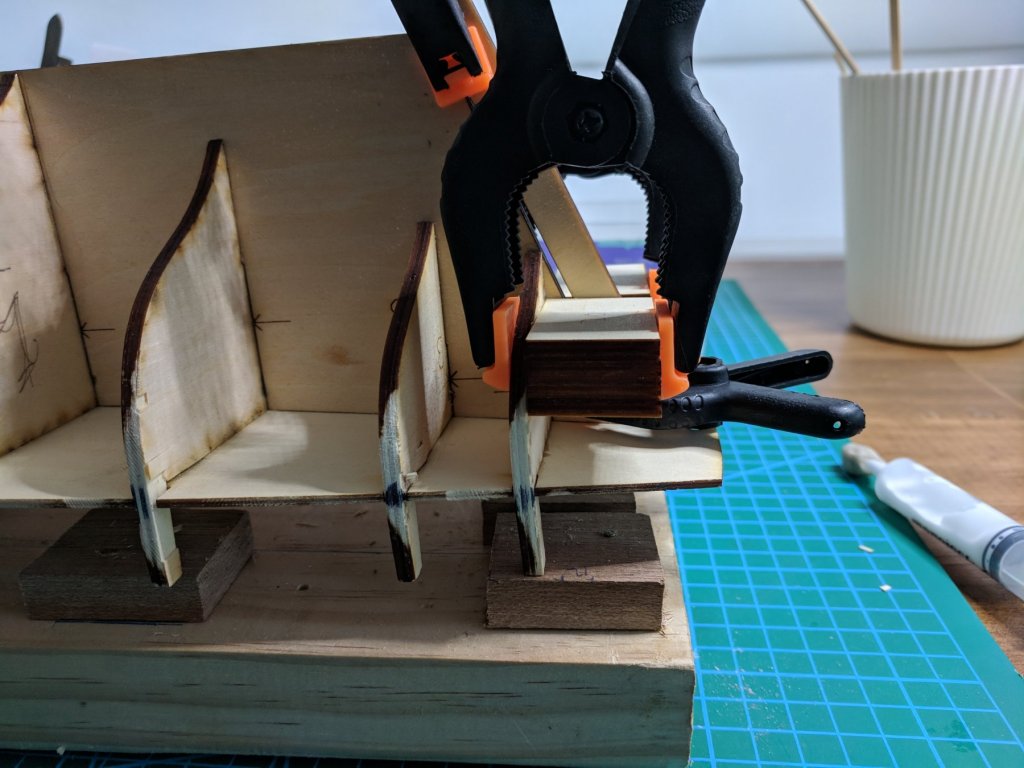
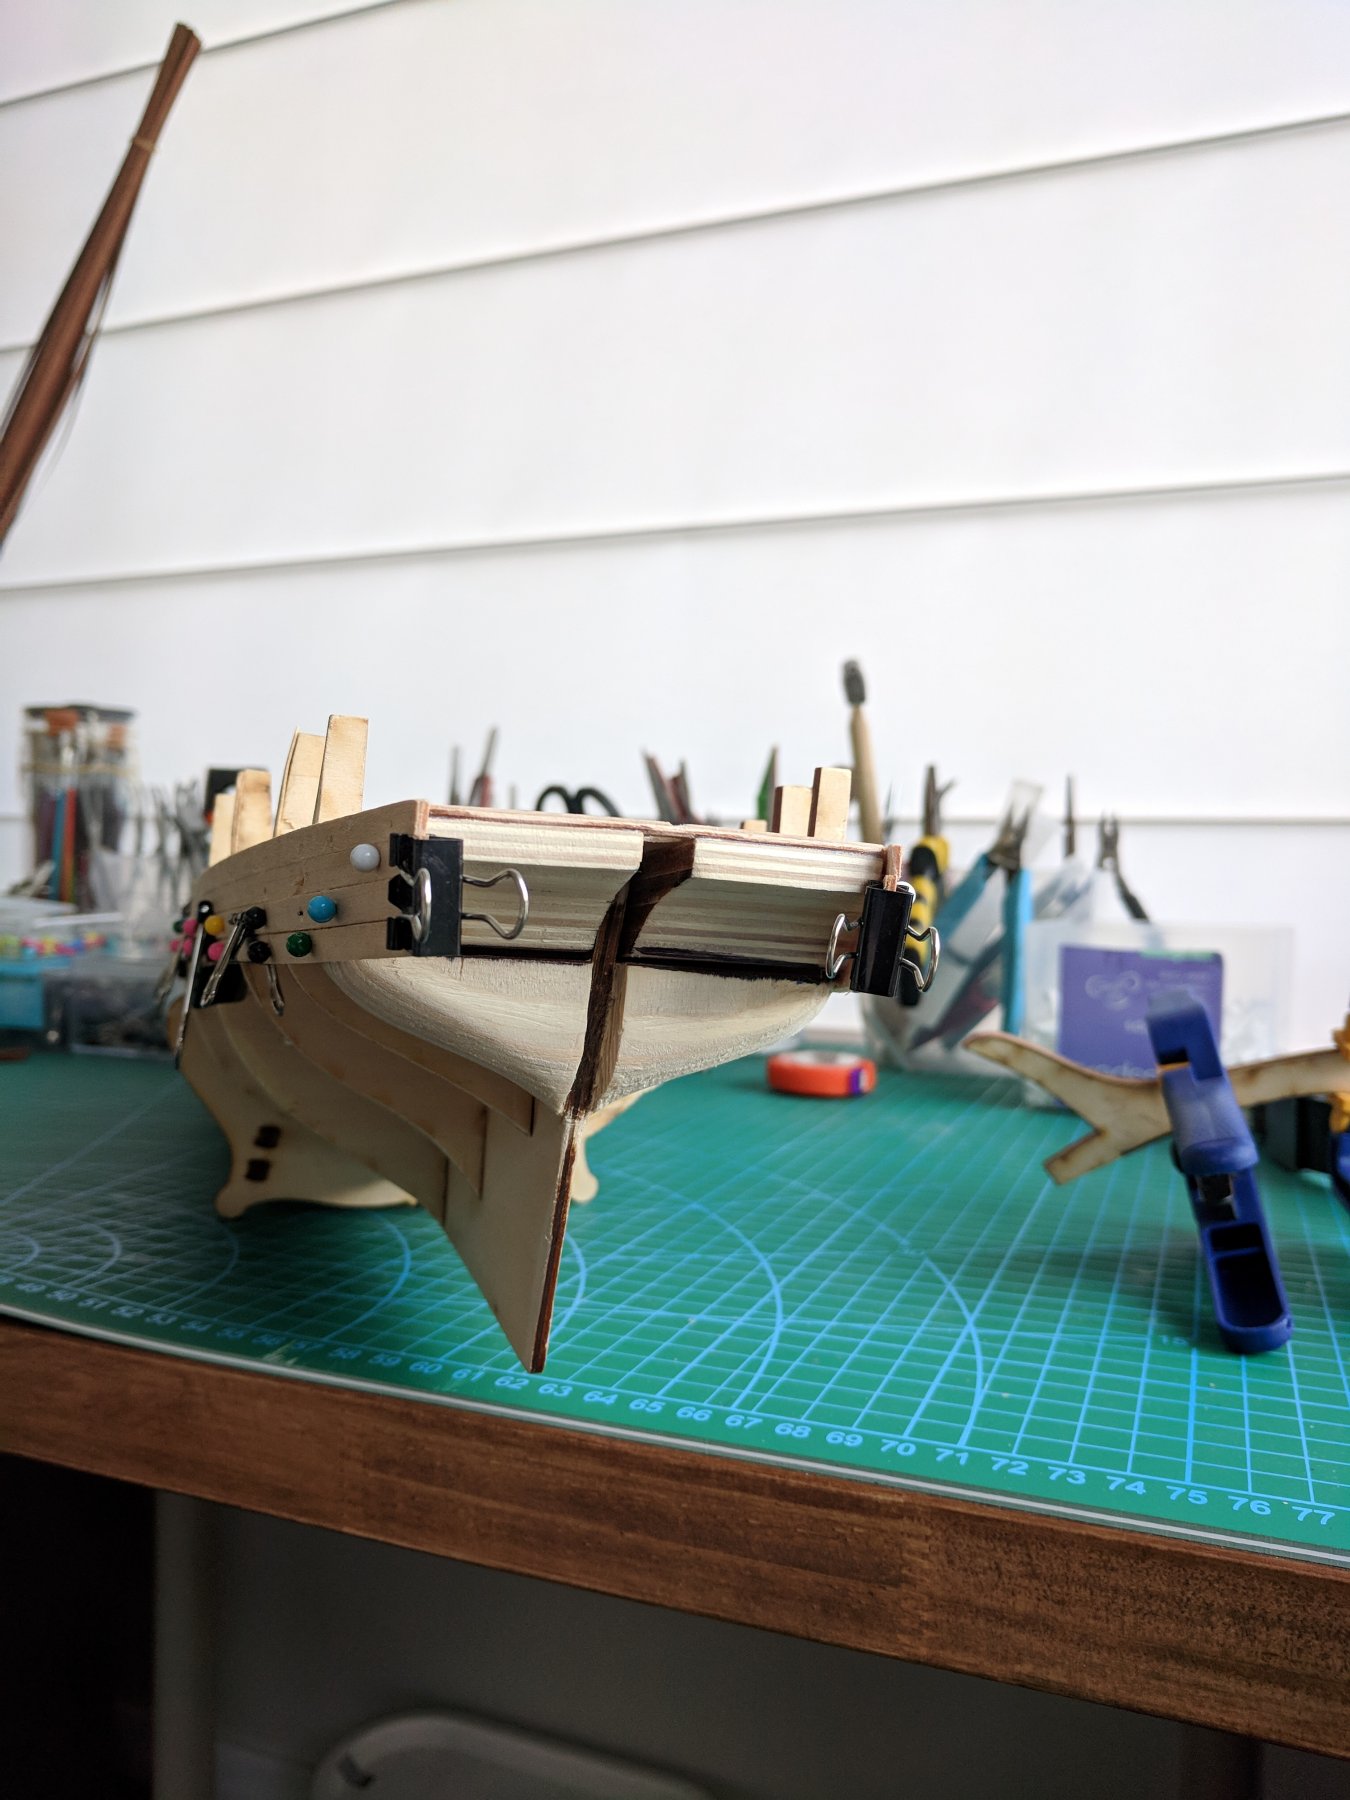
Next update.....a bit overdue! I've now put in the fillers which sit in the tuck of the transom. This took me a while to get right as the different shapes of the fillers needed a bit of sanding. After some time I am now happy with how it looks, although having to get the first layer of planking to fit around these curves is going to be interesting! I'm making a start on the first layer of planking later today and hope to post a couple of early pictures in the not too distant future. Cheers................Fernando