


mati
-
Posts
122 -
Joined
-
Last visited
Content Type
Profiles
Forums
Gallery
Events
Posts posted by mati
-
-
Thank you @scrubbyj427 for your comment
")
Ok Dear Friends
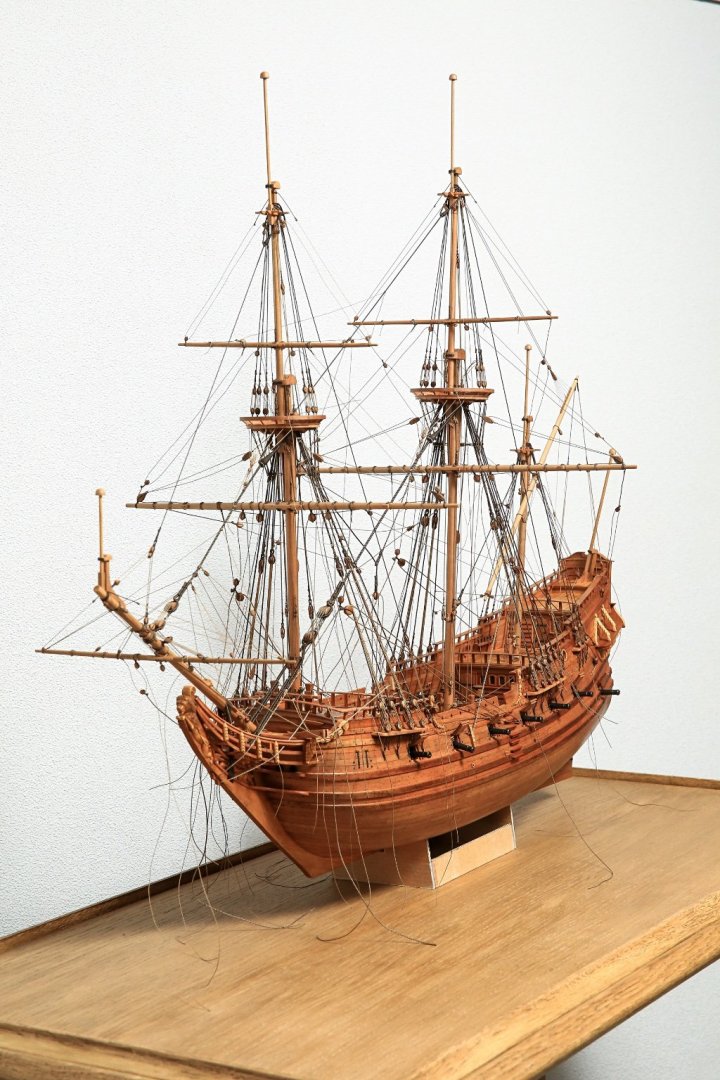
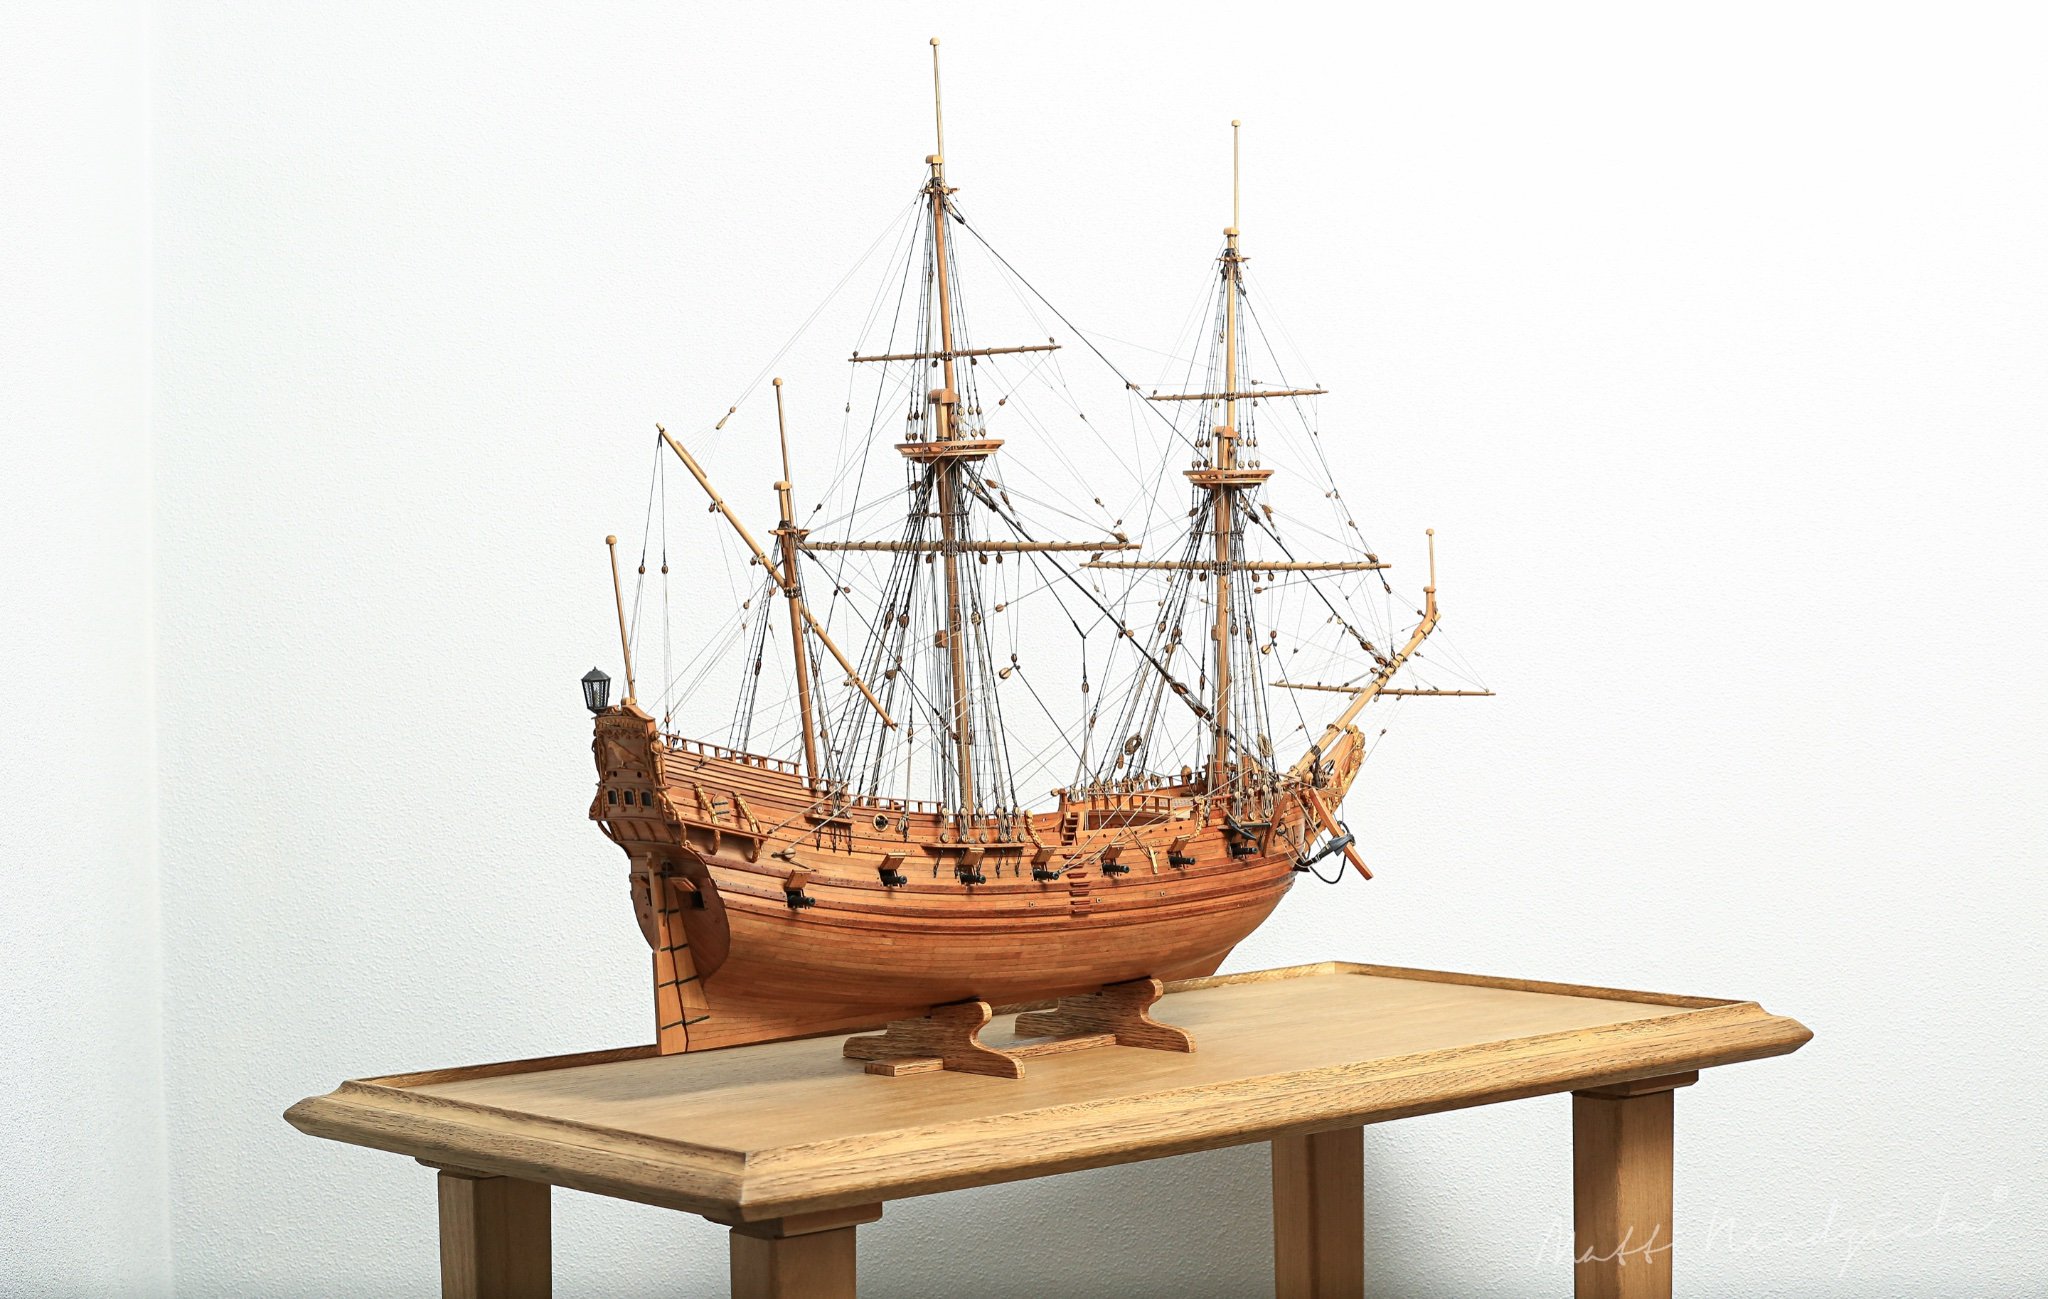
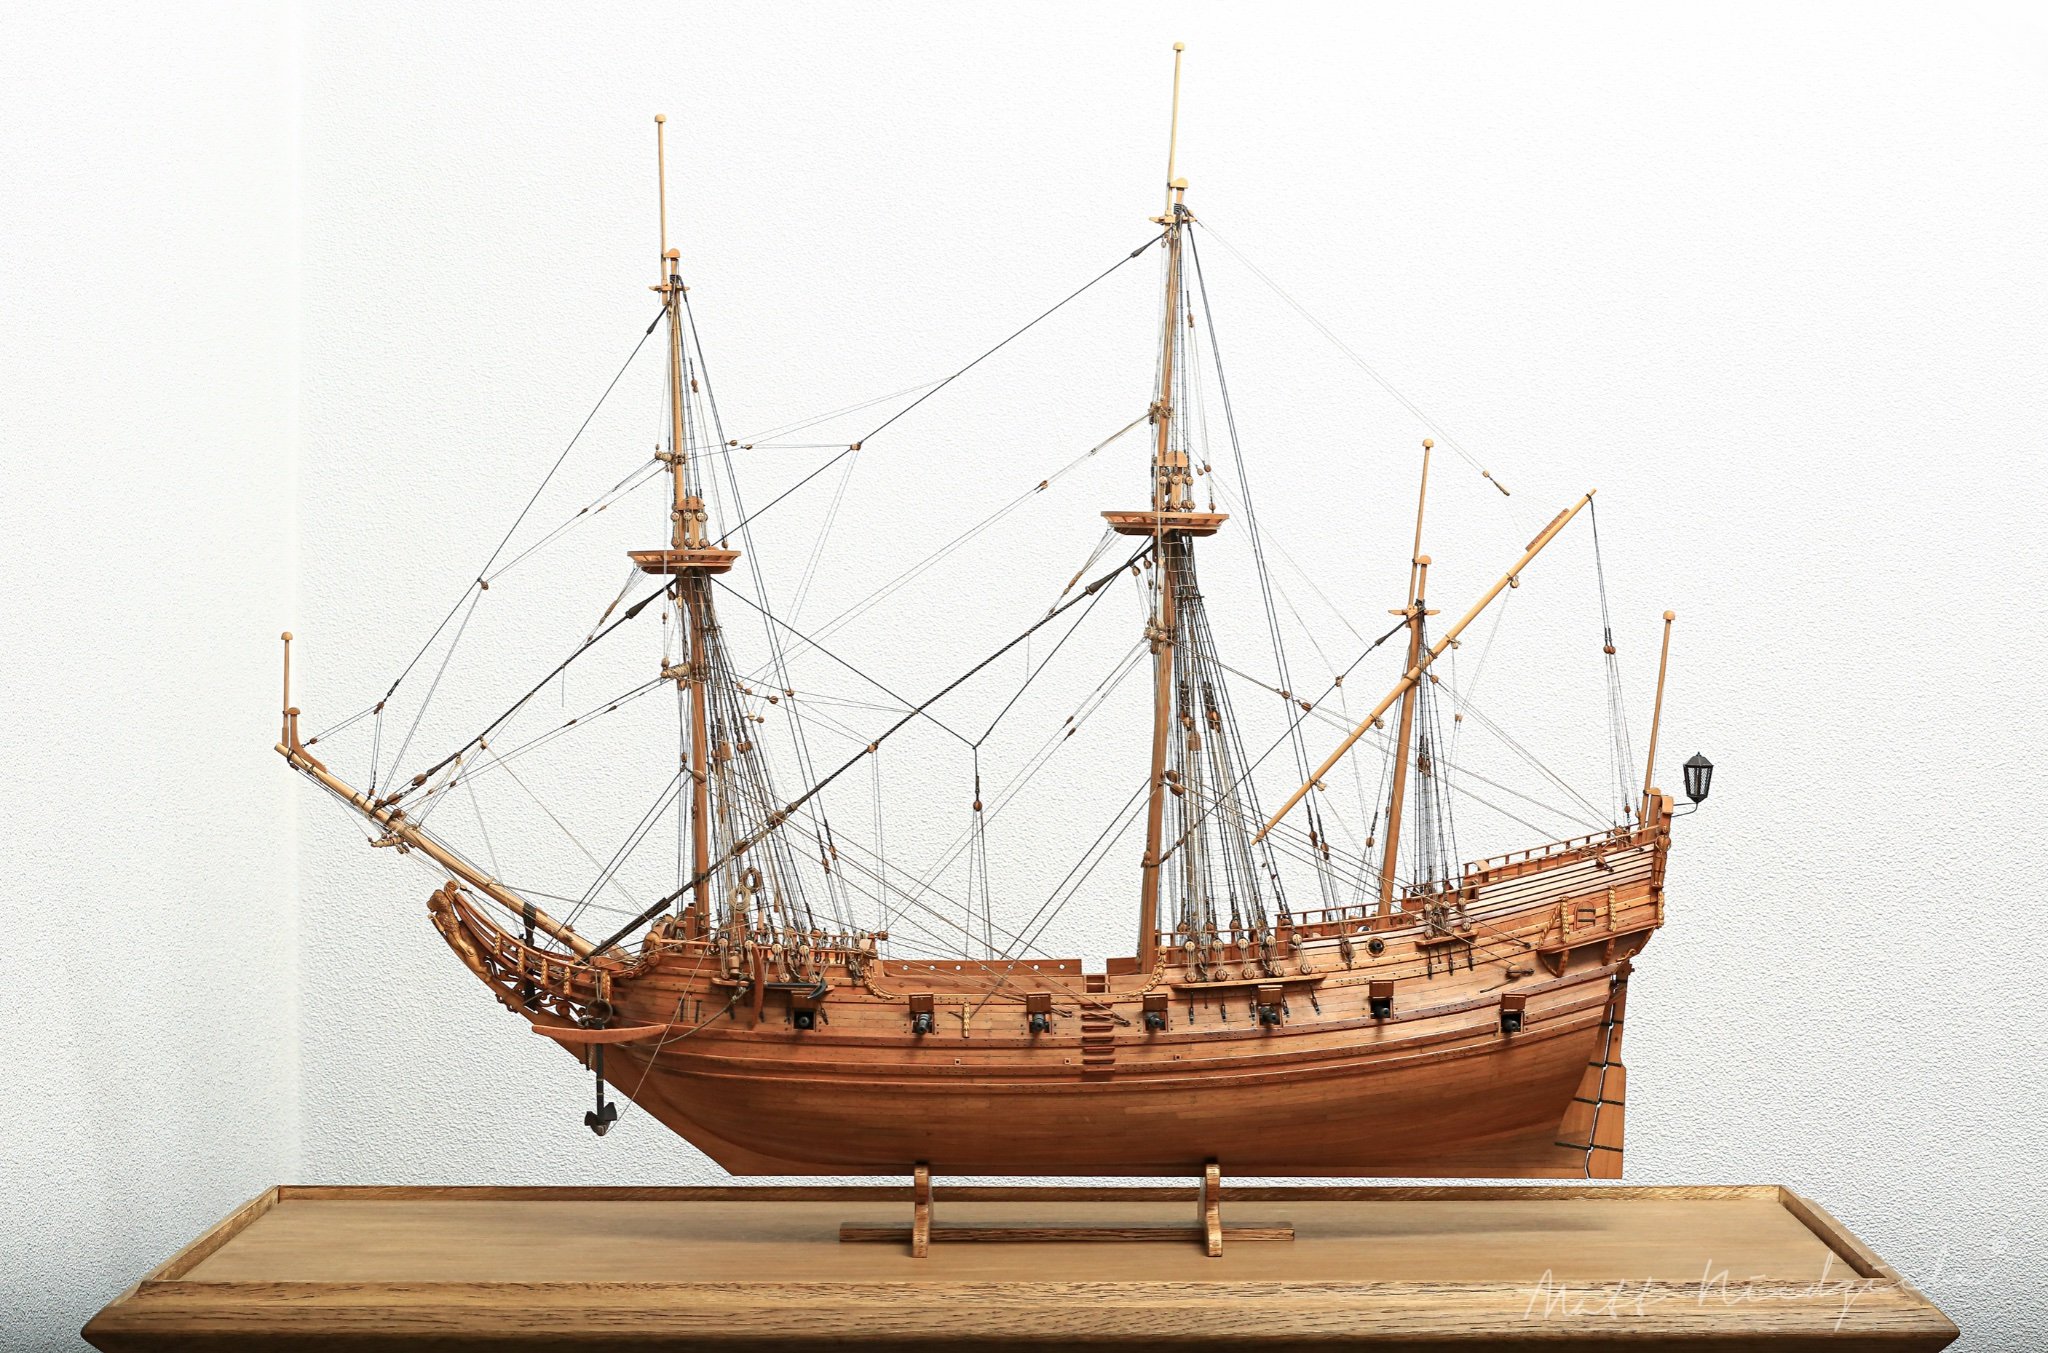
THE END
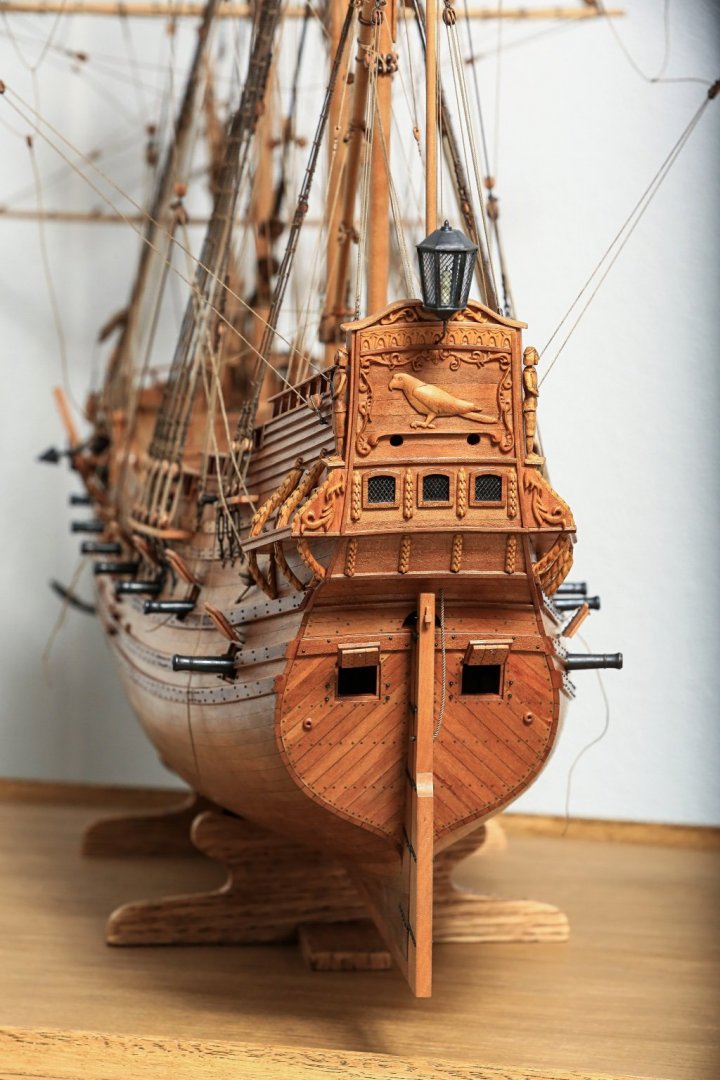
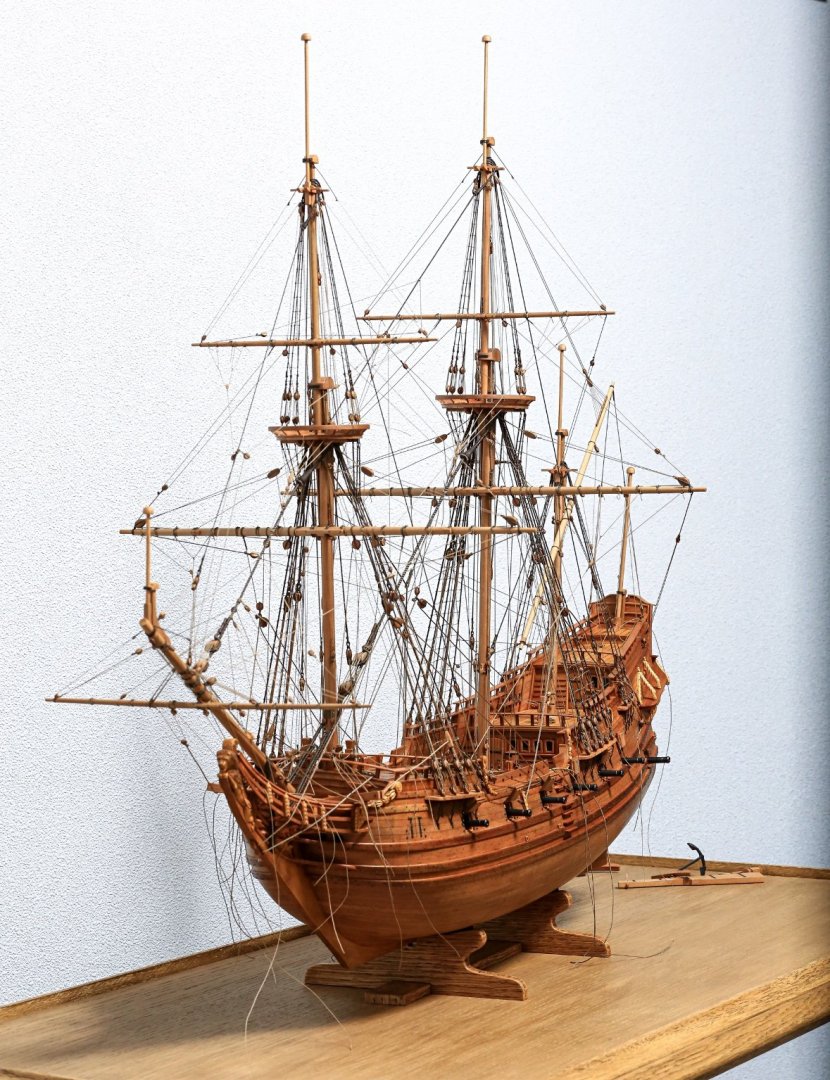
This day has come Model is finally completed.
After many years of resting under the cover, I've managed to tie last knot
I would like to thank you All for many likes and warm comments
So at that stage I would like to share some final "shots" of Papegojan


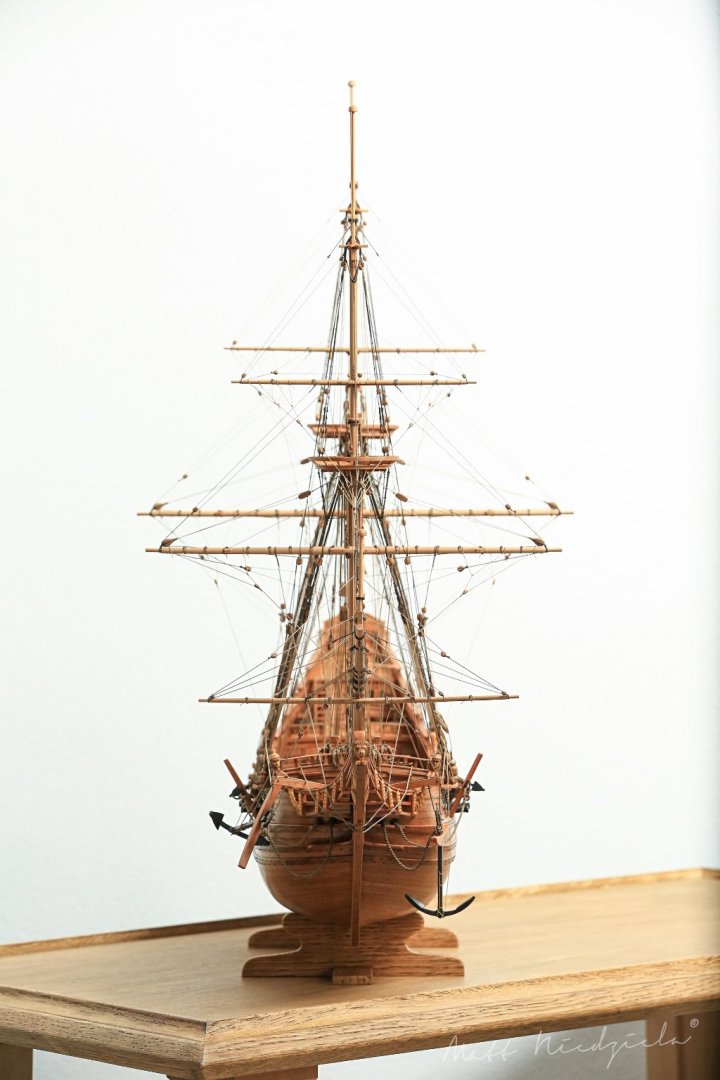
Enjoy... and hopefully see you soon!
...not sure when... but I'll be back
Keep calm and carry on with Your beautiful models!!!
-
Thank you very much @BobG and @GrandpaPhil for your nice comments
🍻
Hi All,
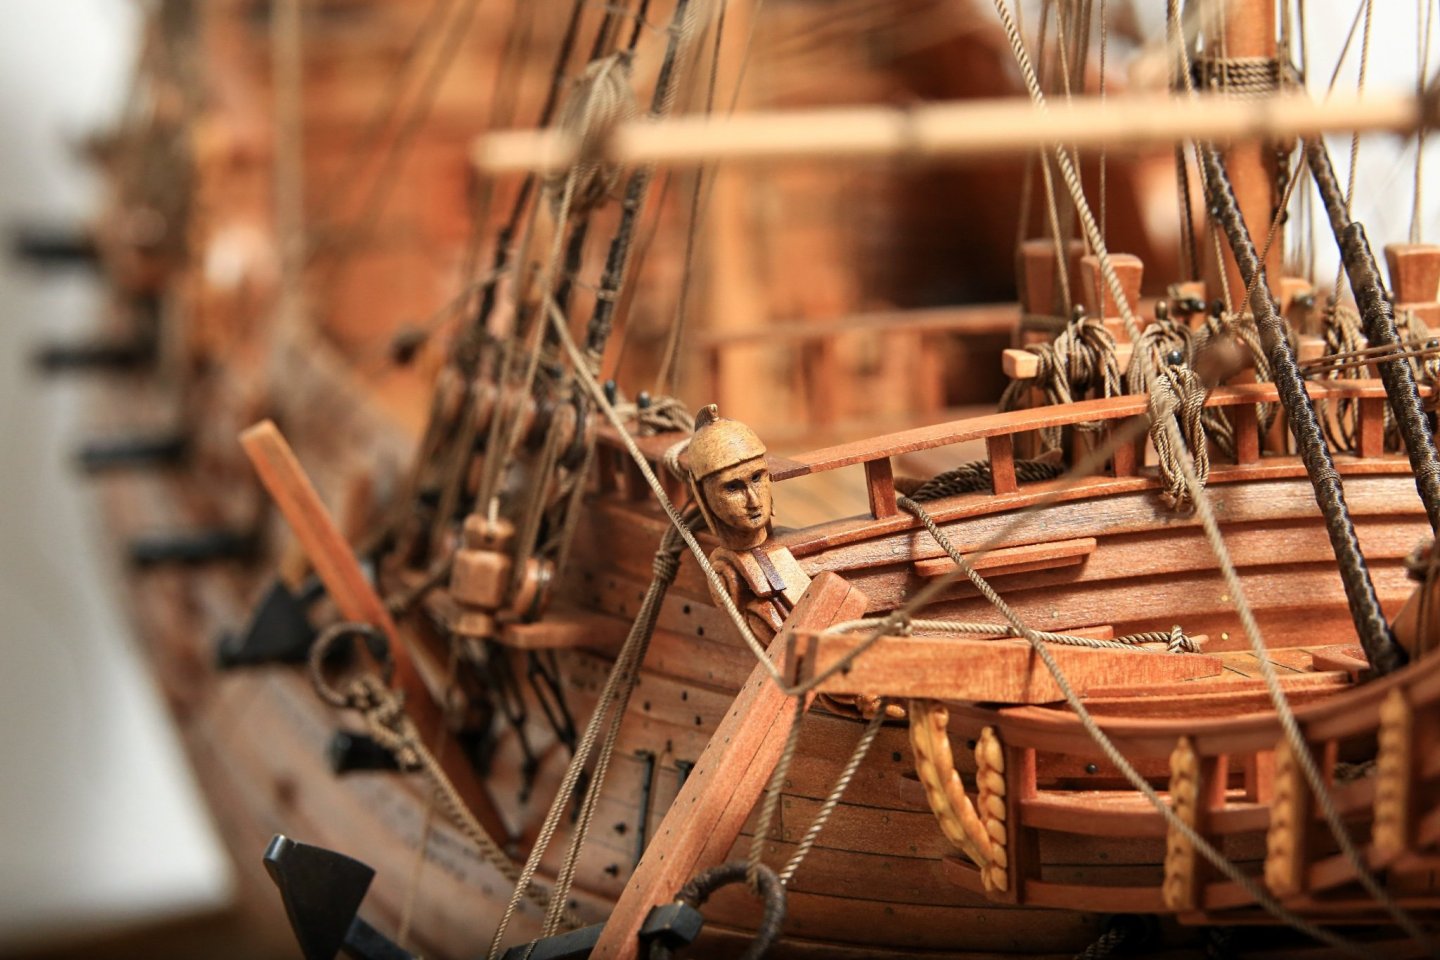
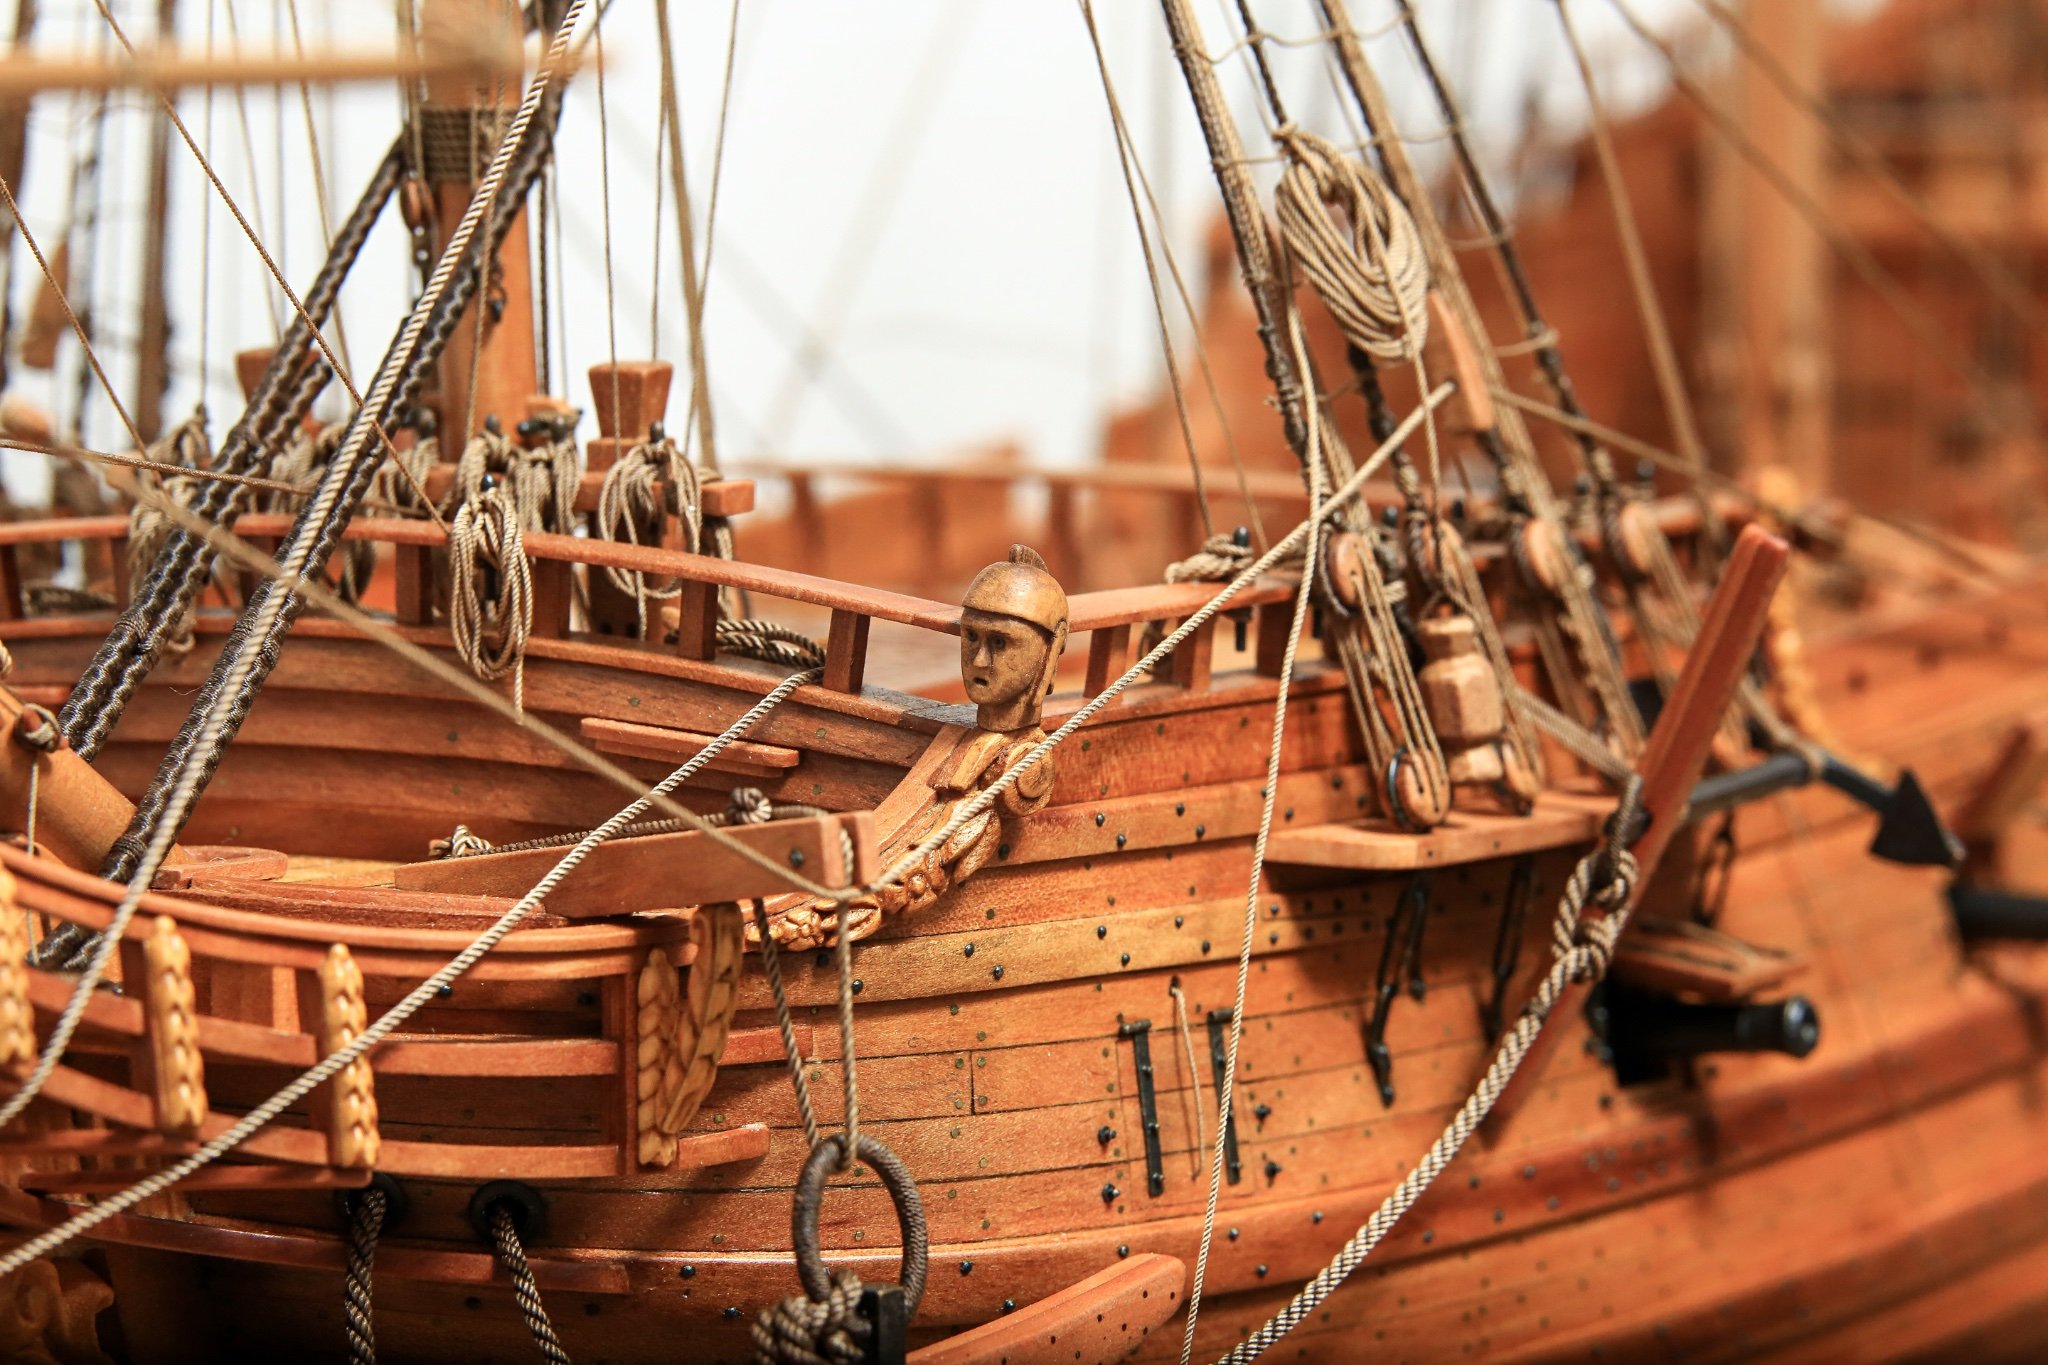
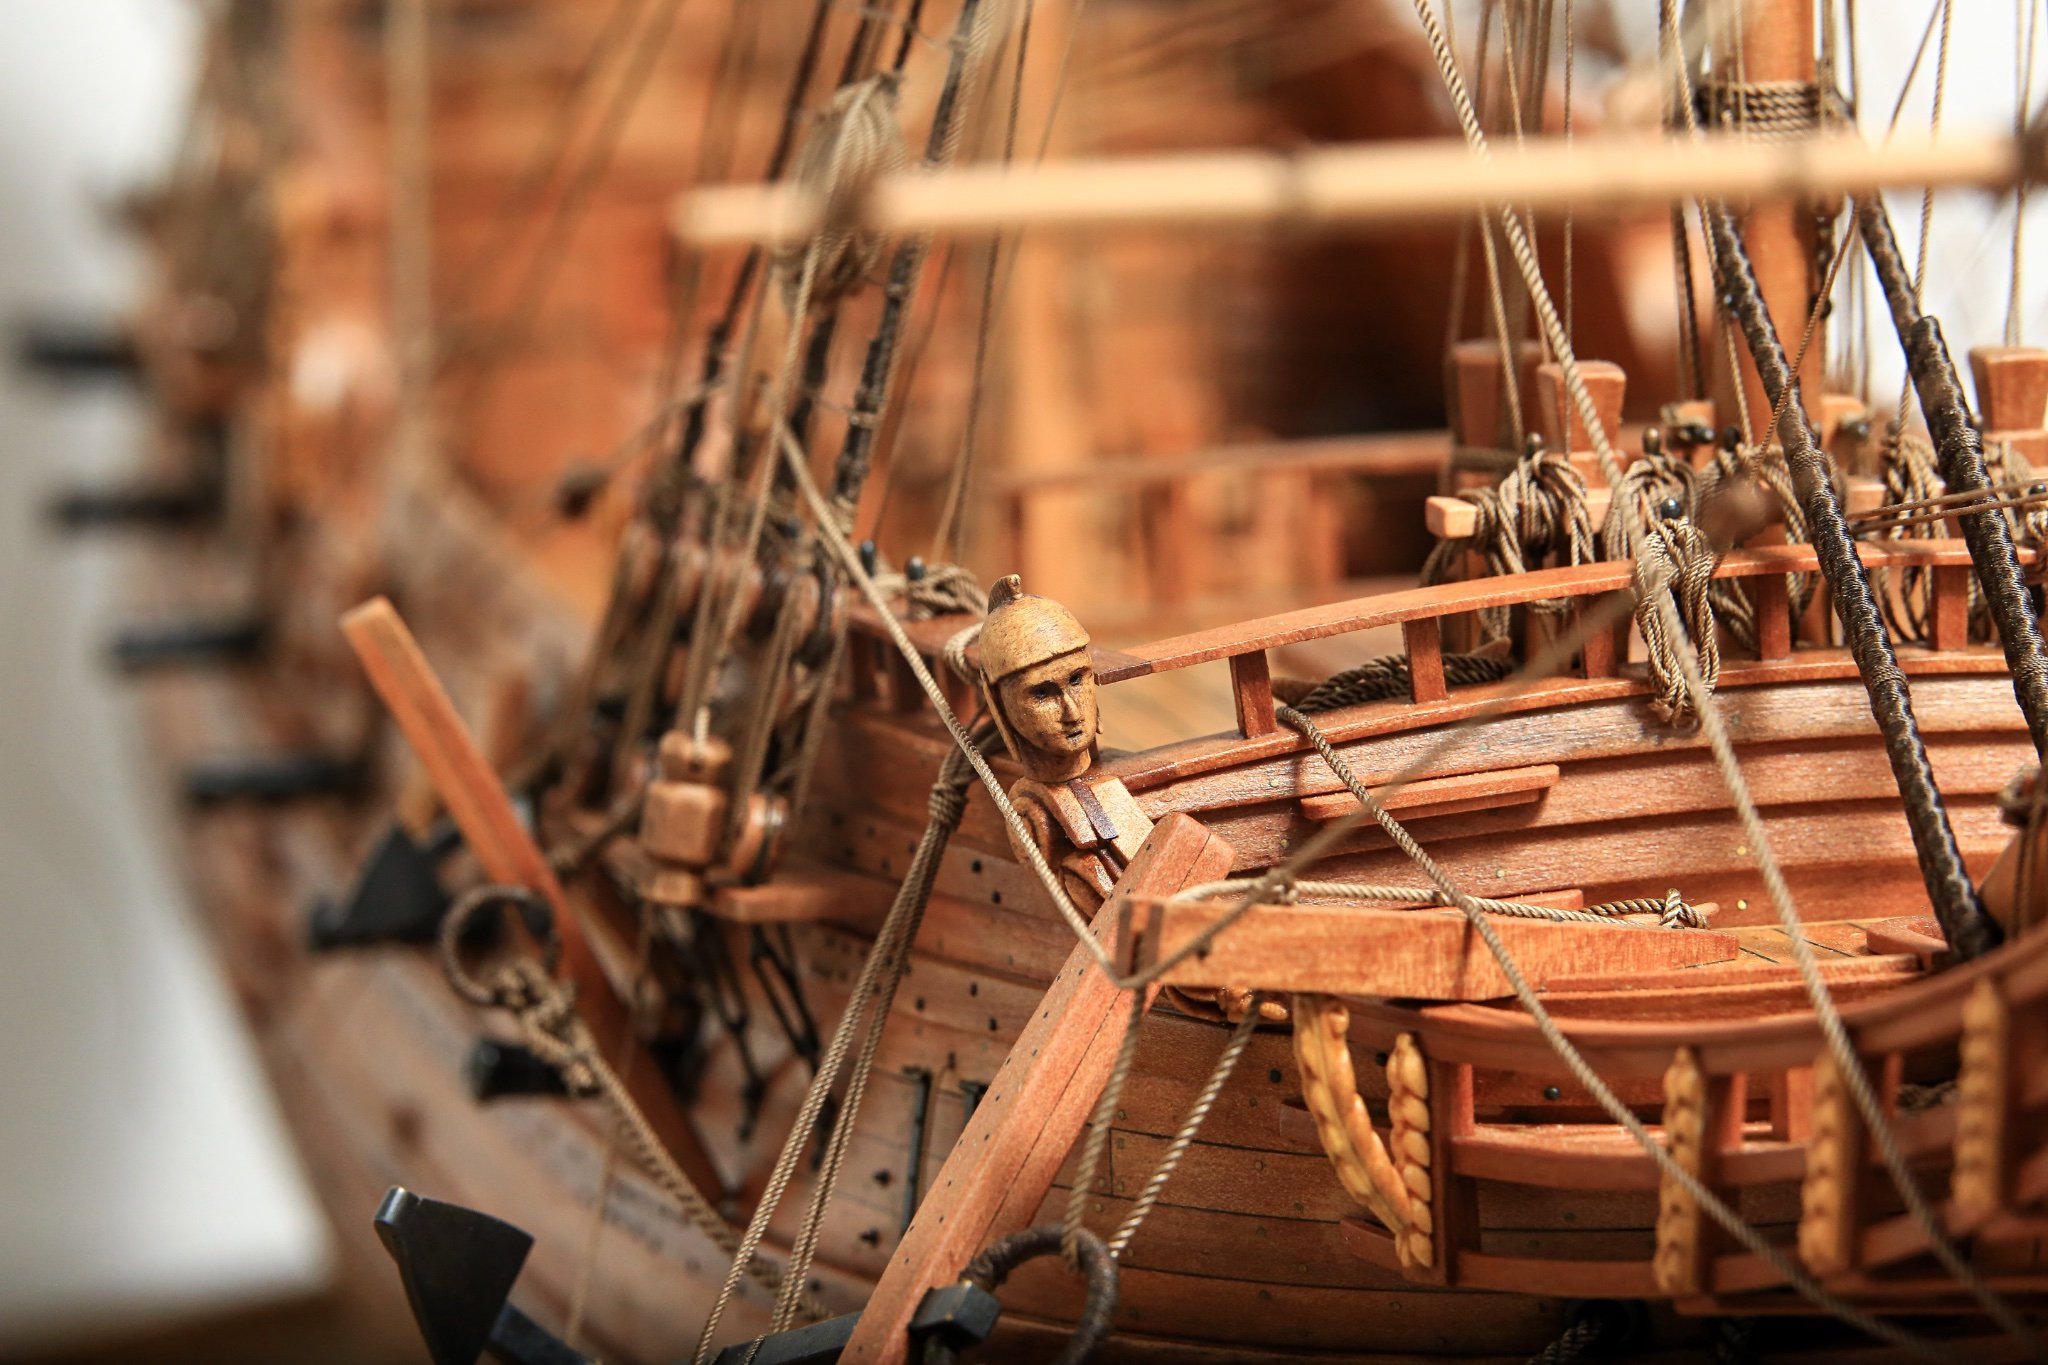
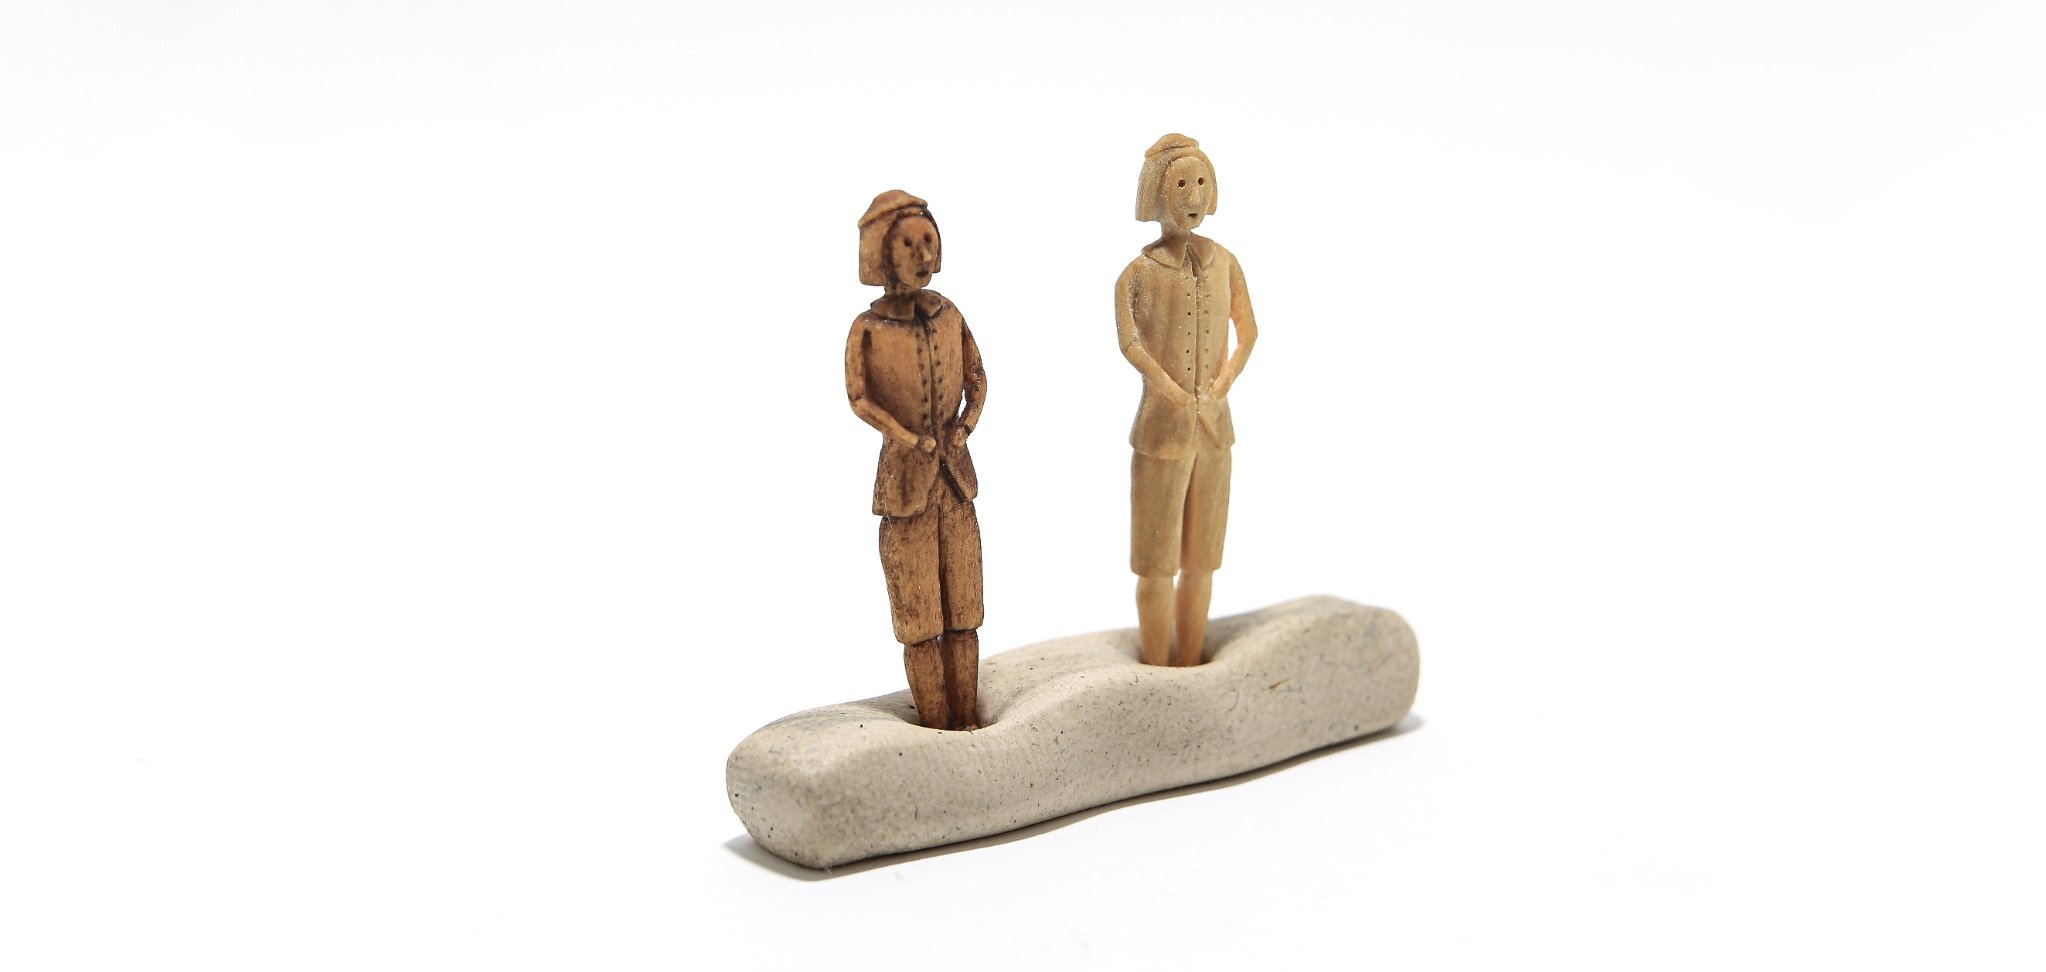
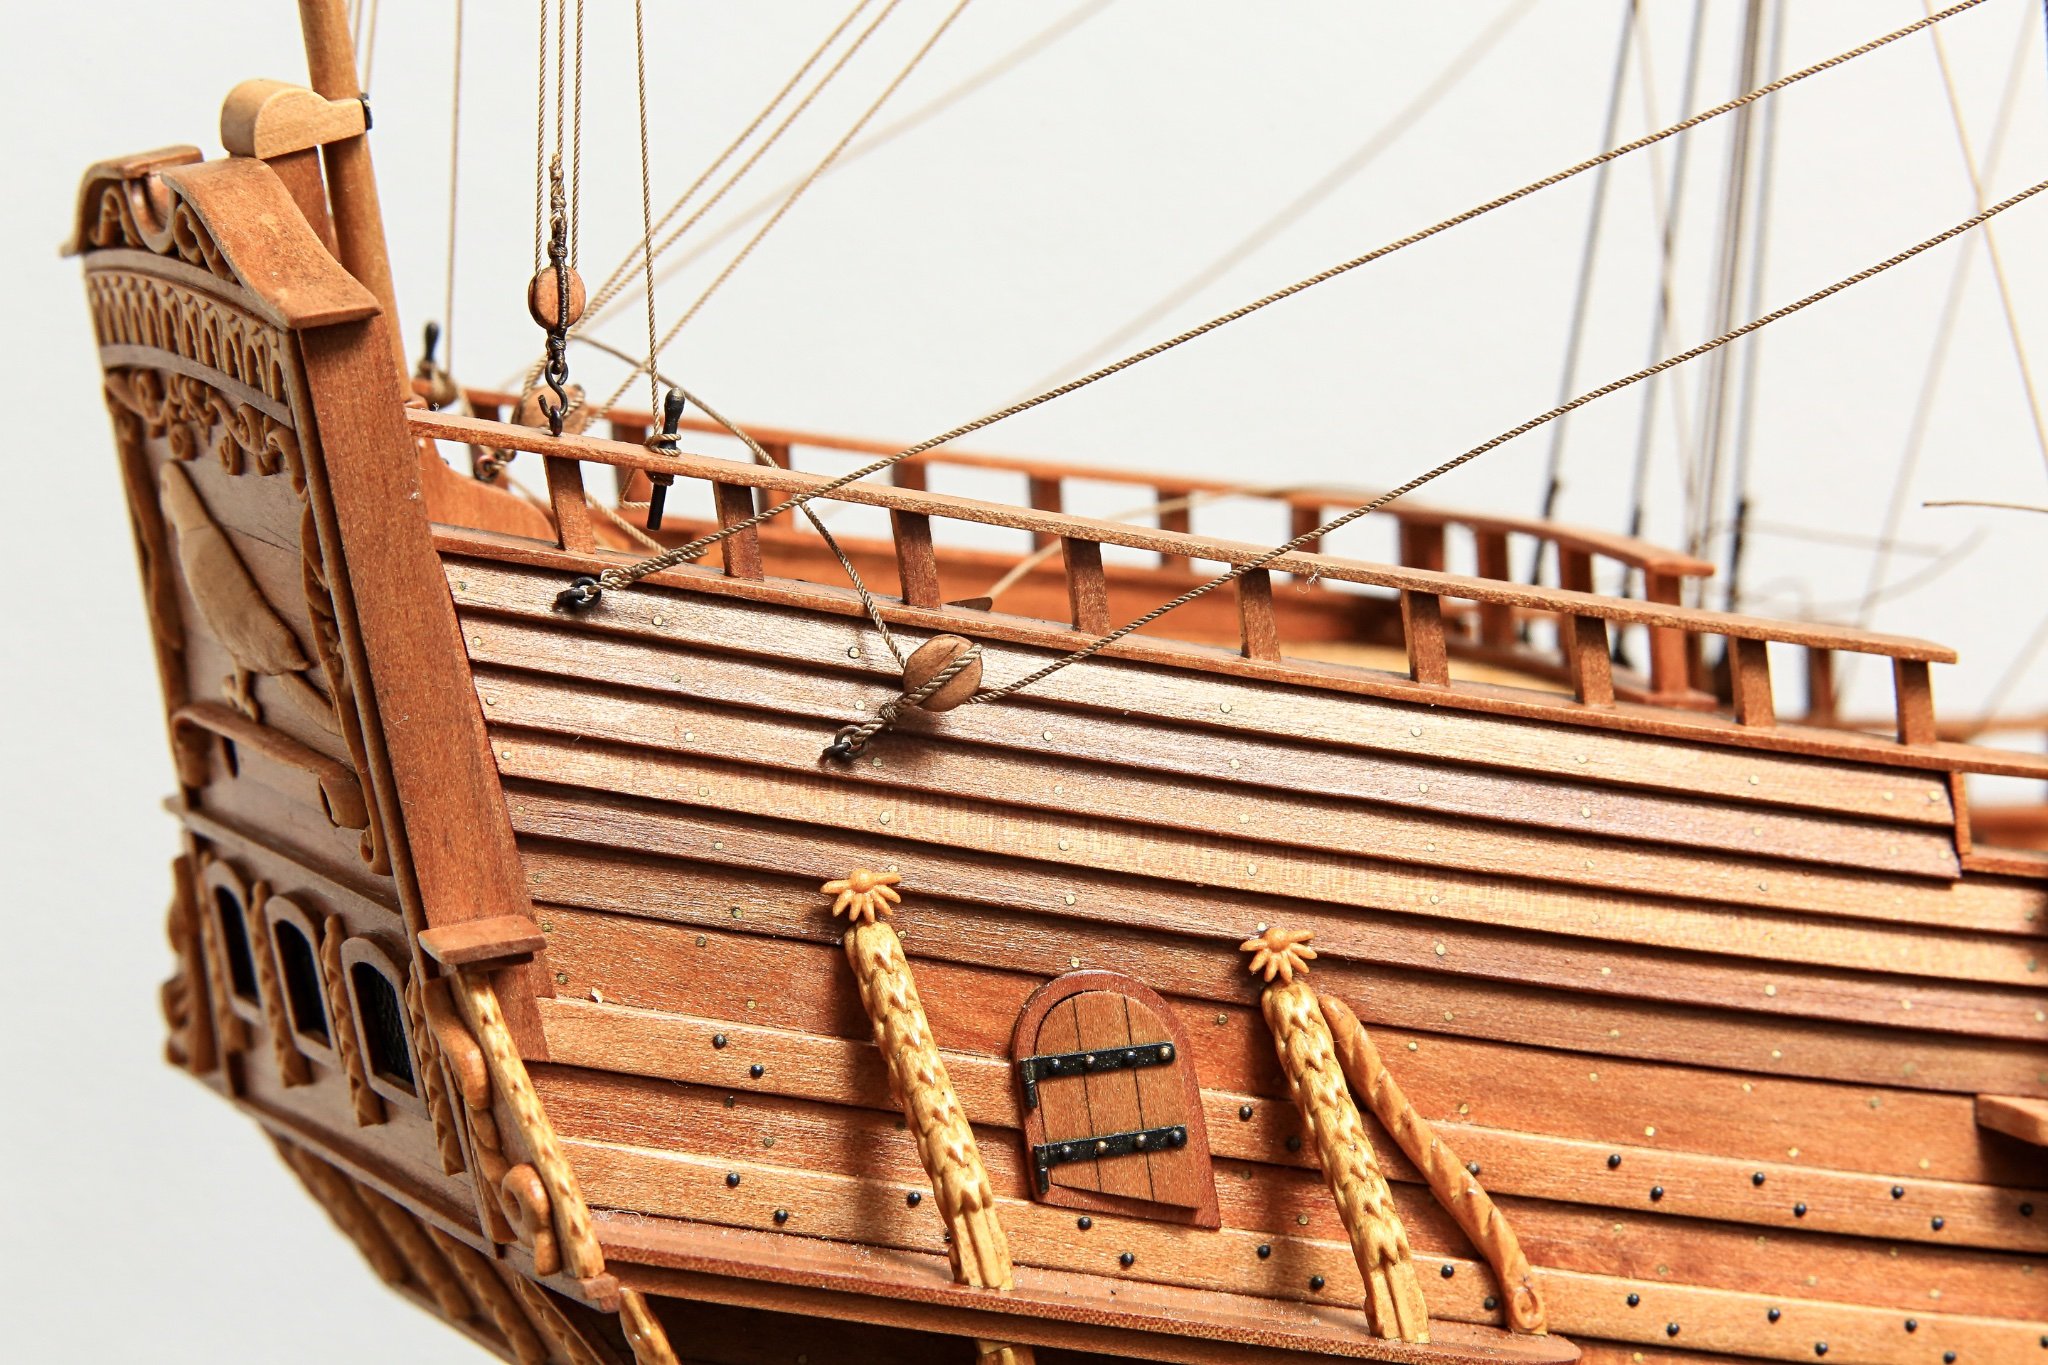
So I've manage to make last to pieces of decoration son this vessel 🥴
Two "soldier" heads... or whatever they should be 😆
Carvings made one again from Laotian boxwood.
Only last few details missing... and I will be able to call the build complete 😜


Cheers,
Matt
-
Hi All,
So I'm done with another painful step 🥴
It is no secret that I'm poor sculptor... but I had to carve these two little fellas to complete stern decorations.
Of course it could be better... but I think this is a peak of my skills at the moment 😆
That's why I'm trying to avoid vessels with carvings 😜
I still have to do two soldier heads for bow decoration.
Anyway... this is how it looks now.
Carving made out of Laotian boxwood.
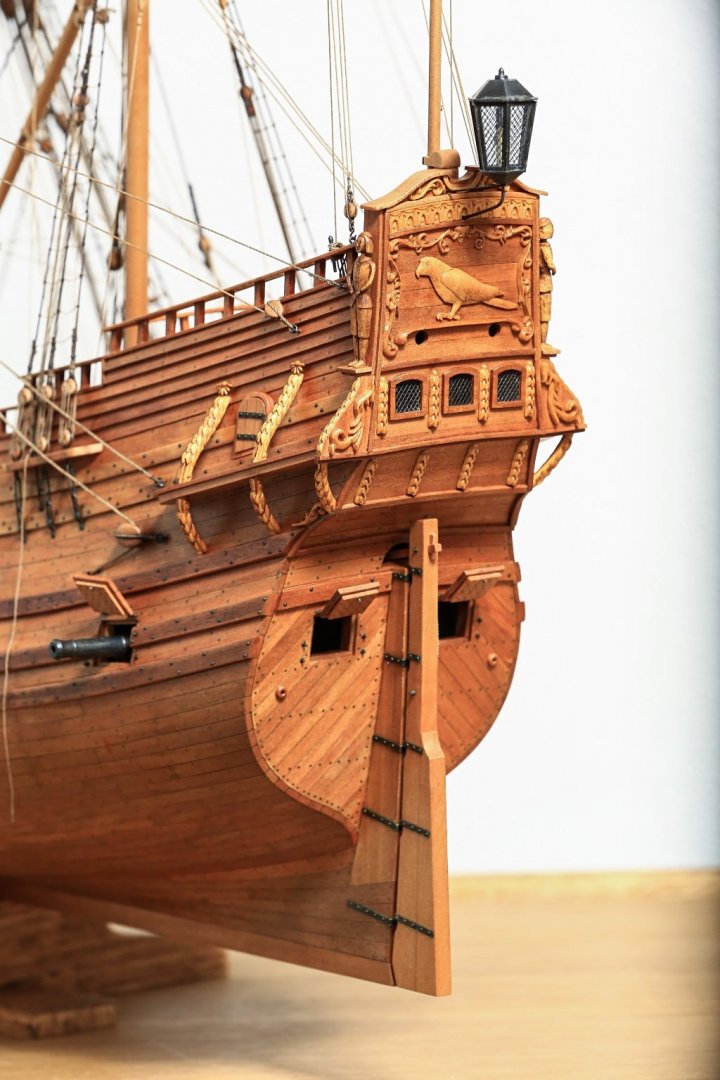
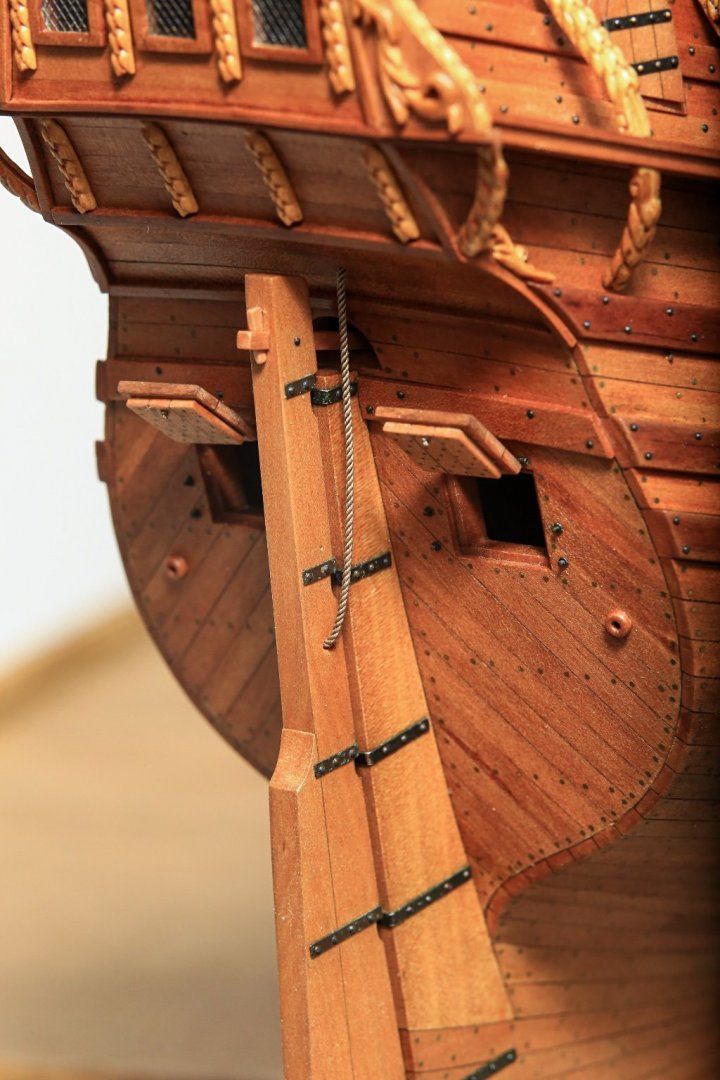
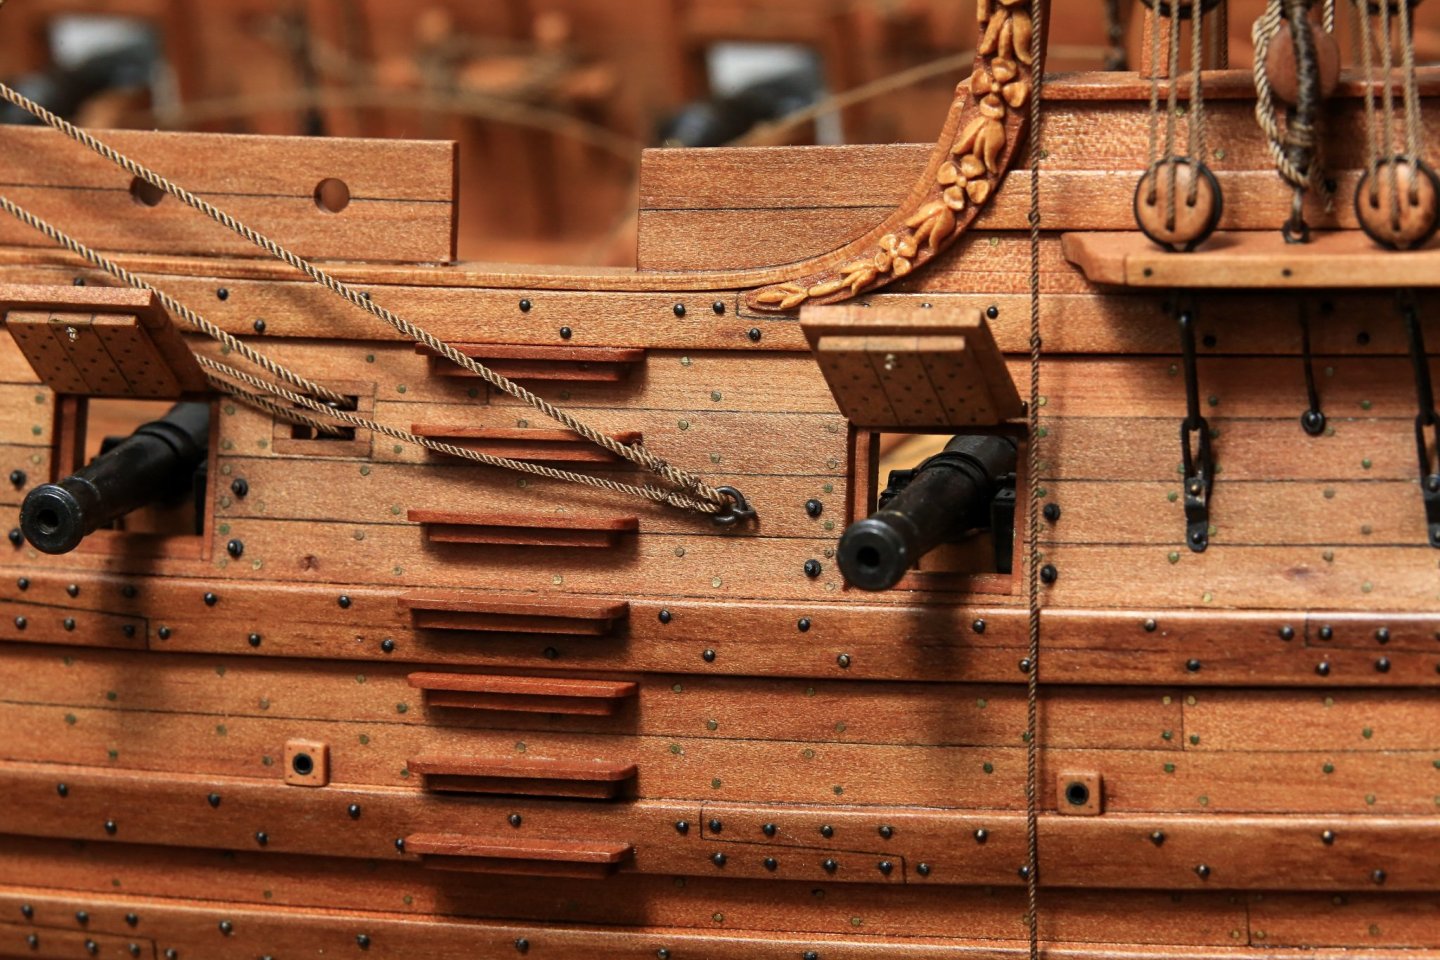
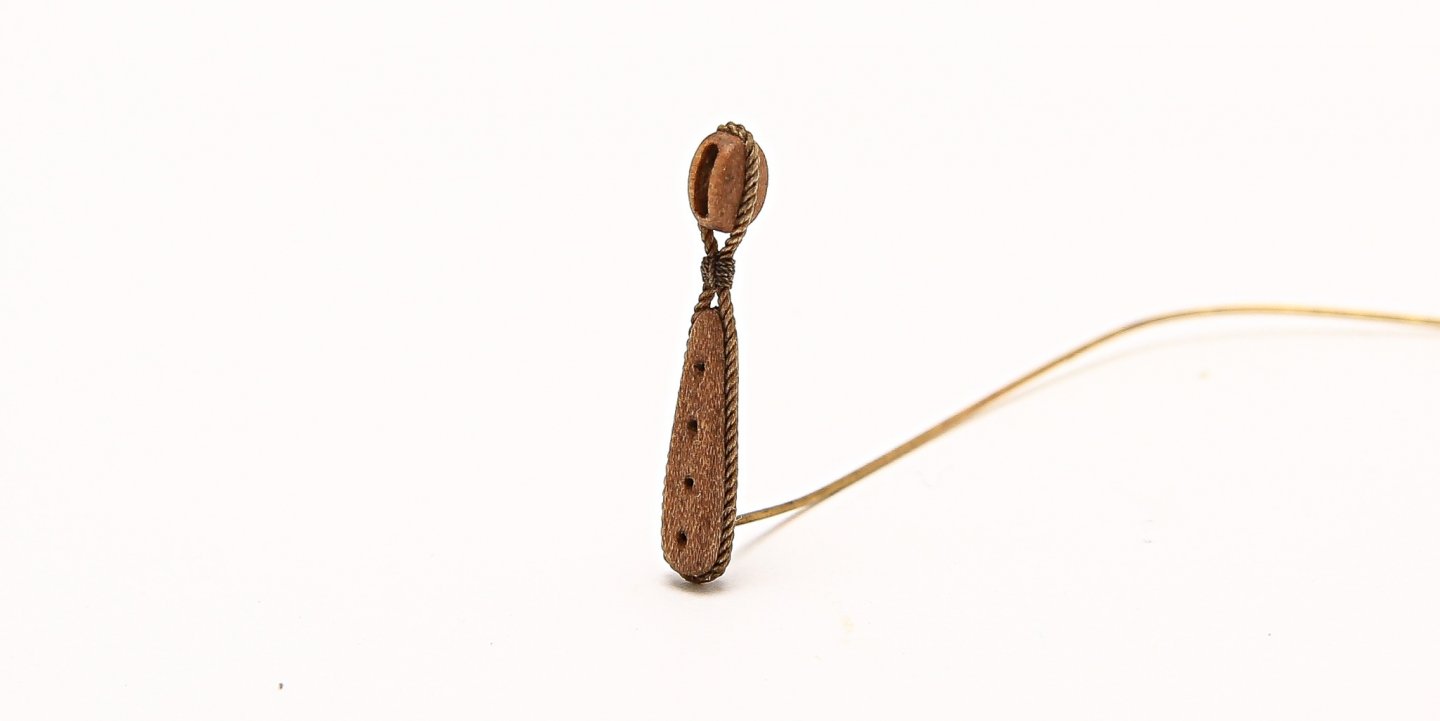
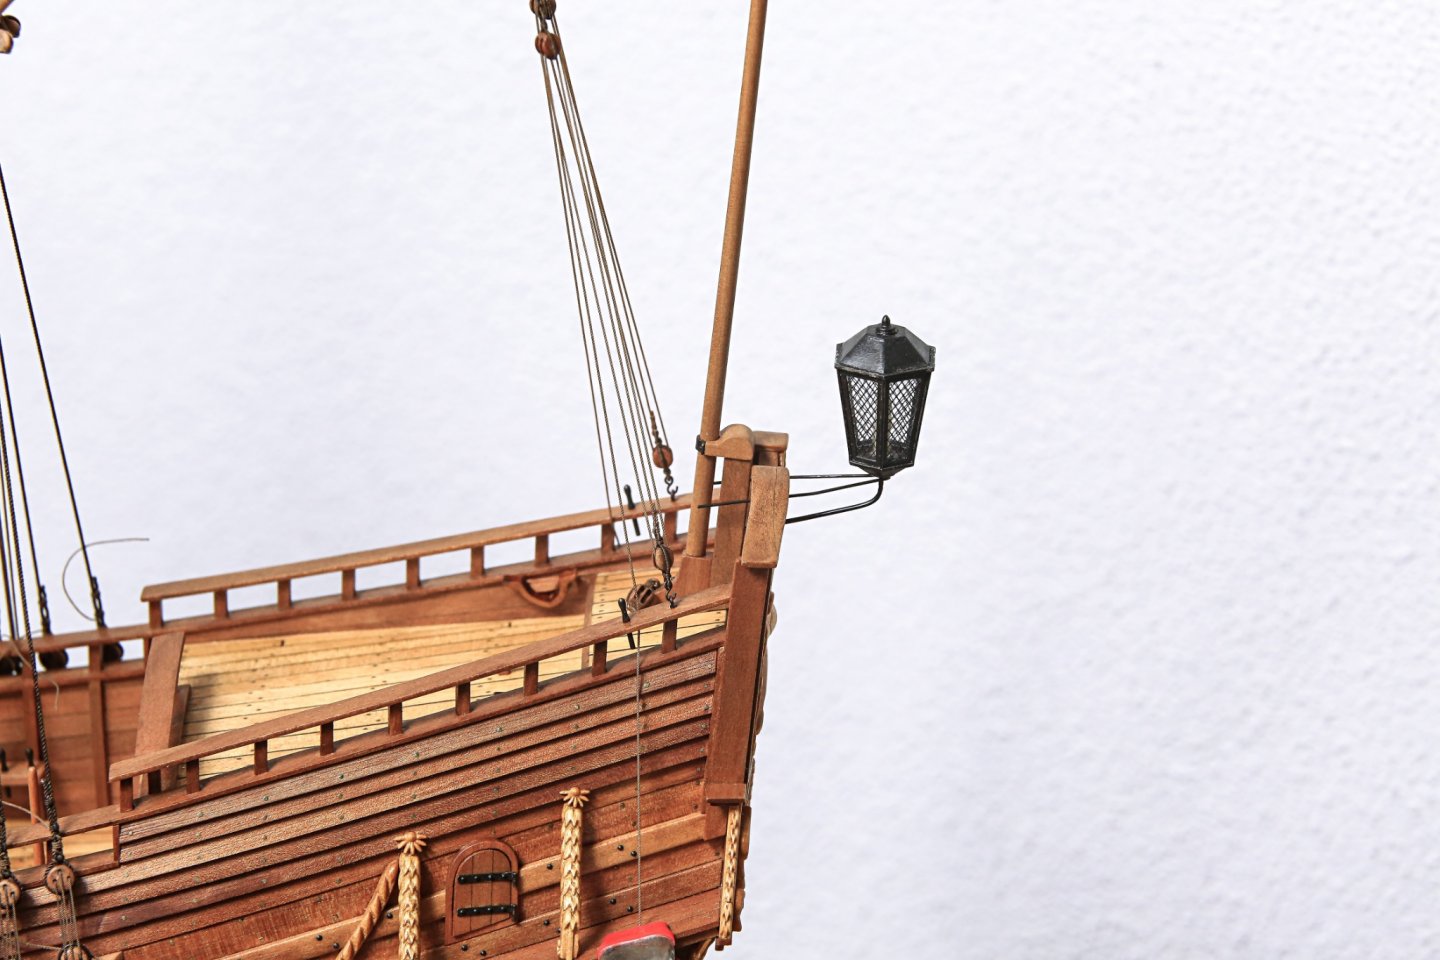
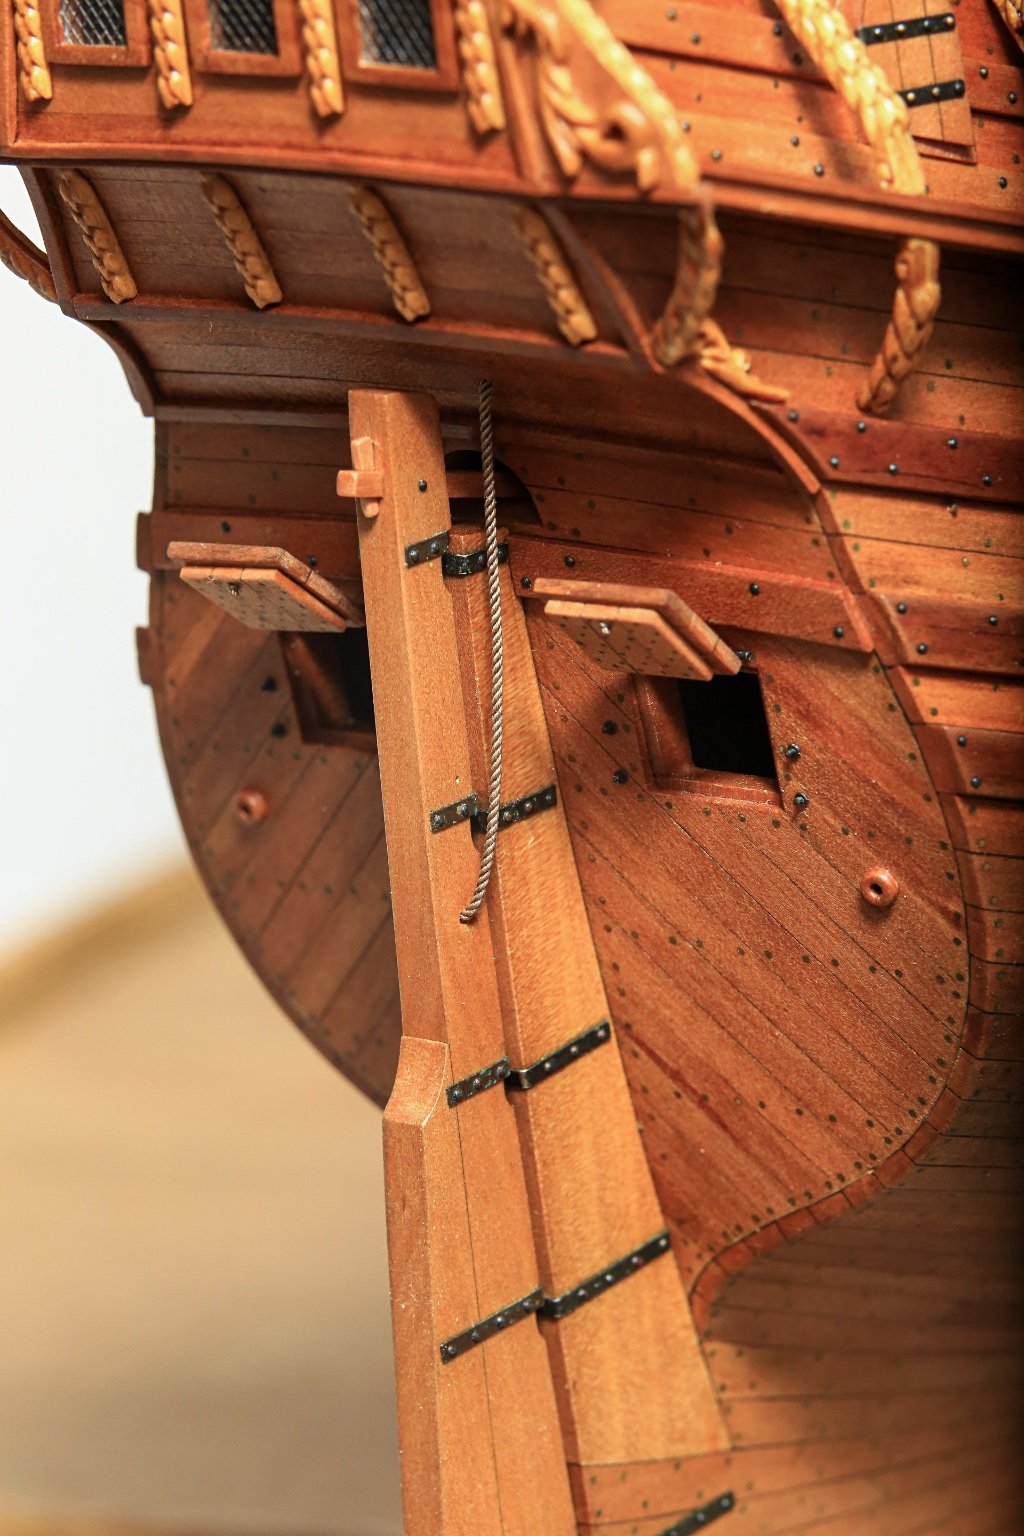
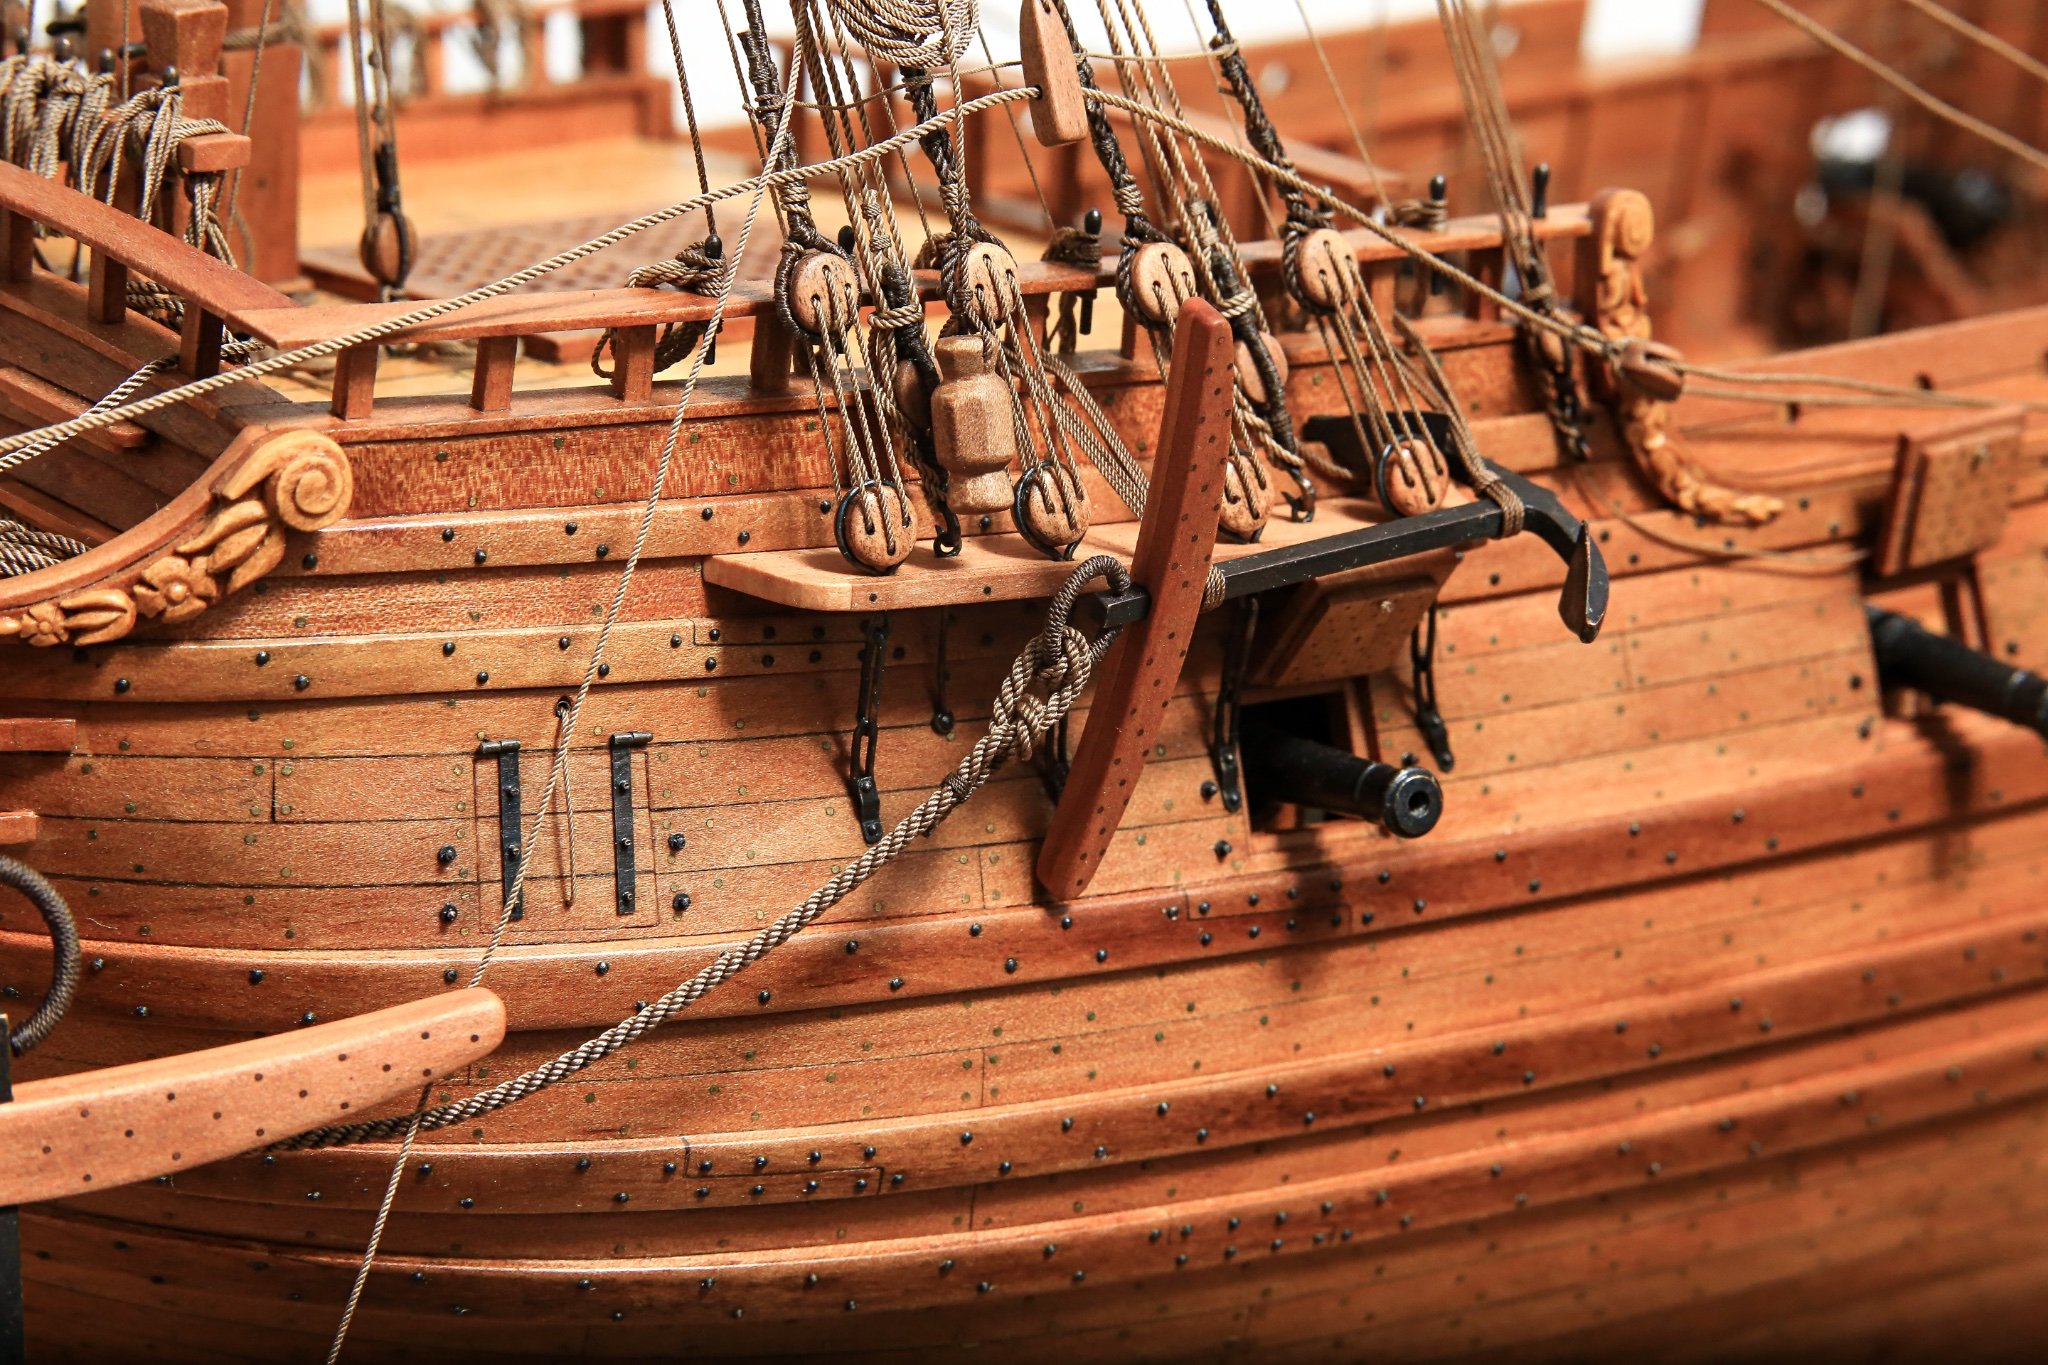
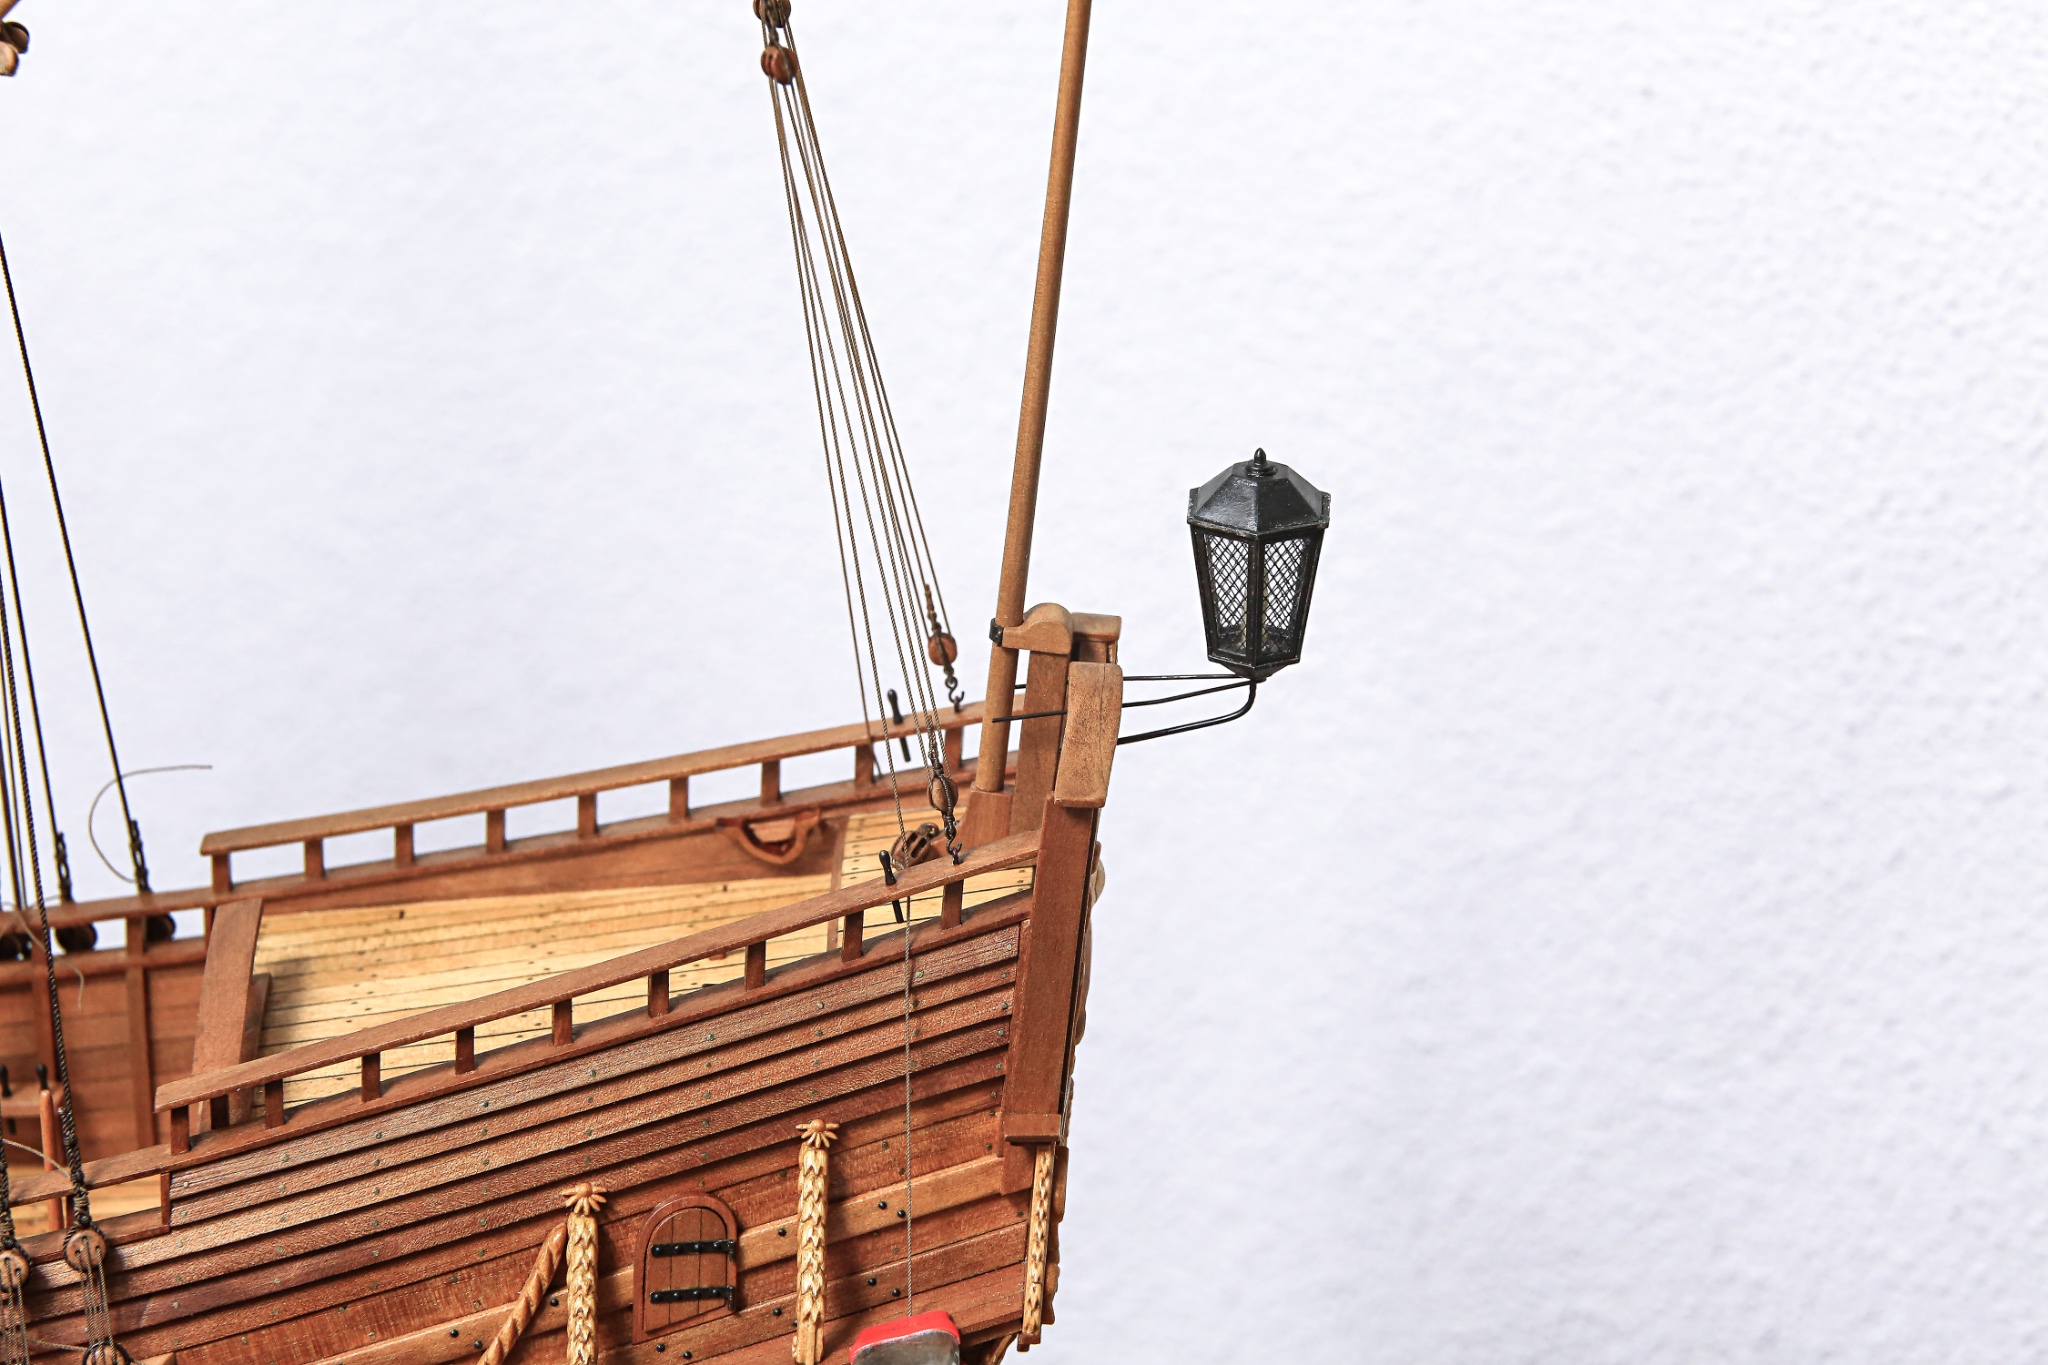
I've made also rudder pendant (preventer)
At that stage I could also install lantern.
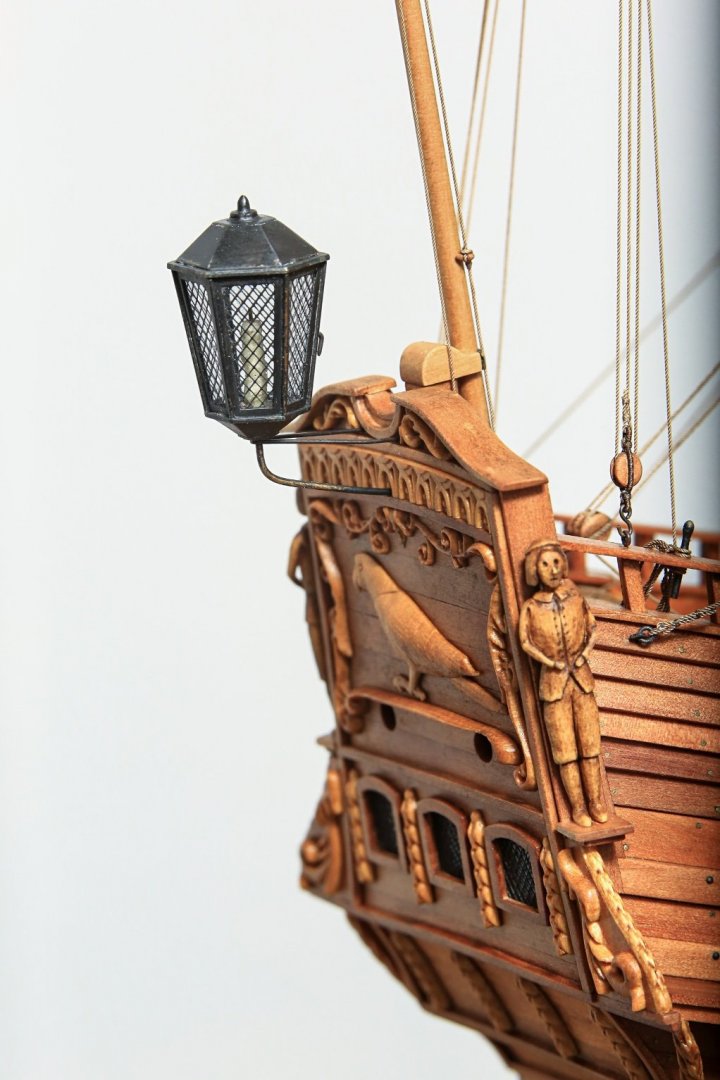
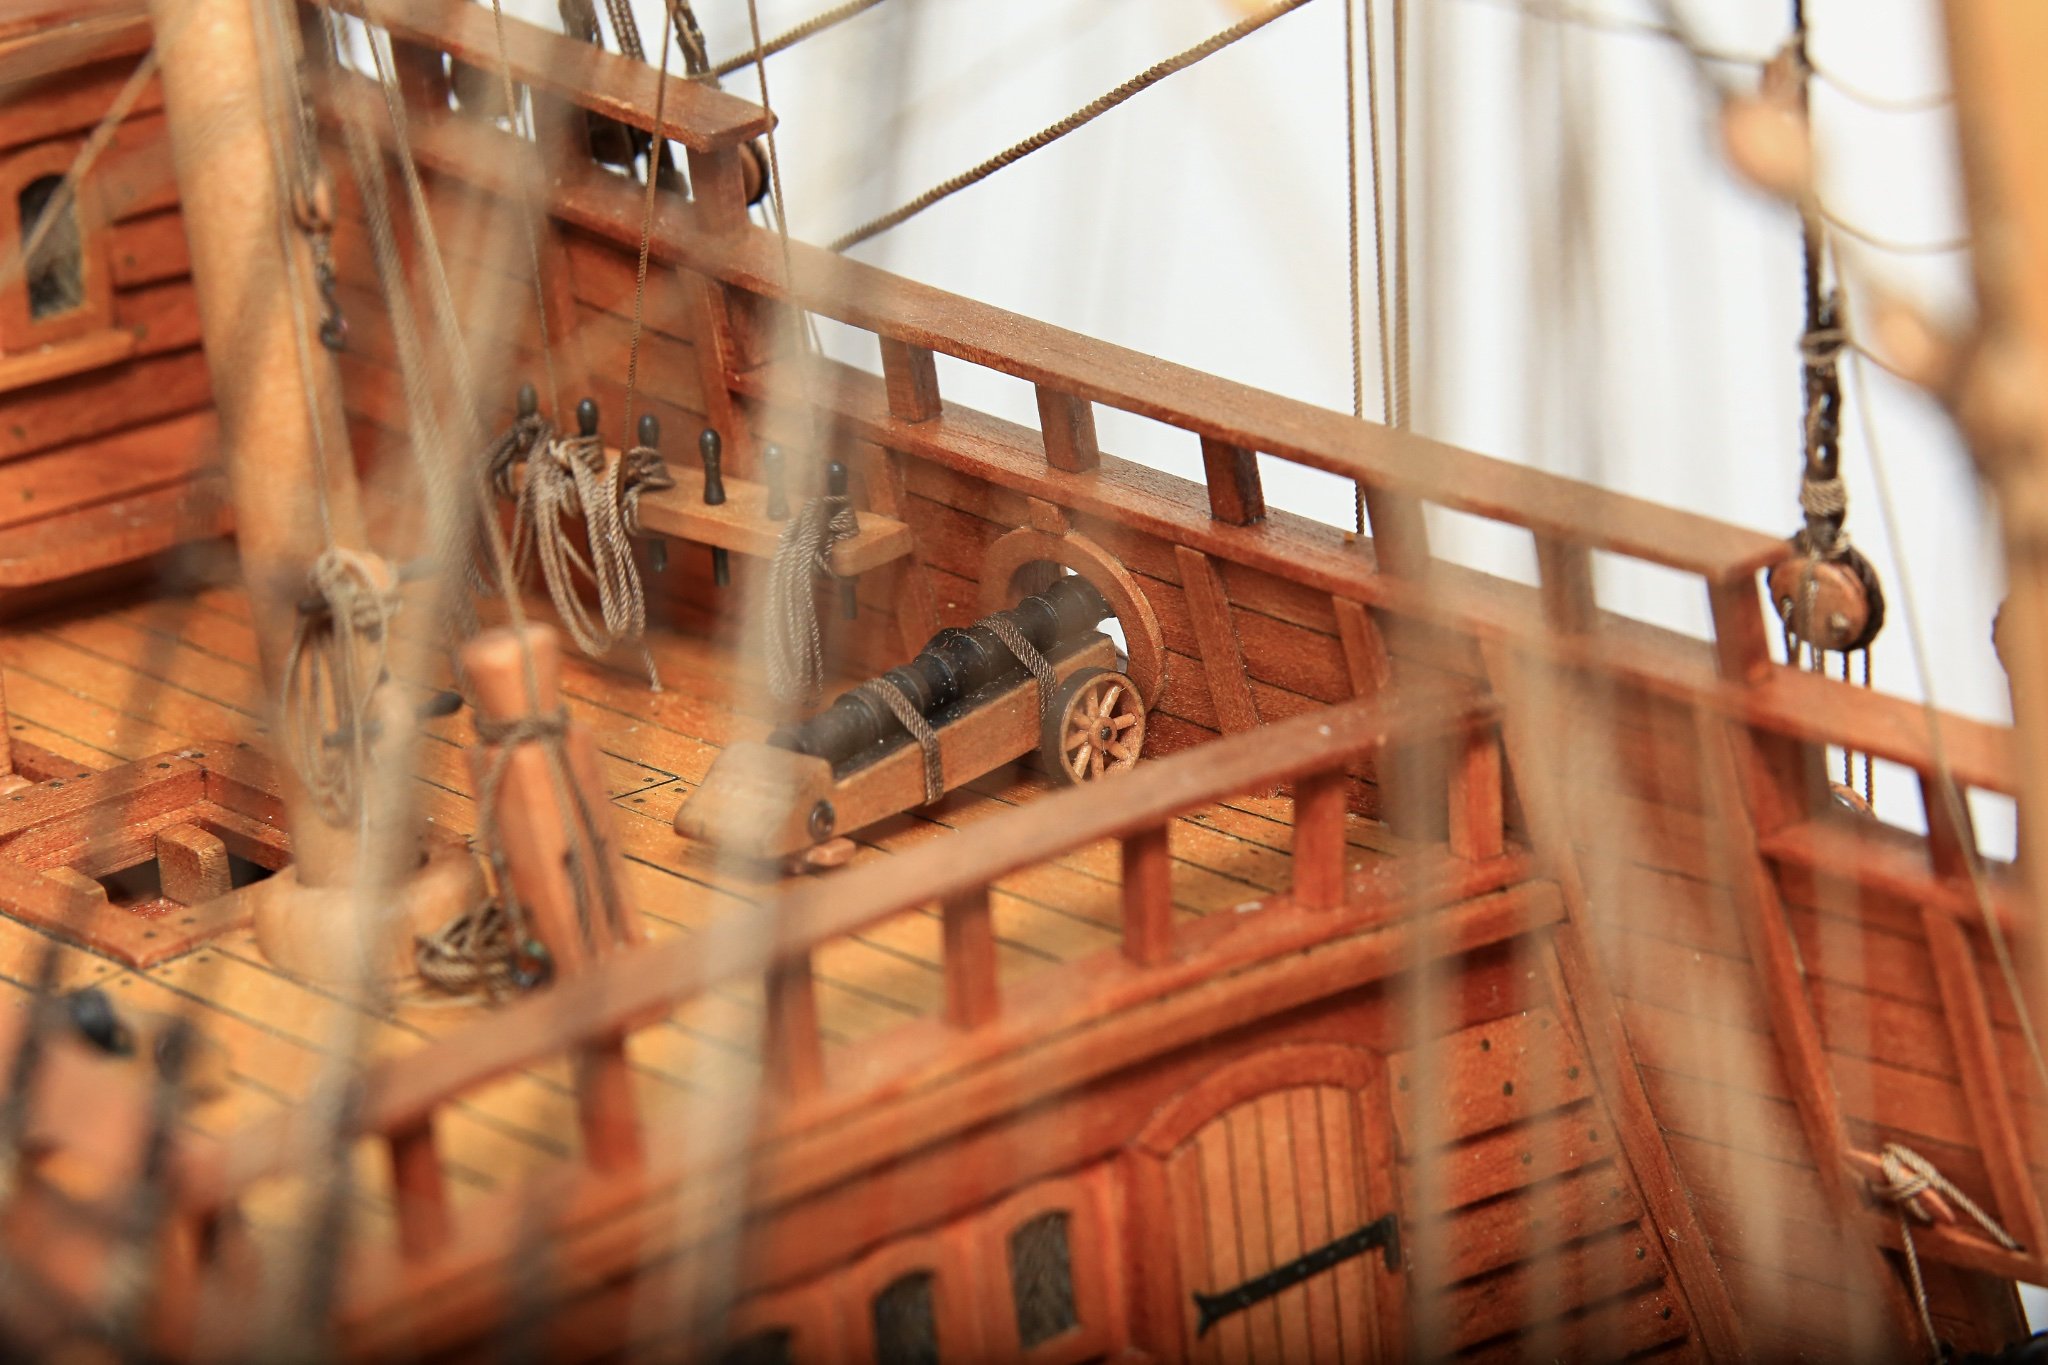
...also last pieces of armament - two bombards...

Cheers,
Matt
-
Just WOW 😳 🤯
Every time I look on your updates I'm more and more amazed of you precise work!
Looking forward for more
")
Cheers,
Matt
-
1 hour ago, amateur said:
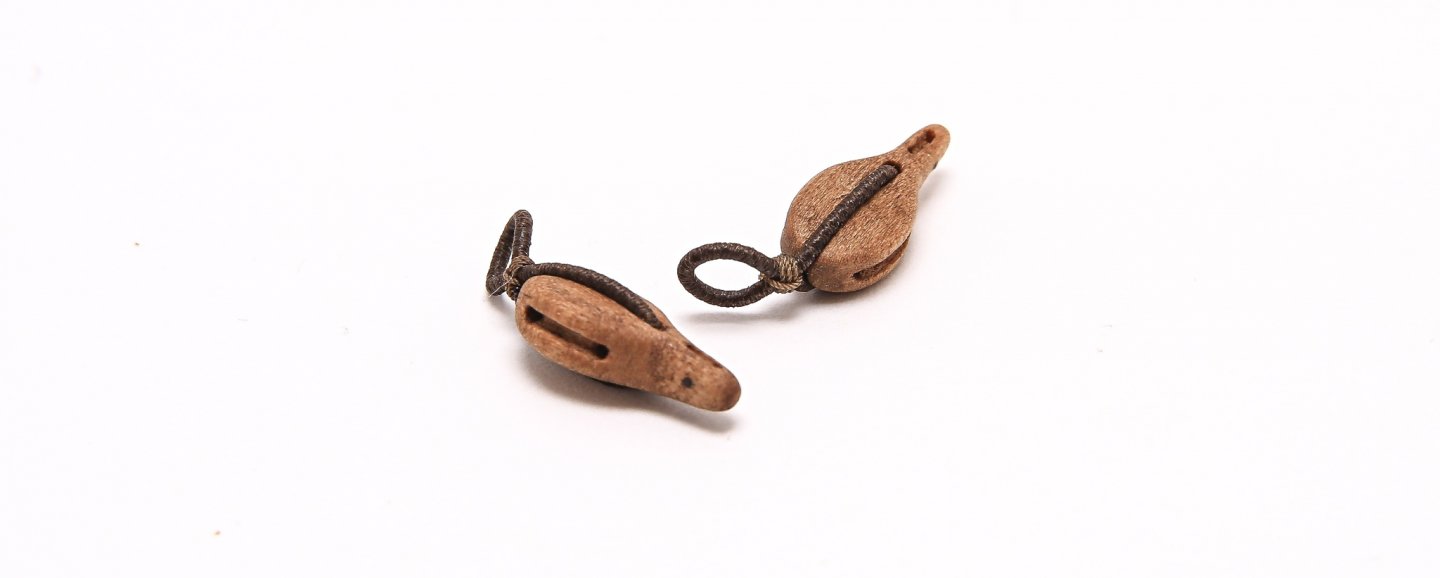
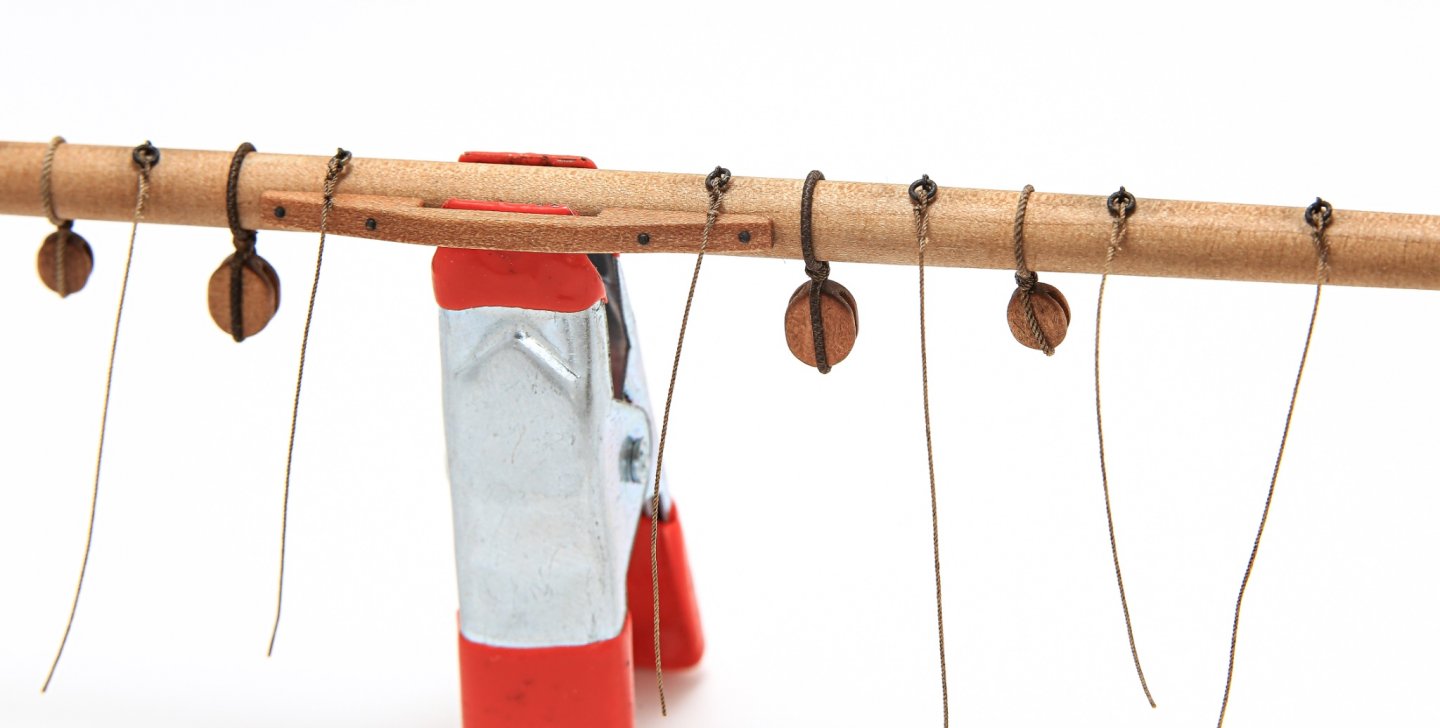
Btw this style of 'simple buoys' is also found on the socalled Hohenzollern Model of a Dutch two-decker, i.e. a rather large ship.
Jan,
That's right... I've seen it too.
This was another reason, why I choose this style of the buoy.
However, this is another subject, where is really difficult to establish fact, which one is correct...
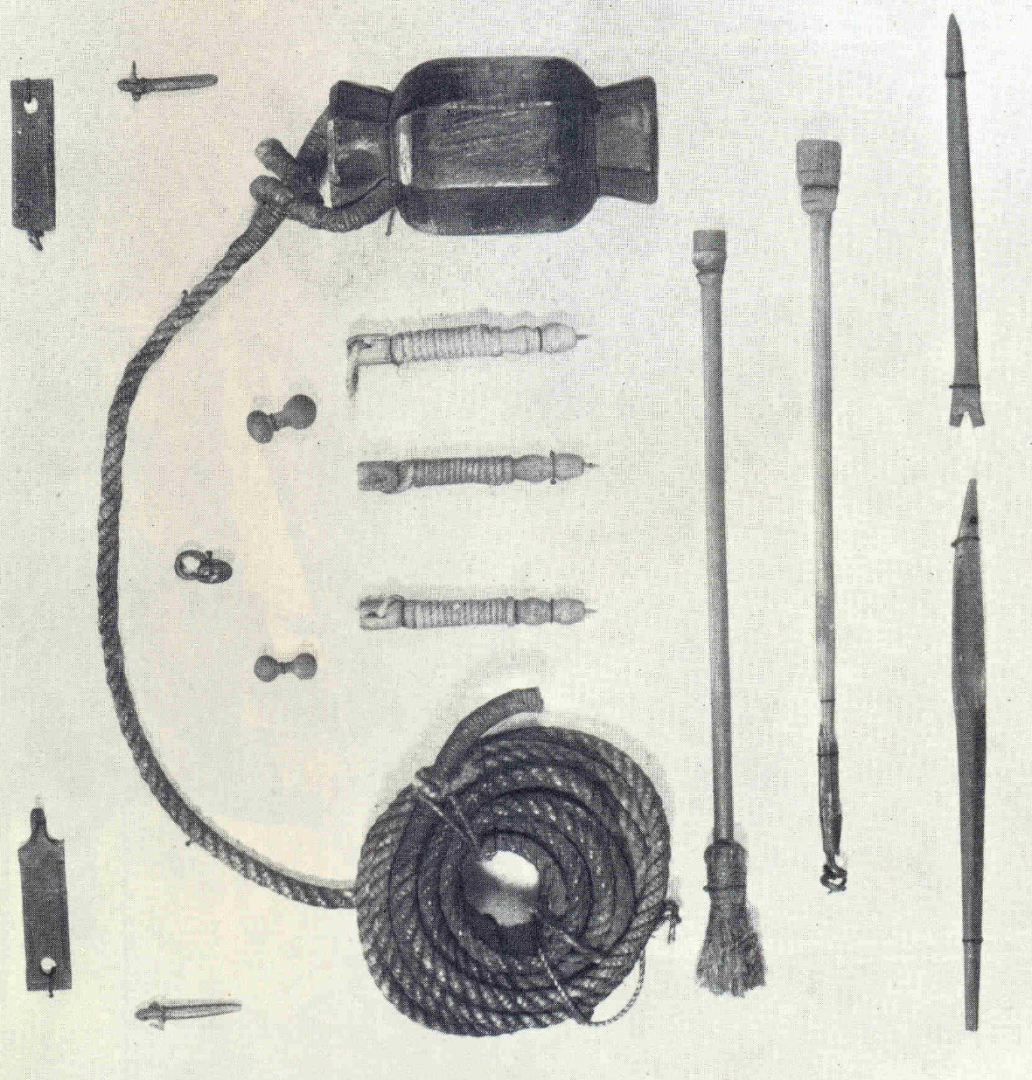
It's really easy to find at least few different kinds or looks for the anchor buoys...
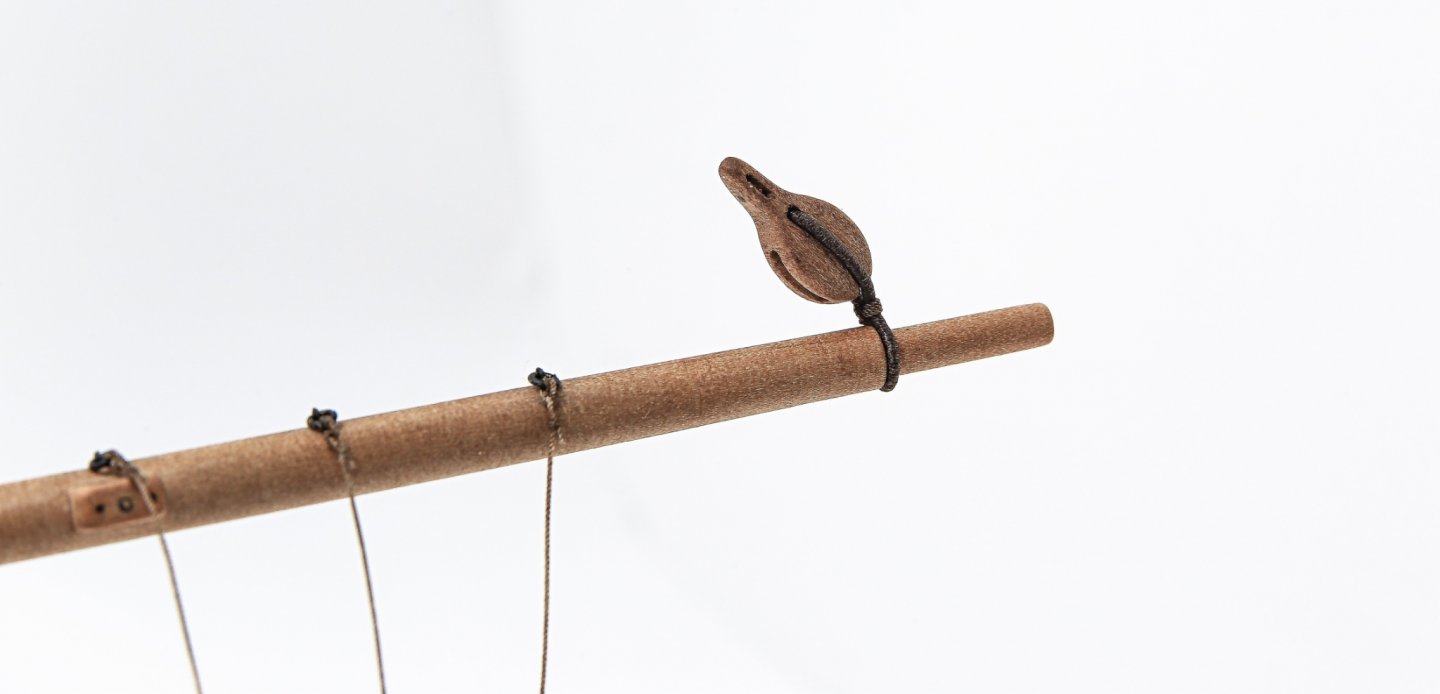
I was also thinking to make buoys like the buoy in right upper corner... but I bet on above type. Is it right? No idea... but I choose to believe it 😜
- mtaylor, GrandpaPhil and Ondras71
-
 3
3
-
Hi,
Thank you Bob!
Thank you Jan... hopefully you find these details interesting and you won't find many mistakes 😏
Regarding books or sources... as Jan already mentioned I'm using few books or sources.
It's impossible to find any source describing in details model, which I'm building... it's just simple pinnace.
So I have to support myself with some other publications regarding Dutch ship building "school" and others.
G.C. Dik - De Zeven Provinciën
O. Blom - De Zeven Provinciën - drawing above with anchor buoy - http://www.otteblom.nl/tekeningen/
A. J. Hoving - Ships of Abel Tasman
A. J. Hoving - Nicolaes Witsen and Shipbuilding in the Dutch Golden Age
J. Harland - Seamanship in the Age of Sail
R.C. Anderson - The Rigging of the Ships in the Days of Spritsail Topmast, 1600-1720
H.M. Kamer - Het VOC - Retourschipeen Panorama van de 17de- en 18de-eeuwse Nederlandse Scheepsbouw
H. Ketting - Prins Willem
Willem Van de Velde paintings
...and many more...
Cheers,
Matt
-
Hi,
Thank you All for many likes!!! 🍻
Thank you @ccoyle Chris for such a nice and generous comment
really appreciate it... 🍻 gives me a lot of motivation to not mess it up 🙃
@Dziadeczek Tomek I have similar tools... even with them in such a tight spot it was a challenge to make all the loops and hang coils... but it's done... Thanks God 😆 Thank you for your comment 🍻
@Backer Thank you Patrick! 🍻 Really appreciate your comment
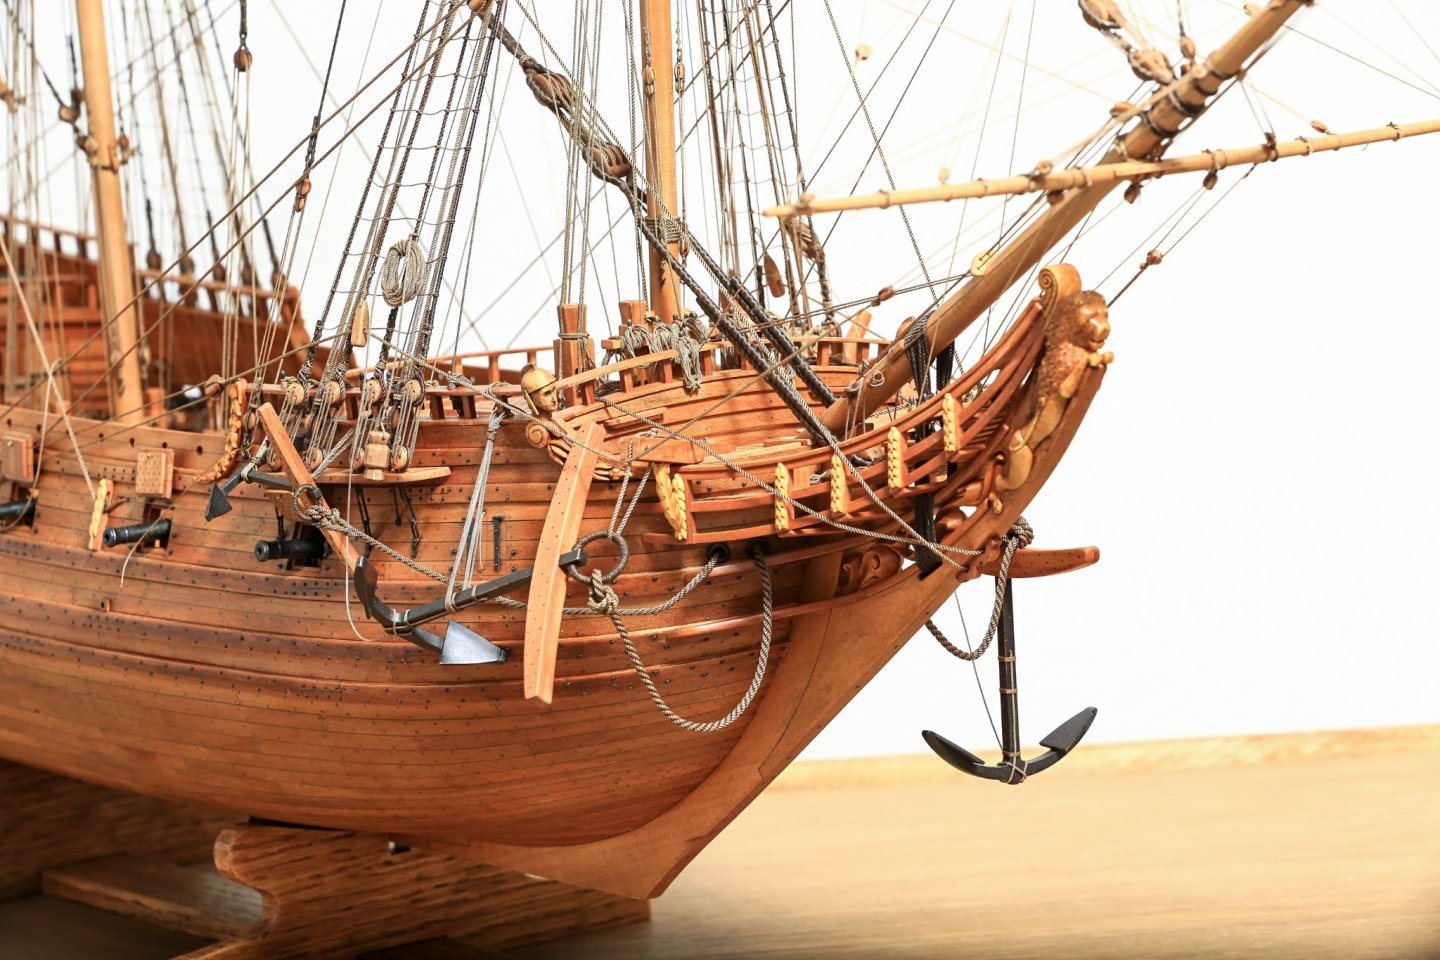
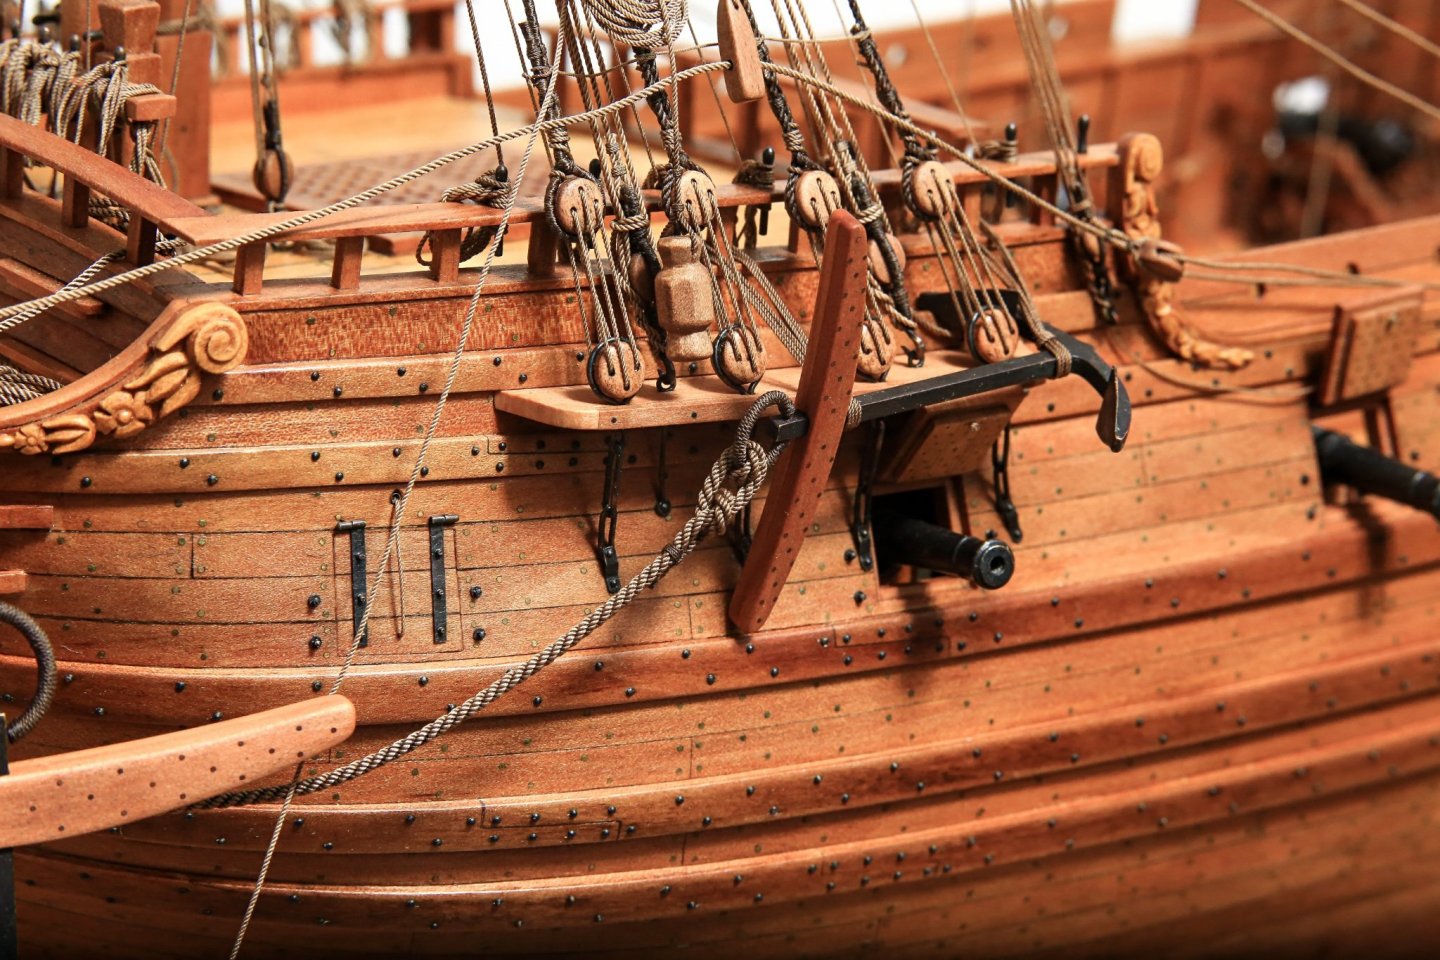
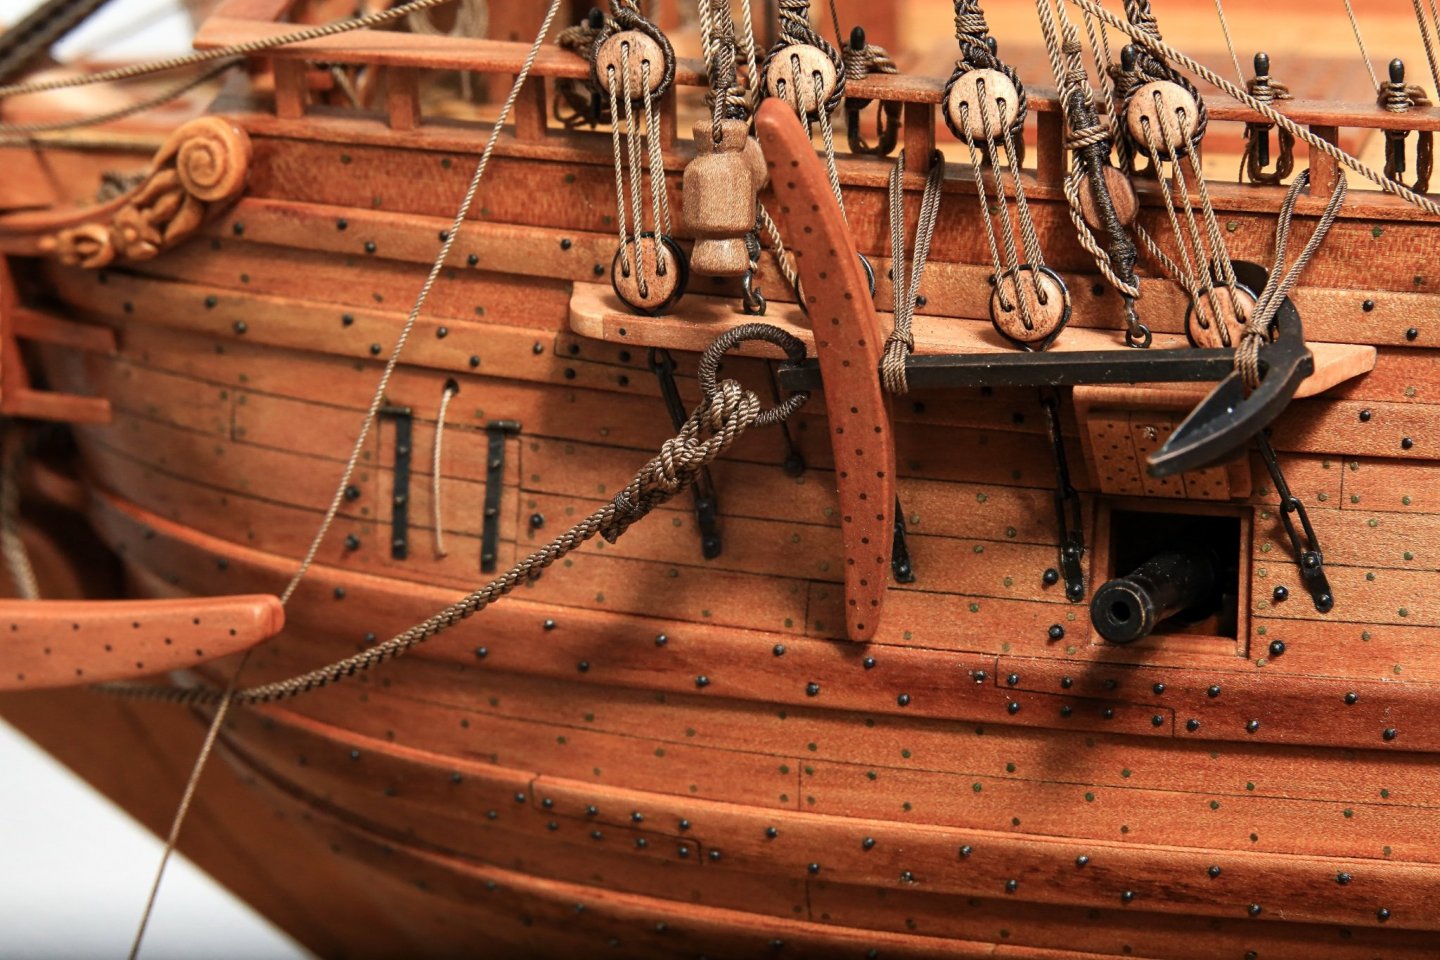
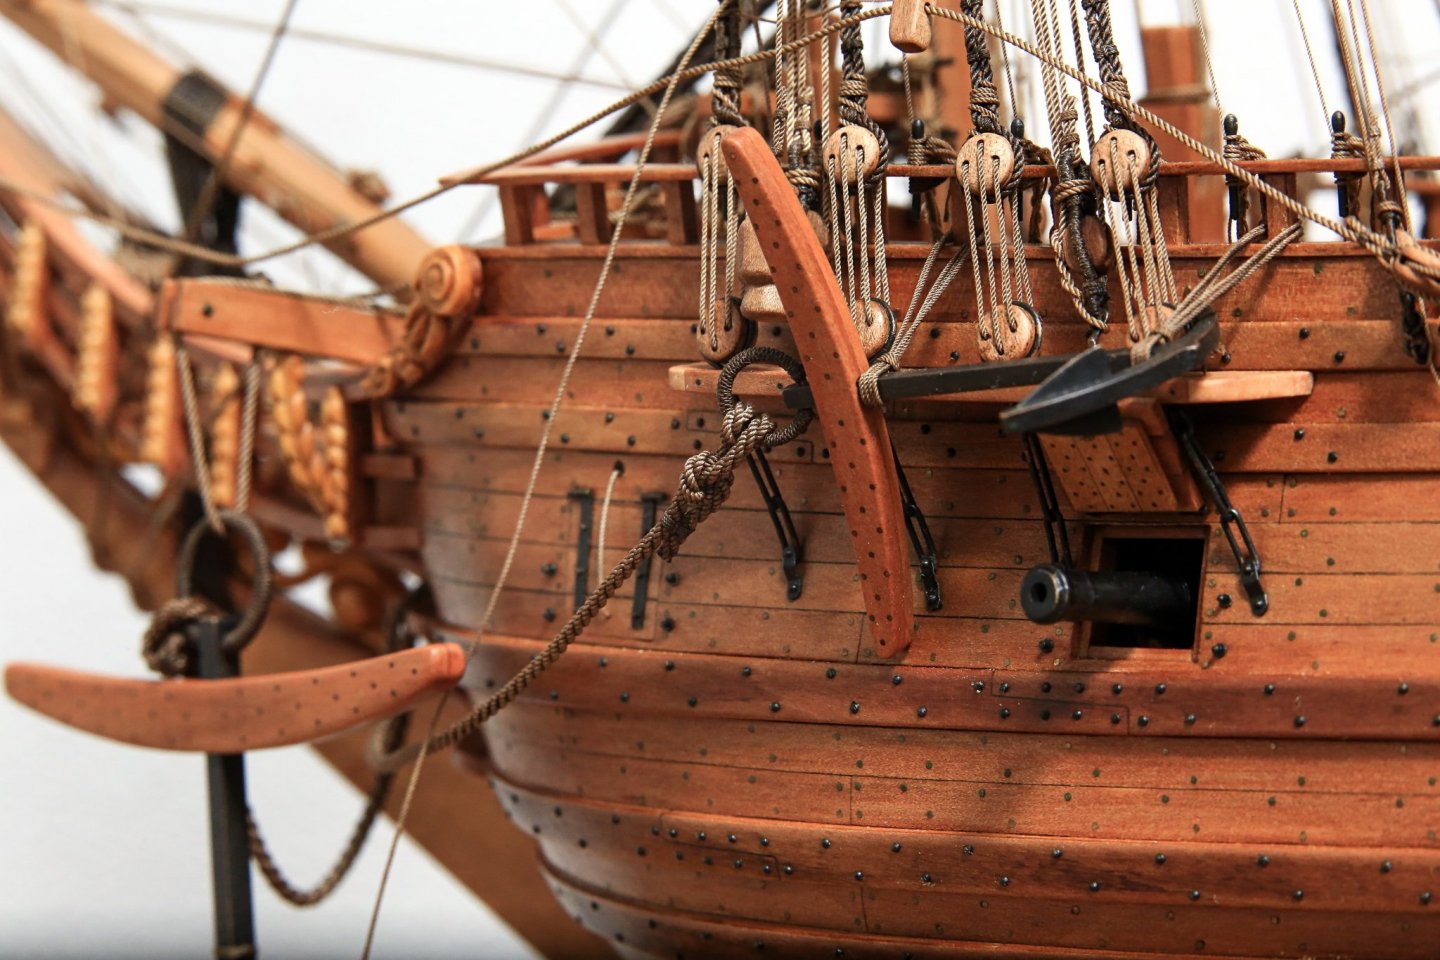
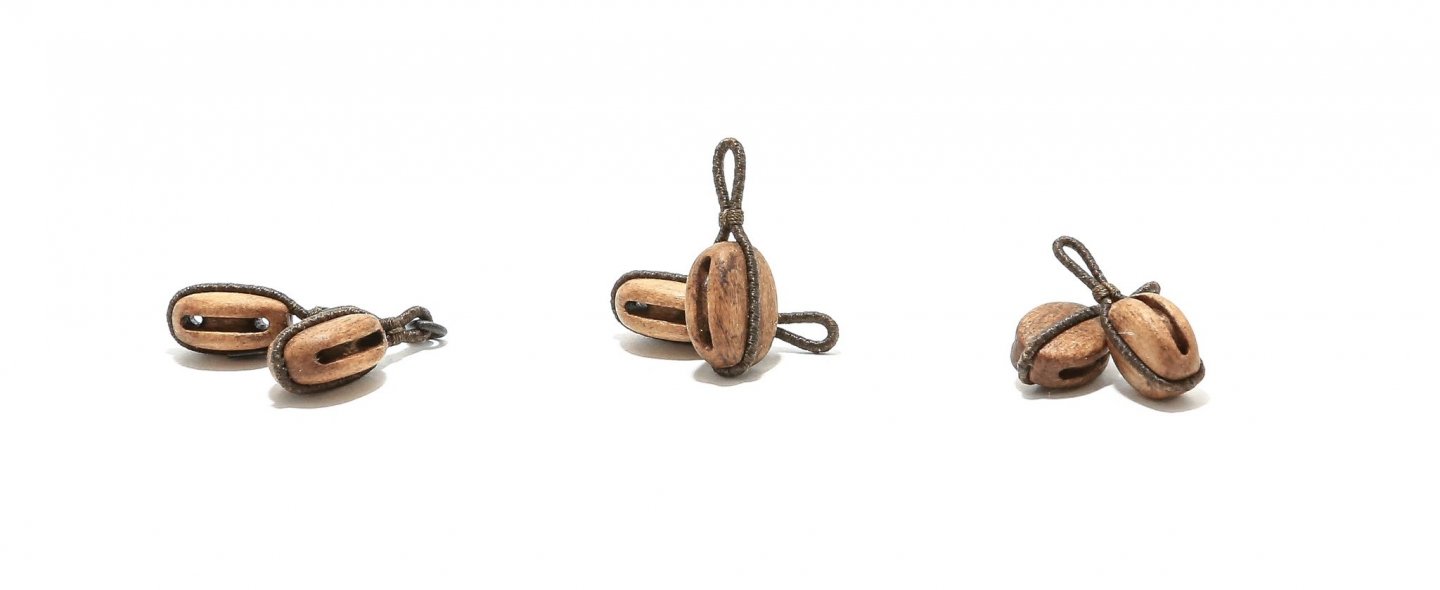
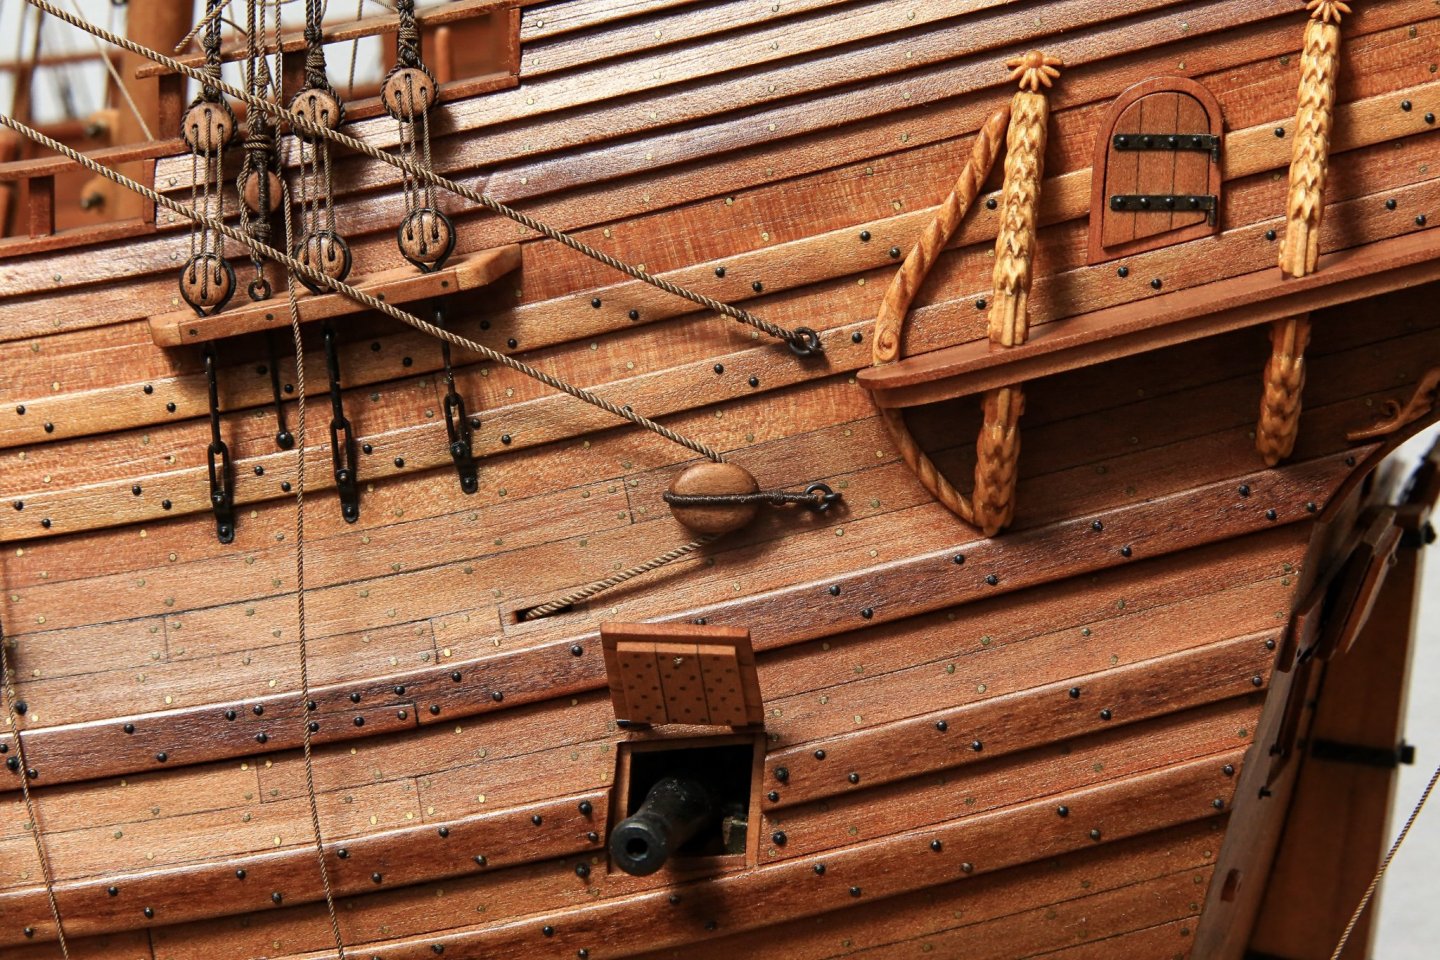
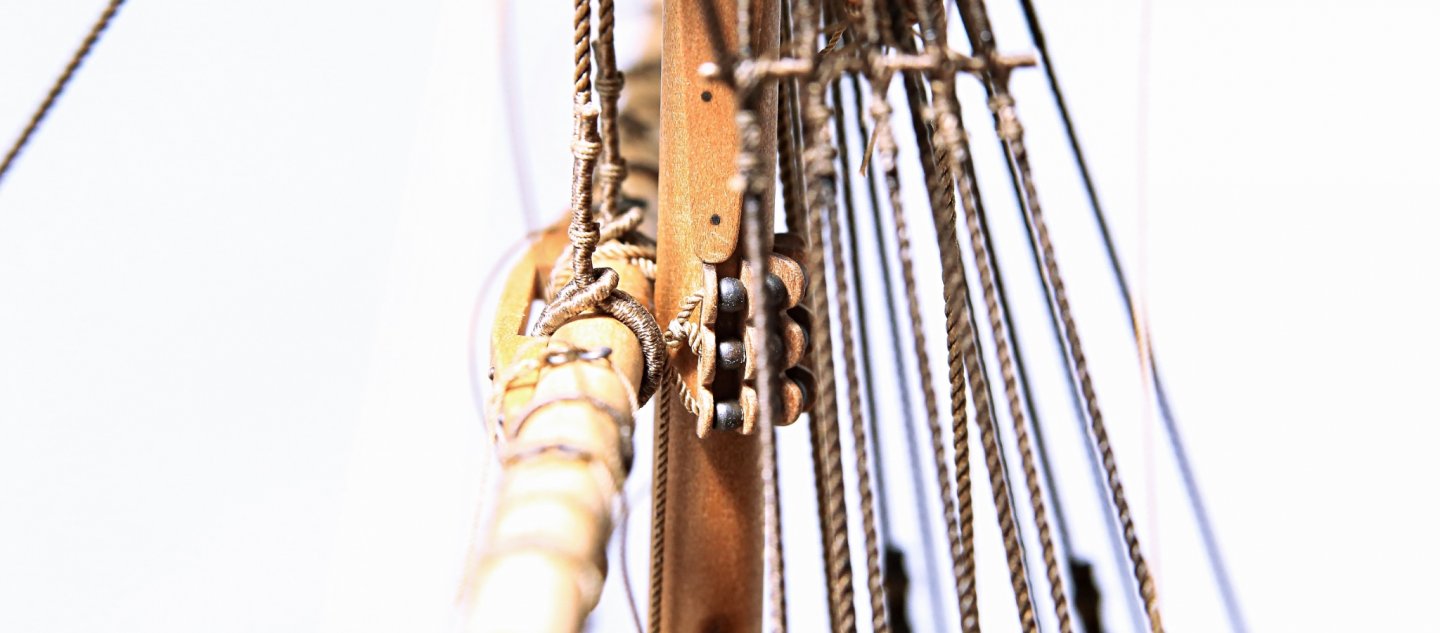
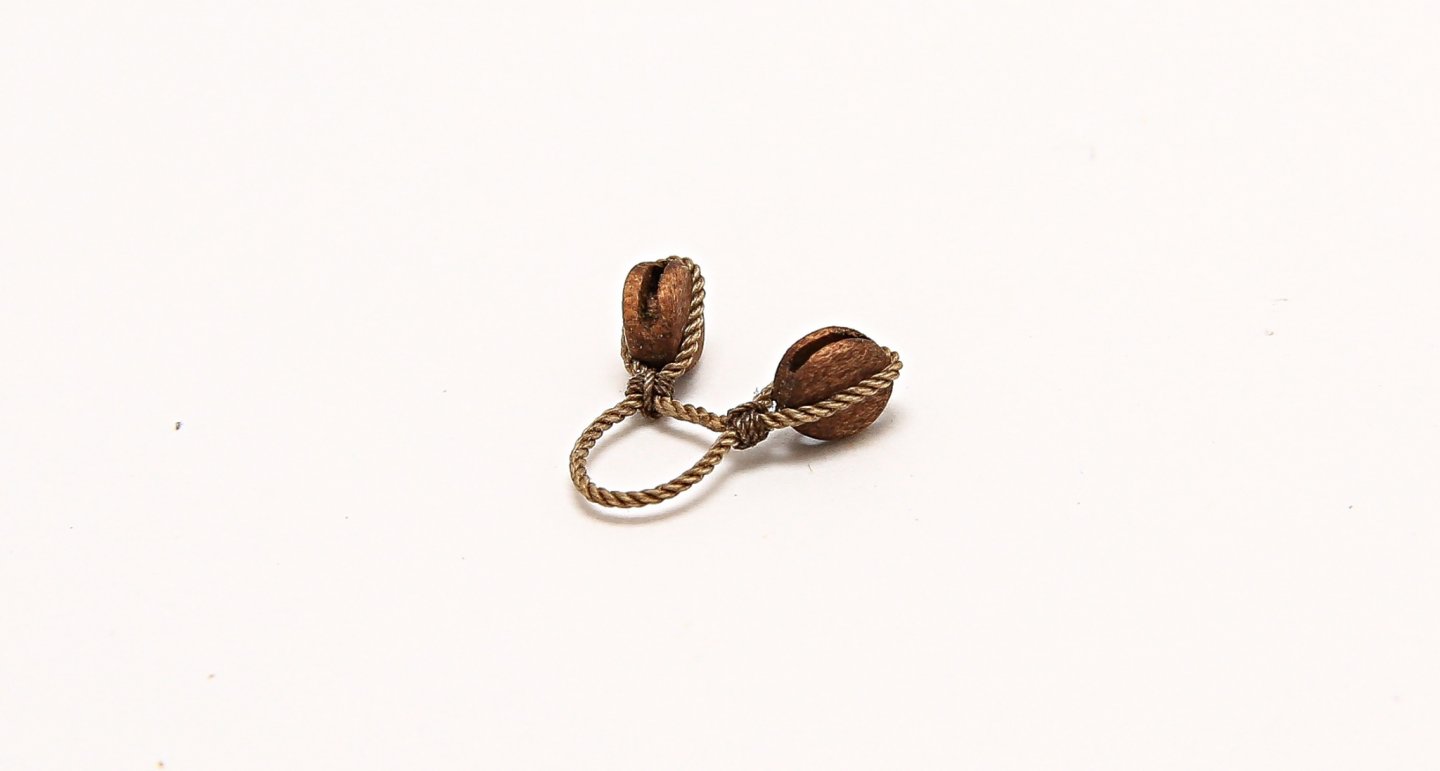
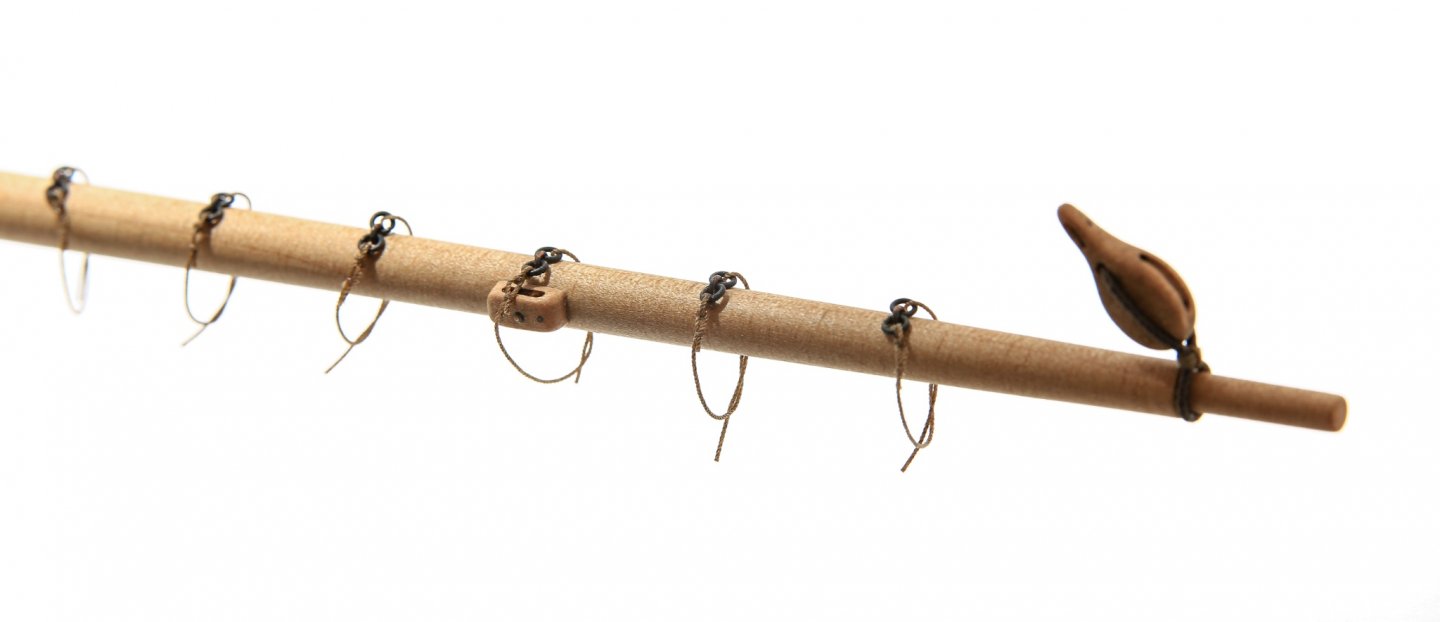
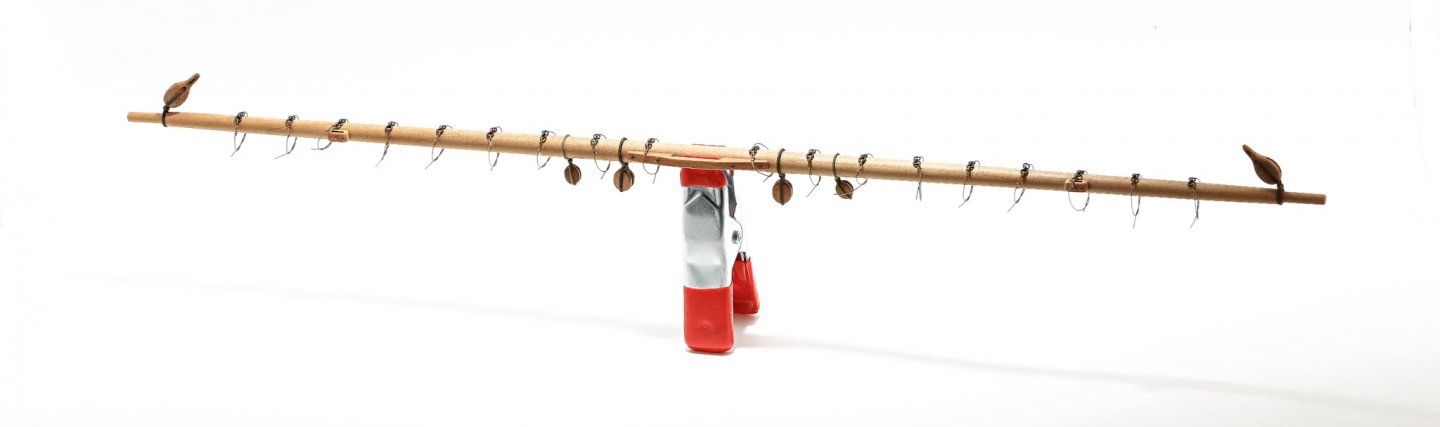
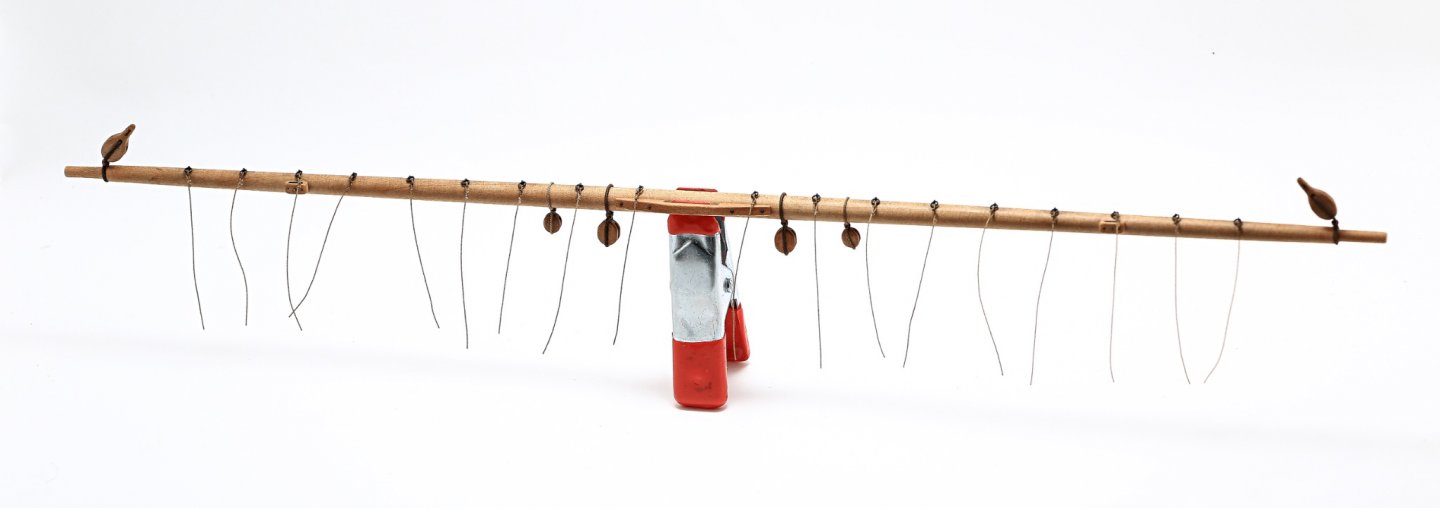
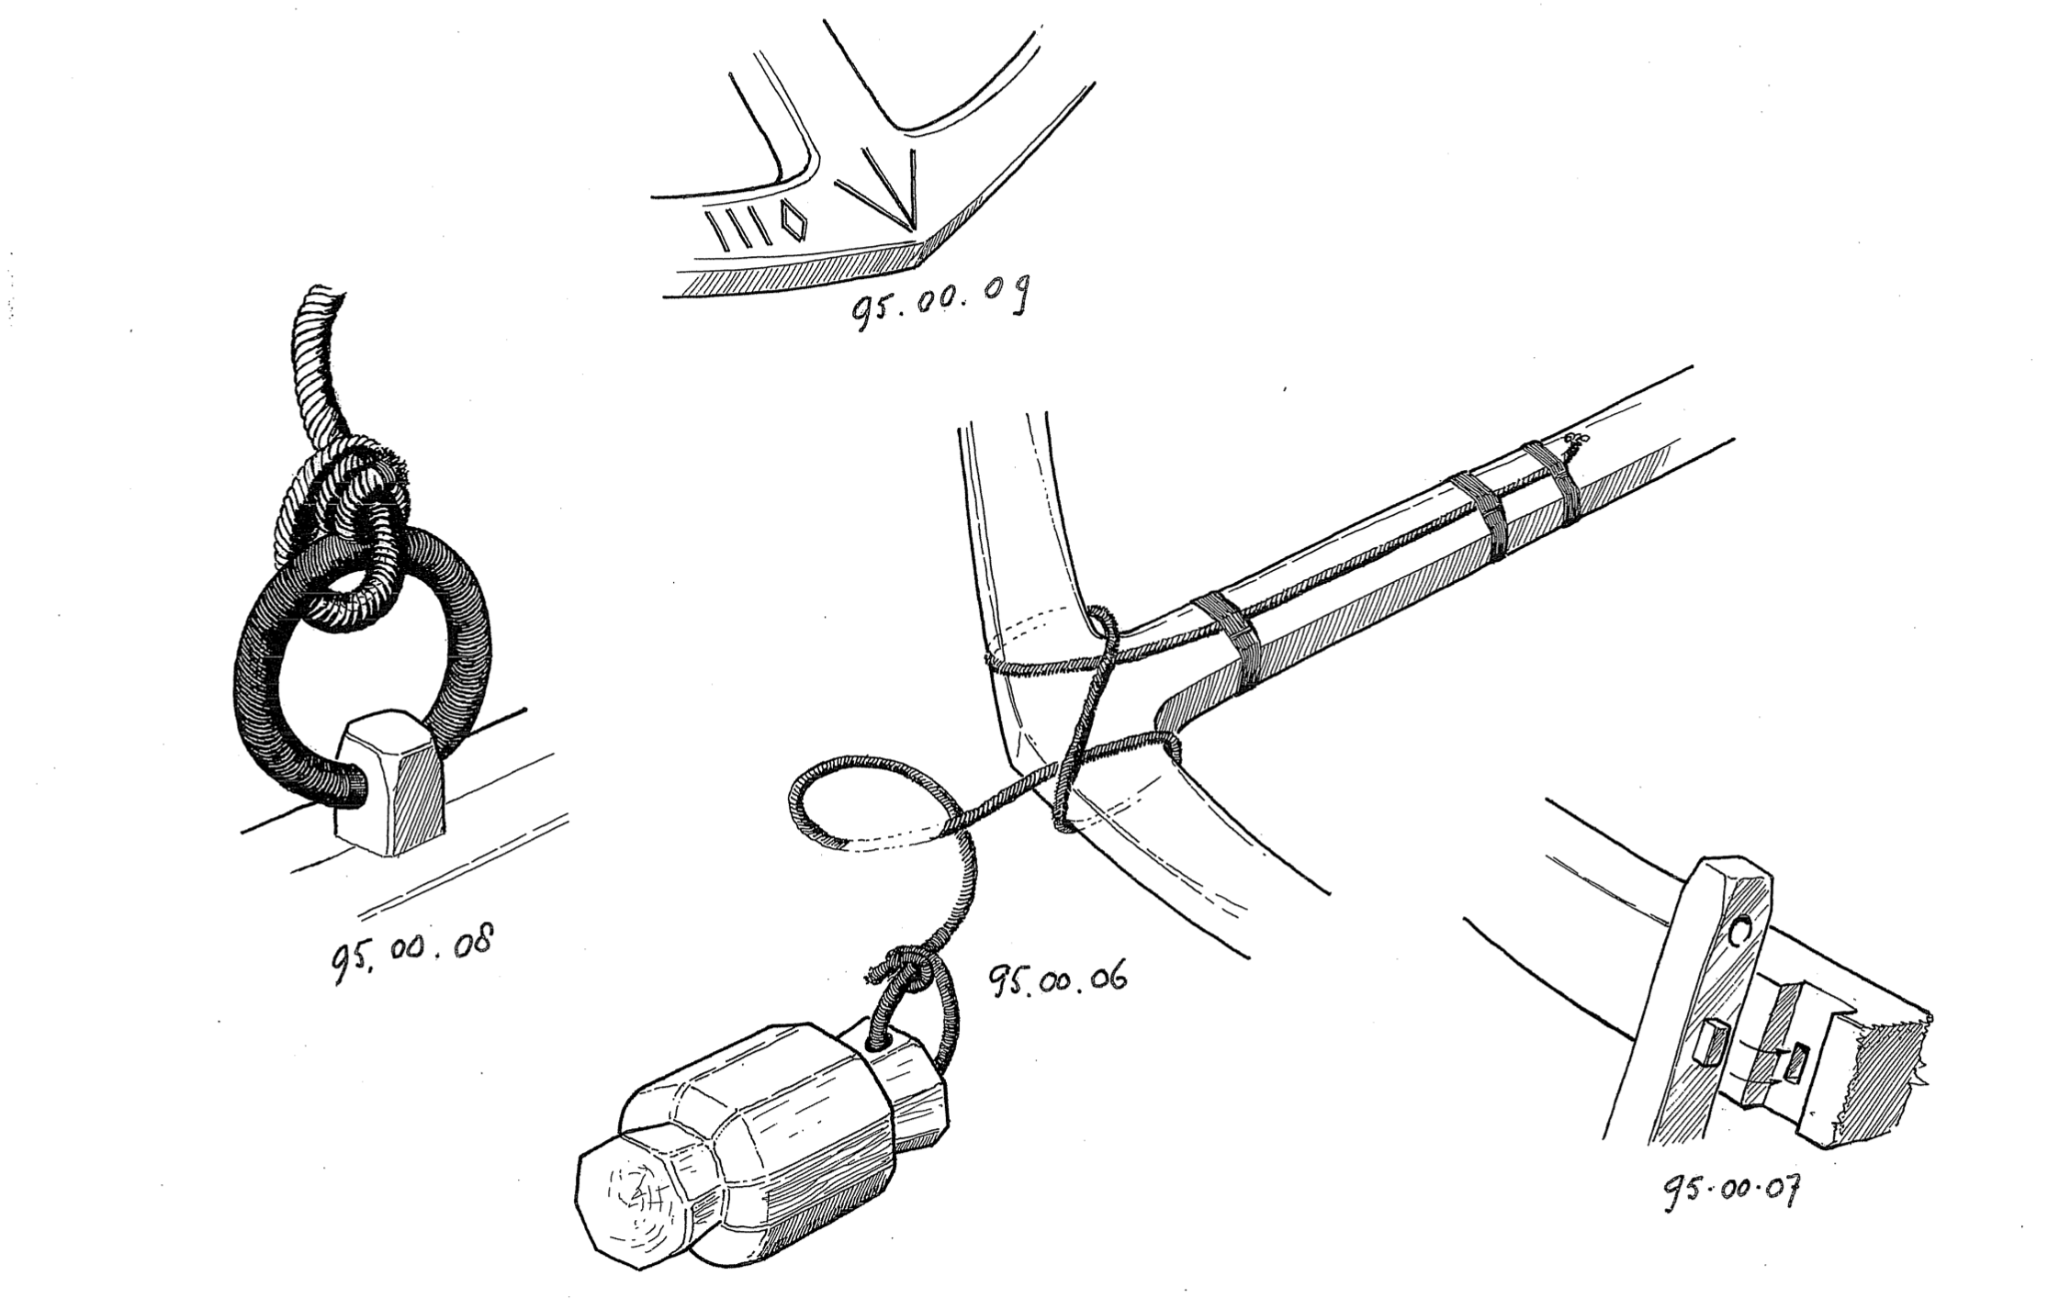
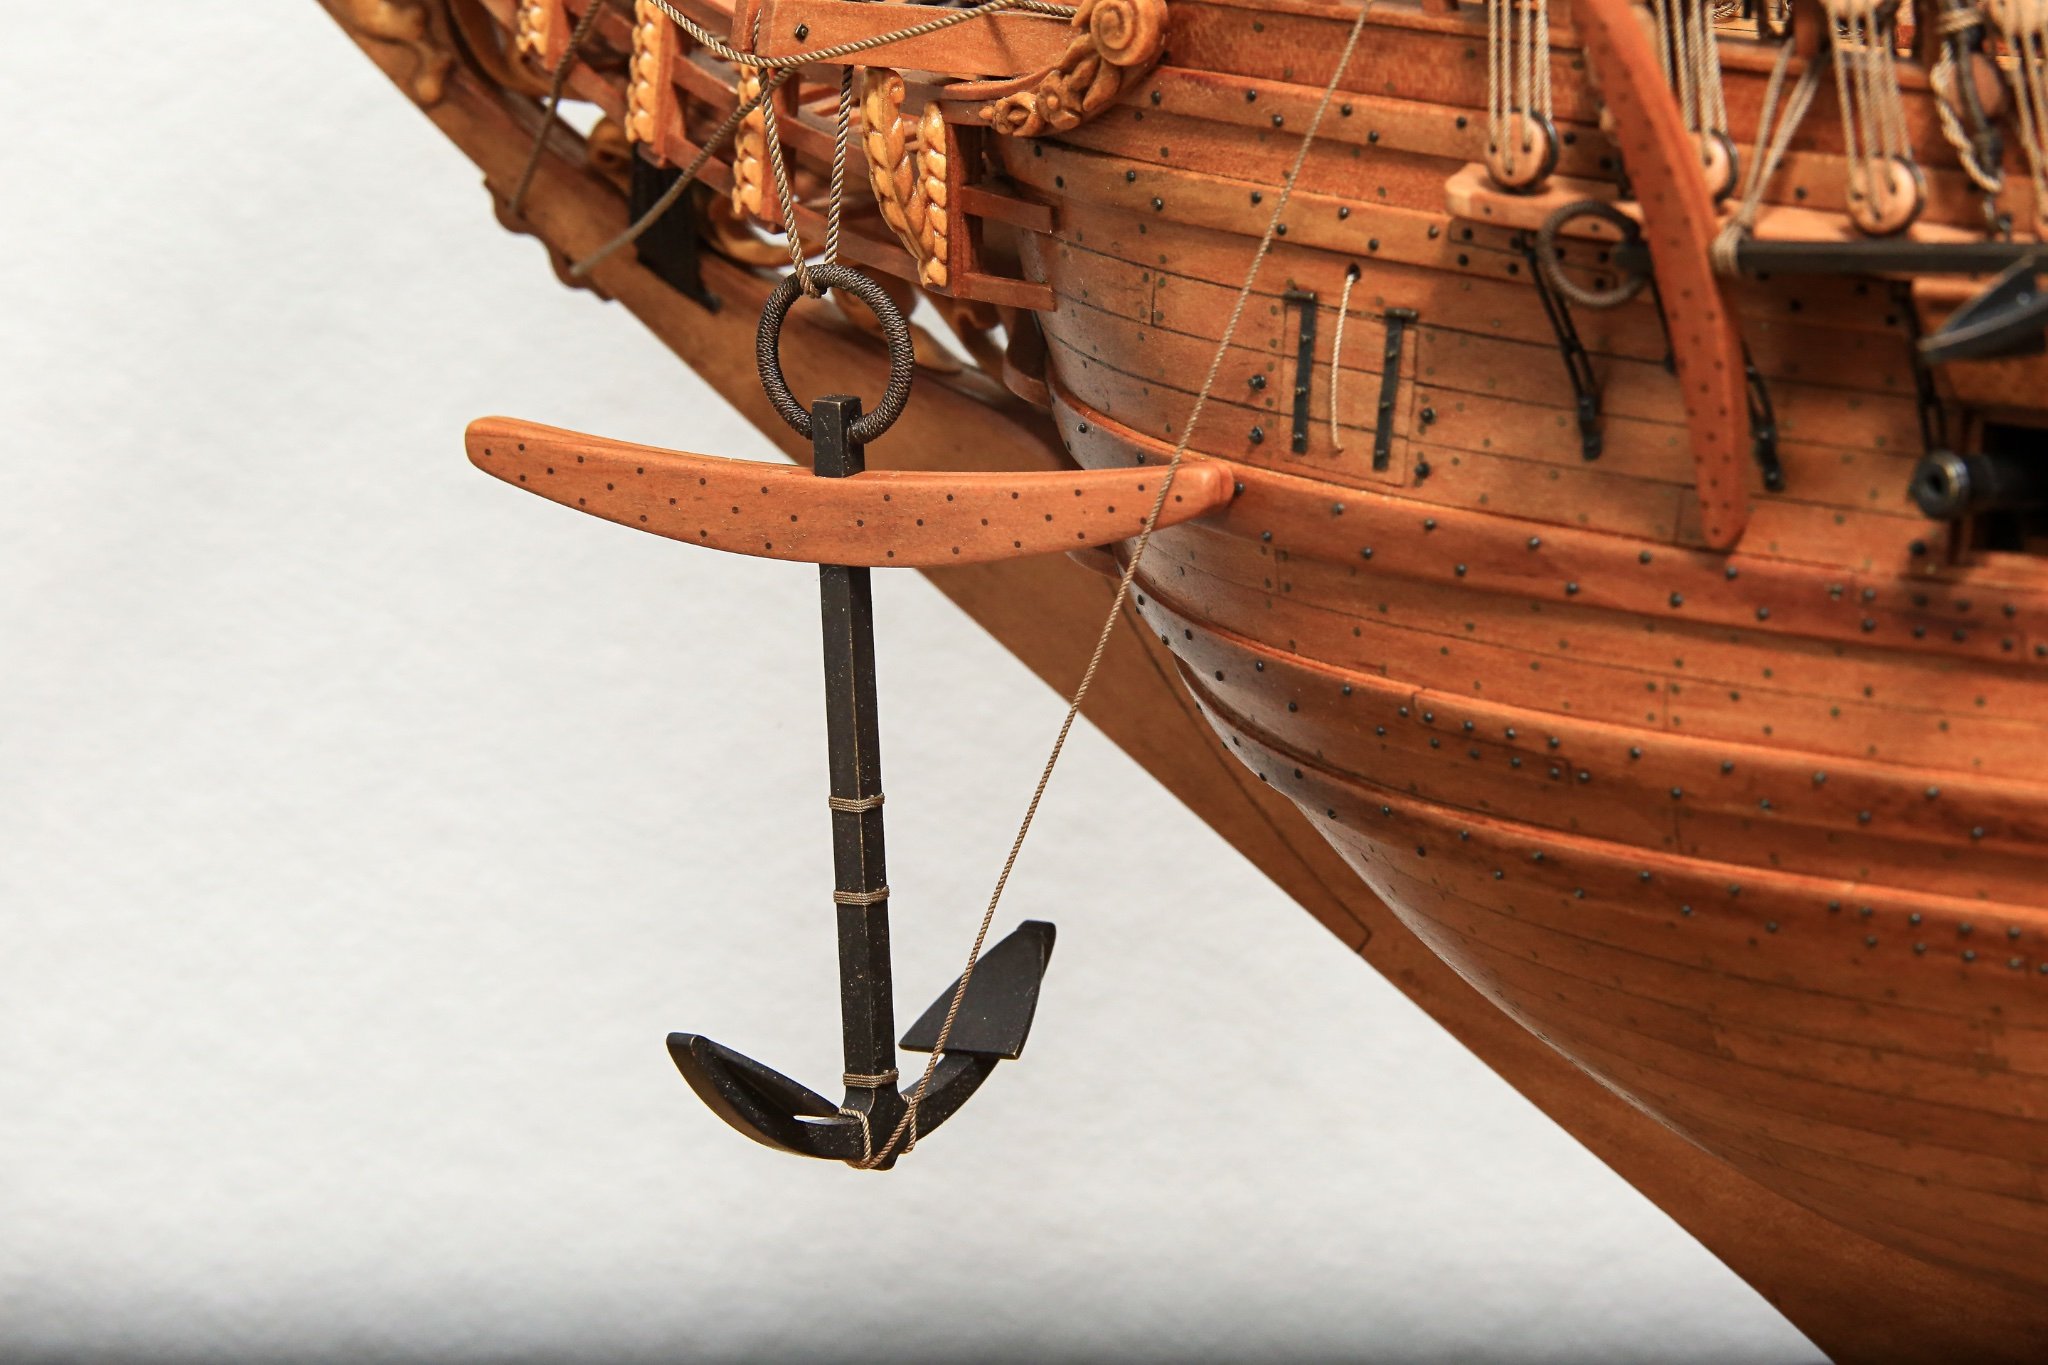
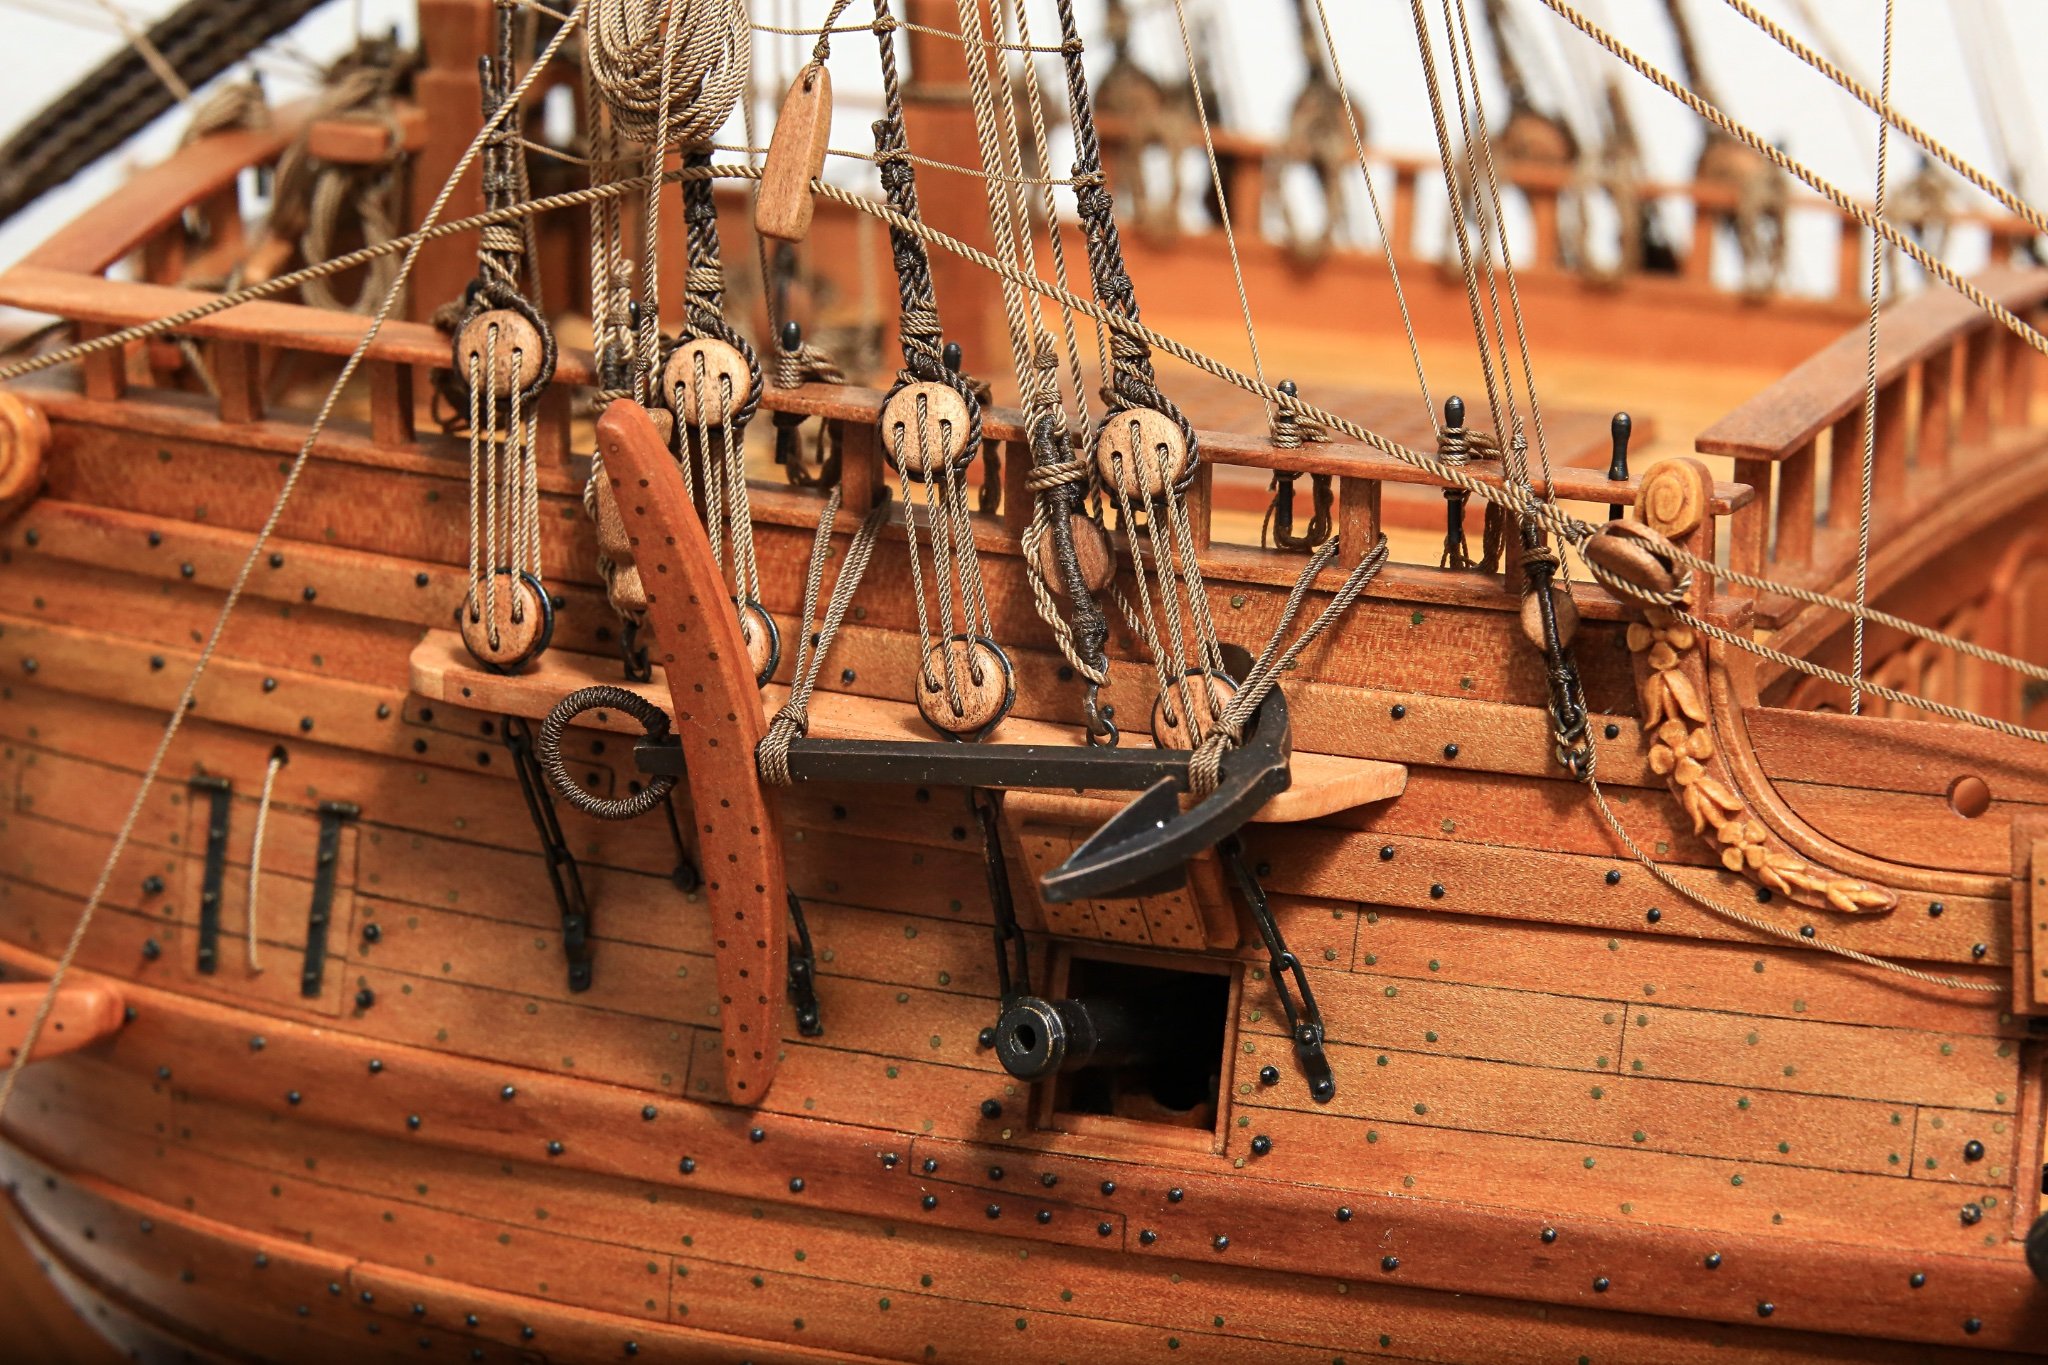
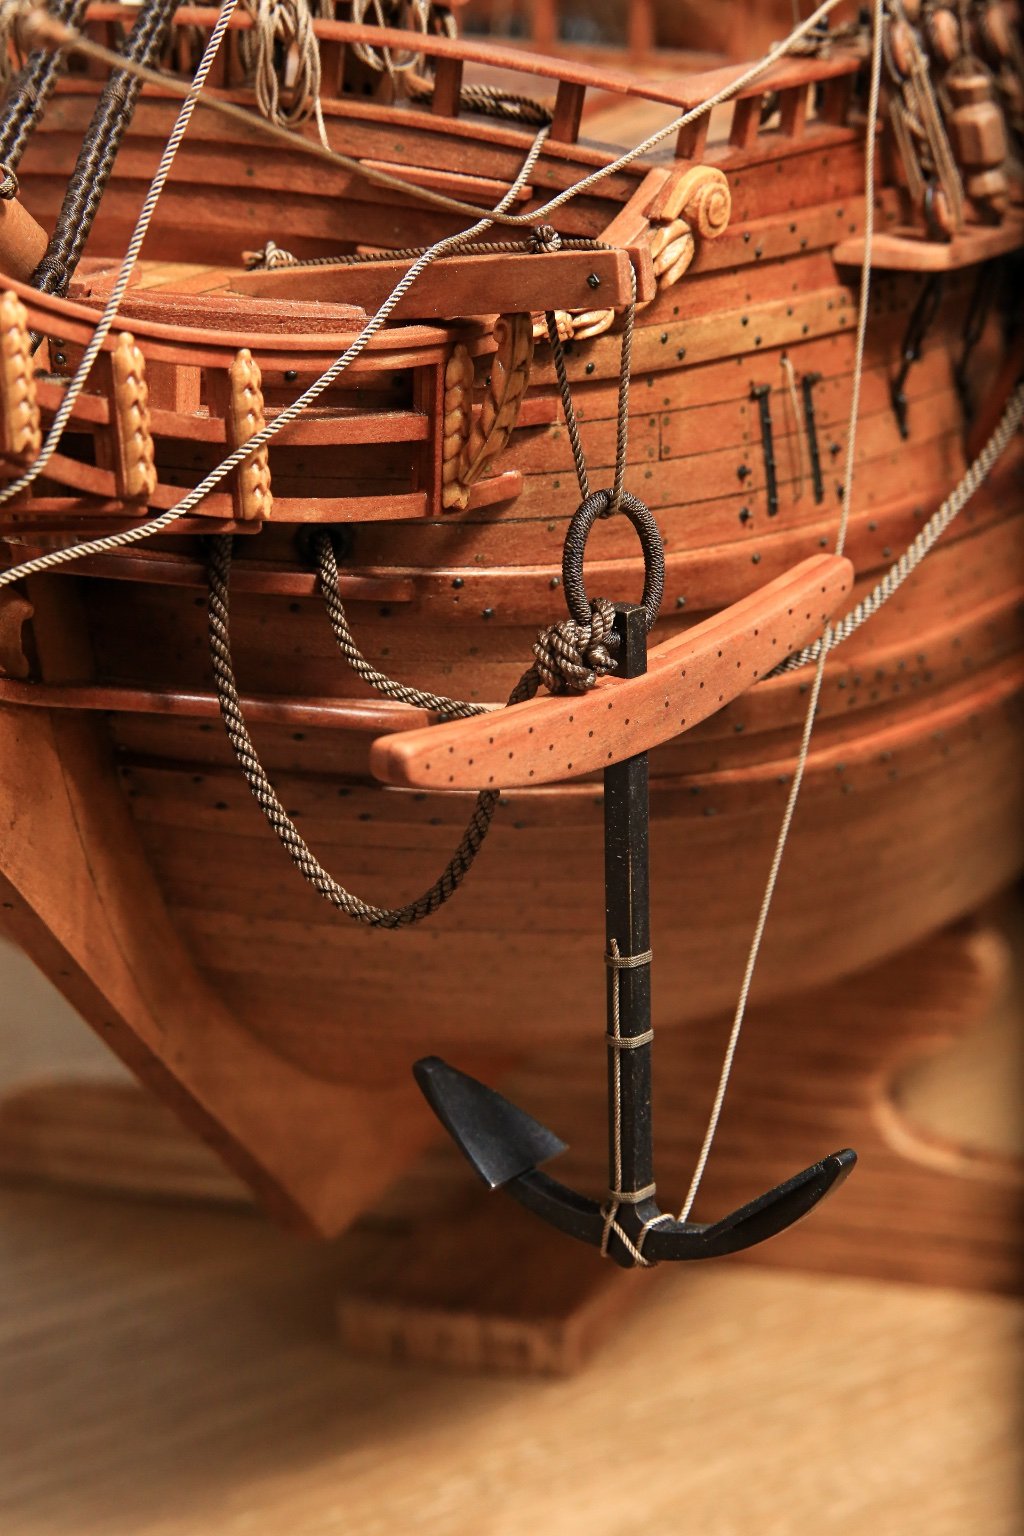
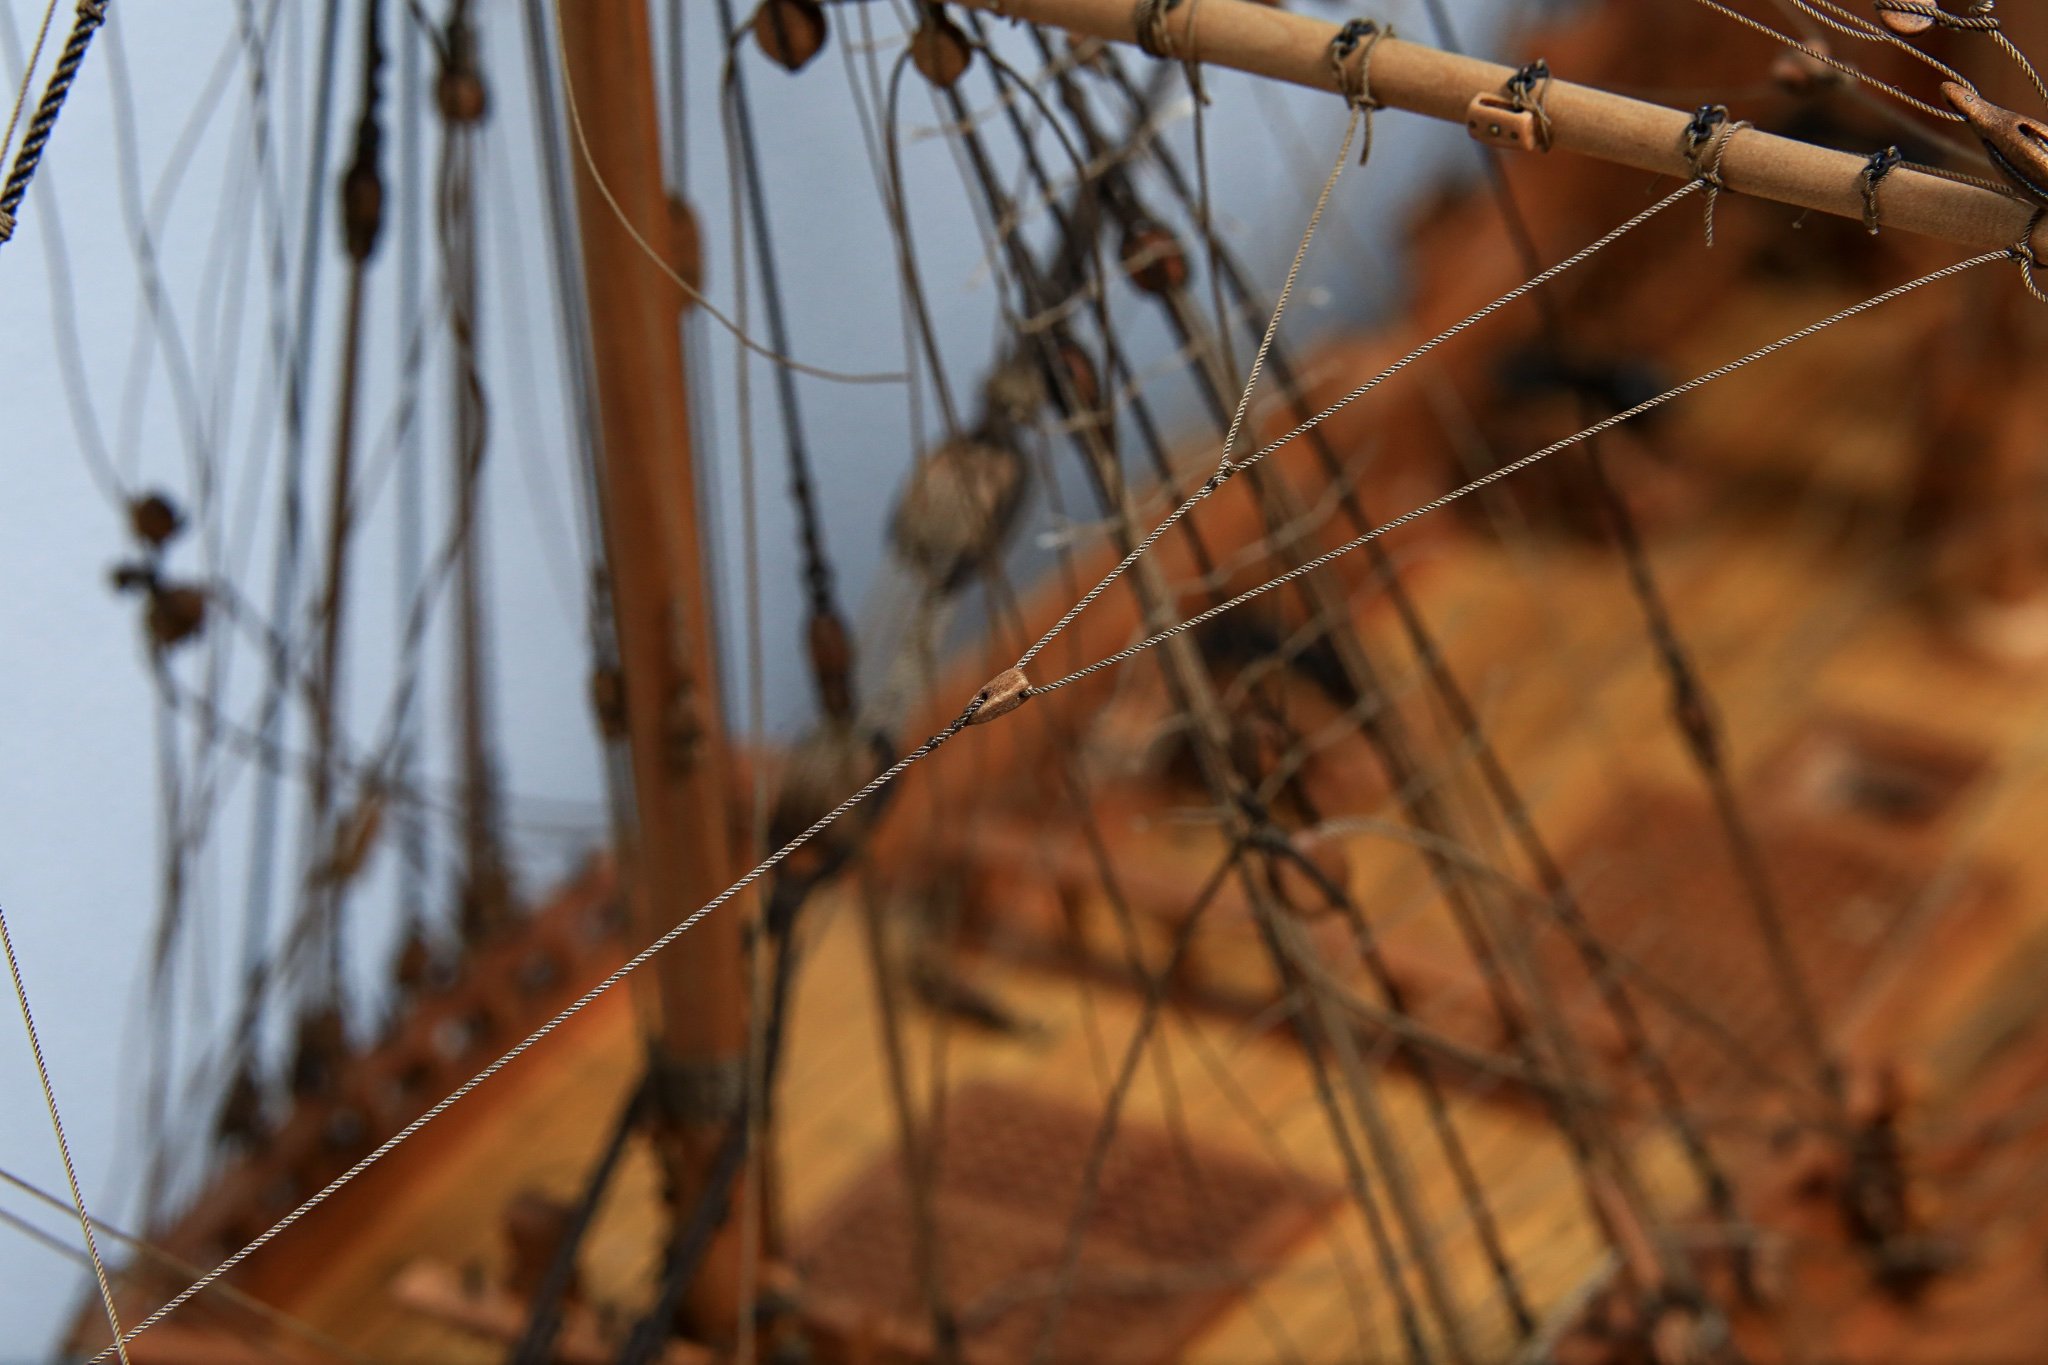
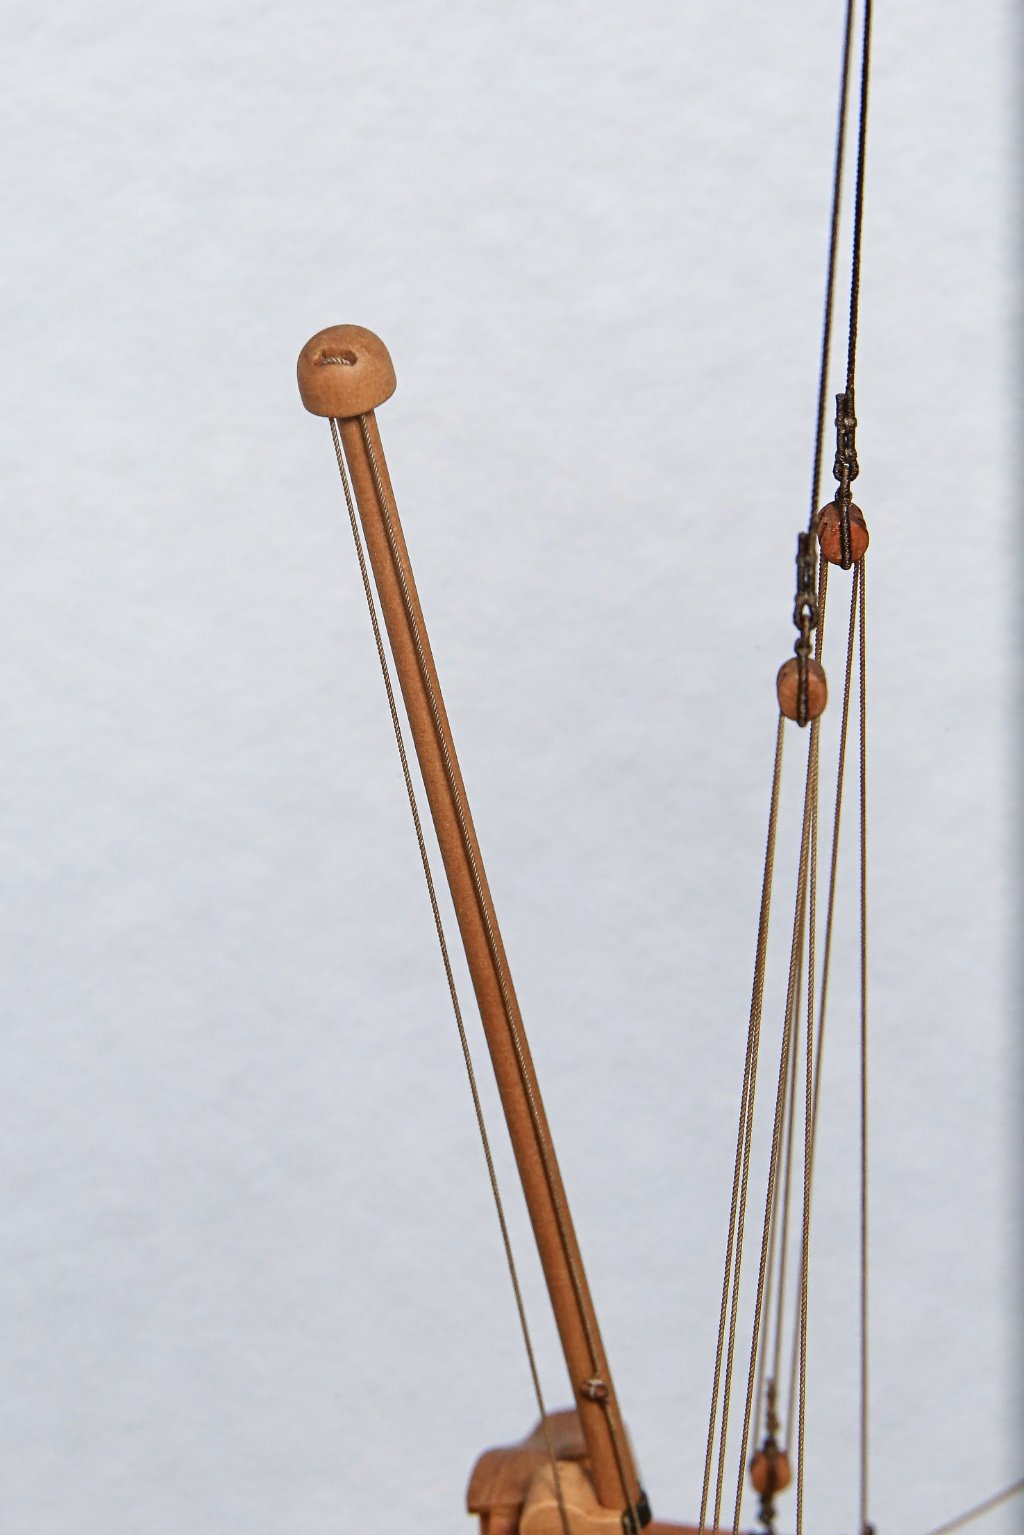
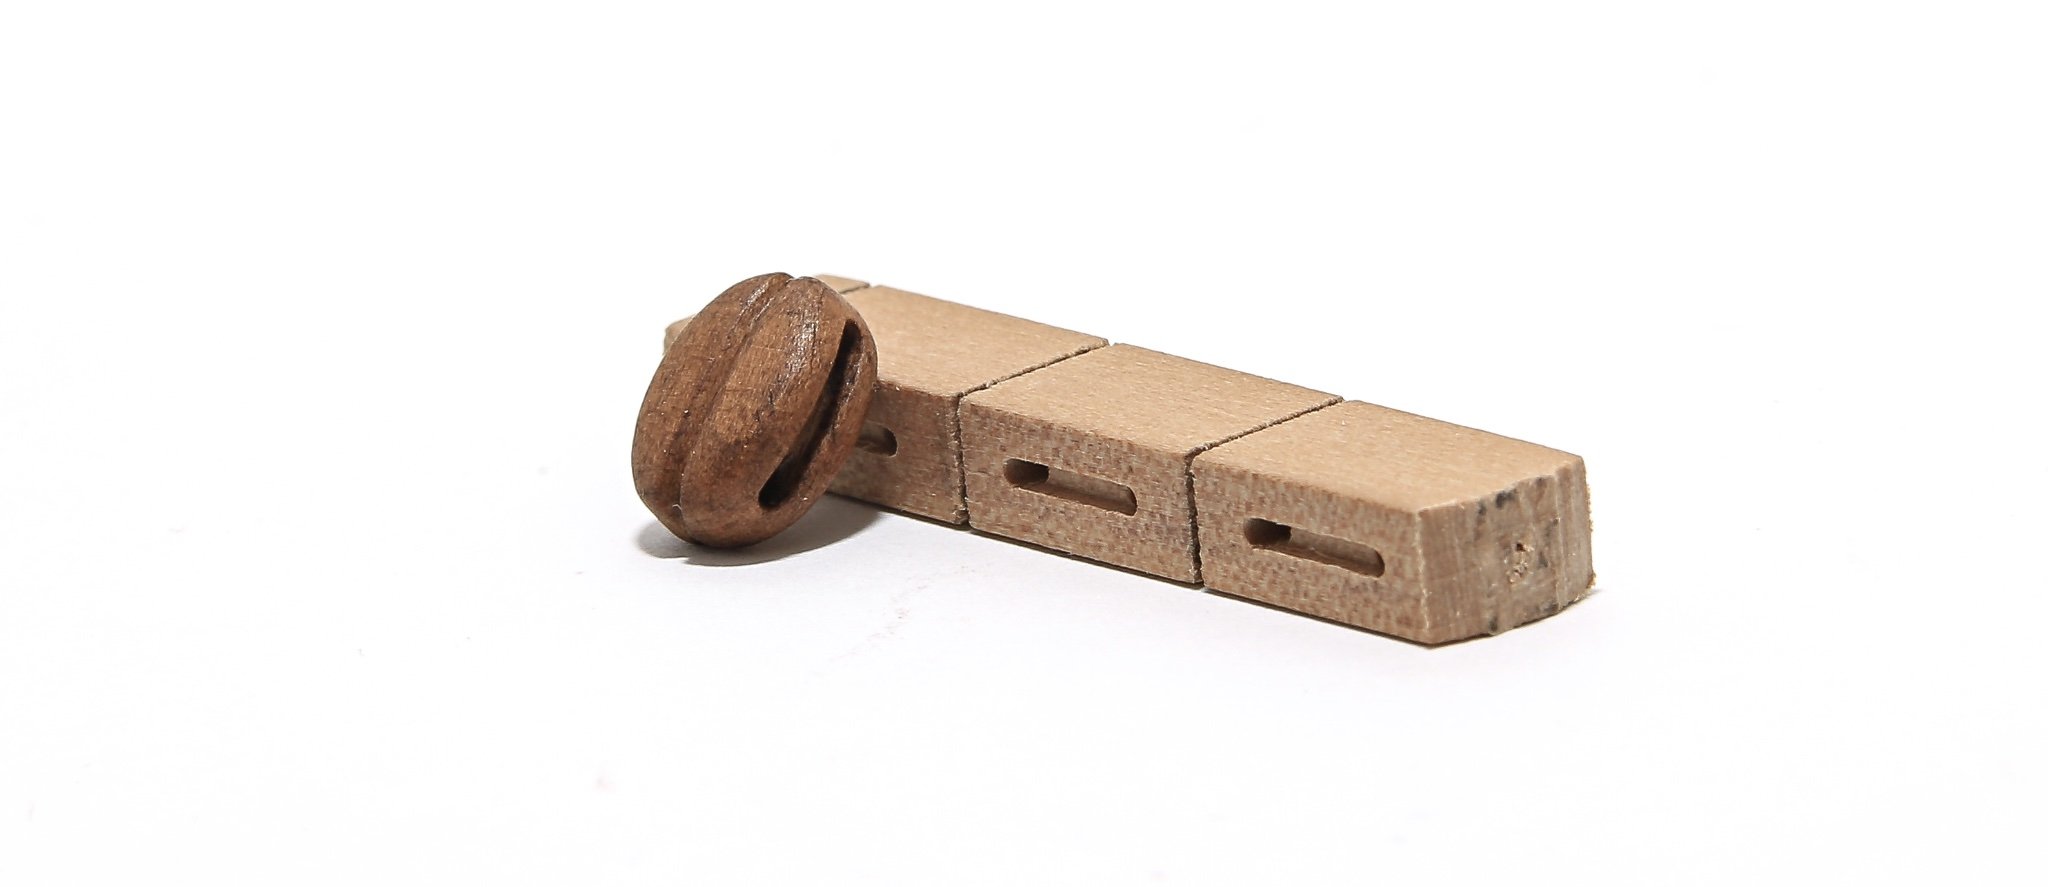
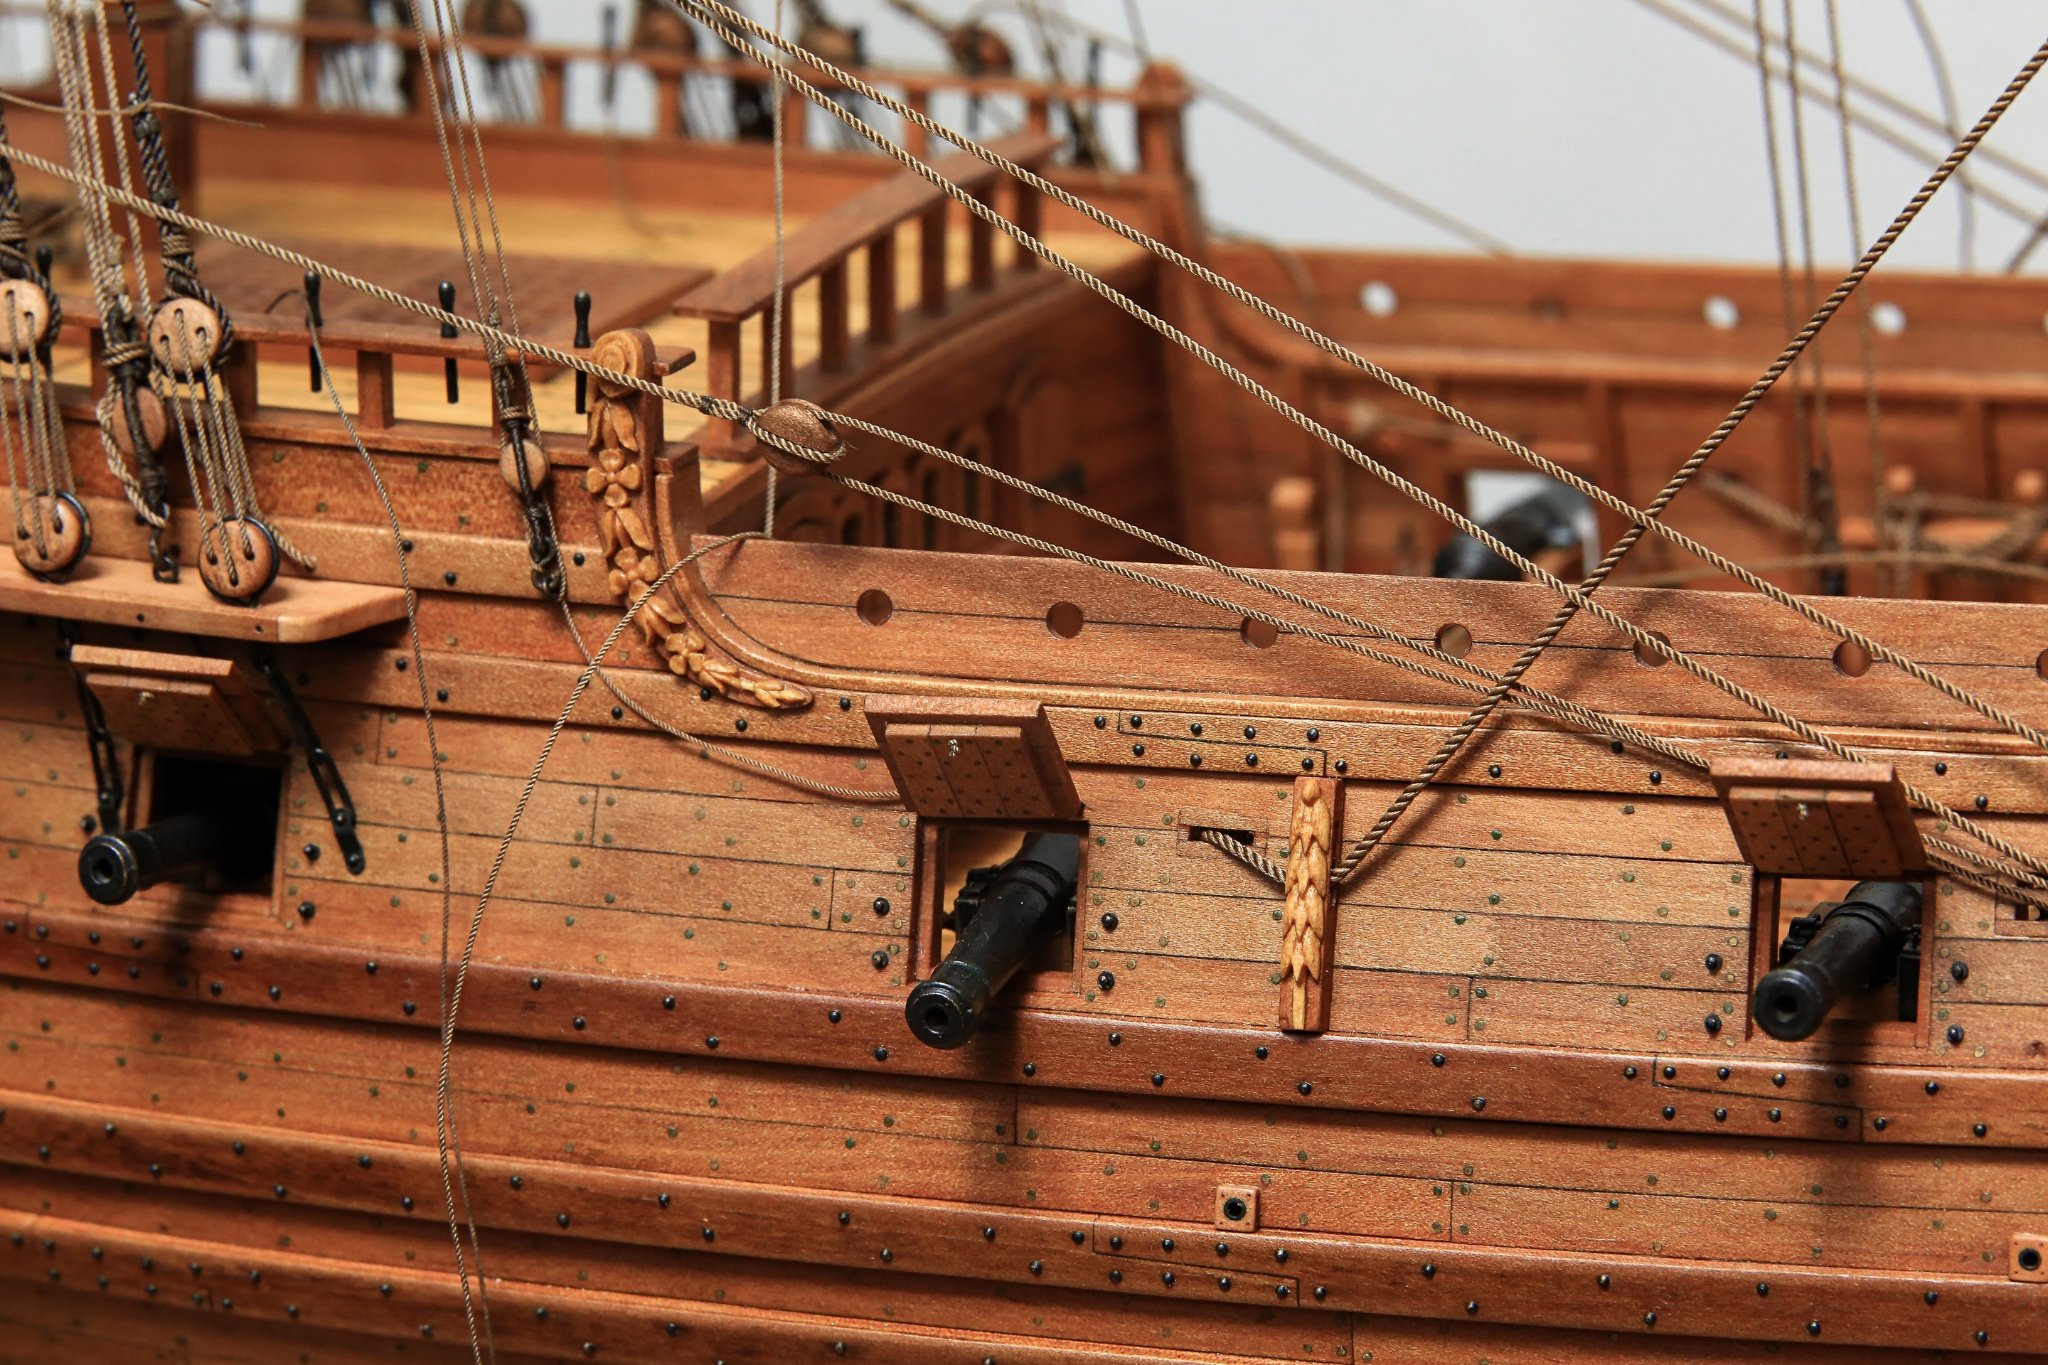
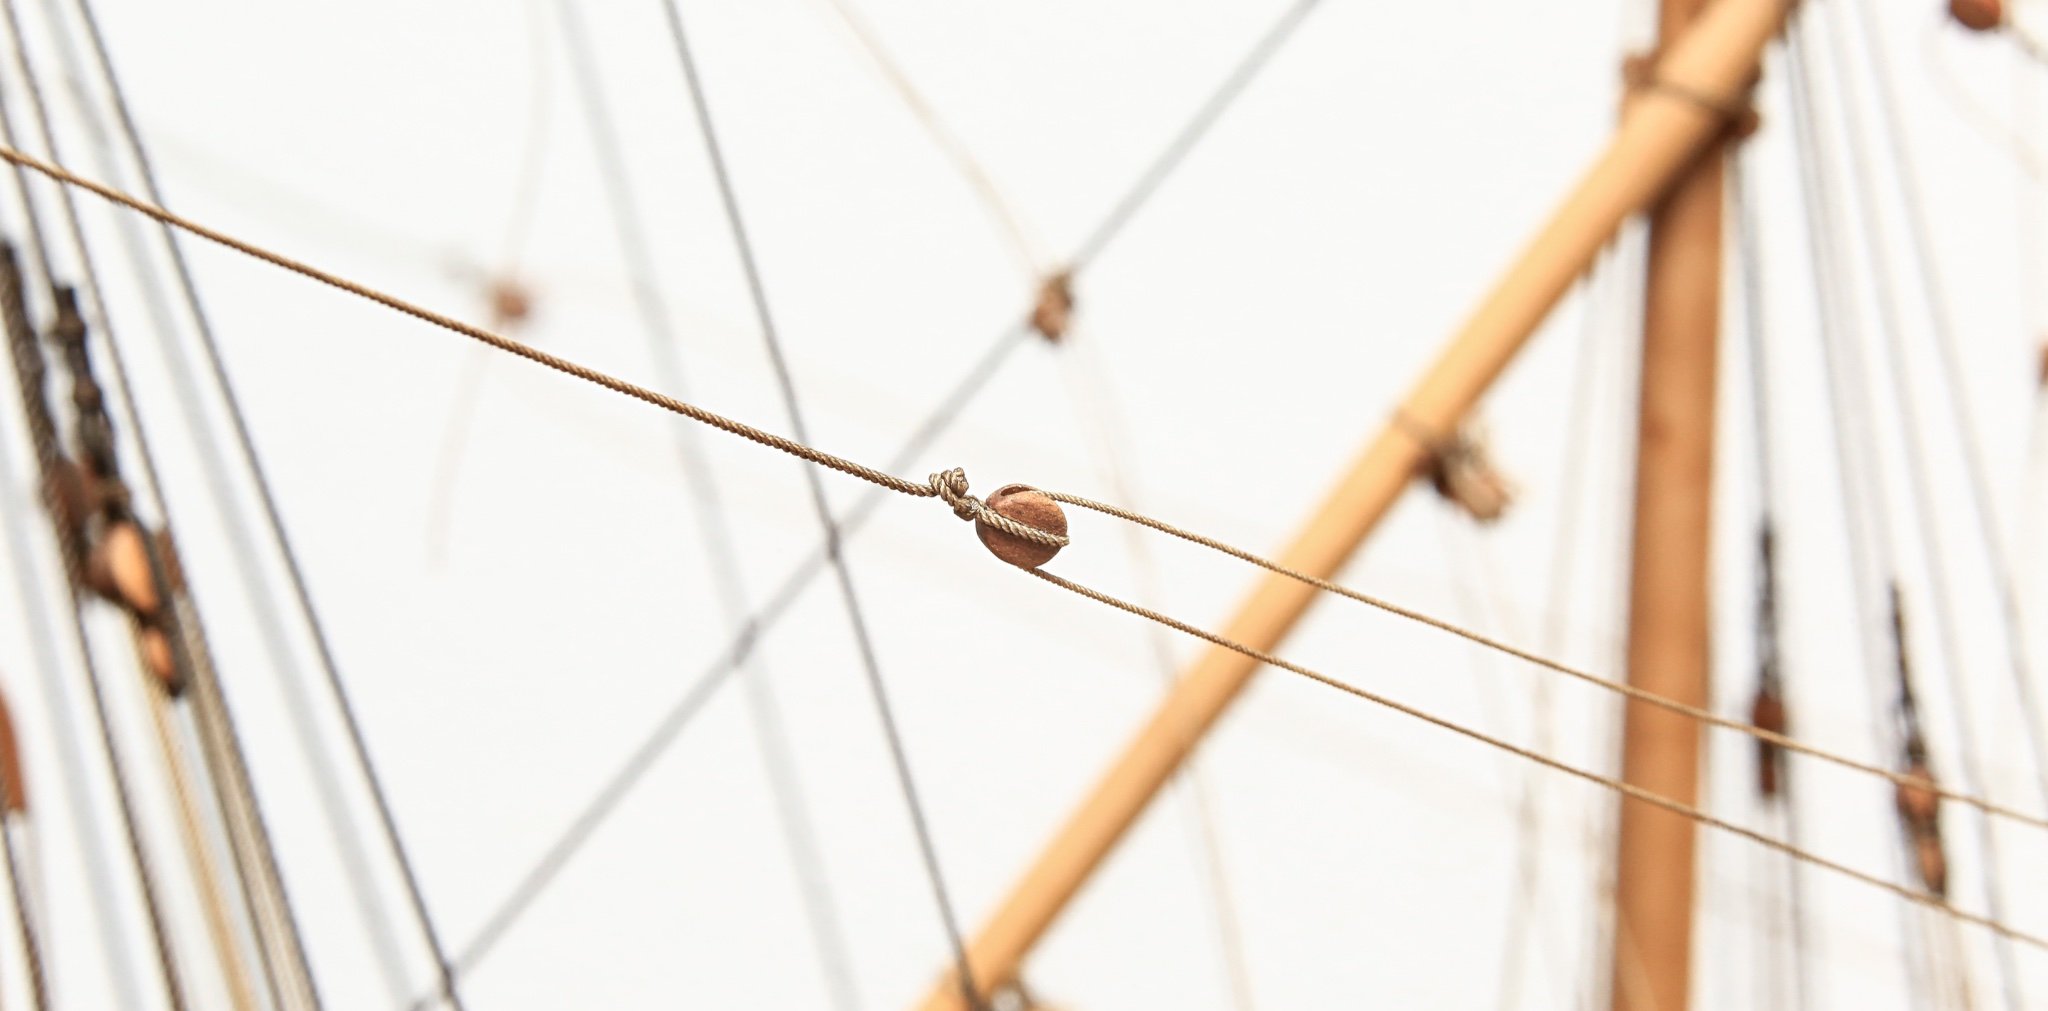
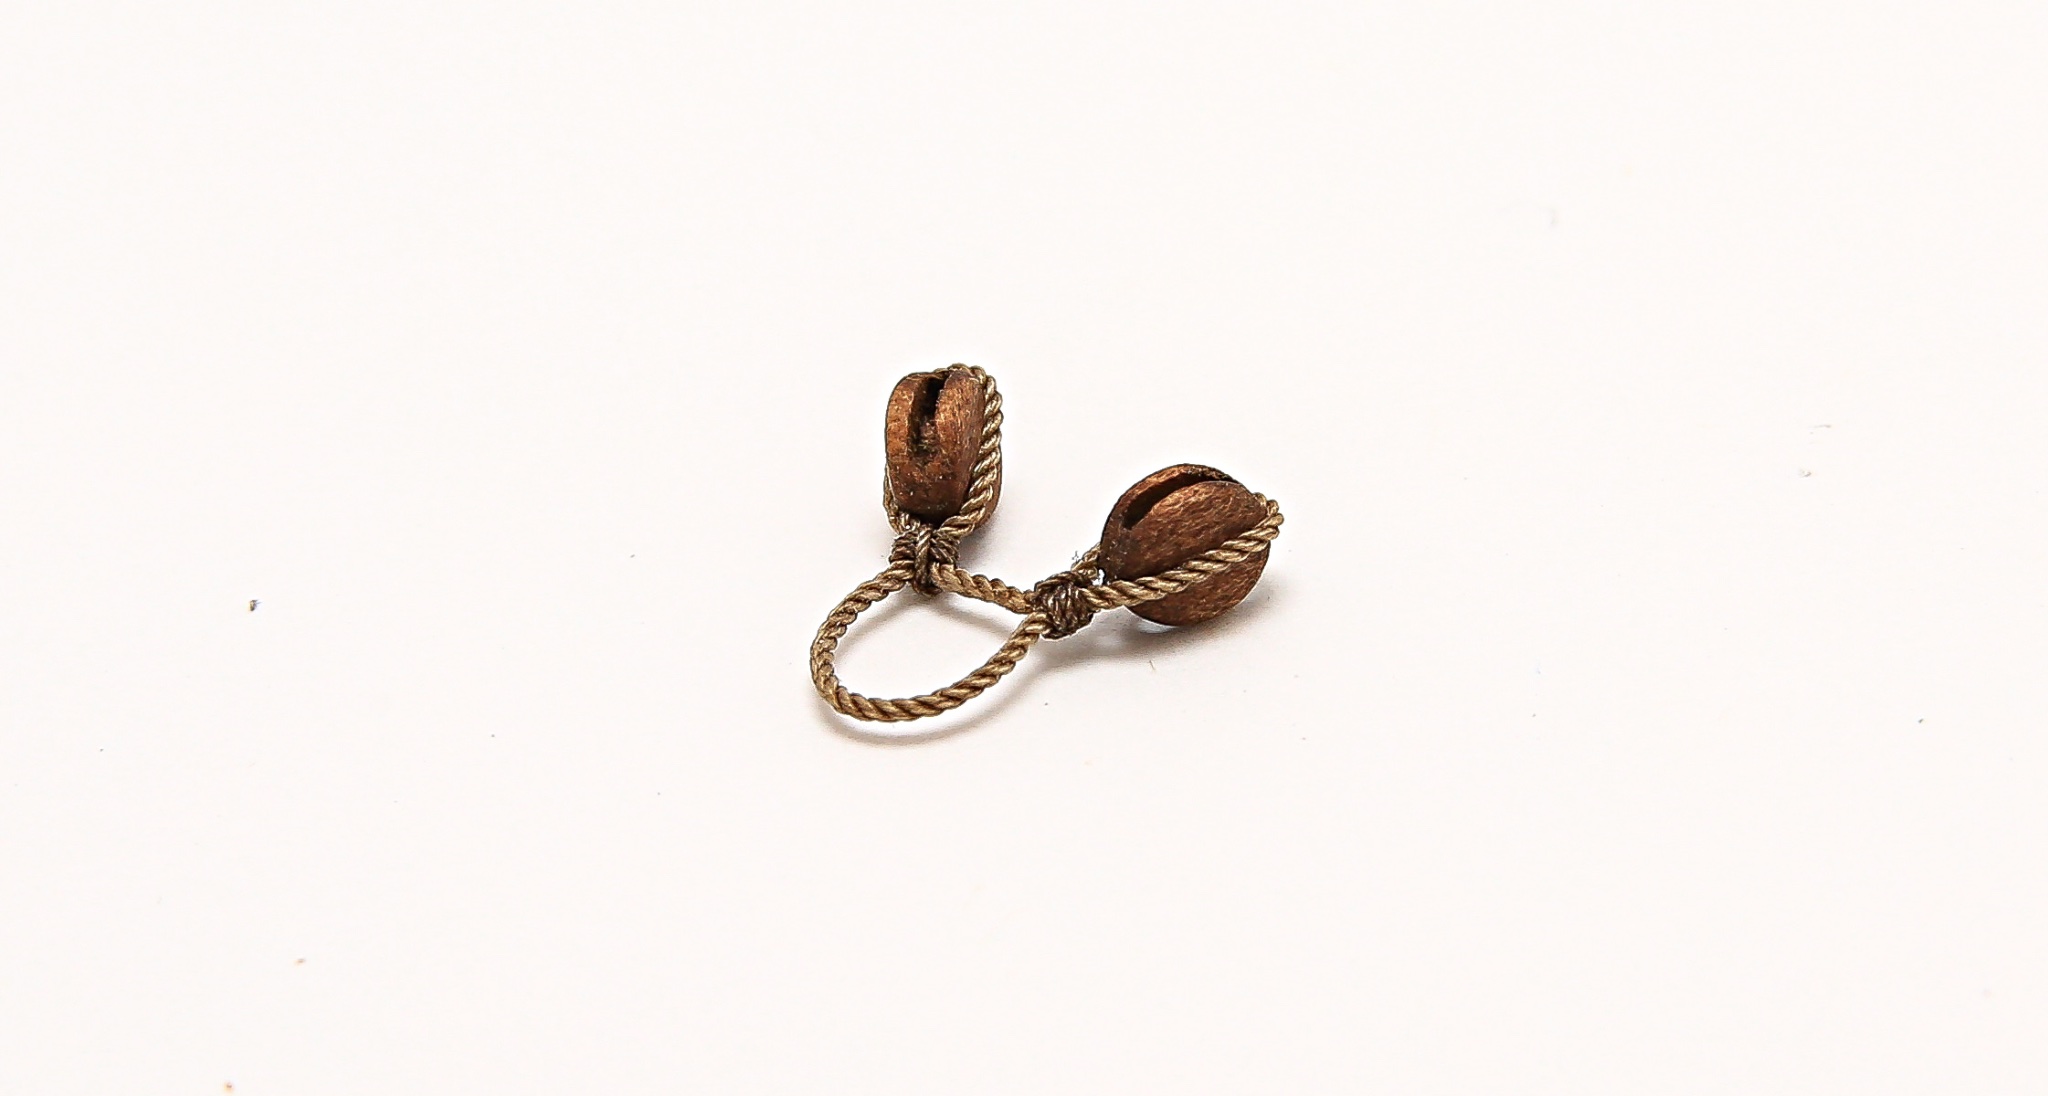
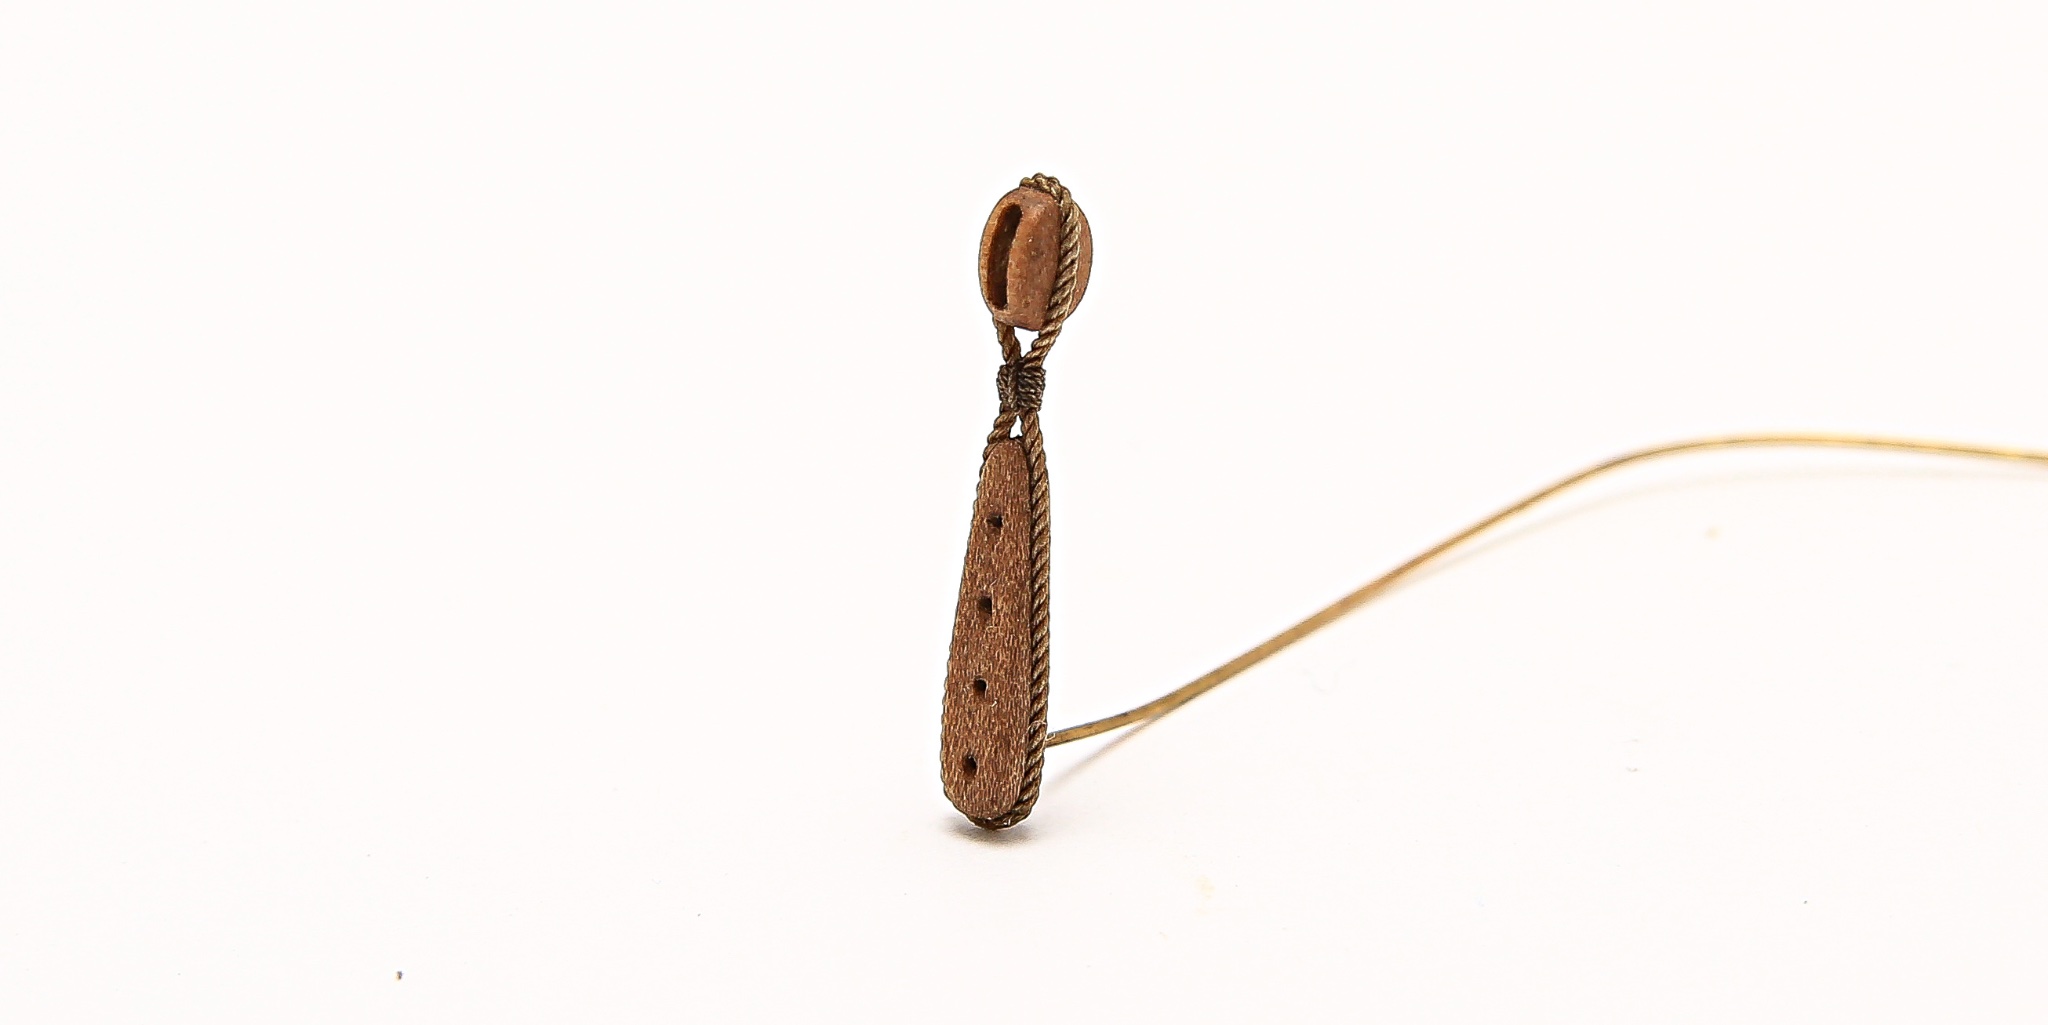
This time I'm ready to show you how I approach anchors subject.
I had another "toughie" about anchor buoy.
I've decided to go ahead with O. Blom visualization.
One more time I've seen at least 4 different kinds of buoys... but I bet on the simple look... simple vessel = simple buoy 🥴


...and because when I did above photos I forgot to attach anchor ropes 😜😆 I have another session with ropes.
Two different knots for big (1) and small (2) anchor.
Cheers,
Matt
-
Hi All
Thank you @BobG @Hubac's Historian for your nice comments!
@Dziadeczek Tomek after looking at my work above... right after when I've posted photos... I came to conclusion it's not how it should be done. This is the time of the life when you know you are doing some stupid thing... but you still carry on 😆😜
I knew it from the beginning... but I guess I've tried to cheat myself 😆
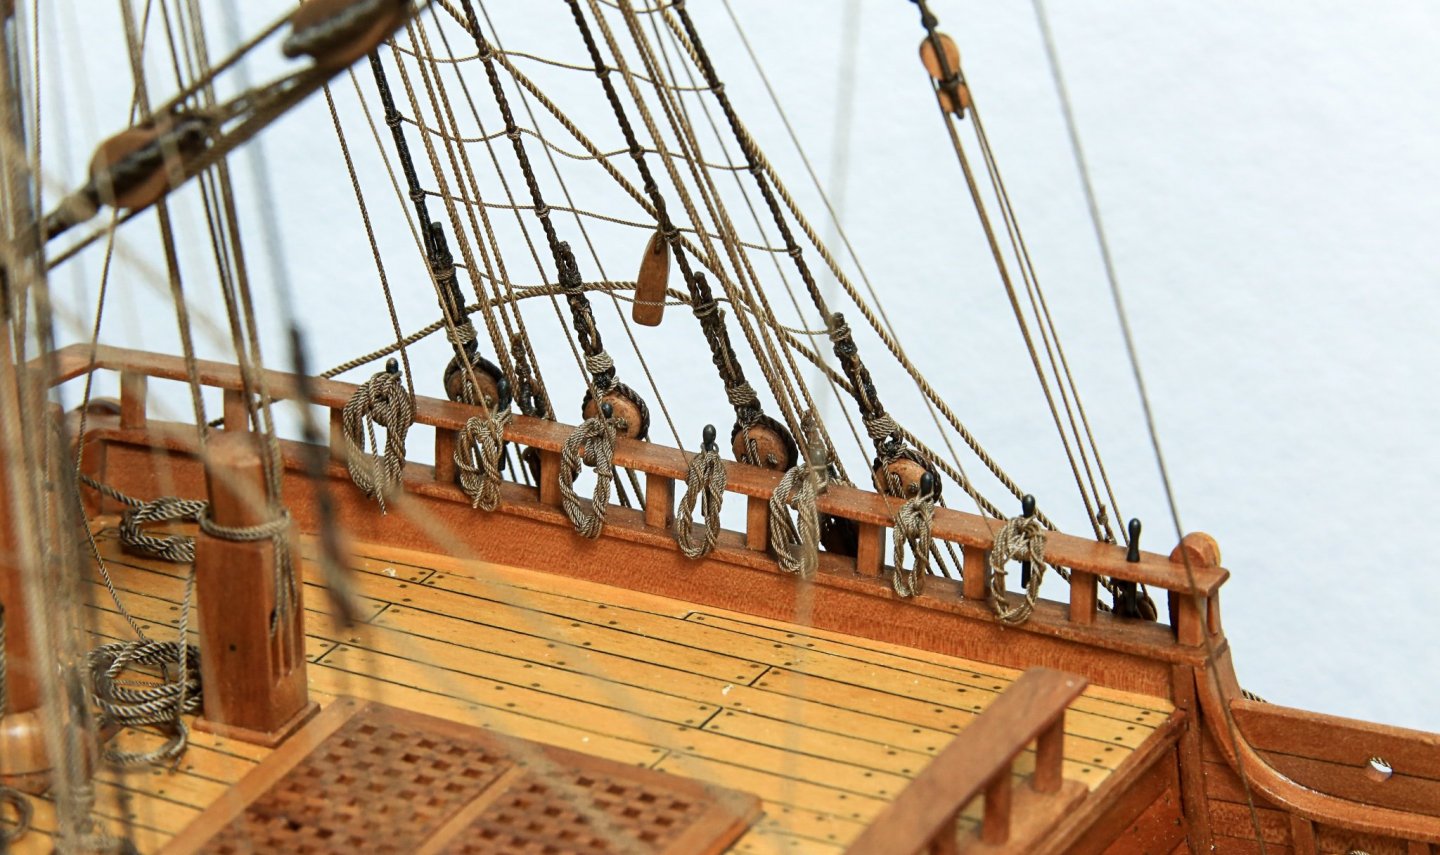
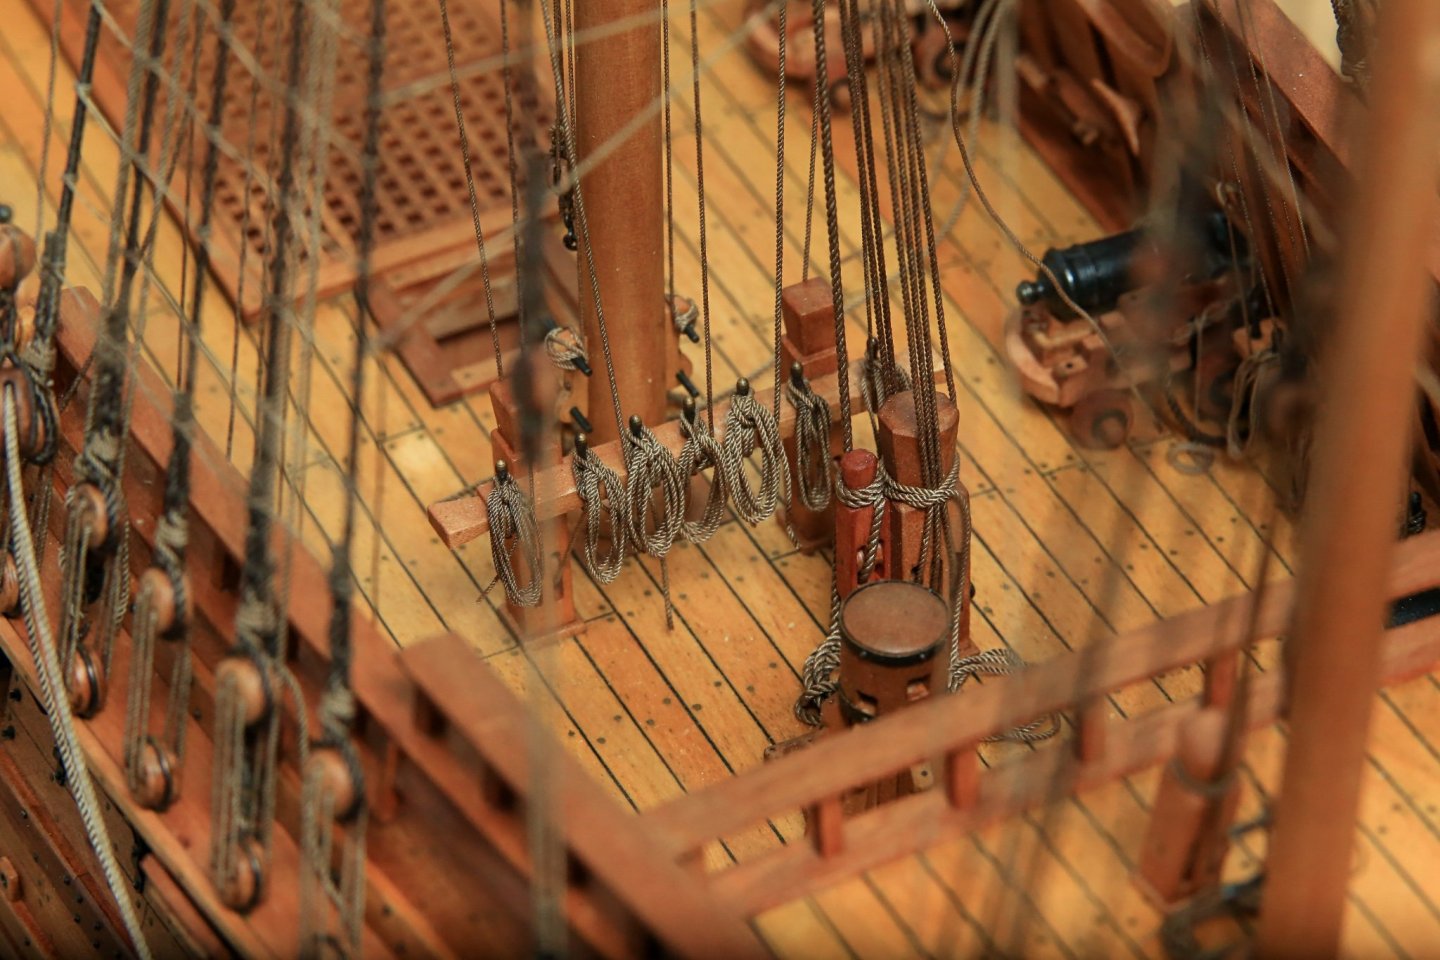
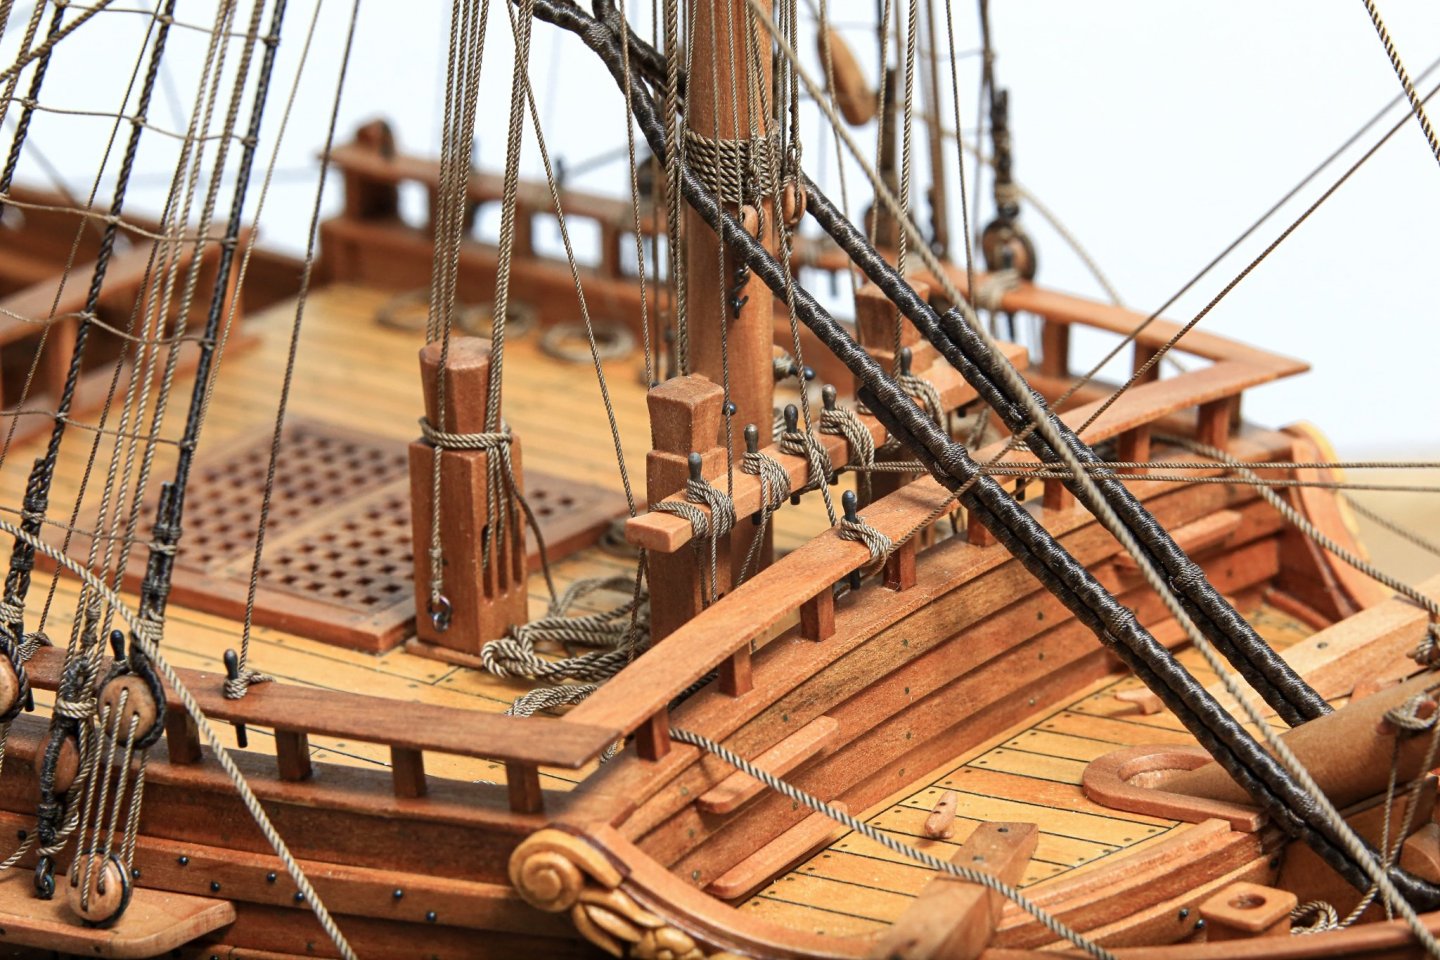
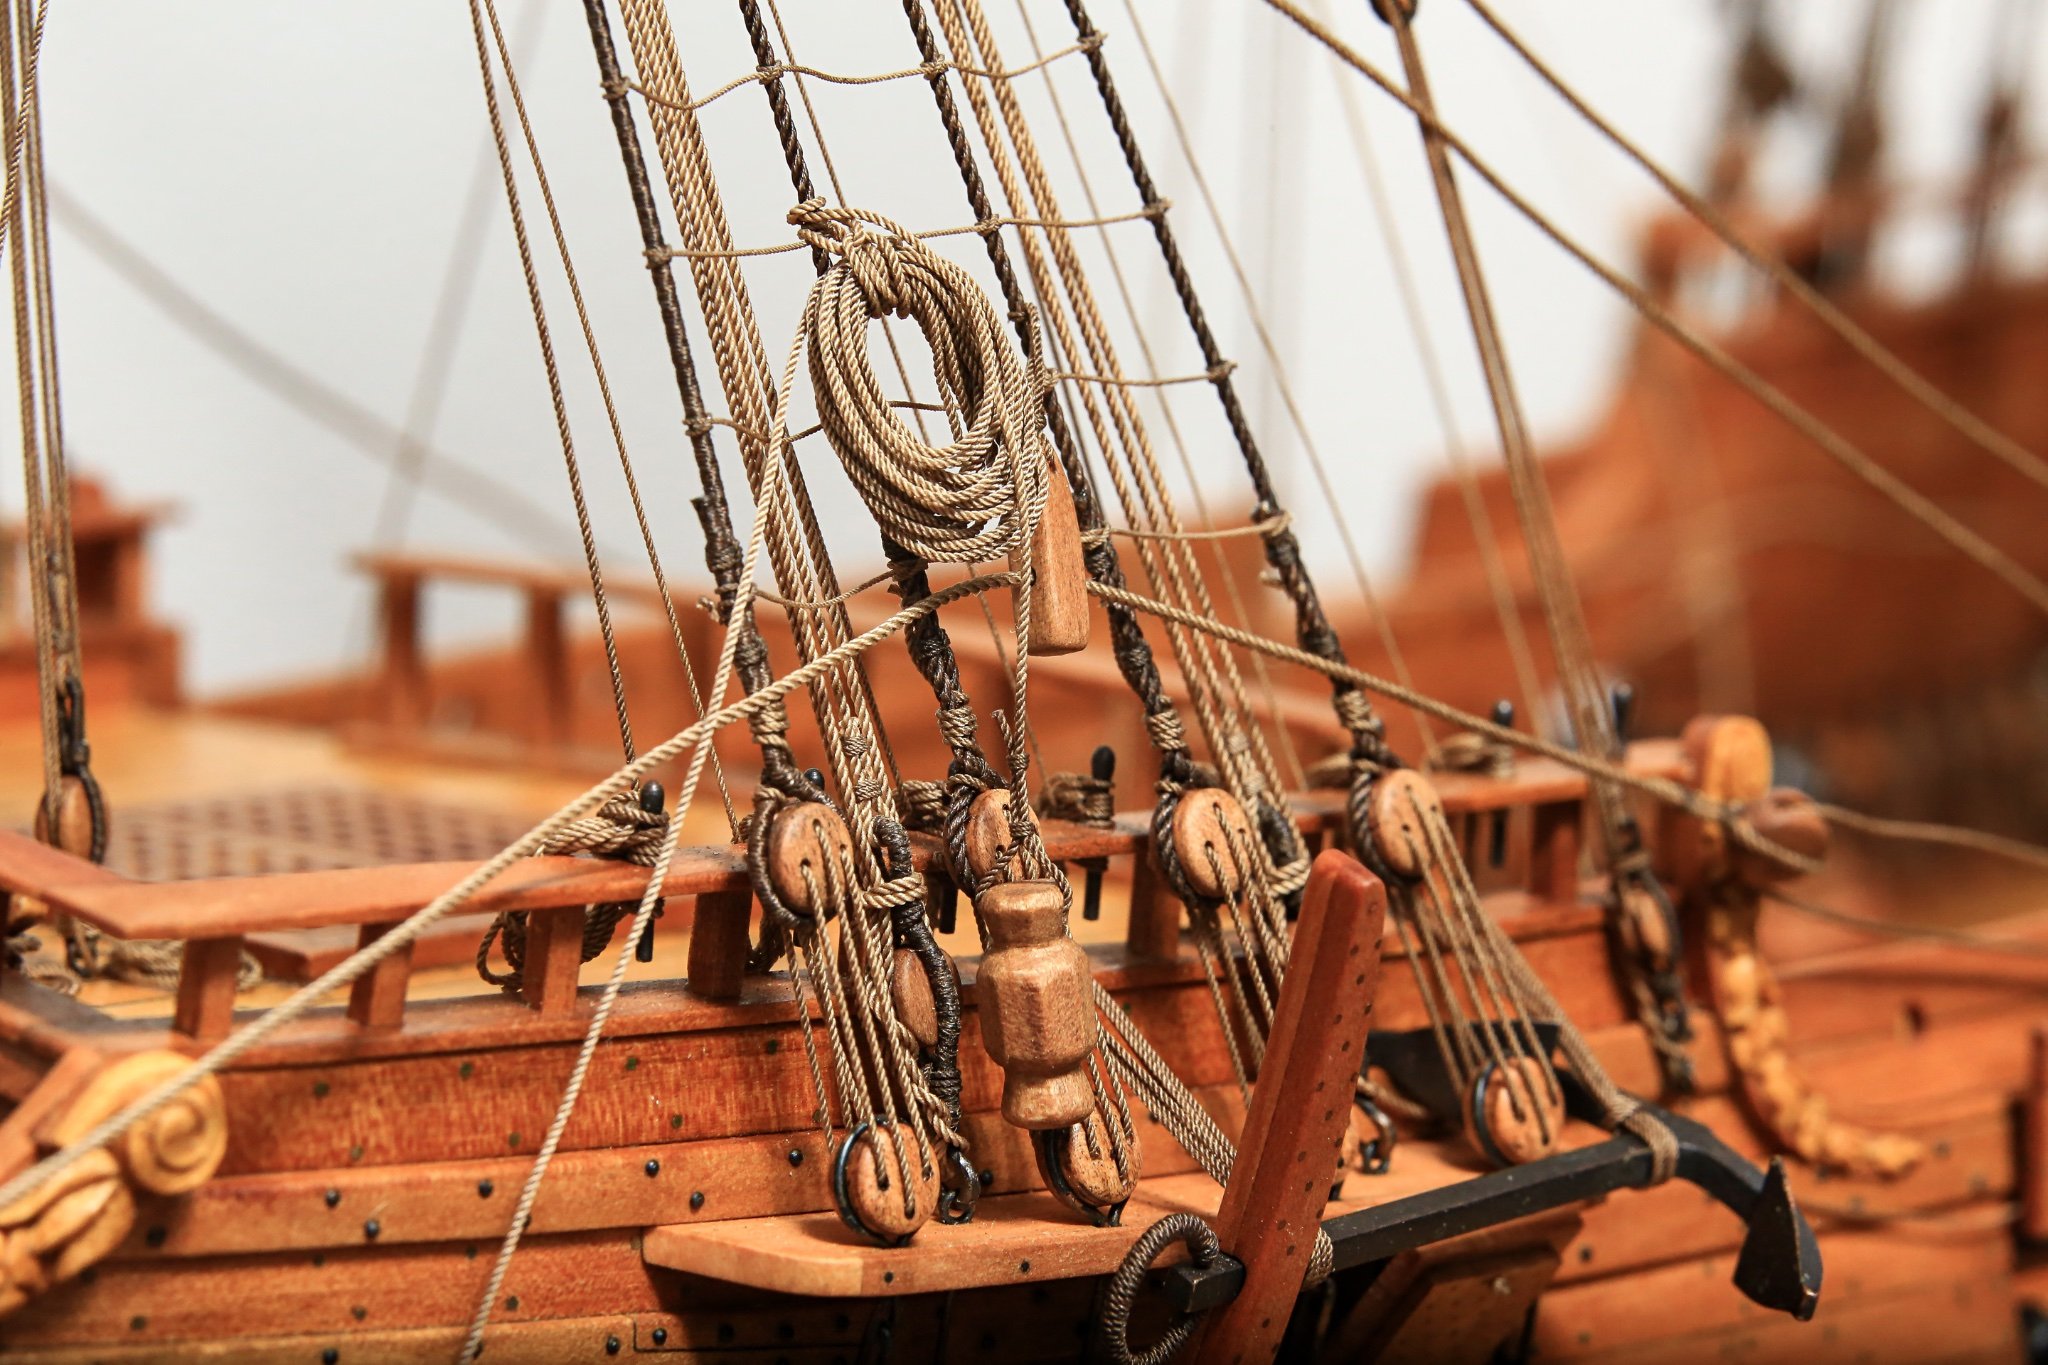
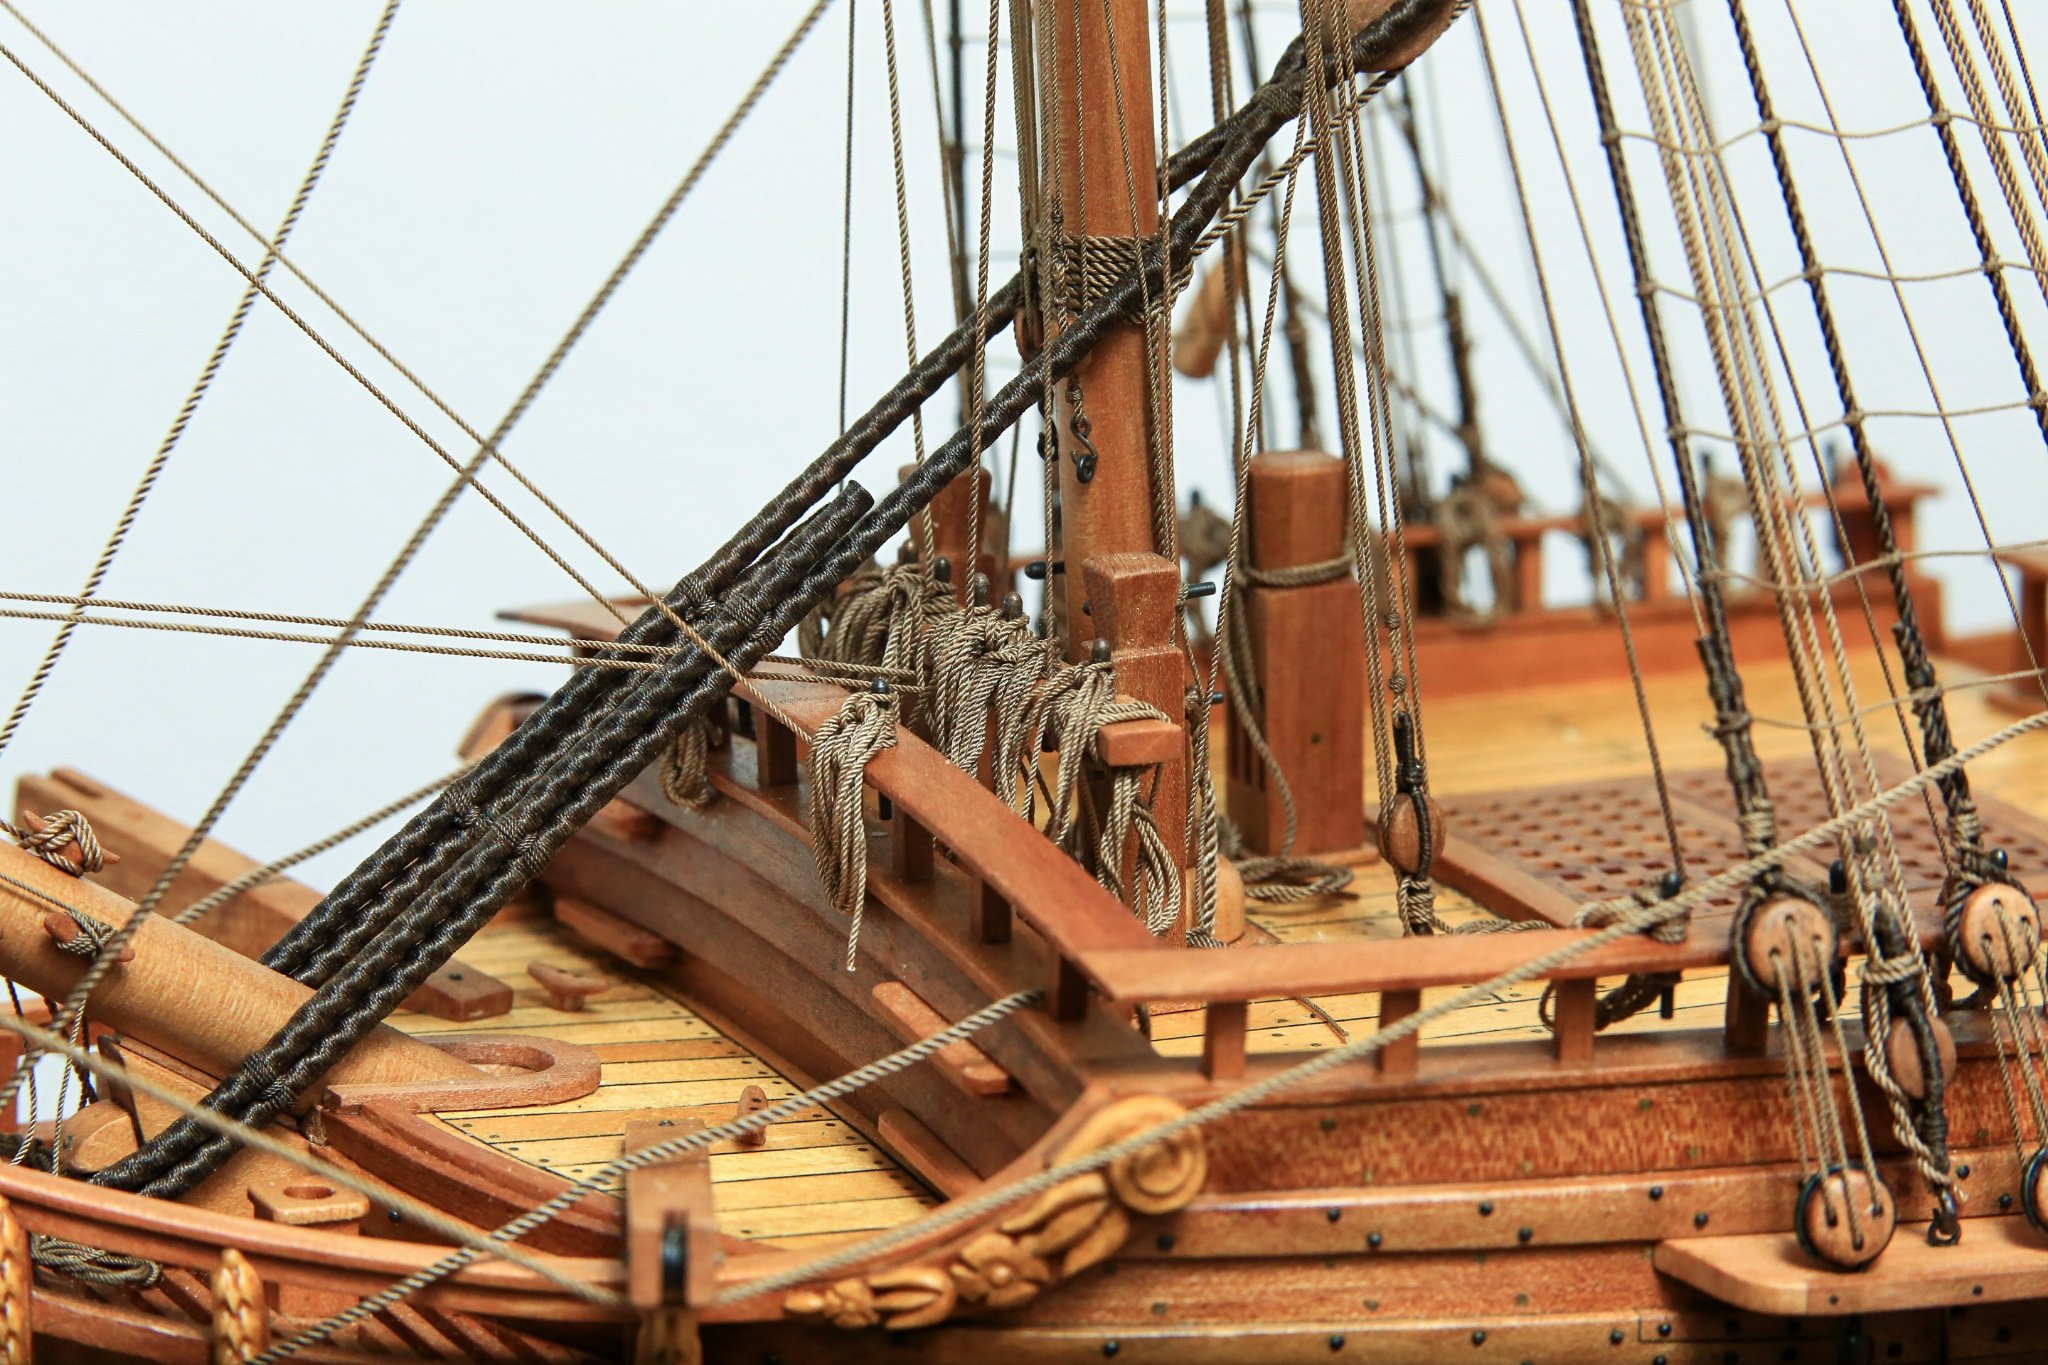
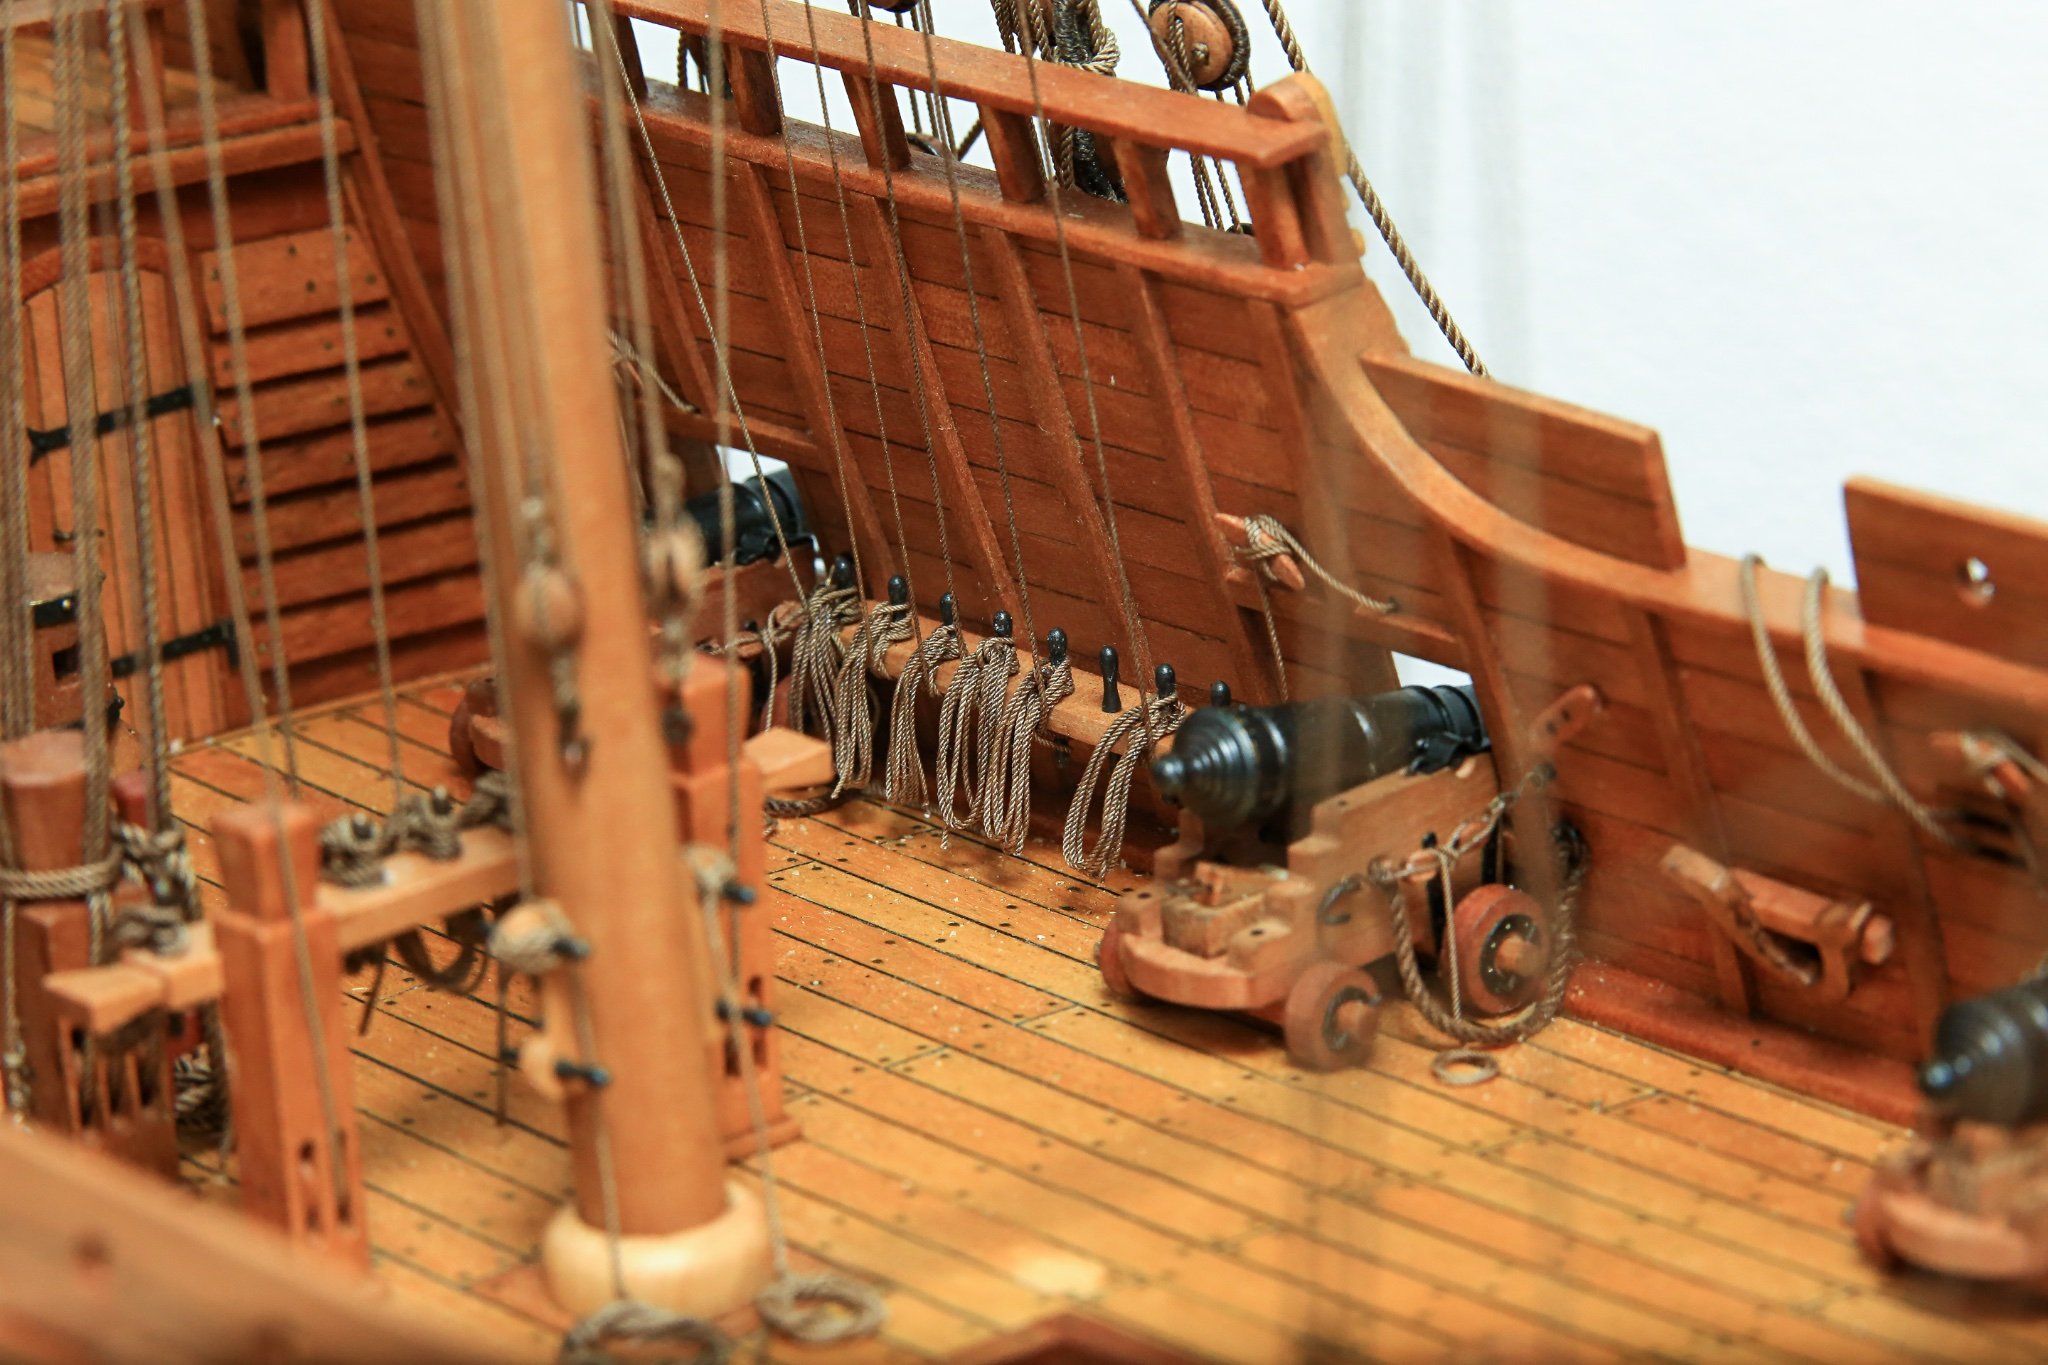
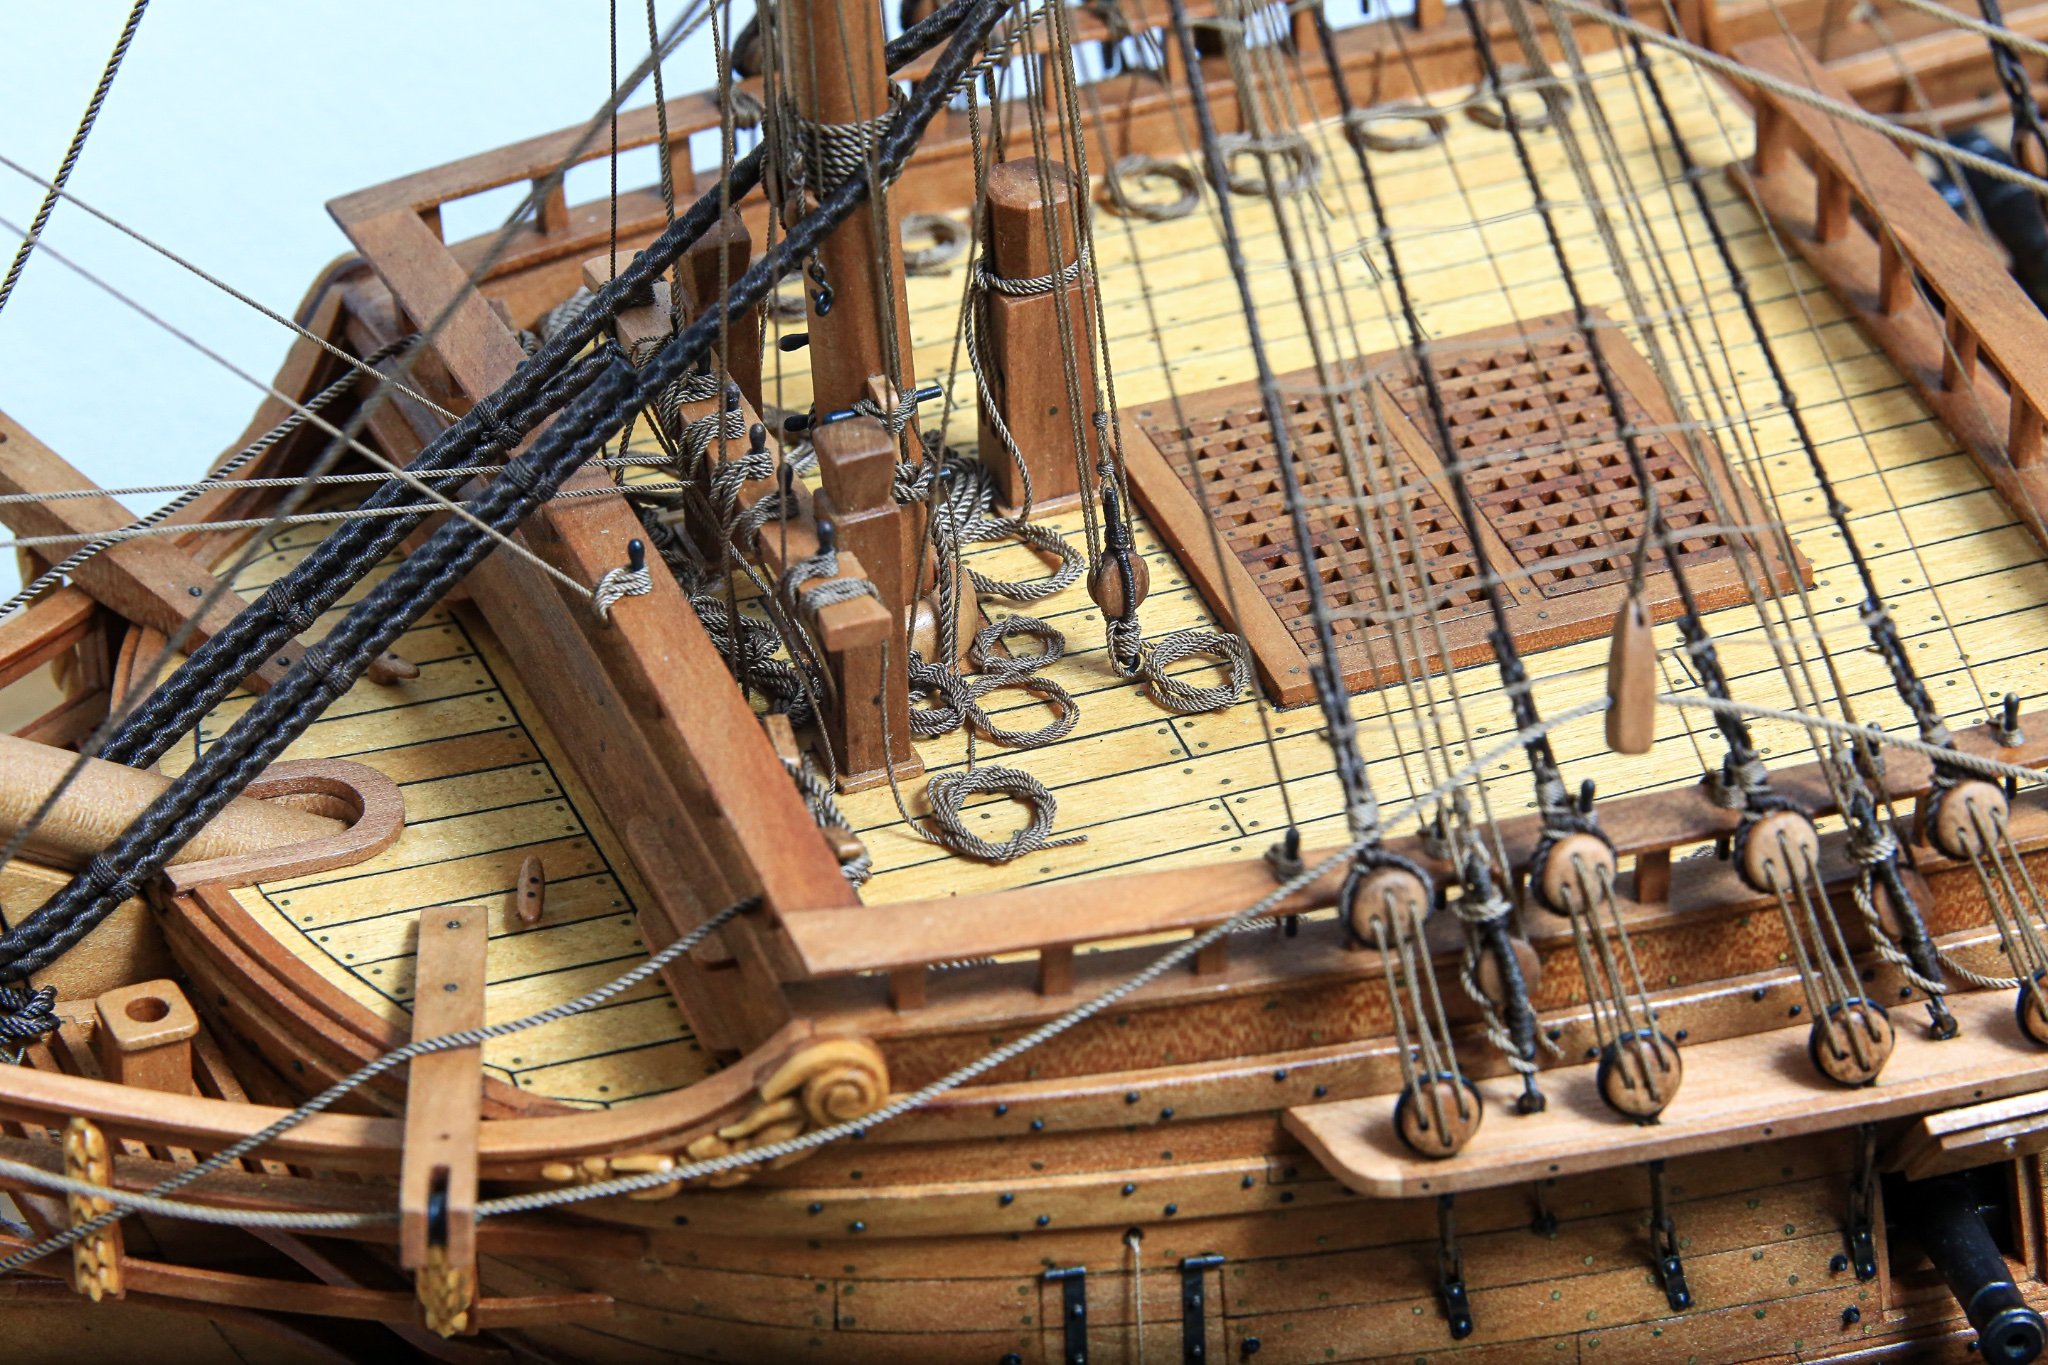
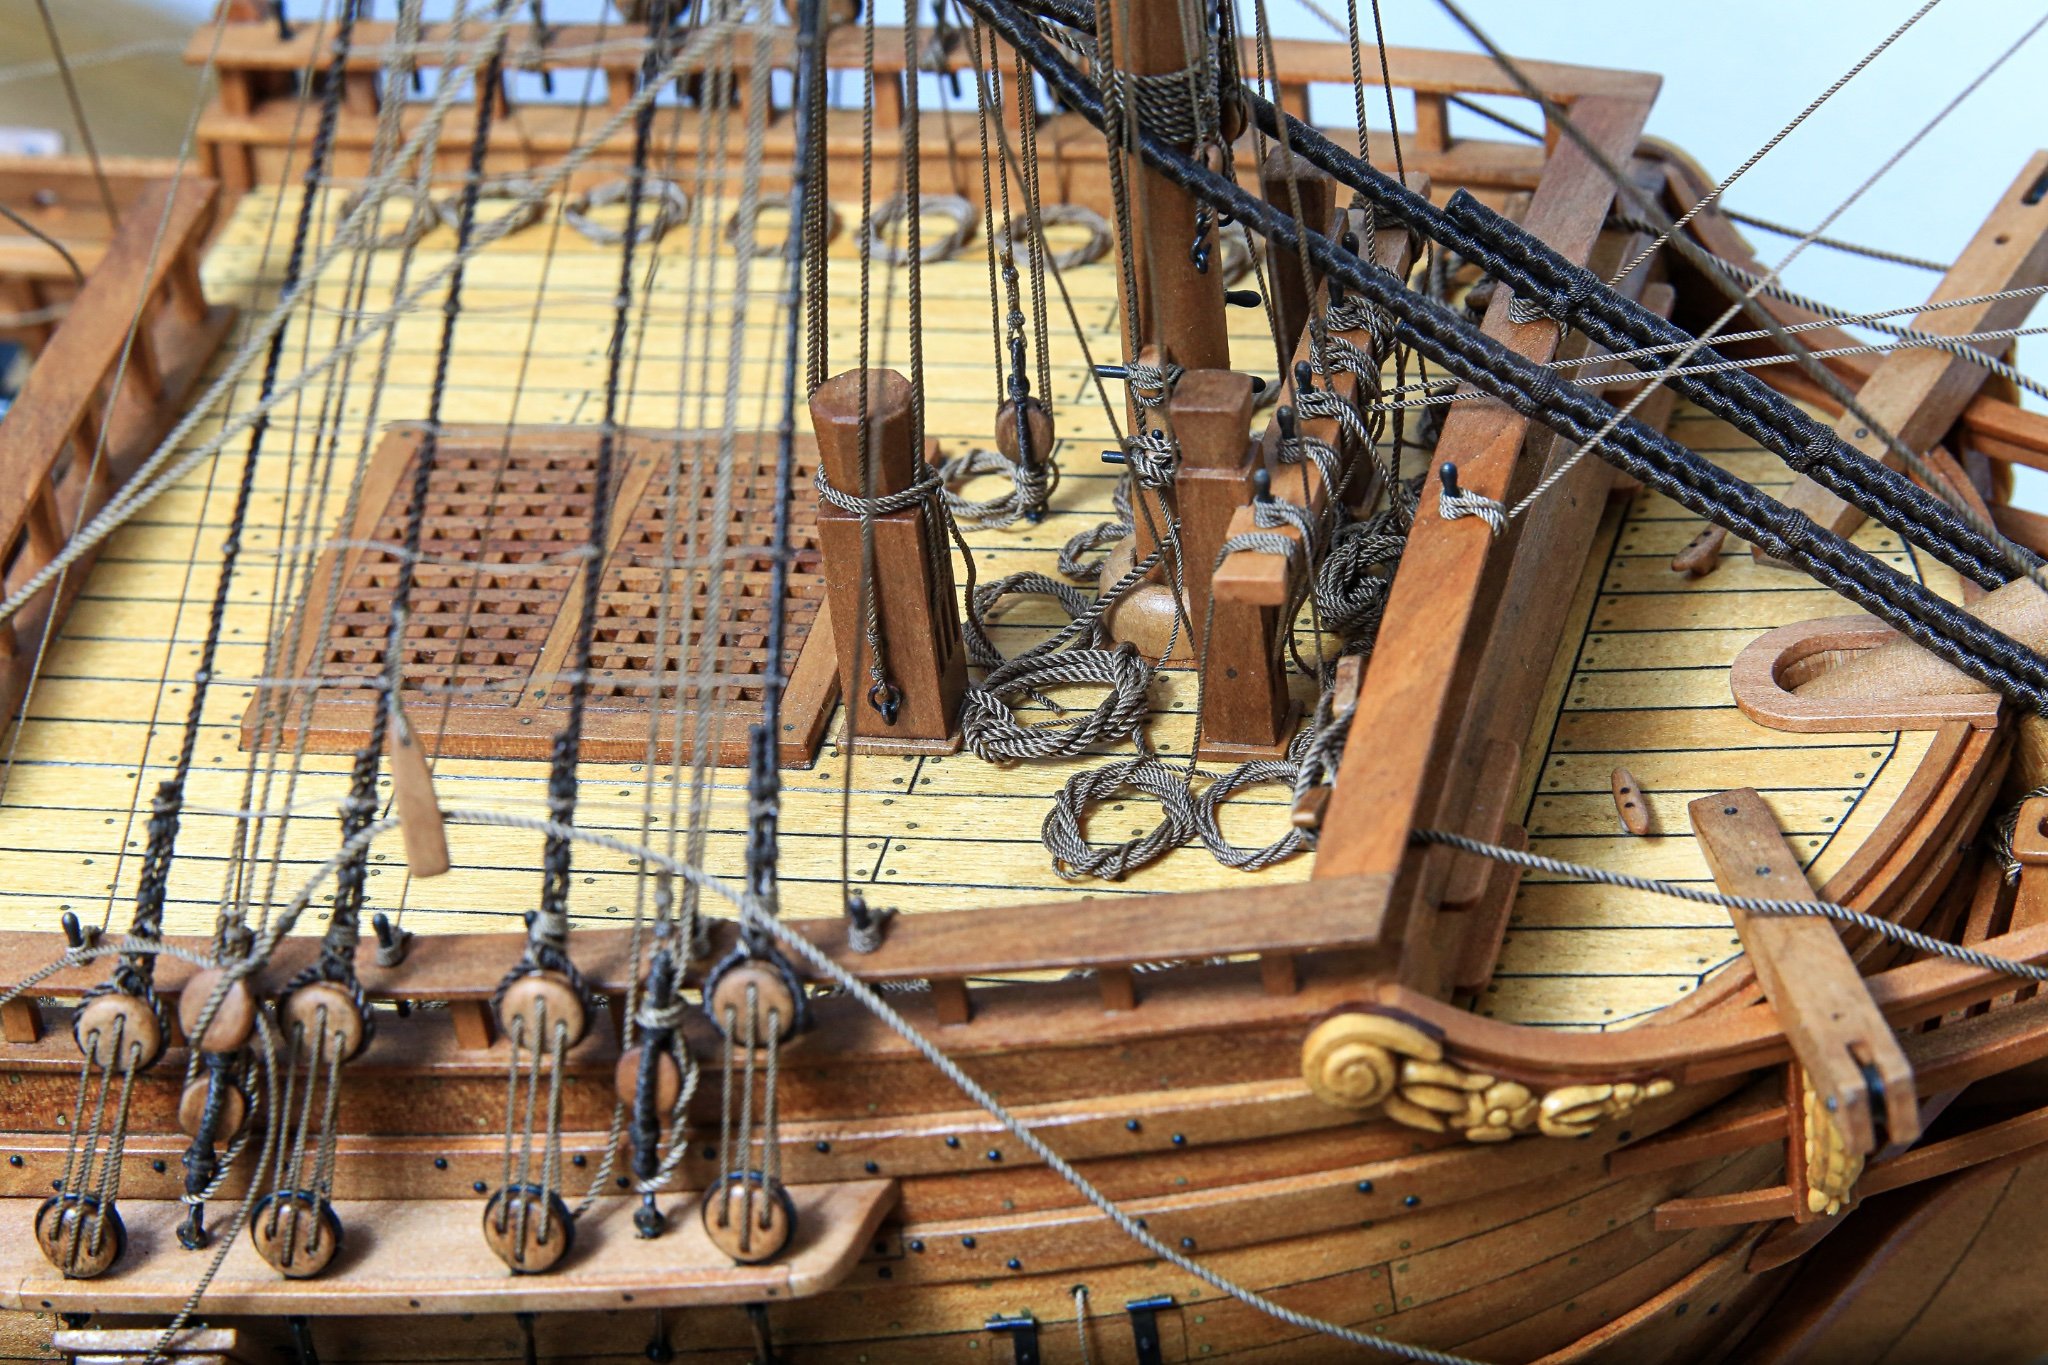
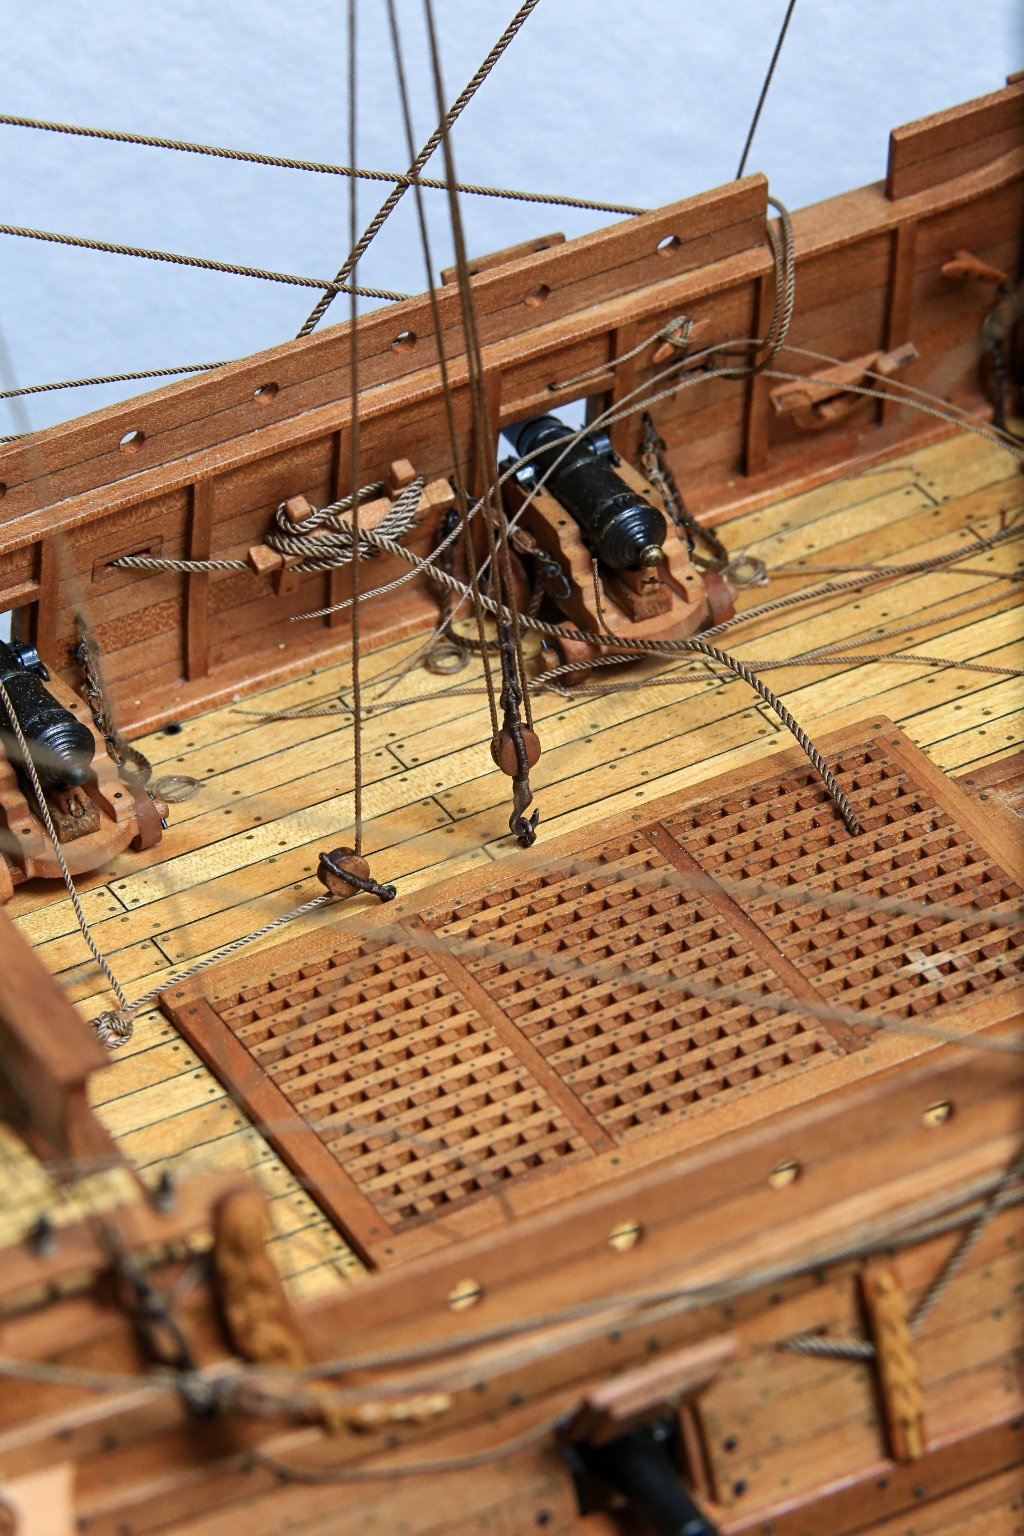
Coils laying down on the deck were quite easy... and let say it was great shortcut... however bit messy I must say.
So right after I've decided to do it right way... and to stop 🤬 around...
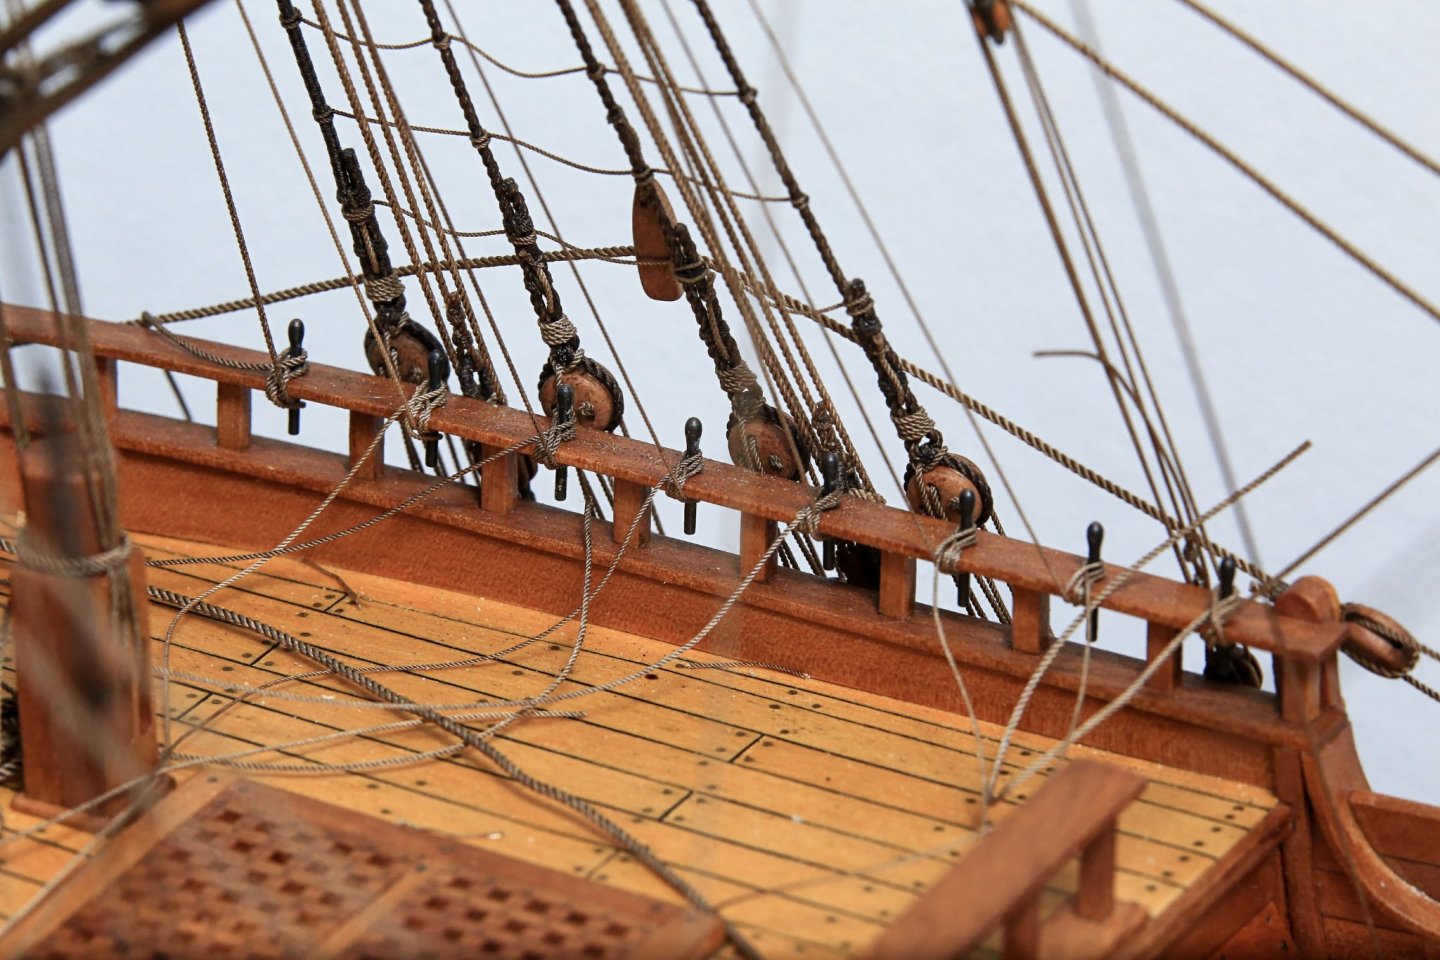
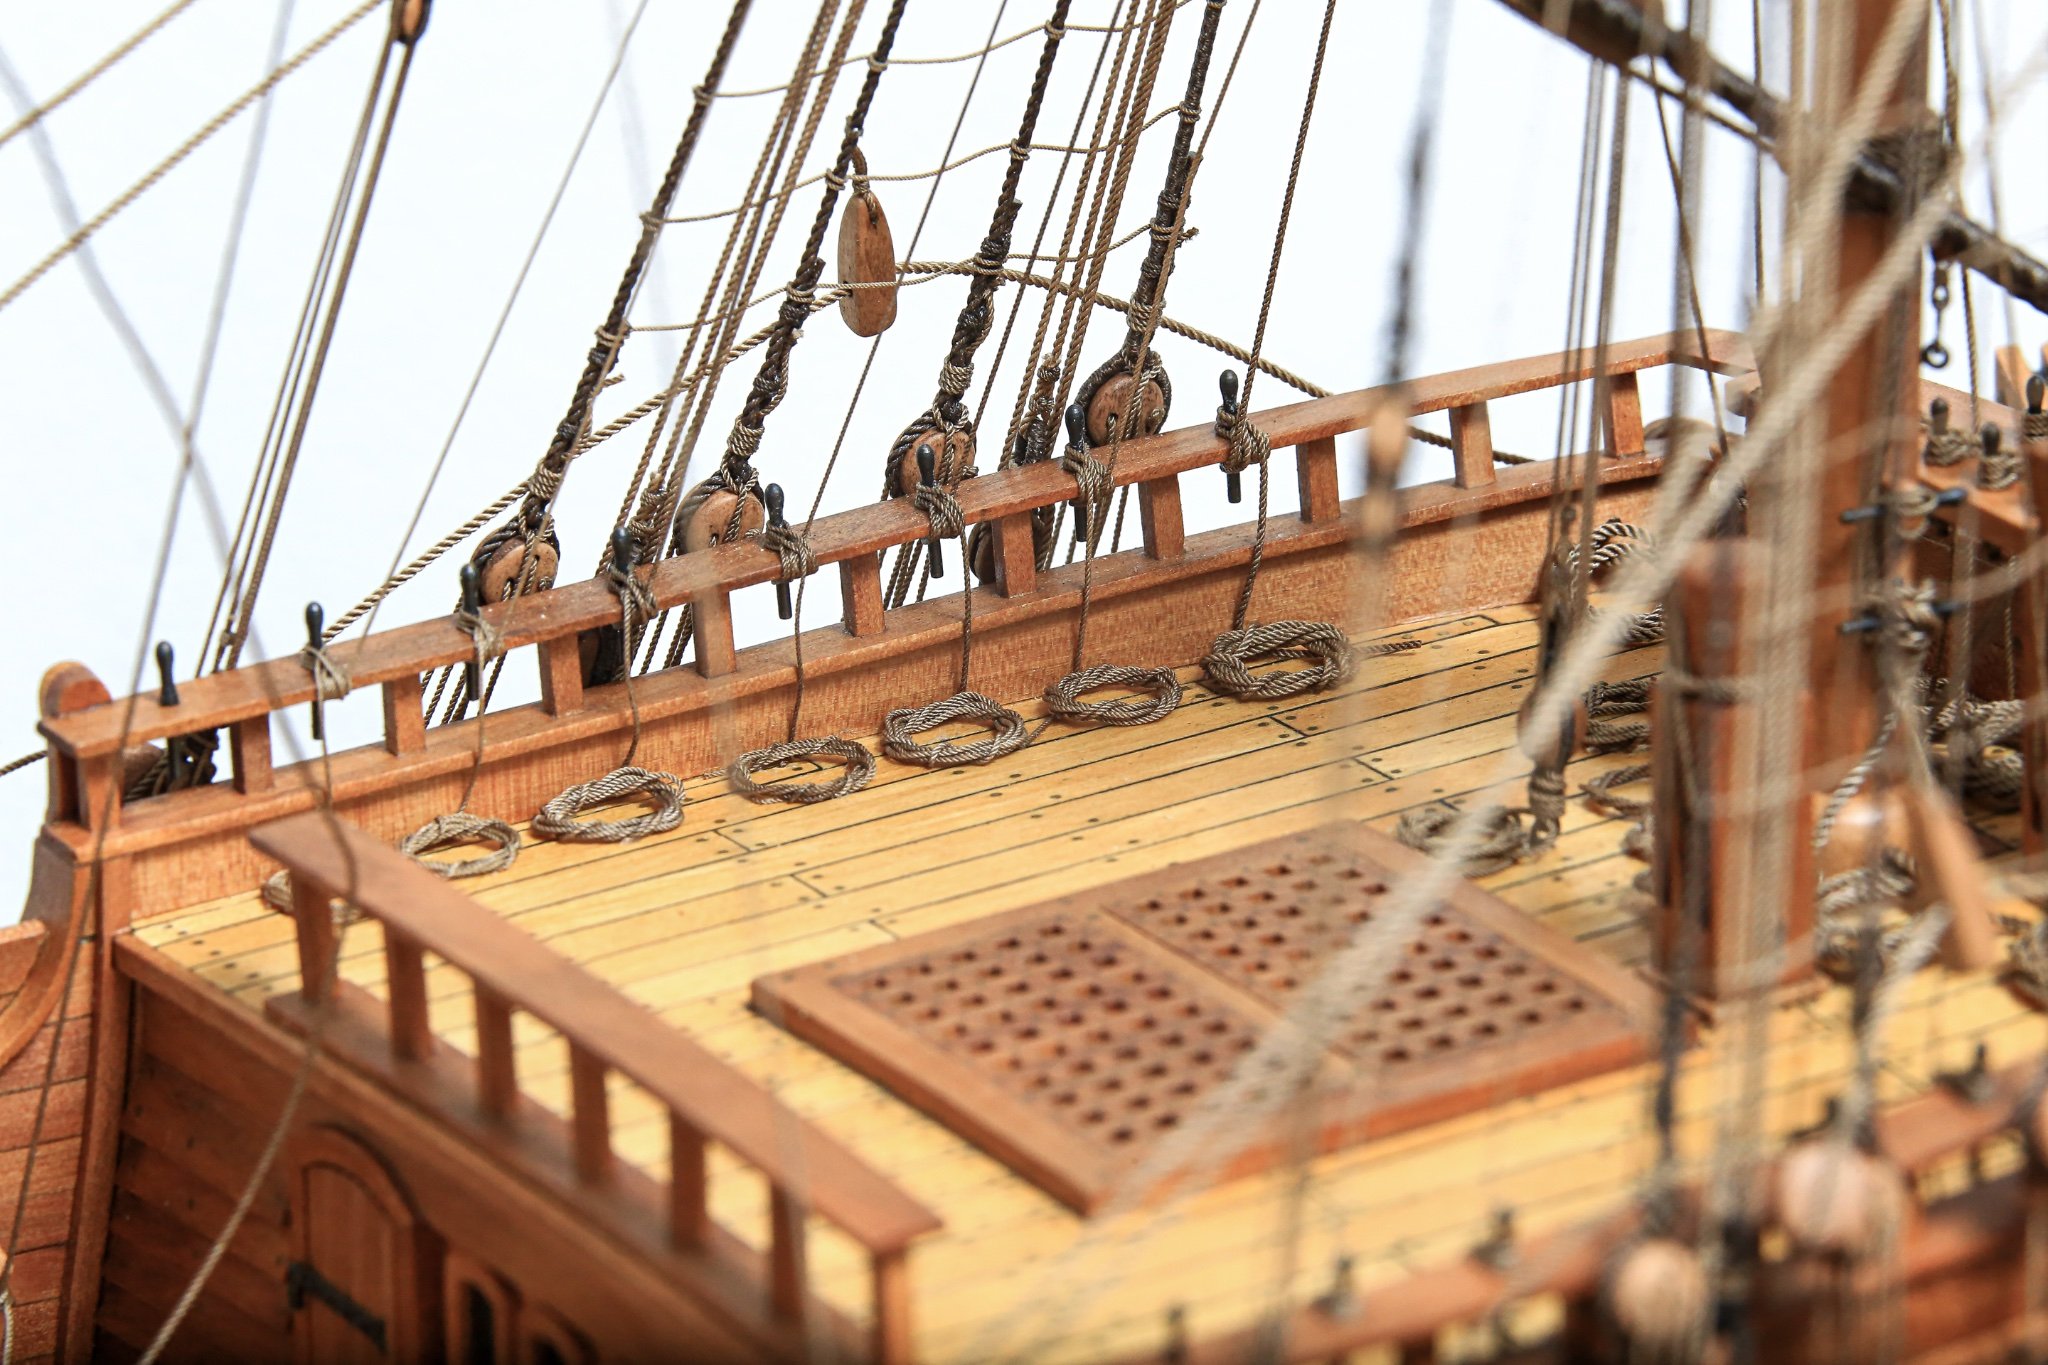
All belayed ropes are mostly hanged on the pins like they should... so it's more organized.
It gave me huge hard time... 🥴🤬 nerve wrecking process... no chance to fit hand between ropes web... but after many insults it's done

All coils were prepared off the model... then coils were tied using excess of relevant rope. No glue. Just tight knot.
Very similar way like shown by @Dziadeczek on the short clip... small loop passed through coil and hanged on the pin.
Why? No idea
Probably just in case if I would like to change some rope one day... but I'm pretty much sure it won't happen anyway
Here and there some of the coils look little bit messy... but I will arrange them after "hoovering" deck from all kinds of debris.


Cheers,
Matt
-
Hi All,
Thank you JJ for your nice comment 🍻
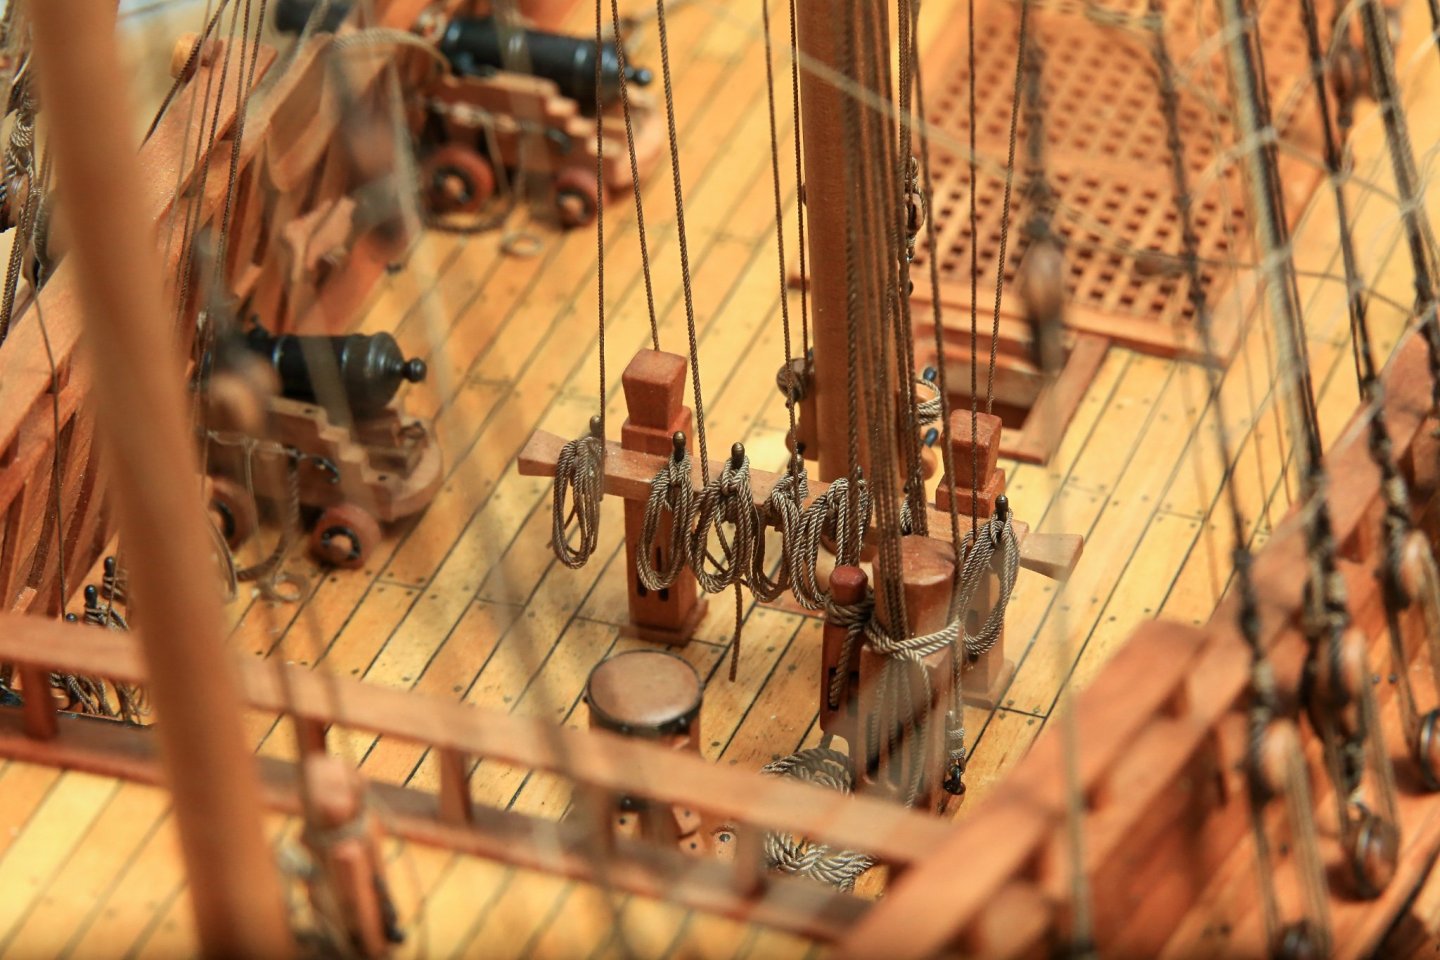
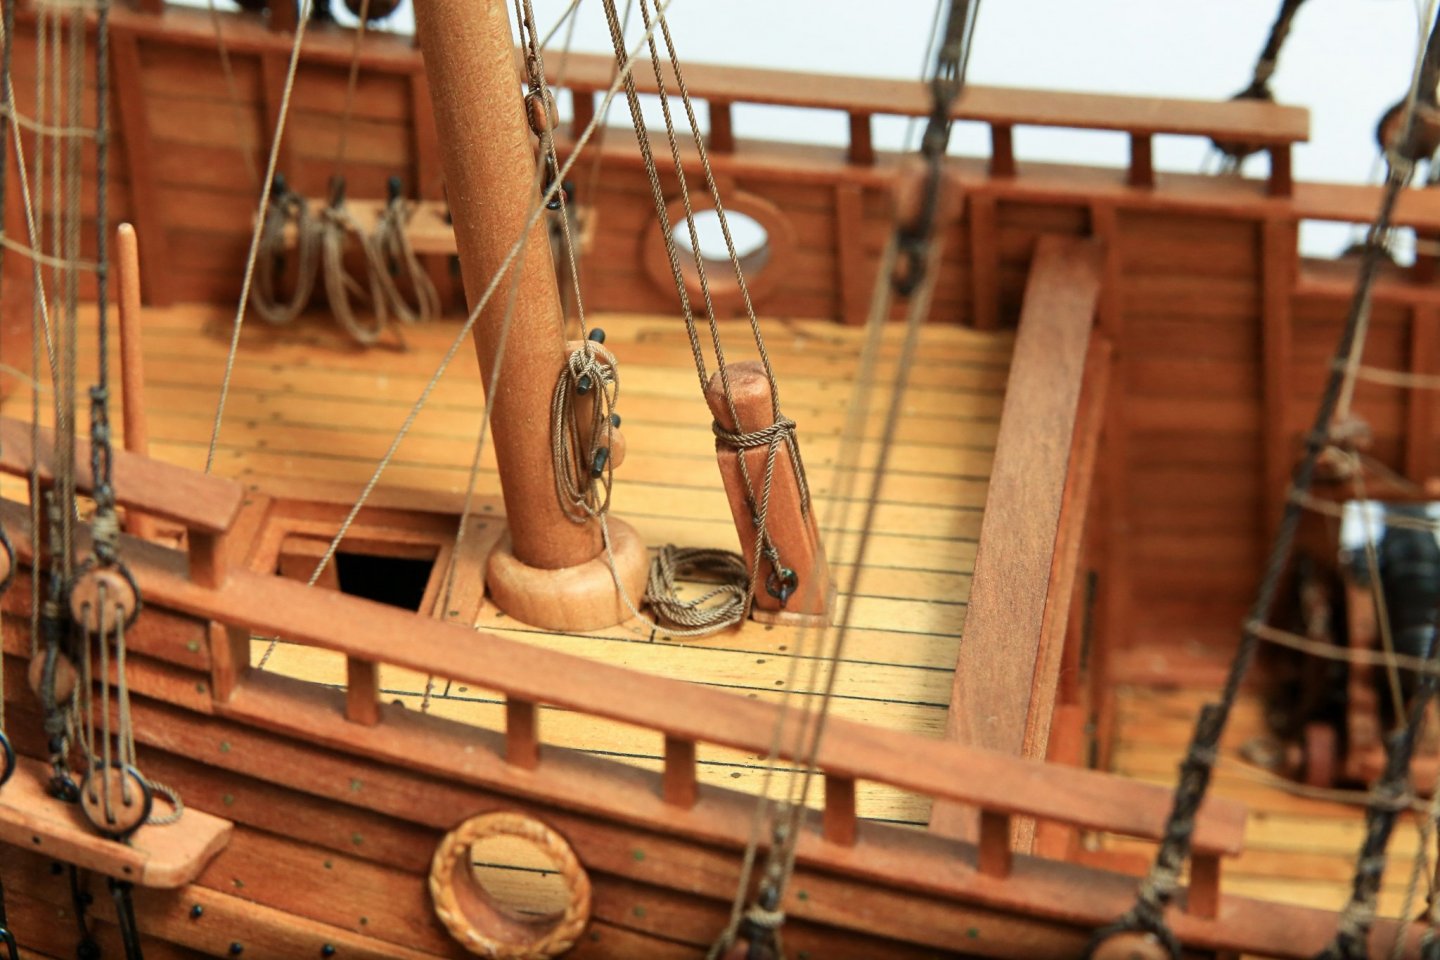
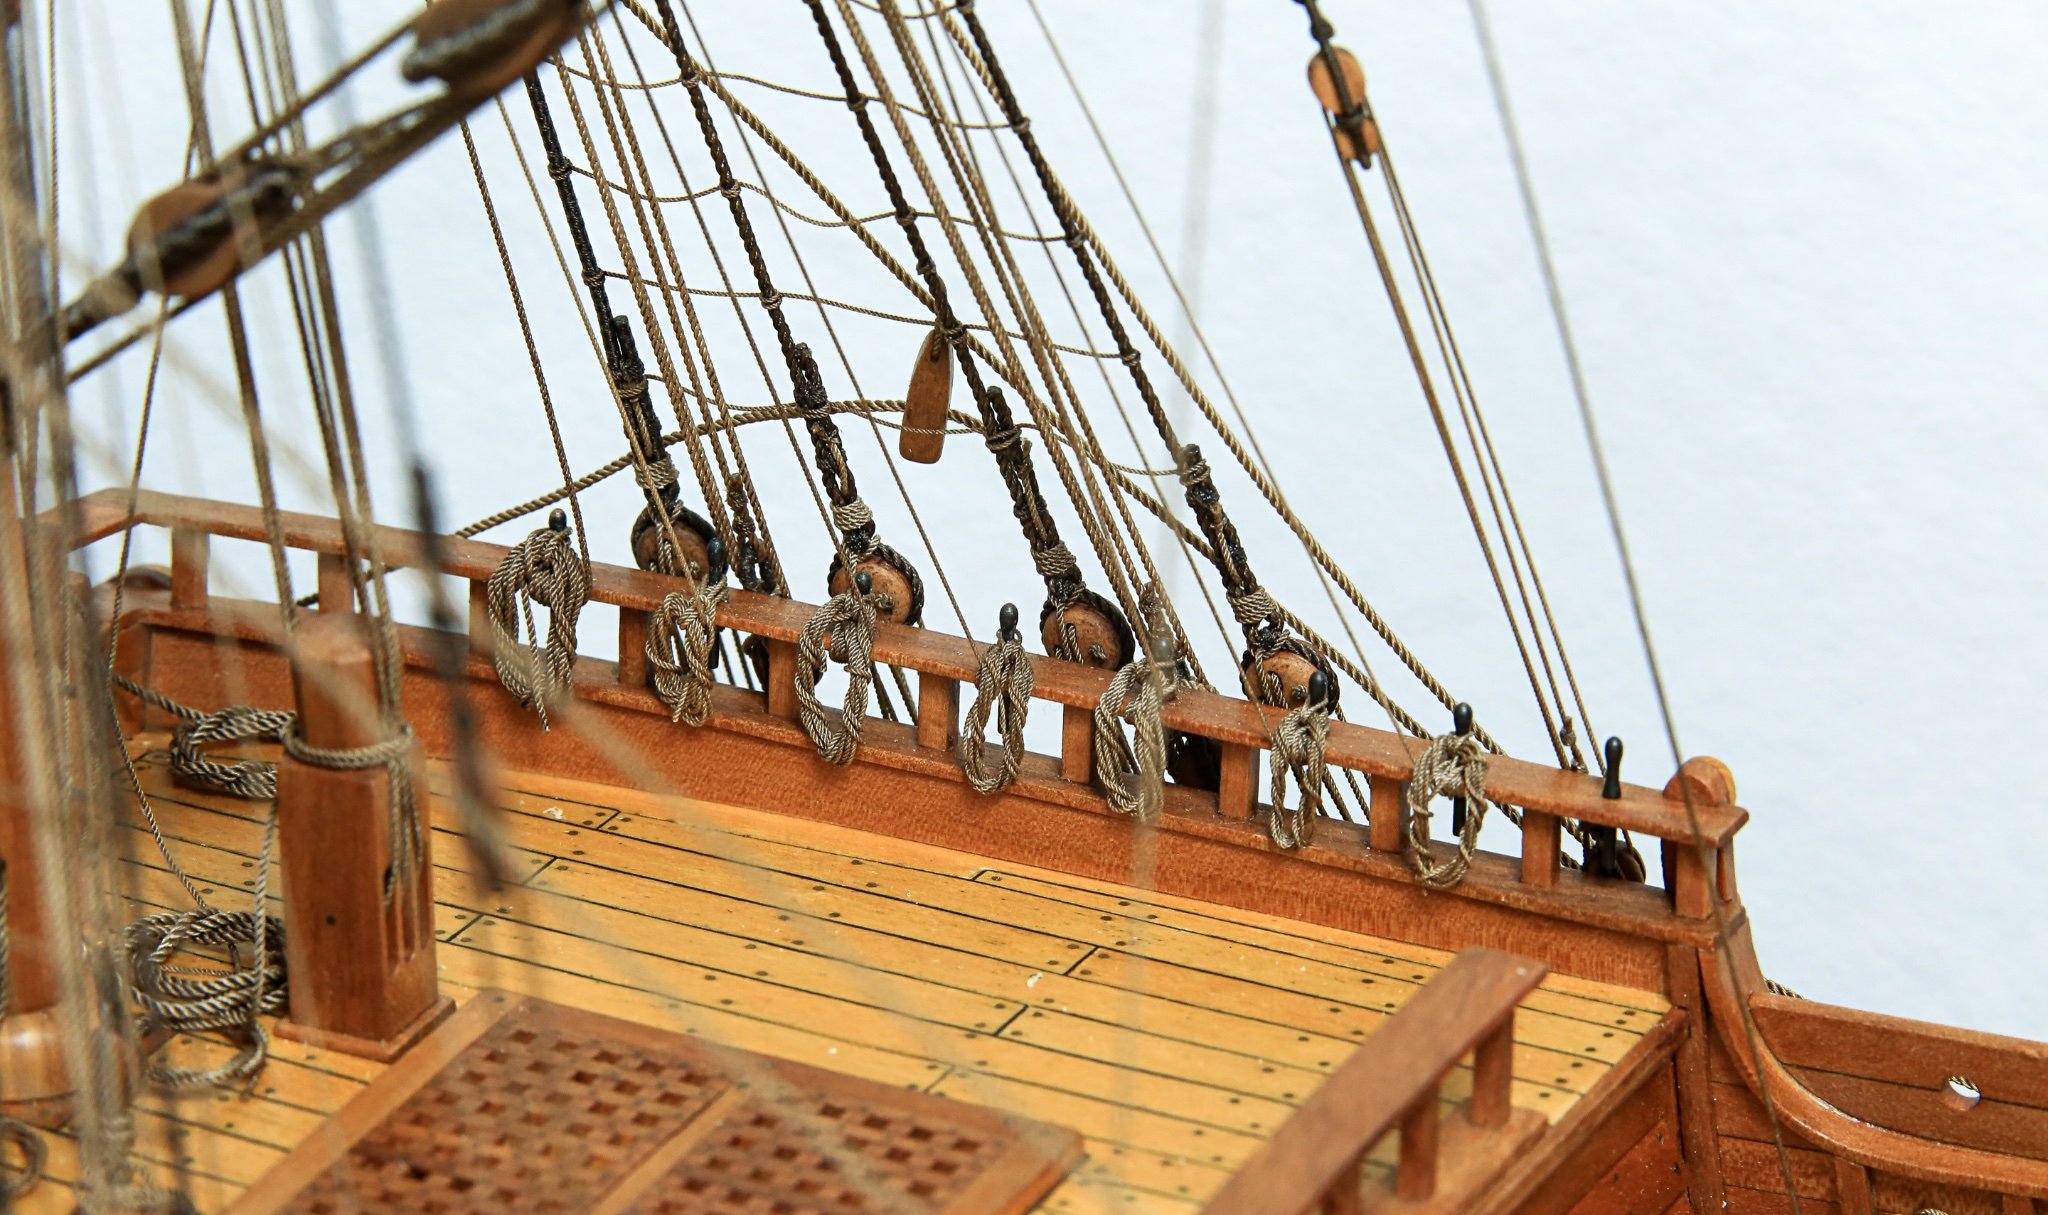
I've started painful process of arranging ropes around belaying pins, cleats, etc...
Not much place for hand or fingers so it's really 🤬🤬🤬
...biggest drama will be to reach belaying pins around main mast 🥴
I was thinking for long how to lay the ropes... and I've decided to go with coils laying down on the deck.
Rope was first laid on the pin around 3-4 times and then remaining rope was formed into coil.


Cheers,
Matt
-
Hi Mark,
Le Rochefort is on my list
It's really nice looking vessel.
...but what you are showing to us here is pure modellers porn 😜😆
Extremely precise work... just wow!
It's going to be world class model for sure!
I will follow your log and once in a while I'll pinch some of your photos to my "library" if you don't mind of course 🙃
It will be great addition and reference for future build.
Good luck!
Cheers,
Matt
-
-
Thank you Ron, GrandpaPhil and Sam.
Really appreciate your comments. Thanks! 🍻🍻🍻
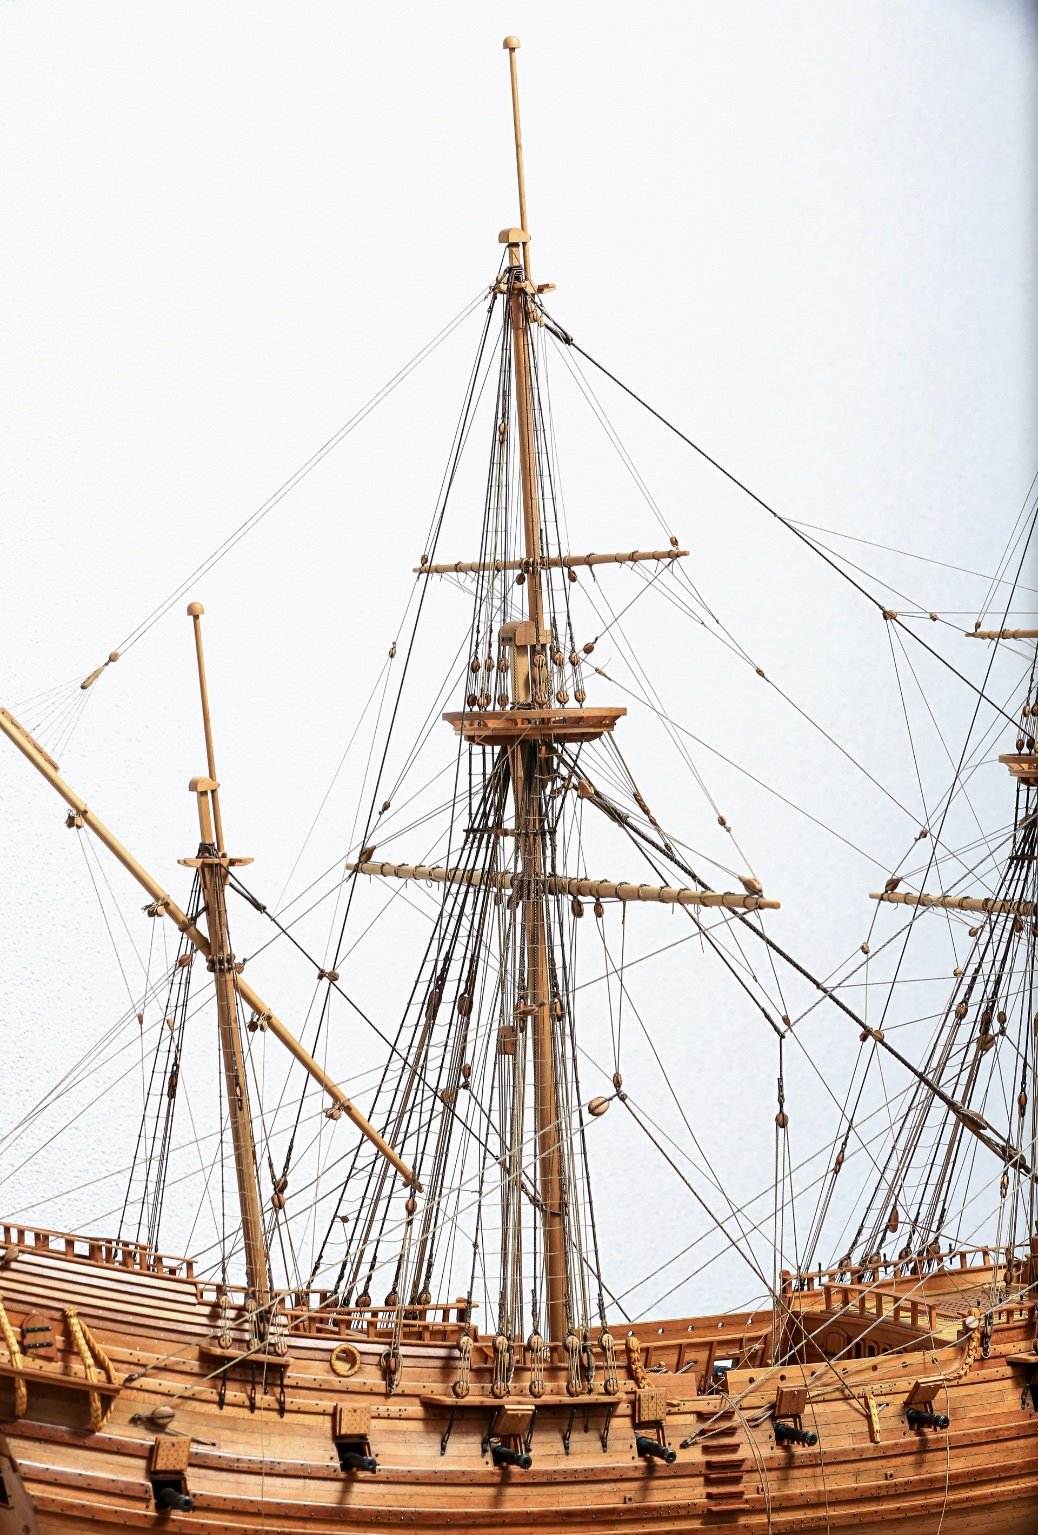
It's been a while without any update... but I've made some progress...
...few steps closer to the end...
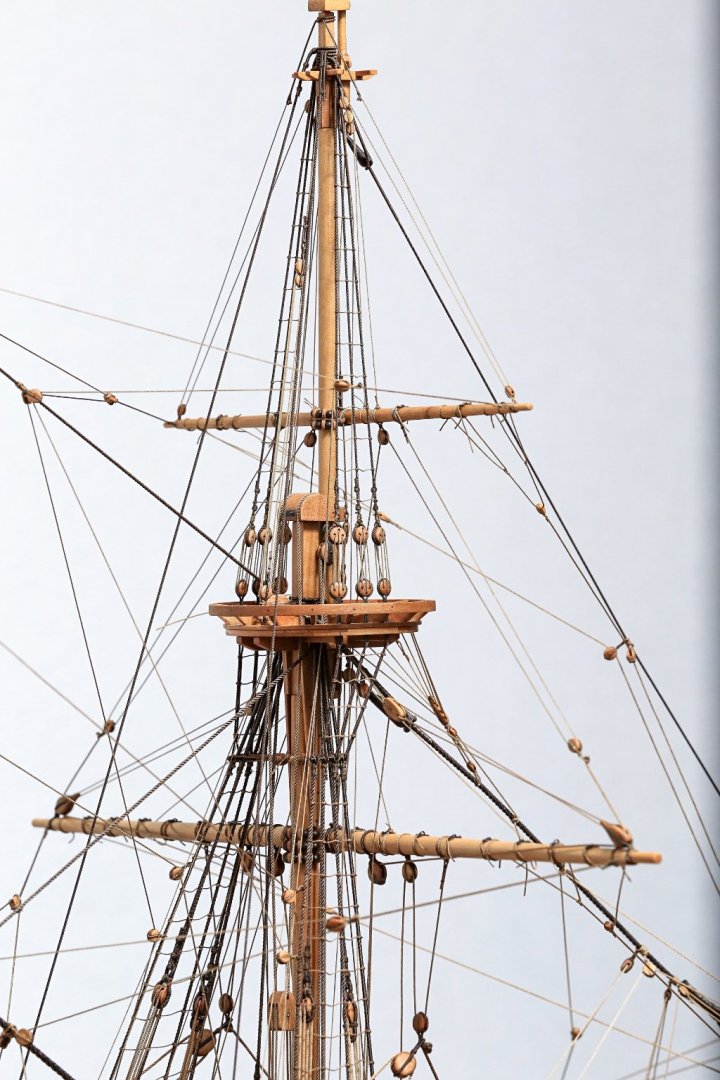
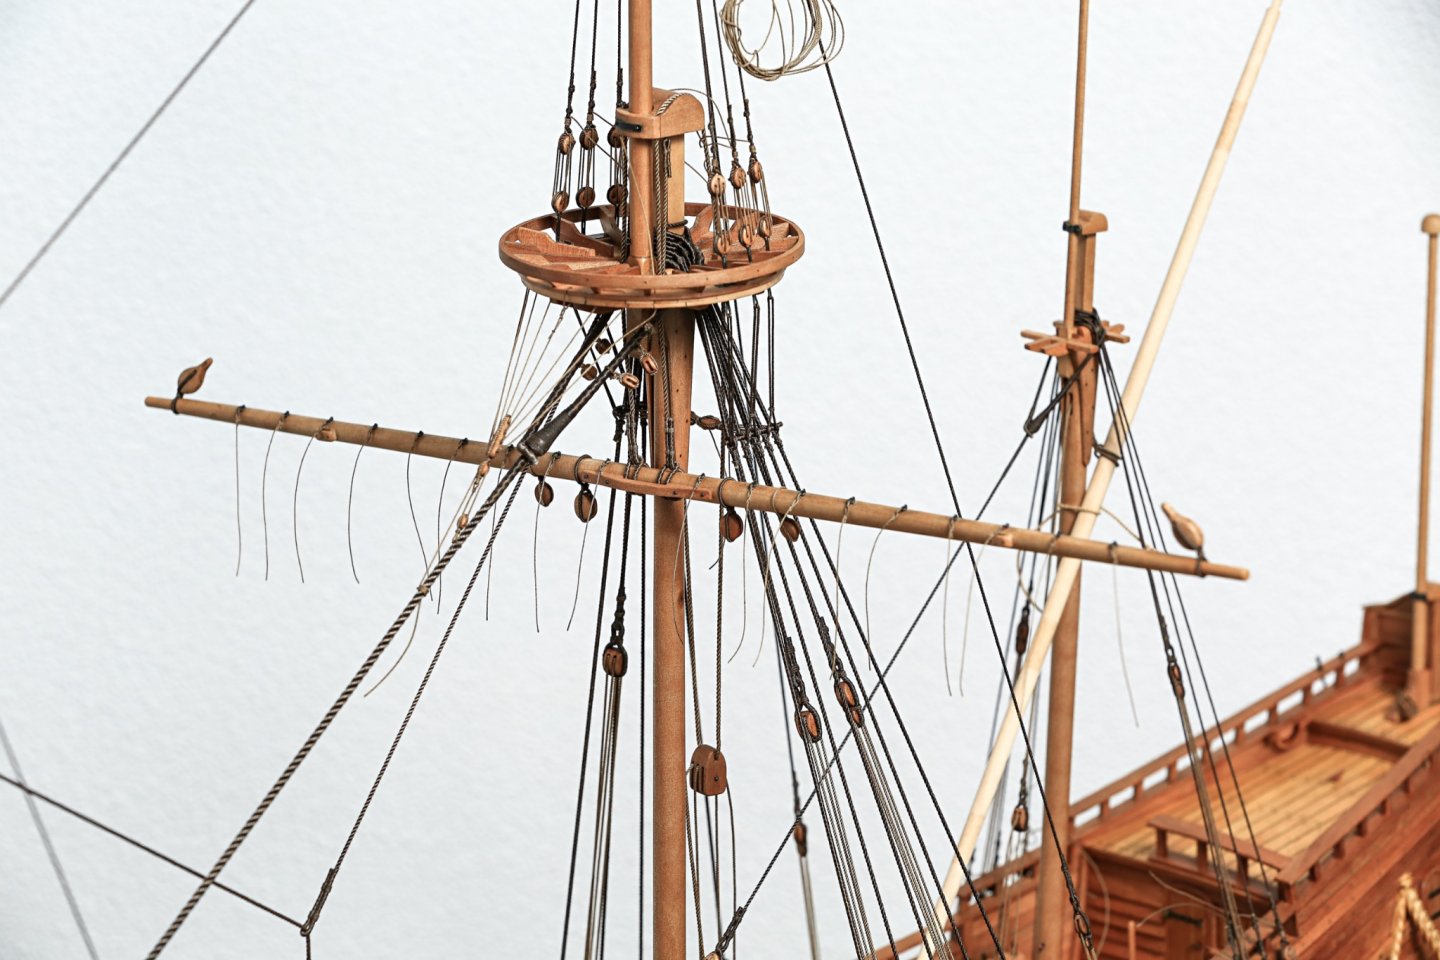
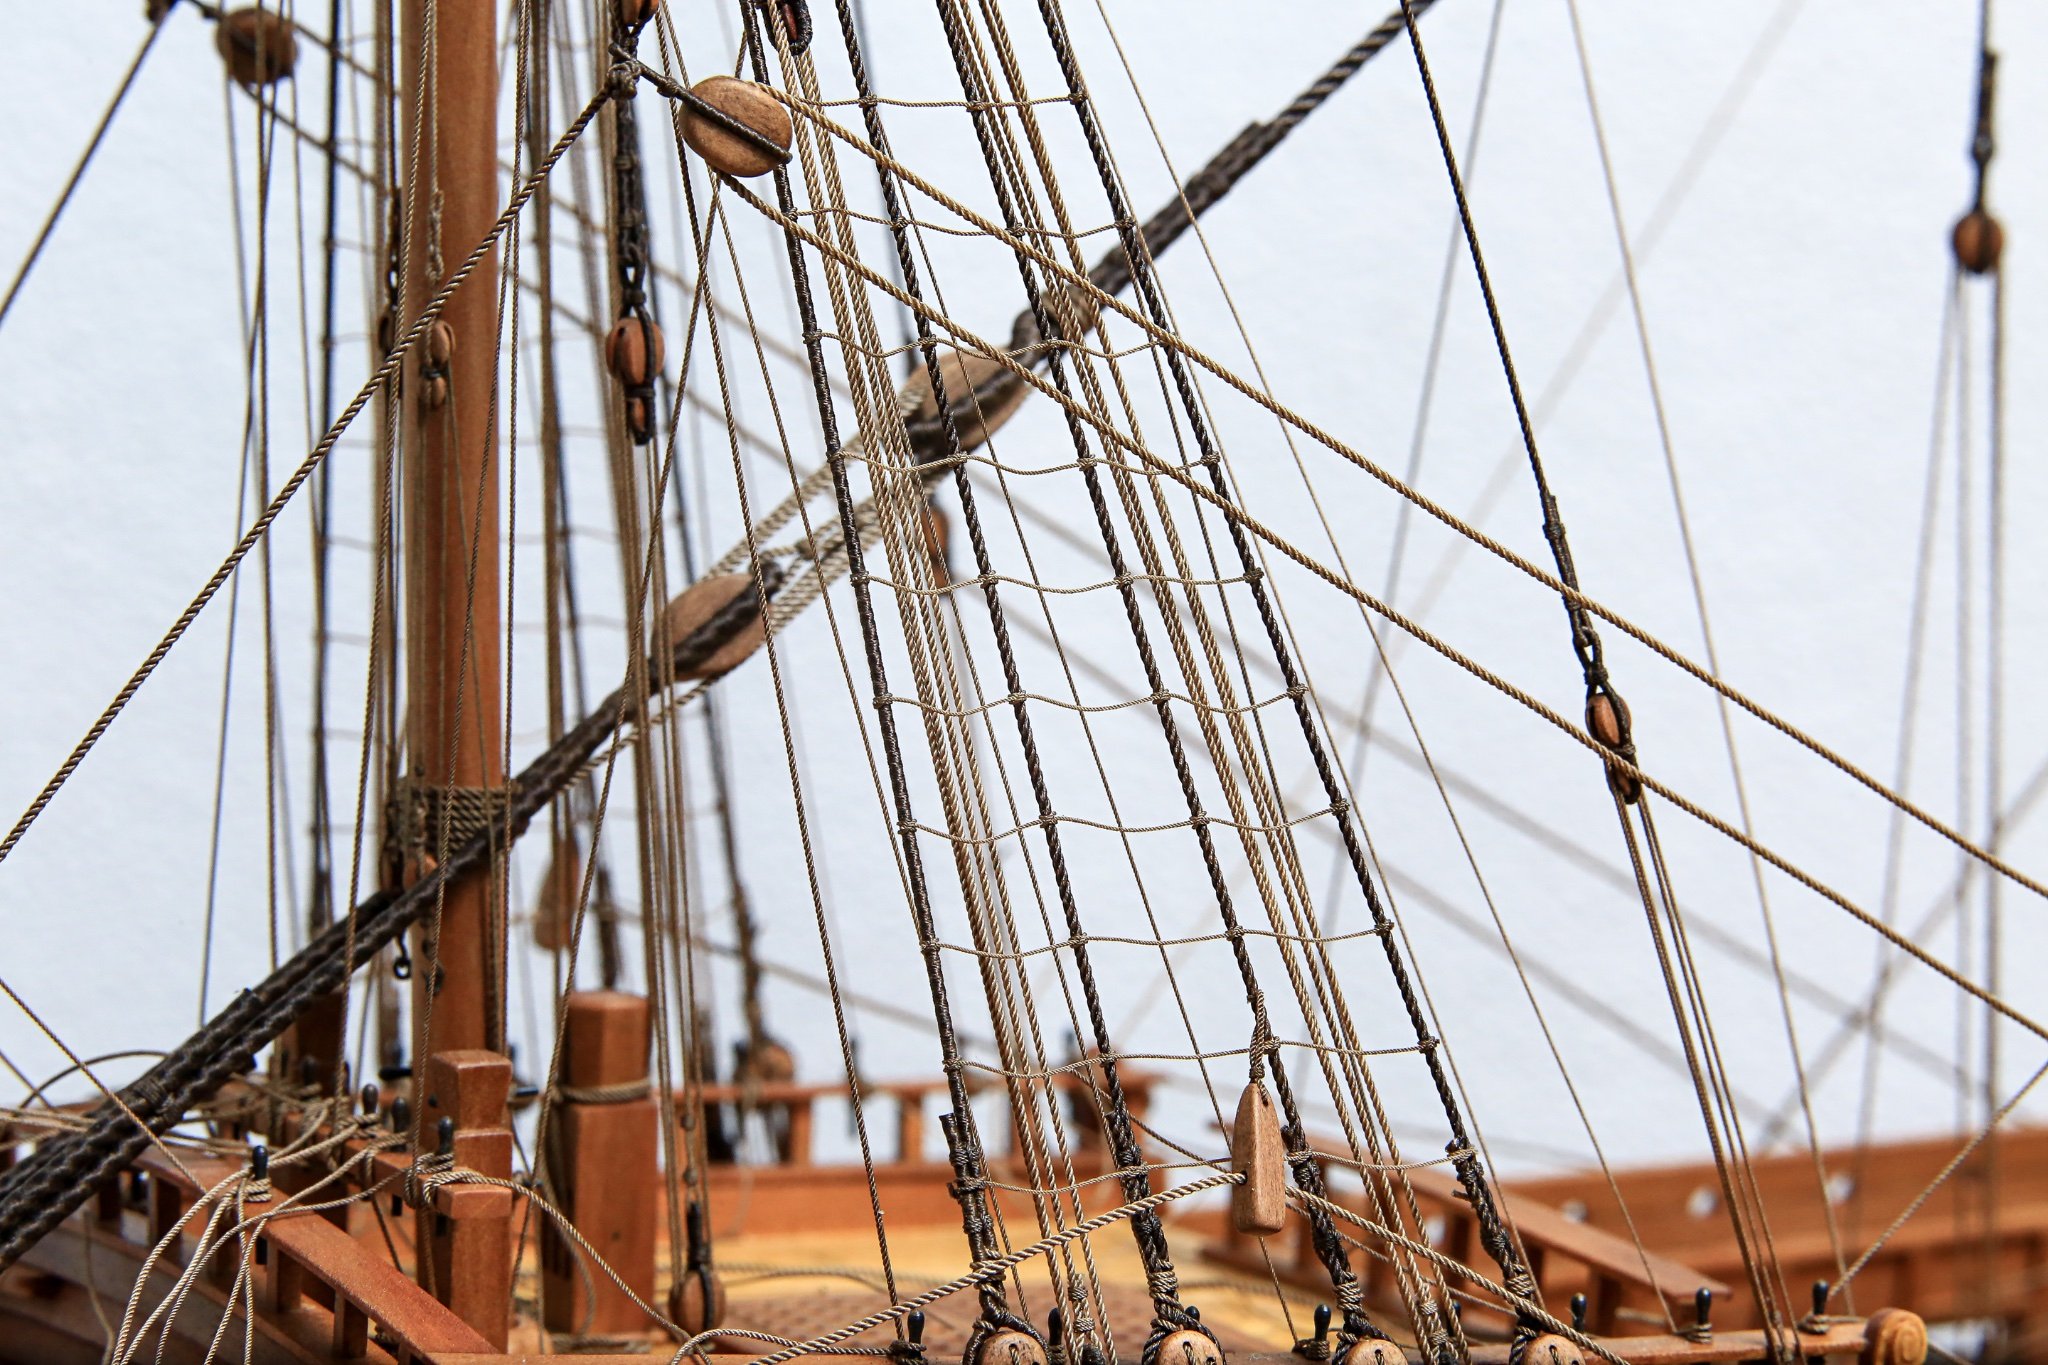
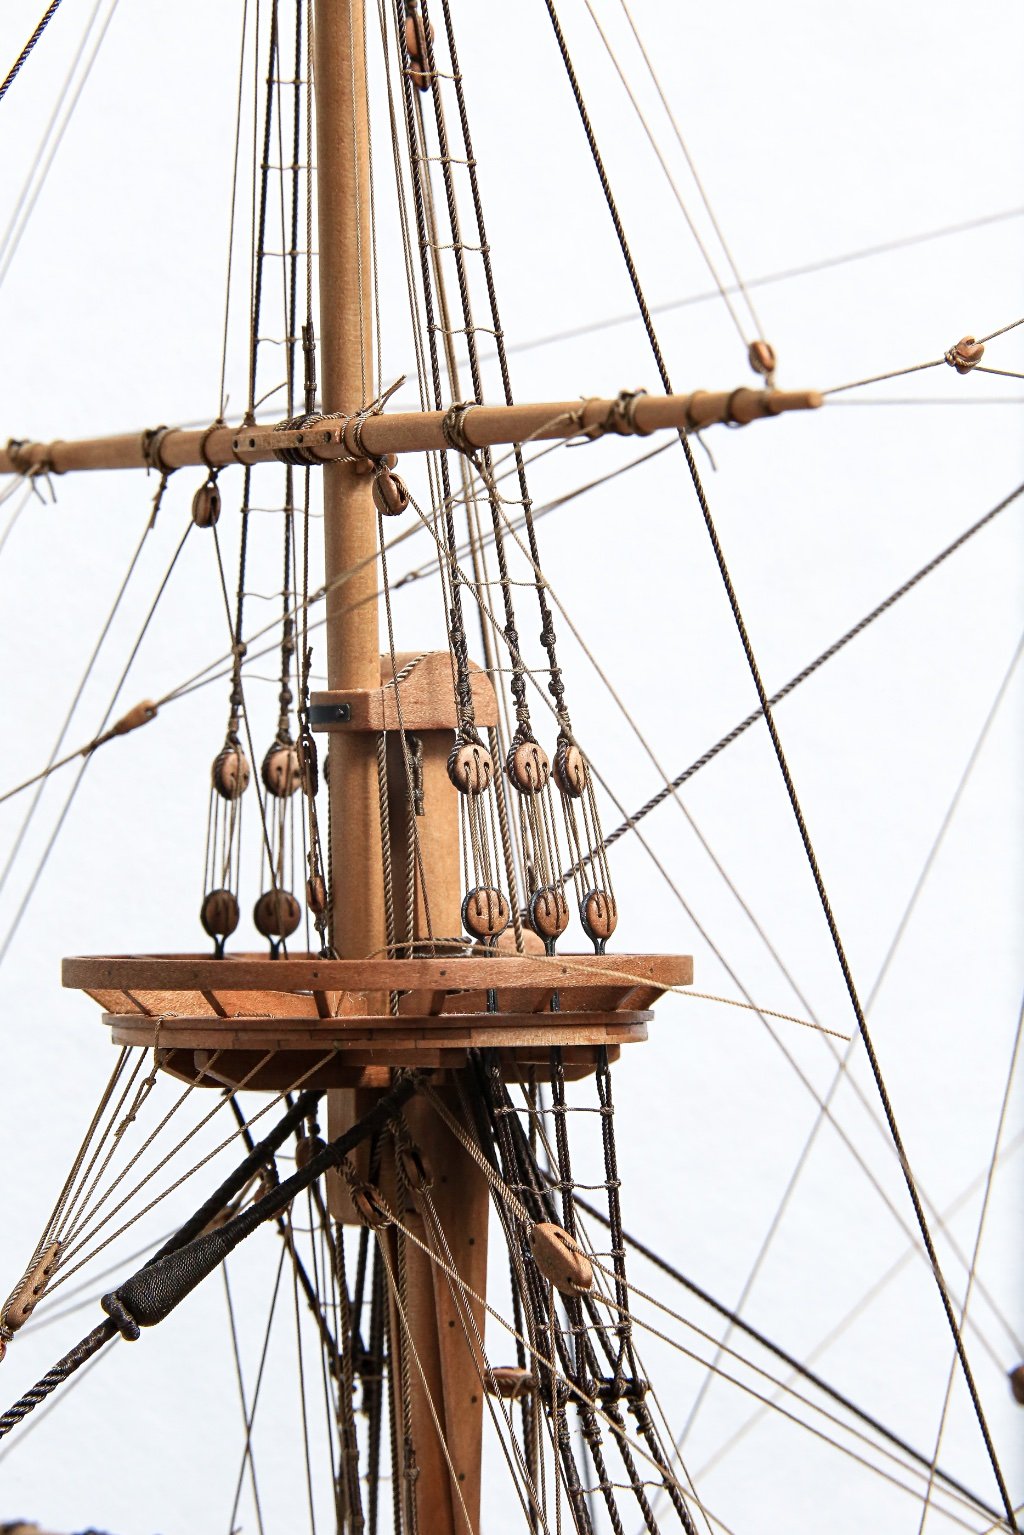
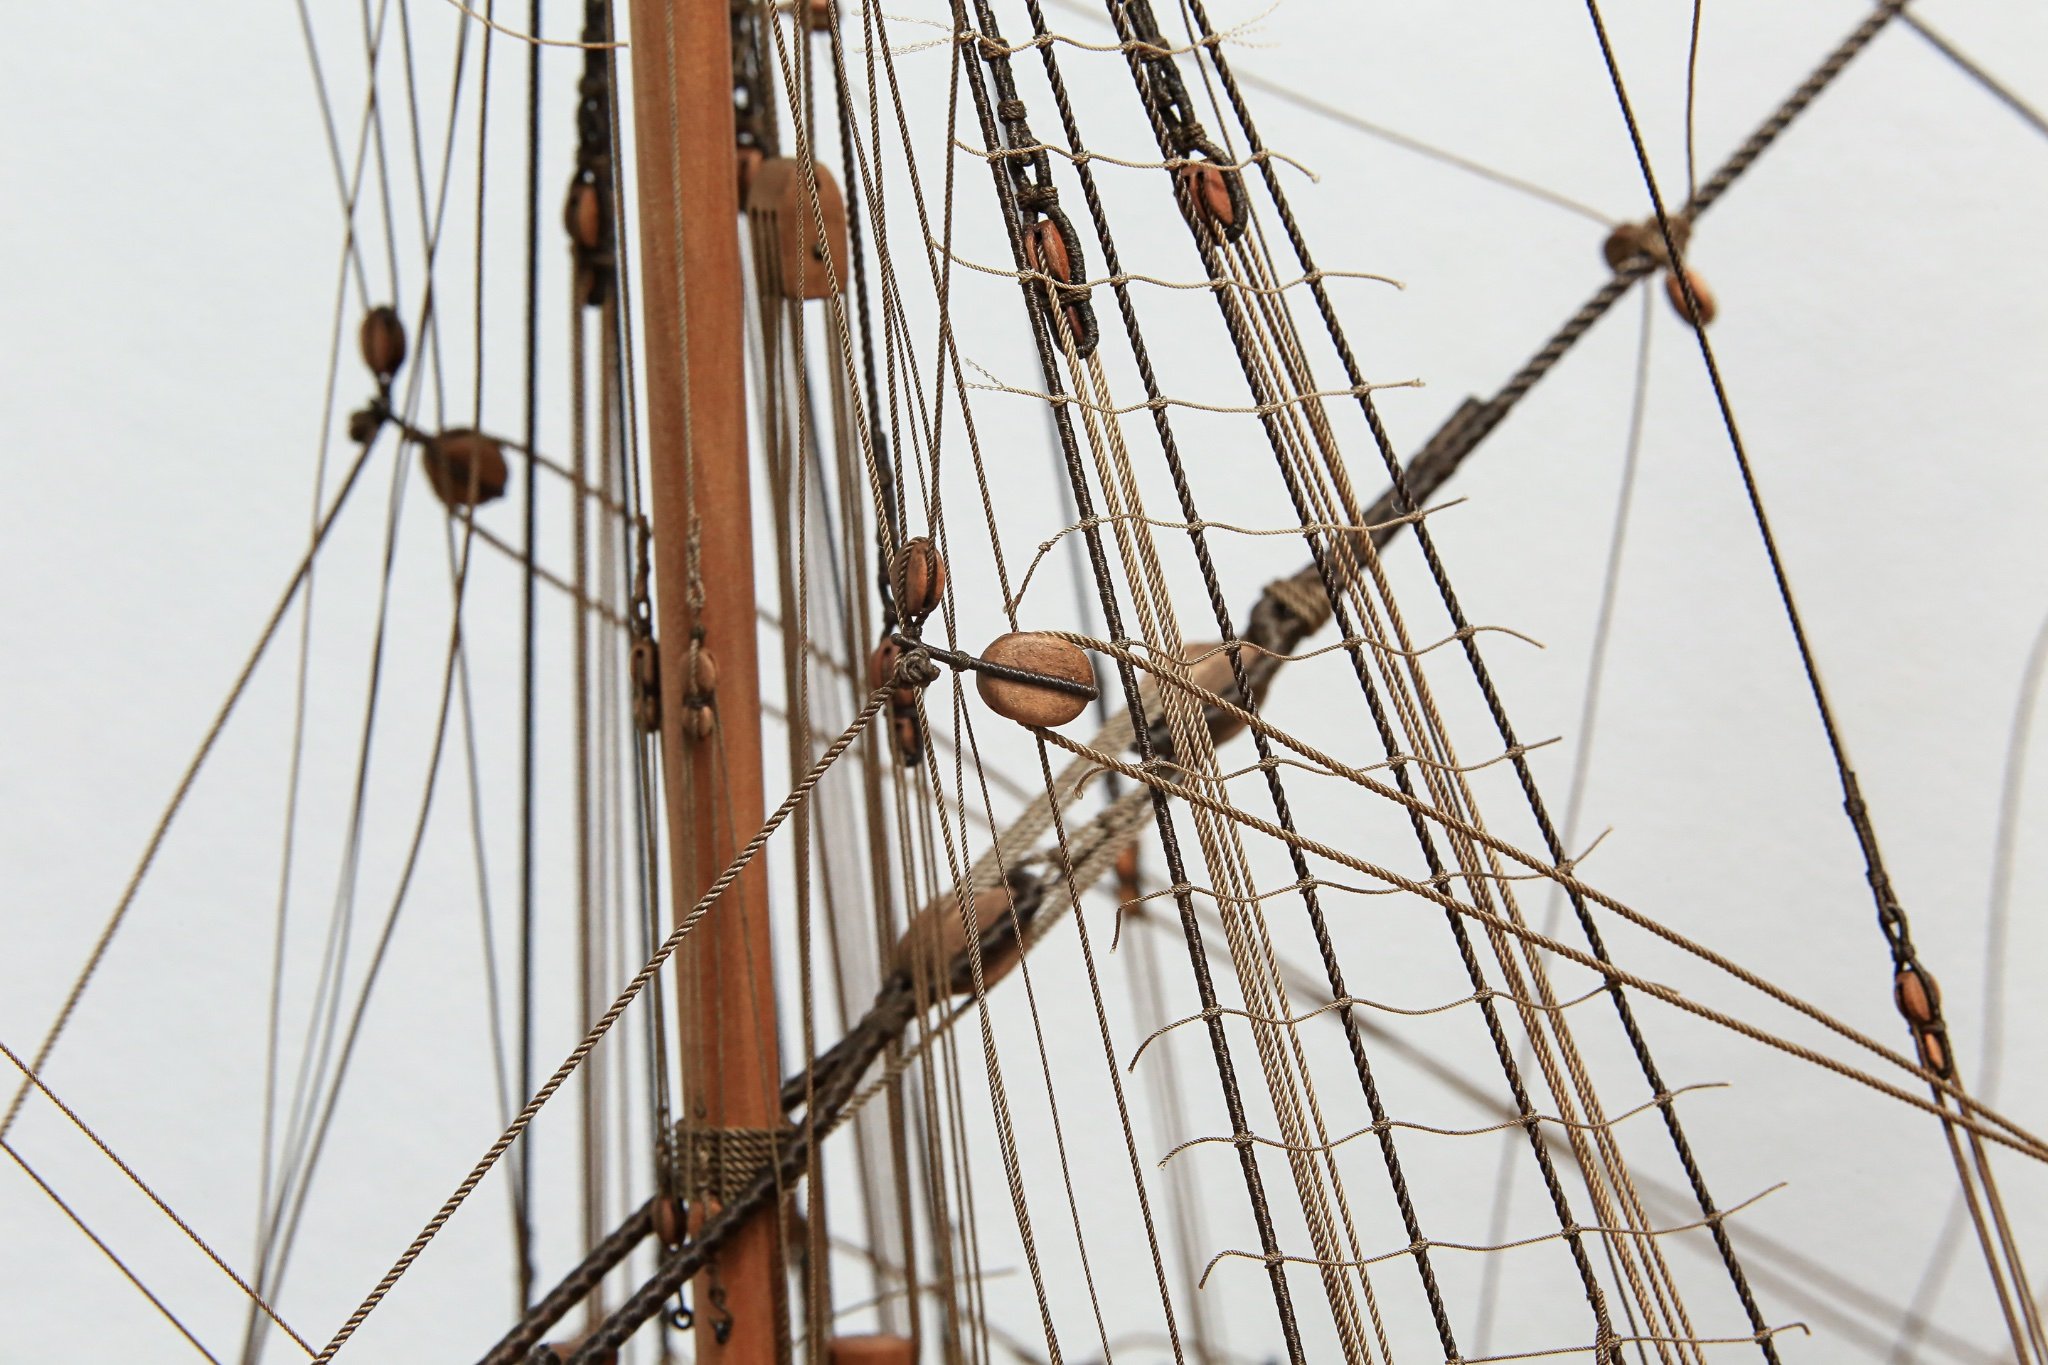
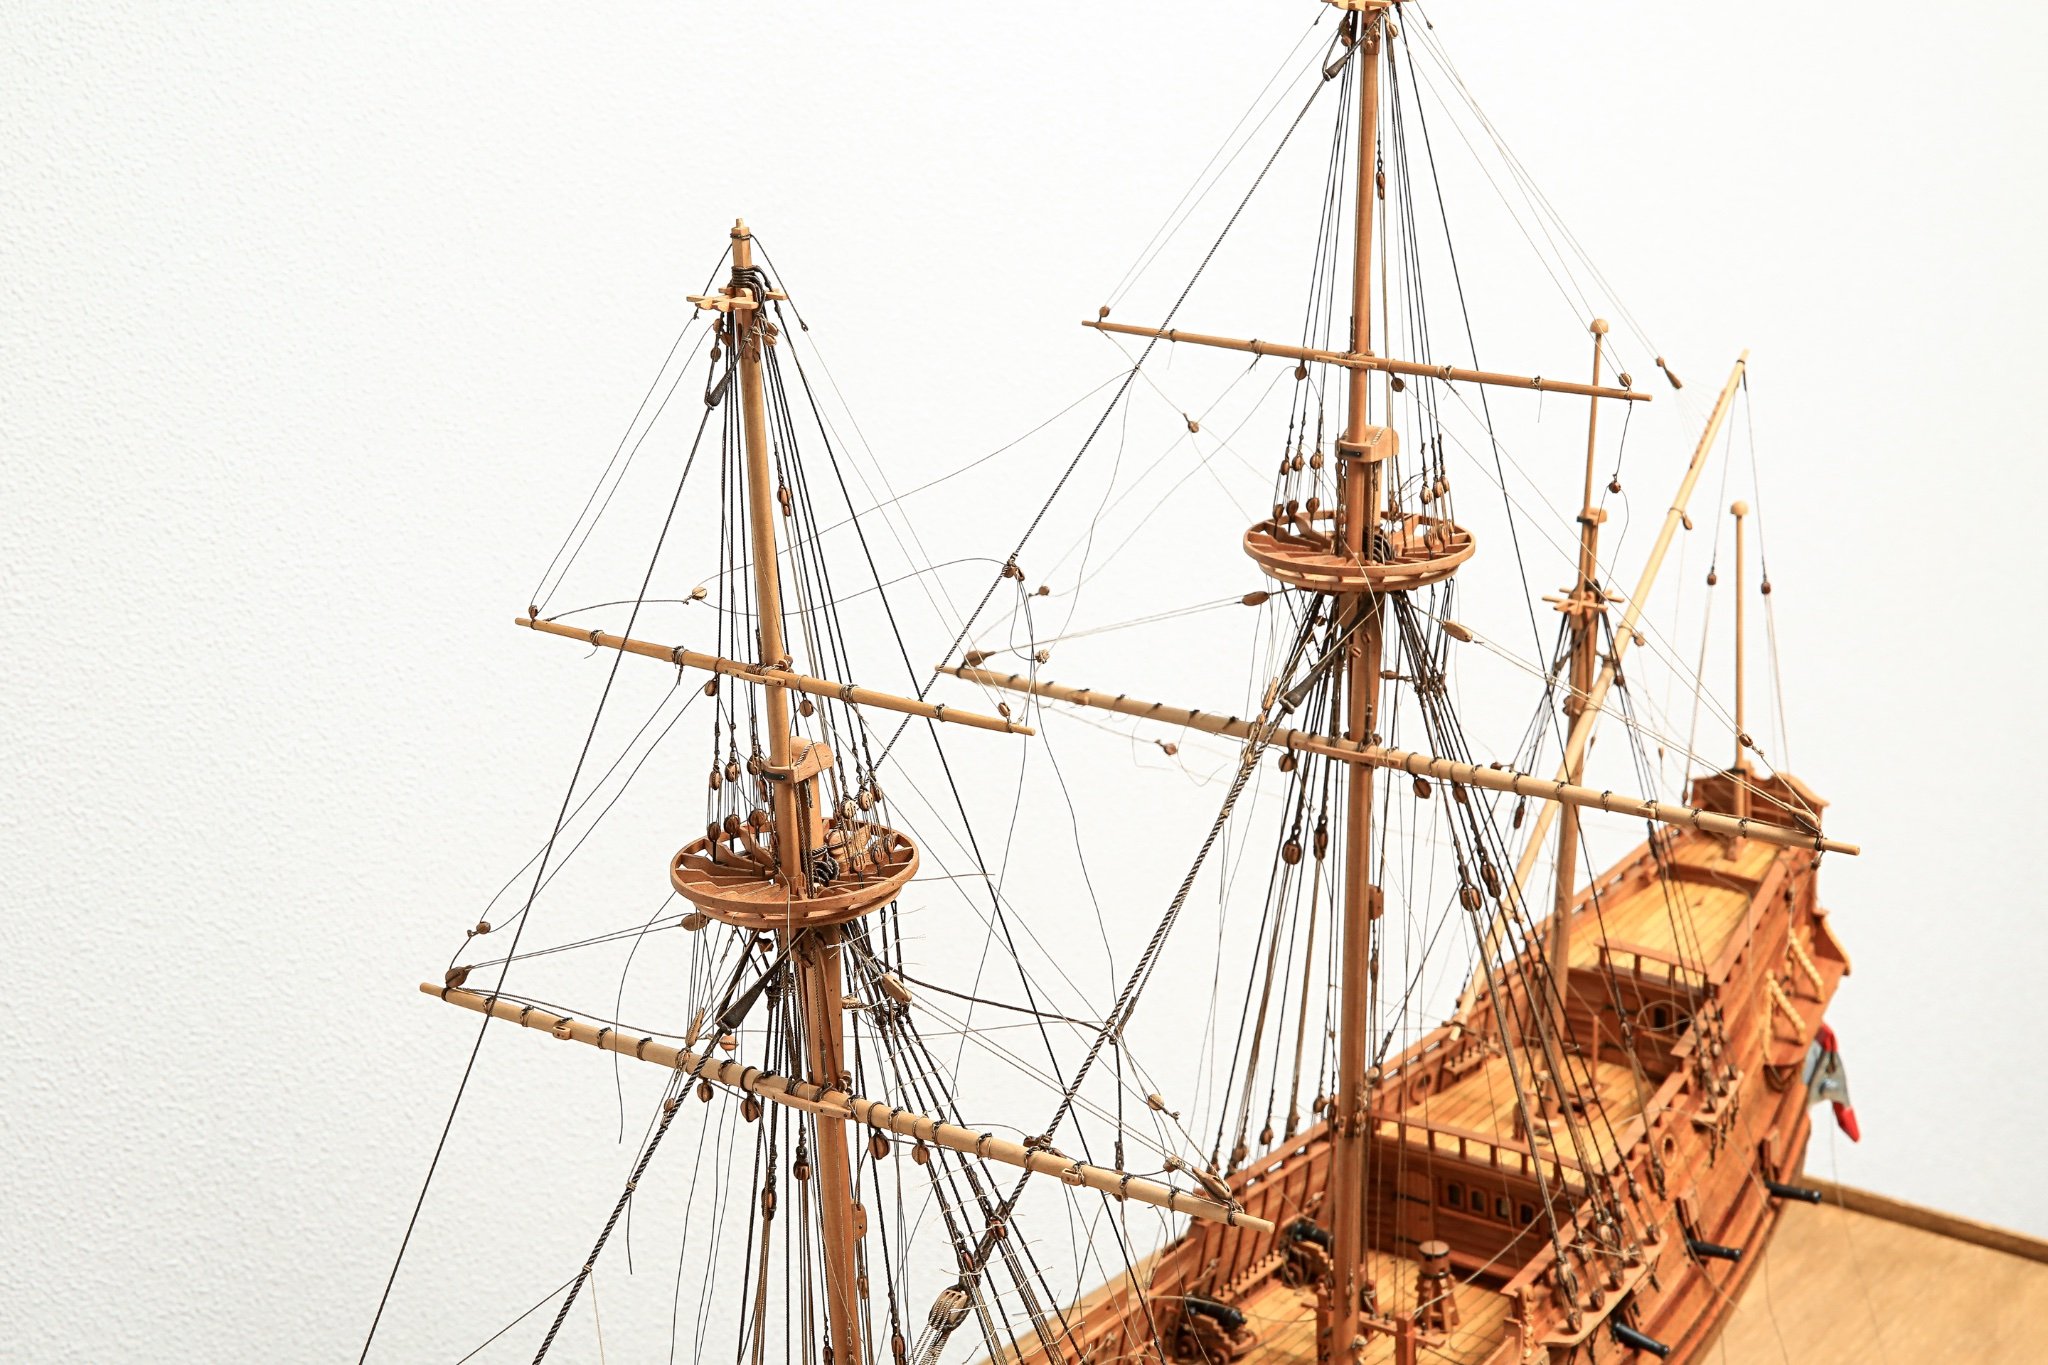
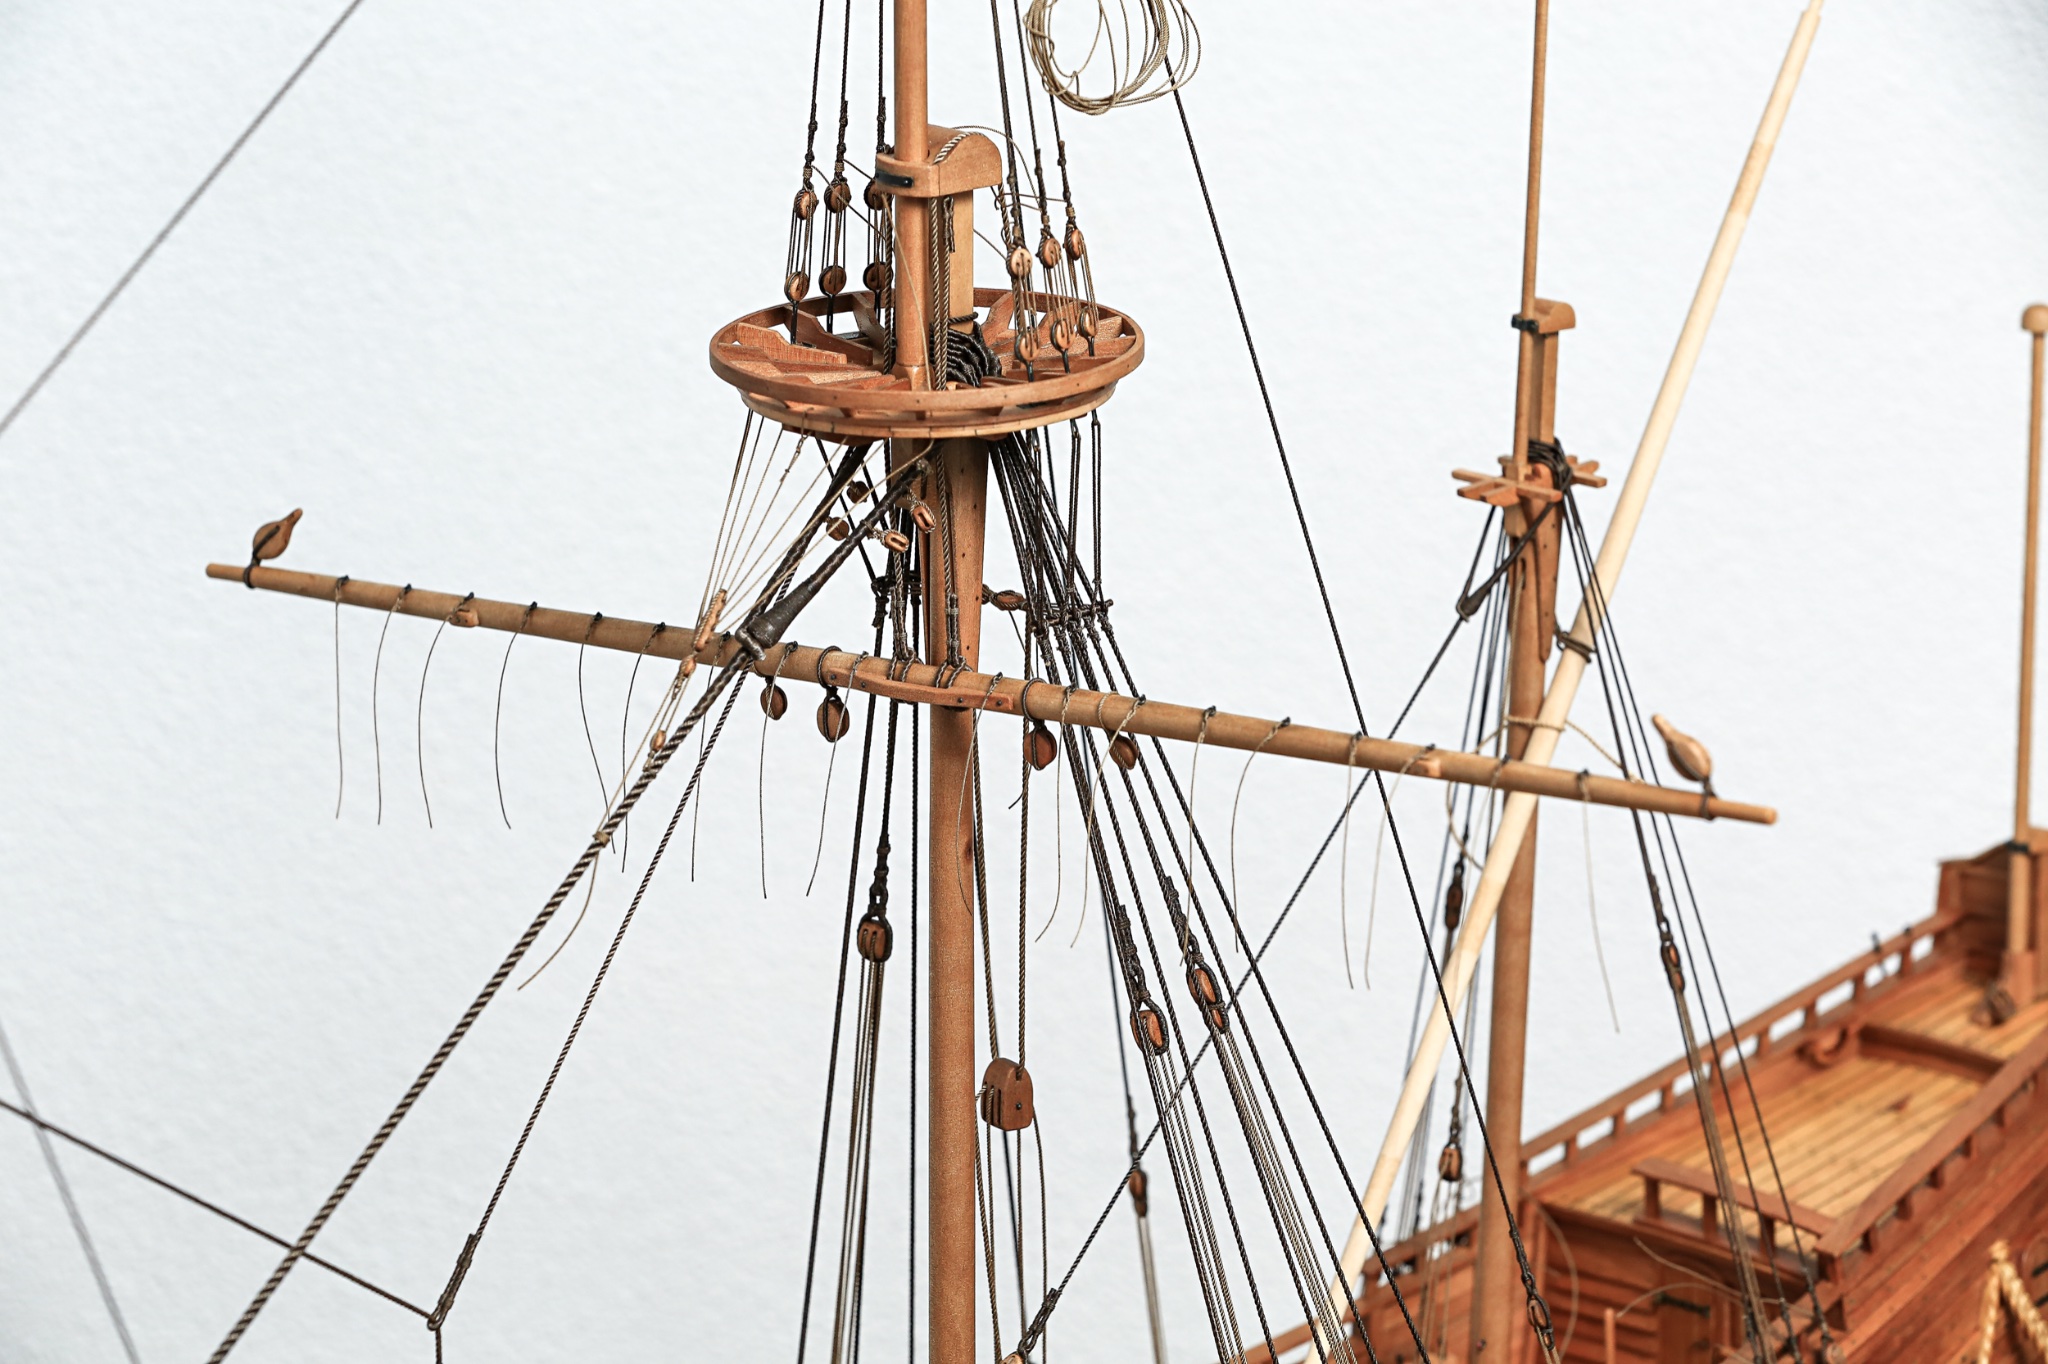
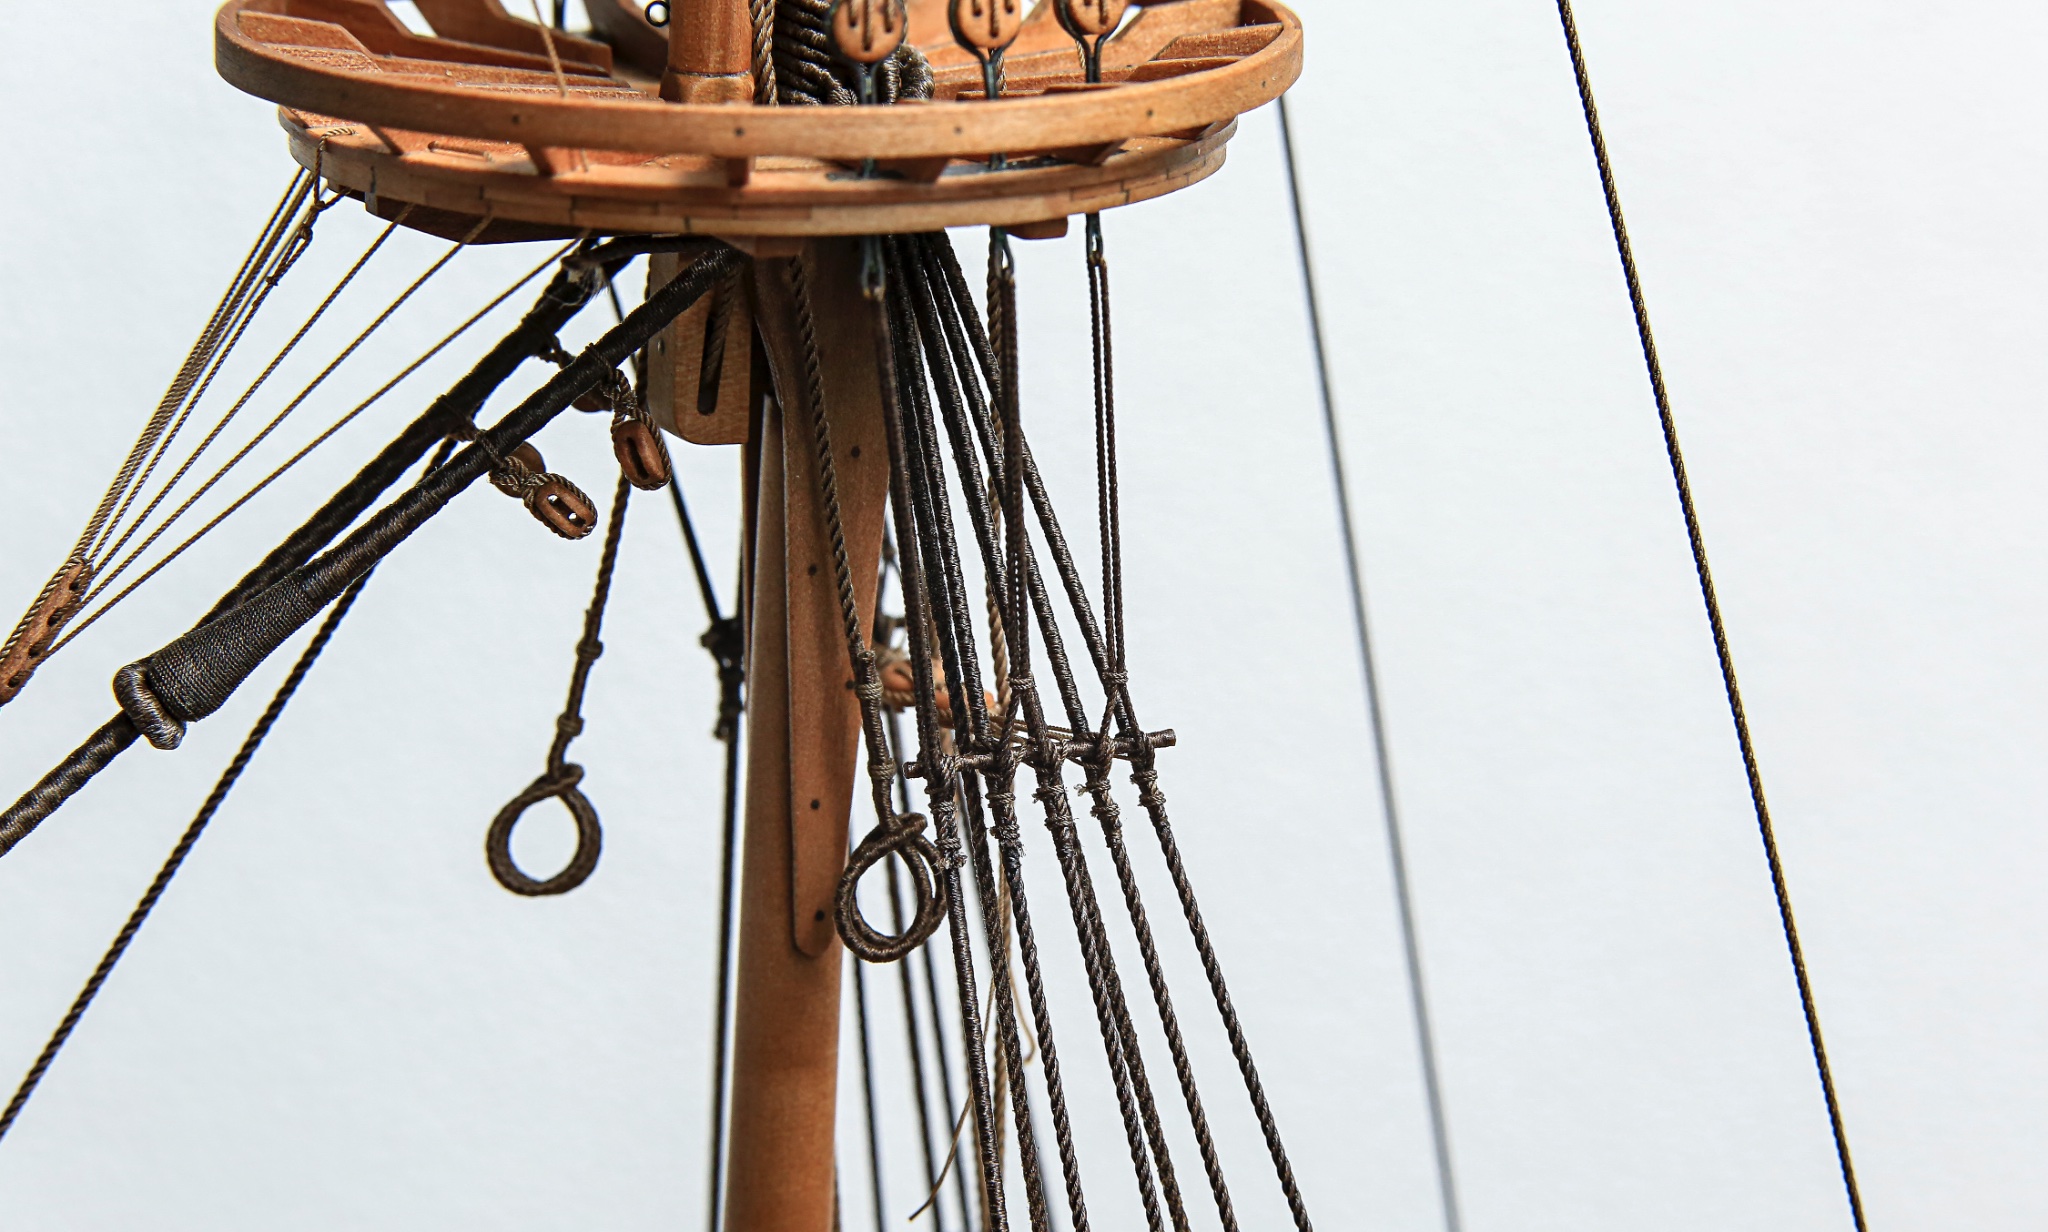
So... after 674 clove hitch knots later... all ratlines are done.
Fore and main shrouds: ~0.20mm rope
Mizzen and top shrouds: ~0.14mm rope
Ratline ropes should be a little bit thinner... but I was not satisfied with the look of the rope made of 2x1 and that's the thinest 3x1 ropes I was able to make so it has to be this way... maybe nobody will check this with micrometer 😆


My goal while rigging the model was to include all ropes. As many as possible... even when model doesn't have sails.
So it bring us to few ropes called bowline, leechline and buntline. As you might be aware, they were fixed to the sails cringles... but no sails = no cringles
...I had to improvise... and those ropes were fixed to the yards using bowline knot.
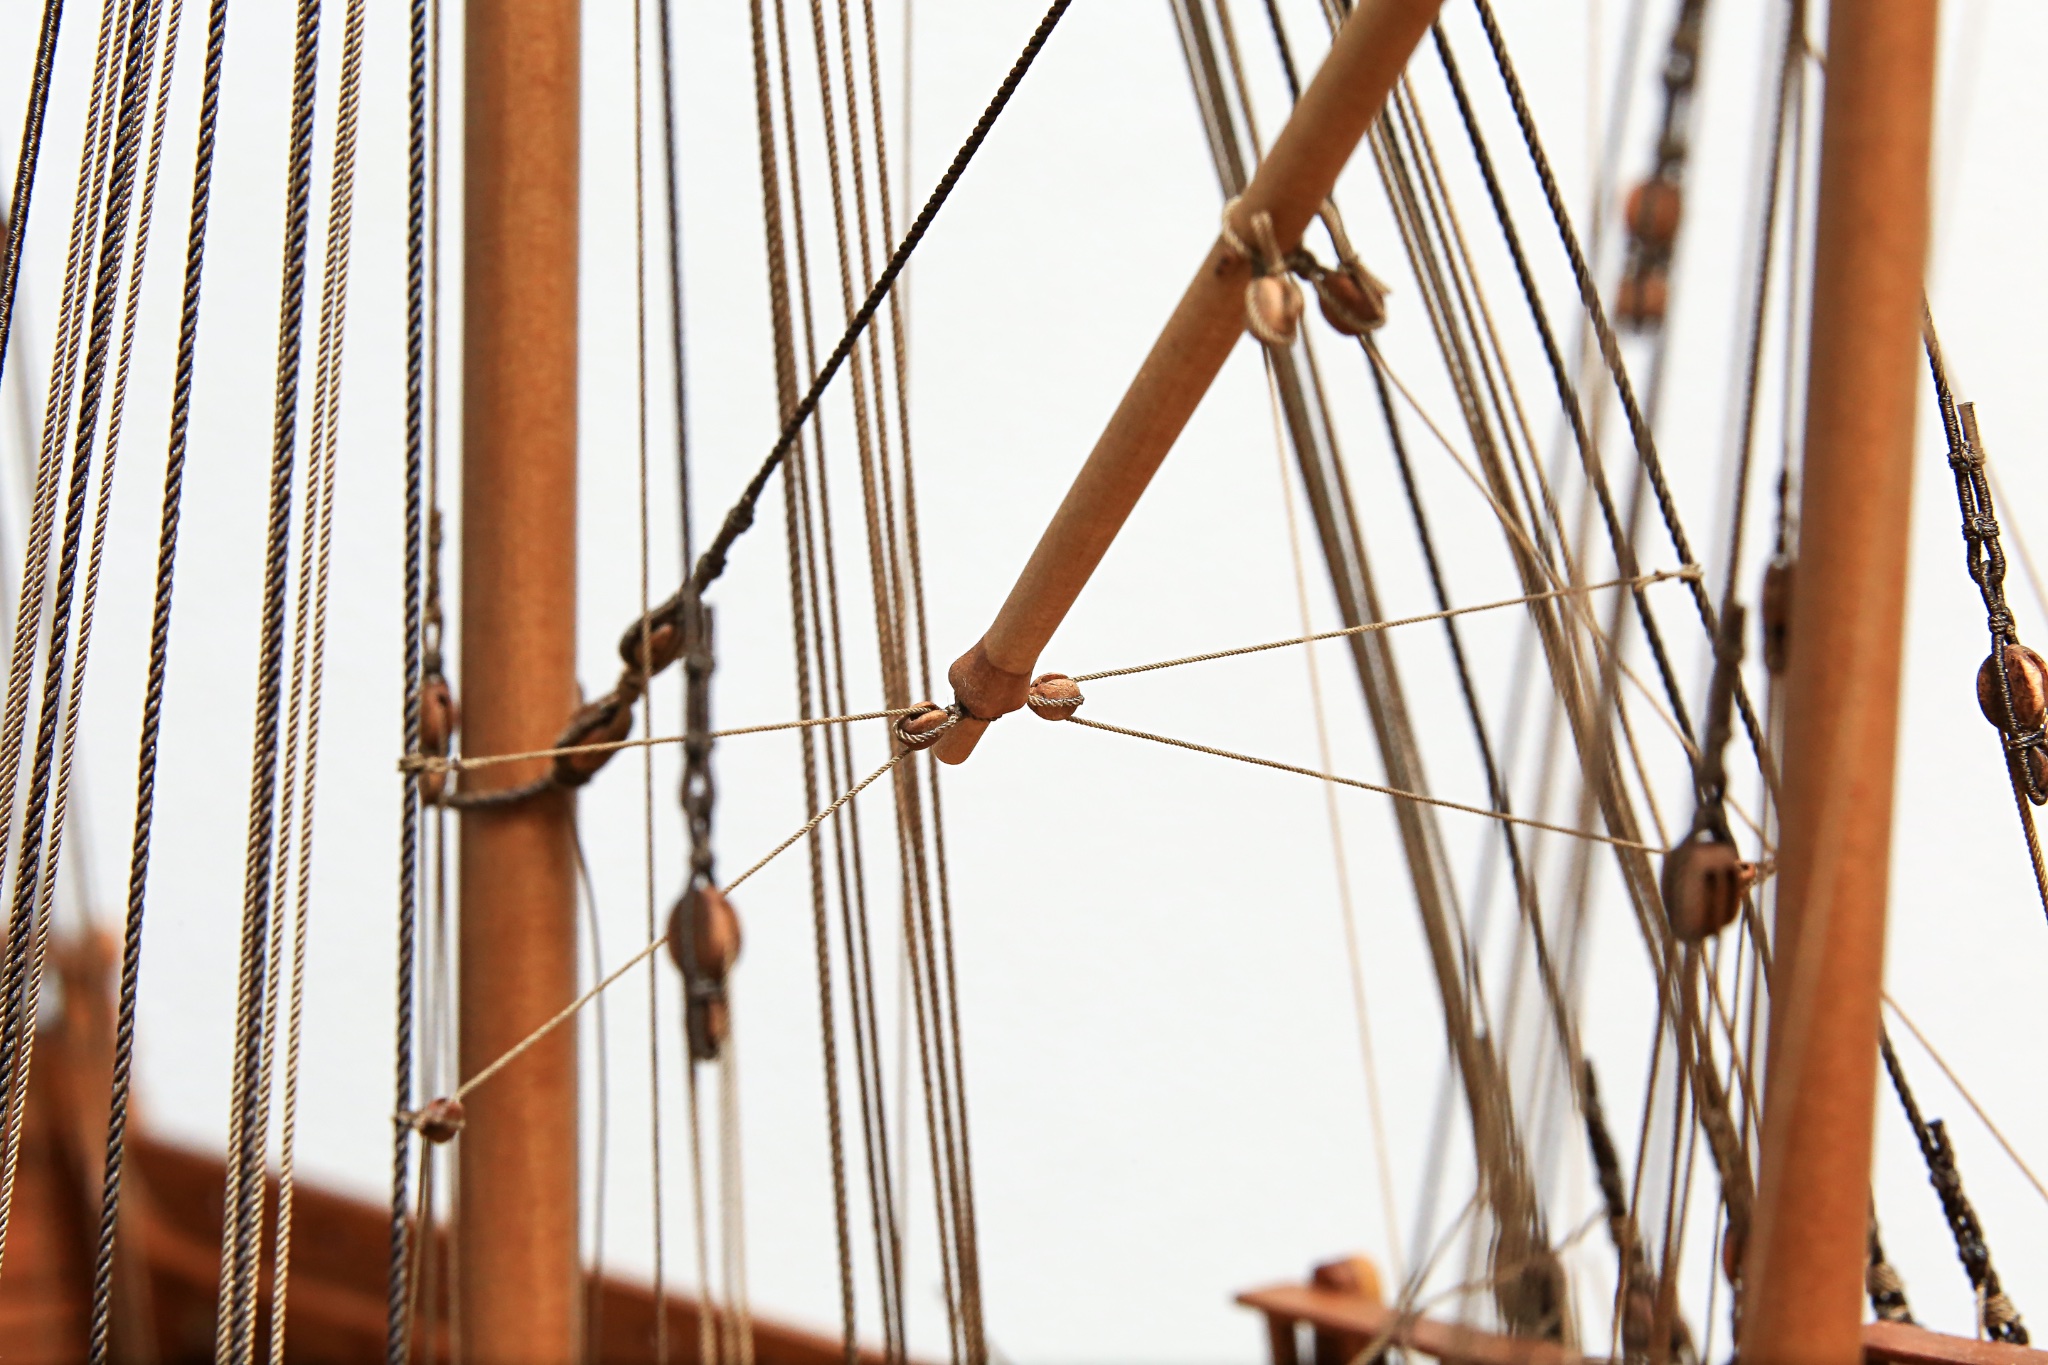
I have little bit hard time to get good quality photo of those ropes due to quite small diameter and amount of other ropes around... macro lens and focusing it's a little bit of challenge, so... sorry if it's not clear enough. If someone will need better shot let me know I will try to focus on some specific detail.


I've also managed to rig the staff on the aft.
I will not hang flags (at least now... maybe one day I will change my mind 😆)
However... I've tried to still include partial rigging.
With flag... visible ropes should be attached to the flag corner cringles by toggles... and flag itself should be secured by rope run spiral from top to bottom around the staff.
In fact visible ropes were use only for rising or lowering.

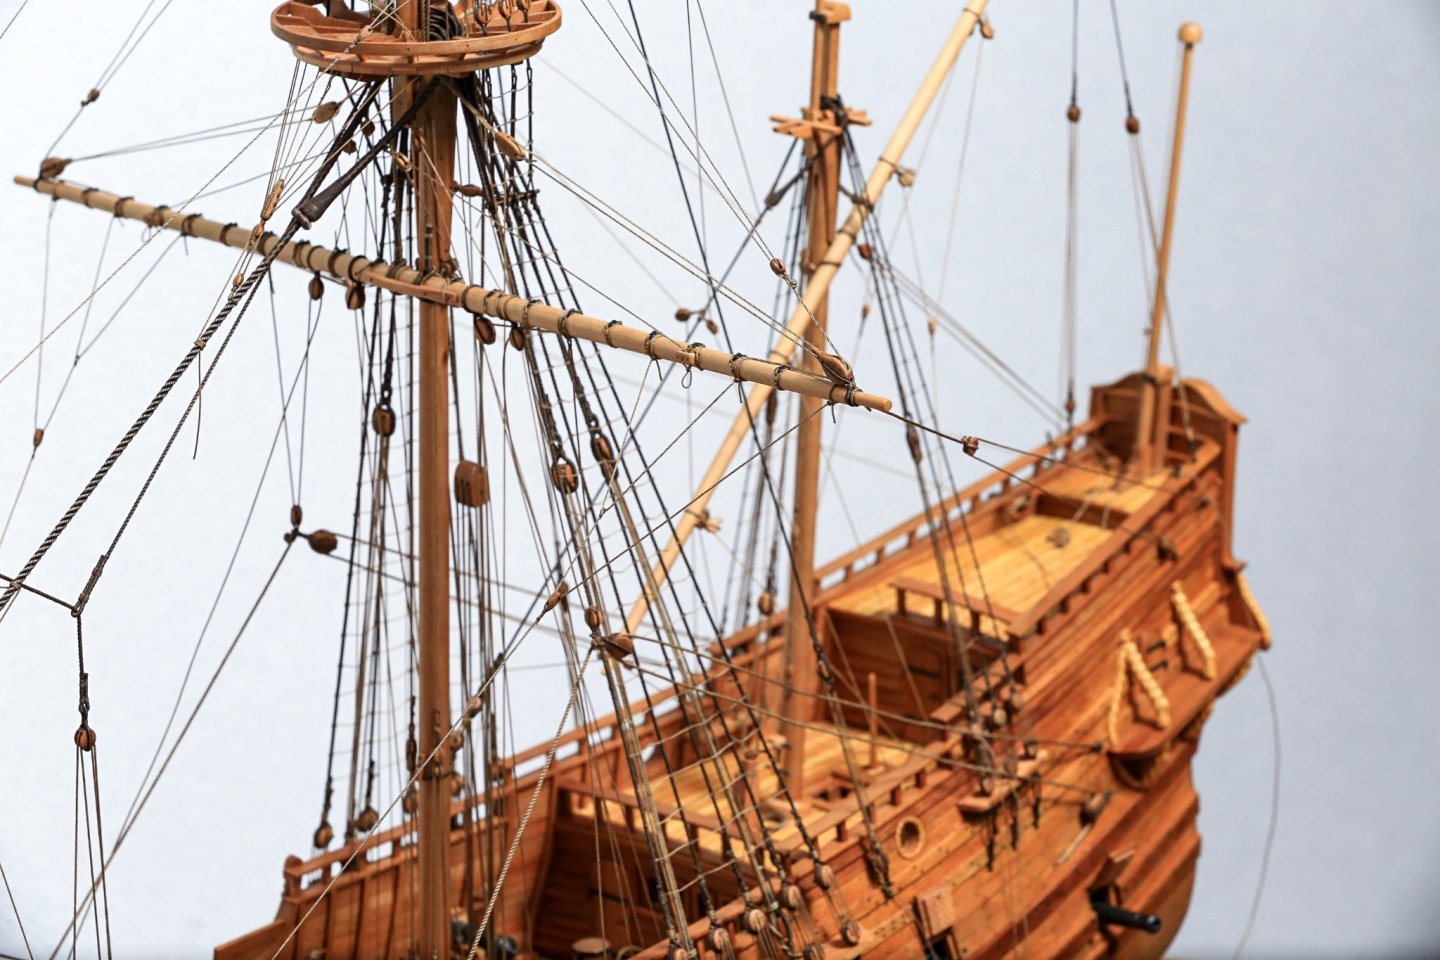
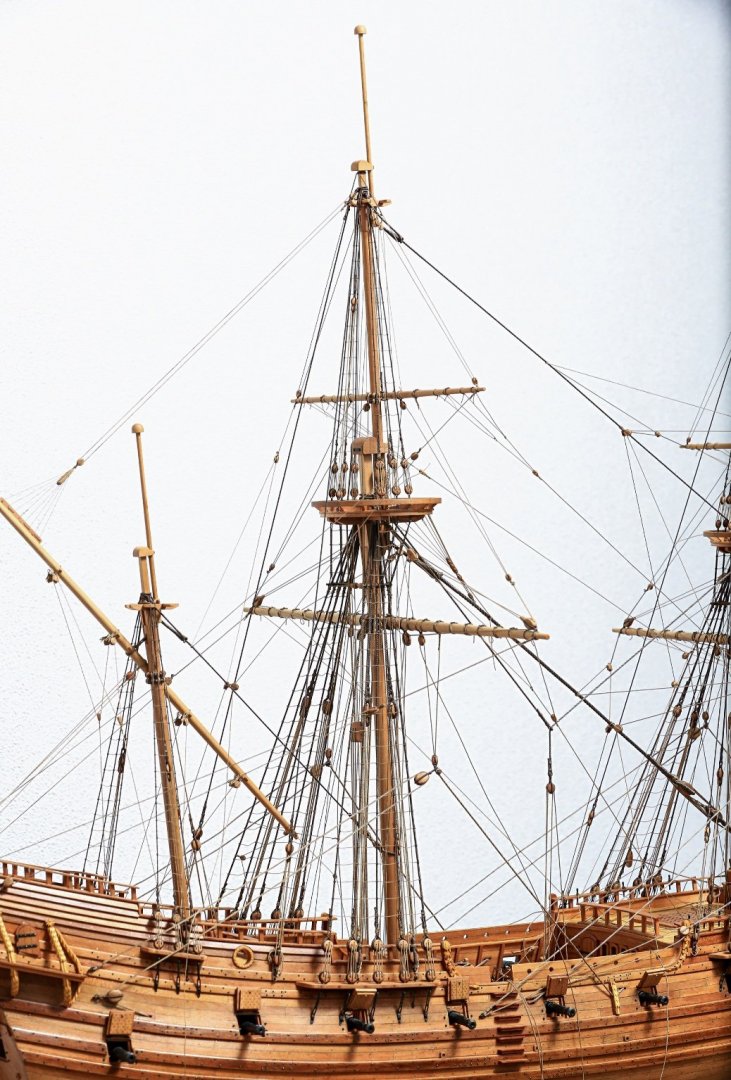
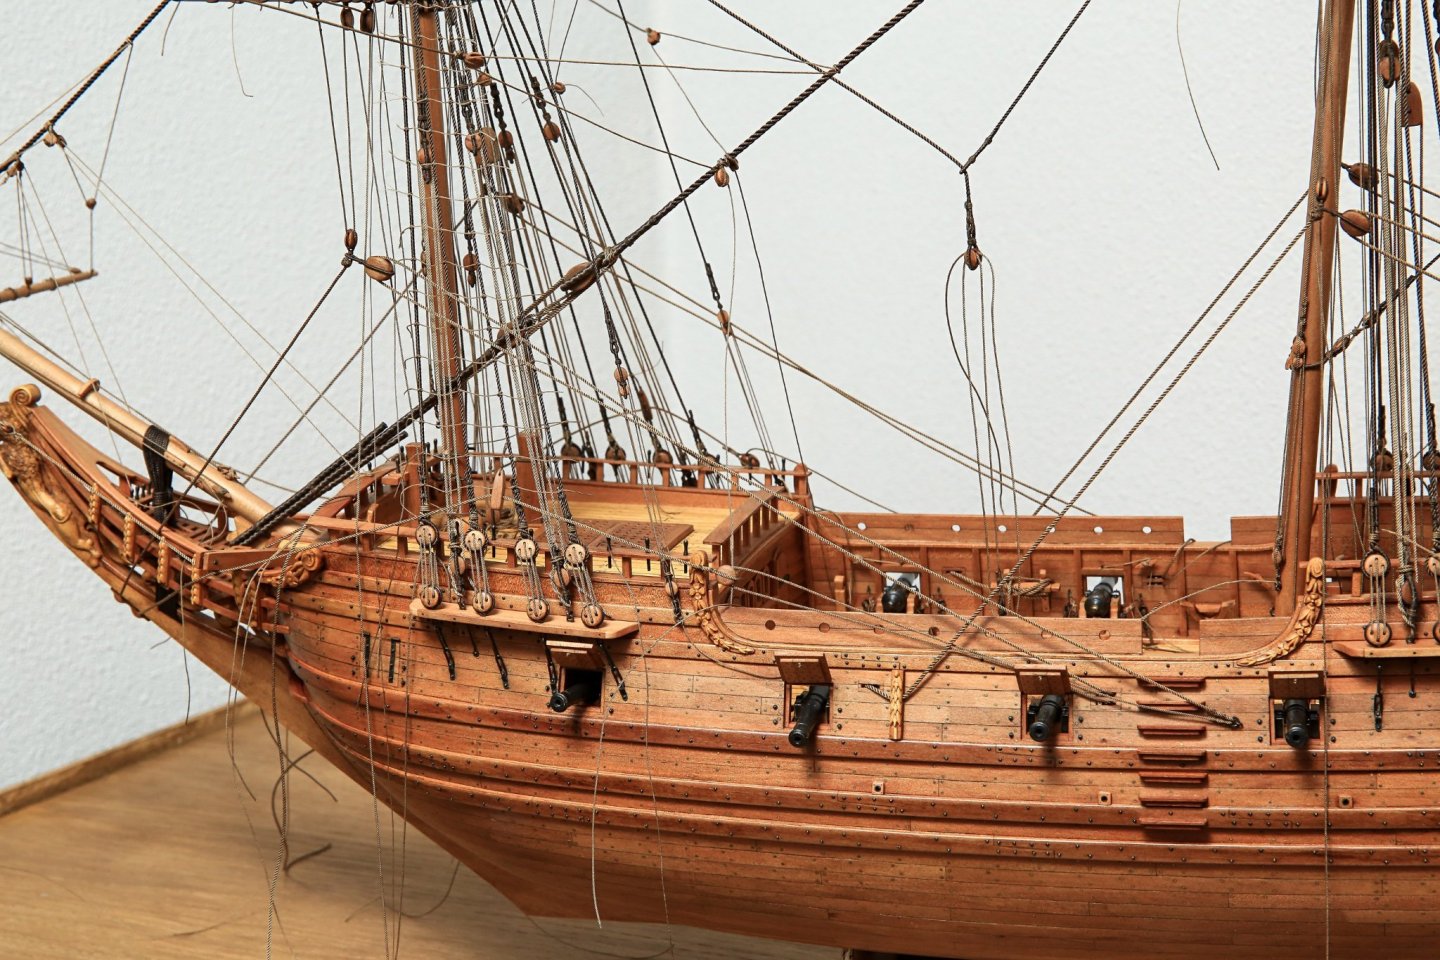
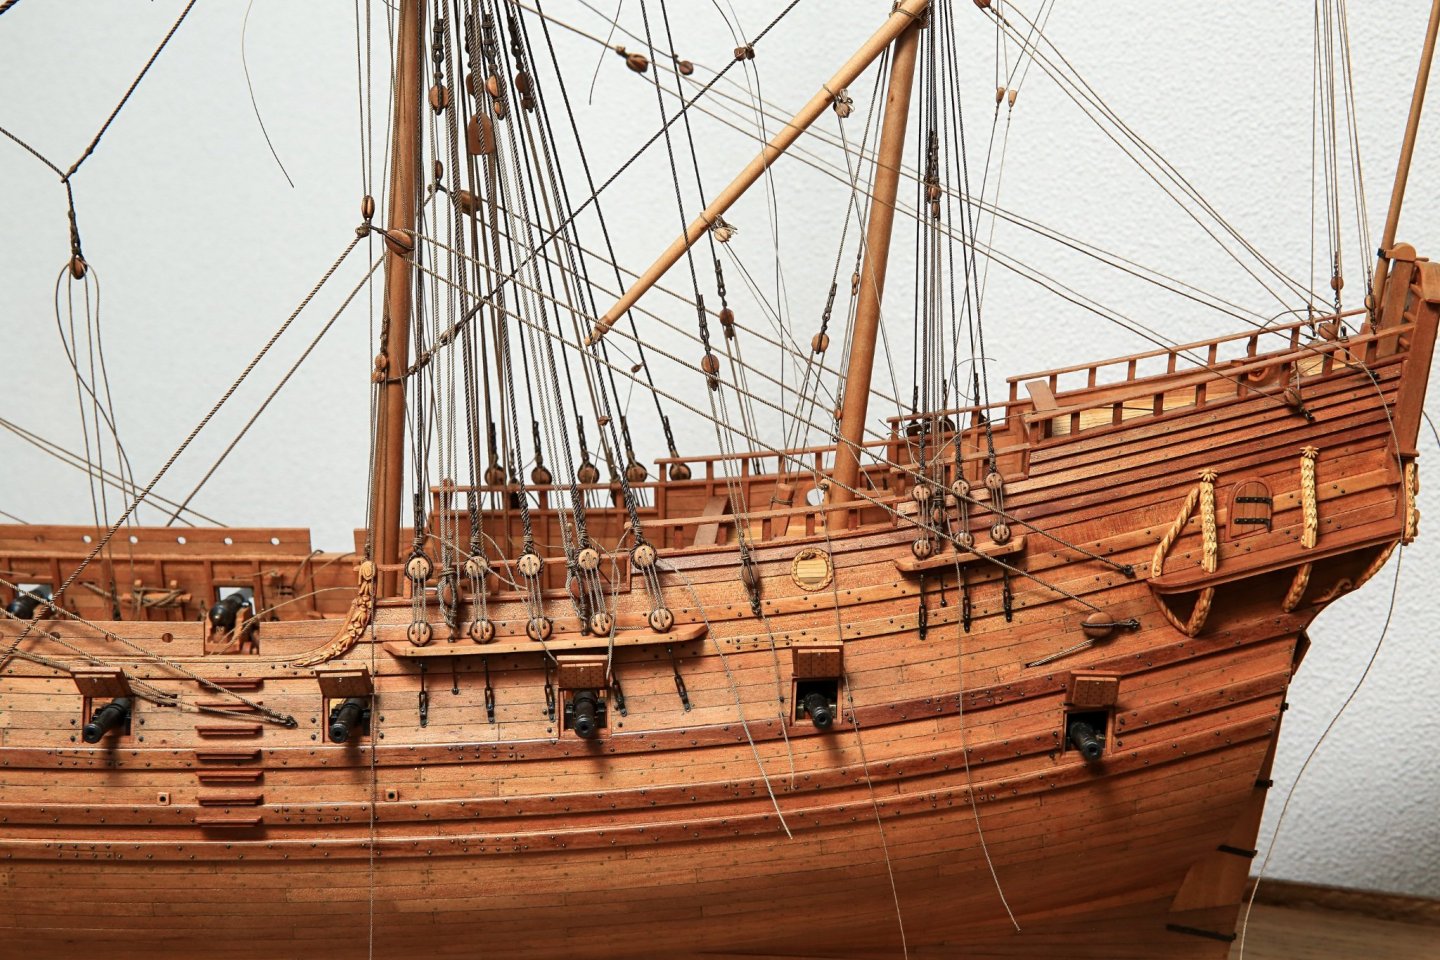
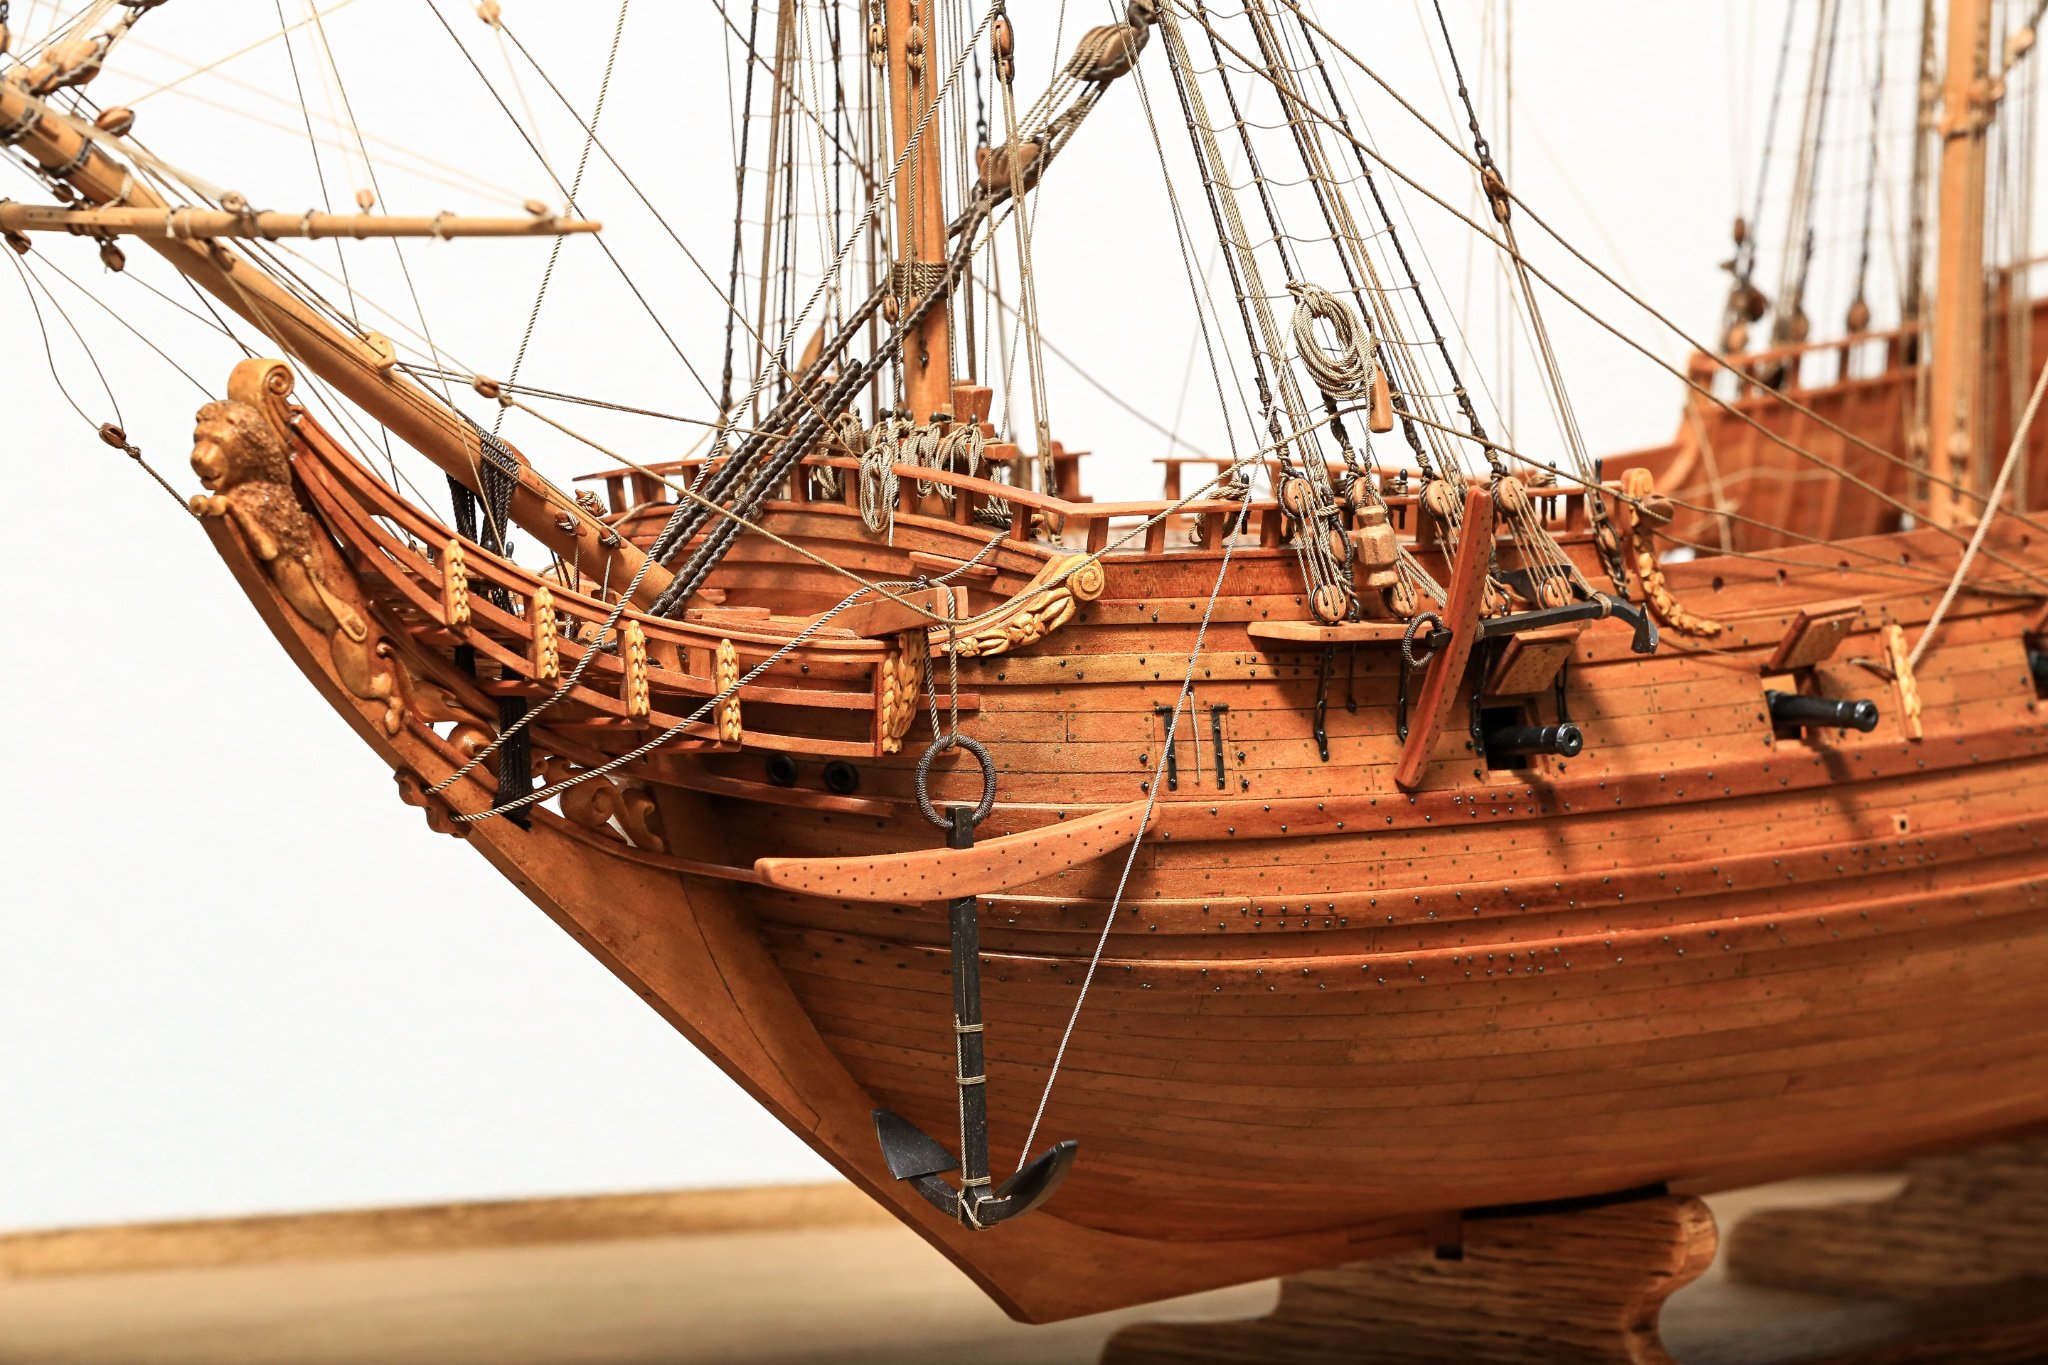
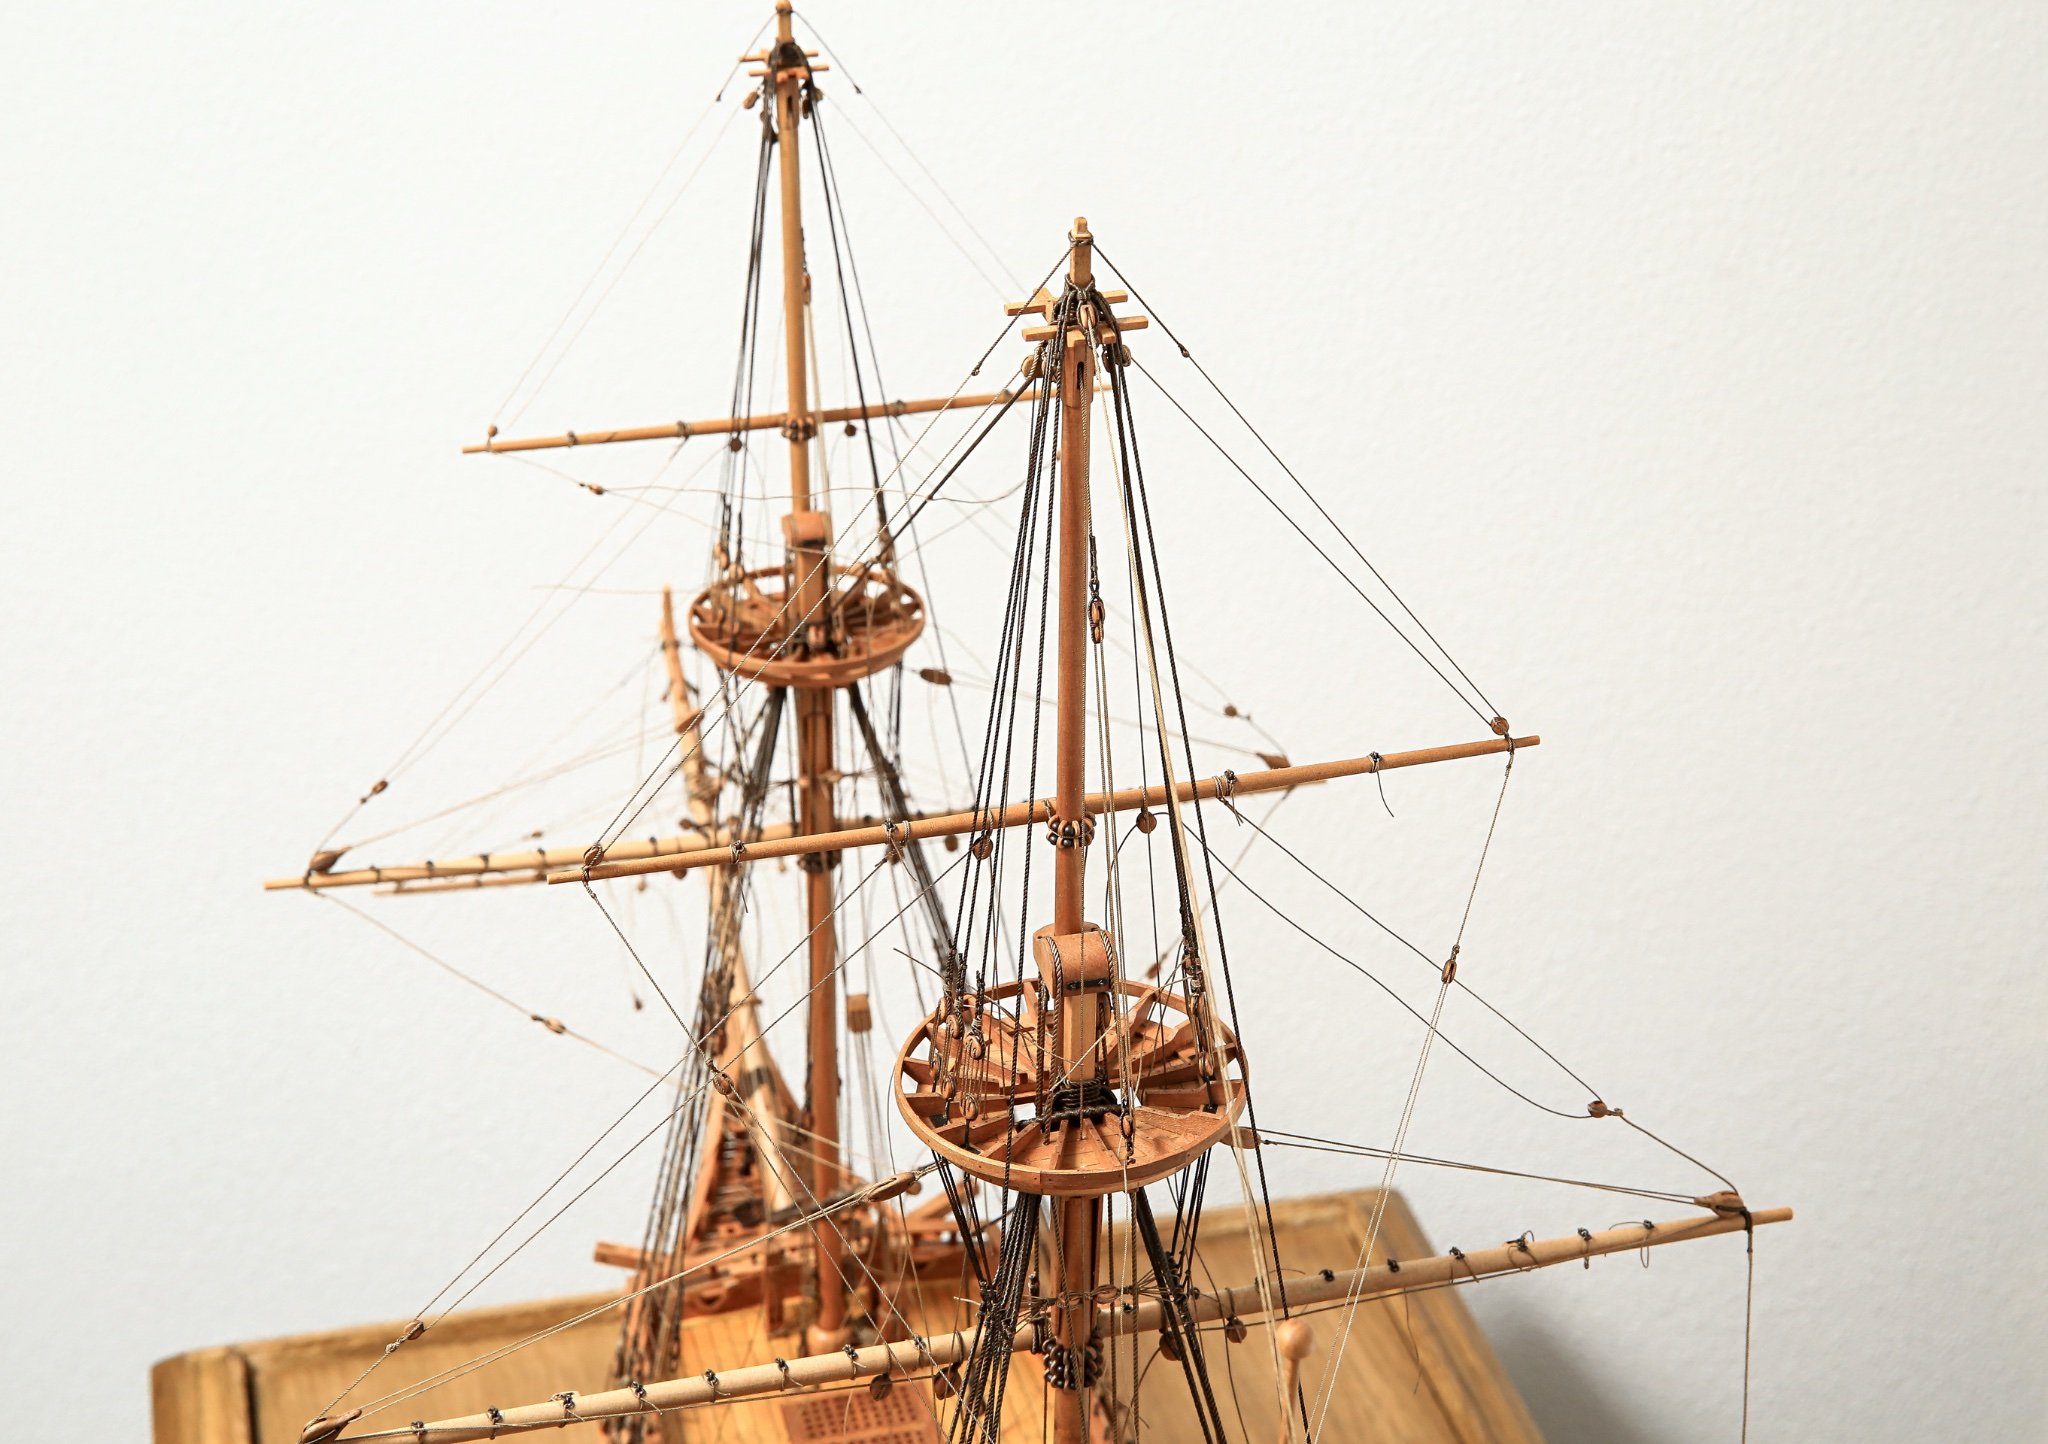
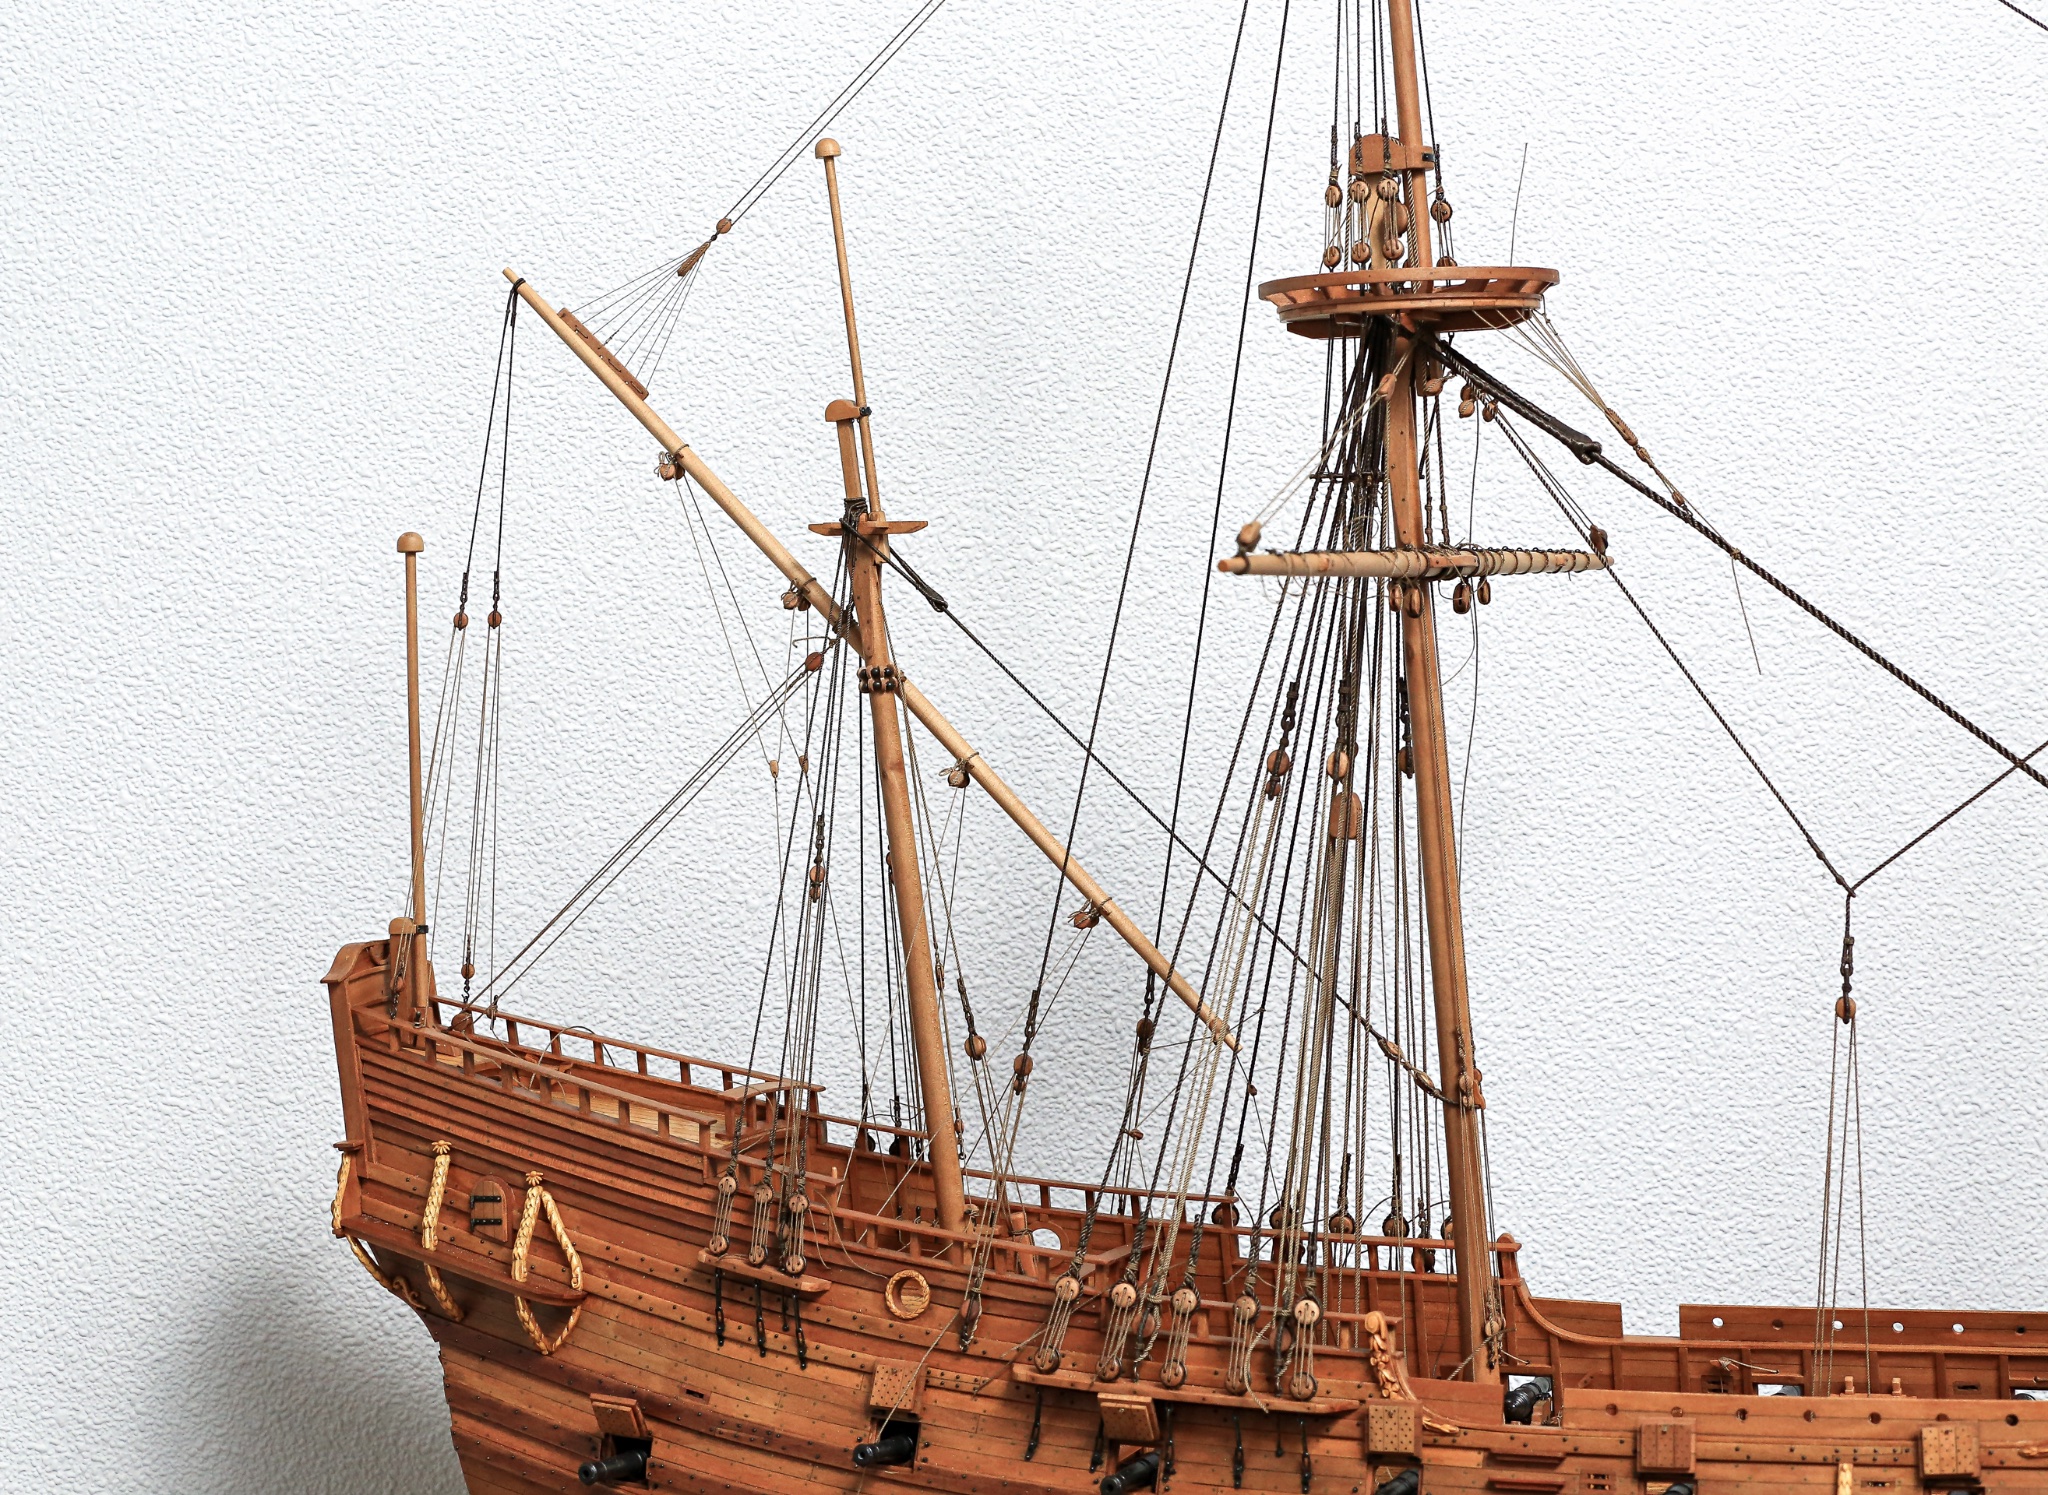
...and to conclude this post I will drop few photos of general look.

Cheers,
Matt
-
Hi All,
Thank you for all your likes!
It was time to make fore and main course (sail) rigging.
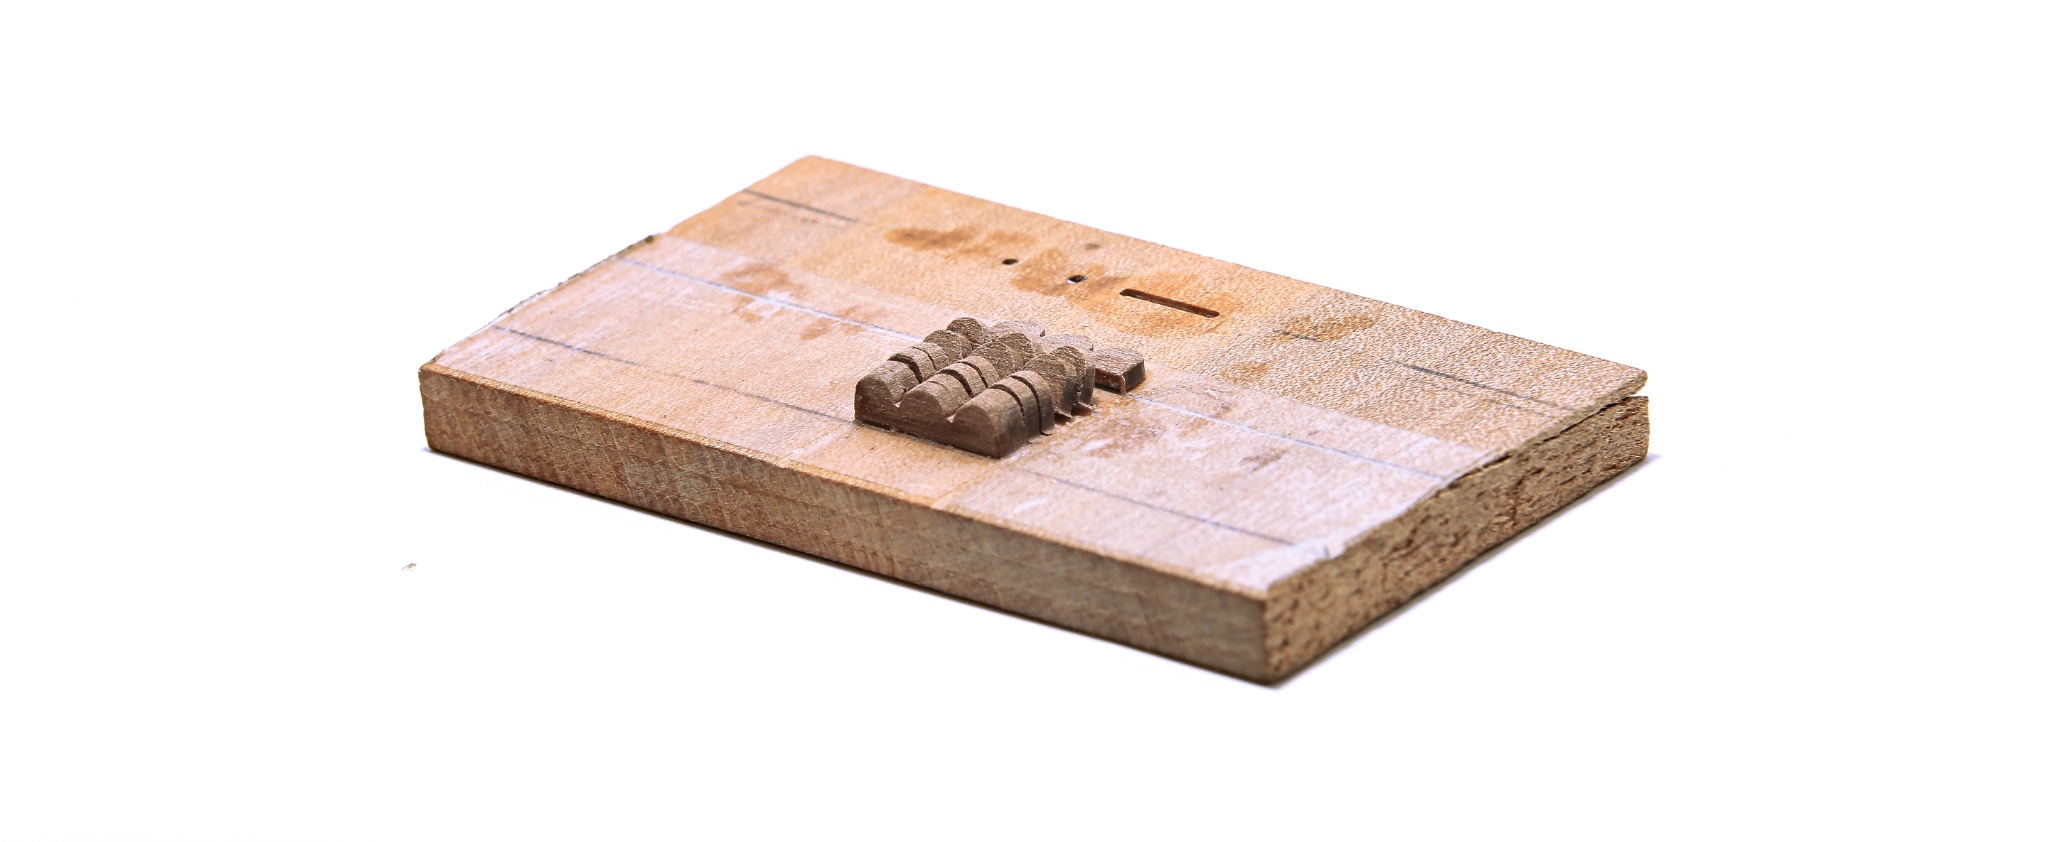
So first I had to make blocks... one of the biggest on this ship.
...quick milling of sheave imitation on piece of wood.
Then just cutting individual blocks and shaping them by hand using files, sanding paper and sponges, et voilà, blocks ready.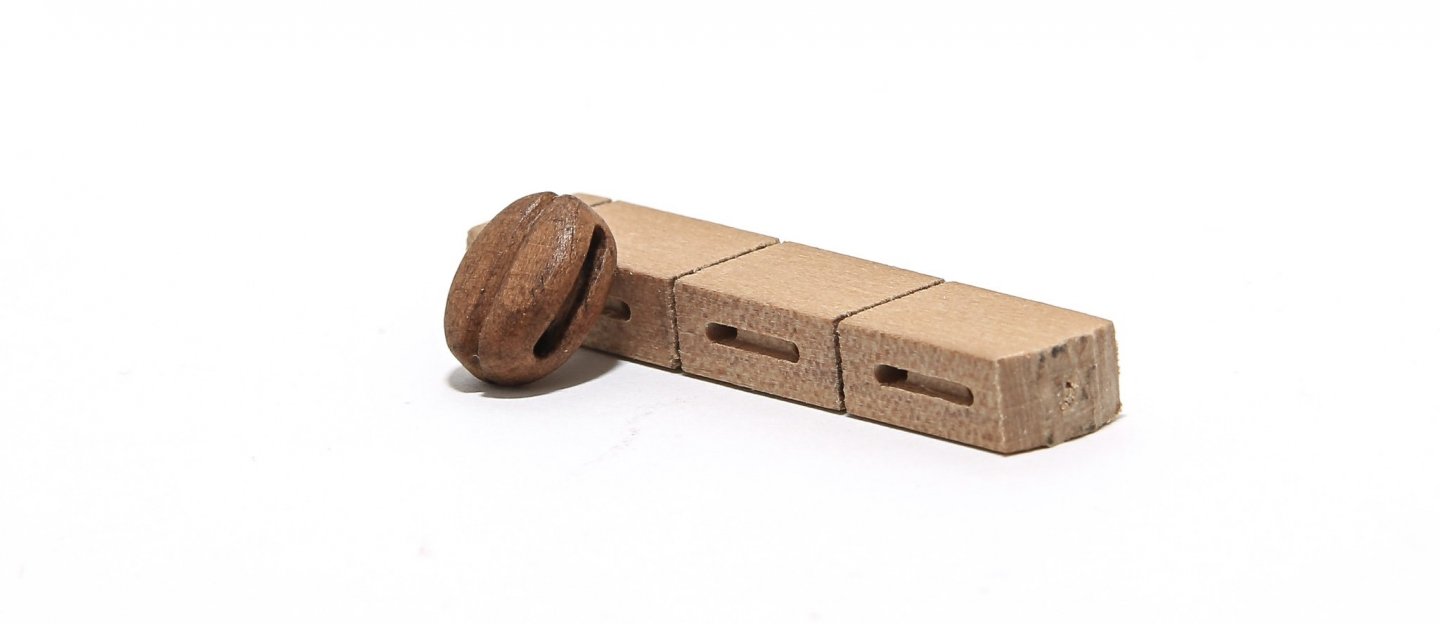
Then I was ready to make fore and main sails tacks, sheets and clew lines.
Fore course
Main course
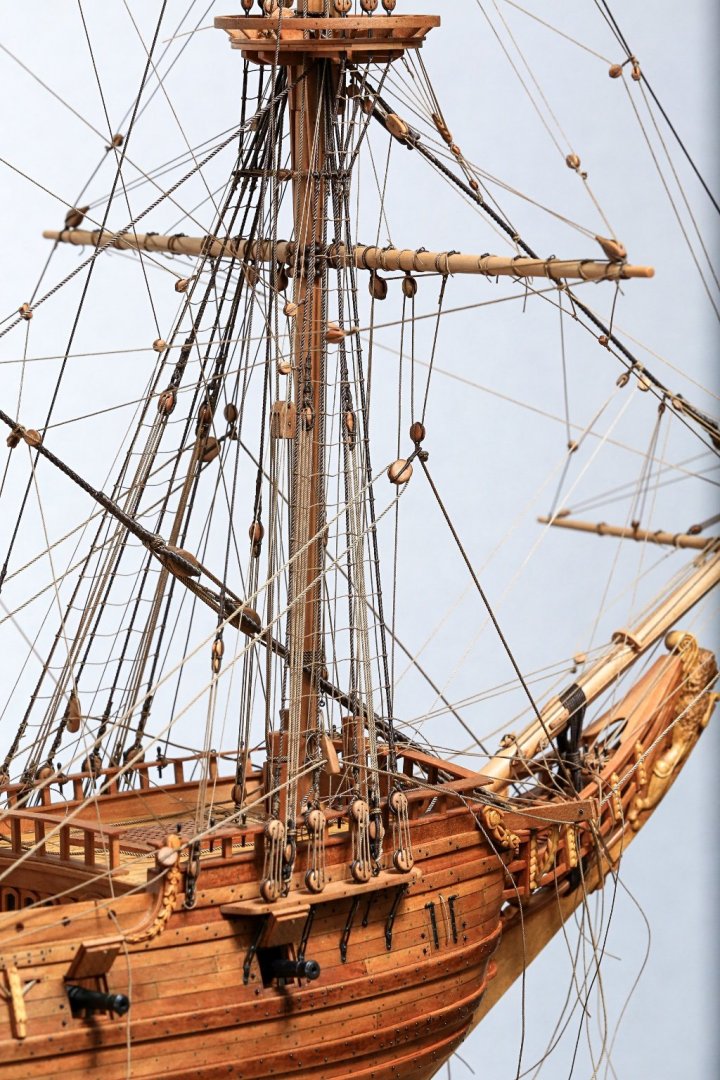
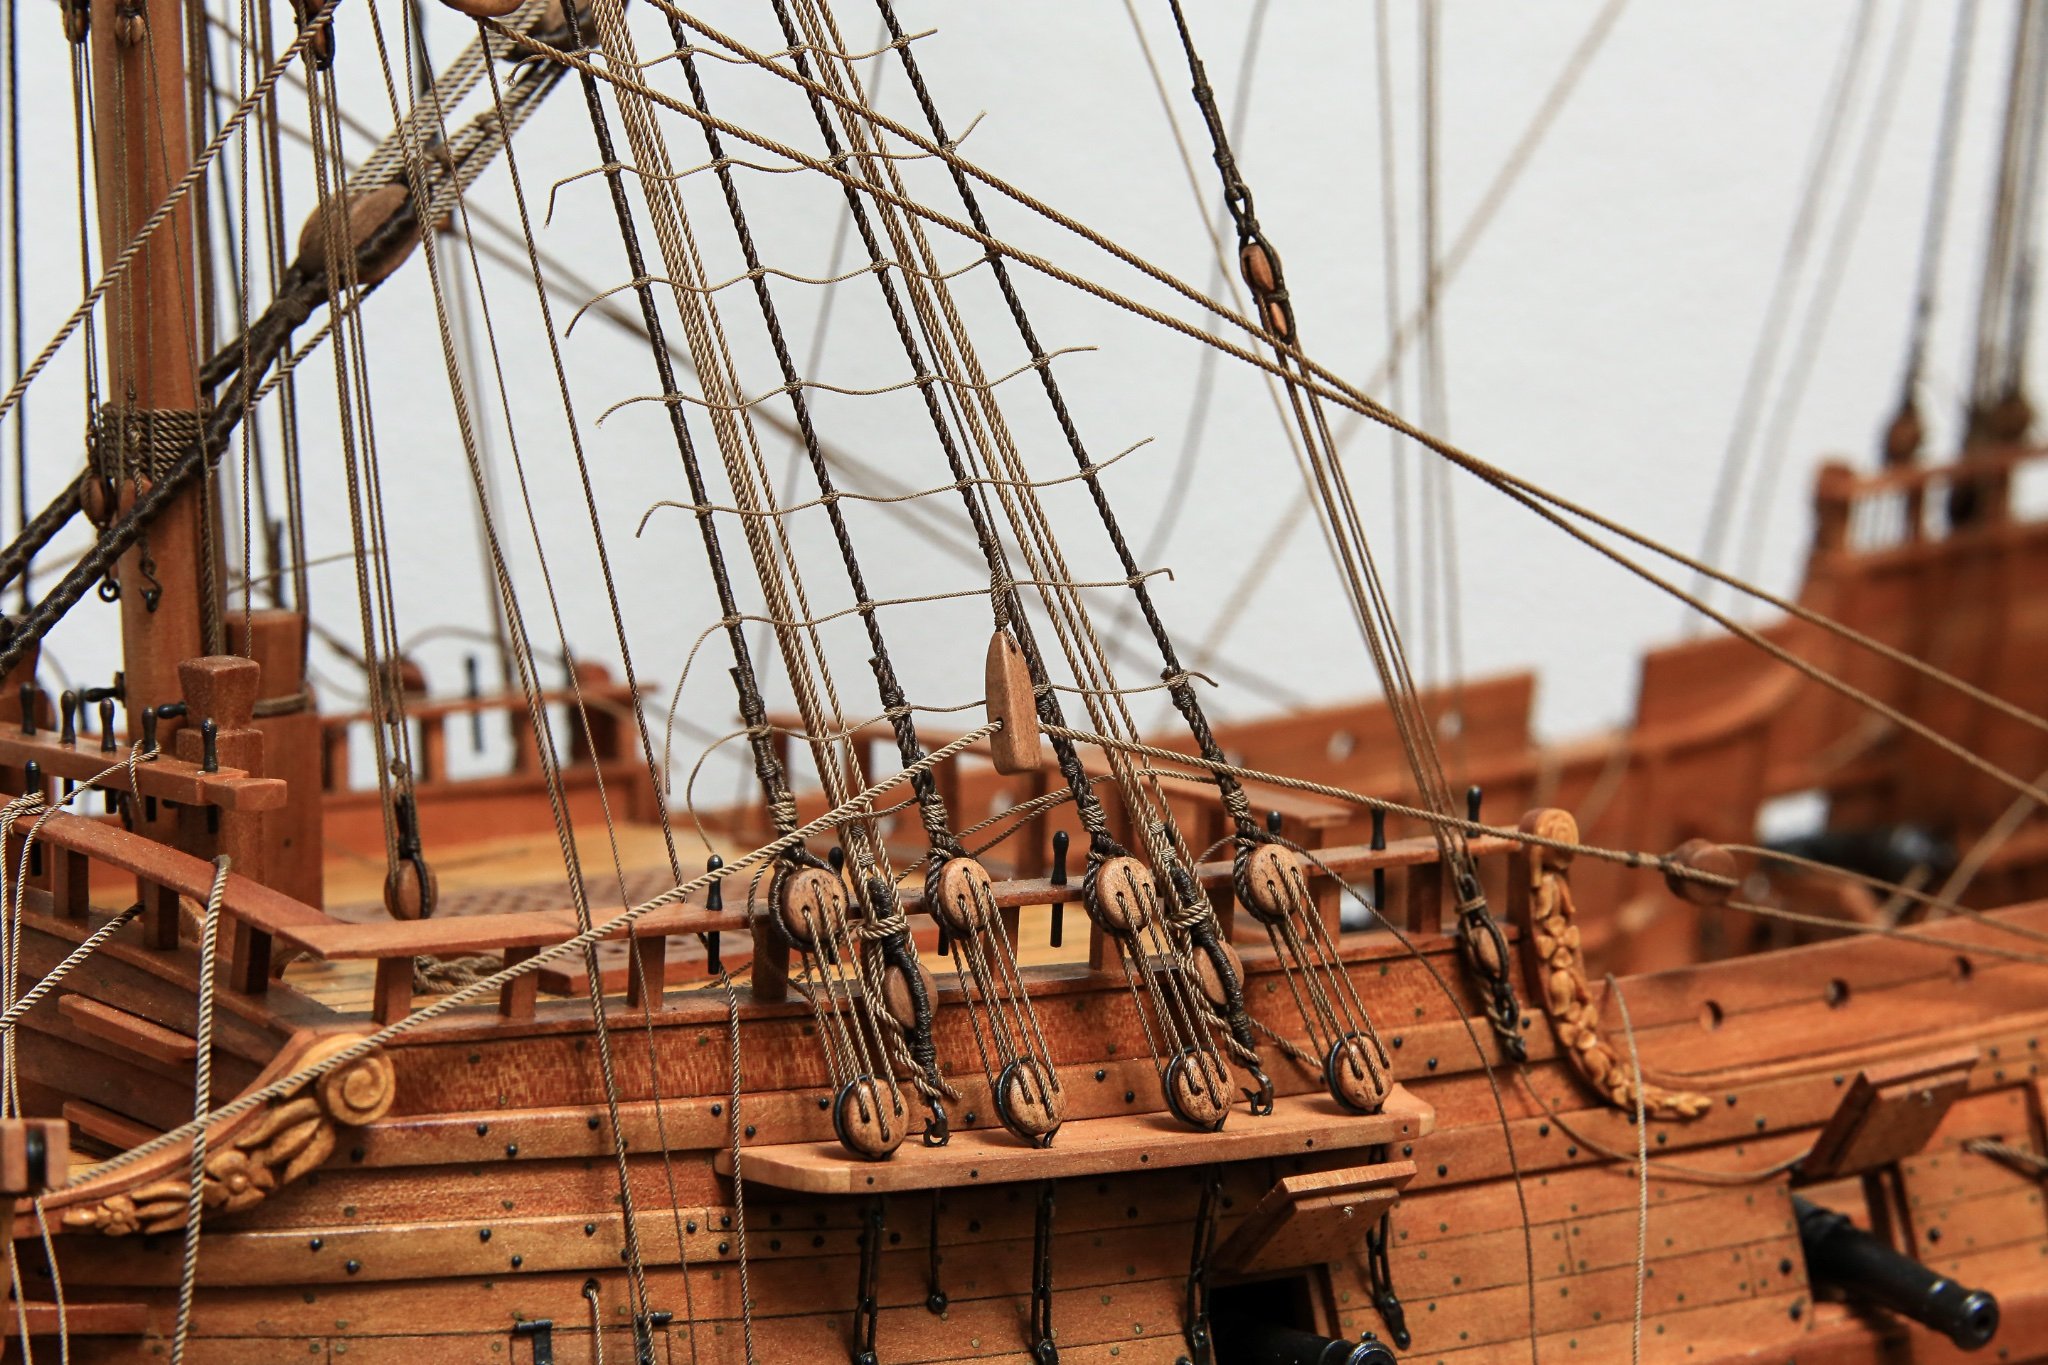
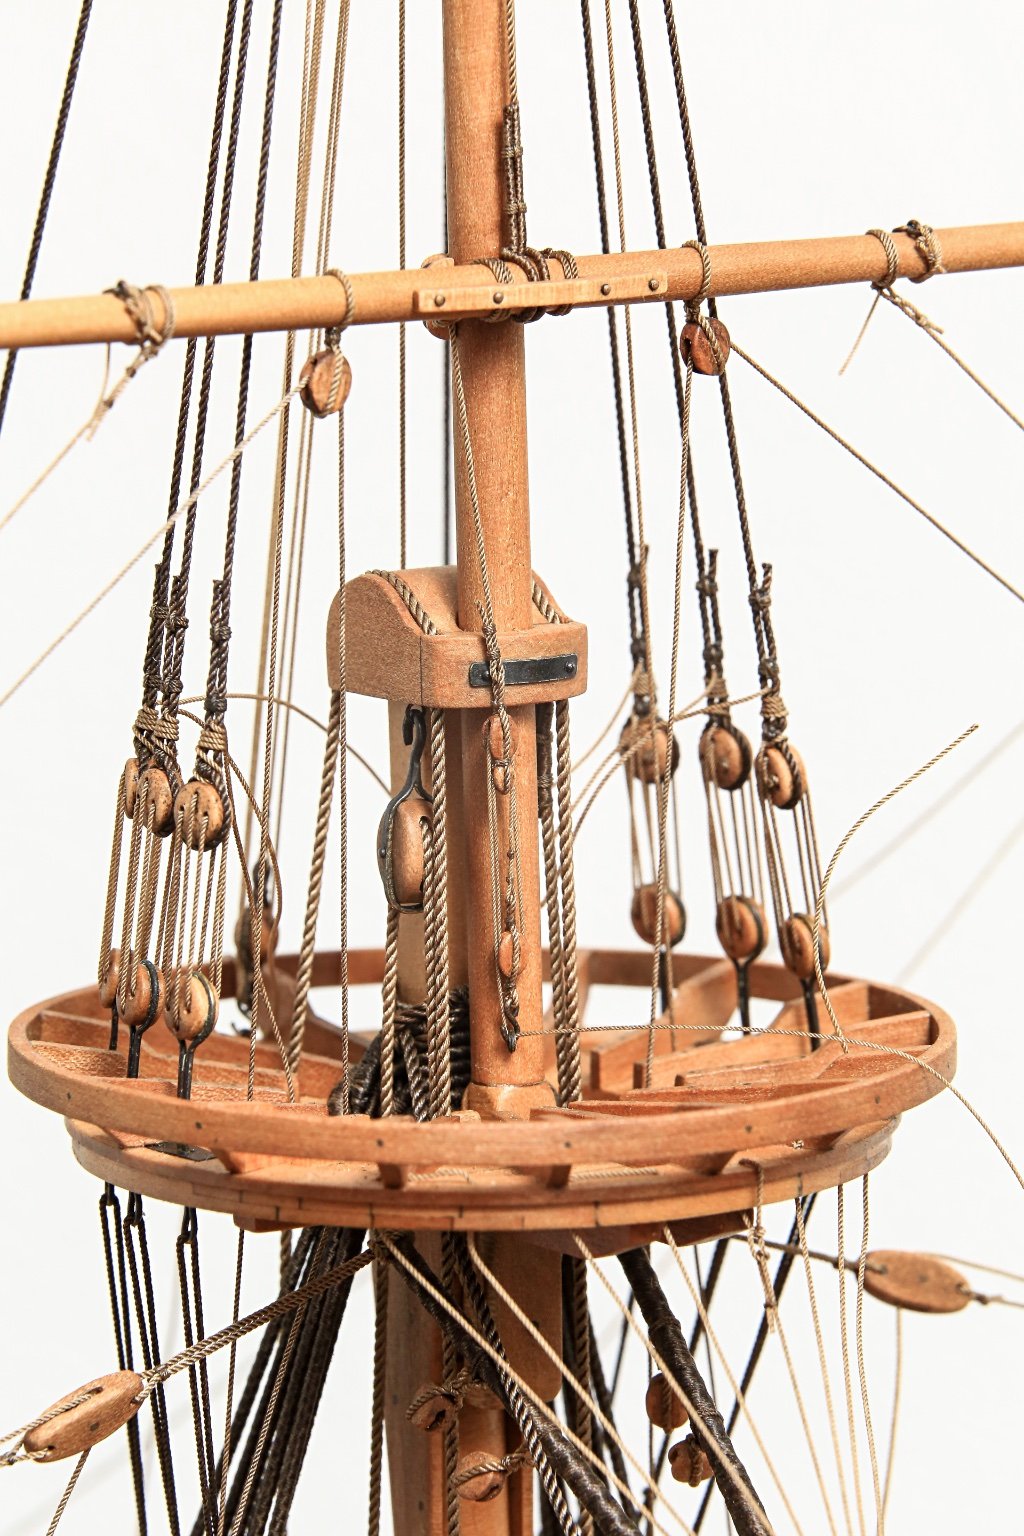
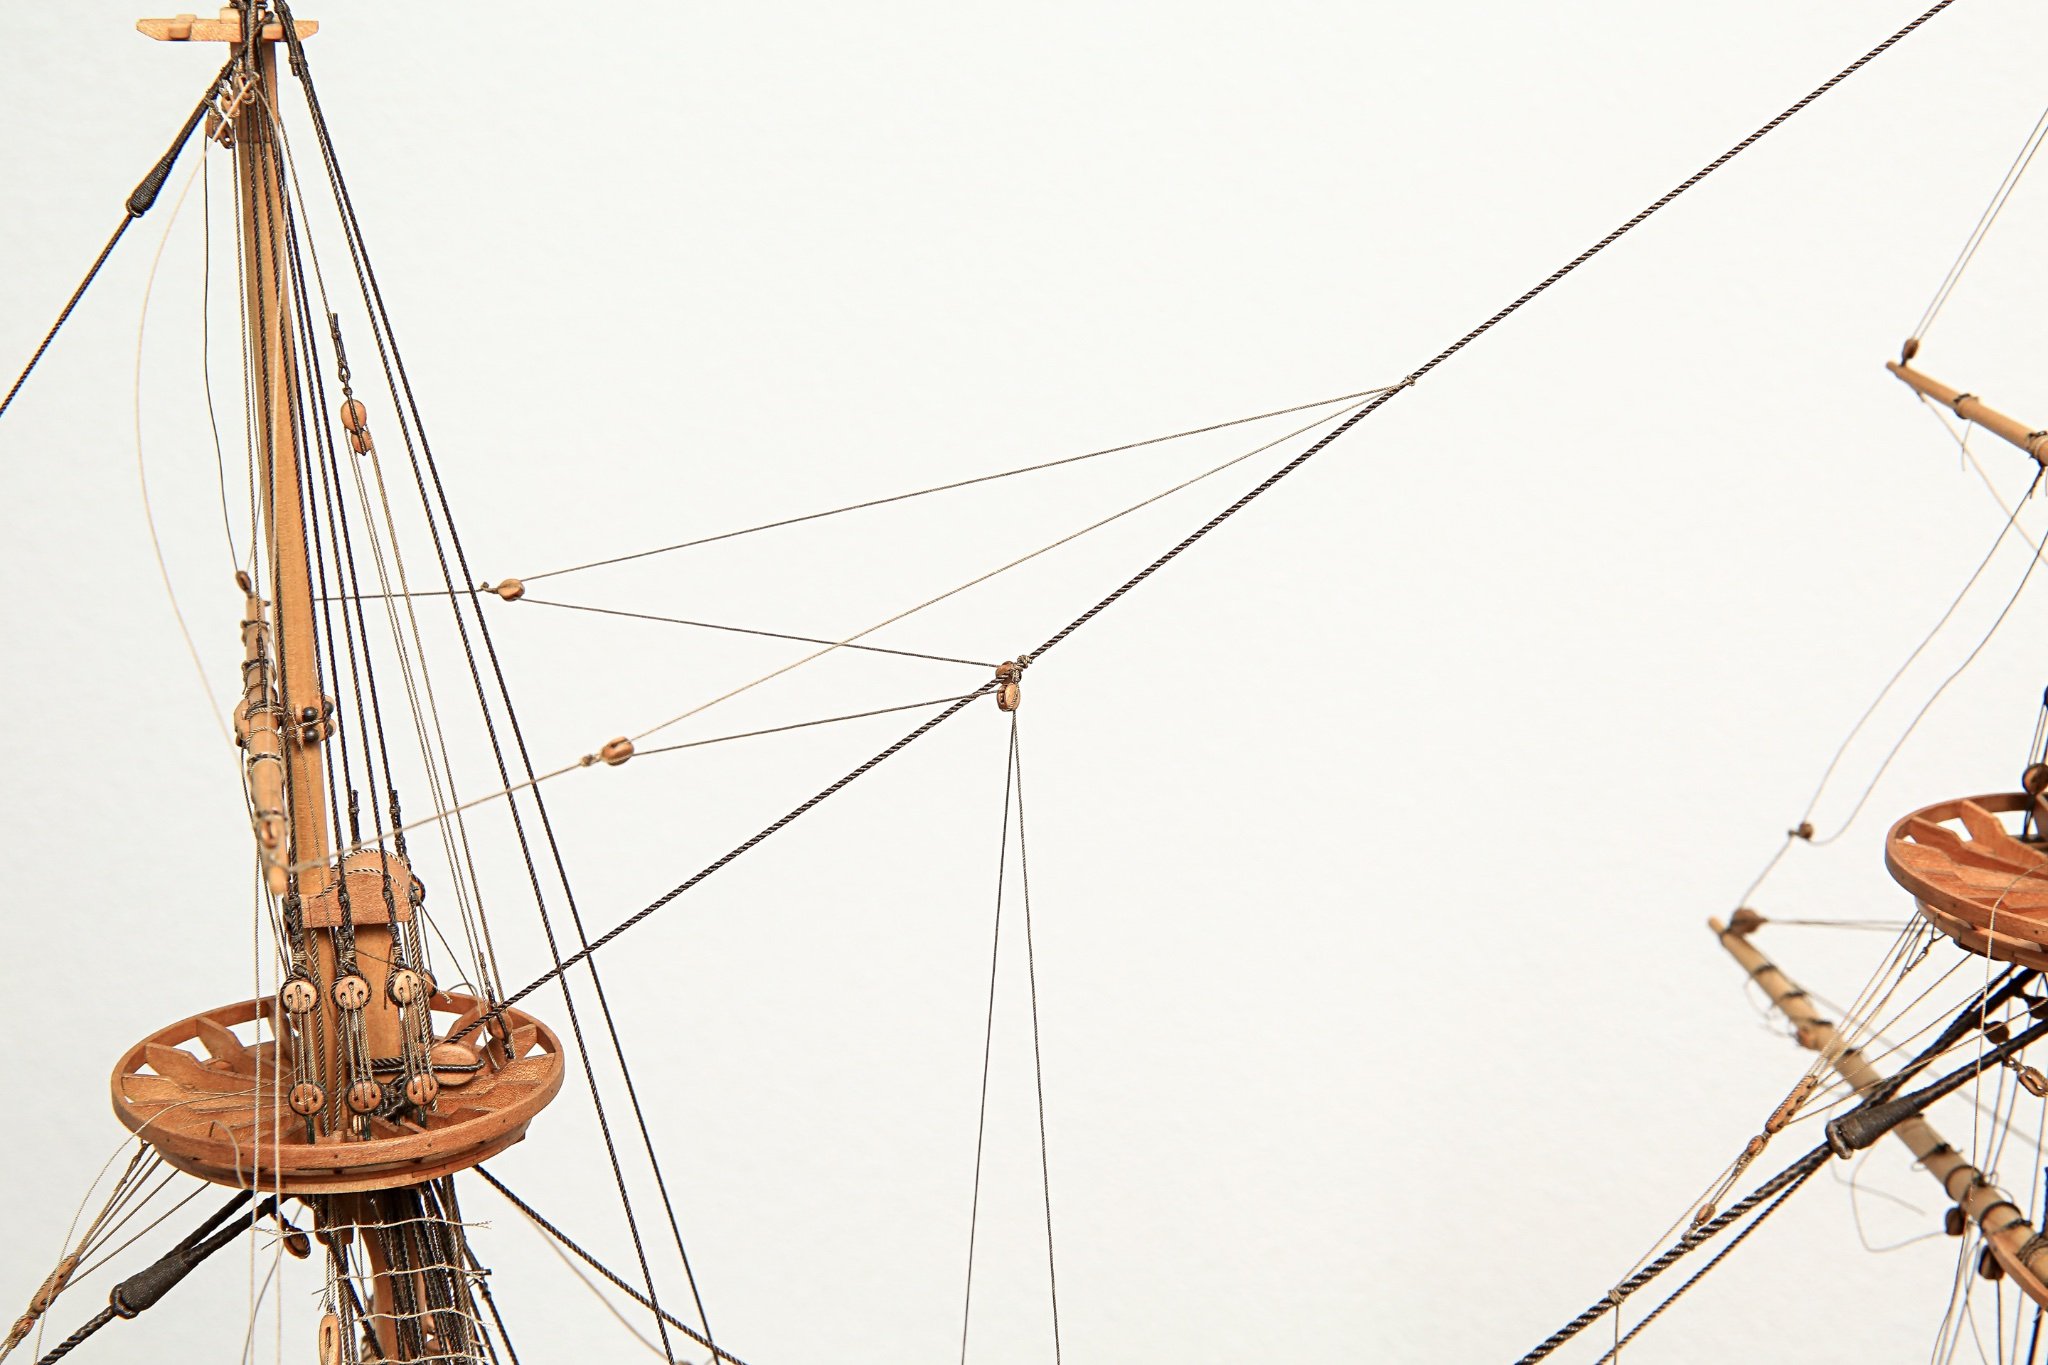
Also I've finished spritsail rigging.
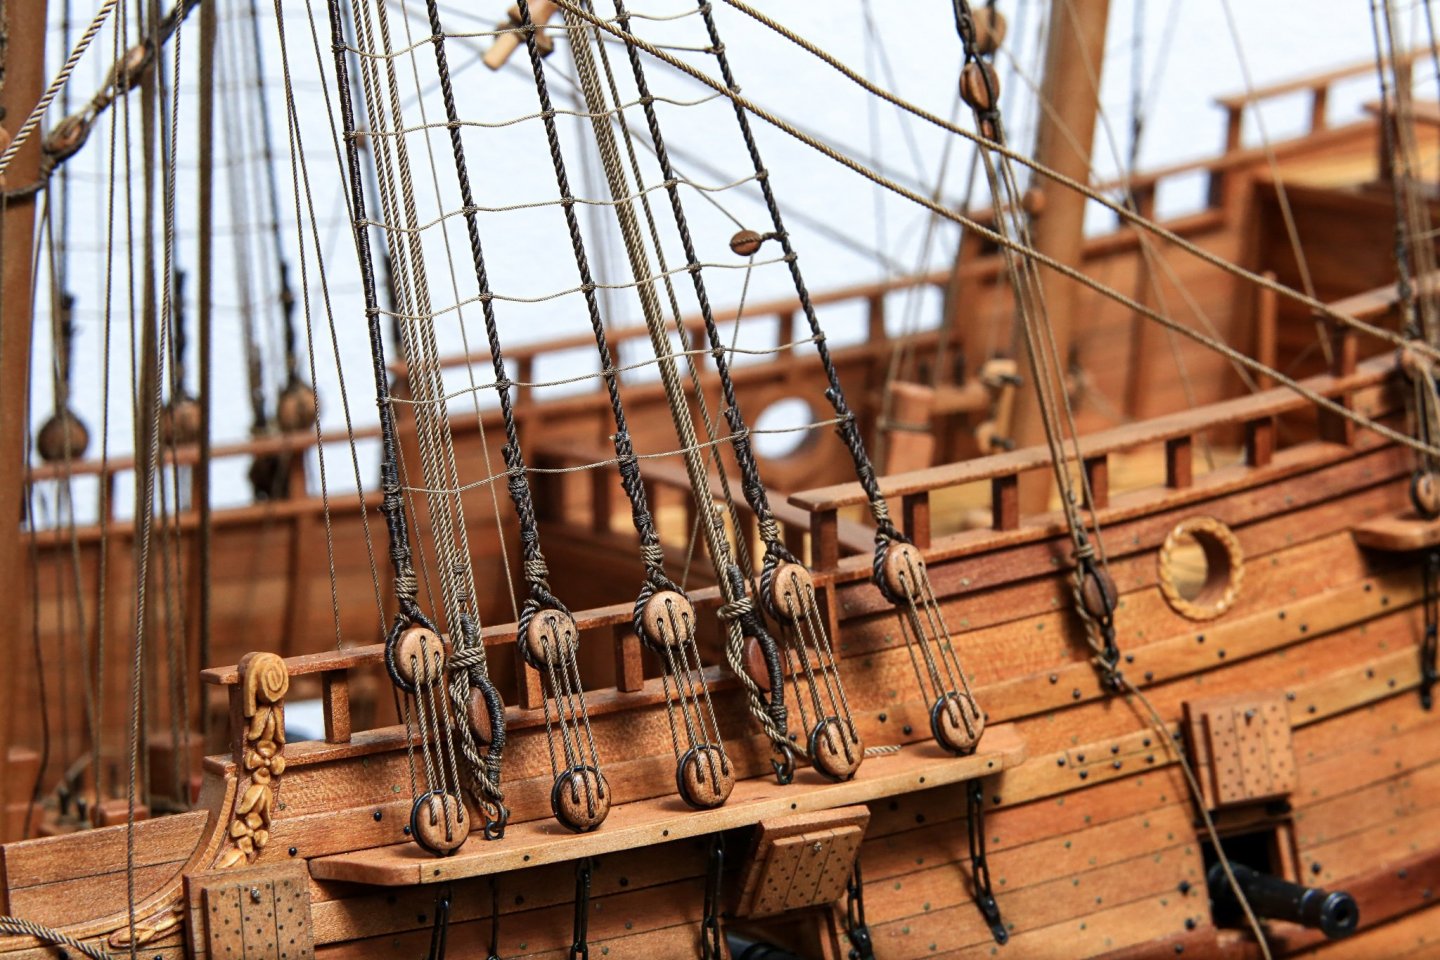
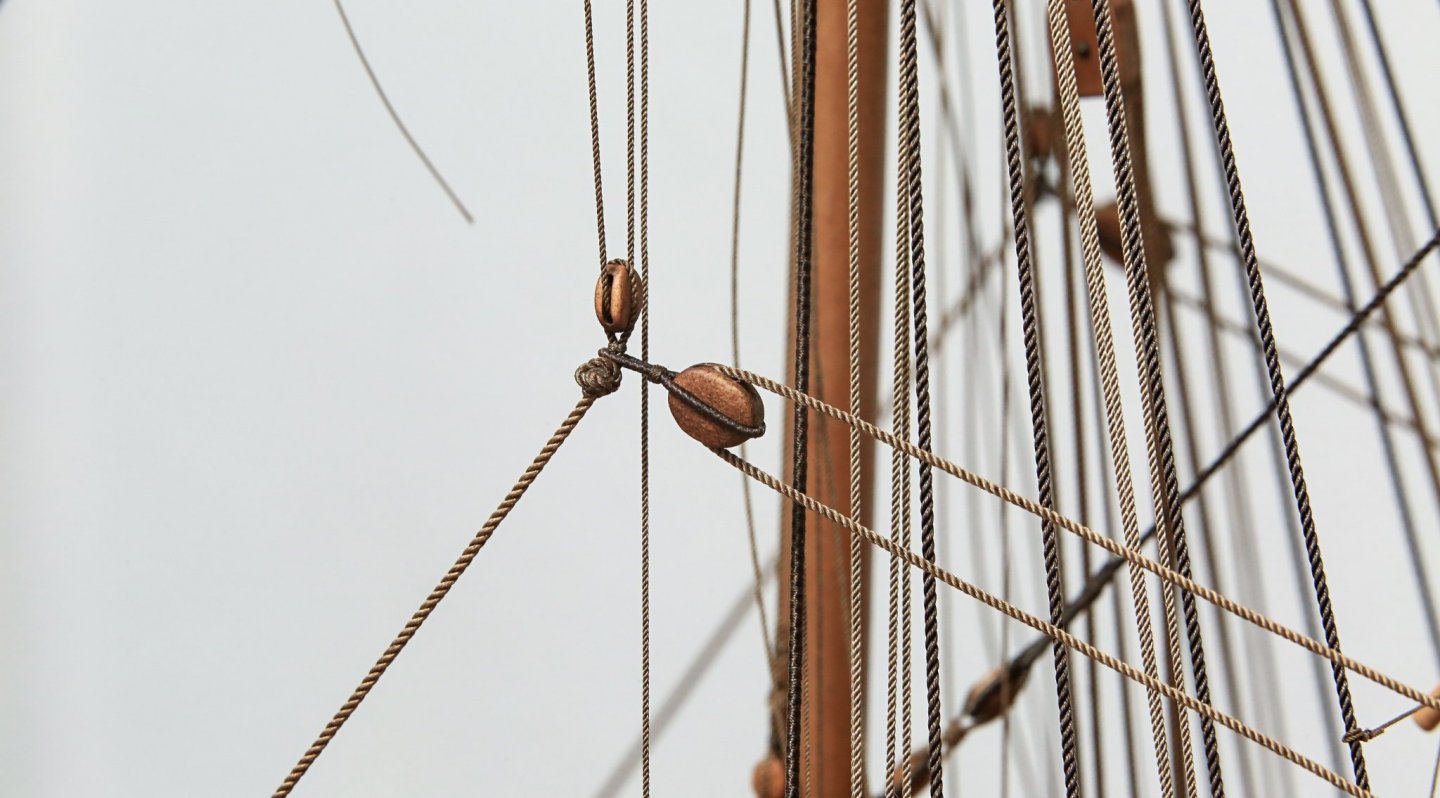
You can see also big bulls-eye block attached to one of the fore shroud. Sheet pendant goes thru this block and then forms tackle fixed to the hull by ring and then rope is belayed on staghorn seen in the background on the photo above.
You can see also first ratlines on the fore shrouds. This will be my next task... to complete them.
...and beside ratlines... only bowlines left... and rigging will be nearly done.
After that it will be this time where I have to "organize" whole rigging. Trim ropes excess , belayed them on corresponding pin, cleat, kevels and staghorns.

...and at the moment model looks as below 😉
Cheers,
Matt -
Hi All,
Another small update 😎
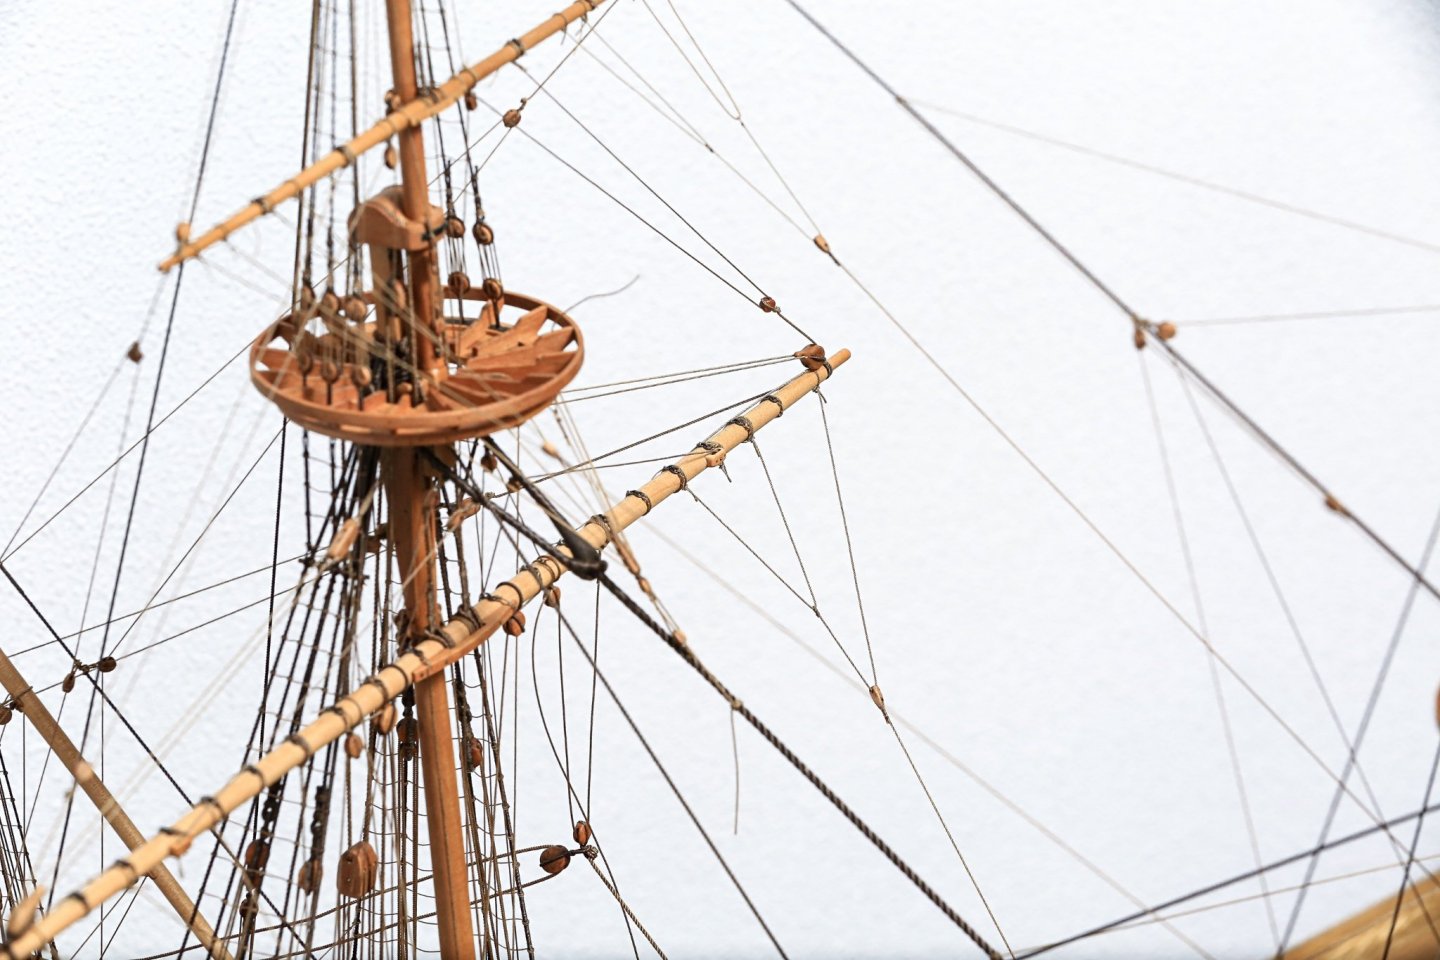
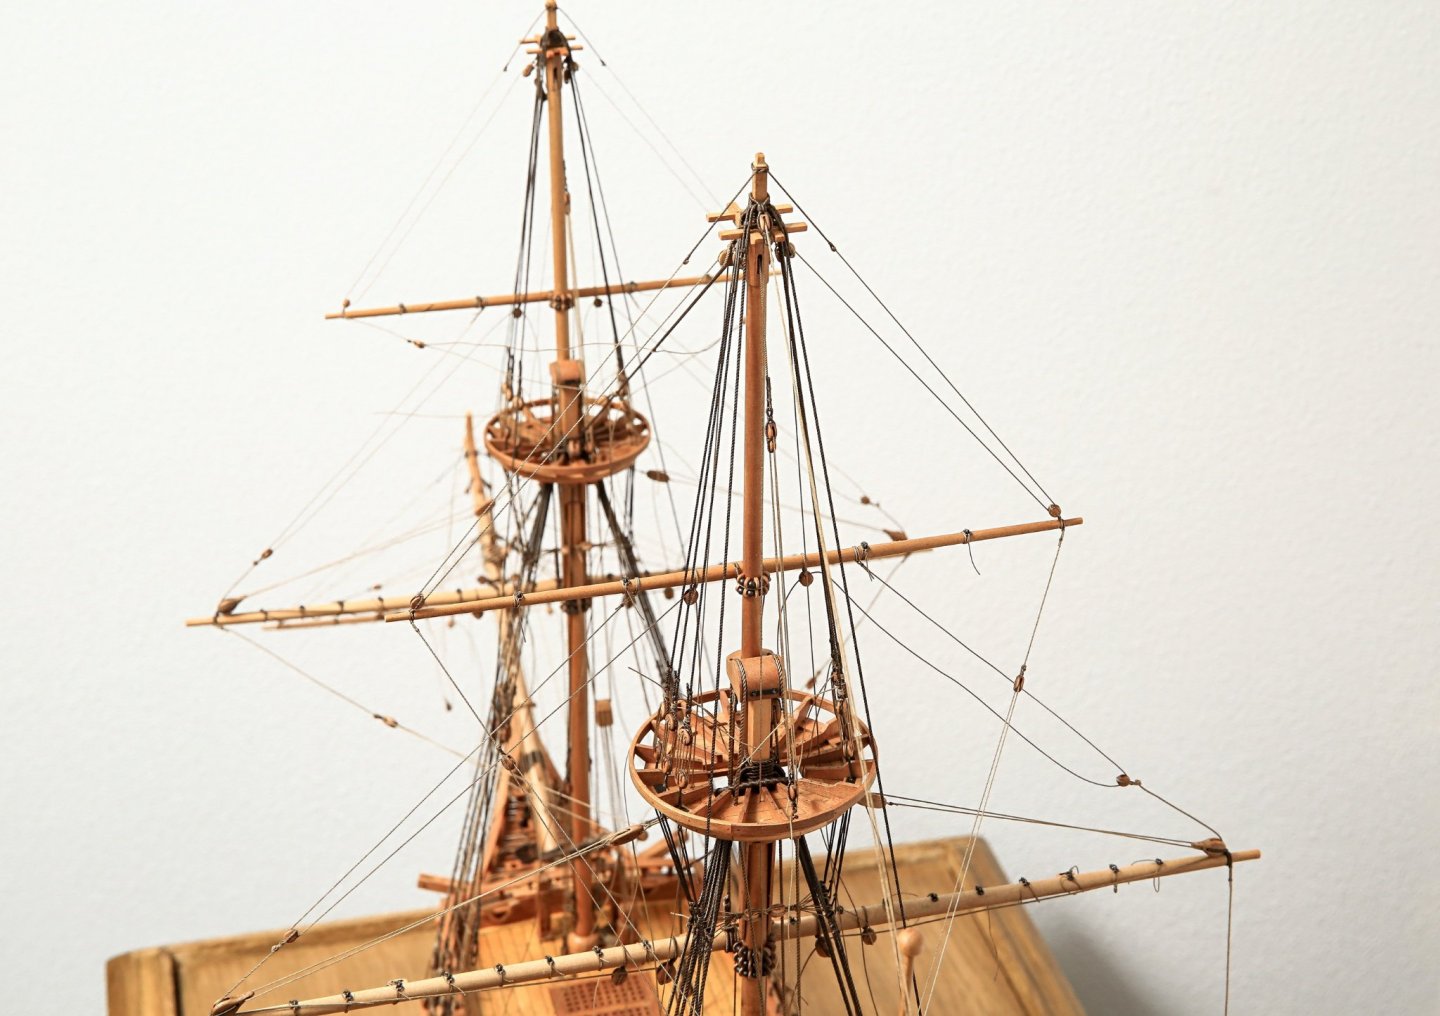
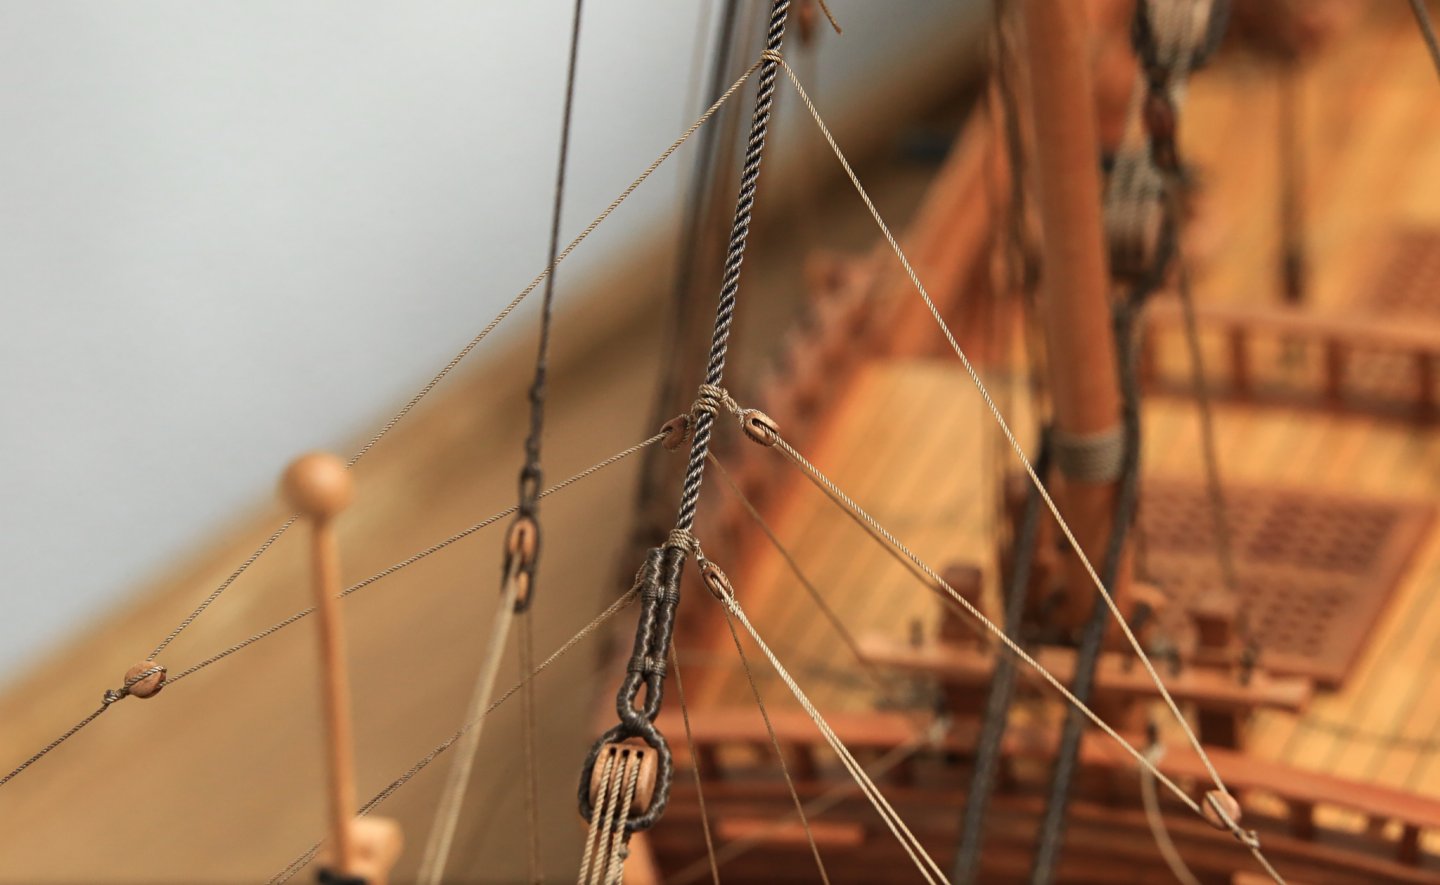
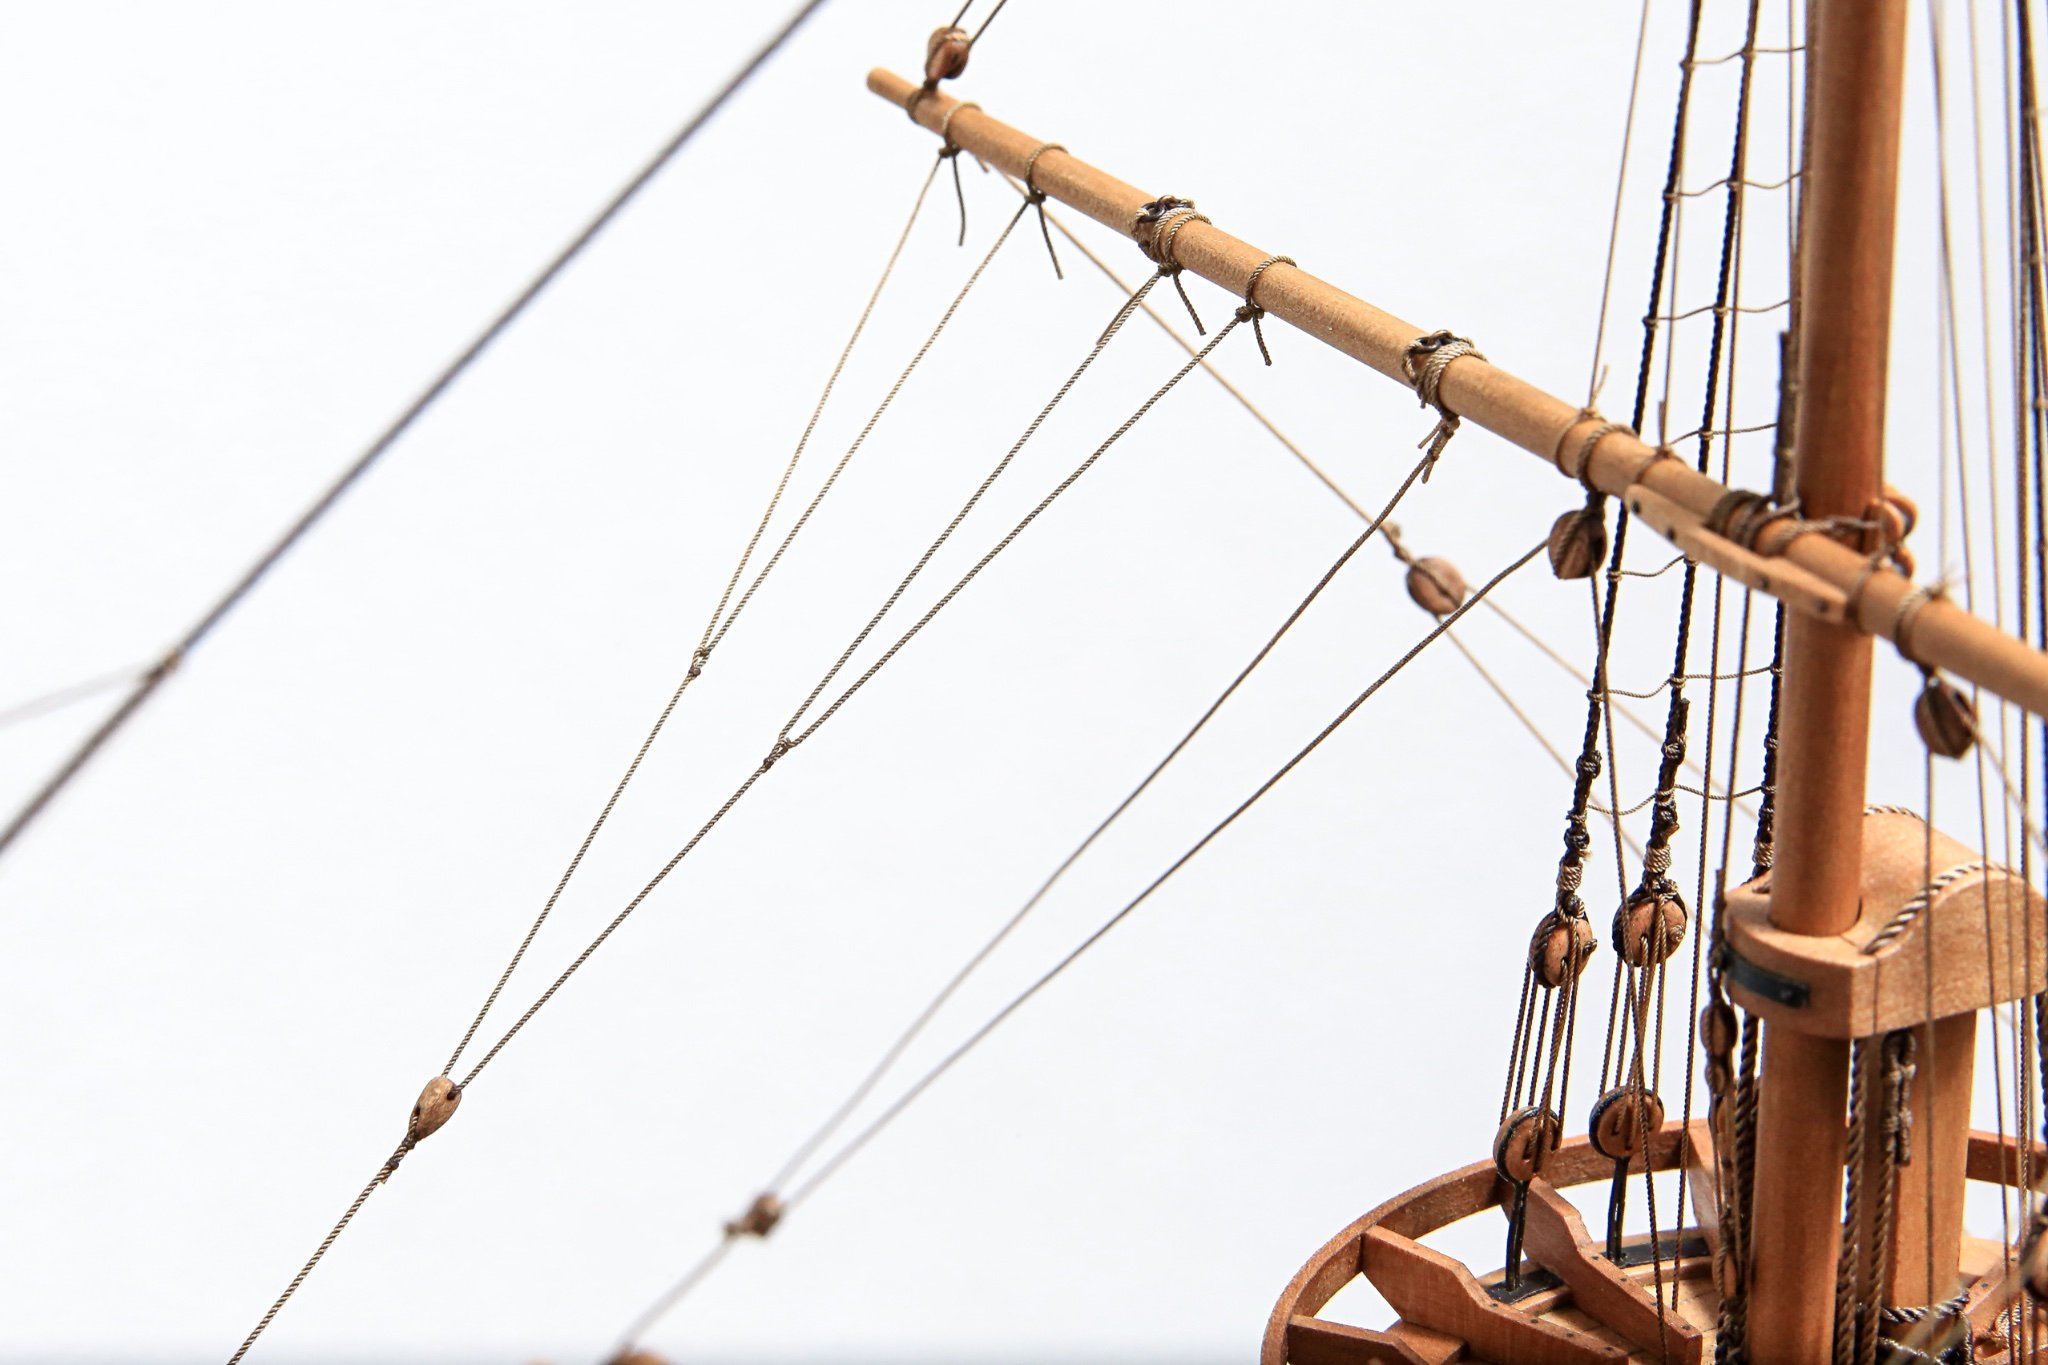
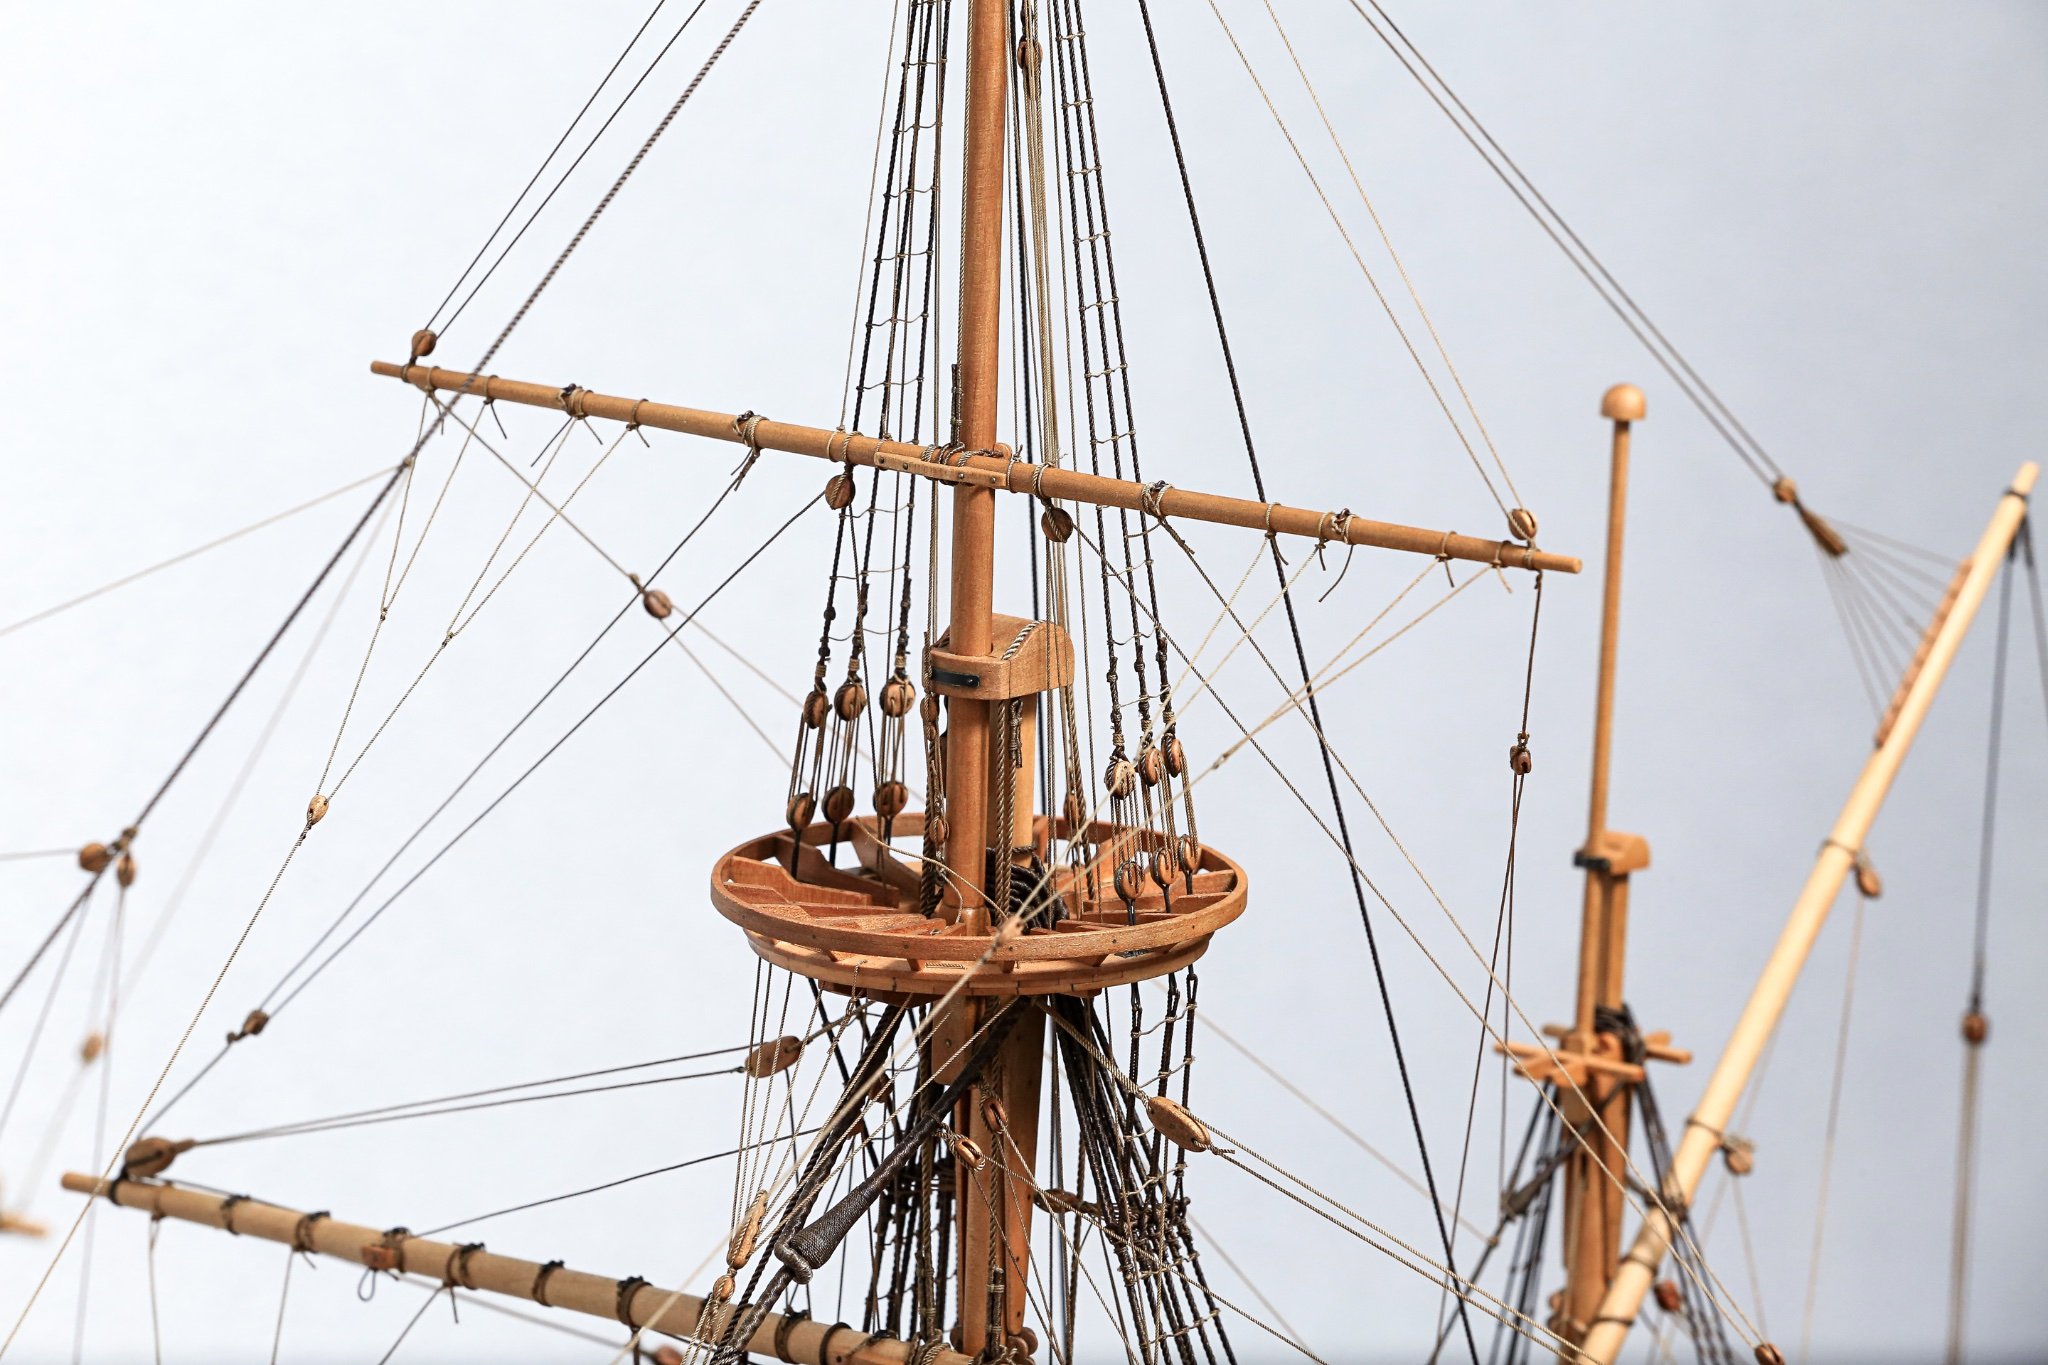
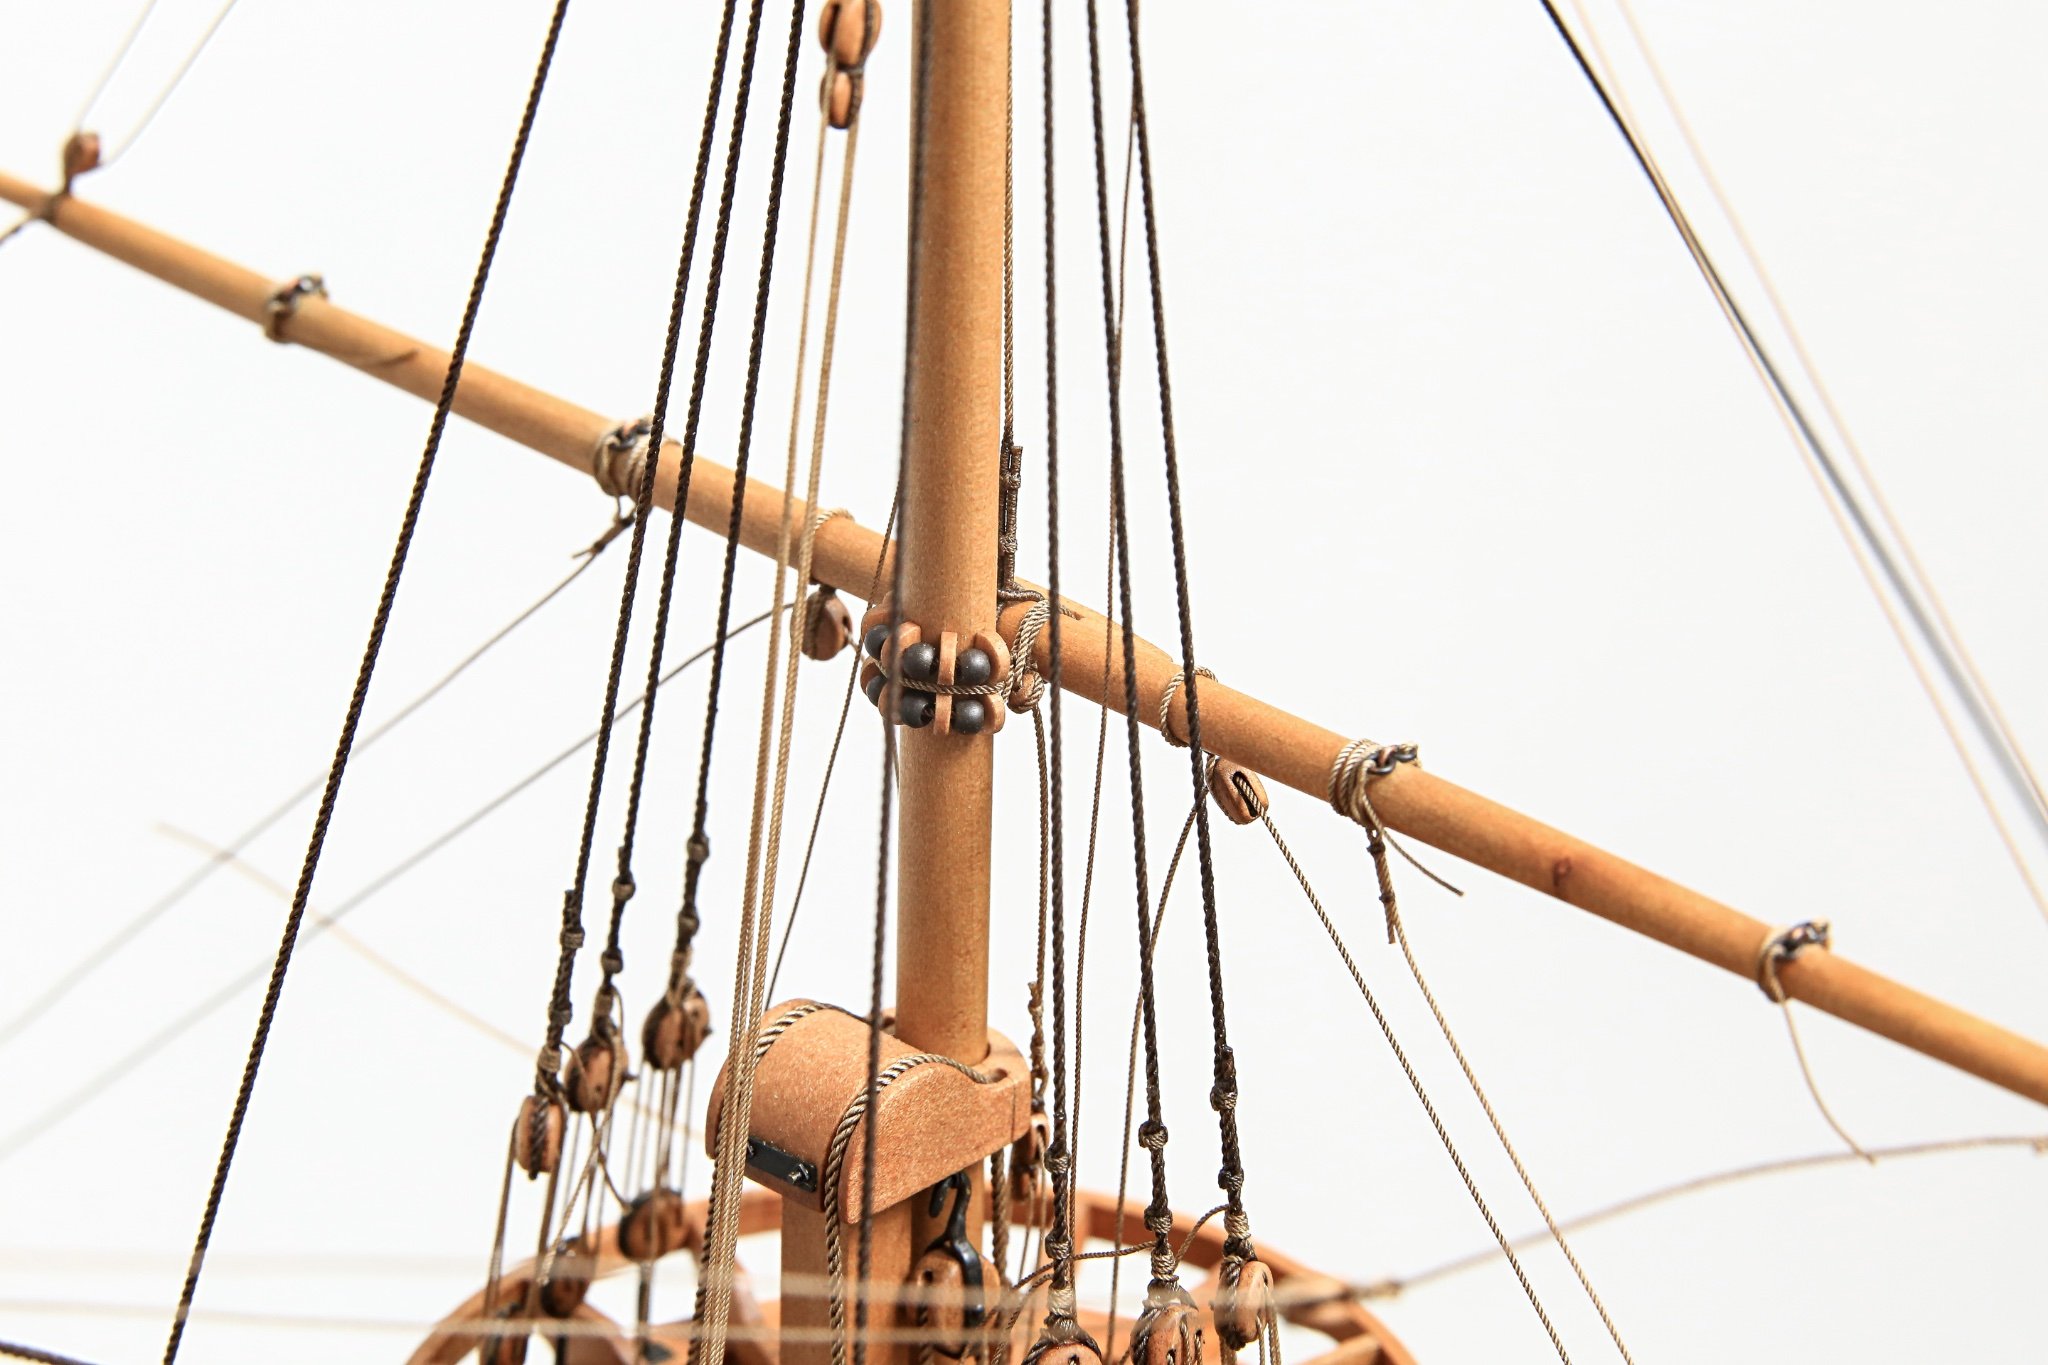
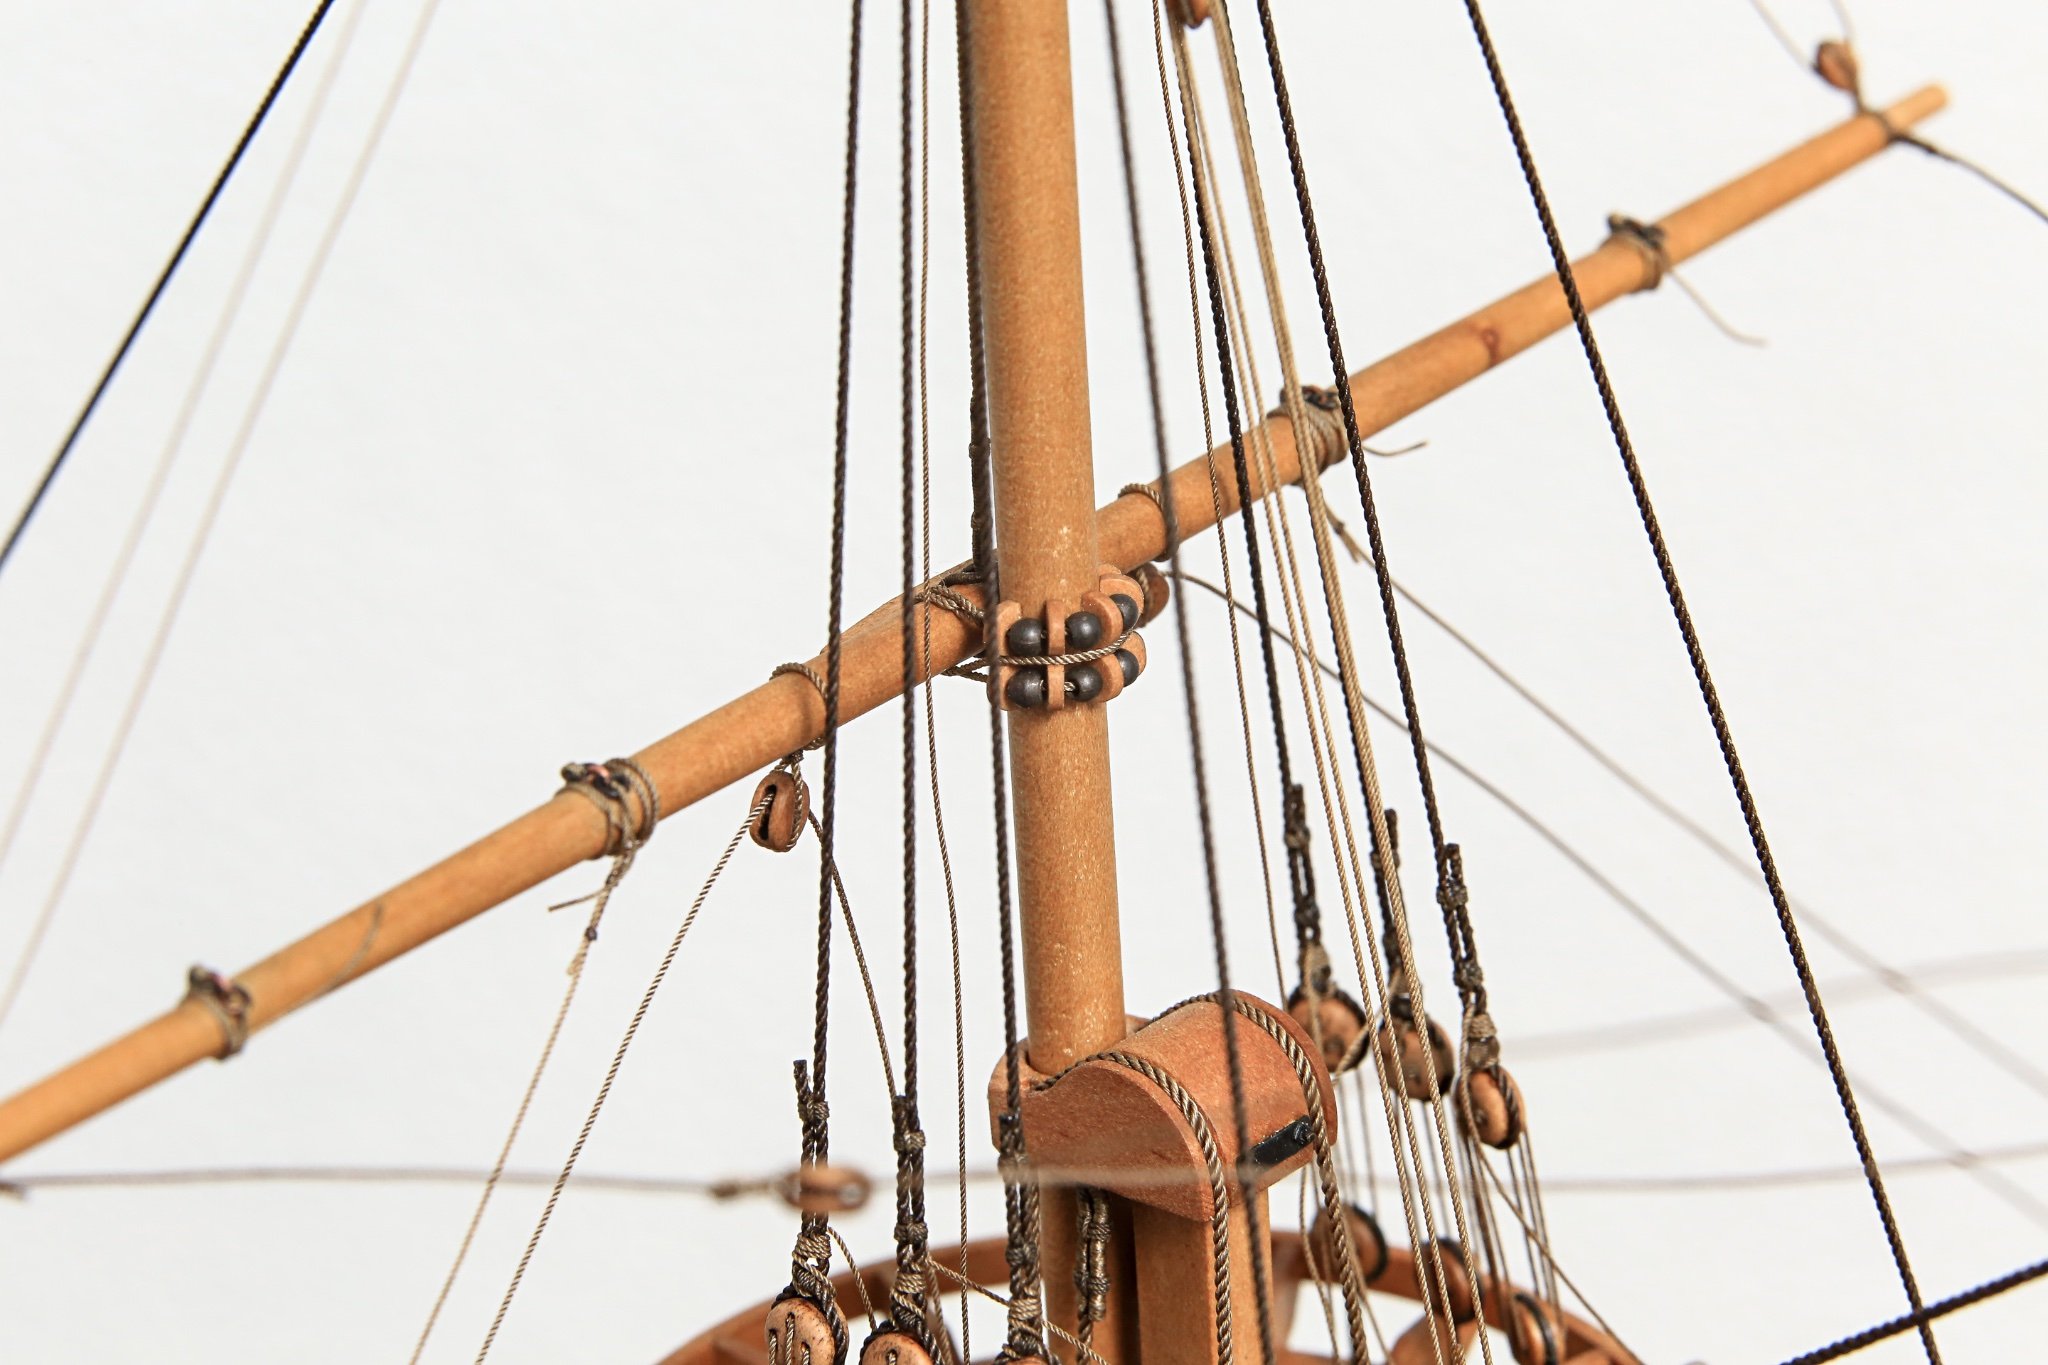
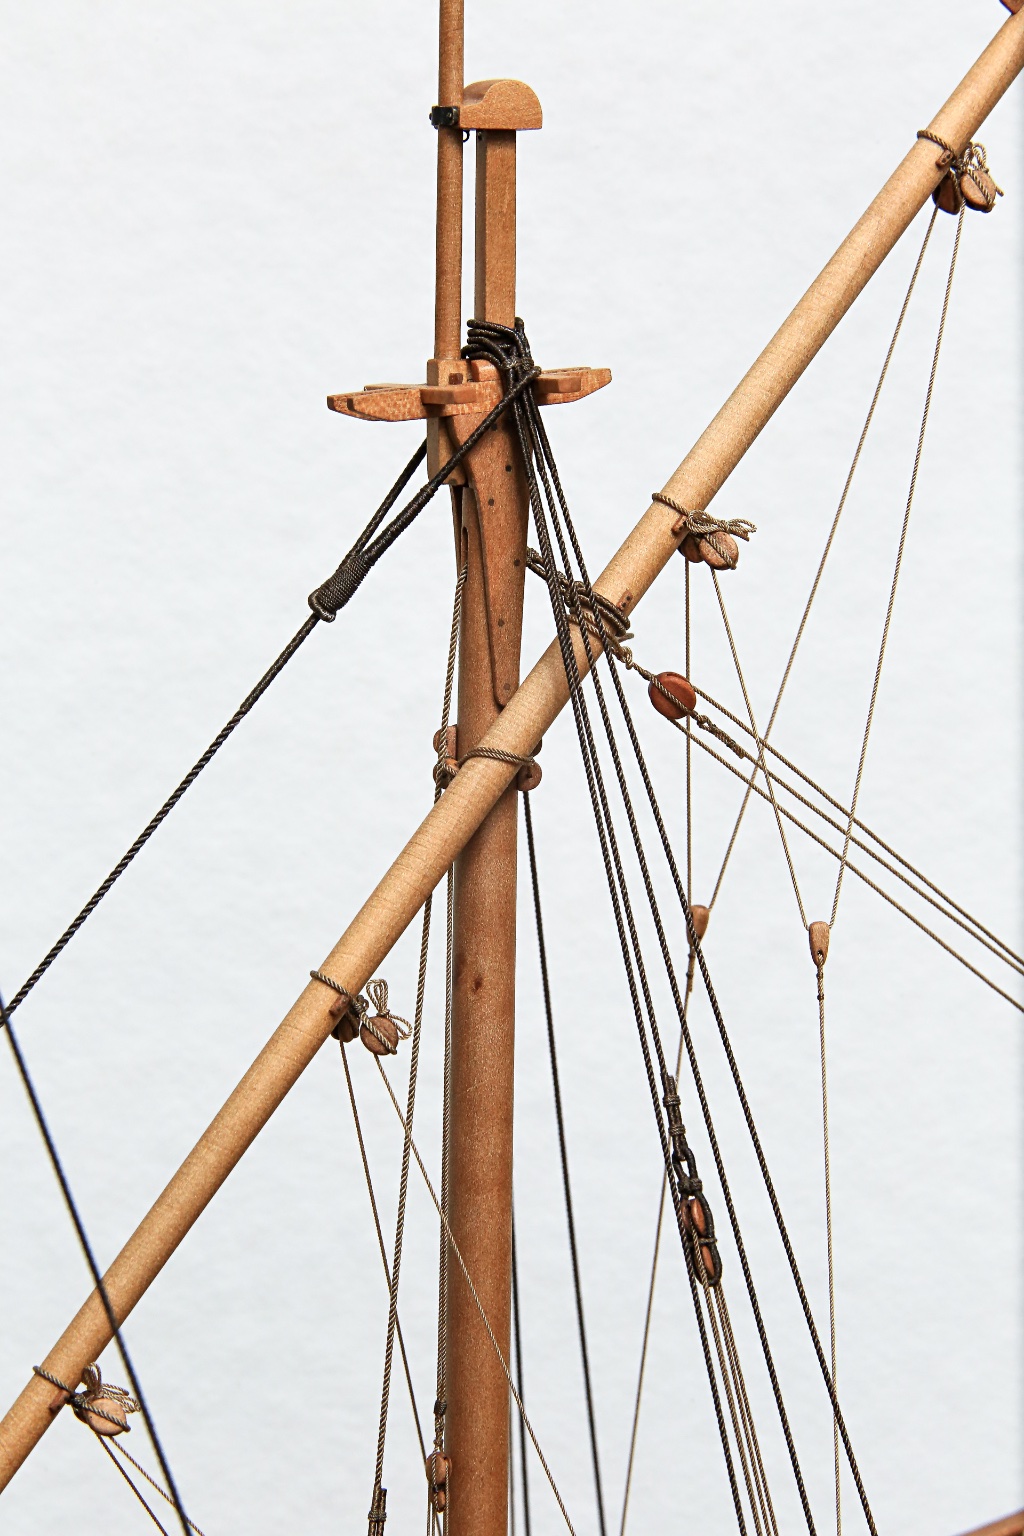
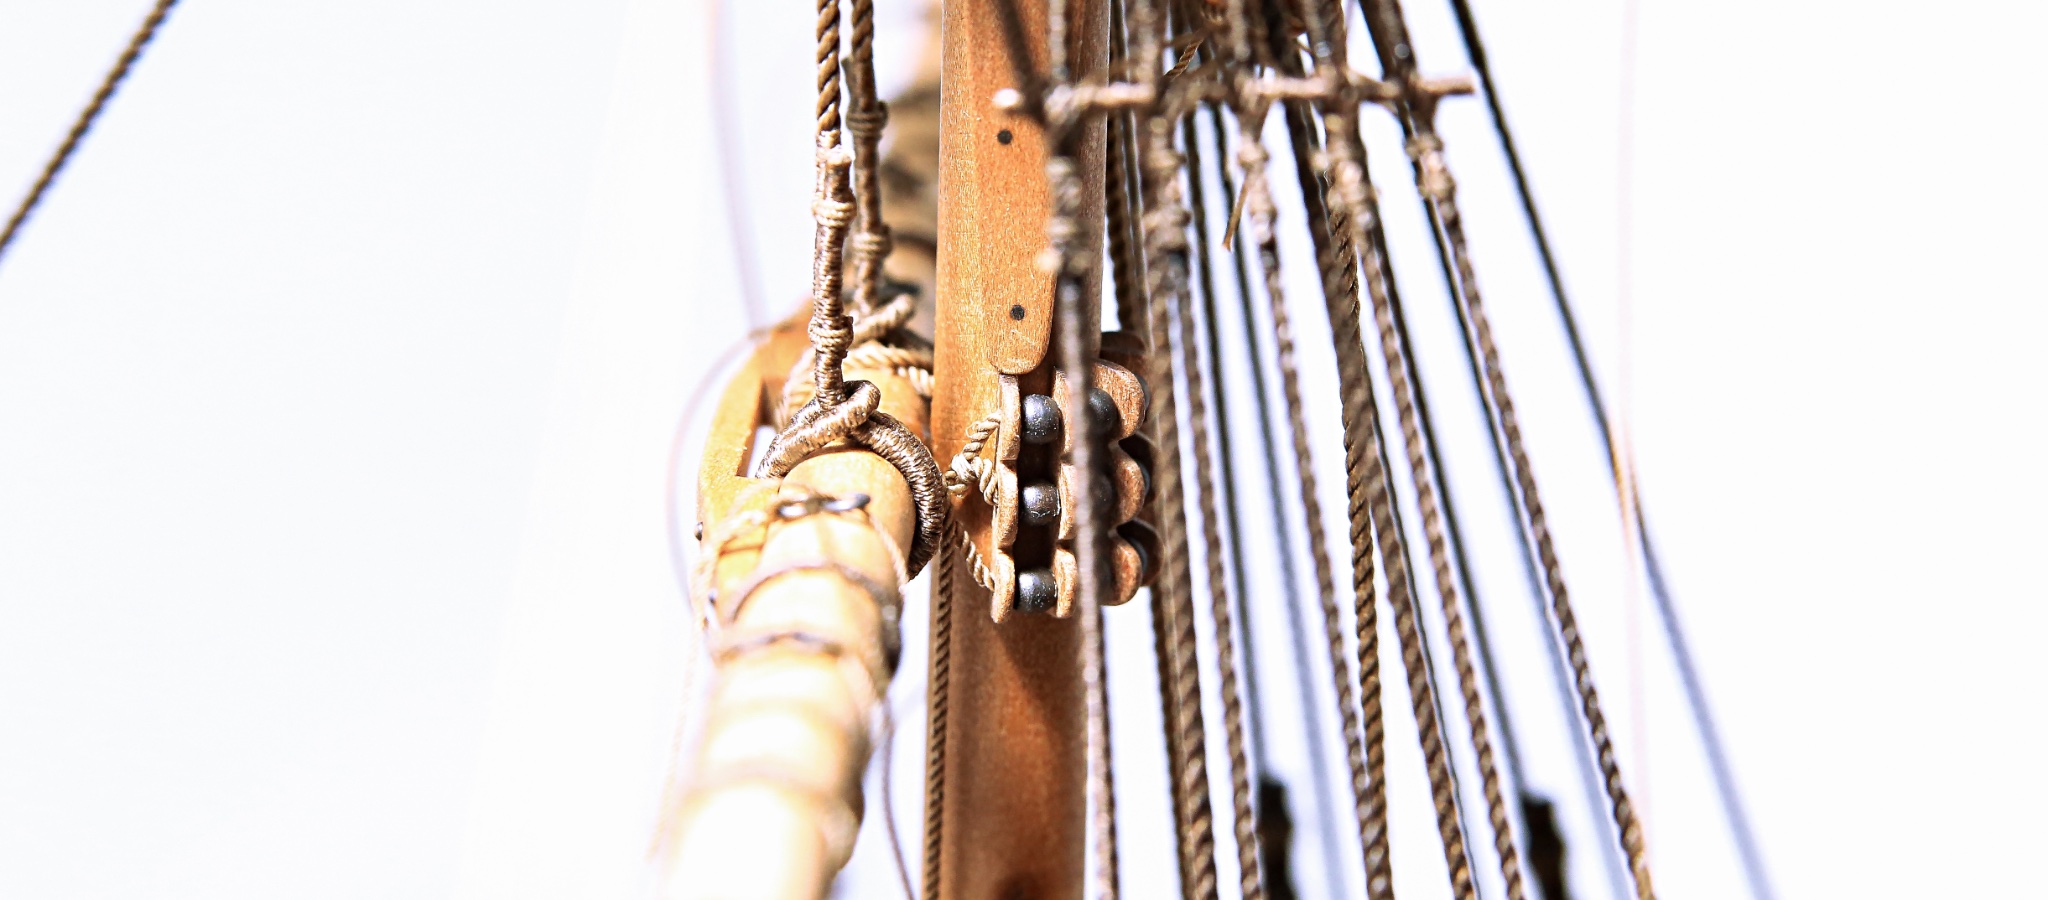
In order to complete wooden sticks I had to hung last two yards. Main and fore topsail yards.
Both yards had slightly different type of parrals.
I saw few different "designs"... but I have decided to go with Herman Keeting "look".
Photos might be not that obvious, because of obstruct and tight spot so I'm attaching also drawing how more or less it should look 😉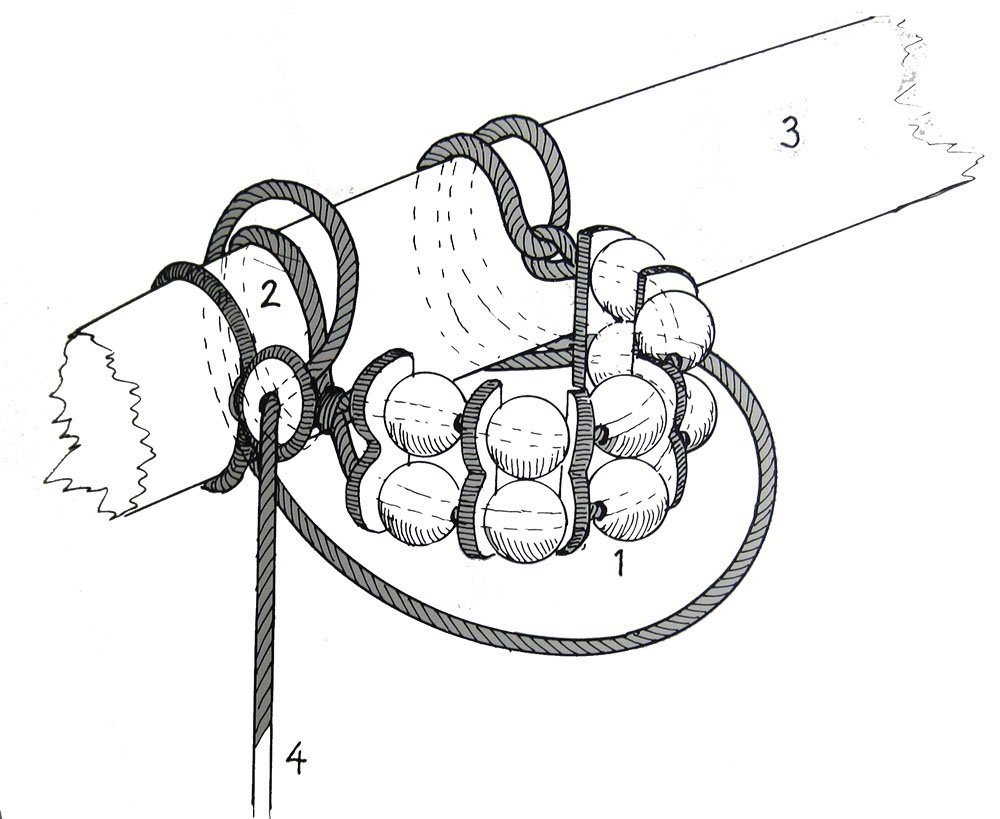


Having all yards in place I was able to start with other rigging.
Braces...


Topsail yards lifts...

Cheers,
Matt
-
Hi All,
Thank you Allan.
That's true... sails in that scale are really hard to replicate to be in correct thickness. I have few different super thin materials, which are looking good and more or less will match the scale... but still I prefer to have no sails.
Another small update...
Mizzen mast is nearly fully rigged. Just ratlines missing.
As you see model doesn't have sails, but still I would like to keep as many ropes as possible.
That's why you can see clewlines and sheet on mizzen mast yard.
With sails clewlines should be attached to sail cringles and sheet to clew... but without I have decided to keep them in the way as you can see on the photos with excess rope belayed next to the blocks on the yard. Sheet block which is attached to mizzen clew has been attached with knot to the yard.


You can see also parral, which is slightly different to parrals on main and fore yard.

...I'm jumping from one yard to another just because to not get bored I was missing fore yard parral.
It's almost the same as main yard, but slightly smaller.
Cheers,
Matt
-
Hi Nirvana,
Thank you for your nice comment.
Regarding sails... after many days of thoughts, some time ago I've decided to omit sails on my model.
I really like "no sail look" on the models, especially with all the possible ropes rigged on the model.
Even If I would add sails to my model... even that, sails would be fully furled to present rigging.
In the end... that's why I'm spending so much time on rigging and trying to replicate as many details as I can... to be able to clearly show it... and not to hide it under the sails
However... if one day I will decide to add sails, running rigging is rigged in that order to be able to loose necessary parts... so no glue has been used.... just tight knots on belaying pins and cleats... and enough rope to extend it or manipulate.
Cheers,
Matt
- allanyed, mtaylor, Louie da fly and 1 other
-
4
-
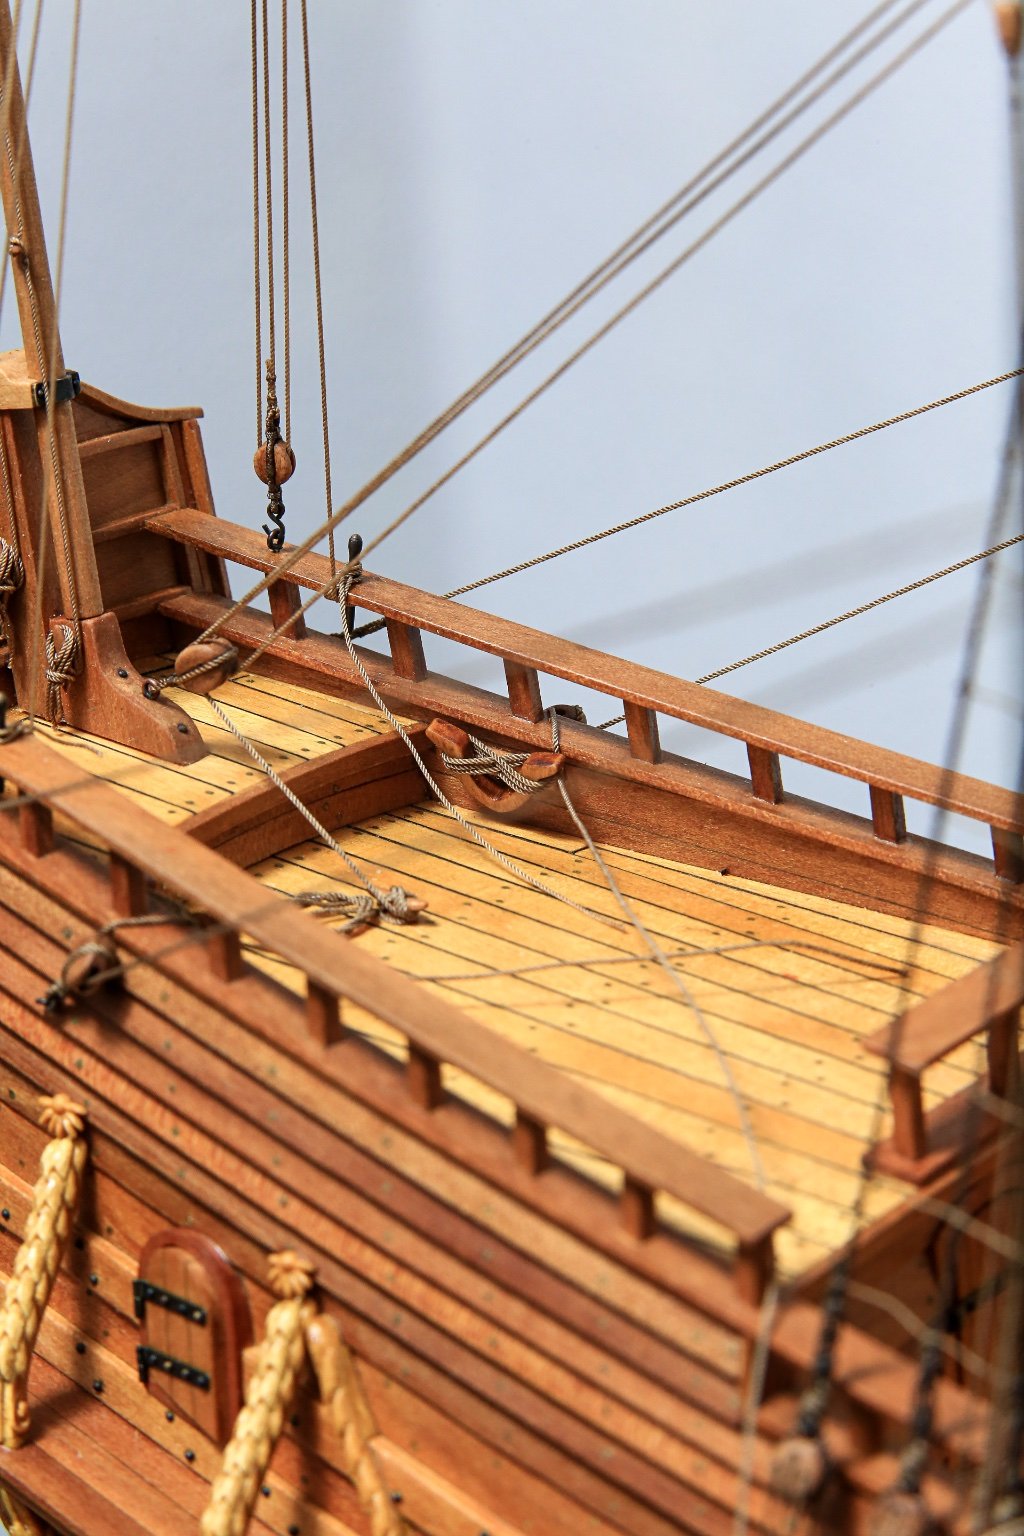
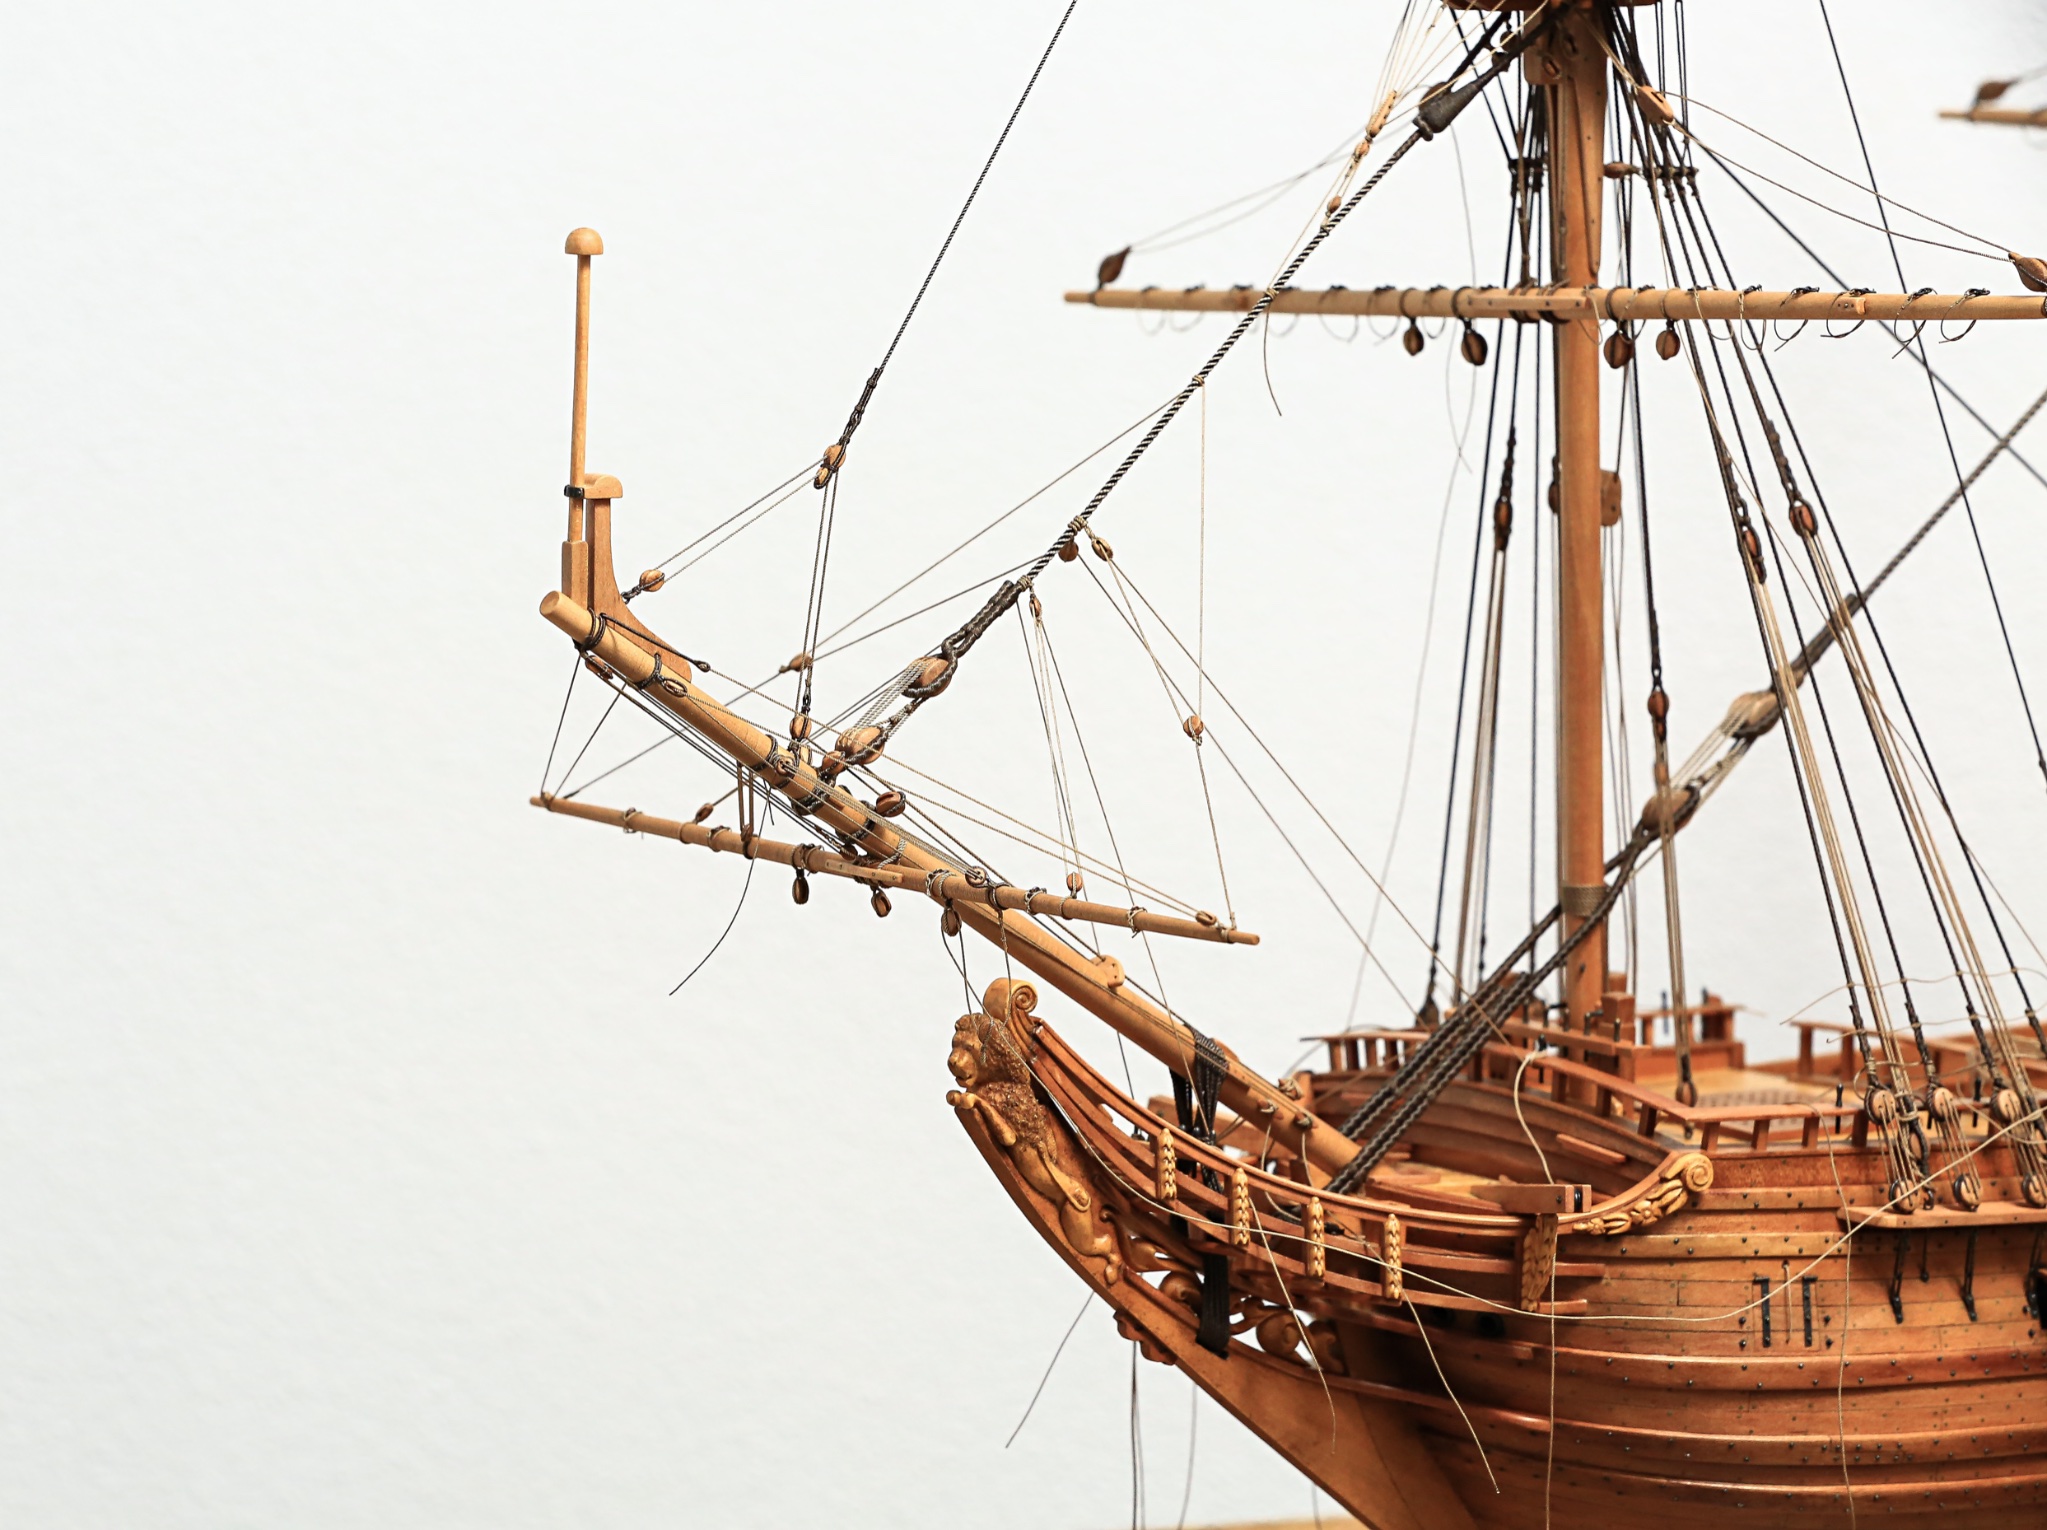
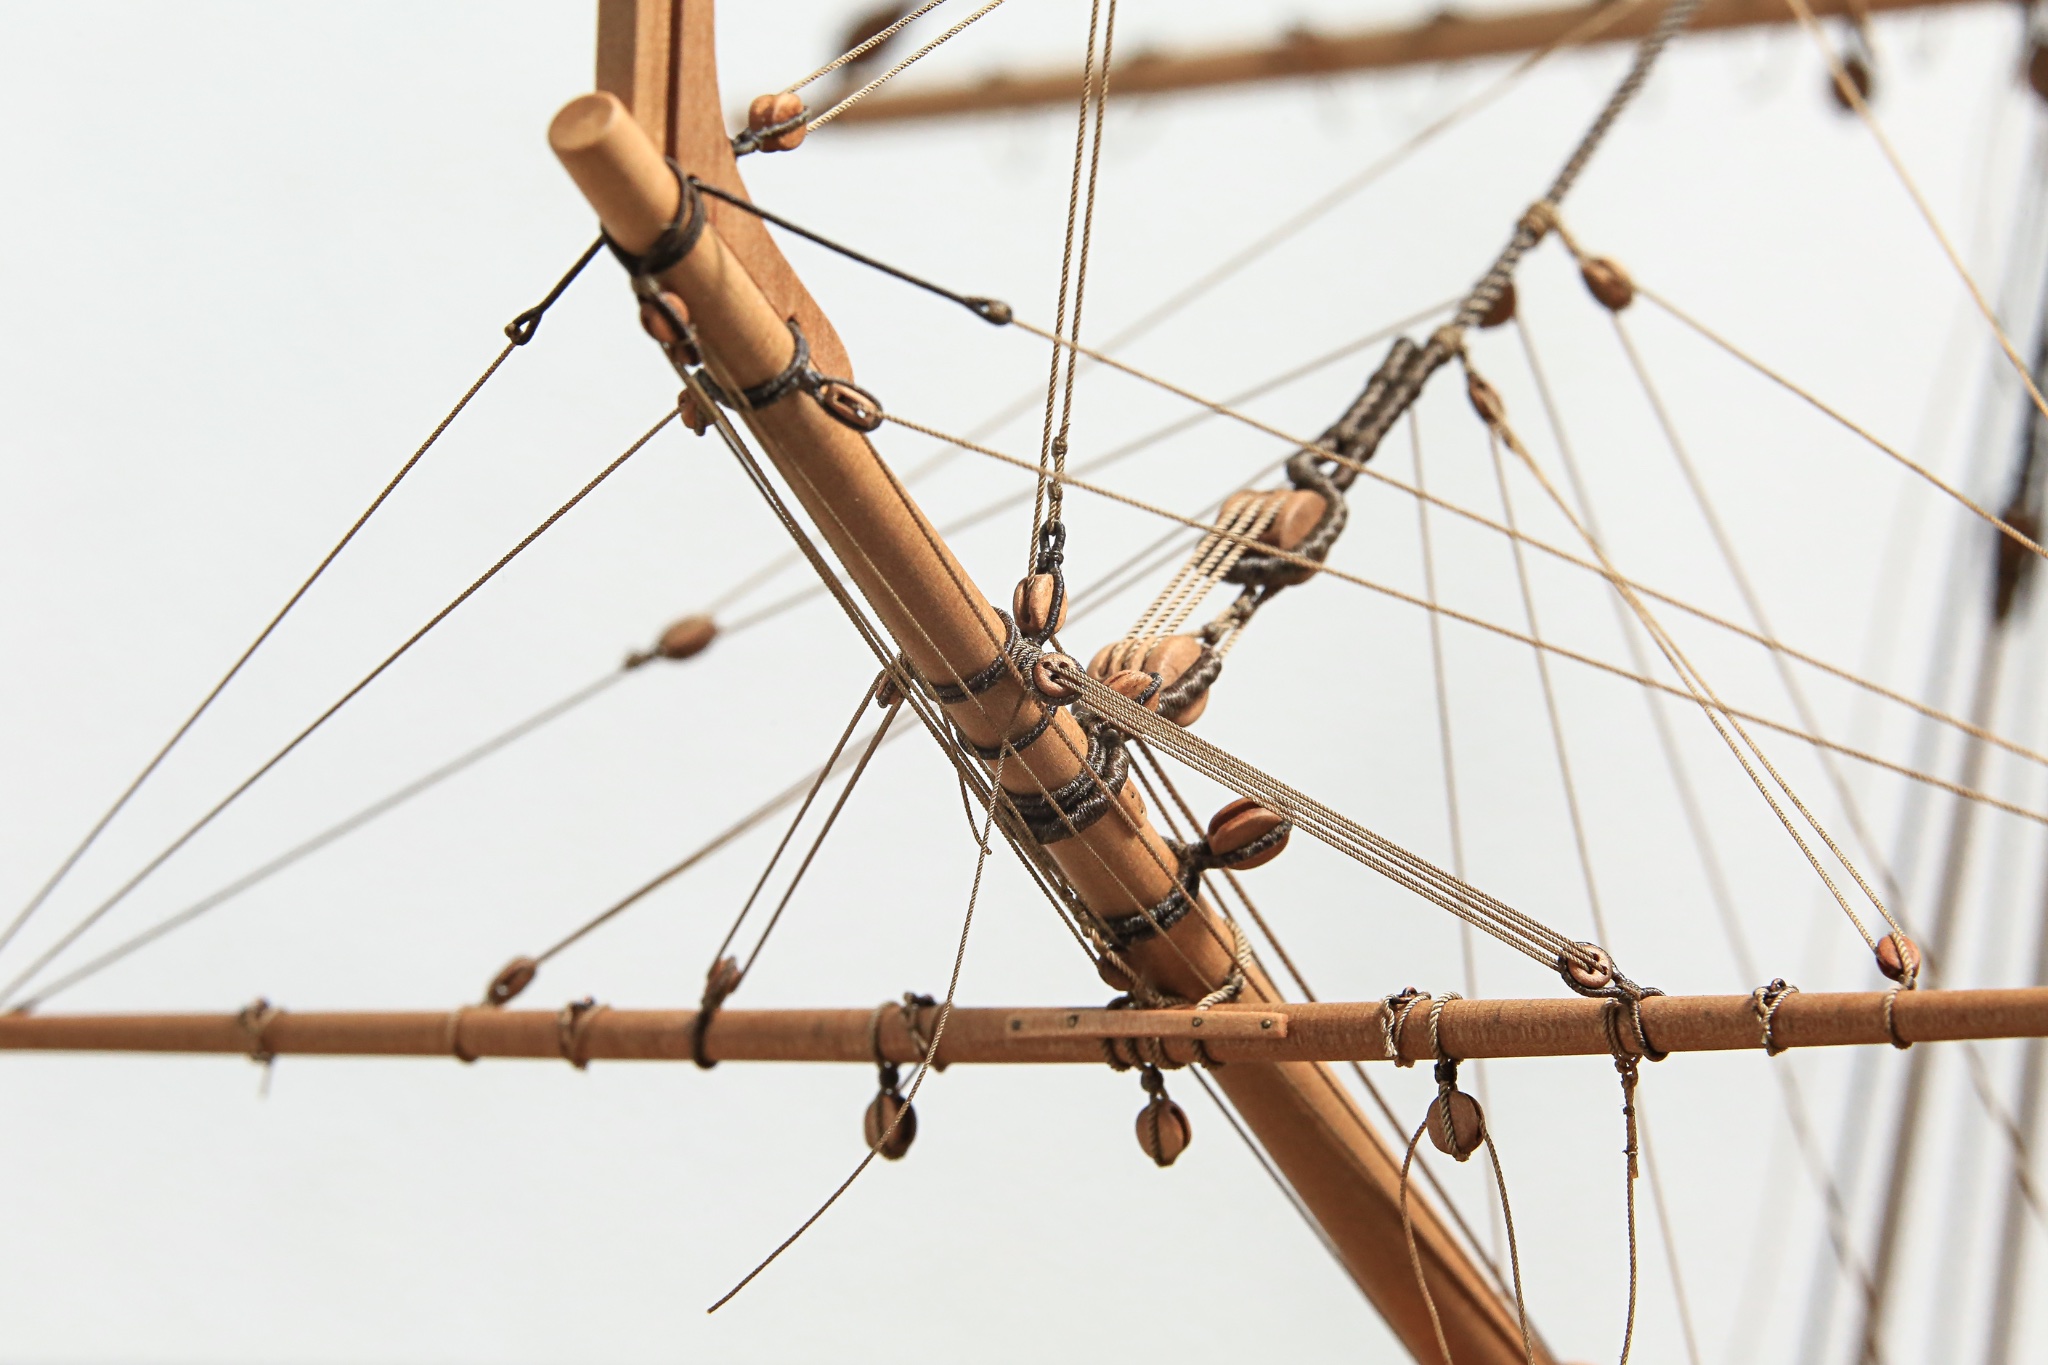
Hi All,
"Cucumber season" is on so as many others I had some break from the model. Nice weather outside so not much motivation to sit behind workbench
Anyway... I have some small progress.
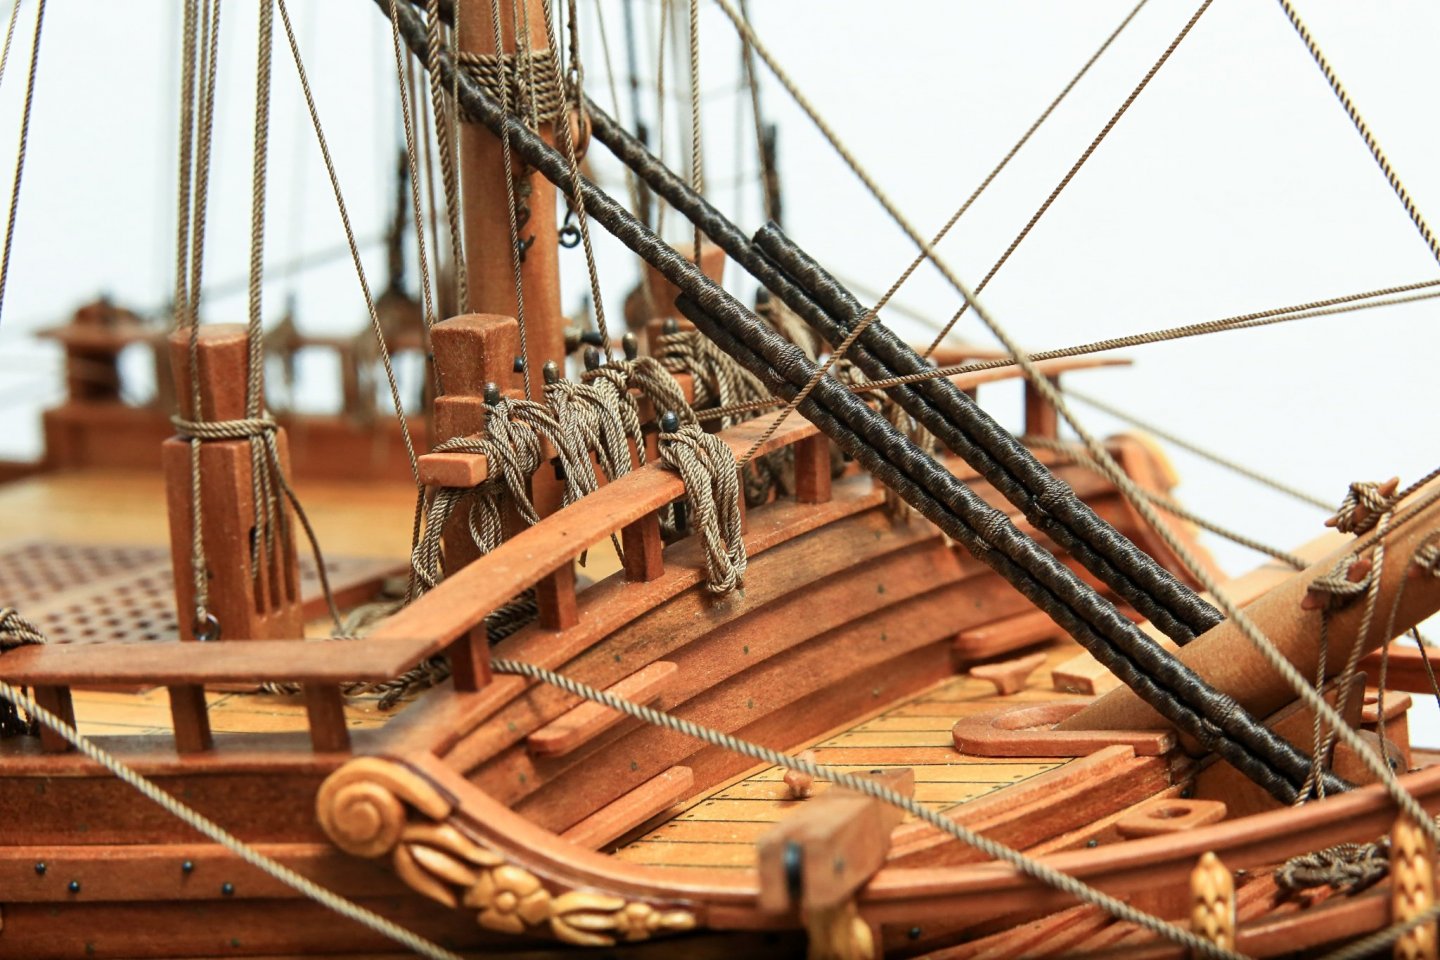
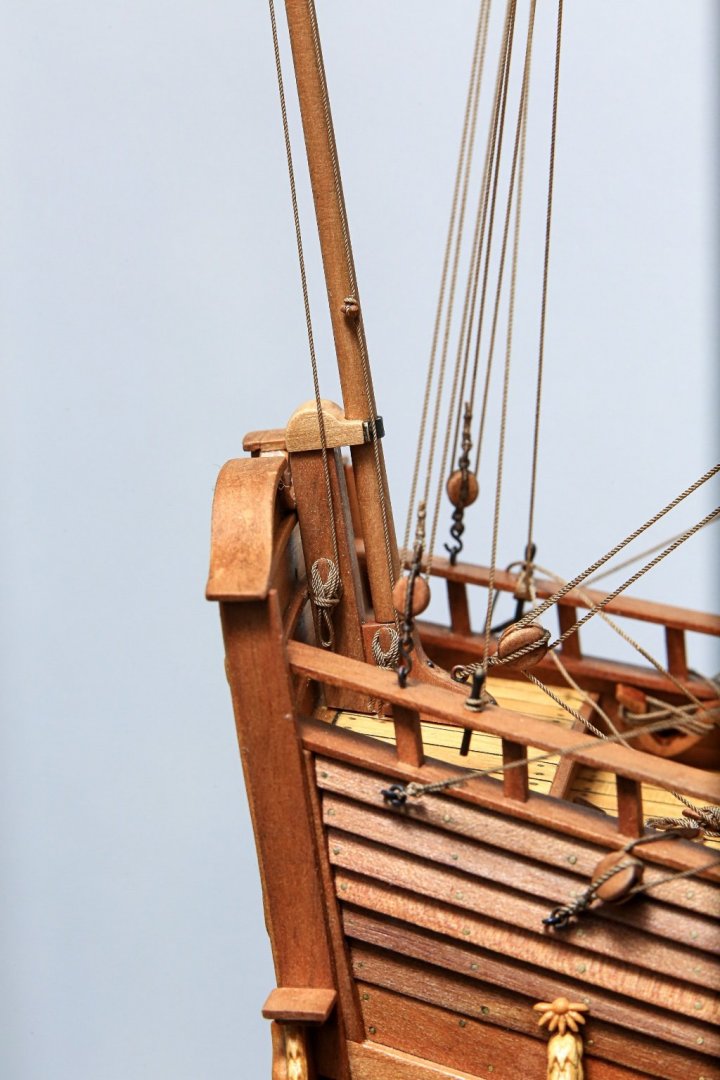
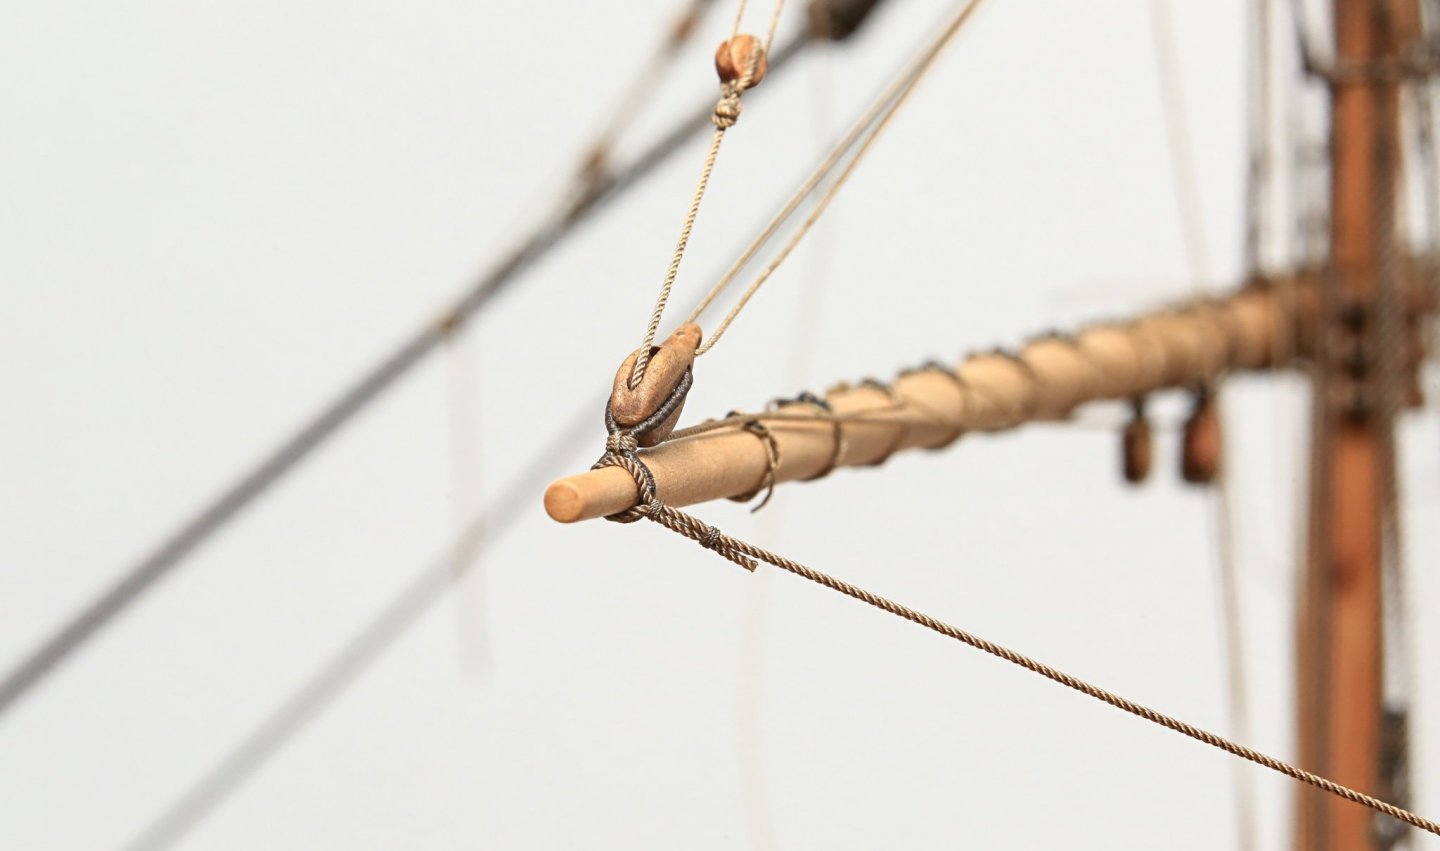
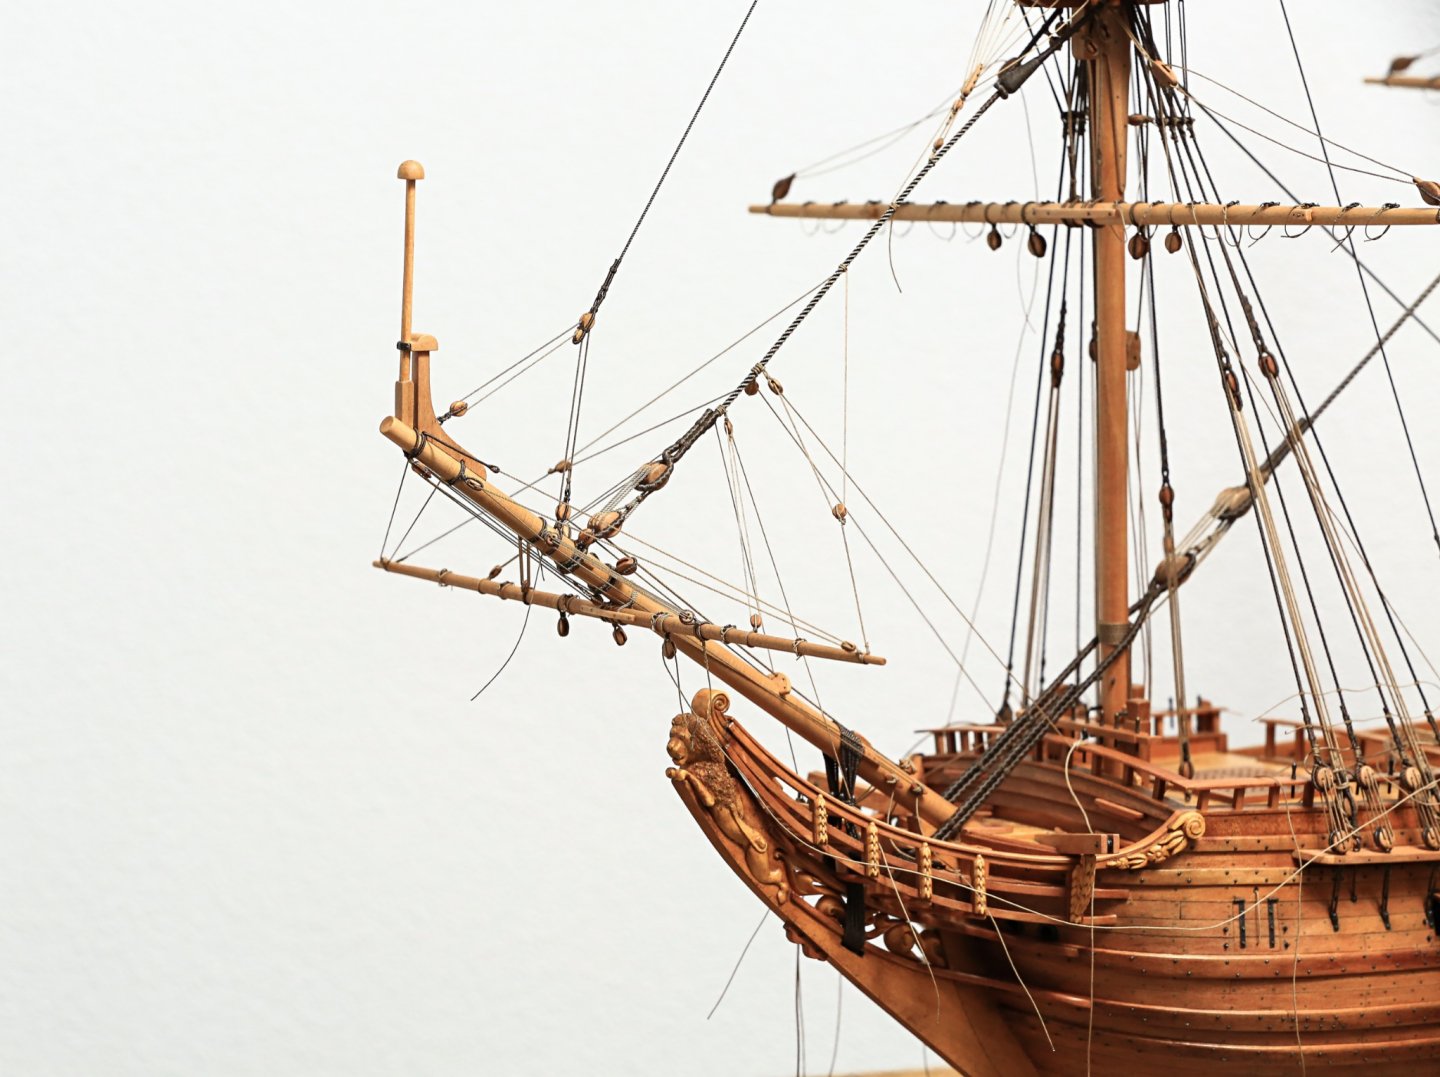
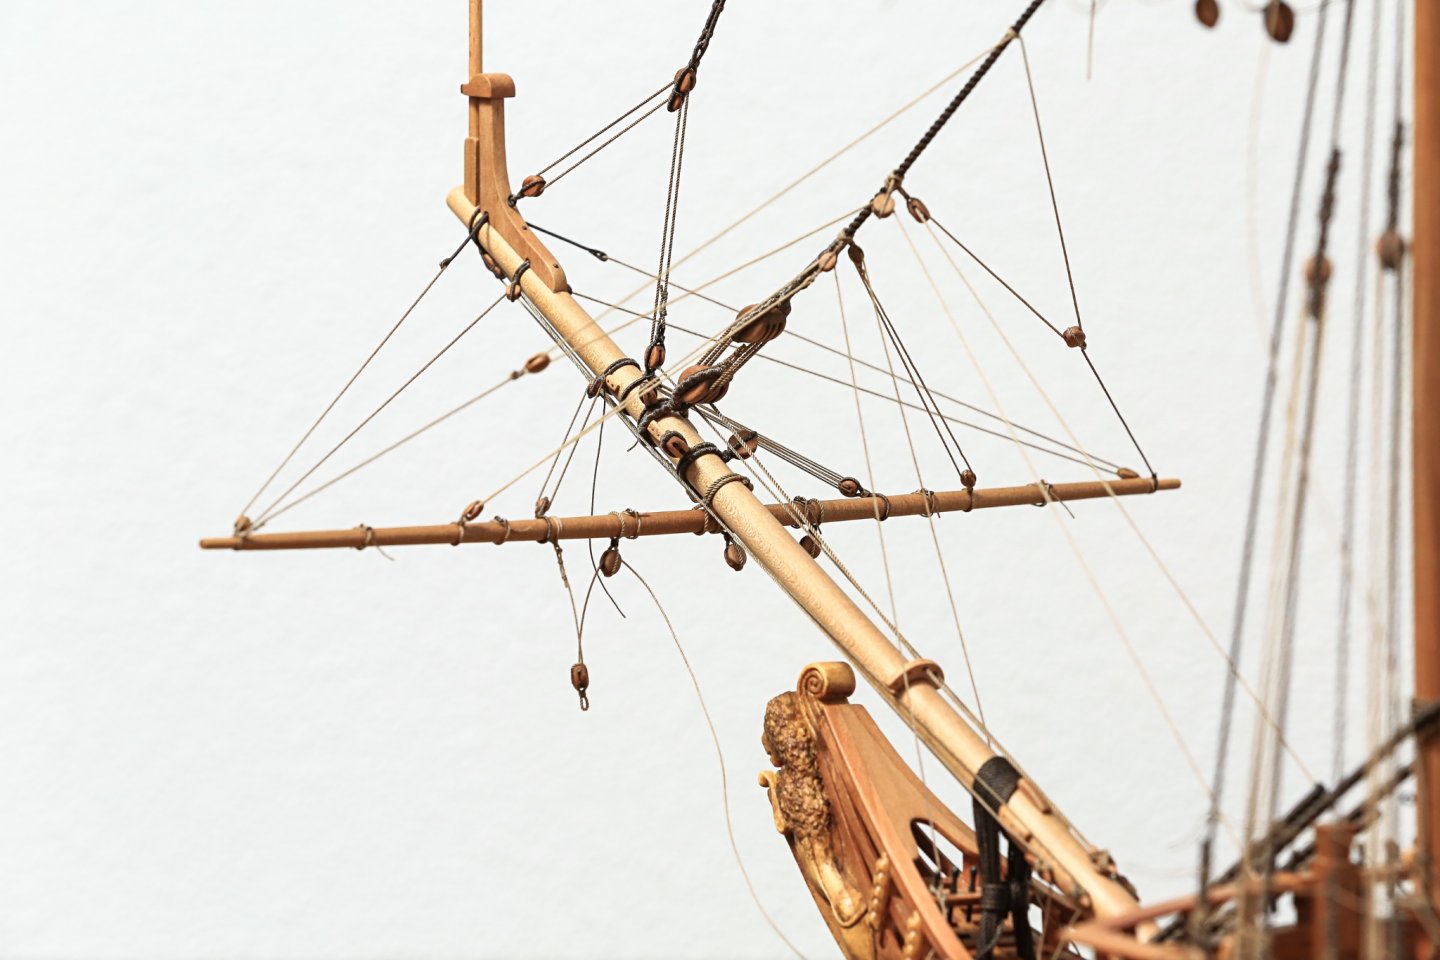
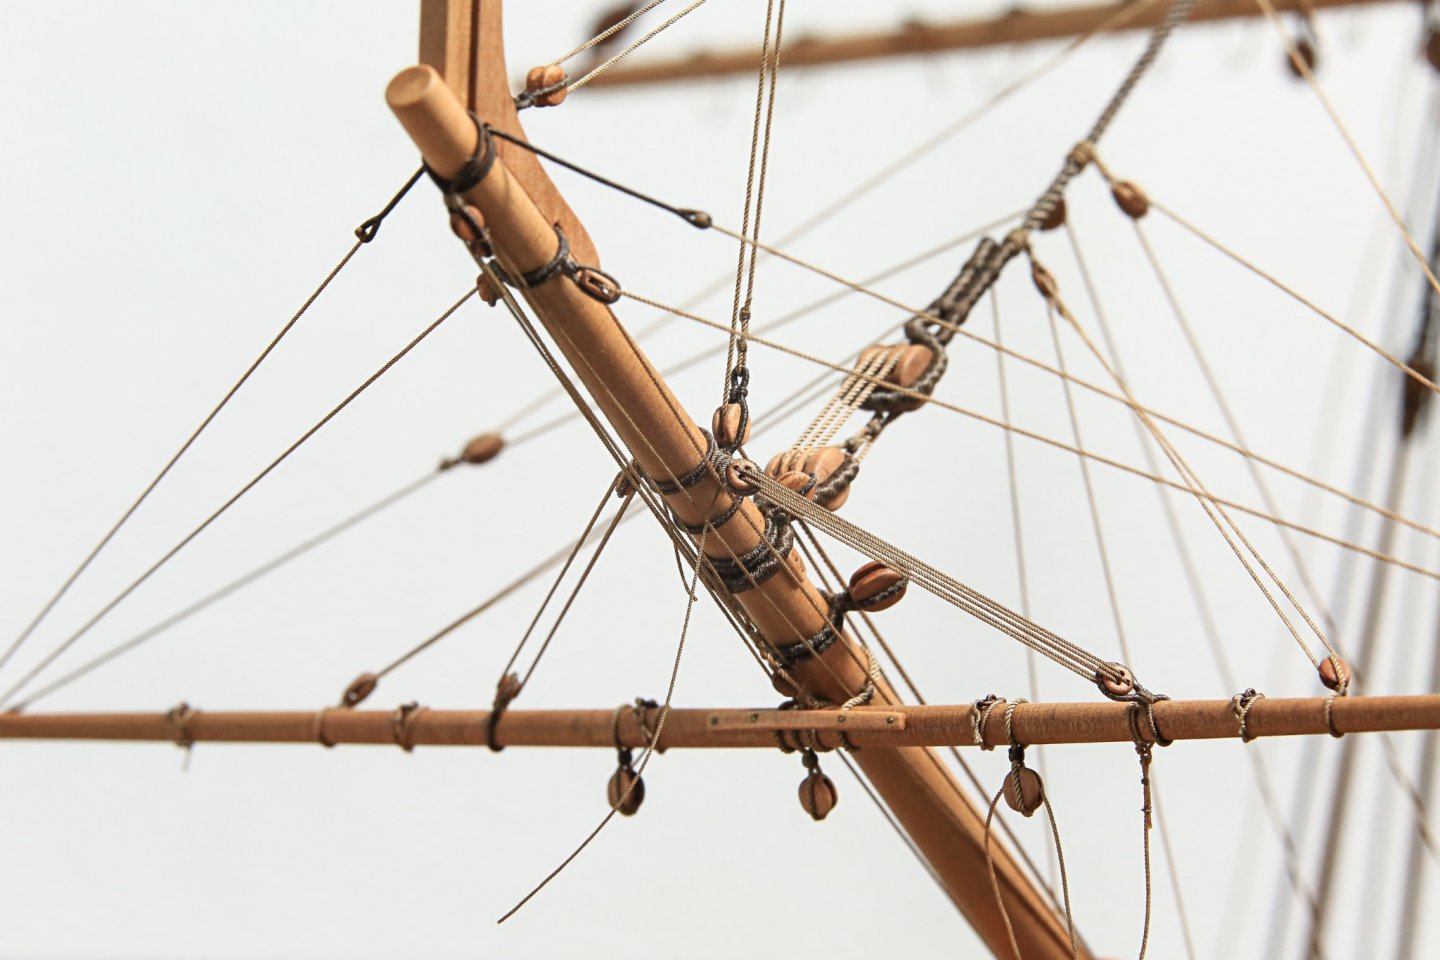
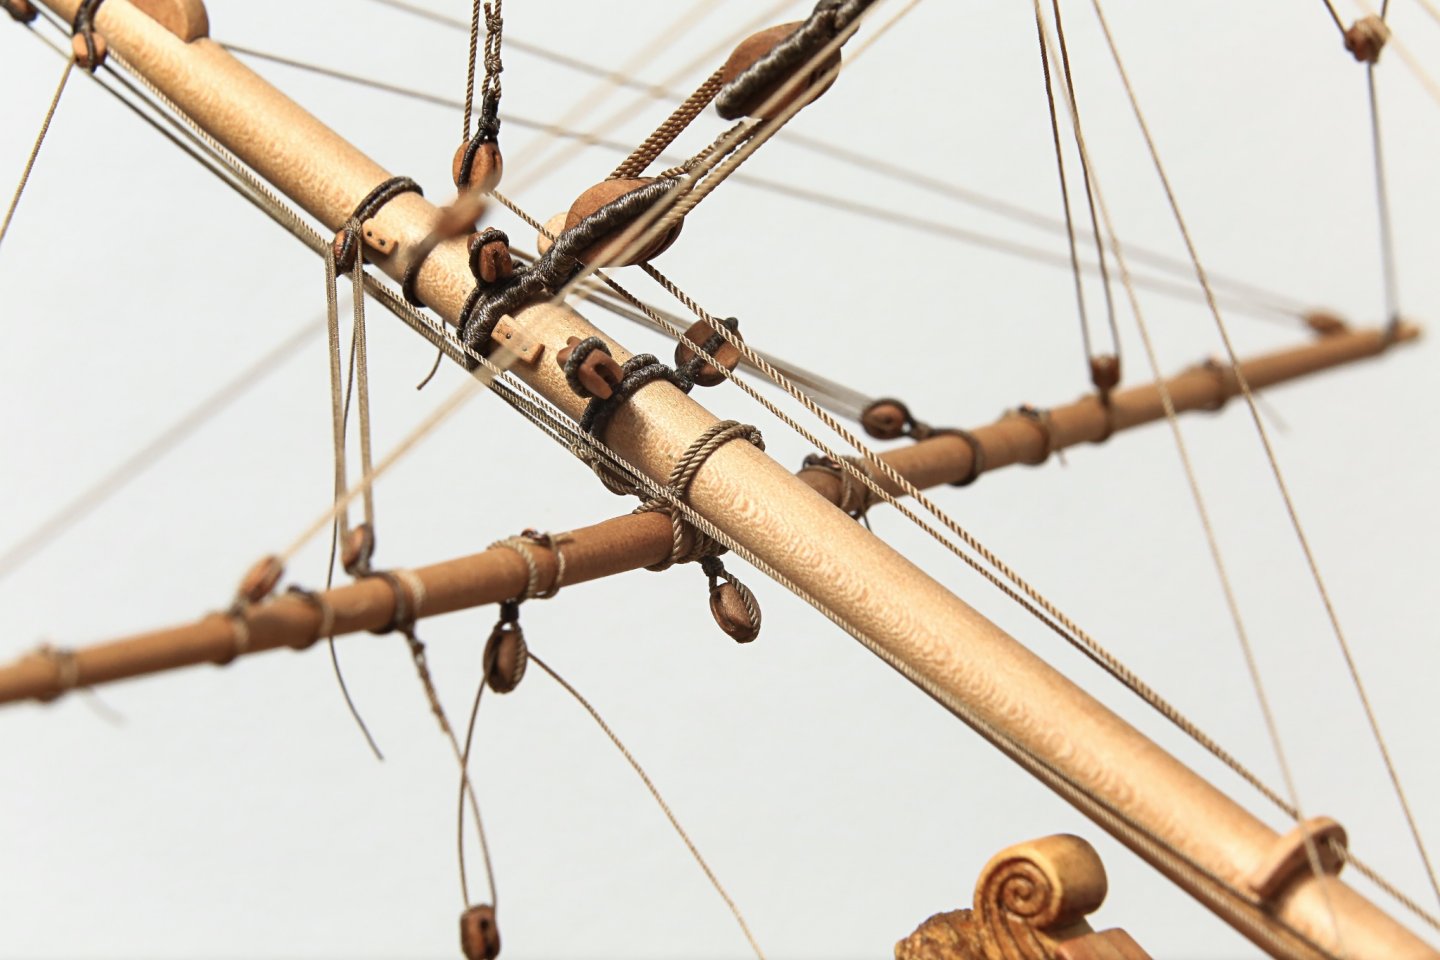
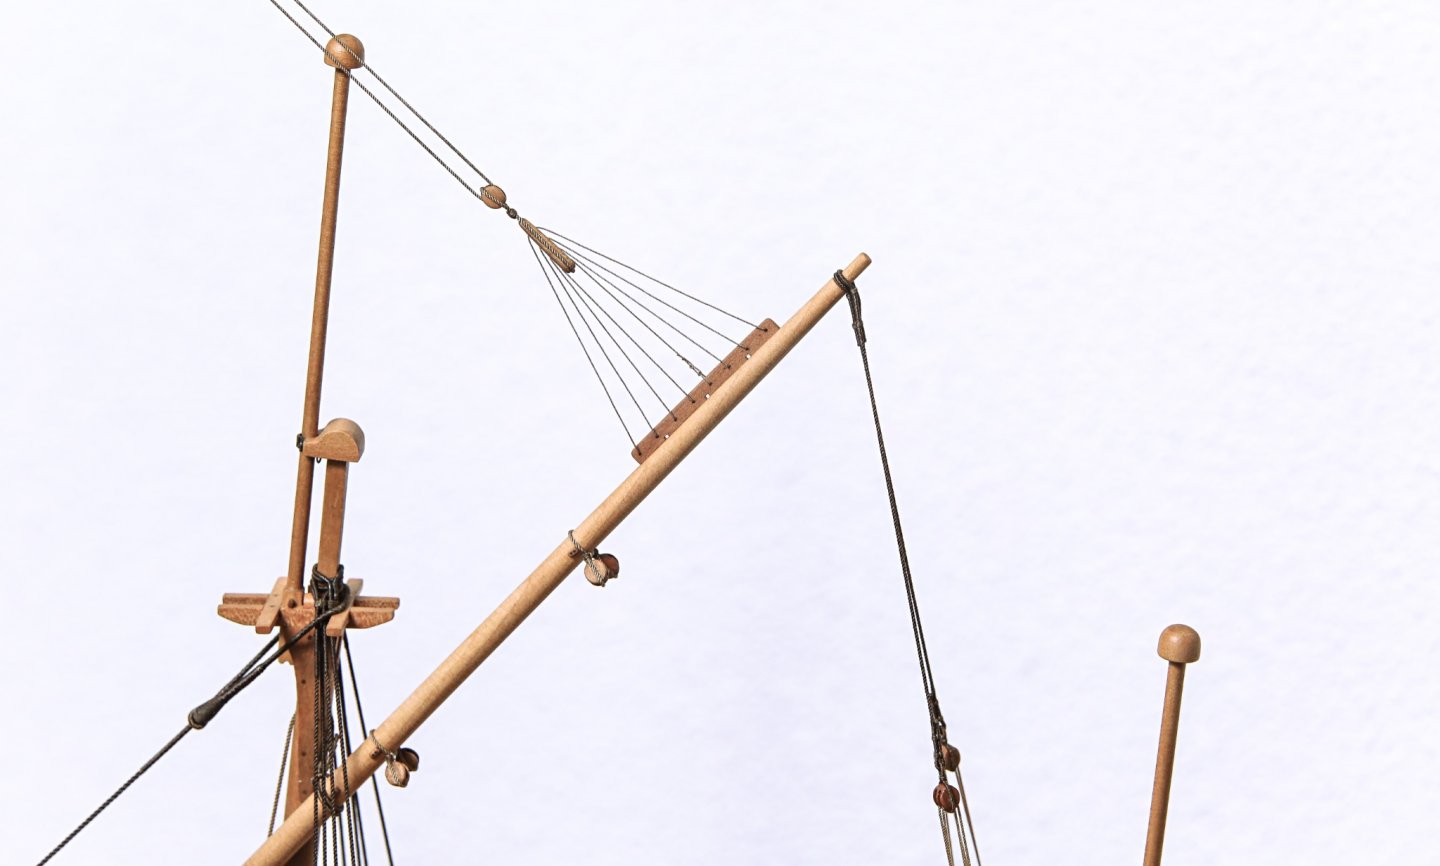
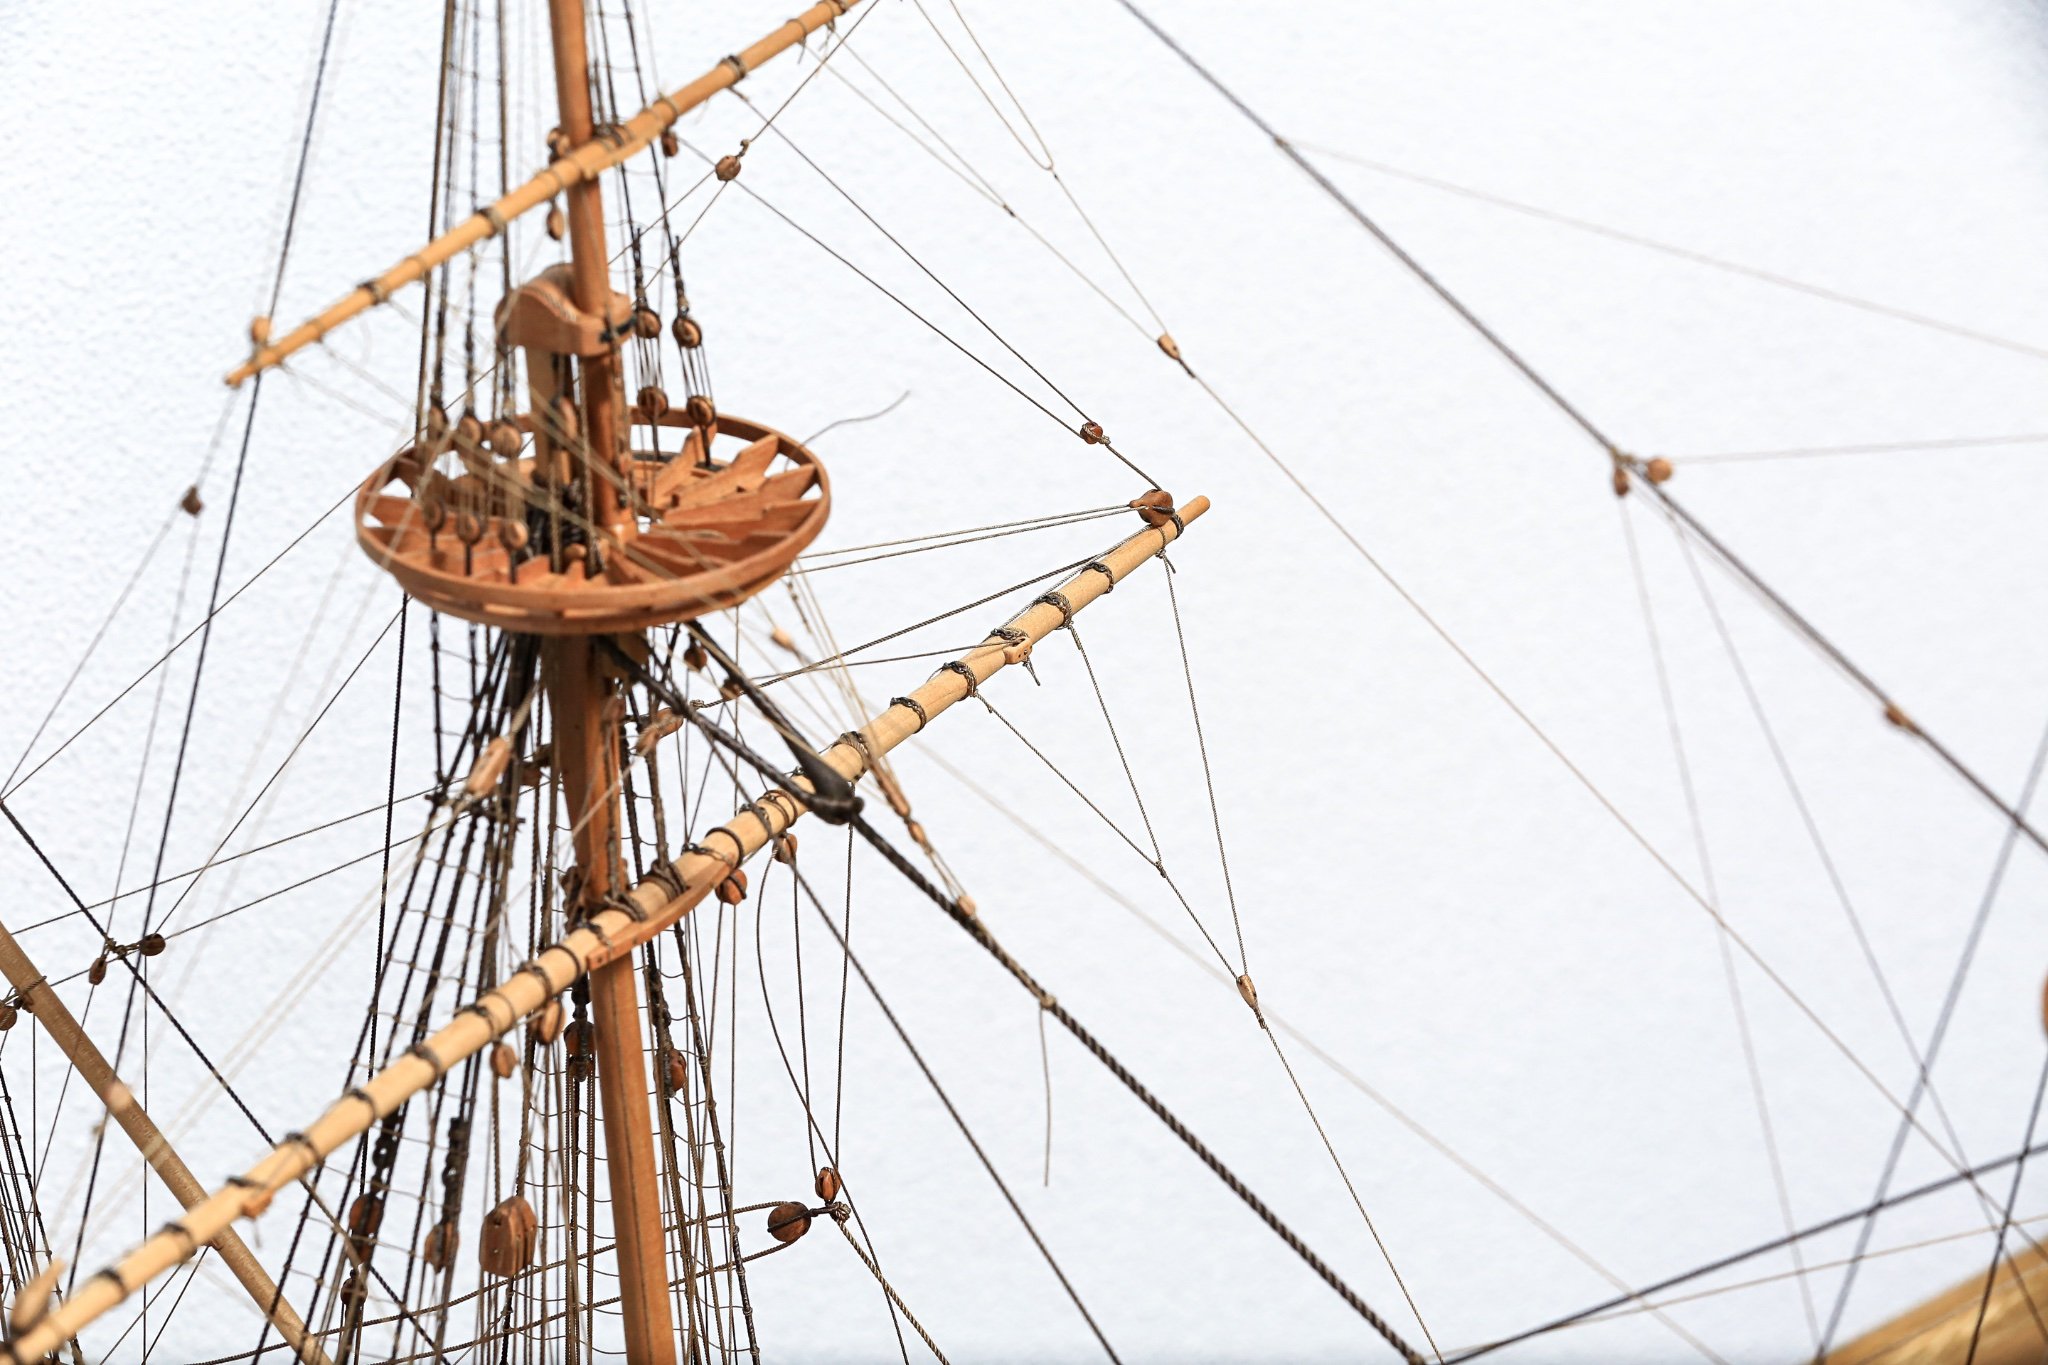
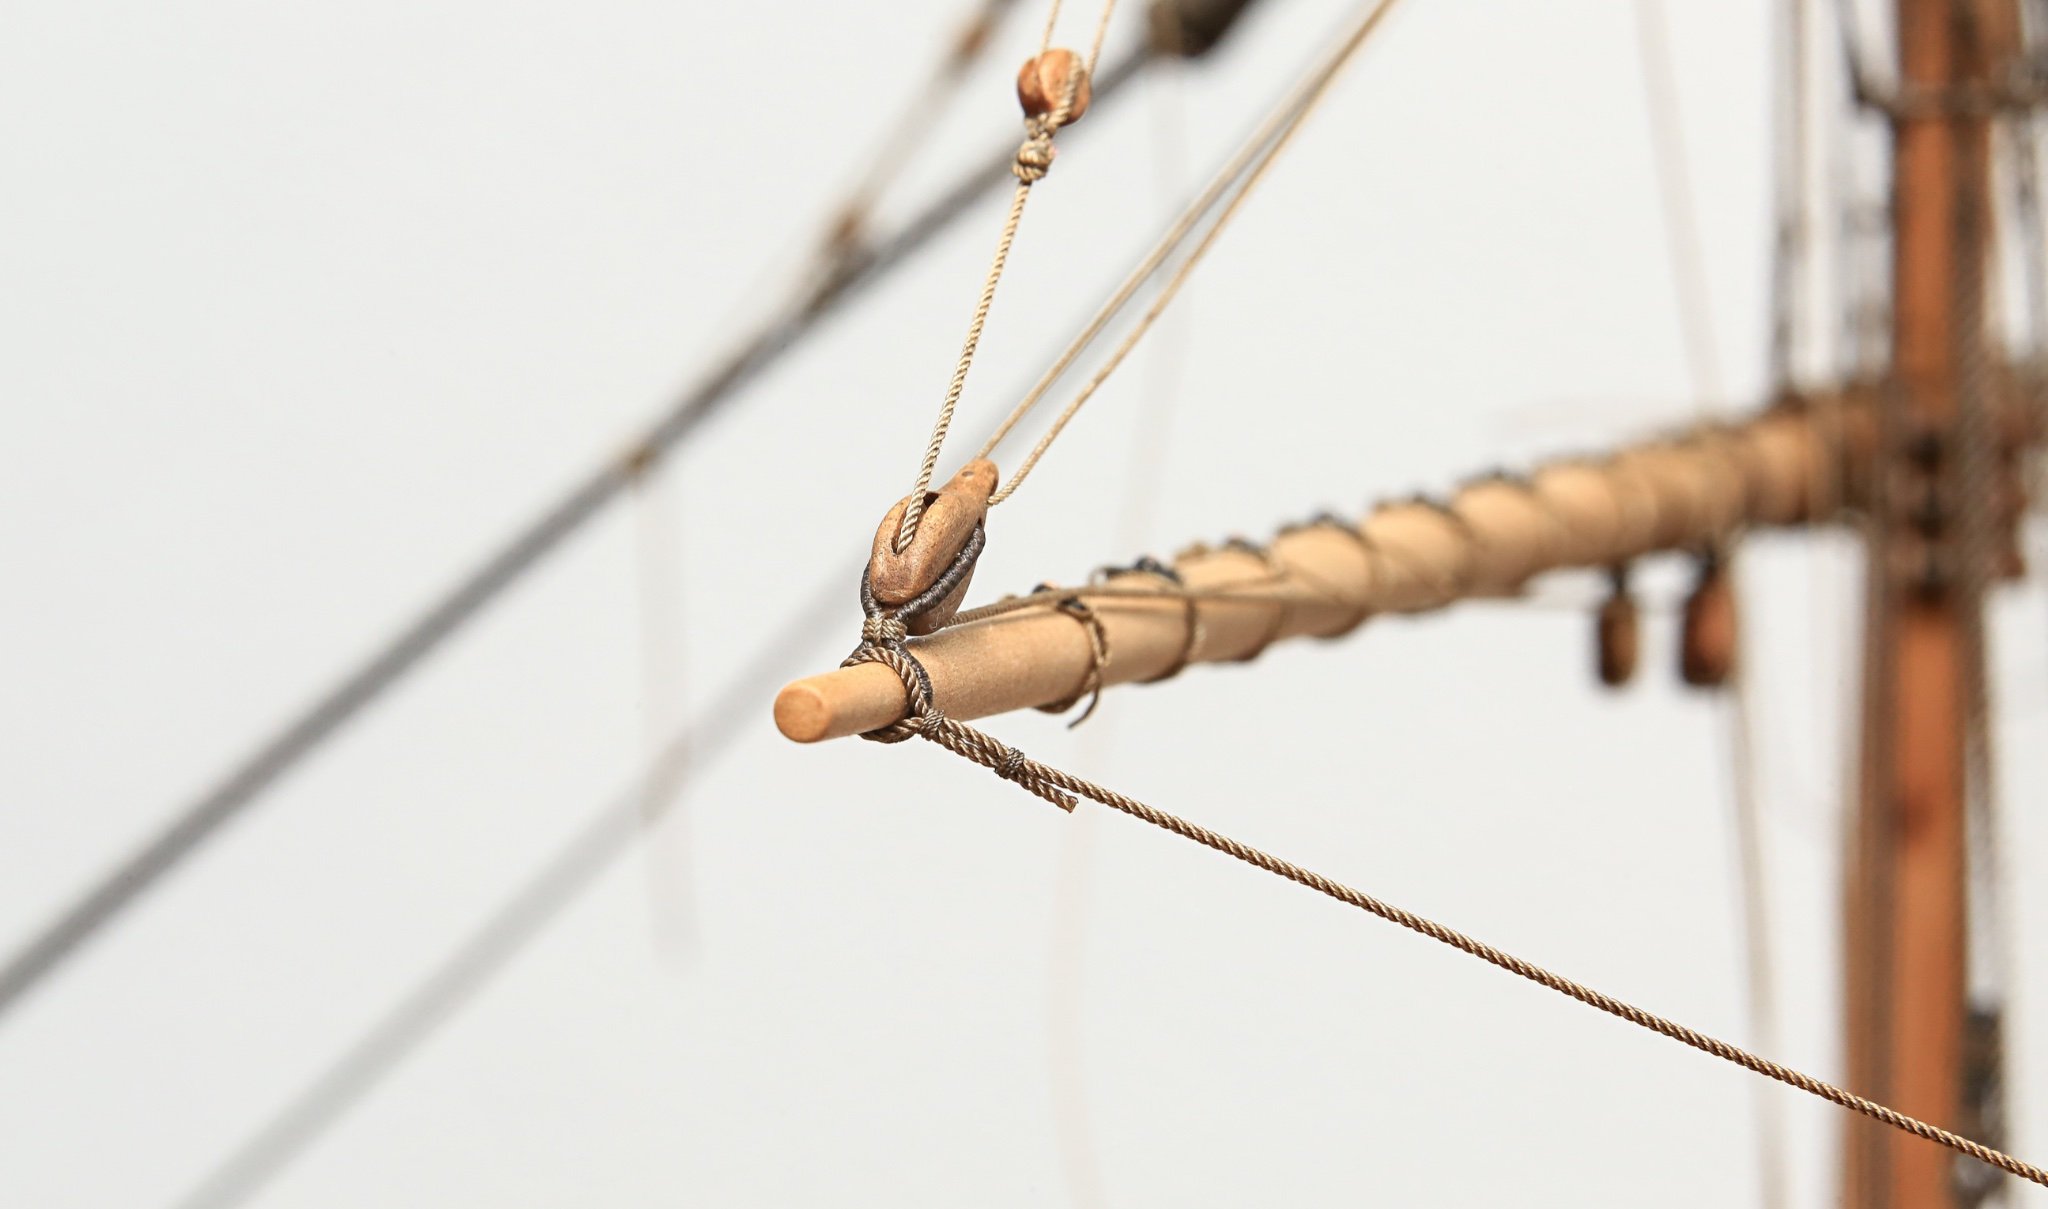
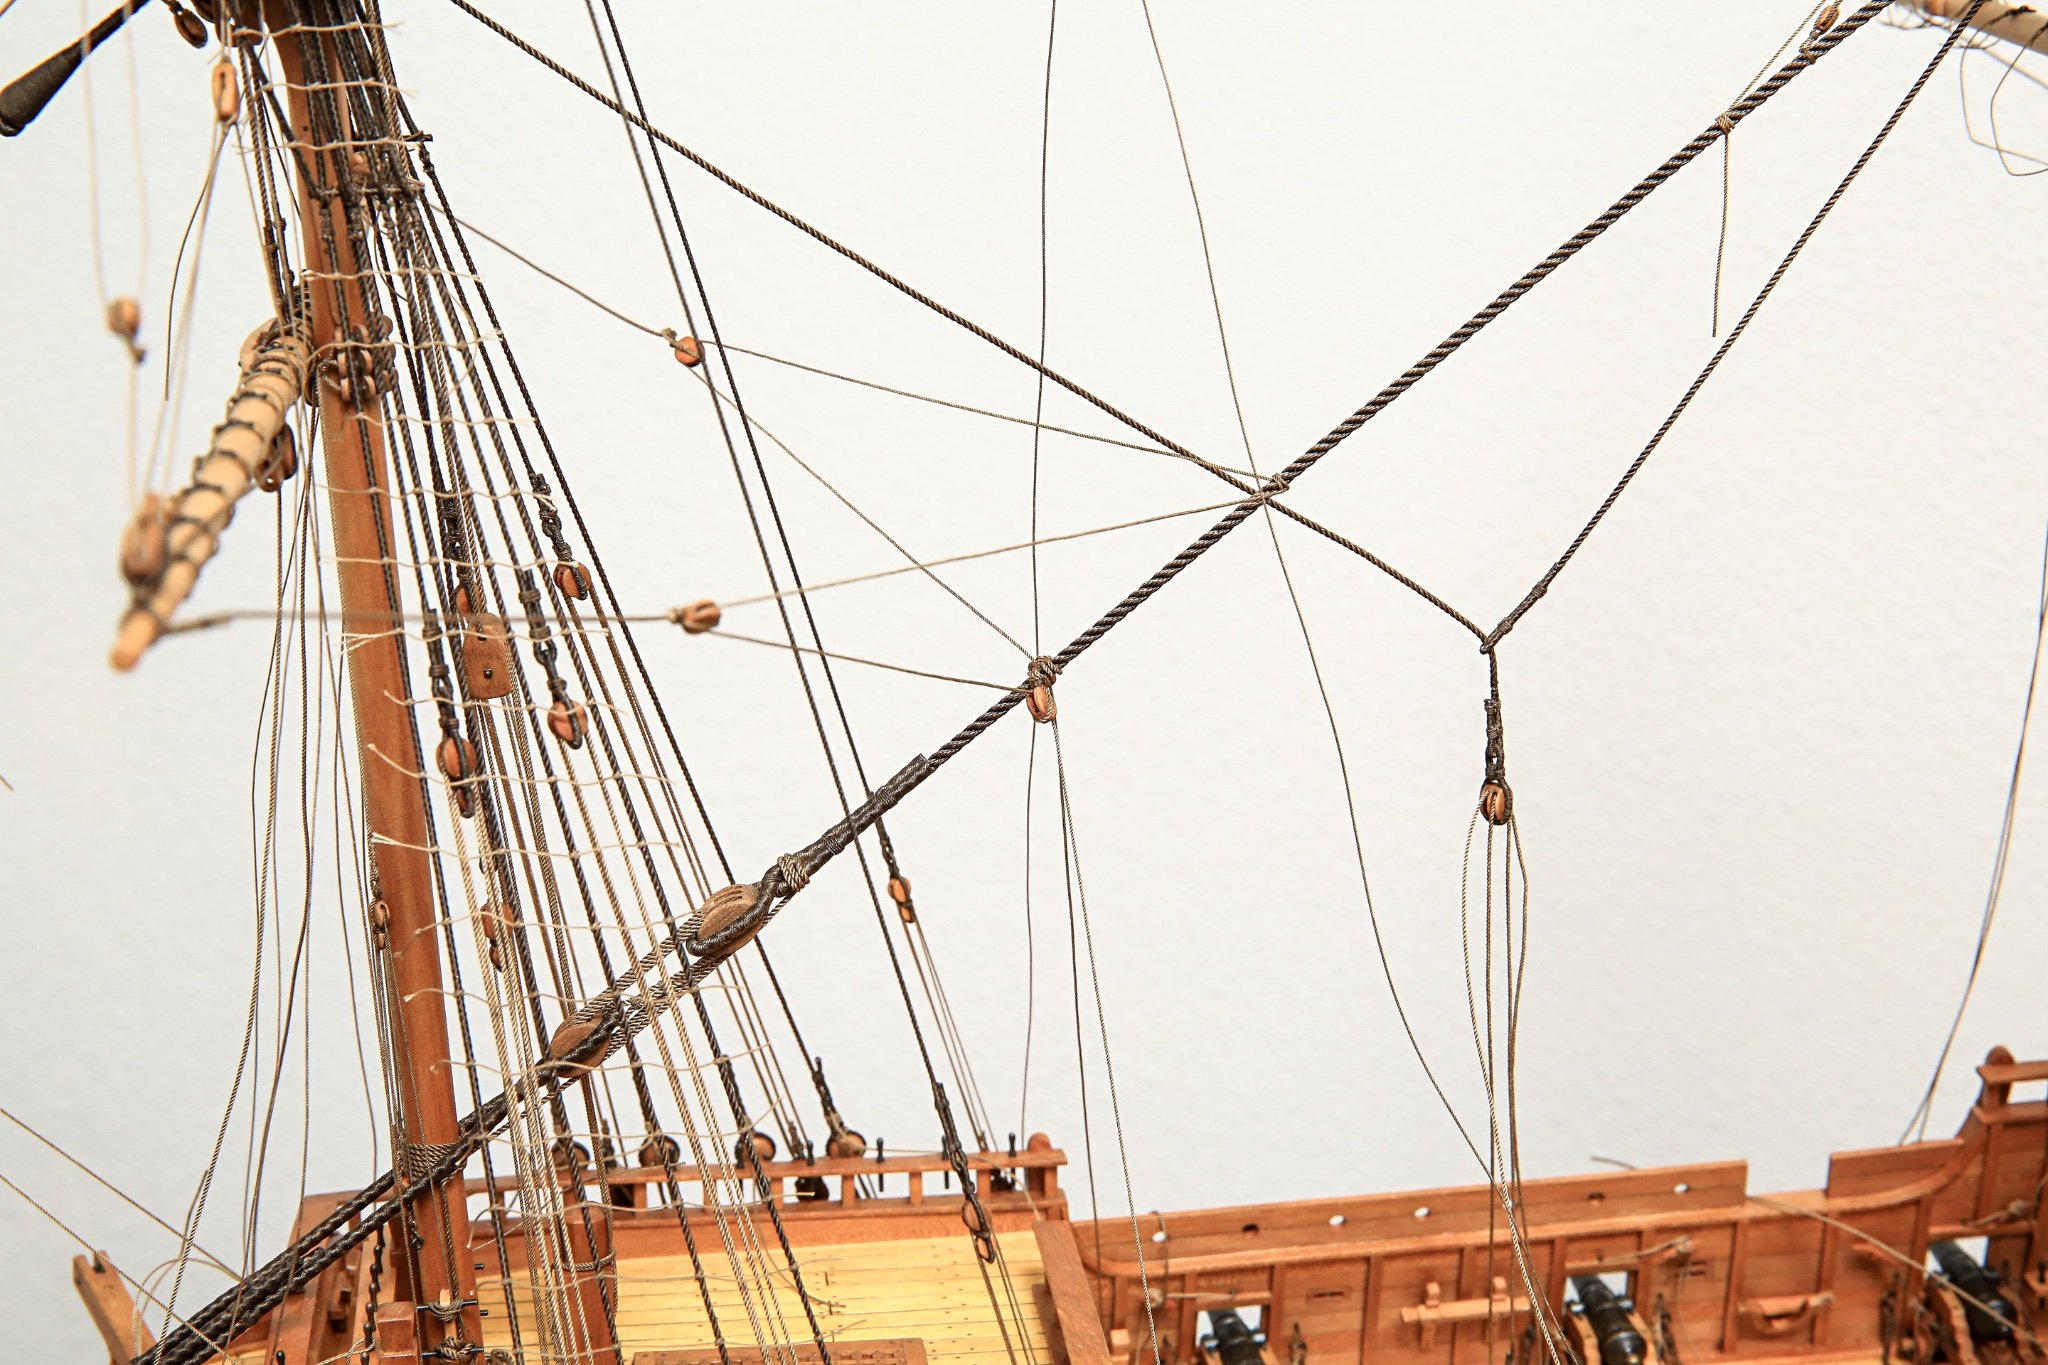
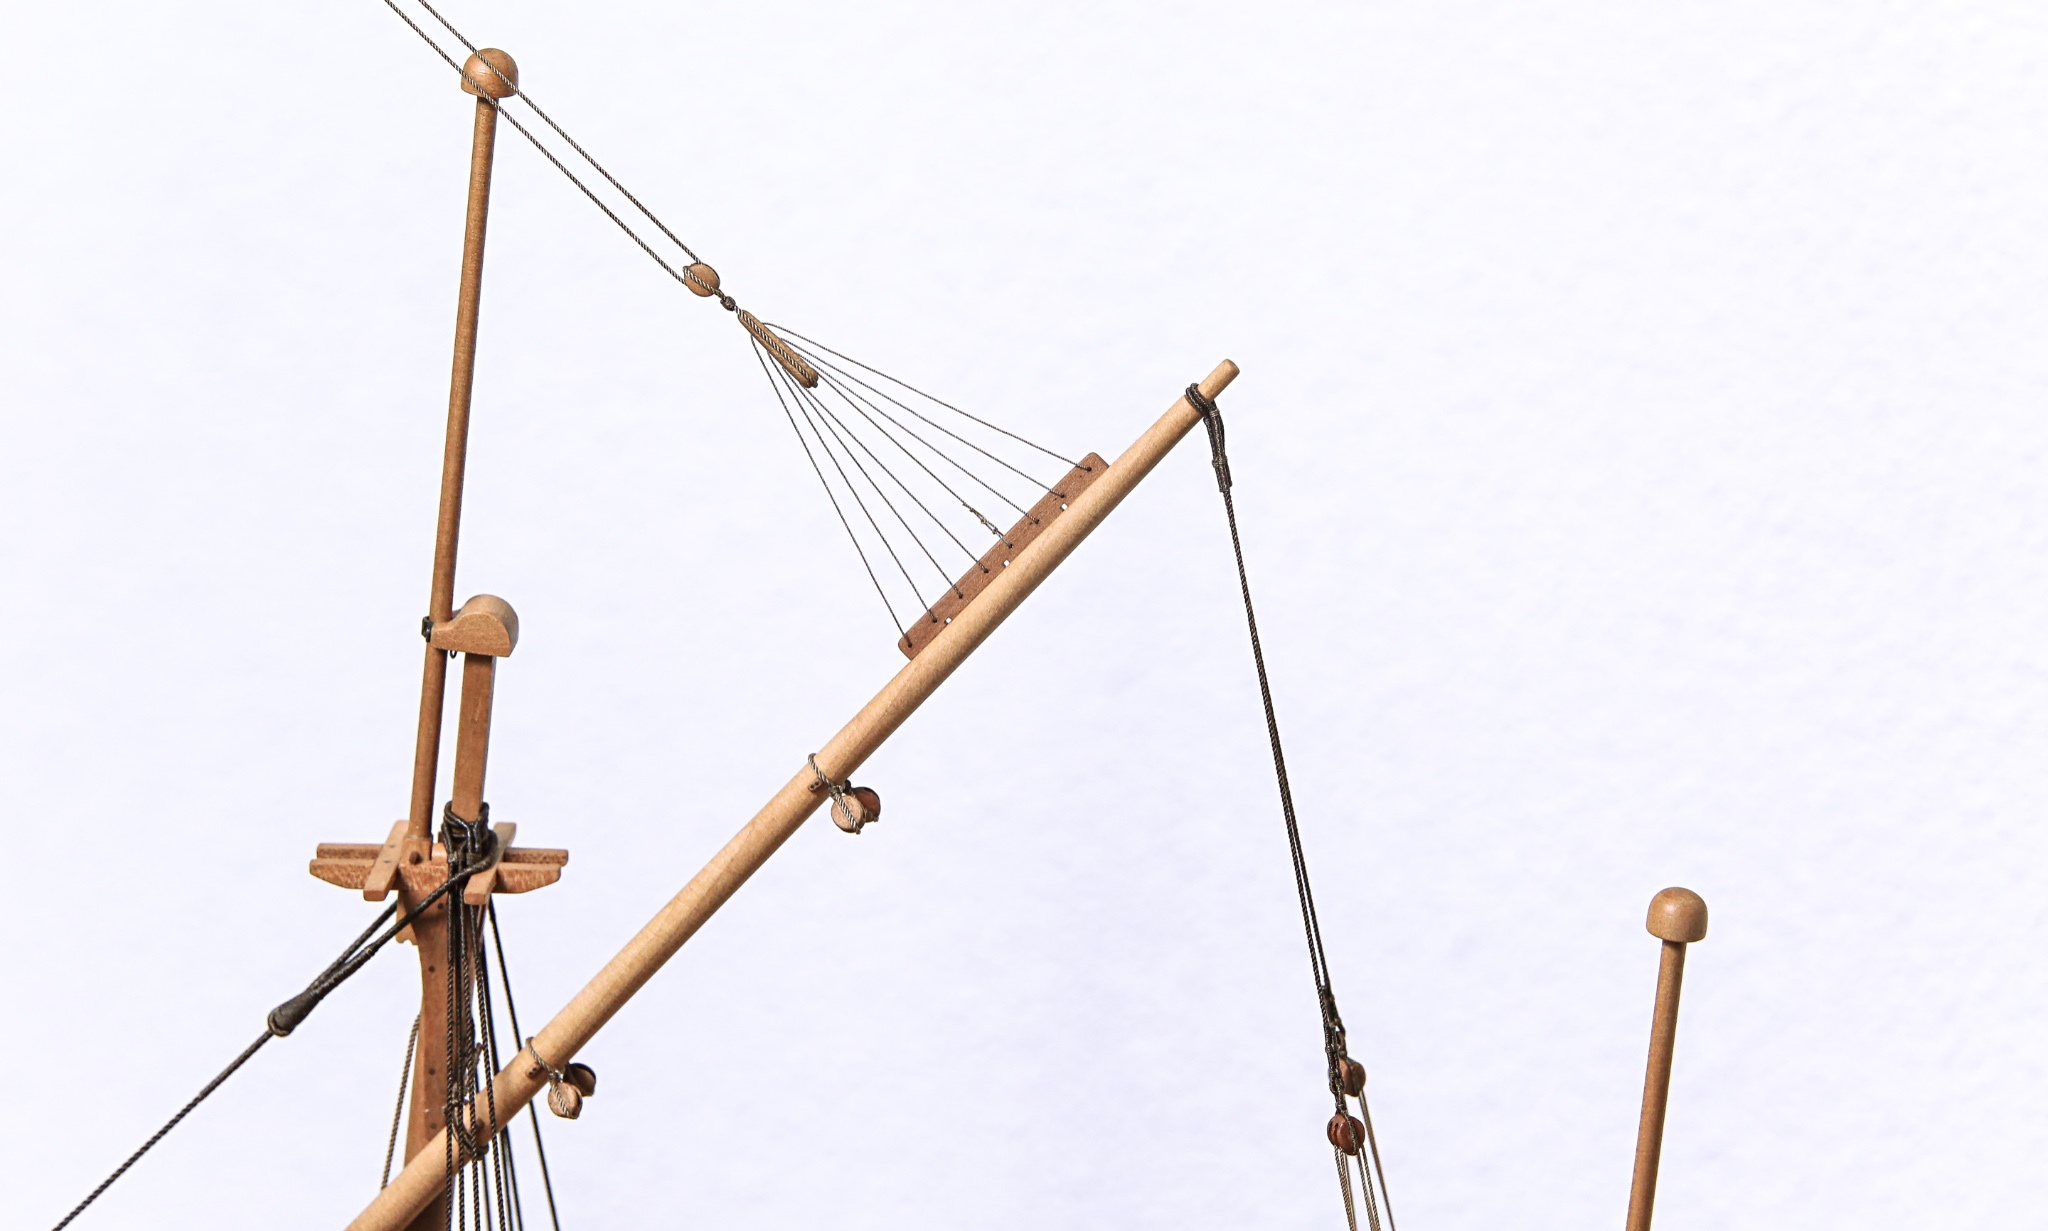
Bowsprit and spritsail yard rigging has been almost completed. Missing sheets will be added later... now they might obstruct space and knowing my luck i will knock off something
I hope photos will be clear enough to see how each particular rope has been fixed.
Cheers,
Matt
-
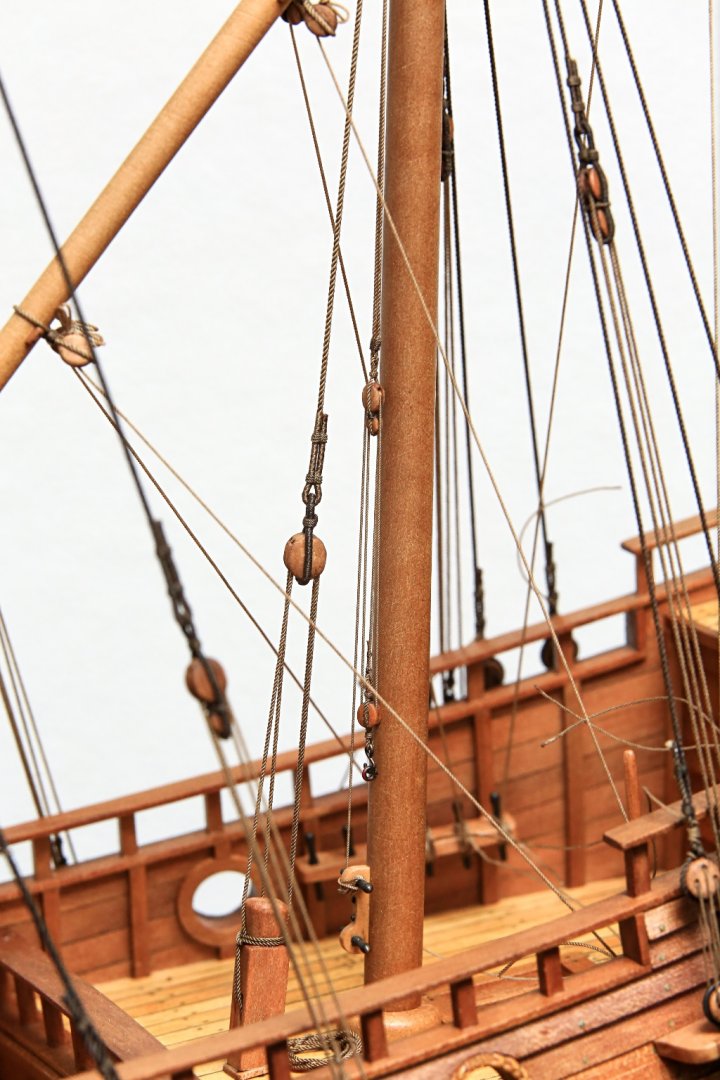
Hi All,
This time just a small update
Main yard parrel received tackles, so this element is now fully rigged.
Cheers,
Matt
- Cirdan, Farbror Fartyg, Ainars Apalais and 7 others
-
9
-
 1
1
-
Thank you All for you likes!
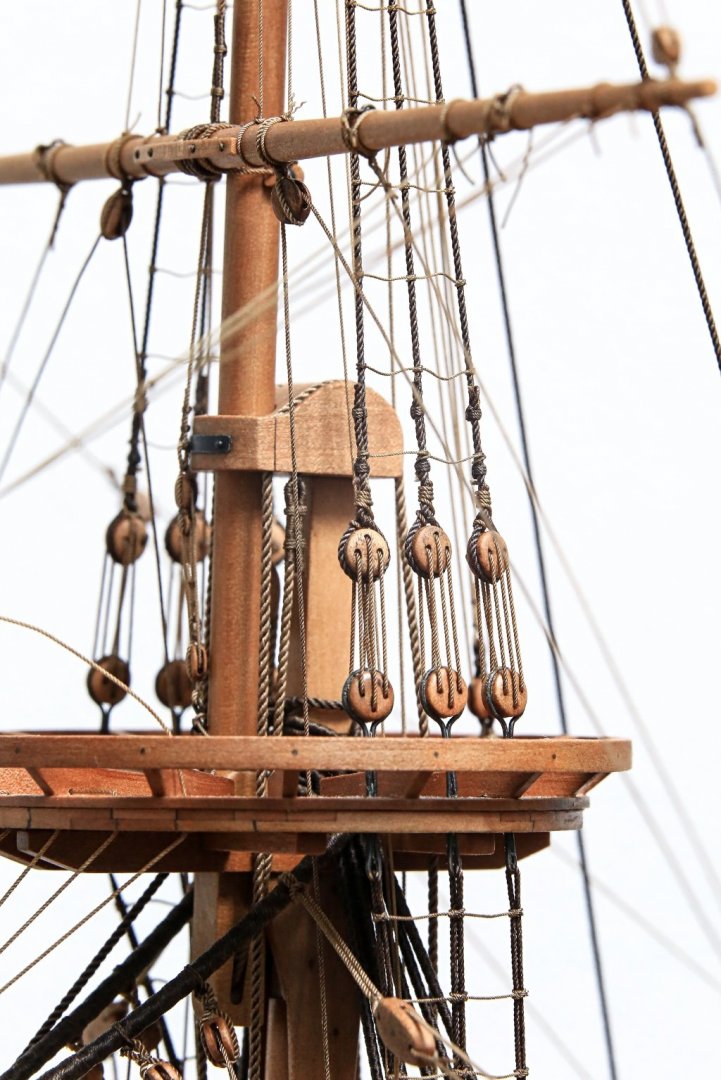
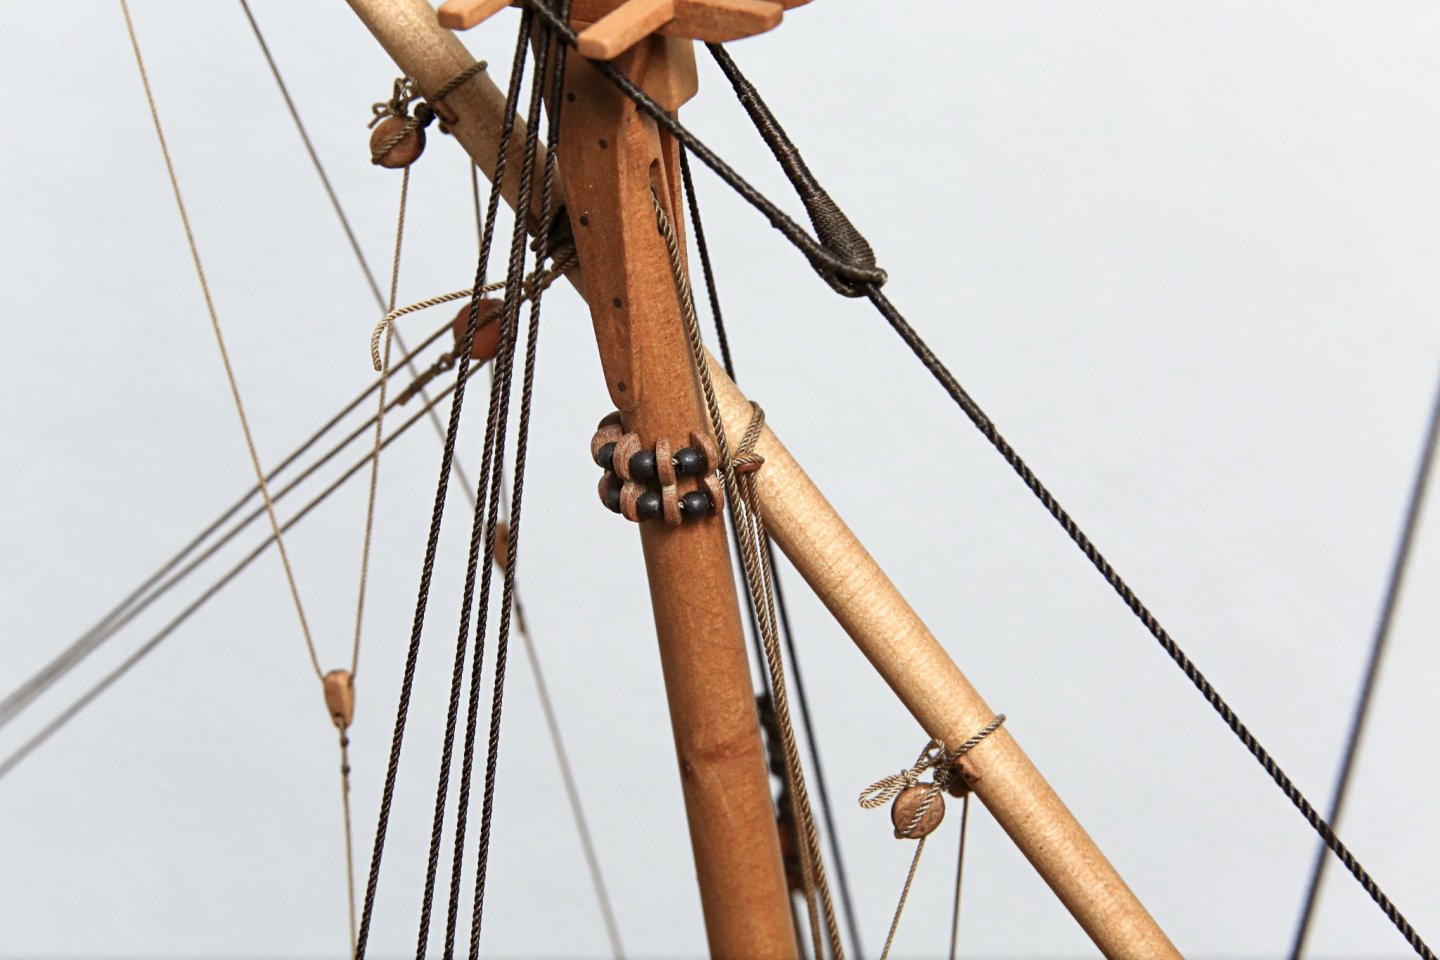
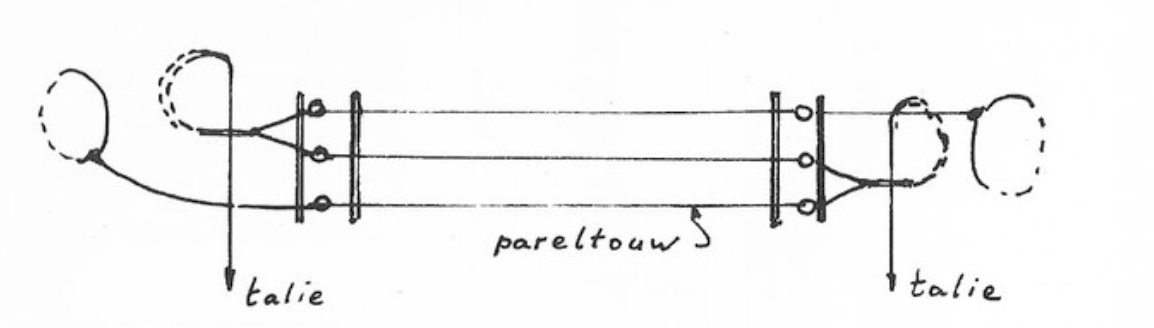
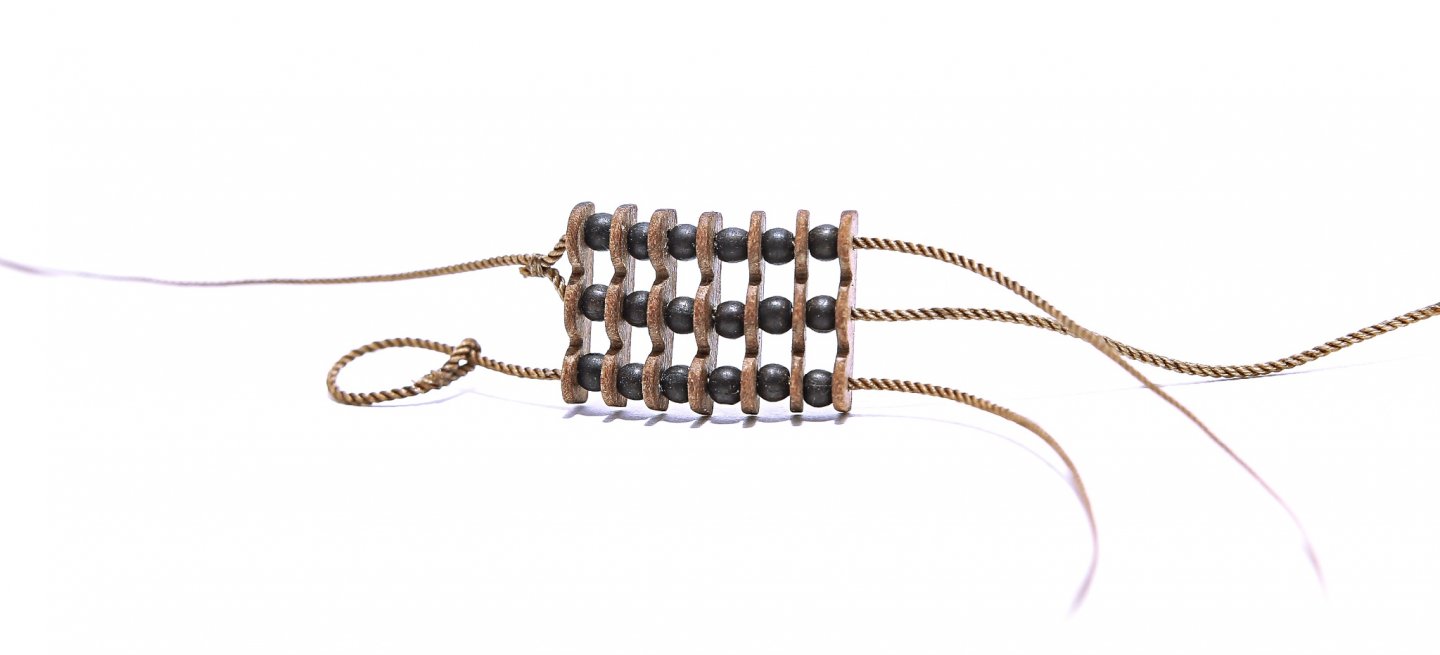
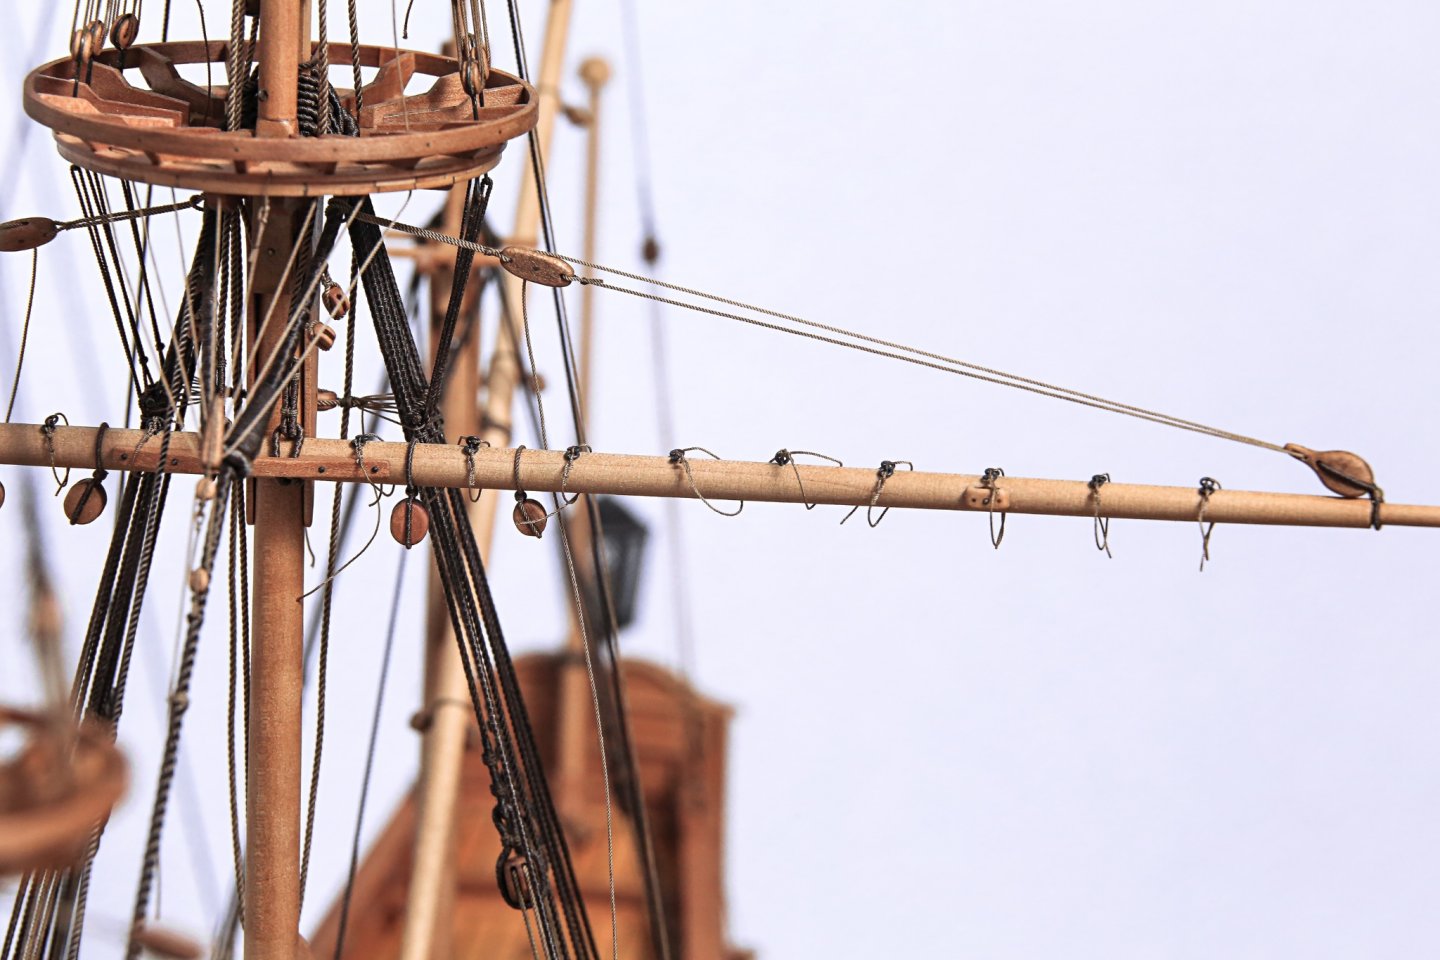
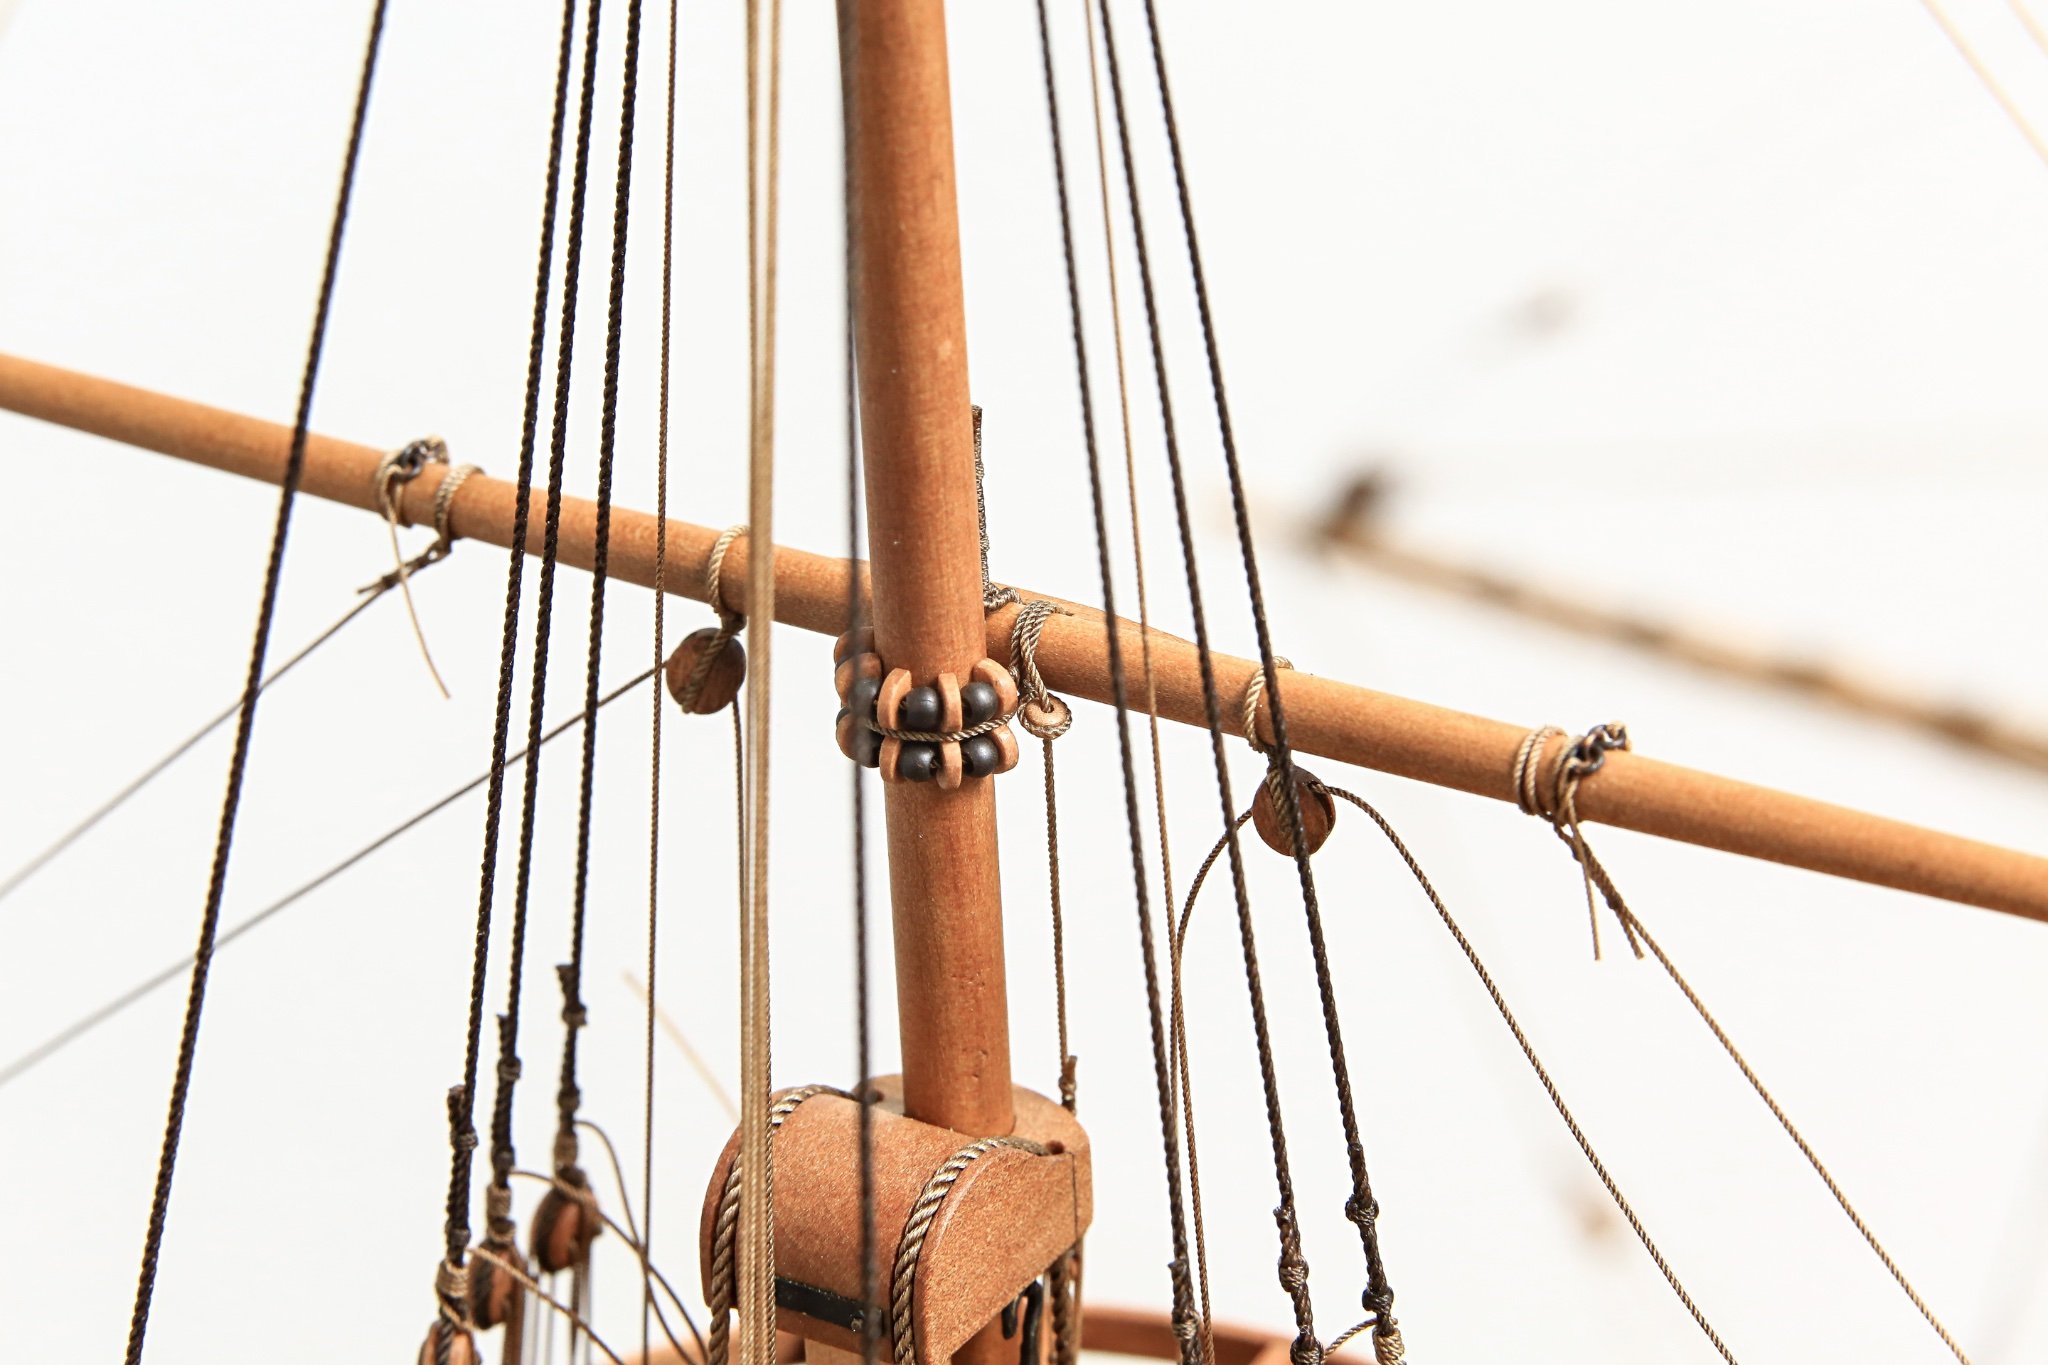
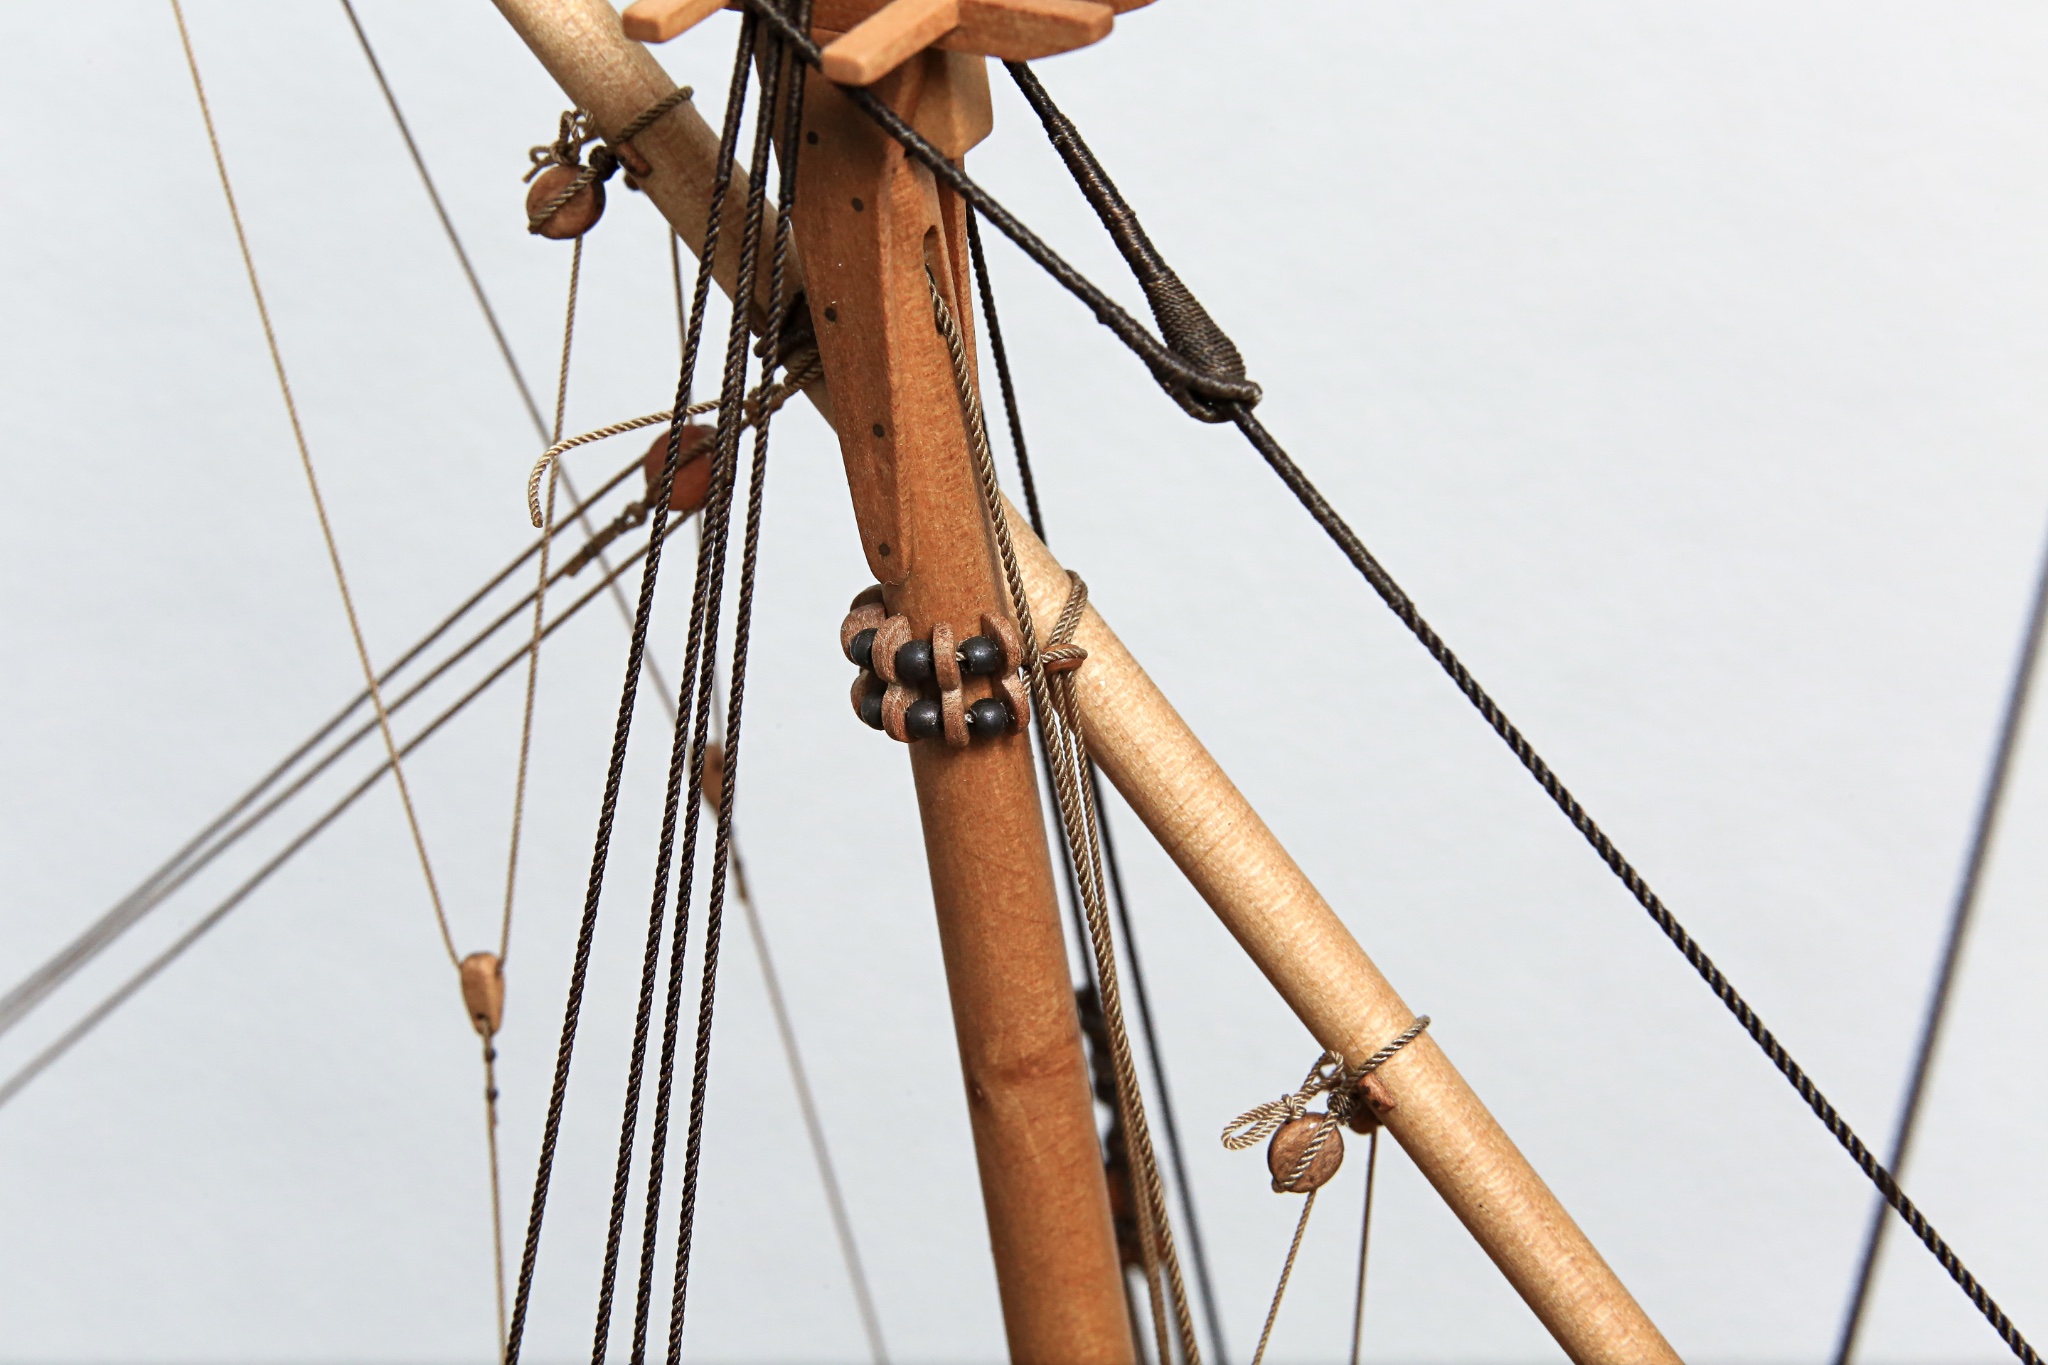
Parrels on the spot now.
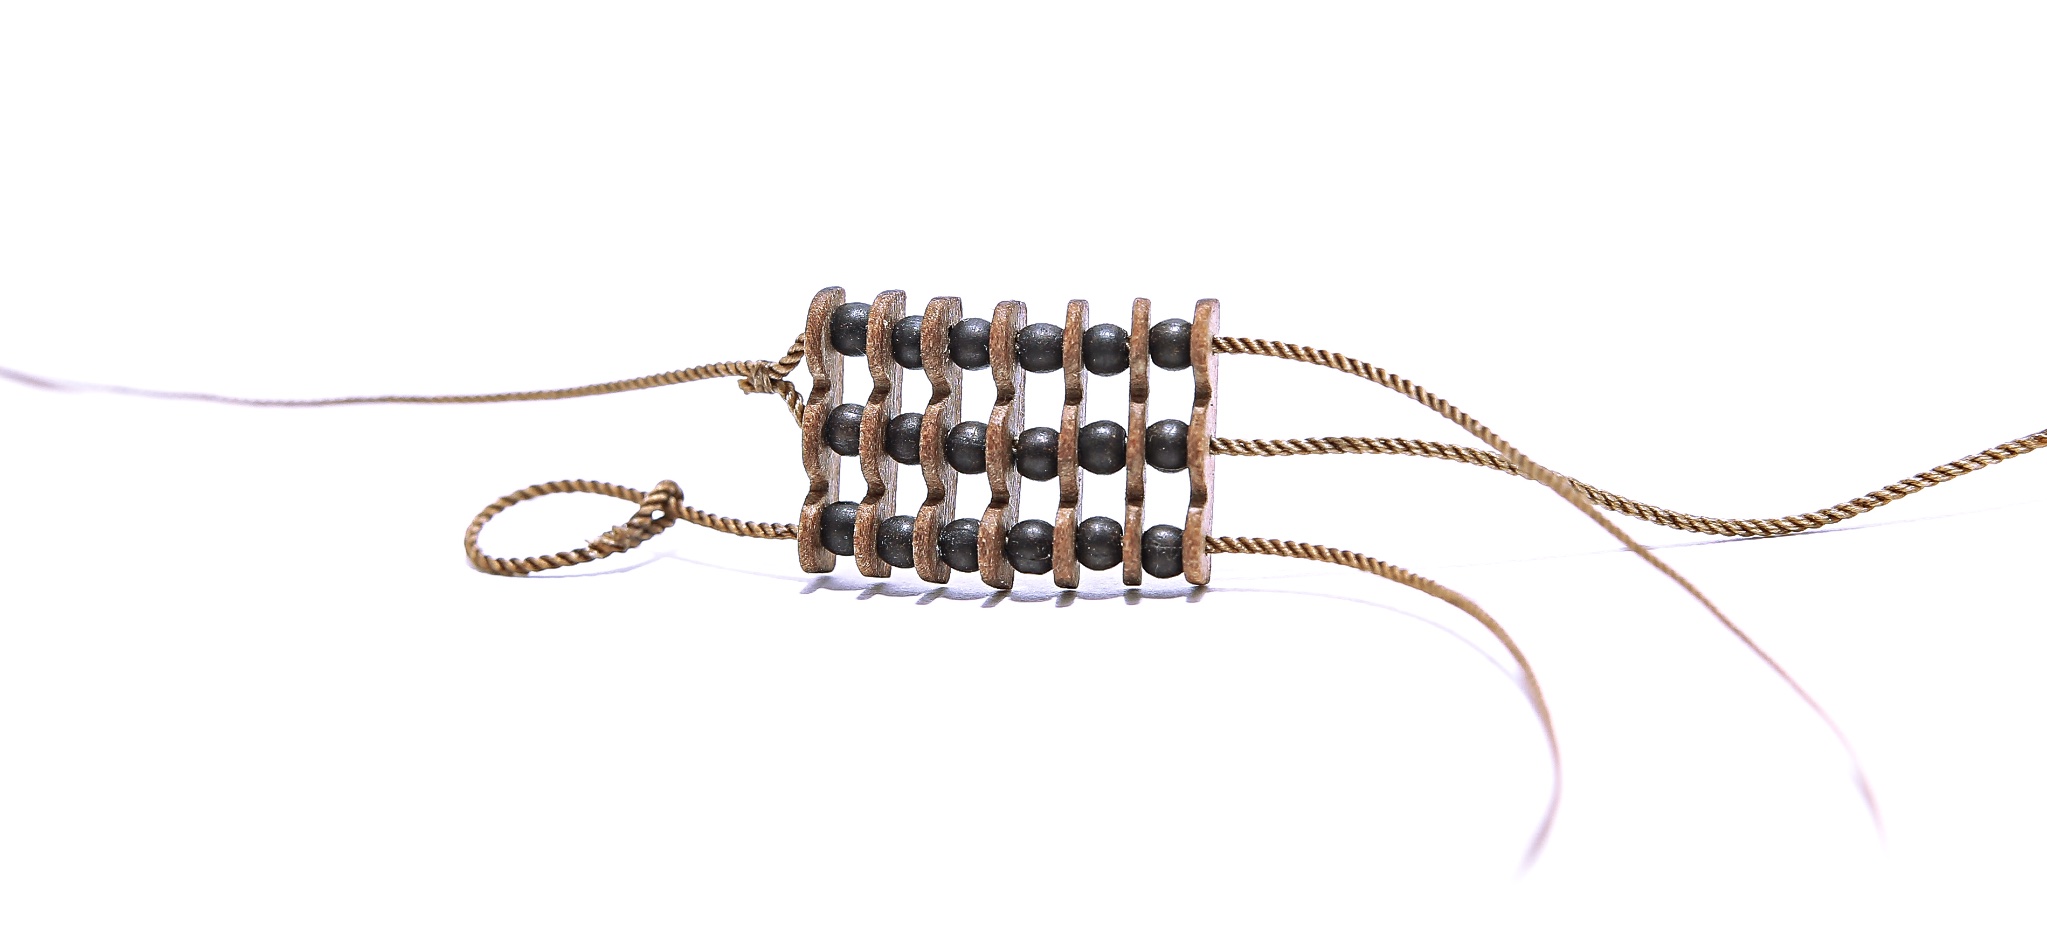
So I've maid main yard parrel.
Rather problematic element and detail... not because of making it... but to fit it to the yard and mast it's great finger gymnastics spiced with lots 🤬 🤬 🤬 🤬 😂
...but it's done. Still missing lanyard, but this will be done next.
Beads are brass little bit less than 2mm (bought super cheap in AliExpress)
Rope is 0,55mm.
It's hard to stick lens in such a tight spot and get good shot where is clear how it's "tight" around yard so I will attach drawing as a guide. Hopefully it will be more clear and understandable.


Cheers,
Matt
- Siggi52, GrandpaPhil, Farbror Fartyg and 4 others
-
6
-
 1
1
-
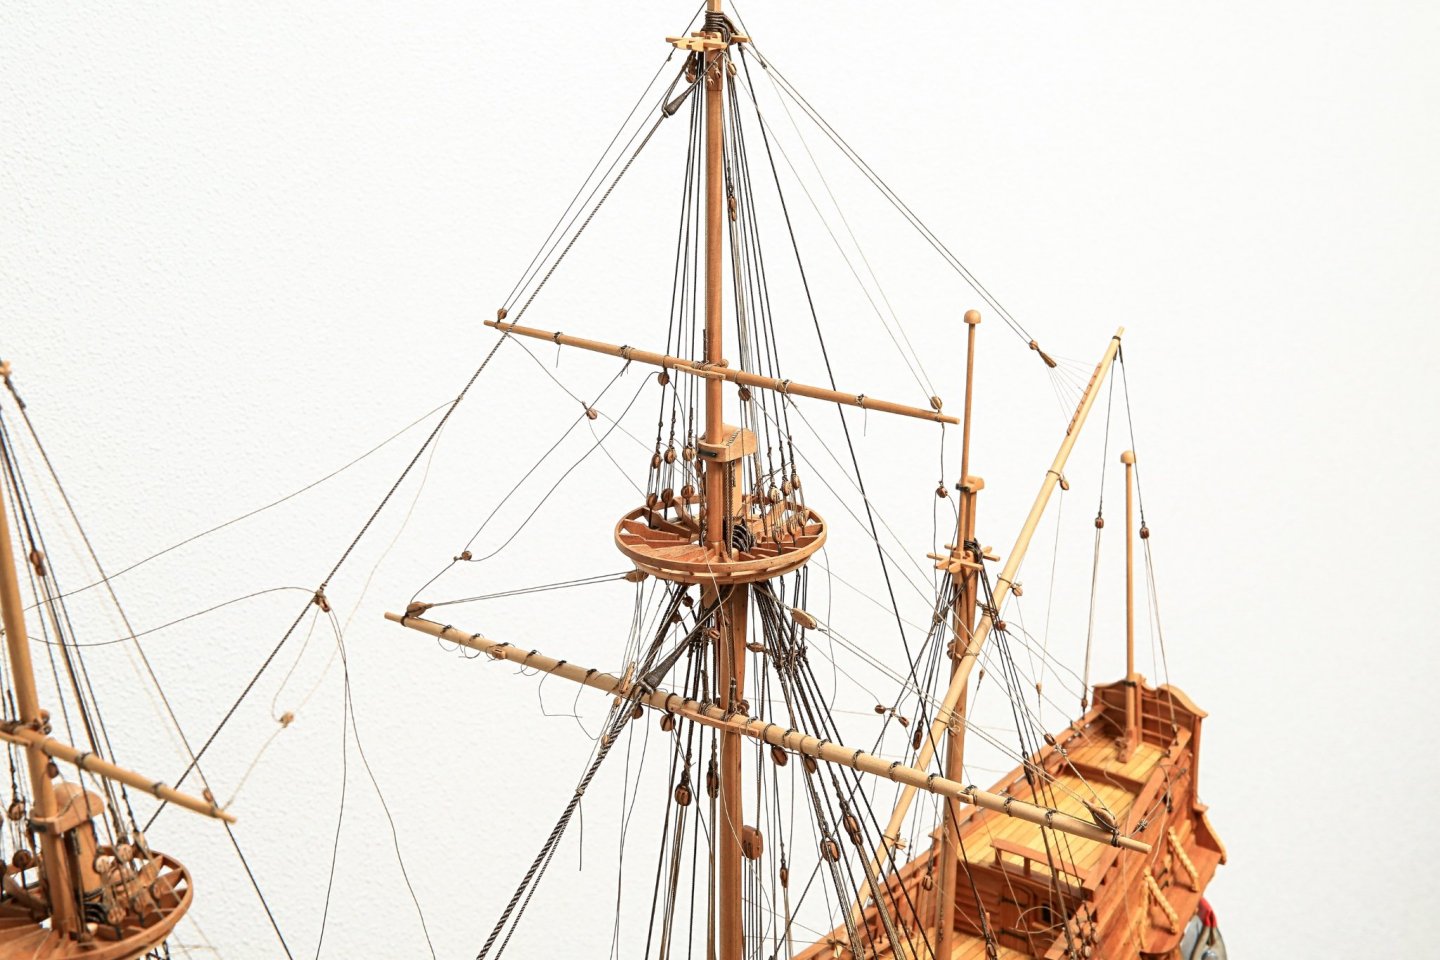
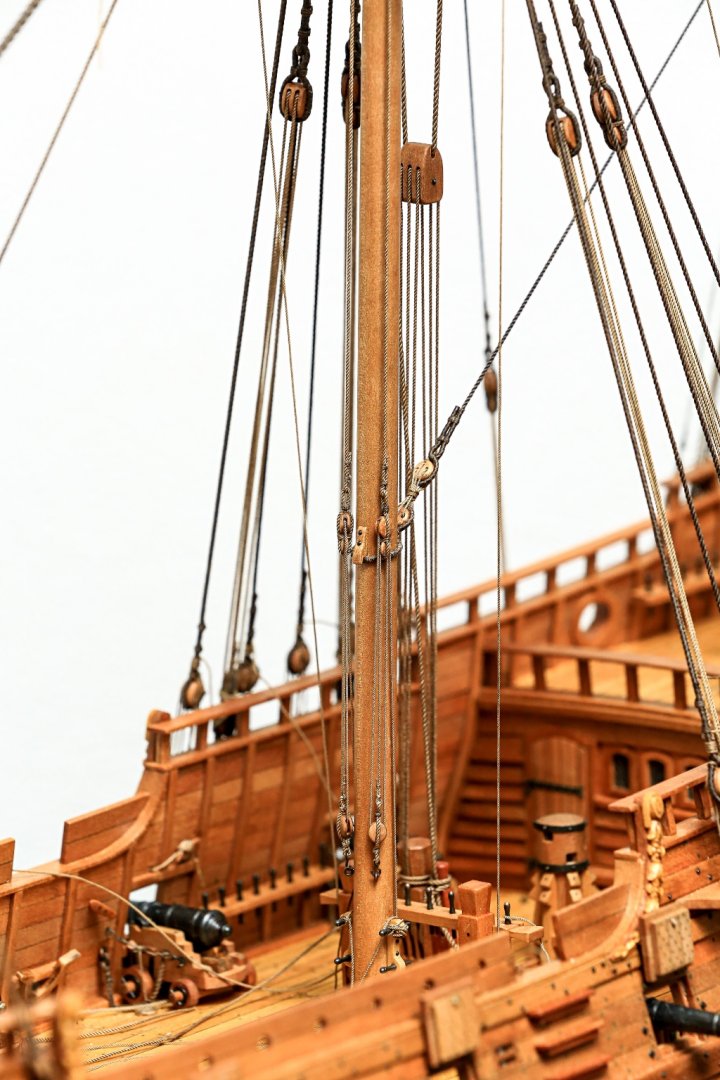
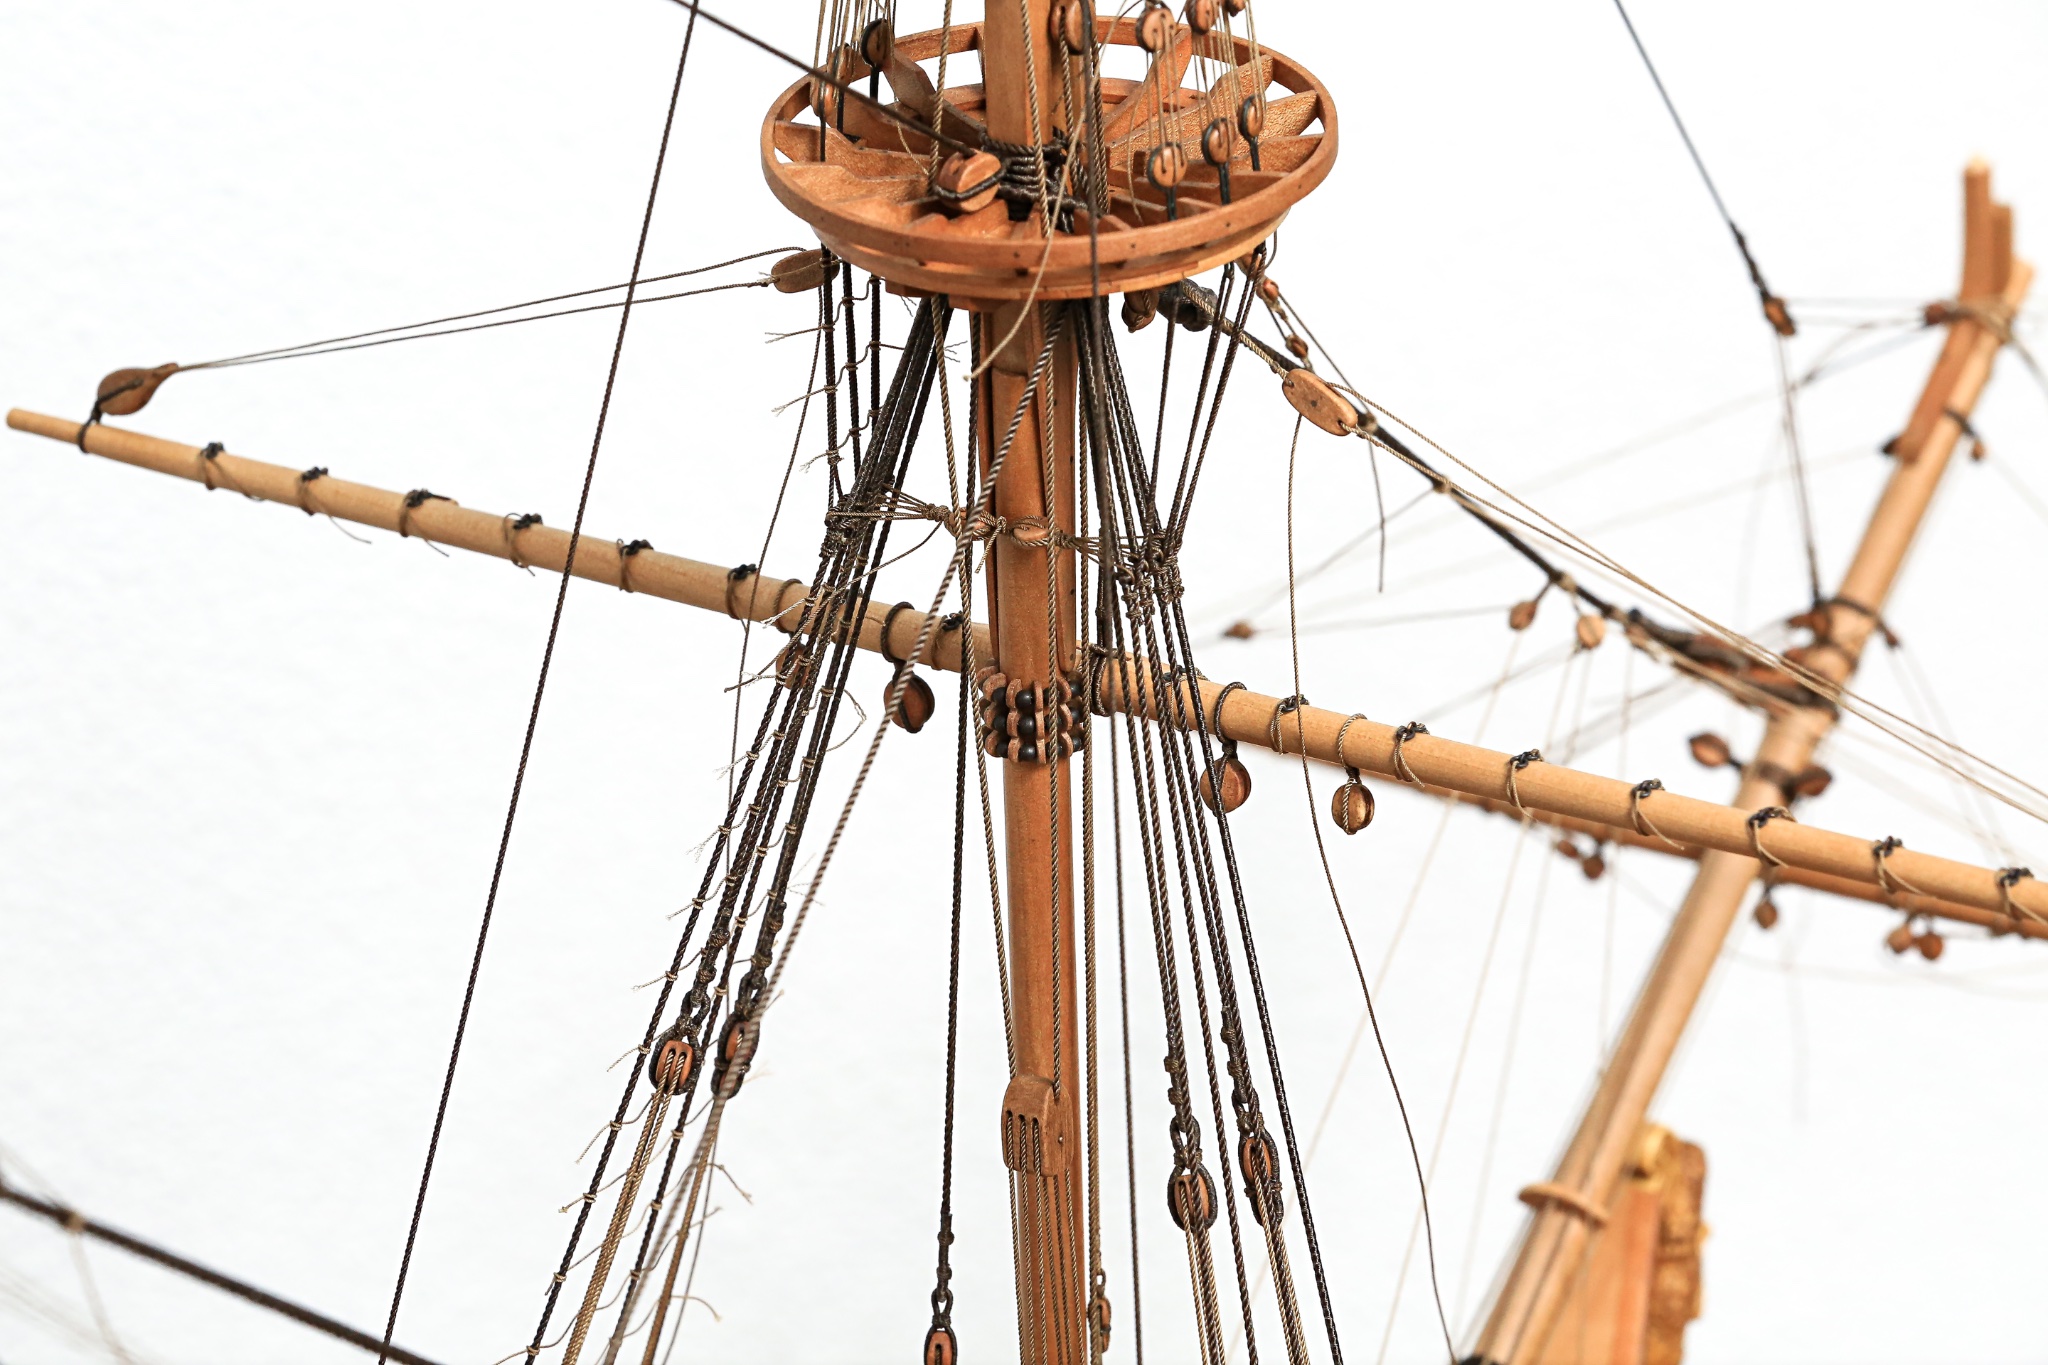
Hi All,
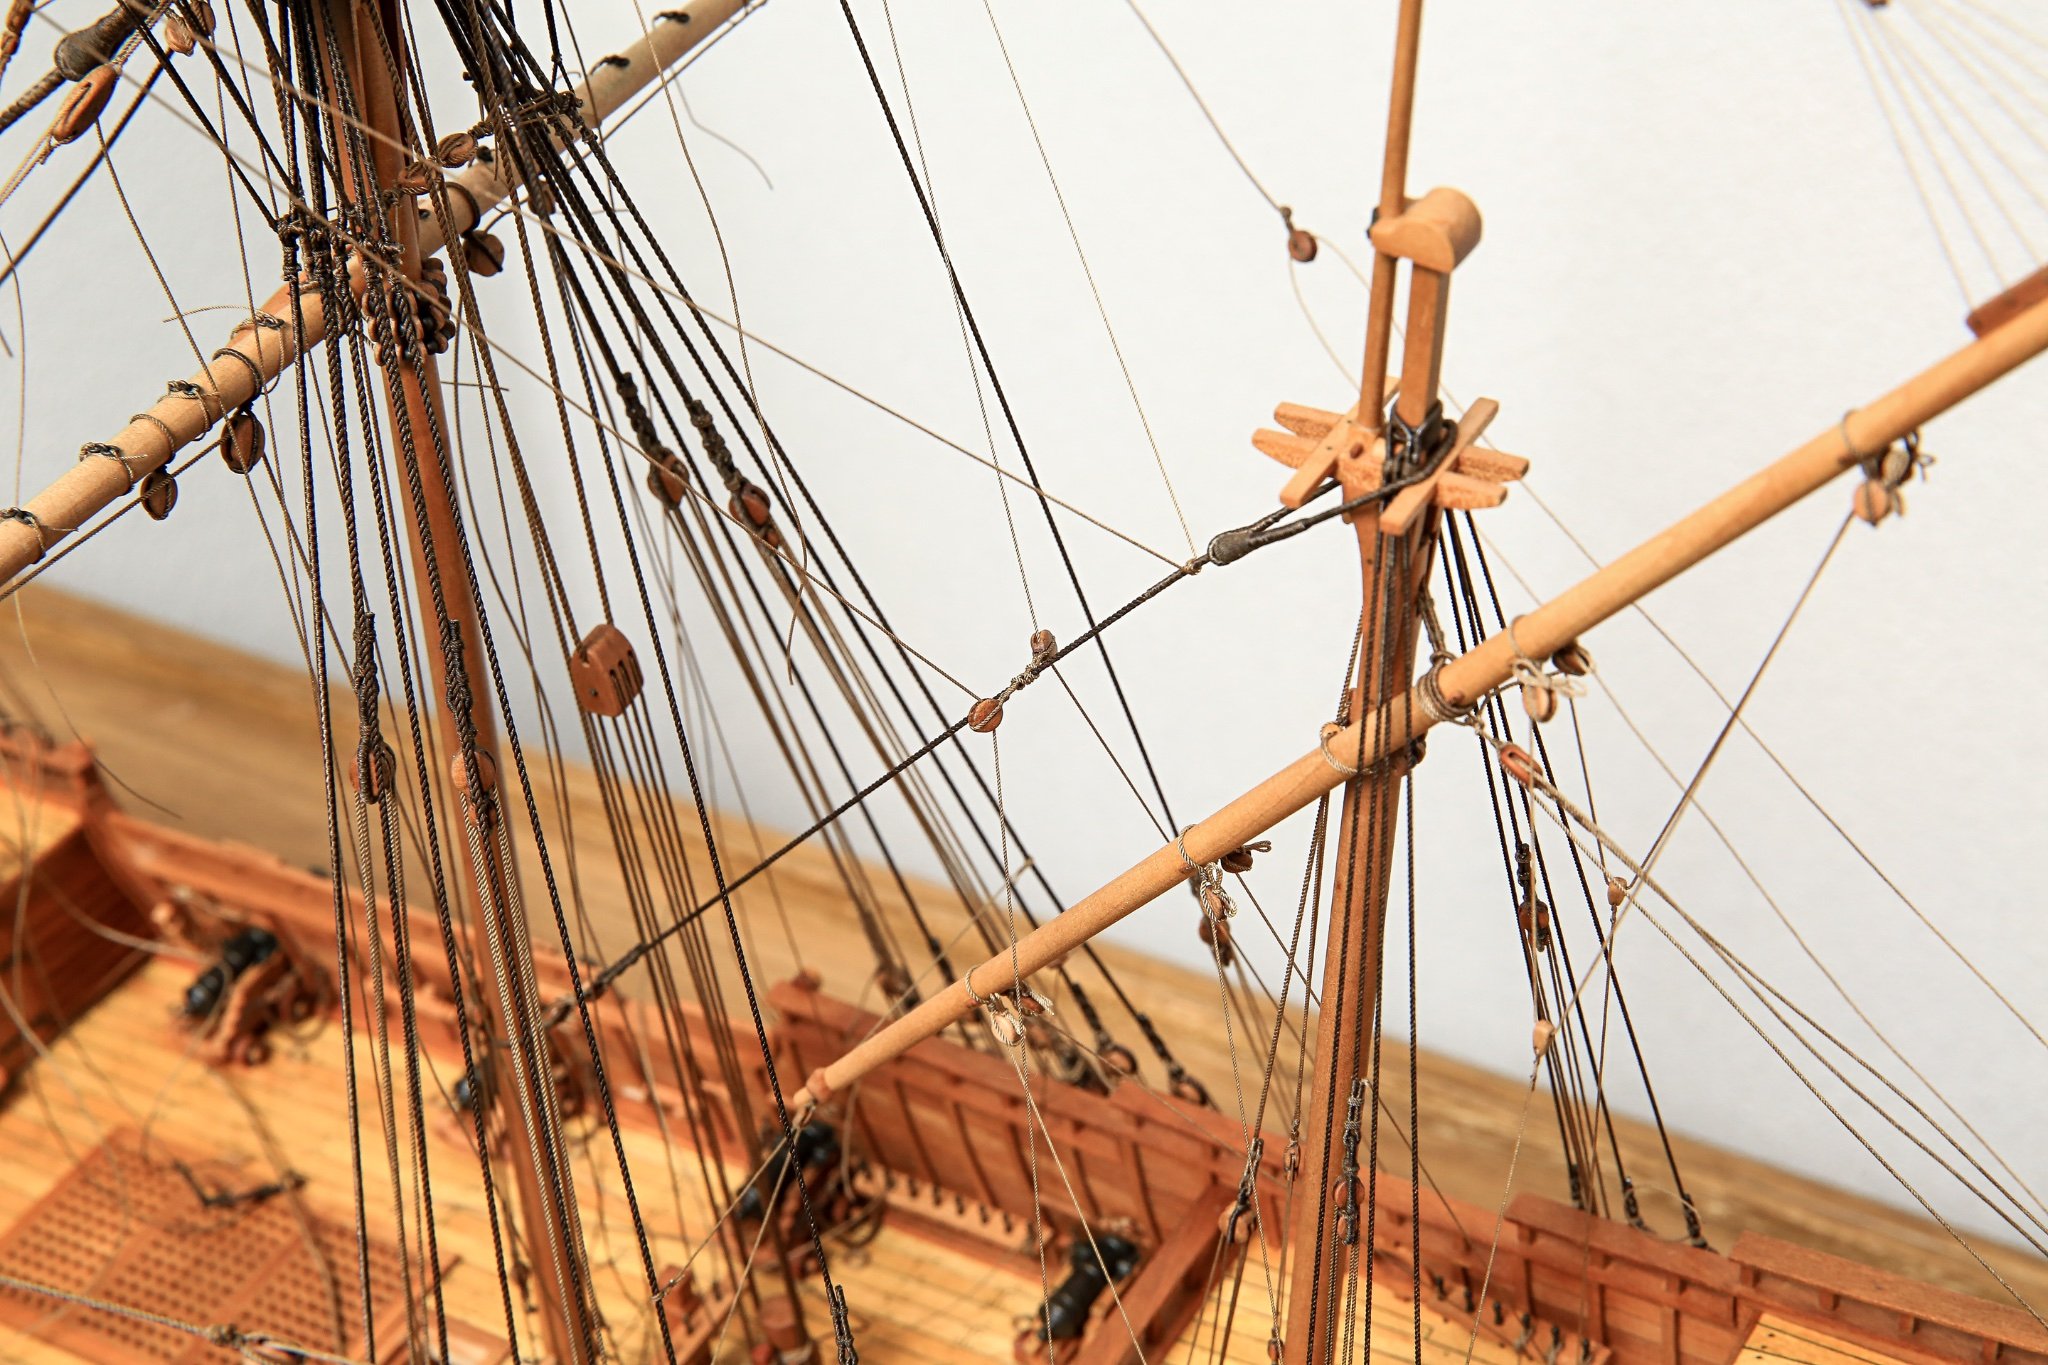
Some updates...
Mizzen yard and all require blocks and mizzen lift are in place.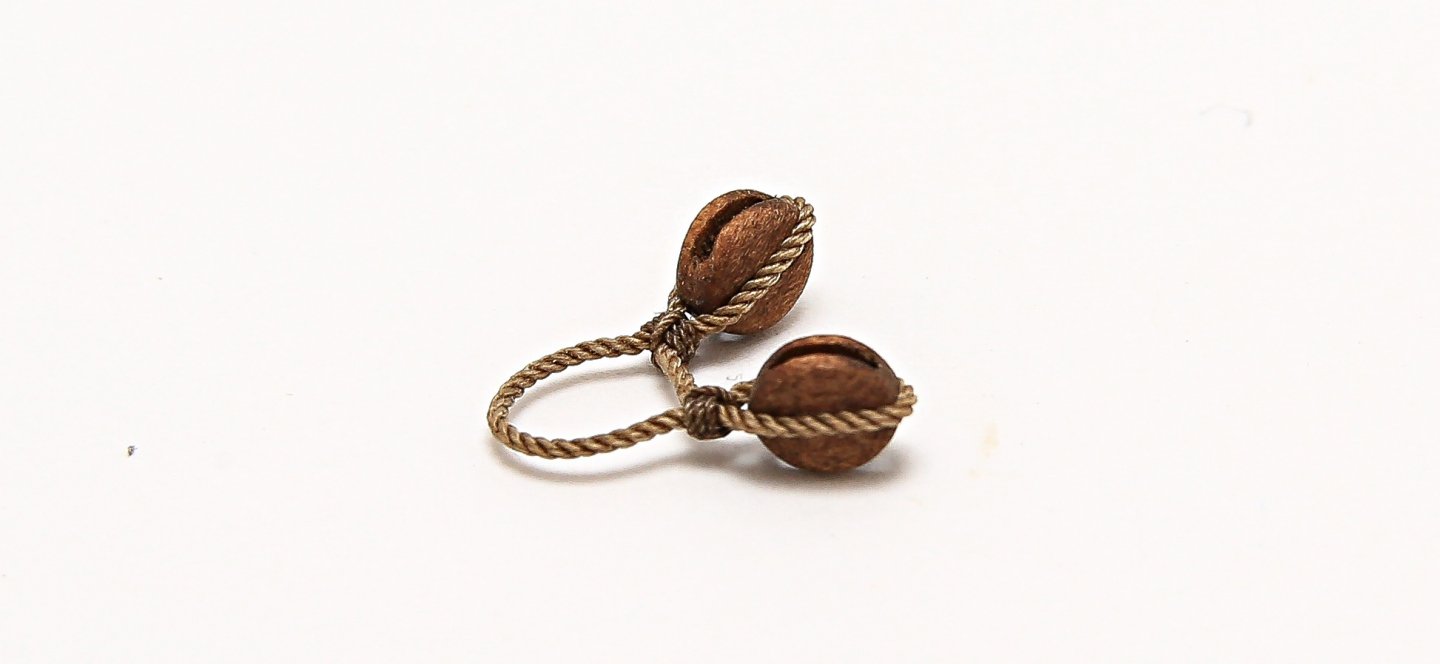
Main yard and fore yard lifts and lift blocks are also in place.
Next step will be to add parrels and tight yards in "permanent" position.
Look's like at that stage parrels has to go on the workbench and I can't delay them any further 😆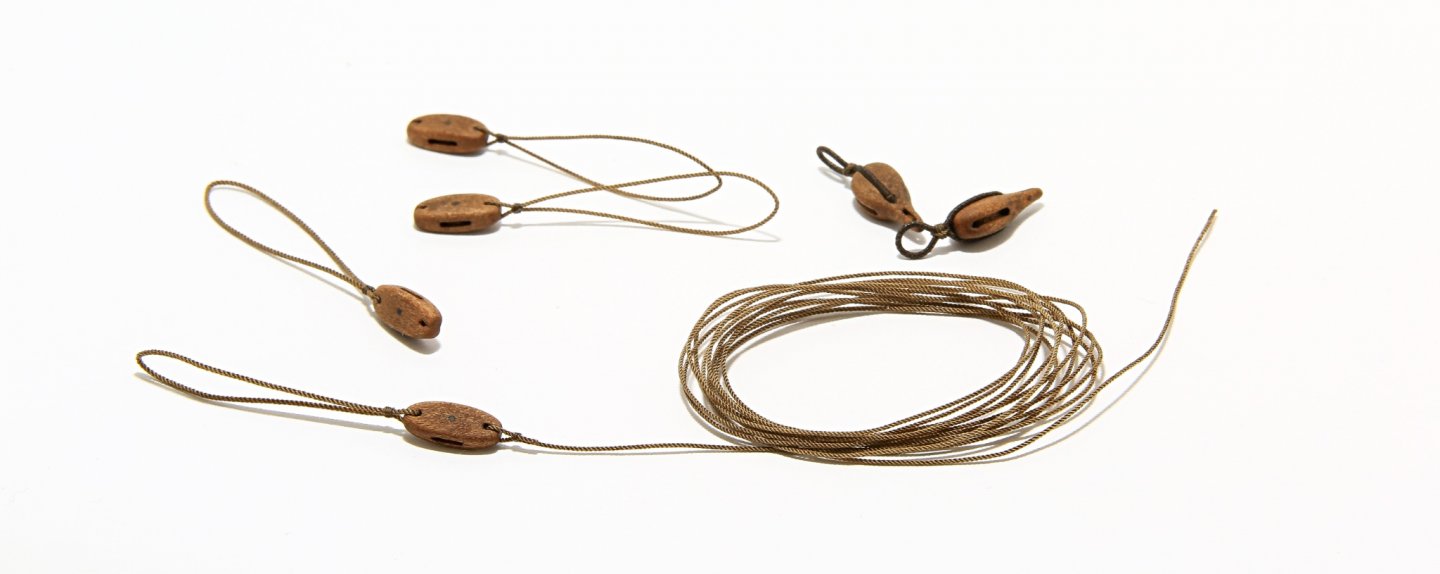

Cheers,
Matt
-
Hi All,
So reconsidering gaskets look once again ...and after some more research and discussions I didn't have any other choice but modify and upgrade them with additional ring.
Gasket should have two rings. First facing forward and second should face aft.
Furled sail was then tighten by rope running in front of the sail and going around to be looped and secured around second ring.
Now I pretty convinced that they look as they should and yard will have more accurate appearance
Cheers,
Matt
- GrandpaPhil, Farbror Fartyg, PietFriet and 5 others
-
7
-
1
-
-
Hi All,
Still on the wave to I have some little progress.
This time main yard.
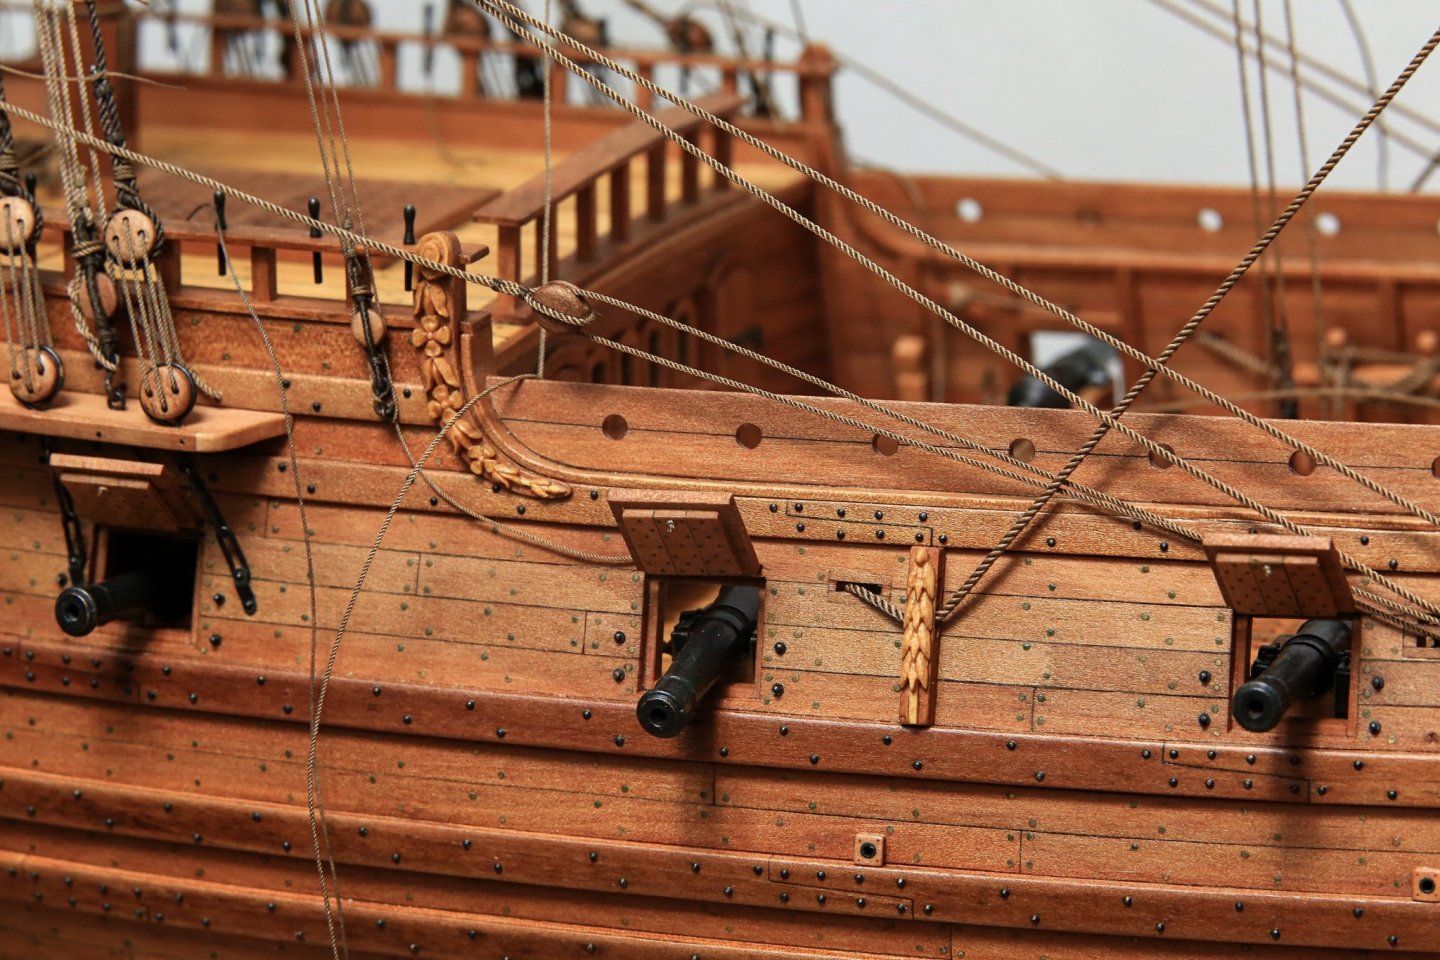
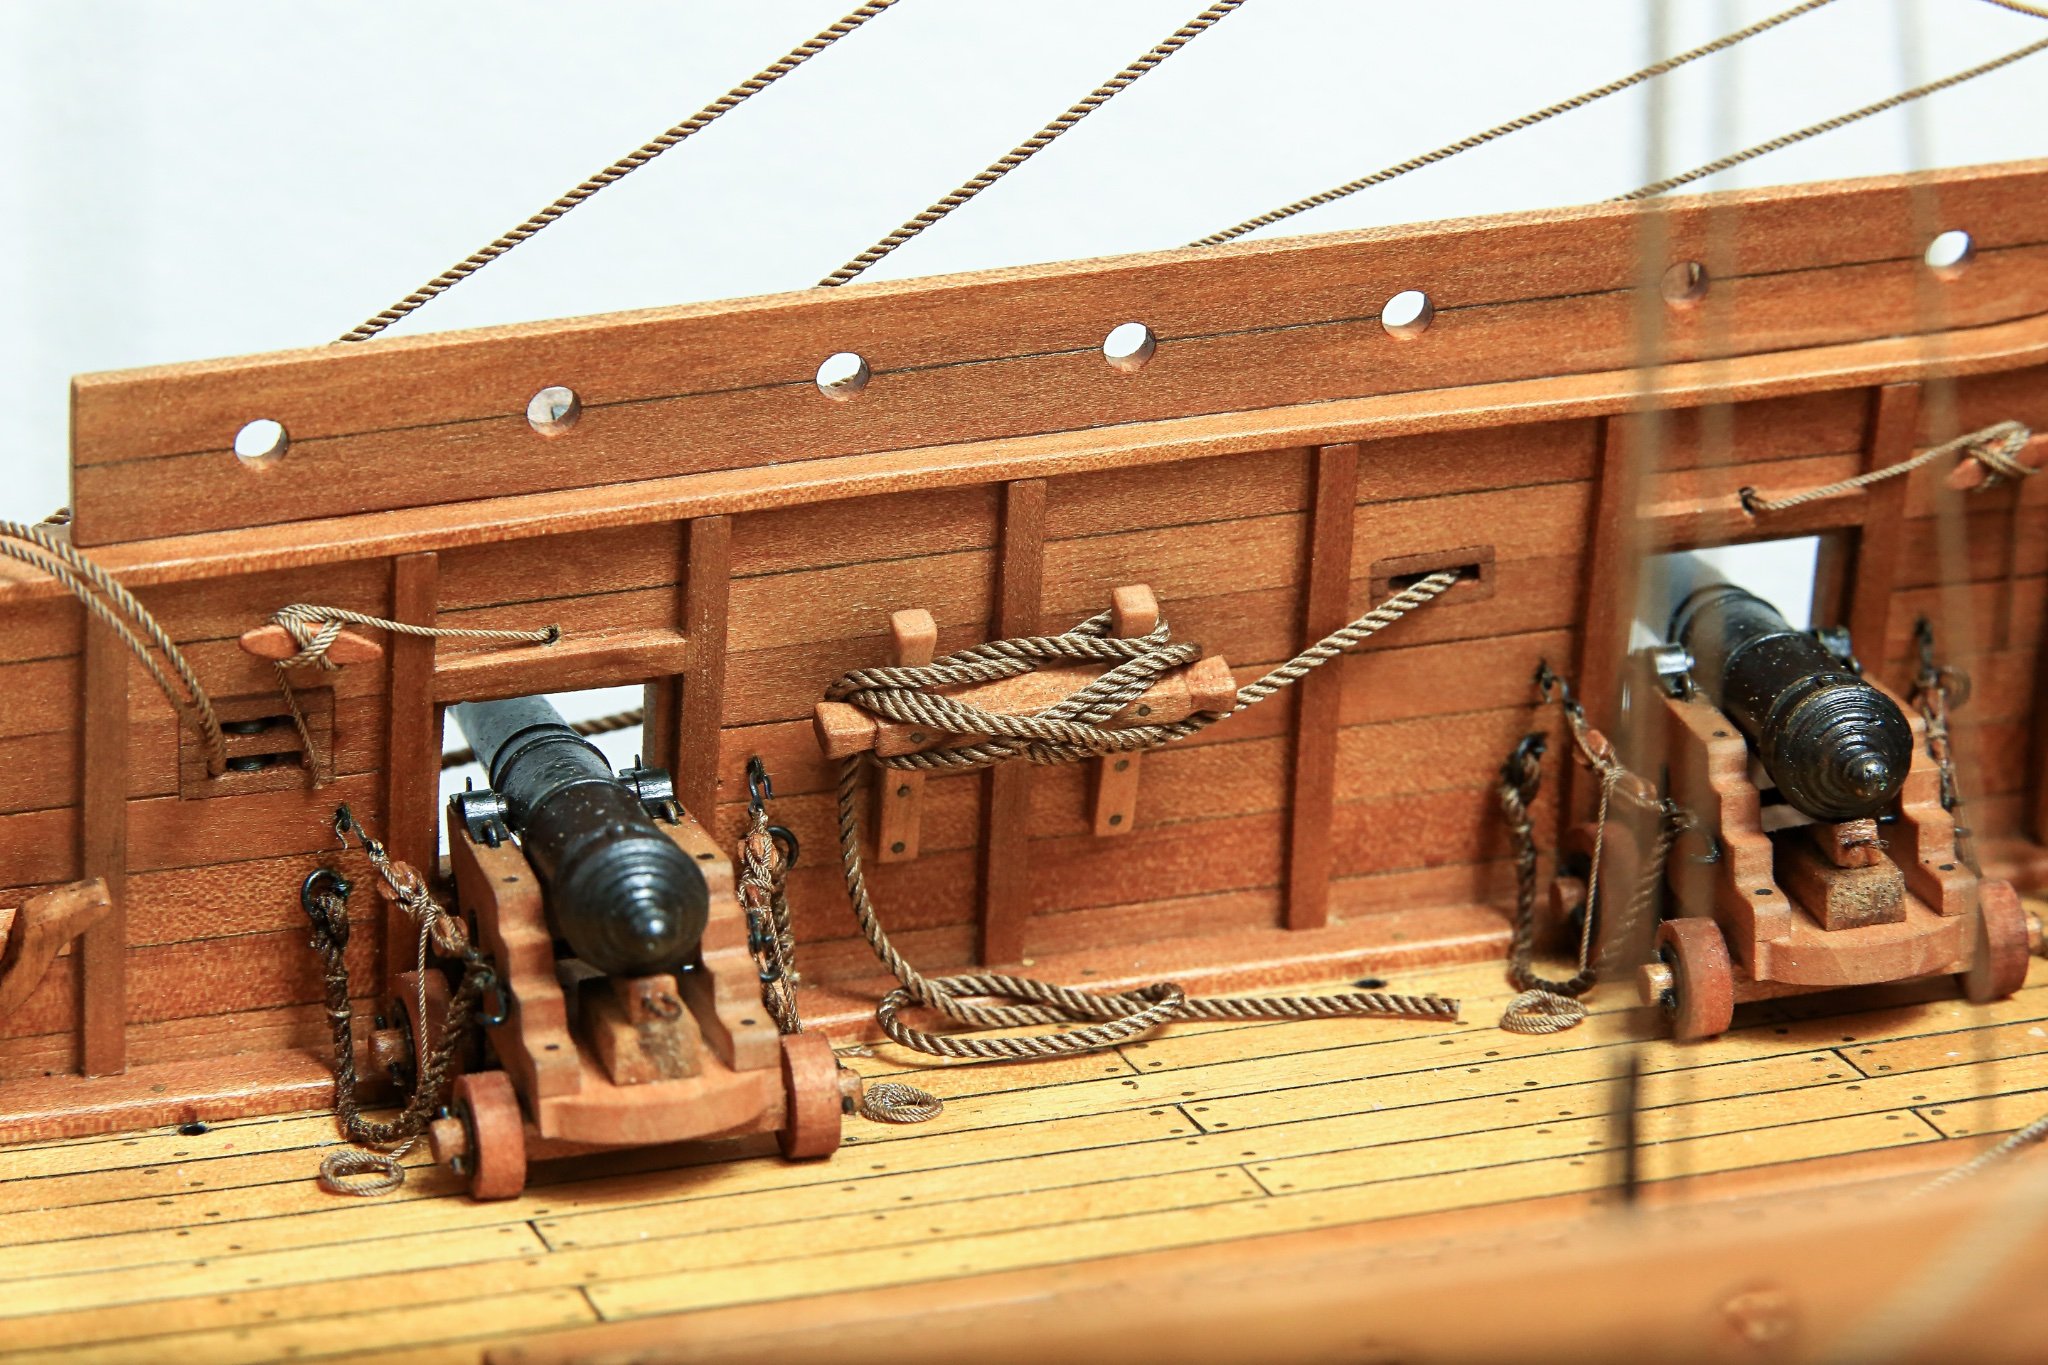
As you might see on the photos main yard are fully "armed" with all sheet blocks and gaskets (gaskets were used for furling and securing sails to the yard)
As far as I found... gaskets ropes were spliced around the yard when not in use... however I kind of enjoying looking at them hanging down freely... so I think I will leave them this way.
Model will be without sails, as I've mentioned before... so I'm hoping for nice visual effect with all the possible fitted ropes.
Few photos...
Sheet blocks.
Milled holes for rope sheave imitation. Final shape and finish by hand using files and sanding sponges.

Few photos of the "fully armed" yard with all the sheet blocks and gaskets.
...and hung in place
Cheers,
Matt
-
Hi All,
Thank you Allan and JJ for your kind "word" 🍻
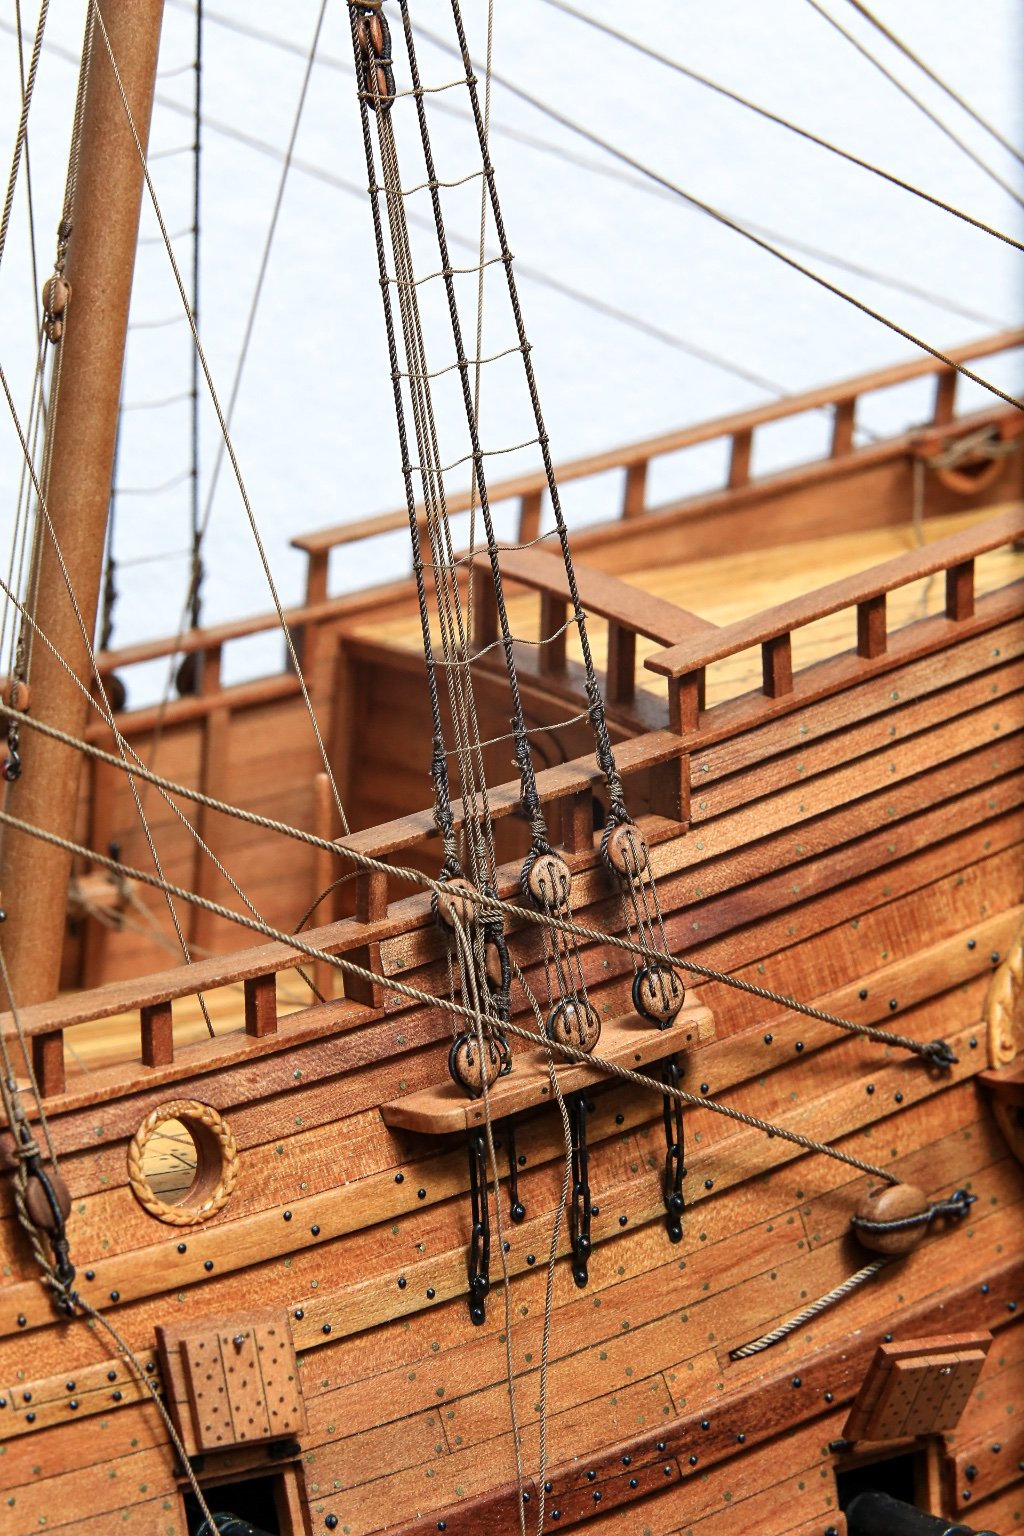
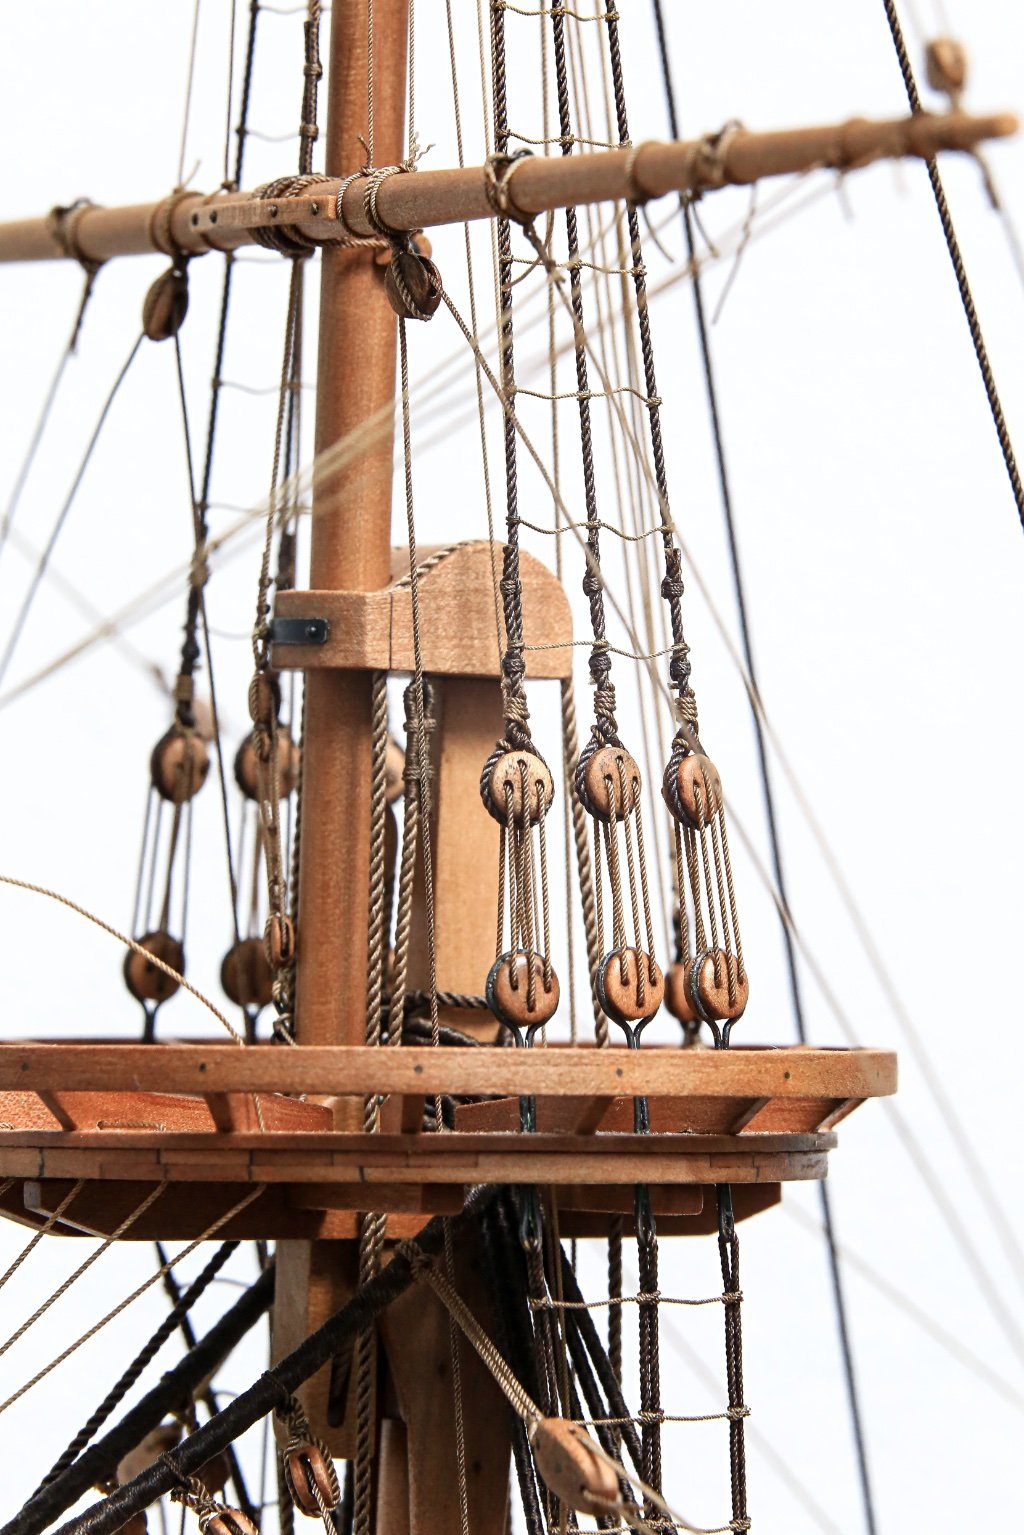
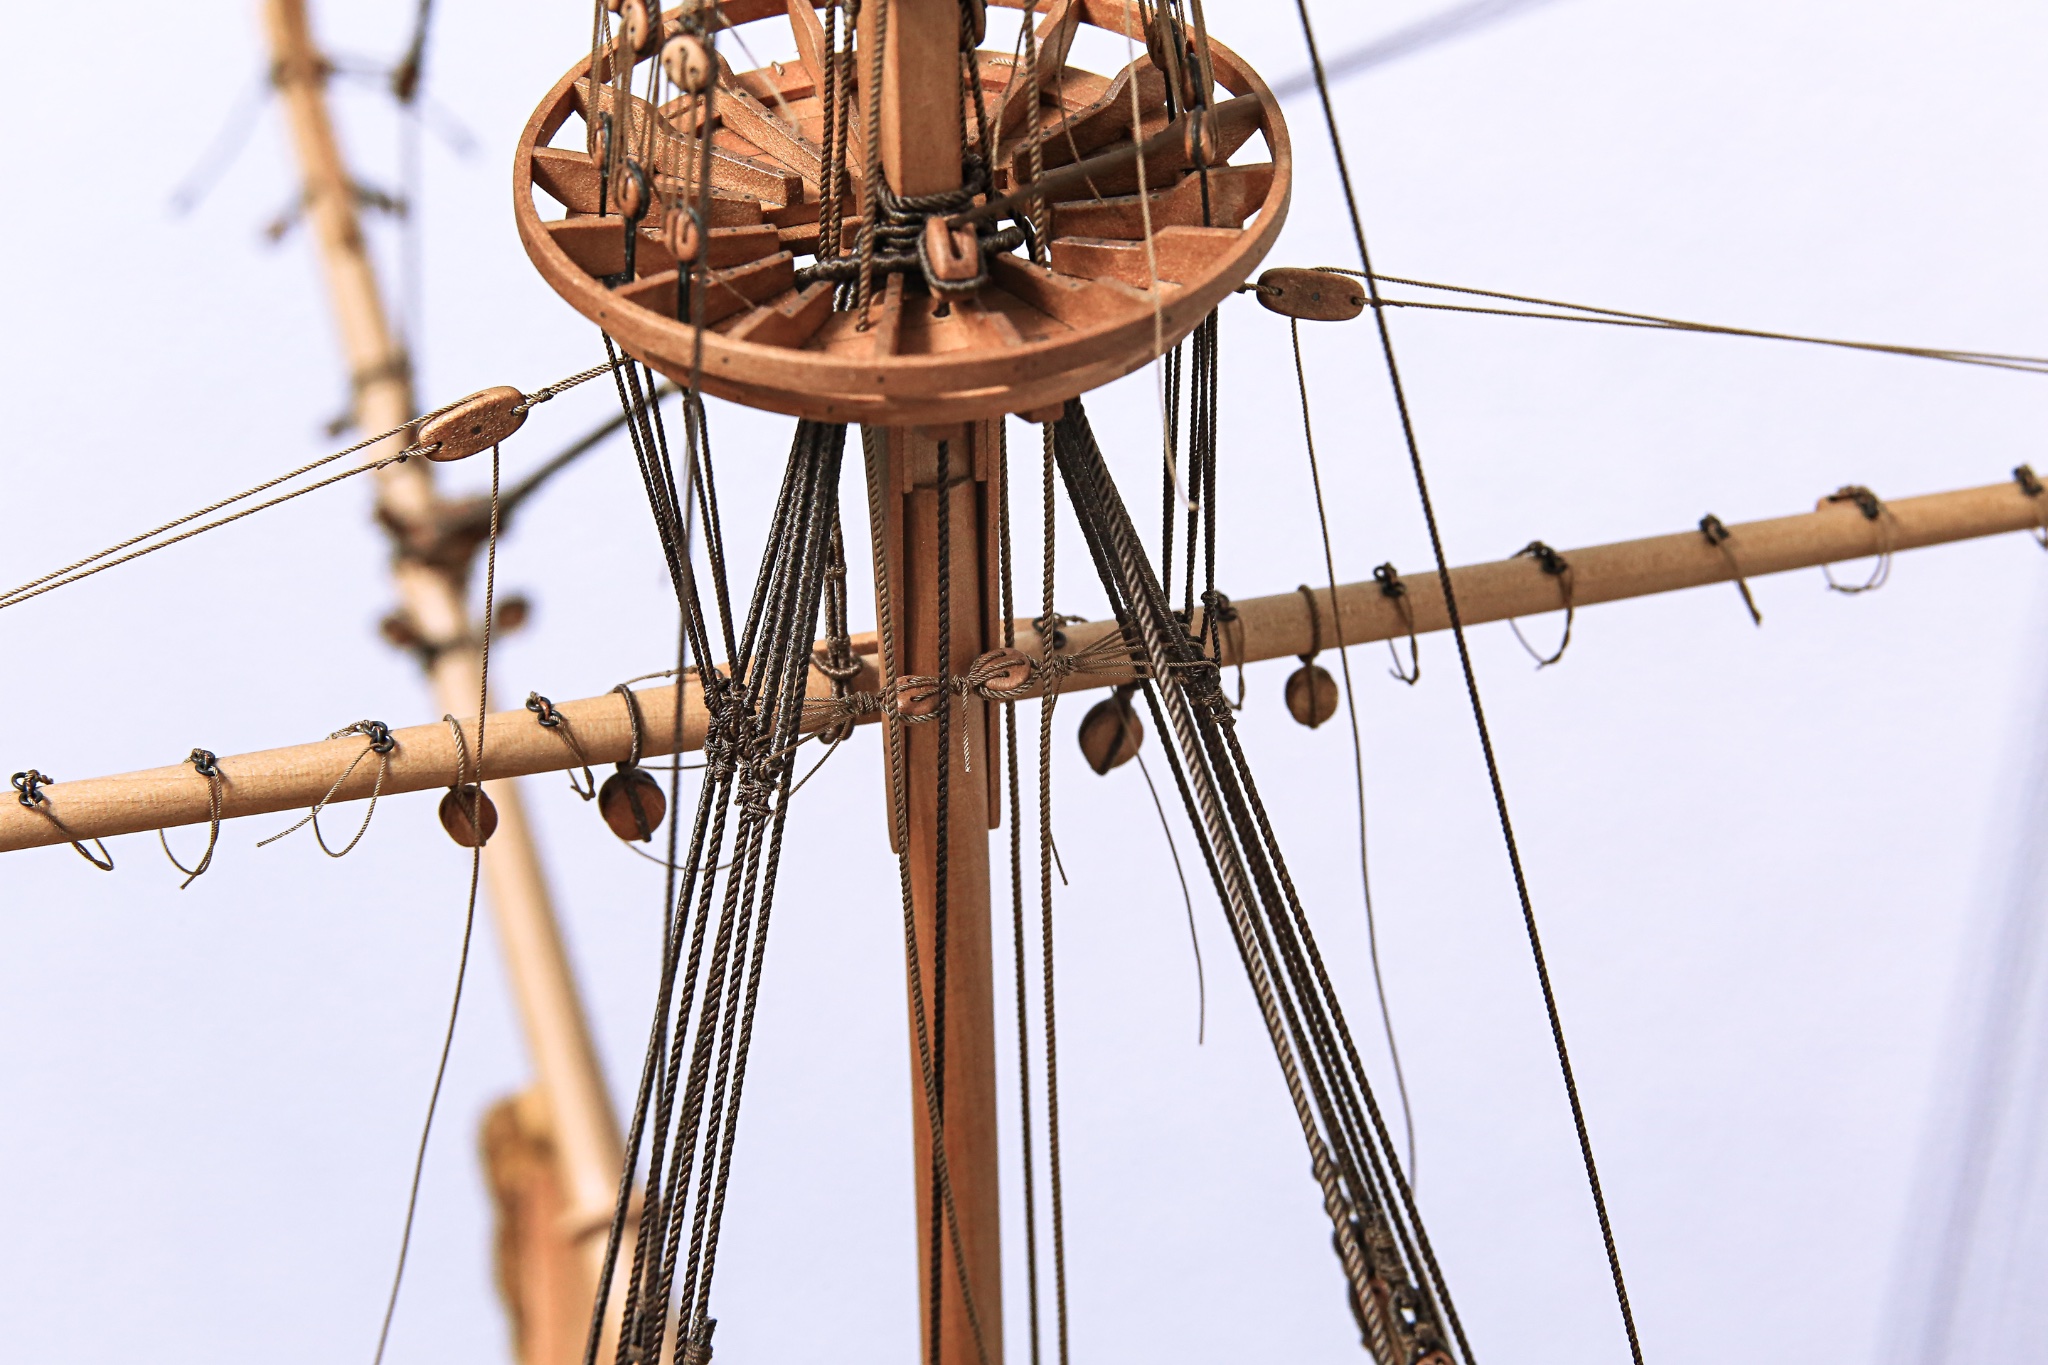
Currently, I'm working on futtock shrouds... so far on mainmast...

...and another a little bit annoying detail, which non of the common viewer will ever notice 😆
Catharpins
It's bit pain in the butt to fix them in place due to lack of space in this area... but could be worst

Cheers,
Matt
- Farbror Fartyg, mtaylor, Archi and 7 others
-
10
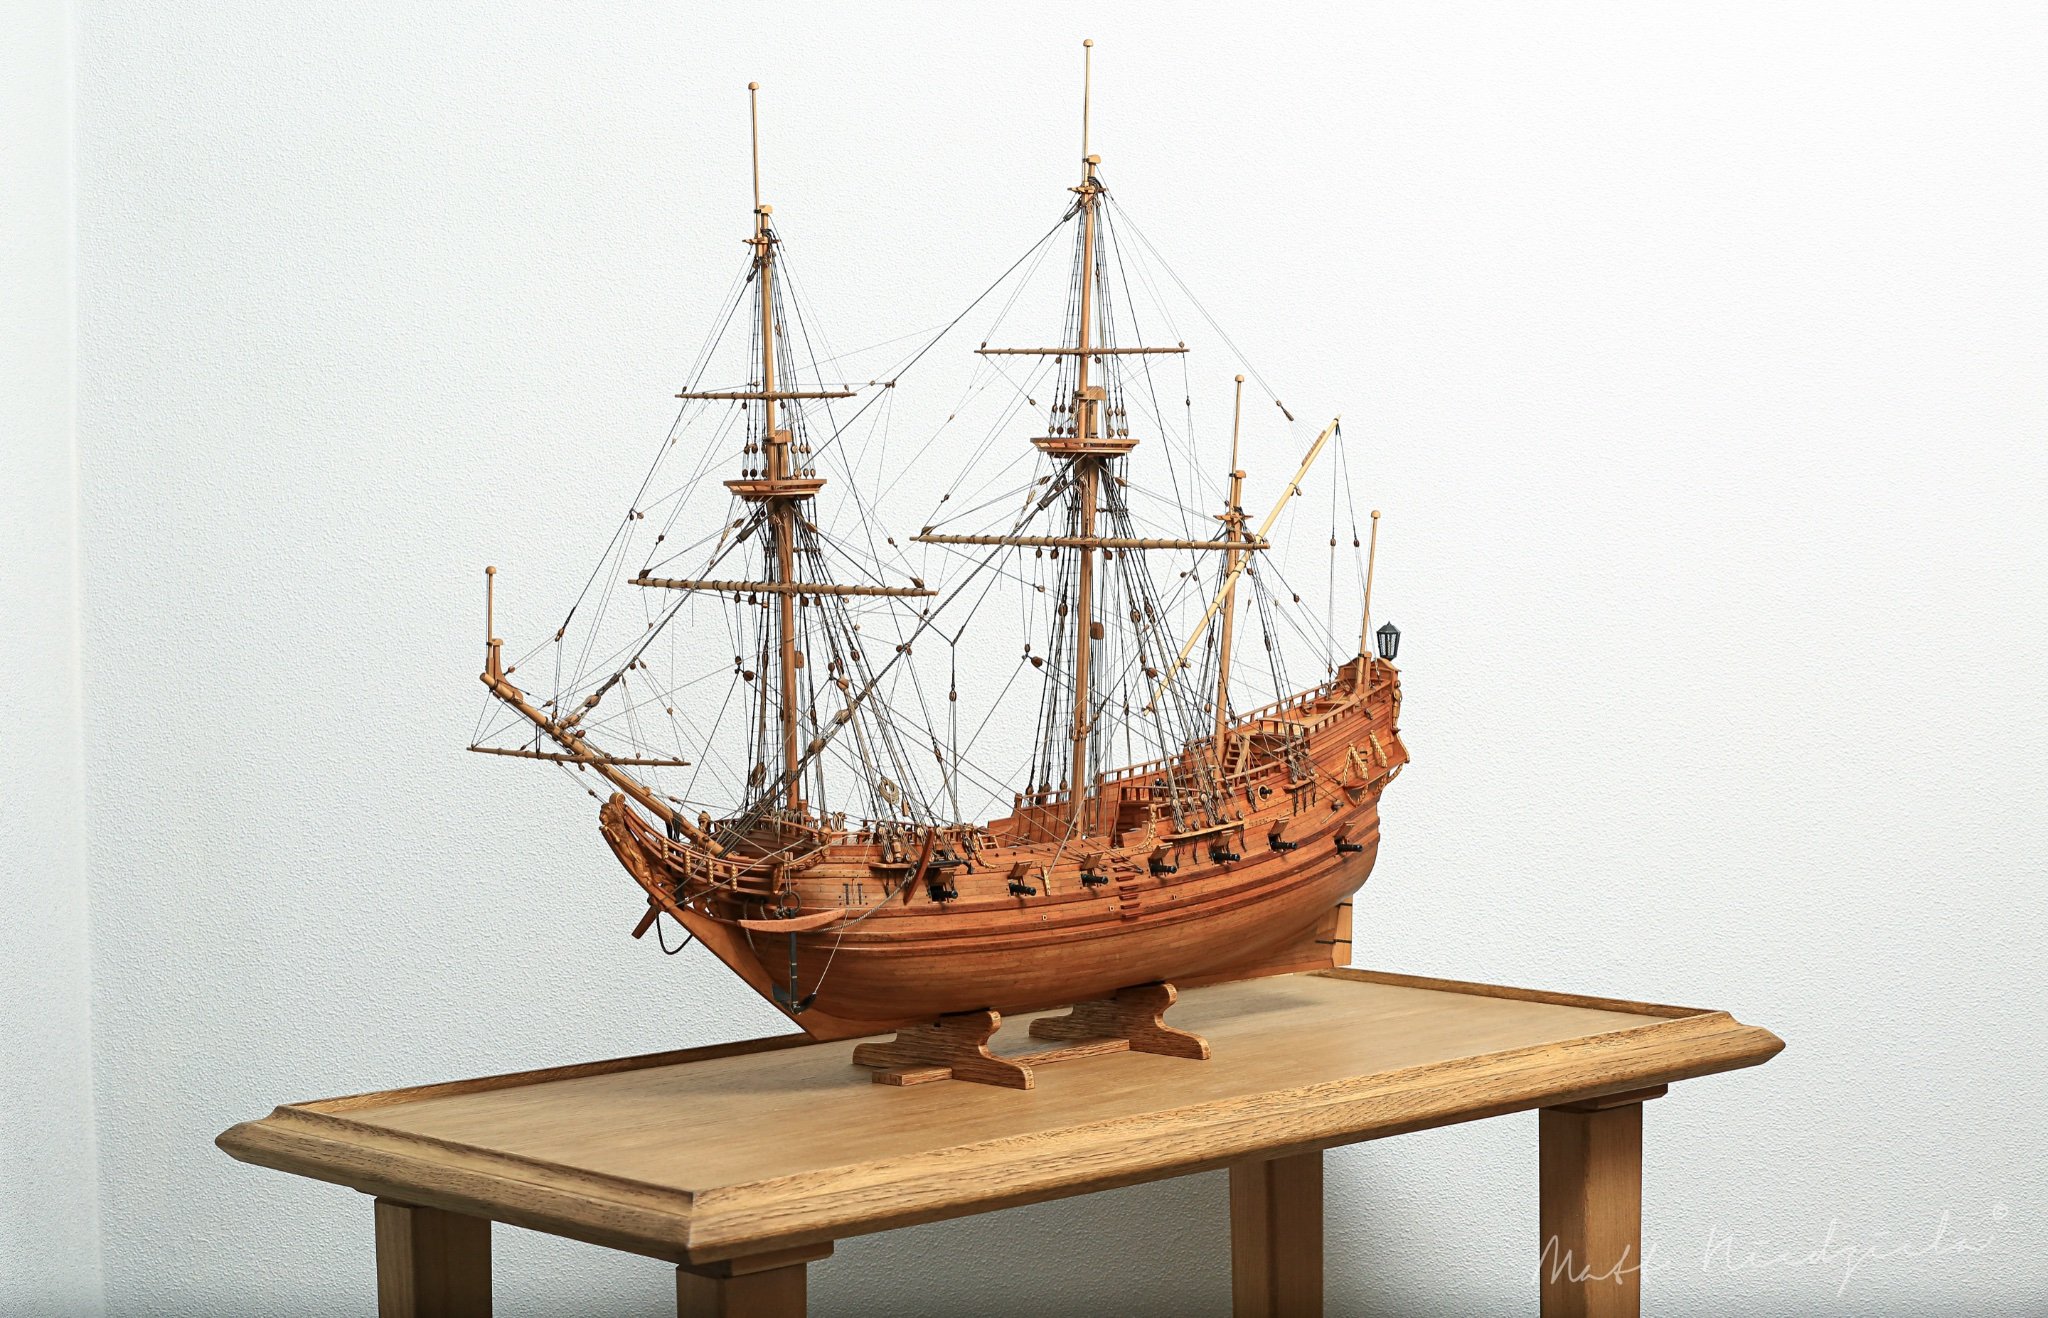


Papegojan 1627 by mati - FINISHED - 1/48
in - Build logs for subjects built 1501 - 1750
Posted
Hi All,
I can't thank you enough for so many generous and nice comments and all likes!
I really appreciate it! Thank you!
It gives me so much motivation to make sure that the next model it is going to be perfect
Thank you @mtaylor @GrandpaPhil @ccoyle
@BobG I'm still not 100% sure what will be next... but I will make sure it will be interesting subject...
@Snug Harbor Johnny Thank you
However, it's more complex...
Please have a look also at Witsen Pinas drawing from Ab Hoving publication. It was re-drawn by Cor Emke in higher resolution.
It will give you possibility to zoom in and look closer at rigging... some of the solutions represent in his drawing can be applied to Vasa.
https://nautarch.tamu.edu/shiplab/images/Pinas4 big.pdf
Witsen - Tekeningen - Ab Hoving.pdf
If you will have some doubts let me know... maybe I will be able to clarify something and help. Good luck!
@Farbror Fartyg Thank you very much for your comment. I'm really glad you enjoyed my build") Hopefully see you soon in my next build
Hopefully see you soon in my next build ")
Keep calm and carry on building beautiful models
Cheers,
Matt