hamilton
-
Posts
1,933 -
Joined
-
Last visited
Content Type
Profiles
Forums
Gallery
Events
Everything posted by hamilton
-
 A bit more work on Bellona today - finishing up the counter planking, stern chaser gunports & the filler blocks at the bottom of the quarter galleries. The lower counter planking was initially a little confusing - the kit calls for 2 layers of planking here but the total thickness (2.5mm) seemed a bit much, so I installed only 1 layer of 1mm x 4mm strips here. I added some extra framing around the gunports so I could plank up to them and painted this framing red, which will be slightly visible once the gunport lids are installed. The last plank to be laid was the one up against the upper counter planking - I made a template for this from card paper and transferred the curve to a wood strip - it took quite a bit of trimming and shaving and sanding and carving until it fit reasonably well - a little bit of filler, sanding and painting later and the results look pretty good, I think. The next step will be the make gunport lids for the closed gunports in preparation for the second layer of planking. I decided against using the dumby gun barrels provided with the kit and to keep any ports that featured these closed. The plan is to install the gunports (minus any hardware) prior to second planking, so I can plank around the ports - hoping this can lead to clean results. In the meantime - enjoy the photos and happy modelling hamilton

-
Hello there: A bit more work on the stern area - I installed planking on the upper counter - spiled from 1.5mm x 10mm stock - and started on the quartergallery framing. In working on the latter, I decided to scrap the 1.5mm plywood support piece - it really did not seem necessary to me - and took a different approach. The first step was to make a tracing of the general quartergallery outline from the plans and transfer this to the model - I was happy to discover that the tracing needed no adjustment and that it fit very nicely in place on both port and starboard sides. Once this was done, I used the outline to trim the framing pieces in their length and width so they fit nicely in place - the aft edges of all pieces and the inside edges of the lower two piece also had to be chamfered slightly to fit. I used the trimmed pieces to mark out their locations on the hull. Filler pieces could then be added using 1/16" scrapwood. It was then a very simple matter of installing the frame pieces. That's all for now - enjoy! hamilton


-
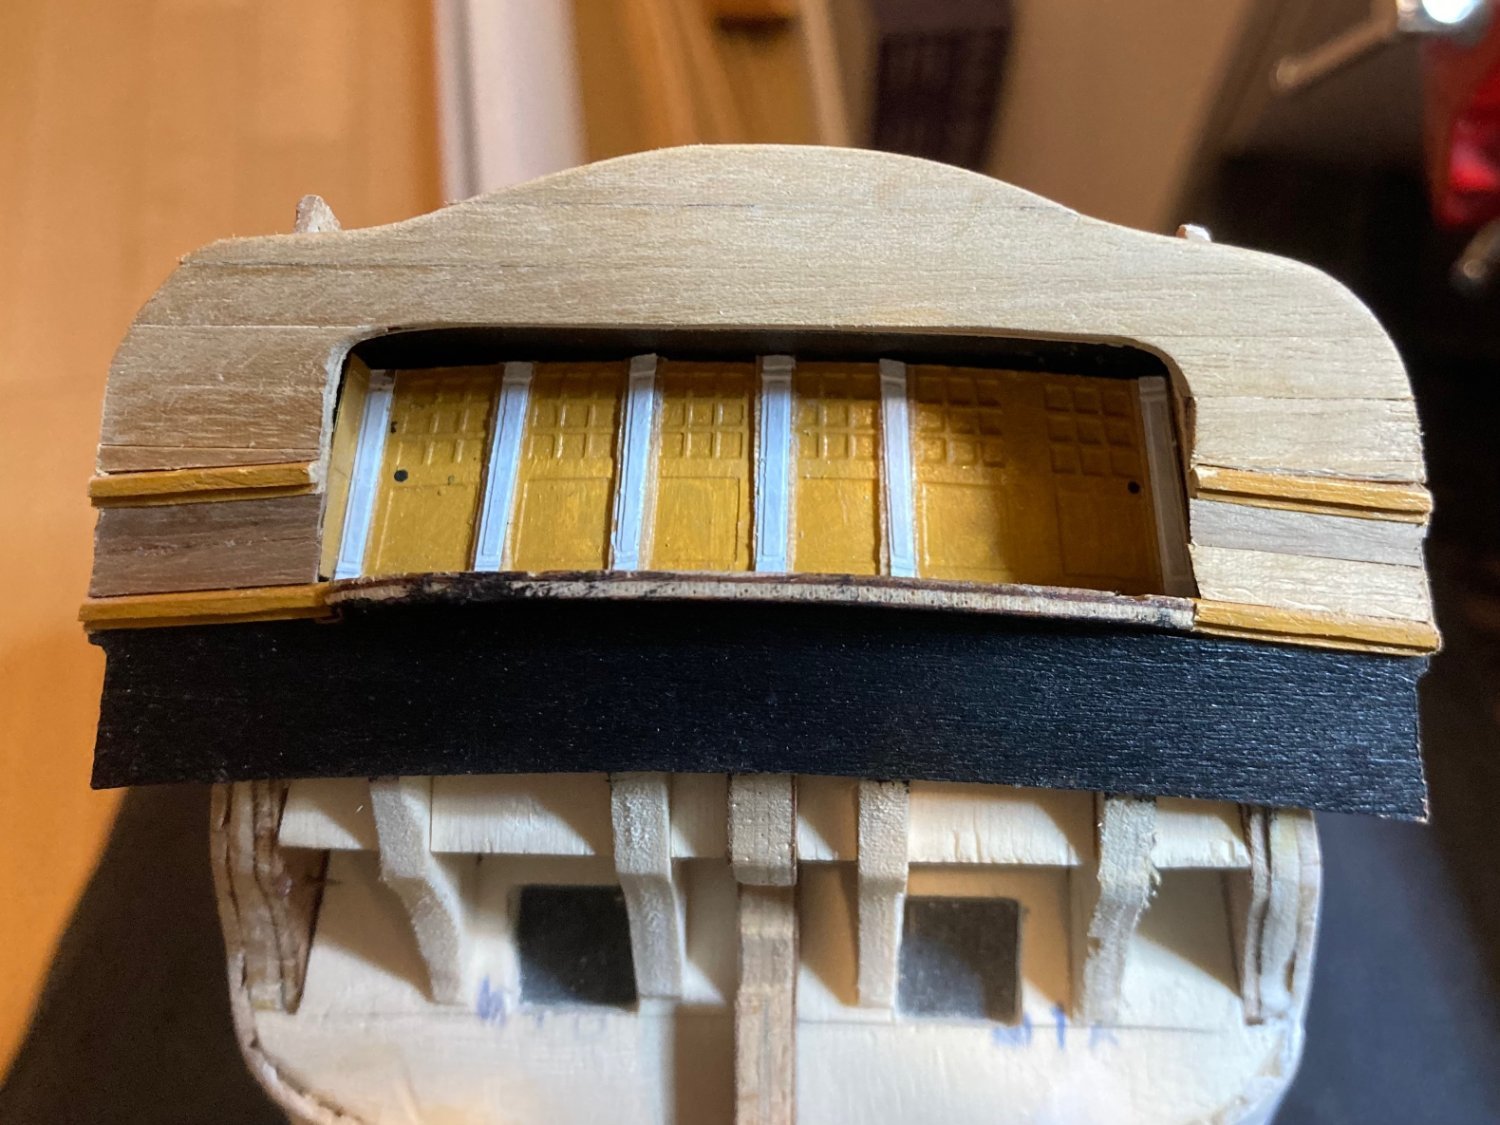
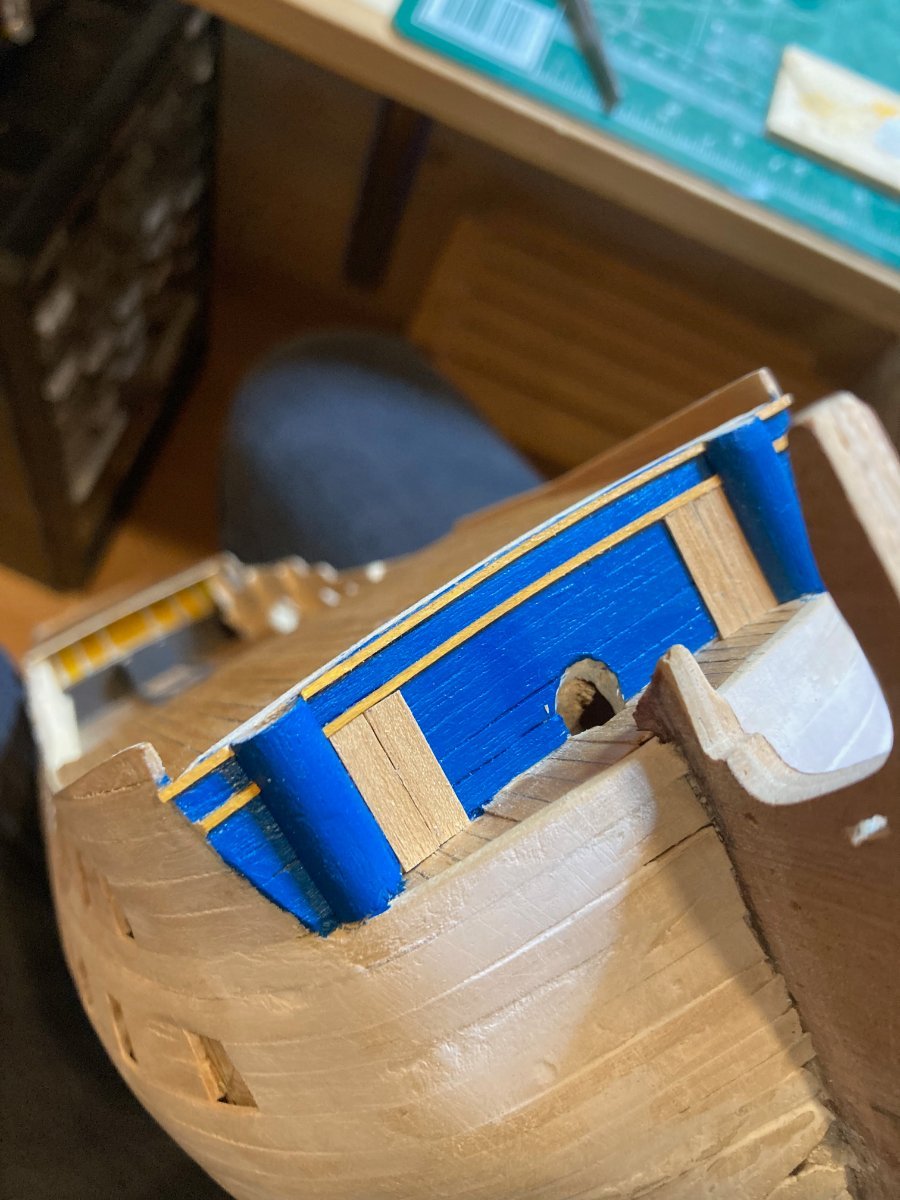
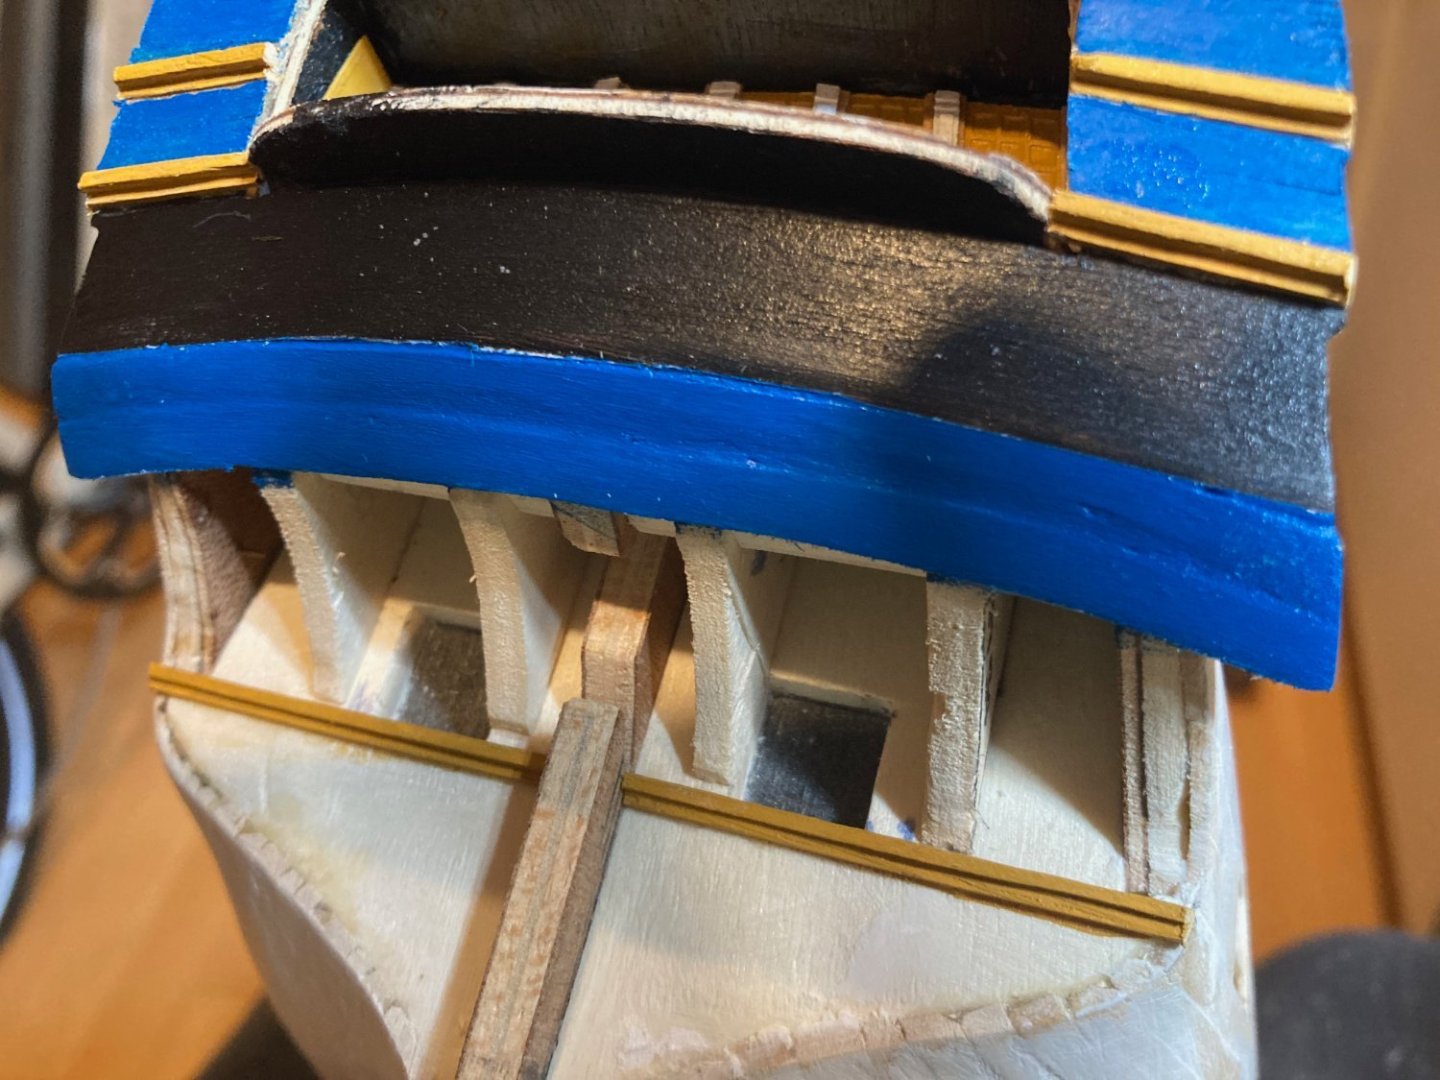
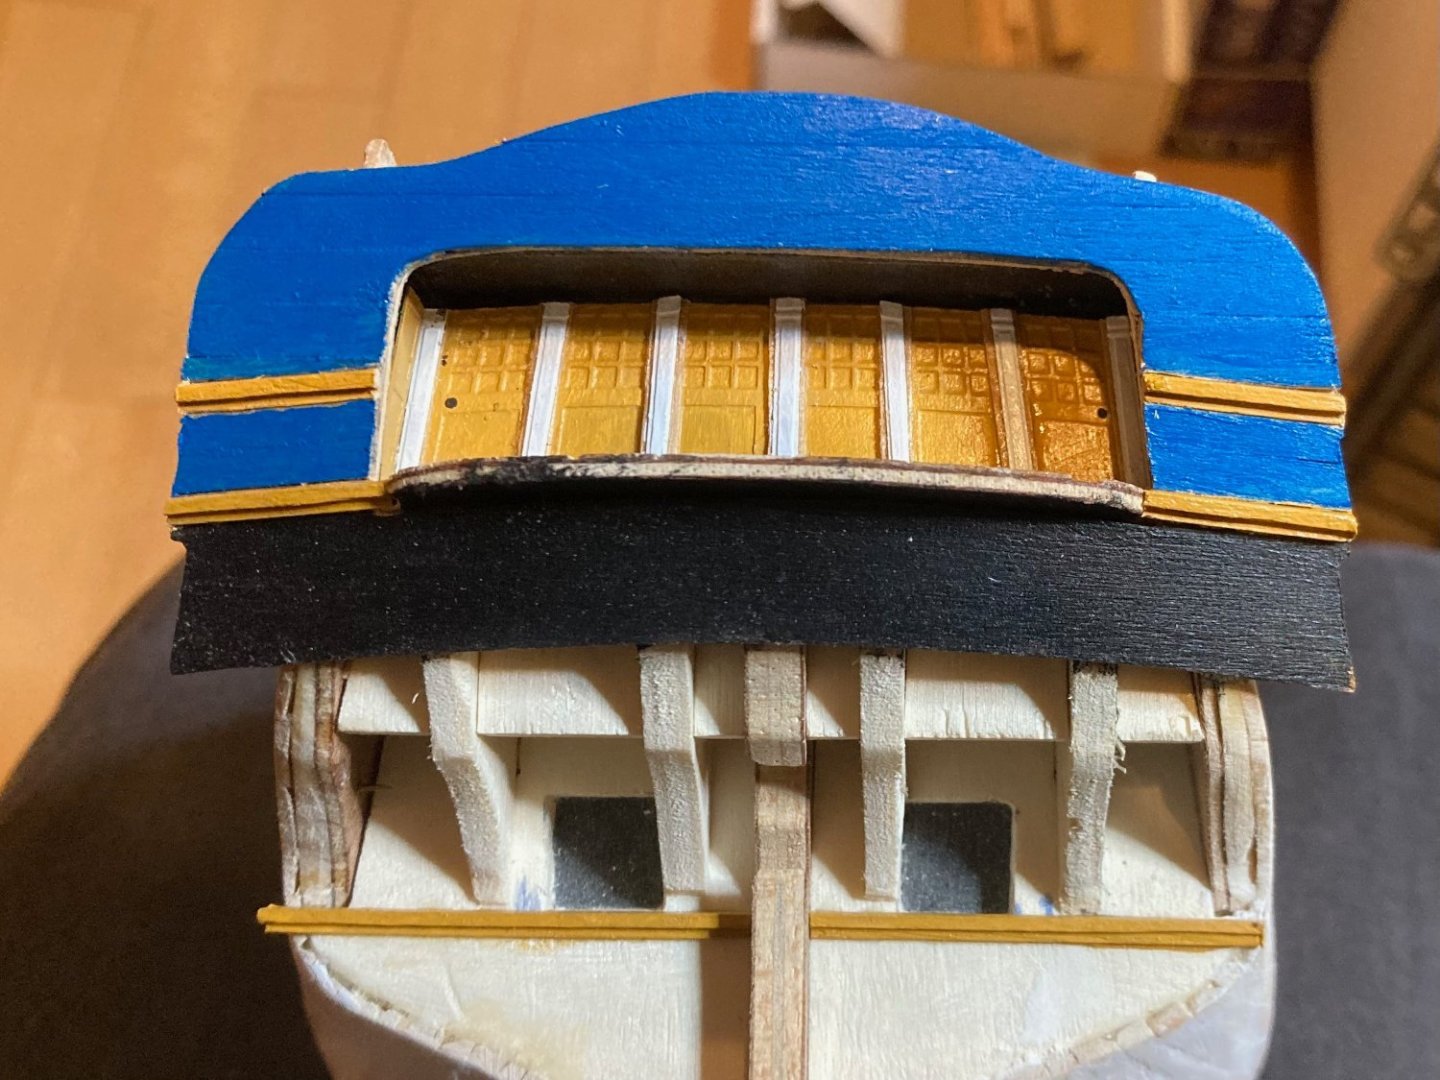
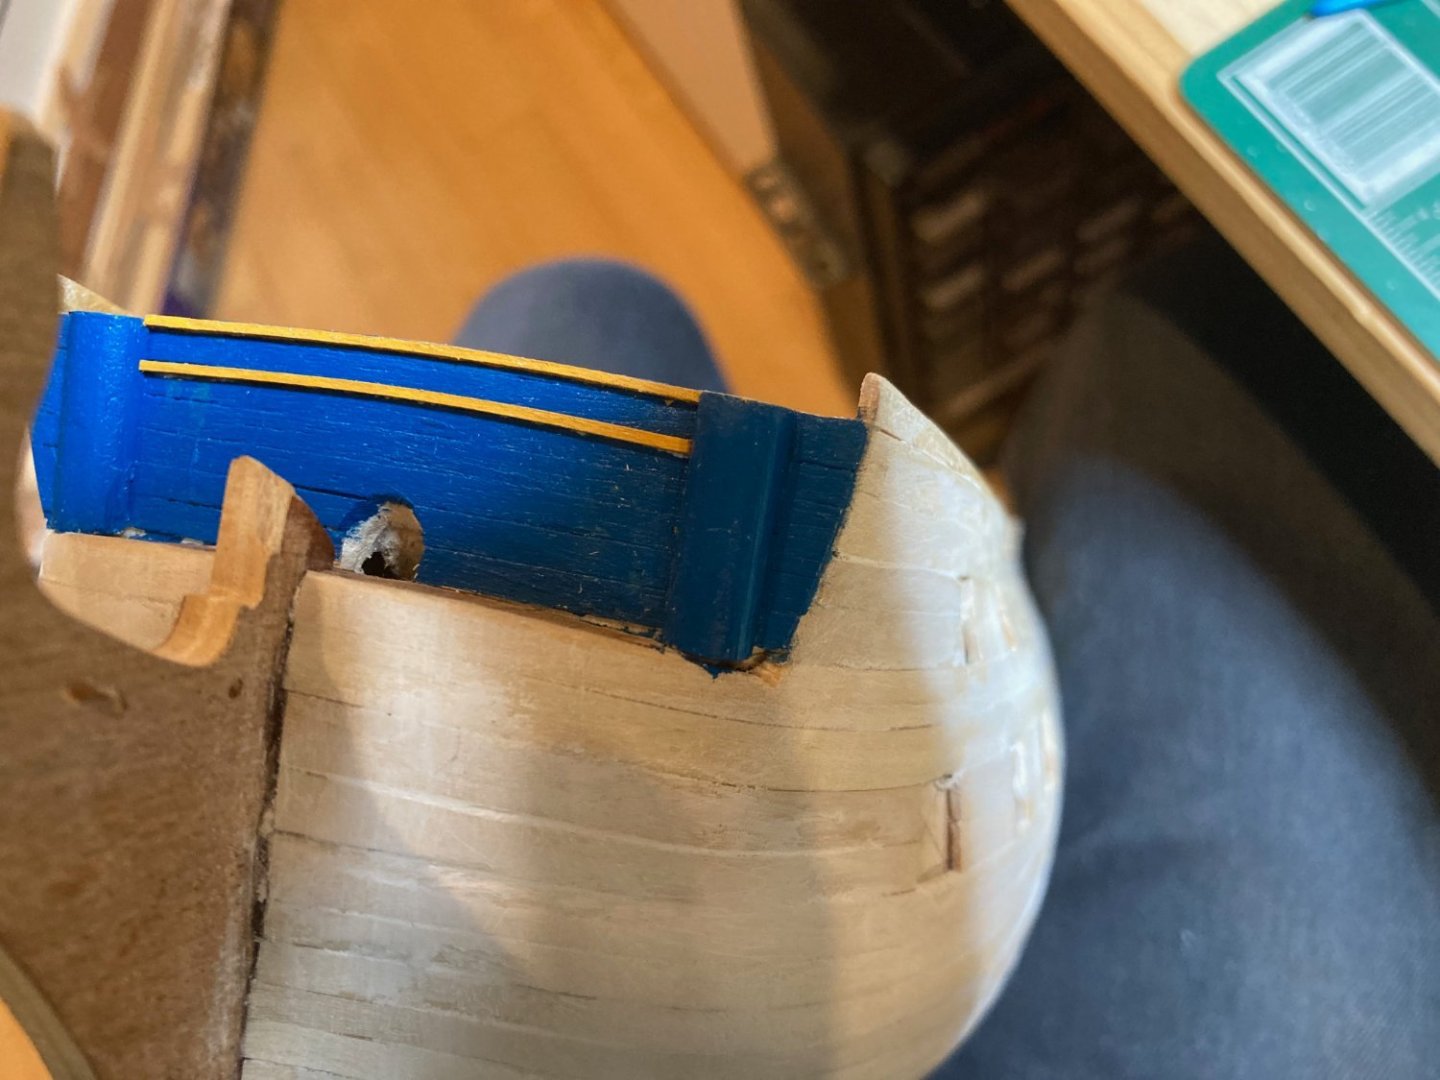
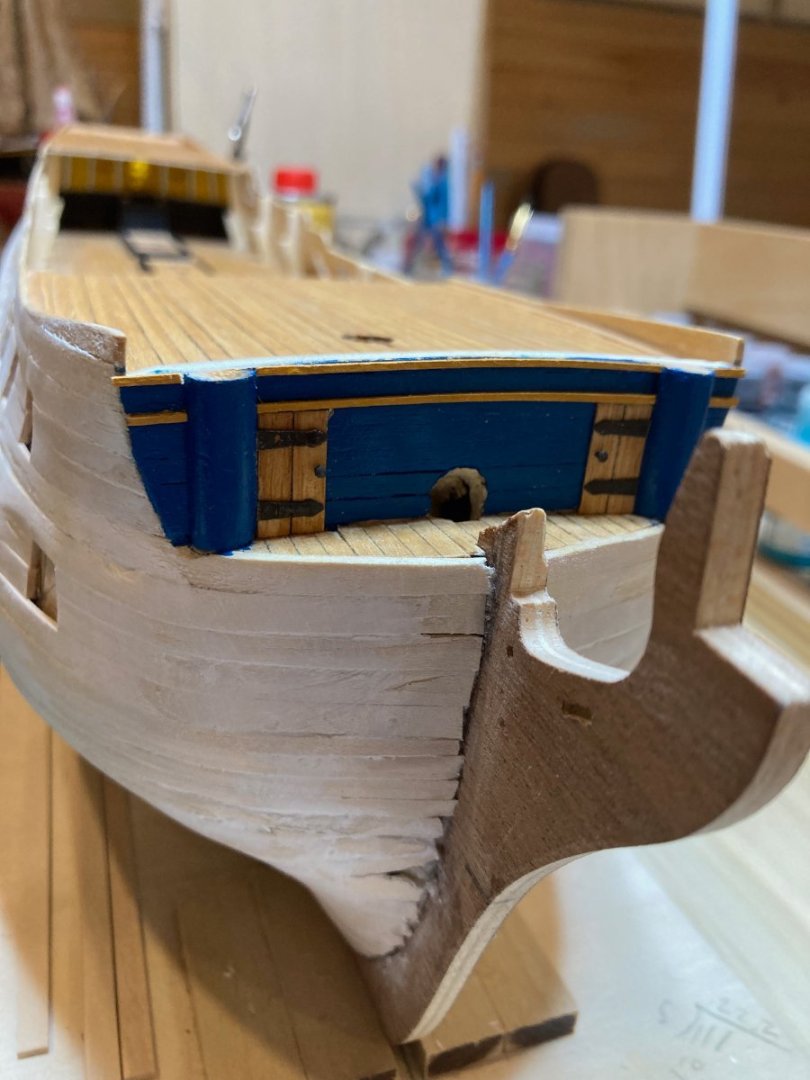
Some progress on the transom while I continue to ruminate about the second planking at the stern.....looking at the small number of other Bellona logs on MSW, I'm struck by how different the transoms are on each - all look good, but all are slightly different - for example, on Harlequin's excellent Bellona log, the balcony, moldings and bottom edge of the transom seem not to have the same athwartships curve (not sure if I can use "camber" in this context) as mine does - certainly not as pronounced. This led me to angle the molding pieces on the transom face so as to follow this line, which required also some fine fitting of the transom planking. The planking between the moldings will be covered by photo-etched parts, so I just laid these strakes in line with the molding. The transom was finished blue to show through once the stern figures are added at a much later stage, while the area beneath the balcony was finished black - some other p-e parts will be fitted there eventually. I also added moldings at the joint of the lower counter and the transom - these mark out the sills of the stern chaser ports. This has been an interesting experience - I haven't made this complex a stern area since my Blandford build over a decade ago, and that was quite tricky to work out. This one is a bit more complicated than that, so I'm trying to go slowly and to be as methodical as I can - but I'm bound to make some mistakes - I wonder if I've already made some and am just waiting to find out about it!! In any case it's still fun, so all is well. Enjoy and happy modelling hamilton


-
Thanks Allan - I'm still open to trying something to correct the issue - Roger, your solution could work - I'll have to develop some more confidence before trying it - but the exposed section of the sternpost gives an indication of the correct angle along the sheer plan, while it is relatively straightforward to determine the section line at which the issue begins. My main concern is my ability to actually do this without seriously compromising the model...I wish I had another hull to practice on! In any case, it's not always terrible to have problems and since I won't have time to work on Bellona for a while there will be plenty of time to mull over how to proceed....I thought I was decided, but I may find a way of working up to something like what you suggest here, Roger. hamilton
-
Thanks Nearshore - I had pretty much decided to go the historically-inaccurate-but-structurally-convenient route, but maybe I'll spend a bit of time studying the model and seeing if I can't manage to correct things as you suggest above....it seems that the planks would need to bend at a really sharp angle without removing quite a bit of material from the bottom edge of that bulkhead....in any case - thanks for the suggestions, illustration and support! hamilton
-
Checked out the wikicommons images and the round tuck transom is pretty obvious from the draft of "Dragon" and the paintings, though the profile drawing of Bellona is hard for me to read - I assume that the arrangement of the transoms below the wing supported a round tuck, though my familiarity with draughts is pretty limited.....I am leaning towards continuing with the build as-is, disappointing as that is, since I definitely do not want to risk the kind of major surgery that a re-build of the stern of the model would involve at this stage.....and I don't have the patience to see how far I can sand the stern down to the degree that would be needed - I'm not even sure that's possible......sigh...... hamilton
-
Thanks Allan: Sanding feels like the only option for bringing into line with Bellona's design - but I feel like the risks to the model of attempting this are pretty great...I'll take a look at these drawings and see if I can work something out...I'm honestly confused as to how I got to this point - there is no indication on the plans and Lavery's stern drawings in the AOS are highly equivocal on this part of the ship. Indeed, on at least one of the Corel plans (a profile drawing) it certainly look like the lower hull planking ends at a square tuck transom....but I haven't seen any other builder of this model make the same error, so obviously I missed something really crucial.... hamilton
-
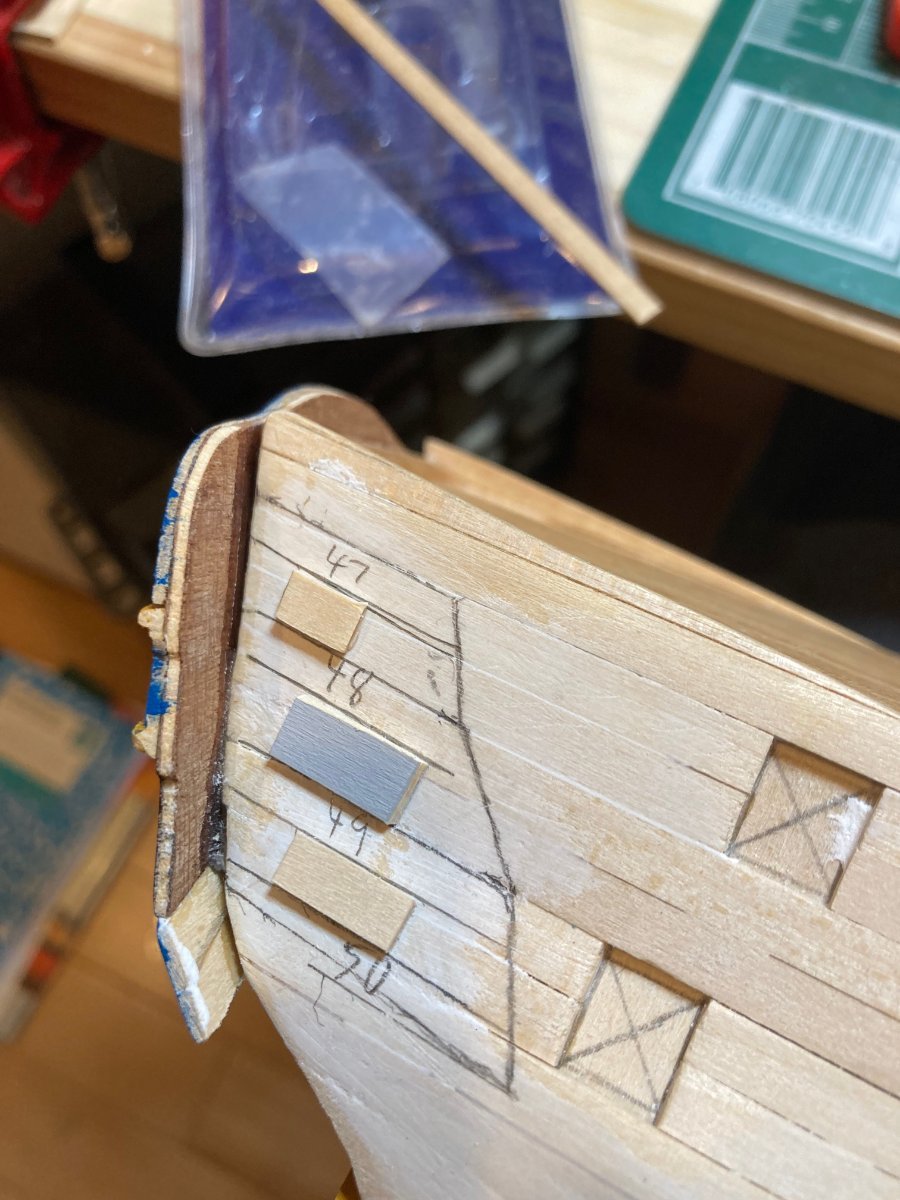
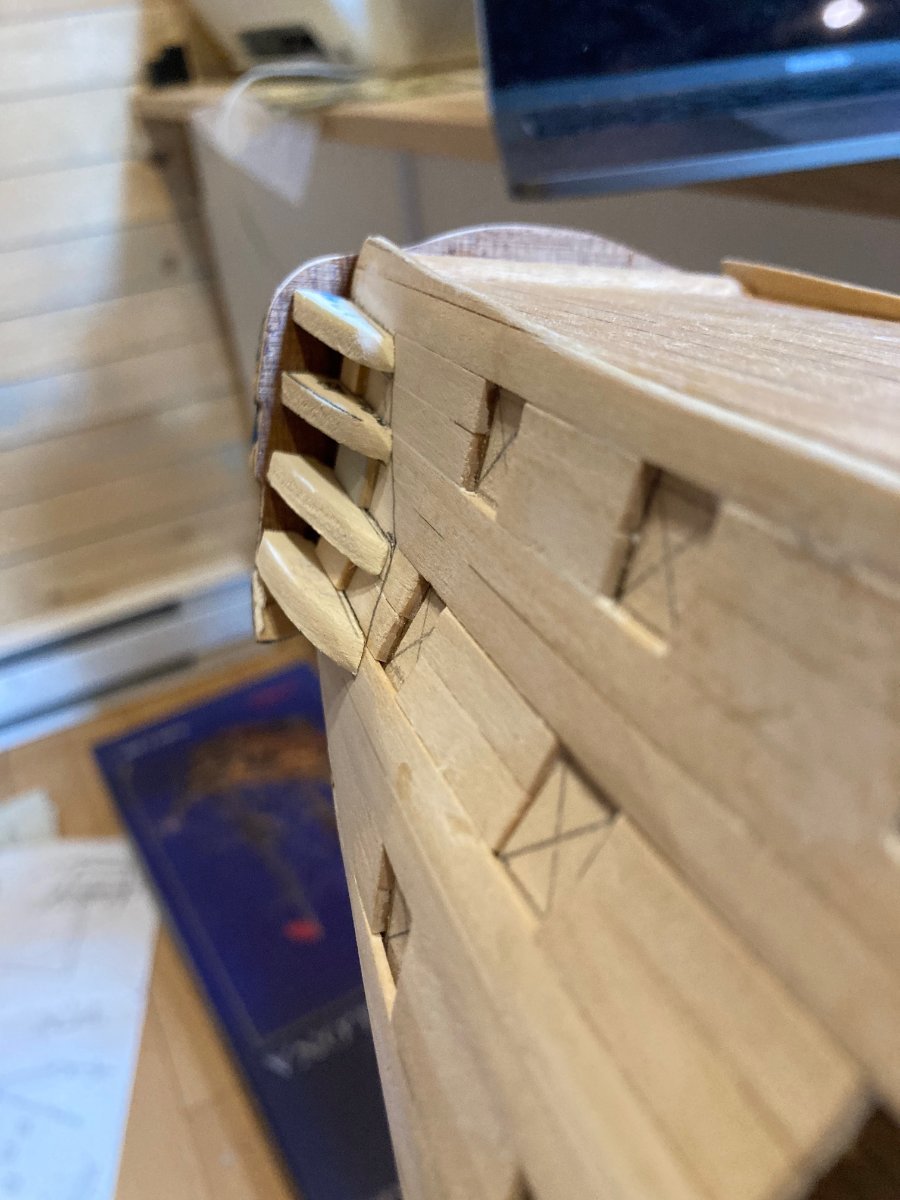
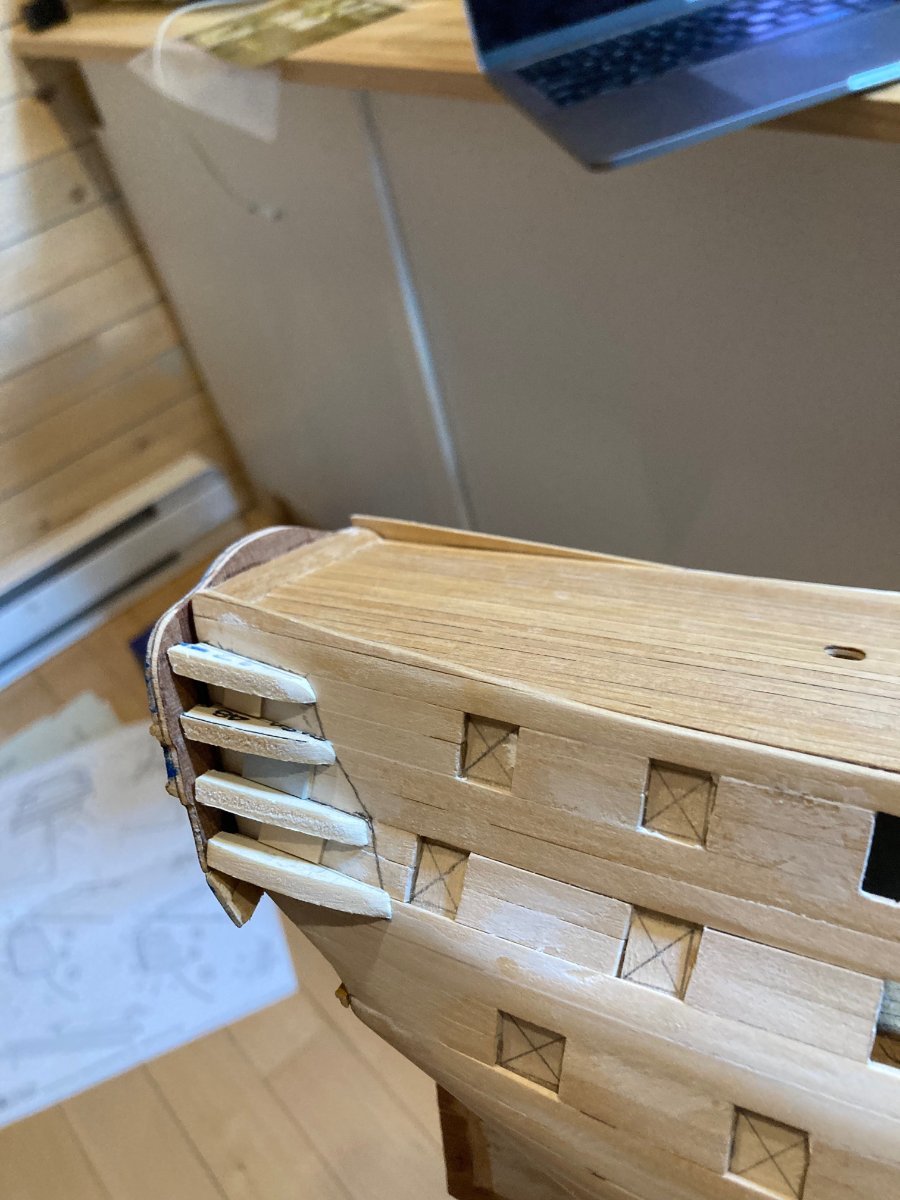
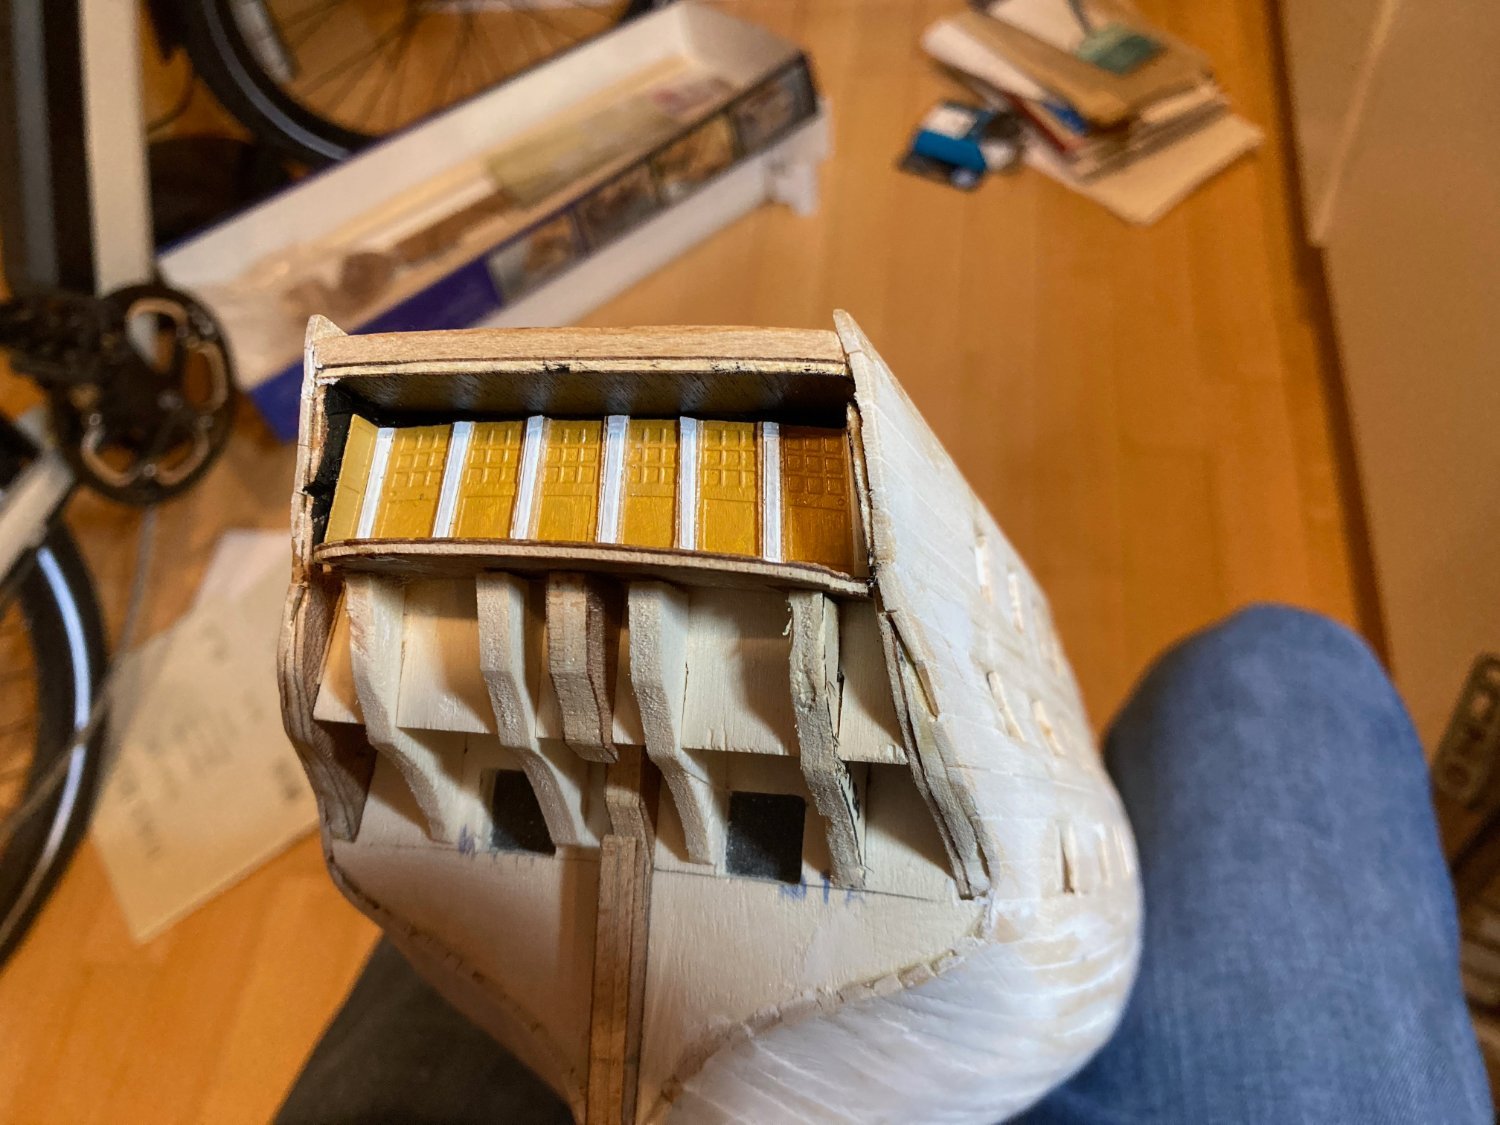
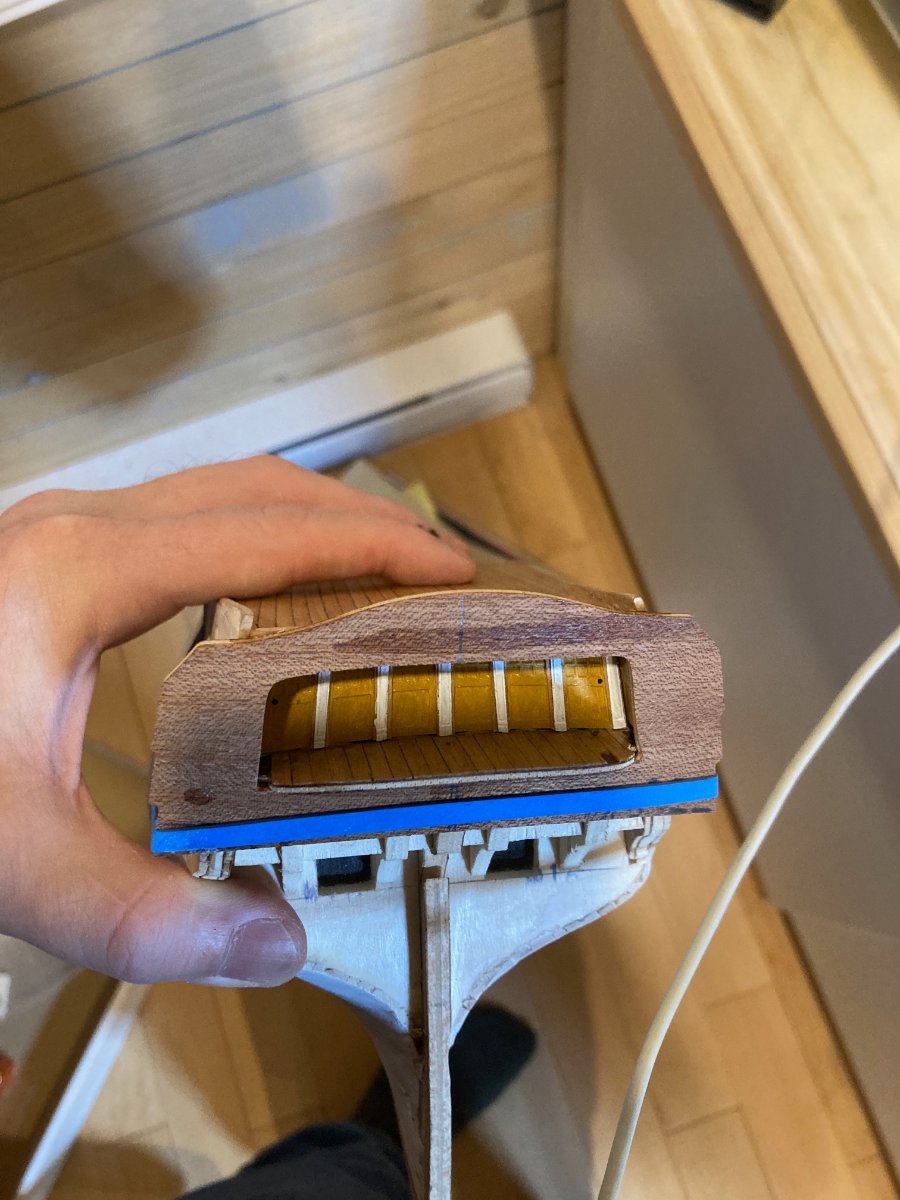
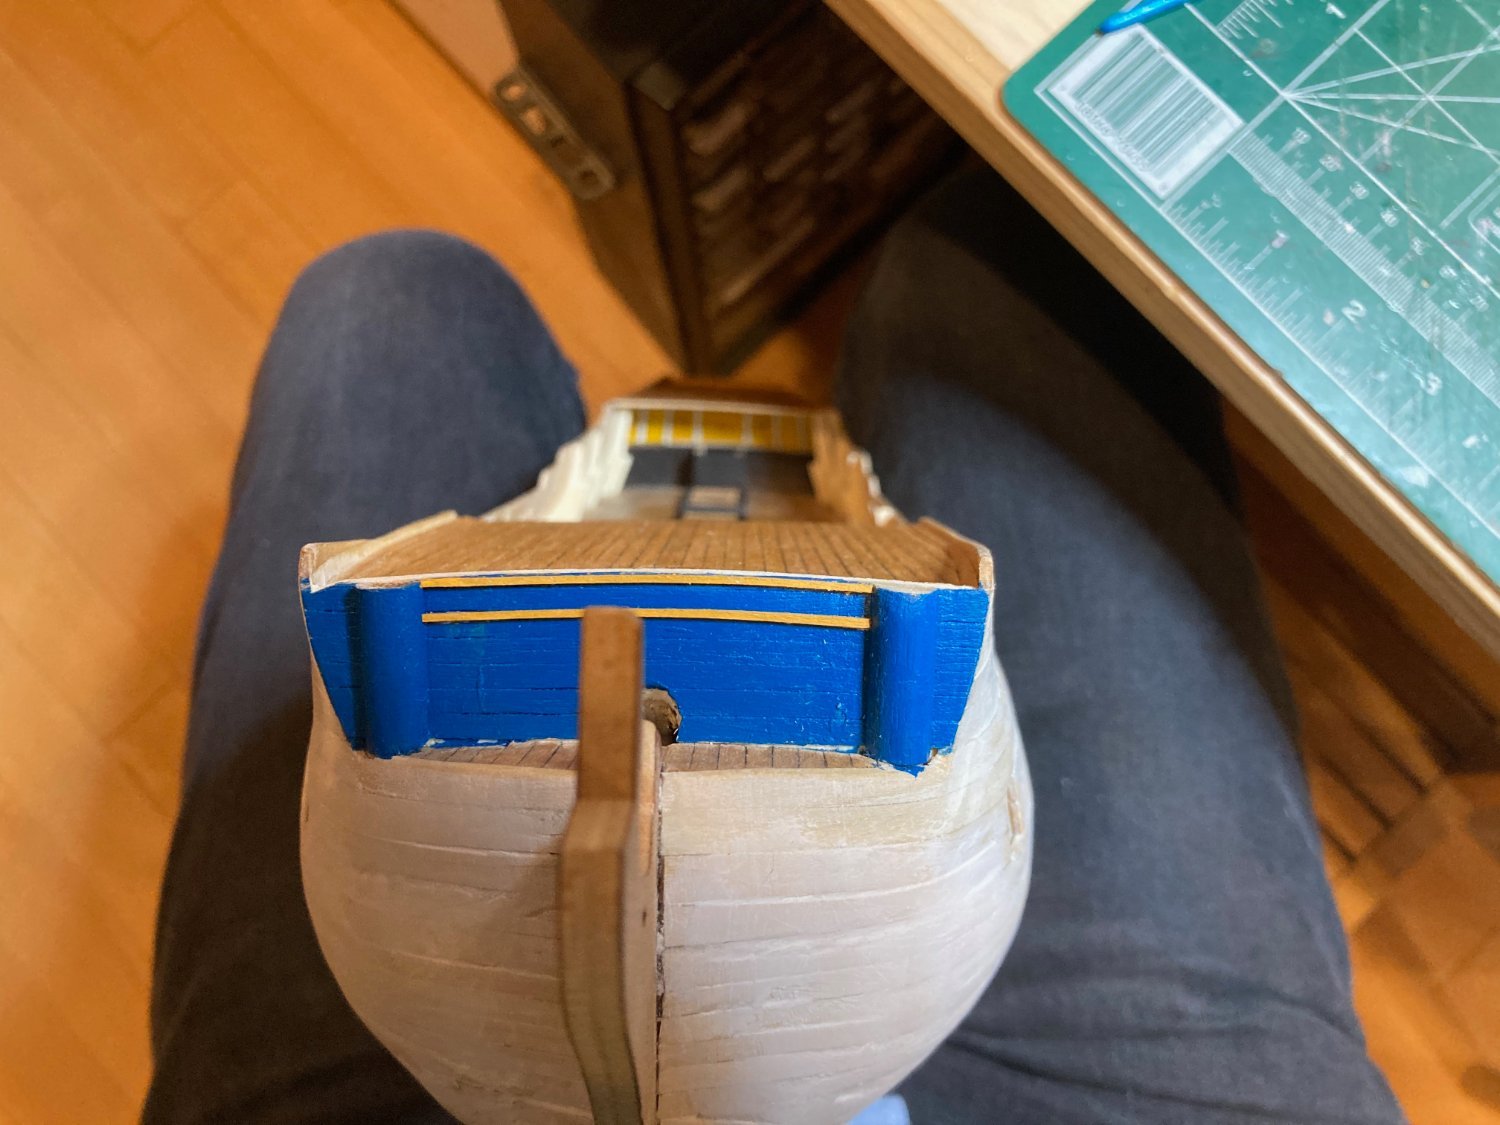
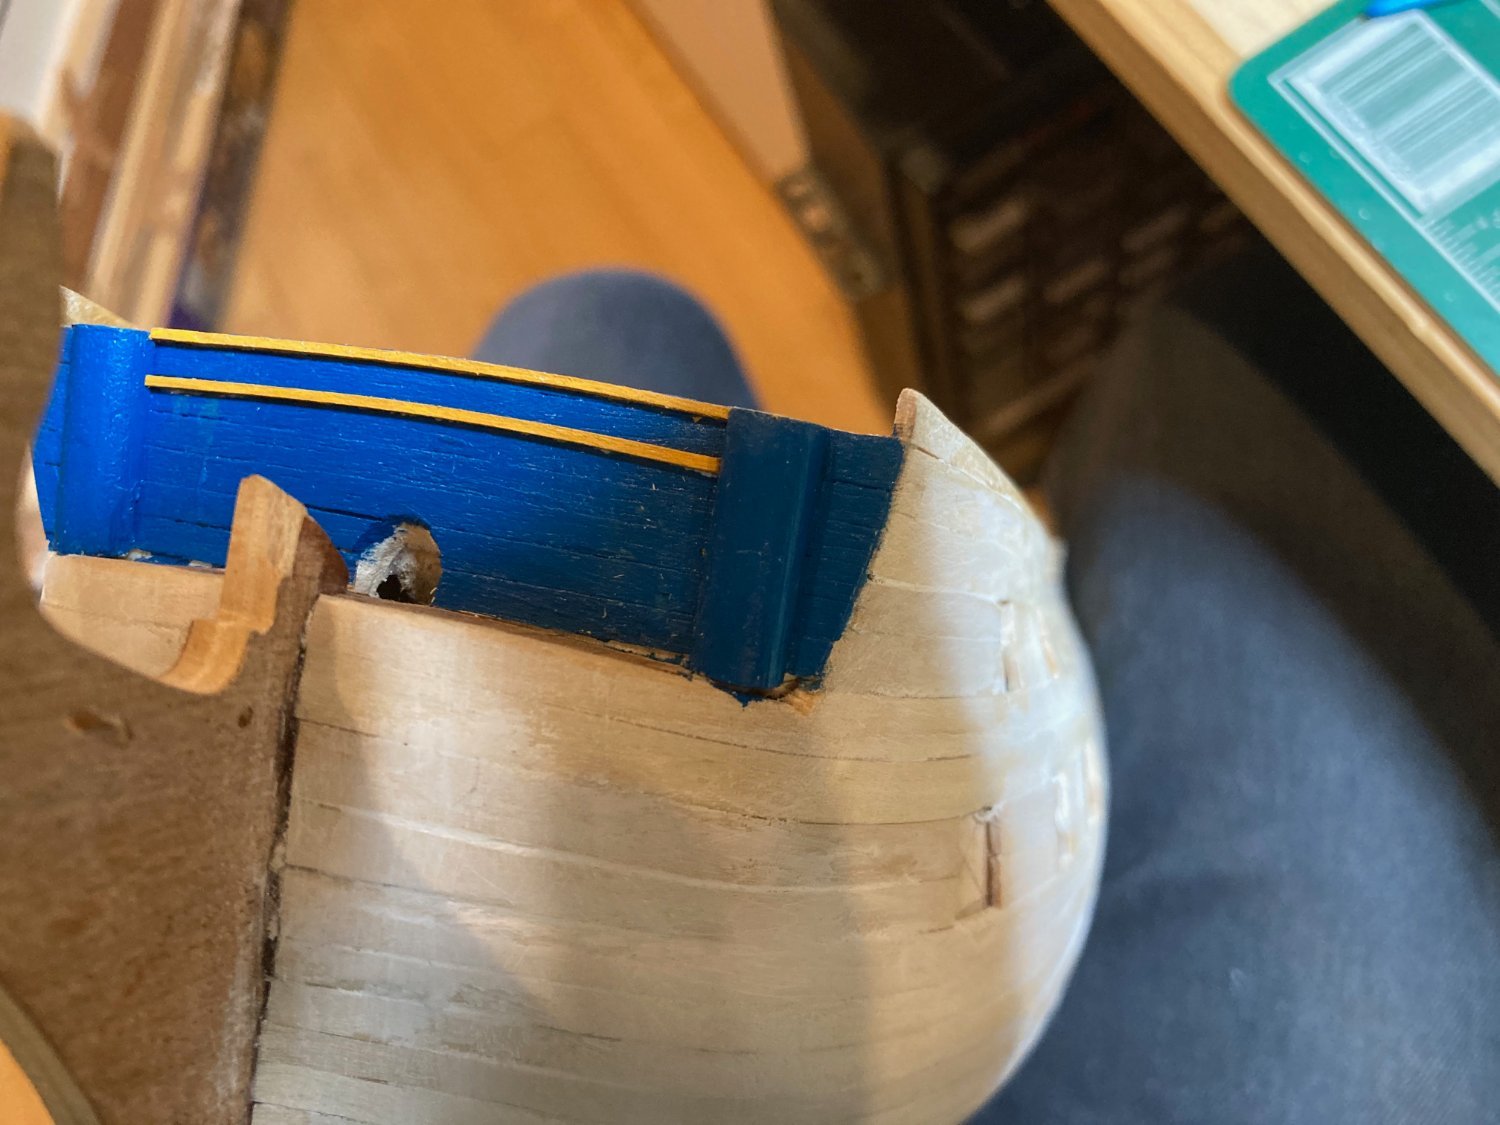
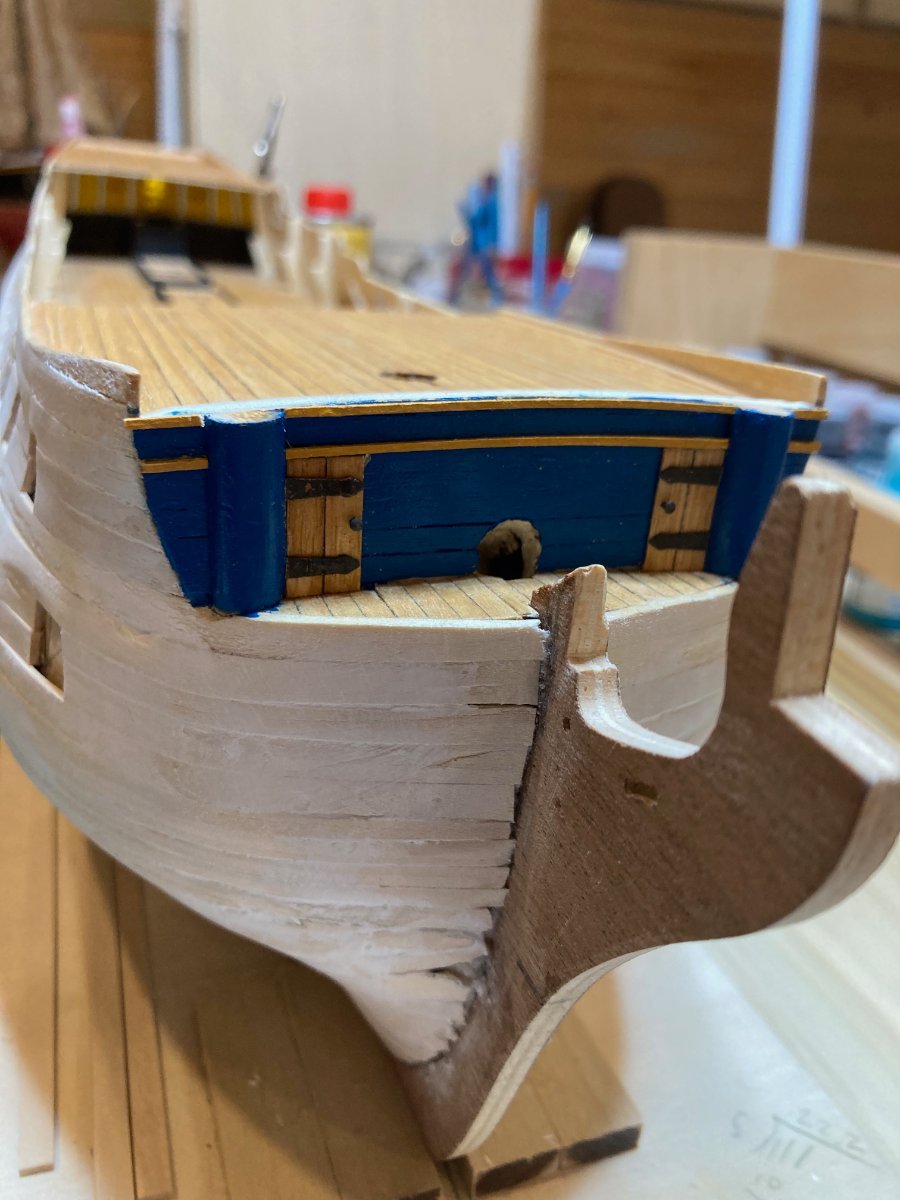
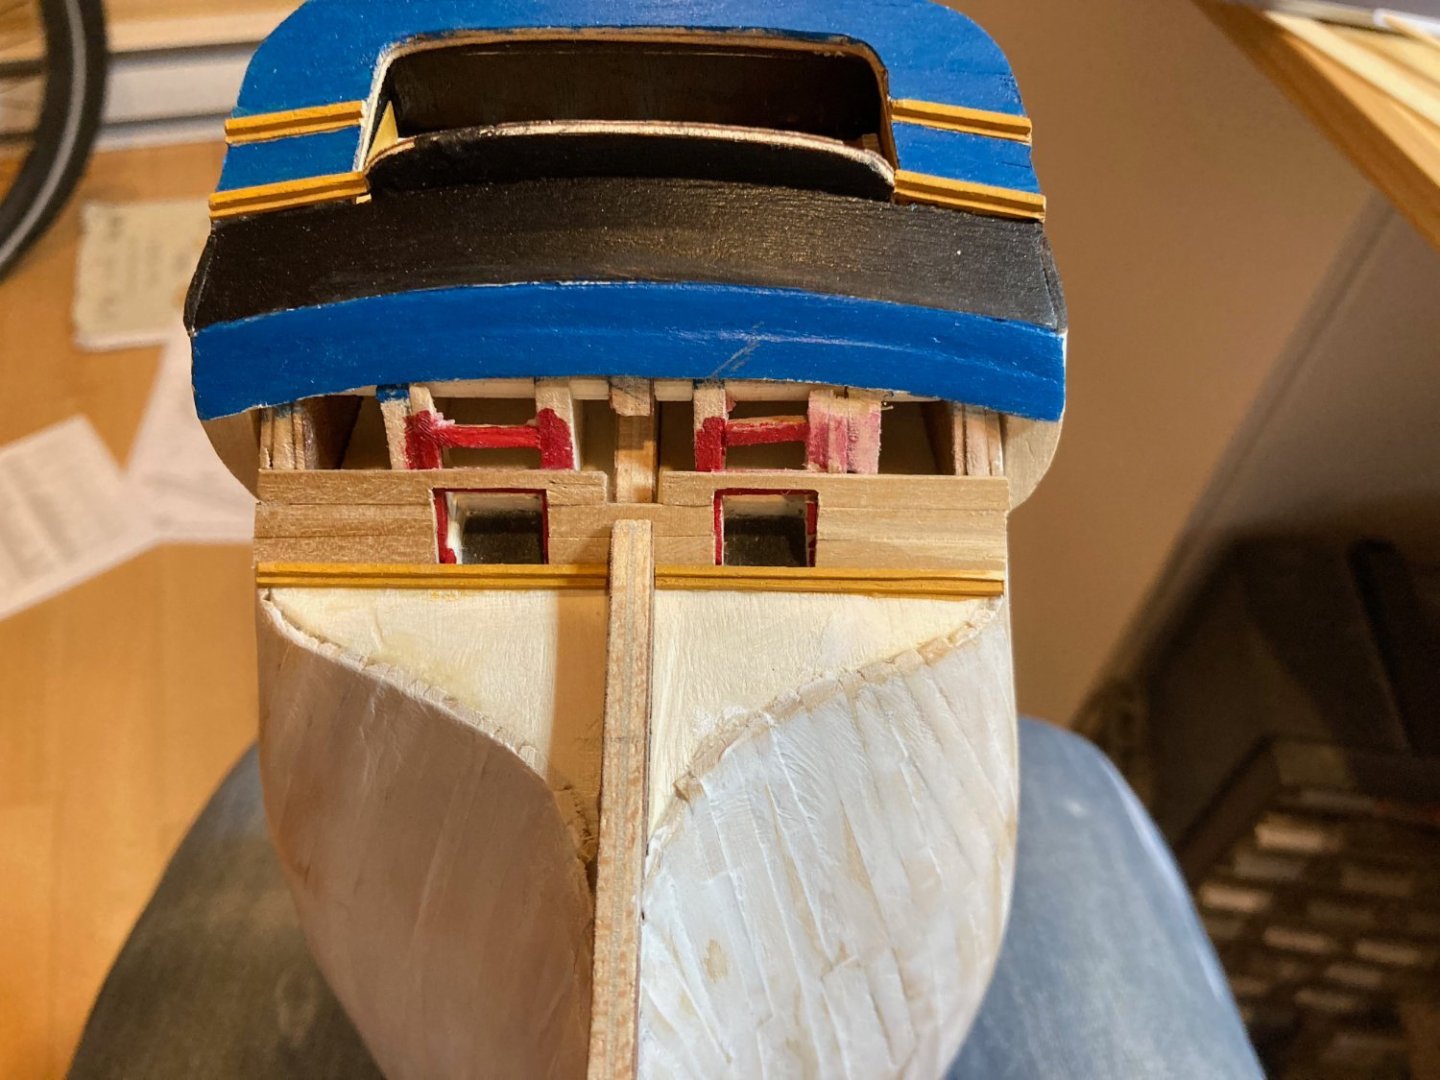
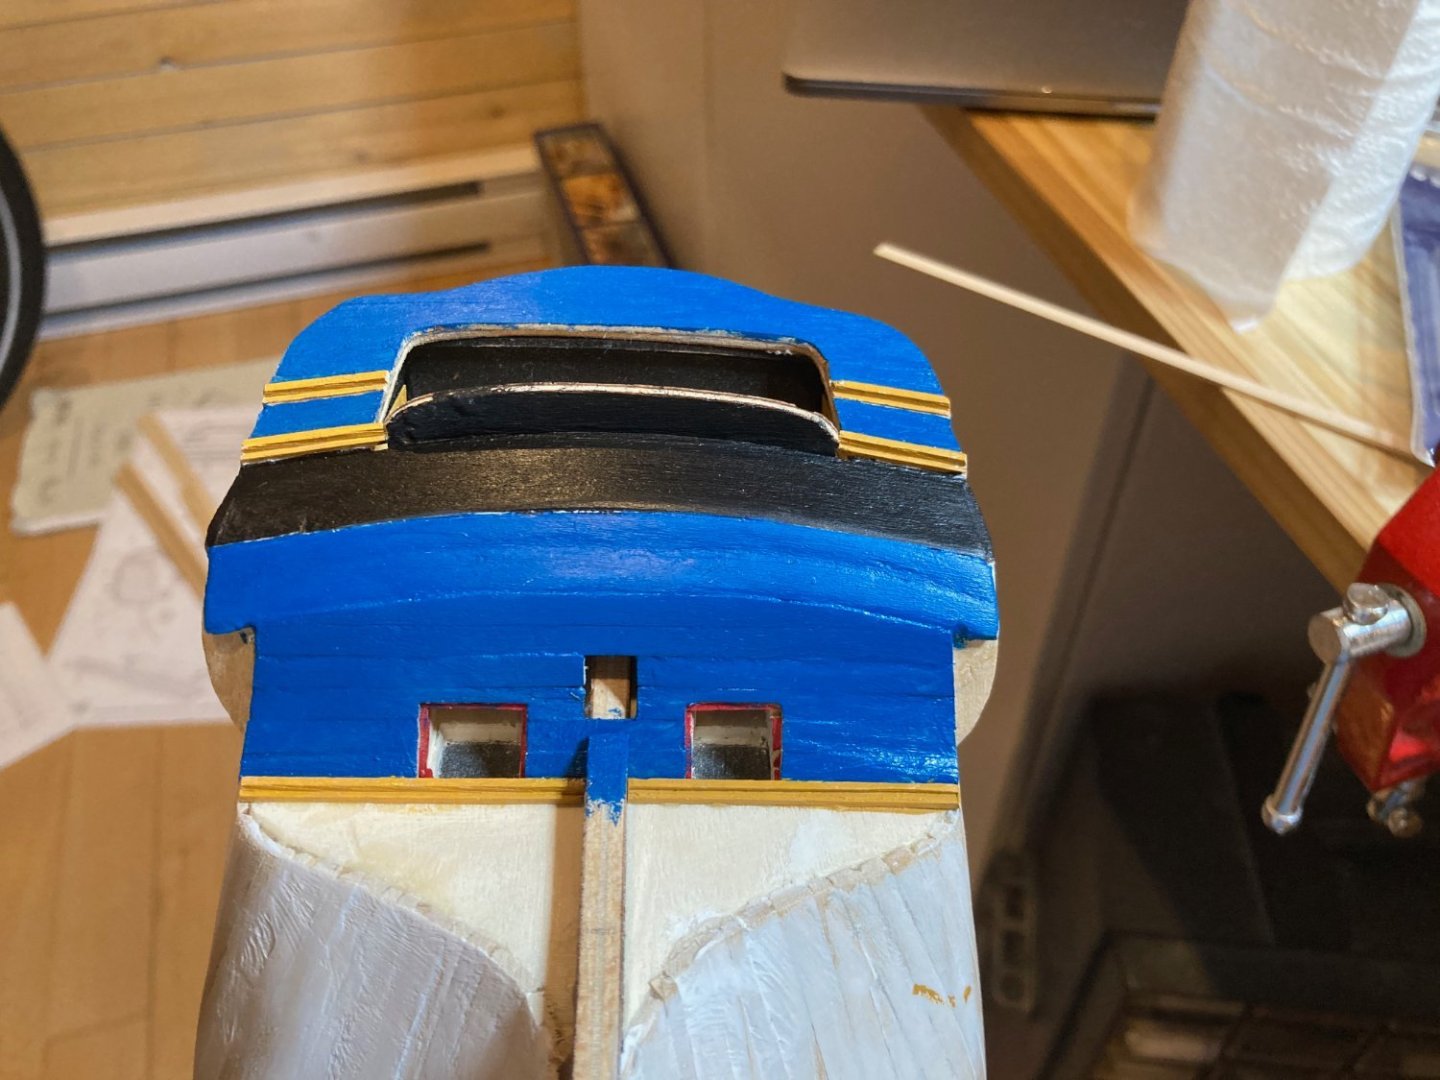
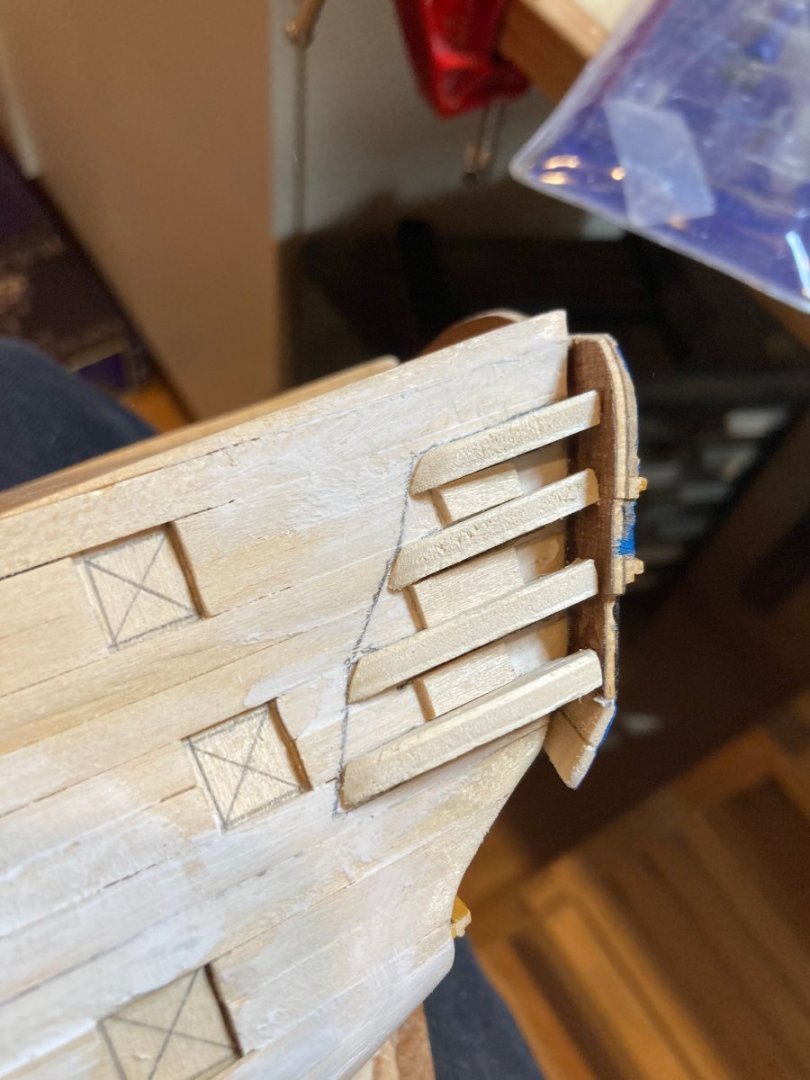
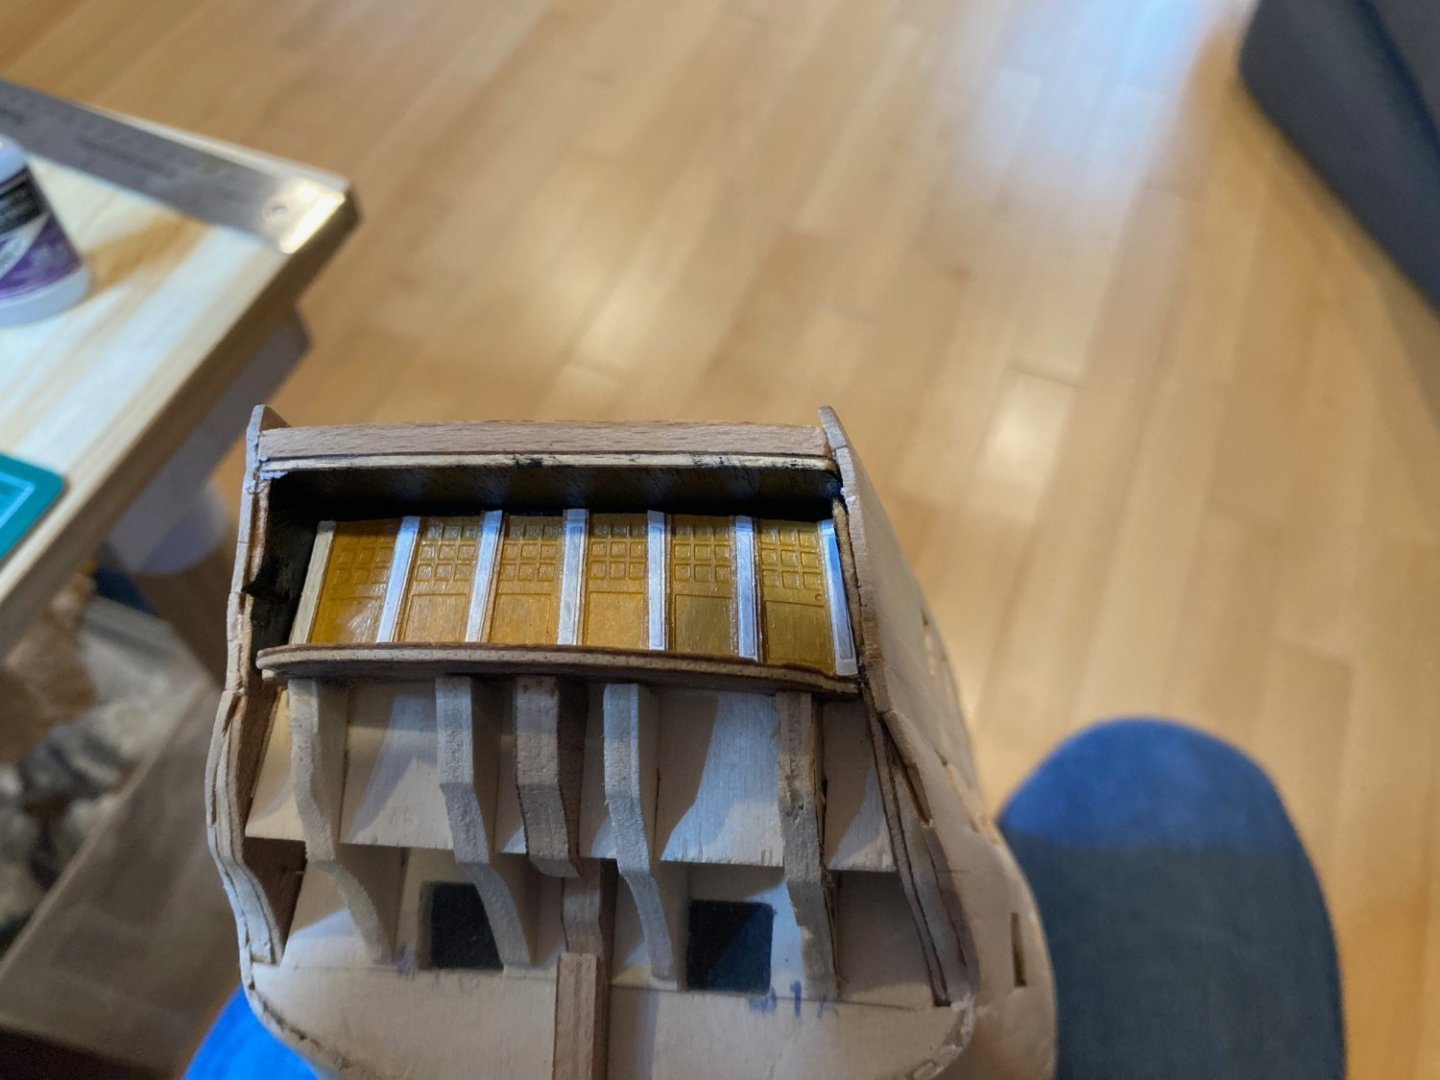
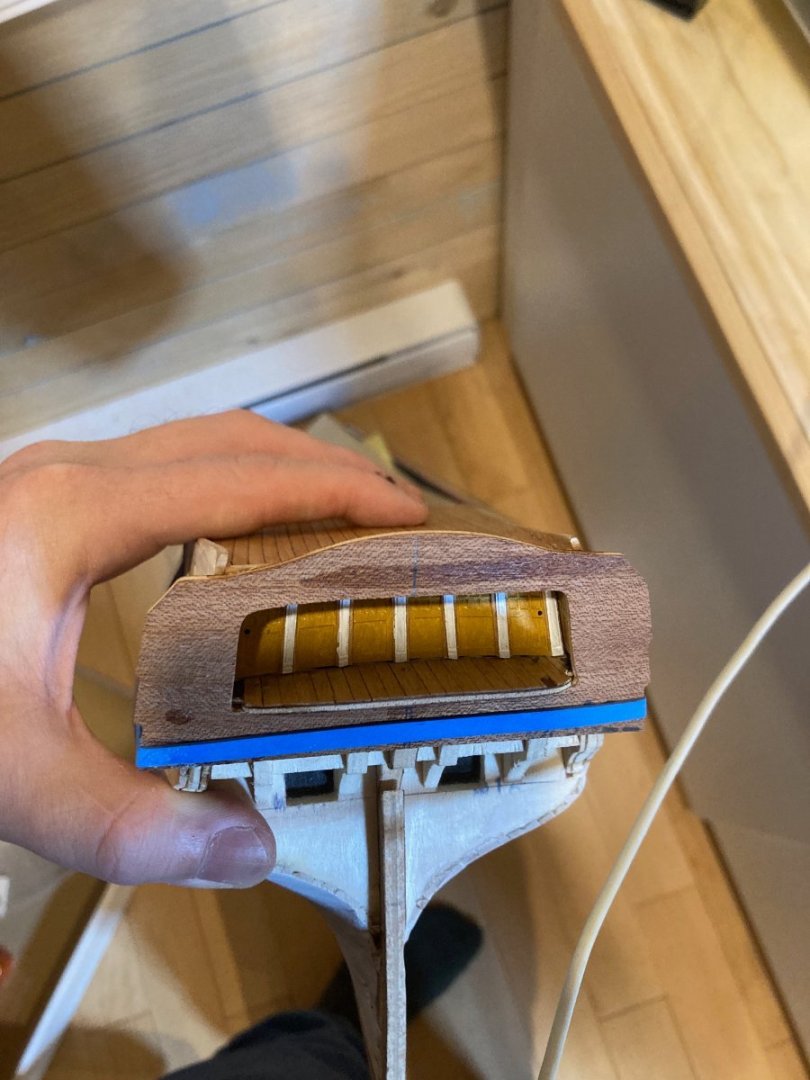
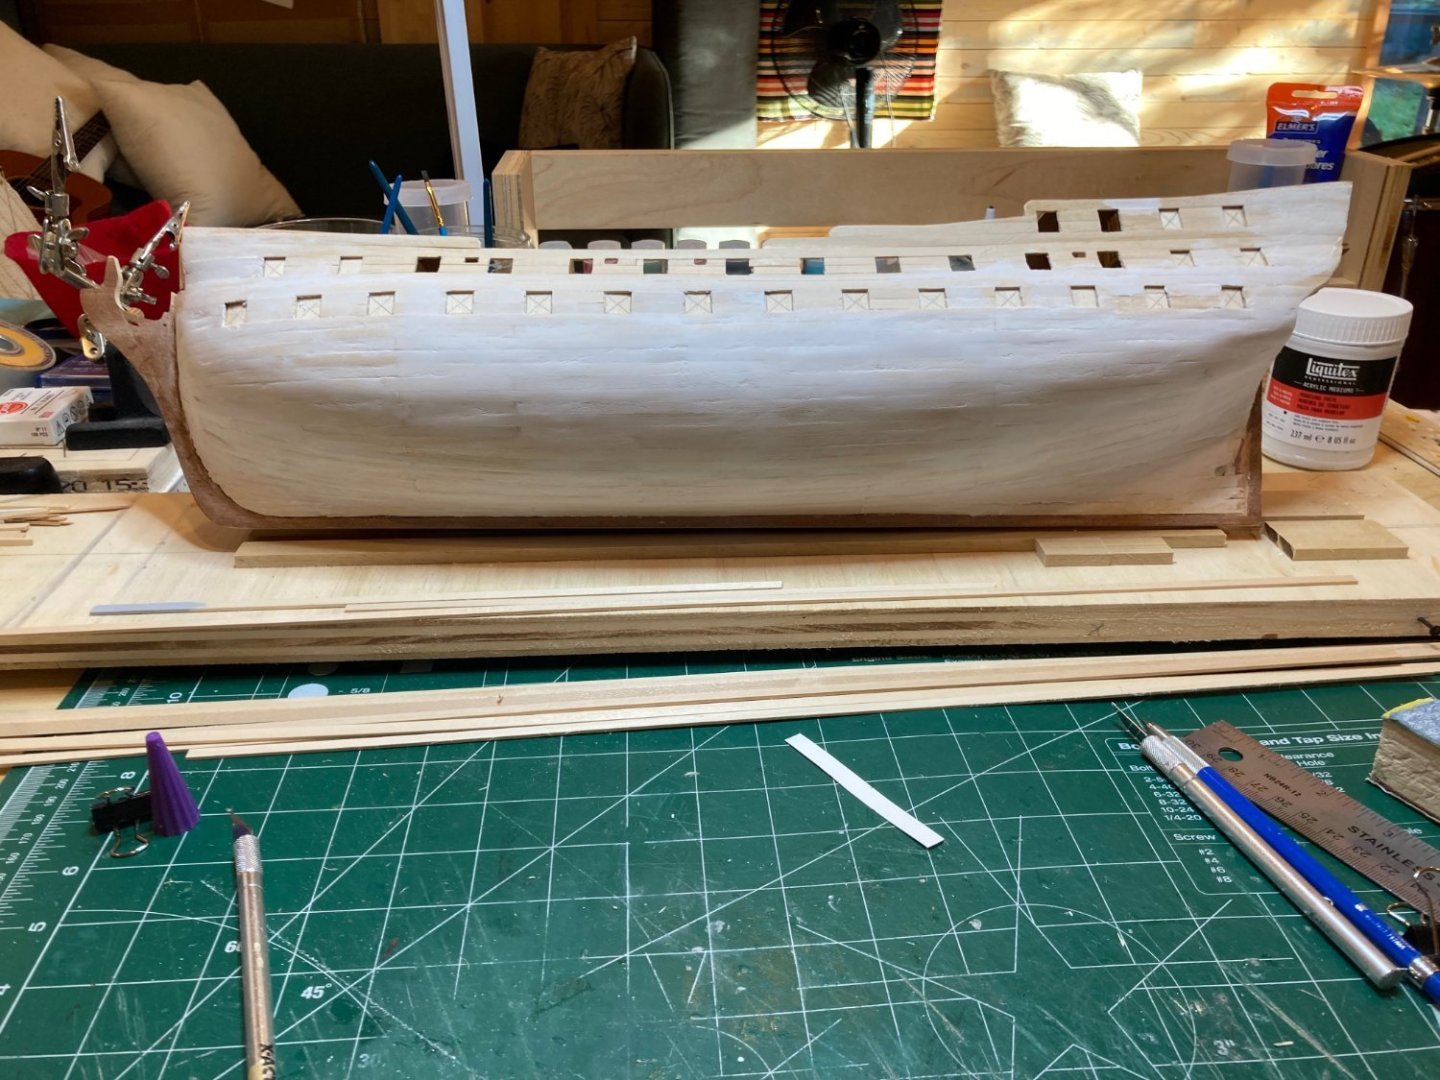
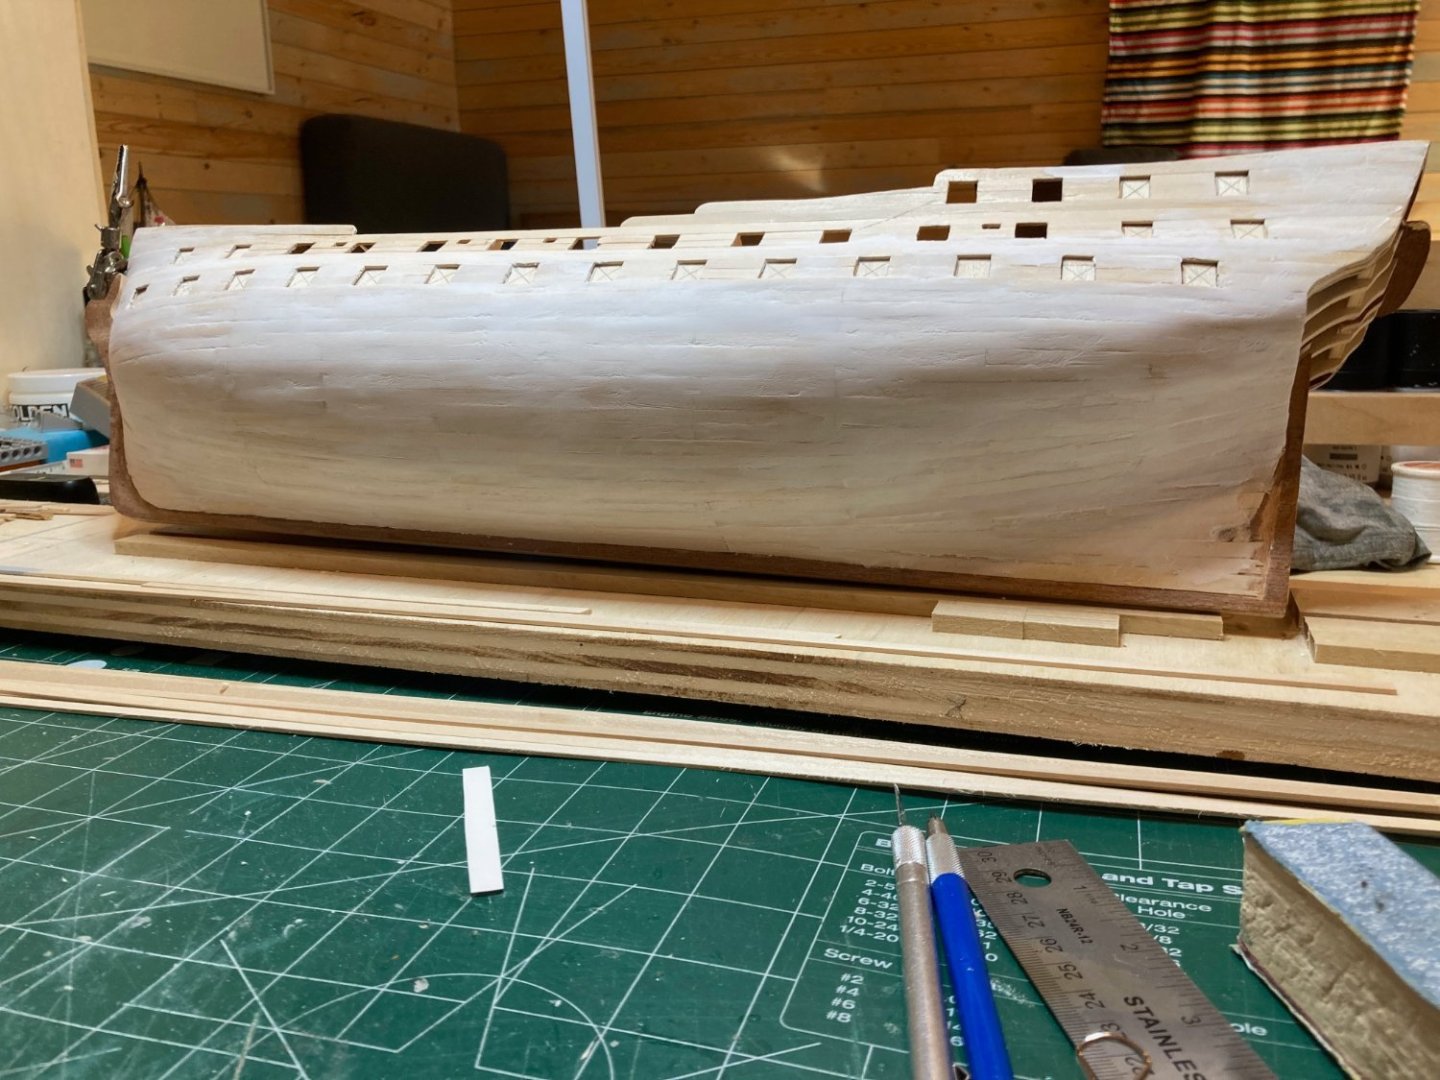
Hello there: I posted this question in my build log for Corel's HMS Bellona, but thought it might get more traction here.... I seem to have constructed the stern area all wrong - Bellona had a round tuck transom, but you'll see in the photo below that my build has produced a square tuck transom. This seemed logical to me as I was building the framework and installing the first layer of planking - the rudder post only protrudes aft of the last bulkhead by about 1/4" so adding fillers there to create a round tuck wouldn't make sense.....but when I look at other build logs (Nearshore, e.g.) there's the round tuck and I see fillers added....I'm not sure how I missed this!! But it is bugging the hell out of me now.....and I'm not sure what, if anything, can be done about it. My first instinct was to start sanding - but given how much material I would need to remove, I don't know if that's advisdable....the other option (beside scrapping the kit!! which is not a real option) is to just leave it as it is, make it with a square tuck transom and consign it to the same realm as other fabulous and fantastical made-up vessels that can be found here and there among the kit manufacturers of the world.... Anyways, here's an image that shows the problem....it may be that I'm past help here, but......even knowing that will be useful. Thanks all! hamilton

-
Well - in doing some research into the transom I discovered that I've actually done the stern all wrong!!! Bellona had a tuck stern, as can be seen in Lavery's Anatomy of the Ship, and in several of the build logs here - I took a look at both Yves Vidal's CAF build and Nearshore's Corel build to confirm....But if you look at the photos of the stern above on my build, you'll note that I terminated the lower planking on the edge of bulkhead 19, rather than shaping it as a filler block to define the tuck of the planks at the transom! This is a "square" transom, which can be seen in earlier ship designs....Corel's plans do not make this obvious - though if I was paying attention I probably could have caught this...... I'm not sure what to do about this now - I feel like I have two choices: 1. Continue as is, plank across the square transom and thus deviate in a serious way from Bellona's actual structure; 2. Try to re-do the stern area somehow to correct for my mistake Option one is obviously easier, but I would prefer option 2 - except I have no idea how to alter the stern area now to bring it back into line with the proper planking arrangement.....I could try just sanding the hell out of the stern , but not sure how effective that will be. Adding filler material doesn't seem possible without really throwing the sternpost/rudder arrangement off......arrghhhh!!! Any suggestions will be most welcome..... hamilton
-
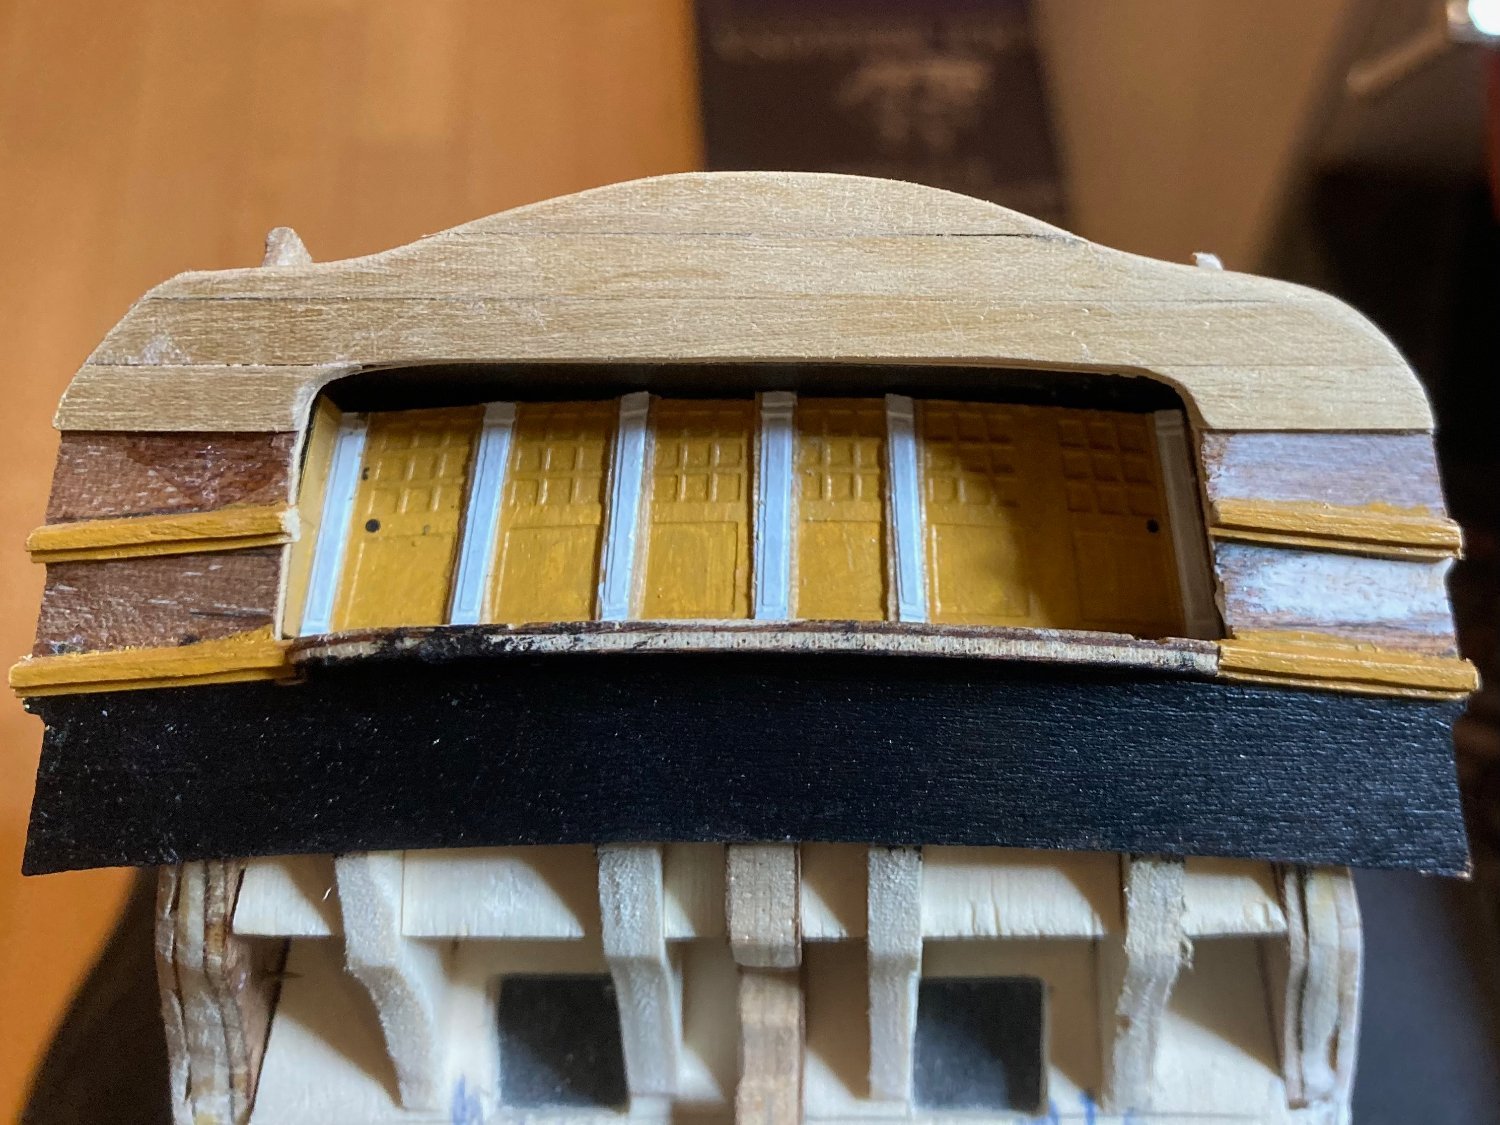
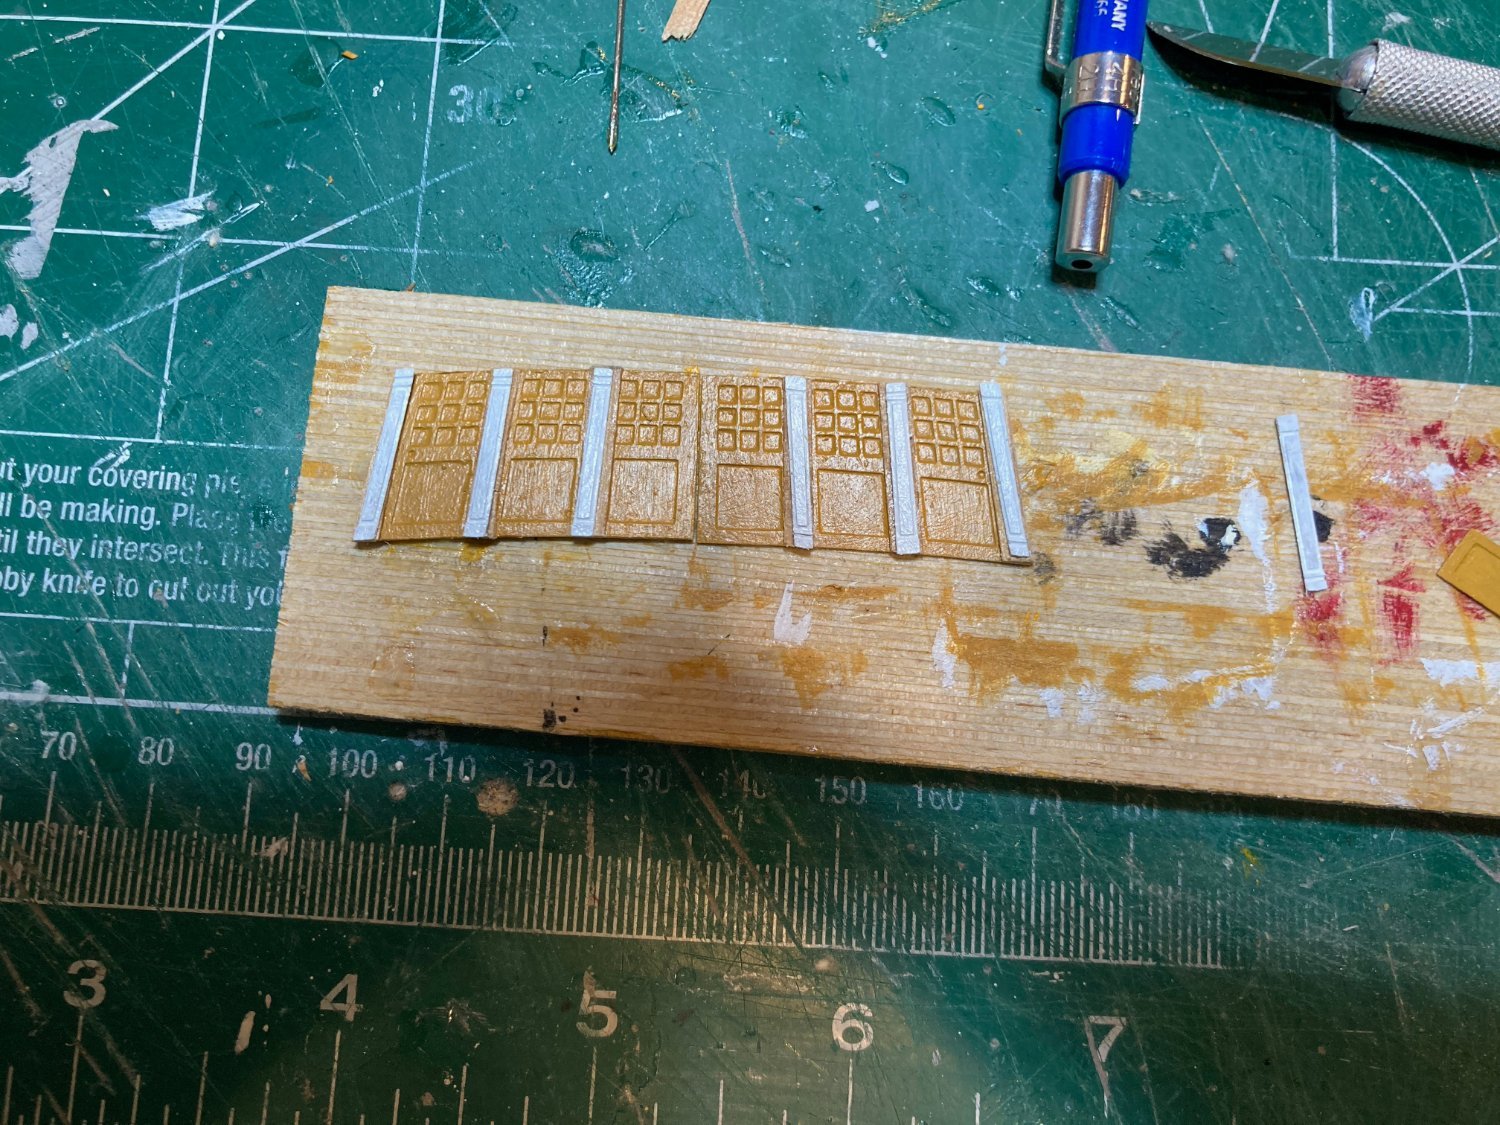
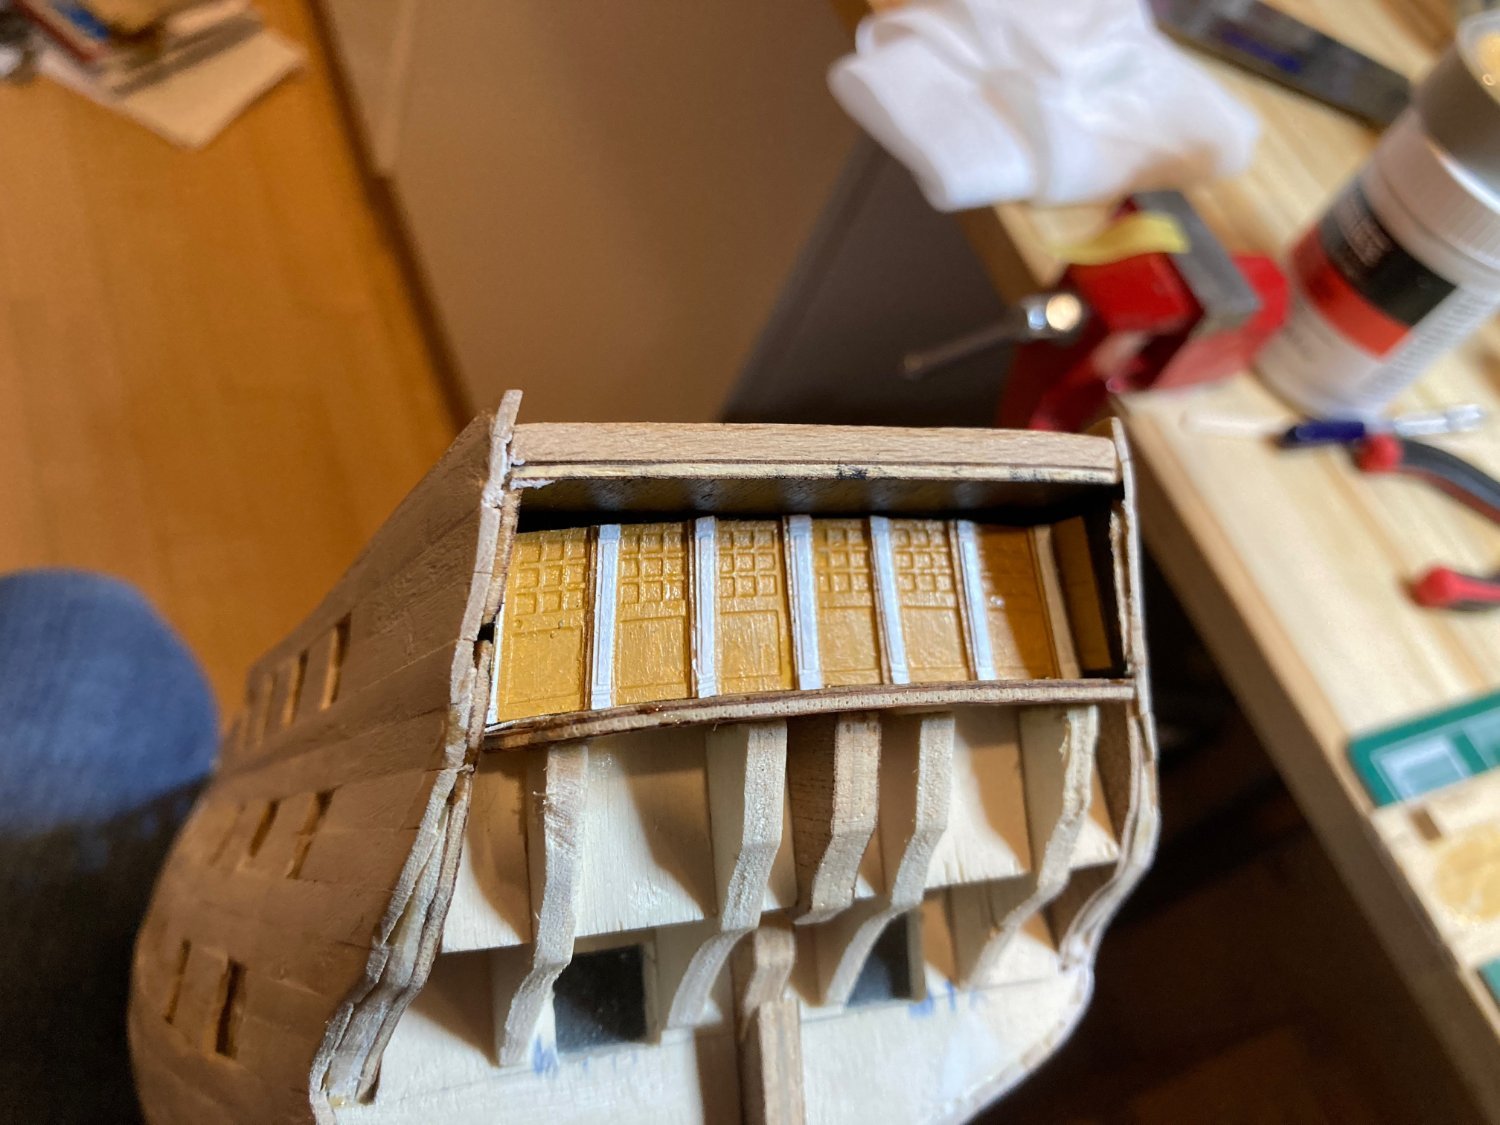
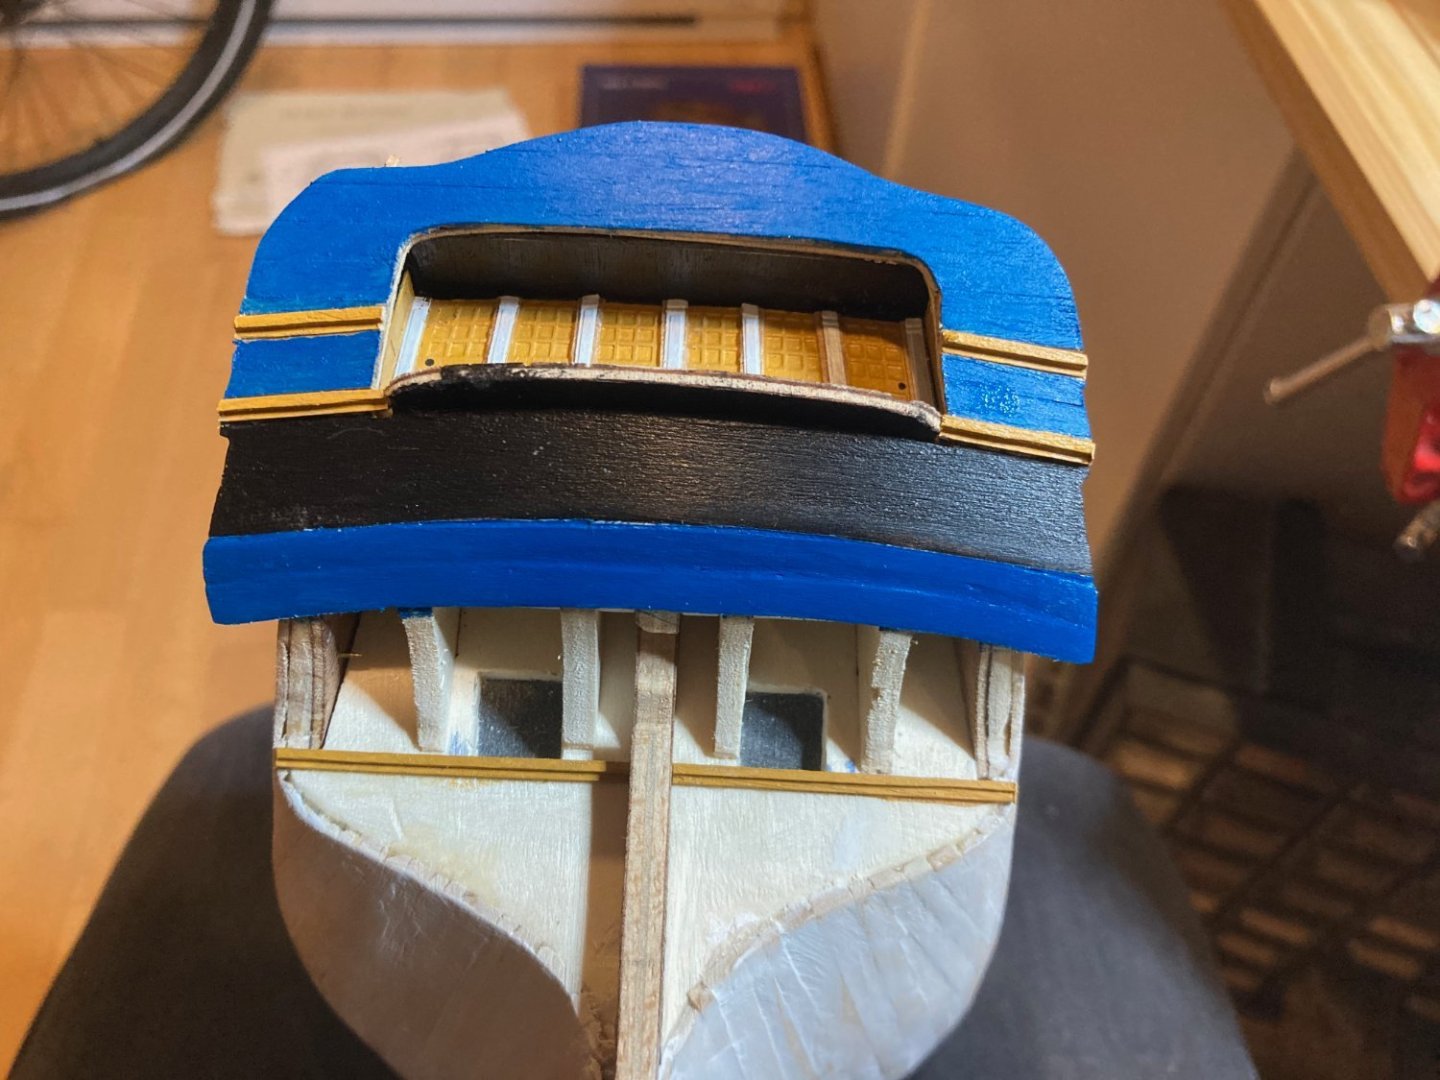
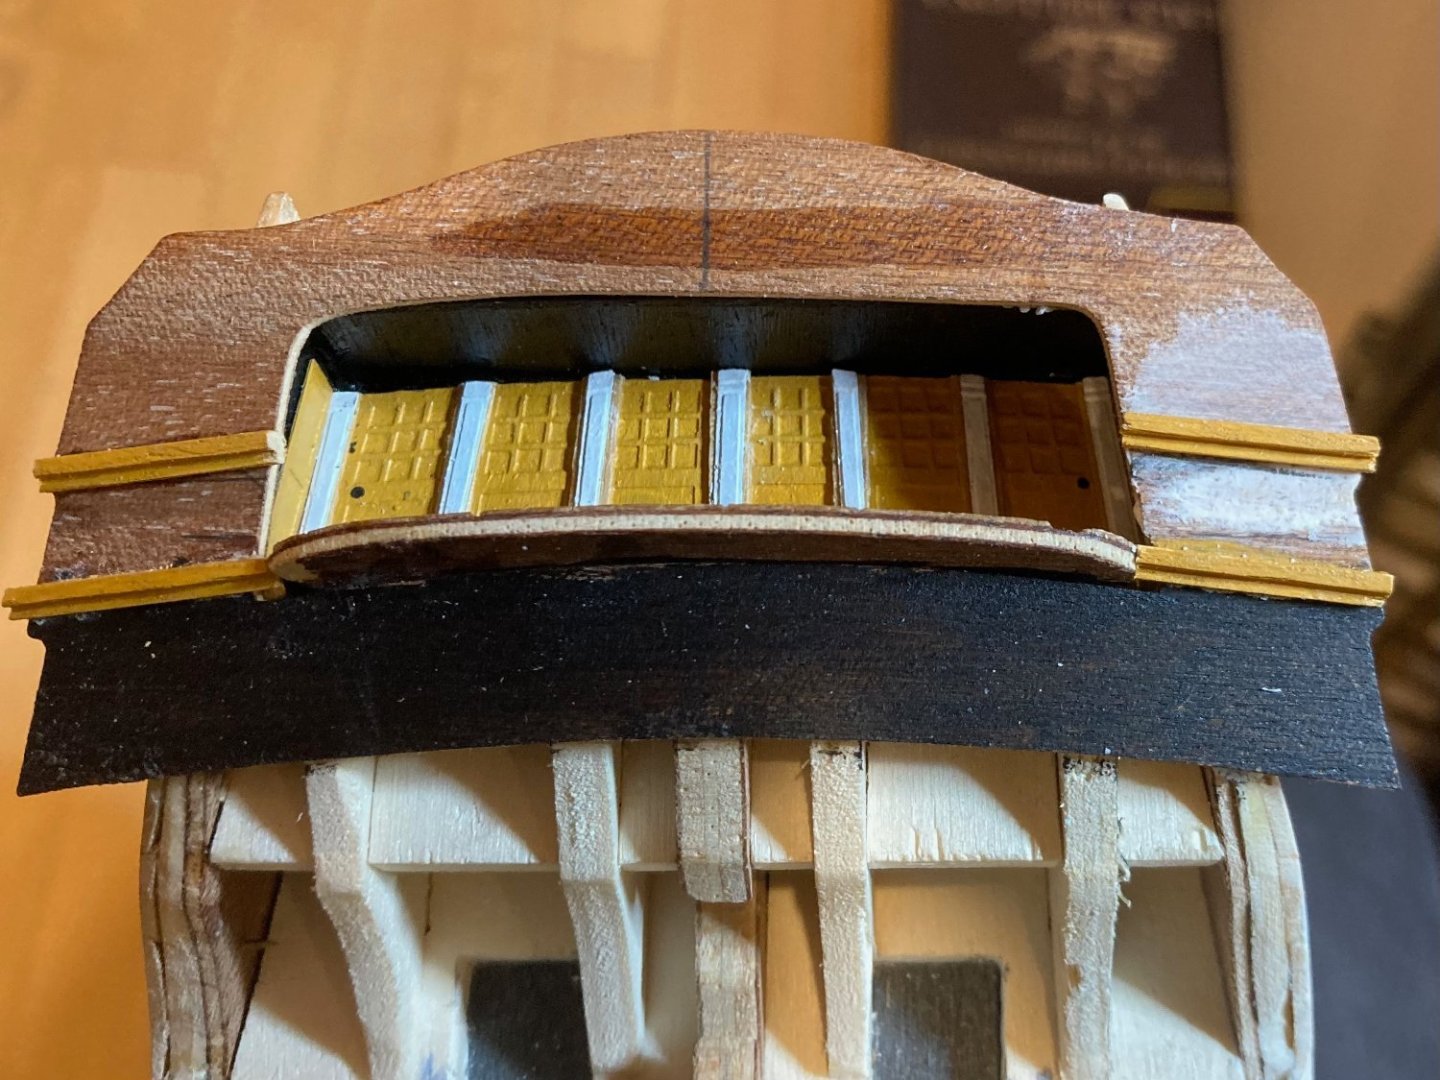
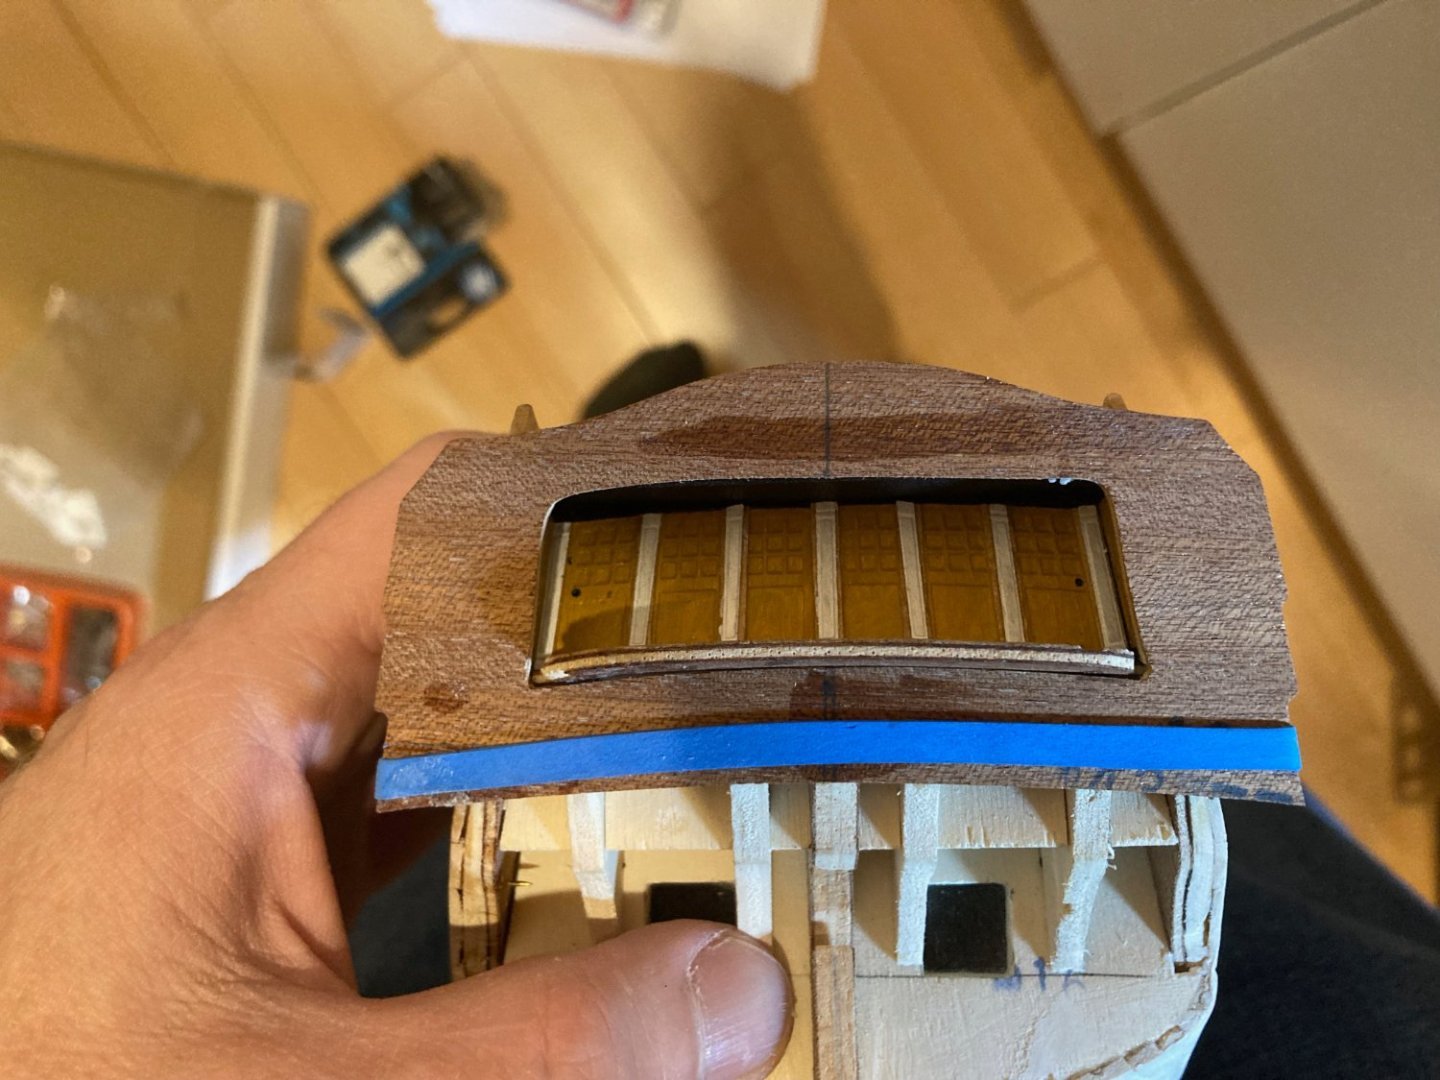
Hello there: Work has now started on the transom. I finished the photo-etched bulkhead part in yellow ochre - it comes in two parts with a central pilaster on its tanganyika mount serving to cover the gap between them. Unlike the p-e part for bulkhead 13 on the q-deck, this one fit quite well, with only a roughly 3/64" gap between the two parts when they were fixed to bulkhead 19. There are also two photo-etched doors that are fitten to port and starboard - this leaves a noticeable gap where the framing (painted black) is visible. I'm not sure if there is some subsequent element that covers this gap, or if it is a weird design feature - I'll have to study the plans a bit more to see what's up there.... Attaching the CNC transom was pretty straightforward - just had to mark the centre line for correct positioning and then "clamp" it in place with elastics. Pretty happy with the results so far but I think this work is about to get very complicated and finicky with the quartergalleries, counter planking, etc. Not sure when I'll be able to get back to this in the lead-up to Christmas, but hopefully I can scratch some time out at the bench here and there....in the meantime - enjoy and happy modelling hamilton


-
Really nice work! hamilton
-
Looks really nice Kurt - happy holidays to you! hamilton
-
OK - now that the lower hull planking (lumpy as it looks) is complete I can take a bit of a breather. I've now turned to the beakhead and the stern balcony area before commencing on the second planking. I spent this morning prepping the photoetched parts for the balcony and finishing/adding moldings and doors to the beakhead. I'm still puzzling over how to the bend the 1mm x 1mm moldings around the roundhouses....I'm now wishing that I had added the molding to these half-dowels before installing them in the model....another error in the way I'm staging the build that I'll have to think through..... In any case, here are some photos of the beakhead. Enjoy and happy modelling hamilton


-
Hi Nearshore Just took a look through your recent progress and I have to say your approach to the build is much smarter than mine - I followed Corel's instructions and attached the poop sub-deck before doing the main cabin bulkhead and everything on the quarterdeck, which I'm now realising was a real error....doesn't make it impossible, but definitely makes for a challenge..... In any case, I think your Bellona is looking great - the quartergalleries and transom are shaping up and the planking is coming along well! I'll definitely be looking back here when I get to that stage - hopefully shortly after the new year..... hamilton
-
Ahh - sorry to heart about that! hamilton
-
Maybe it's just me but I can't see any of the Vanguard kits when I visit your website and the links above give me a 404 error......are you still carrying Vanguard products? hamilton
-
Thanks Tony! This one's pretty different from Bluenose that's for sure! But just as fun so far.... Harlequin! It's good to hear from you! I get it - I probably have more kits than I need, but I still have hope that I can complete all of them in my lifetime!! I took a long break from modelling - putting in sporadic and minor work from Summer 2017 until Summer 2021 when I built a small (undocumented here) rowing skiff at 1:12 scale. This was meant to get me back into modelling again and it worked! But like with everything, it's often good and refreshing to take a rest - I hope you return to it at some point - but either way, you're always welcome here!! hamilton
-
Looks really good to me! This is one of the easier hull forms to plank I found - much less tapering and spiling involved and since the hull is finished this provides an opportunity to bury any defects of the planking itself. hamilton
-
USS Constitution by mtbediz - 1:76
hamilton replied to mtbediz's topic in - Build logs for subjects built 1751 - 1800
Very nice and exacting work on the copper plating! hamilton -
OK - it's been very busy at work the last couple of weeks, but we're in a lull now until end of next week, so I'll have a bit of time at the bench til then to make some progress on Bellona. I'm still soldiering on with the first layer of hull planking and in a milestone have now completed the port side, filled and sanded. The starboard side is still in progress with roughly 8 strakes remaining. The planking is pretty rough I haver to say, but it should provide a decent foundation for the second layer, which I'll pursue with more care and sensitivity to the results! My goal is to finish the first planking tomorrow and then move on to the beakhead, stern area and quartergallery framing, which I'm both very excited about and pretty intimidated by....but we'll see how it goes! Not much in the way of interest in the photos, really, but here they are hamilton PS - to the right in the background in the first photo, you'll see the filler product I use - Liquitex acrylic modelling paste. It is really a wonderful product (I have no association with the company at all) - it is a medium thickness almost like light cake icing, but it dries incredibly hard and sands down to a very fine eggshell finish. It also takes both paint and adhesive really well, which is a nice bonus. h.
-
Incredible craftsmanship here! Great modifications to the MS kit! hamilton
-
Thanks for your response Chris! Yes I understand - but it's not about a version of the vessel - it's about specific kits that are desirable to build and that create real excitement among the modelling community - yours and Chuck's fall squarely into that category. No offence to Panart, but the Victory you designed just seems better in every respect. I don't necessarily want to build "a" Victory, but I definitely want to build your Victory, if that makes sense. The economics of kit manufacture are unfamiliar to me, so I would never presume the circumstances you face in developing and maintaining your business. That's not what the issue is. It's more that perhaps some business innovation - like Chuck's with the Winnie & Cheerful broken into chapters, or CAF's with their line - will be helpful at sustaining this craft for a broader cross-section of the ship model market. $500.00 is about my limit for a kit - about the price of Chapter 1 of CAF's Granado. I imagine others set their sights similarly or lower. If the Victory or other high end kits were presented in modules, I imagine way more people would buy them and manufacturers could tap into markets for their products that otherwise represent unrealised demand. It requires some innovation and re-thinking on the manufacturer's side, but once that's done..... It's kind of like when the Bell phone company originated, they though that their business model would involve selling expensive devices and connection services to the wealthy - niche product, small market, high price point. Bell (well....Alfred Vail) figured out that the value of their network was based on volume of connectivity - so there was good business sense in expanding the network and lowering the cost of service to facilitate this - a move that led to massive profits for Bell and put them in the catbird seat for network development for a sustained period of time. I believe you, Chuck, CAF are in that position now, representing younger and more innovative entries into the manufacturer's market with an opportunity to refresh things overall - think of the number of kits you have developed in the last 2 years relative to what Caldercraft/Jotika has introduced in the last 2 decades....that says a lot, I think, about market position and market potential. People are excited about your kits and Chuck's too, and this community provides an active following that serves direct promotional functions. It's a great situation! But it could be even better! The idea of the high-value product for the niche modelling market is fine, but there is still money to be made outside of that market with the same product through a different organisation of the manufacture and presentation of the kits. Admittedly I have no idea how offering kits in sections/chapters might affect the cost of manufacture - obviously a big concern - or even if it is a realistic approach to design....but it seems something worth exploring more generally as a means of sustaining the craft and the businesses on which it depends. The modular nature of ship modelling itself also supports this approach. Full disclosure - I'm a philosopher by trade and not an entrepreneur, so my comments here come from a pretty idealised conception of how to run a ship model business - or any business! But at the level of accessibility and market development, it seems to make sense to offer avenues of access that can realise the value of the ship modelling market more fully than the complete high-end product can or does. I hope these remarks are not taken in any way as a slight against any kit manufacturer's practices! More the observations of an envious modeller dreaming of a different world..... hamilton
-
Feel like it's more of an educated guess, based on the price of the Vanguard Indy, which at today's exchange rate would set me back $2300 CDN....a desirabe kit, beautifully constructed and well out of my grasp. hamilton
-
Hi Tim - not sure how I missed this log during my BN build....your work is excellent! Very nice results. I'm always impressed by those who, like you, can pull off such nice metal work at this scale! hamilton