


cotrecerf
-
Posts
152 -
Joined
-
Last visited
Content Type
Profiles
Forums
Gallery
Events
Posts posted by cotrecerf
-
-
-
JackAubrey,
many thanks for the ample and fascinating info on these boats and ships. Great photo collection; not so easy to shoot them under sailing conditions.
Yes, and I agree that the O'Brian naval novels are so enlightening for the era and always worth to re-read them. Each time I find new fascinating details to follow.
best regards
Joachim
-
Valeriy, this is a marvelous approach yielding a top product. You're so ingenious.
At your home, I hope all is well.
All the best to you and best regards
Joachim
-
Valeriy, I'm so glad hearing that you are well and able to continue your so impressive work.
It's a pleasure to follow your build and and always admire your super-fine detailing work.
All the best to you
- FriedClams, shipman, Keith Black and 4 others
-
 6
6
-
 1
1
-
On 5/6/2022 at 7:10 AM, Dr PR said:
Mike,
The shrouds will not be the same length exactly. The forward shroud is close outboard of the mast and the aft shroud is farther back. Since the mast has some rake (leans aft) the distance from the deadeyes to the mast top will be a bit different.
In Steels Elements and Practice of Rigging there is described the making of Shround and how to come to the necessary lengths from fore to aft of the respective mast:
David Steel: The Elements and Practice of Rigging and Seamanship
186*Shrouds made in the house
RIGGING PREPARED IN THE HOUSE.
THE RIGGING FOR THE LOWER MASTS.
SHROUDS. The cablet is warped round two iron fids, fixed in the floor, as distant from each other as the first warp is long. The length, which is the distance from the top of the bolsters at the masthead to the foremost dead-eye, is specified in the Table of Dimensions. One end of the cablet is made fast to the lower fid, and passed round the upper fid; and so on, alternately, one turn close to the back of the other, and each hauled tight by hand. The additional length, gained by the turns lying round each other, is sufficient for the lengthening of each pair of shrouds, as they rake aft. When the whole gang of shrouds are warped out, the bights at the lower end are cut through, in a strait direction with the fids.
The upper bights are designed for the eyes, and are marked round the middle, beginning at the inner one, with one piece of spun-yarn knotted, two for the second; and so on for the number required.
The outer turn is called SWIFTERS; and they are left four or five feet at each end longer than the shrouds, and have an eye spliced in them the circumference of the mast-head.
The shrouds, when cut to their length, are got up and stretched thus for worming: at the end of each length is made a bend; one end is passed through a pair of slings, fixed round a post, at the lower end of the house, and the other end through the strap of a treble block, and a fid thrust through each bend. The treble block is connected by its fall to a double block, lashed round a post, at the upper end, thus: The standing part of the fall is fastened to the becket, at the **** of the double block; then reeved through the first sheave of the treble block, then through the first sheave of the double block on the same side, and so on alternately, and the fall carried and attached to the windlass by three or four round turns. The windlass is put in motion by men, with levers, or handspecs, and each length thus stretched, hand-tight.
- mtaylor and Keith Black
-
2
-
-
OOpps sorry Varleriy,
I should have considered that you have yor own detailed drawings for everything on the model.....
I see now that Ras Ambrosia has a need for such details So Ras for your perusal
- mtaylor, popeye the sailor and lmagna
-
3
-
Valeriy,
thanks heaven, so good to hear from you again!
Nice work as usual. Take care and all the best.
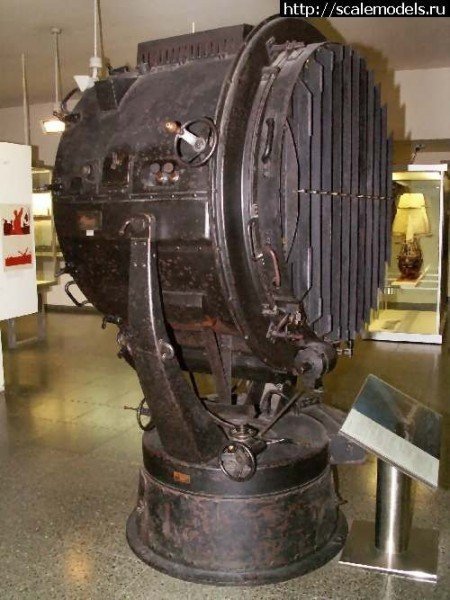
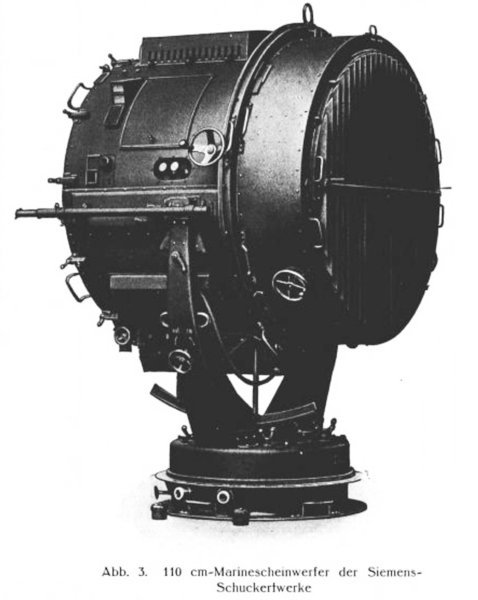
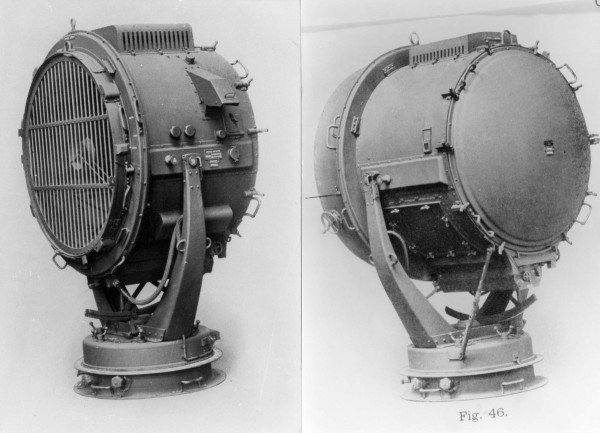
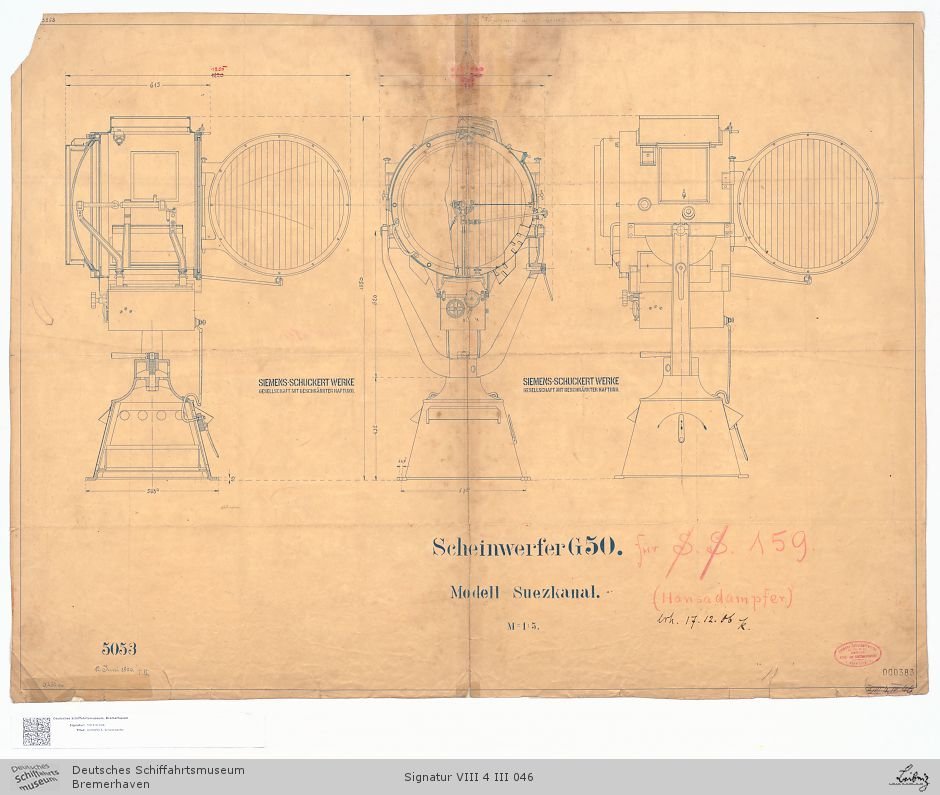
Maybe these are of some help to you. The Searchlights are mainly German manufacture from Siemens, Schuckert etc. around year1900 and were in use by German Imperial Navy.
Best regards
Joachim
.jpg.a48b655f7935c472343958e8e5c55413.jpg)


-
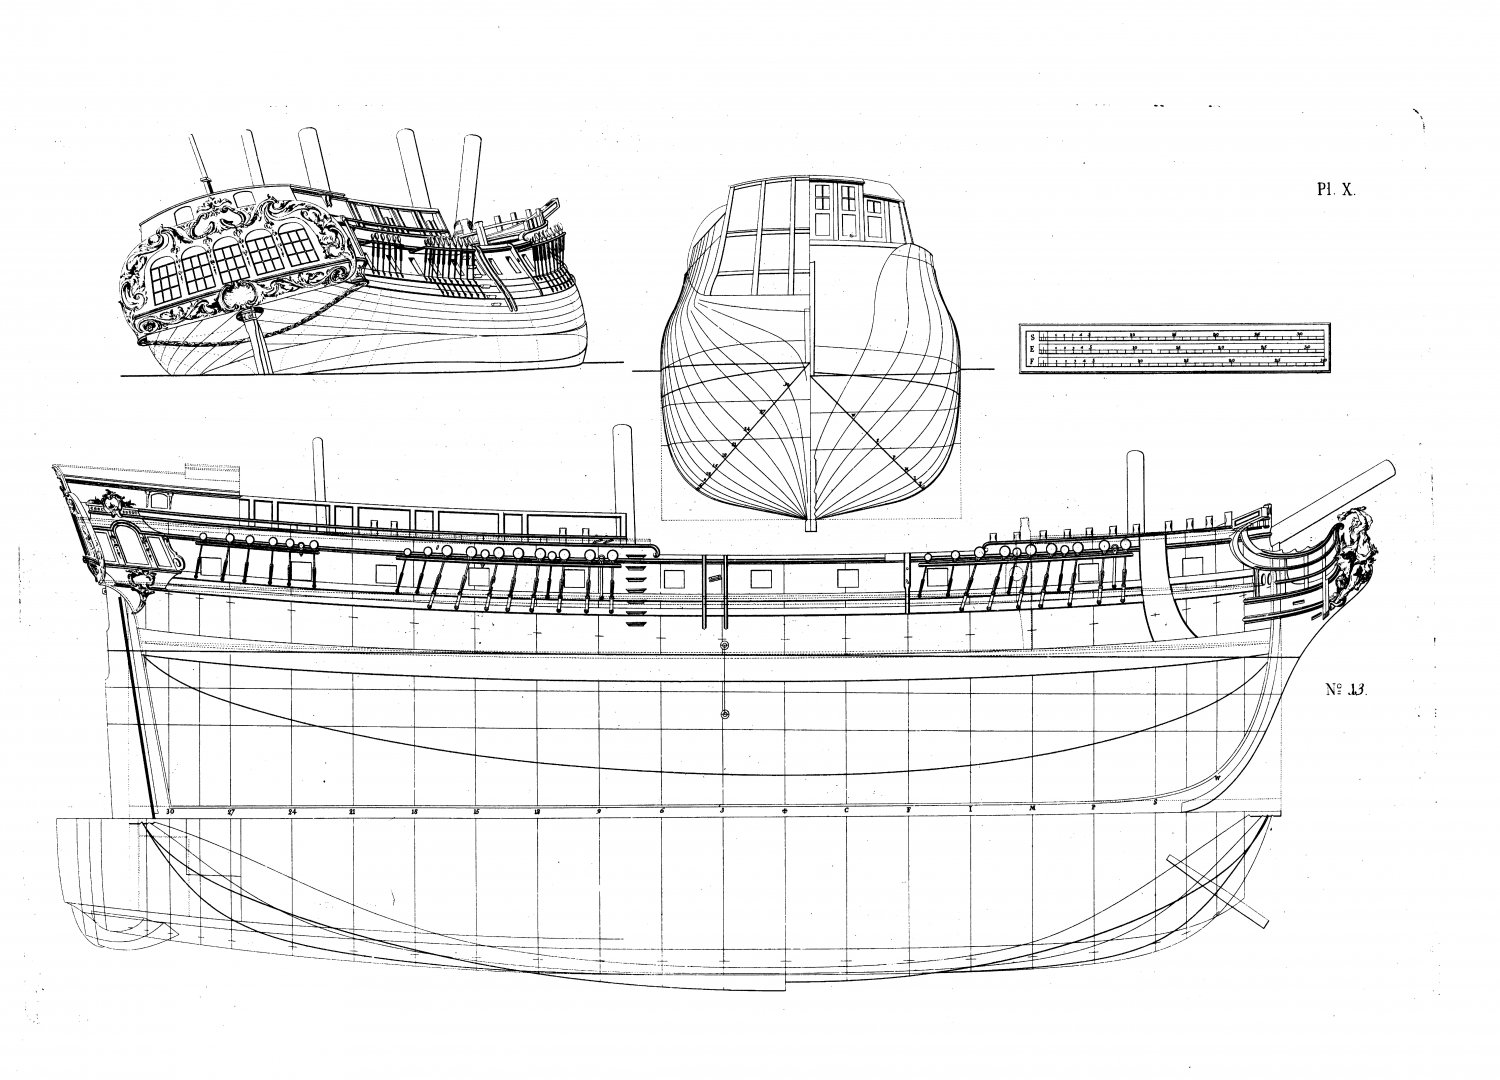
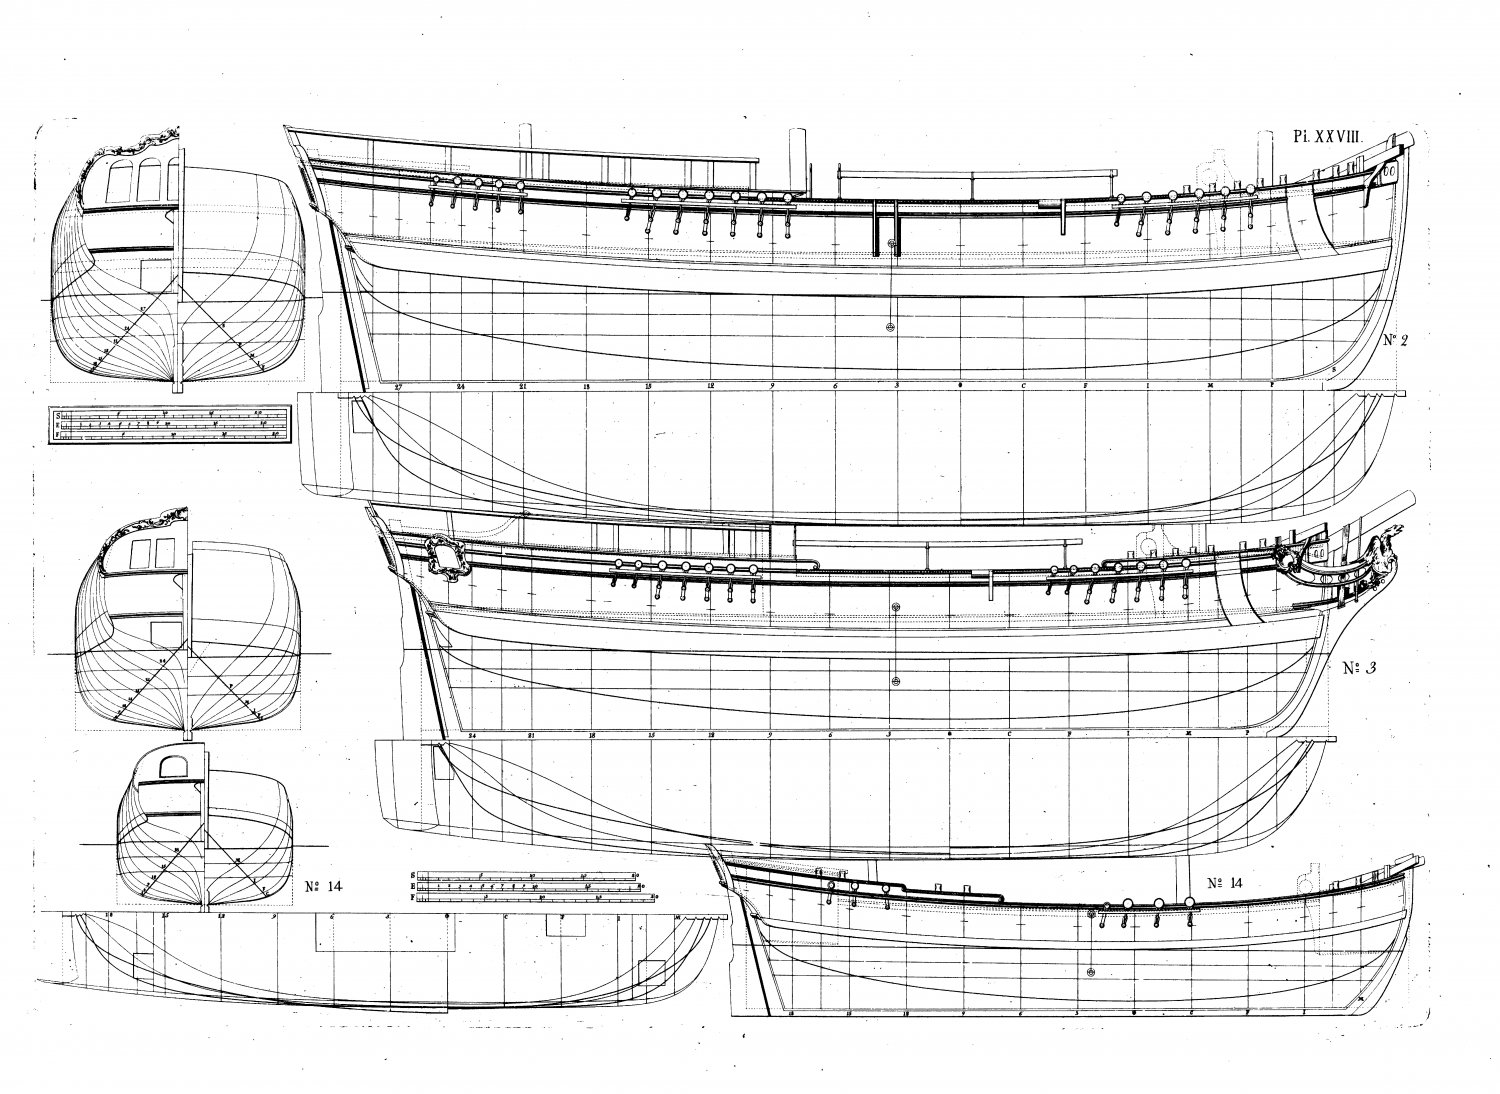
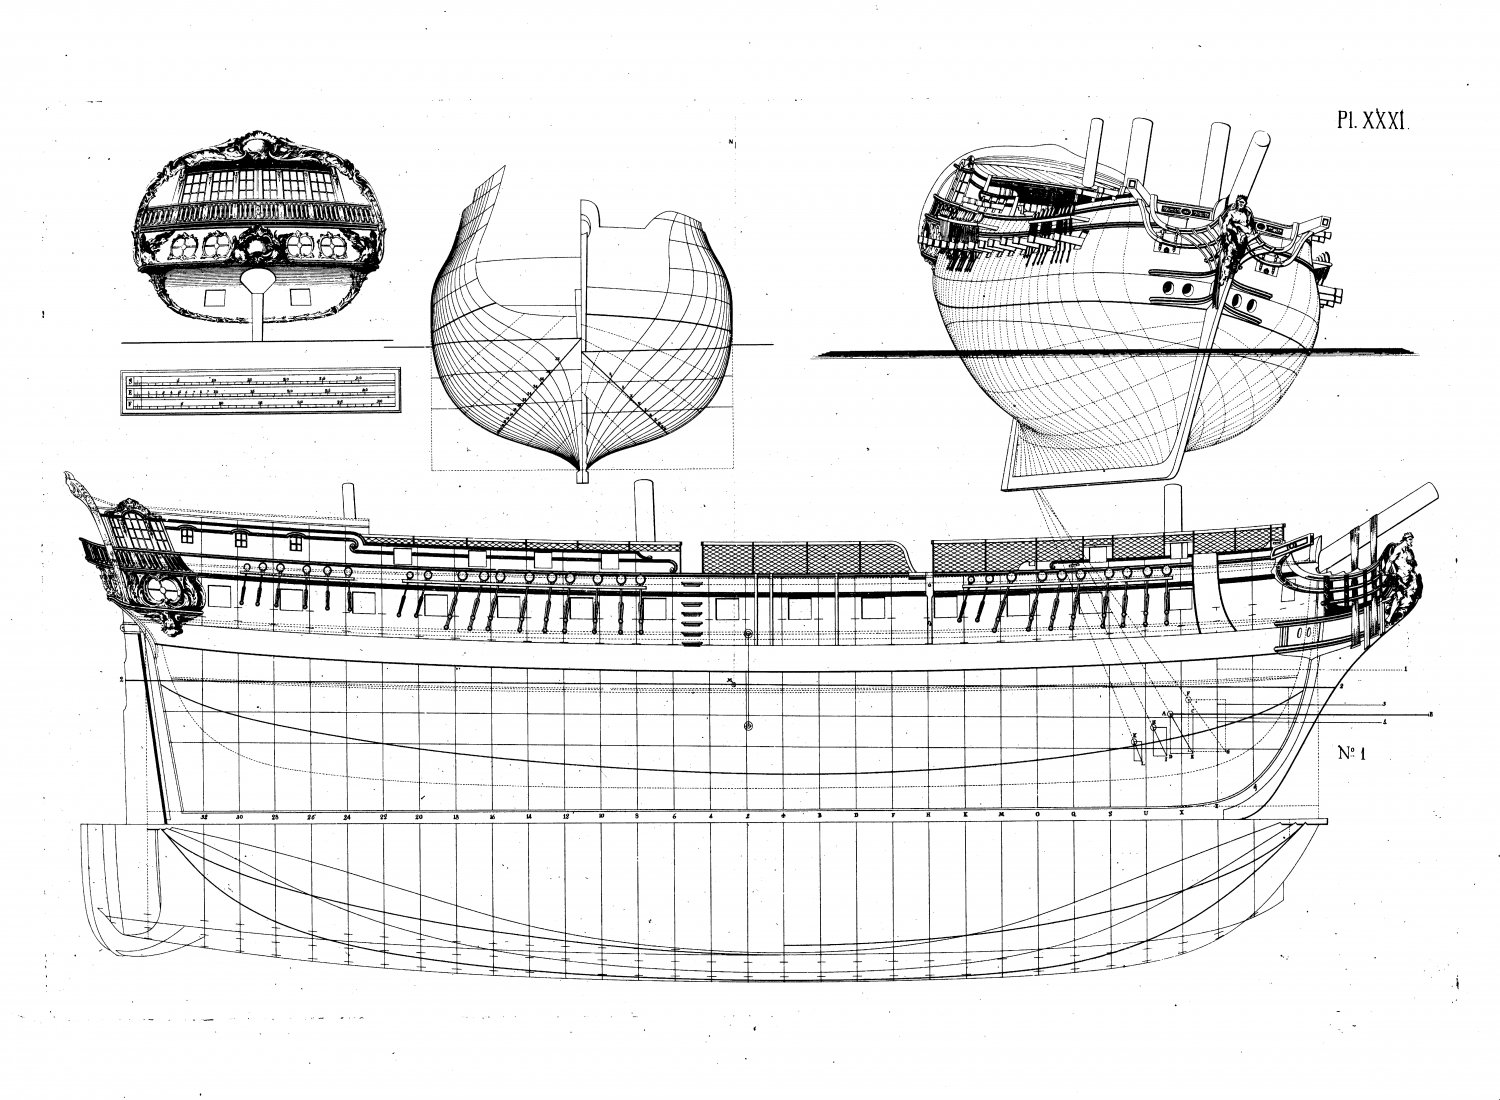
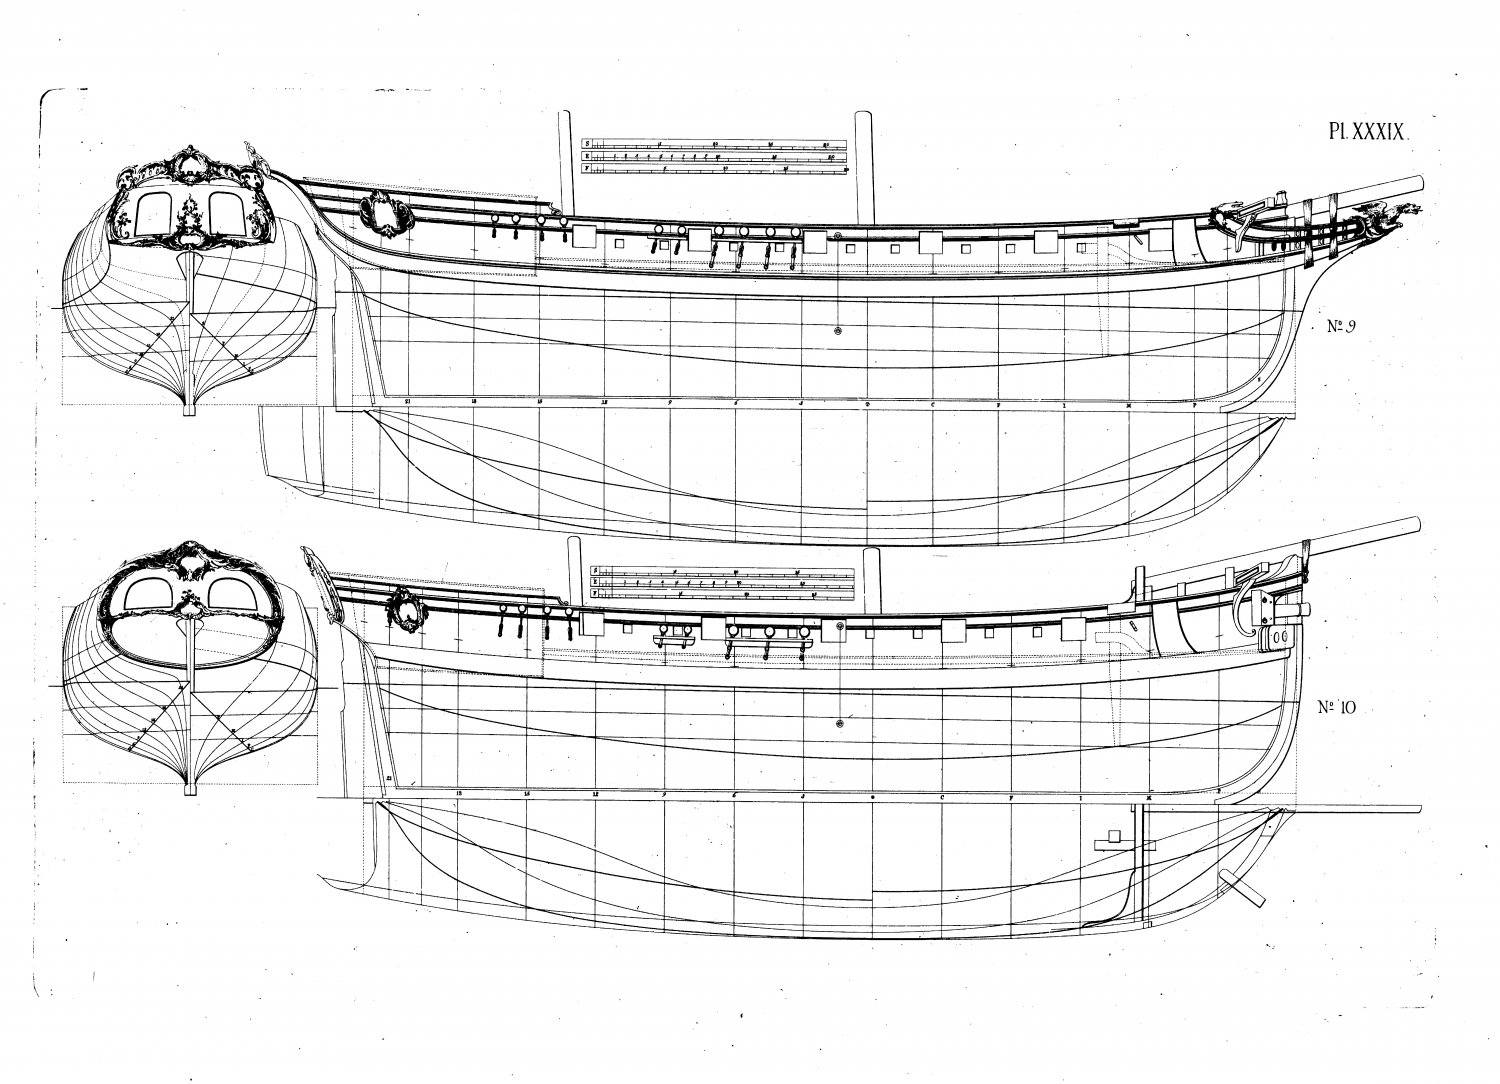
for further reference I add an index to a.m. plans:
- Keith Black, druxey, bruce d and 1 other
-
4
-
-
Hello Valeriy,
I wish you all the best for the new year.
You give me joy seeing your building log growing by all the wonderful items you are able to make.
- druxey, FriedClams, Keith Black and 3 others
-
6
-
-
-
Welcome Ibozev,
from the last 2 fotos of your build it looks like the spine (keel) tends to slightly curve to the right side seen from the bottom resp. left side seen from the bow. I hope it is only an optical effect from your camera. If not, I strongly recommend to immediately ensure to have a straight spine right at this early stage of the build. I the the same problem with a kit many years ago and I did not manage to correct this mistake later on. So I really discarded the kit in the end after wasting a lot of time in fruitless repair.
best regards and thumps up
Joachim
-
-
-
Wow, you are a real Jack-of-all-trades. I am deeply impressed.
-
Hi CDW,
I must have been blindfolded...Sorry, I'have seen the Log Header now!!
- CDW, thibaultron, Canute and 5 others
-
8
-
Hello CDW,
I just stumbled on your interesting build log. As I've not found an indication in your log, what is the scale of the car and the personnel?
Thanks
Joachim
-
Very nice work, Valery! All hull details are no "drowned" in paint but still crisp and clearly discernible. Did you use airbrush and what kind of paint (acrylic, 2-component car paint or else) did you apply?
greetings
- Keith Black, Valeriy V, FriedClams and 3 others
-
6
-
-
Giampiero,
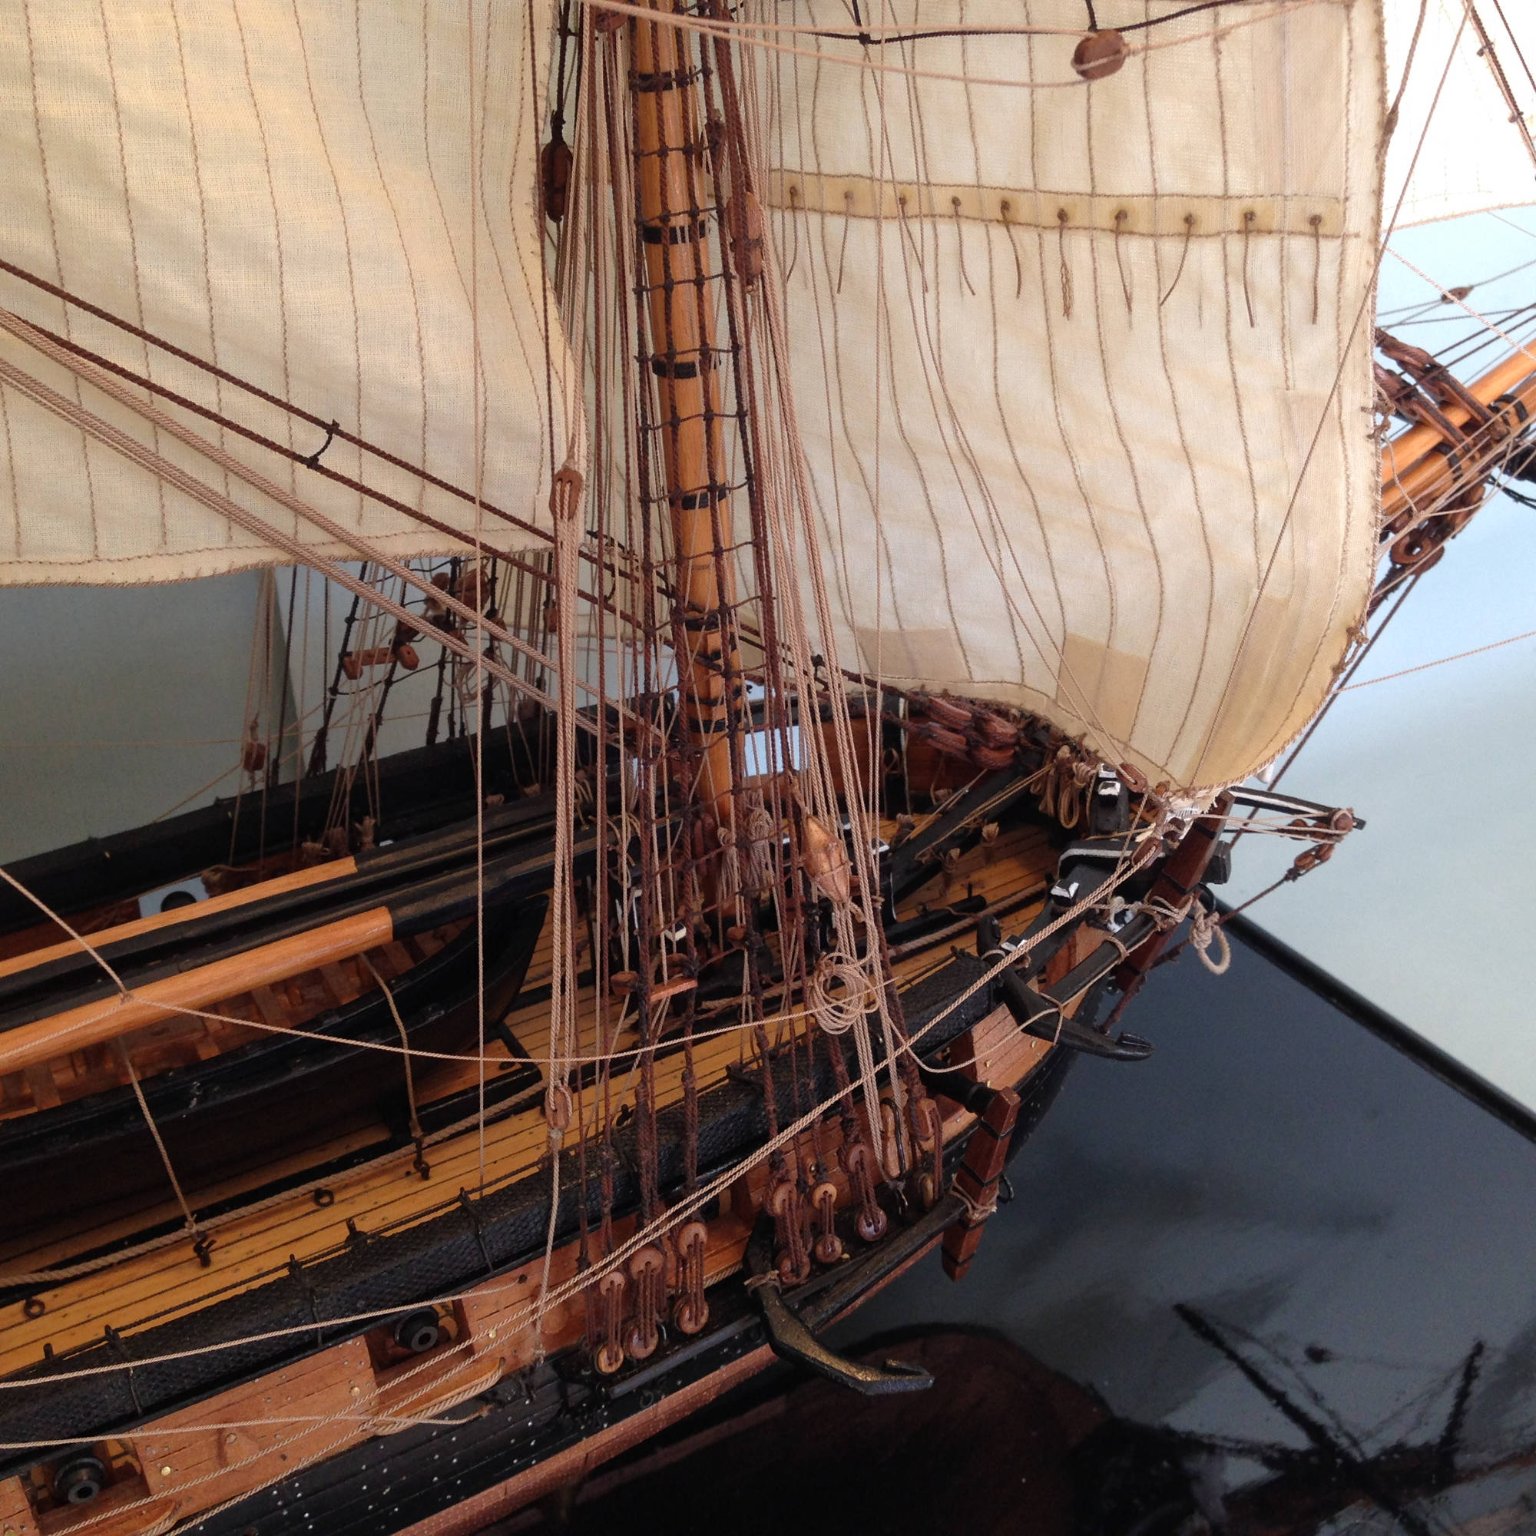
So, all I want to say is: leave your rigging as it is, it is authentic and correct.
- mtaylor and giampieroricci
-
1
-
1
-
-
.jpg.f075b58727941a1cd0ab7c6ae9fffc8b.jpg.8737dc980f1351c1fbffa4b7b1d0baea.jpg)


Varyag 1901 by Valeriy V - FINISHED - scale 1:75 - Russian Cruiser
in - Build logs for subjects built 1901 - Present Day
Posted
Hello Valeriy,
I fully second your point of view regarding meticulous manufacturing methods based on long established data. To me this is a way of Zen aspect: whatever you do, do it as well as ever possible and fully concentrate on what you are actually doing.
best whishes to you.
an absolute admirer