


VTHokiEE
-
Posts
1,528 -
Joined
-
Last visited
Content Type
Profiles
Forums
Gallery
Events
Everything posted by VTHokiEE
-
 Thanks! I almost lost my mind when I sent one flying off into the black hole of my garage. Thankfully, I was able to recover it, but that and having more than one float in the CA to an undesired place was enough to peg my adrenaline. That’s not a bad idea; the nails seem to work well enough (especially from a normal viewing distance). Thanks guys!
- 436 replies
-
- 4
-

-
- vanguard models
- alert
- (and 1 more)
-
The directions call for turning a 275mm piece of 8mm round dowel into a 6mm (really 5mm) square and then rounding it for the bow spirit. I bought a plane, tried my best and well it’s not square or 5mm. Does anyone have a suggestion of where I can get some 5mm square stock? And what wood I should be looking for? The kit doesn’t call out what wood the dowels were but I think I should be looking for beech or maple or...? I suppose I could get 1/4” and sand it down as well.
- 436 replies
-
- 1
-
-
- vanguard models
- alert
- (and 1 more)
-
Very nice work! I have used some tape to create a stop on my drill bit to make certain I don’t go to far.
-
I shouldn’t have looked closely; that Chevy Bel Air looks really neat. I always thought that would be a cool classic to own... maybe someday.
-
I hope his situation improves and isn’t a reoccurring thing. This reminded me that I have been considering getting a book or two from there. Every time I take a look I get overwhelmed as everything seems interesting.
-
I think they are simply plastic clamps here are two examples: https://www.micromark.com/CLAMP-SET-PLASTIC-4 https://modelexpo-online.com/LARGE-PLASTIC-CLAMPS_p_606.html
-
I’m really excited to watch your build of this. I thought it looked beautiful in Chris’s unveiling pictures and I can’t wait to see some of the new design ideas used.
- 117 replies
-
- 4
-
-
- vanguard models
- yacht
- (and 2 more)
-
You might try collecting the saw dust from your hull sanding and adding a little wood glue to make a filler that matches your wood. I would try some on a piece on scrap wood to see if it stains evenly before using it on my hull.
- 34 replies
-
- 1
-
-
- model shipways
- 18th century longboat
- (and 1 more)
-
Thank you! I’m really enjoying myself on it (just wish I could devote a little more tune to it each day, but don’t we all?).
-
This is my missing piece; unfortunately, when I try to focus my hand like that I get the shakes. I usually try to stabilize my arm against the table as much as possible to minimize it (and only do a little at a time), but hopefully it’ll get better with time but even as a kid I was never good at it, my older brother was much better 🙂.
-
Those look really nice! Wow, someday I’d love to be able to paint miniatures like that!
-
My Alert came with boxwood deck planking that I didn’t use as I bought the etched deck when it came out. This is an iPhone shot and the boxwood is still in plastic but it should give you an idea. Also this pear sheet was not laser cut by Chris but by his contractor prior to him purchasing a laser cutter.

-
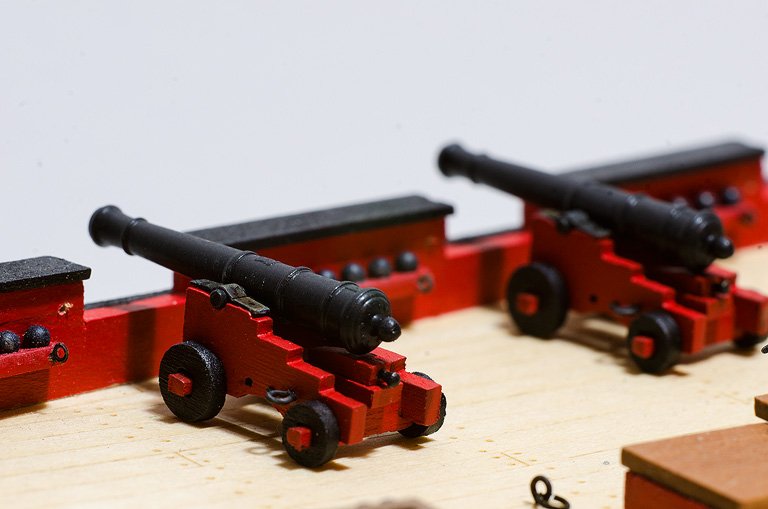
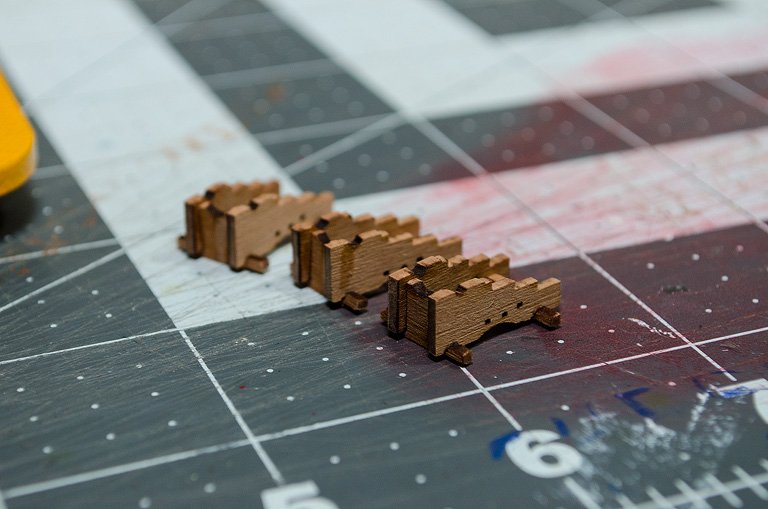
I thought I had a great idea to make assembly line quoins, then I cut them too narrow and split 3 in a row trying to drill out a hole for the handle so back to doing them one by one for now. I have two cannons "completed" until I get to the rigging so I placed them on a deck for some pictures that I thought I would share (boy does everything look rough under a macro lens though). I have broke my two spare PE cap squares before figuring out a better method for shaping them (off model with a block that I filed a half circle into and using a metal rod that I had from a PE rolling kit from when I did some Metal models, not perfect, but it works).
- 436 replies
-
- 11
-
-
- vanguard models
- alert
- (and 1 more)
-
Blackening brass
VTHokiEE replied to Bill Hill's topic in Painting, finishing and weathering products and techniques
Nope, straight from the acetone into the blackening. I’ll add that to the list of things to do. Thanks! -
I used to love launching rockets... my kids aren’t quite the right age yet; I had forgotten about joke much fun it was. I recall building one that the top popped up and released blades so the rocket “helicoptered” back to earth. Sorry to sidetrack the log, but you reminded me of some good times.
-
Blackening brass
VTHokiEE replied to Bill Hill's topic in Painting, finishing and weathering products and techniques
I’ll add the steel wool; currently I’m simply doing an acetone bath for a little bit (~10mins) and then the brass black (I did have some better luck this afternoon not being so rough with my polishing though - which was countered because I forgot to shape the part first - doh). -
This is quite interesting, I was considering both as well but was leaning towards the Triton as well.
-
Blackening brass
VTHokiEE replied to Bill Hill's topic in Painting, finishing and weathering products and techniques
May I ask what prep you did on the pieces? I haven’t tried the method in the thread above yet (and I should) as I’m not having great results yet (I think I may have learned today that I was polishing a little too hard as well...). -
Looks beautiful Bob! I’m glad you kept at it. I need to bookmark this for the future!
-
Out of curiosity (and maybe to play the devil’s advocate...) does it? I’m a novice but some much more experienced than I have mentioned that if you aren’t going to be heavily handling the model the paint should be fine. Or is this less about protection and more to get the right finish that you’re looking for?
-
Nice! I like the deck planking as well
-
Thanks! I'll put that carriage on the ship in the various spots and see how it looks before gluing them on.
- 436 replies
-
- 1
-
-
- vanguard models
- alert
- (and 1 more)
-
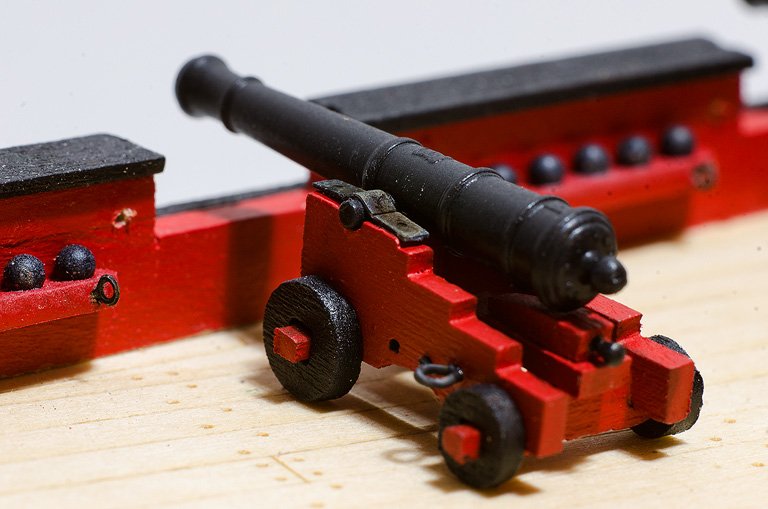
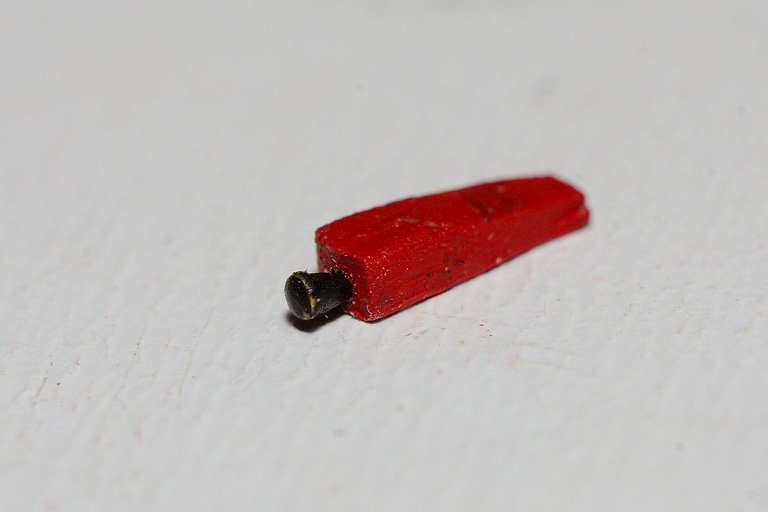
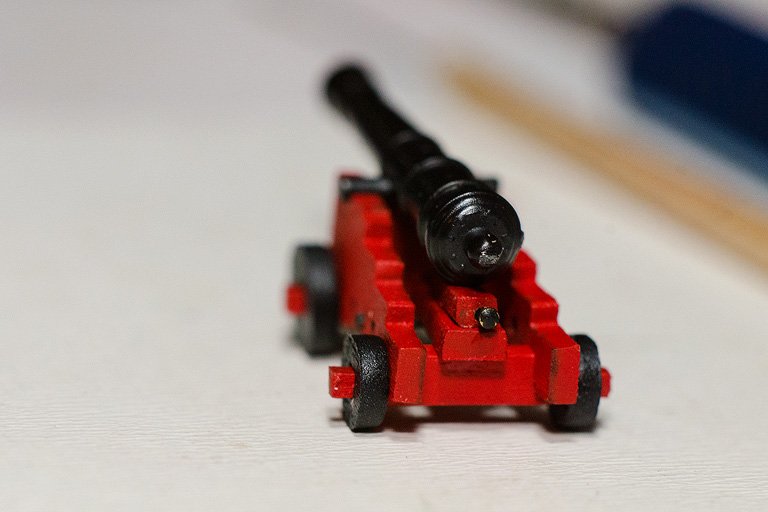
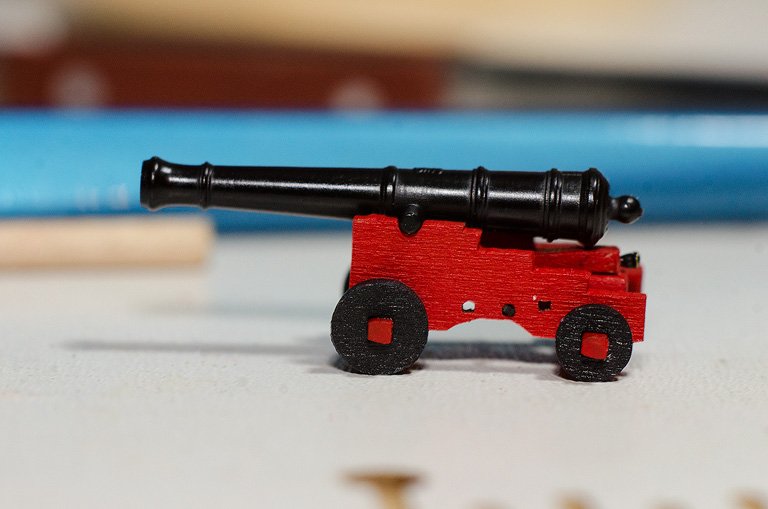
Thanks for all the likes and comments! I ordered a few of these and a few assorted sizes from Rosemary Co in the UK (I feel like almost everything I've been ordering lately has been from the UK; if they had some beaches like FL I might be interested in relocating 😄). I've been working on my cannons and had a question. I started cleaning up the carriages with a file and assembled them. The kit doesn't come with quoins (at least I think that is what they are called) and I felt that the guns were too elevated so I tried my hand at scratch building one to see how it would look. I unfortunately couldn't get the handle centered, so I may toss this one (realistically, I'll probably make a handful extra and see if I have any better luck centering the handle and toss the extras). This is quite the closeup, so you can see where I'd need to touch up the paint on the handle. I took a page from BE's book and used a blob of PVA to make the handle. I dipped the tiny nails that come with the kit for the first planking into PVA. Once the glue dries I painted it black and trimmed of the rest of the nail. I also contemplated simply using the block with no handle, any thoughts? I don't think the AotS diagram showed a handle if that makes a difference, but I'm not inclined towards complete historical accuracy for this build. This view of the rear shows the off center drilling 🙁. Finally, what is an appropriate elevation for the gun? Does the below look reasonable? I've also received my shipping notice on the fly thread recommended by Derek (also coming from the UK) so I'll be able to start on the rigging once I finish all of these carriages up. Thanks for following along!
- 436 replies
-
- 9
-
-
- vanguard models
- alert
- (and 1 more)
-
Oh boy, now you have a collectible on your hands; guess the only solution is to buy another 😉. Seriously, that looks awesome! Can’t wait to see what you do with it.
