


VTHokiEE
-
Posts
1,528 -
Joined
-
Last visited
Content Type
Profiles
Forums
Gallery
Events
Everything posted by VTHokiEE
-
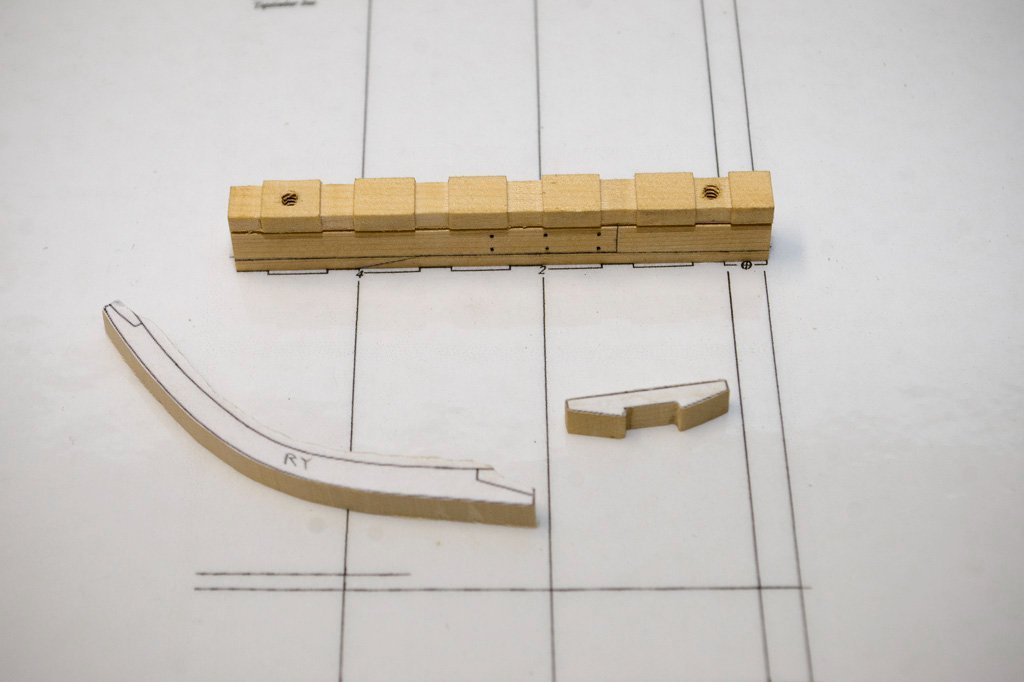
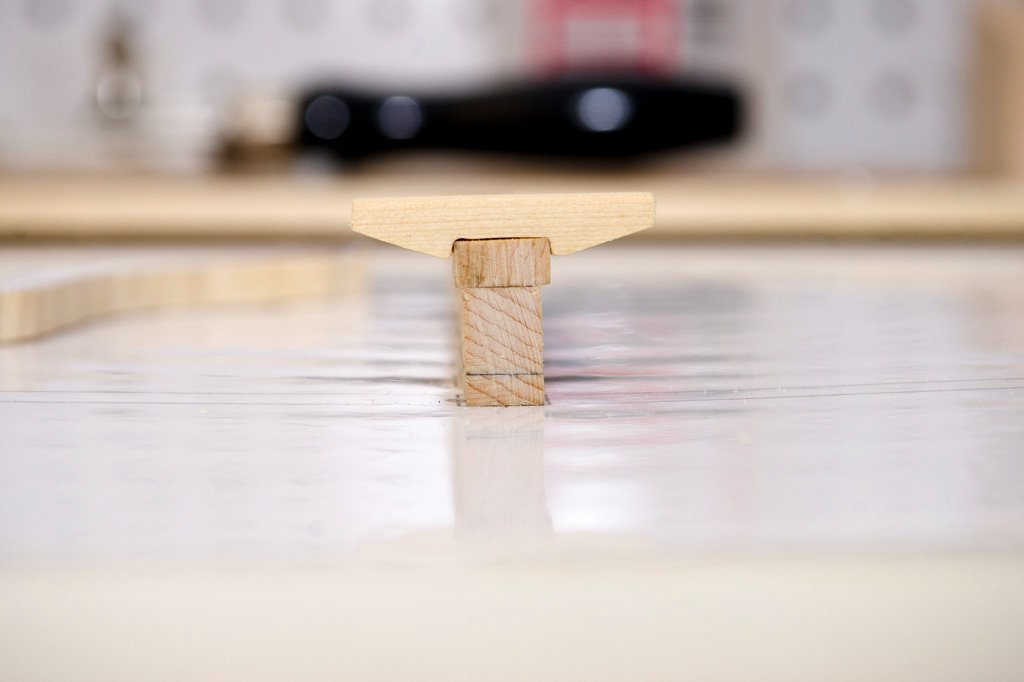
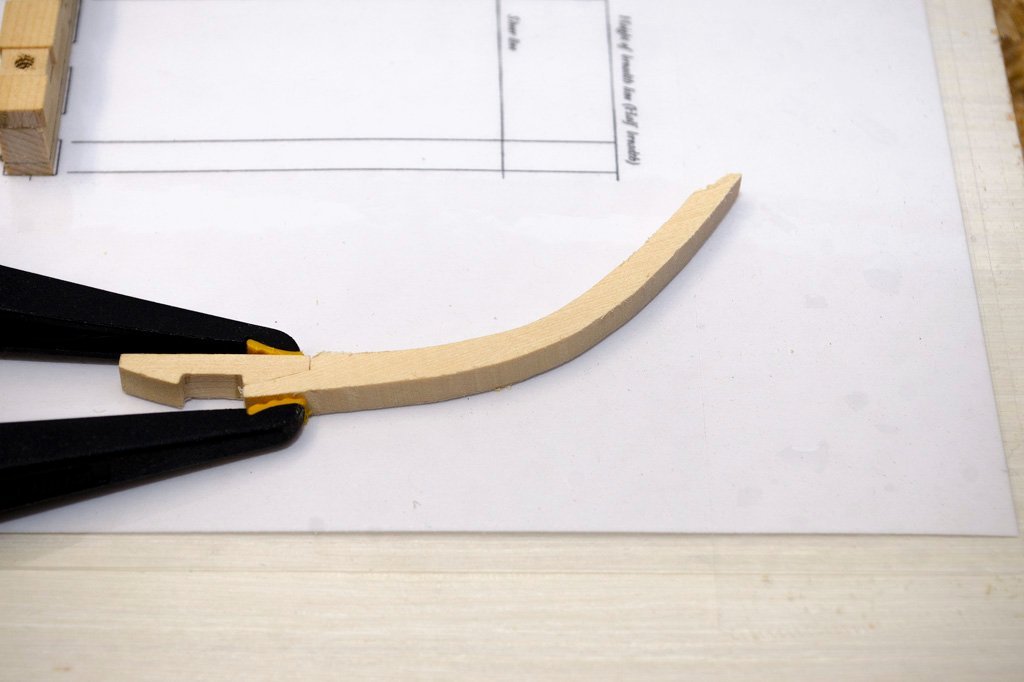
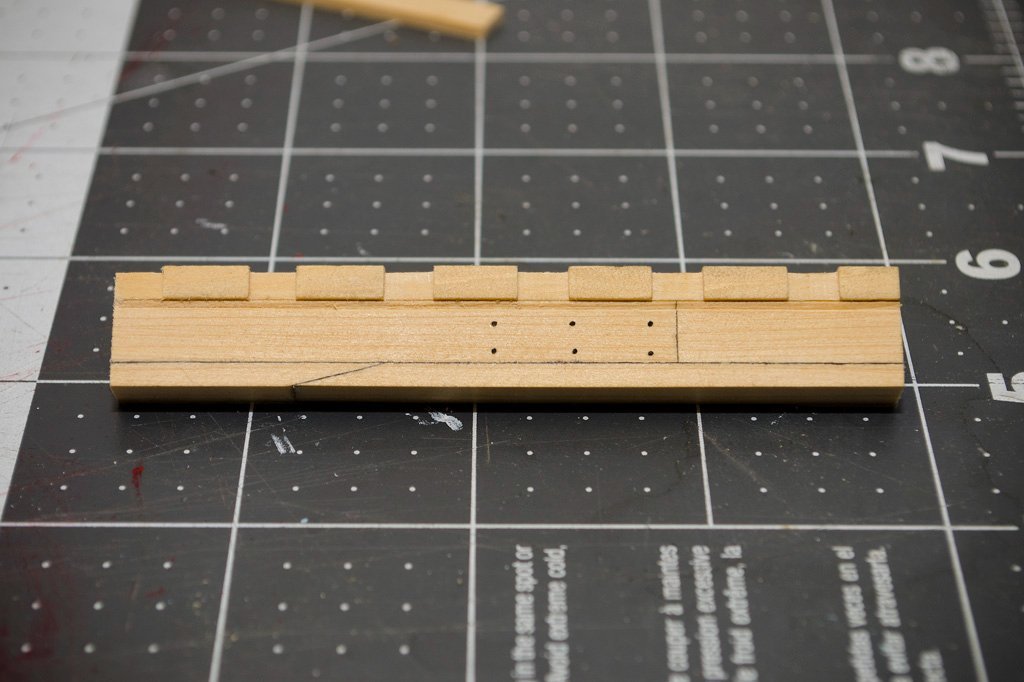
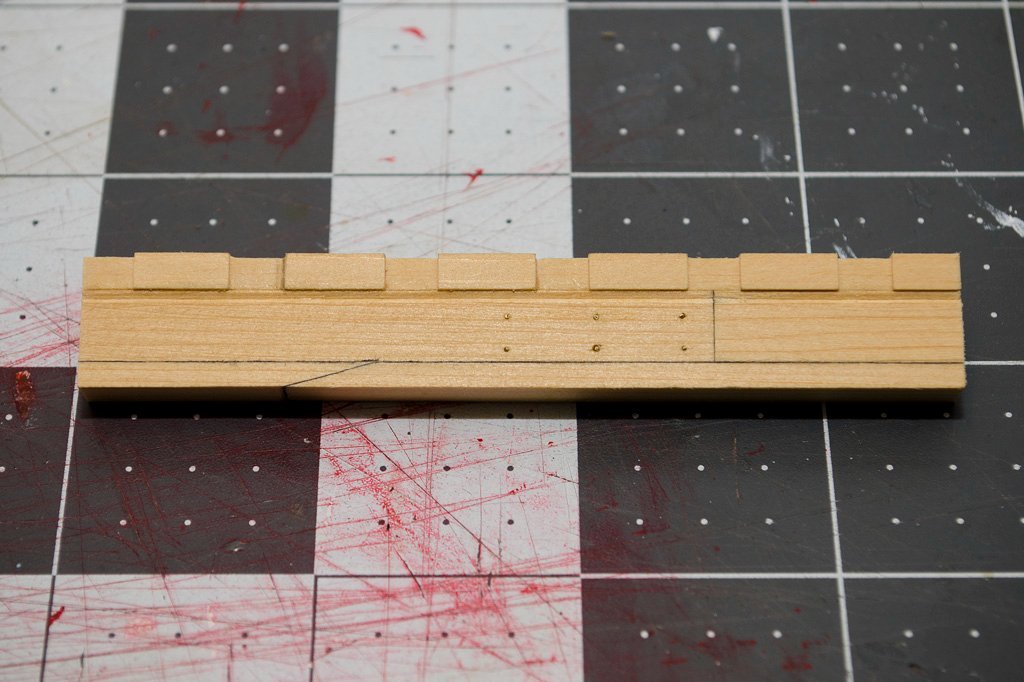
 Thanks @druxey and @dvm27, I will need some serious practice with my chisels but I’ll get there. I went back and cut out a new cross chock. To set the width of the opening I actually used a razor saw (very slowly) and then chiseled out the interior section. It worked well and I think will be a usable part. Now for the remaining 6 pieces of the frame…
 -
Unfortunately I’m not certain I can say they are now in good company (sarcastic and tongue in cheek). I’ll keep working with the jeweler’s saw and see what happens. I’ve been reading a lot of chisel sharpening; I’ll be picking up a kell honing guide in the near future to help there.
-
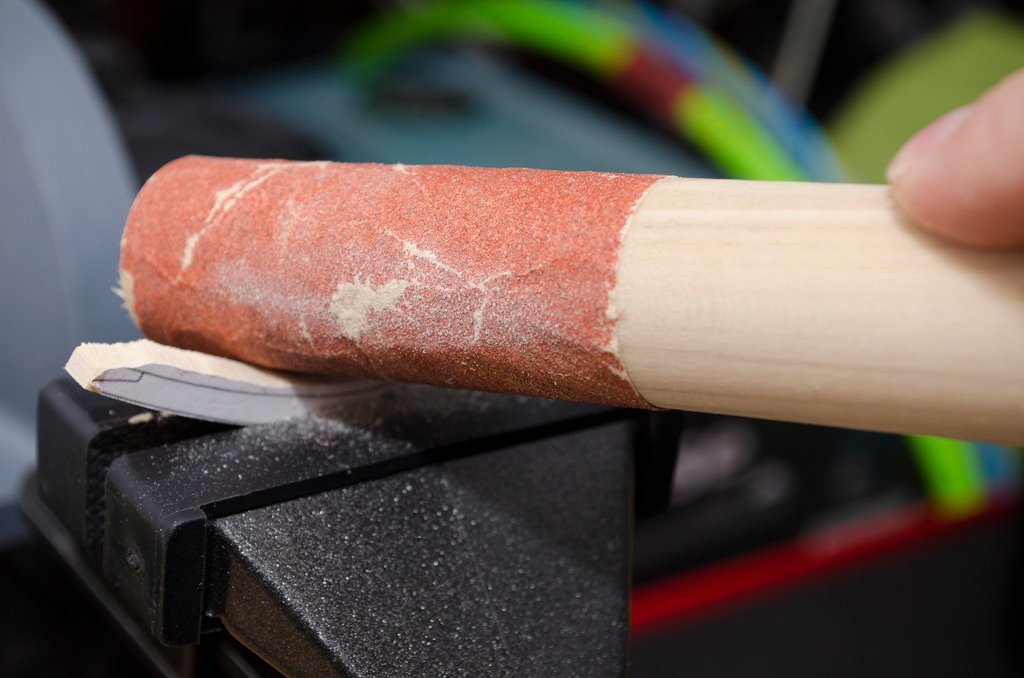
I'm currently pondering how to best cut out frames. I don't have any power tools for the task (but I'm starting to consider a scroll saw ha) so I started with a jeweler's saw to cut out the first two futtock pieces and a cross-chock and used my disc sander for exterior curves and ends. This worked well for the cross-chock but cutting out the slot proved difficult - I tried to may a sanding jig to help but it left some to be desired. I then tried cutting out one of the futtocks in the same manner (I left too much meat on the interior of the piece to hand sand off - ugh), but eventually using a sanding stick I was able to get an okay interior and exterior curve. Again though cutting out the "slots" proved tricky. I tried both a chisel and my jeweler's saw, my chisels are not sharp enough (I plan on picking up a sharpening system) but using the jeweler's saw worked a bit better. I'll need to redo these pieces which brings me to my first question - Would a scroll saw, with practice, help me to cut these notches out? I'm a little space constrained so I still hesitate to pick up either a drill press or a scroll saw yet but I'm nervous about my ability to get straight lines (both horizontally and vertically) for these joints.

-
I’m incredibly impressed by what you’ve done with your own wood. I would also think that cutting planks out of cherry would be trickier than basswood so honestly - hats off to you! Looking forward to the next set of photos. If nothing else it’s really neat to see how things look with Cherry.
-
I’m just starting to really learn my saw but I’ve been using it to cut out some slots and I wouldn’t mind having a “thick” high tpi “speciality” blade for that purpose but maybe I only think I want that until I learn more 🙂
-
They looked really nicely done! I’m going to need to re-read this section of your log several times. The outcome is pretty awesome - it’s no wonder you’re happy with them.
-
Looks like a neat kit; personally I’ve also thought tugboats were an interesting subject so my vote would be build it. However if the finished model isn’t your cup of tea I’d sell it (my gut thinks trading maybe tricky to find someone with a kit you like who wants this). Good luck!
-
I think I'm calling the keel finished (...I'm also out of 0.5mm drill bits. I think I need to find a better set of bits - I've bought the cheap PCB bits off eBay too many times now). The black monofilament above worked perfectly (7/8" bolts at scale). I tried to blacken the brass on the keel and the liquid turned blue as it reacted and dyed the wood (live and learn - I tested the liquid on wood without any brass to react too which was not a quality test as I found out). Now to go pickup a build board (and try not to shed a tear as I bore and tap two holes into the beautiful piece I just built).
-
Tough call; rhetorical questions but How much does it really bother you and if you do make it worse how hard would it be to completely replace the section? I think I’m starting to go over to the “fix it” side because It’s all part of the journey :-). Good luck in whatever you decide!
-
So sorry to hear this Mark; praying for your comfort.
-
Thanks @Chuck right now I ordered 25lb line here: https://www.amazon.com/gp/aw/d/B07GDLGY4K?ref=ppx_pt2_mob_b_prod_image&th=1&psc=1 I’ll order a more full fledged suite from sunset amnesia to cover other sizes. Appreciate it!
-
Thanks @DelF Appreciate it @glbarlow and @Justin P. I ordered some 0.45mm line (the bolts I’m trying to simulate are almost 0.5mm) and I’m guessing before I’m done I’ll have ordered a handful more sizes 🙂
-
That’s wise… damn guess another revision is in my future. Do you have a link? And have you measured the diameter?
-
That doesn’t look to bad at all (I think you may have been sandbagging us with the previous comment 😀). One small tip - your fingers may help finding high and low spots by running them along the hull.
-
Well it maybe too late for that 😂. I inserted brass wire and then trimmed it flush. I’m not altogether certain how I could blacken the wire ends prior (getting the perfect length cut before installation seems tricky). Would you recommend using something different (seems like copper wire would fit the bill next time potentially…)?
-
Almost finished up V2 of my keel (took a little while longer than expected because it may actually be V3 - a drill bit broke in the second and somehow messed up the rising wood pattern as well but shhh 🤫). Is there a general consensus about trying to blacken the simulated brass bolts? I can do some test runs but I'm slightly worried that either the blackening chemicals will mar the surrounding wood, or the blackening will run off and mar the surrounding wood. Still no building board, but I have the drill bit, tap and screws (hopefully they are long enough) when I get there.
-
Simply recalling my own experience. I was too embarrassed to show a picture of my first planking, then I did and was given some very helpful suggestions on how to proceed. I unfortunately had to rip off all the planking I had done, fair the hull a little more and then repeat. I had much better success the second time around, but planking caused me at least a couple of sleepless nights (and I think will do the same next time I approach it). Keep at it though!
-
Beautiful kits! I can't keep up with your output but I do enjoy watching the development and build log's of others!
-
Good luck! I hope yours goes better than mine! I had to take a short break, but I’ll return to it.
-
I think it’s 2.25”, I wish I could be or more service but I’ve never planked a deck (yet). I think a little bit comes down to what you think is going to be most pleasing to your eye. In this case I would suggest cutting a small section of plywood (if you have scraps) and plank it for a few different styles. 2.25” (or 2.5”) at 3 and 4 butt shift, then maybe do one at 4” lengths. Try tree nailing at one. Step back and experiment and see what you think you might like. A few on the planked decks I do recall them starting in the center. I think they all used solid planks between the various deck elements. Then then lay the margin planks (and if you get really ambitious add in the jogging, I think that’s the right term). Good luck!
- 100 replies
-
- 1
-

-
- Syren
- Model Shipways
- (and 1 more)
-
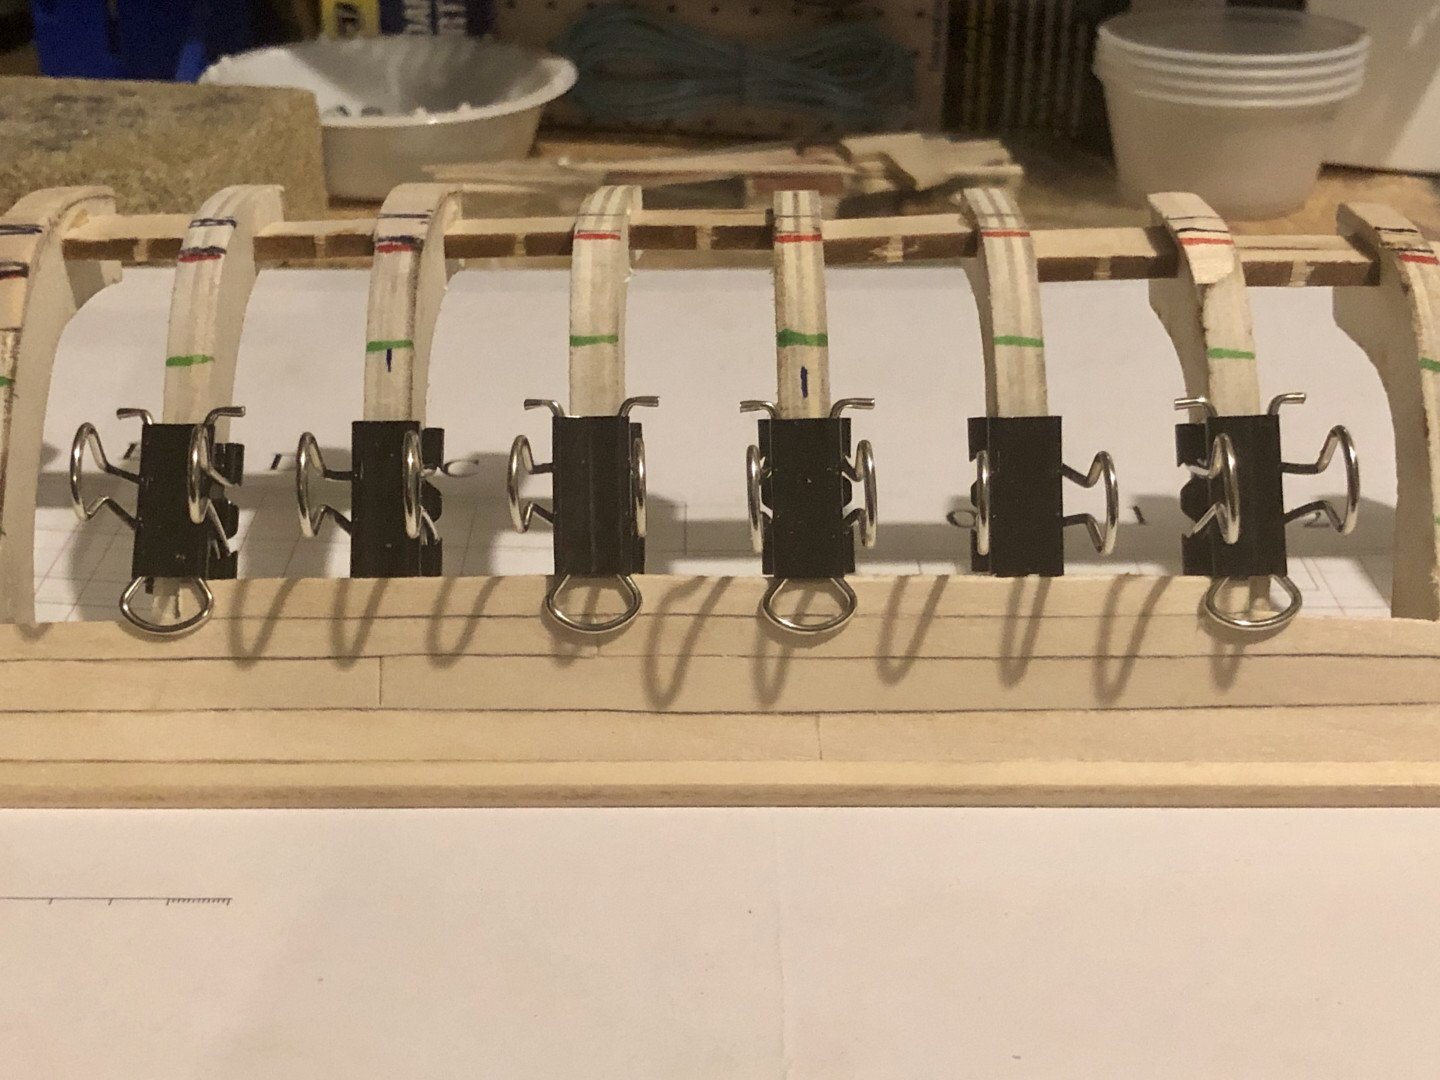
A few questions that may help use PVA glue (if you want). I used PVA on the first layer and CA on the second layer. Are you pre-bending the strips? What types of clamps are you using? Ive had some success using binder clips for sections. Eventually the clamping can get quite creative. Planking though is definitely something to take your time on. On my Alert I think I would consider it a busy day if I had able to do more than 2 planks.
-
You may want to send Jim a PM on here. I had better luck that way.
-
Really fine workmanship Glenn - whether you rig her or not it's a beautiful model. I fully understand the siren's call and look forward to seeing your progress on the Winchelsea.

