HOLIDAY DONATION DRIVE - SUPPORT MSW - DO YOUR PART TO KEEP THIS GREAT FORUM GOING! (Only 13 donations so far - C'mon guys!)
×


src
-
Posts
2,300 -
Joined
-
Last visited
Content Type
Profiles
Forums
Gallery
Events
Everything posted by src
-
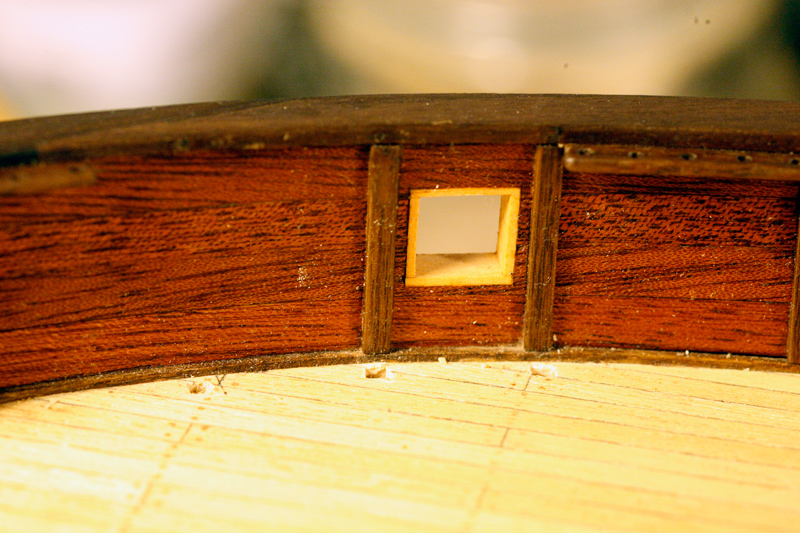
Rich, Nice work on the ports. I am not sure about Constructos' method of cutting the ports out after the planking, When I did my Enterprise they directed me to do the same and keeping the port sides parallel in multiple dimensions was interesting. Your method appears to be much better. Overall what are your thoughts on your Constructo kit? I am finding my kit instructions are a bit vague. Sam
-
Robyn, Leszek, Sorry for the late reply, thank you both for the encouragement and kind words. Leszek, nice work, thanks for the link. Building has slowed to a crawled here. Work and other life "adventures" are taking all my time. Sam
-
Mark, Following along quietly here, learning. How did the ebony react to soaking in acetone? I have never actually soaked exotic woods lik that before, just liberally wiped them down a couple of times and then immediately glued them up. Sam
-
Vivian, Great work and in such a short time. looking forward to your future build(s) Sam
- 188 replies
-
- 1
-

-
- latin caravel
- artesania latina
- (and 1 more)
-
Yambo, The incra rules are very nice IMHO. I especially like the "Tiny T Rule" Sam
-
Rich, Sorry about your loss, I am sure she had a great fifteen years with you and your wife. Happy New Year and welcome back! Sam
-
Sjors, What brand camera are you using? I love my 5d's but some times they are a bit much for a quick update. Sam
-
Sjors, looks good. I especially like the "Captains eye view" My SLR is too big to get shots like that on my build. Still dont see any ratlines........ Sam
-
What brand is a good head mounted magnifier,light.
src replied to kiwiron's topic in Modeling tools and Workshop Equipment
Or those who want to keep 20/20 vision Sam -
Ron, that looks great! I am with Remco, I think I need a new hobby. Sam
-
Thanks I will look into it. Sam Very useful having blobs of it to stick things into for holding also. Cheers Slog
-
Wow Sjors! She is going to be a big girl! Looking good. How come there are no ratlines yet O-Mighty-King-O-the-Ratlines? Sam
- 1,616 replies
-
- 1
-
-
- caldercraft
- agamemnon
- (and 1 more)
-
Ron, That looks great. really enjoying watchig it come together. sam
-
Slog, Looks real good like always. Thanks for the photos of the jig, you just solved a dilemma for me. I had been wondering how I would place my Bow Sprit when the time came. What is blue tac? It looks like some kind of putty. Sam
-
Sjors, Thank you. The likes and encouragement from everybody is always appreciated. Your correct about the darkening over time, I also had forgot about the coat of shellac I put on the deck years ago as a sealer, that will help too. As soon as it warms up outside a bit more I will go do that. Although I suspect its slightly warmer here in Los Angeles then where most everybody else is. Chugging away on my carriages, if I get far enough today I will get some pictures up. Sam
-
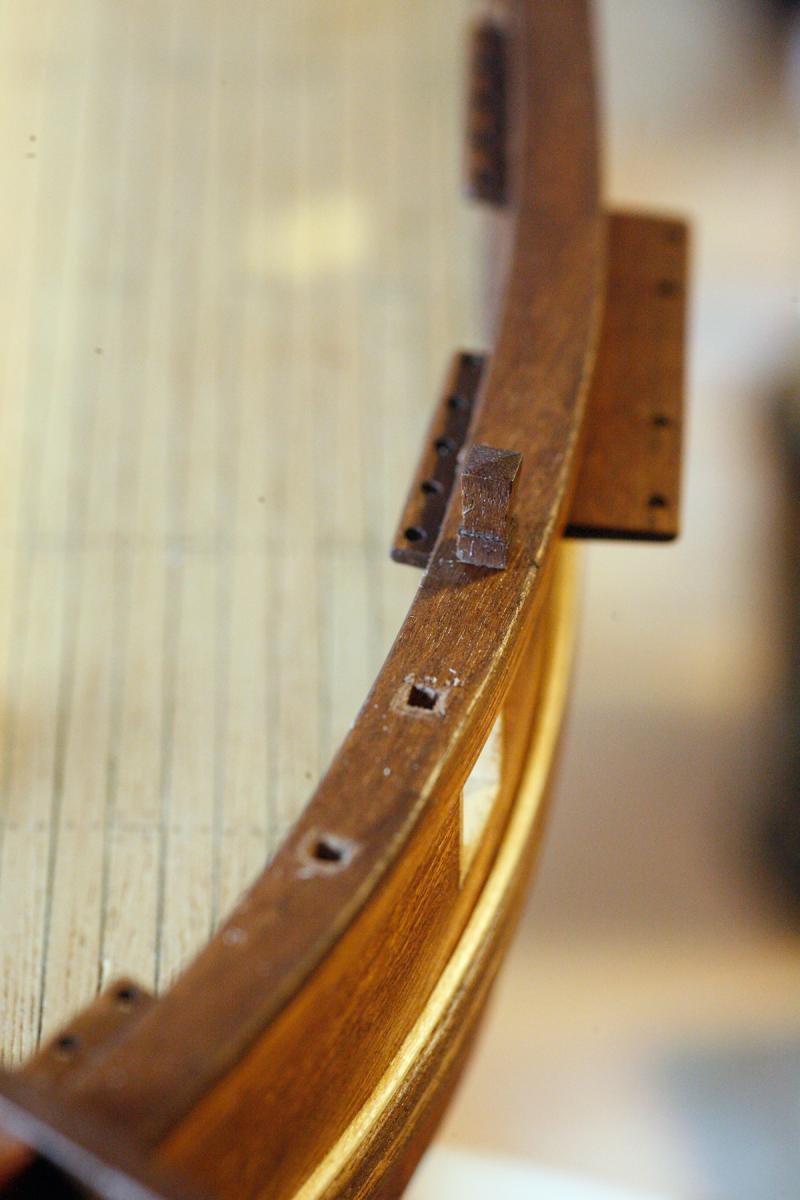
Russ, Mark, Thank you. Contrast does work, it adds interest. Rich, thanks. I did the tenons on the timberheads with my dremel router table. I set the depth so the resulting tenon was the same size as one of my little chisels. After transferring the measurements to the cap rail I drilled a hole just slightly smaller than the finished dimensions of the mortice. Afterwords it was fairly simple to square up the mortice and then glue the timberheads in. I did use a file on the tenons to fine tune them a bit. Its not terribly different from chopping out for a lockset on an entry door. If you look on post 223 you can see the old timber heads have new tenons routed into them. I see I reposted pictures too..... Sam
-
Mark, you definitely should use some acetone to clean the oils off, that should solve your problem. Next time you feel you want to play with ebony, check out RLBs Onieda build. He did something with tea and a stain IIRC. I was very impressed with the color myself. Happy New Year. Sam
-
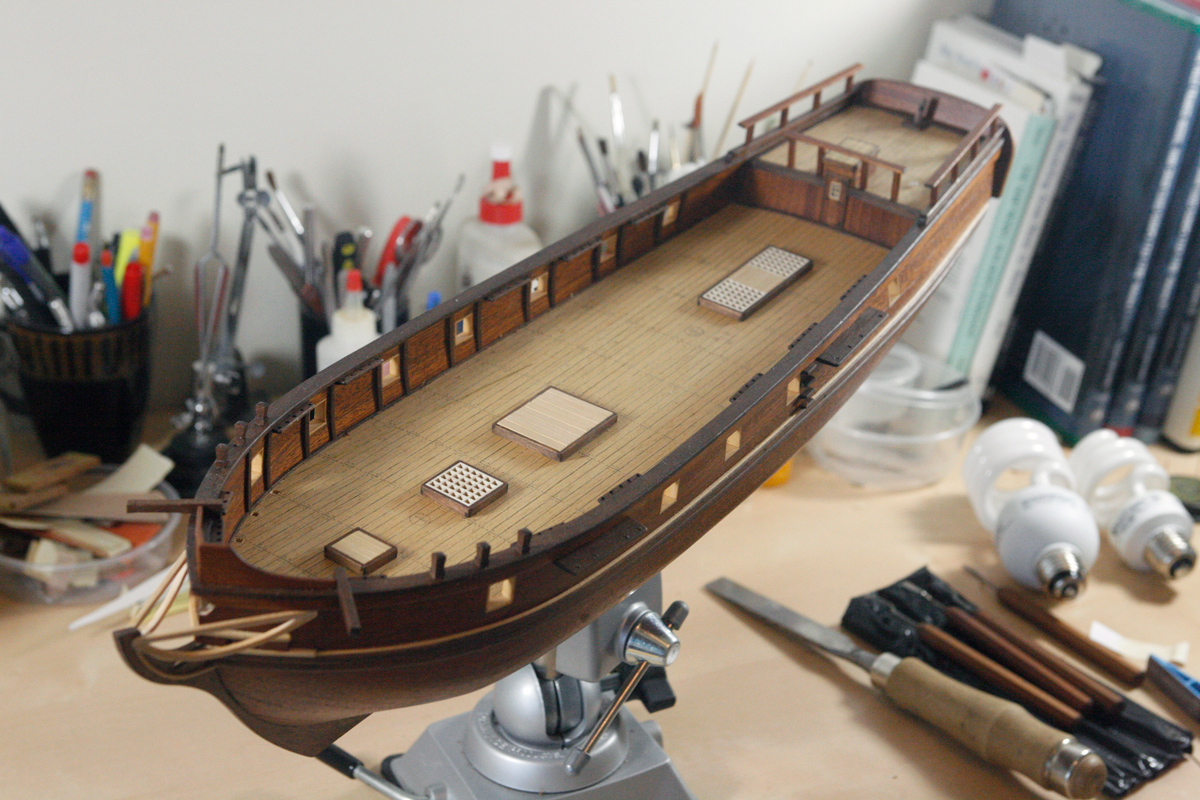
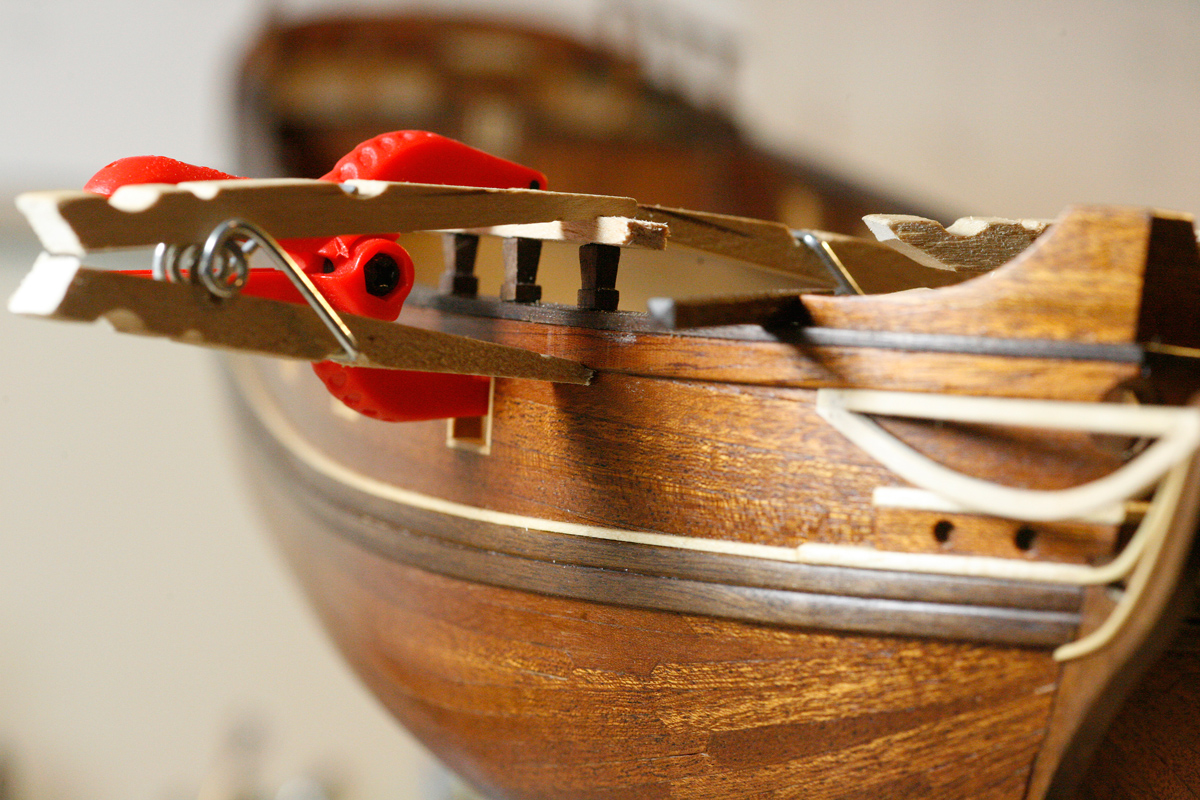
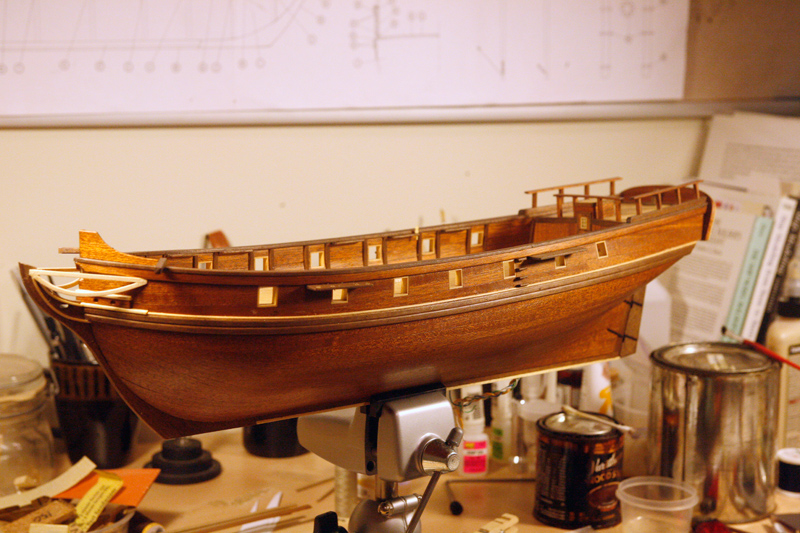
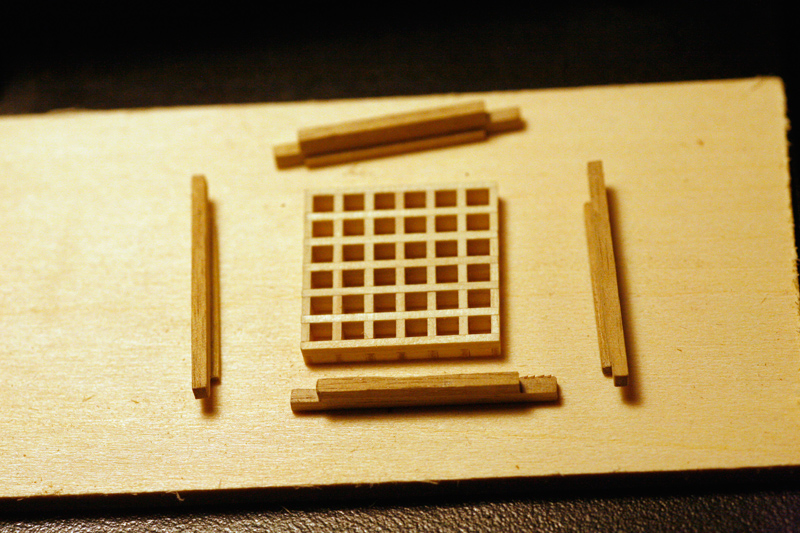
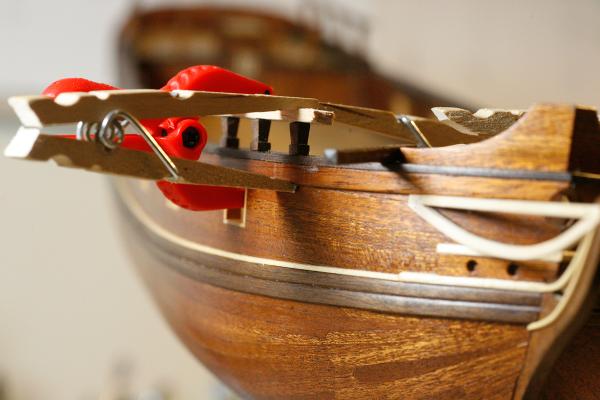
Wow, Another year gone by. Where does the time go? Life has kept me busy these last few weeks, work has slowed down and yet up till Xmas eve it seemed i was still working more then resting/building. I have been slowly making progress though. I finished modifying the bits timberheads and relocated them to the proper locations. Clamping them in place turned into a bit of a challenge, I ended up using a piece of balsa with some divots cut out for the tip of the bits timberheads to rest in and them carefully clamped with clothes pins and clamps. I tried rubber bands but the pressure was wrong, they kept wanting to lean inboard when I dry fit. After the bits timberheads were in place I stated in on the hatch coamings and grates. I used the kit supplied gratings and leftover boxwood for the planks. The instructions called for Ayous wood but either none was supplied with my kit or I used it for something else, either way I had none so boxwood it was. The color doesnt match the decking but I'm not going to worry about it. That is about it for now, today I am starting in on the gun carriages. At the rate I am going I wont be done with those till February. This kit is gettign cheaper by the year!! Other than the tools I have bought I am down to about $40.00/year! Happy New Year everybody. Thanks for all the advise and encouragement throughout the last few years, I wouldnt have the build I have today if it wasnt for all of your input! Looking forward to an even better 2014 for everybody Sam


-
You have earned the title Ratline King me-thinks. But I will be happy to call you anything you want as long as you dont ask me to call you daddy.... Sjors, Happy new year to you and Anja. Sam
- 1,873 replies
-
- 3
-
-
- occre
- san ildefonso
- (and 1 more)
-
She is quite the Lady Sjors! You are living up to your King of the Ratline title. Sam
- 1,873 replies
-
- 1
-
-
- occre
- san ildefonso
- (and 1 more)
-
What brand is a good head mounted magnifier,light.
src replied to kiwiron's topic in Modeling tools and Workshop Equipment
Ellia, I am in the same boat (sorry for the pun) as you; Eyeglasses astigmatism etc. A magnifier is like a whole new world opened up! I have found I am using mine for more than work and ship building. Fixing odd items for the Future Admiral, splinters at work, even sharpening tools; I am finding its much easier to see the burr when I sharpen a knife or chisel with the magnifier. Sam -
Rich, Very nice work. I wouldnt worry too much about the filler, a bit of stain and then some oil or satin varnish and youll be looking great. Sam
-
Z, Looking good! Like the colors. Are you going to clear coat? Sam
-
Vivian, you will get better with each one, as long as that one of your goals. Its life life, each little step becomes easier the more you do it. Listen to me, haven even finished my first build and giving that kind of advice, HA! take it from a life long carpenter and tool snob; you can never have to many tools! Its kind of like some women and shoes. Sam