HOLIDAY DONATION DRIVE - SUPPORT MSW - DO YOUR PART TO KEEP THIS GREAT FORUM GOING! (Only 24 donations so far out of 49,000 members - C'mon guys!)
×

Rob S
-
Posts
339 -
Joined
-
Last visited
Content Type
Profiles
Forums
Gallery
Events
Everything posted by Rob S
-
 Great kit Cleat! Looks like you are well on the way. This forum has recently been reorganized but used to have this great planking resource that really got into the details. I do remember one planking constraint where no plank should be tapered below 20% of the non-tapered plank width... so in those cases, the stealers come in. It looks like you are employing many of the techniques (e.g., creating bands, measuring the band length for each bulkhead, etc.) from the resource. You may be familiar with the resource I’m referencing, but in the meantime will try to find a link to it. Rob S
 -
Looks good Robert! The deck staining turned out very well. As you get into planking, you may want to consider sanding down the forward and rear facing corners of your forward and aft bulkheads, respectively. This provides more bulkhead surface for your planks to adhere to rather than just the bulkhead edge. This is especially truce in the more forward and aft bulkheads.
-
What a beauty she is! Great log;appreciate the multi-media
- 358 replies
-
- 1
-

-
- occre
- santisima trinidad
- (and 1 more)
-
Working the bow stanchions and finding it difficult to modify the 10mm x 2mm x 2mm walnut laths to show the detail (e.g., Timber Heads). I’m amazed at the abilities of those able to implement this level of detail. Also need to do some cleanup on some of the paint.

-
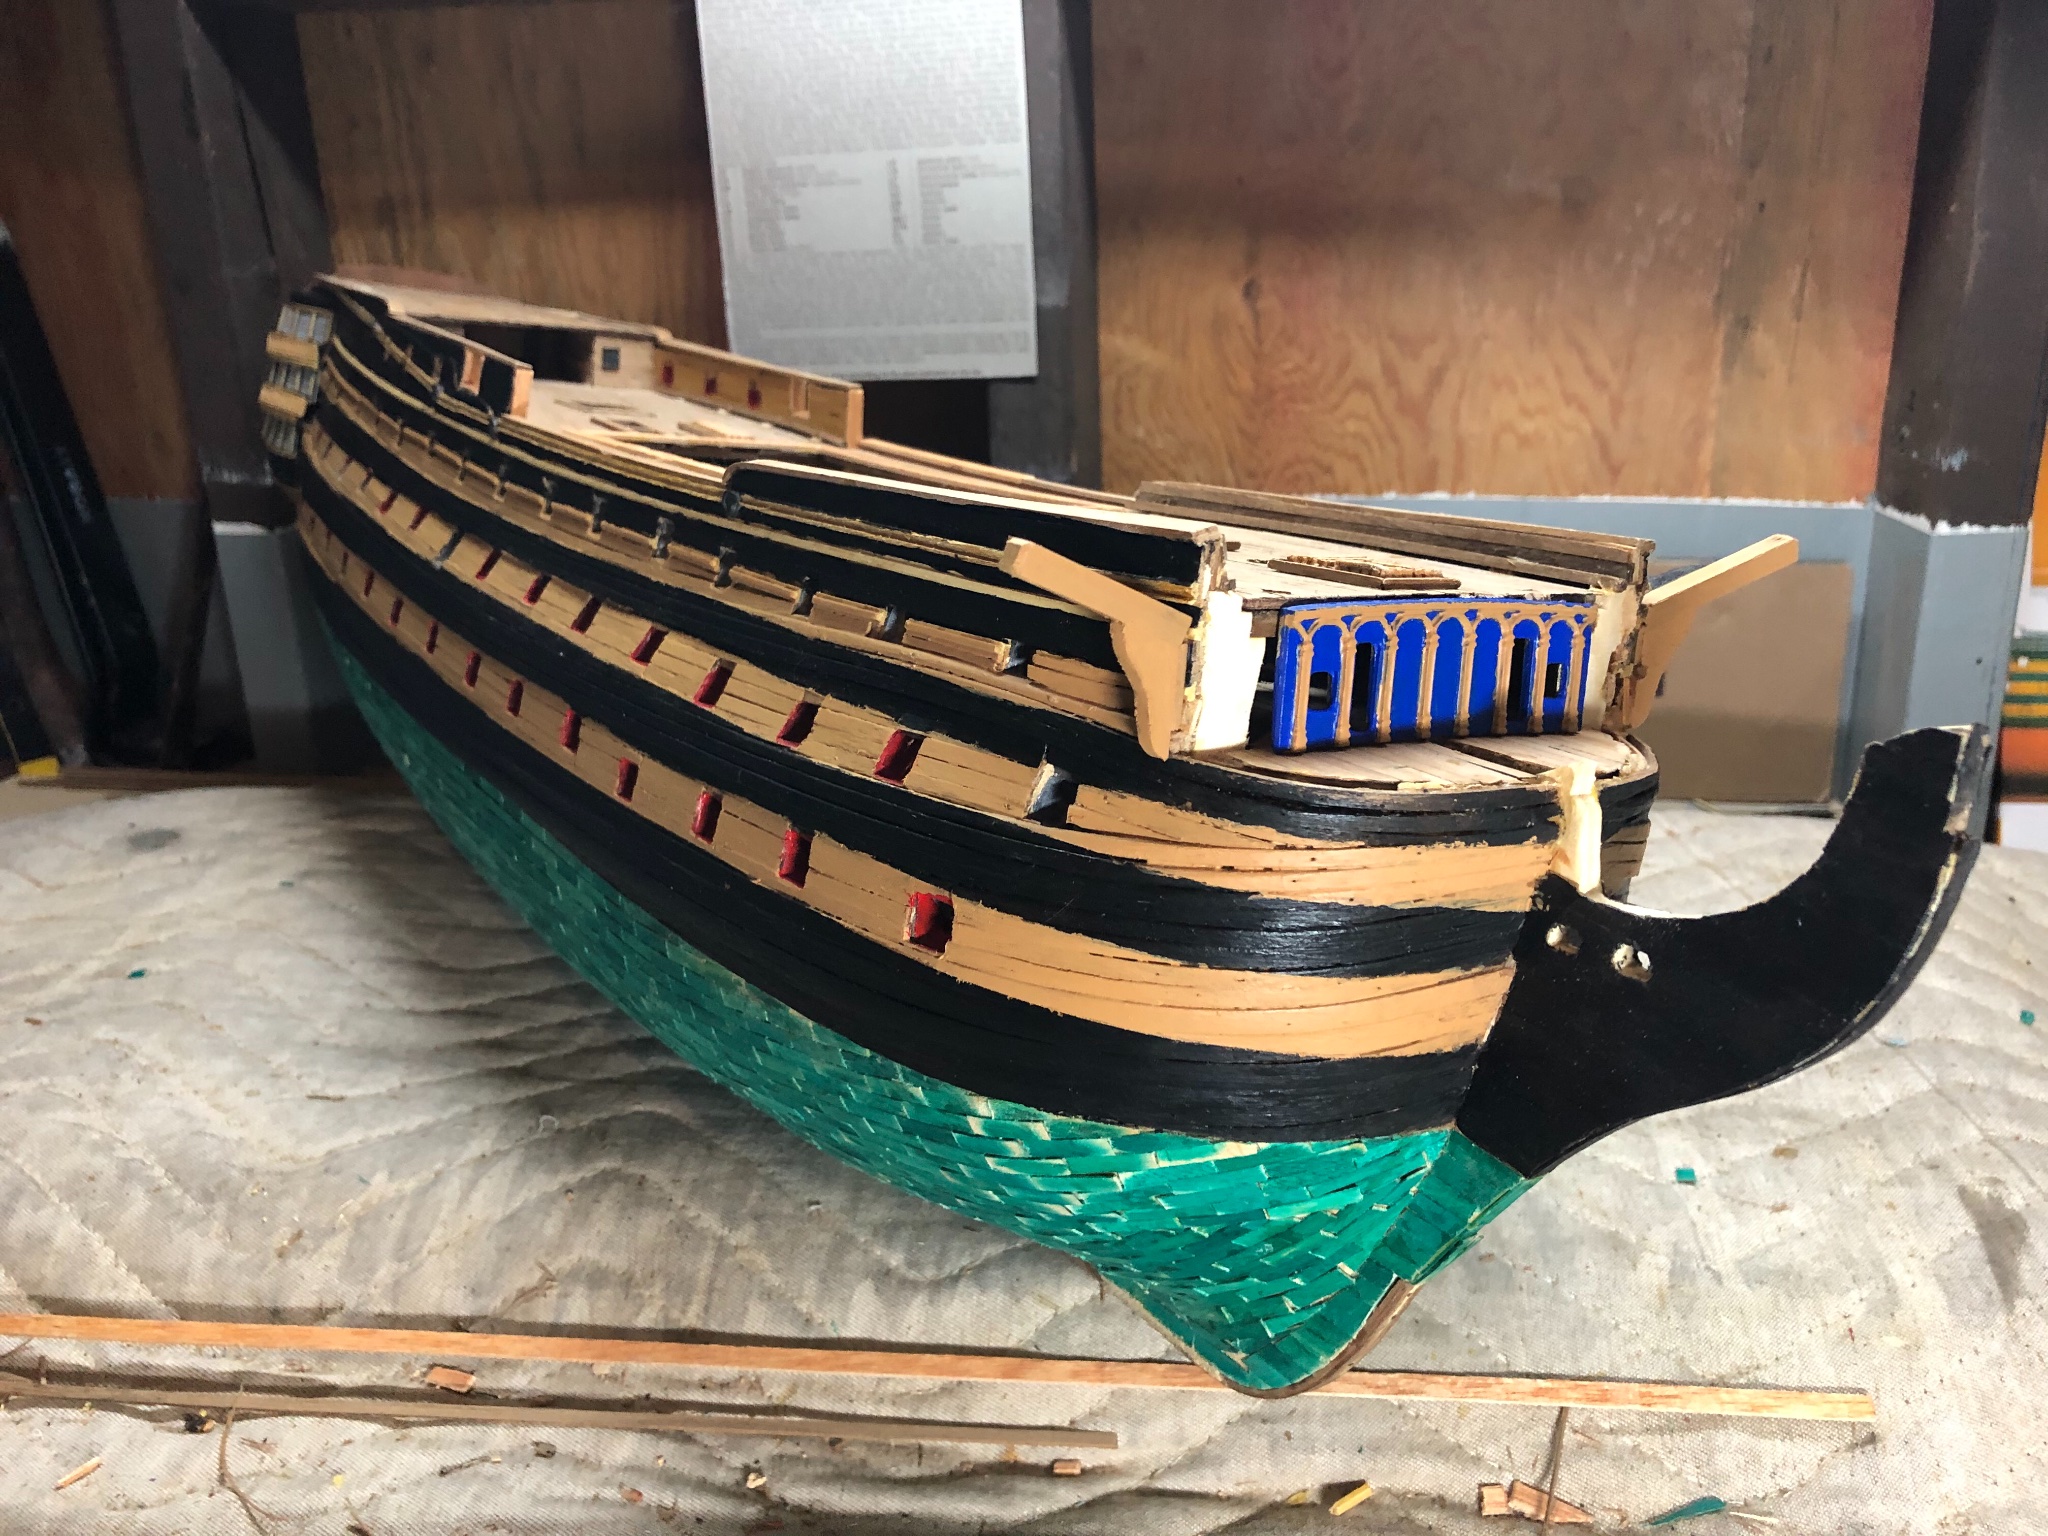
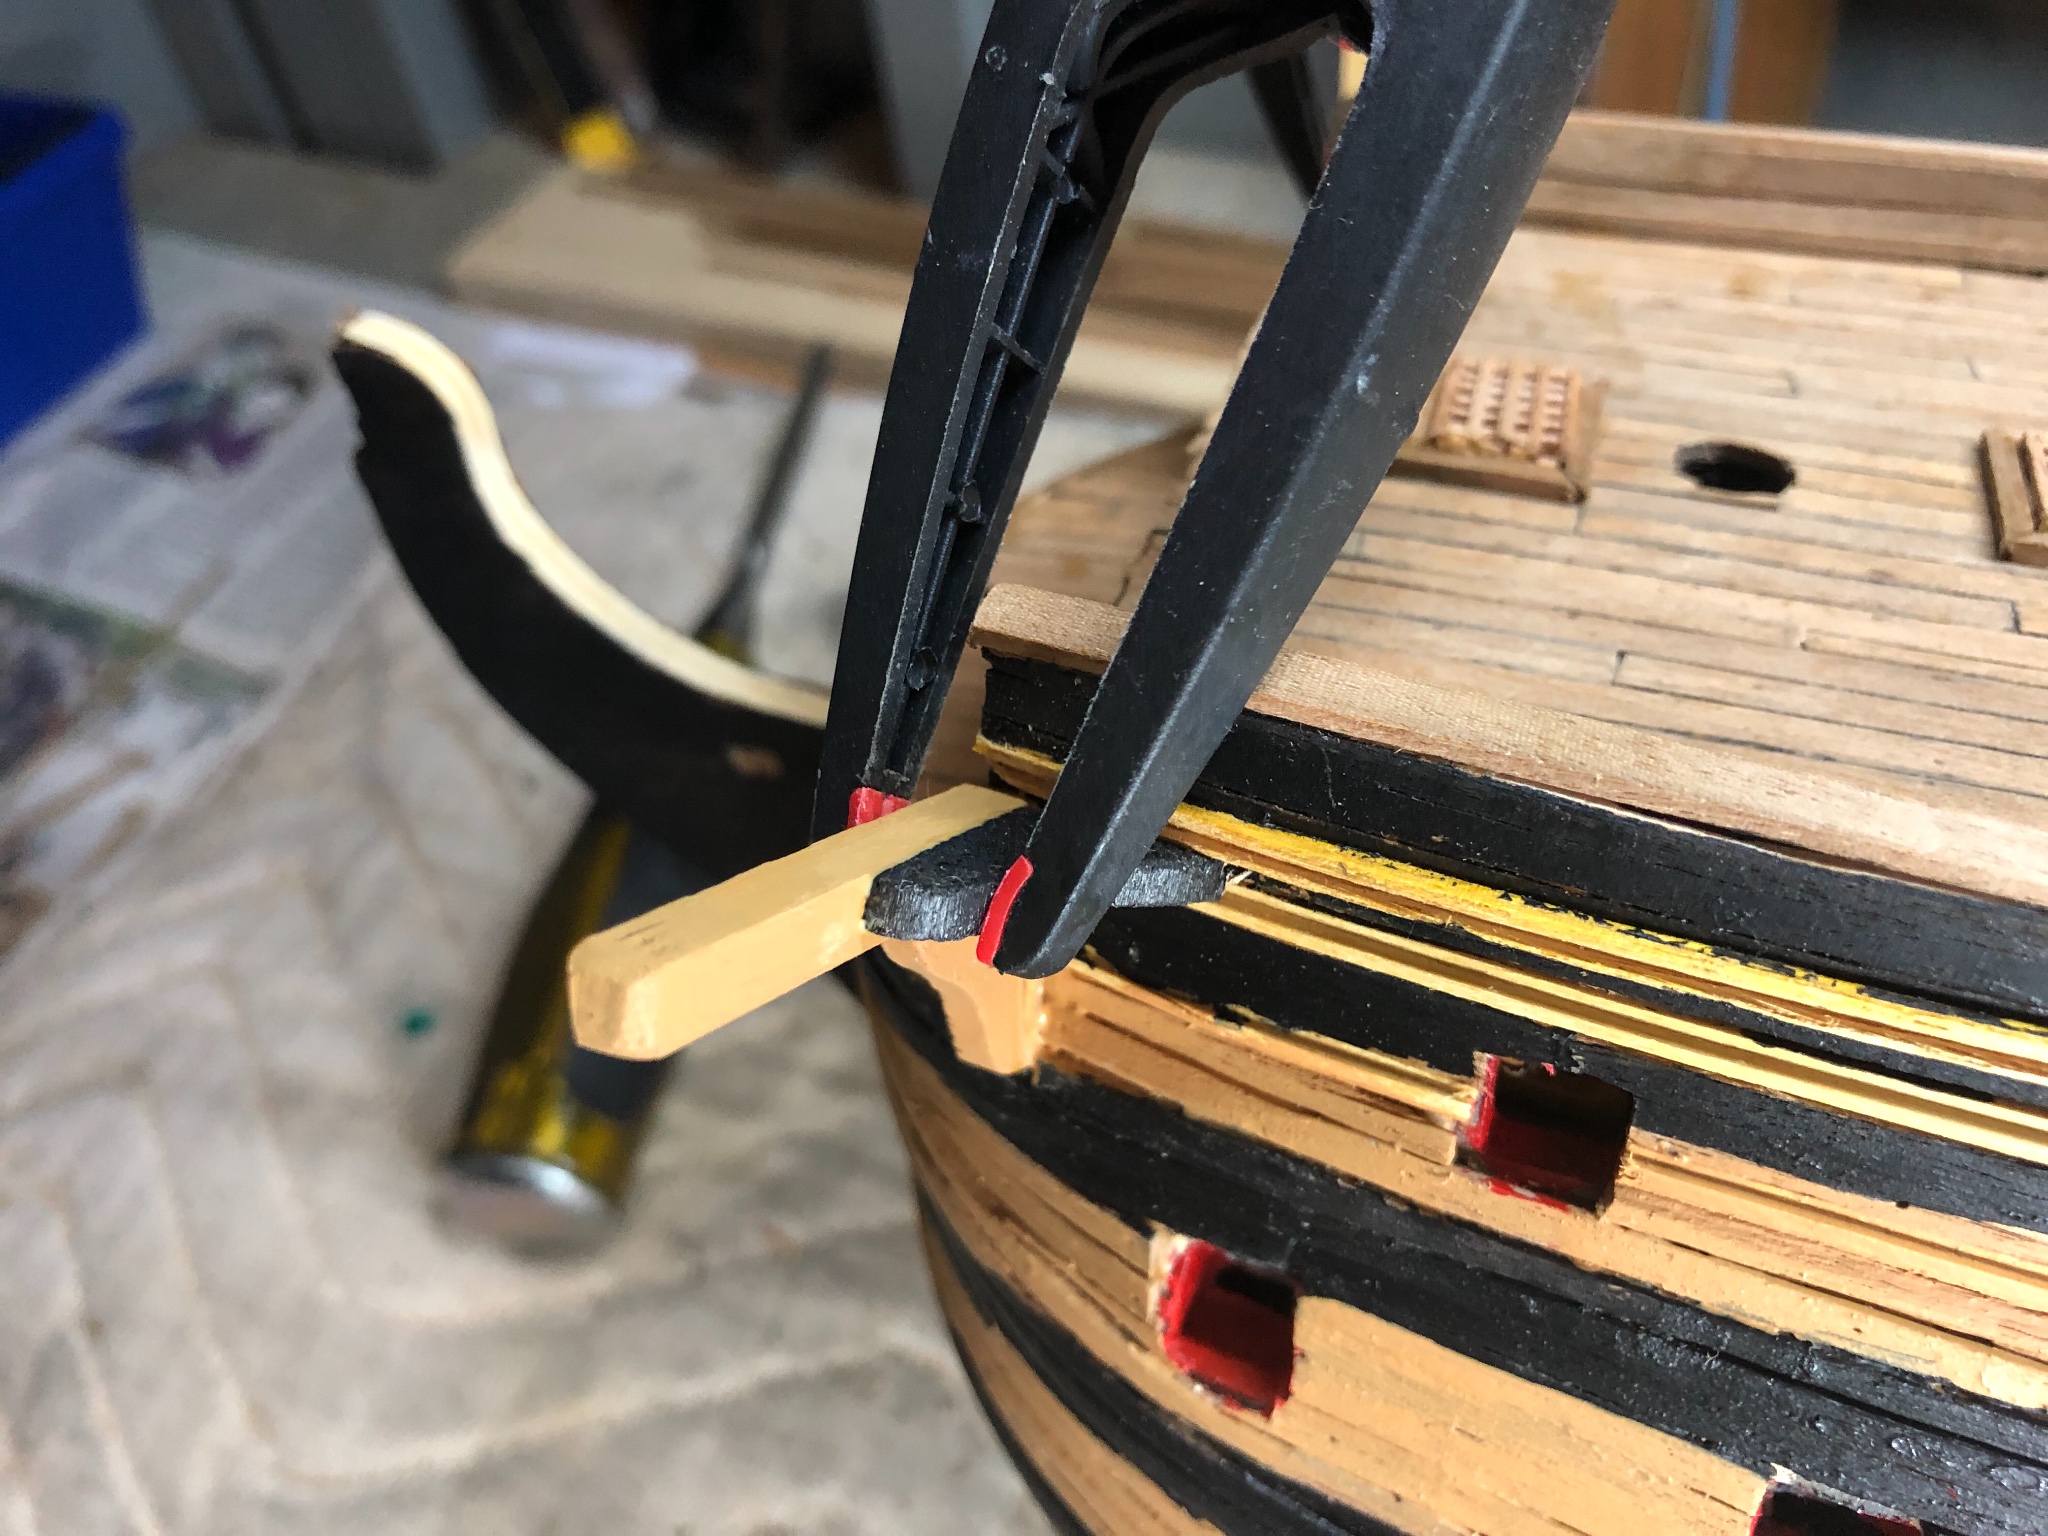
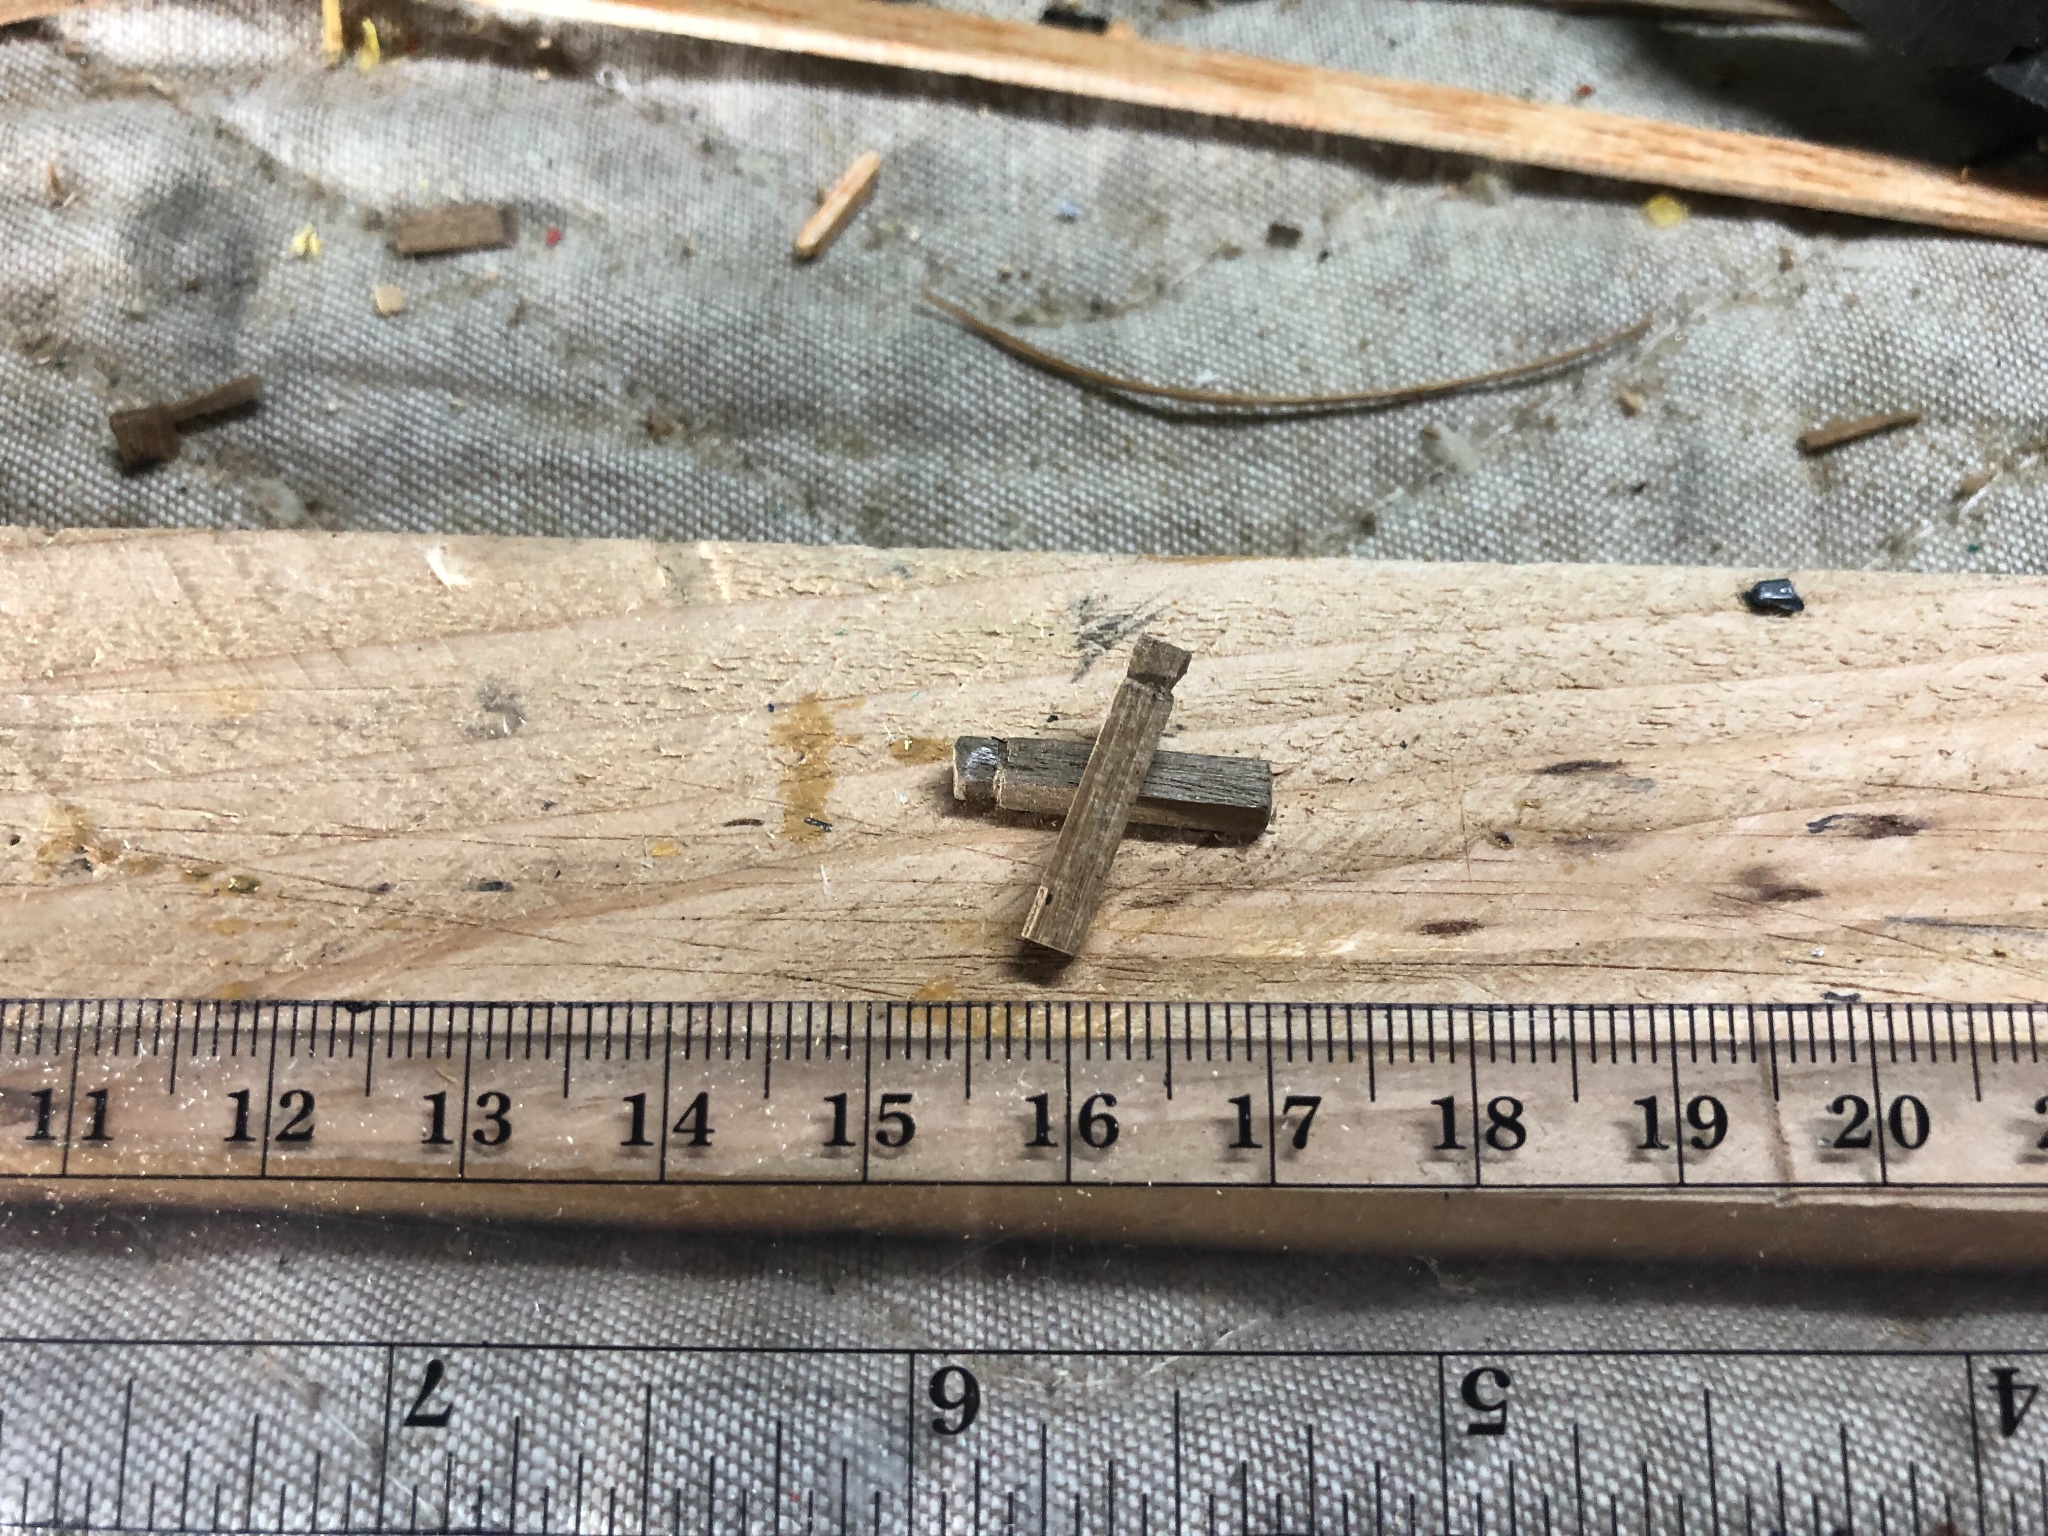
Setting the rudder. The lead pieces provided are brittle and subject to breakage. Slow, but steady going.

-
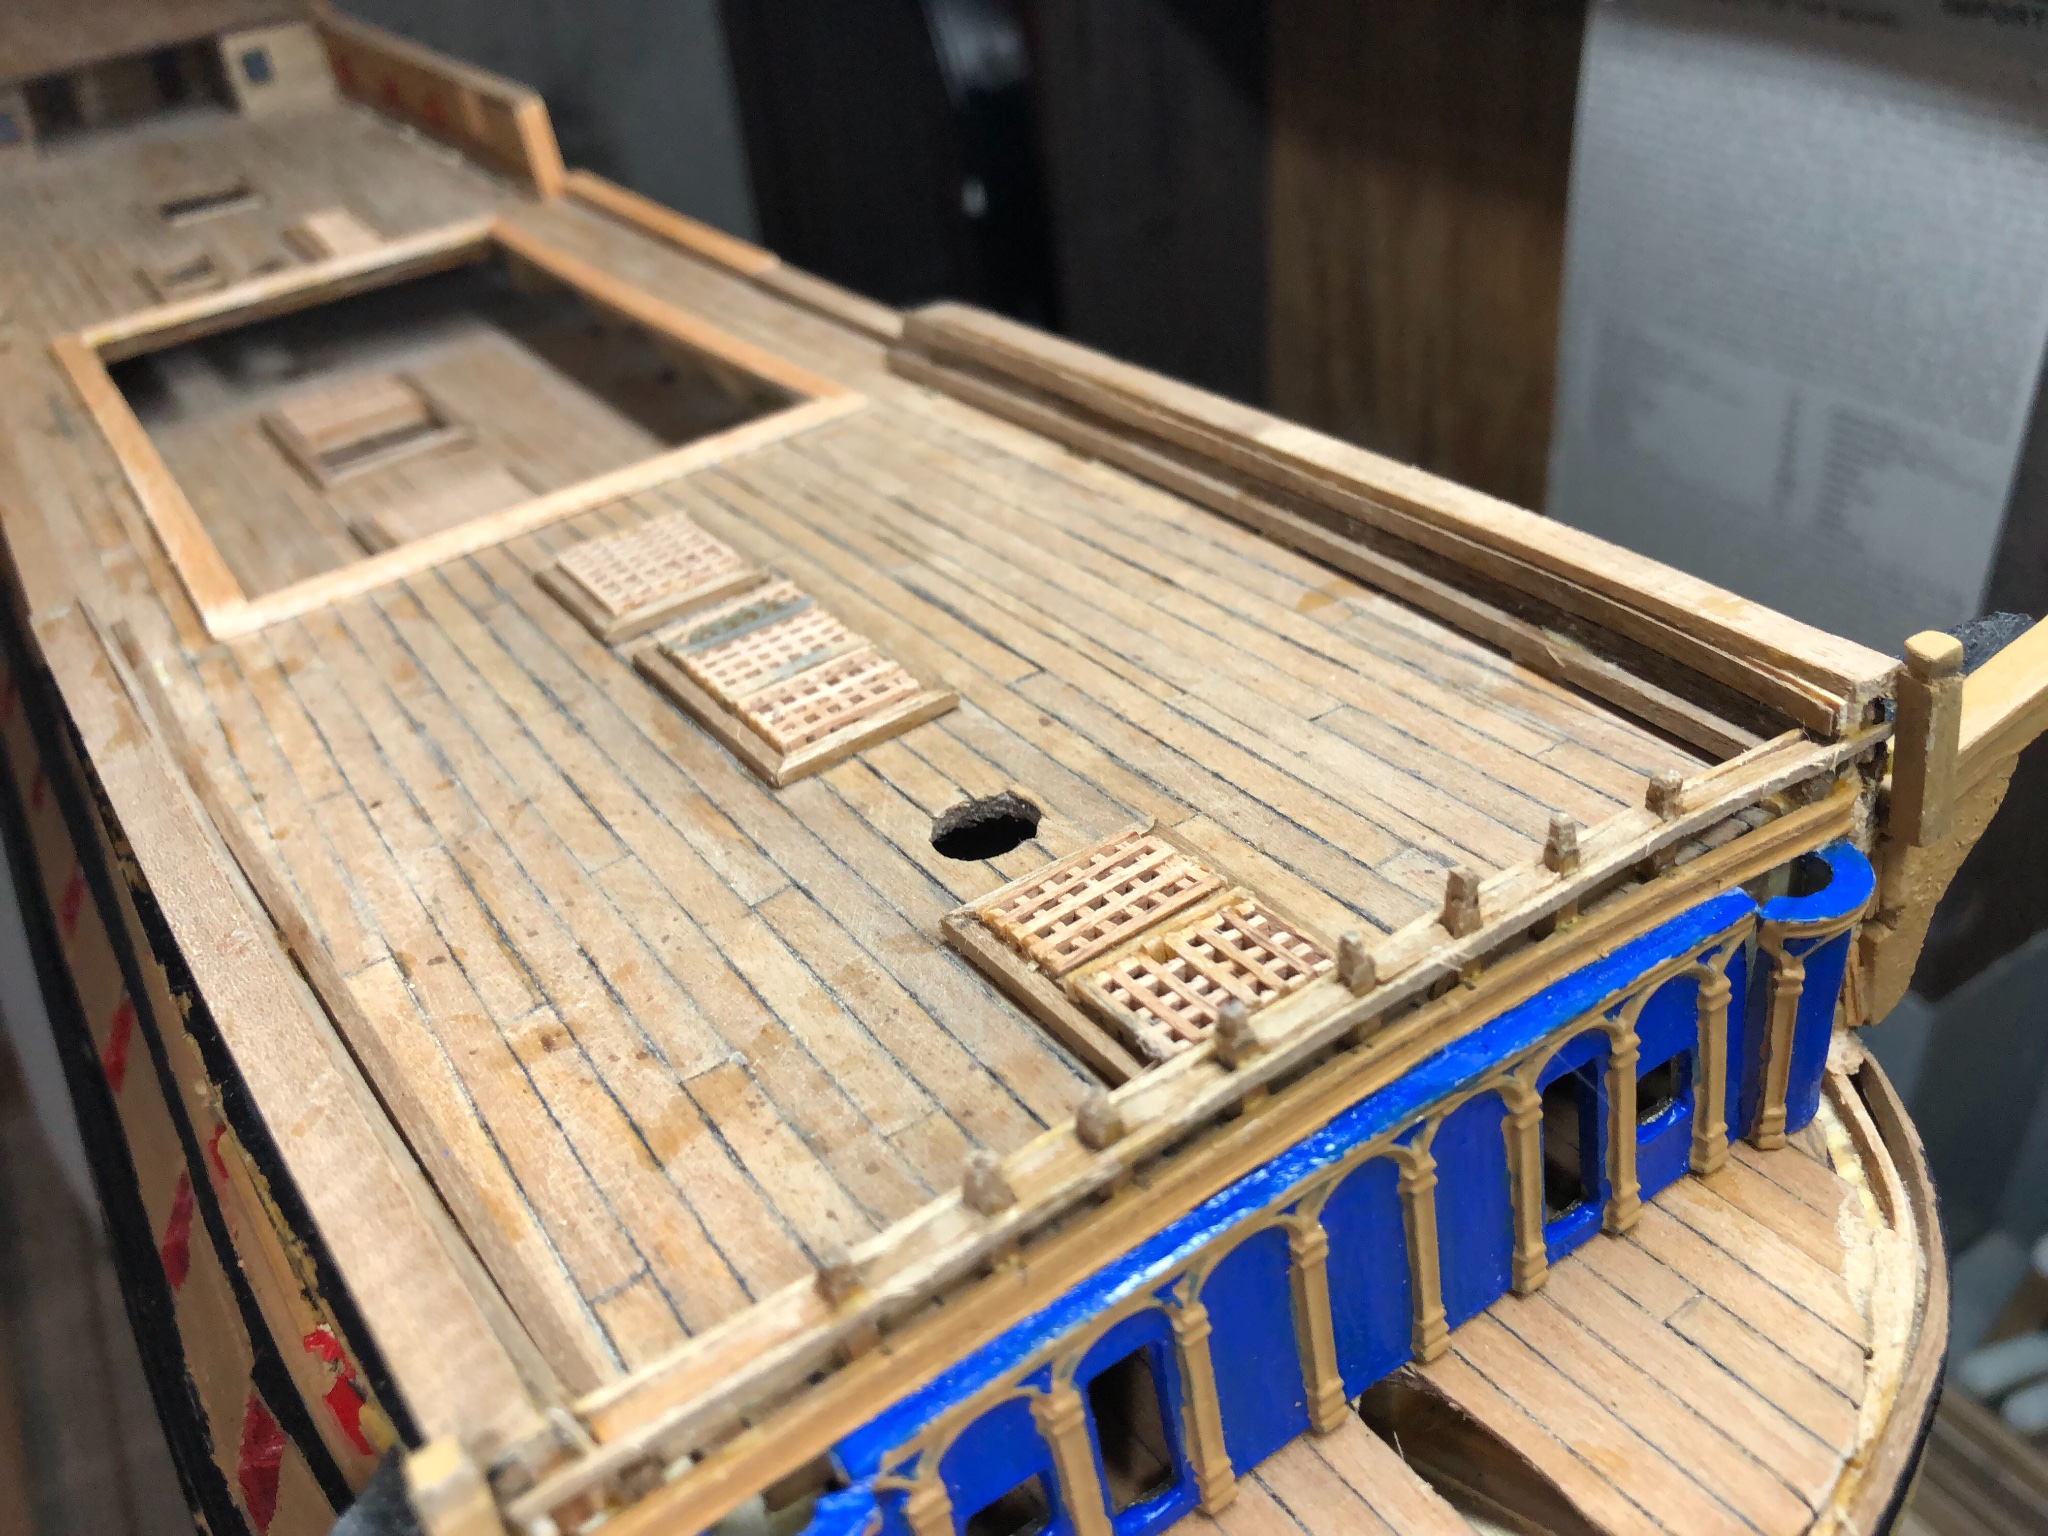
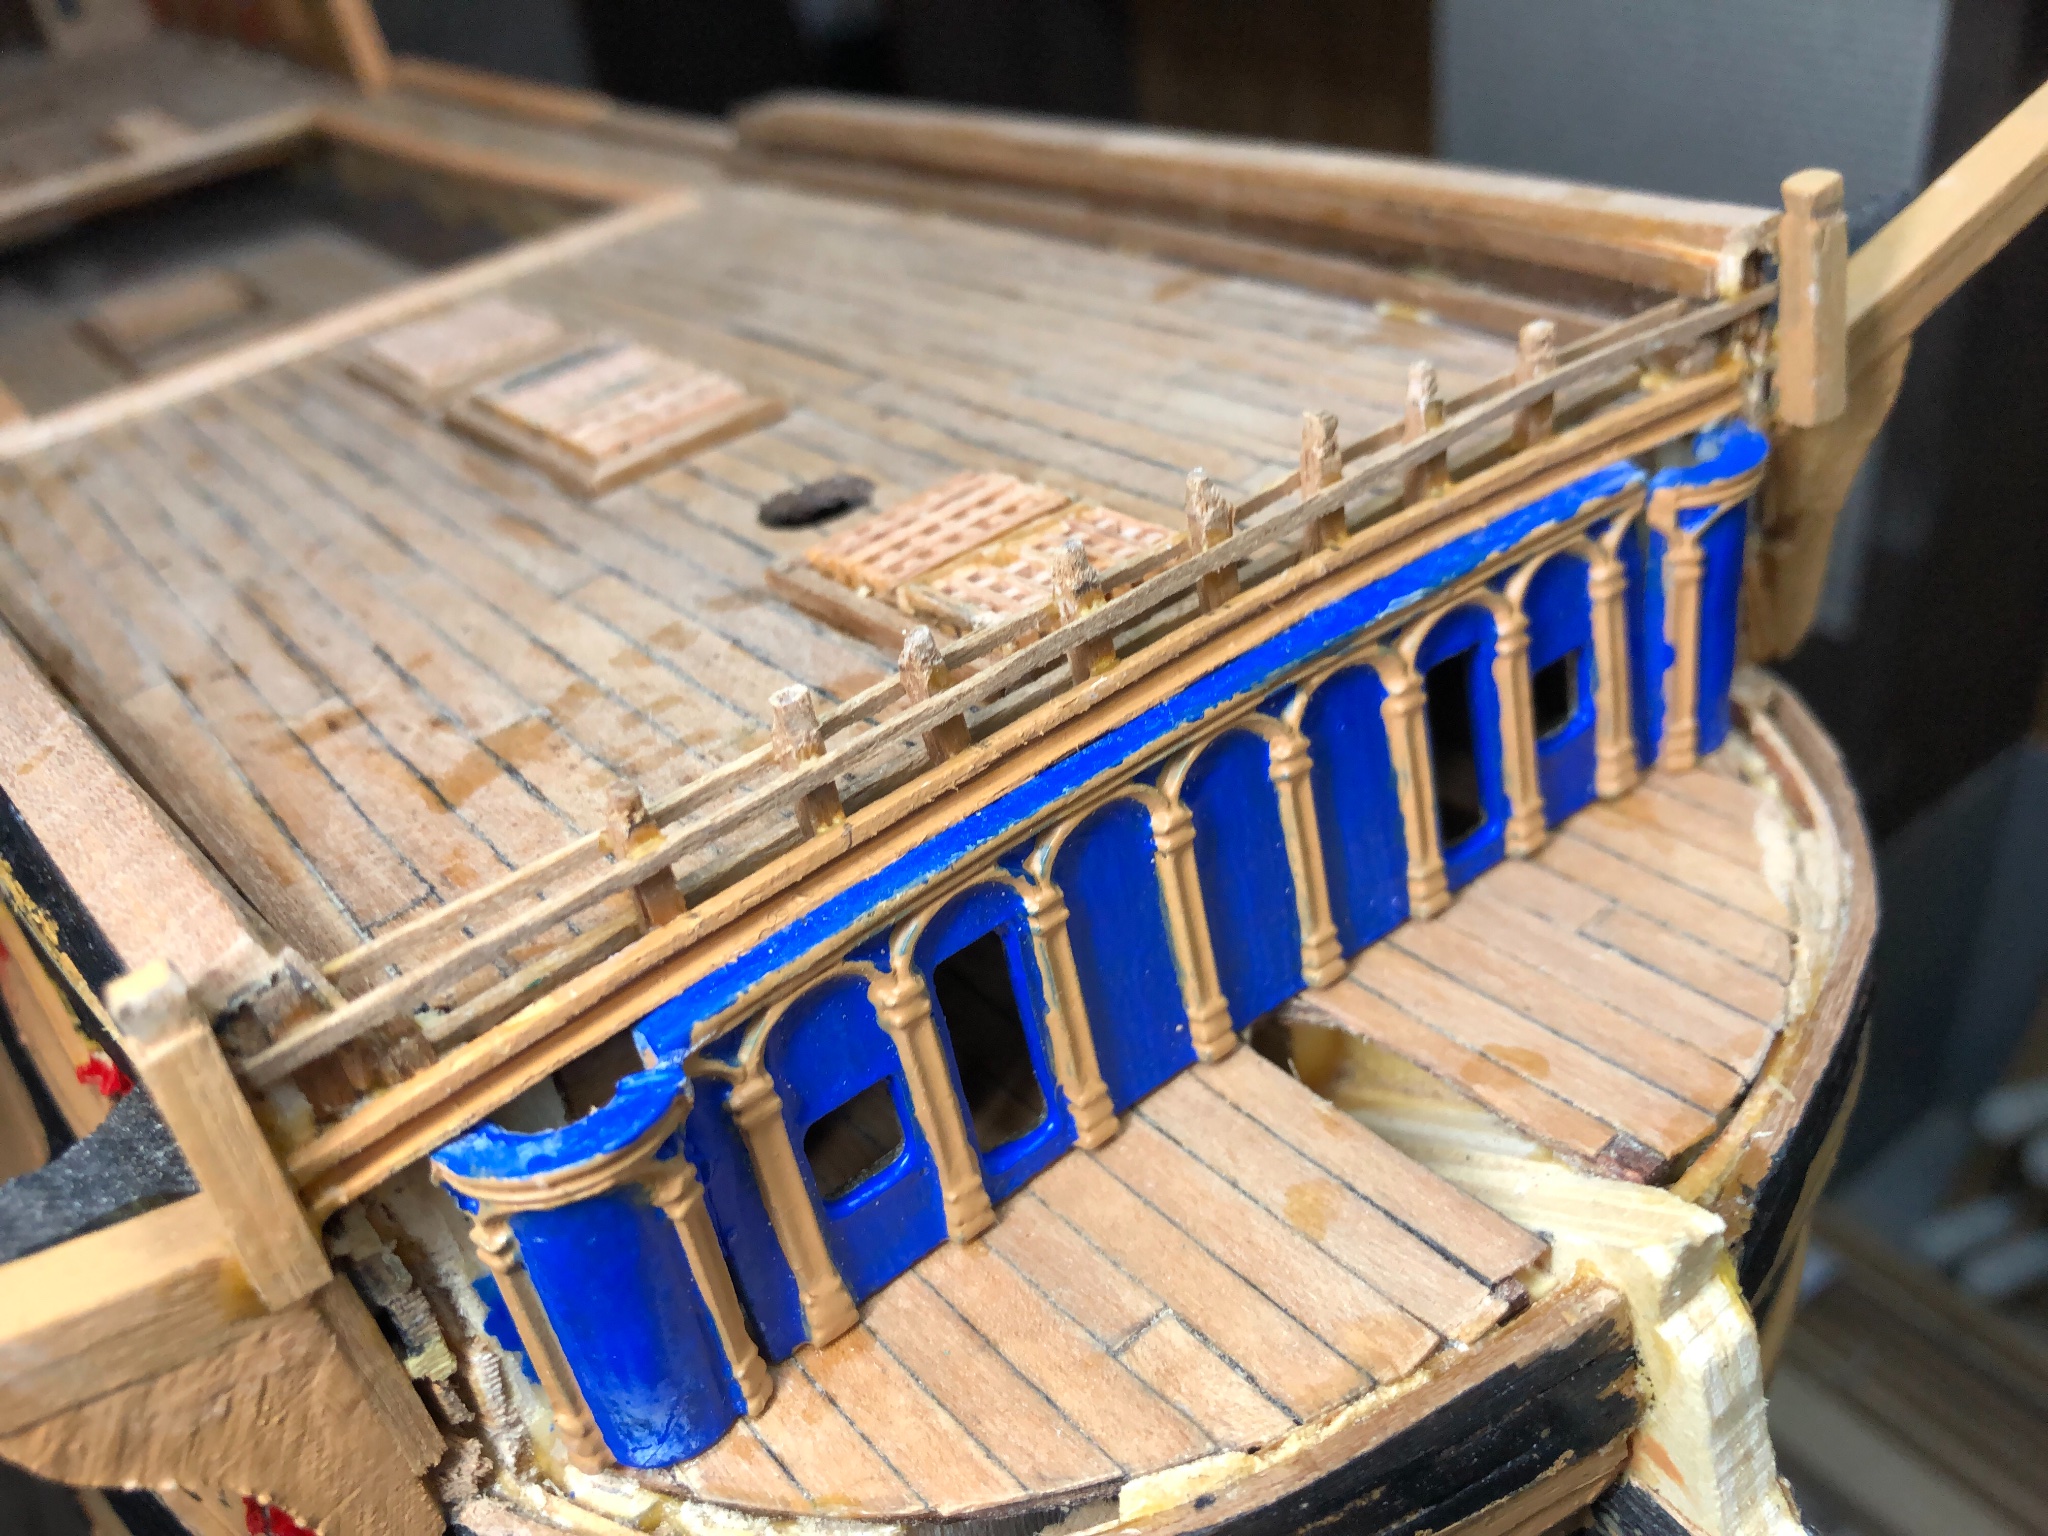
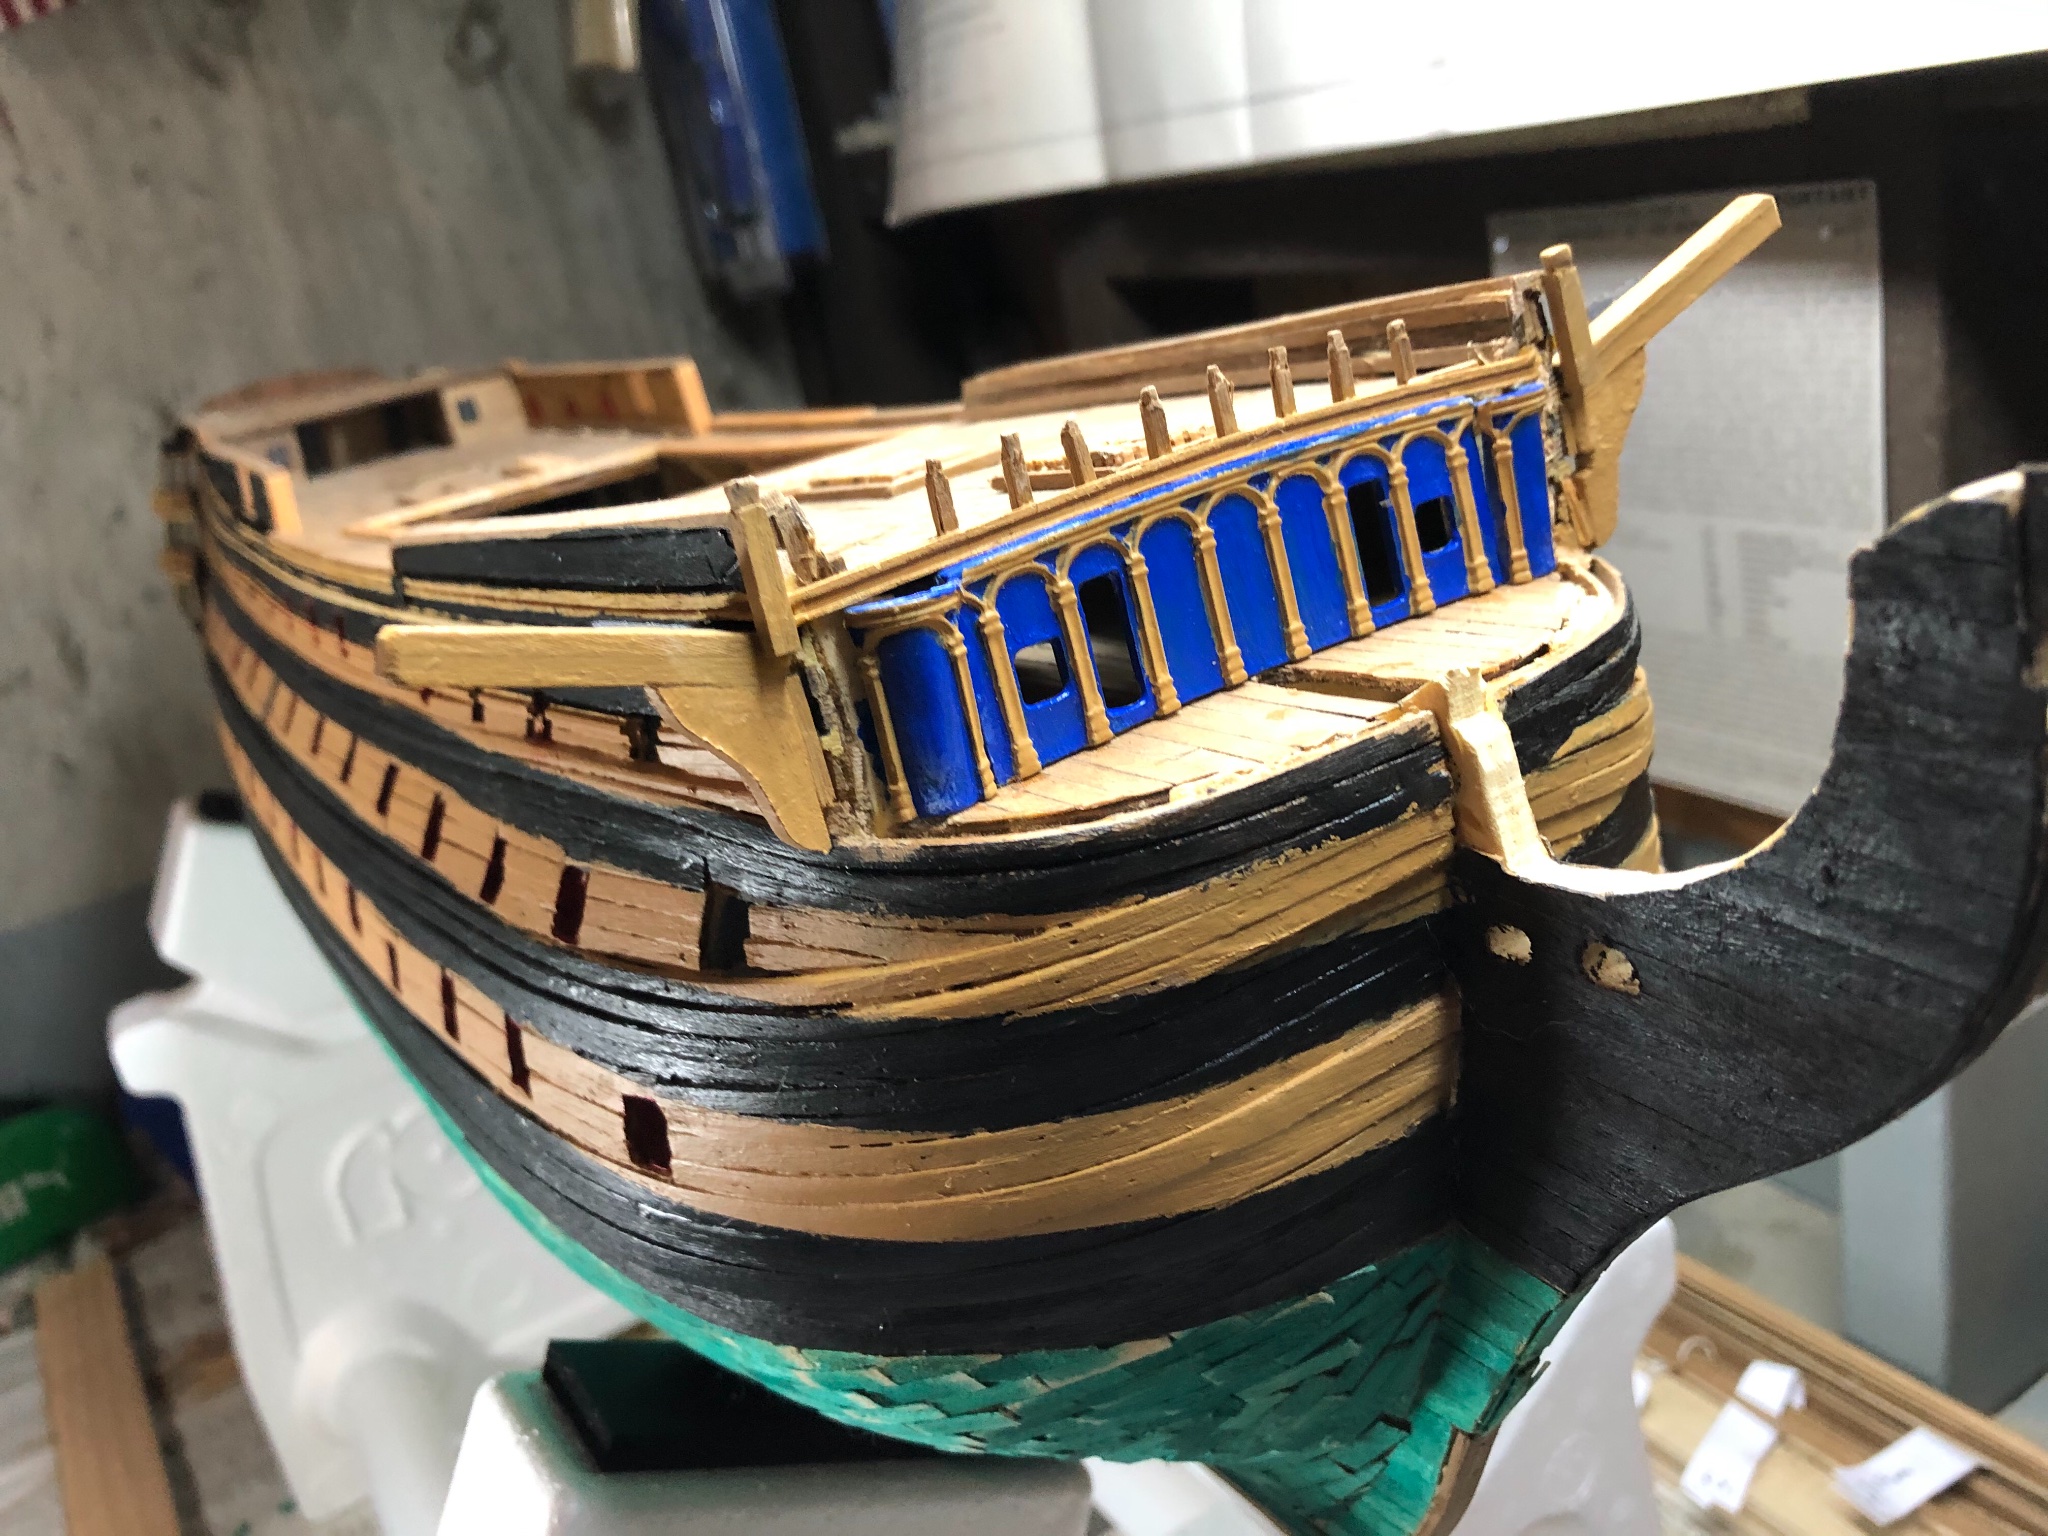
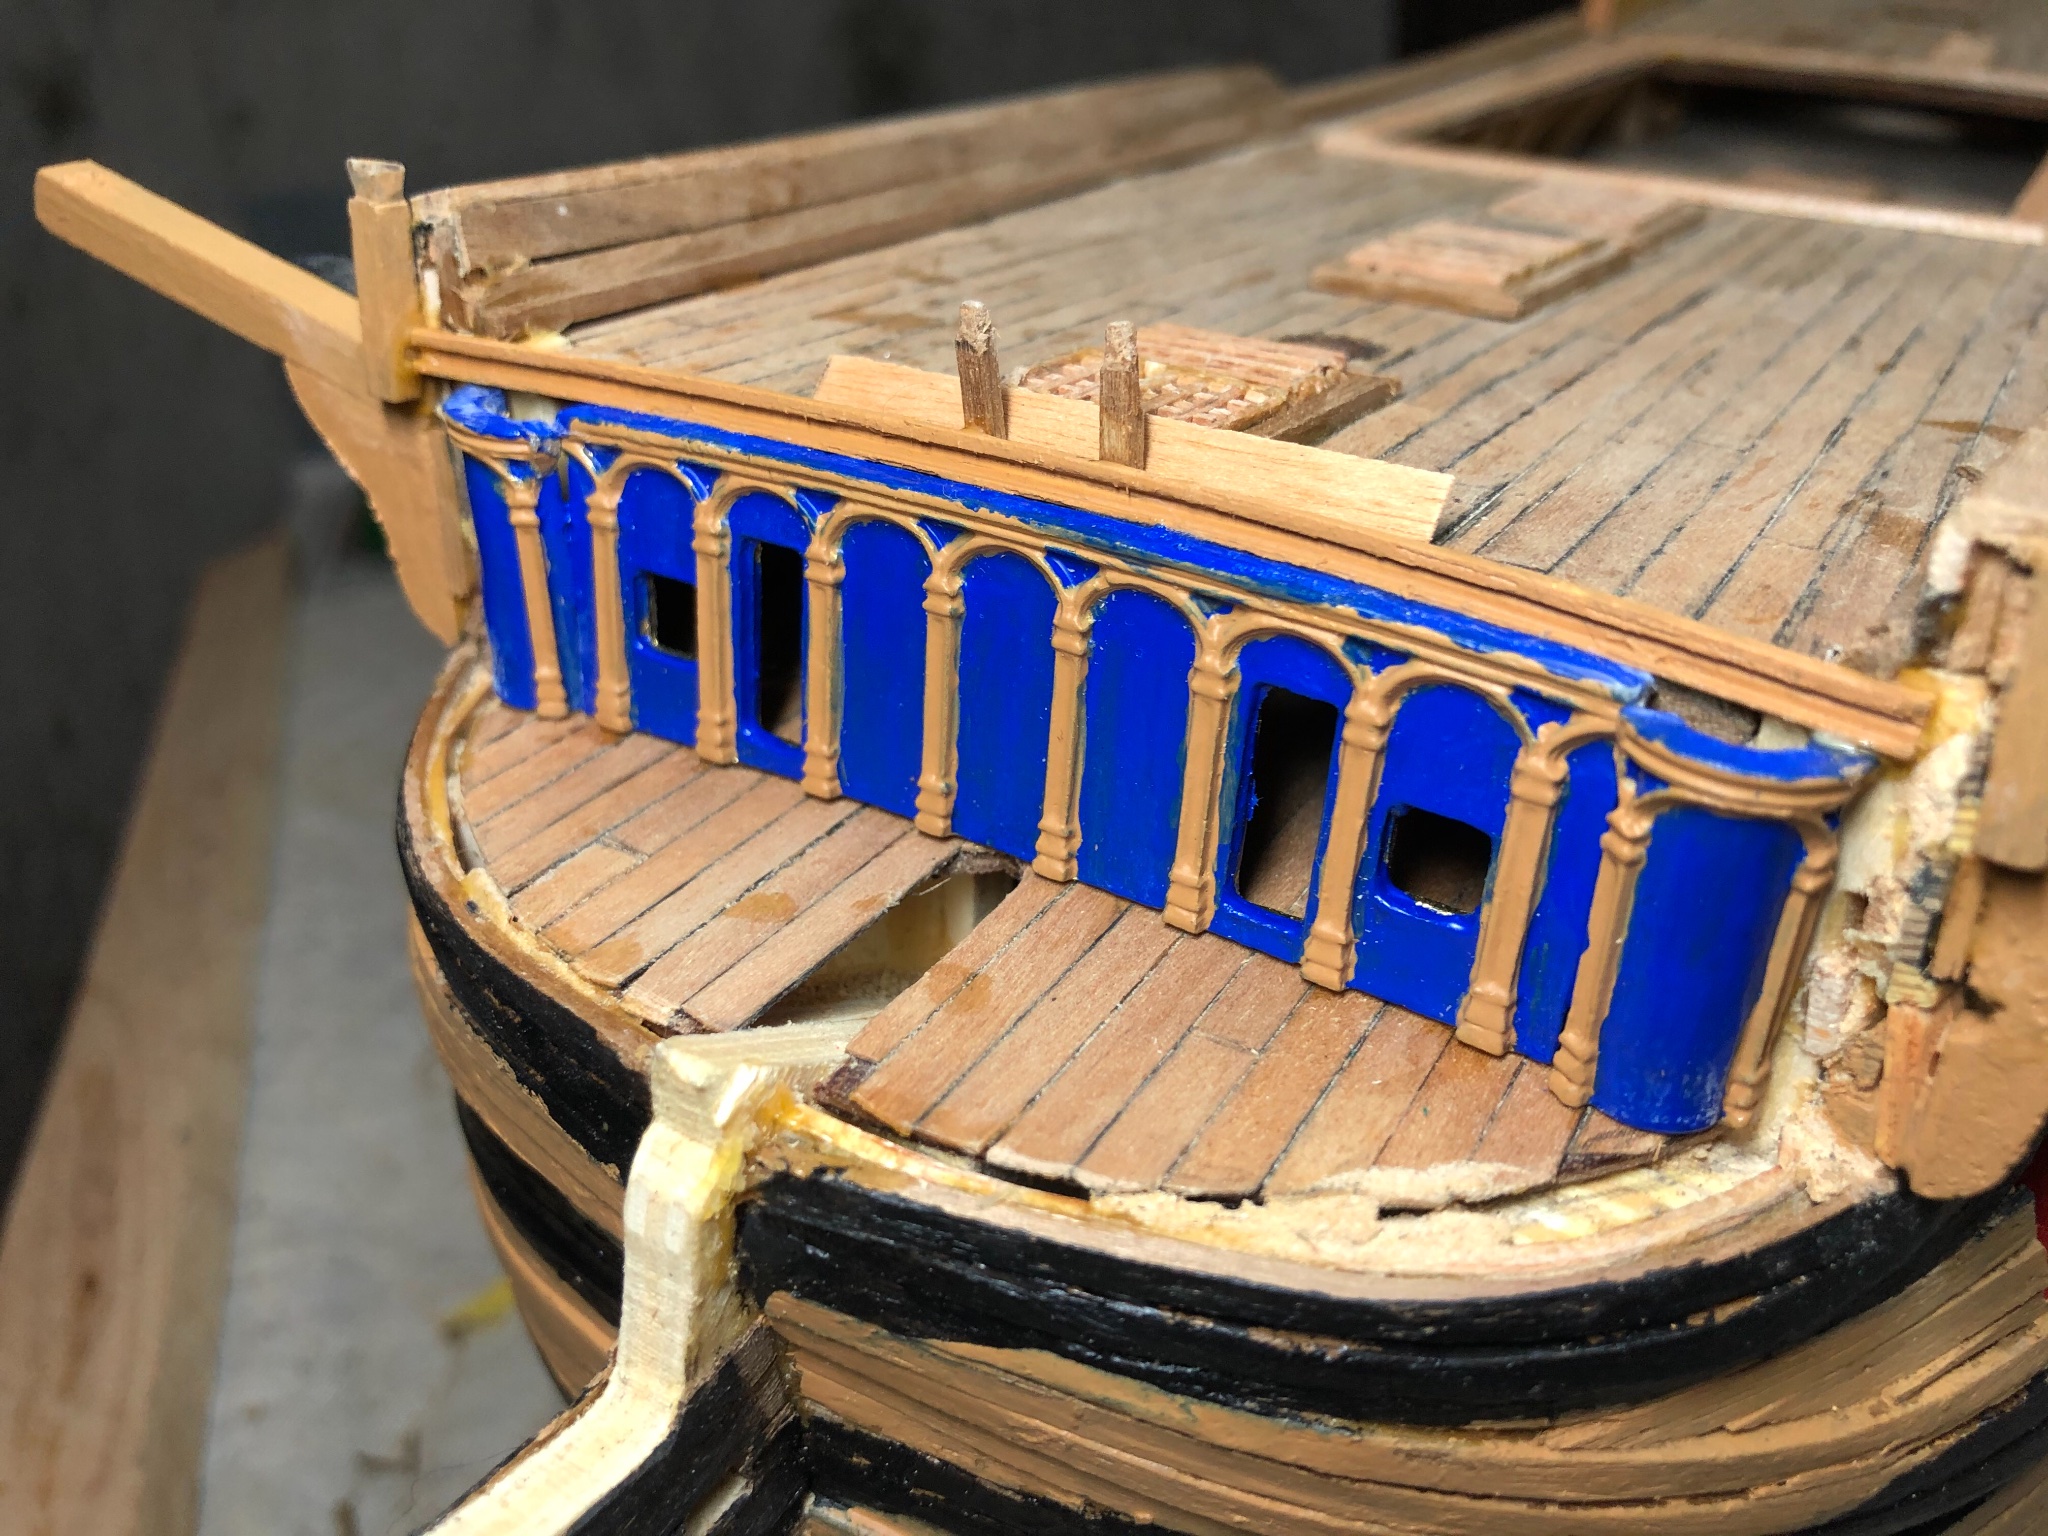
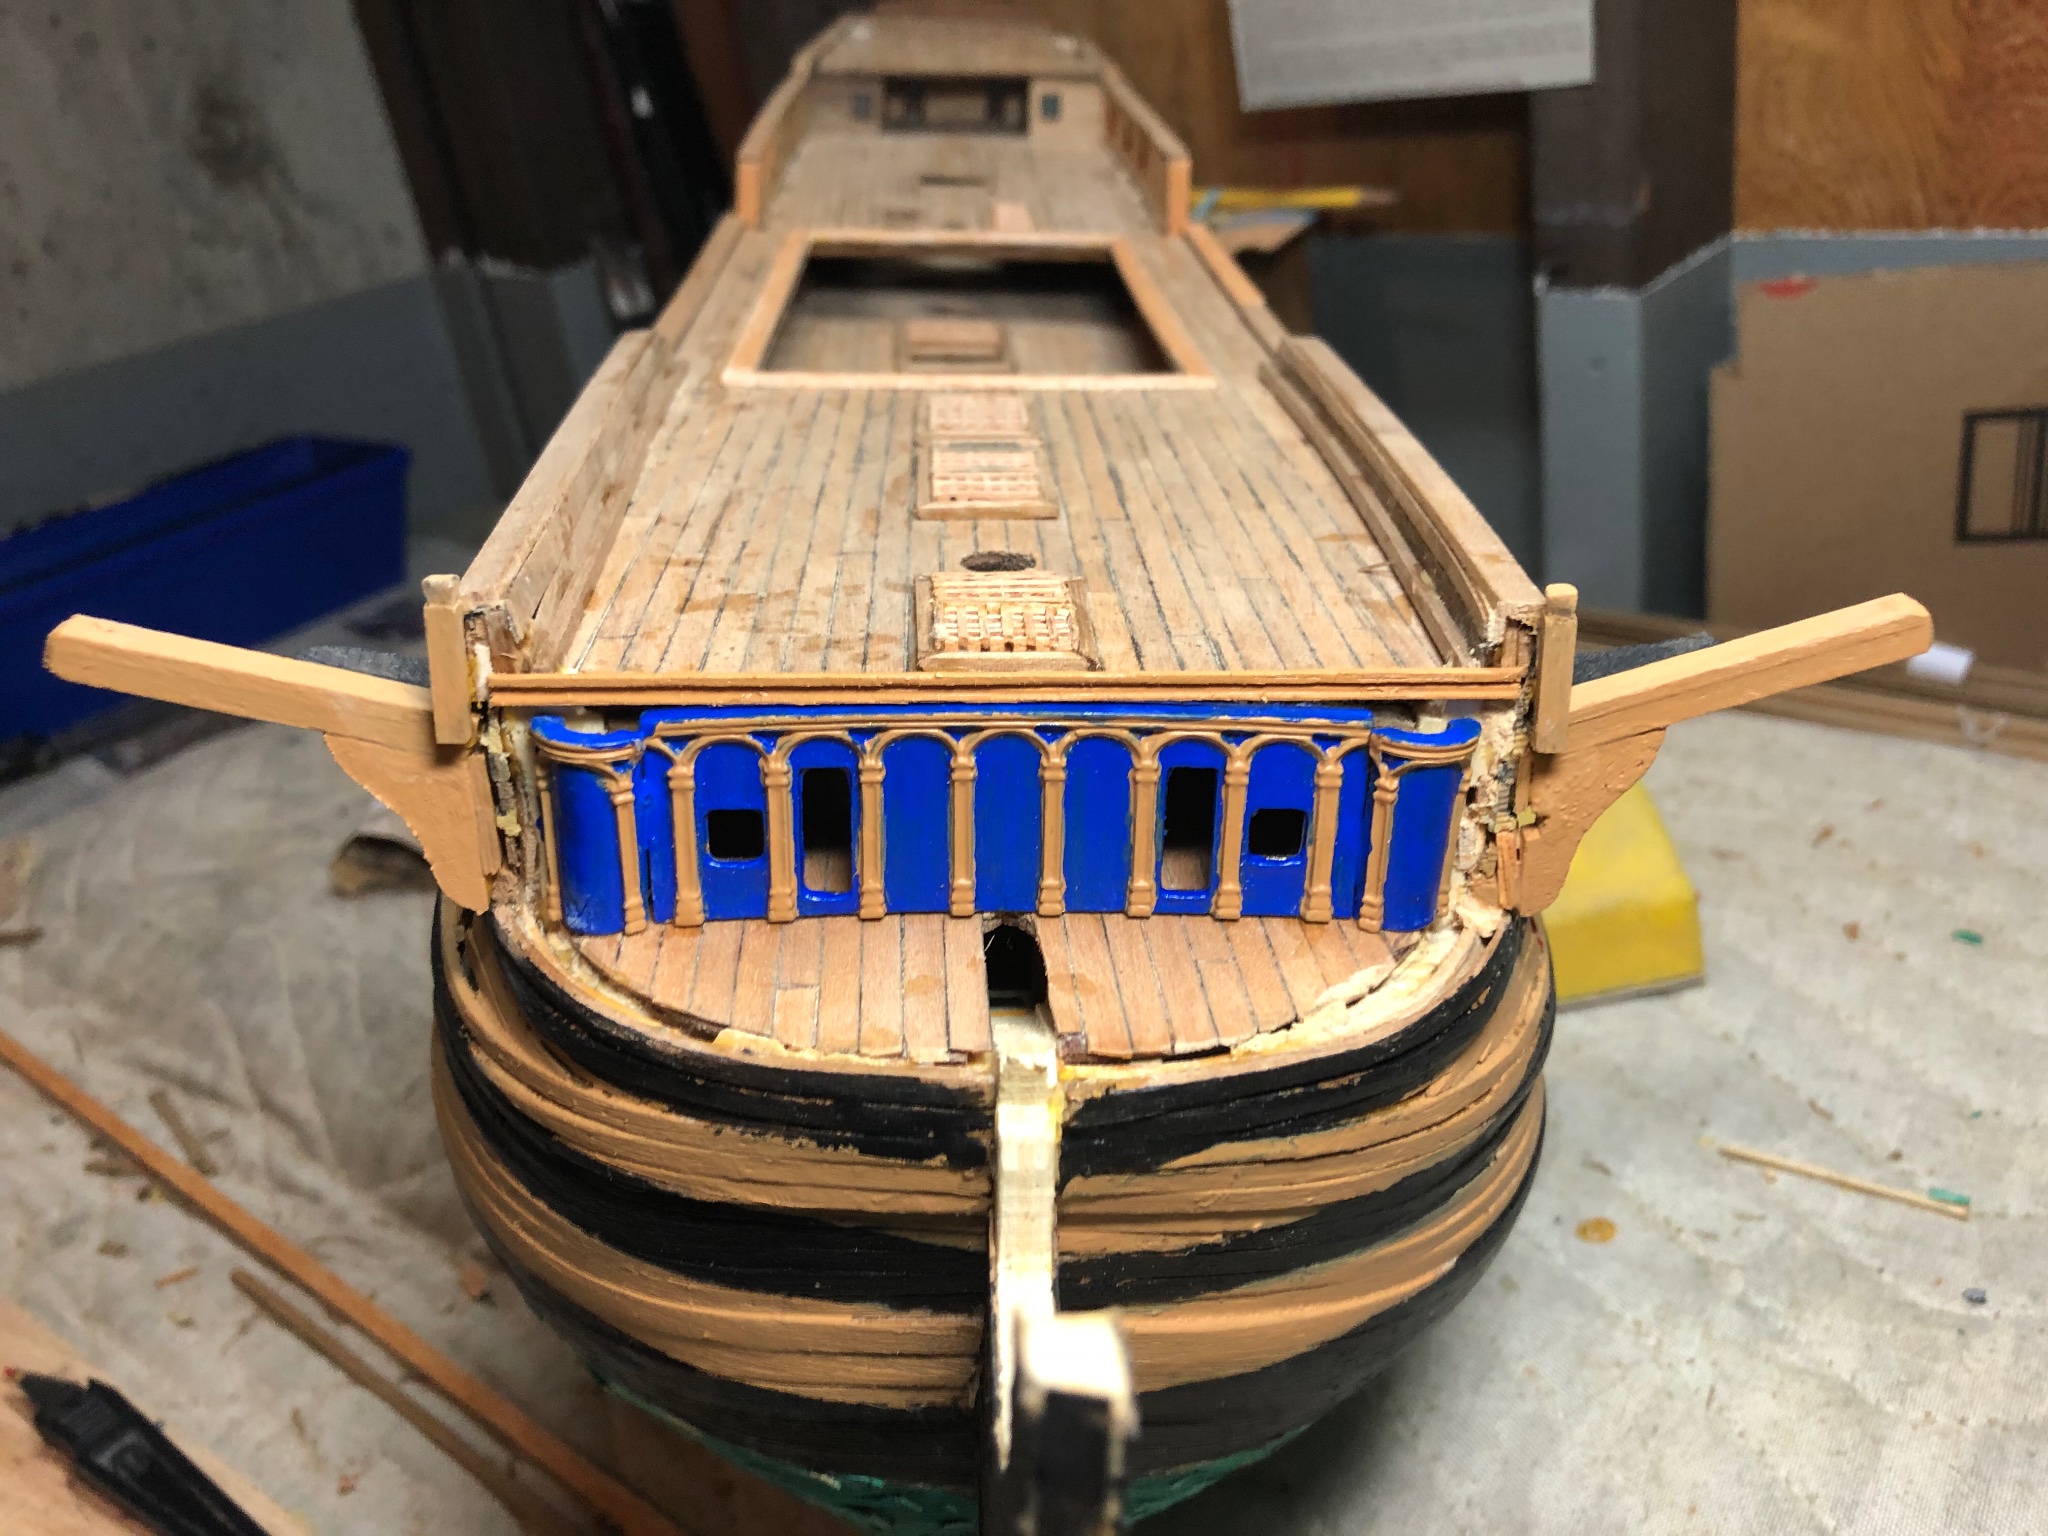
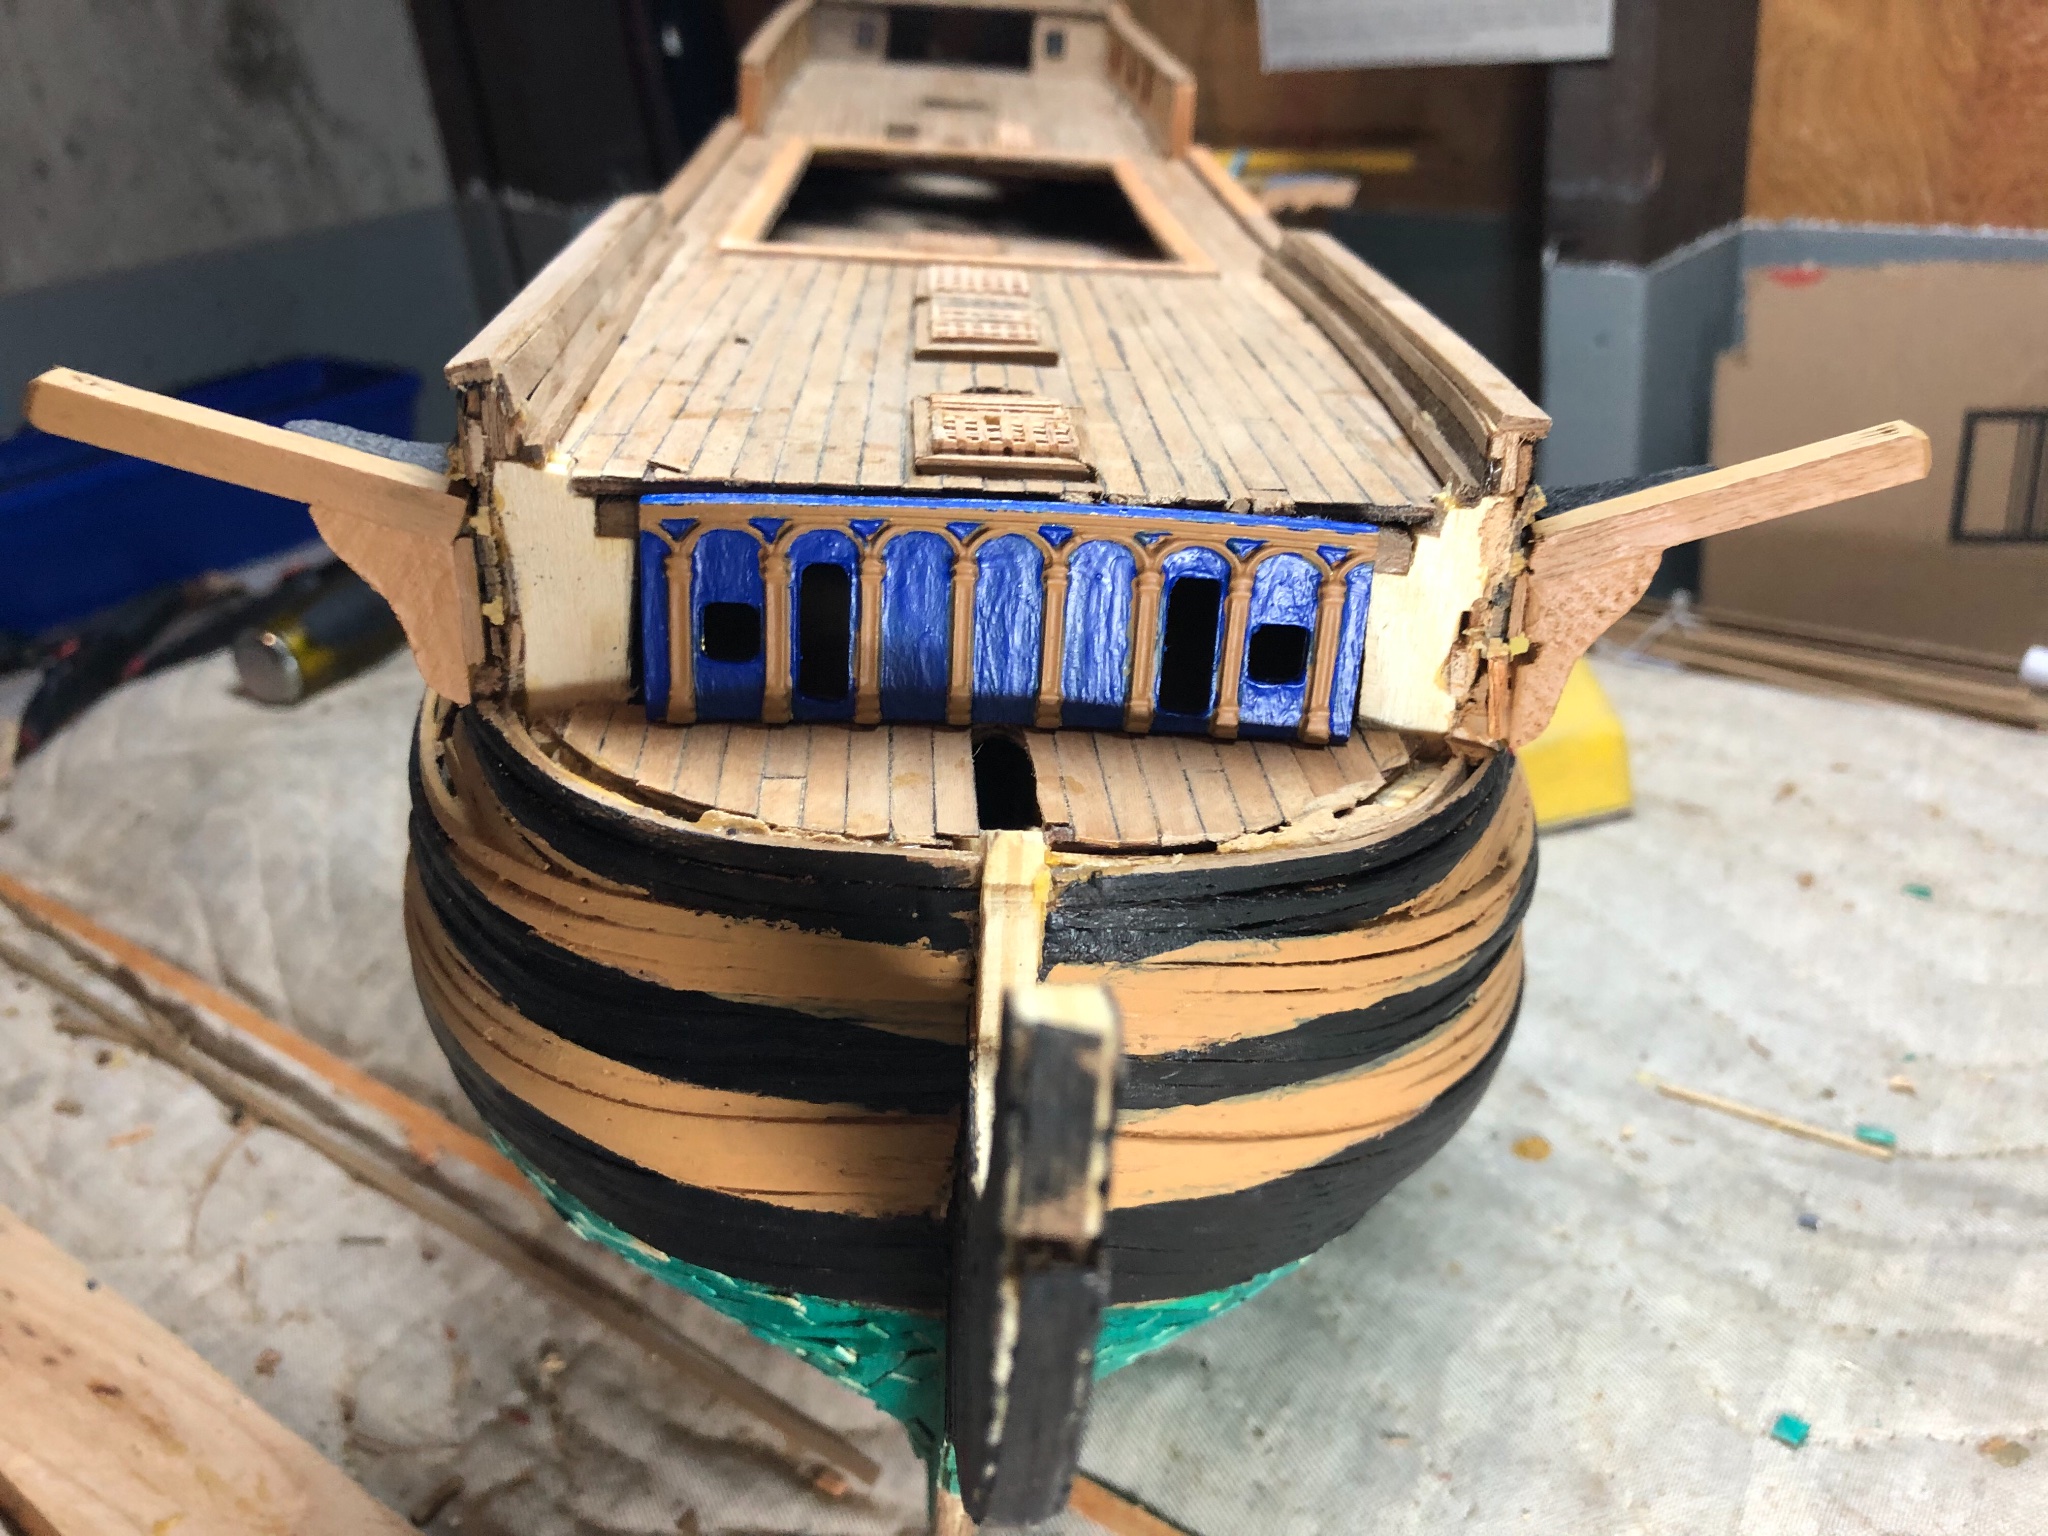
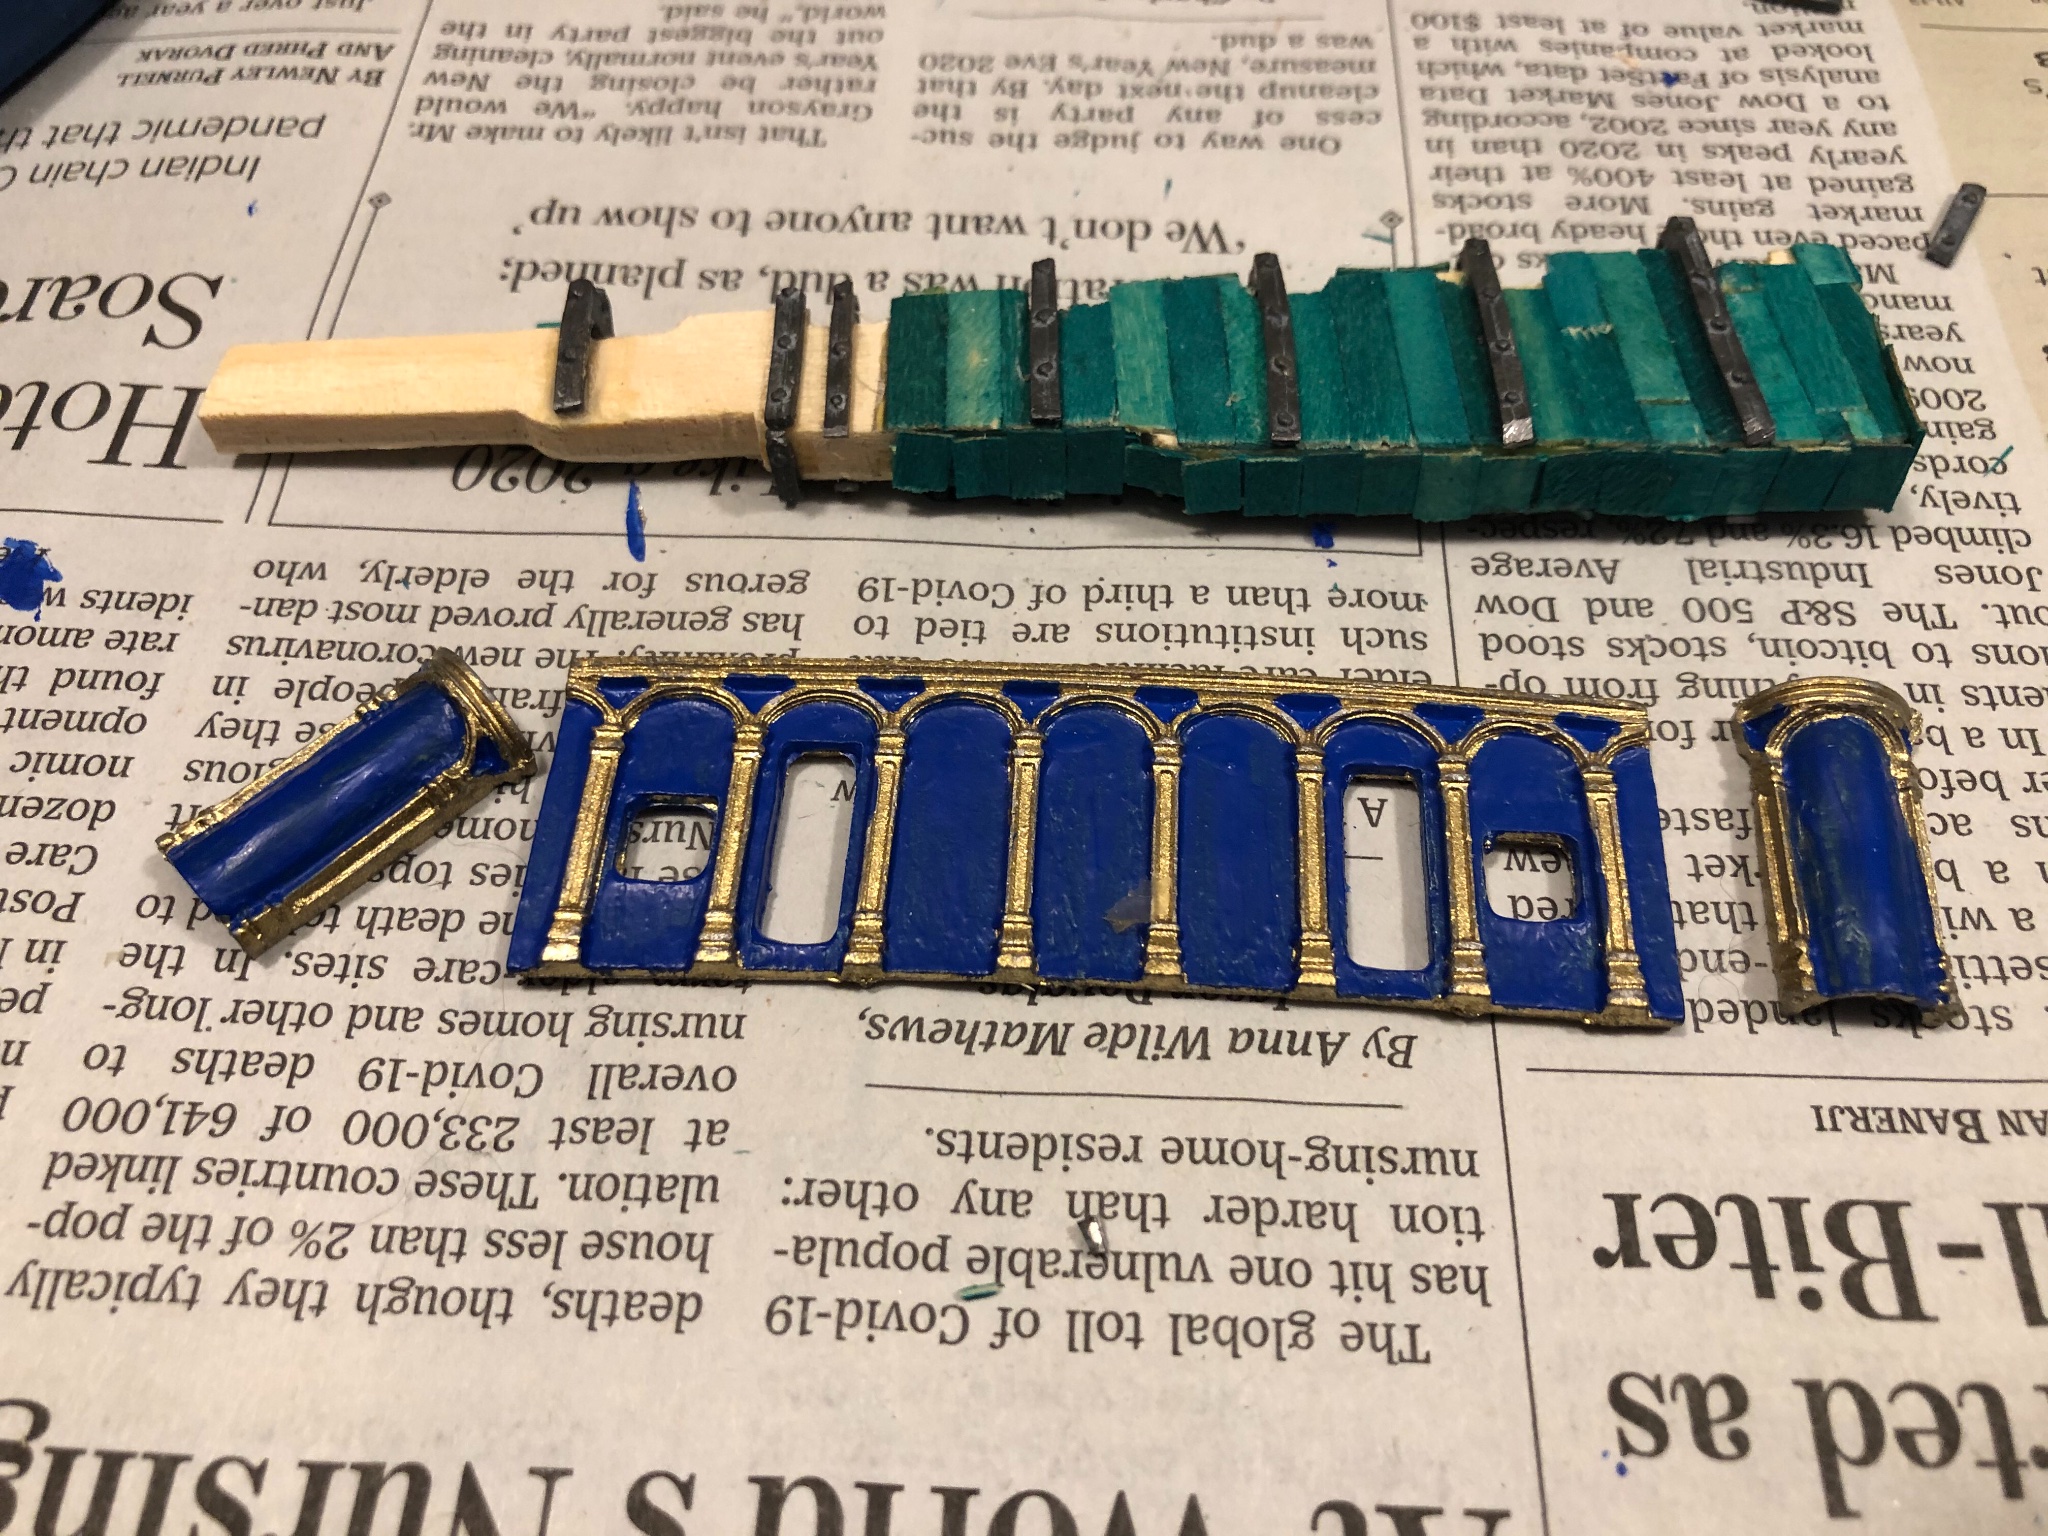
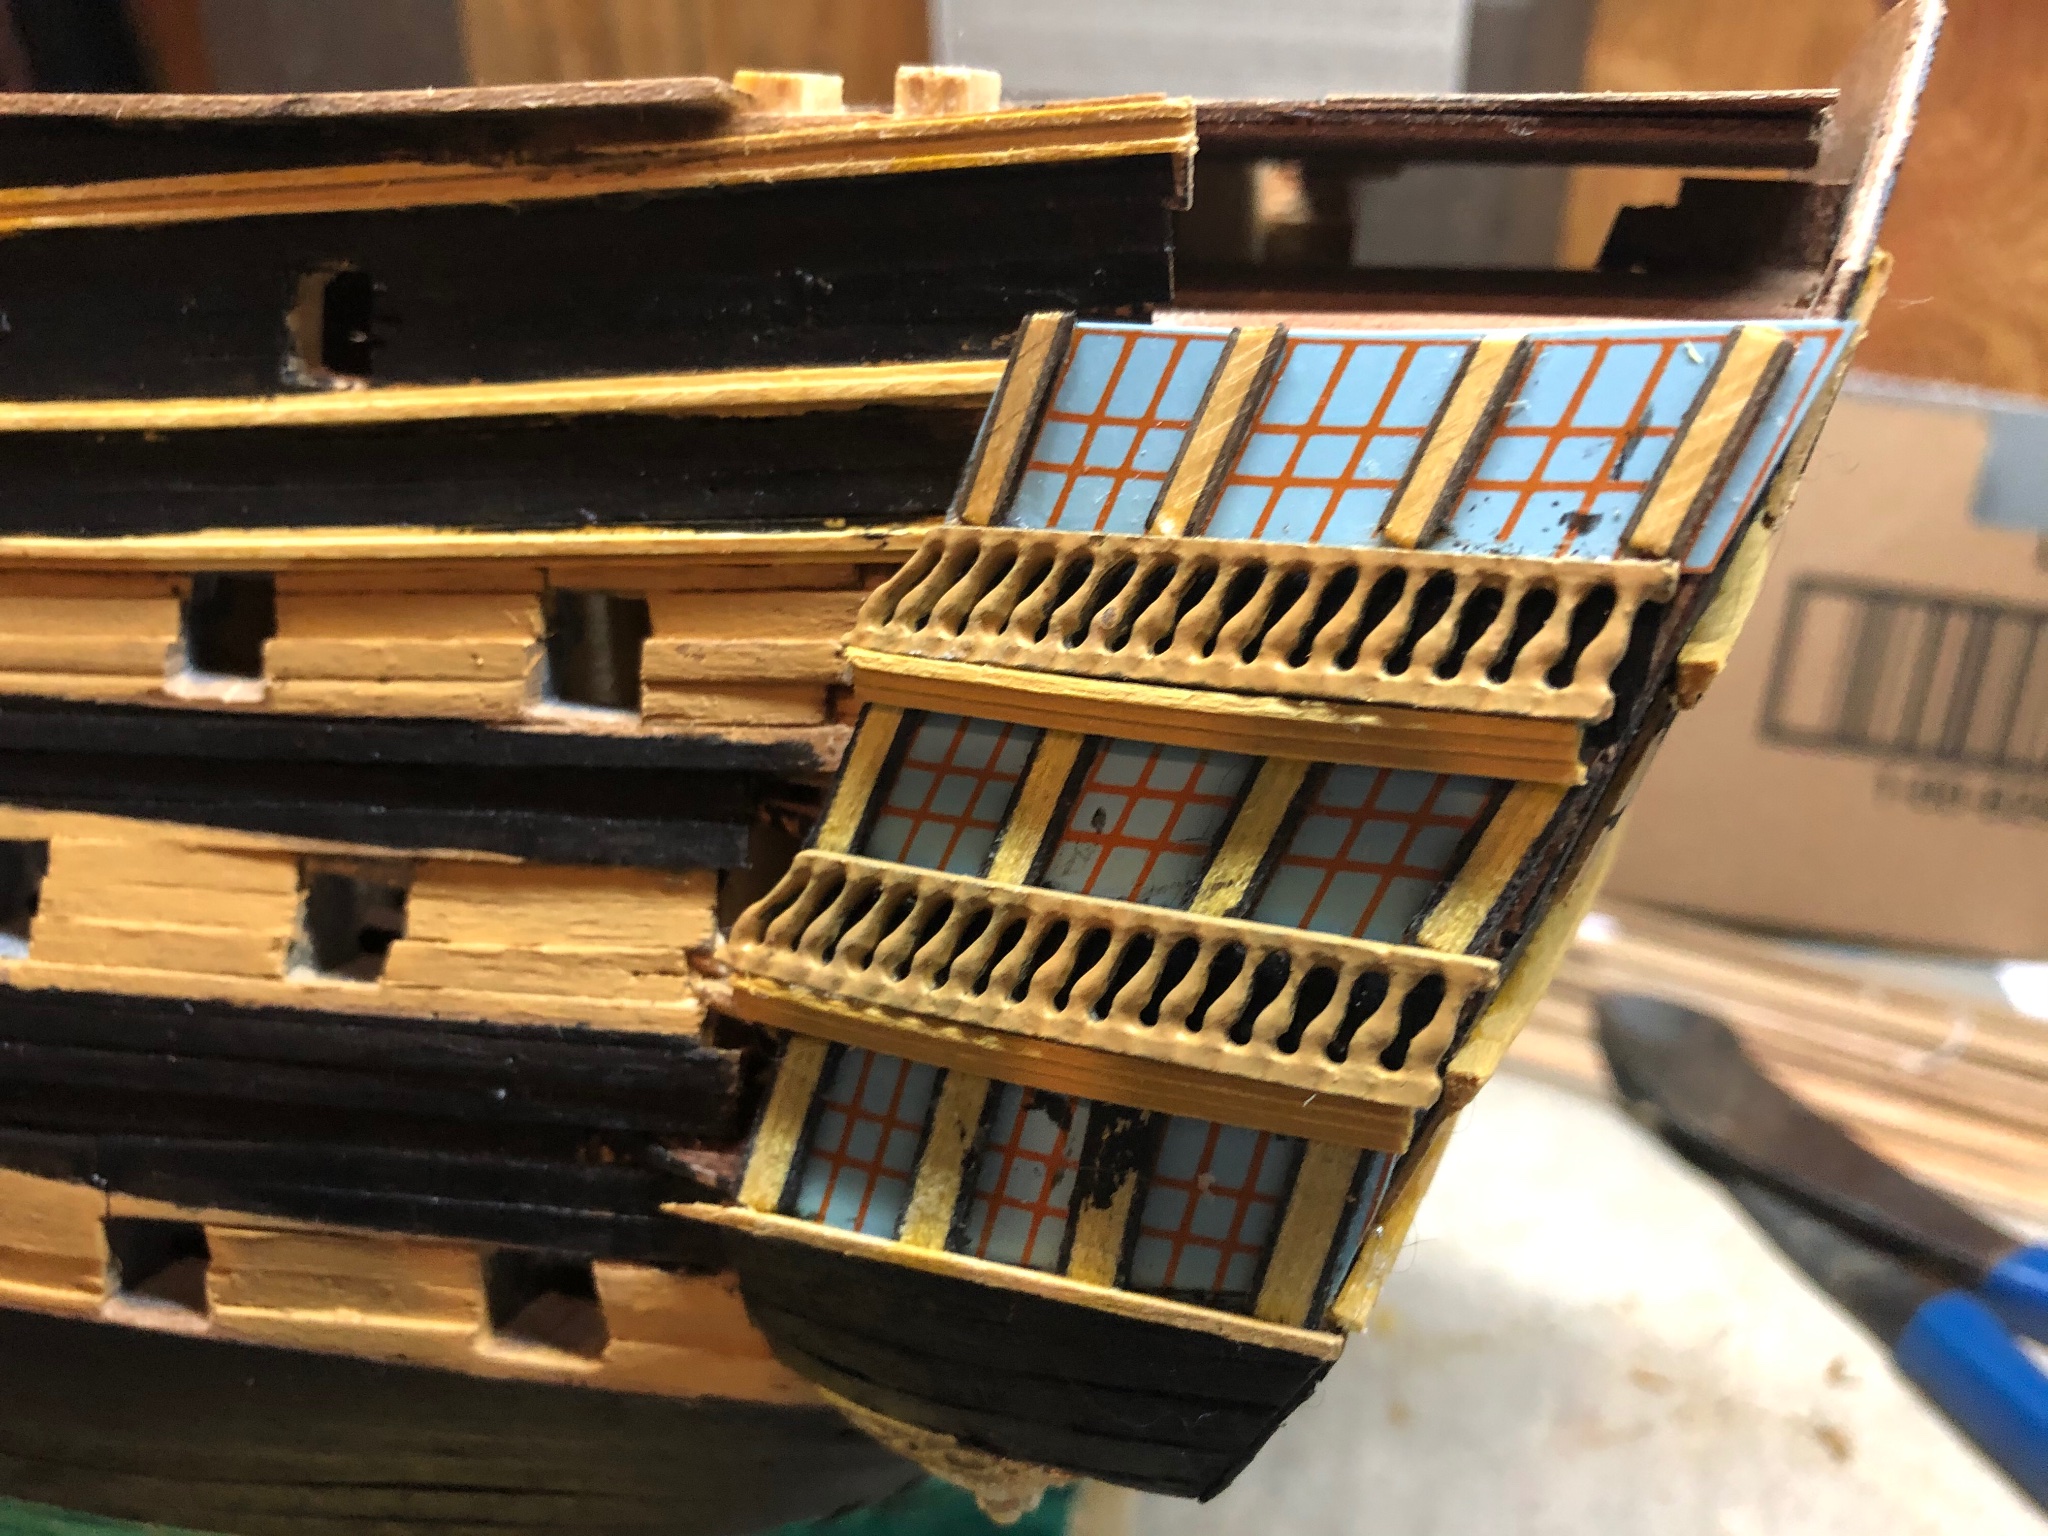
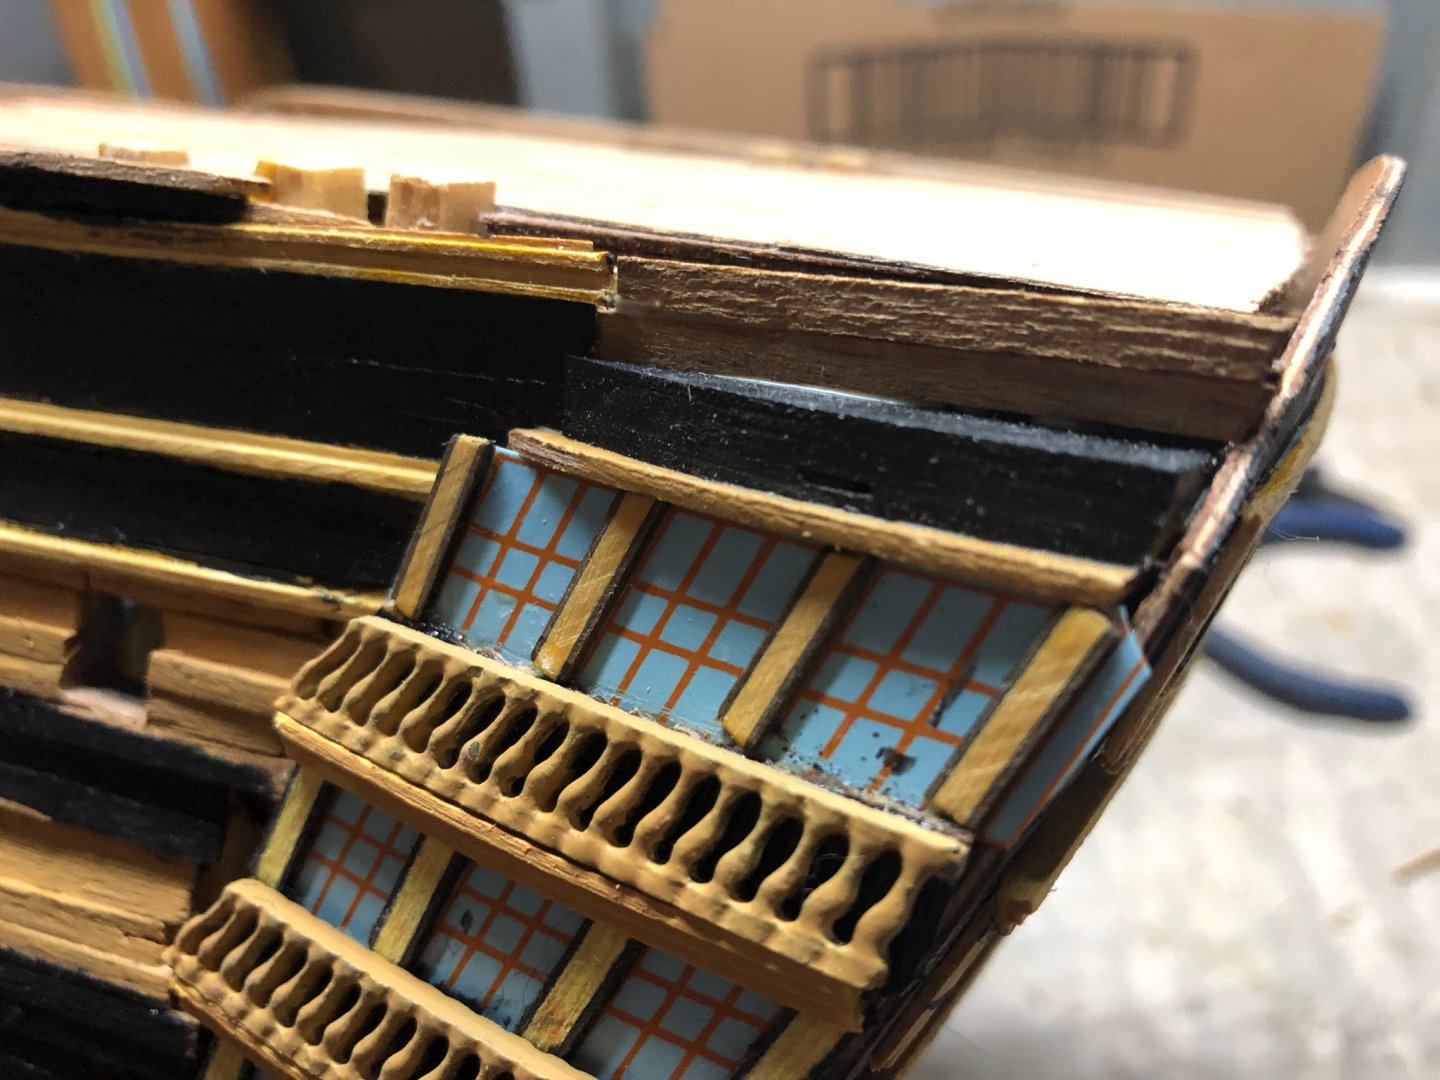
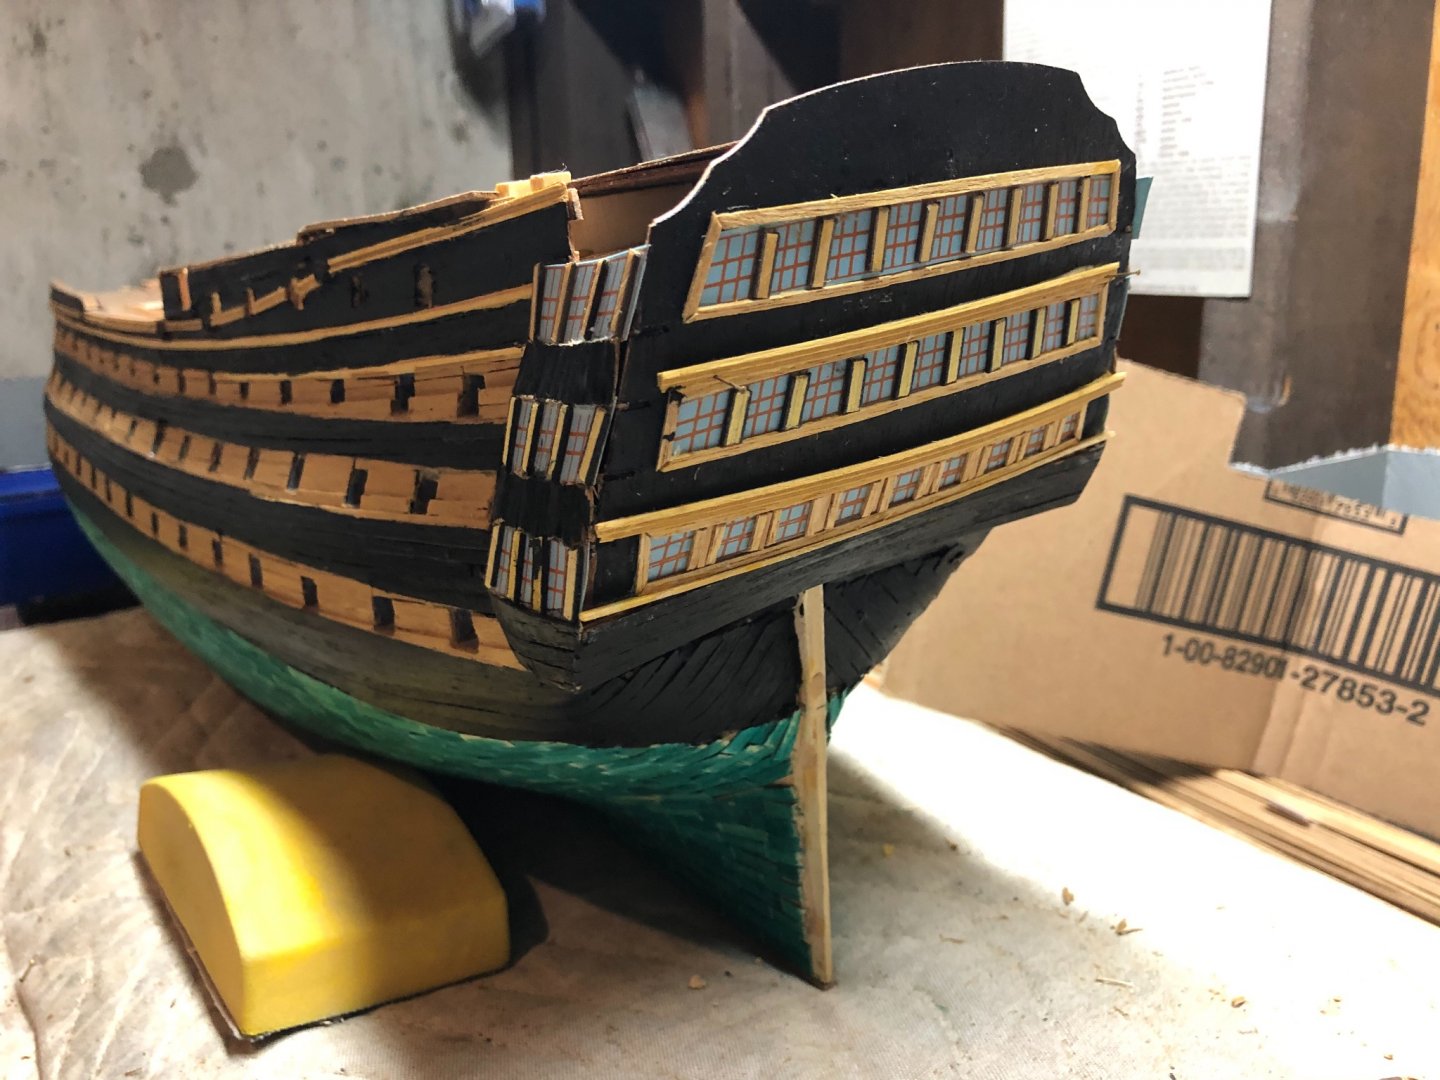
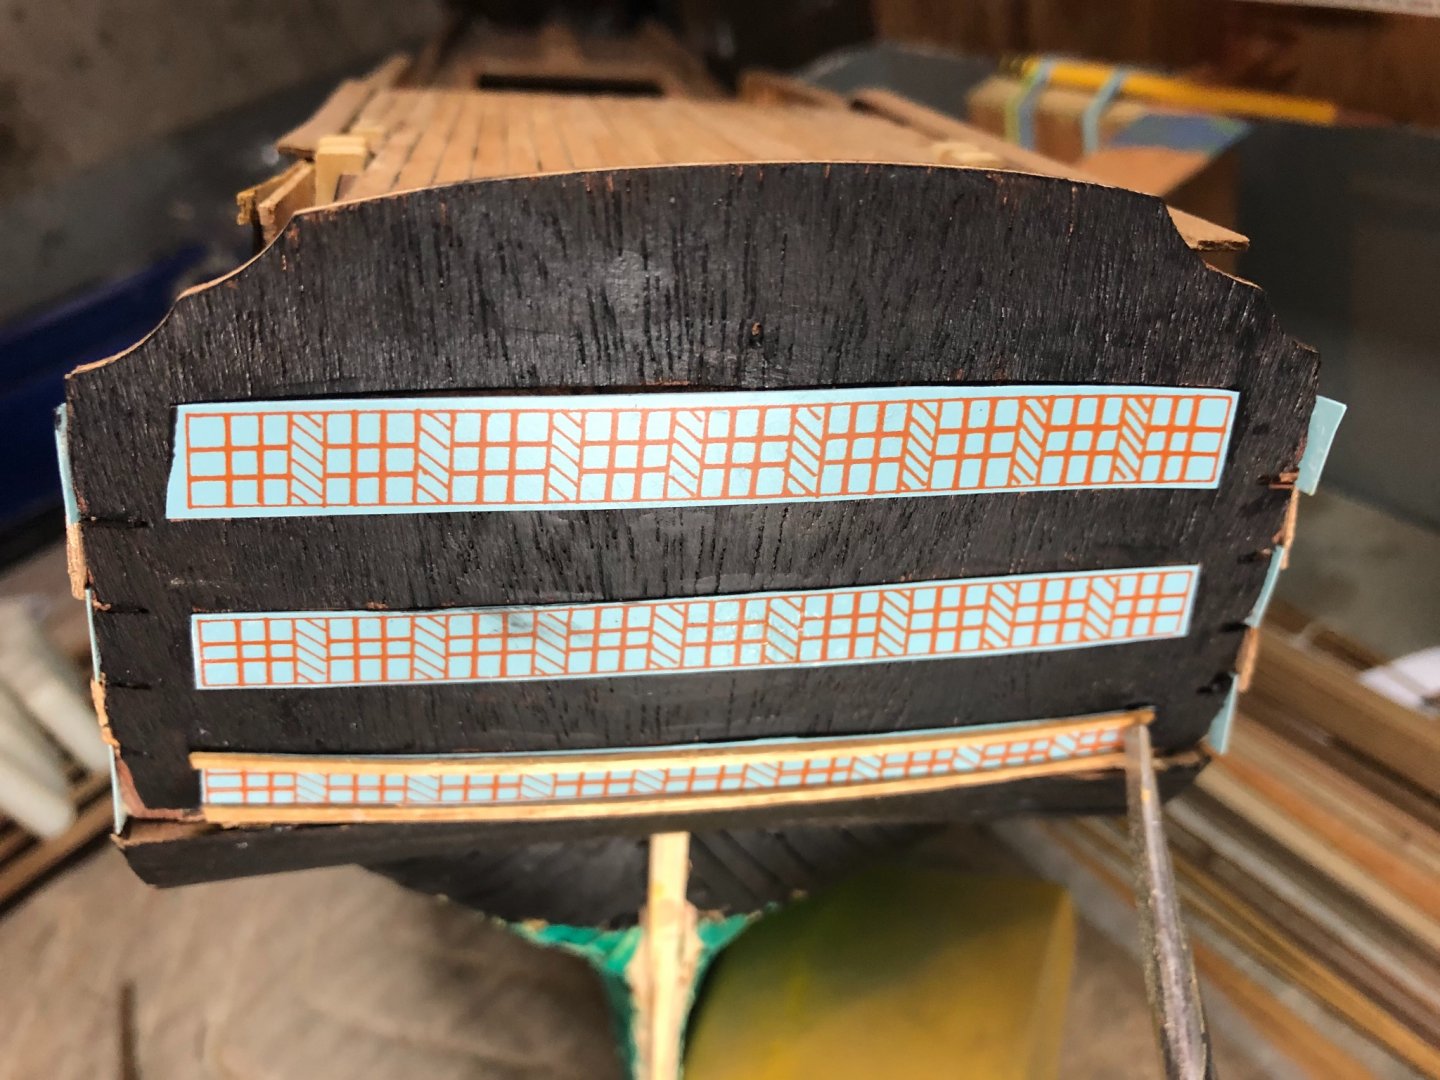
Taking an opportunity to prep for the next stage by painting the beakhead bulkhead with associated round houses as well as finishing the rudder before installing it. Also noted the transom had some missing planking that I’ve add to both port and starboard sides. You can see the build progression. I will also be filling in some of the missing planking/deck area on the poop deck after removing the upper part of the aft bulkheads that show above the poop deck. I also need to fill in some planking that is missing at the transom/ship hull interface. So lots of ‘little’ things going on and still to do on the transom area before transitioning to the forward part of the ship.


-
Beautiful build with outstanding attention to detail!
-
Robert, your build looks to be off on the right foot! I think I’ll pull up a chair and enjoy the progress:)
-
Dave - I appreciate all the detail you’ve provided during your planking exercise. Your Bounty looks very nice. While I’m a bit late to the party, I experienced many of the issues you have during the planking of my Vic. As time went on, I assembled a ‘soaker’ tube from PVC piping and ends and used it in conjunction with my plank bender. Also, your second planking will cover up some of your earlier errors:) I look forward to following along on your journey!


-
Beautiful work! She looks fantastic!
-
Merry Christmas to you as well Diablo! Happy New Year! Appreciate your kind words on my build. In truth, my transom is coming together more because of your progress/pictures than of the Mamoli instructions! I am nearing the end of my build as I only intend to go to a 'hull down' type of finish rather than the full up, rigged model. Takes up much less room. Of course, I might change my mind later:)
-
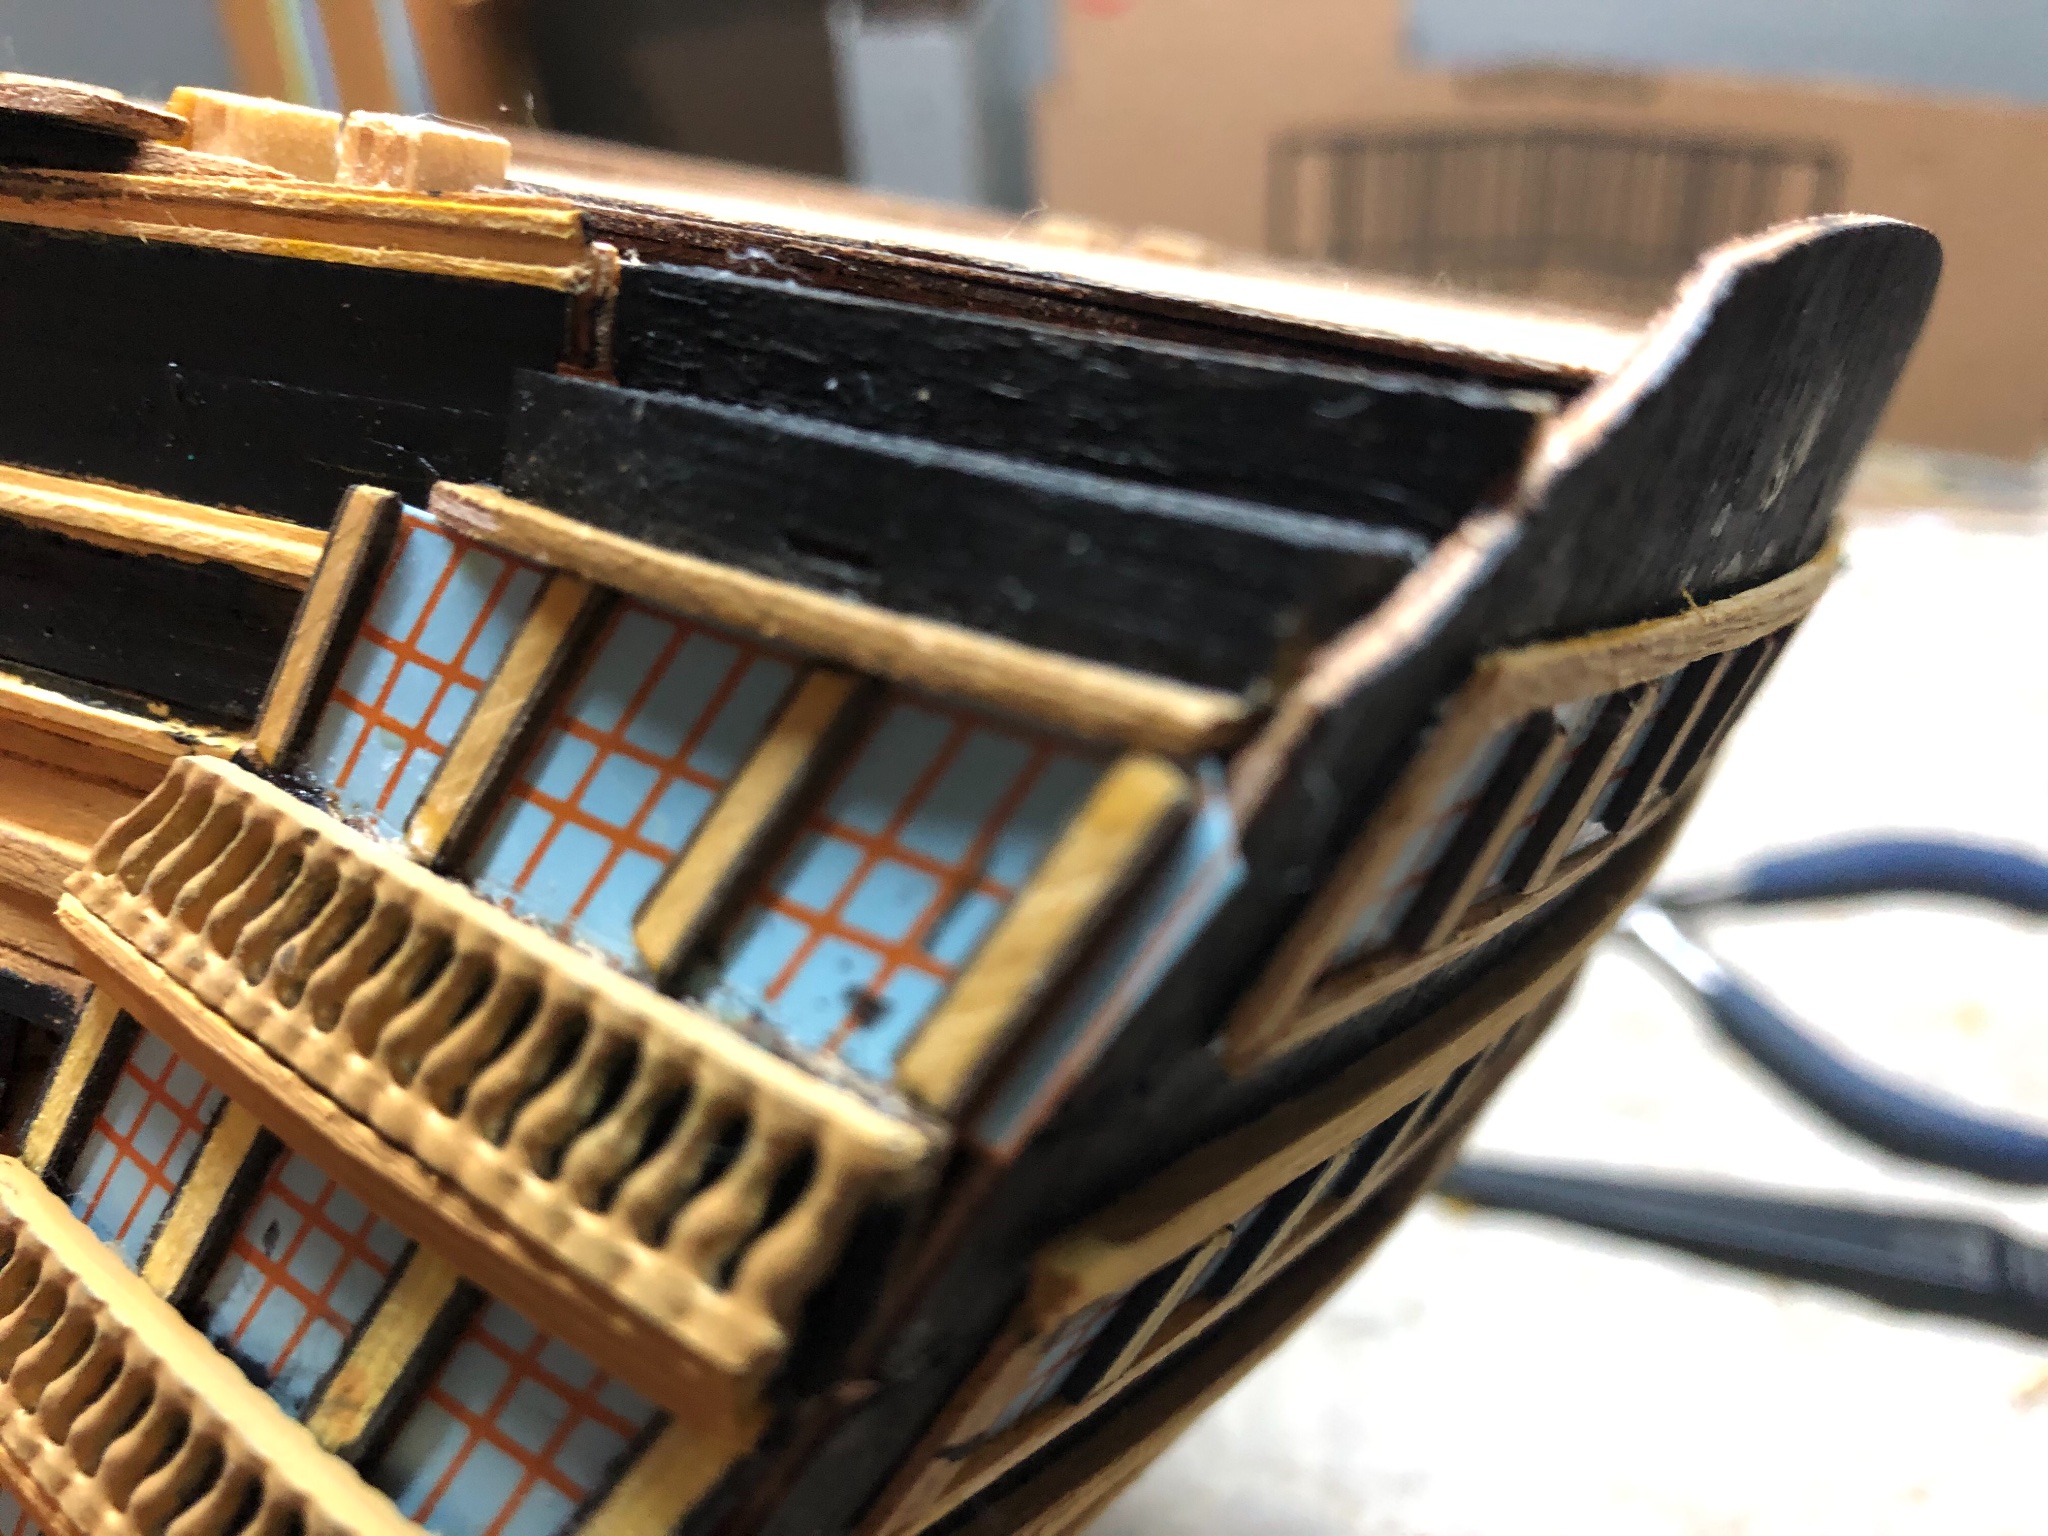
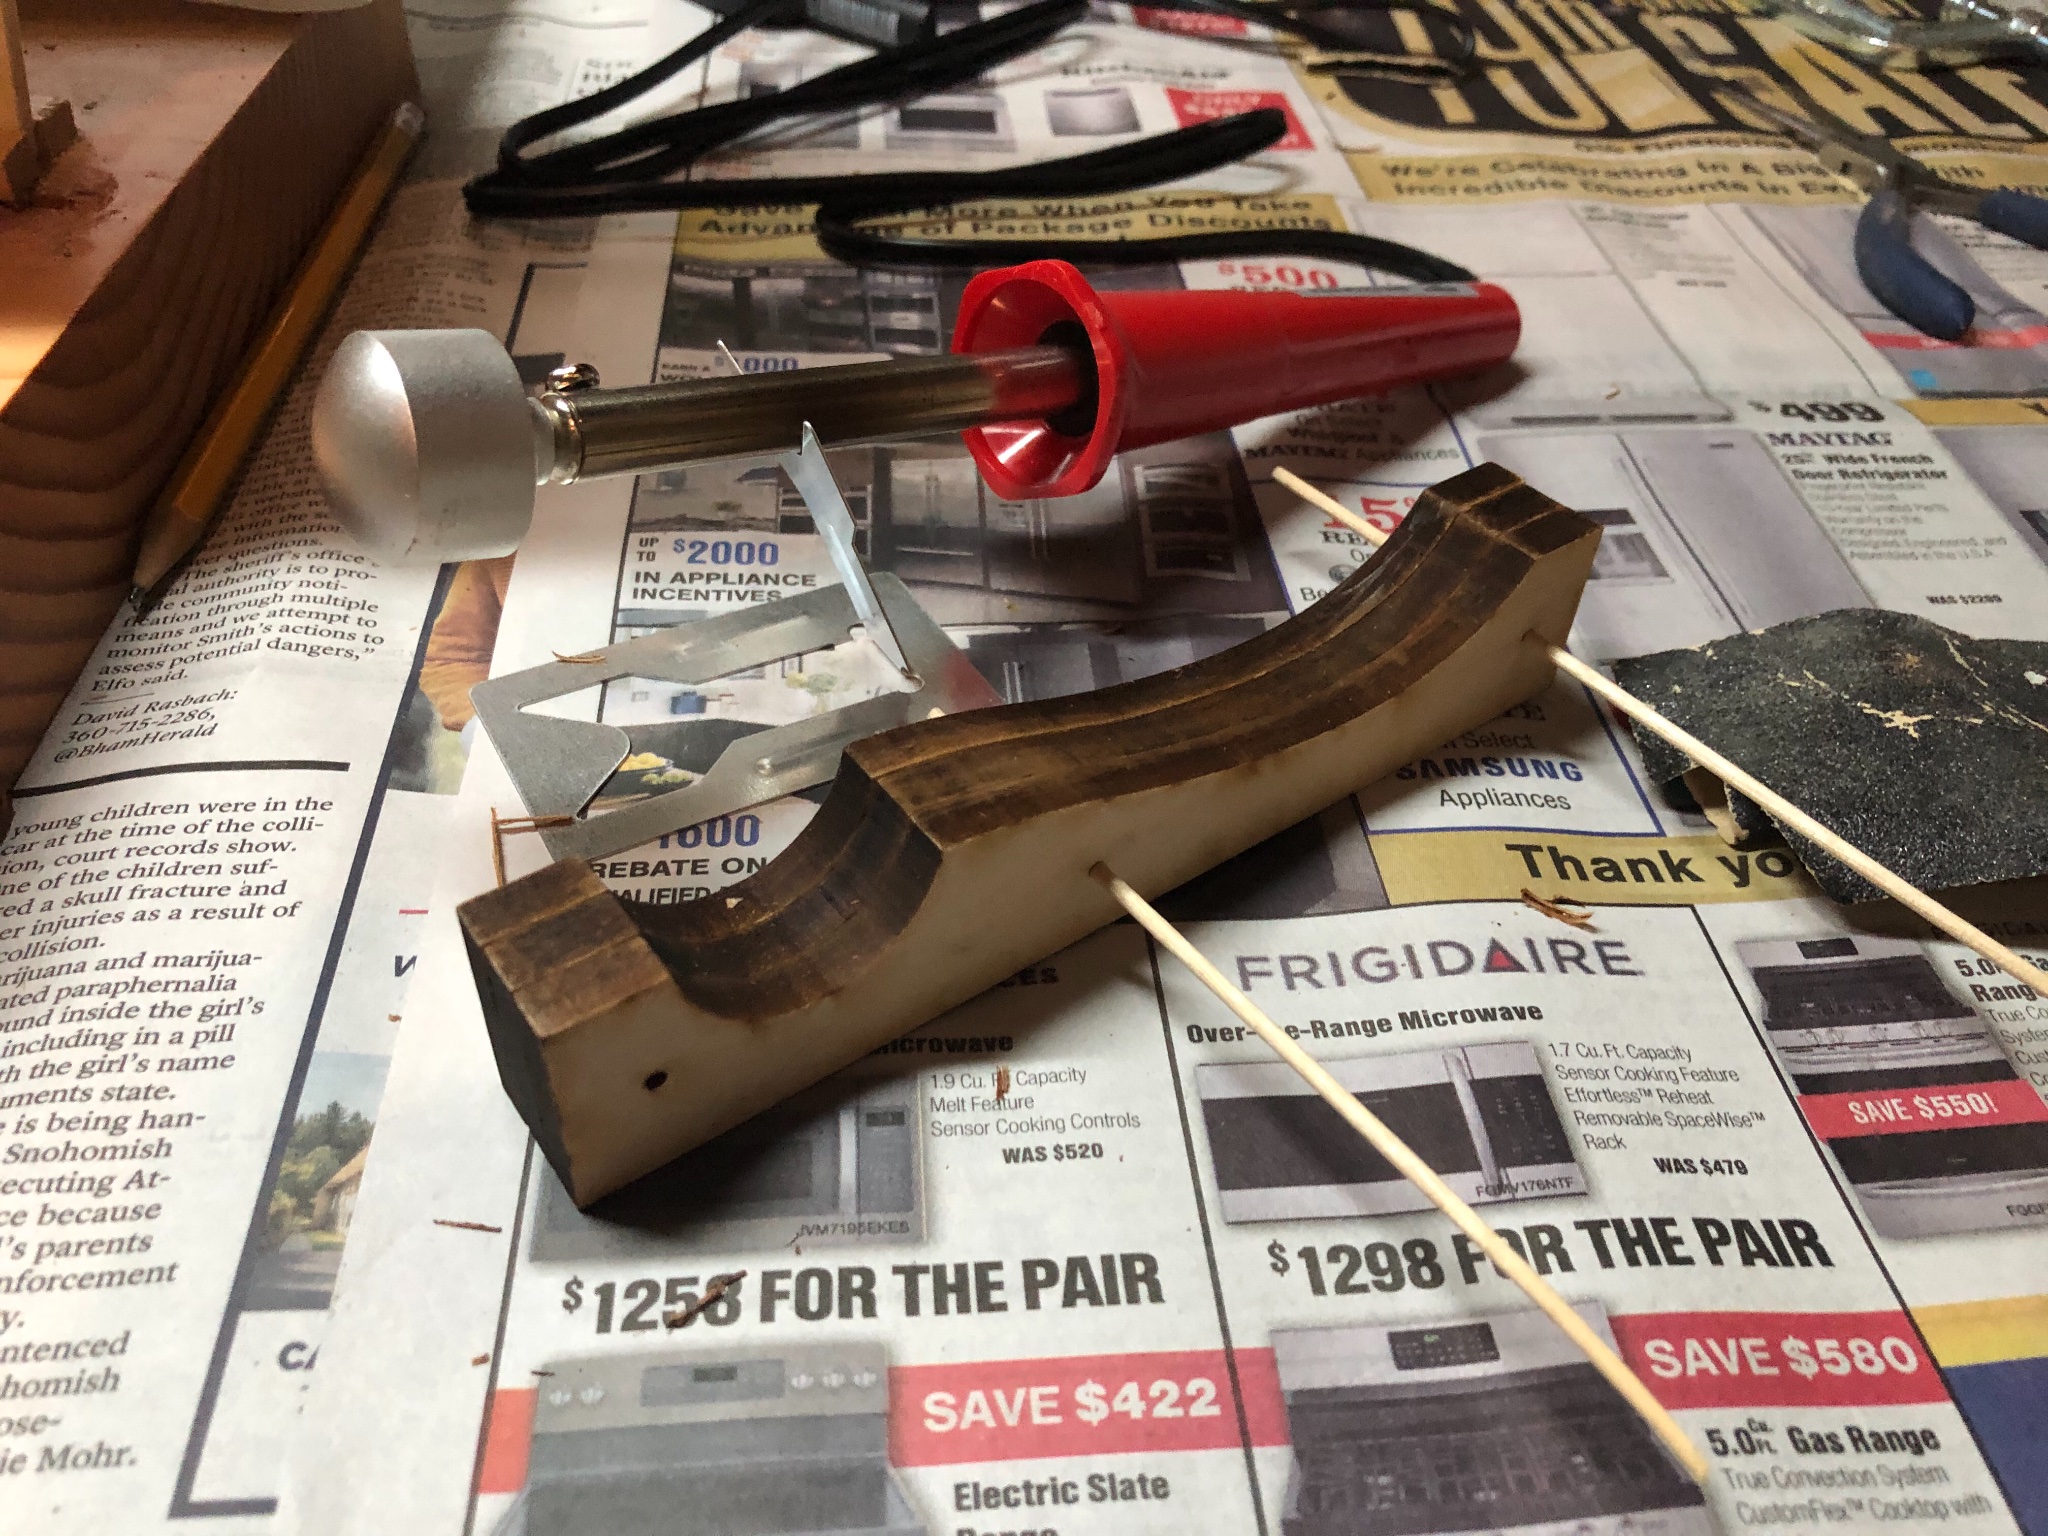
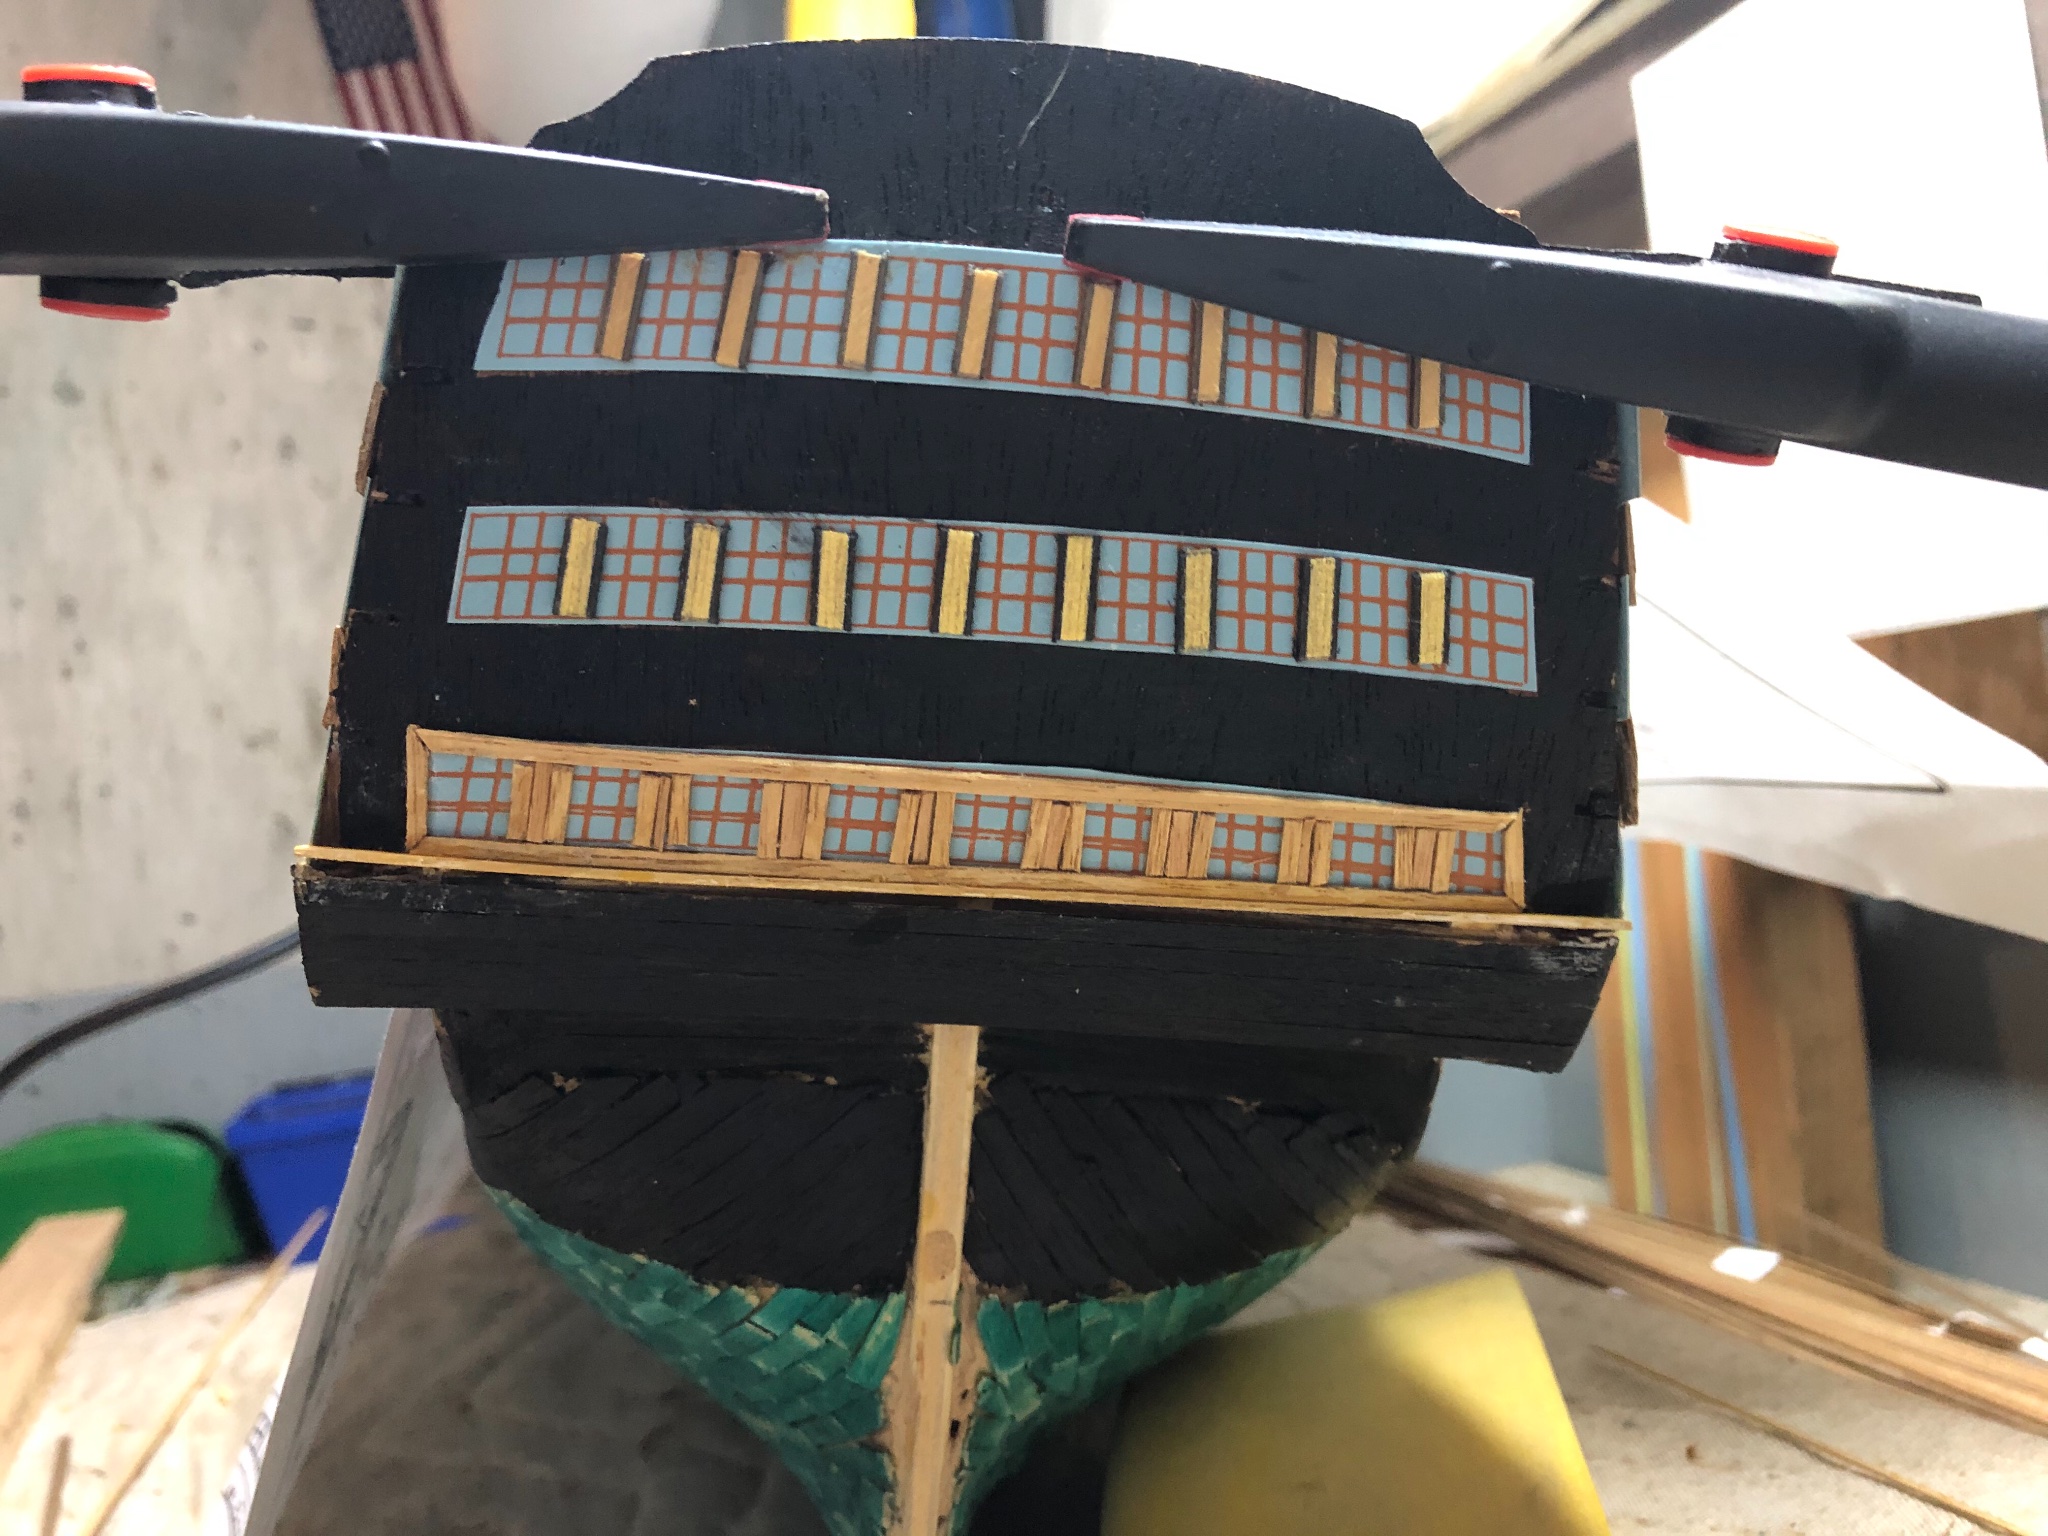
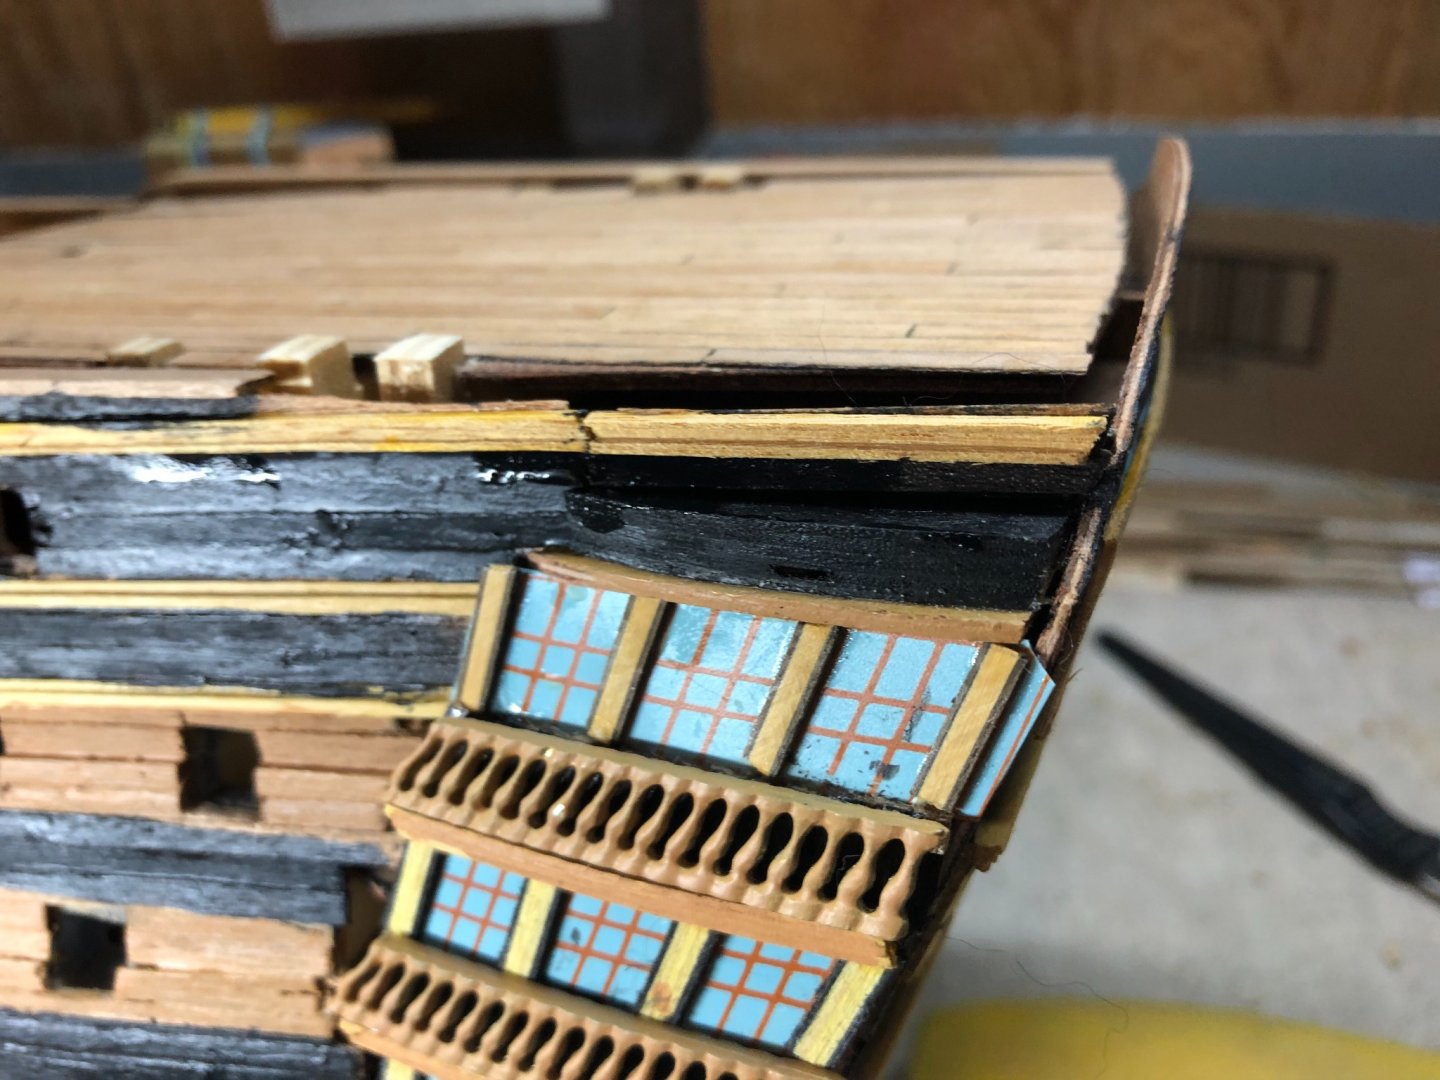
Transom framing coming along. After shaping molding to better align with the transom surface, I still find it difficult to hold the pieces in place while the glue sets. You can see my mish-mash of tools used to keep the piece in place. Sometimes successful, other times not. Had a slight mishap with wet black paint but was able to get most of it off. You can see the remnants on the port side of the transom.


-
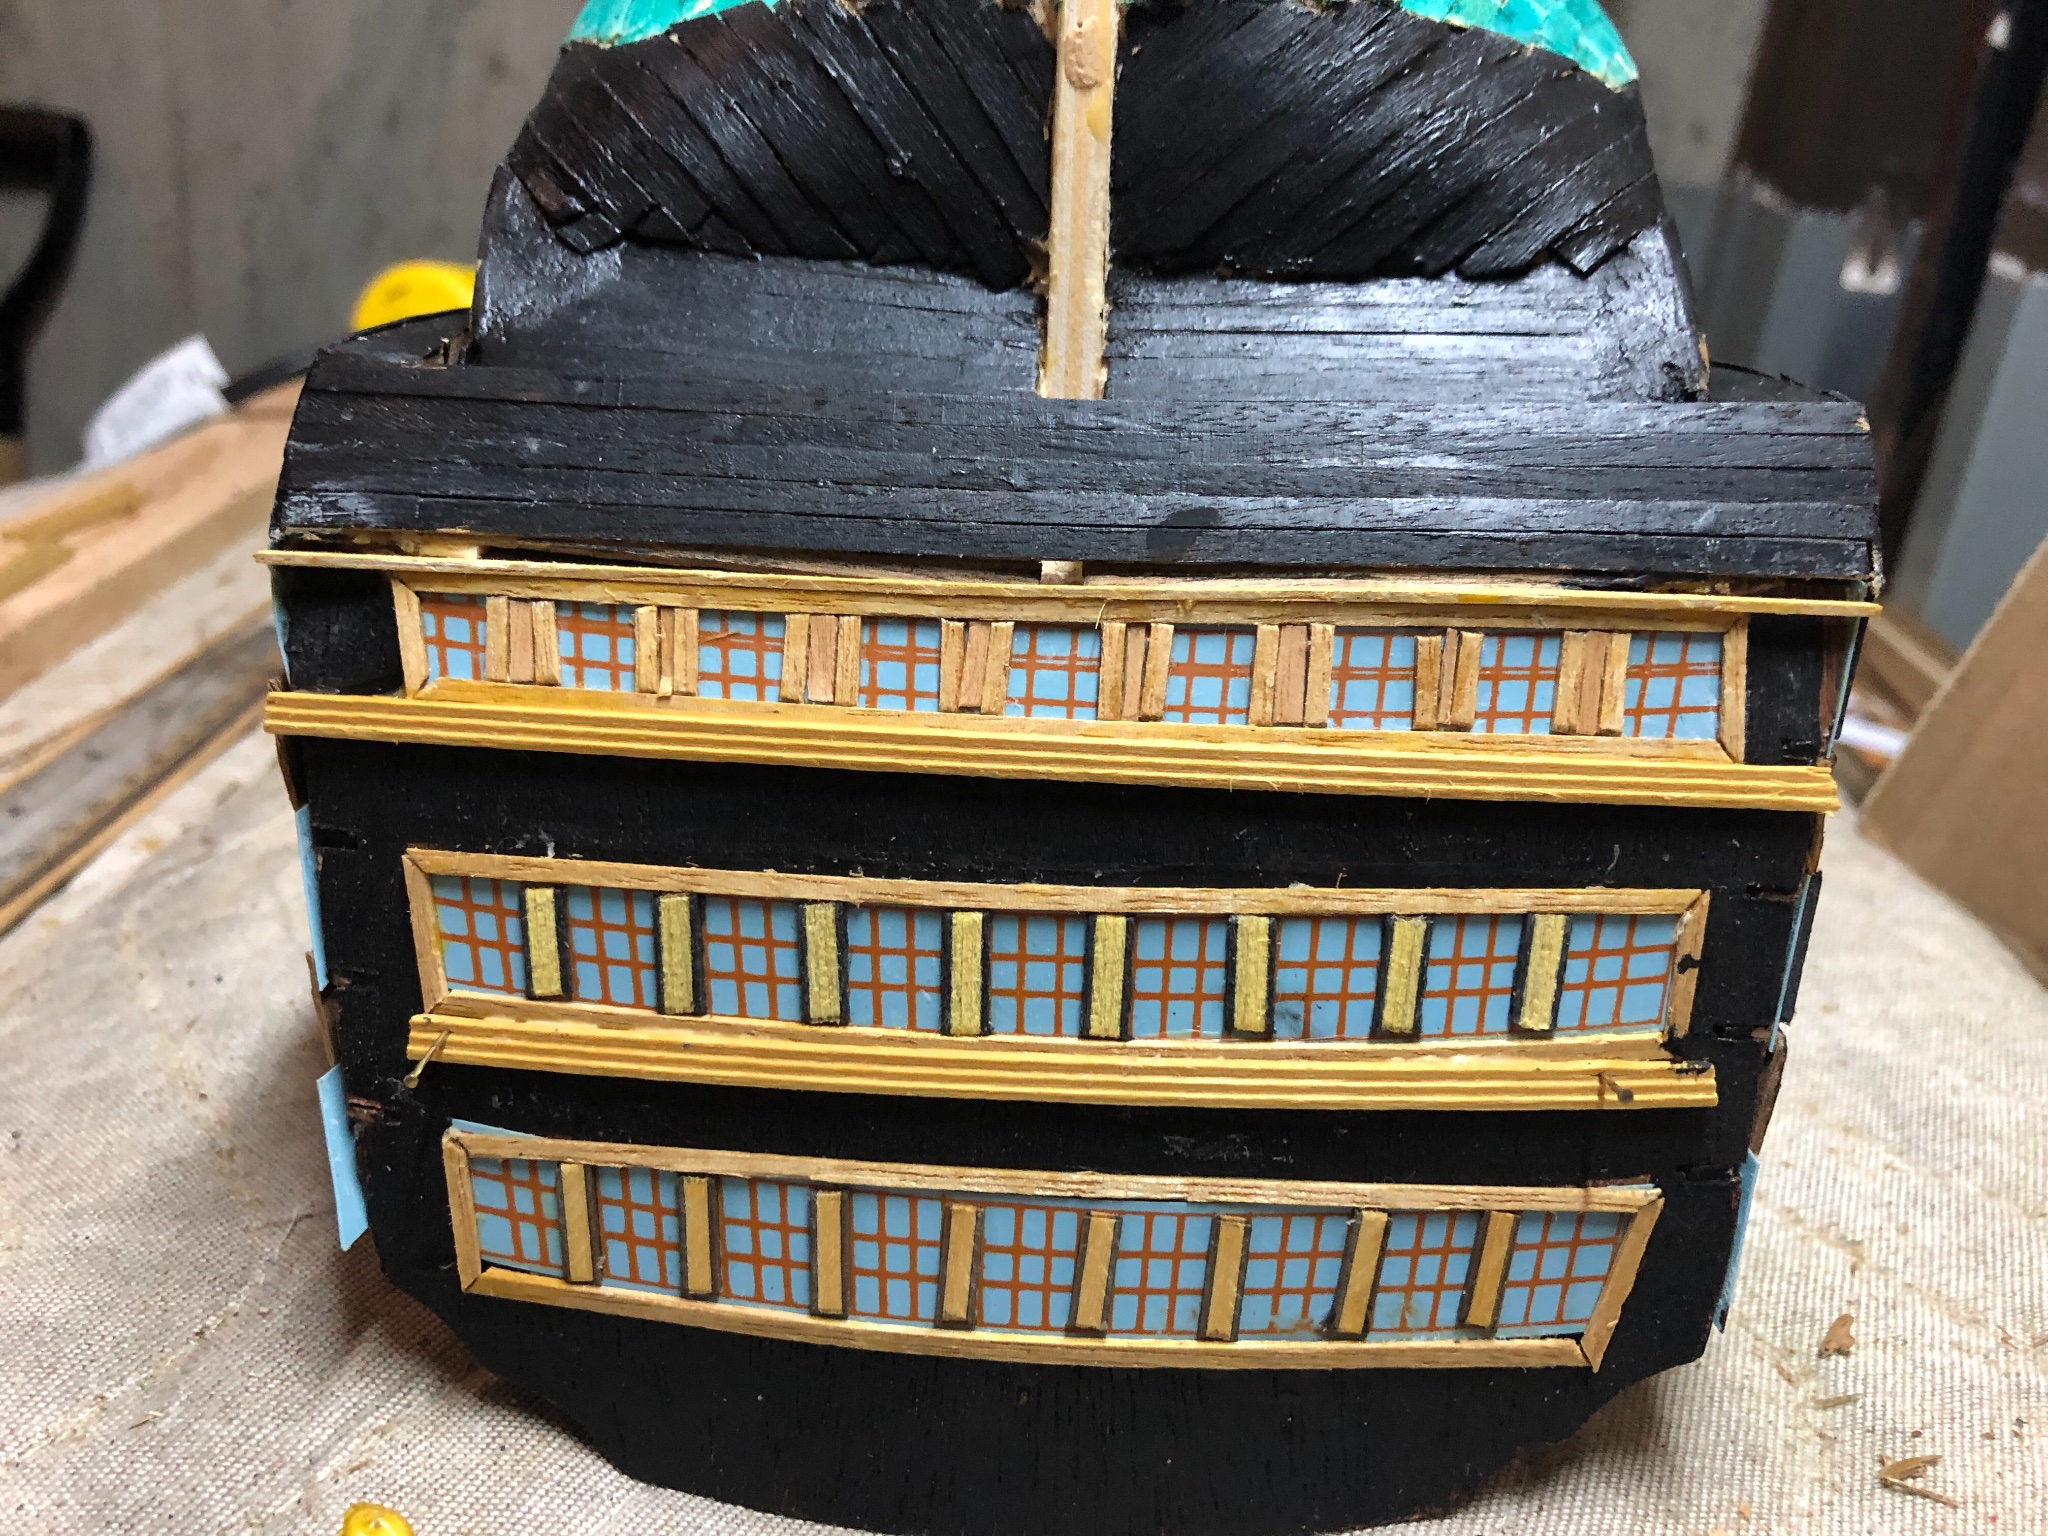
Continuing transom finishing. Still working to understand the directions, but glad I have some Victory source material to aid with what pieces go where. Also painting the metal railings yellow ochre. I’ve shaped a molding piece for later inclusion above the lower windows. The metal railings will go above the piece.


-
Very nice work Henrik; the detail looks very good! What was your secret for the cannon ball rack?
-
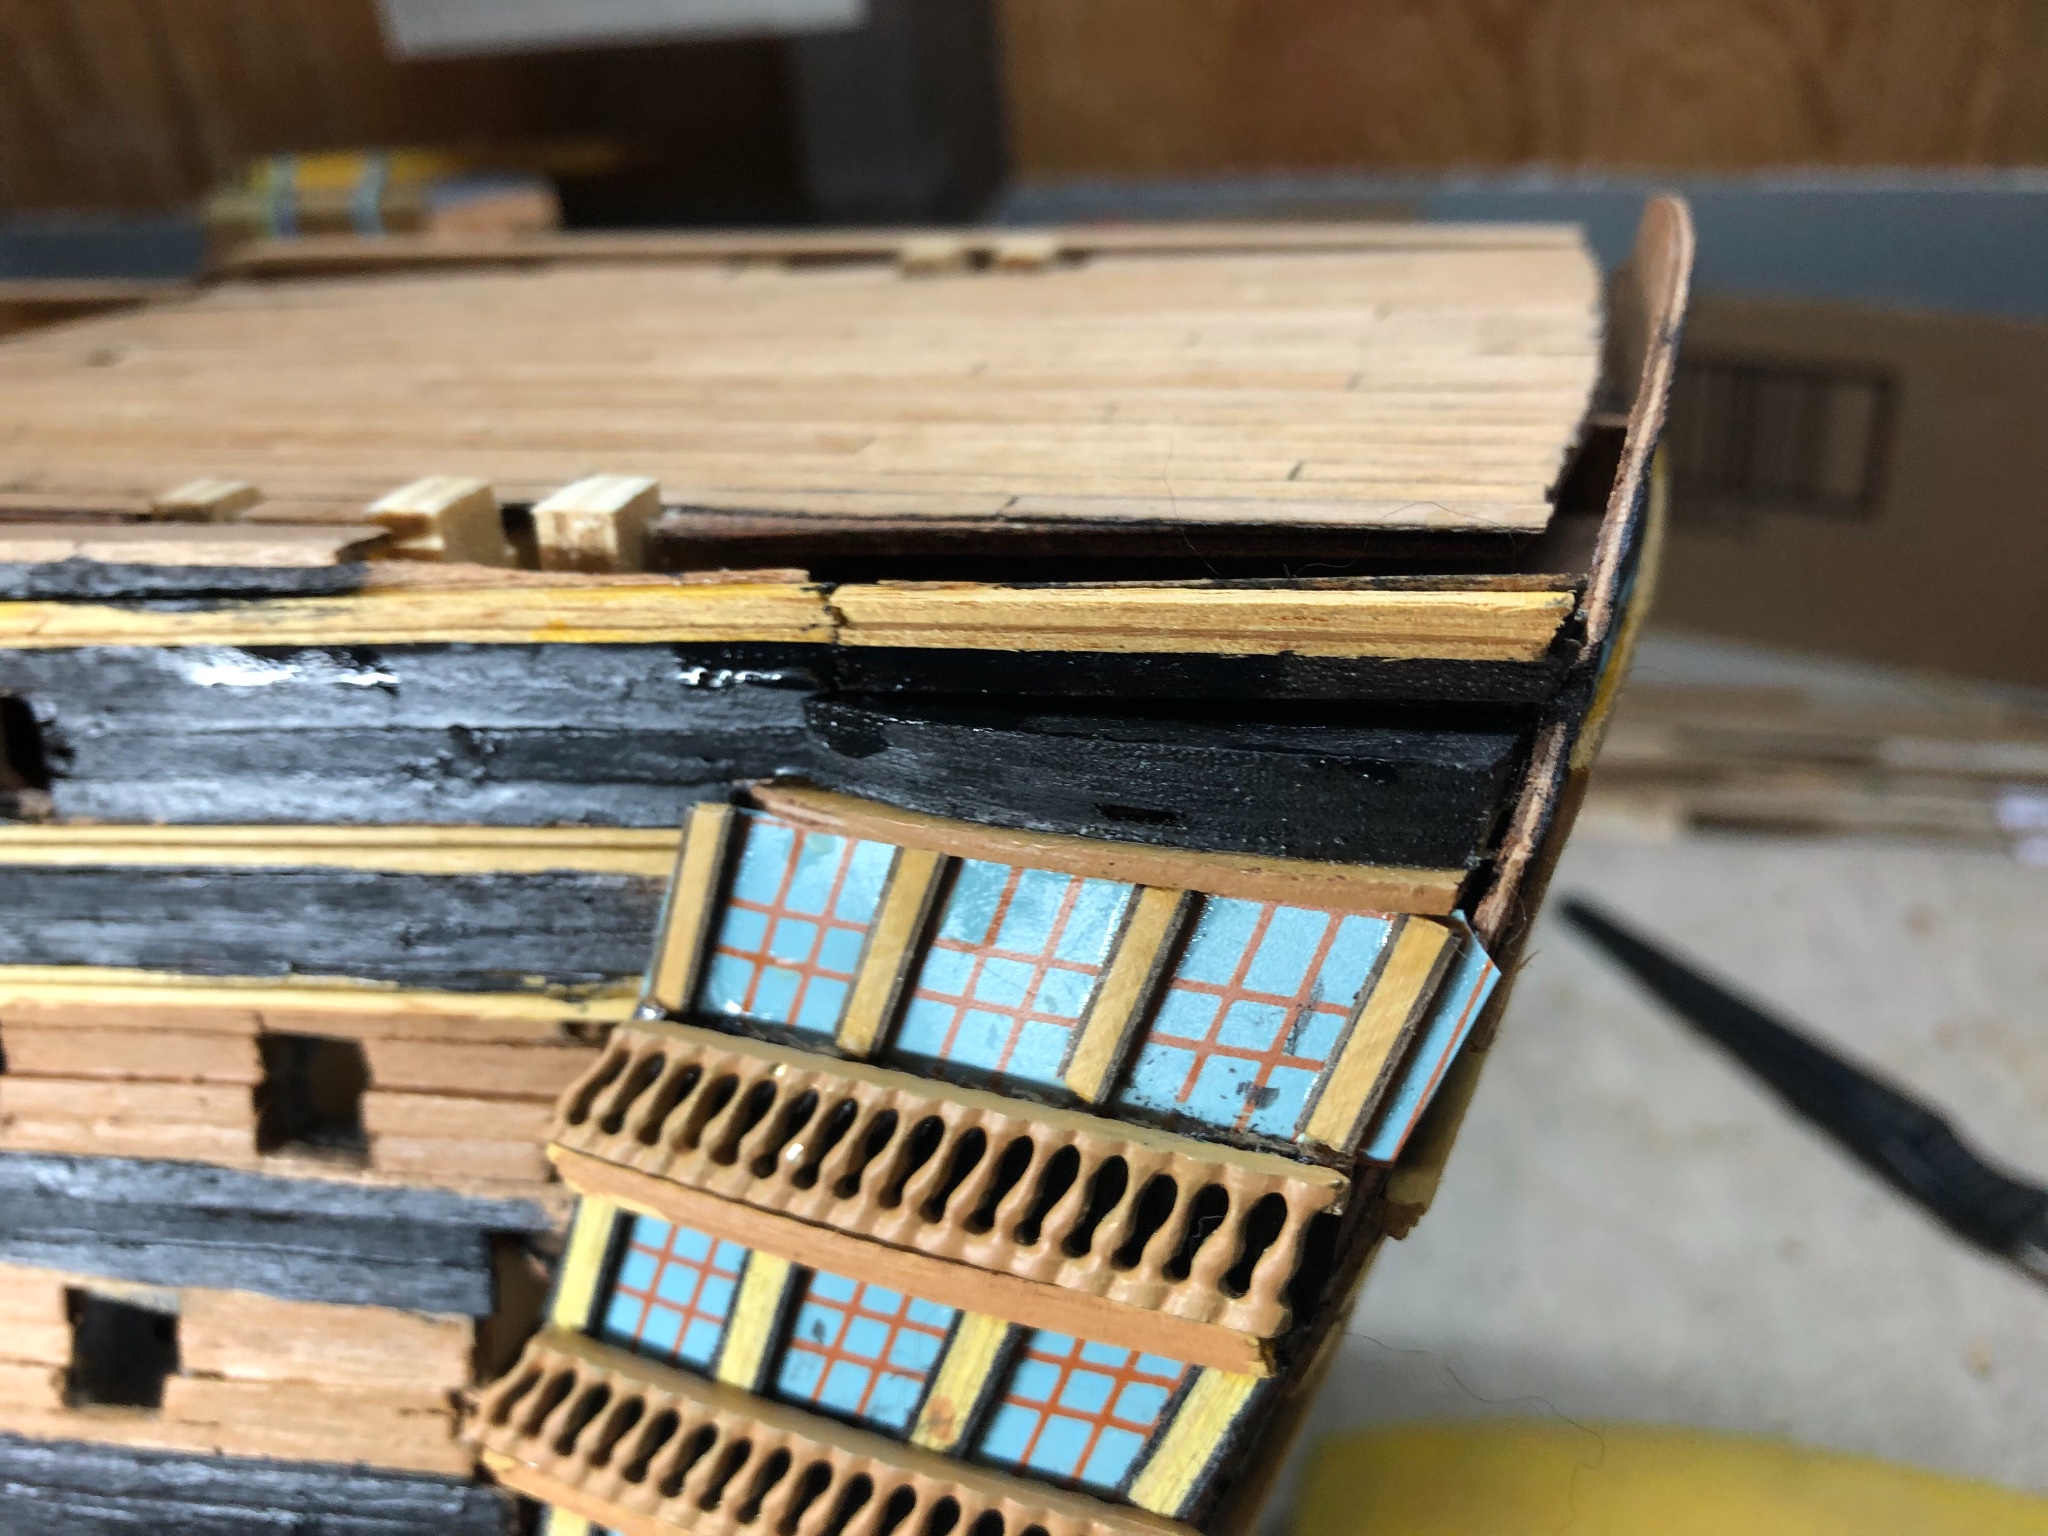
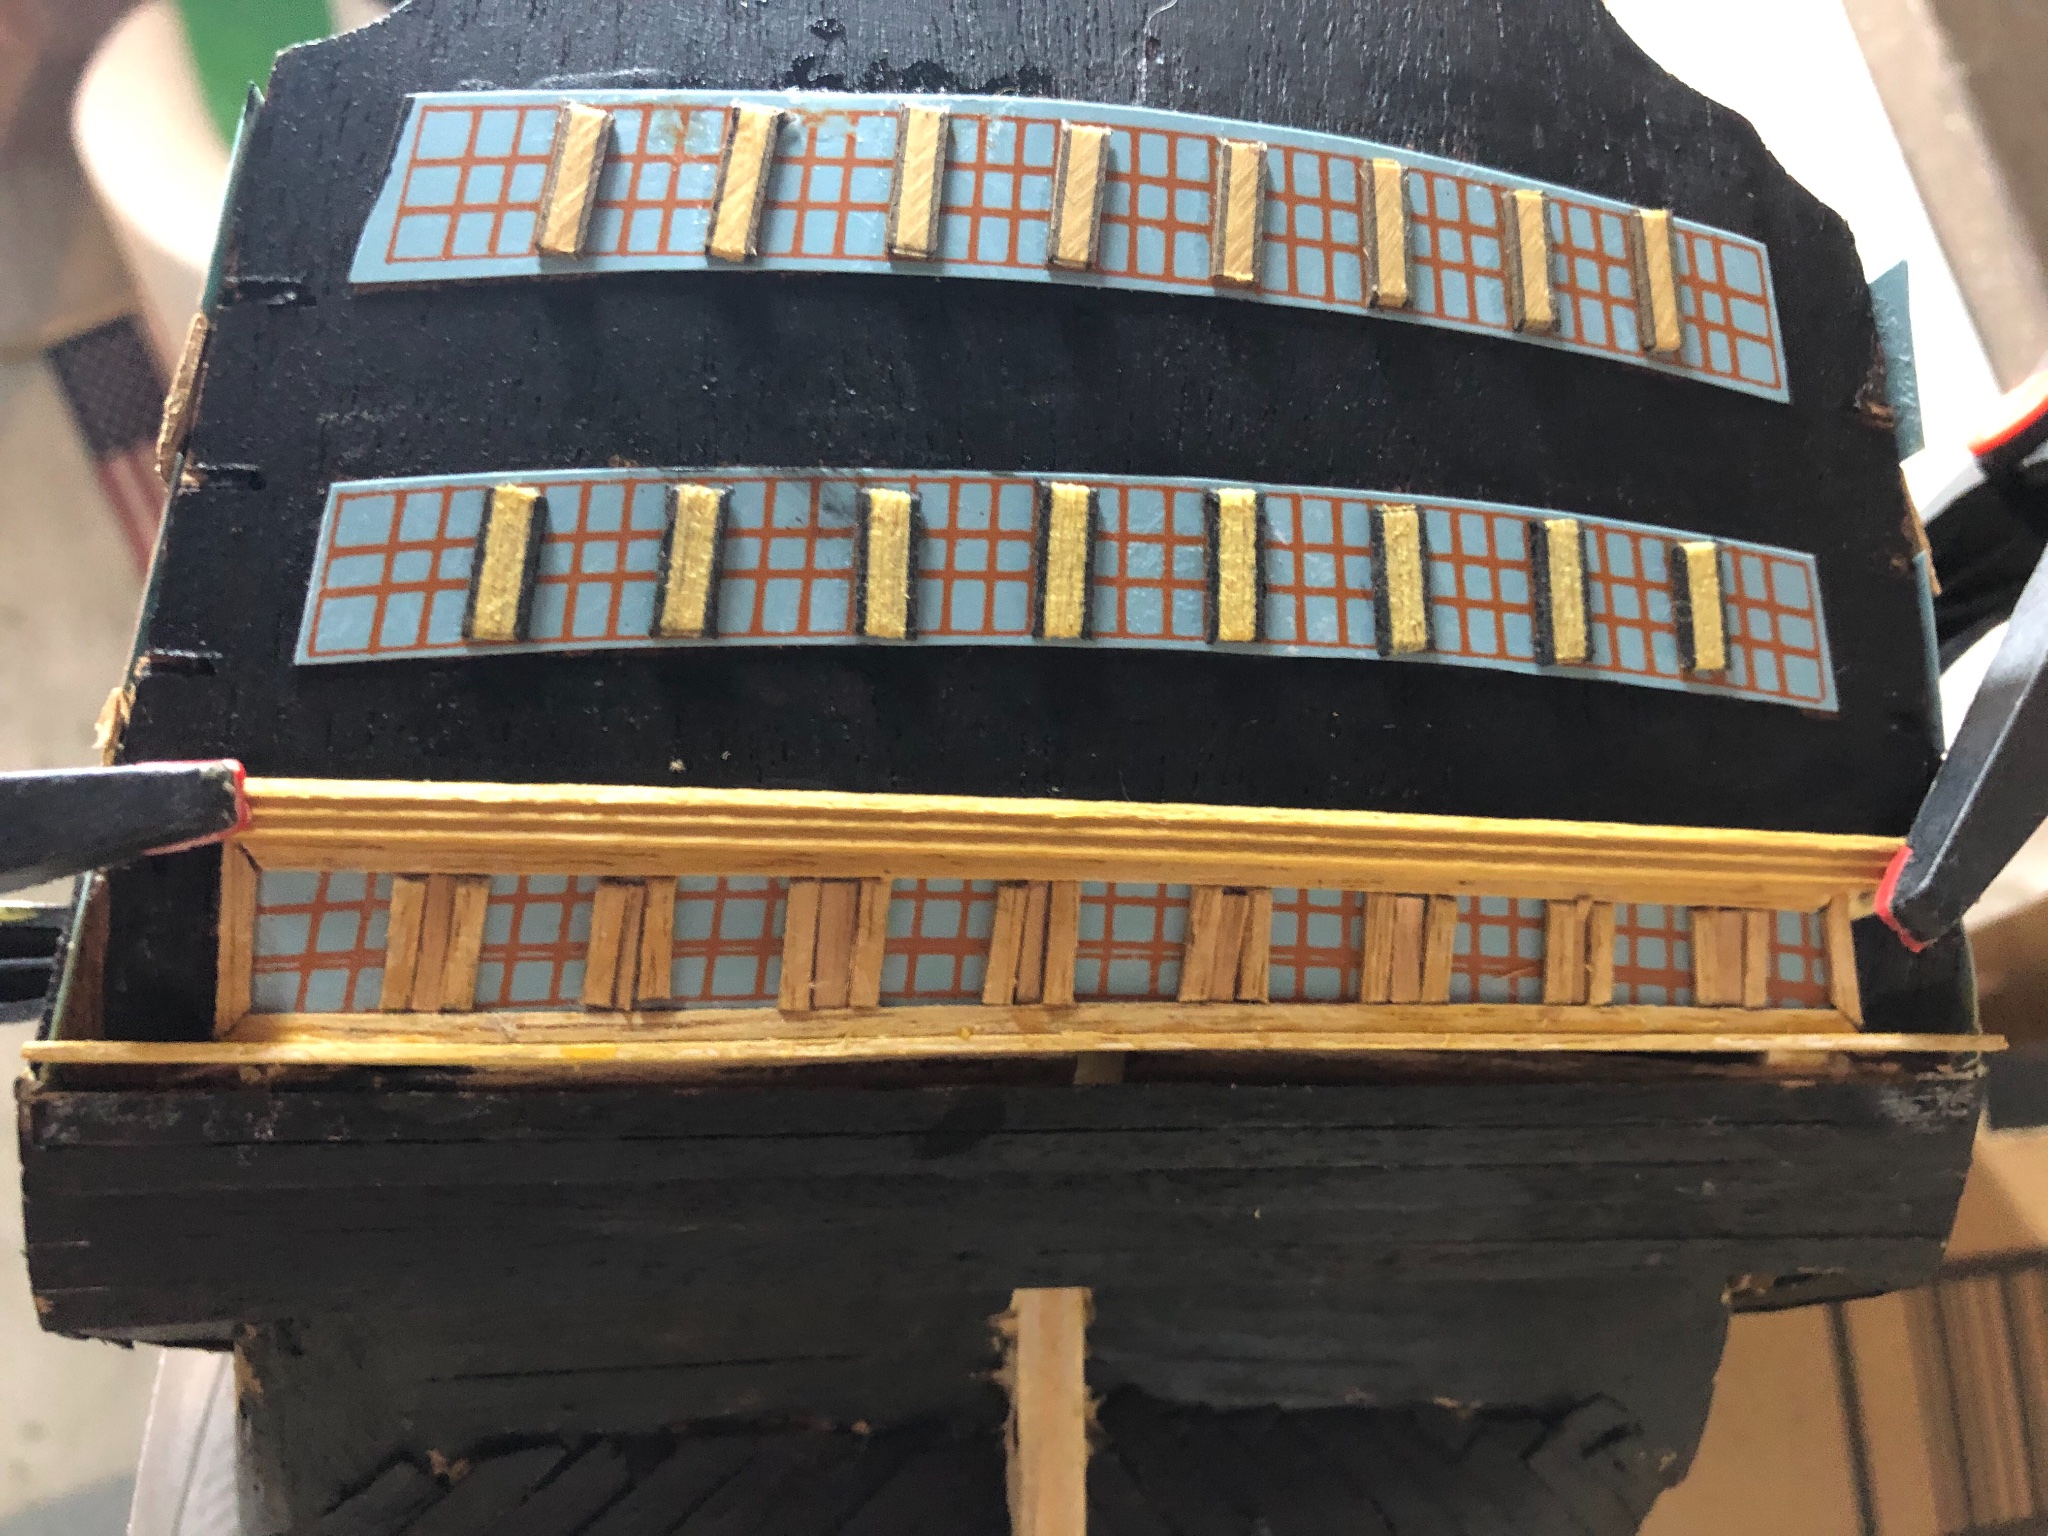
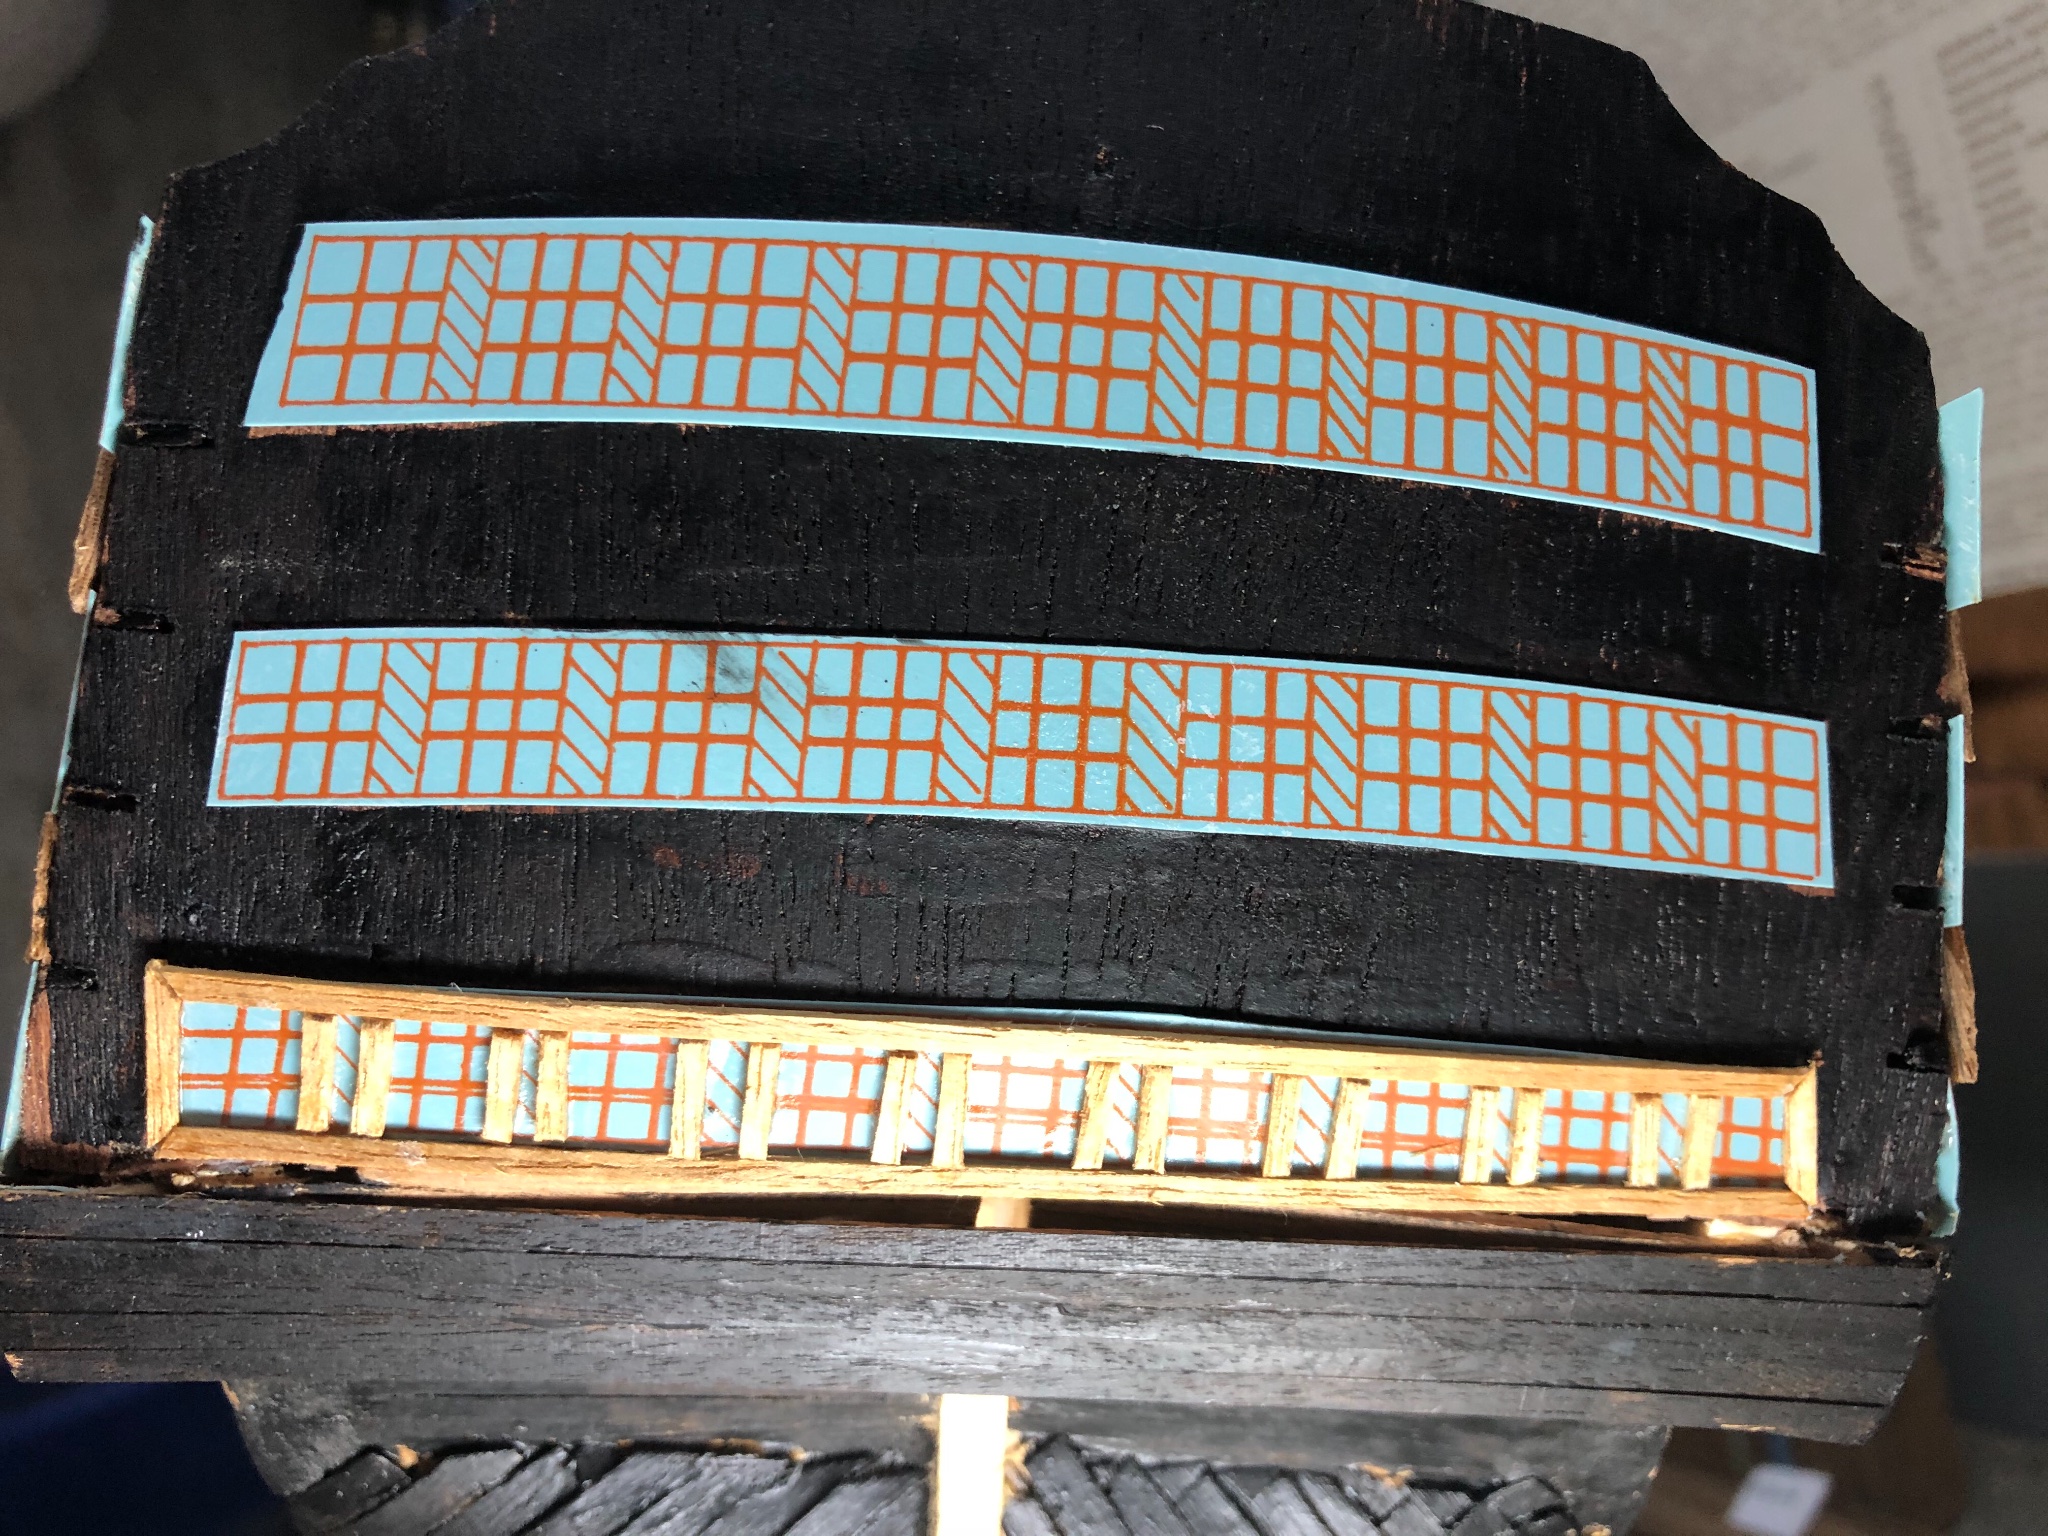
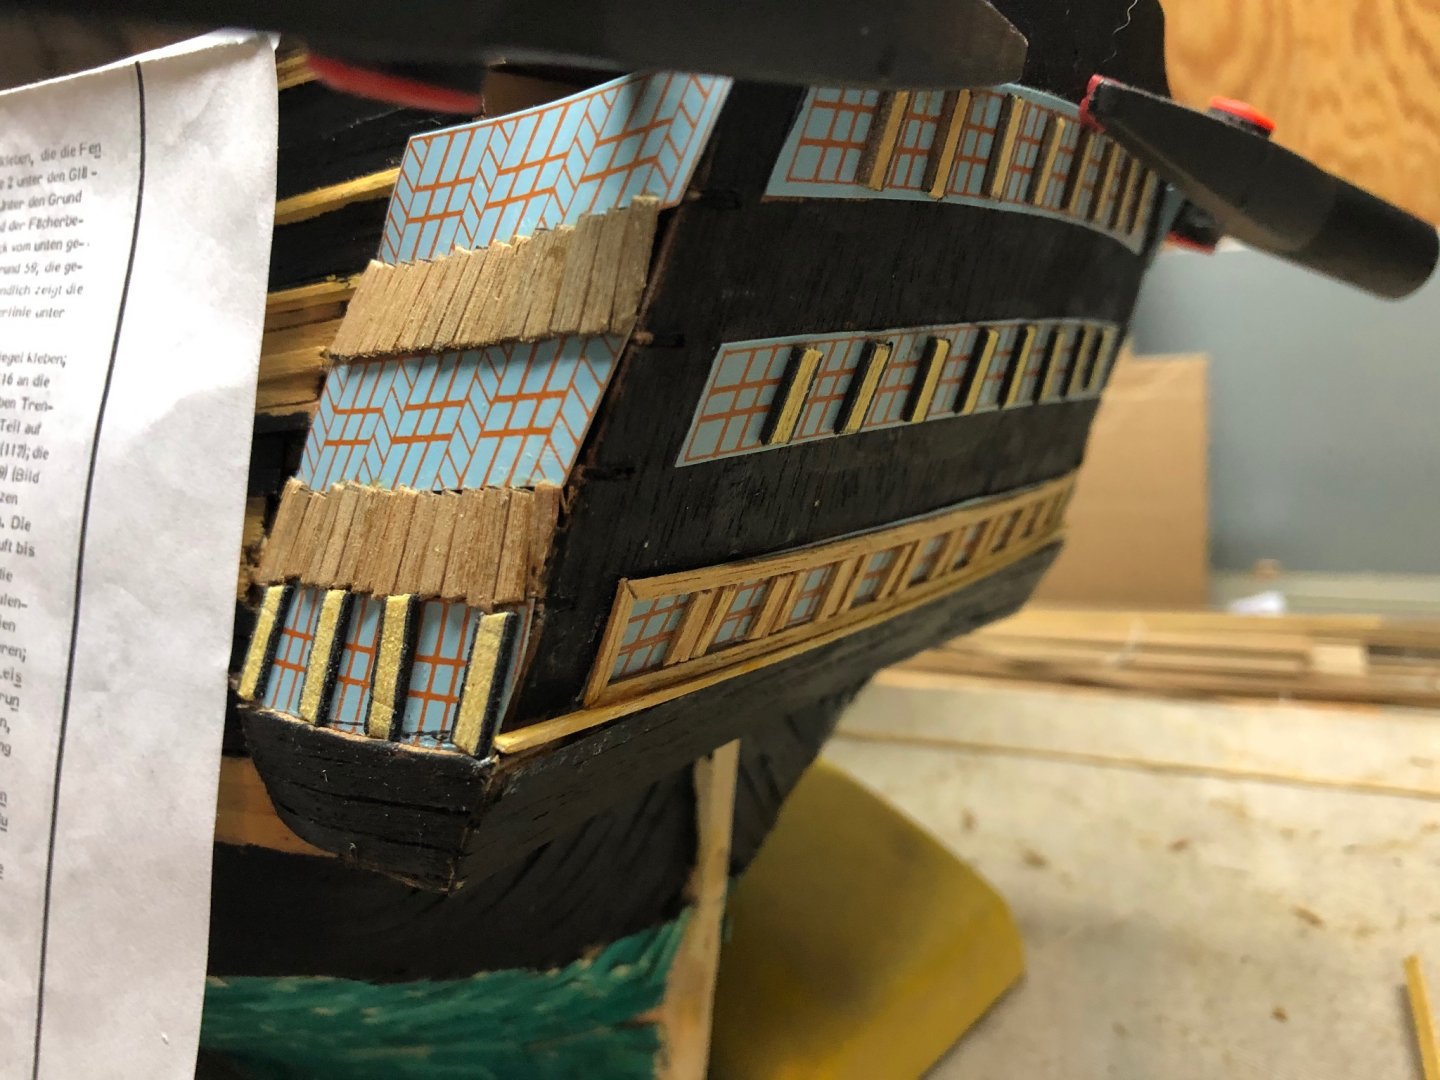
Assembling the lower transom window framing with 1x2mm laths. I’ve decided the wider (2mm) side of the lath will be placed against the windows rather than the thinner (1mm) sides. This seems consistent with the instructions however the material then covers up some of the window markings. The same size lath is to be placed under the the bottom framing next before putting the inner planks between the windows.

-
Just starting the transom finishing of the stern windows after a short break. The window material is a plastic base vs. the wood framing so I’m using a ‘super glue’ variant for the window/framing bond. I just wish the glue worked as well bonding the material as between my fingers and the wood!? There is a slight radius on the transom and to aid the bonding process, I actually soaked the wood and used my plank bender to set a slight ‘bend’ in the 1x2mm planks and then secured it in my plank bender apparatus while they dried to maintain the radius. That helped with the actual placing and bonding as it is easier to hold the frames in place while the glue sets when the planks align with the surface.
-
Thanks for the kind words Bill! I don’t really know what happened with Y.T. All I know is one day he was here and then he wasn’t.