HOLIDAY DONATION DRIVE - SUPPORT MSW - DO YOUR PART TO KEEP THIS GREAT FORUM GOING! (Only 13 donations so far - C'mon guys!)
×


cog
-
Posts
8,764 -
Joined
Content Type
Profiles
Forums
Gallery
Events
Everything posted by cog
-
 the beauty of brass ... it seems you are getting the intricacies of it drilling on the model isn't the easiest way to do it. if you can, drill on the desk, and put it on later. you can even drill the plastic part after attaching the brass ... every step takes you further ... slow and steady mate
 -
Steve, Welcome aboard. Glad you found my hidden build. I take comfort in the knowledge those passed have a ball (somewhere) with ones they love. Thanks for your support in this Ships most would call them here ... back to the plastic tubs ... I know of it, but I'm afraid my stanchions would incinerate at the size they are 0.16" high, width ... 0.04". If I heat it, I will probablynot be able to press it in the plastic, for it would bend to easily. Besides I have painted the deck in it's final colour as I need to put on furniture before I add the stanchions. I don't think the particular cheap plastic furniture likes the touch of a red hot stanchion ... I think it could work on a 1/200 or larger build though ... The scorching of the deck depends largely on the heat you need to apply to press the stanchion in without breaking or bending it, and furthermore the resistance of the paint to heat. I would suggest to test it. You will certainly have a piece of your build's plastic left and you can try it on bare, and painted plastic. It should be faster if you get it to work, for strength I can't say, as I use CA Cheers
-
I have to agree with you on the second build being less hard. I'm on my second WWII Tribal class destroyer, the first one I bashed rather heavily on the rear superstructure, and the bridge. The current one it's the bow I altered, and adding more detail with PE, and loose stanchions with EZ line, you know, the stuff for whimps . I found some rather nice 3D printed parts at shapeways, European, so that might not be of interest to you when postage is added ... Your hull "red" is not as dark as I expected, how much of a light grey/white did you add, or is it ready made?
-
Thanks for the likes gents, gives a bit of energy ... Patience ... nope ... I've been looking at you building a lot but mainly because I'm tired of working Thanks for the vote of confidence
-
I have to "waste" quite a few carbide drils for a single high speed steel one ... besides ... haven't found a supplier nearby as yet ... for the steel ones.
-
Quite so. Already ordered a few more boxes to ascertain a steady flow of drill bits to the waste basket
-
You missed a spot on the starboard side ... looks quite smooth from this side of the internet. The stern must have been hard to shape ...
-
Depends on what your interpretation of "railing" is ... and the way you build it ... I thought about doing it the easy way, you know, cut some railing resembling brass from a sheet, and stick it on the ship ... but why should I do that if I can accomplish, a probably lesser result, the hard way ... it is all about agony right ...
-
I'm just glad my metal hole isn't a hole It's a mere indentation on the stanchion ... and as you will know by the scale ... hardly visible at all, even with a visor ... and yes ... time just vanishes into thin air ... as Tommy would say. I'm getting quite good at it you know ... I can do an inch in about an hours time must be a record of some sort ... glad I can practise on something small like a superstructure. The stanchions on the deck's edges will be even more fun
-
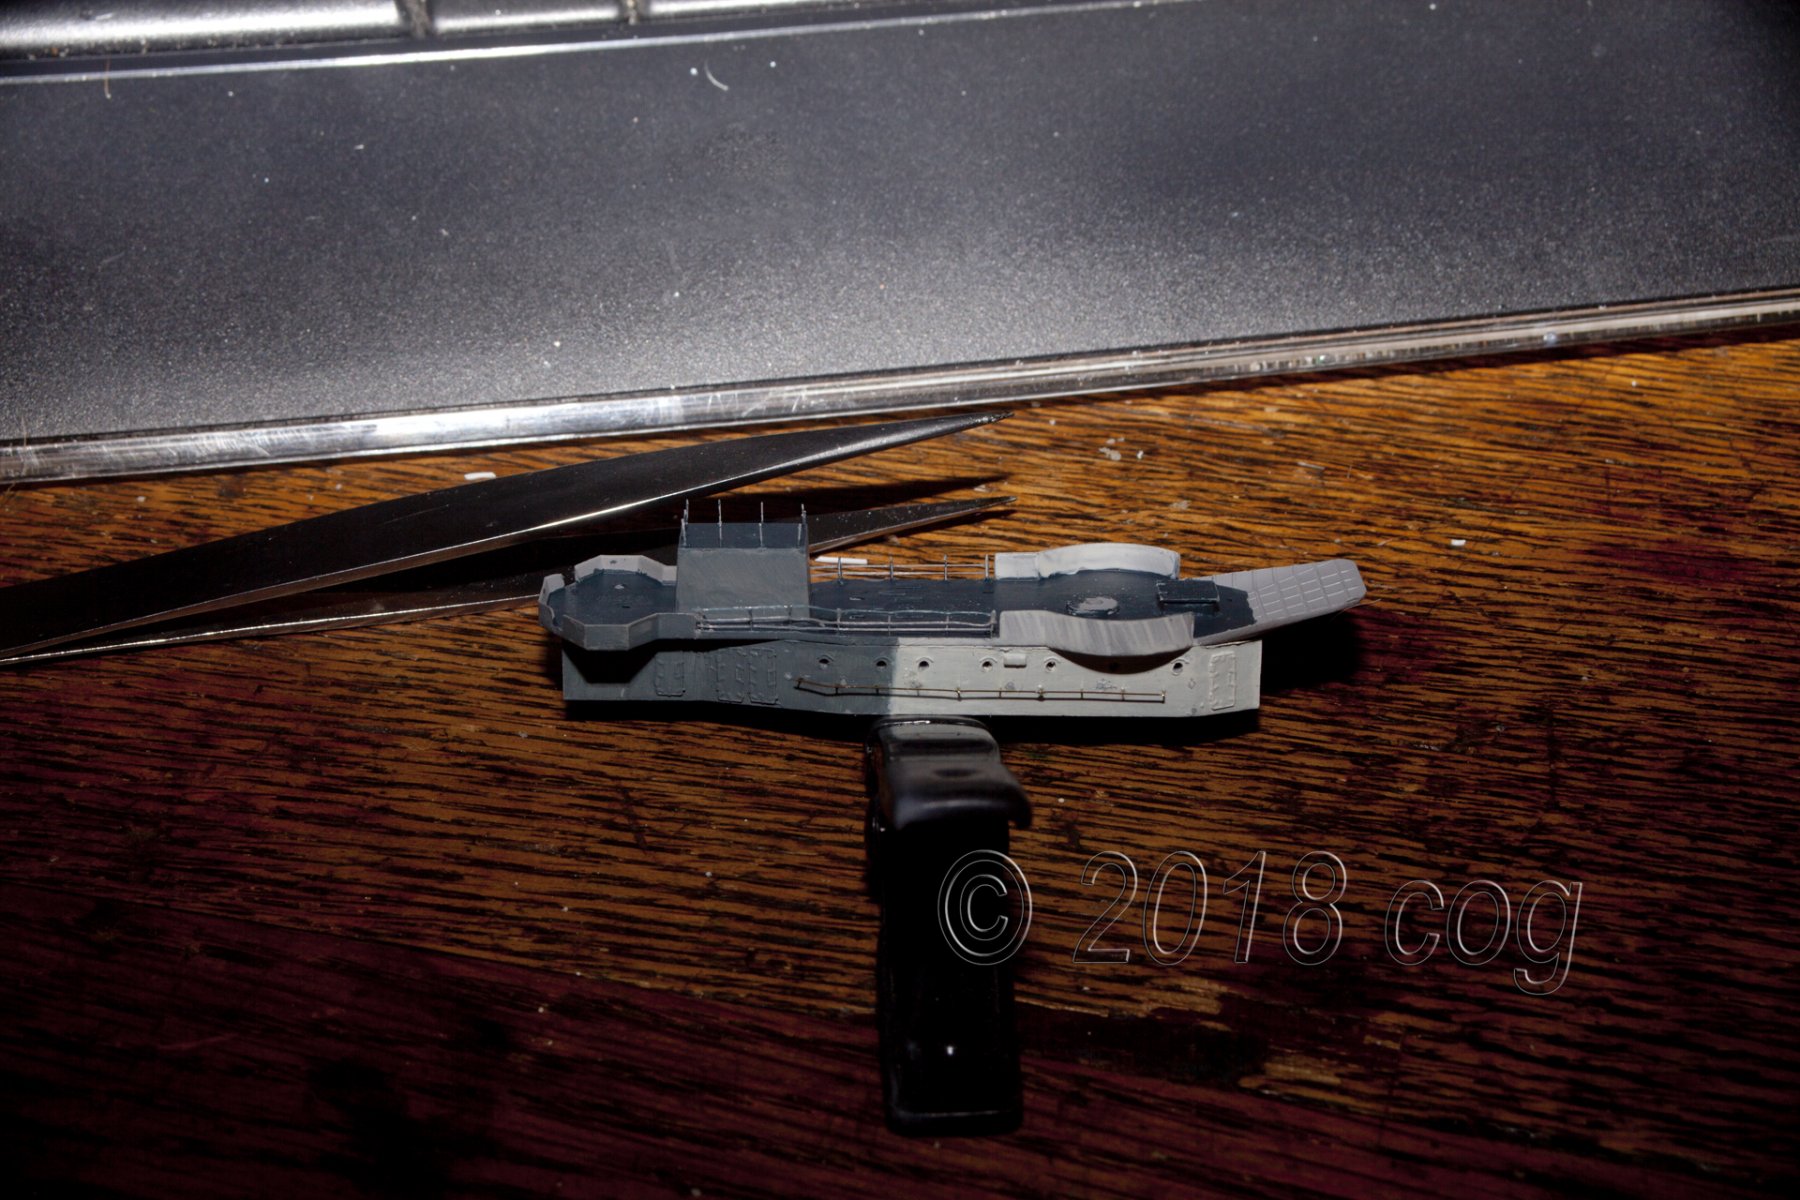
Snipped the plastic handrails of and replaced them with brass, started on the wire for the stanchions (EZ Line fine version)

- 361 replies
-
- 10
-

-
Frank, not much to like, take care of things at home first, I can wait ... as the French say: Bonne courage
-
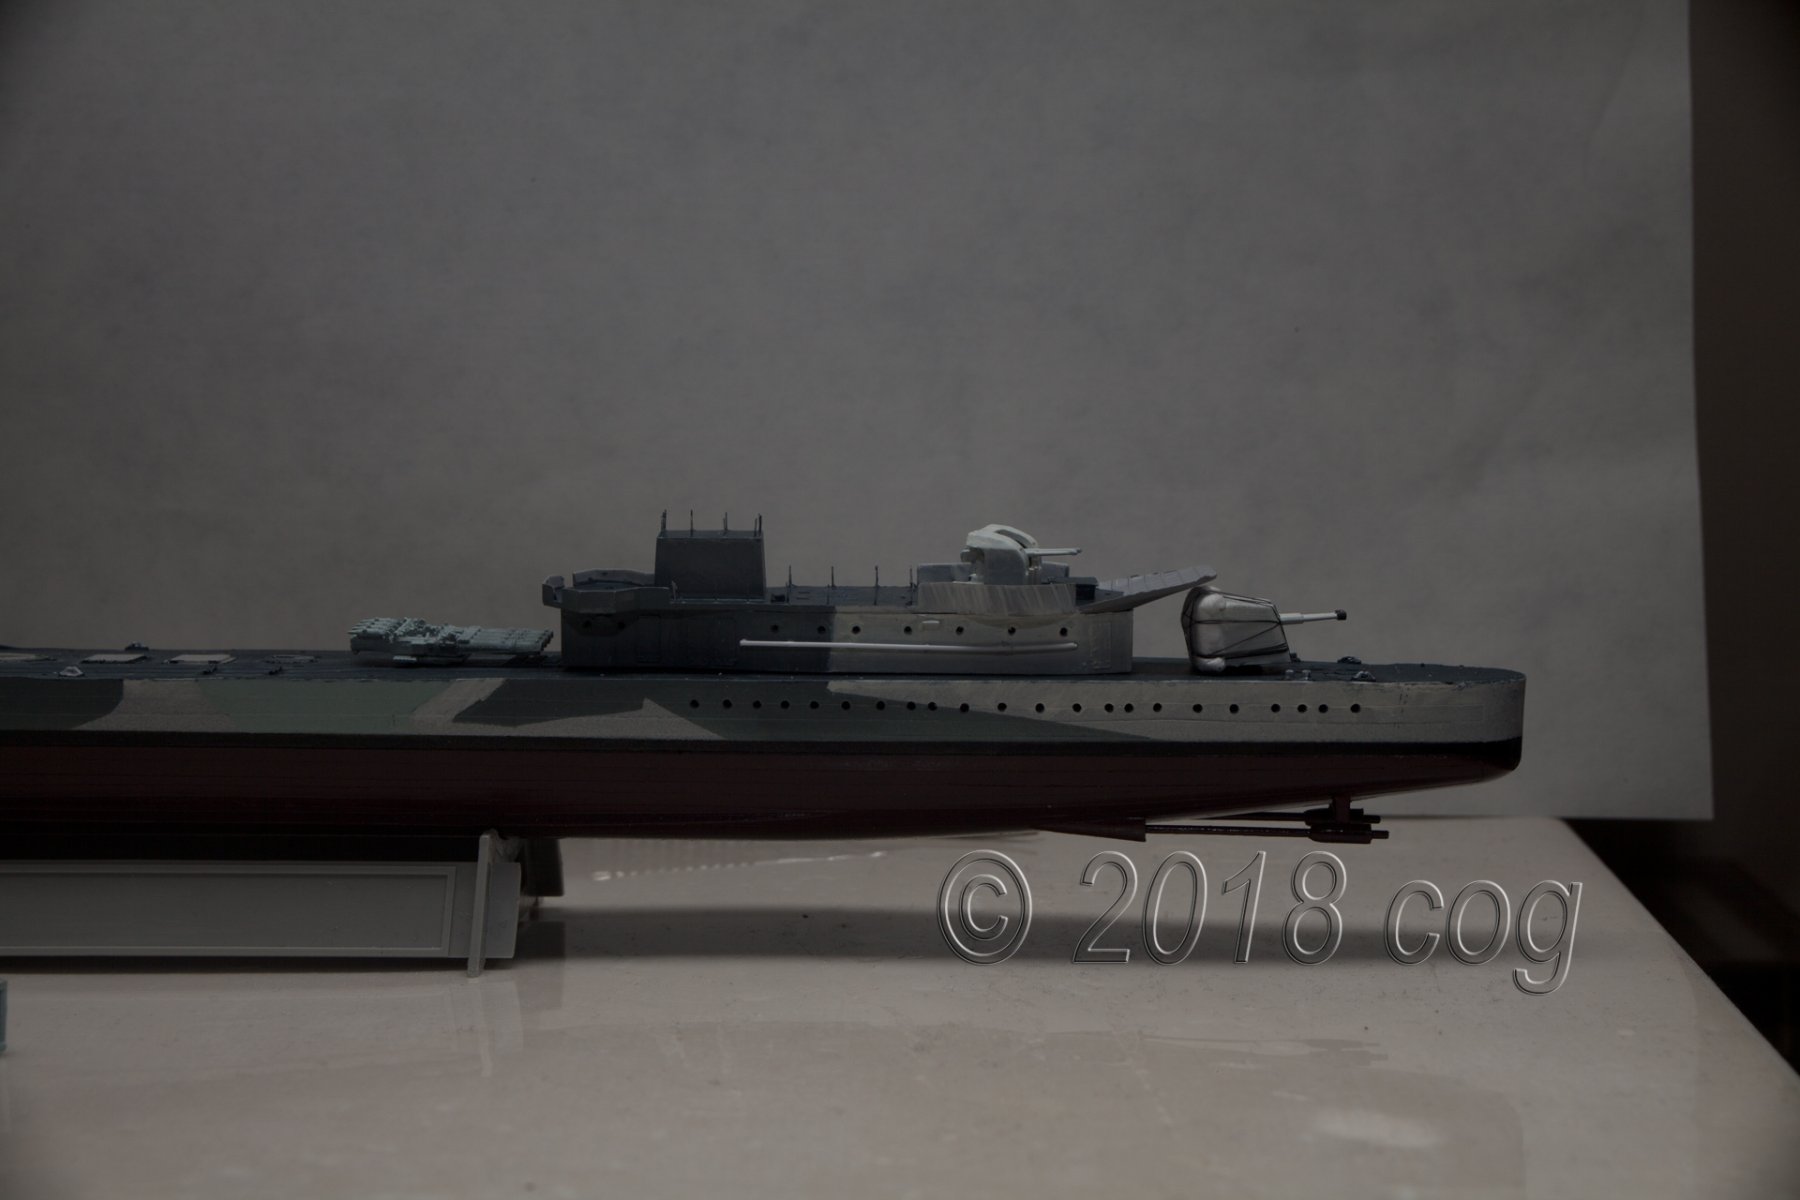
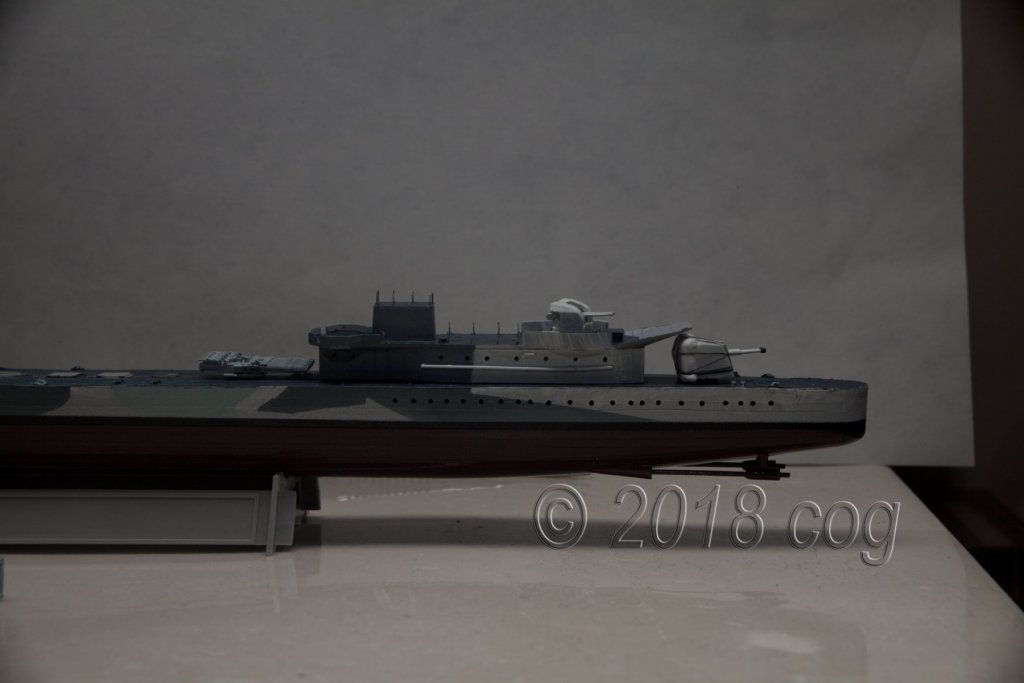
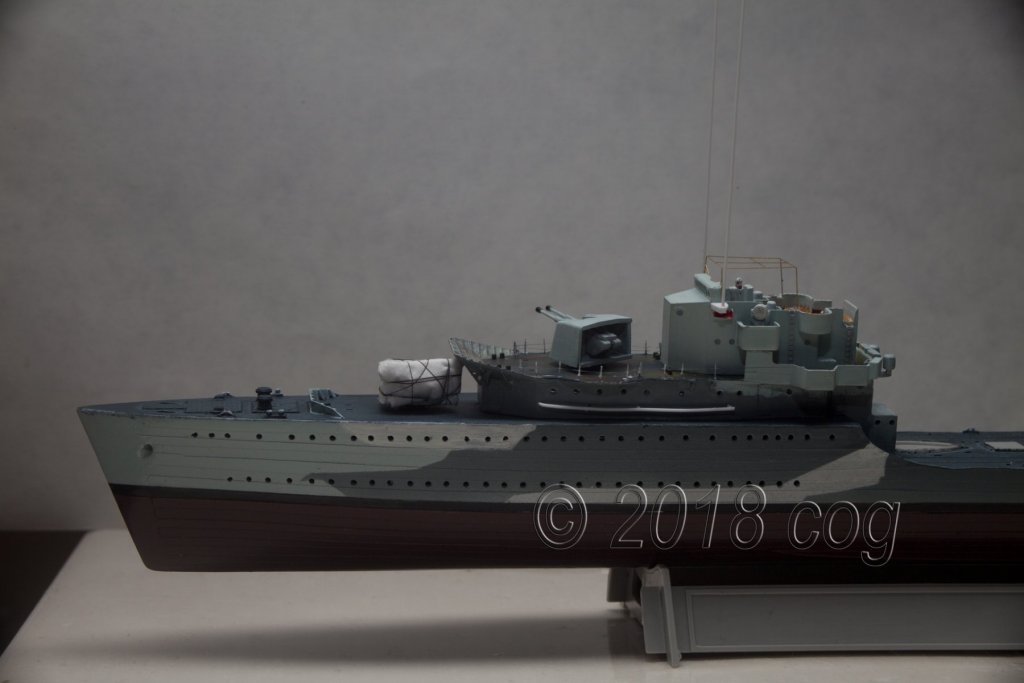
In between work, garage cleaning, garden chores, cooking, and all the other usefull activities we endeavour, I managed to squeeze some modelling. Some wobbly handrails on both structures (to be painted as goes for the other minor additions), an antenna at each side of the bridge, port and starboard lights, the canopy structure on the bridge, gave the guns their final colour, and closed two of the guns with a trapaulin (tissue works great) against rough weather ... leaves me another two
- 361 replies
-
- 11
-
-
such a length ... must be hard to get that straight without a keel fixed to a building board!
-
to me she looks all dressed up and ready to go ...
-
You should, however, admit you did a damn good job on it. Your hull looks impec, and you deck ... well from here I would say it's wood Fortunately, here at MSW we know we are our own worst critics ... I am in the stage of painting an 1/350 .5"x .75" destroyer's bridge deck, and it doesn't look good - size probably is a factor - on another one I used off cuts from a battleship's wooden deck, Pontos or Fly Hawk, and that looked a lot nicer, despite the, what you call "straight grain" from front to back. You should wait 'till you've got some deck furniture for rent on the decks. It will make a lot of difference
-
Nice progress ... it pays to check on the wear of your rotary cutter ... frequently, some just don't keep it up very long I remember I pored resin at the stern to seal the prop shaft when I built the Smit Rotterdam & Smit Nederland, the same with the rudders, as the hull couldn't cope with the strength of the servo.
- 446 replies
-
- 4
-
-
- zebulon b vance
- deans marine
- (and 3 more)
-
Saw your album ... unfortunately it doesn't do your work justice ... your photographs are missing the brightness in colour which the ones in your build log show. Still a marvelous build. I really like the way the camouflage turned out, and the lovely details on her deck and structures ... another gem in the cupboard ...
- 405 replies
-
- 4
-
-
- tamiya
- king george v
- (and 2 more)
-
She's a bit of a black sheep with all the grey around her ... marvelous work. A few new tricks ... the next one I'll be at the front row ...
- 405 replies
-
- 7
-
-
- tamiya
- king george v
- (and 2 more)