HOLIDAY DONATION DRIVE - SUPPORT MSW - DO YOUR PART TO KEEP THIS GREAT FORUM GOING! (Only 72 donations so far out of 49,000 members - Can we at least get 100? C'mon guys!)
×


cog
-
Posts
8,764 -
Joined
Content Type
Profiles
Forums
Gallery
Events
Everything posted by cog
-
 The advantage we have with this scale ... you experiment a lot! I love this build log, from start to finish it has been one big lurning curve for me, thanks for that. Back to business at hand, doesn't the brass get rather weak when annealing? Wouldn't "tapping" it into shape keep it stronger? It turned out real good though!
 -
That's a hard question, especially since I do not have any ethics when it comes to work ... Let's put it this way: It is a long piece of brass, and will be hell to cut up and put back together again without to much loss (I would certainly have a tantrum whilst doing that), so I'll just put it on in one piece, but I glue it in sections
- 292 replies
-
- 6
-

-
- g class destroyer
- trumpeter
- (and 4 more)
-
DARN!!! I warned you ... the bitch could just catch her flying ... Yes it looks like a new ensign on a manure barge ... doesn't fit in yet ...
- 292 replies
-
- 3
-
-
- g class destroyer
- trumpeter
- (and 4 more)
-
Searching sometin ... tomorrow some better piccies, the light doesn't really cooperate next steps, matt lacquer all over, after that, the railings on the aft and lower deck, then move forard to finish the forecastle ... a bit of flat lacquer again, and then rigging

- 292 replies
-
- 7
-
-
- g class destroyer
- trumpeter
- (and 4 more)
-
I searched a local product for you, since we do not have that brand Denis
- 292 replies
-
- 5
-
-
- g class destroyer
- trumpeter
- (and 4 more)
-
" is it possible the spur was carried inboard and only fitted (while beached or the like) as required?" So you would have to beach her to fit the spur, run back to sea and get the other ship ... which will be behind the horizon by then, or has it's spur in your back ... besides it will be rather inconveniant to have such a tree trunk on board, at least so I presume ... interesting concept though, Pat
-
Never heard of plastic metal ...? you're working with card now ...!!! what build log? Already am ... partially that is, hull has been prepped, working on the superstructures, when waiting for the current one ... slow and easy, first to finish the Glowworm ...

- 292 replies
-
- 5
-
-
- g class destroyer
- trumpeter
- (and 4 more)
-
The idea is good, I would have used sharp corners instead of this pool like shape, but that's a personal preference. I think you're a bit early prepping for the cleaning lady ...
- 83 replies
-
- 6
-
-
- marcle models
- card
- (and 1 more)
-
Denis, All WWII destroyers were based on a design derived from improvements on previous ones, which resulted in these. The average shape was more or less the same, differences were made in the propulsion system, engines, deck layout, and armament. Later radar was added and improved. The next build will be an HMCS ship, which has a longer rear superstructure, double barelled guns, if I'm not mistaken 4" instead of the 4.7" on this one, one set of quadruple torpedo tubes, and instead of two quad vickers, oerlikons, and radar, no searchlight. In effect the G&H class are a blown up version of the V&W class, the latter (despite the further in the alphabeth) were build just after WWI. I think they needed the heavier, and larger ships to compensate for Germany's ships and probably for the infamous Northern Route to Murmansk. Haven't read up on that. Although the difference in details aren't that overwhelming, they are clear enough, besides that, there is a distinct difference in camouflage, which I want to try out as well ... so the next will be weathered camouflage ... whatever that will look like ... probably a bare metal hull
- 292 replies
-
- 6
-
-
- g class destroyer
- trumpeter
- (and 4 more)
-
Thanks Denis, thought it was somewhat silent in your neck of the woods, but you have been paddling your bum off ...
- 292 replies
-
- 4
-
-
- g class destroyer
- trumpeter
- (and 4 more)
-
Probably, but that might be because you suddenly start to say nice things to me ... another option is that I got home frustrated from something called work and smash my laptop on top of her ... not likely, because I tend to throw my electronic mouse against the wall, or smash it on the desk ...
- 292 replies
-
- 7
-
-
- g class destroyer
- trumpeter
- (and 4 more)
-
Thank you gents, those are some great comments. However, don't give me to much credit before she's finished, the fat lady might just sit on it instead of sing about it ... Cheers
- 292 replies
-
- 6
-
-
- g class destroyer
- trumpeter
- (and 4 more)
-
I would wonder, since they would be anchored forard or it would be to pull them off, but I find that rather unlikely with a stone ... interesting thought though, Pat
-
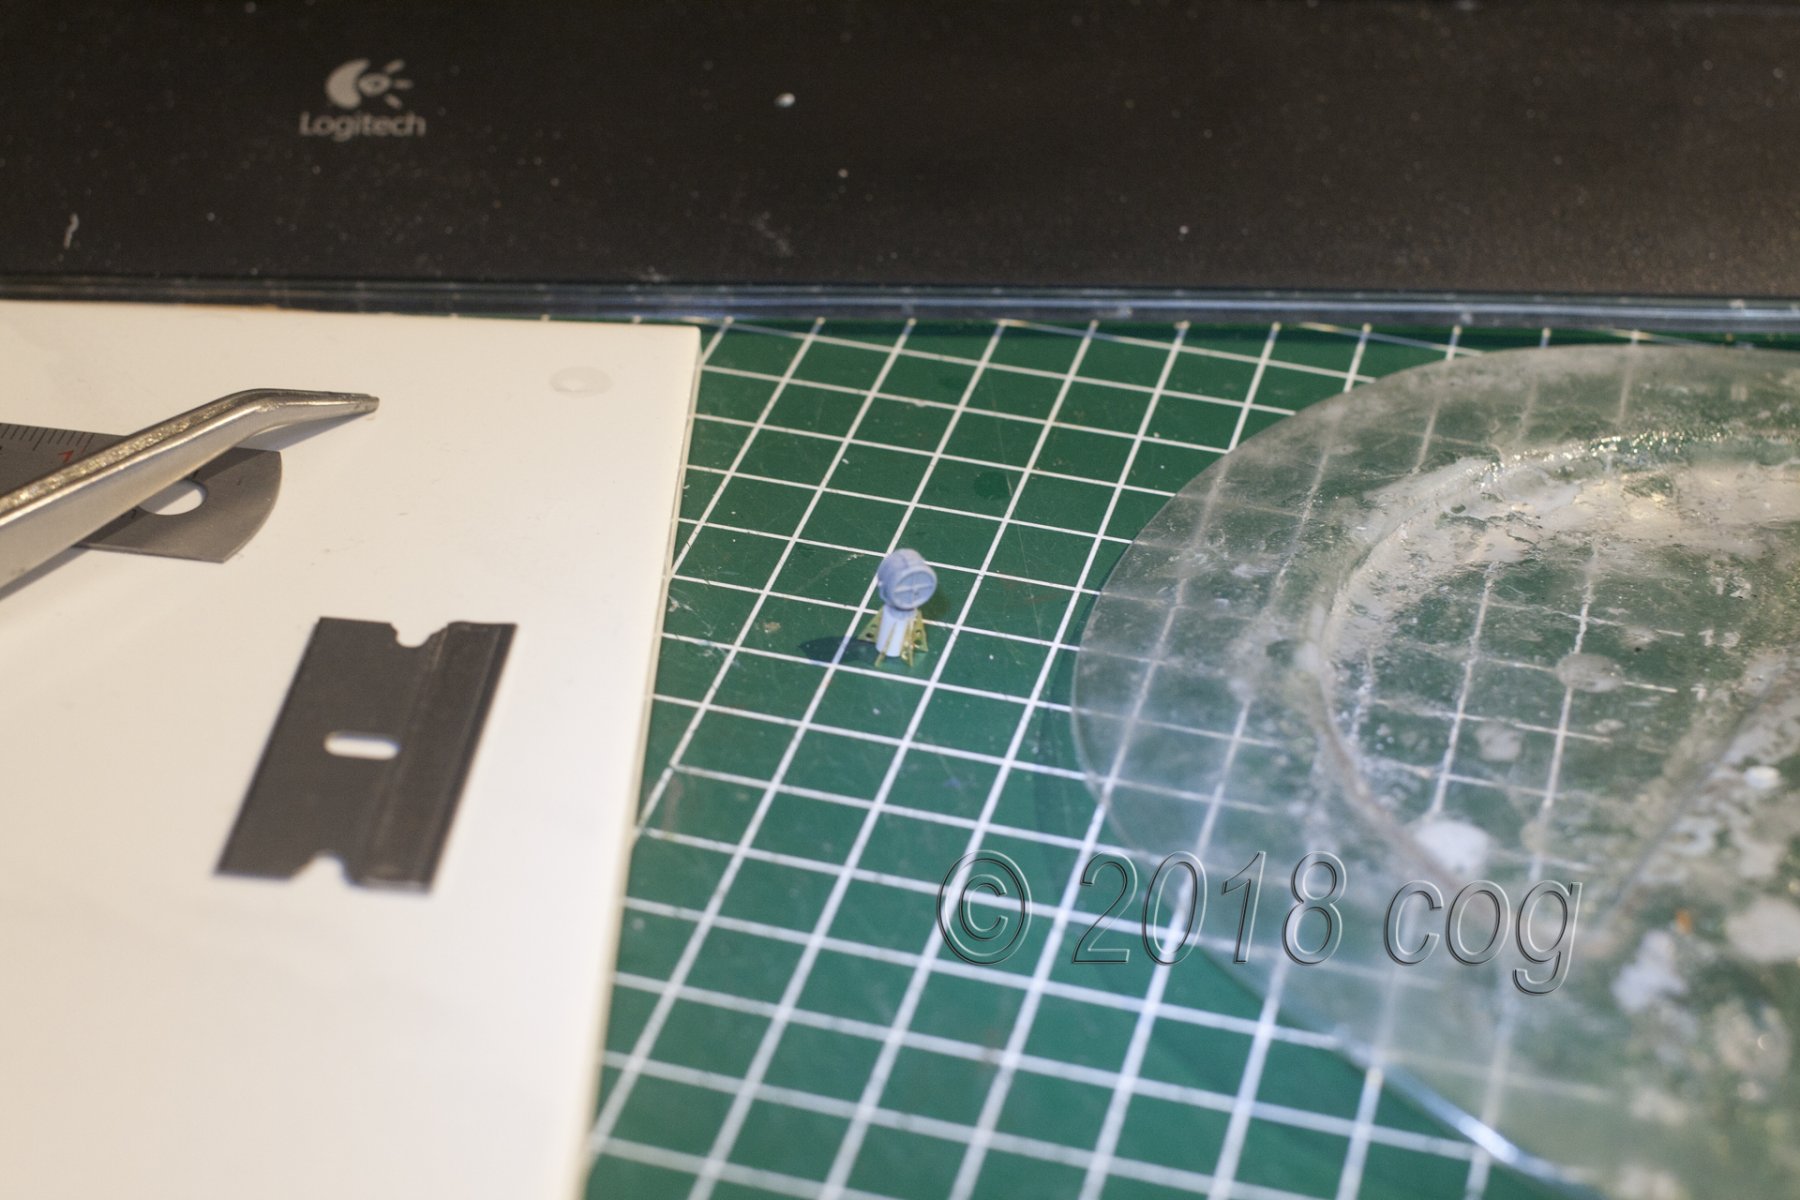
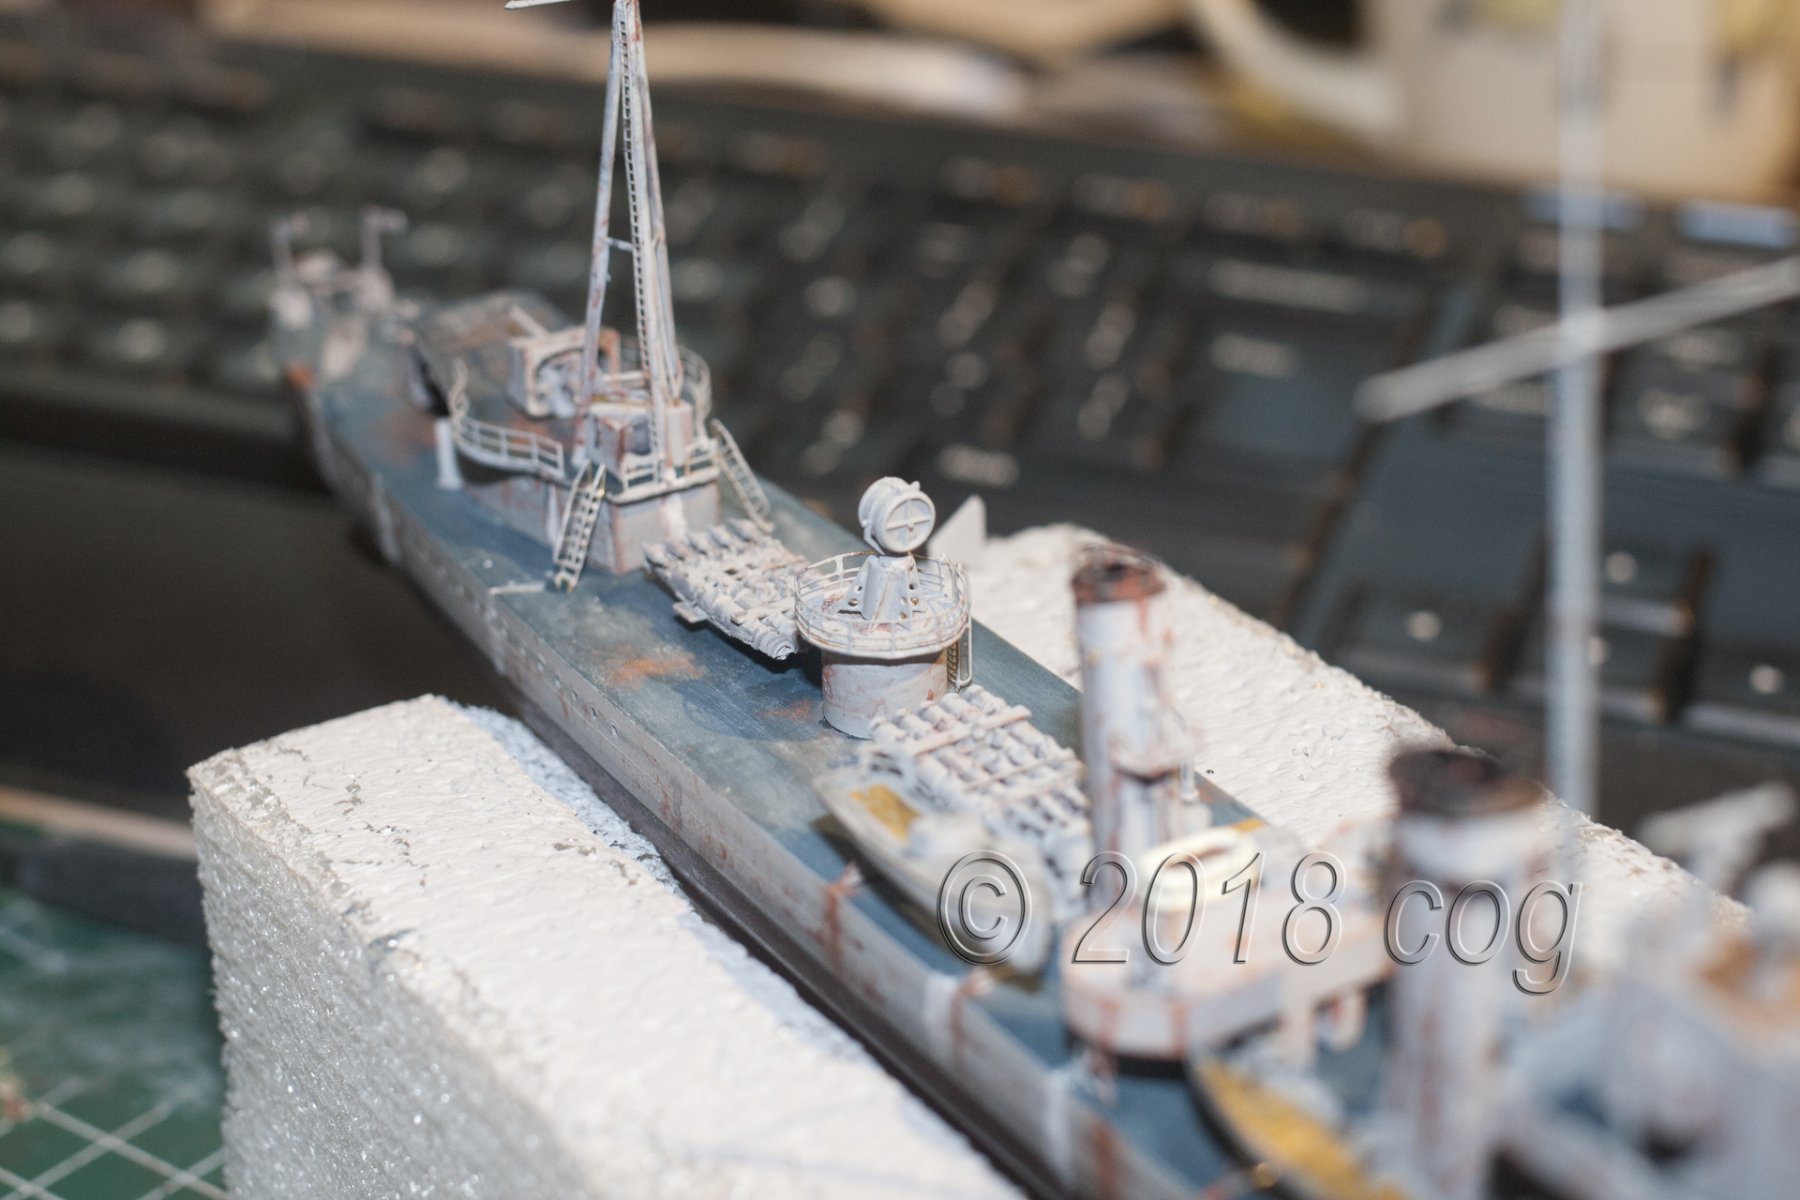
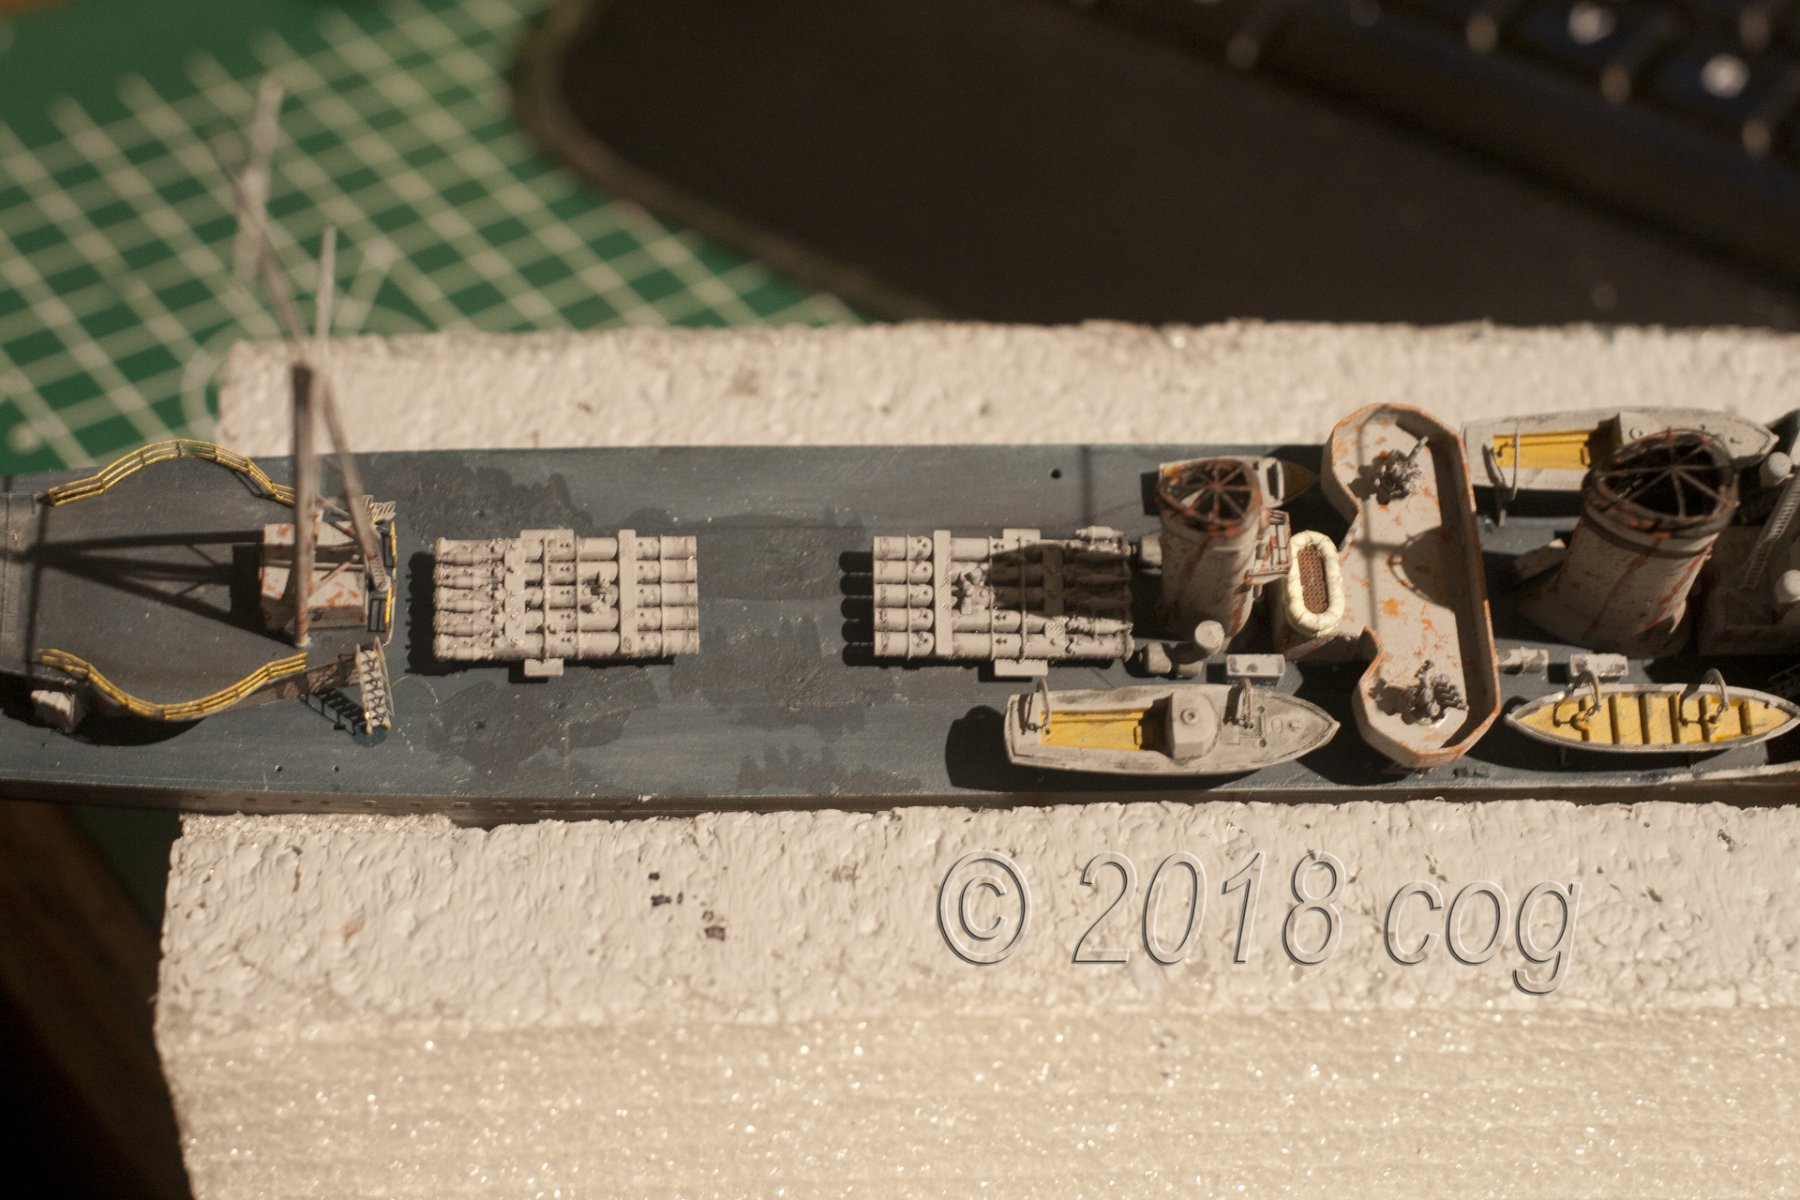
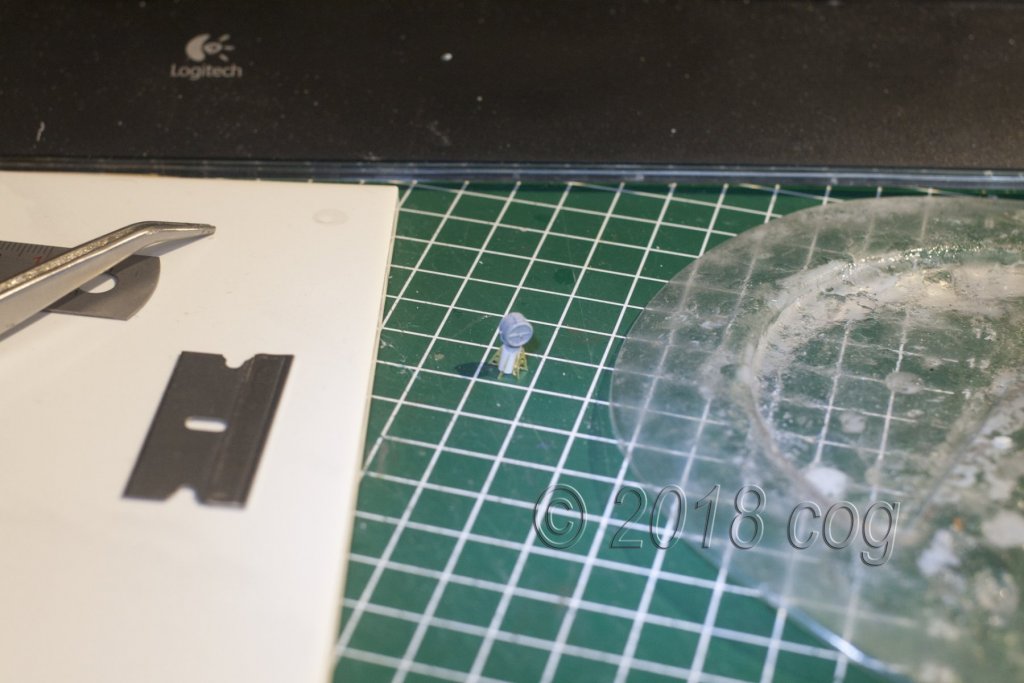
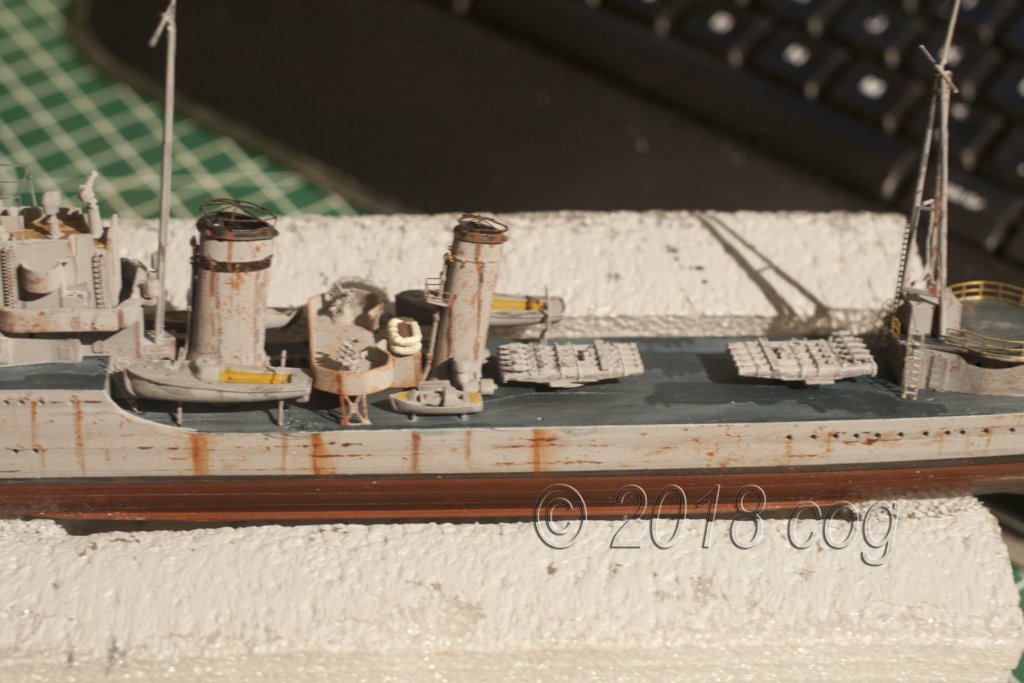
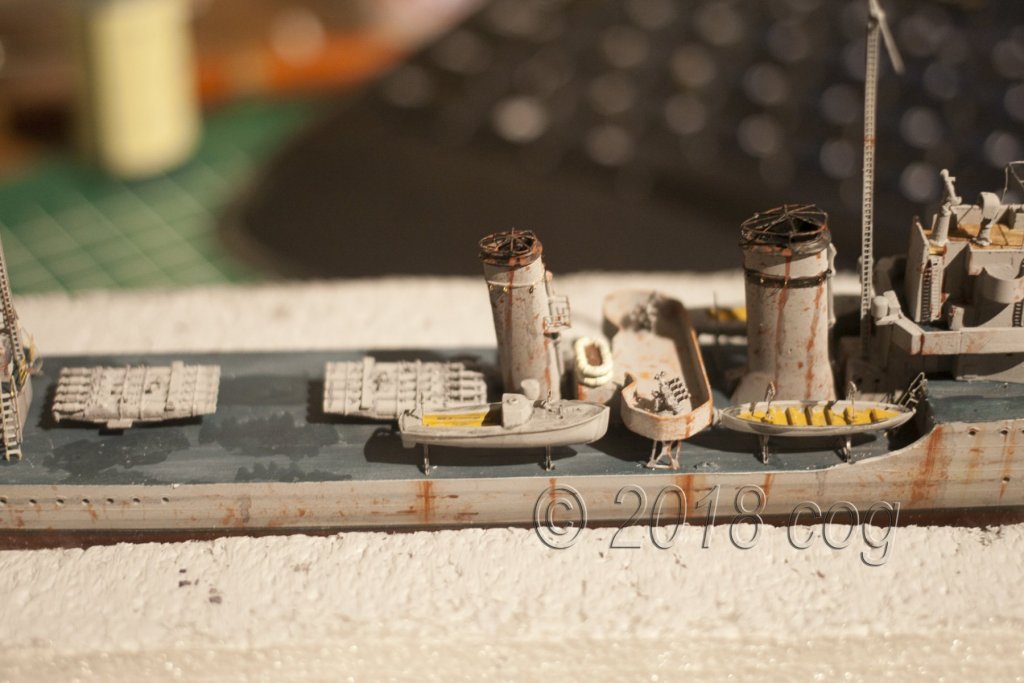
Could do a bit of work today, messed up the deck, so I had to colourise it, now remains some white and black pastels to rub in, and it will blend in nicely with the rest of the deck. Added the ship's boats, the vickers platform, need to add another two carley floats to the stack and tie them down, torpedo tubes fitted, still the search light tower to make ... nearly there with the middle and aft deck ... getting somewhere now ... I see a finish somewhere very distant ...

- 292 replies
-
- 9
-
-
- g class destroyer
- trumpeter
- (and 4 more)
-
You'll be needing some balast at the rear to counter weigh that trunk of a tree!!! Seems to fit rather snuggly to the bow
-
The things we have to cope with in model building ... mostly by our own doing. Hoiwever, you did a smashing job at the redodelidumdum. It looks very spiffy, mate. Lou, in this case I would have said: "Why didn't you make it five pieces for the ease of handling, and realism In fact you could have made it to the size of the tarps if you wanted to...
-
HMCSS Victoria 1855 by BANYAN - 1:72
cog replied to BANYAN's topic in - Build logs for subjects built 1851 - 1900
That is some incredible detail Pat. I am awe struck, especially when I look at the railings ... I know what it is like in PE, so I know how difficult this must have been to create ... the gratings, handles ... I am dumb founded- 1,013 replies
-
- 4
-
-
- gun dispatch vessel
- victoria
- (and 2 more)
-
lou you may have overlooked this bit: unfortunately, would have been a nice alternative though
-
You might indeed see some (major?) difference ... you can always put that spot in the shade ... on the other hand if this one is open and the other three are closed you will probably get away with the difference, since they wouldn't look the same anyway ... different angle, other light fall, etc ... perhaps compare before glueing it down to it's spot?
-
Go to see you can still rock & roll Patrick ... lovely view in the dark
- 756 replies
-
- 2
-
-
- galleon
- golden hind
- (and 2 more)
-
It's a pitty the rudder looks a bit clumsy compared to the rest, for the boats really look marvelous!!