

.jpeg.7d7eba14c97a2e1d9f79cd2c97f6424a.jpeg)
EricWilliamMarshall
-
Posts
985 -
Joined
-
Last visited
Content Type
Profiles
Forums
Gallery
Events
Posts posted by EricWilliamMarshall
-
-
I'm glad you were able to bypass/solve/etc. the numerous glitches. Quite the adventure!
- thibaultron and mtaylor
-
 1
1
-
 1
1
-
Keith, do you carve? If so have anything you want to share? Same for you Marc? We have seen you work in plastic, but I know you have worked in wood as well! Or anyone else along for the ride, have something to share a snap of?
- Keith Black and mtaylor
-
2
-
10 hours ago, Keith Black said:
As you said, a little filler and those gaps disappear.
To quote Nic:
"Putty and paint.....
Makes it look like what it ain't"
")
- mtaylor and Keith Black
-
2
-
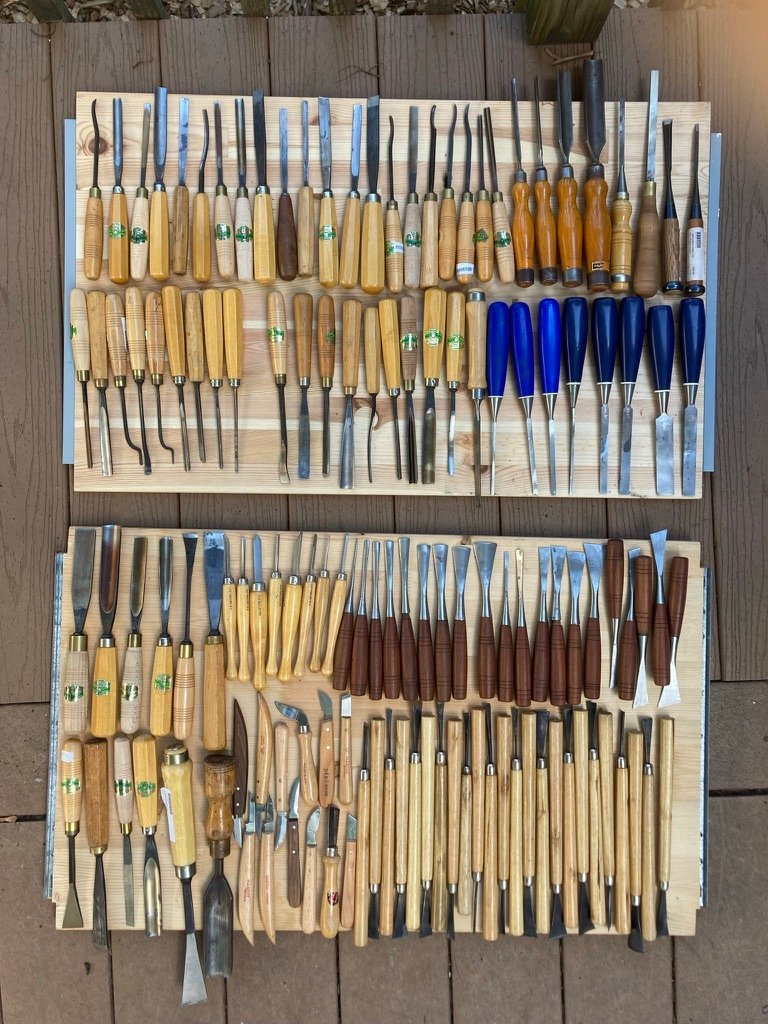
Thanks for the kind words. As for the carving tools, I wouldn’t be able to replace them. It took me decades to find them. The oldest were bought in my first weeks working full time in NYC doing furniture restoration back in the ‘90s. The Japanese ones and some of the large ones were bought at a sculpture supply place that gave up on wood tools for pennies on the dollar on the west side of NYC.. The Chinese ones took years to find a set I could afford. There is at least one in there that I made from old files and turned the handles. And the mortise chisels and the ones on the bottom with the mahogany handles were my father’s before he died. He turned mahogany handles but never attached them. So I did finished his project. Some are from the 19th century and I reconditioned them. I traded time and hunting in NYC for just buying sets at full price. If you can sharpen the chisel, you have enough skills to save old chisels, which are usually quite cheap. I remember the ones I had to pay full price for that where needed for a job and the like. I’m not a master carver but I can hold my own and have done some nifty work here and there. But I digress!
As for the mended hull, you can see the scars if you look for them but they don’t jump out at the eye. And that is fine with me. I can live with that.
I have a little work with the rudder ahead and then the whole topic of coppering is up next!!
- Keith Black, mtaylor, KenW and 1 other
-
4
-
On 10/18/2021 at 11:22 AM, Hubac's Historian said:
The best example of this is my wood carving assemblage of misfit gouges and skew chisels.
I finished 'recovering' my carving tools from the flooded basement thanks to Ida. (Last Wednesday we finally got the sump pump squared away! - now with battery backup!) I had triaged my tools with oil but I've been cleaning and removing rust and reshaping due to rust pits since then.
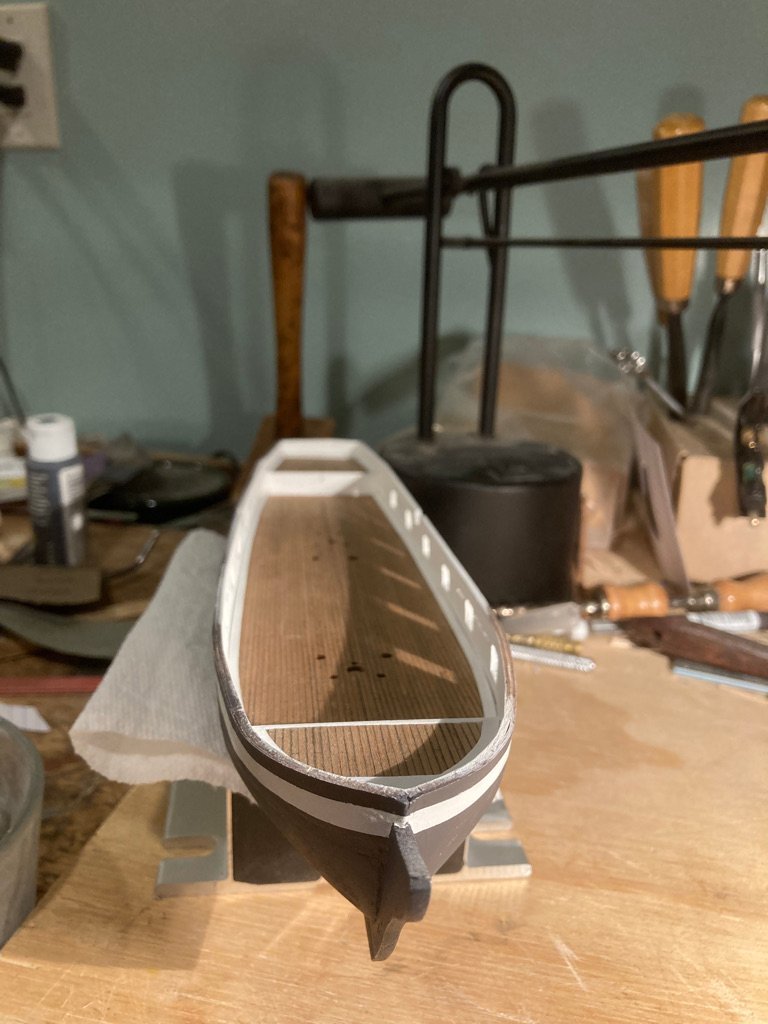
I also added the waterways to the ship. The long one runs in the center have gaps and I have to either fix or fill that. Two photos due to me choosing a range to have all in focus.

-
That’s enough for me. I’m familiar with that approach.
Many thanks!
Regards,
Eric
- mtaylor, Ryland Craze and No Idea
-
3
-
29 minutes ago, VTHokiEE said:
Thanks @EricWilliamMarshall I ended up ordering the kell guide - I don't trust my freehand at all. I'd love to know about the books
Sure!
Taunton's Complete Illustrated Guide to Sharpening by Thomas Lie-Nielsen (yes, that Thomas Lie-Nielsen, the famed tool maker). It starts with kinds of tool steel, heat treatment and abrasives. Then machines and jig and then chapters on sharpening various tools. https://www.amazon.com/Tauntons-Complete-Illustrated-Sharpening-Taunton/dp/1631860860/
The Perfect Edge: The Ultimate Guide to Sharpening for Woodworkers by Ron Hock (yes, he is that Ron Hock, yet another famous tool maker). It has a similar range: tool steel metallurgy, heat treatment, abrasives and chapters on sharpening various tools. https://www.amazon.com/Perfect-Edge-Ultimate-Sharpening-Woodworkers/dp/1440329958/
The Complete Guide to Sharpening by Leonard Lee. Again similar topics. And again a similarly famous tool maker.
https://www.amazon.com/Complete-Guide-Sharpening-Leonard-Lee/dp/1561581259/
I honestly don't have a fav among the ones above; I find they complement each other.
And a gem of a book regarding the odd-shaped carving tools like bent gouges and the like:
Woodcarving: Tools, Material & Equipment by Chris Pye - Pye (a carver not a tool maker!) has a number of good books on carving but this one has a bible on sharpening and other details regarding the setup and use of carving tools. https://www.amazon.com/gp/product/1861082010/ref=dbs_a_def_rwt_bibl_vppi_i5
There is a reprint (newer and pricer): https://www.amazon.com/gp/product/1635618142/ref=dbs_a_def_rwt_bibl_vppi_i2It isn't a carving book but a book on carving tools.
-
On 11/27/2021 at 10:26 PM, druxey said:
You know whether the edge is sharp by the sound it makes as you slice through hardwood. It should make a nice crunch like cutting a crisp apple.
Yes! If the chisel is that sharp then you can cut end grain without crushing some of the wood. The sharper the blade, the less force is required (although it does always feel that way but it will feel easier to control).
To use water stone well (in my opinion) you have to develop a feel for full contact between the chisel and the stone. Full contact means you are removing metal from across the entire surface. Partial contact means you are creating a bevel or facet. Developing this feel takes time. I should note sometimes there is a change in the sound when full contact is made. It took me months to get in the ballpark and years to nail it (with a nod to Bill Marshall and Steve Peng for guidance).
One way to work on this is to color the part of the blade you want to sharpen with a sharpie marker. Take few strokes and see where metal was removed. Smaller blades are even harder to feel.
I’m a fan of 25 degrees; you will see recommendations for higher numbers. Generally, those angles work better where more force is used, like cutting mortises for furniture.
I have found success sharpening the dockyard mini chisels and gouges with a water stone for flat and outside curves and sandpaper or diamond files for the inside curves but I don’t know what the ‘canonical’ way to sharpen such small tools. I’m also partial to using strops or very fine yellow water stones for tasks that need super sharp edges.
I would love to have water stone system with a water feed but even those systems are subject to a bit of wobble which hamper the sharpening. Note that any machine process is more dangerous than a hand process.
Jigs are the quickest way to get an edge that is flat unless you are comfy with the feeling of contact I mentioned before. Jigs for curved blades are rarer and a bit trickier and usually for larger blades used in wood turning. I will also note lots of folks do fine with somewhat sharp blades.
")
If you are curious, I can suggest a few books on the subject.
-
-
1 hour ago, Keith Black said:
I'm lazy so I cheat by adding poly over the paint, brush marks are never to be seen again.
“I'm
lazyefficient so Icheatinnovate by adding poly over the paint, brush marks are never to be seen again.”
Two can play this game! “Three great virtues of programming are laziness, impatience, and hubris.” - Larry Wall, noted computer programmer and inventor of the Perl programming language. He defined laziness as “the quality that makes you go to great effort to reduce overall energy expenditure“5 hours ago, Hubac's Historian said:but I have zero brush marks.
The technique does work as advertised. Brushless when dry!
It is about the same amount of time as setting up the air brush, painting and cleaning. Perhaps a smudge faster!
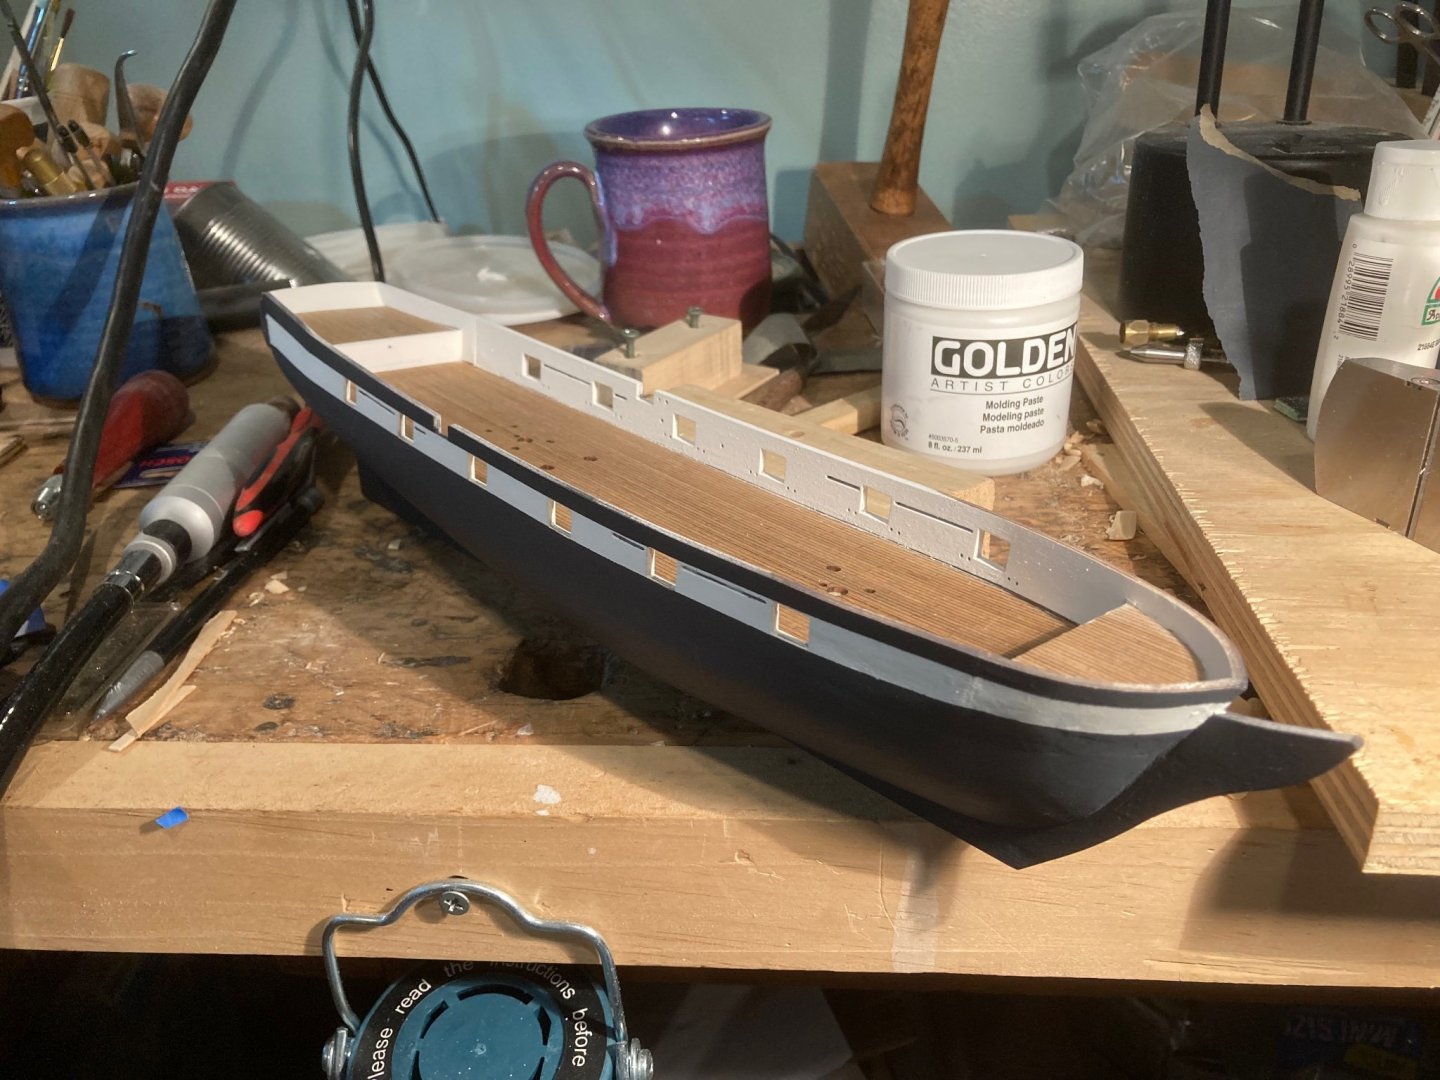
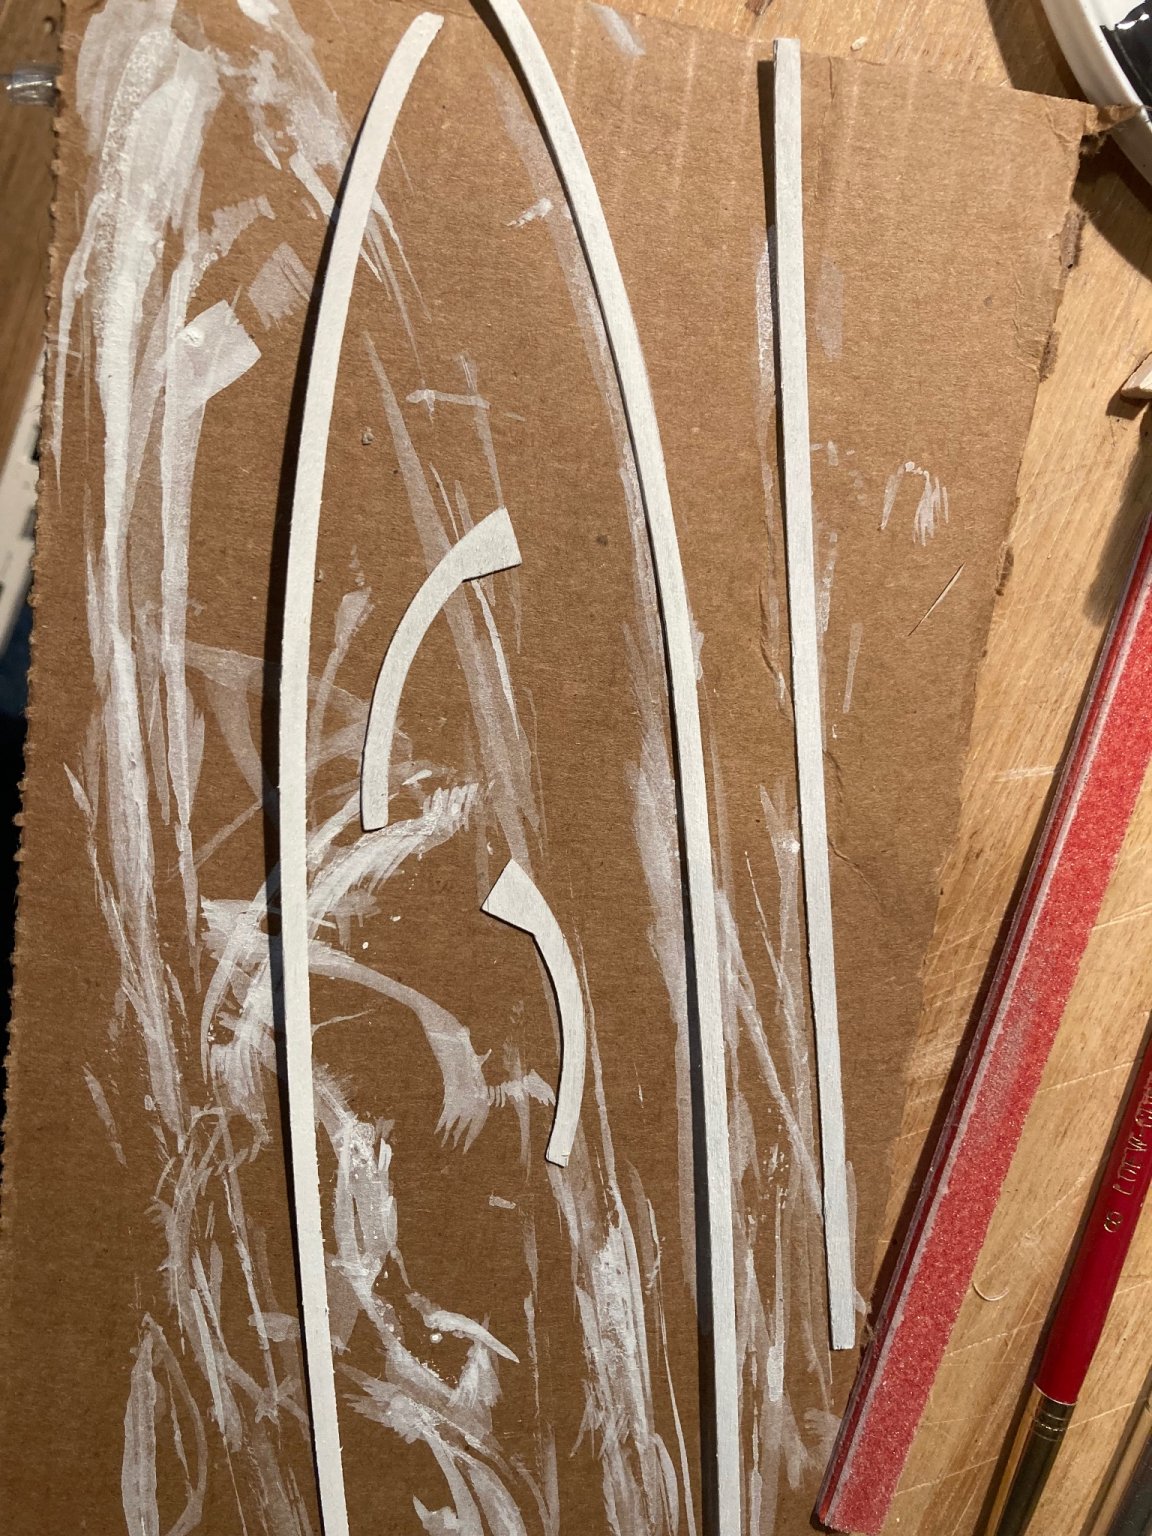
I added some of the water ways to the ship and recut the other ones from scrap for the bow and stern. And they are being painted white. (I counted this time - 6 coats but one coat was too thin).
-
I tried a painting technique I attribute to @Chuck via second-references (although I don’t actually know). The story goes this was from an assignment in design school, where he had to paint a square perfectly. Loosely the idea is this: to achieve a painted surface without any brush marks, you use repeated applications of thinned paint via a brush.
My goal was to see if I could match the evenness of the air brush via this technique, so using the same paint I mixed for the airbrush, mixed with more water until the paint was almost transparent. I used a heat gun to accelerate the drying. It works and with only a hand full of coats. (Less than a dozen; I didn’t think to record the number of coats. Sorry about that.)
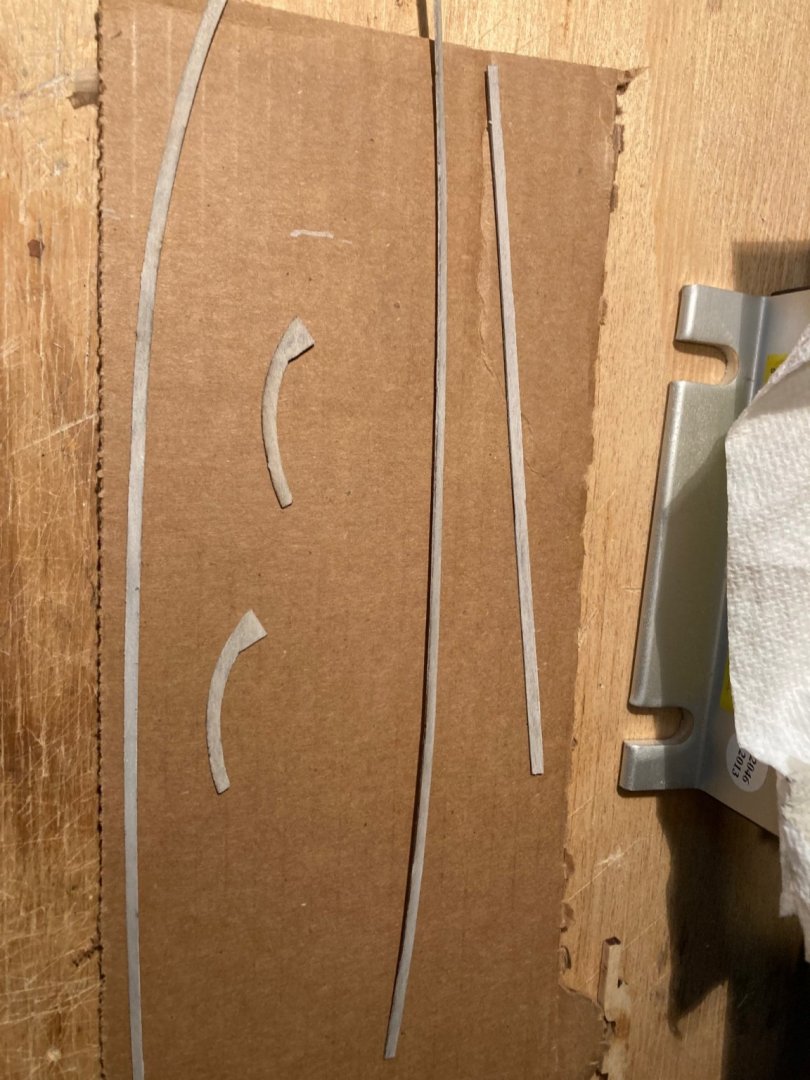
These pieces are the water ways, which seem a bit wide to me but that’s what’s in the plans and I couldn’t find a clear reference one way or the other, so I’m going with “as is”. I thought if I added them to the model later than suggested in the instructions, I could have a slightly cleaner transition between the deck and the painted woodwork (and hide any messy seams under the waterways!)
These water ways are laser cut in thin three-ply plywood, which gives a thin but hearty part which doesn’t split and bends easily. A nice gesture on the part of the kit designer for handling parts that could be quite fiddly and worrisome. And since they will be painted, the color difference from other wood in the kit is of no importance.

-
I’m tempted to rename the my tips and hacks: “Captain Park’s Imaginary Tips and Hacks” after a little remembered board game. It is currently a free print and play game designed by James Earnest.
His brief description of the game is this: “You’re all would-be adventurers who are terrified to go on any real journey, so you sneak around London collecting artifacts and stories, and then return to the Adventurers’ Club and lie about where you’ve been. Africa! China! Mount Everest! The South Pole! The villain of the game, Captain Park, thought of this scheme first, and he’s not going to make it easy for you. Captain Park wanders the streets of London, and if he spots you, the jig is up.”
James Earnest has a number of delightful little games. One is board game where every player has invented a time travel machine, and everyone races back in time to patent it. It is called U.S. Patent No.1!
https://cheapass.com/free-games/originals/captain-parks-imaginary-polar-expedition/

- Hubac's Historian, mtaylor, ccoyle and 1 other
-
4
-
-
OK, kind souls of MSW, more than one dear reader has mentioned that my use of ‘stupid’ to label some of the things I share is off/wrong/etc. I have used that word as shorthand for “the following observation may or may not be of interest, use, etc. It may not work exactly as expected. May not be of any practical value in your own work. Your mileage may vary. Etc.”
What would be a better replacement? I’ll use (and replace) a sensible or clever word or phrase that folks like. So if you have minute or two, please suggest something better! Thanks!
-
4 hours ago, Hubac's Historian said:
This looks awesome, Eric!
That is very kind of you! Nothing like your work! I recommend anyone reading this to head over to Marc’s build log right now and see the insane labor of love there!
- mtaylor, Ryland Craze, Keith Black and 1 other
-
2
-
2
-
Another stupid suggestion: to learn some control with the airbrush, fill the paint receptacle with just water. And spray on newsprint or brown paper bags or cheap construction paper. Any material that looks different when wet.
You will learn to keep moving when spraying and the variety of effects easily without getting paint everywhere or needing a respirator for the solvents. Added bonus, you don’t have to clean the airbrush when done!
- BobG, VTHokiEE, Keith Black and 4 others
-
7
-
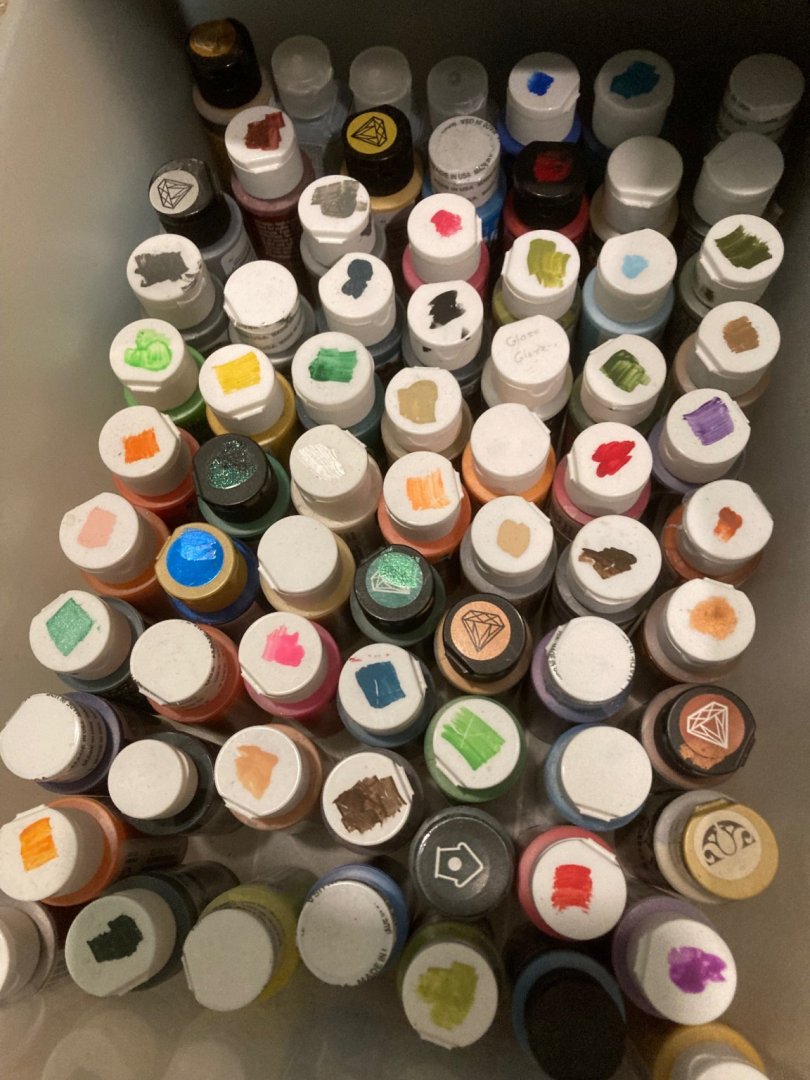
Stupid suggestions: I painted the tops of the various paint jars with the color they contain. This makes it easy to see what color you want, how opaque they are and what it will look like when dry.
- Duanelaker, Keith Black, mtaylor and 5 others
-
8
-
3 hours ago, Hubac's Historian said:
I have found that I have to significantly thin my Testors ModelMaster acrylics to get them to airbrush well.
The craft paint is similar. There isn’t an exact ratio since the paint varies in thickness and ability to cover depending on color and age. The worse I recall is two parts water to one part paint; most are one part water to one and a half of paint. All of it dries flat. It is prefect for the kids painting minis. I will note that craft paint takes a while to fully dry and adhere to plastic. The chief advantage is that is cheap and easy to find.
-
I snuck in some time in the workshop and dug out my air brush and compressor (cheapie stuff from Harbor Freight) and relearned. I briefly explored the airbrush back when I started posting here at MSW but haven’t used since working on a plastic kit a couple of years ago. I trimmed the height of the bulwarks after noticing a mismatch in painting diagram and my work. It is also in the regular plans - I just missed it. I used a sharp block plane but sanding stick or similar would work.
I picked my colors from my collection of craft paint. (For a while my kids painted minis for role playing games, and craft paint is junky but cheap and cleans with water. It worked very well for us.) I would not recommend this paint for airbrushing since the particulate size in the paint varies greatly, often quite large. Which is the opposite of what is desired for paint to be used in an airbrush! I mixed in some water with the paint until it is similar to milk in thickness.
First was a bit of grey as primer. Then white cut with a bit of eggshell/off-white to cut the brightness of straight white for the stripe across the gun ports. I should mention I use my heat gun to speed up the drying. Which also helps when I mix in a little too much water and/or I’m in danger of drips on the model. A few seconds of the heat gun dries it immediately and I can spray again. To site a source: Adam Savage of Myth Busters fame uses the air brush without paint, just blowing air to speed up drying between coats. After the white coat, I tried using some modeling paste as filler, but couldn’t quite get it to work as I would like. I will explore its use further.
I then added more tape and sprayed my black (which isn’t a pure lamp black but is also cut with a warm grey). After that, I removed the tape to see how it went.
- mtaylor, Edwardkenway, TomShipModel and 5 others
-
8
-
-
2 hours ago, amateur said:
HMV-card lasercut detailset
The HMV product - https://www.amazon.com/gp/product/B009H748N2/ref=ppx_od_dt_b_asin_title_s00?ie=UTF8&psc=1
- ccoyle, Old Collingwood, Canute and 4 others
-
7
-
2 hours ago, Landlubber Mike said:
Standards? I have no standards.
Hahaha, how about: you are much more ‘less worse’ than me.
2 hours ago, Landlubber Mike said:Do you have a hold and fold?
Nope, it’s on my list to get. Thanks for the recommendation. I folded that an #11 X-acto blade and a bit of a hack saw blade. And tweezers, since I couldn’t pick it up with my fingers!
I wish everyone a wonderful Thanksgiving!
-
5 hours ago, TomShipModel said:
It looks even better up close.
You are too kind!
3 hours ago, Hubac's Historian said:Nice save
Thank again for the kind words!
I’m not going to plank this hull, since a) I’m going for building this as directed (mostly) and b) as an apprentice builder I’m don’t have the skills to plank a hull without some guidance from the kit. (That was a misstep of mine with the Dapper Dan, that will be remedied before I return to the Dapper Dan build.)
So, I almost at the point to start thinking about painting.
I wish you all a pleasant and peaceful Thanksgiving!
-
19 hours ago, Canute said:
they do look like a nice short flight of stair
I’m quite happy with them; fear not! While I’m not up @Landlubber Mike’s standards, I have endeavored to steal some of his wisdom regarding working with the tiniest of the tiny.
- Old Collingwood, thibaultron, Canute and 3 others
-
5
-
 1
1


Tools described
in Modeling tools and Workshop Equipment
Posted · Edited by EricWilliamMarshall
Complete set of tools - 1. An oxymoron designed to sell half the needed tools, all of which are half the quality needed to be useful.
I see ‘complete set of tools’ advertised everywhere and rarely do they ever measure up.