

.jpeg.7d7eba14c97a2e1d9f79cd2c97f6424a.jpeg)
EricWilliamMarshall
-
Posts
986 -
Joined
-
Last visited
Content Type
Profiles
Forums
Gallery
Events
Posts posted by EricWilliamMarshall
-
-
-
On 4/21/2022 at 8:13 PM, mark.bukovich said:
It was your build log that encouraged me to do more than just follow the instructions. I really liked the custom stuff you did on yours, and I'm finding it so much more fun
If you will pardon the metaphor, sharing information and approaches allows ‘all ships to rise’ at a loss to none. It’s what make this site so wonderful. I’m happy I could add in a tiny way to your adventure! Rock on!
- thibaultron, mark.bukovich and Dave_E
-
 3
3
-
19 hours ago, Hubac's Historian said:
Will you go back to New London a week from Saturday?
Yup, I will be making the pilgrimage to the Joint Clubs Northeast Ship Model Show & Conference. And you?
- mtaylor and Ryland Craze
-
2
-
You’re doing a wonderful job! She looks great!
-
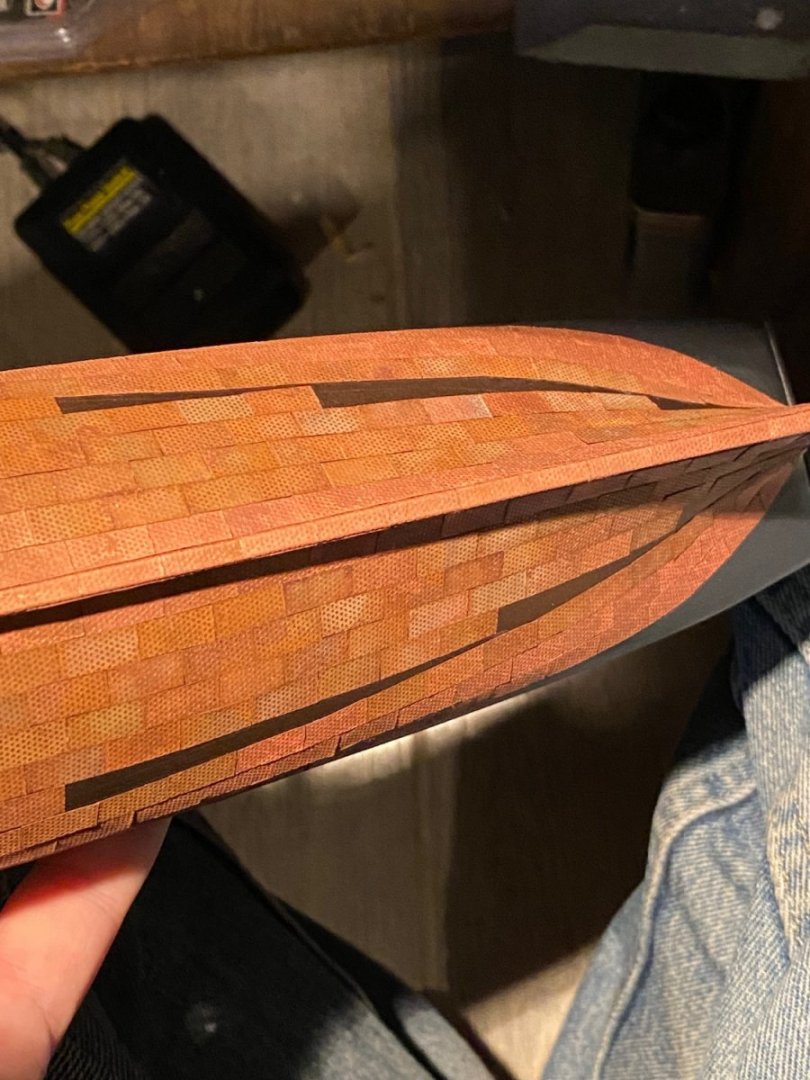
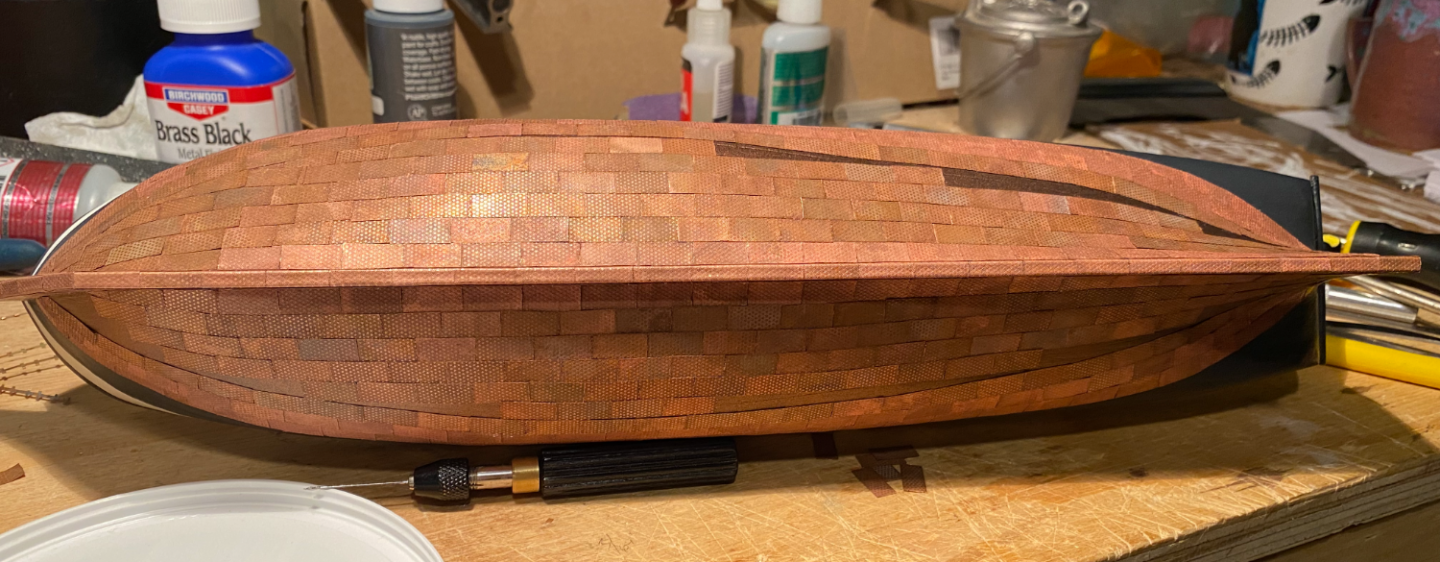
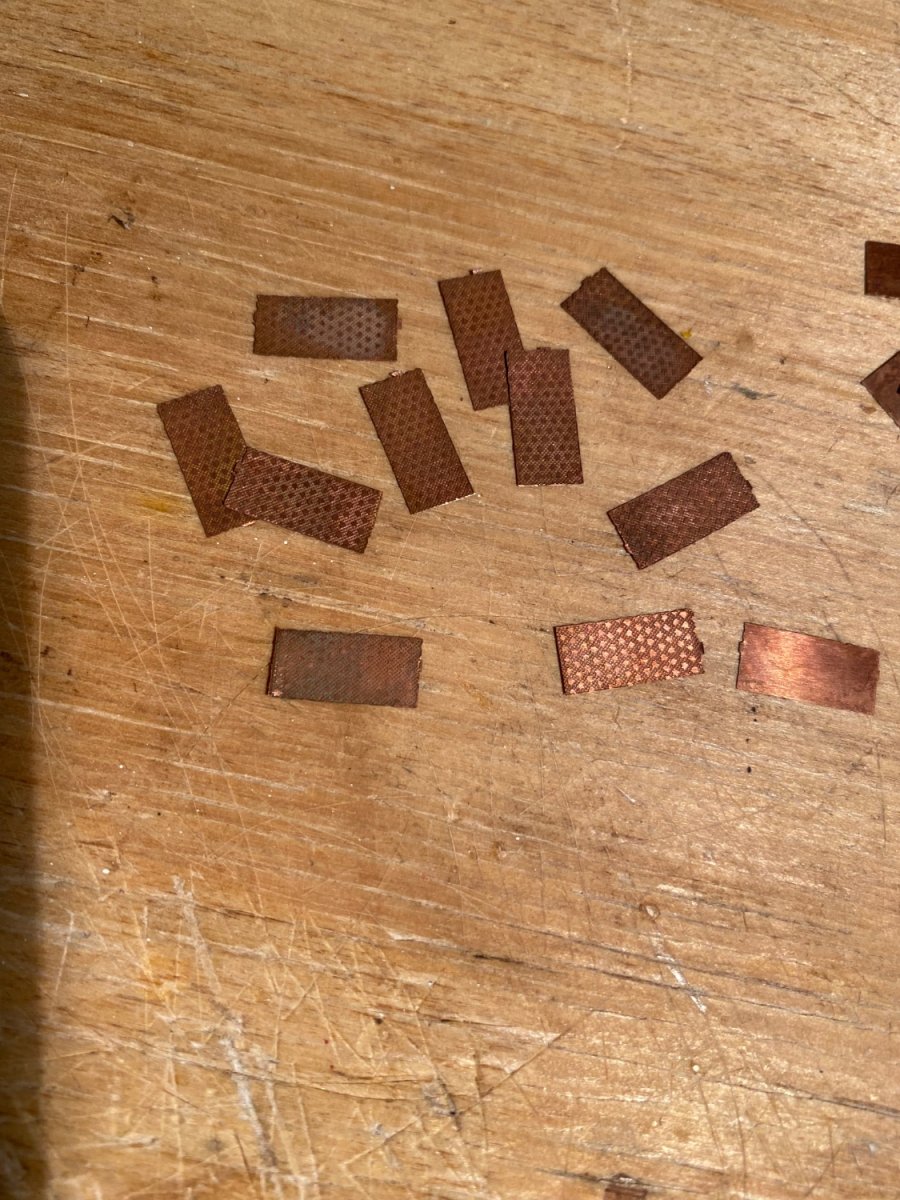
I’m still chipping away at the copper plates. I’ve fussed over the coloring of the plates and mis-trimmed a number of the plates, so I went back cleaned up the edges of the plates with the rotary tool where I left a bit of a tab.

- Jeff preisler, mtaylor, ccoyle and 8 others
-
11
-
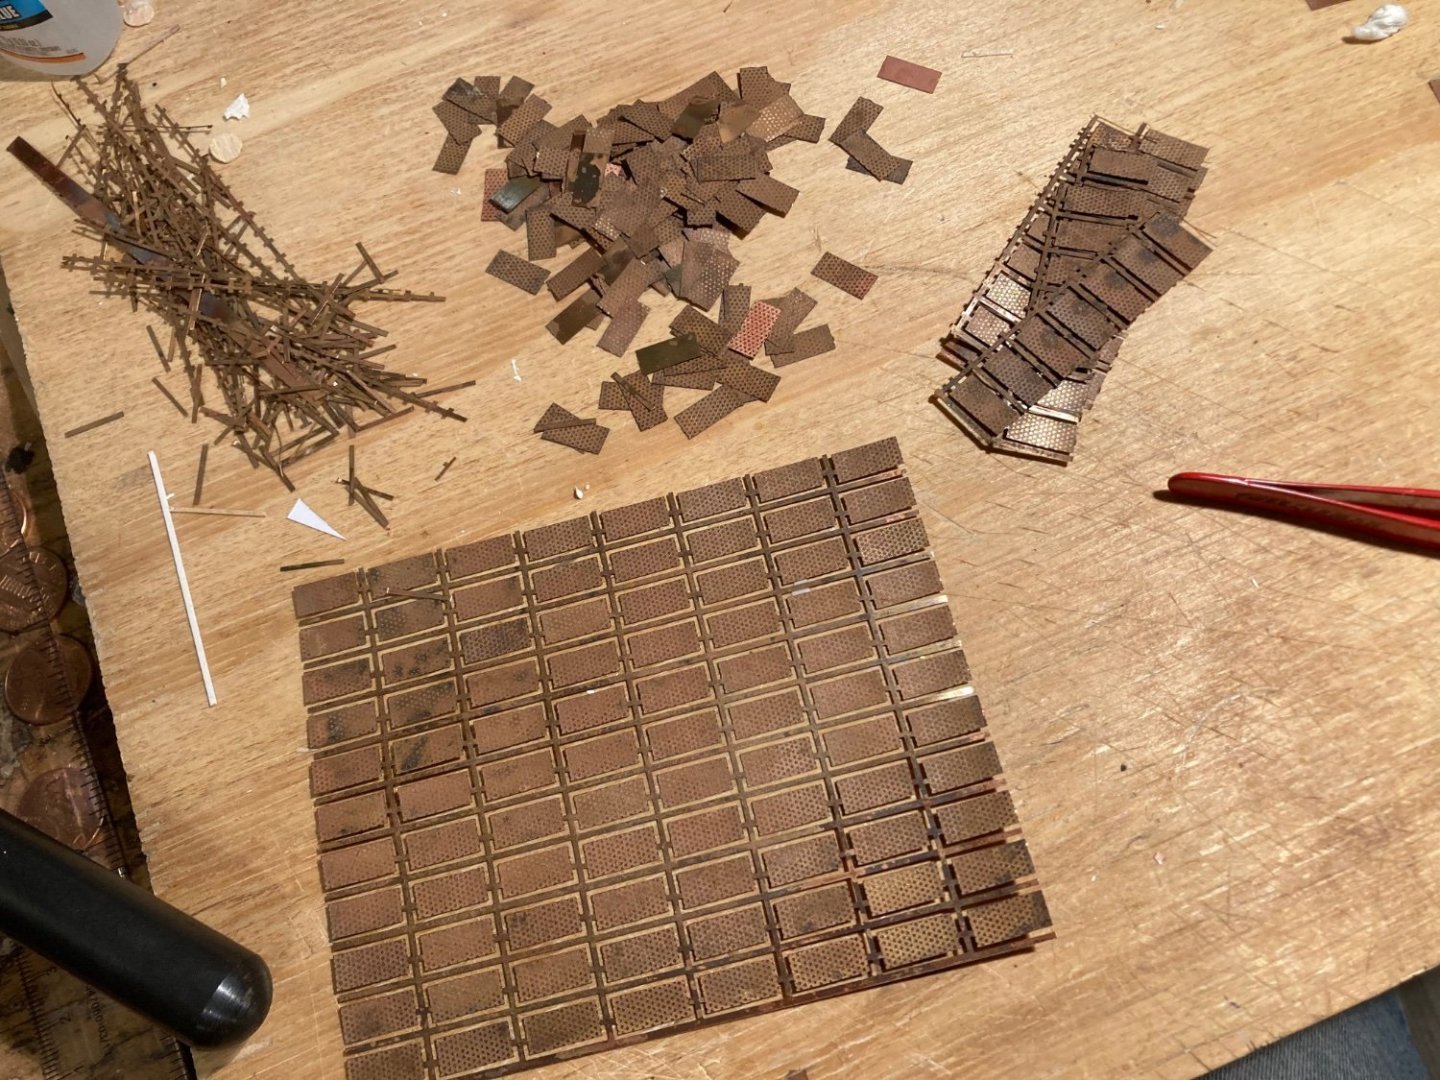
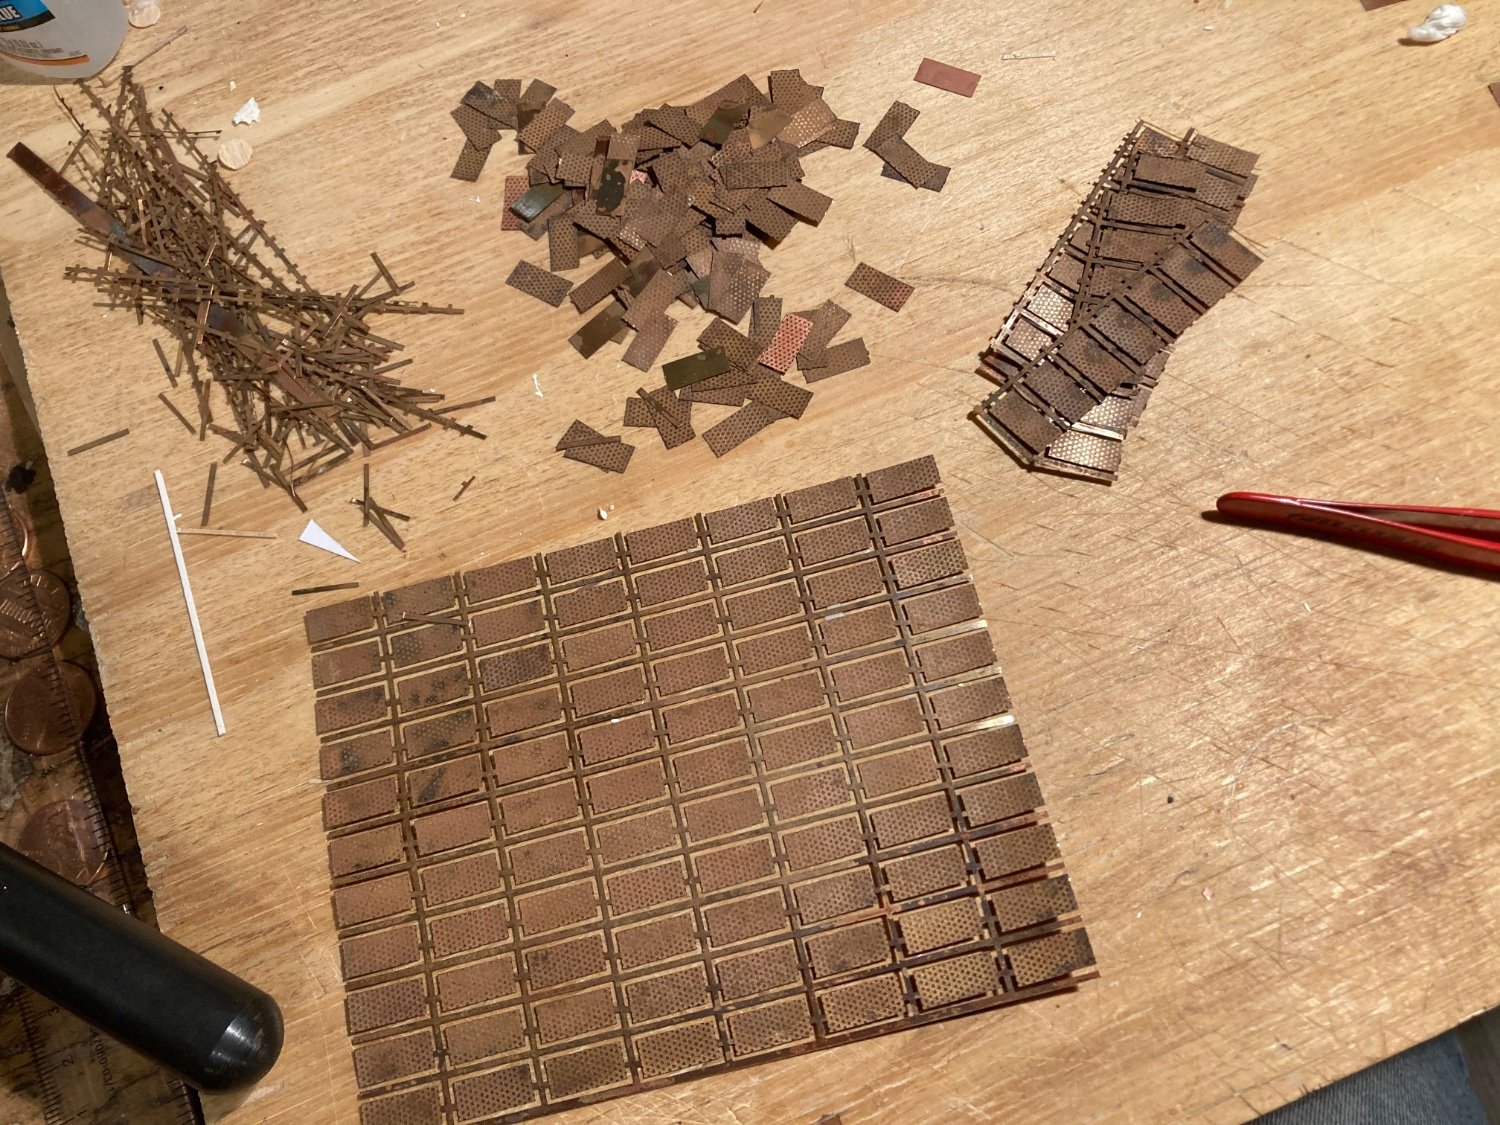
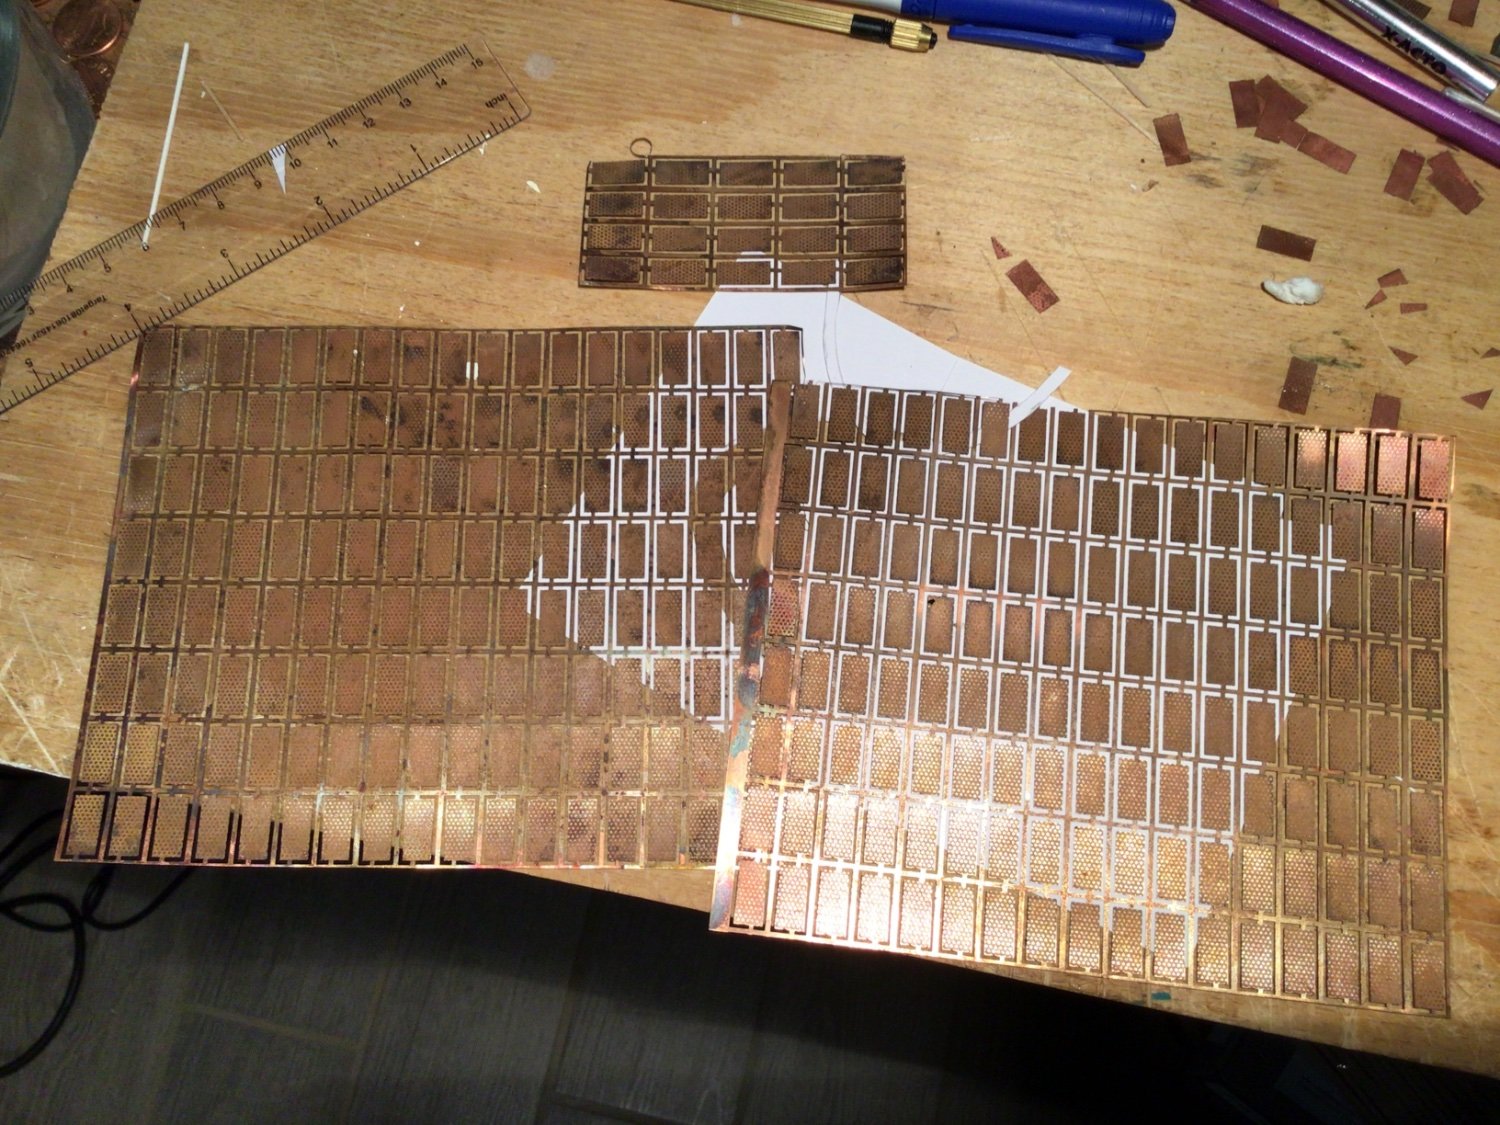
And now the long task of making little rectangles from the sheets.
- Edwardkenway, bruce d, oneslim and 5 others
-
8
-
First hurdle with the new copper is matching the patina of the old set to some degree. In retrospect, I should have stopped earlier and then mixed the old plates with the new. I’ll fix that as soon as I fix the time machine. ( The current model, uselessly, only moves forward at the same rate as reality.). I gave the new plate a hot soak in vinegar and salt. Then I put them the toaster oven for 15 minutes. ‘Season to taste and then serve!’

- Hubac's Historian, mtaylor, oneslim and 4 others
-
7
-
The new set of copper plates have finally arrived from the folks at Bluejacket Shipcrafters! So I will shift back to hull plating shortly.
-
-
I have played with gluing while wet. I did glue wood that was still moist. First, the CA glue works with wet wood. I have noticed for myself that as the wood fully dries when glued wet it may shrink a bit leaving a slight gap. I have to be honest; it may be I *thought* I glued perfectly but didn't instead of drying wood causing the problem. Once I noticed this, I started gluing the wood dry and the problem went away (but it may be that I was playing more attention)! I found that I could do a lot of bending with on dry wood via a heat gun.
On 2/11/2022 at 7:35 PM, rudybob said:Your build is great but what I really appreciate is your presentation. You are clear and concise.
Thanks so much! My hope is to make it easier for the next fellow just as others before have made it easier for me!
'A rising tide lifts all the boats.' -
1 hour ago, Keith Black said:
please provide details of your photograph
2 hours ago, BobG said:Now, tell us about your photo...what is it?
There is a water-soluble dye called walnut crystals. I mixed up some to dye thread/scale rope for the smuggler’s model I built recently. When the water evaporates from the cup, the dye leaves a thin coat which cracks when throughly dry.. So I waited for that to pass and took a close up photo of the crazed dye dried to a translucent plastic cup. You are seeing the bottom of the plastic cup from the top looking down. And there is a light source on the far side of the cup to provide the red glow.
-
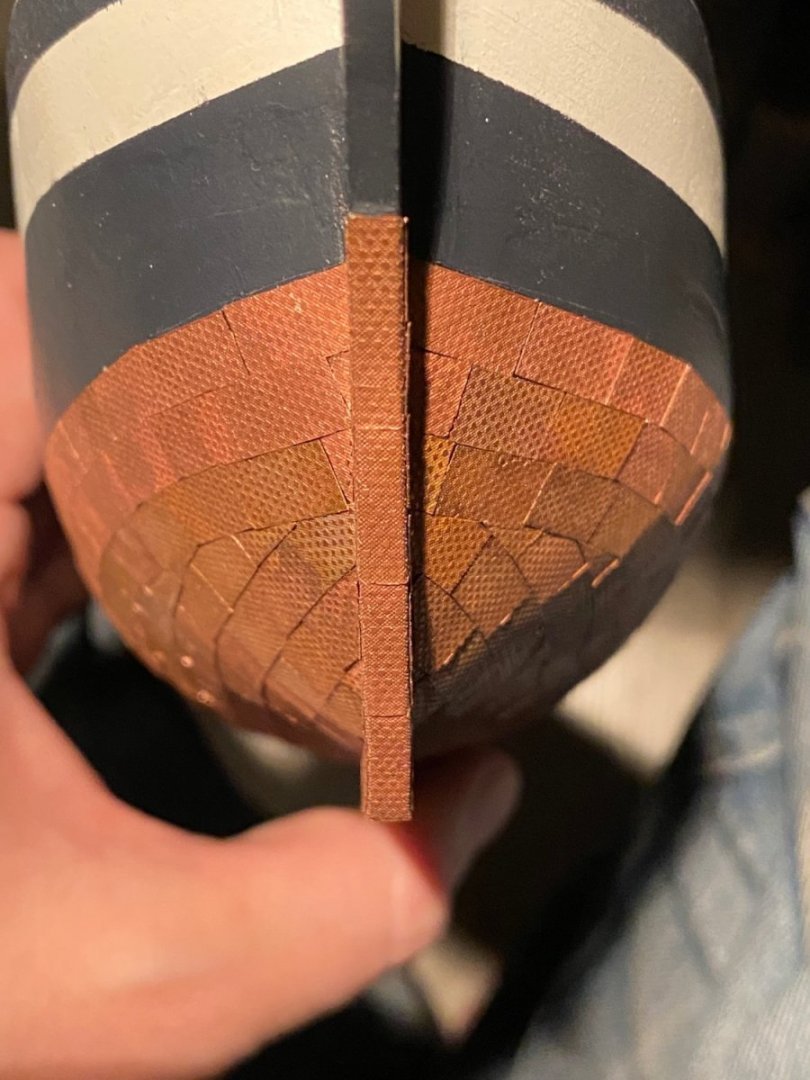
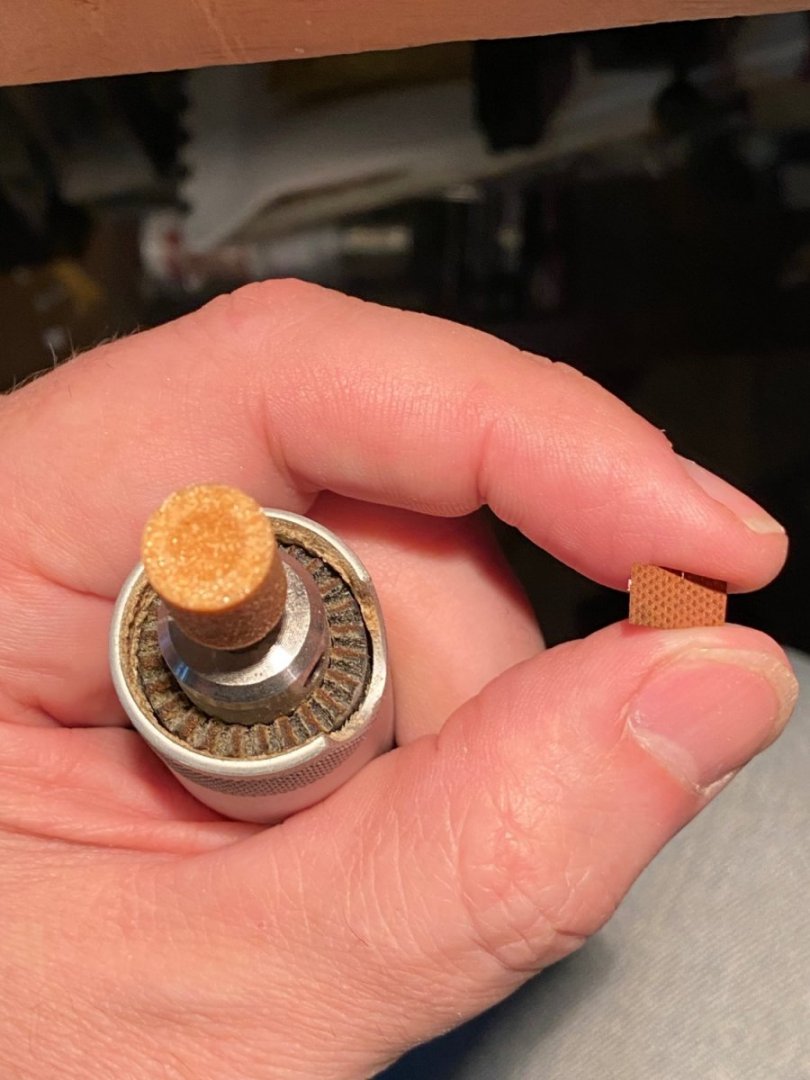
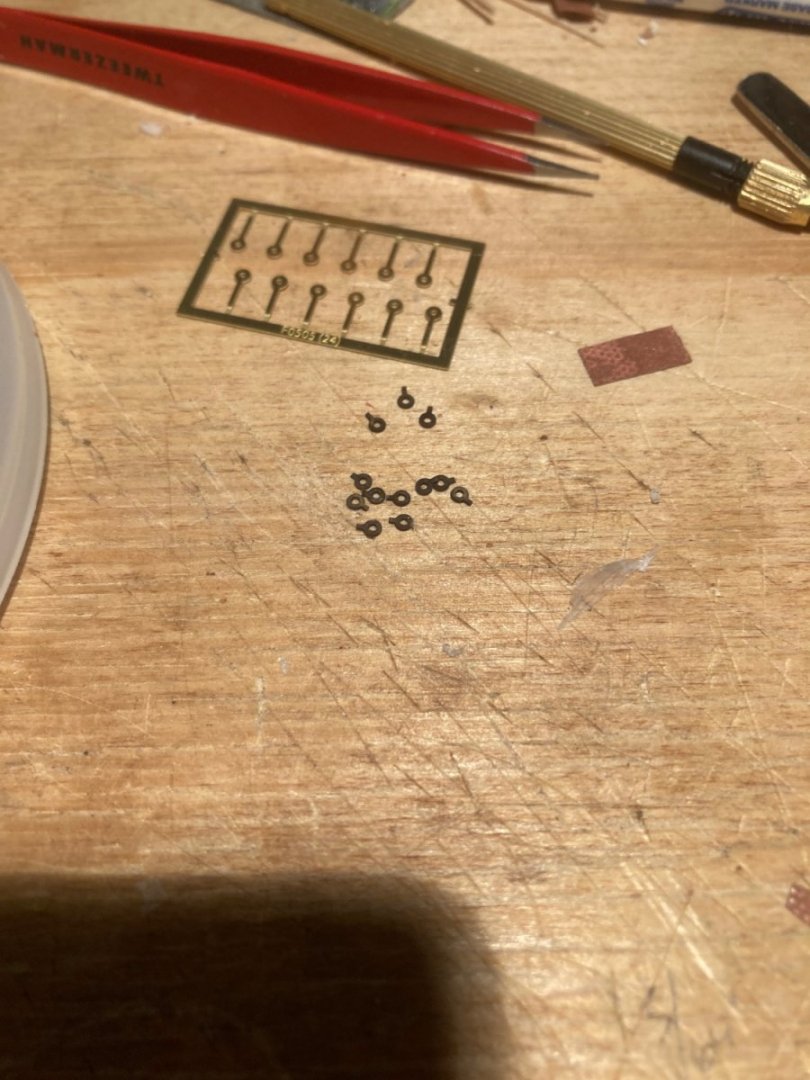
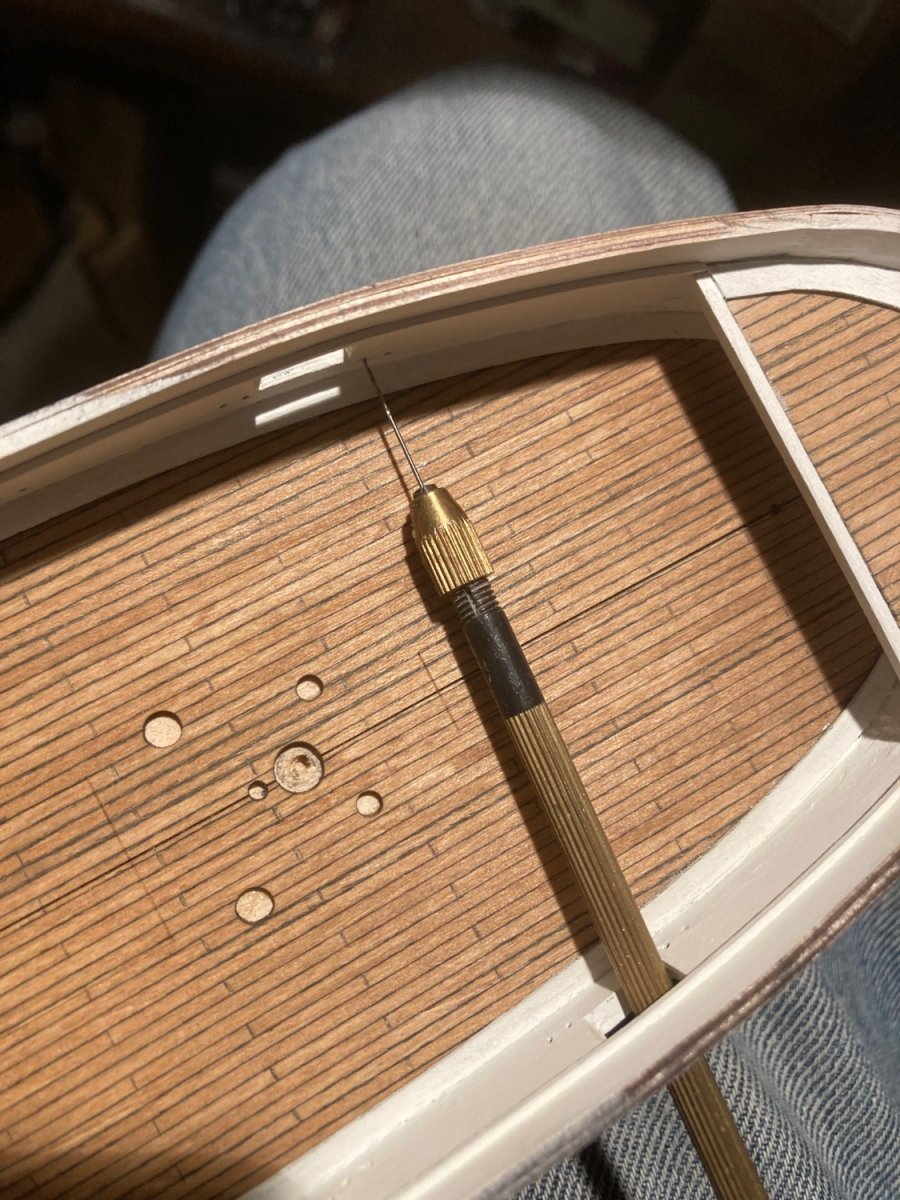
As for the ship model. I cleared the holes for the gun’s rigging. I couldn’t fit my pin vise inside the ship but the gun ports served nicely. The instructions state a size #75 drill bit should be used but the holes are mostly nine sizes larger. I found, then cut as directed and blacked the rings that will fill the holes. I used Blackwood Casey’s brass black. This time I exposed the rings briefly to the blackening liquid (10 second or so).

- Ryland Craze, BobG, Edwardkenway and 4 others
-
7
-
Forgive the off-topic post - I just found out this week, I got an Honorable Mention https://www.ippawards.com/2021-winners-abstract/ for this abstract photo:

-
The Frid books are a great place to start.
If you are looking for a gentle start, I suggest: I Can Do That! Woodworking Projects: 48 quality furniture projects that require minimal experience and tools by David Thiel.
The Complete Manual of Woodworking: A Detailed Guide to Design, Techniques, and Tools for the Beginner and Expert by Jackson is nice ‘overview’ and cheap used.
I also like Flexner on wood finishes: Understanding Wood Finishing - again cheap used.The aforementioned sharpening book by Lee is great.
Check out https://lostartpress.com/. They are geared towards the use of hand tools more than machine in general. They have number of reprint of interest and a collection of Hayward’s work as well: https://lostartpress.com/collections/books/products/the-woodworker-the-charles-hayward-years. Hayward’s books are old and out of print but good reads.
If you are interested furniture and hand tools, this is a treat: https://lostartpress.com/collections/books/products/the-anarchists-tool-chest
I would also suggest Fine Woodworking Magazine. It covers hand and machine work; it is consistently worthwhile. Their publisher, Taunton also has a number of good books. You can find all the issues of the magazines in one shot here: https://www.tauntonstore.com/2021-fine-woodworking-archive-usb
For another take on woodworking, take a peak at https://woodgears.ca/.
Is there something in particular you have in mind?Woodworking is like ship modeling, there is no end to reading, the history and the trivia. I have a ton of books and matching number opinions so ask!
")
- Canute, SaltyNinja, mtaylor and 1 other
-
4
-
-
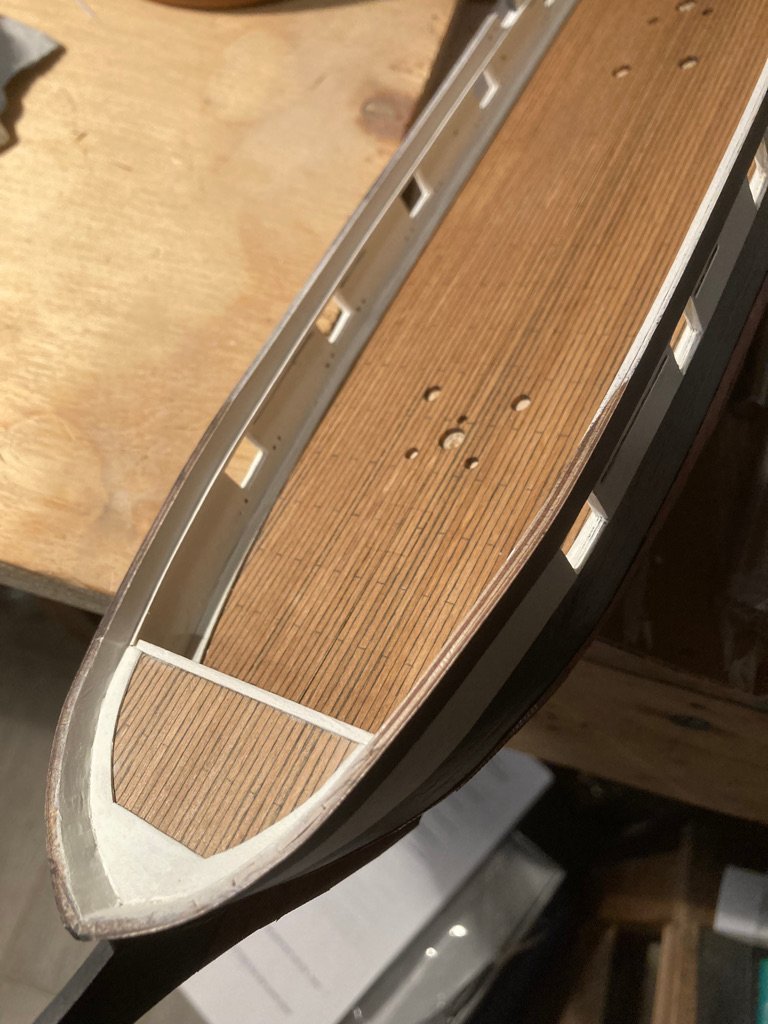
In the absence of new plates, I've started on other parts of the build. I debated putting in a second rail as per the older set of plans but it would interfere with pin racks of the current model so I backed down. As for work done, I filled in the gaps in the plywood visible in the gun ports (I couldn't tell if these are covered later via a casual search in the instructions) and painted the same. I added a moulding as well (which echoes the aforementioned rail) which you can see above the gun ports in this photo.
-
-
-
Agreed! I have to say as a casual observer, I hadn't noticed glaring touch ups myself in your work, so either it's careful photo taking or you got it!
- Edwardkenway, Canute, BrianK and 5 others
-
8
-
On 1/25/2022 at 7:39 PM, bruce d said:
are you going to do another one?
Yes, but not immediately. I want to finish my other build first. Card models have such a wider selection than wood or plastic, so I don't have a next in mind. @Dan Vadas built a beautiful train engine that caught my eye, but I need to figure out a bit of the paper-model skills - rolling, seams, not reducing little paper boxes to round-ish blobs of paper, etc. before I tackle something like that.
")
-
On 1/26/2022 at 5:26 PM, ccoyle said:
My fear is that if I add any more red, I'll push the shade too far into purple territory and have to start all over again.
On 1/26/2022 at 6:40 PM, ccoyle said:only becomes a potential issue if large touch-ups on printed surfaces become necessary
Ah, now I understand. I hate to say it, one batch of the 'right' color won't help. That is to say there are a few issues at play.I used to work on 'art objects' and antique furniture before the turn of the century, with the same issues and 'touch ups' were a routine part of the work. Being practiced is the key, not being Polish. From the web site you shared, being practiced and Polish seems to be the best option though!
A few thoughts, if the 'touch up' stuff is still bothering you:
1) printed paper and paint have different reflective properties (as I'm sure you have noticed!), A painted surface will never look like printed paper.
2) how the light hits the surface changes (slightly) the color the 'touch-up' needs to be. So verticals will be slightly different than horizontal.
3) the lights you work under have a slight color bias as compared to full sunlight, so your 'touch ups' will look different under different lights. So work under strong bright lights if possible. Sunlight is the best.
4) the person who did the 'touch up' will always see it. (Unless you wait a couple of years...)
5) keep the 'touch up' small - small and "close" is better than large and perfect.6) sometimes adding visual 'noise' helps. Darker specks and the like come to mind here.
7) sometimes adding transparent layer(s) on top helps 'blend' the 'touch up' and the rest.8 ) too dark is always better than too light. Too light always jumps out to the eye.
9) if possible, make sure that the original and the touch up have a coat on top that gives everything the same sheen (or flatness), so raking light doesn't reveal your work via the 'touch up' being more shiny or more flat than the paper.
10) the 'touch up' can't be too thick or it will have its own shadows and be noticable.
11) airbrushing and similar approaches will allow you to blend easier than usings a brush. (This suggestion won't work on this 1/250 model but it might elsewhere.)
Since this advice is free and unasked for, I heartly offer it with a full money-back guarantee!! -
Tough call most certainly. I did find being a shader darker was easier on the eye than being too light for edge coloring.
- Edwardkenway, Egilman, ccoyle and 5 others
-
8
-
I'm in. I have my popcorn and cooler with drinks and the like. And a ton of questions, having just barely survived my first encounter with a 1/250 HMV kit!
- Old Collingwood, Canute, Egilman and 4 others
-
7
-
I've used up all the copper plates (to my surprise) and have spent my dollars so some more will find its way from Maine to my secret lair.
(ok, it isn't a lair nor secret...)
- Keith Black, sjanicki, Ryland Craze and 4 others
-
3
-
 4
4


USS Perry by EricWilliamMarshall - BlueJacket Shipcrafters - Scale 1/96
in - Kit build logs for subjects built from 1801 - 1850
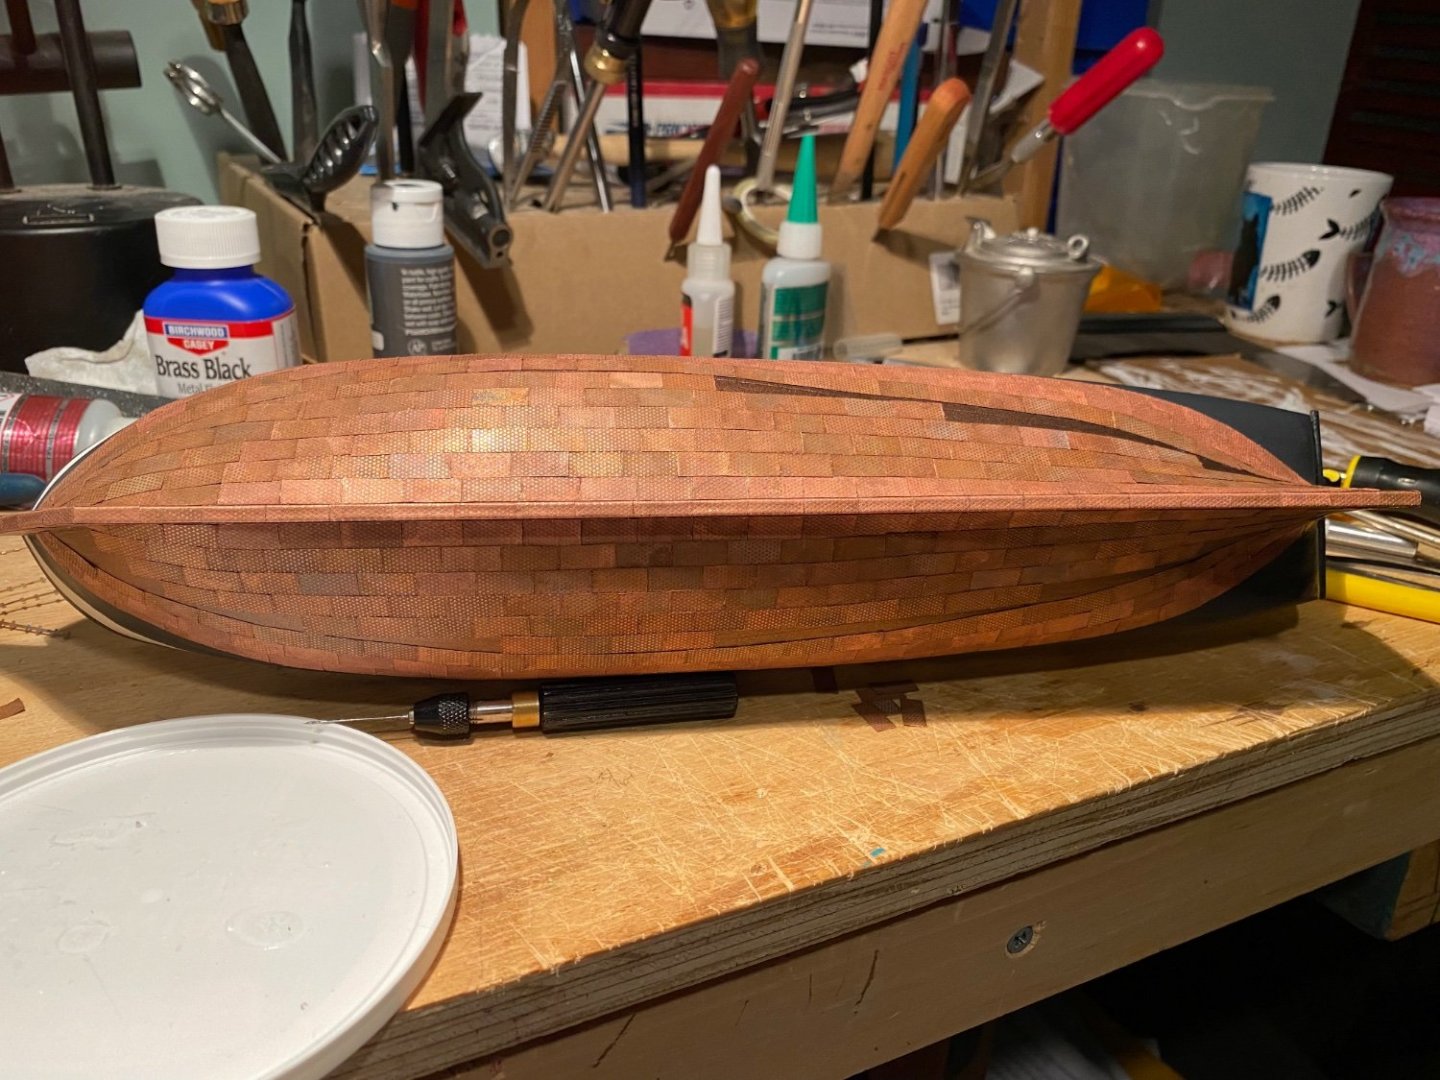
Posted · Edited by EricWilliamMarshall
The coppering of the hull is done except for the rudder. Little by little. The little irregular-shaped bits took vast amounts of time. I’ve started to spend quality time with the instructions again since I haven’t had to refer to them for a few months.")