HOLIDAY DONATION DRIVE - SUPPORT MSW - DO YOUR PART TO KEEP THIS GREAT FORUM GOING! (Only 13 donations so far - C'mon guys!)
×


Mirabell61
-
Posts
7,407 -
Joined
-
Last visited
Content Type
Profiles
Forums
Gallery
Events
Everything posted by Mirabell61
-
 very nice work juergen, are you going to plank the entire frames, or leave an outcut for to see the lovely framework ? Nils
 -
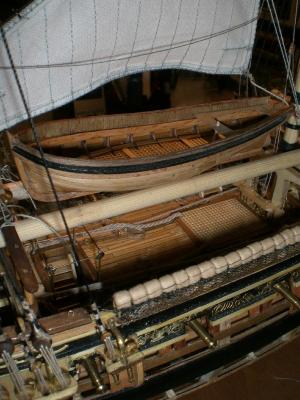
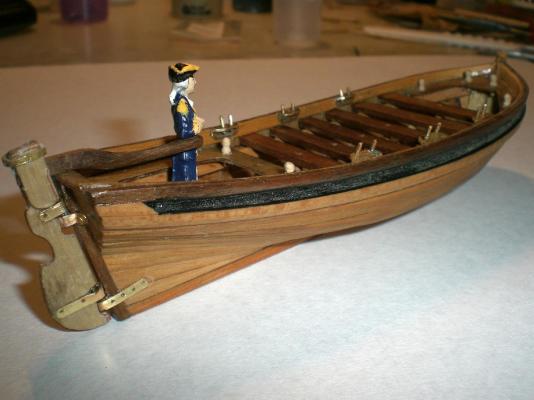
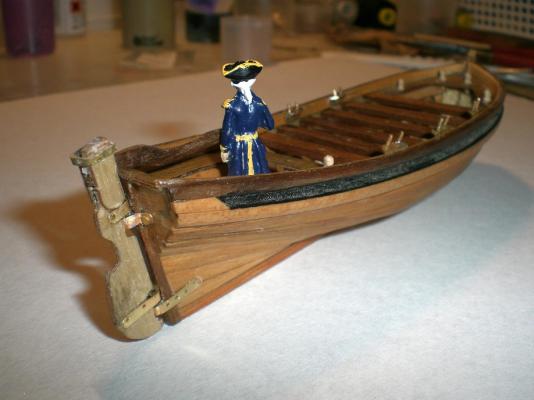
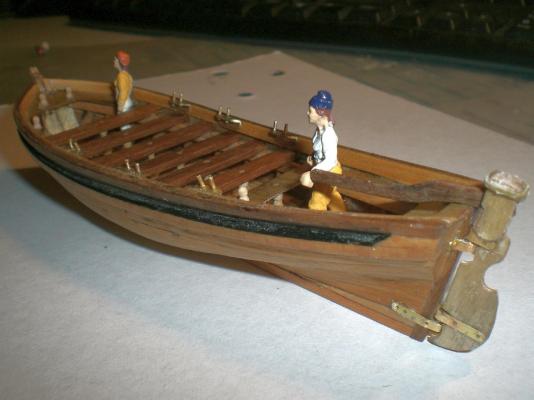
Update on Captain`s gig.... mast holding fittings and bow clues and and some small parts still missing, but at this stage it looks like what I had in mind gig fits in on the gallows the captain saw that the rudder still requires seaworthy varnish staggered oar-hold port / stb for rowing with long oars, 1 man per seat two crew members are eager to get her into the harbour basin for trials the tiller can be slipped in also with the curve upwards Nils
-
Longboat by Rao A.L.G. - FINISHED
Mirabell61 replied to Rao A.L.G.'s topic in - Build logs for subjects built 1751 - 1800
congrats Rao, there are so many fine Details to discover for the Fitting out of your boat. What about building a number larger next time with plenty of space in between and on the decks..... Nils -
HMS Alert 1777 by Jaekon Lee - 1/64
Mirabell61 replied to Jaekon Lee's topic in - Build logs for subjects built 1751 - 1800
beautiful work Lee, very detailed framing for scale 1:64, precise and neat, Looks great Nils -
Wow ! Michael I am highly impressed of your skills, your manyfold wisdom and knowledgement for both boatbuilding and combustion engine building. Somehow and with much regret I missed to look into this build log of yours, it is worth every post, most interesting and a delight to study. Do you have a machinery Workshop career ? I presume that you will be operating this Buffalo 2Hp engine per RC control, with the Launch and can hardly wait to see it in action Nils
-
very nice rigged masttop Danny, I also like the combination of Colors... Nils
-
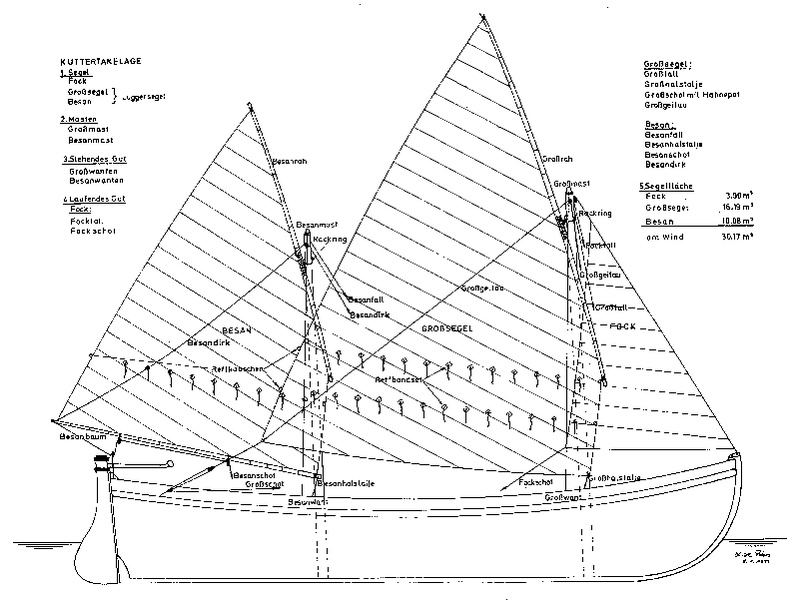
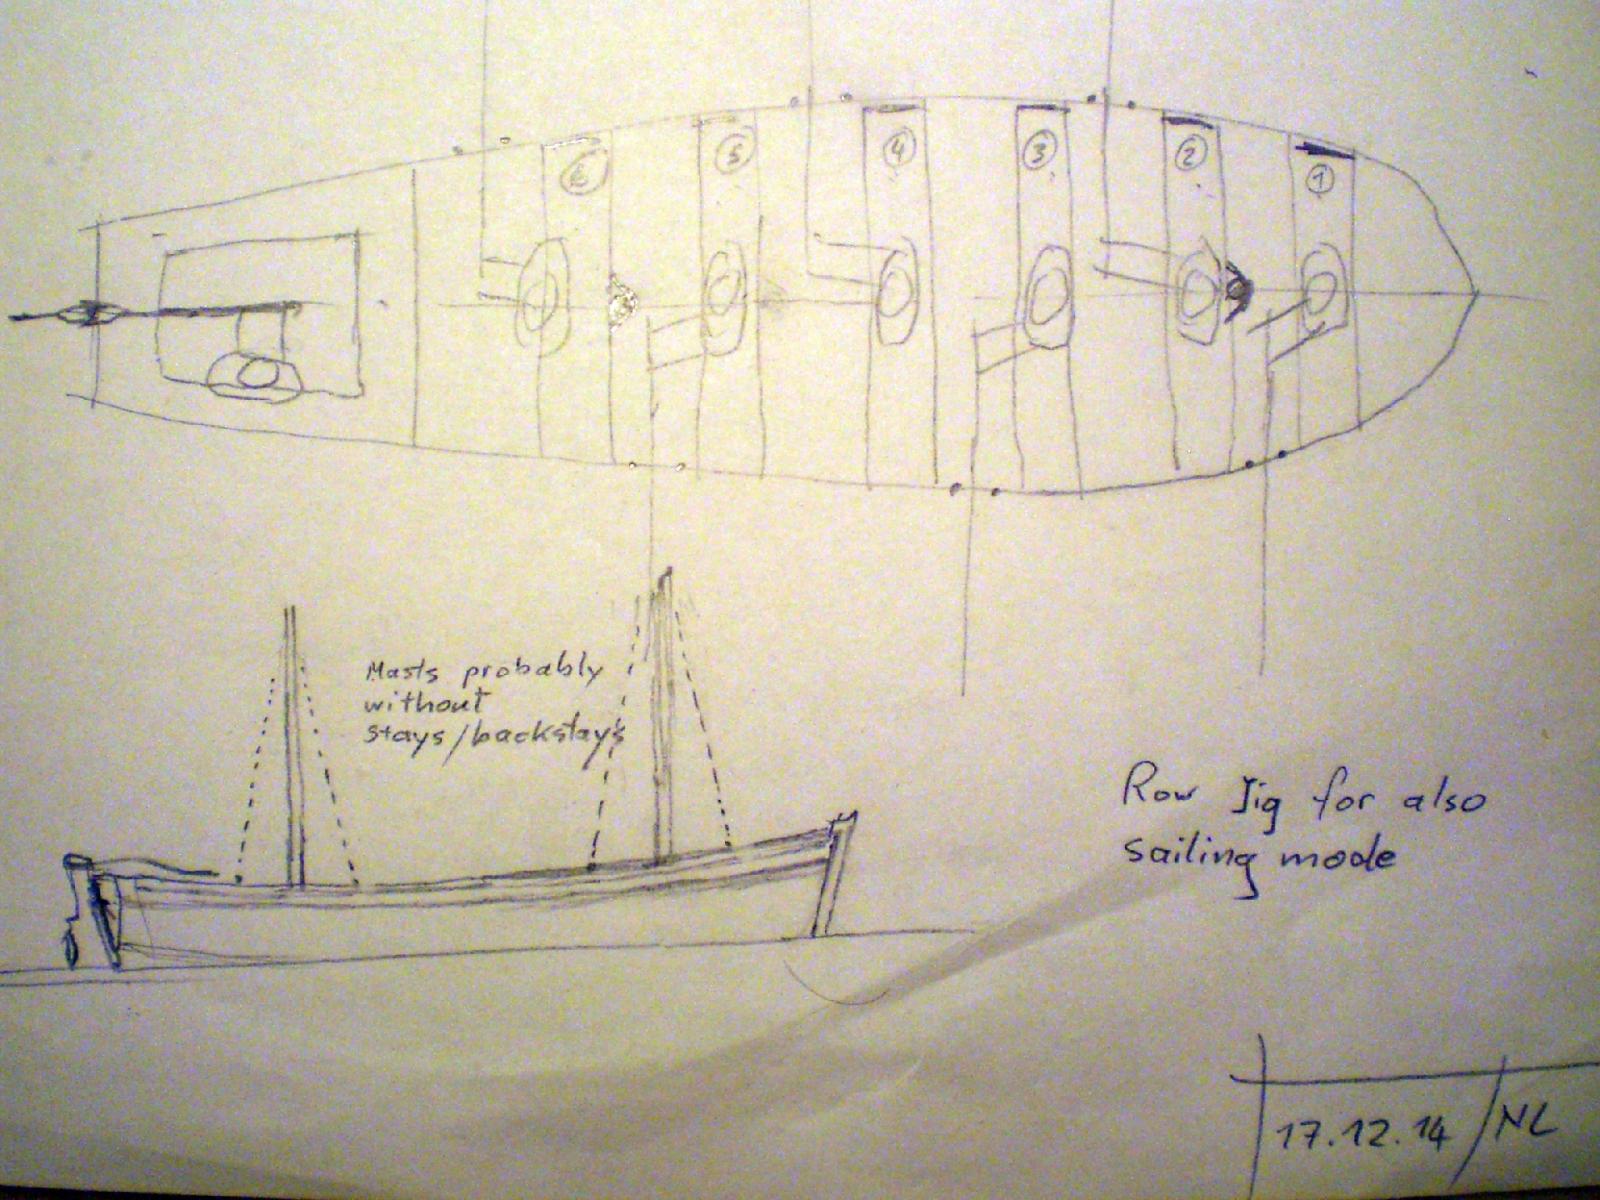
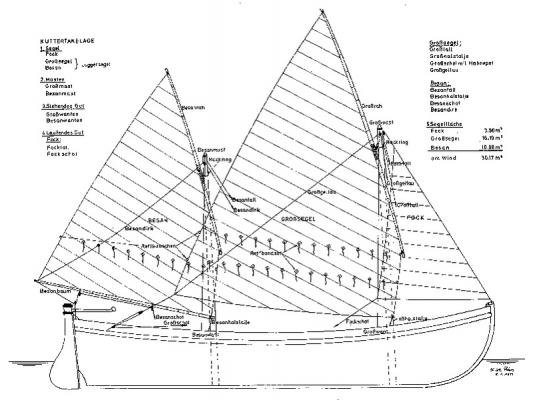
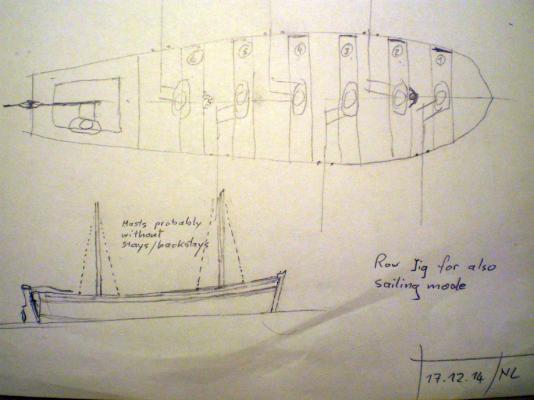
Hello Peter, Thank you for your words... I´ll follow your suggestion to allow sailing as well......, but without rigging masts and sails. Trust that will be a good compromize here is a rough illustrated thought i have for rowing mode : capt. at the tiller, six men at the oars, two mastfoot positions with additional support attached to seat 2 + 6 ref. to hand scetch the sailing mode : two masted, without stays (masts just stuck in place), sails acc. a little bit to the rigging of a naval marine cutter for rowing and sailing, but without triangle-foresail Due to the long keel I think that a swivel-centerboard can be avoided arrangement with 6 seats for rowing, (one sailor per seat, long oars) this is a lovely cutter rigging ( borrowed from the web), although its heritage, it may perhaps be too modern ? this could be the arrangement for rowing / sailing my jig... Peter, please feel free to let me know your opinion Cheers Nils
-
Thank you Juergen, there were times when I got frustrated (breaking Frame parts when removing from the build plate, or breaking out structures from the gratings), but all is mended now Keith, thank you, I still had two Little sets of grating parts I could use here, but not enough to replace gratings where some Little bits had broken away Thank you Omega, It could have been a wee bit shorter in planing, because the model mostly gets a bit longer than planed (but it still fits in) Thanks Popeye, the gratings build 30 x 30 mm in raw condition, so There had to be three single plates, and there is a slight horizontal curvature in the grating floor I`m not sure if there should be four or six oarmen to find their stagered seat Arrangement (one man per seat) and if I should arrange for small mast-foot Settings, and rigging Points, in case the gig should be sailed. In the literature I fould remarks that the gig was exceptional rowed and other comments that they were prepared for saiing as well Nils
-
Hello Peter, the stowed boats and the sprit topsail on the jib boom are looking great. You did a good Job on tidying up the decks and loose lines, etc. All Looks neat and crisp now, very nice apeal... Nils
- 431 replies
-
- 1
-

-
- pegasus
- victory models
- (and 1 more)
-
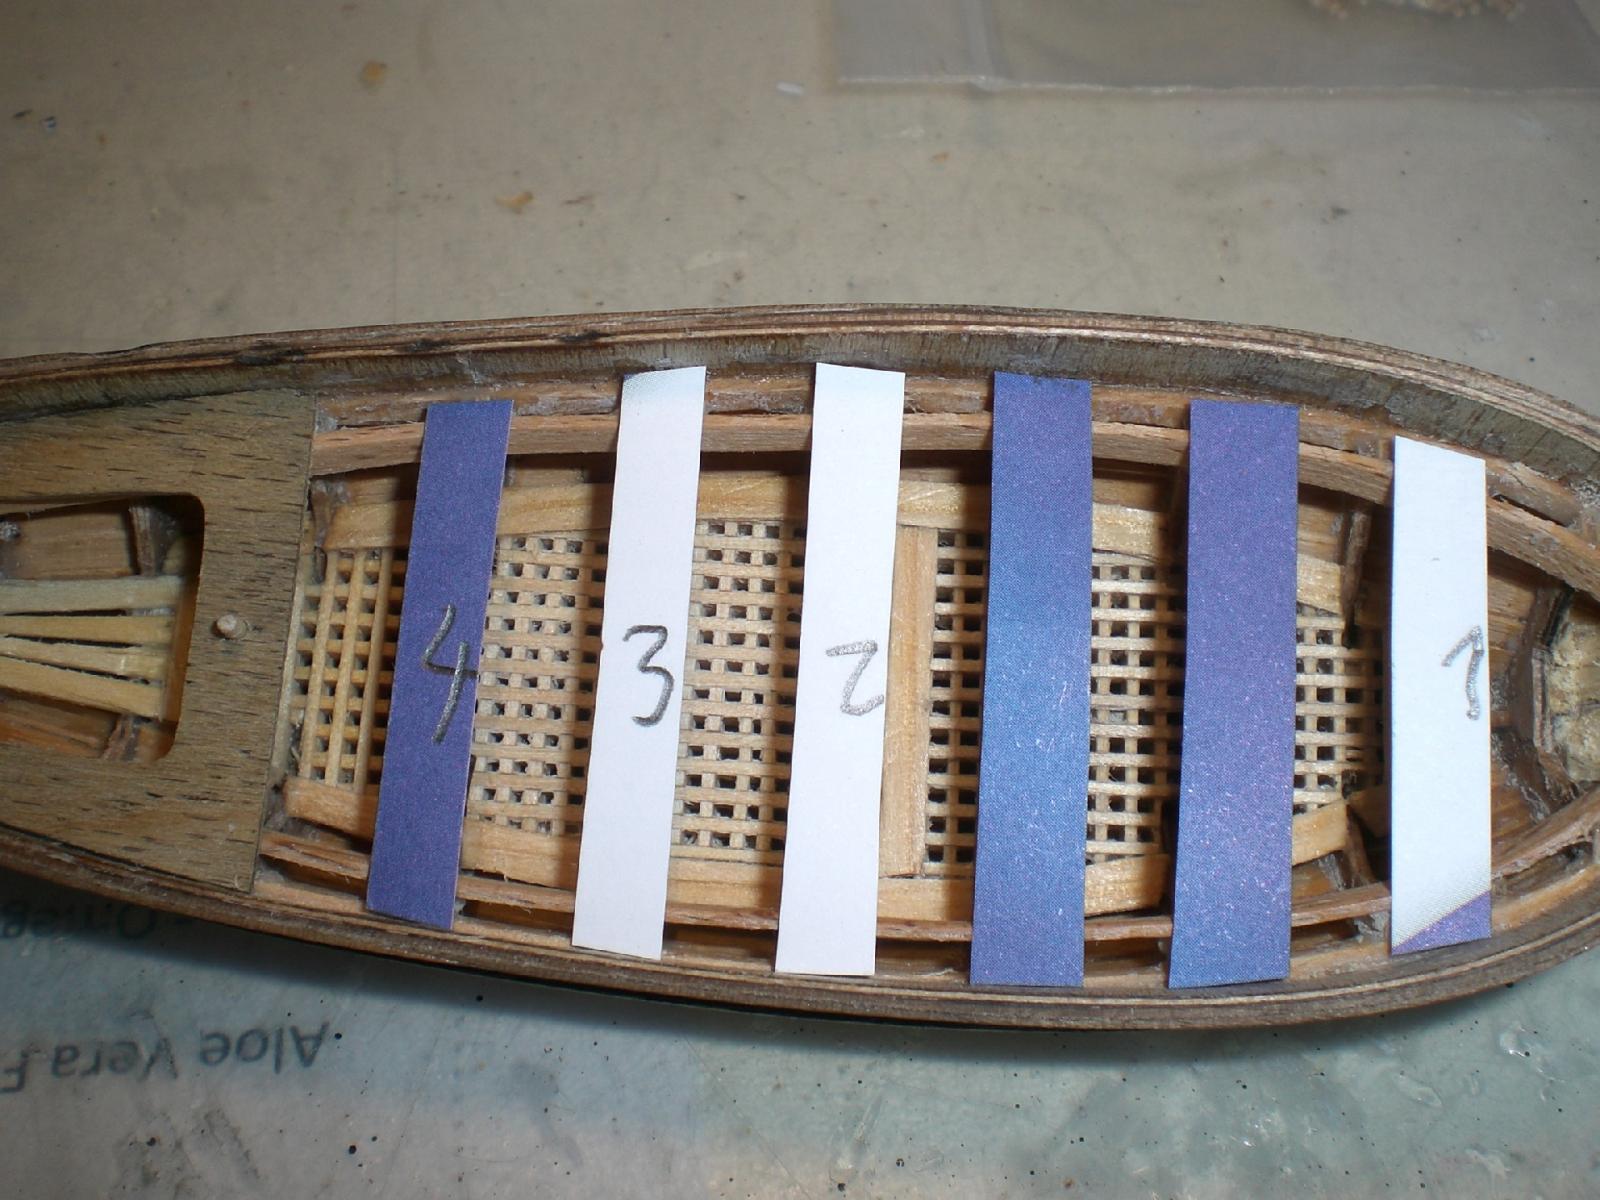
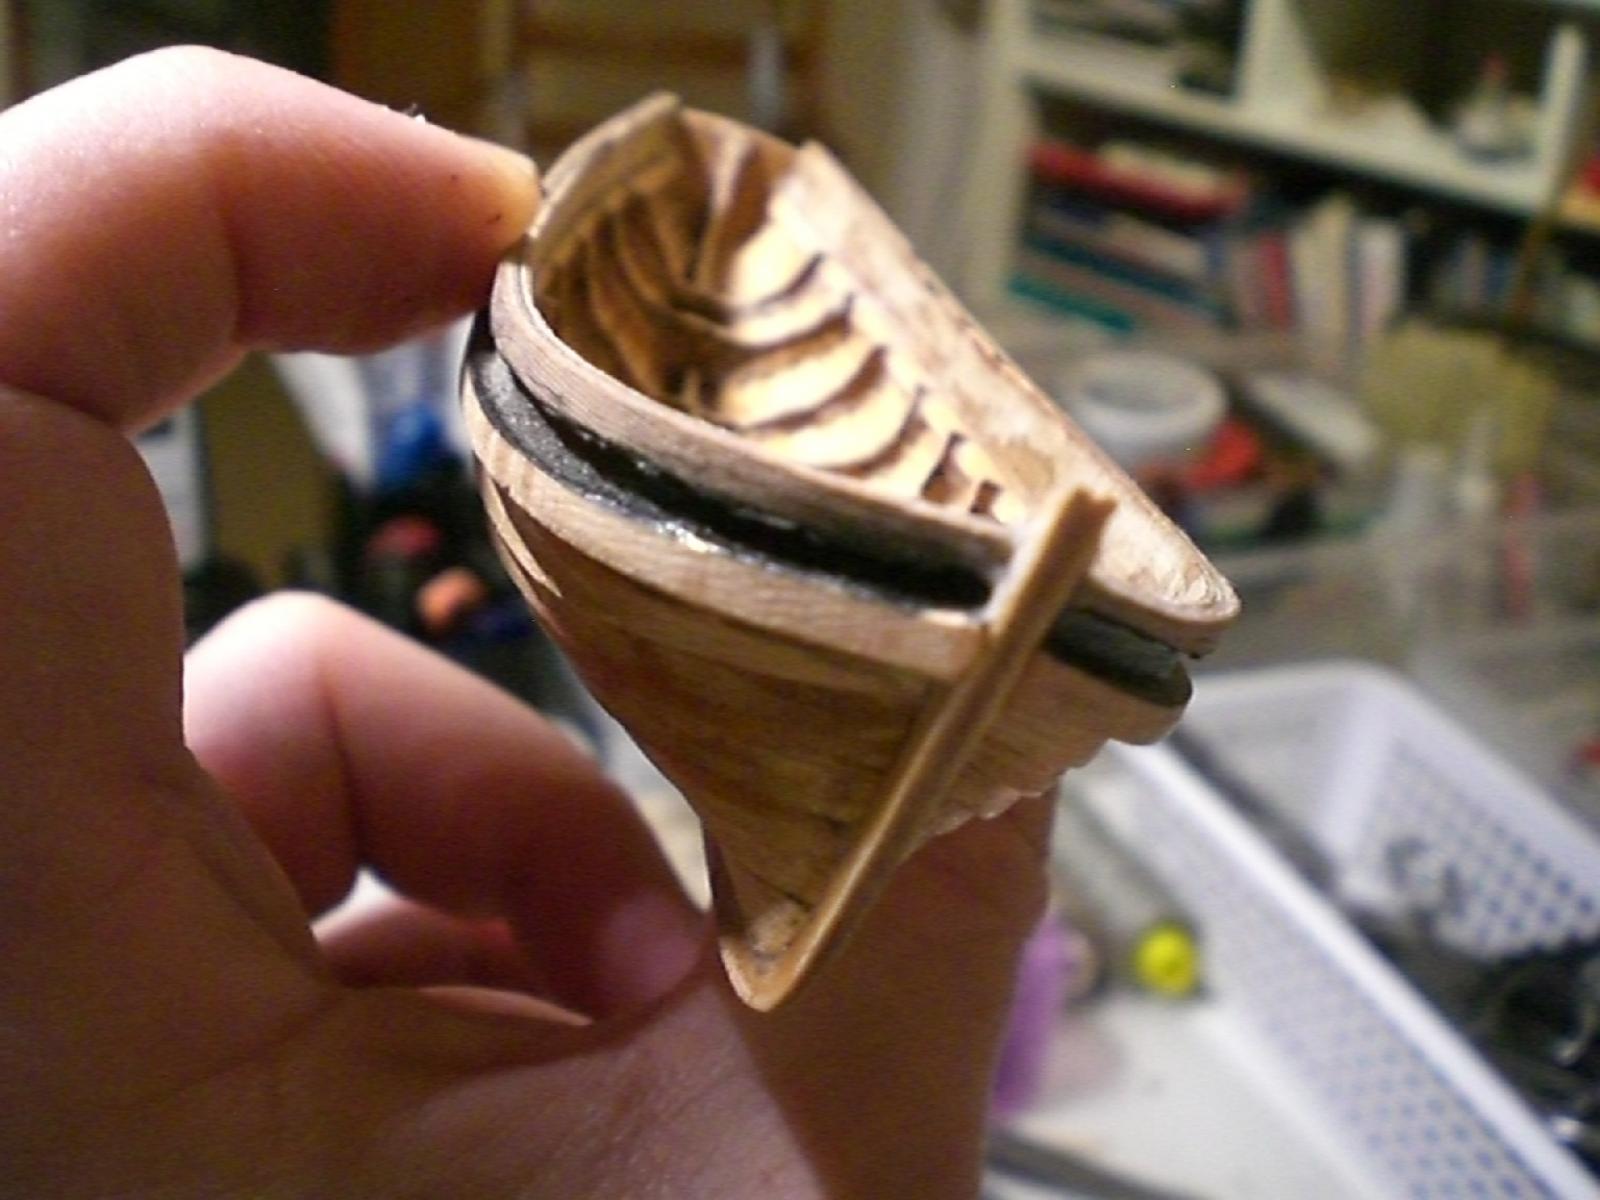
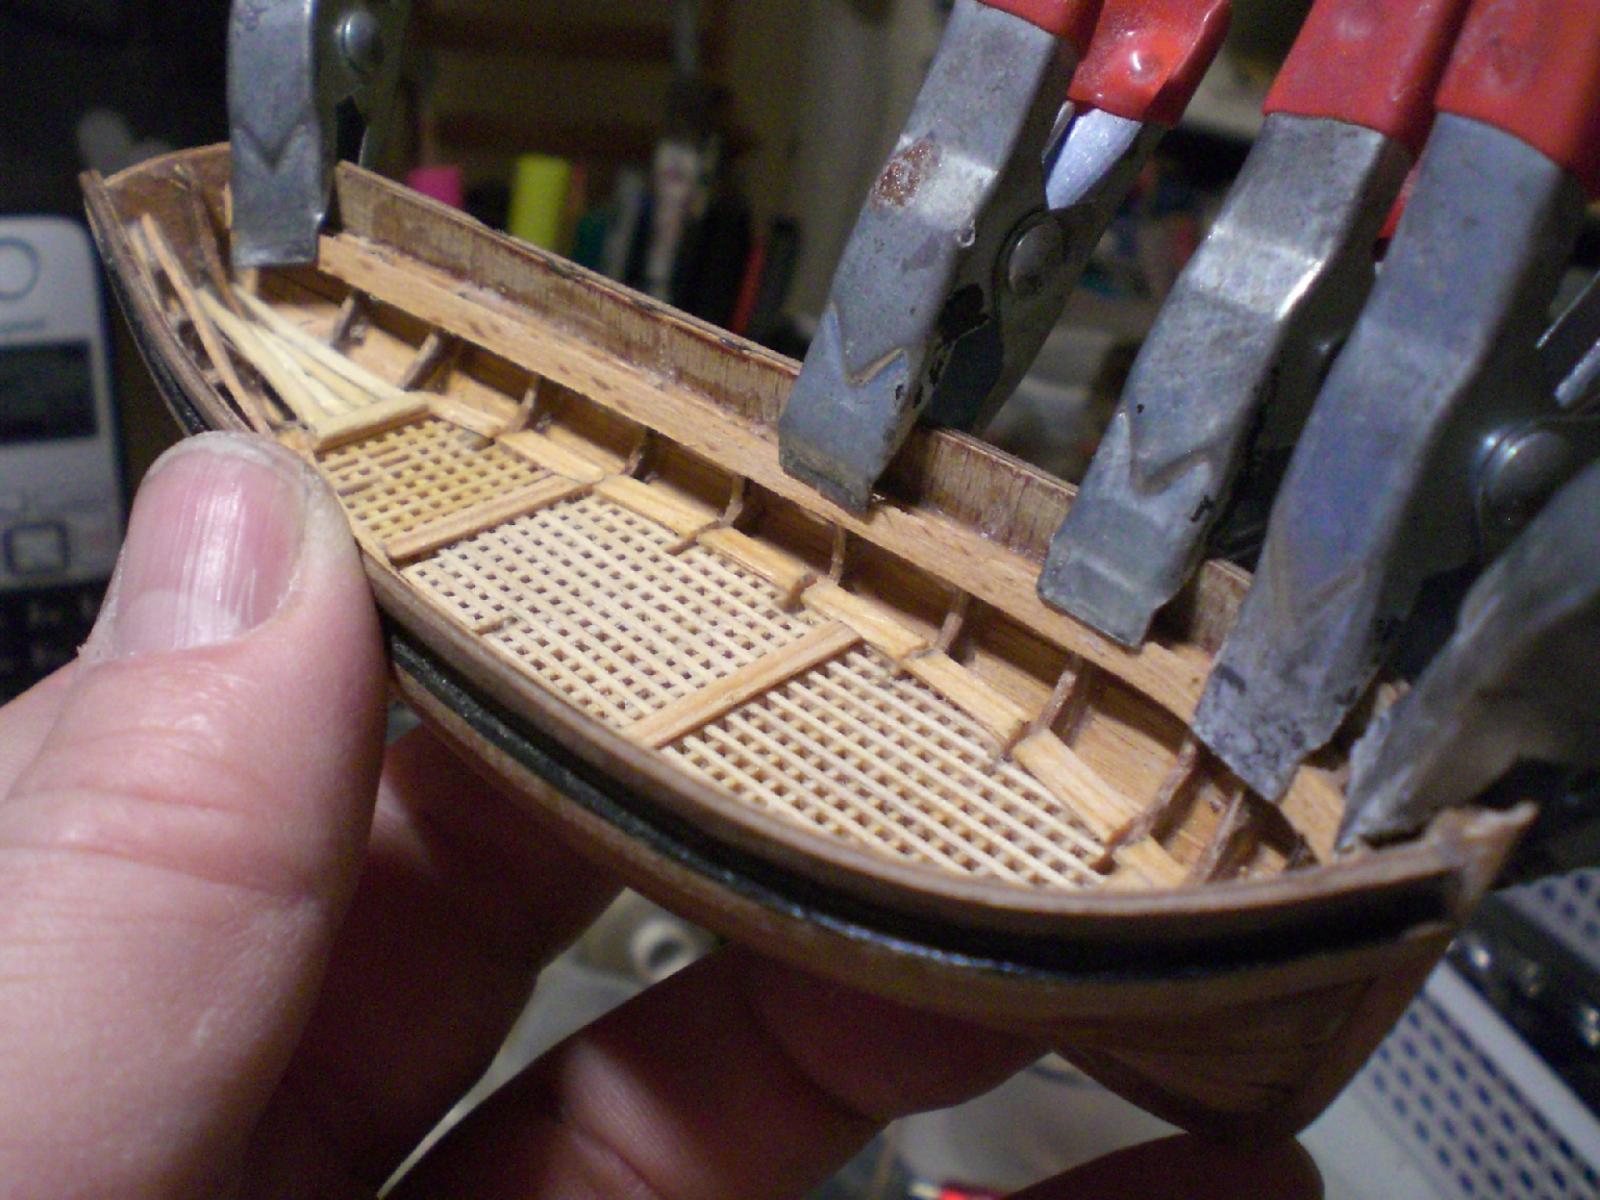
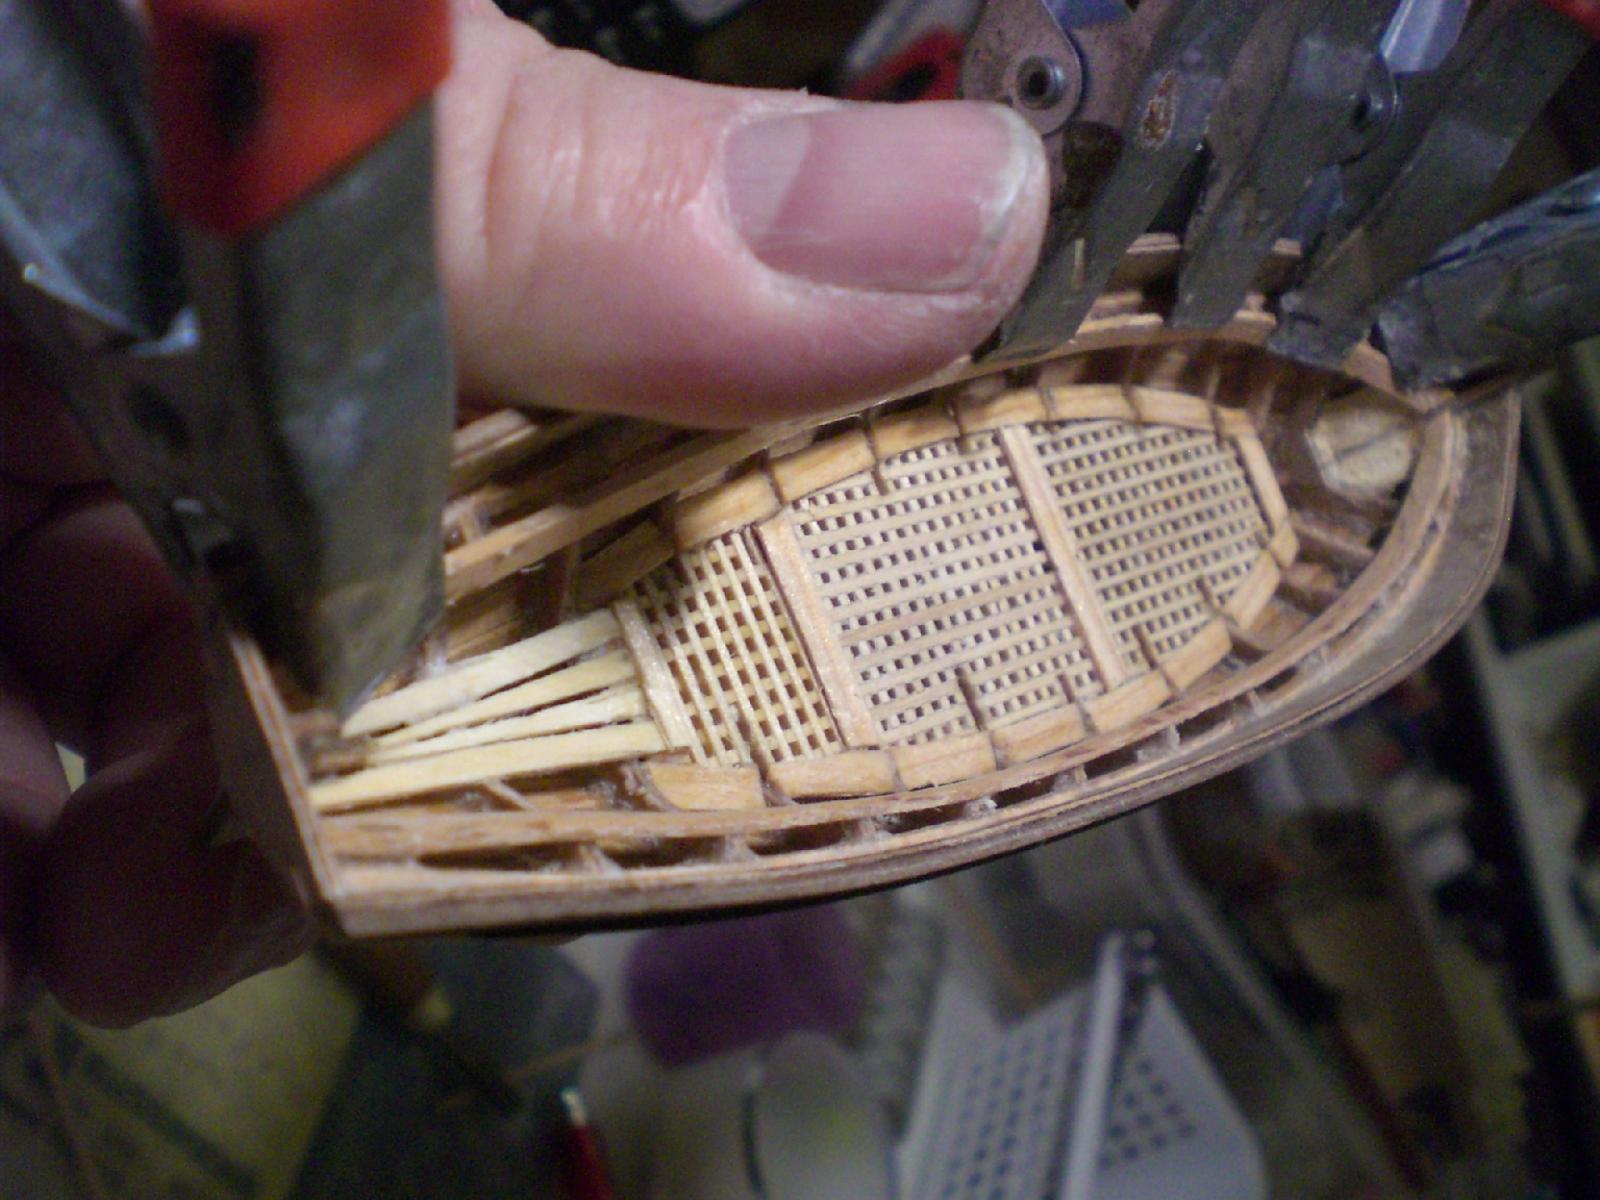
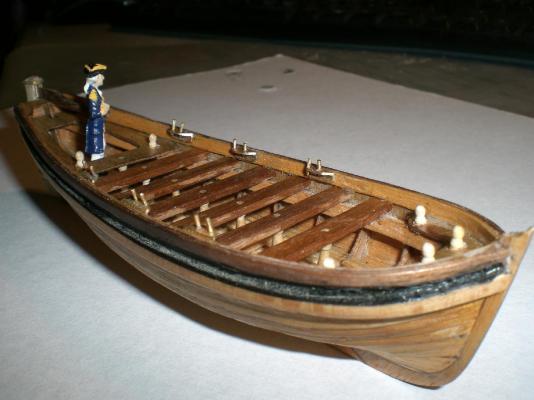
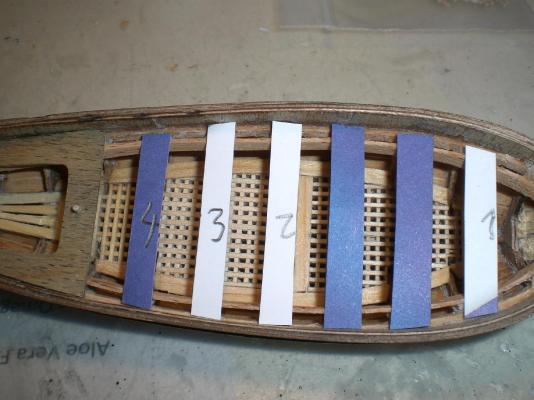
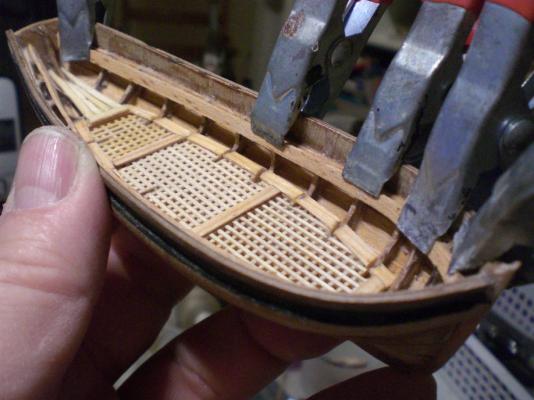
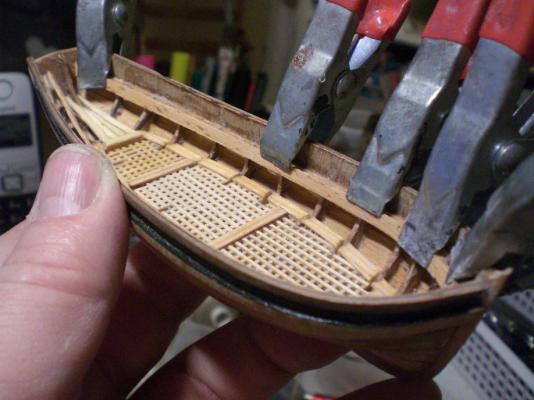
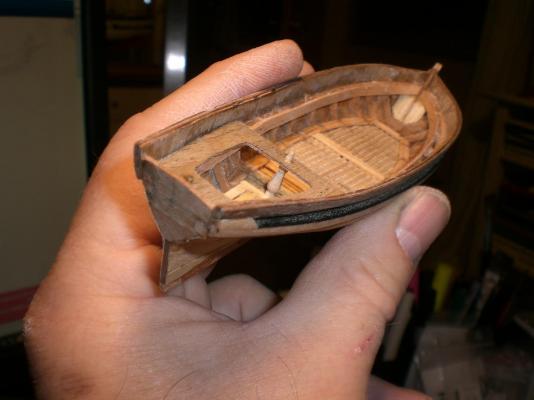
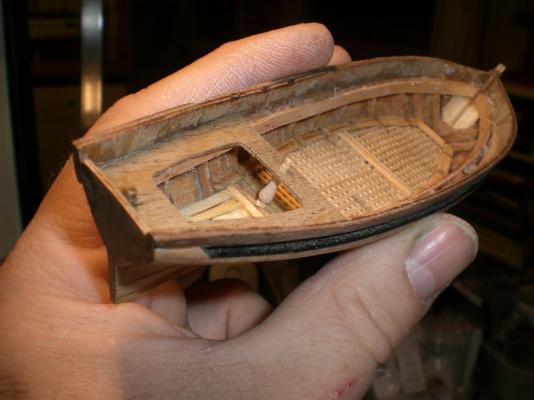
Update on captain`s gig..... there is still quite a lot to do on this little boat, but its realy fun all the way added a black liner at the sheer here the floor grating and linings covering the connection links and the grating contours These grating start breaking away, the moment one starts cutting slots etc..... aft section sitting area and pillar support beneath the bench, plank floor here Nils


-
Wonderful model Bob, I`m with Omega and also find she deserves a fine glass case for dust protection, allowing to lokk in from all sides... Nils
-
very sweet build Omega, have you planed your next Lilliput Project already ? Nils
- 120 replies
-
- 1
-
-
- mystic
- motor yacht
- (and 2 more)
-
Longboat by Rao A.L.G. - FINISHED
Mirabell61 replied to Rao A.L.G.'s topic in - Build logs for subjects built 1751 - 1800
very nice looking small craft Rao, much love put into the Fitting out Details... Nils -
Great looking Swan Class Toni, beautiful planking Job of the port side.... Nils
-
Thank you Nigel, agree with the "something satisfying"... remark on small ships, I think its probably that one Comes to results faster, turning in Hand, looking at different angles, and relativly quick adjustments possible. I just looked back to your RC`s Launch, beautiful Little boat in slightly different technique, but also Overhead planking. Was that from a kit in 1:48 or so ? Nils
-
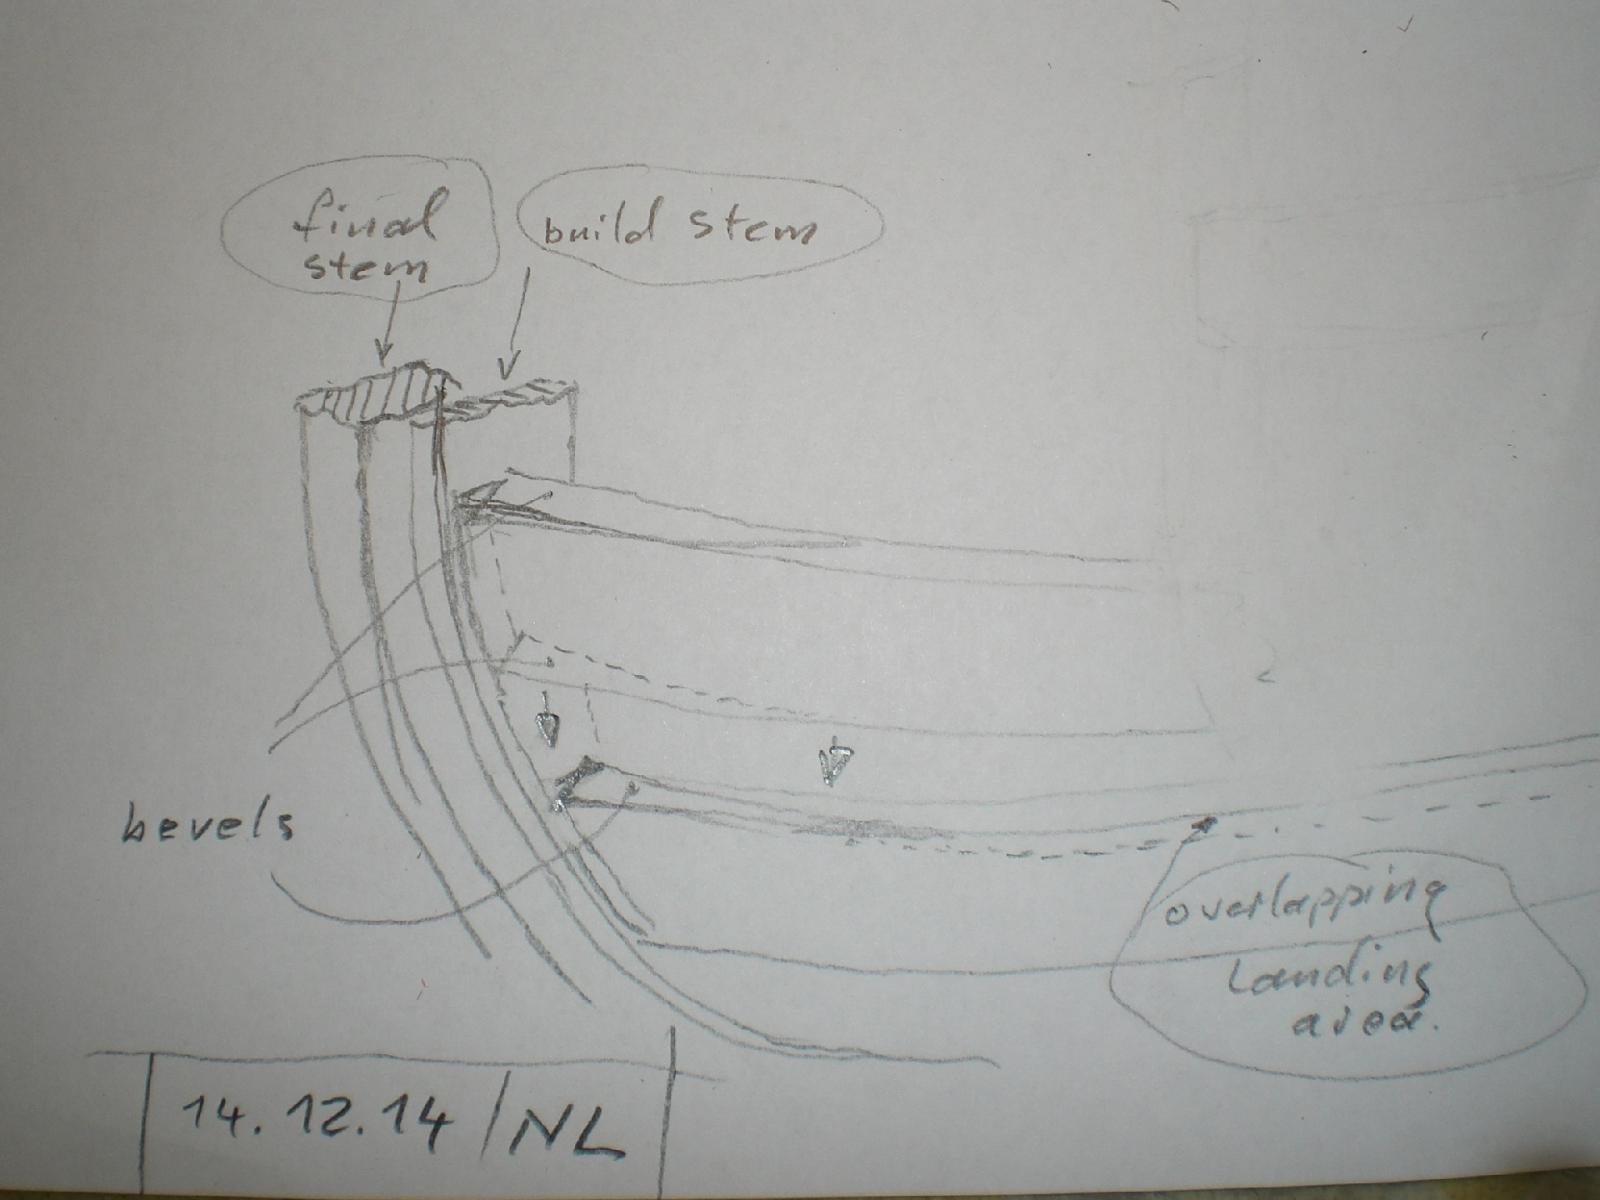
Martin, many thanks, I`m glad you like it Omega, thanks for your appreciation and also a merry Christmas to you Michael, thanks for your words , I also like the clinker build for those reasons. I would have liked to build a real wooden Dinghi for sailing and rowing, but then had a GRP hull daysailer instead for many years Mark, thank you very much, the Little Shell turned out to be 4 mm longer than planed, but luckily it still fits in at the foreseen place at the "Pegasus" waist area Keith I see with a smiile you realy have looked at the details...... the build-stem and transom surfaces are flat without any rabbet grooves, the planks are rather thin and do not allow much sanding after Fitting. The plank Ends are cut (beveled to the end sections, appr, 15 - 17 mm), the plank widths are tapered with a scalpel from mid length to both Ends with aid of a metal ruler. The "rabett" at the stem is simulated by means of post adding a seperate stempost (also keel) after the planking is done. This can also be seen done a number larger, in the same technique for my "HMS Pegasus" post # 23, build log part 12. For the Long overlappings in remaining plank length there was no beveling done for the landings. Glueing was per CA application with toothpick at landings , stem and transom. For the Illustration of the plank endings here is a Little Hand scetch NIls

-
Well done Piet ! that Little Dinghi no. 2 Looks great, and nice decription of your planking procedure ( plank endings, CA, toothpick, etc...), I felt myself remembered to my own experience... Also smart idea of thinning the peg clamps down to appr. half the width Nils
-
Congratulations Matija, you have built a super looking schooner, I love it.... There is so much on great details and fitting out with this model that I presume "Bluenose" fellow builders will gladly refer to the bench-mark you have set here Again, thanks for sharing this wonderful build log Nils
-
the treenailed deck looks great Nigel, seems to be never ending drilling session.... Nils
-
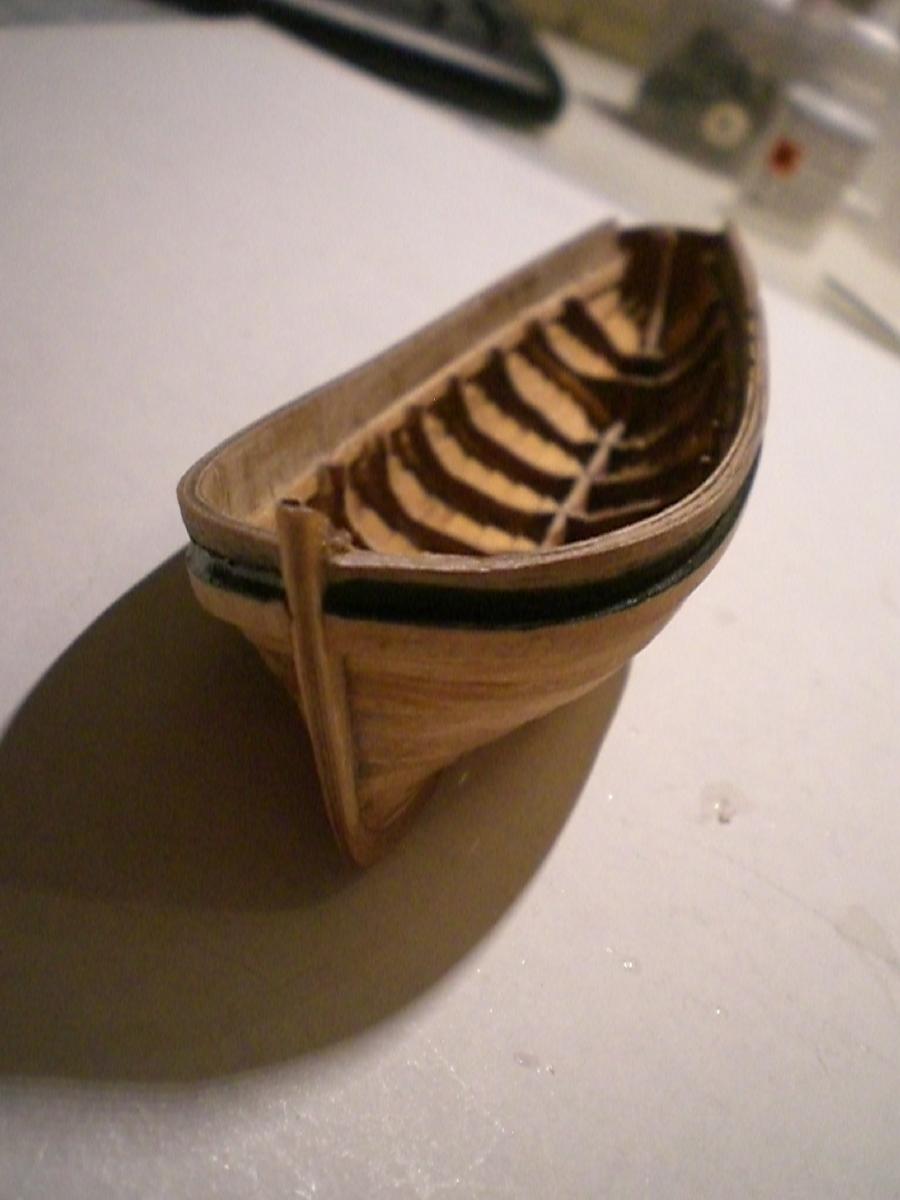
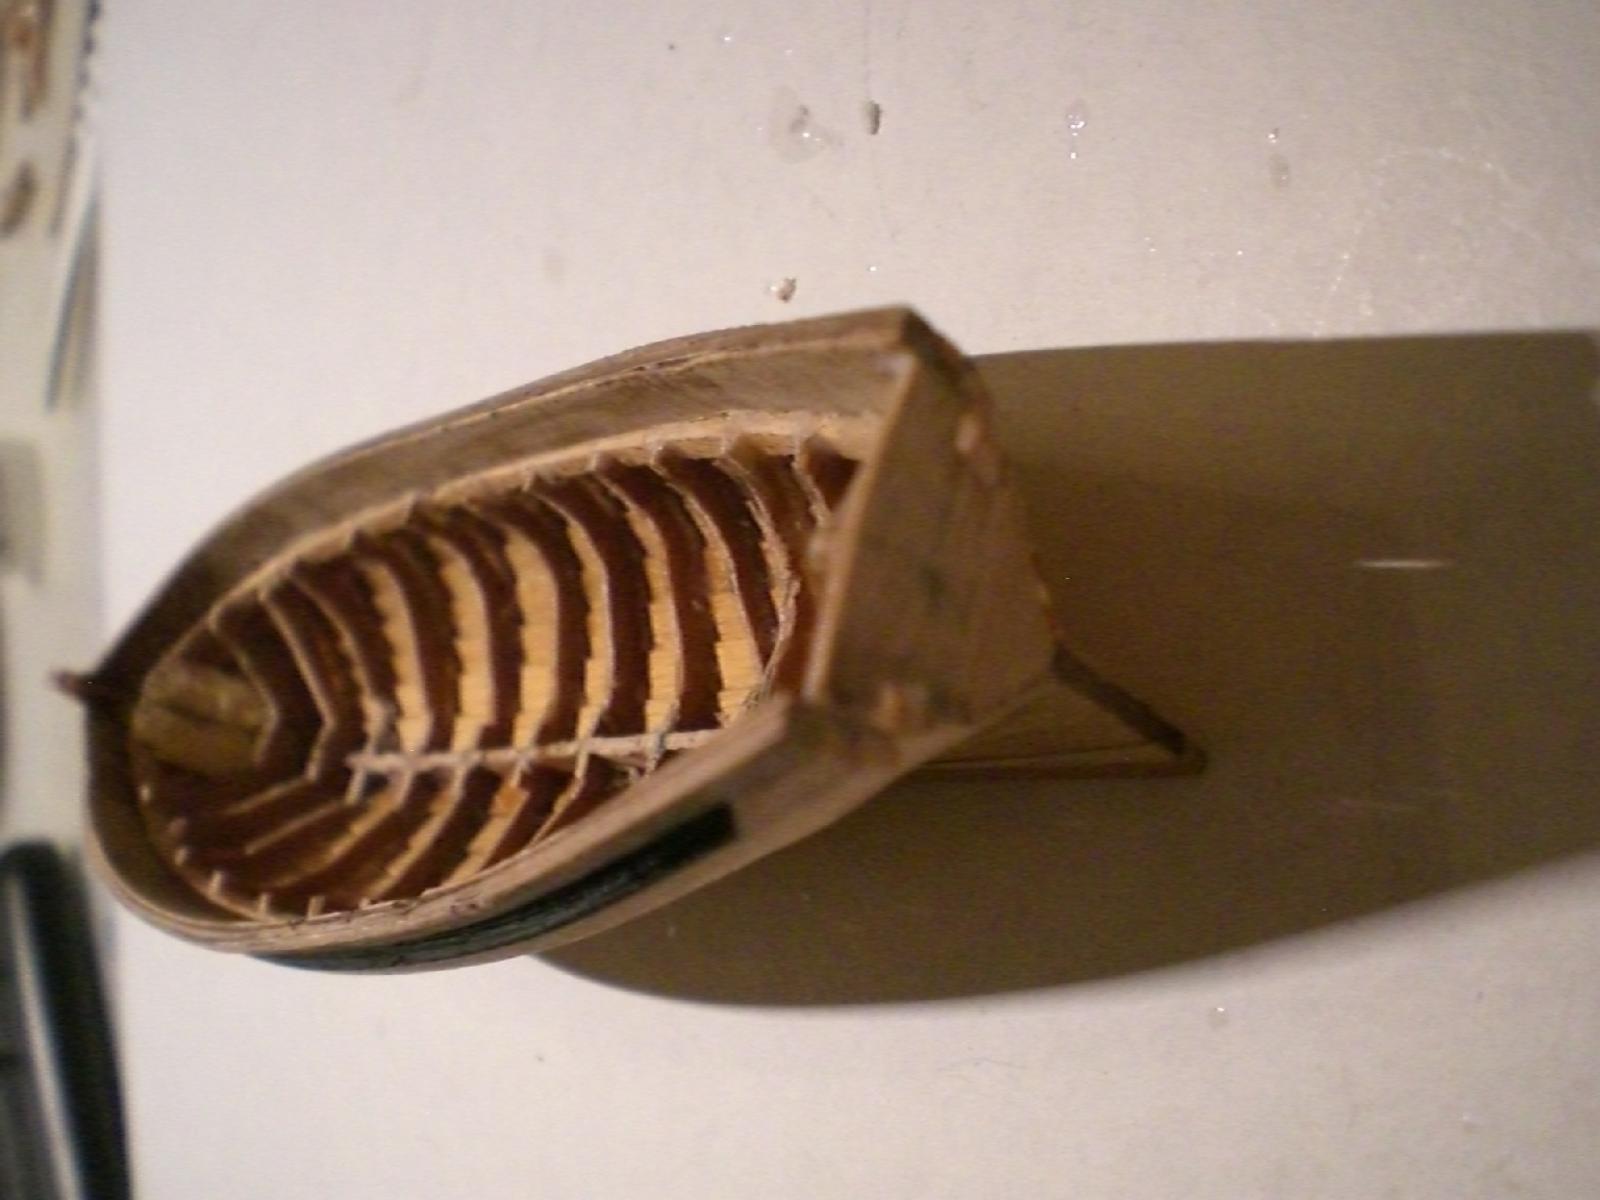
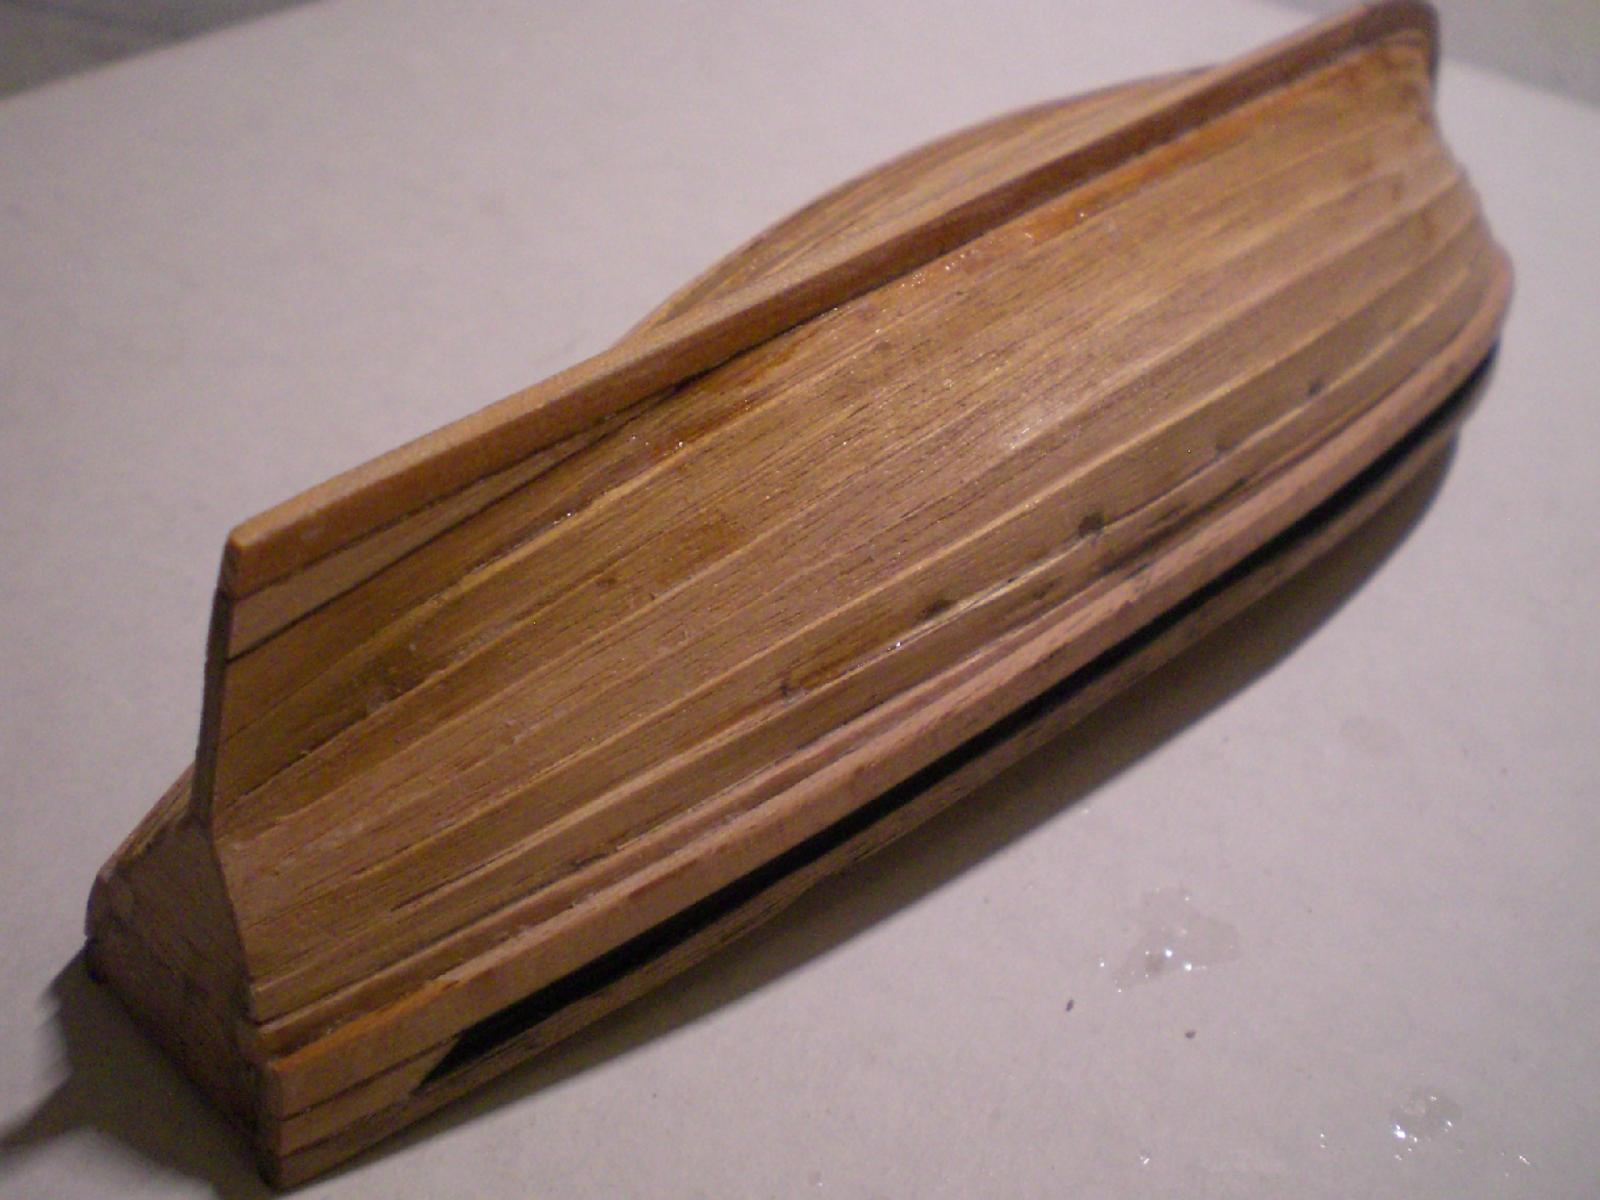
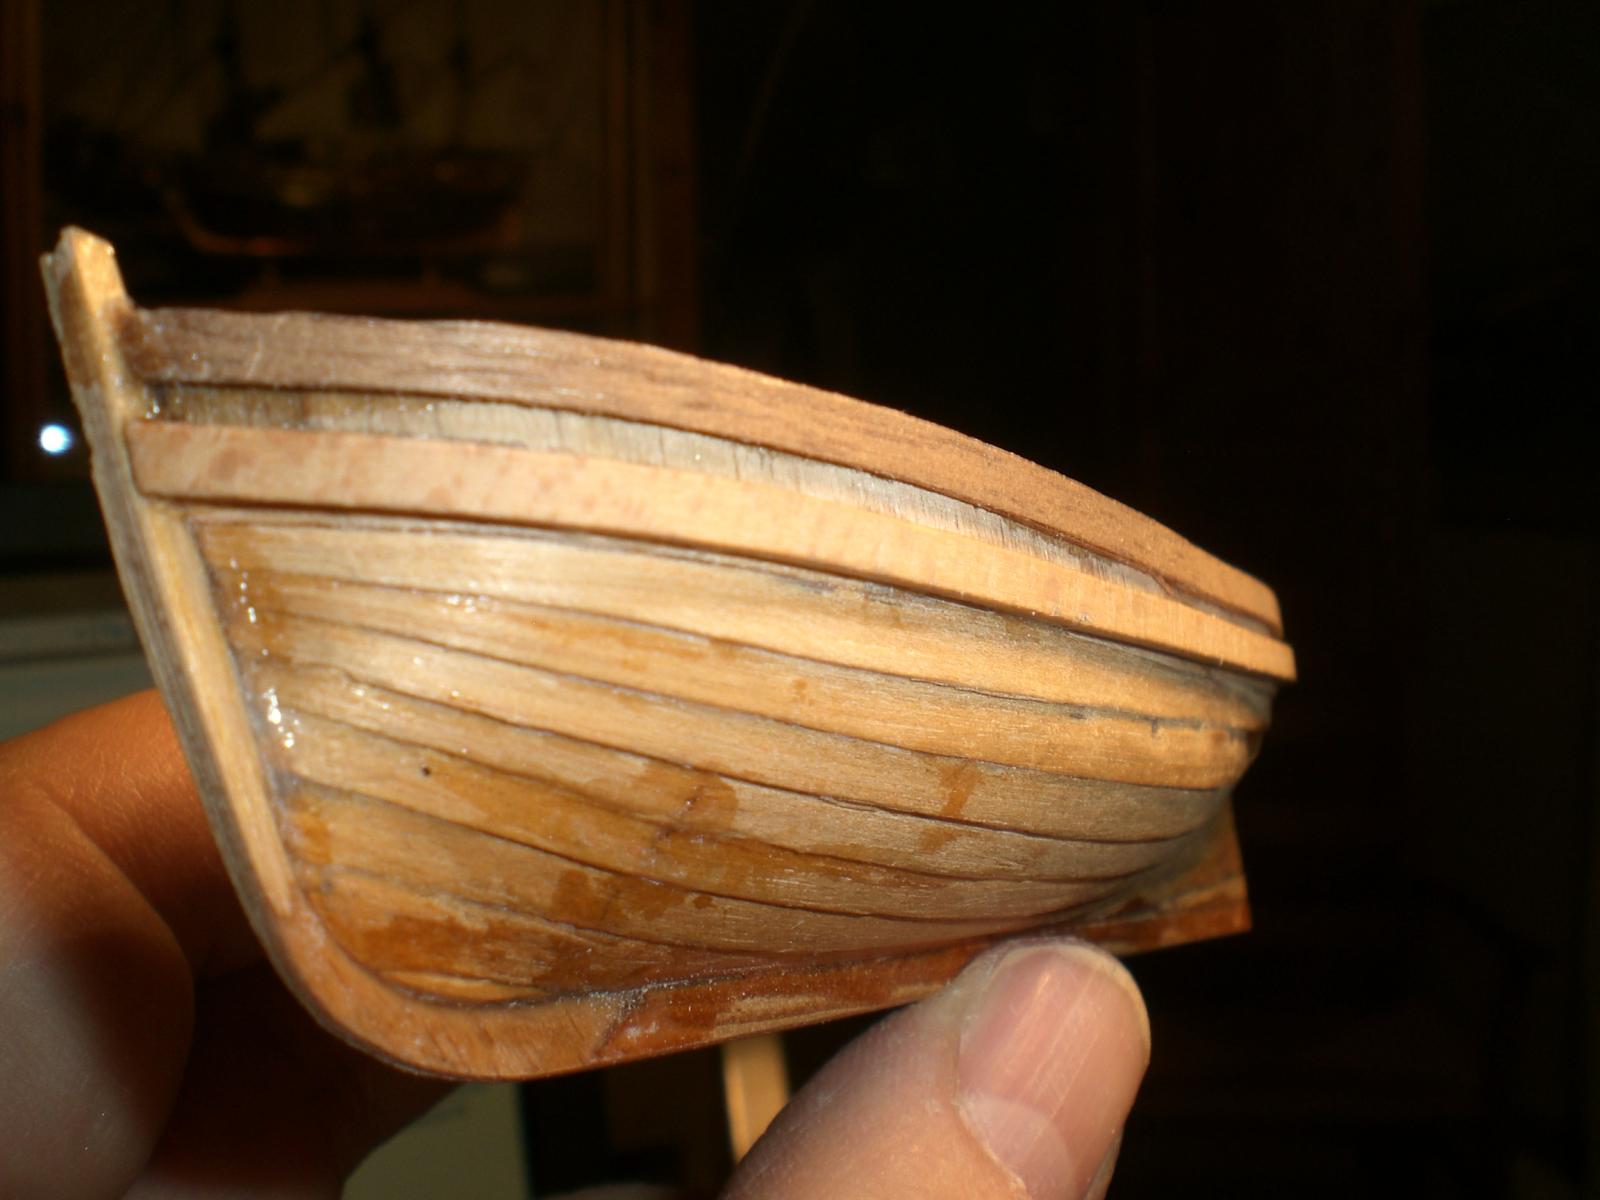
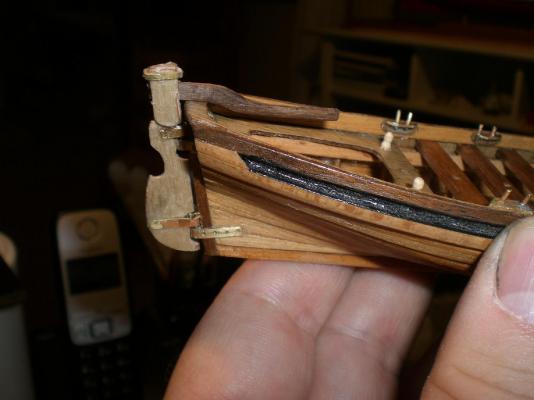
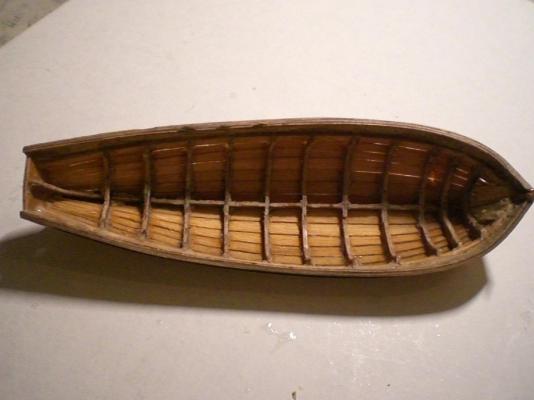
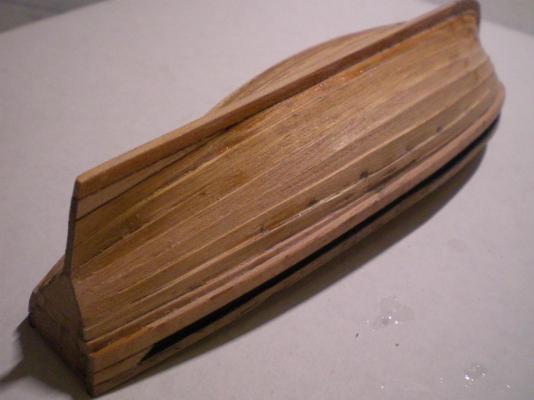
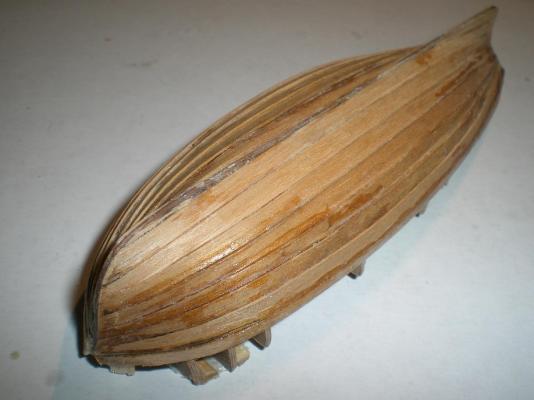
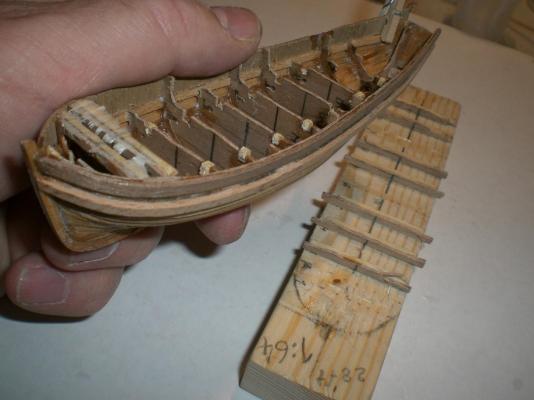
Update on the boat..... of course I was too impatient to see if all had worked out as I thought it would. When taking the small (upside down planked) boat-hull from the block I ripped off some of the upper parts of several frames. But thats not too much trouble because the middle sections of the frames will be removed anyhow.... thats how it looks after removing from the building base some of the broken upper frame portions planking so far acceptable, will need some touch up work thats the rough hull, without trimming, bow post and keel are on. I was surprised how light the hull is, it feels in hand like the half-shell of a cracked giant walnut Nils


-
Pen Duick 1898 by Mfelinger - 1:20
Mirabell61 replied to Mfelinger's topic in - Build logs for subjects built 1851 - 1900
beautiful classic yacht Matija, I love those lines, the model Looks great so far.... Nils -
beautiful planking in your post #207 Chuck, I love the way you do the absolutely smooth and precise single layer planking. Here the rather thick Frames provide a good base for glueing... Nils
- 1,051 replies
-
- 1
-
-
- cheerful
- Syren Ship Model Company
- (and 1 more)
-
Thank you Bob, I saw this lapstrake method in a wooden boatbuilding book many years ago and hoped that someday I could make use of it. I think for building a cutter like "Alert", or "Cheerful", or Sherbourne" in a larger scale with clinker planking, that would be a nice exercise to do Nils