


Mirabell61
-
Posts
7,324 -
Joined
-
Last visited
Content Type
Profiles
Forums
Gallery
Events
Posts posted by Mirabell61
-
-
Hi Sterlingclements,
beautiful and excellent built "America". I love the sights into the ship
Well done !!
Nils
-
Hi Keith,
there is no particular reason, the reason is just, that I was looking for a way to do the window frames. Using squarebar tube it worked well with my Ergenstrasse, The brass squarebar is 1 mm thickness, in scale that would simulate the windowframe dimensions so here it goes again ......
for small scale ( etc 1:160) an alternative is to fix approriate slide guides on the inside of a window front and then slide in one an acrylic stripe that covers all windows simultainiously That is completely without any glue and a clean job. I used that version on my "Kaiser Wilhelm der Grosse" model
Nils
-
Veszett,
The brass square tube was easy to get, but it looks that my supplier for 6 x 6 mm silicone rod has run out of stocked material. Fortunately I still have enough left from my Ergenstrasse.
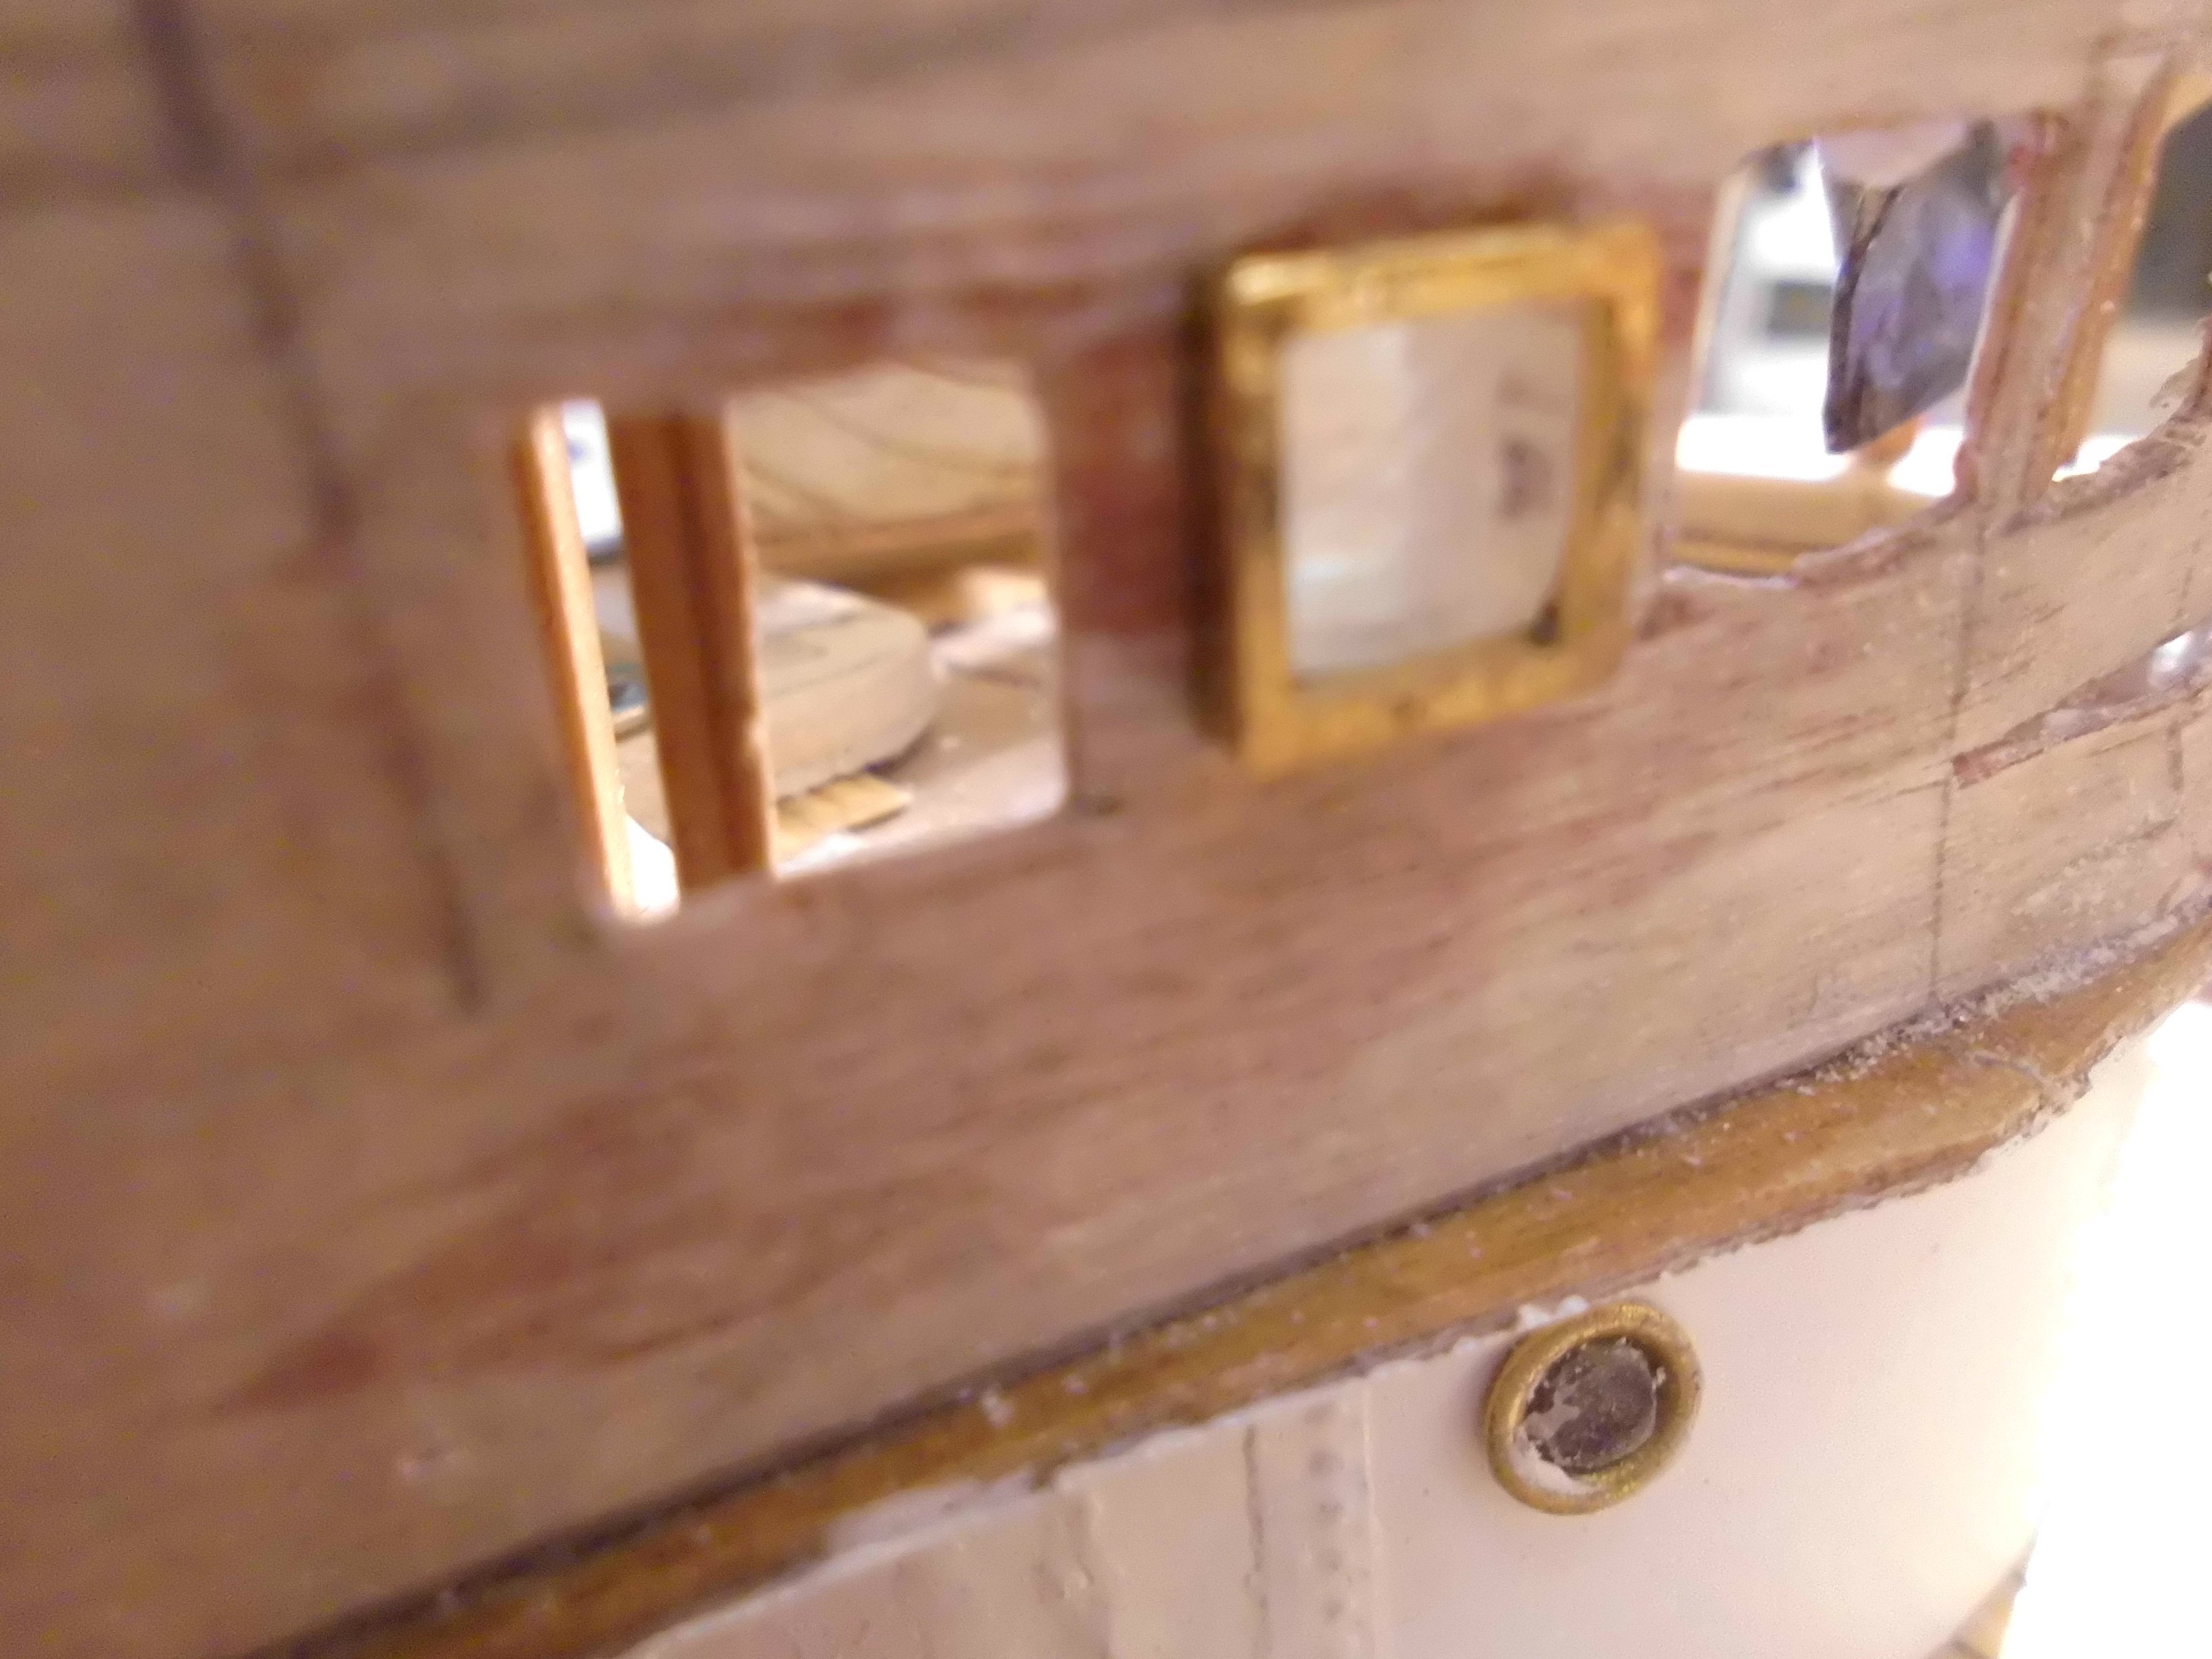
The other flat sides with theire window outcuts will be easier to make
Nils

- Canute, FriedClams, Jack12477 and 3 others
-
 6
6
-
thank you very much John,
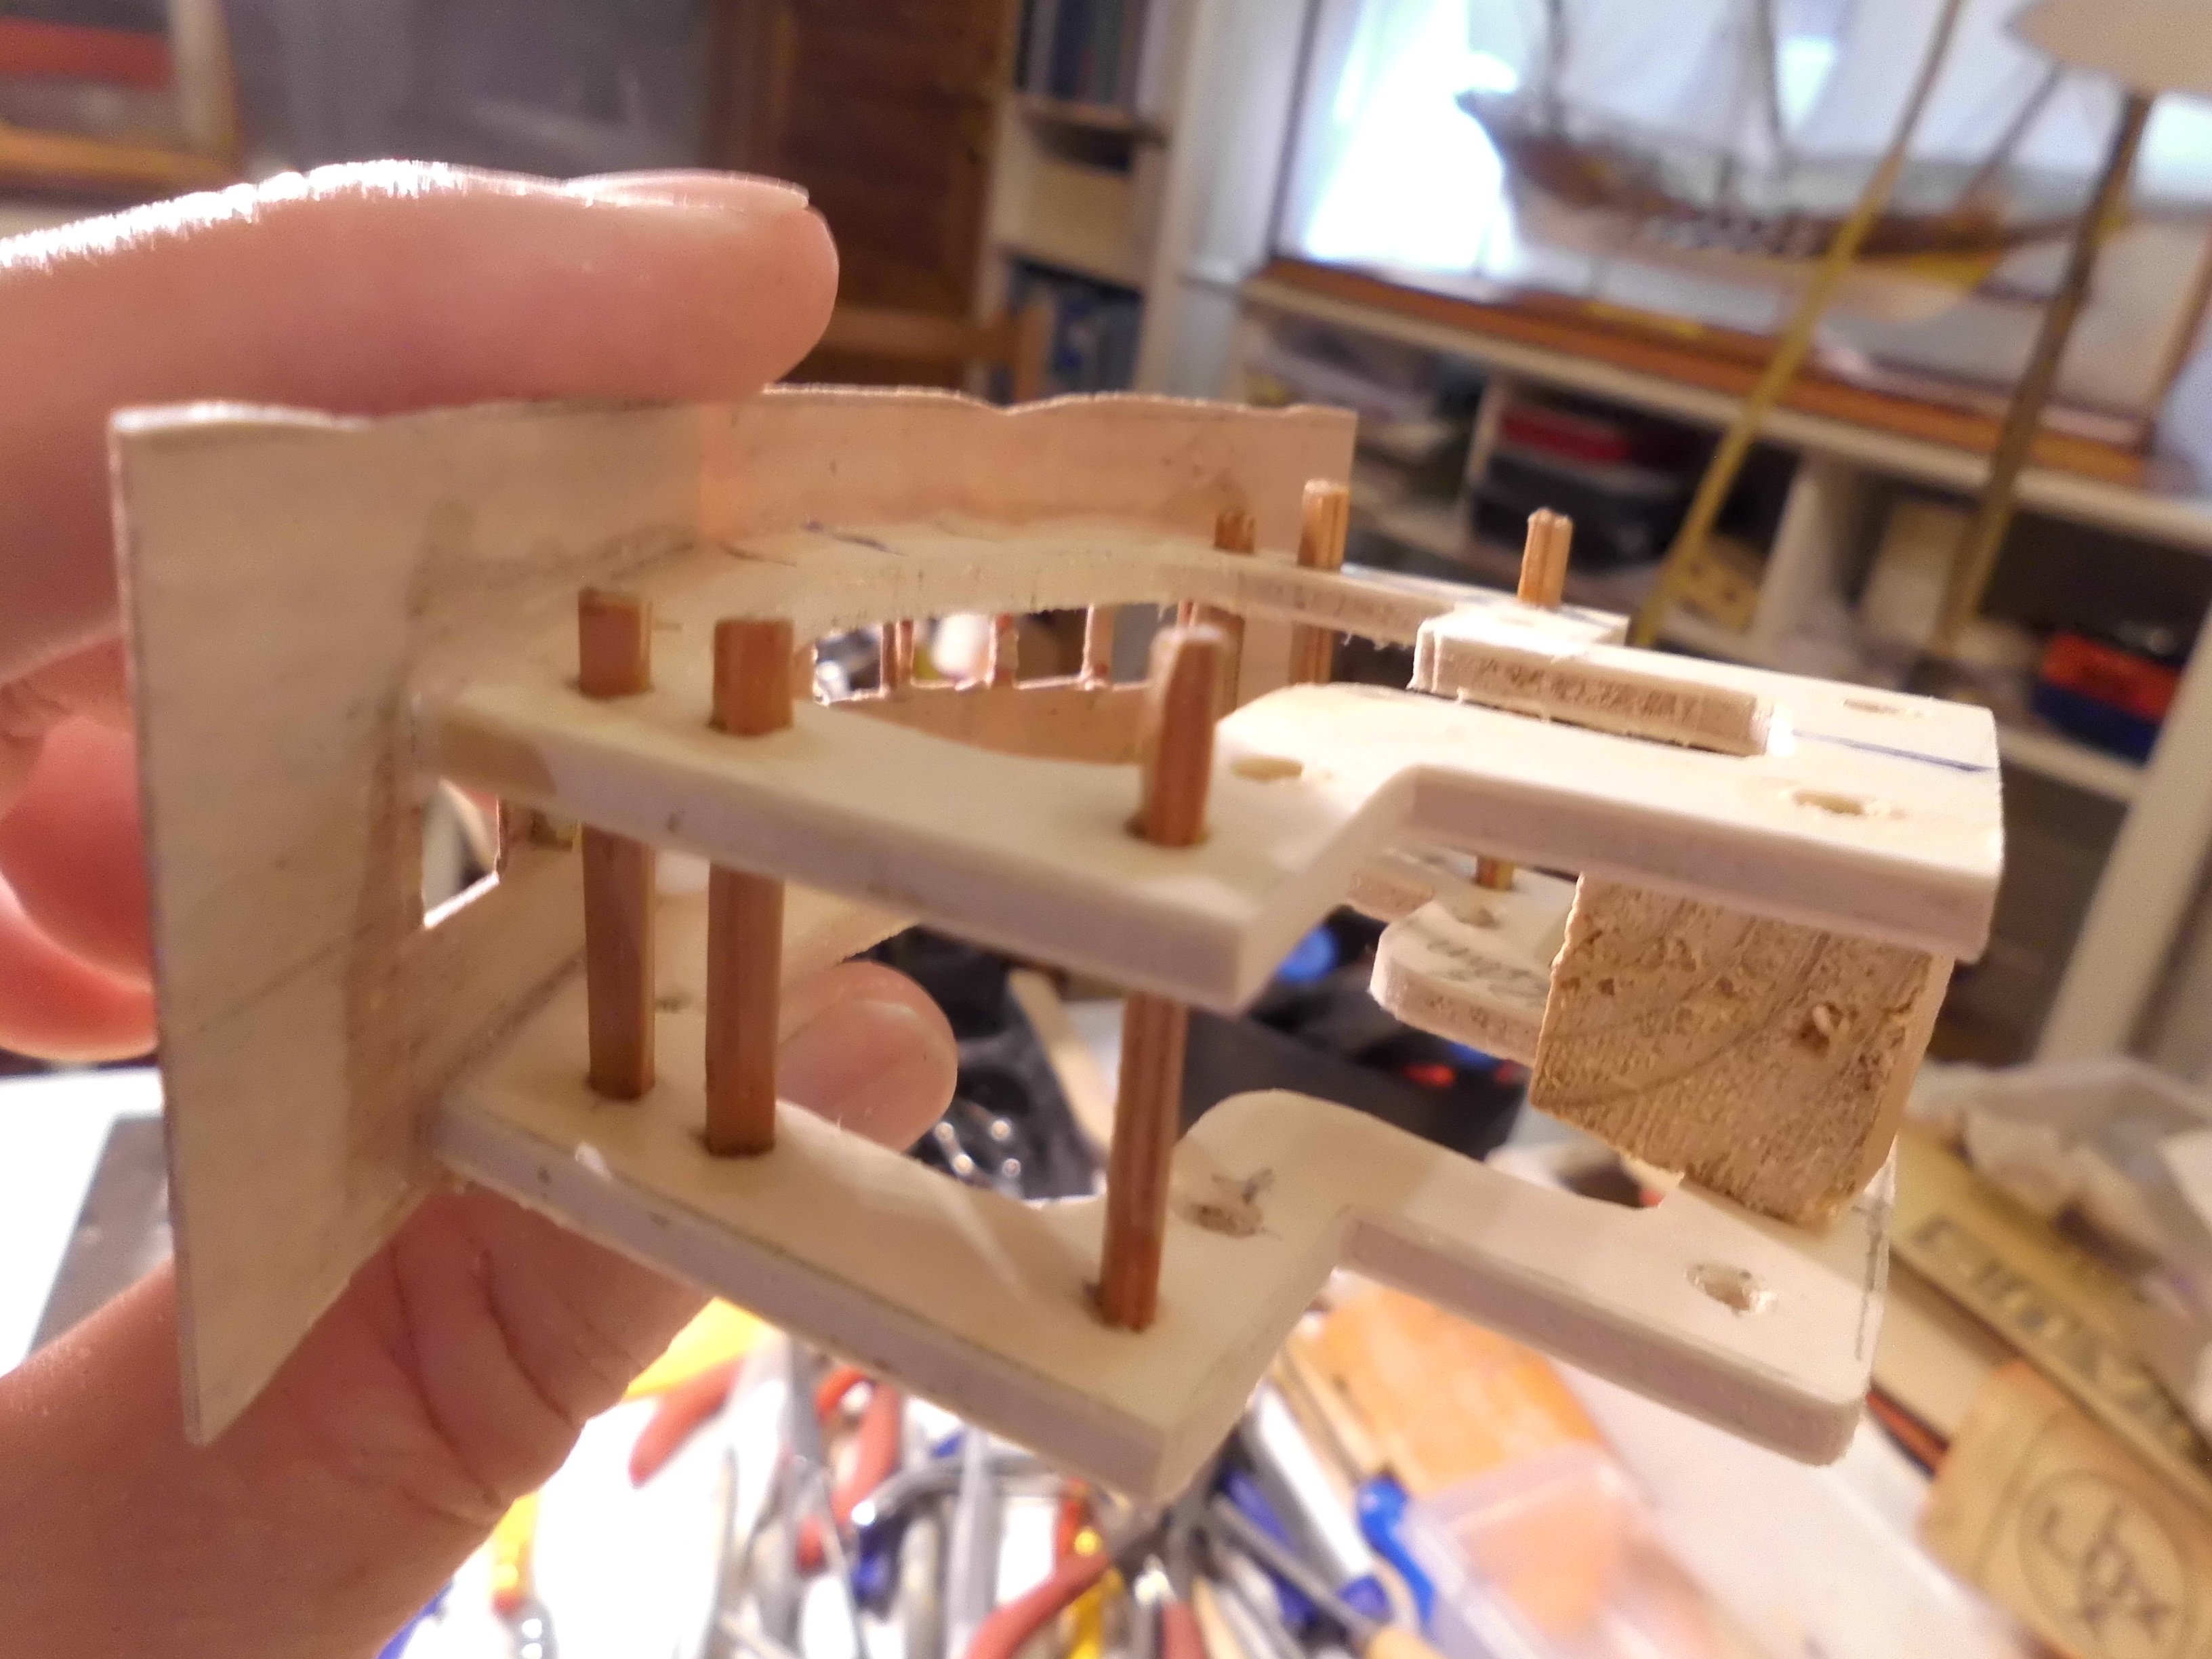
I`ll take off the wheelhouse now (screws) and do the remaining sides. The six preliminary pillars of the frame will stay in place until the sides are all closed and then cut away.
Nils
- mtaylor, Canute and FriedClams
-
3
-
Hi Veszett,
I refrained from using flat transparent polysterol or food containment packages because its too messy with the glueing in, and CA leaves sometimes leaves a nasty stain.
I`m quite happy with the methode I described, also the silicone is translacent (semi transparent), so I need not worry what the inside of the appropriate superstructure looks like, I do`nt have to fit it out
Nils

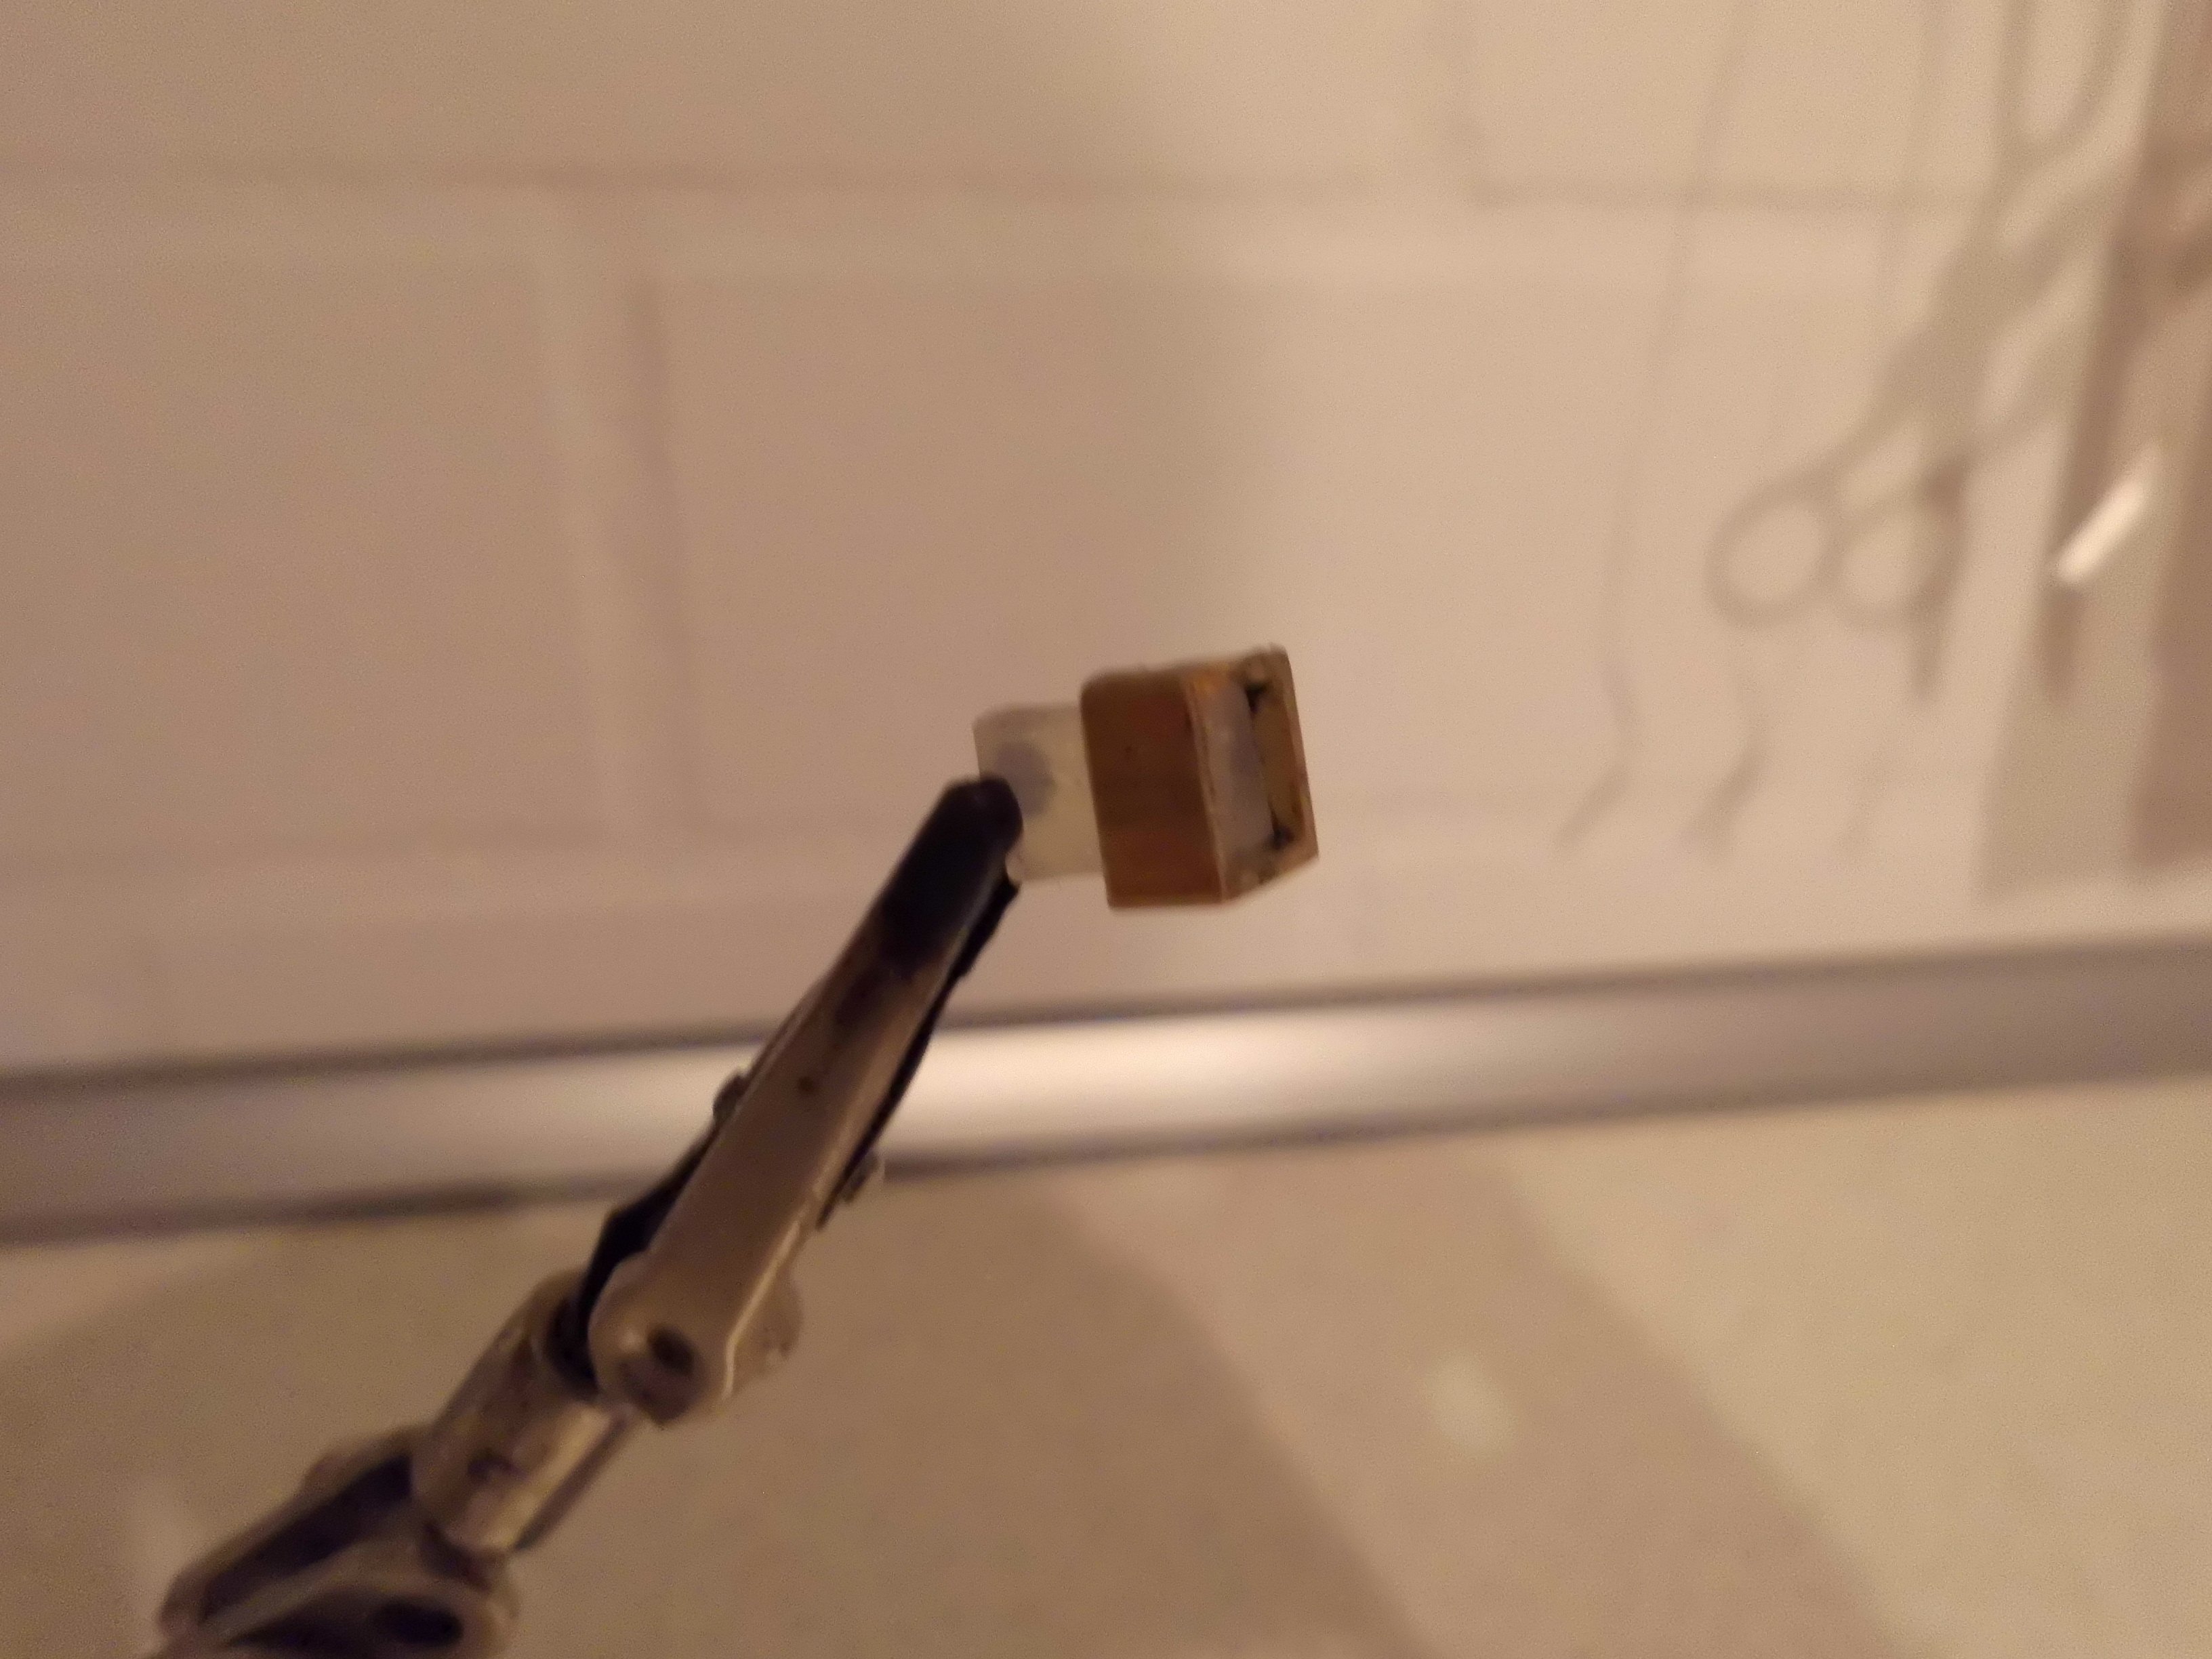
square silicone bar 6 x 6 inside a 8 x 8 square brass tube, sorry for the rather poor photo quality

mounted it would look like this (second from left window )
- GrandpaPhil, yvesvidal, Canute and 4 others
-
7
-
-
Rudder chain device is great Valeriy,
obviously it was not hyraulic operated yet
Nils
- Keith Black, FriedClams, cotrecerf and 3 others
-
6
-
Thanks for your words Uwe,
all the coming items are being built from pictures as good as I can
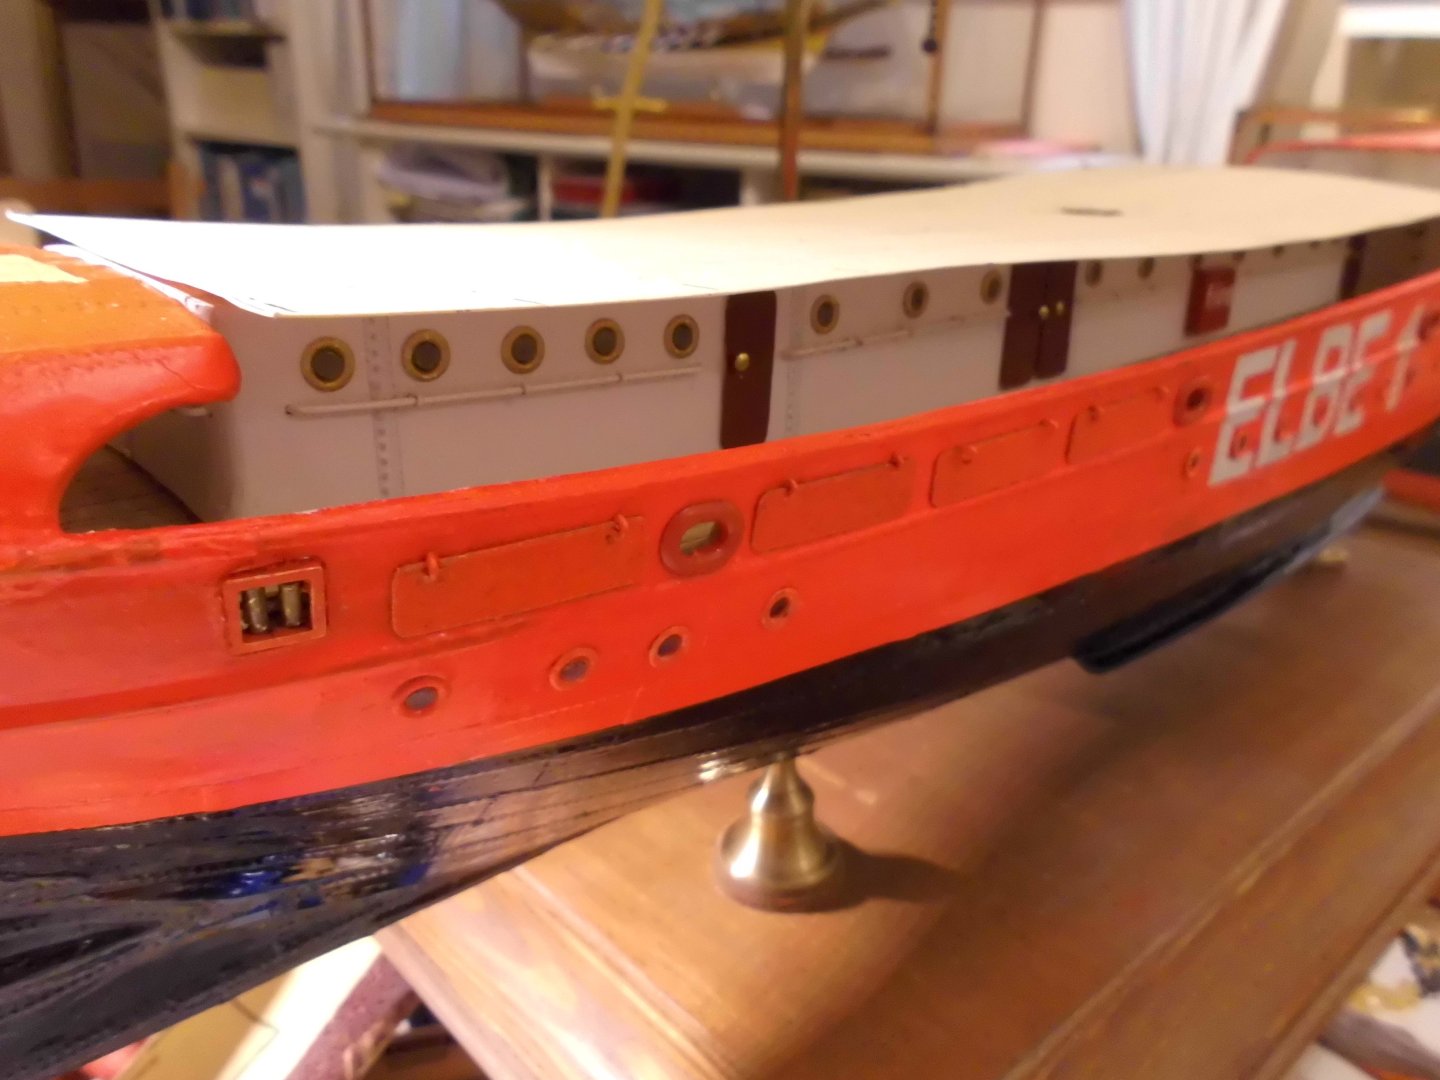
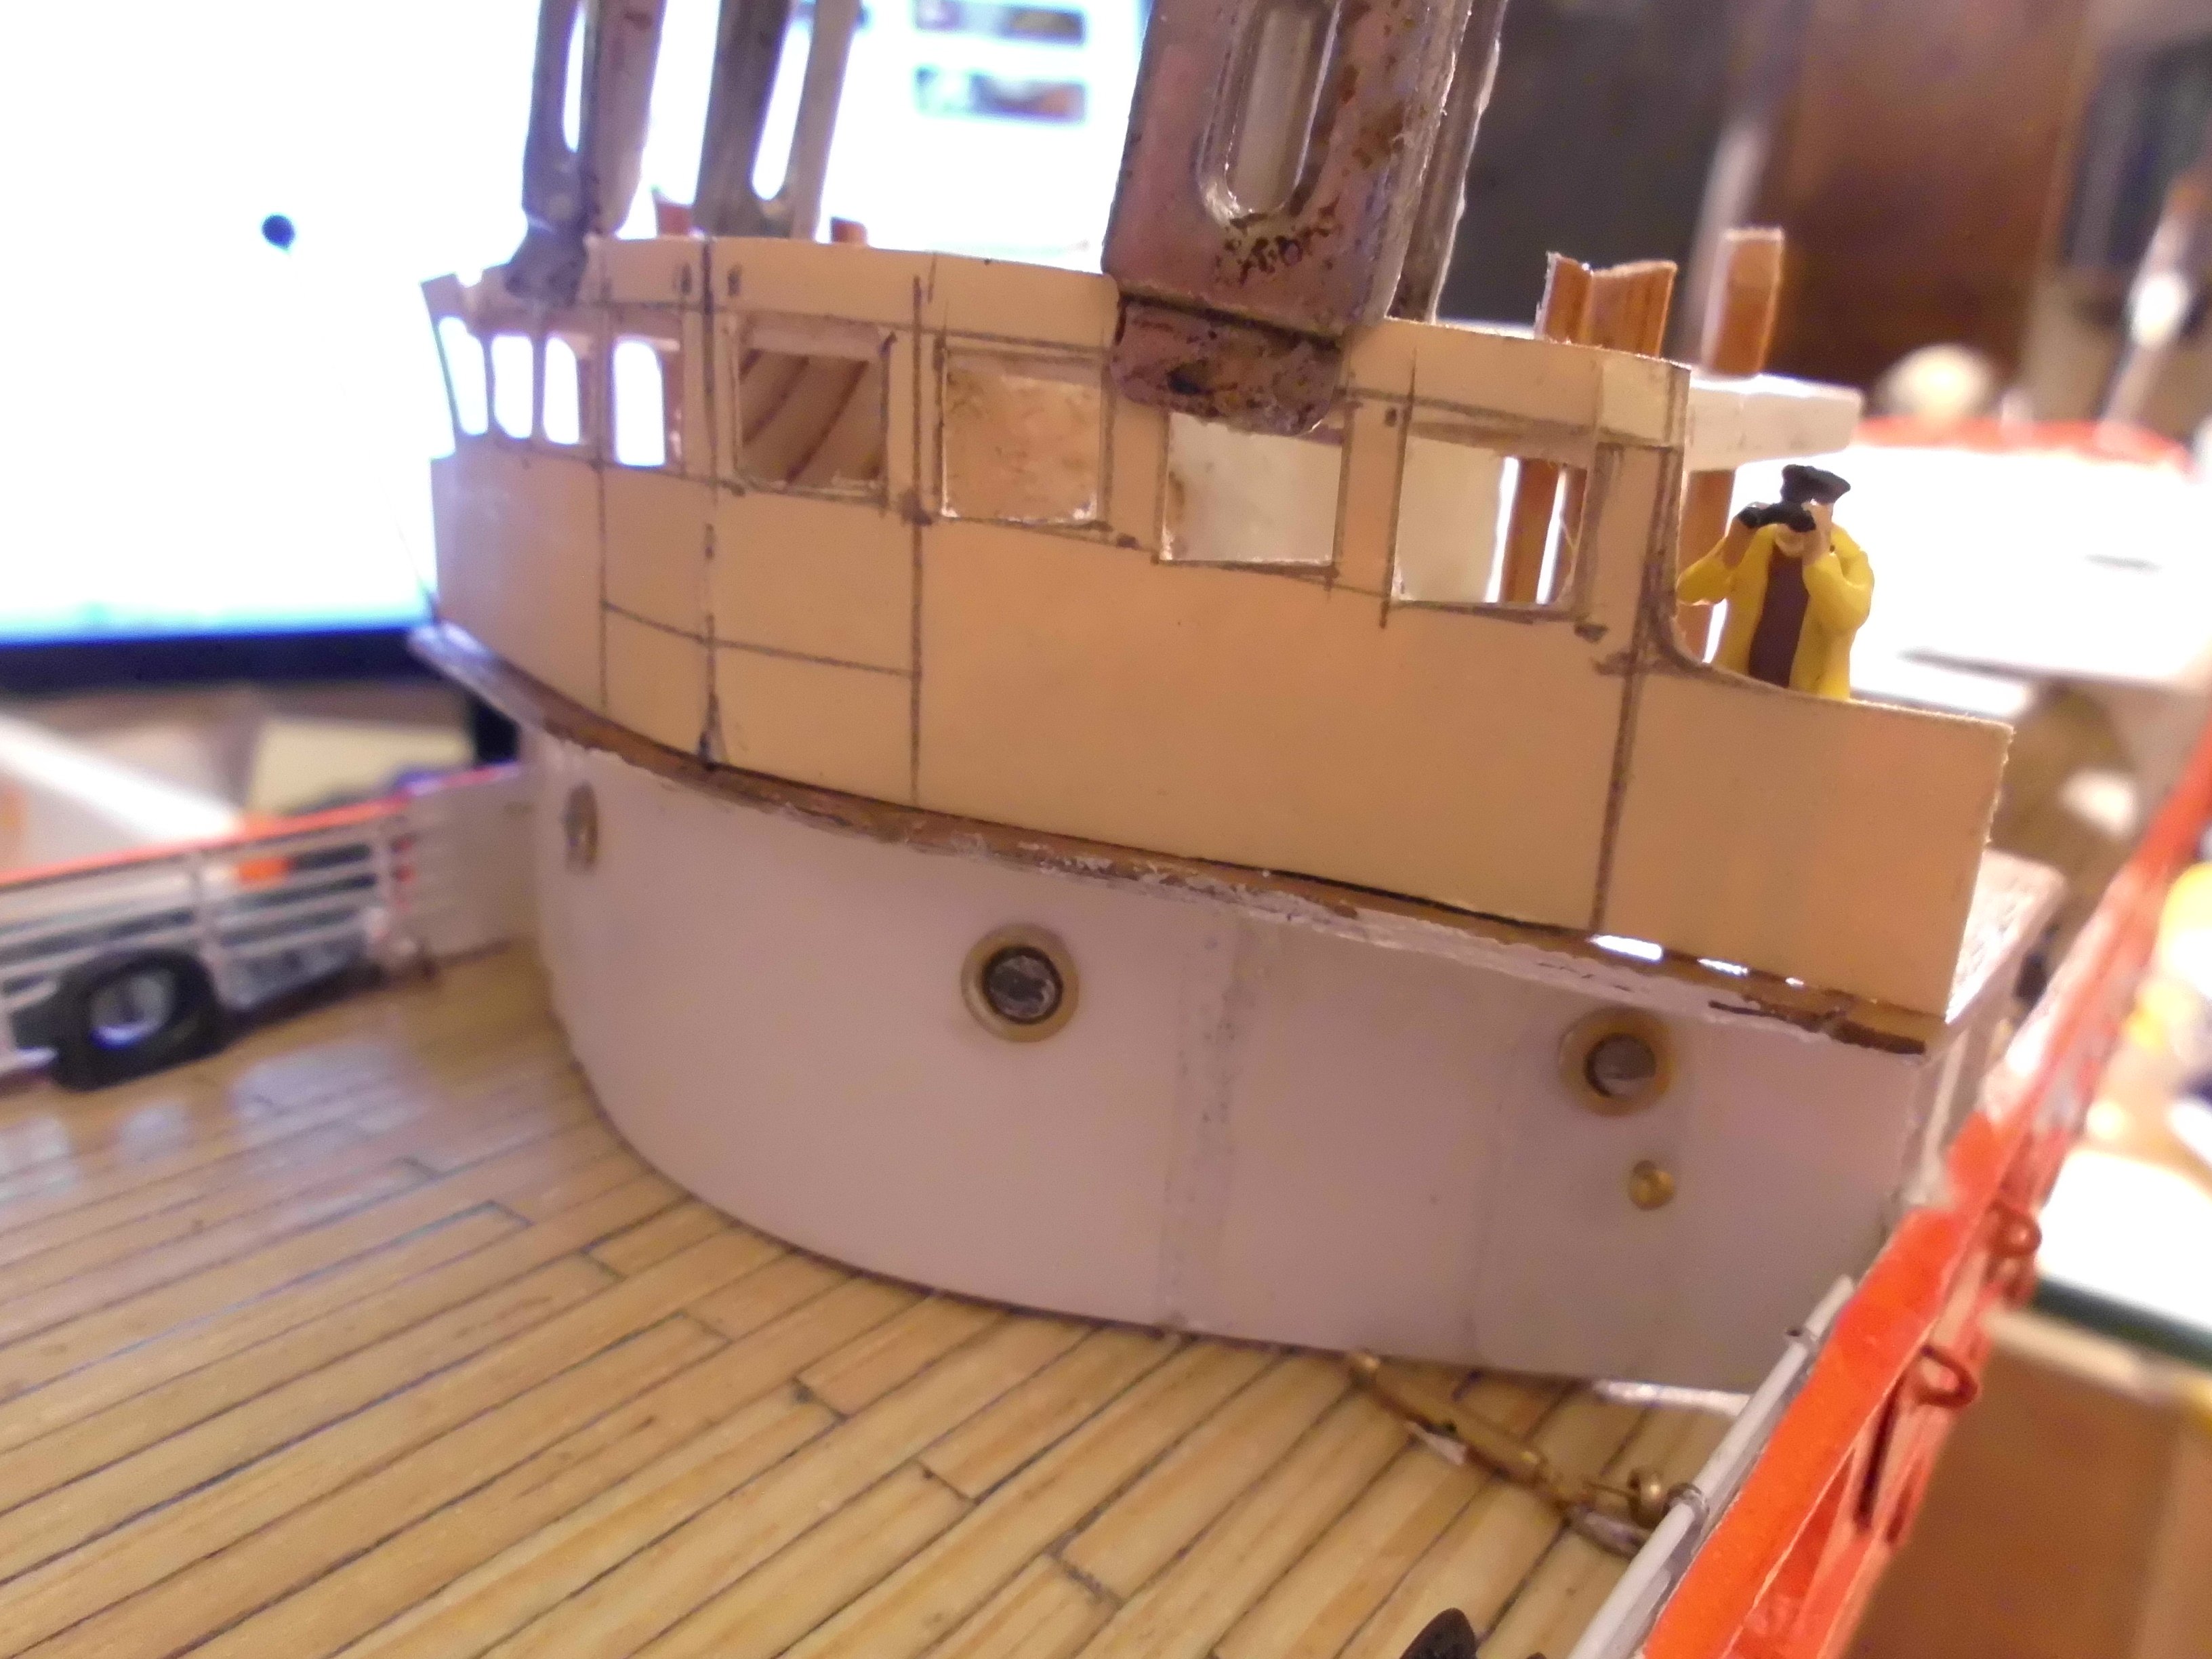
I found a solution for finding the "lost" anchor cable in the closed hull, and to secure it. I`m currently trying my luck with the wheel- and nav house from 0,8 mm ply, I´ll try to do the square windowframes like already done once for the "Ergenstrasse", which has the same scale. Its a bit more tricky and fragile here in order to bring 8 windows over the limited wheelhouse breadth
Nils
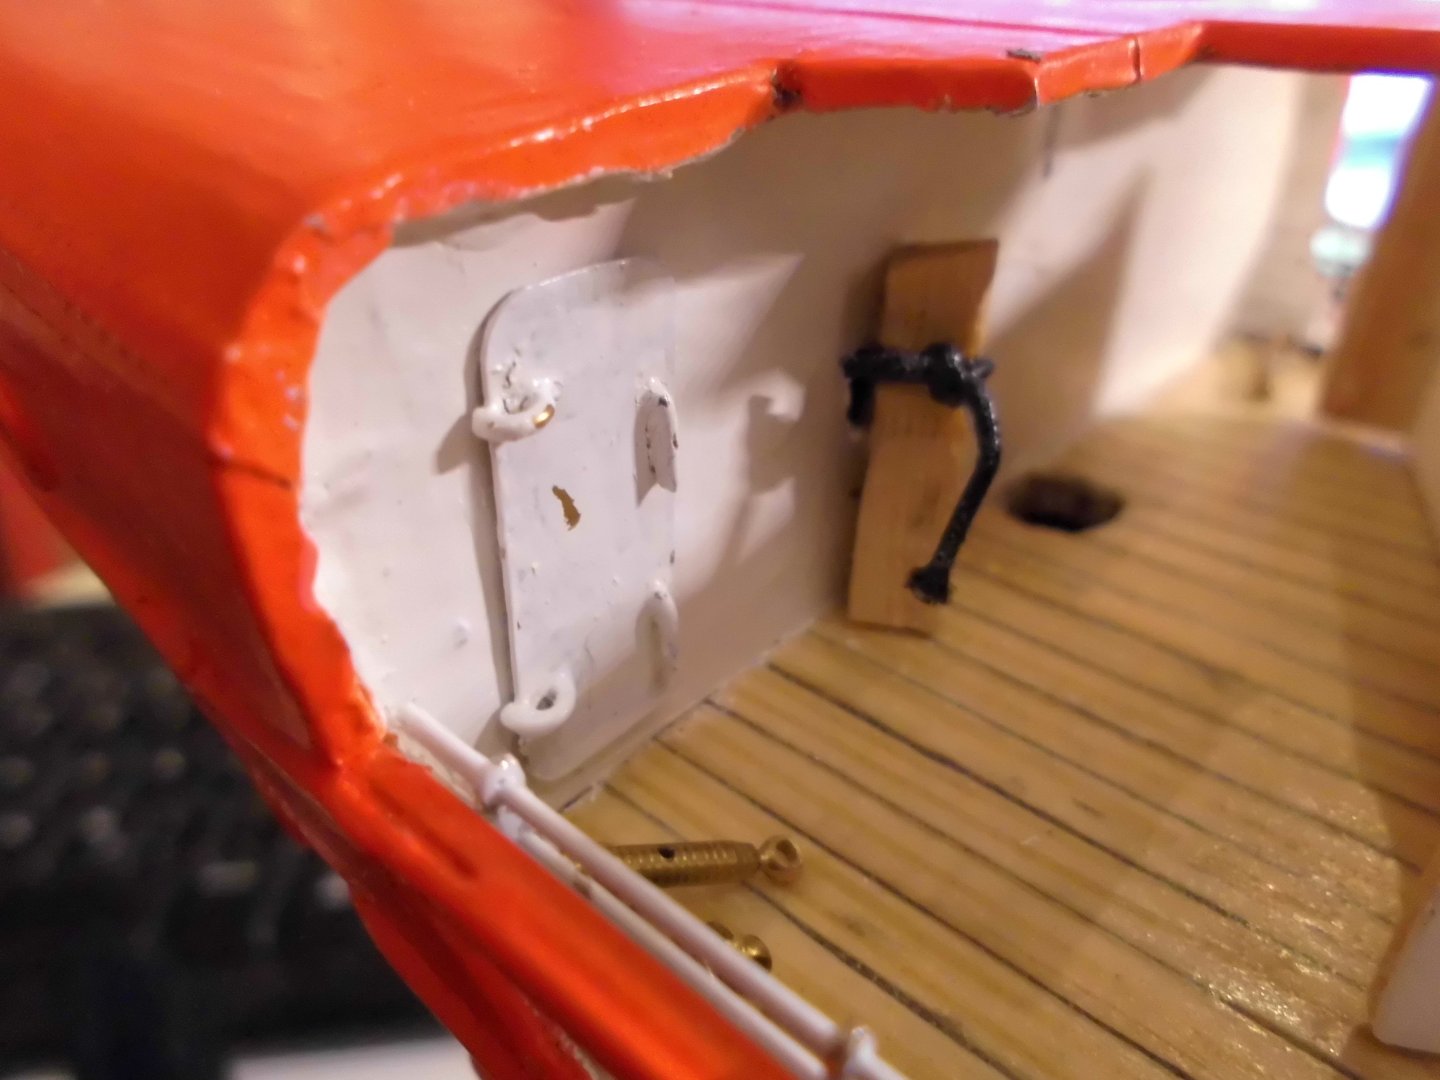
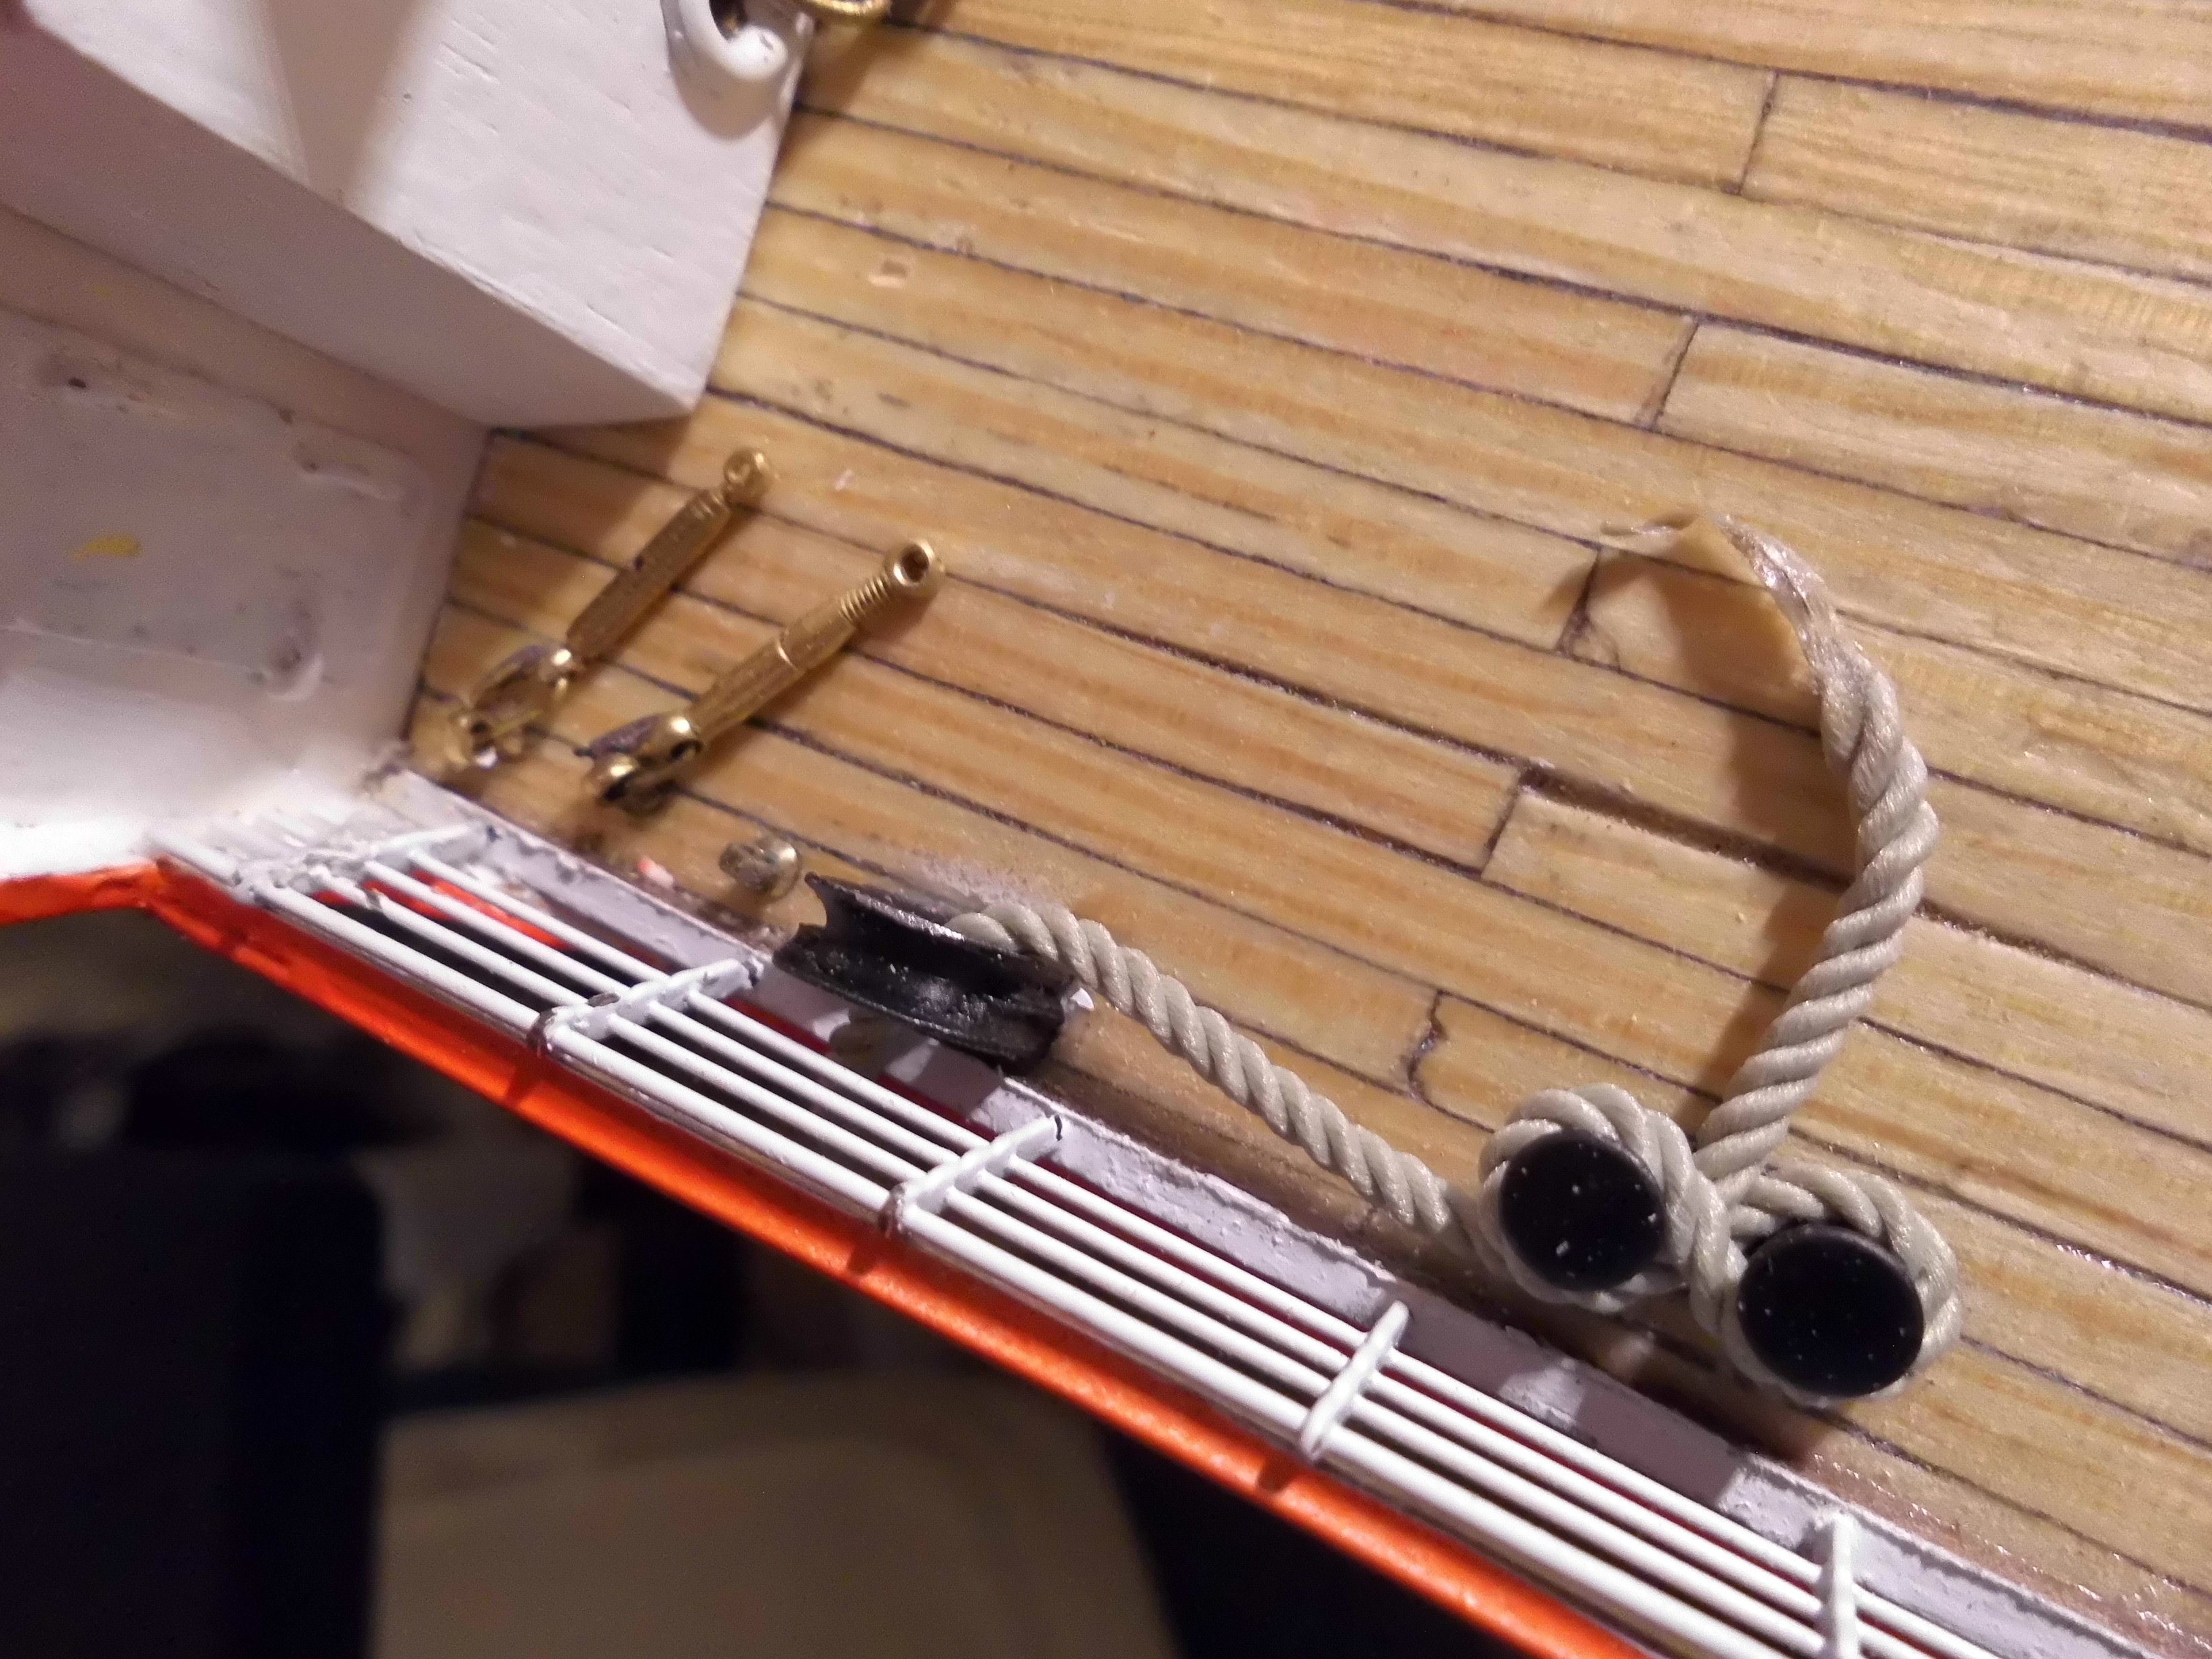
a hole was drilled into the forecastle bulkhead, the "lost" achorcable of the hall anchor fished through this hole and secured with a wooden stopper. This lays between bulkhead and its cover item.
Paint touchups pending later on

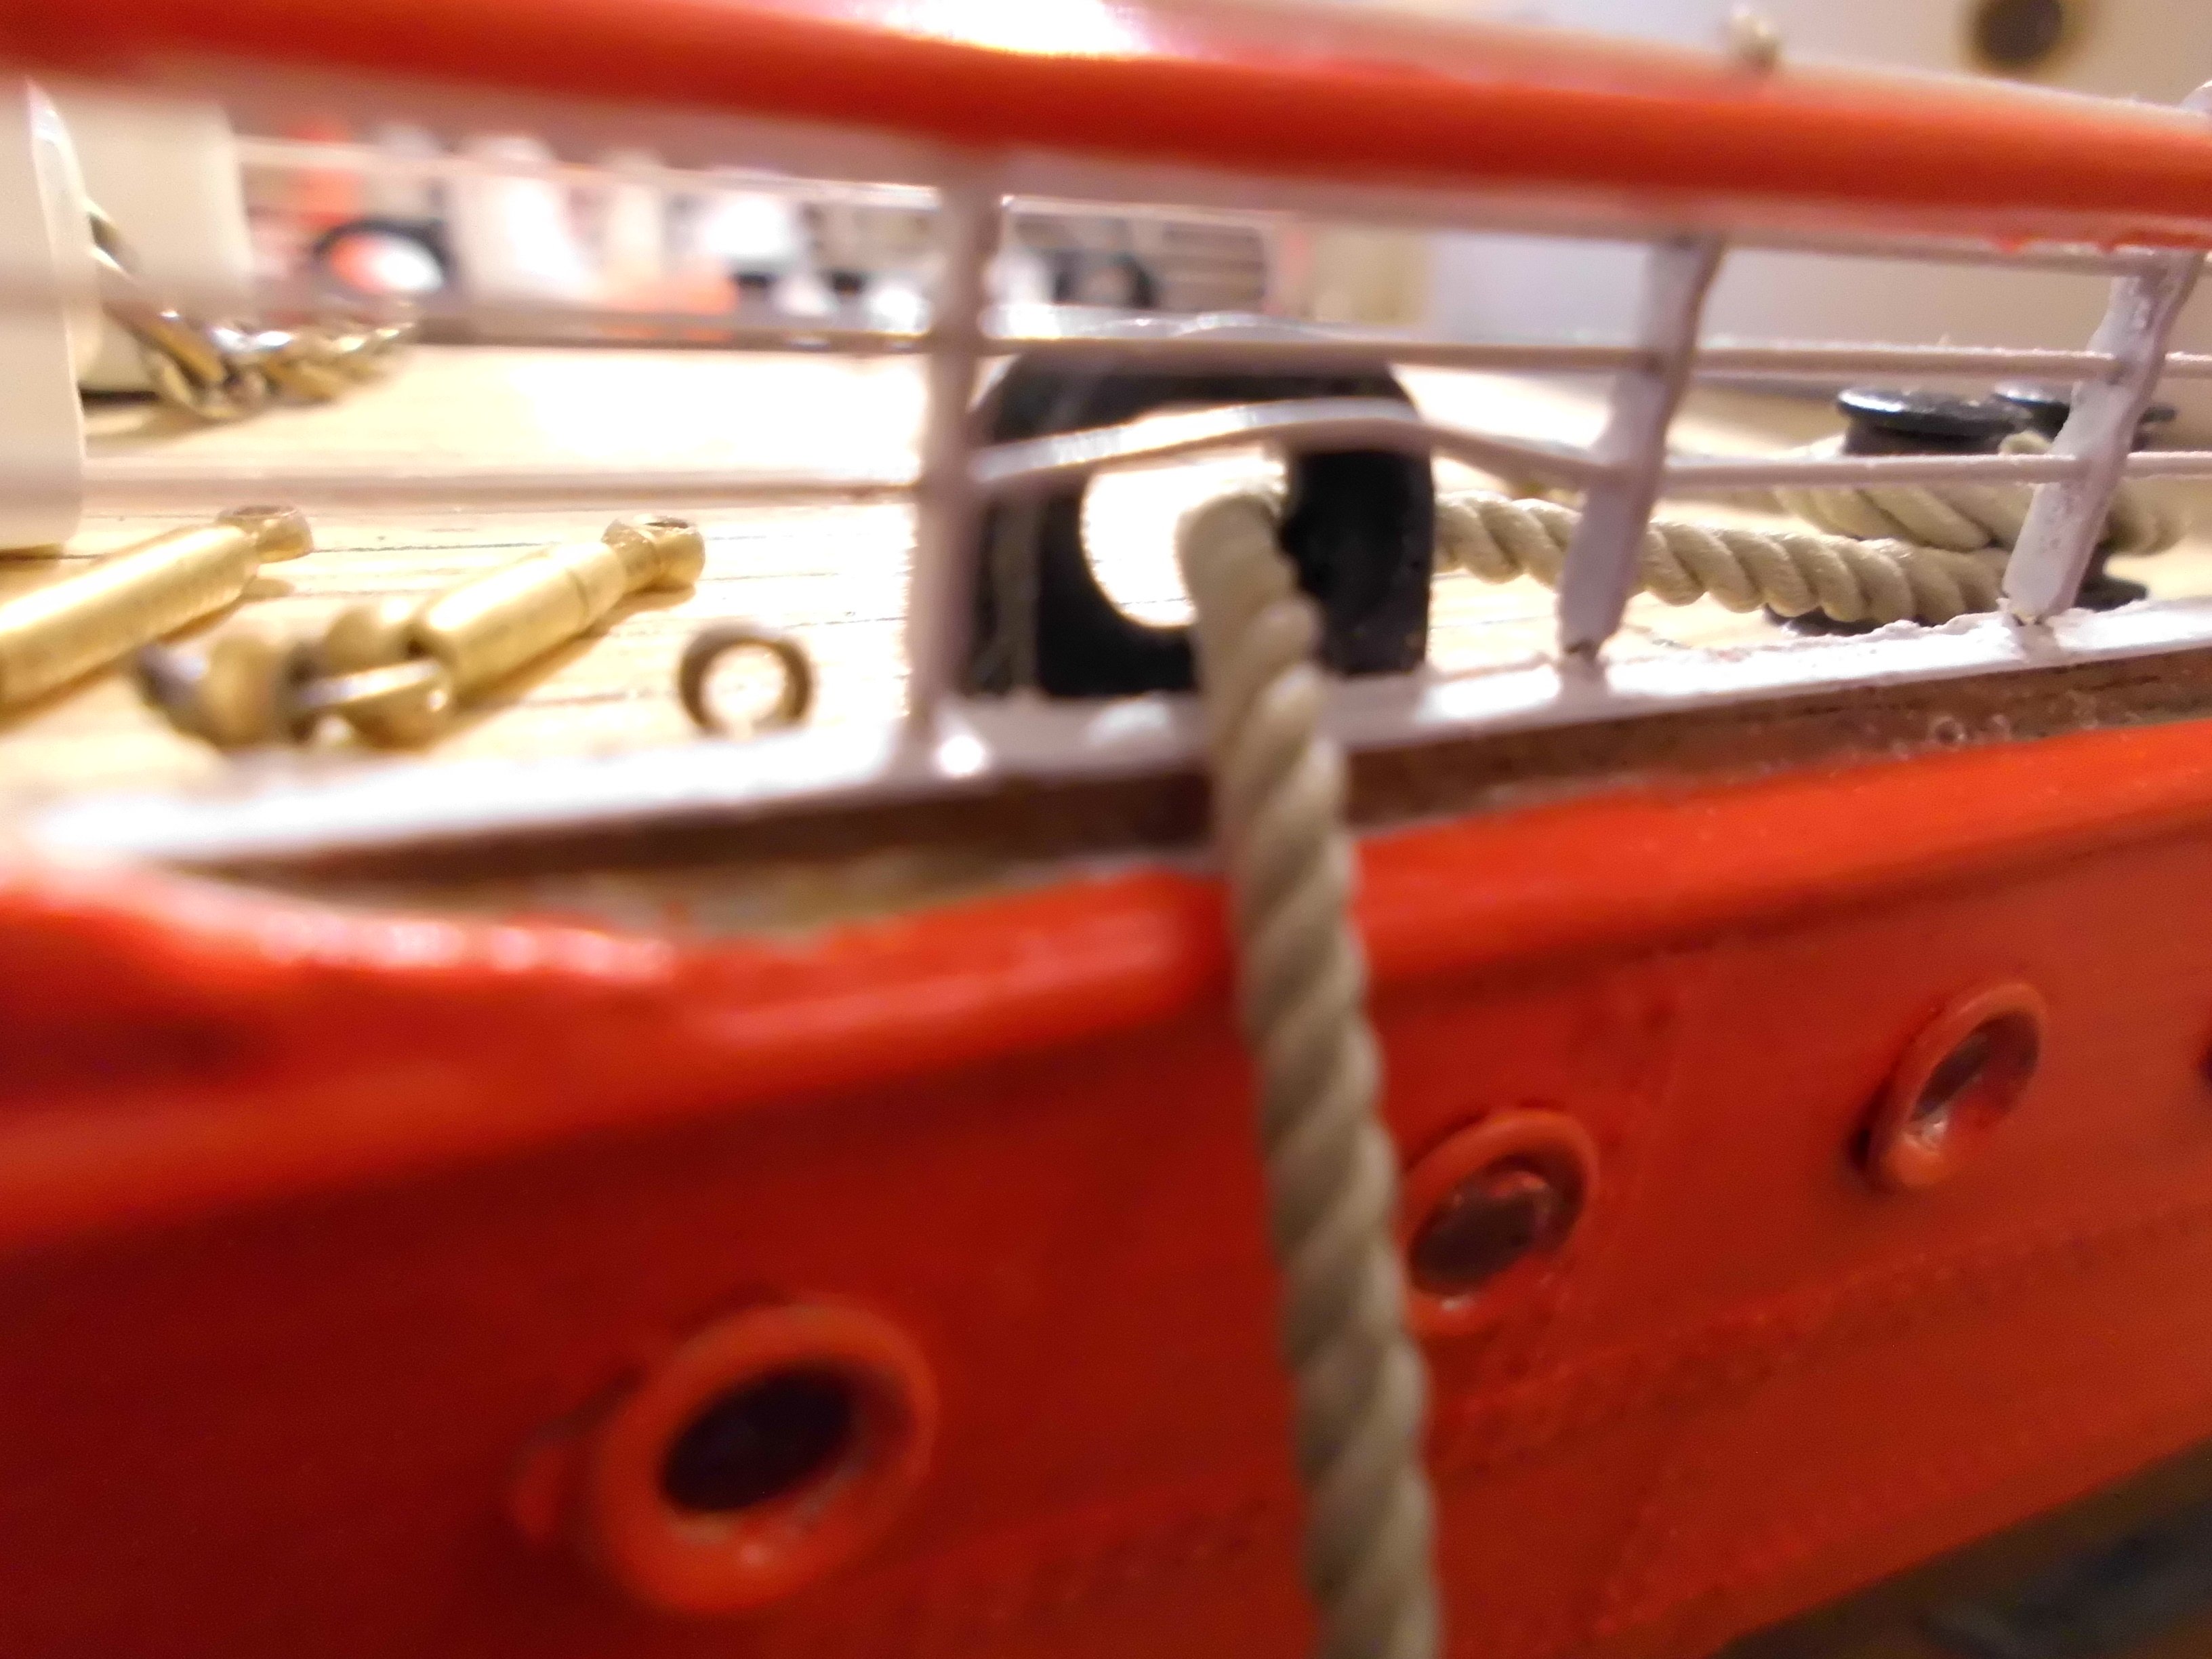
the arrangement for the waistdeck fastenings of the mooring cable


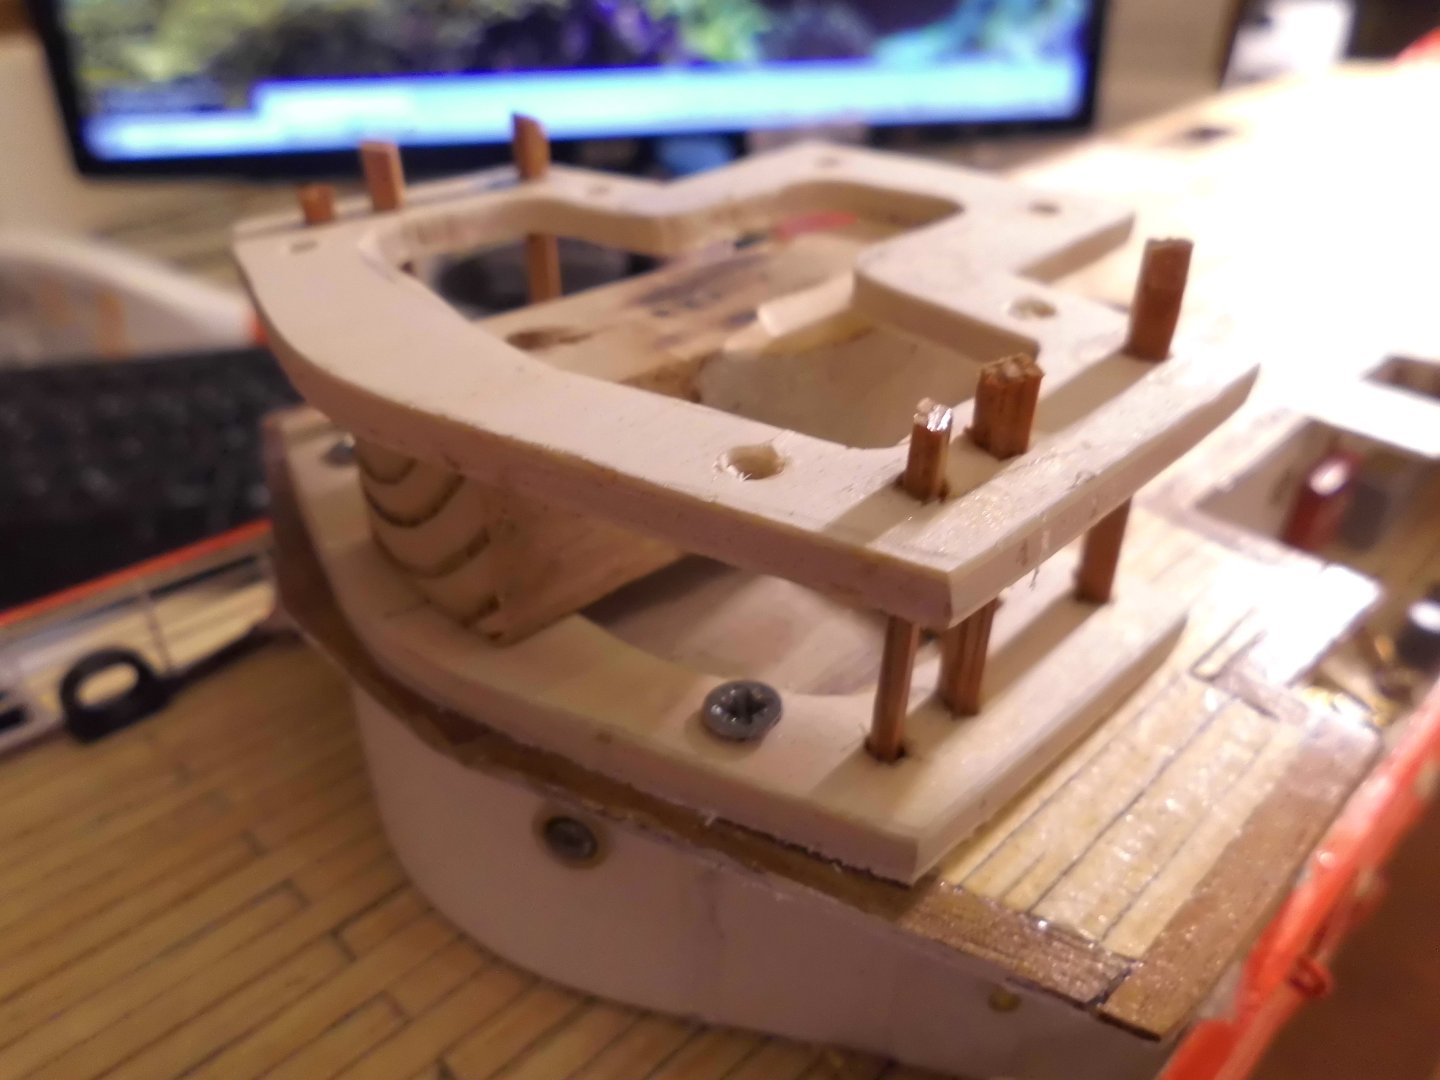
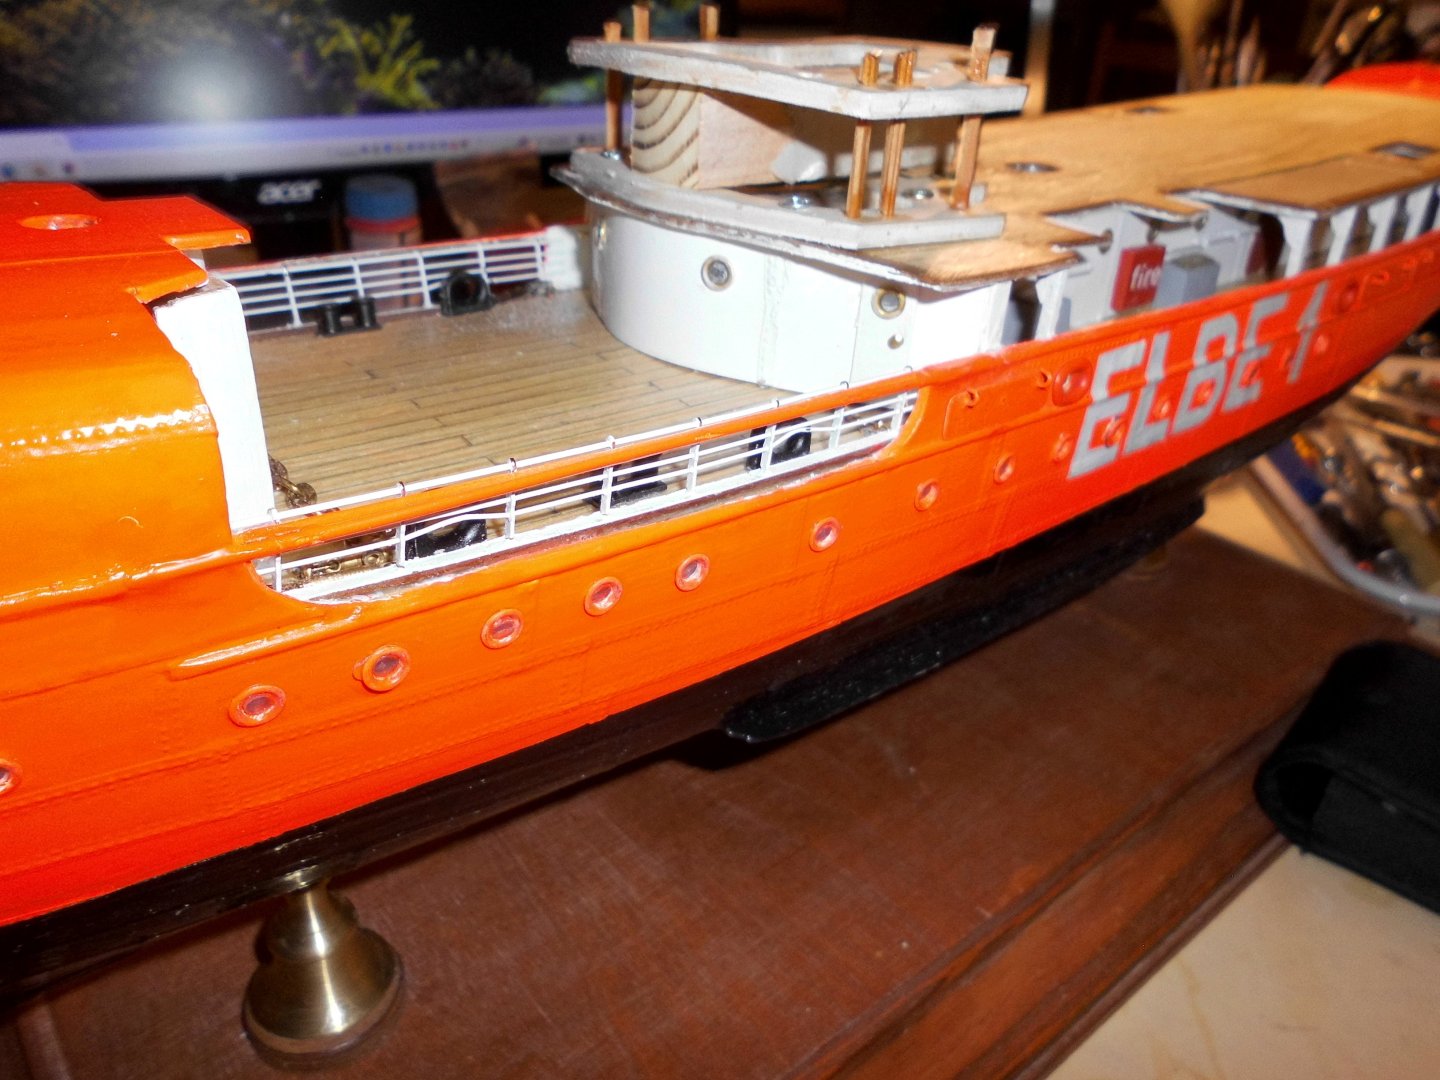
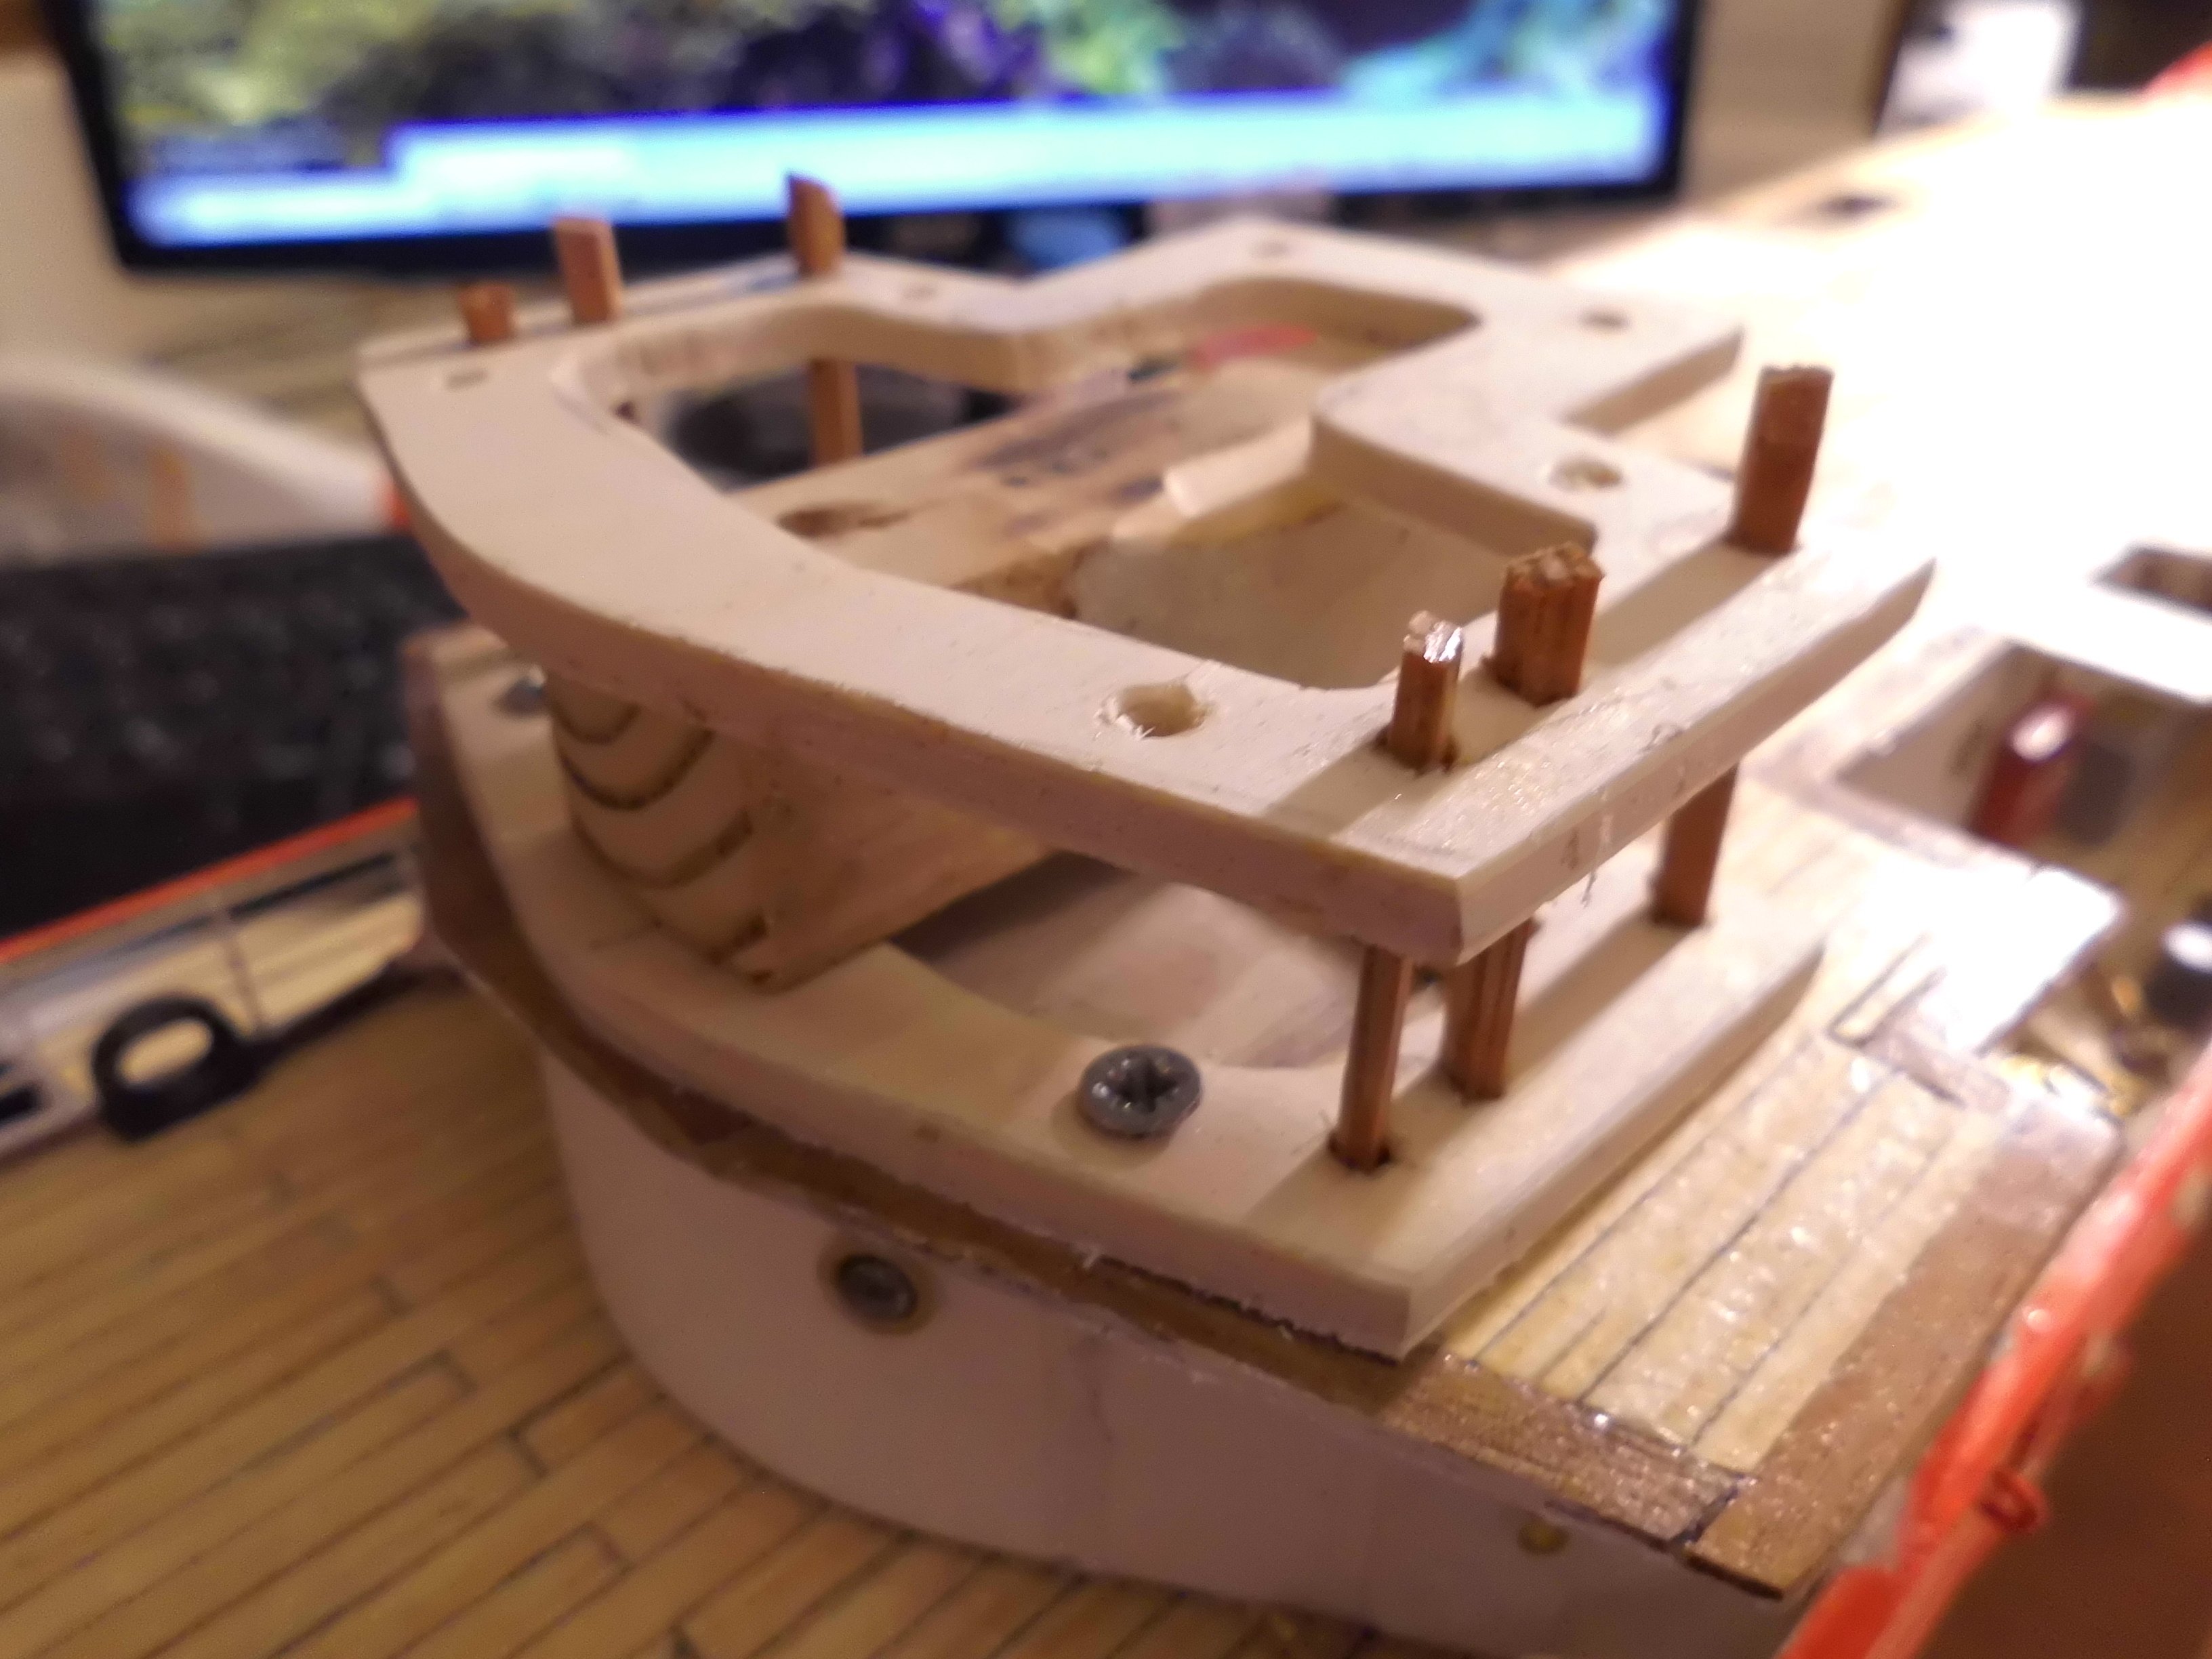
made a little framework for the wheelhouse sides. A wooden spacebar provides for the right height afterwards
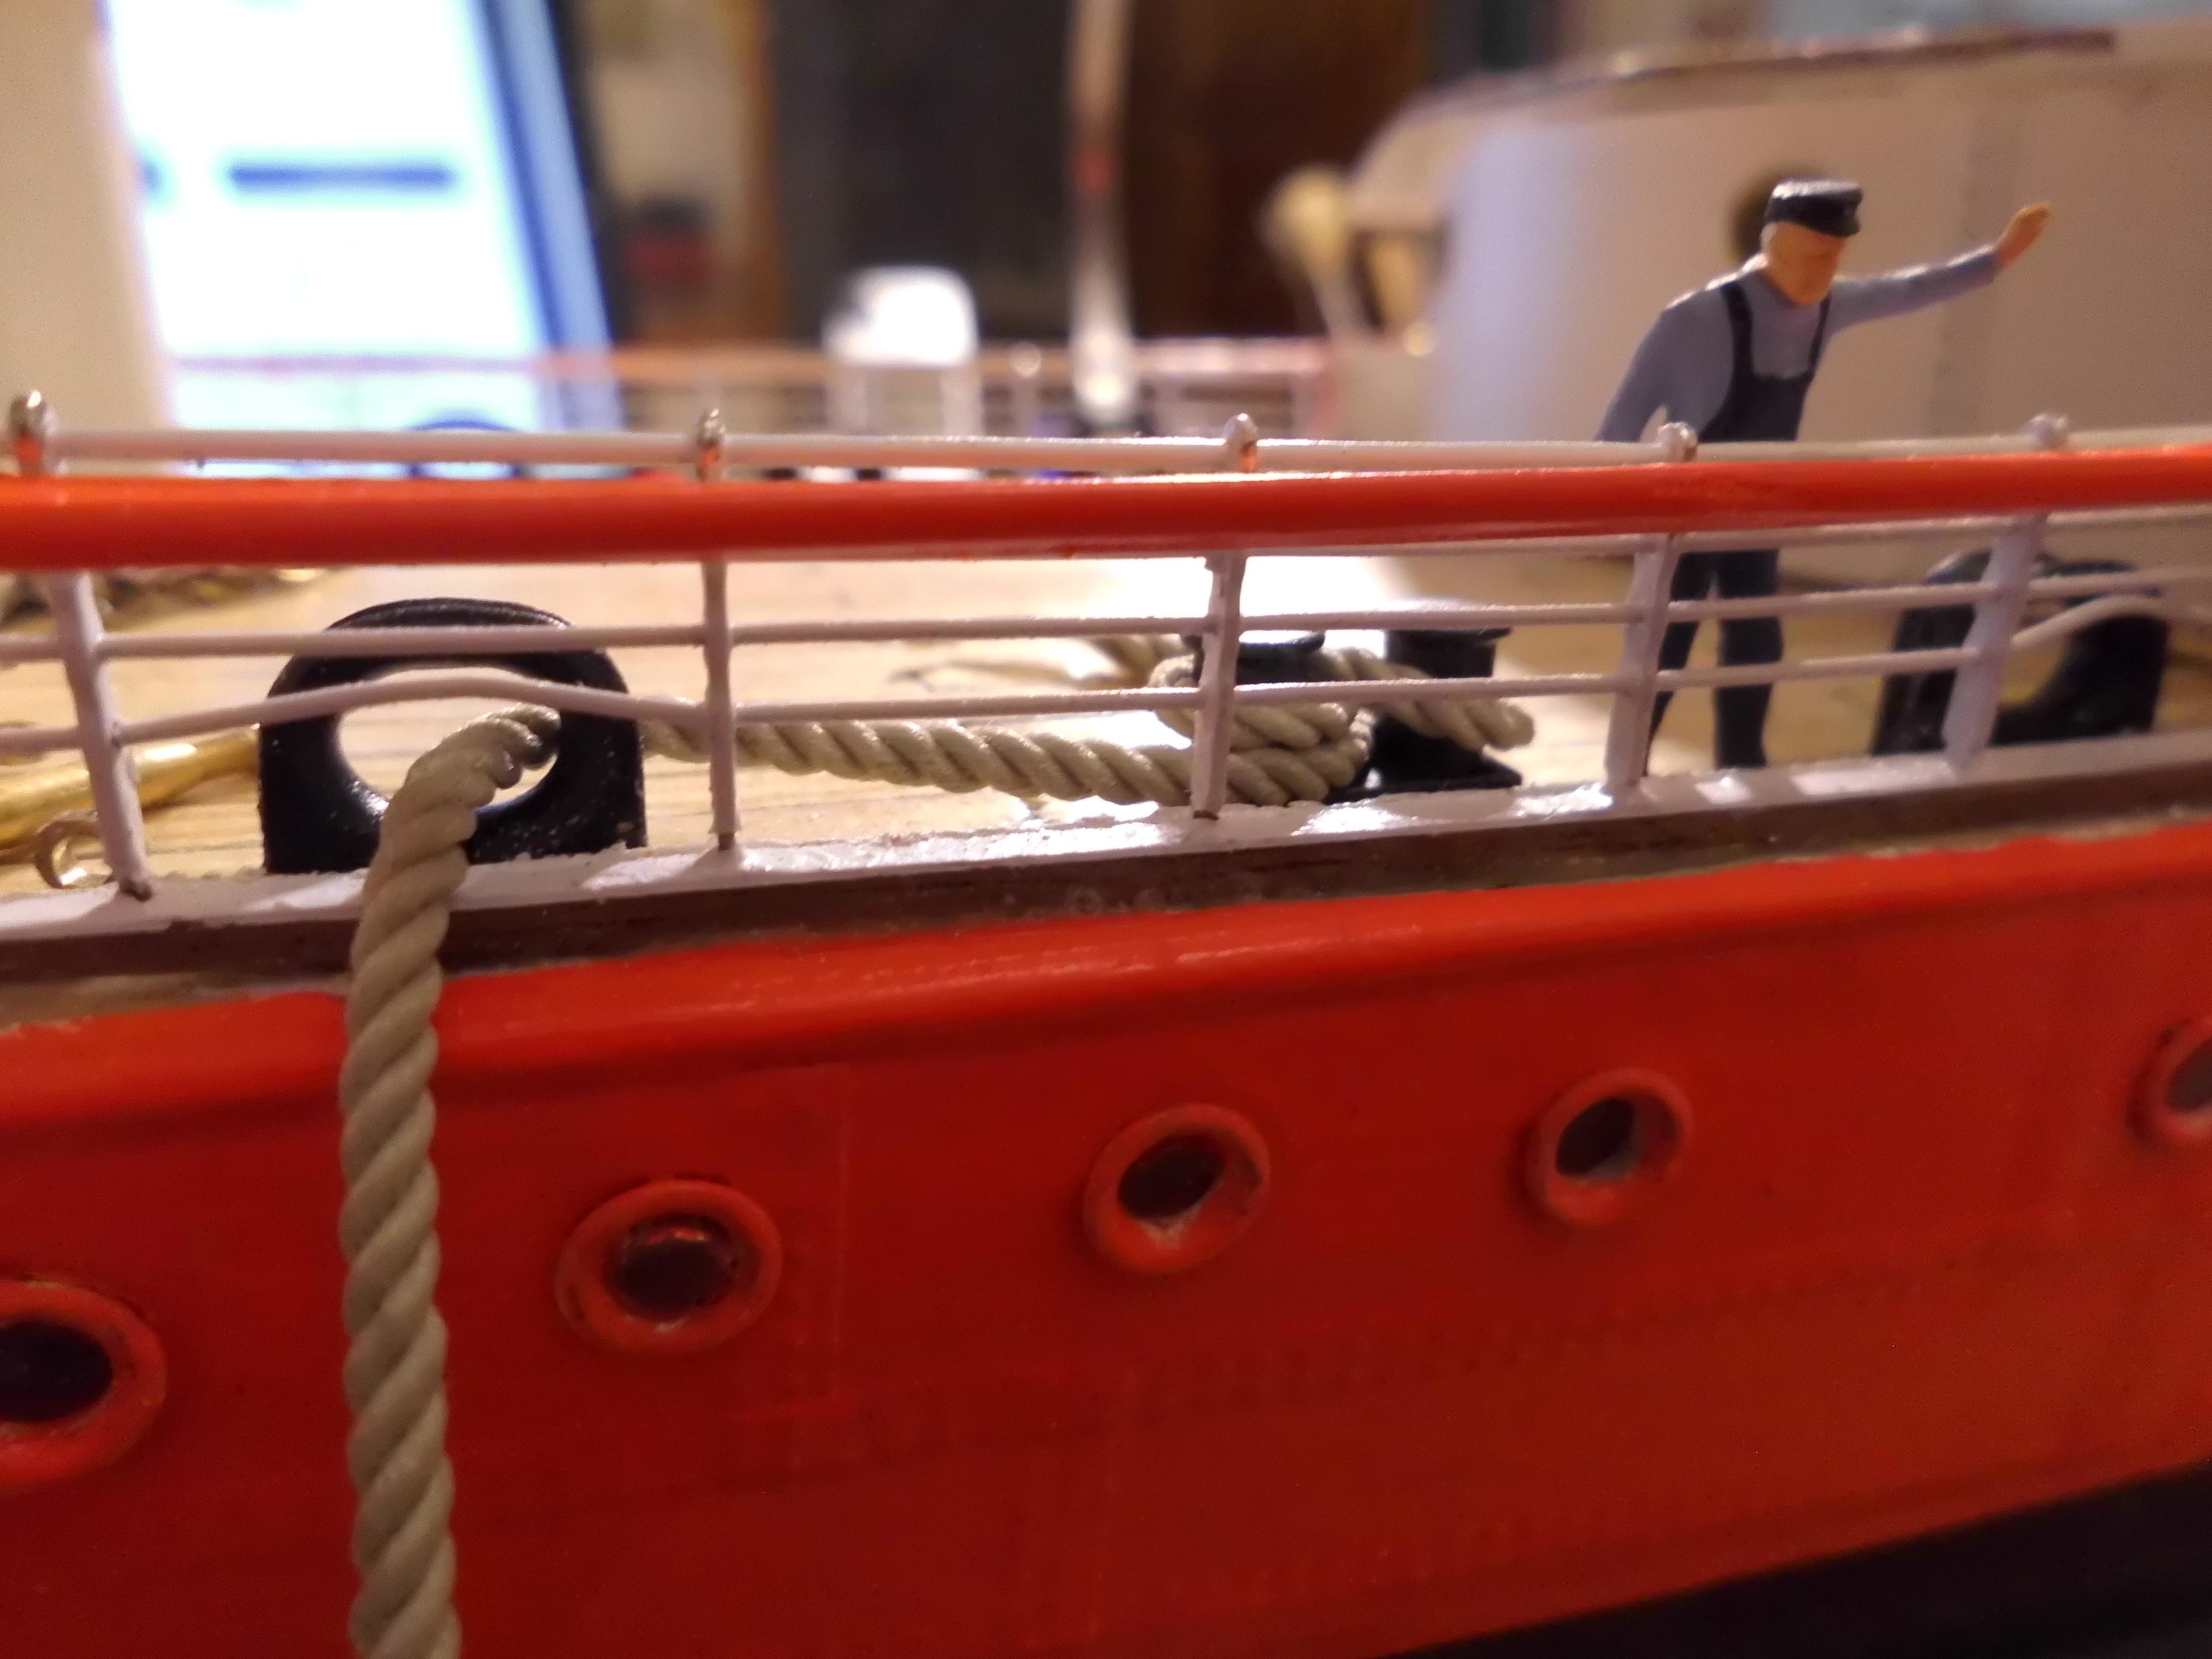
there are panama fairleads to prevent dammage to the railing
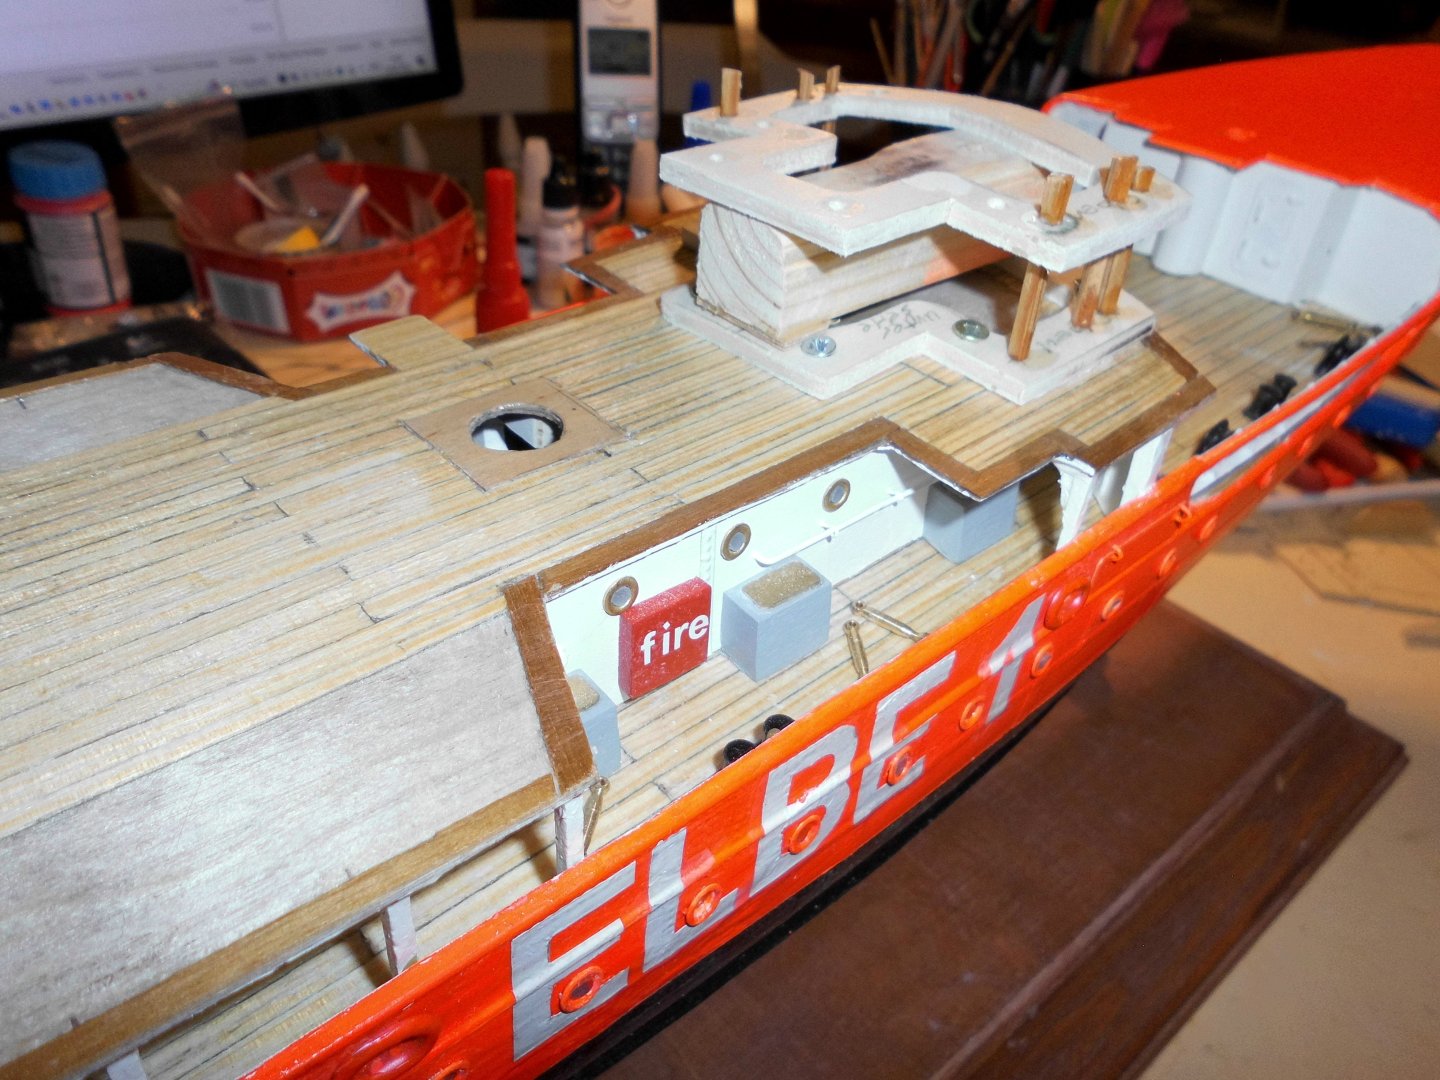
the framework is fastend to the boats deck with screws so that it follows the decks sheer
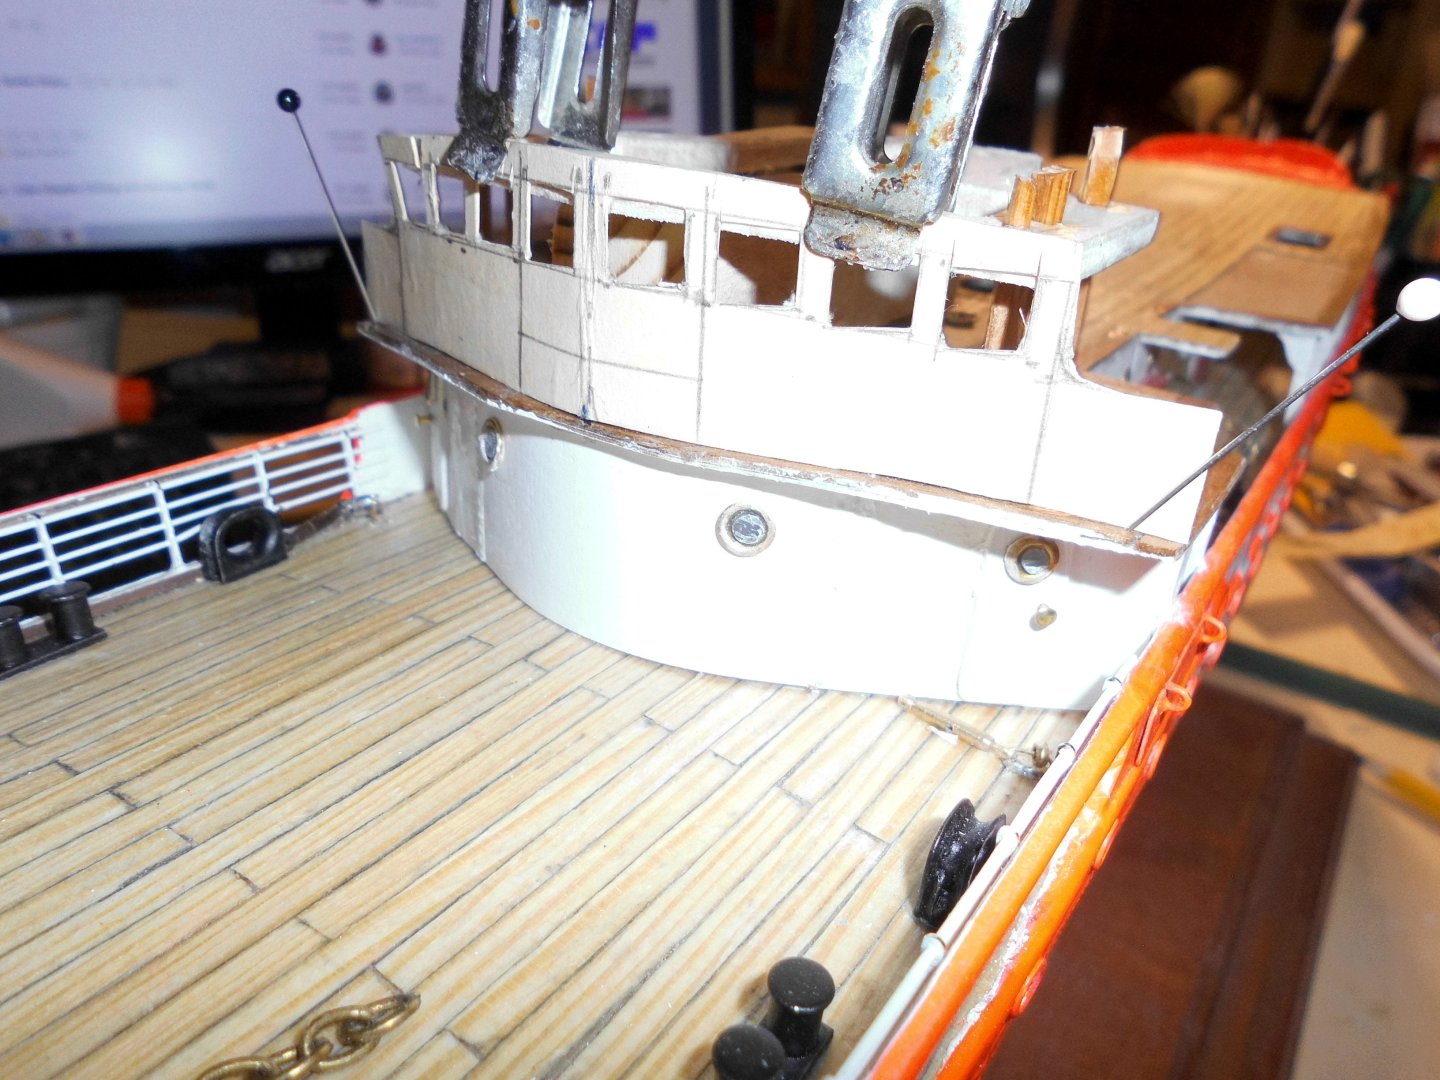
a card template for making the front window front, the other sidewalls will be done likewise

the windowframes will be made from brass square tube, the glassing done later with square extruded semitransparent silicone bar
-
You`re right Veszett,
thanks for your input ....
unfortunately I had no oportunity to vist the real ship yet and take my own photos, so that my orientation comes from other models built by other skilled modelers. I`m pleased with my own version.
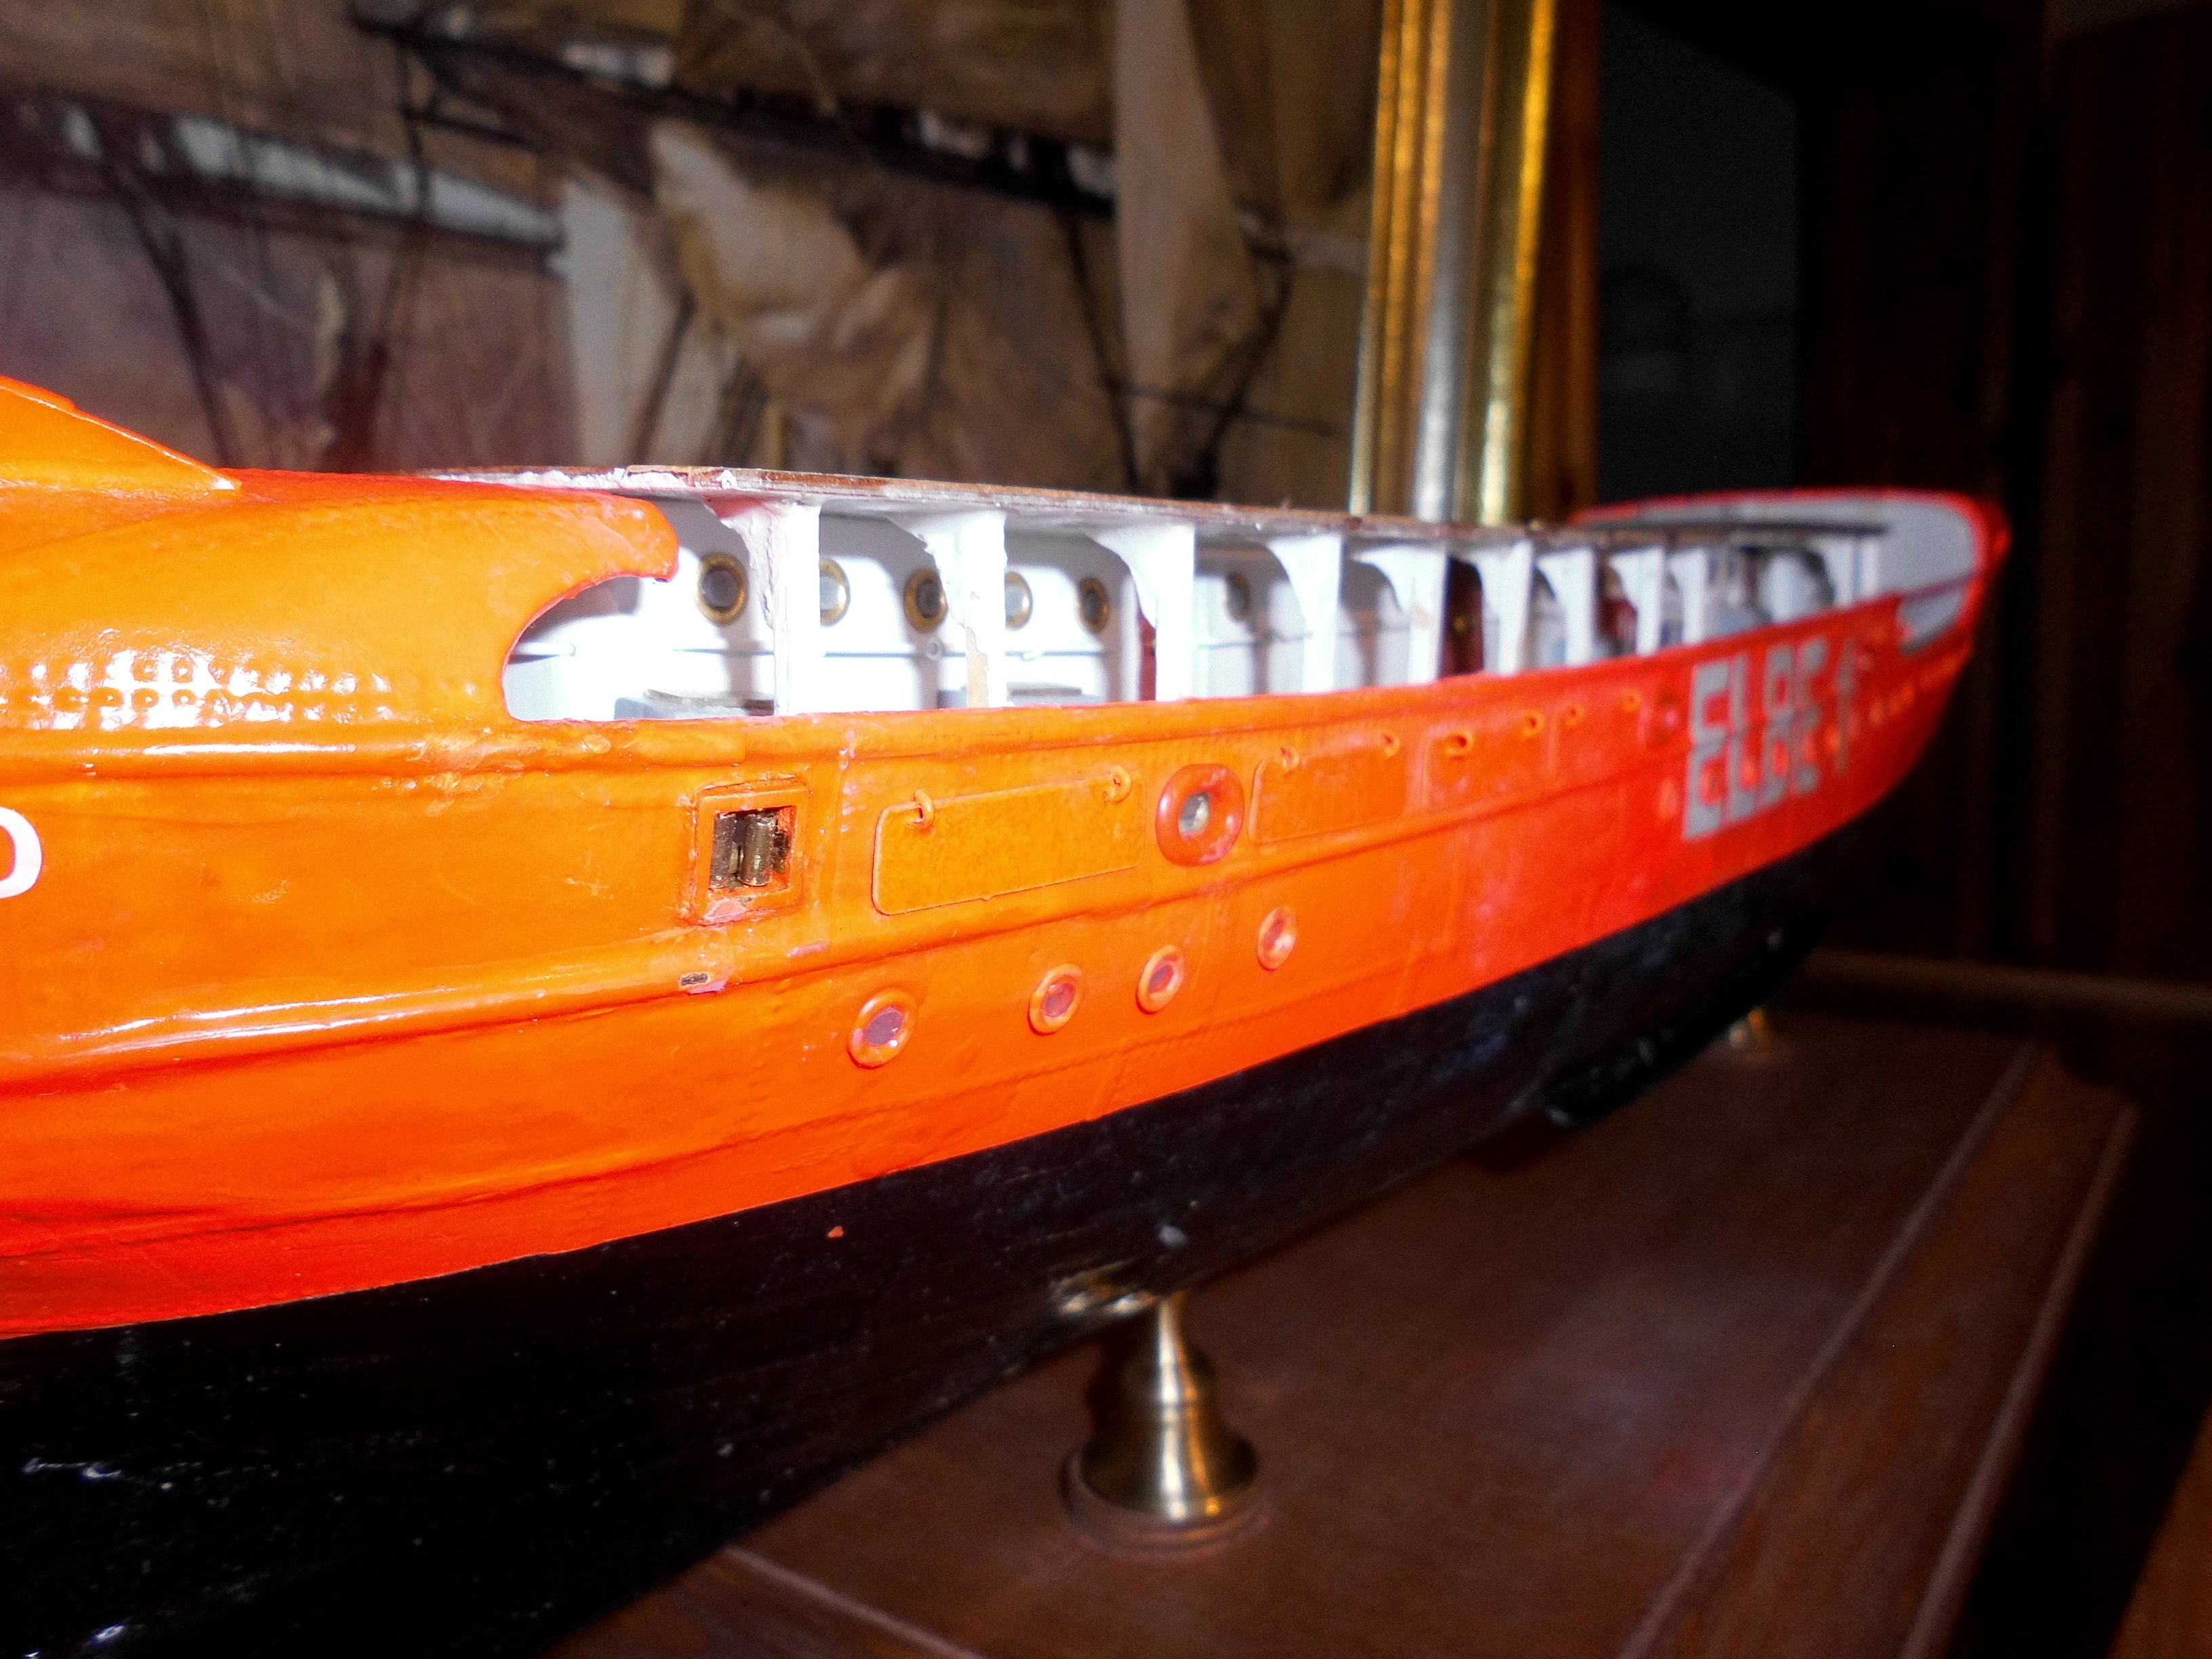
There is a white skirt outside around the decks length, that would incorporate the decks hight with the aft section, in fact it would narrow the sight on to the decks house from the side
I`m including 3 pics from other well built models from master builders
Nils
.jpg.8ee17a78a06b087c4f55803c8cec5926.jpg)
this is a model of Horst Henryschowski (the deck is laying on the aft section
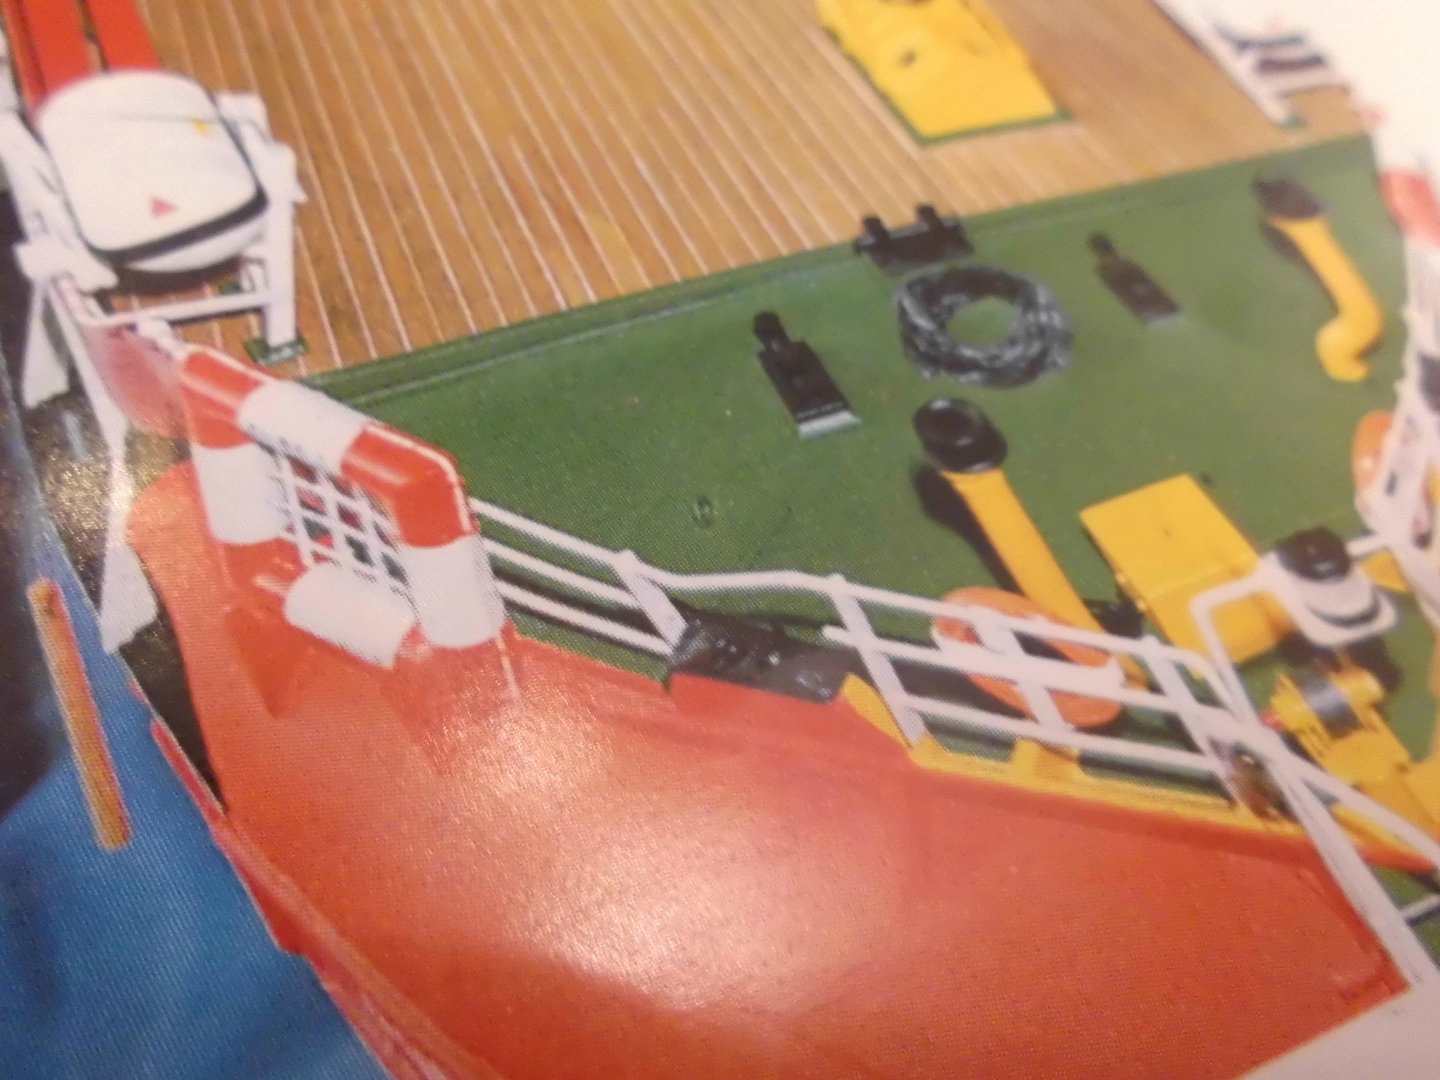
model of Helmut Thomas, which is my favorite benchmark
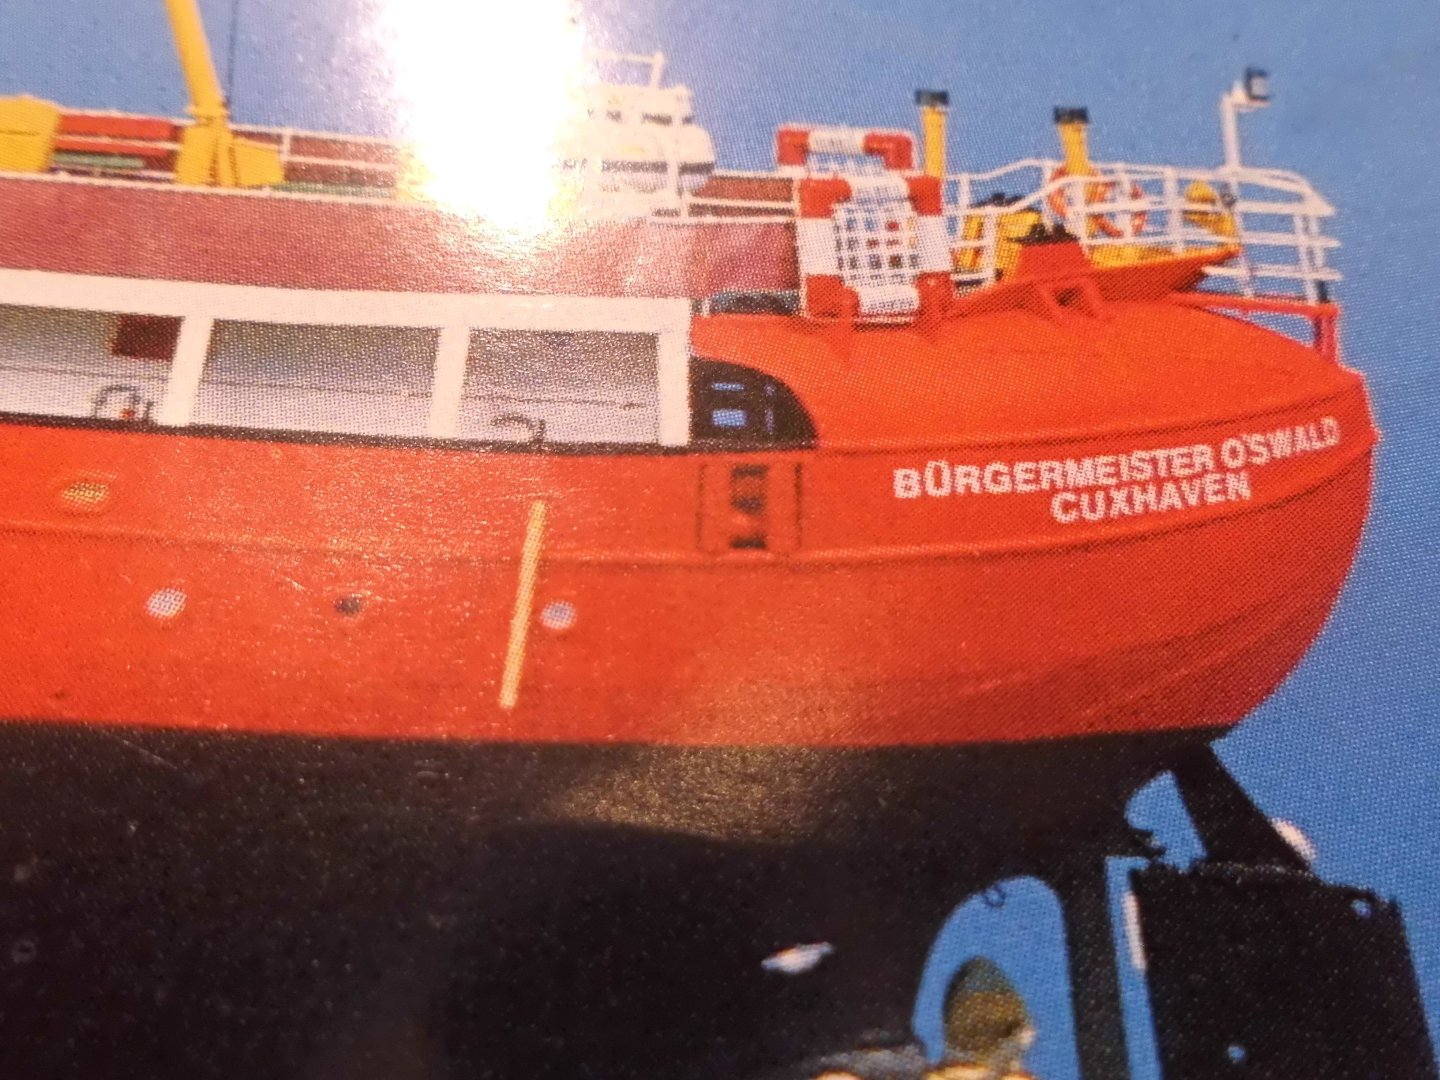
Model of Helmut Thomas
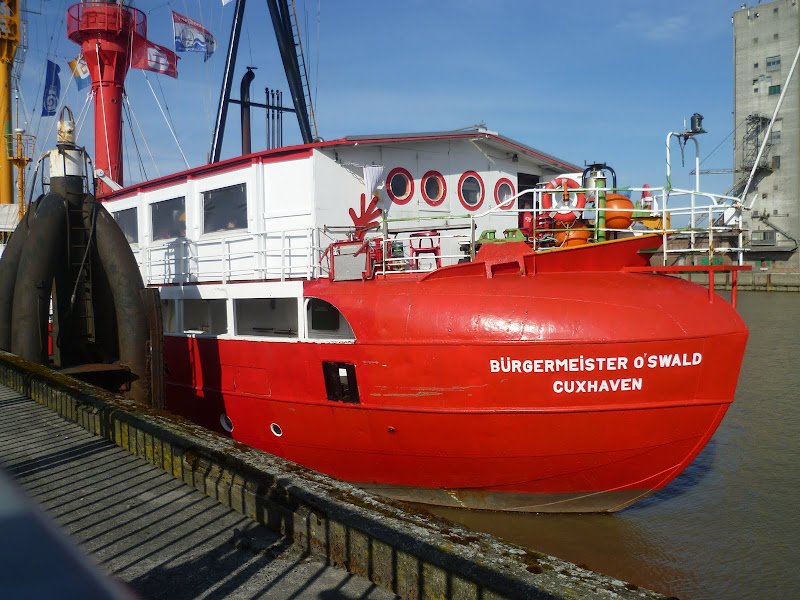
the real thing moored at Cuxhaven. The white tent on top is for visiting guests only, since the ship is out of duty
- GrandpaPhil, Valeriy V, mtaylor and 4 others
-
7
-
16 hours ago, empathry said:
Hi there ! I remain highly favourable to the "ancient traditional style" workmanship, sculpting the pearwood with one's hands, just as you do Haiiaphnk !
Realizing a model is a true adventure with high (enlighted) moment ... and also more difficult moments ; and the new generations prefer to throw away those (supposed) difficult moments by using computers.
Therefore and for the fun (because I don't wish start a combat), I wish to post hereunder the realizations of some vessels made by AI programmed softwares ... Please feel free to comment !
 16 hours ago, empathry said:
Hi there ! I remain highly favourable to the "ancient traditional style" workmanship, sculpting the pearwood with one's hands, just as you do Haiiaphnk !
Realizing a model is a true adventure with high (enlighted) moment ... and also more difficult moments ; and the new generations prefer to throw away those (supposed) difficult moments by using computers.
Therefore and for the fun (because I don't wish start a combat), I wish to post hereunder the realizations of some vessels made by AI programmed softwares ... Please feel free to comment !

Hi HALLPHNK,
nice paintings, but in the first pic its the first time I see a squarerrigger sailing backwards and the top flags are in wind direction
Nils
-
Thank you Rick,
I am pleased that you are following and that you like it.
Yesterday I mounted the boatdeck supports on stb. side, it will take some minor paint touch up, also the underside of the deck at the glueing points after also the port side supports are on
Nils

- Glen McGuire, mikegr, Siggi52 and 7 others
-
10
-
Many thanks Uwe and John,
for your words
Nils
- Canute, mtaylor, FriedClams and 1 other
-
4
-
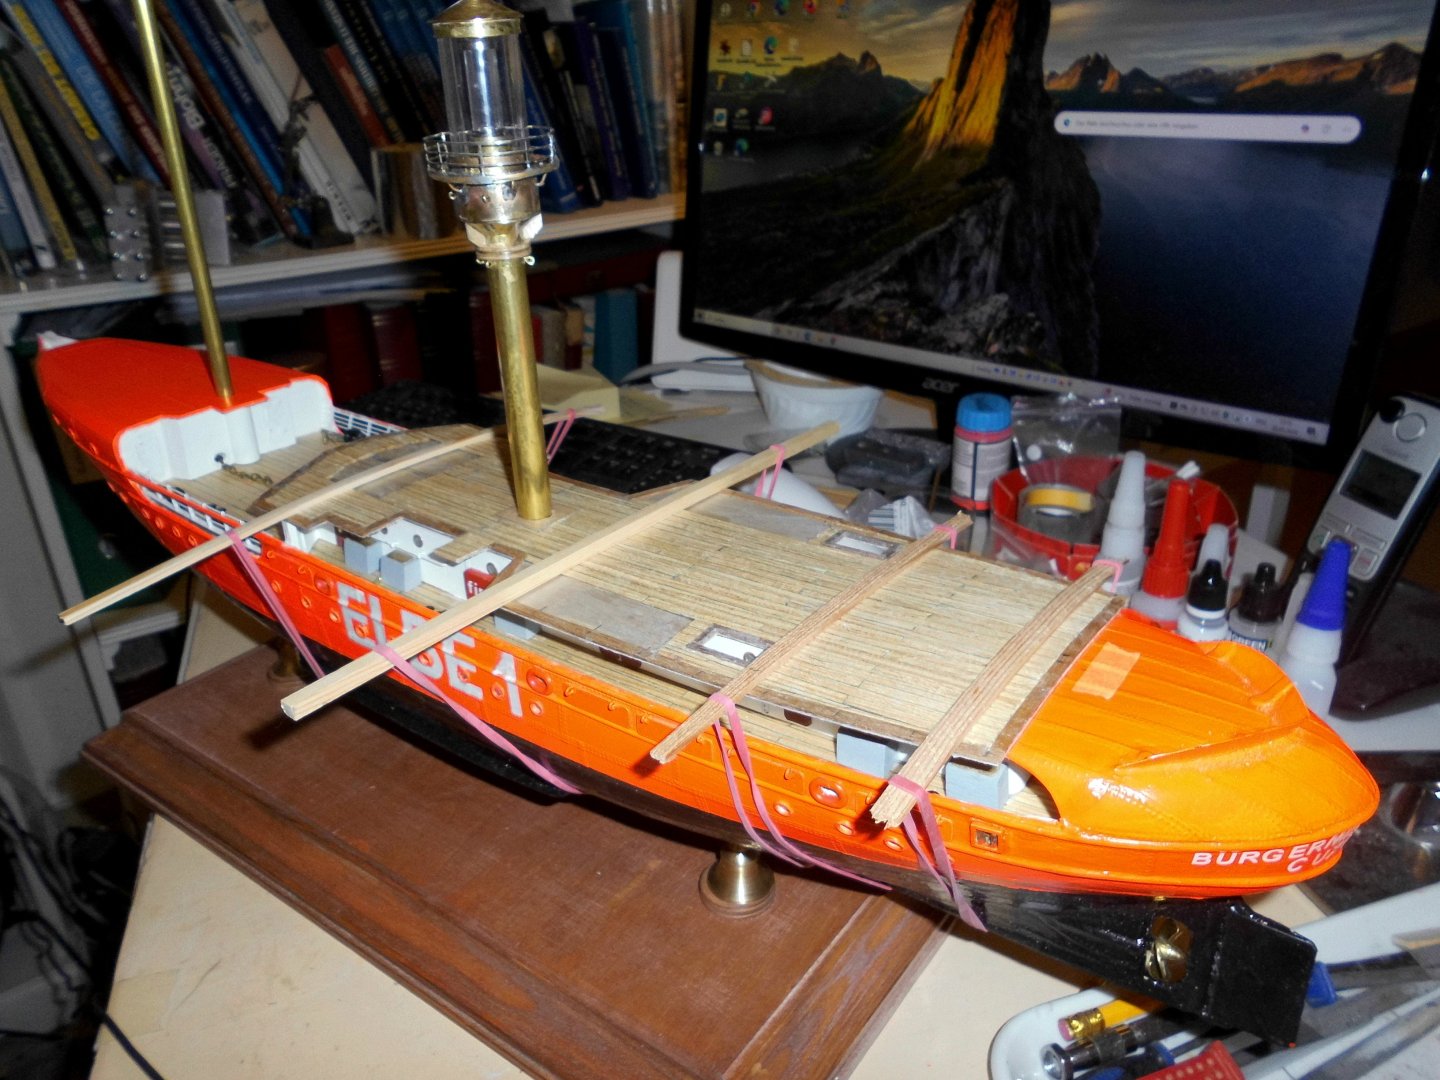
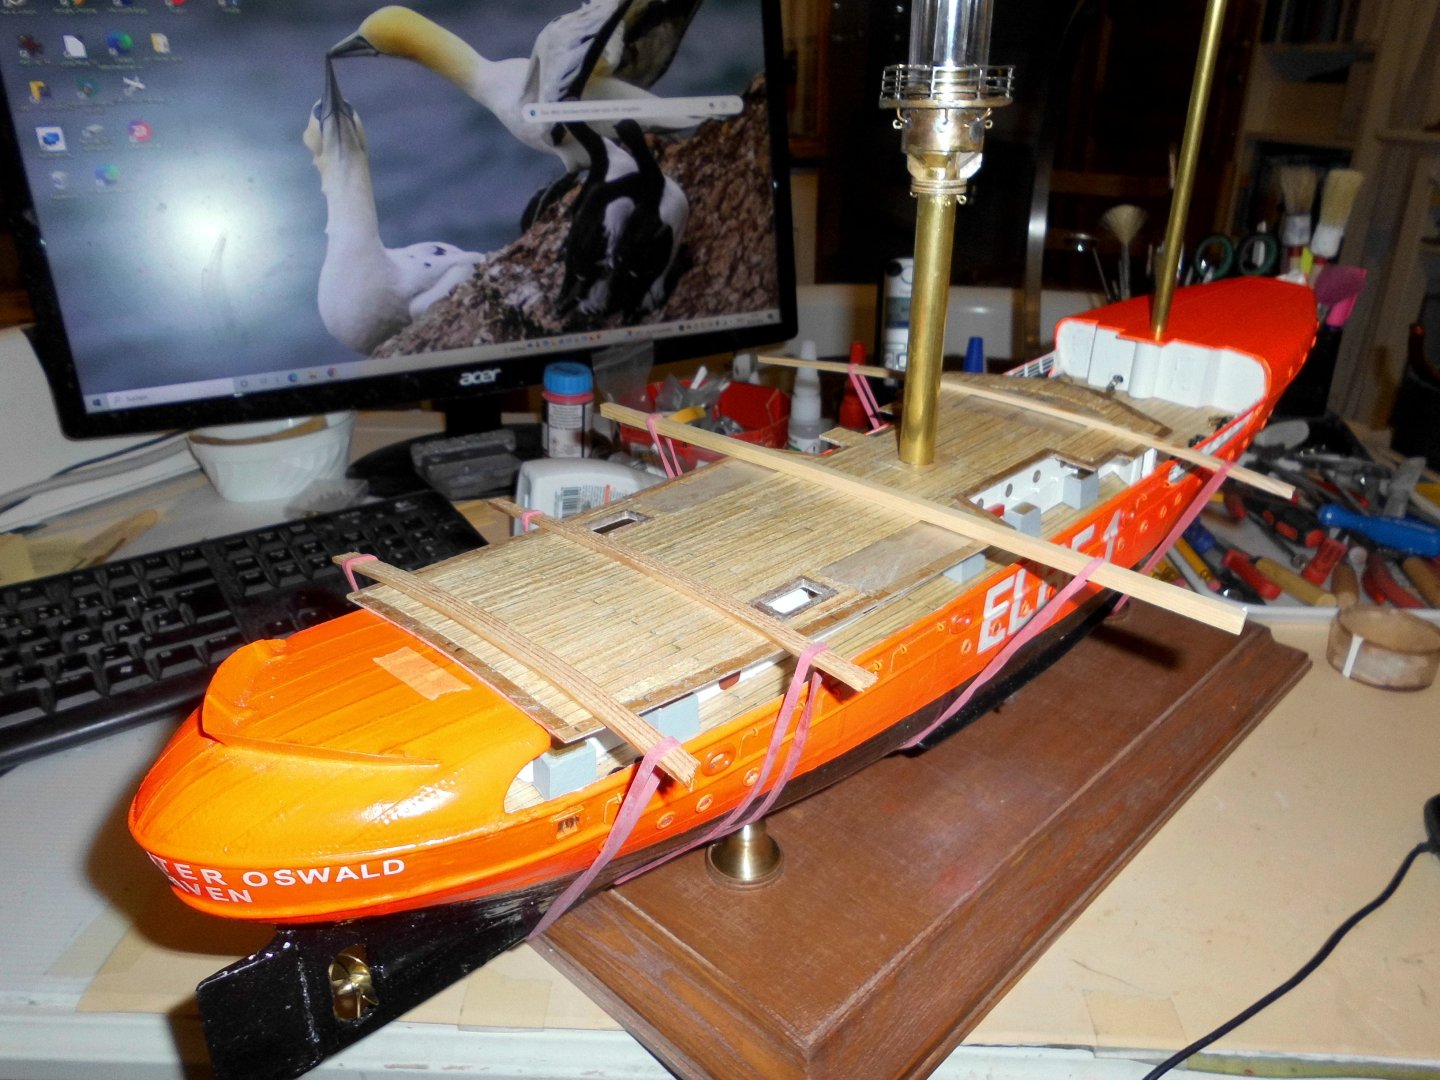
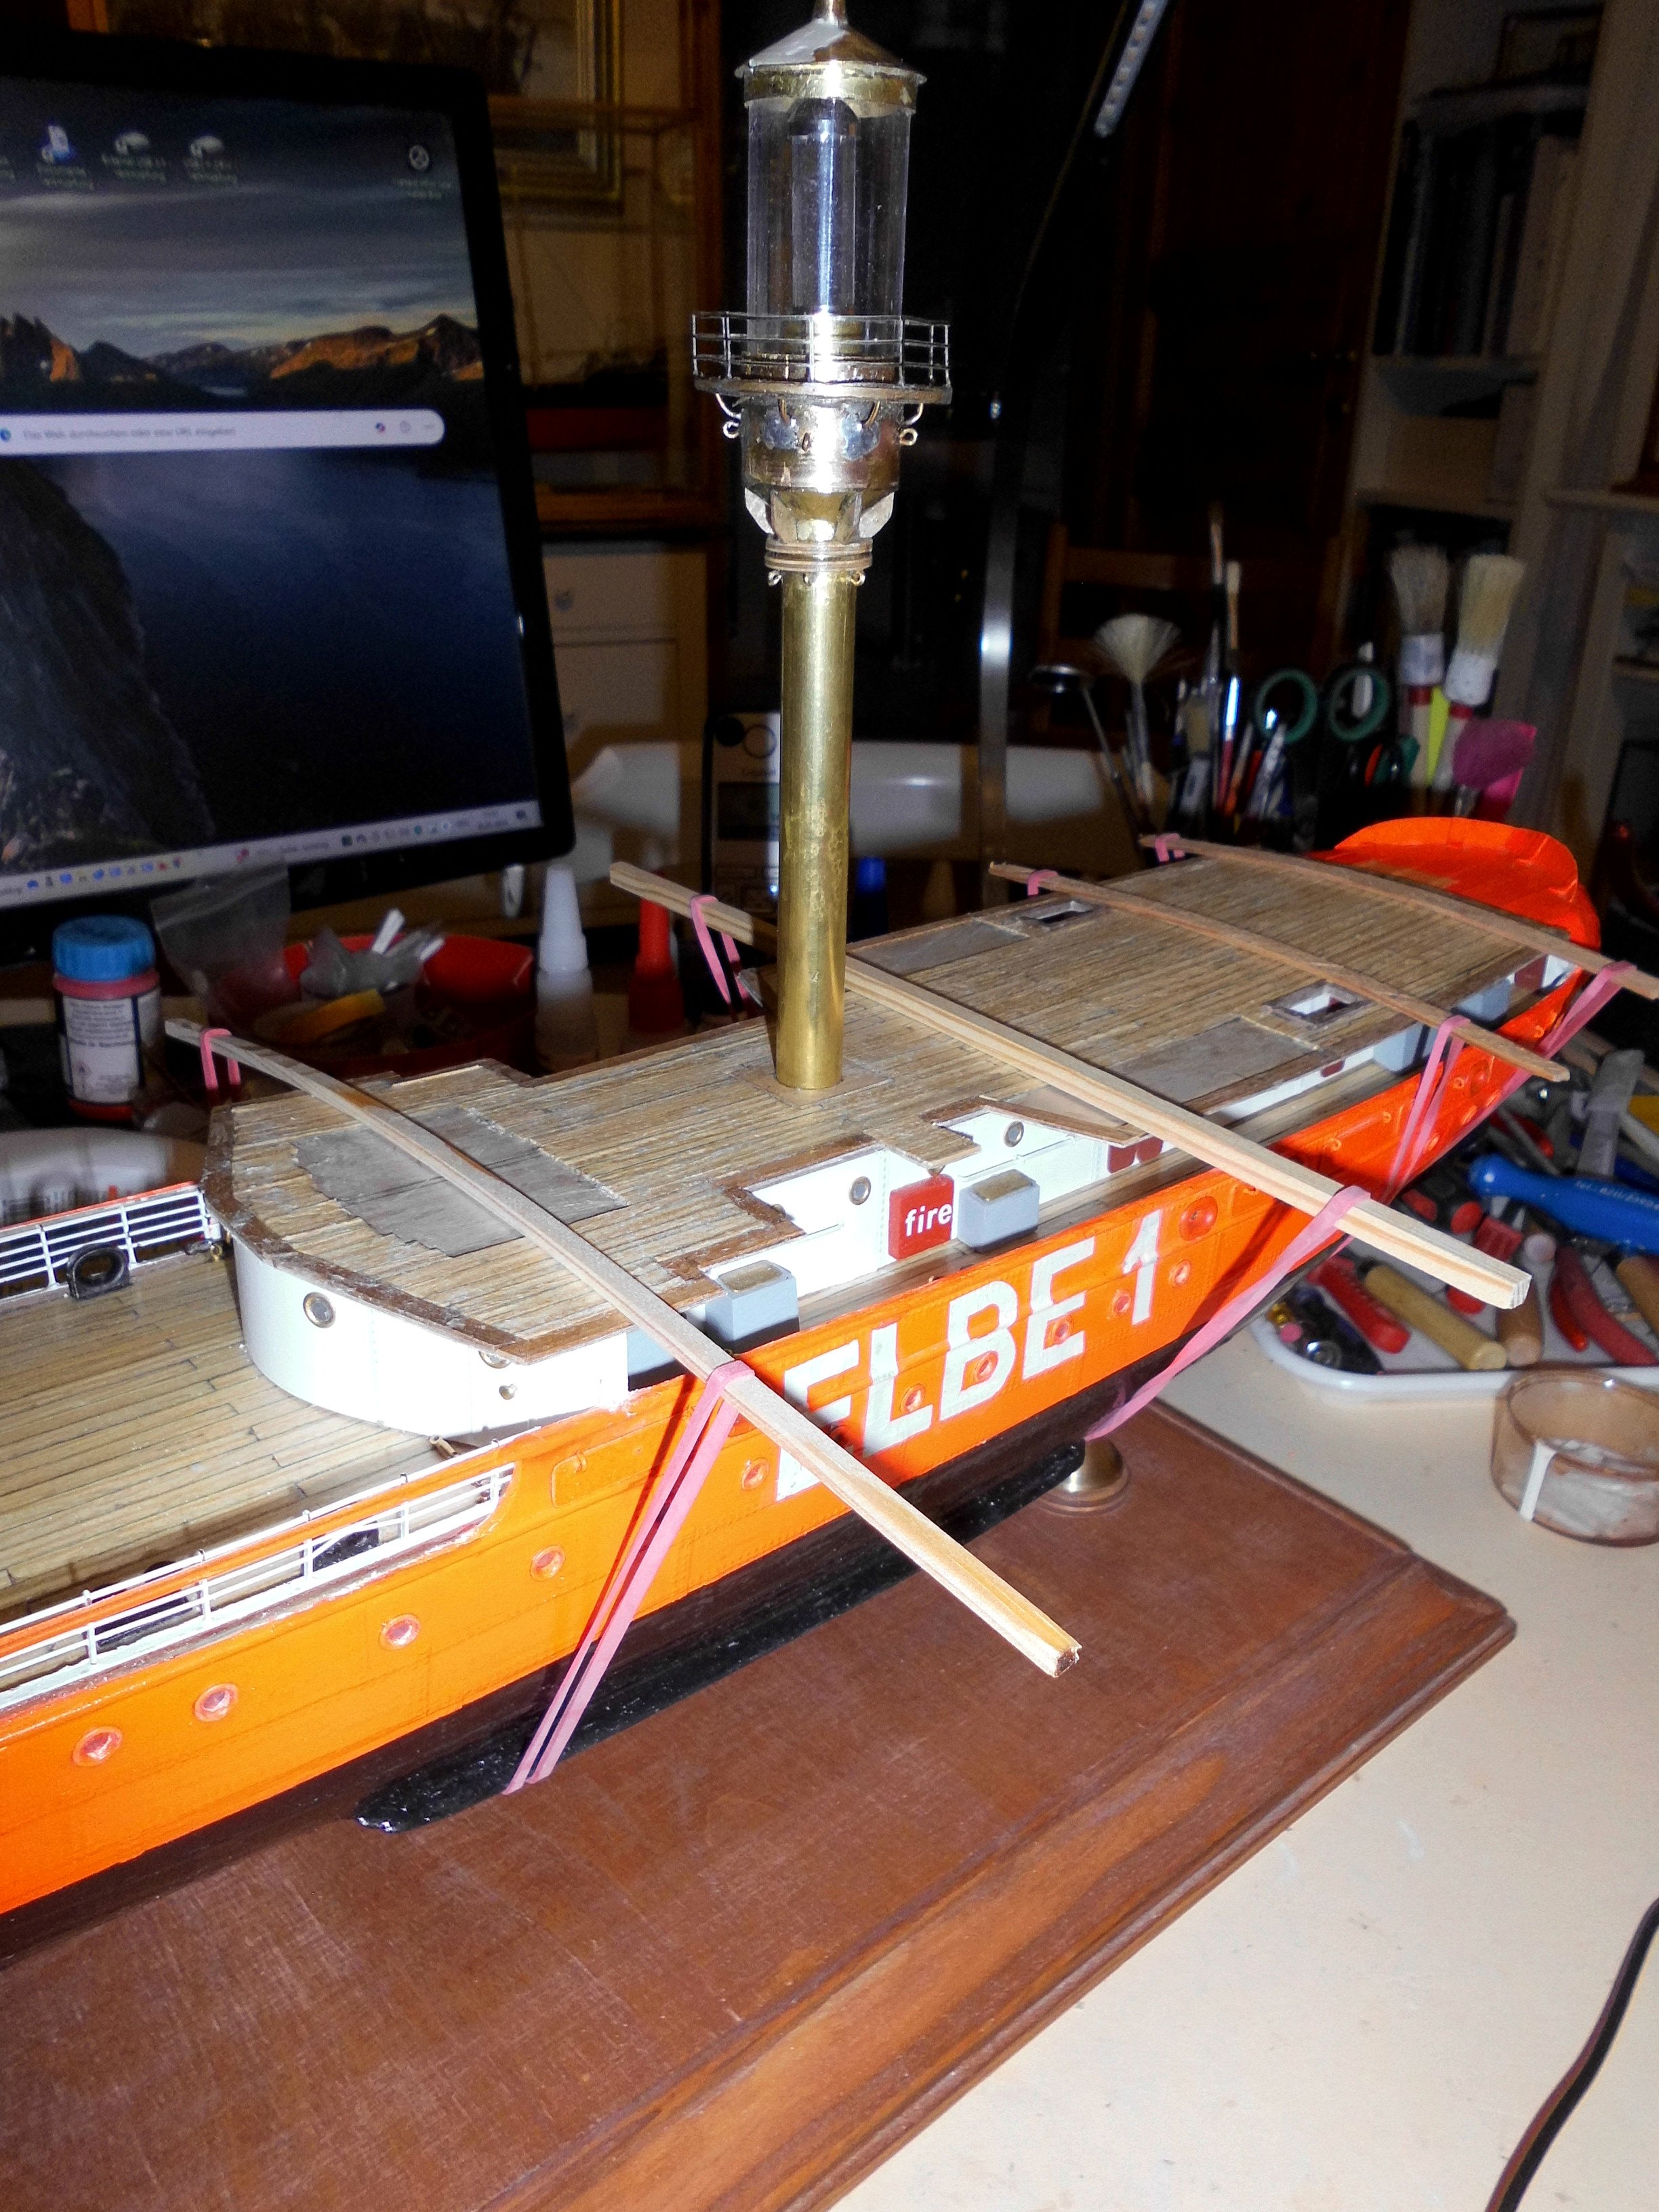
Thank you Keith,
yes, I bought a bunch of longer and broader rubber bands some time ago and now they come good to use.
The light mast (till unfinished) was one of the first parts I started with. There will be a ladder from boats deck to the light platform later on. That will be quite tricky to solder ....
Today I closed the long deckhouse with the deck on it, and first made a pic of the last possible look into the hull. The moment the deck was glued on I realized that the cable from the hall anchor was only prefixed with a tape, so I have to find a solution for fixing the cable permanently, because I had unfortunately forgpotten to do so
Nils
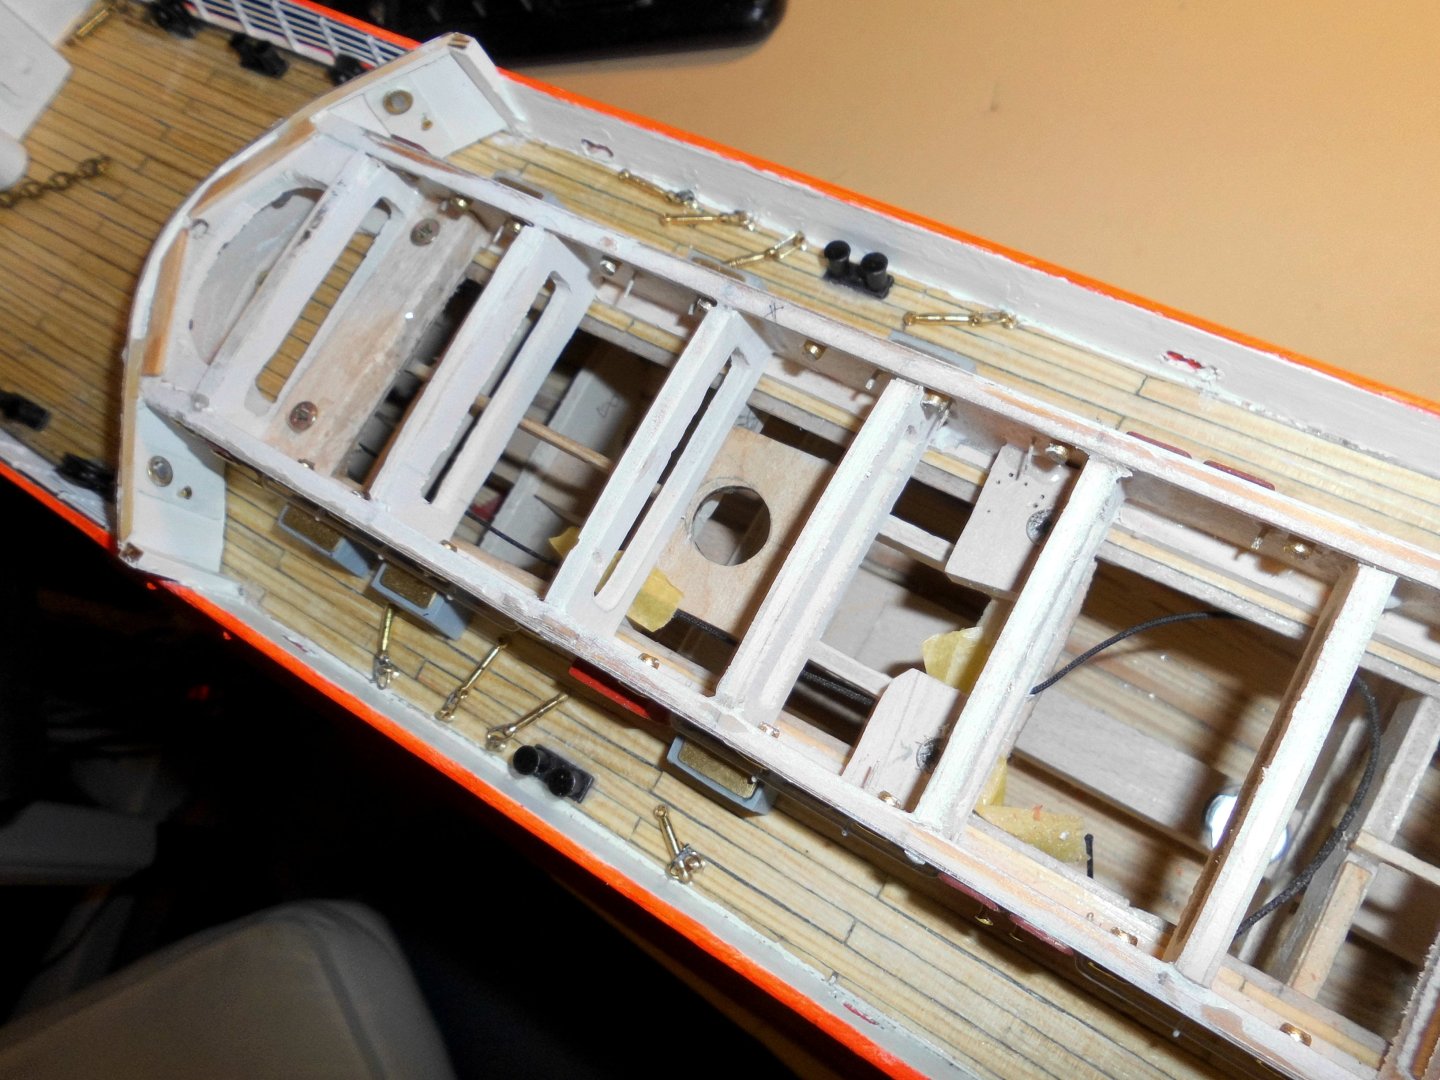
last look into the hull. here one can see the cable I had forgotten to tie to the frames or somewhere else.
Also the turnbuckles can be seen. Bollards and Panama fairleads are also mounted on foredeck and along the long deckhouse
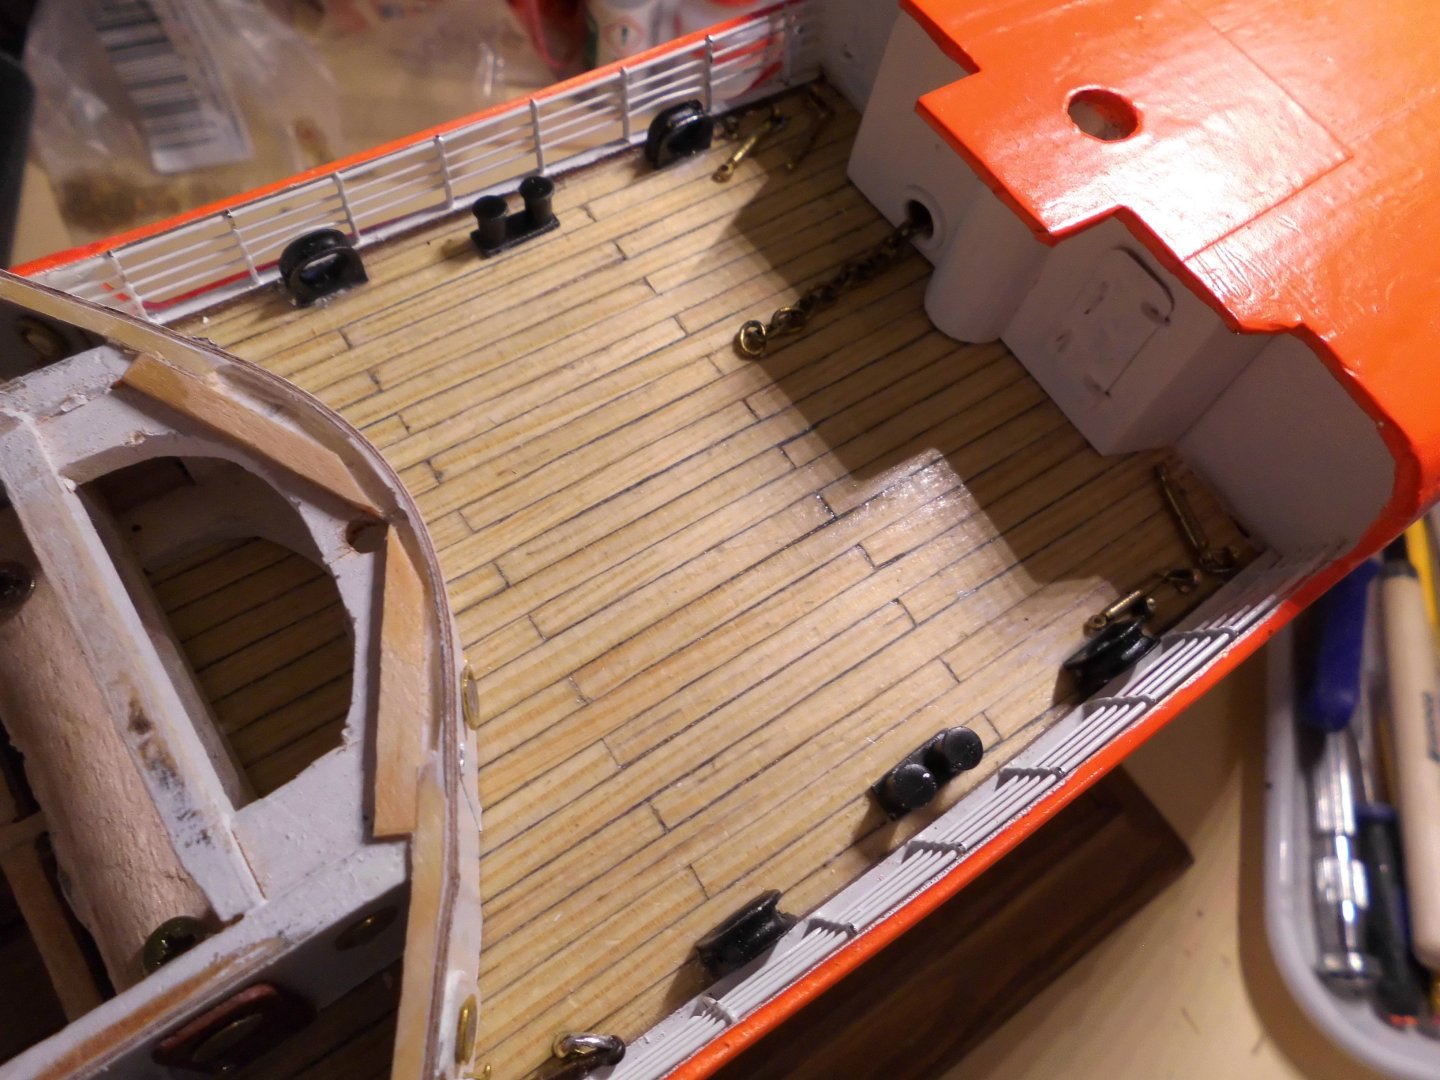
the chain end (of mushroom anchor) coming from the front bulkhead (on deck) is going to be fastened to the spring loaded buffer element
the underside of the boatsdeck is painted except (taped off ) for spaces where the supports will be fixed and the deck to be glued on to the superstrcture below
-
Update
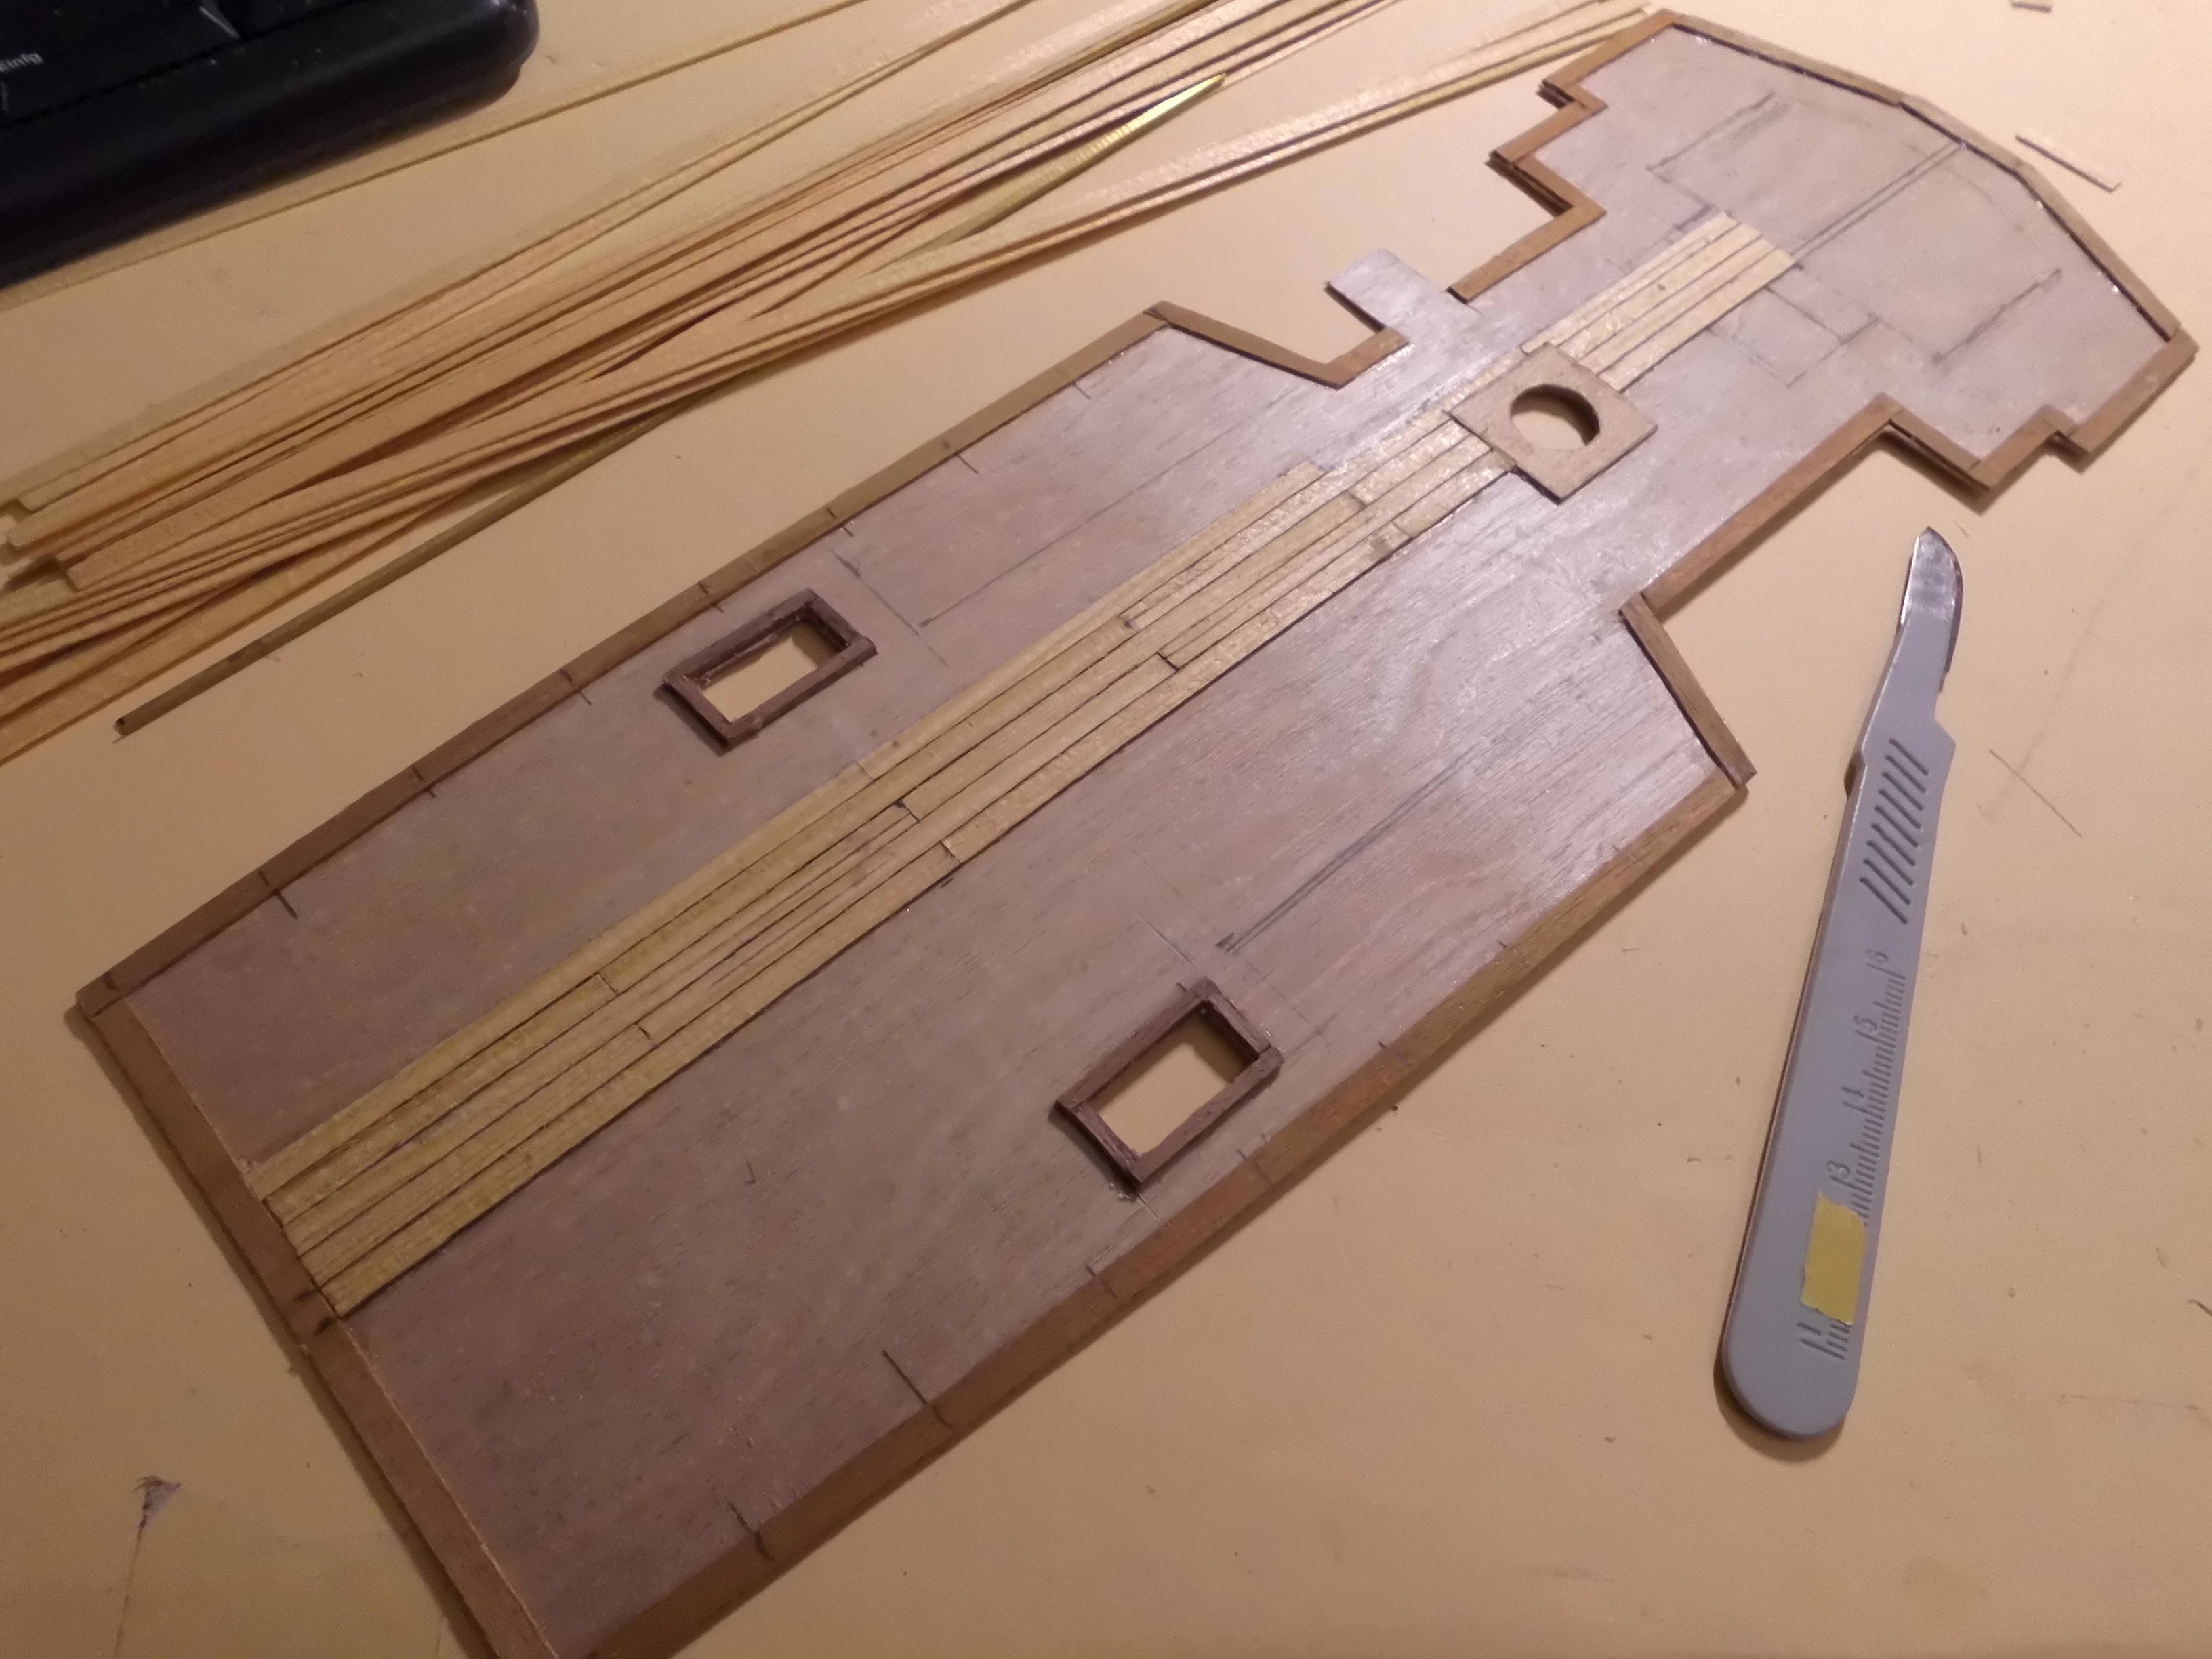
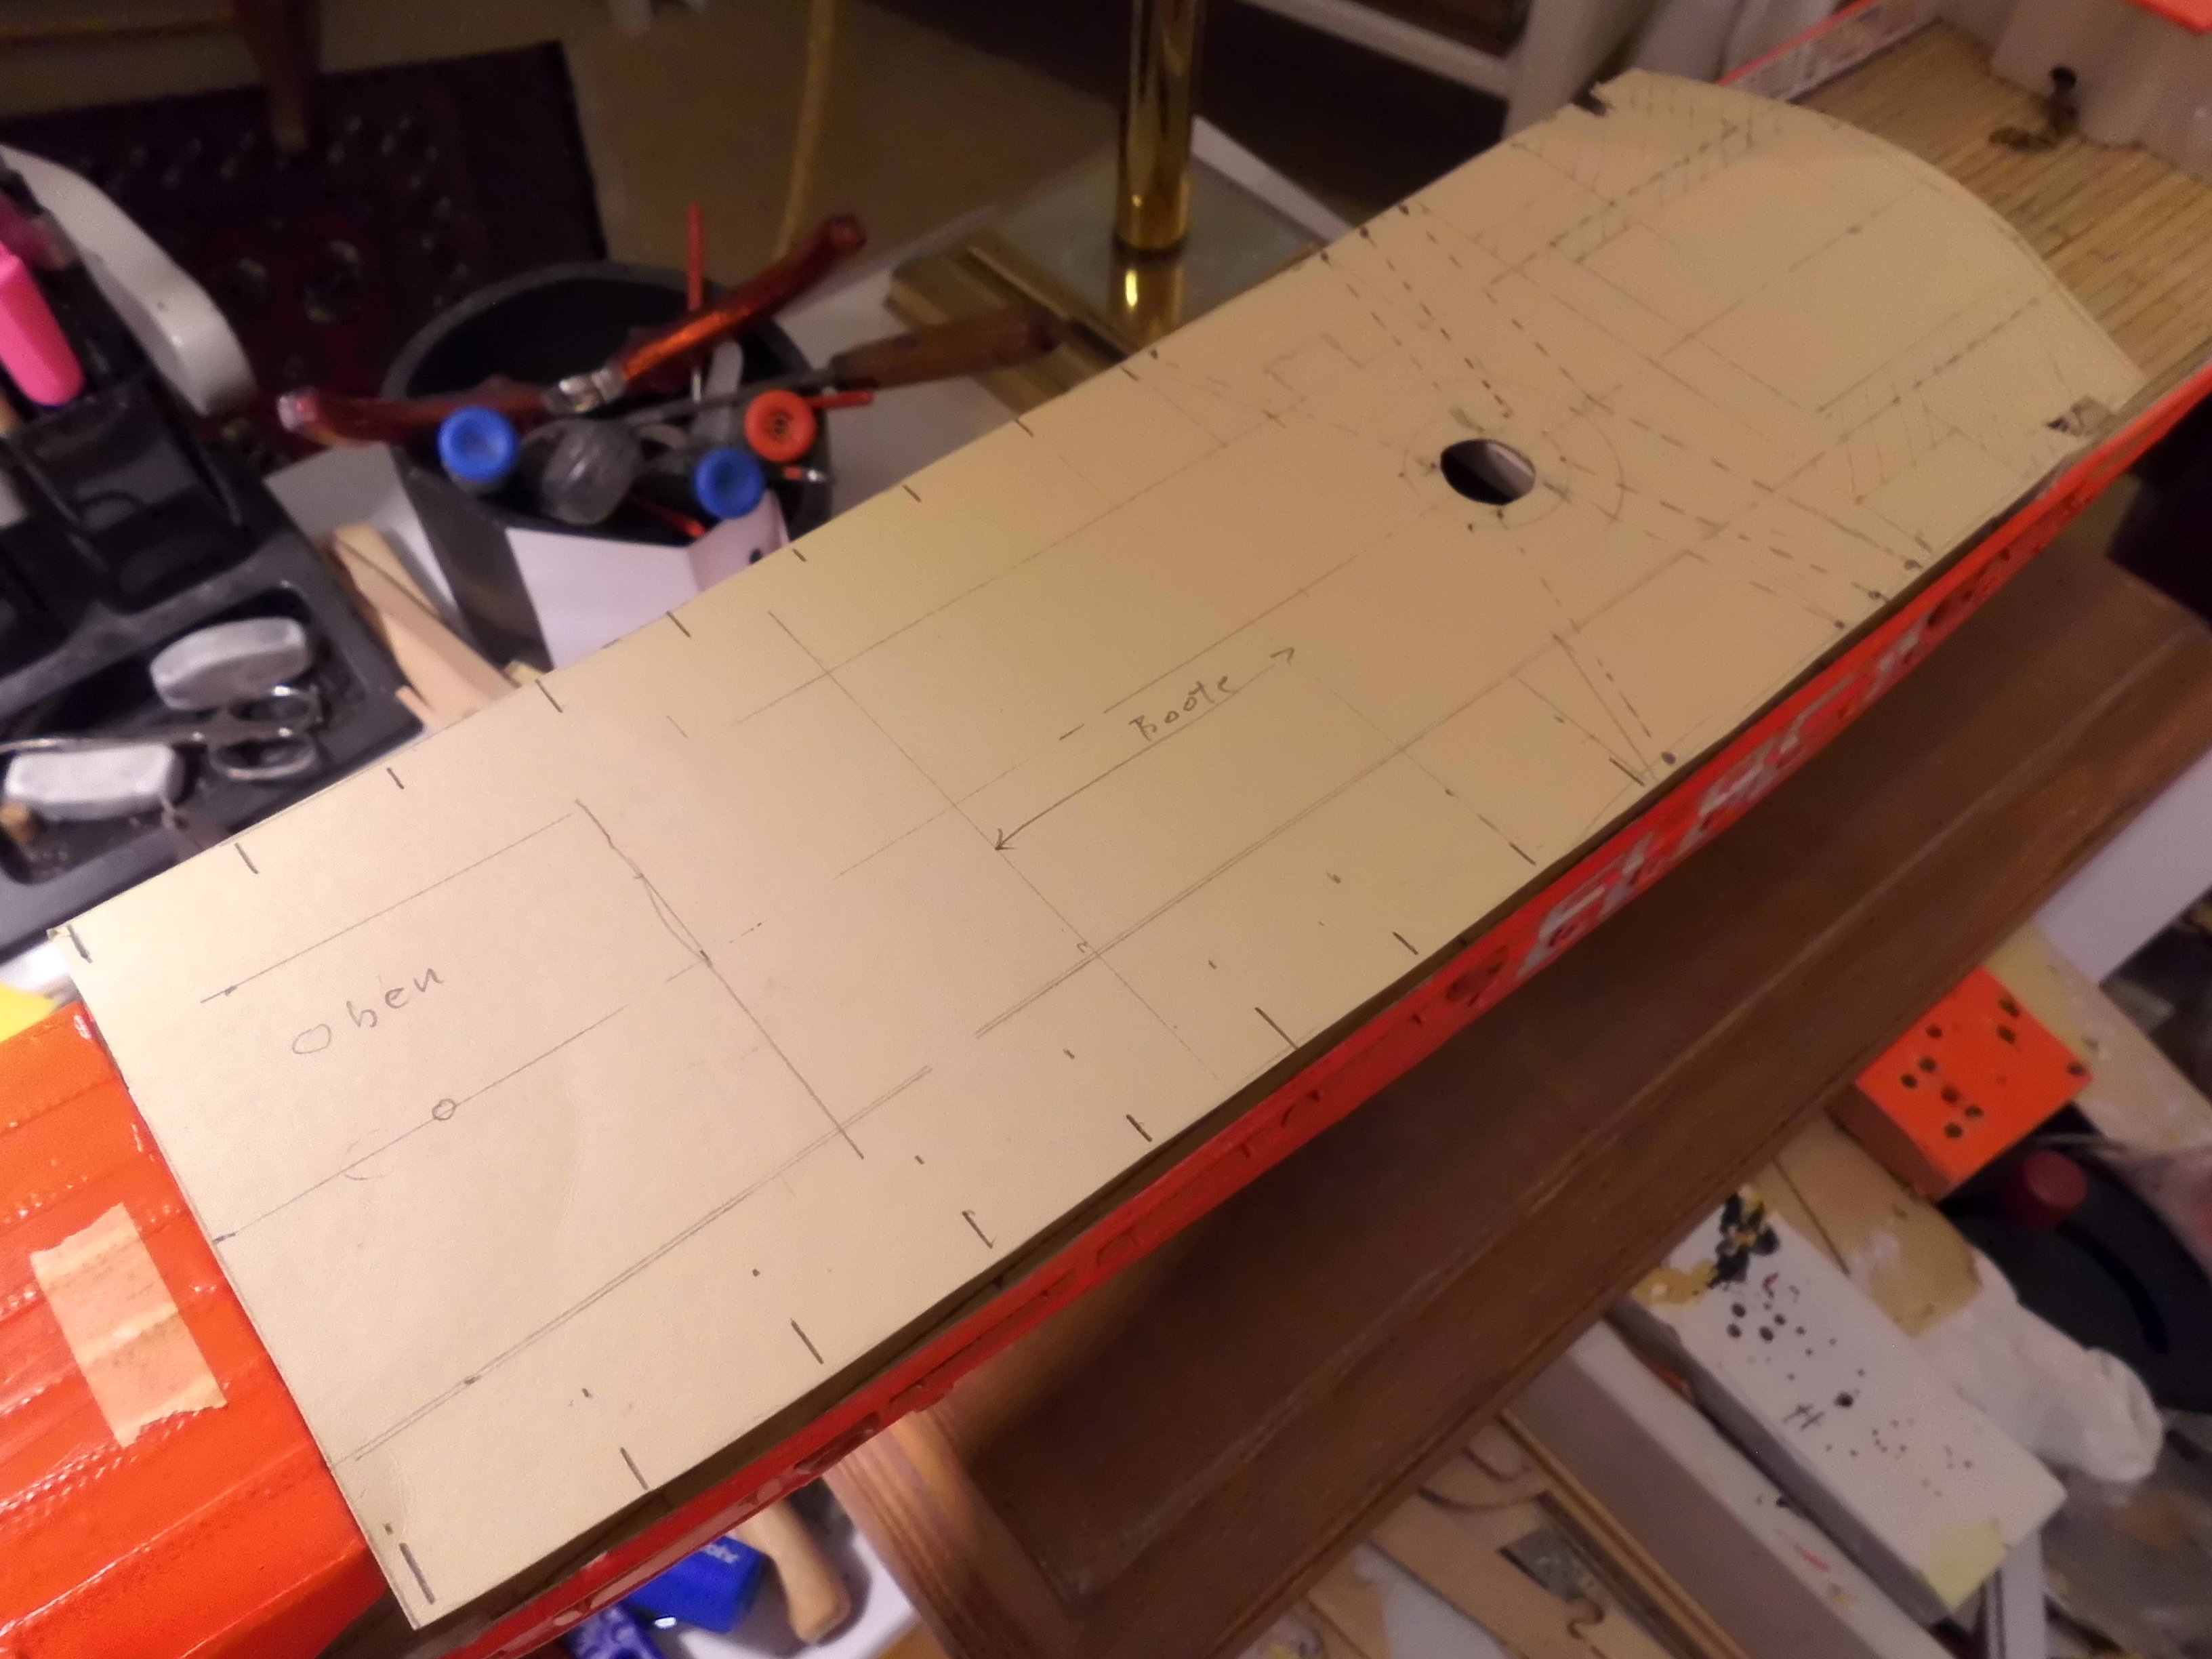
made the boat`s deck and planked it, also coming for edges and aft stair outcuts. The fastening points (turnbuckles) for the mast stays were mounted. It would be difficult to mount the bottlesrews after the deck is on.
The blanc patches on the deck in the areas for the boats will be plated with a profiled anti slip layer
Nils

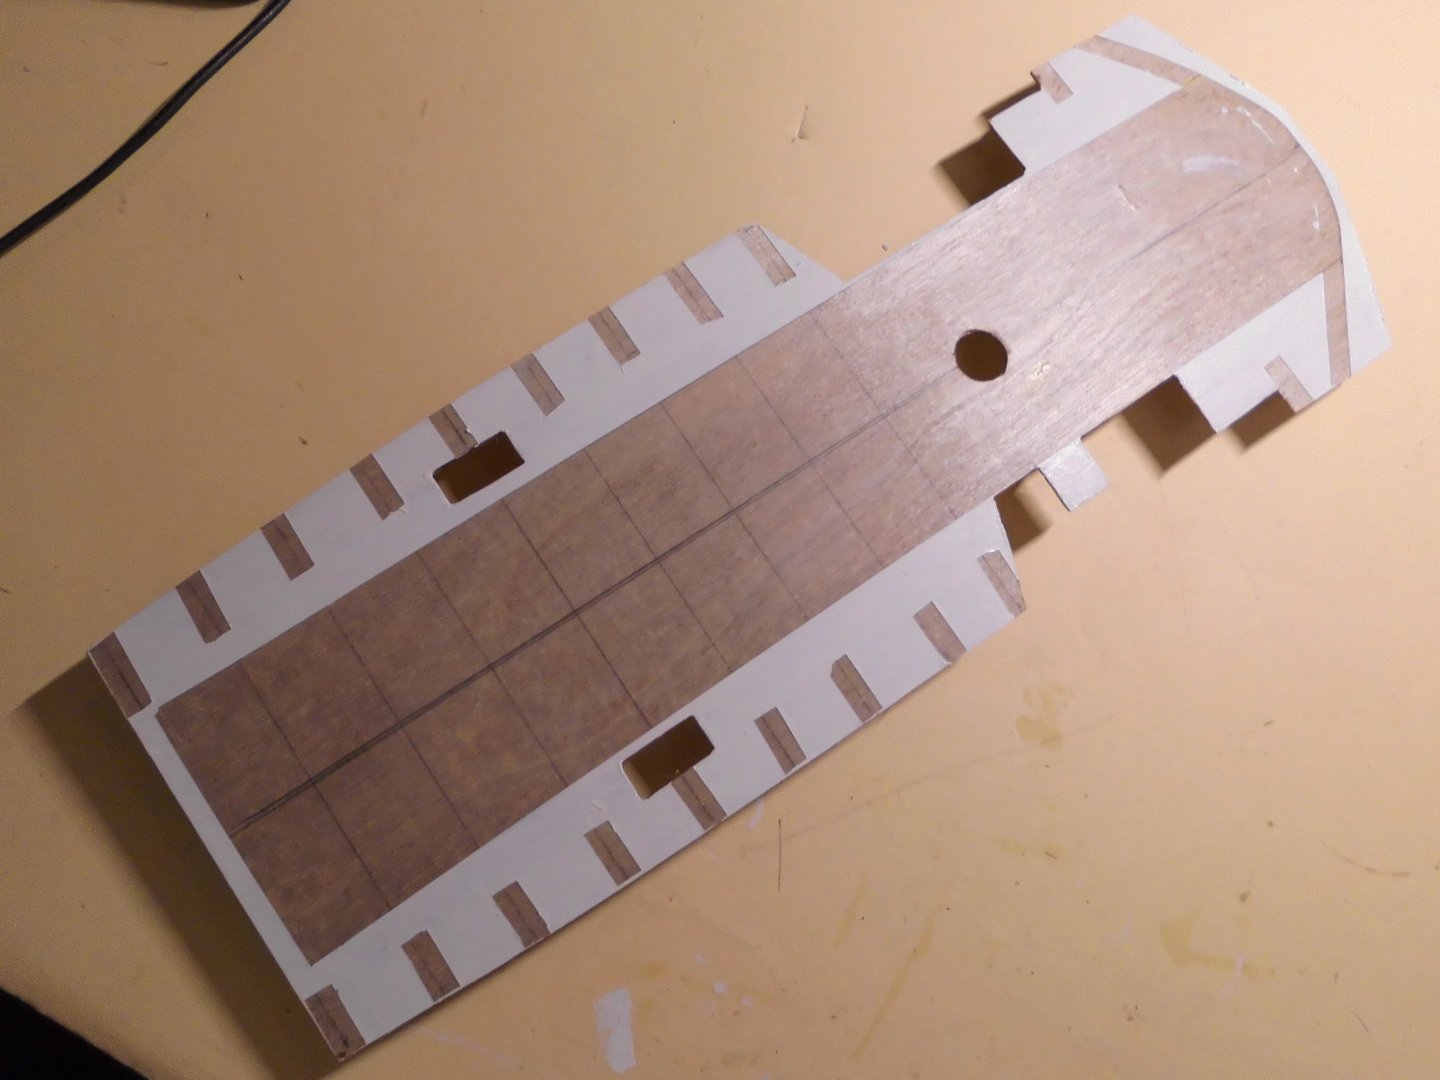
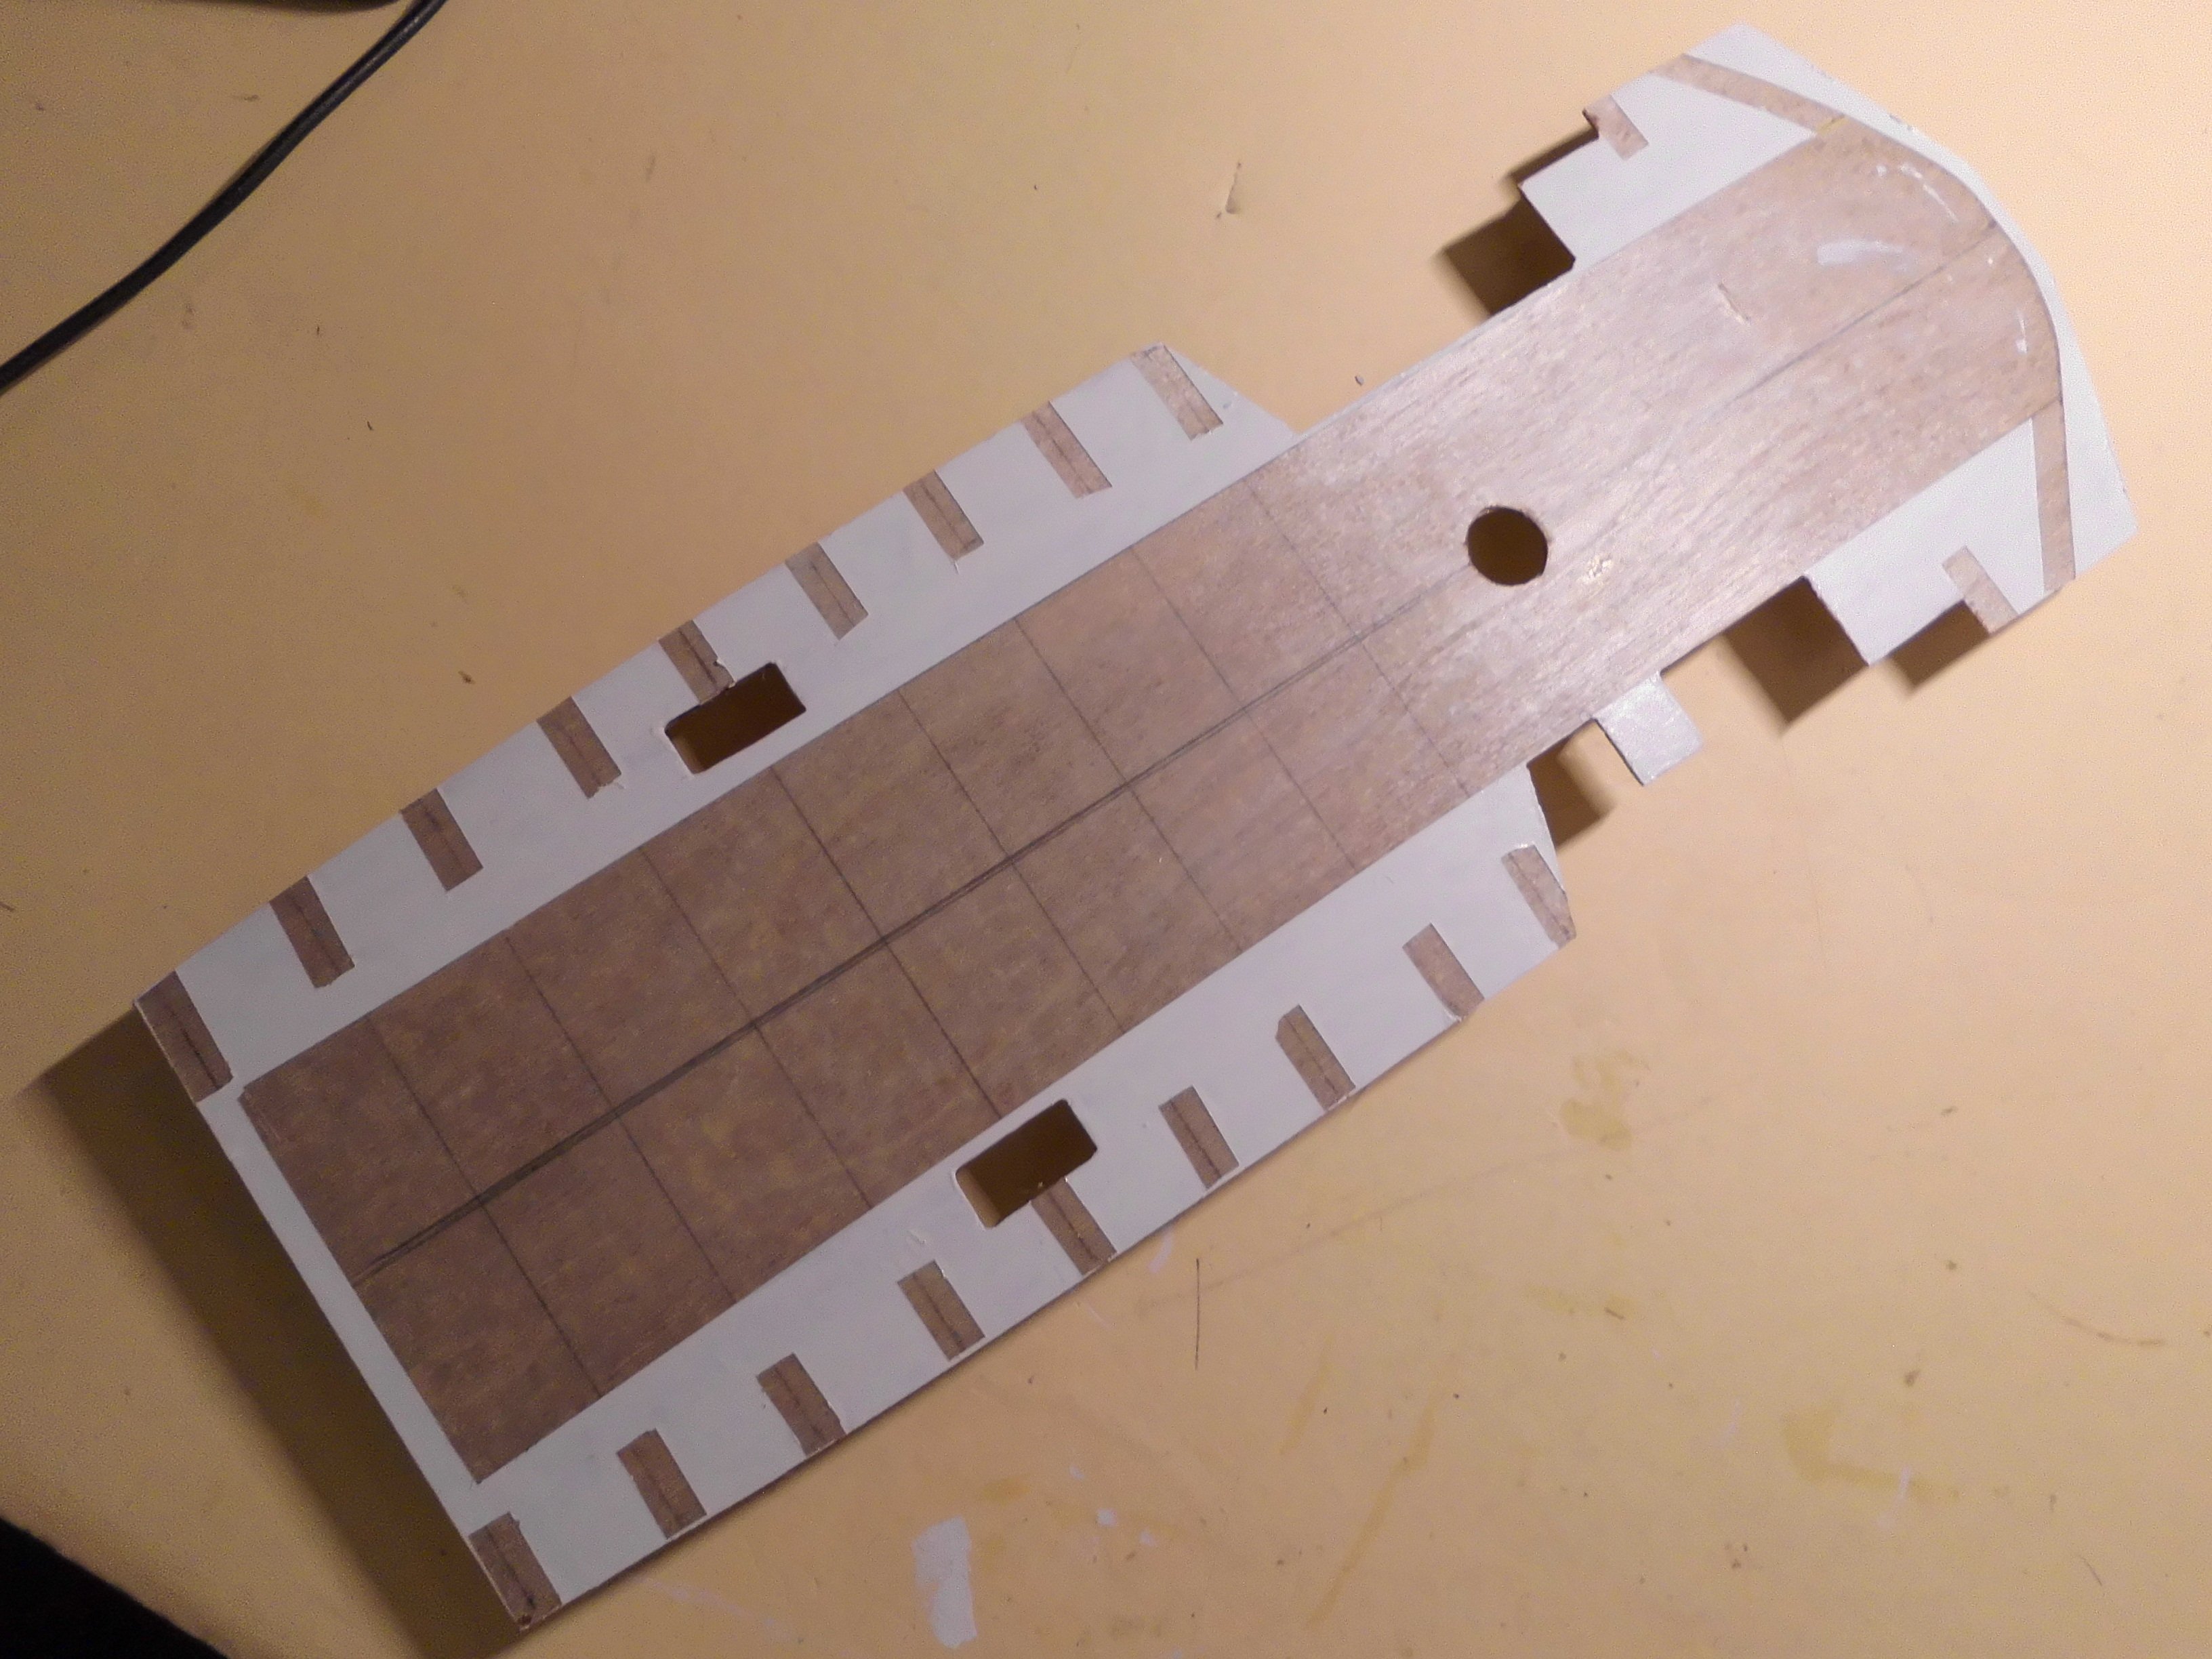
the card template for the boats deck

start with the planking. Deck and planking strips are both 0,8mm thick, so the total thickness is 1,6mm. That is flexebil enough for sheric bending down when glueing it on.

measures to bring the curvature into the deck
supports will be mounted (10 on each side) between deck and bulwark
-
many thanks Roel and Keith,
I learned a lot from your input with ref. to duty on lightships
Nils
- Canute, Javelin, Glen McGuire and 4 others
-
7
-
Hi Roel,
the propulsion was done with a 650 PS MTU / MAN diesel engine
Nils
- FriedClams, Canute, mtaylor and 1 other
-
4
-
Hi Keith,
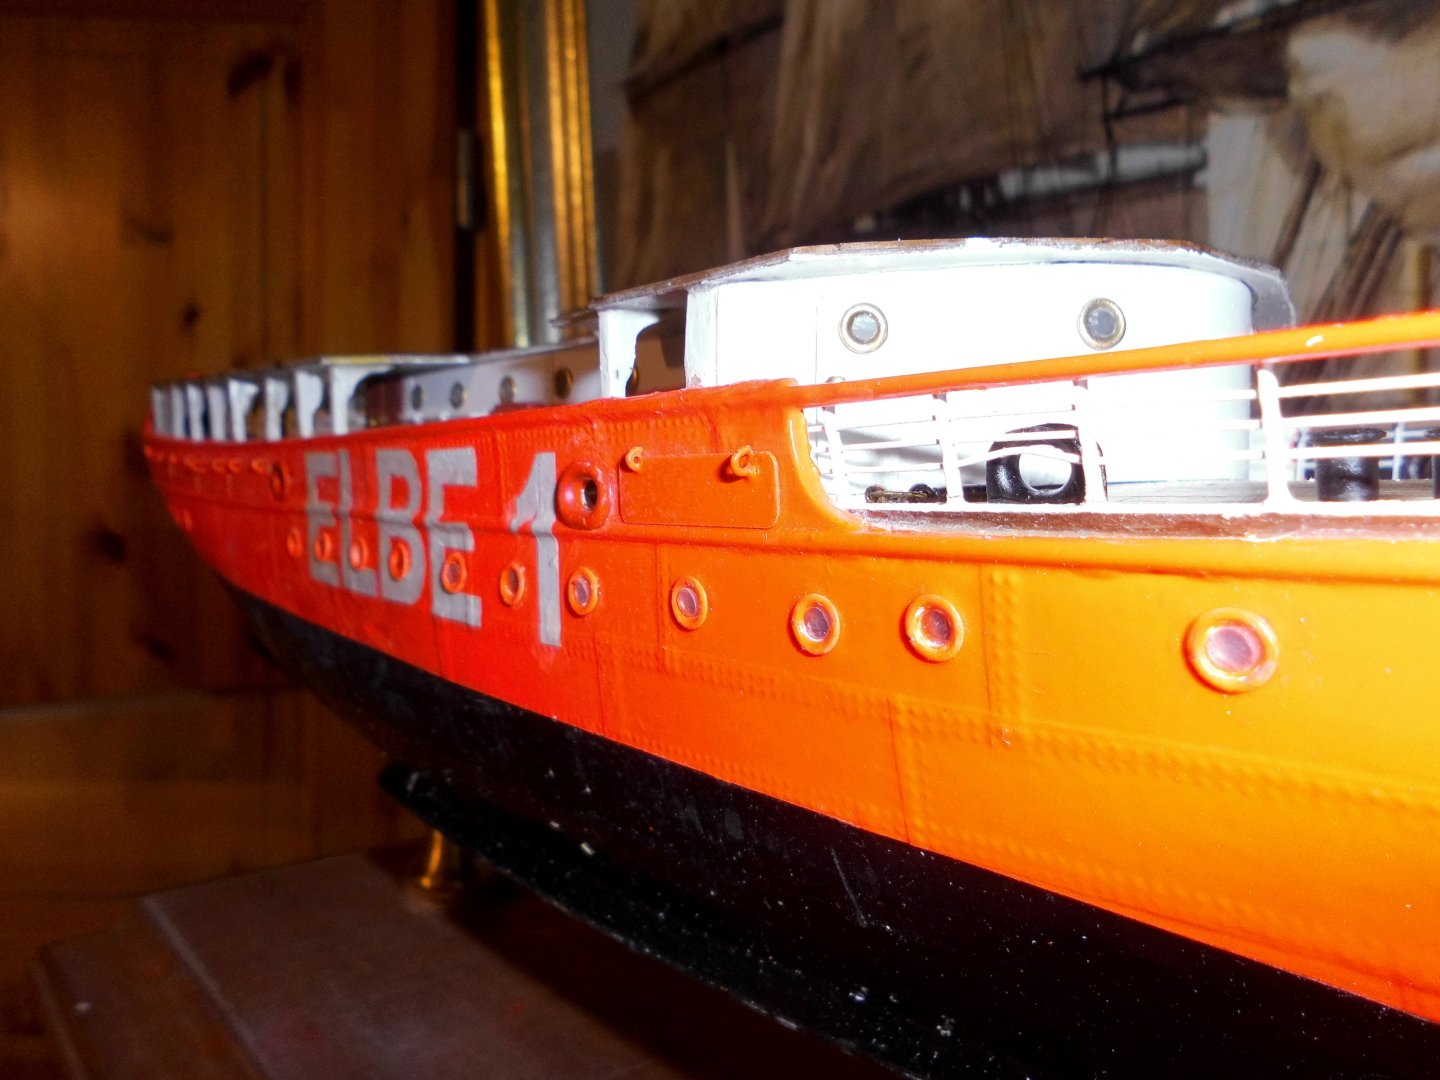
acc. to the techn. data of the Elbe 1 there was a 12 head crew, but i also unfortunately do`nt have any information for their individual tasks. Probably in duty-shift operation at a time there were 6 on duty and the other 6 had free time, (or on stand by).
The Elbe 1 is (was) the largest German lightship ever.
Nils
- Canute, mtaylor, FriedClams and 1 other
-
4
-
congrats Kevin,
your Hercules is a very fine tugboat, well done, also thanks for your conclusion notice
Nils
- Old Collingwood, Canute and Kevin
-
3
-
Thank you Phil,
for your input, I took a look at the Columbia WLV604 lightship per WW-web. A nice Vessel, perhaps we shall see a model of her here at MSW someday.
Nils
- Jack12477, mtaylor, FriedClams and 1 other
-
4
-
many thanks for your words Andy,
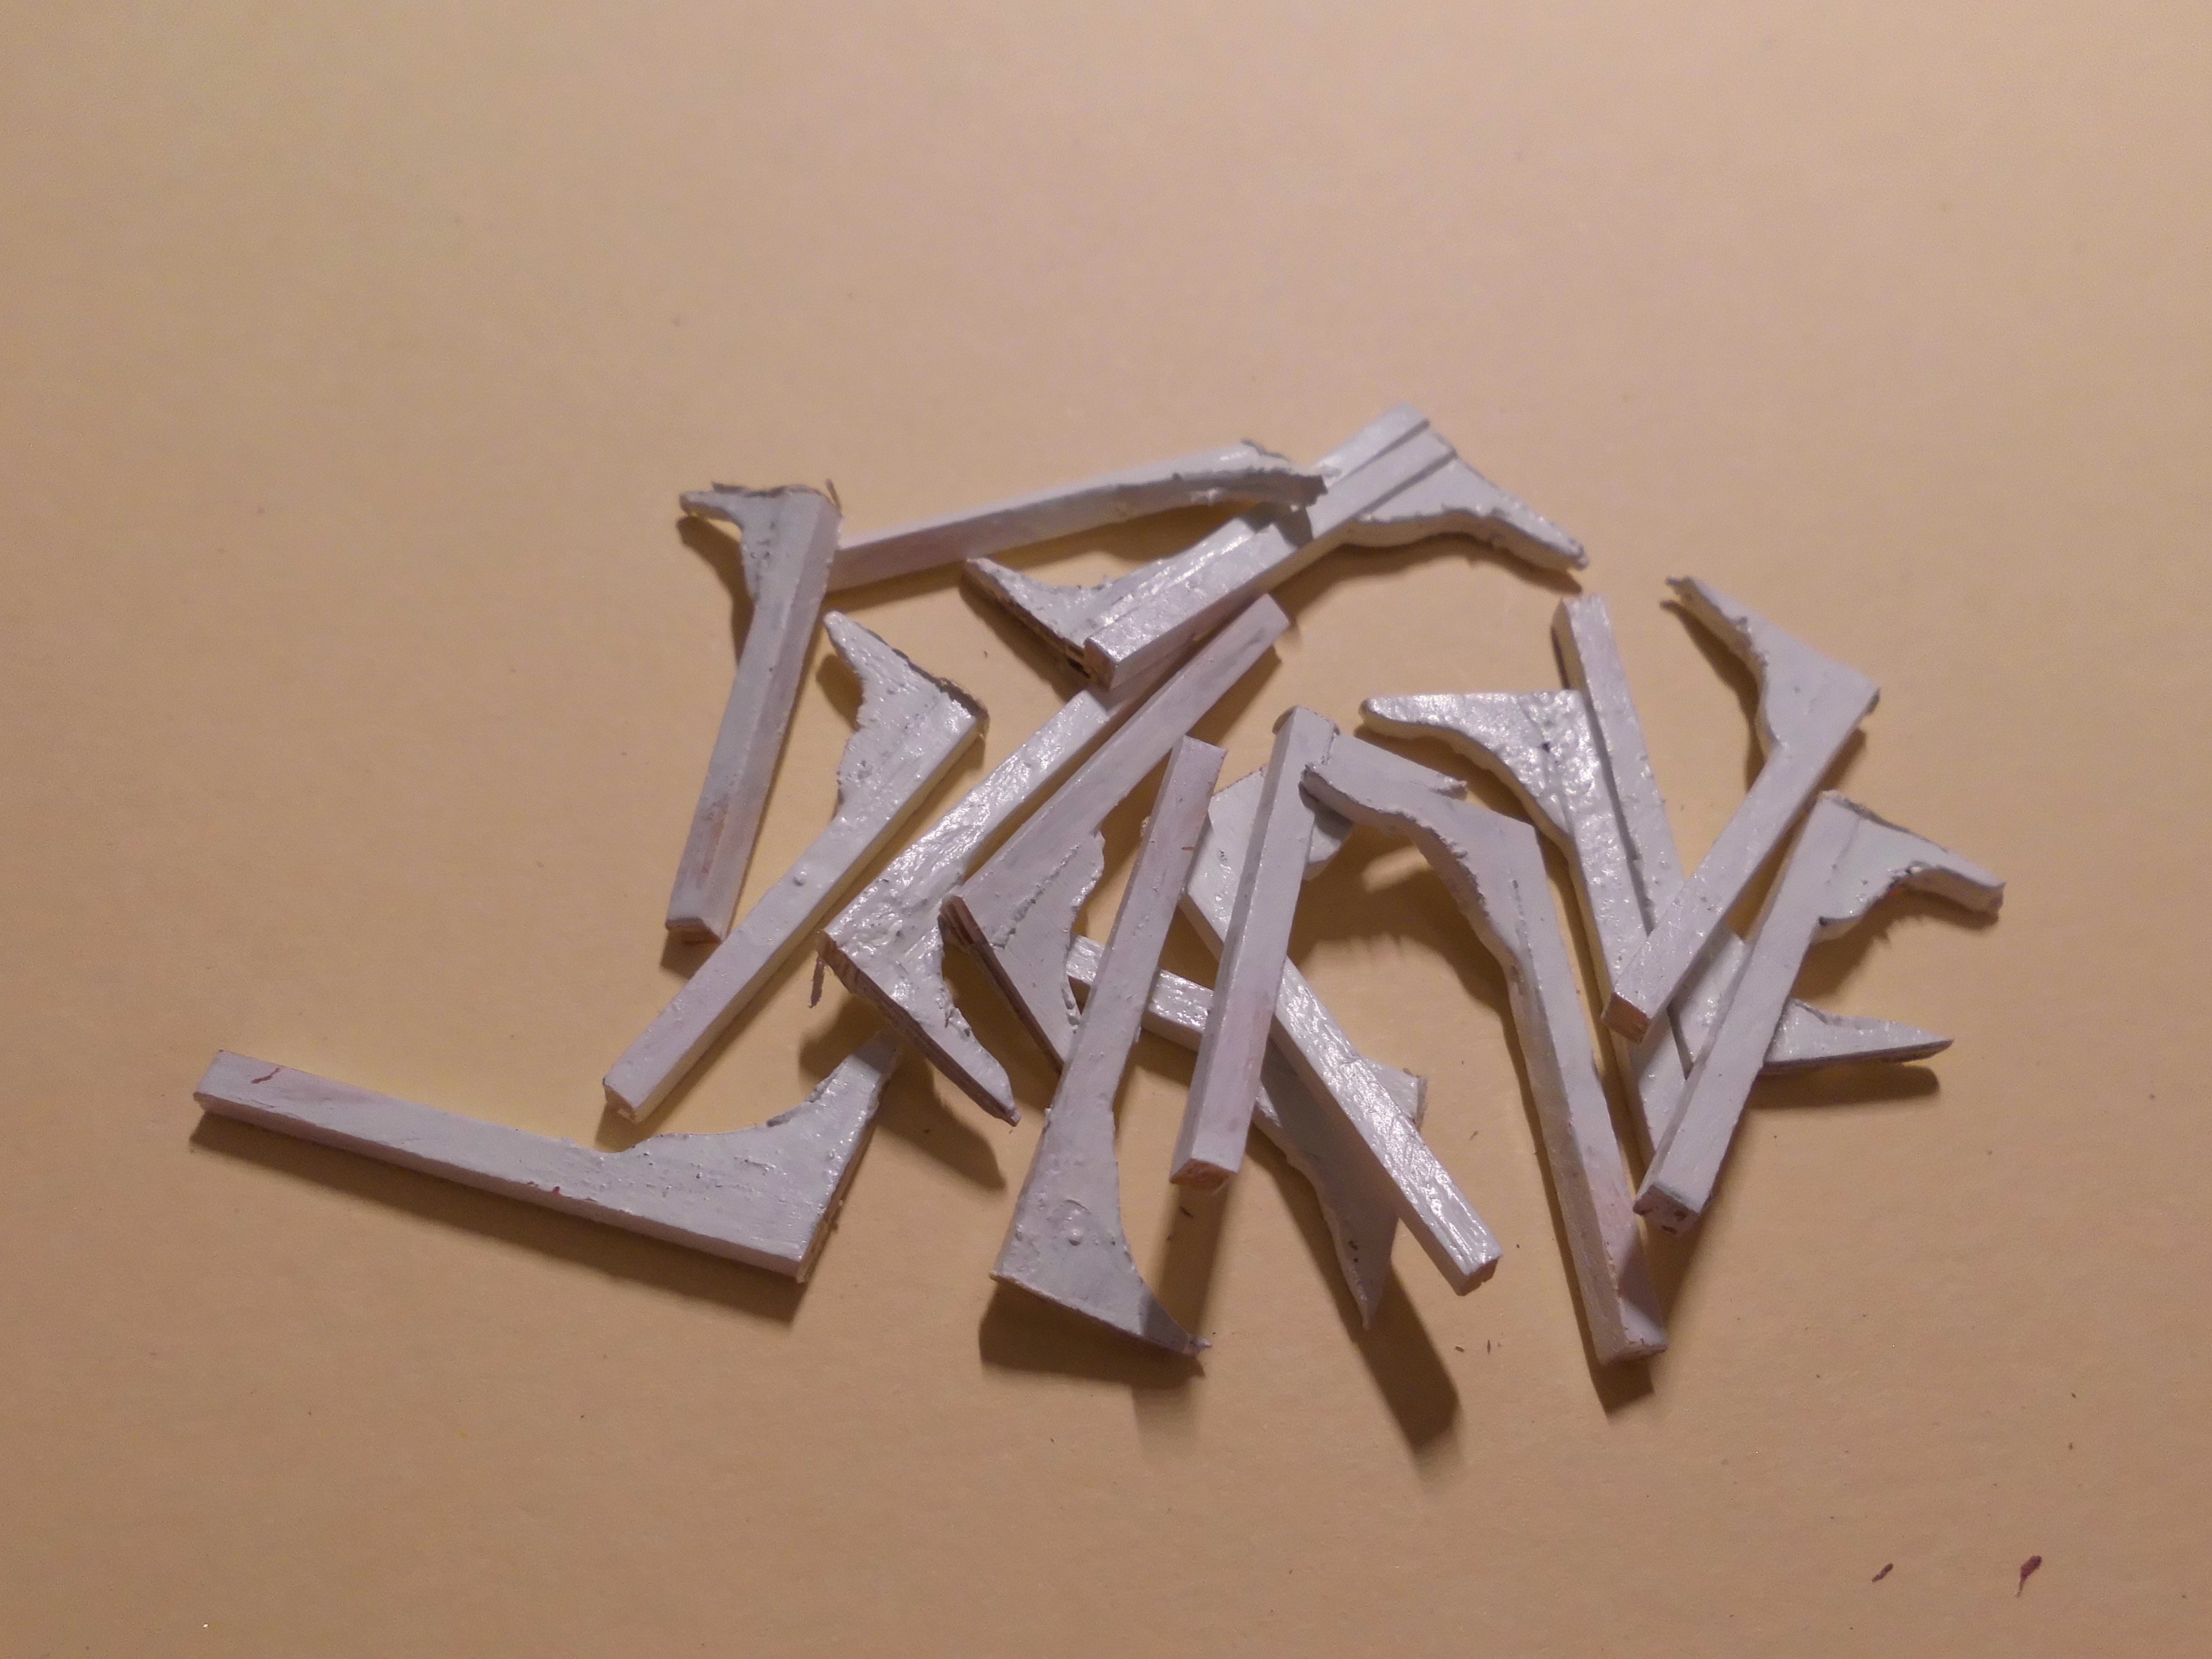
you`re right, I also sometimes make a decision on a certain build sequence and start preparing to the intended thing, but after thinking it over twice I recognize that if I would do so, there is no more access to an item that lays behind or under the section I`m planing to do. So foot on the brake before continuing. For example, before the boatsdeck is placed, I have to make sure that the ship`s bollards are near to the appropriate fairleads and the footpoint-fastening positions of the lighttower stays are placed so that they do`nt interfere with other items, and that the stairs to the boats deck are clear form what is to be mounted items above later on.
For mounting the boatsdeck to the long deckhouse and to install a number of supports along the length, I decided to make a bunsh of wooden supports which have slight overhight so that the can be tuned to precise fit when mounting. In this case I refraigned from making a brass framework to mount on.
Nils

these are the 20 wooden supports for the boatsdeck. 2mm pine squarebars with ply-knees

a template for the boatsdeck, for evaluating positions etc.
the boatsdeck has a shere and a longitudinal curving. The standovers (port and starboard side ) need to be supported and fastened to bulwarks below and deck above. Before that the 0,8 mm ply deck needs to be planked, like the main deck below. All must be in accordance in what I wrote in the beginning of this post
- mtaylor, Canute, FriedClams and 4 others
-
7
-
Thank you John,
I`m evaluating the boats deck and how it can be mounted with all those side supports to be fitted in ....
Nils
- Canute, FriedClams, mtaylor and 1 other
-
4
-
Wonderful work Marsalv,
it is a pleasure to watch your work
Nils
- mtaylor and Keith Black
-
2
-
very nice painting Valeriy,
it looks great
BTW. those are the colors of the Laeisz flying P-liners
Nils
- cotrecerf, Valeriy V, Ferrus Manus and 6 others
-
9
-


Sciabecco 1753 by Greg Davis - FINISHED - Amati - 1:60 scale
in - Kit build logs for subjects built from 1751 - 1800
Posted
good progress Greg,
she`s looking great
Nils