


Mirabell61
-
Posts
7,401 -
Joined
-
Last visited
Content Type
Profiles
Forums
Gallery
Events
Posts posted by Mirabell61
-
-
-
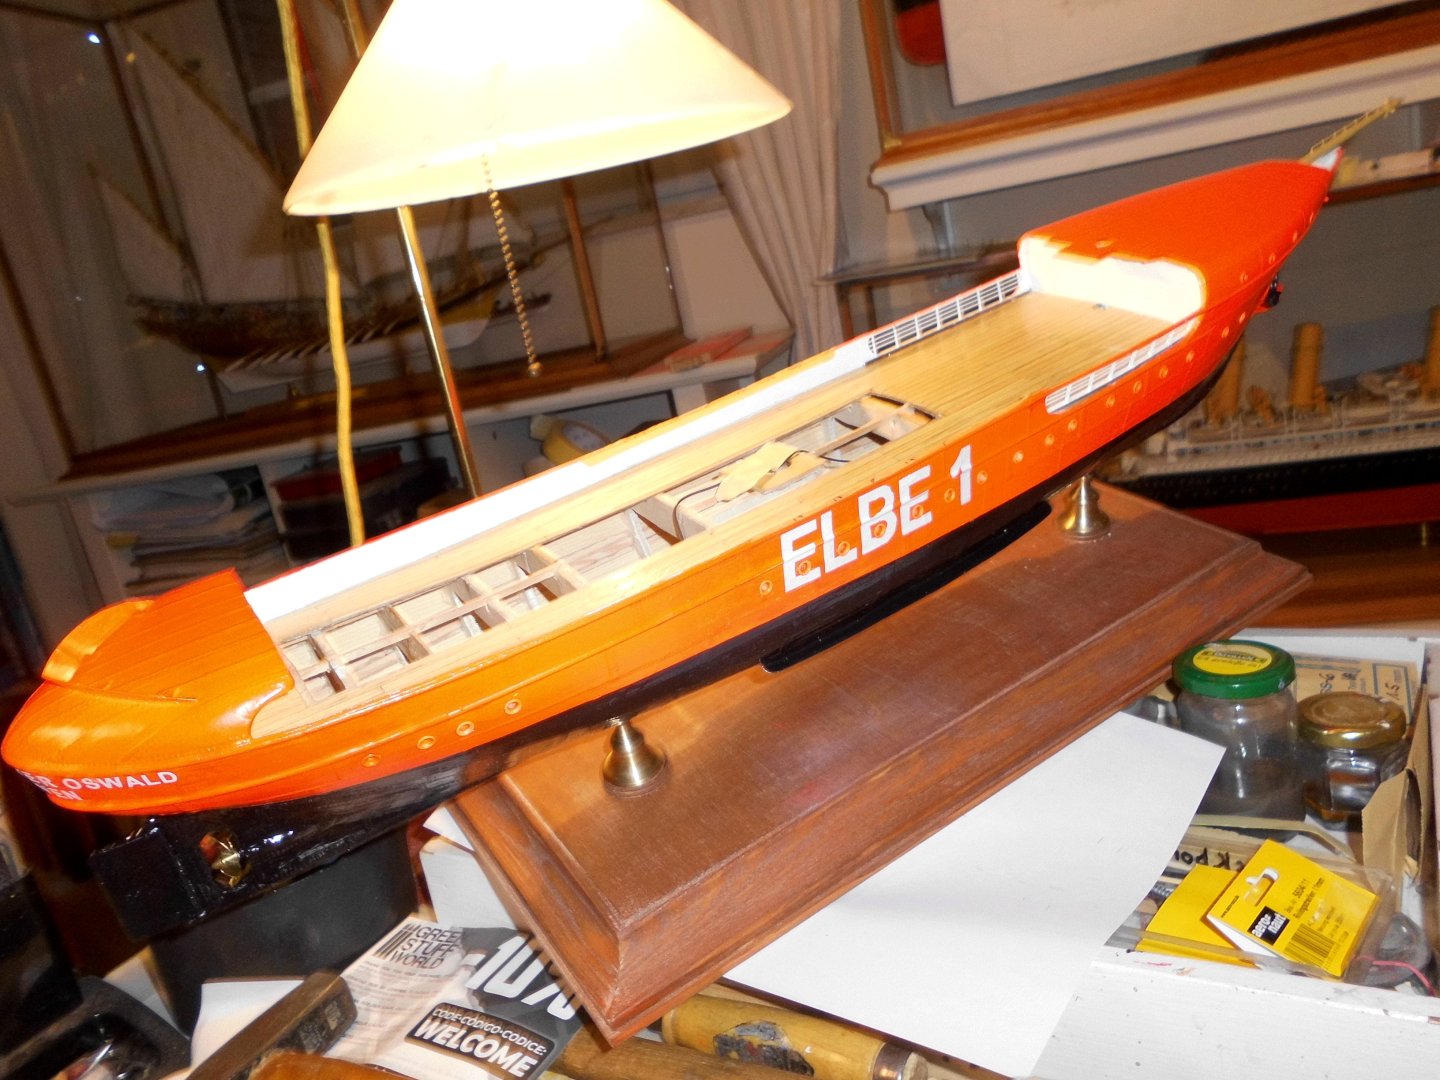
Update
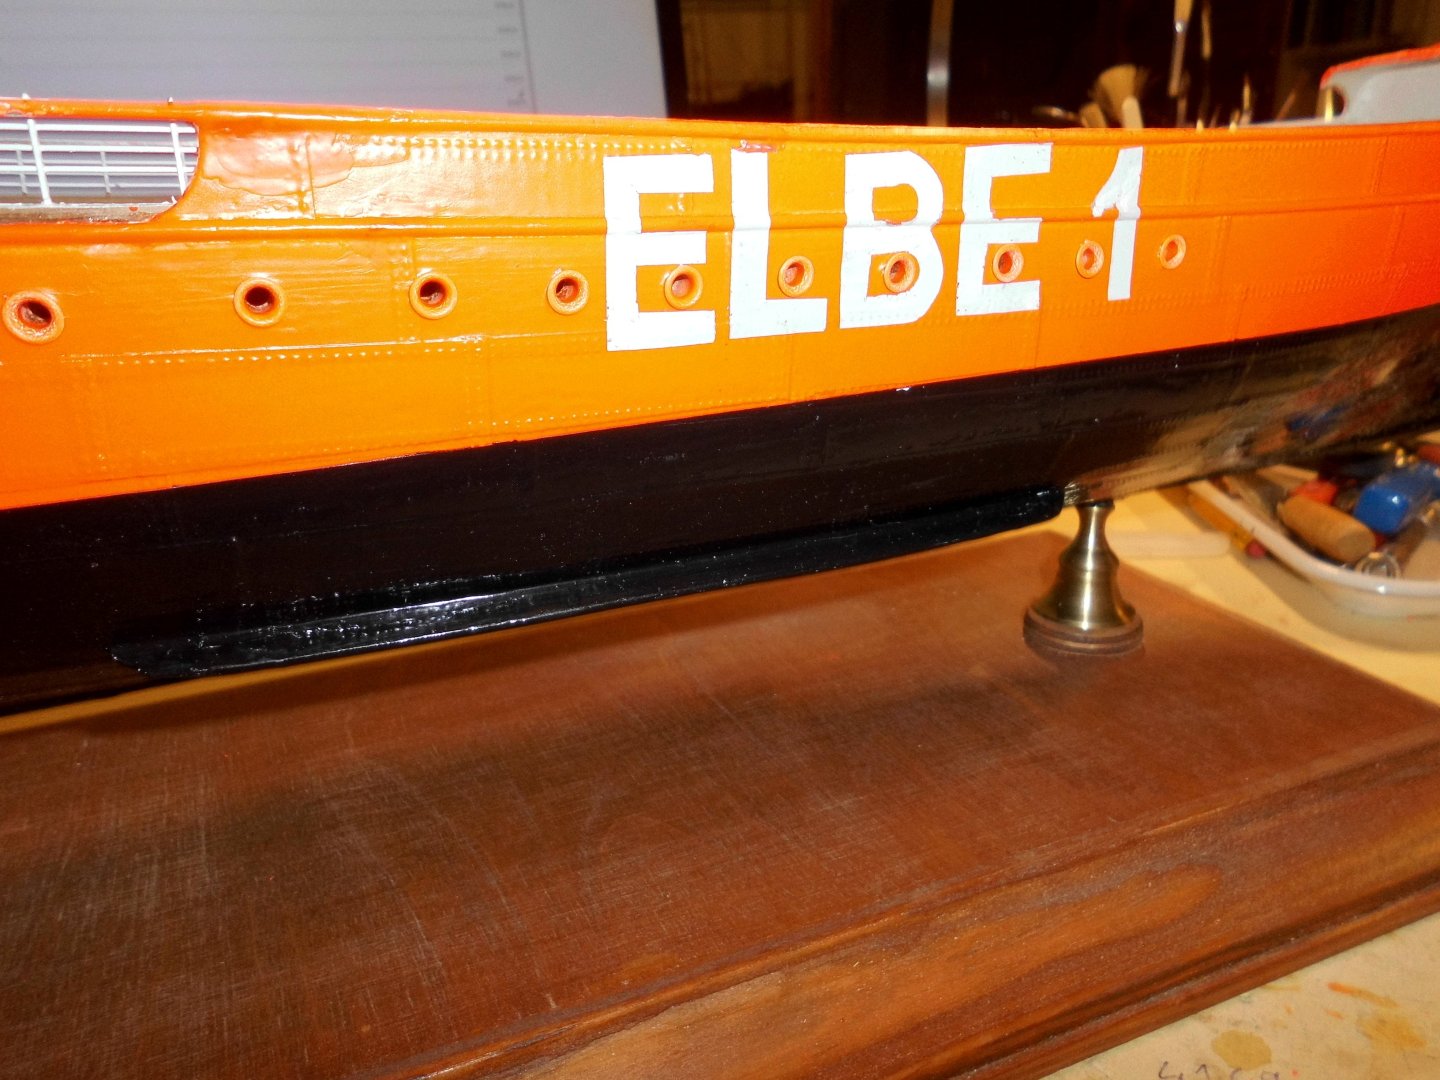
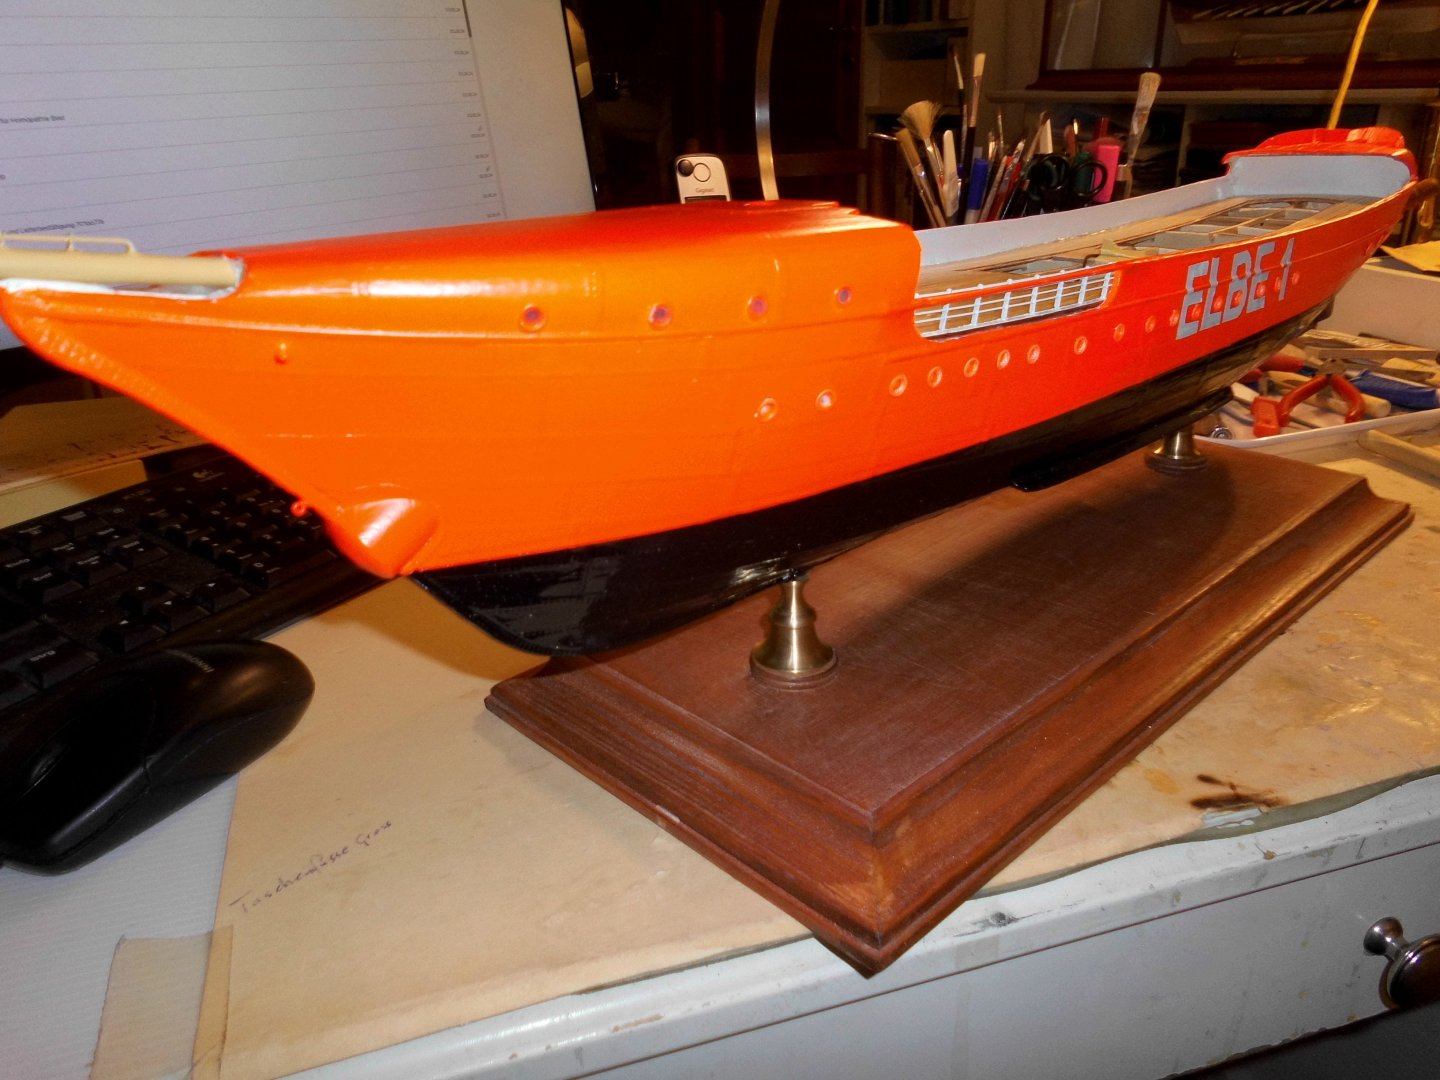
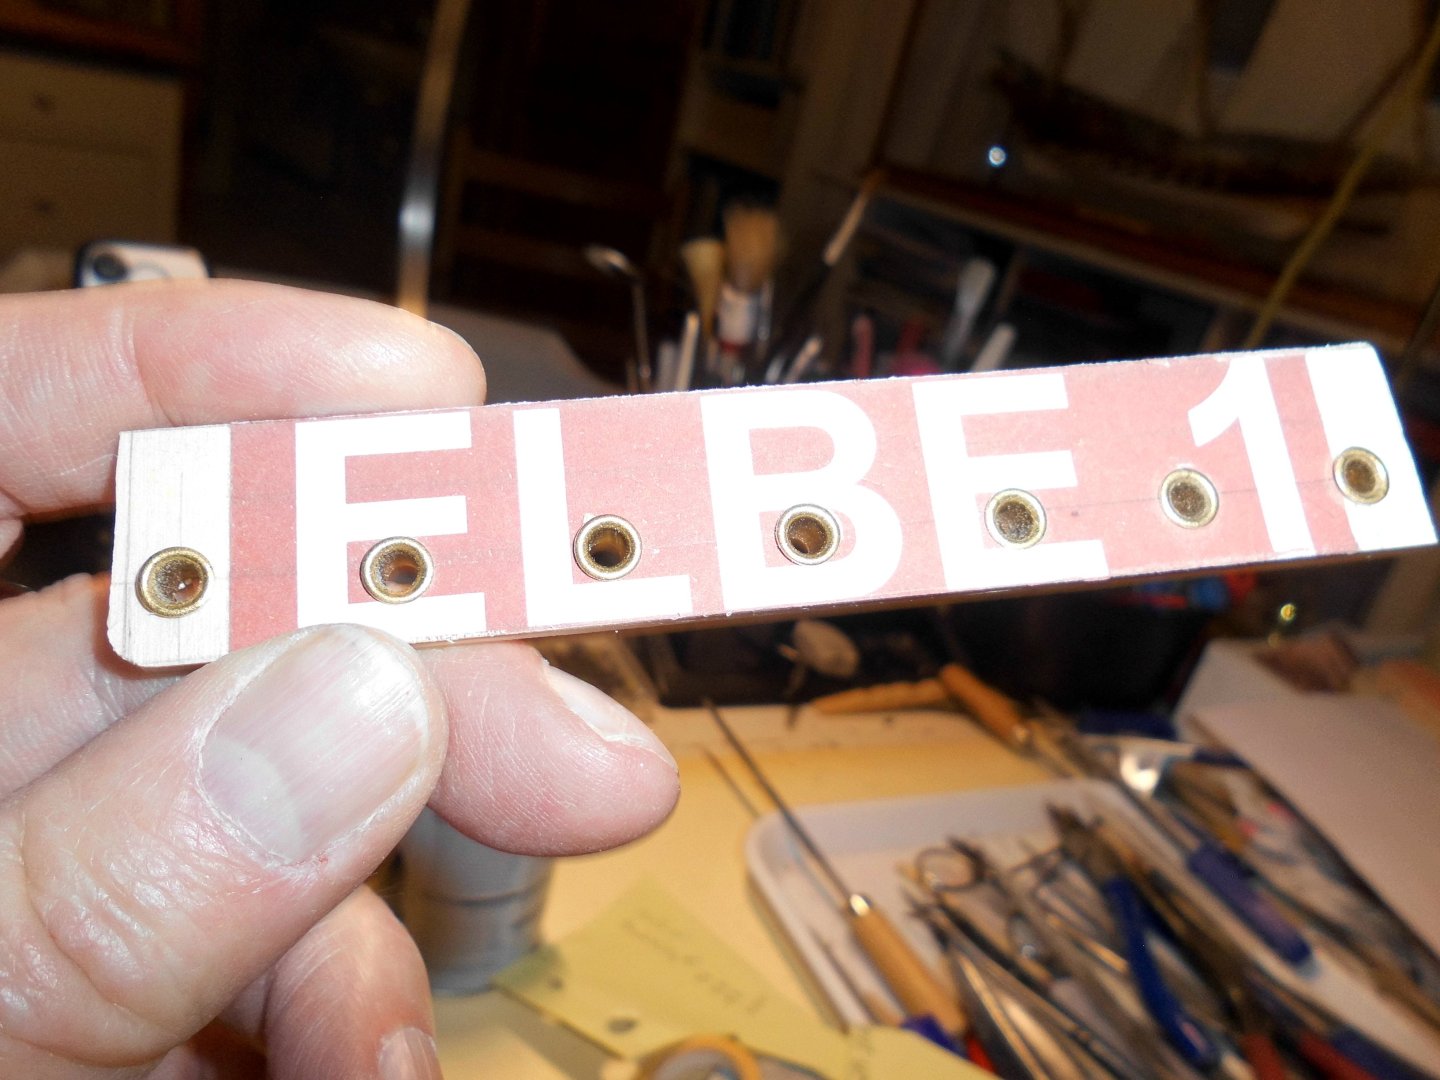
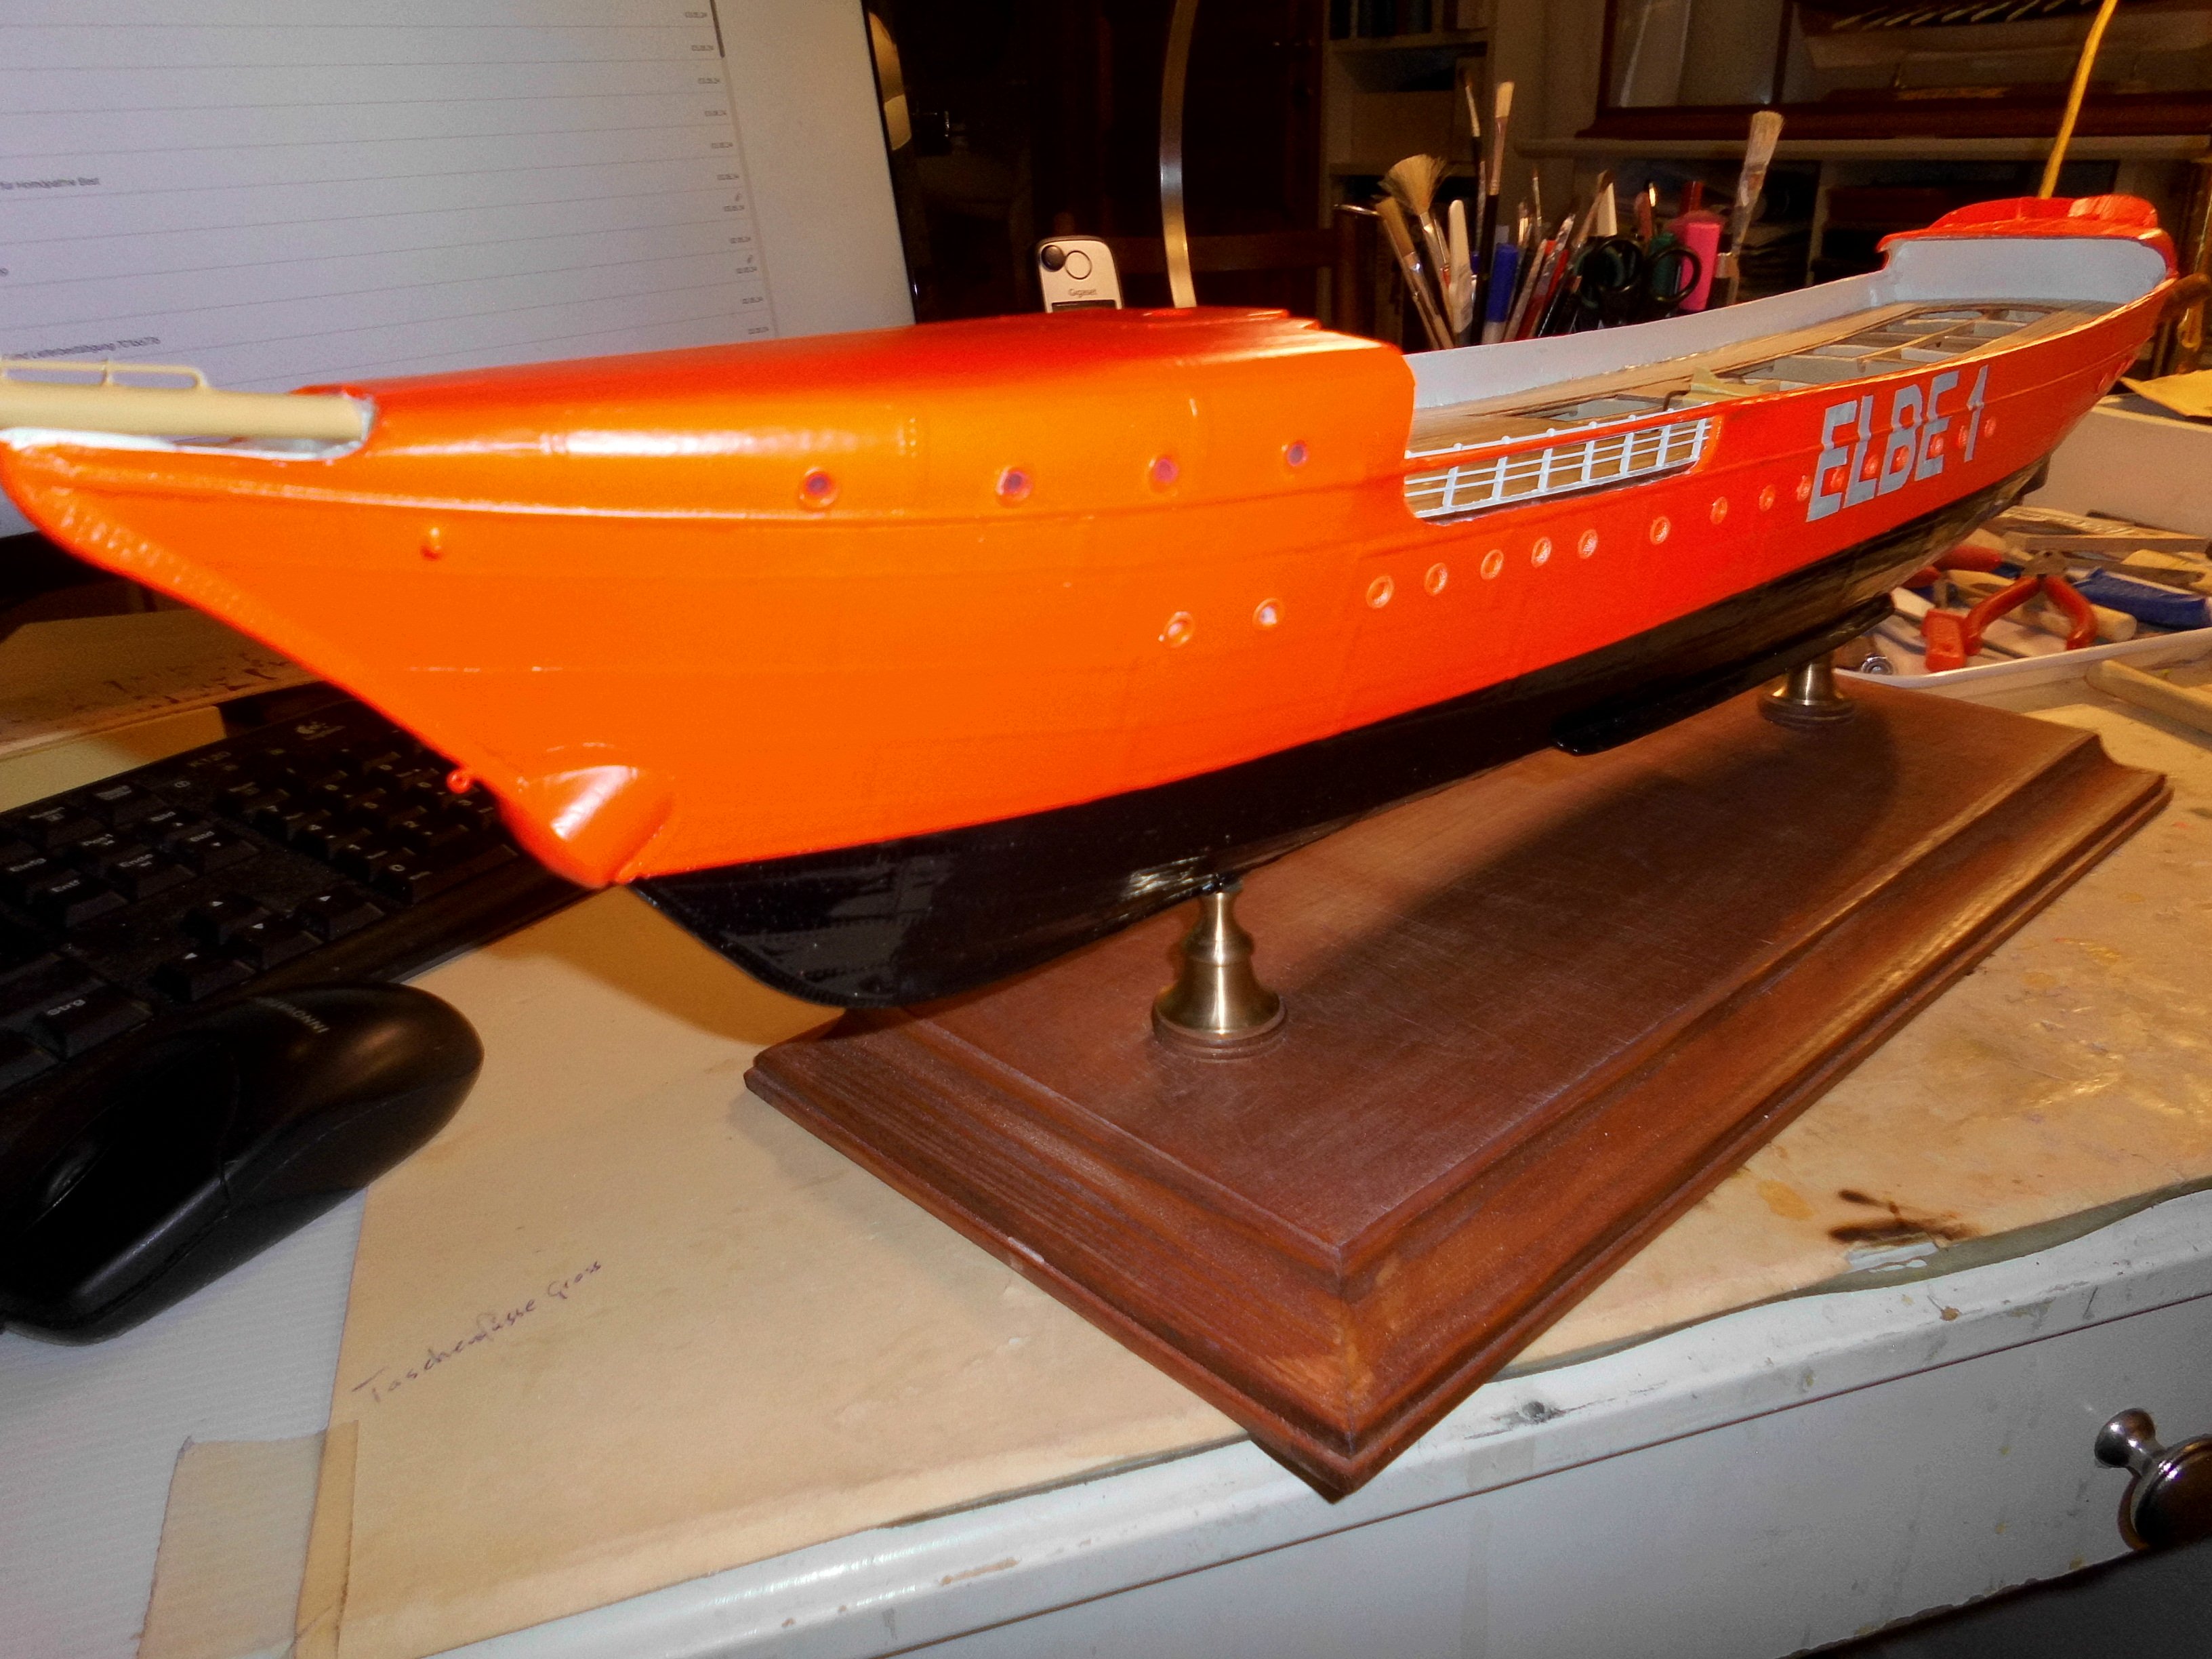
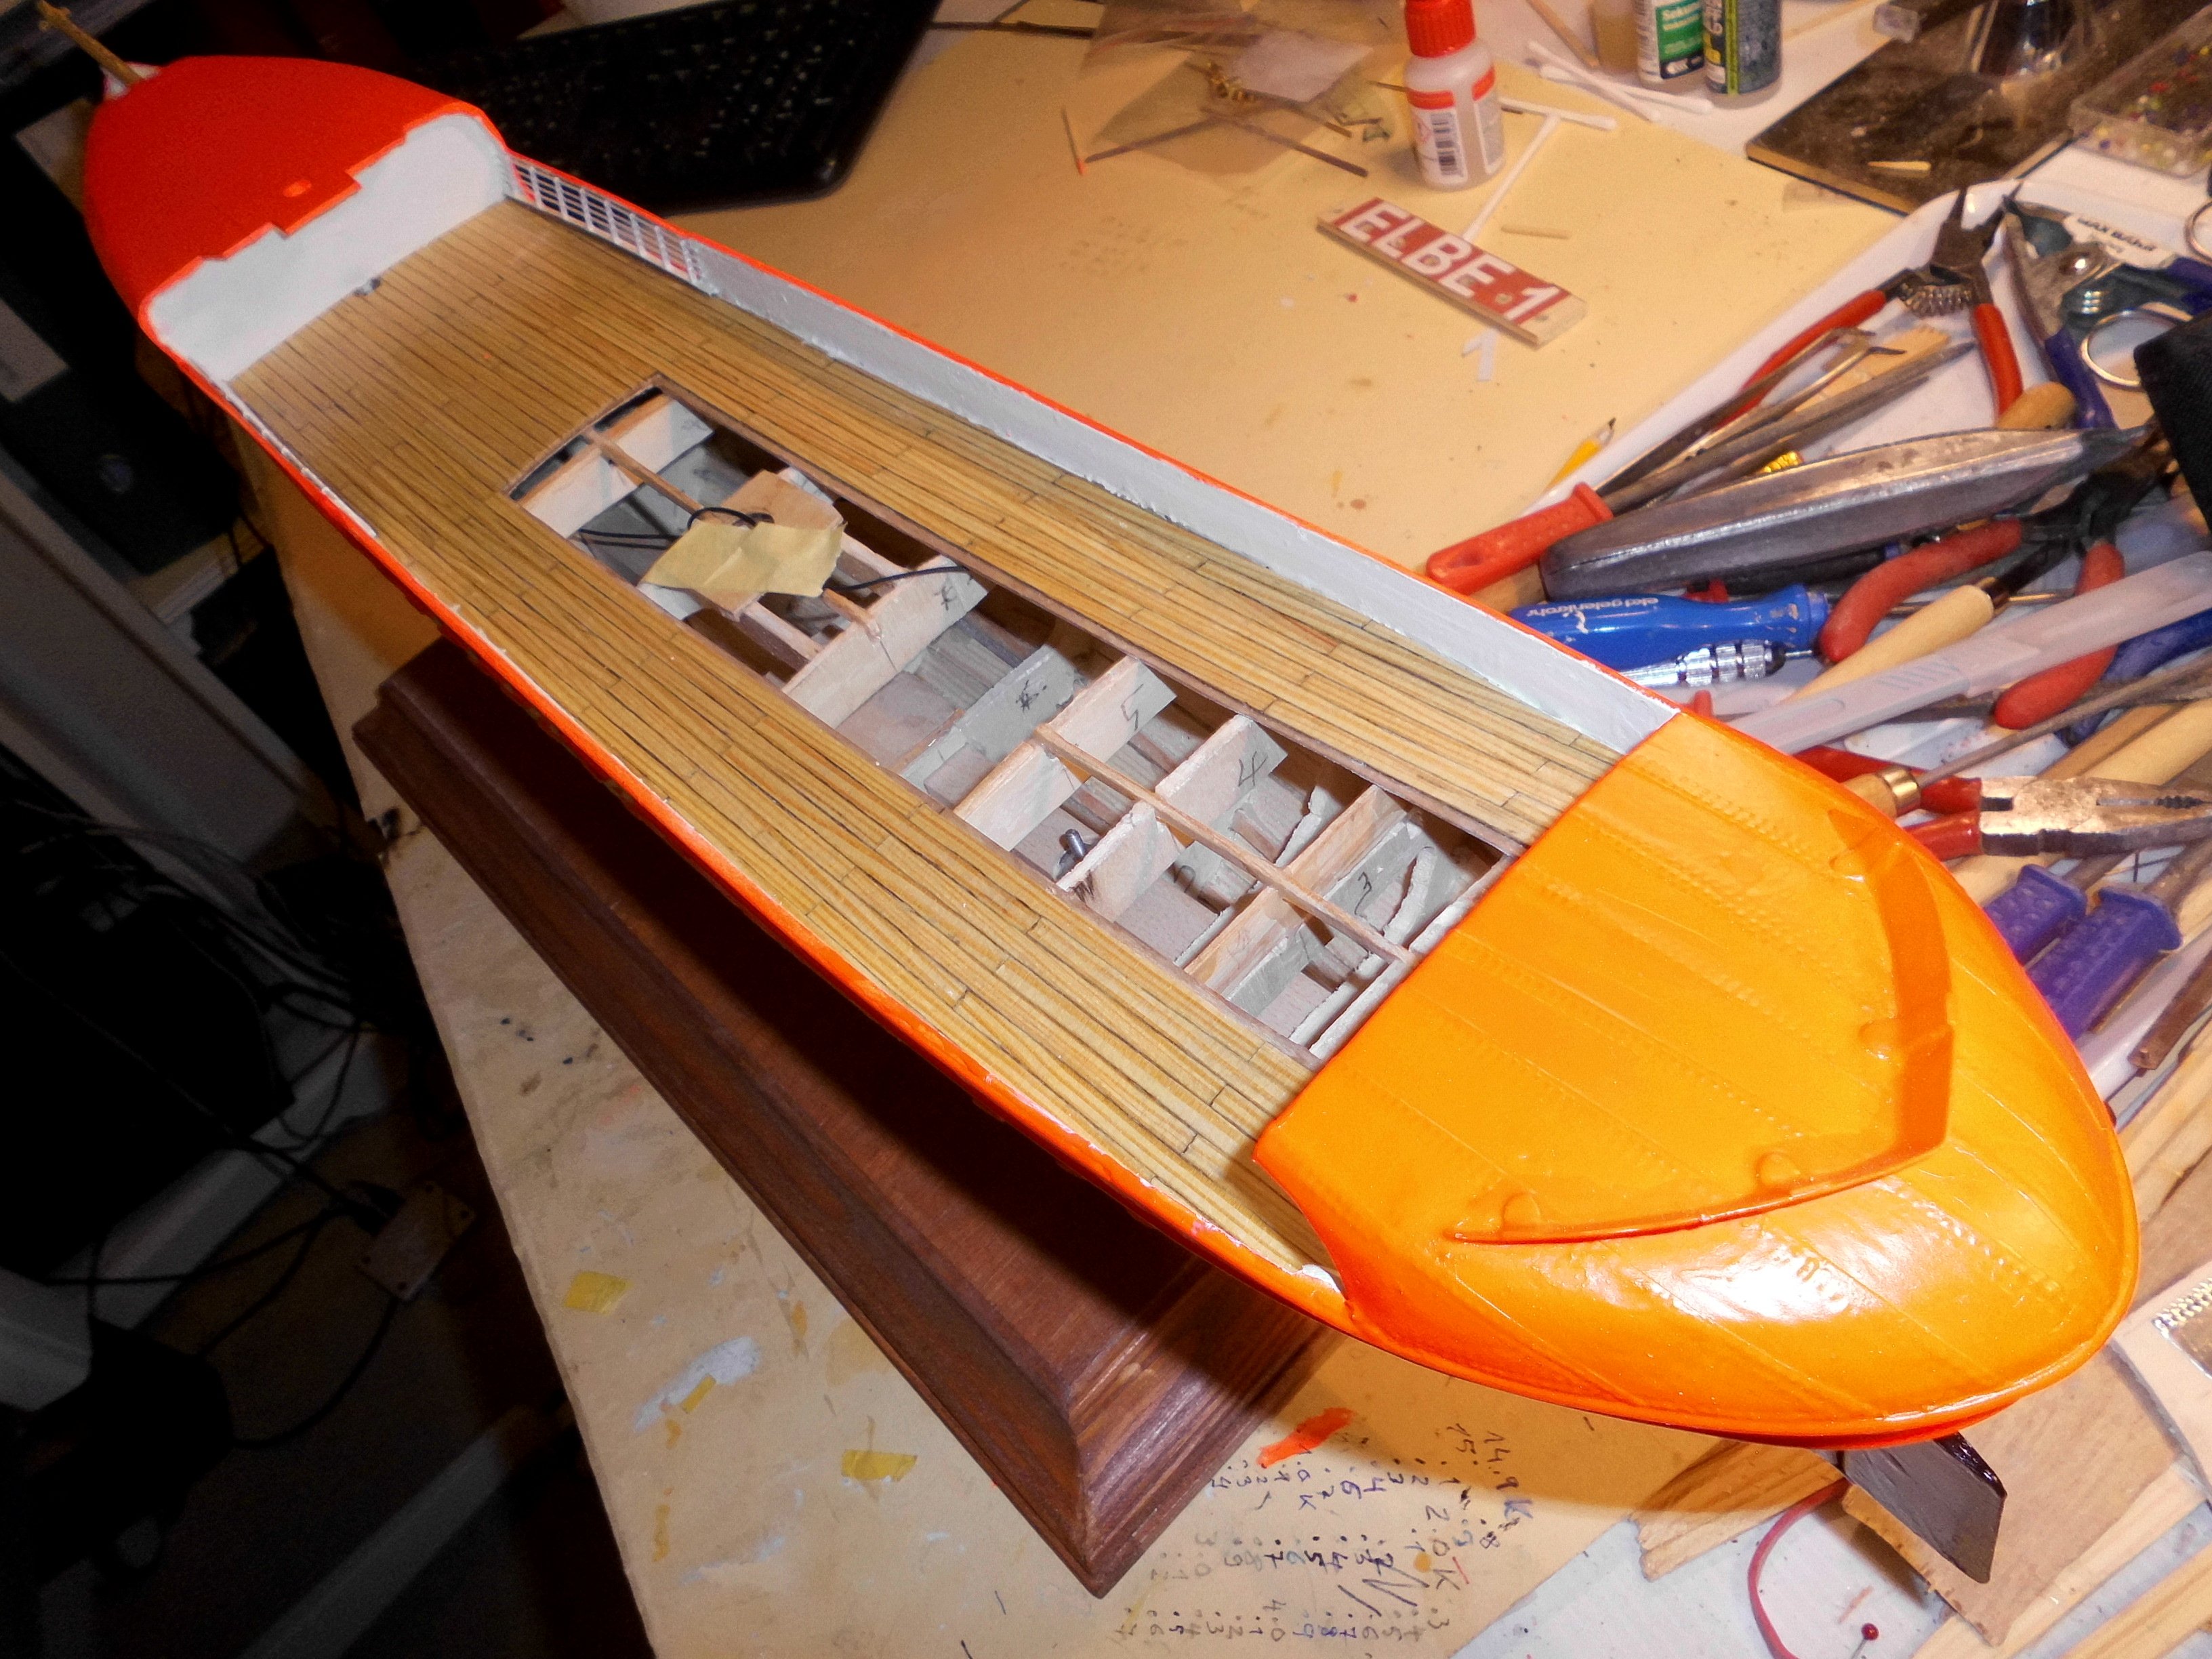
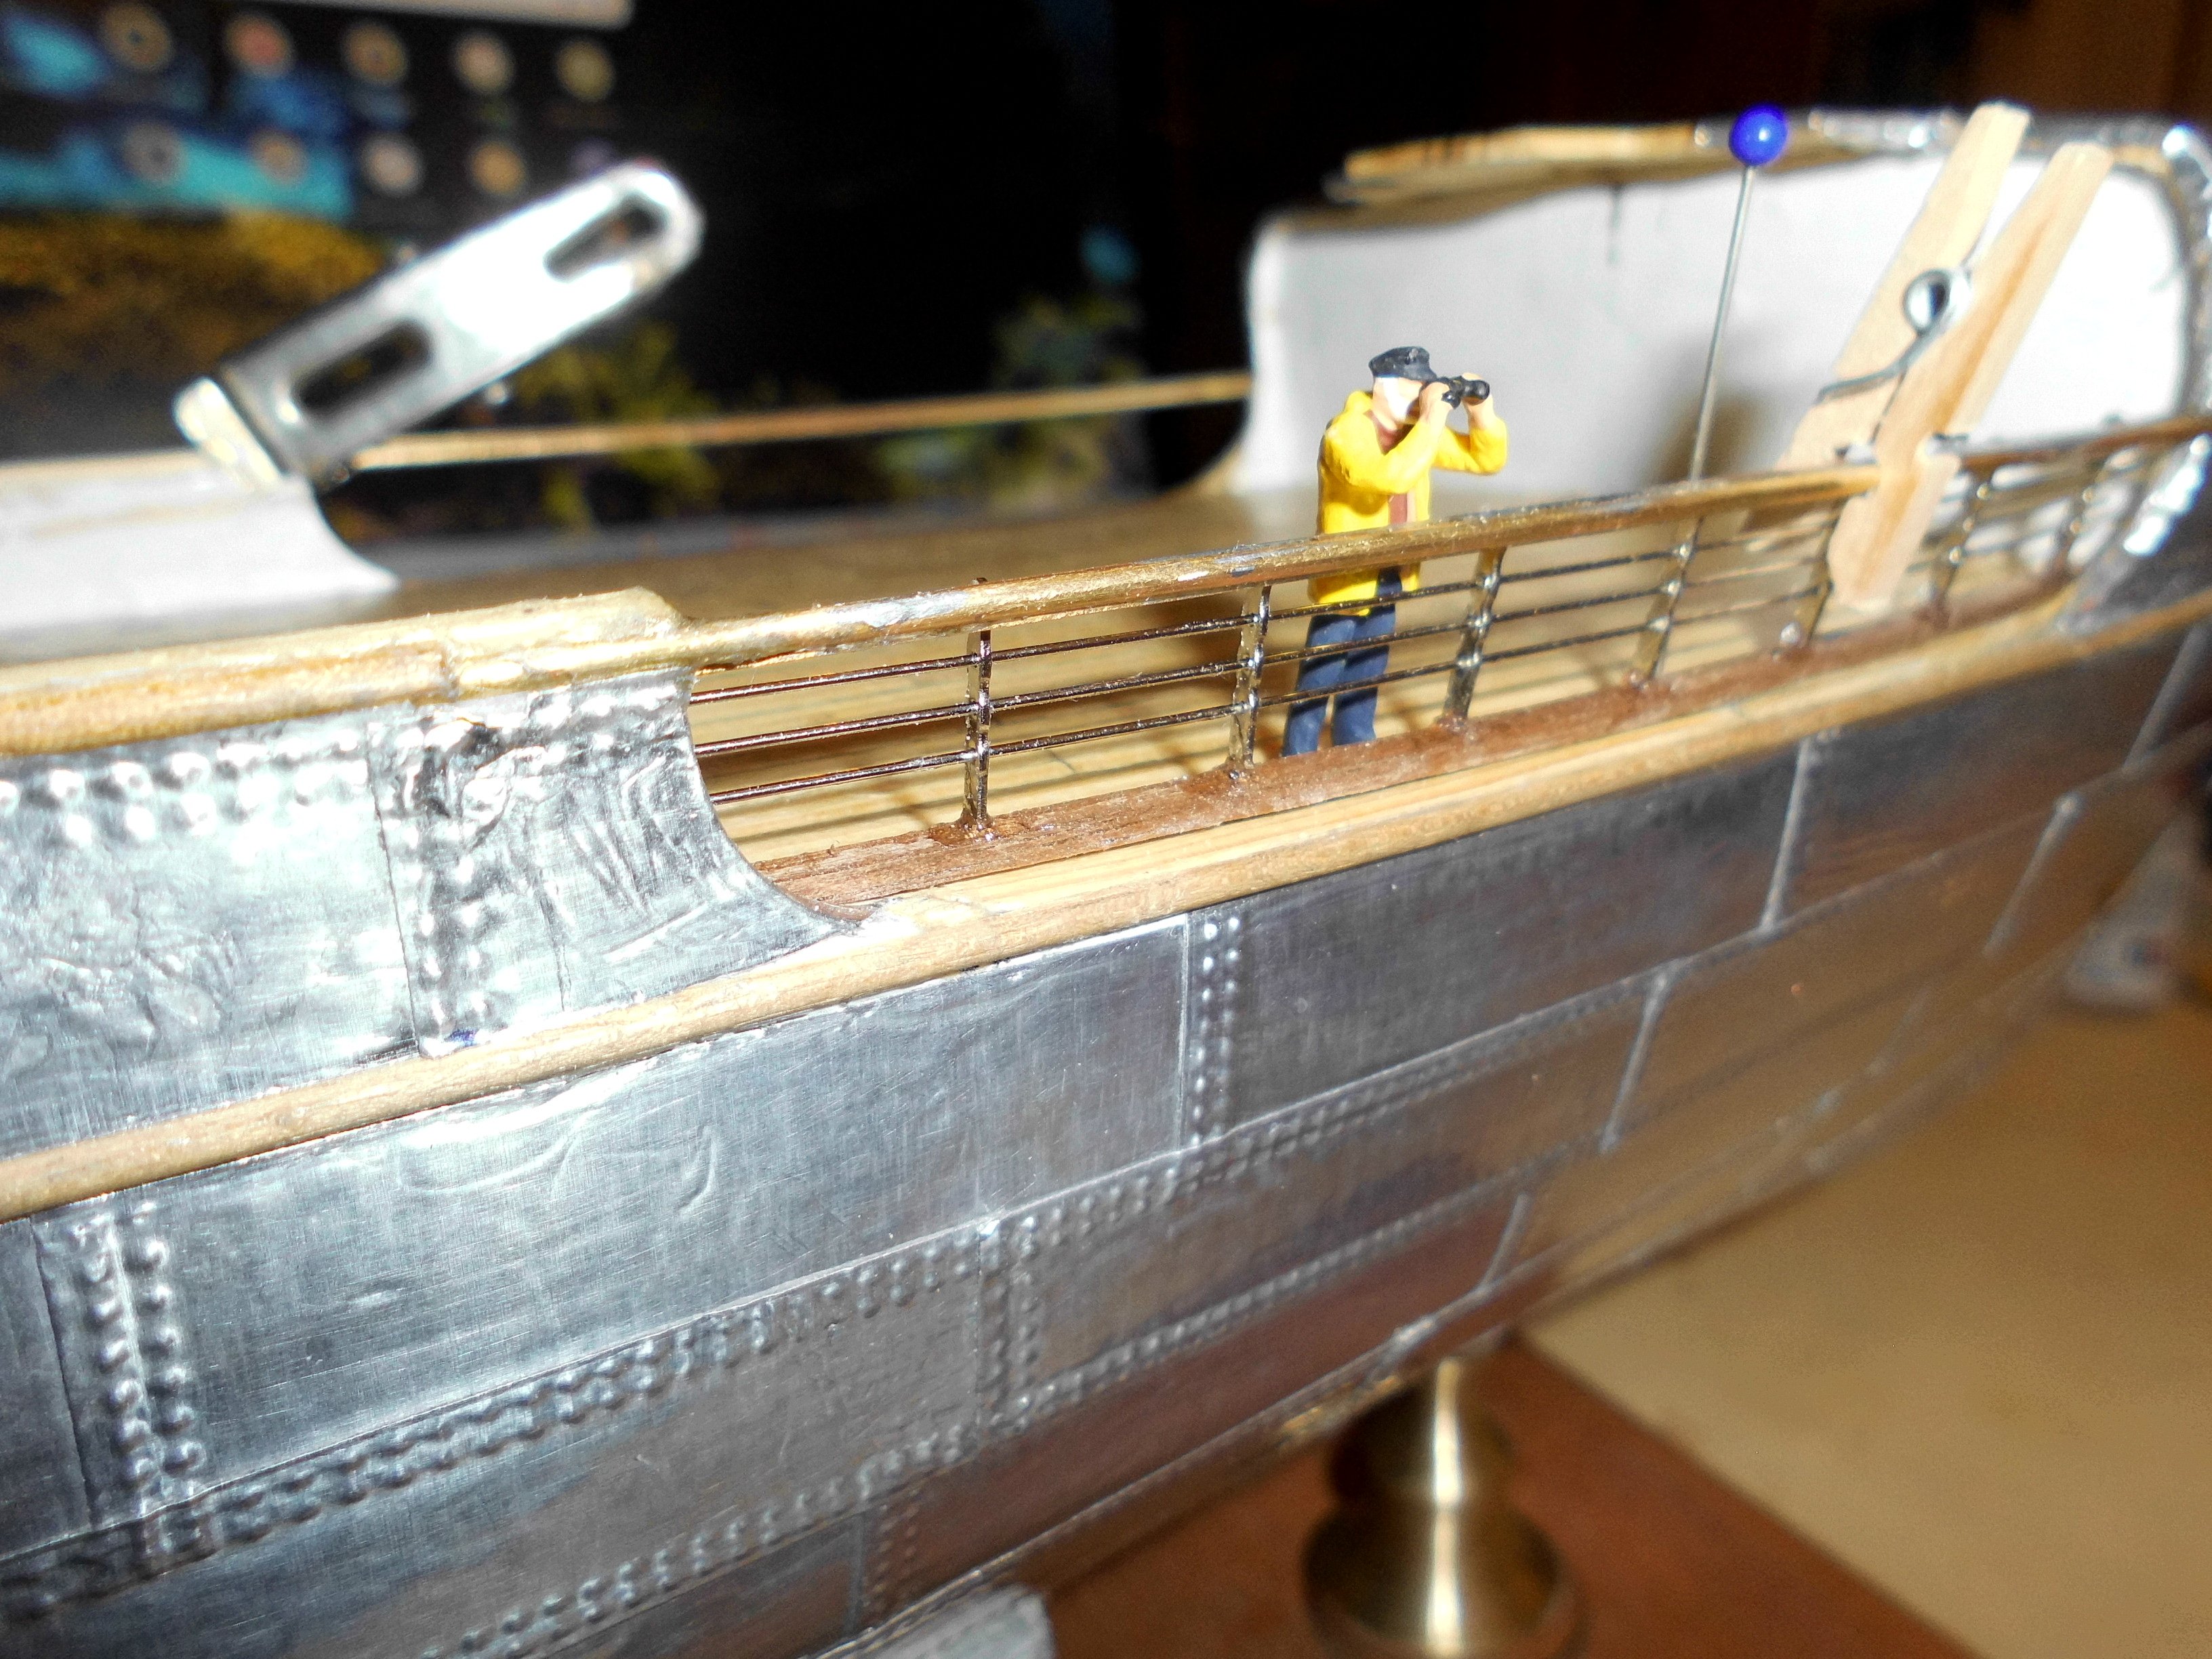
Yesterday I finaly got the lettering done and positioned as intended. This morning I placed all the portholes (painted in hull color, and now all is prepared fore doing the porthole-glassing. The upper row of the forecastle is glassed already. I use 3mm OD silicone transparent cord for the glassing, glue the bits in with CA and cut off from outside square to the porthole face
Nils
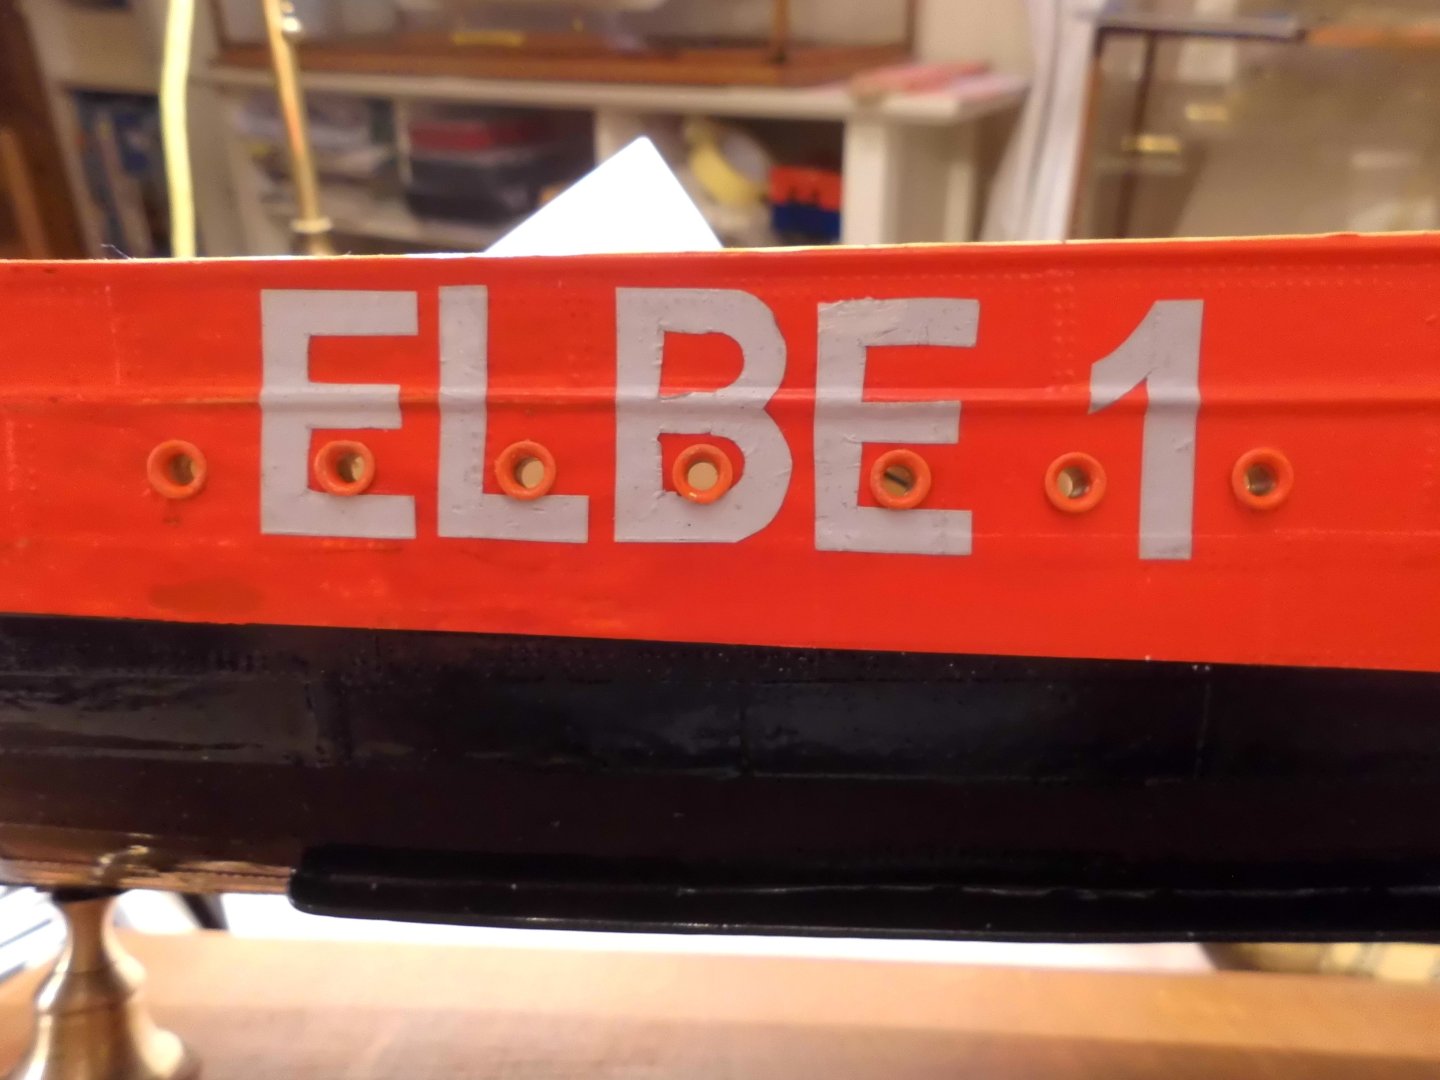
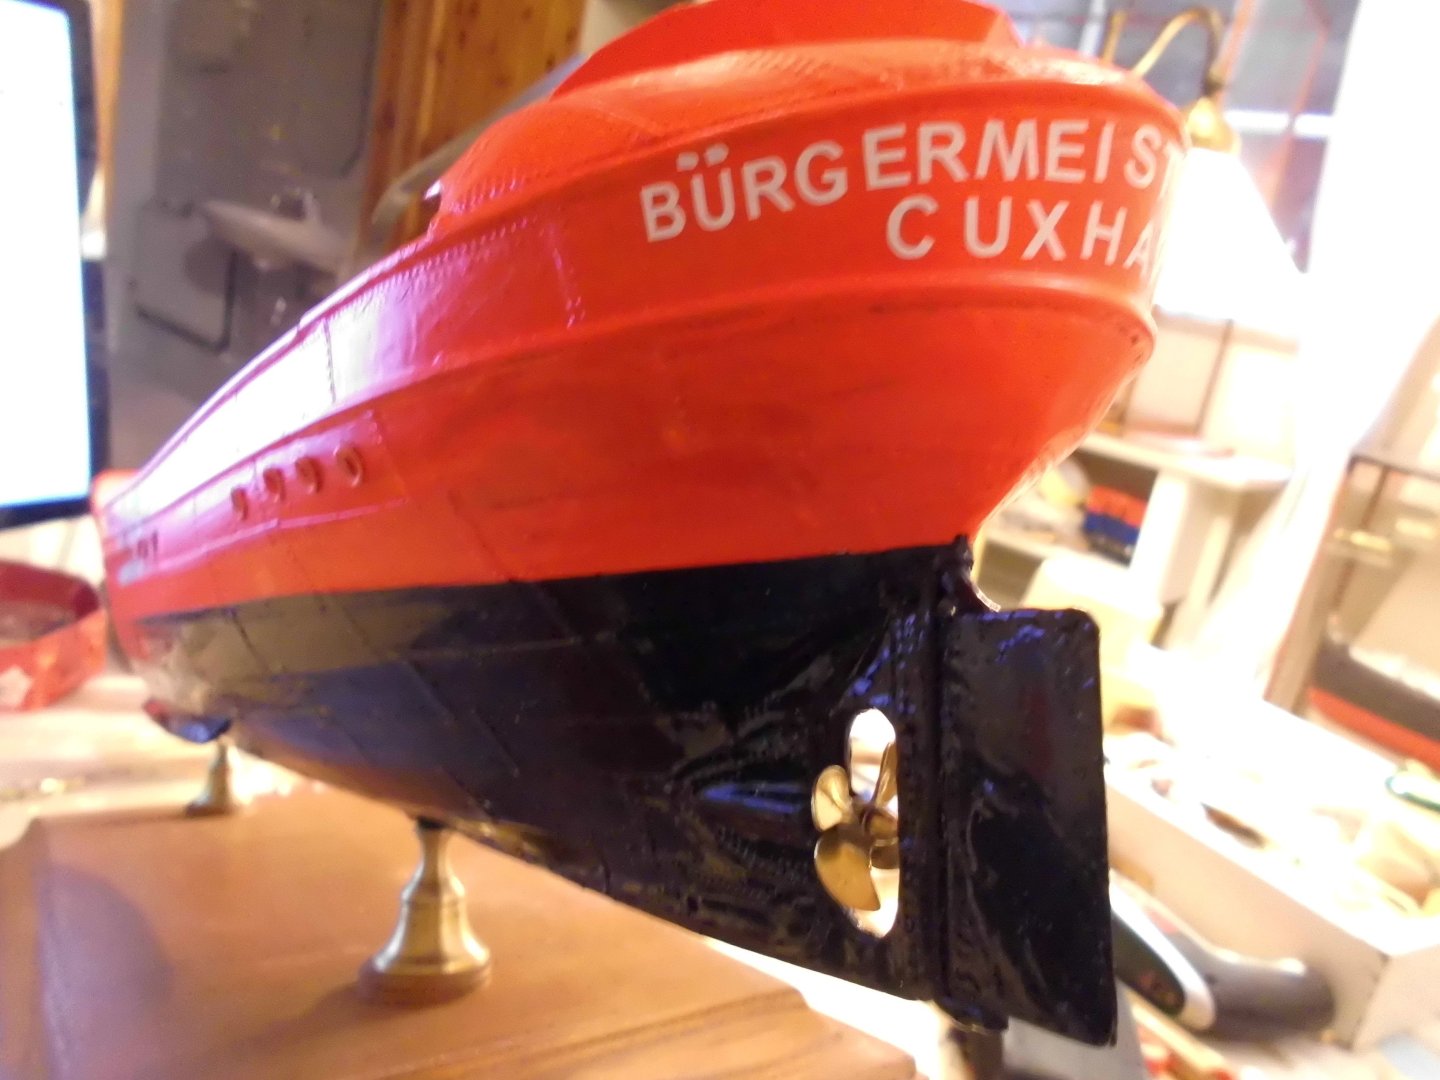
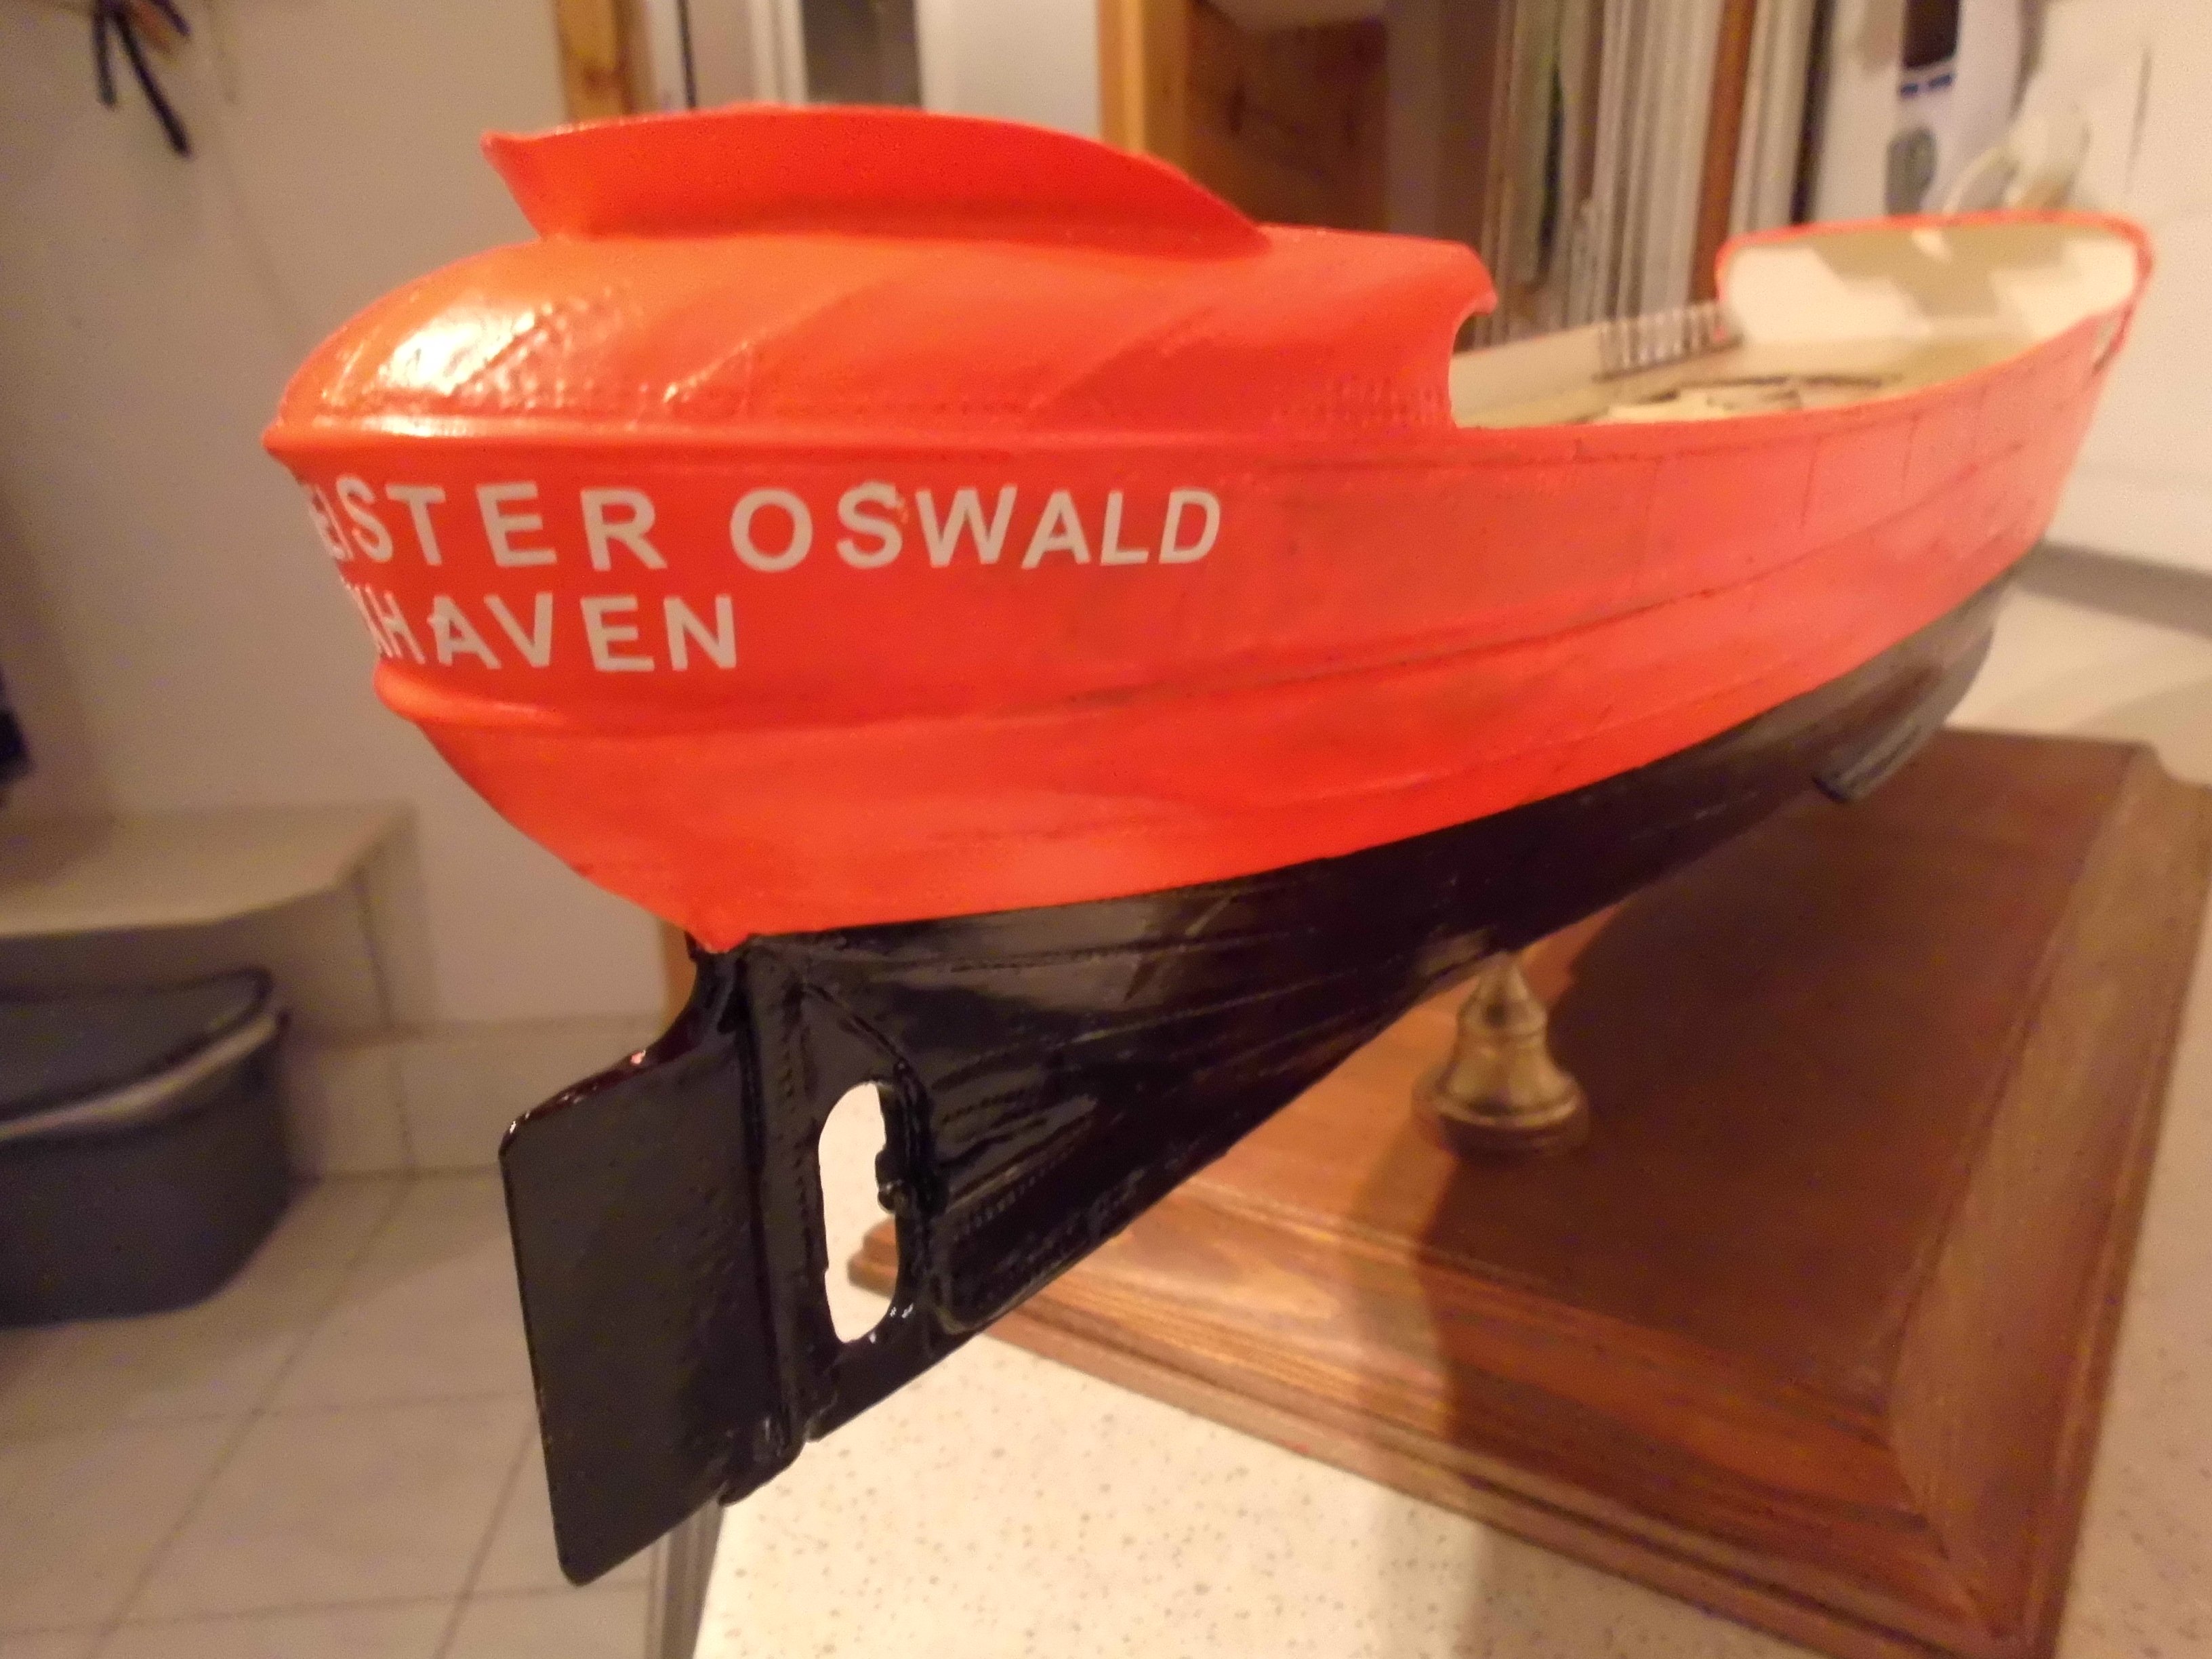
the lettering at the stern (aft) is made from 5mm high white adhesive stickers

-
Many thanks to Keith, John, Phil, and B.E.
for all your nice comments ....
Keith,
I did not find any other lettering related eg. on riveted surface and with rail underneath.
I trust the methode now found will do itJohn,
I`m glad that I did all the trials on a dummy background first
Phil,
thanks your encouraging comment
B.E.
I just love the challenge to find a way of realizing an idea. Once it works it goes to the "box" of approven experience
Nils
- FriedClams, Jack12477, mtaylor and 2 others
-
 5
5
-
Phil,
thank you very much for your suggestion, your kind input is very much appreciated. I indeed am having problems with the lettering, and I do`n want to spoil the model. My great hope was that the decal application would do it. I tried this a few times and it always ended in a mess, because the cut out and wet decal letters are far too fragile to shift them in place without breaking. This brought quite some frustration and gave me some headaches thinking what to do, and tying out alternative ways. I needed some time for further motivation.
Finaly I found a methode that worked (at least on a dummy arrangement ) :
I printed the letters on normal paper and cut them out with a little oversize. Then I sprayed some adhesive promoter on a bit of very thin and self adhesive strip of silver aluminiun foil. After that the silver foil side was painted in color of the letters (white). The oversize cutout printed letters were glued to the rear side of the foil`s silicon paper protection side. Then the aluminium foil with glued together with the printed paper cutout templates these "laminated letters" were cut out as precise as I could. Finaly the thin aluminiun letters (now white color) were removed from silcon paper and then carefully brought into position.
Due to the good adhesive gluefilm of the aluminium foil rearside, the underground contures ( rivets and rail ) could be easily pressed down with an rubber erasor. The foil did not partiialy "lift off" in the problem zones, and the rivets can be recognized
I hope this was understandable and enclose two pics......
Nils
these paper prints were only needed for size and contours of the letters
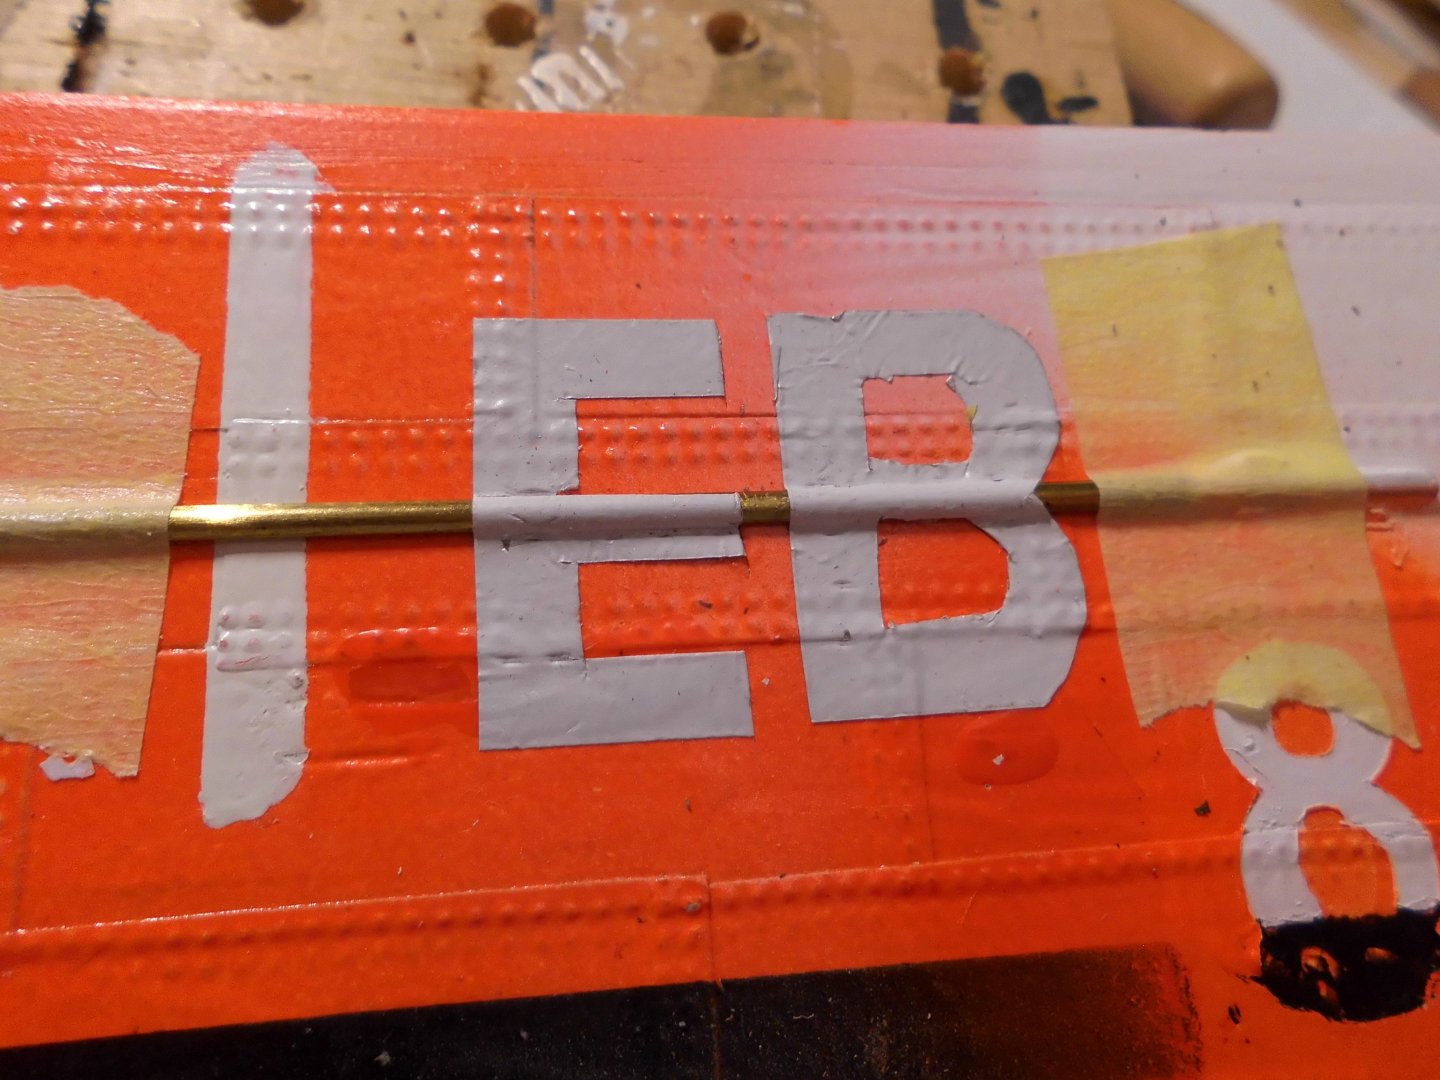
here samples for letters "E" and "B" were placed were peranently to the dummy arrangement
- GrandpaPhil, mcb, KeithAug and 9 others
-
12
-
Congrats B.E.
both models are masterly built, and eyecandy museum quality to look at
Nils
- CiscoH, Blue Ensign and davyboy
-
3
-
-
Hi John,
yes its causing me headaches, and I`ll ty to avoid a mess up on the hull, because I never did own-made decals before. Because I ca`nt print white on transparent decal paper, I`m using white decal ground and have to sharp cut out every letter as good as I can and then start the waterslide transfer letter per letter. I`ll do a trial decal attachment to a dummy arrangement first, when I have the ordered softener in hands
Nils
- mtaylor, Canute and FriedClams
-
3
-
Hi B.E.,
ca`nt wait to see your case, I also prefer glass, the acylic is a magnet for dust from the outside. You`re right with the handycap for the glass weight, I use 4mm thick panes, they fit nicely into the wooden case- frames with 4mm slots
Nils
-
Thank you very much Mike,
I`m just trying to get the portholes ( 6mm OD )in line with the lettering, and must arrange them so that I drill the borings clear of the frames. Also the outside diam. of the portholes must be centered in the letter-spaces without damaging them too much. Made a small dummy for the check. The white decal letters must be brought in very precice positions to the hull. Hope it works
Nils
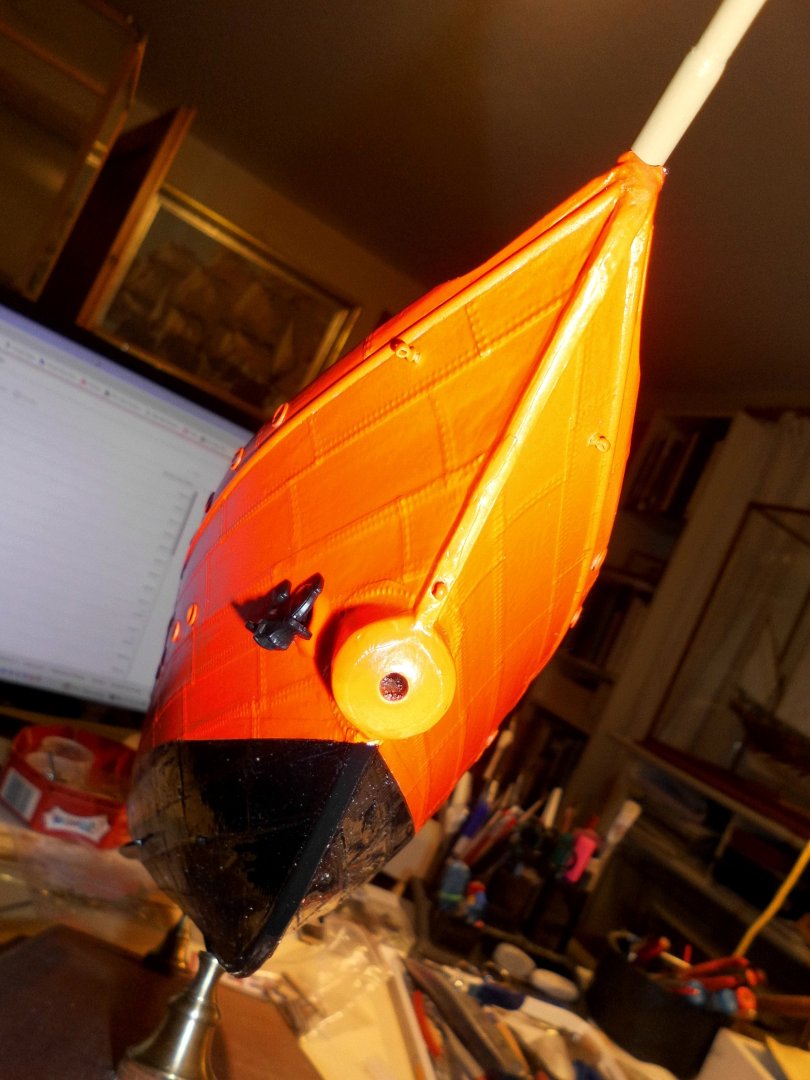
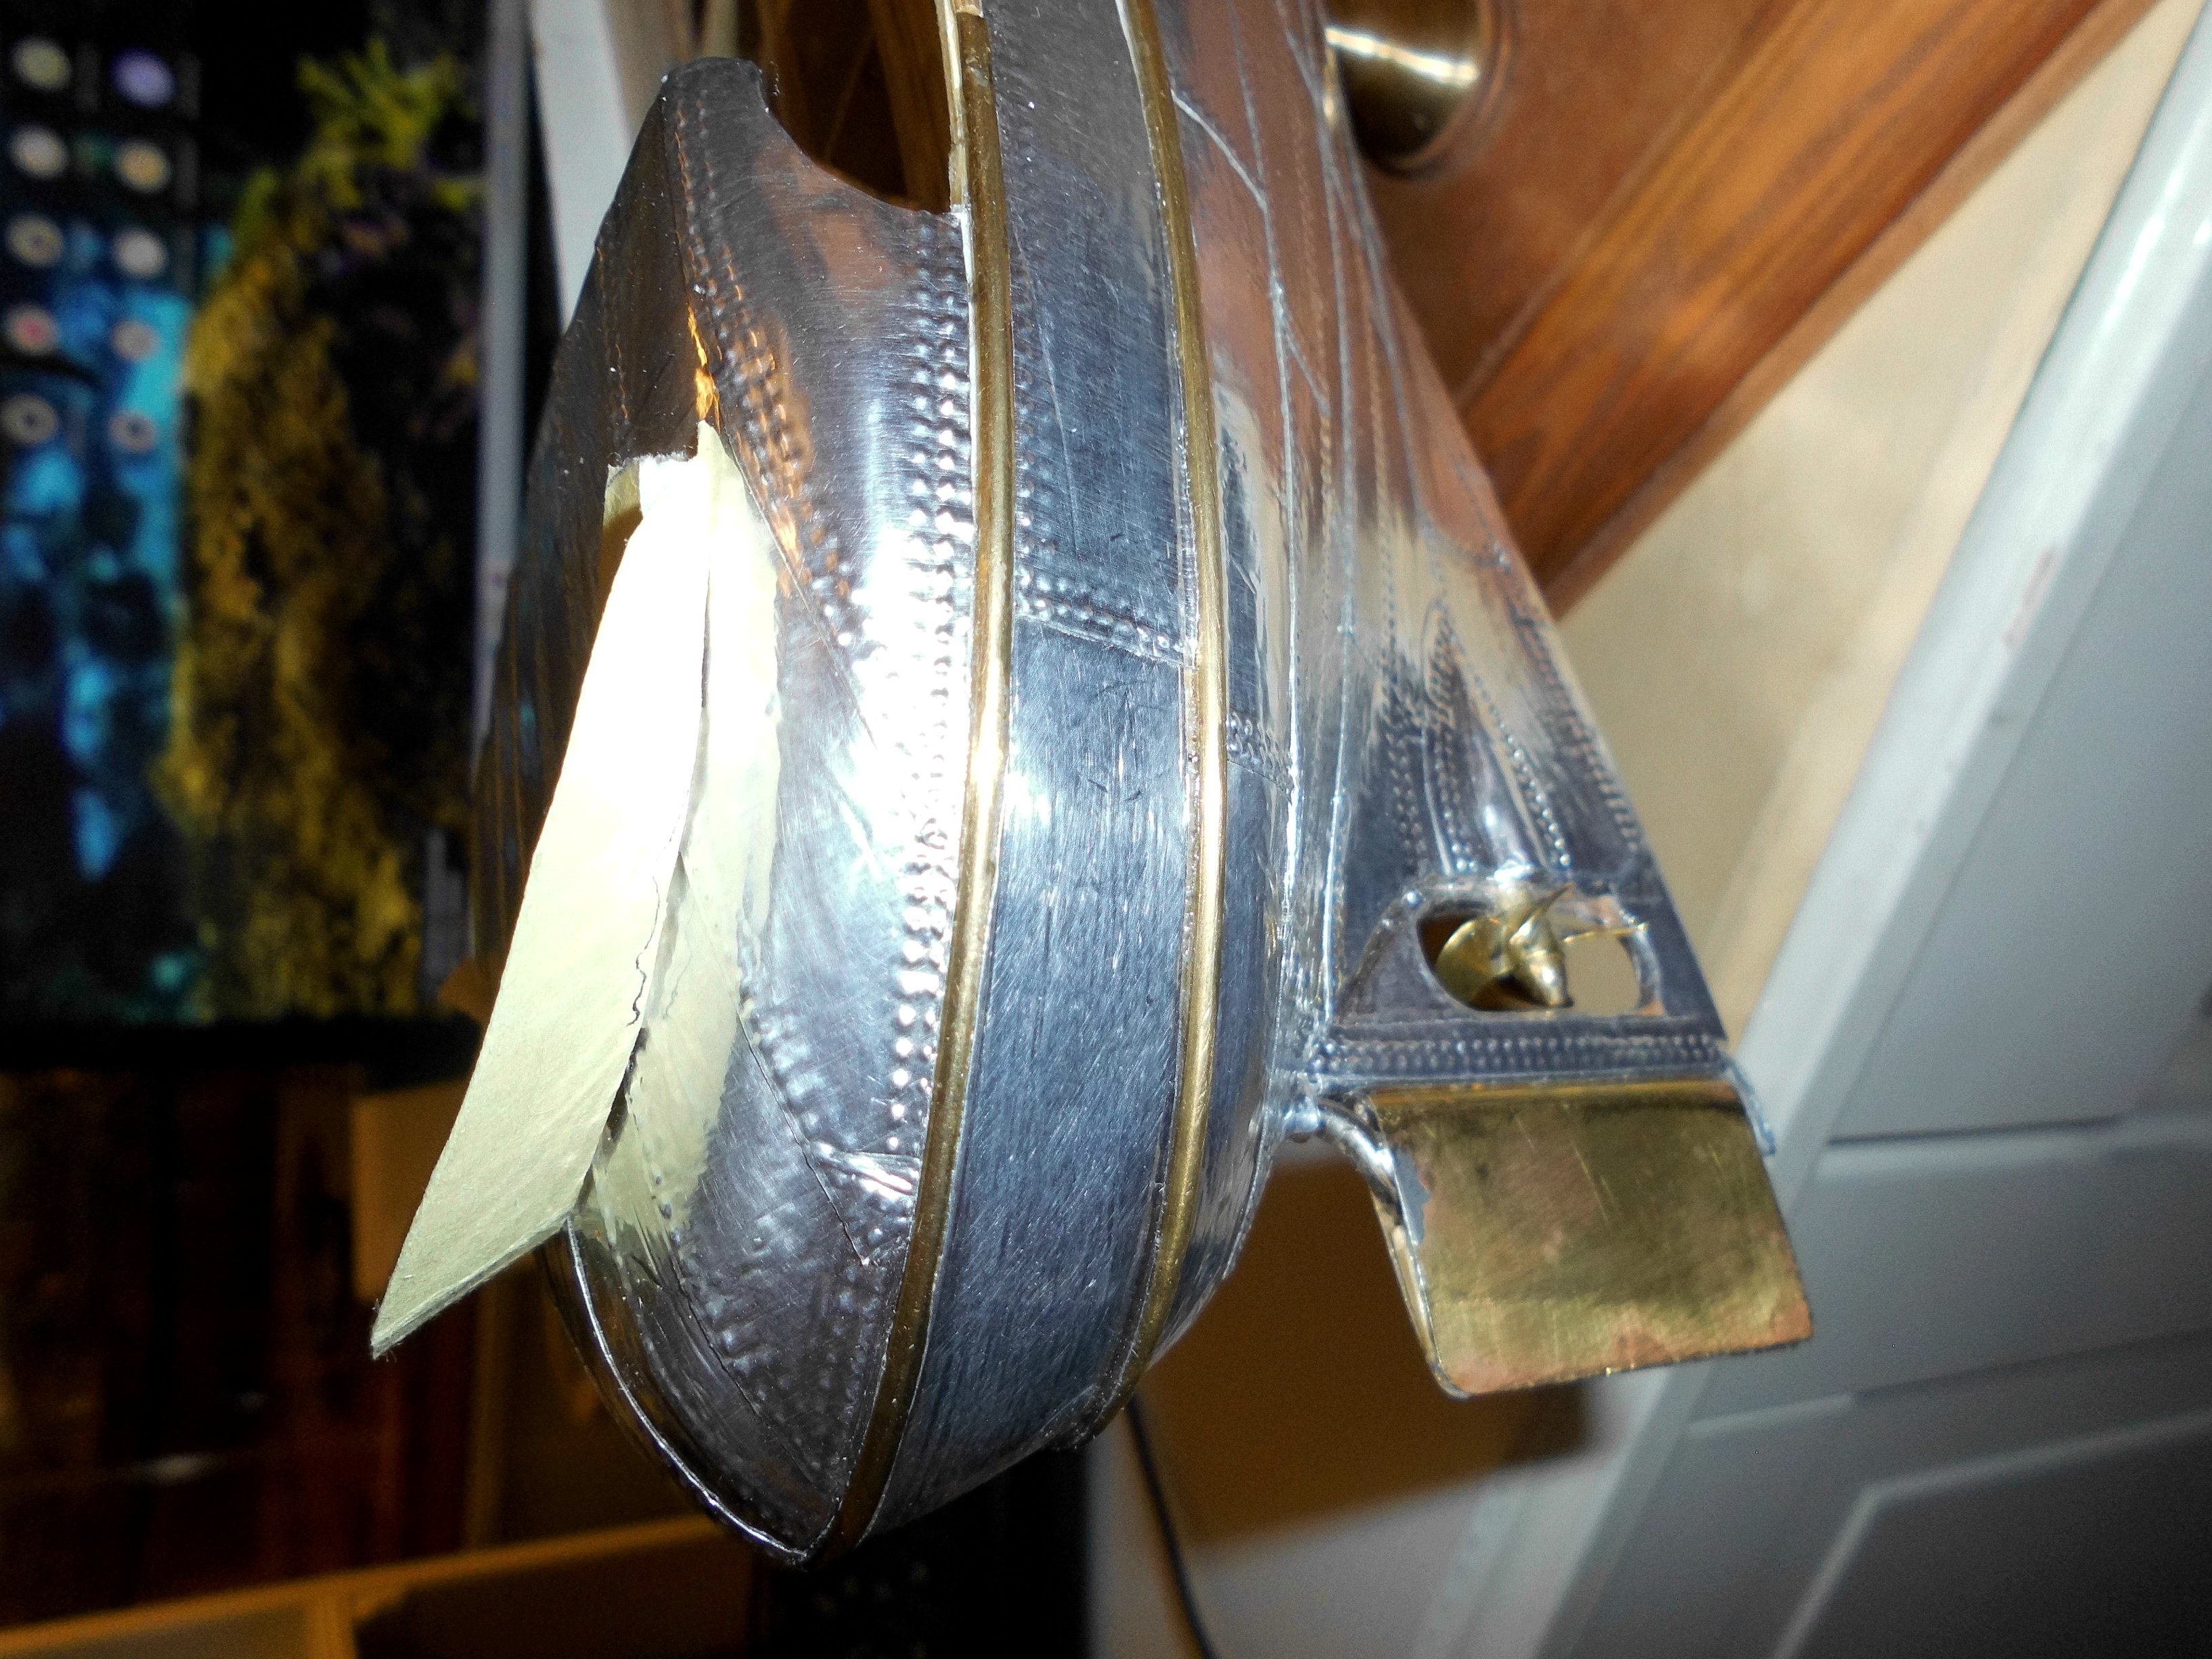
20 mm high lettering. The brass portholes will be prior painted in red hull-color, glassed an then pushed into the 4 mm holes
- FriedClams, steamschooner, wefalck and 9 others
-
12
-
Hi Richard,
I had a look at your splended and wonderful build of the Bluenose (in progress ) for several times already. It keeps me reminded to my 1:75 Billing Boats model of the Bluenose gloucester fisher I was excited for, after seeing the movie " The World in his Arms ", featuring amoungst others Gregory Peck and Anthony Quin long, long ago as skippers, both masters of two of these ships, and in a spetacular breathtaking Bluewater-race, hard at the wind, in the Pacific ocean at the edge of limits
Nils
-
-
A wonderfull build B.E.
are you having a glass or a plexiglass case in order ?
Nils
- Ryland Craze, mtaylor and Blue Ensign
-
3
-
Nice progress Harry,
I like the clean framing work, looking foreward to your planking
Nils
- hof00 and Scottish Guy
-
2
-
-
Thank you very much Lefebvre, John and Richard,
Lefebvre,
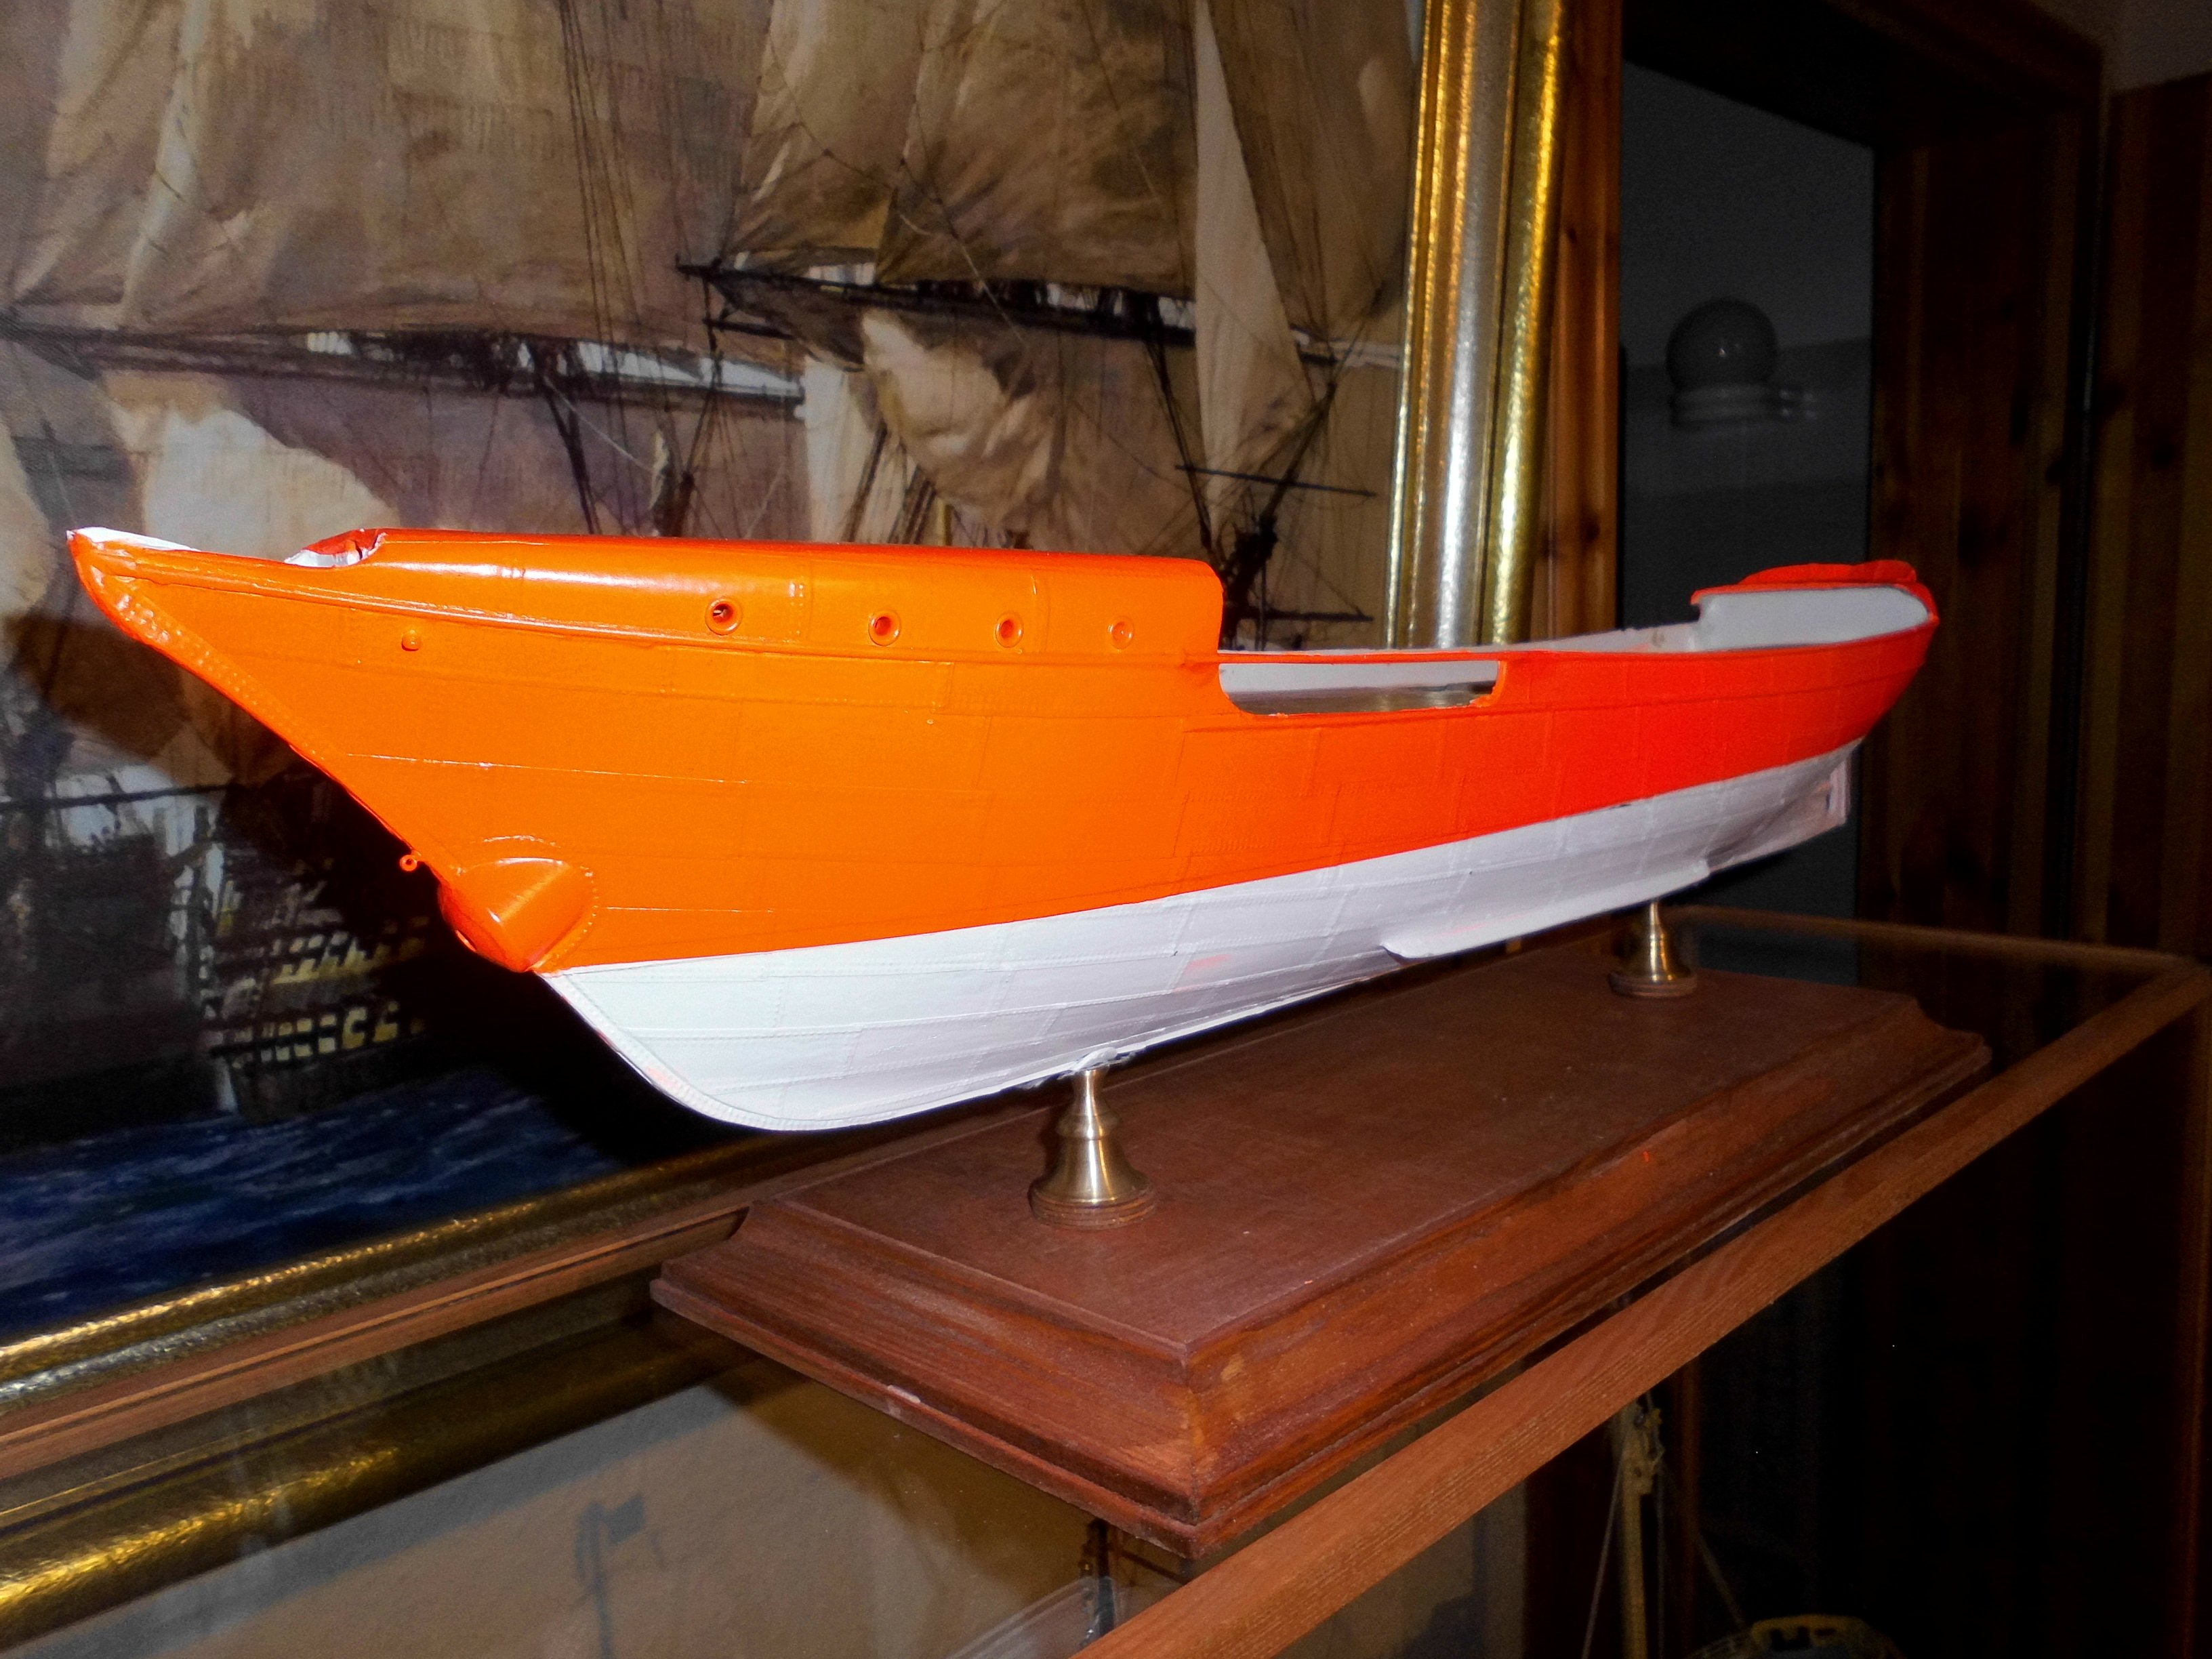
yes, its a pitty that this happened, but that paint does not allow reasonable corrections after this happened during spraying. I already tried my best to mend it.
John,
I think I`ll leave it as is, because heavy paint corrections will make things worse. I`ll take it as a rough touch with the kay wall in the harbor longer ago
Richard,
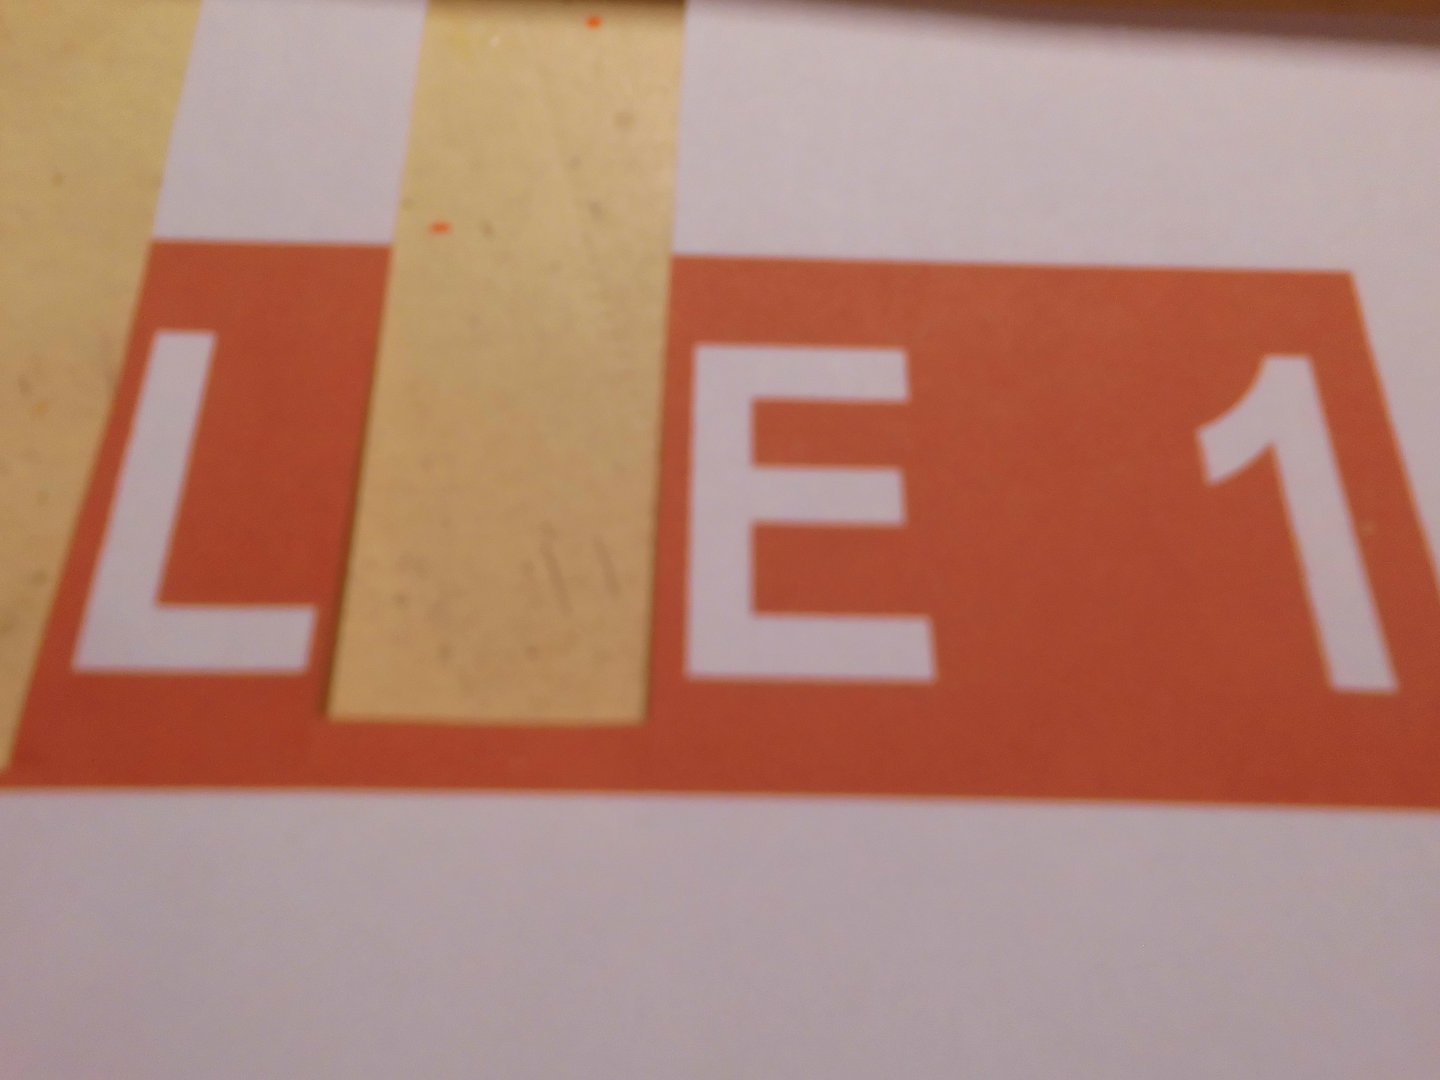
now the time has come to start with the decals for ELBE 1
I did the masking off for the sub waterline black coating, and fitted the ships name and homeport with small 5mm high white sticker letters, that I had already bought earlier for this purpose. It worked well, and I had left the space on the hull rounding there without "rivets"
Many, many thanks to you again for your kind help in encouraging me to do my own decals. I have received white decal paper for inc-jet printing, but am still eagerly waiting for the decal softener to arrive
Nils
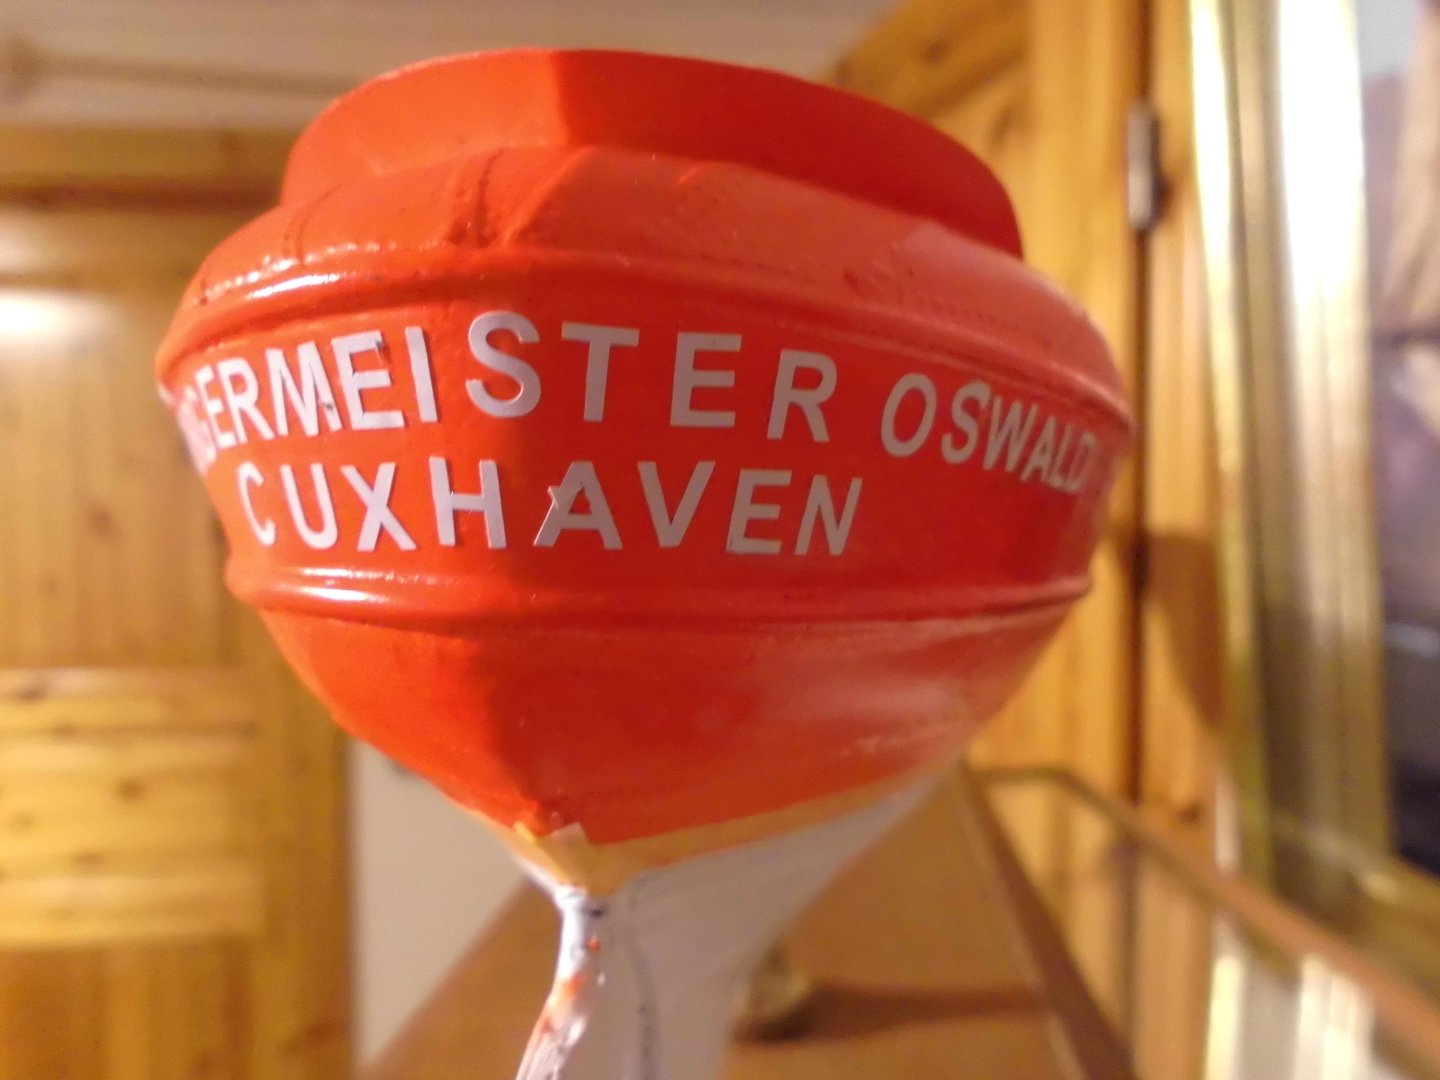
the ship`s name is "Bürgermeister Oswald" and the homeport is the town Cuxhaven at the mouth of the Elbe river
to date I hve had good results with Tamiya masking tape
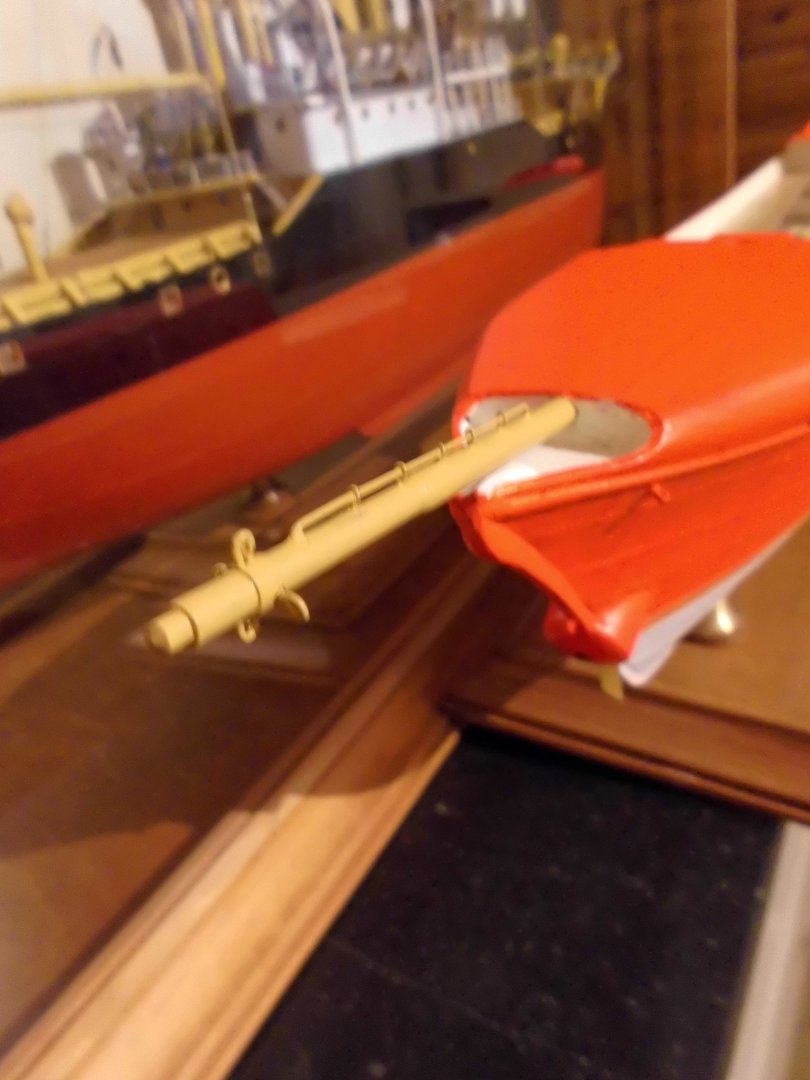
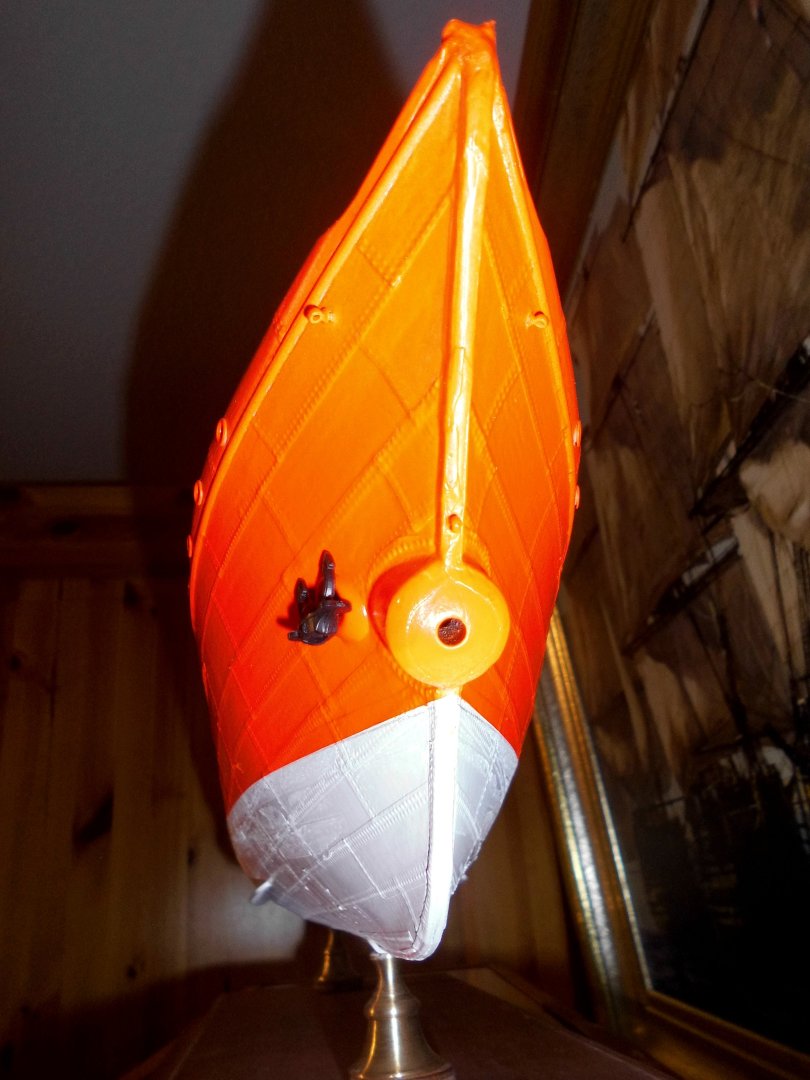
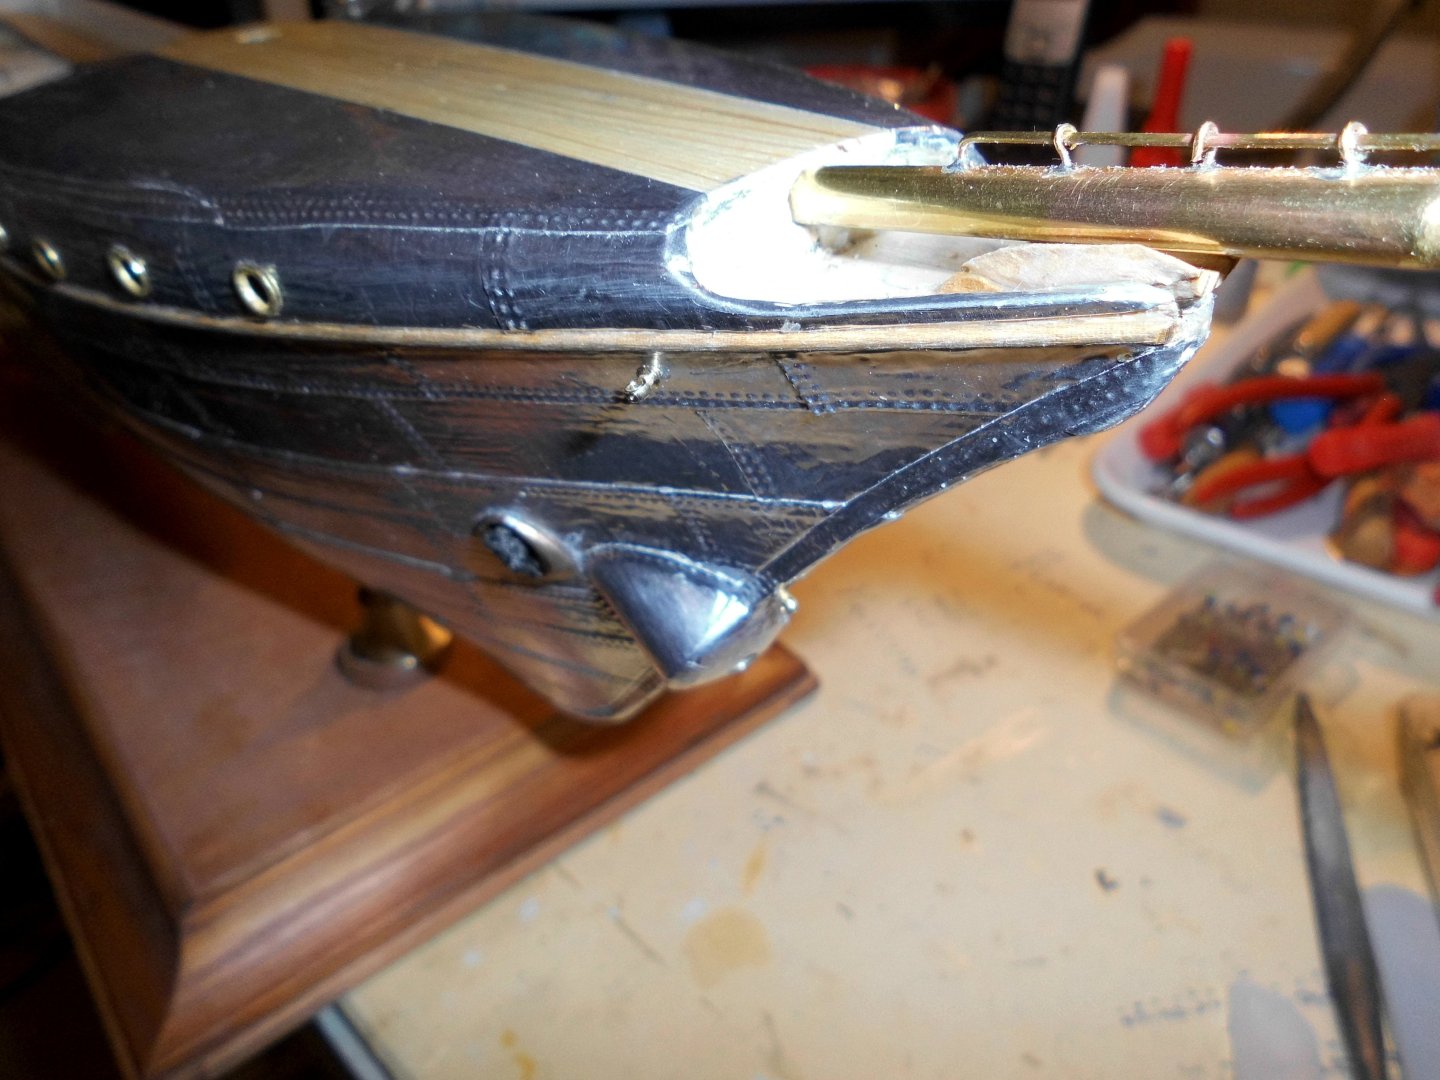
The painted bow-sprit bumpkin in place
both waist railings are fitted
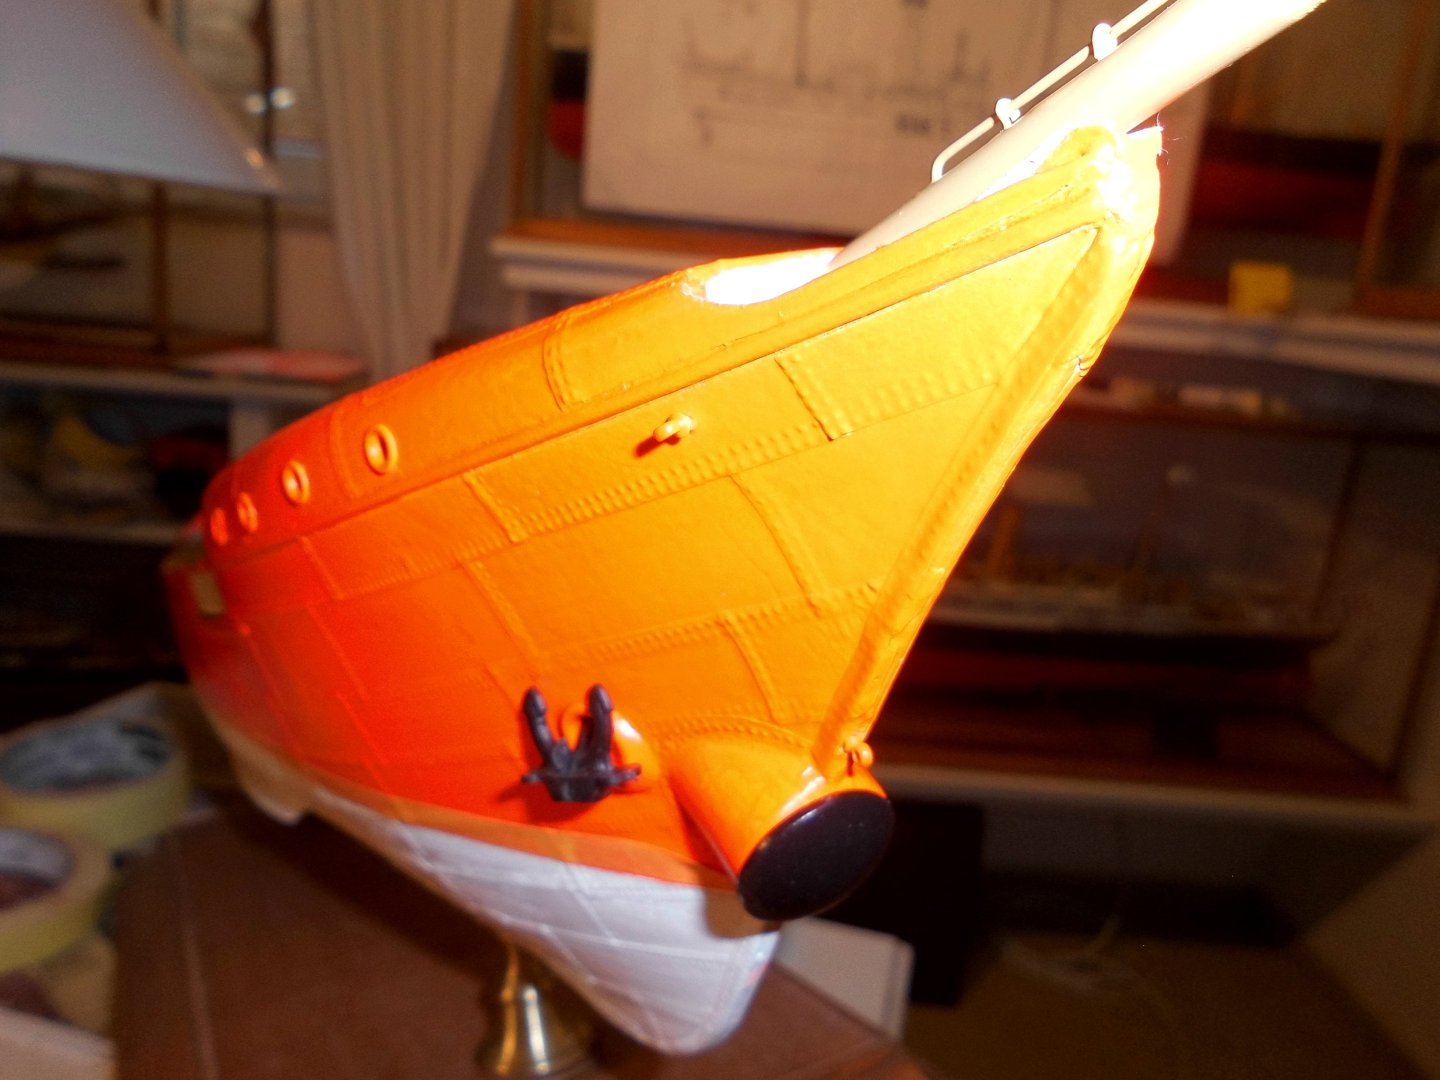
both the stb. side hall-anchor and the mushroom-anchor are fitted
-
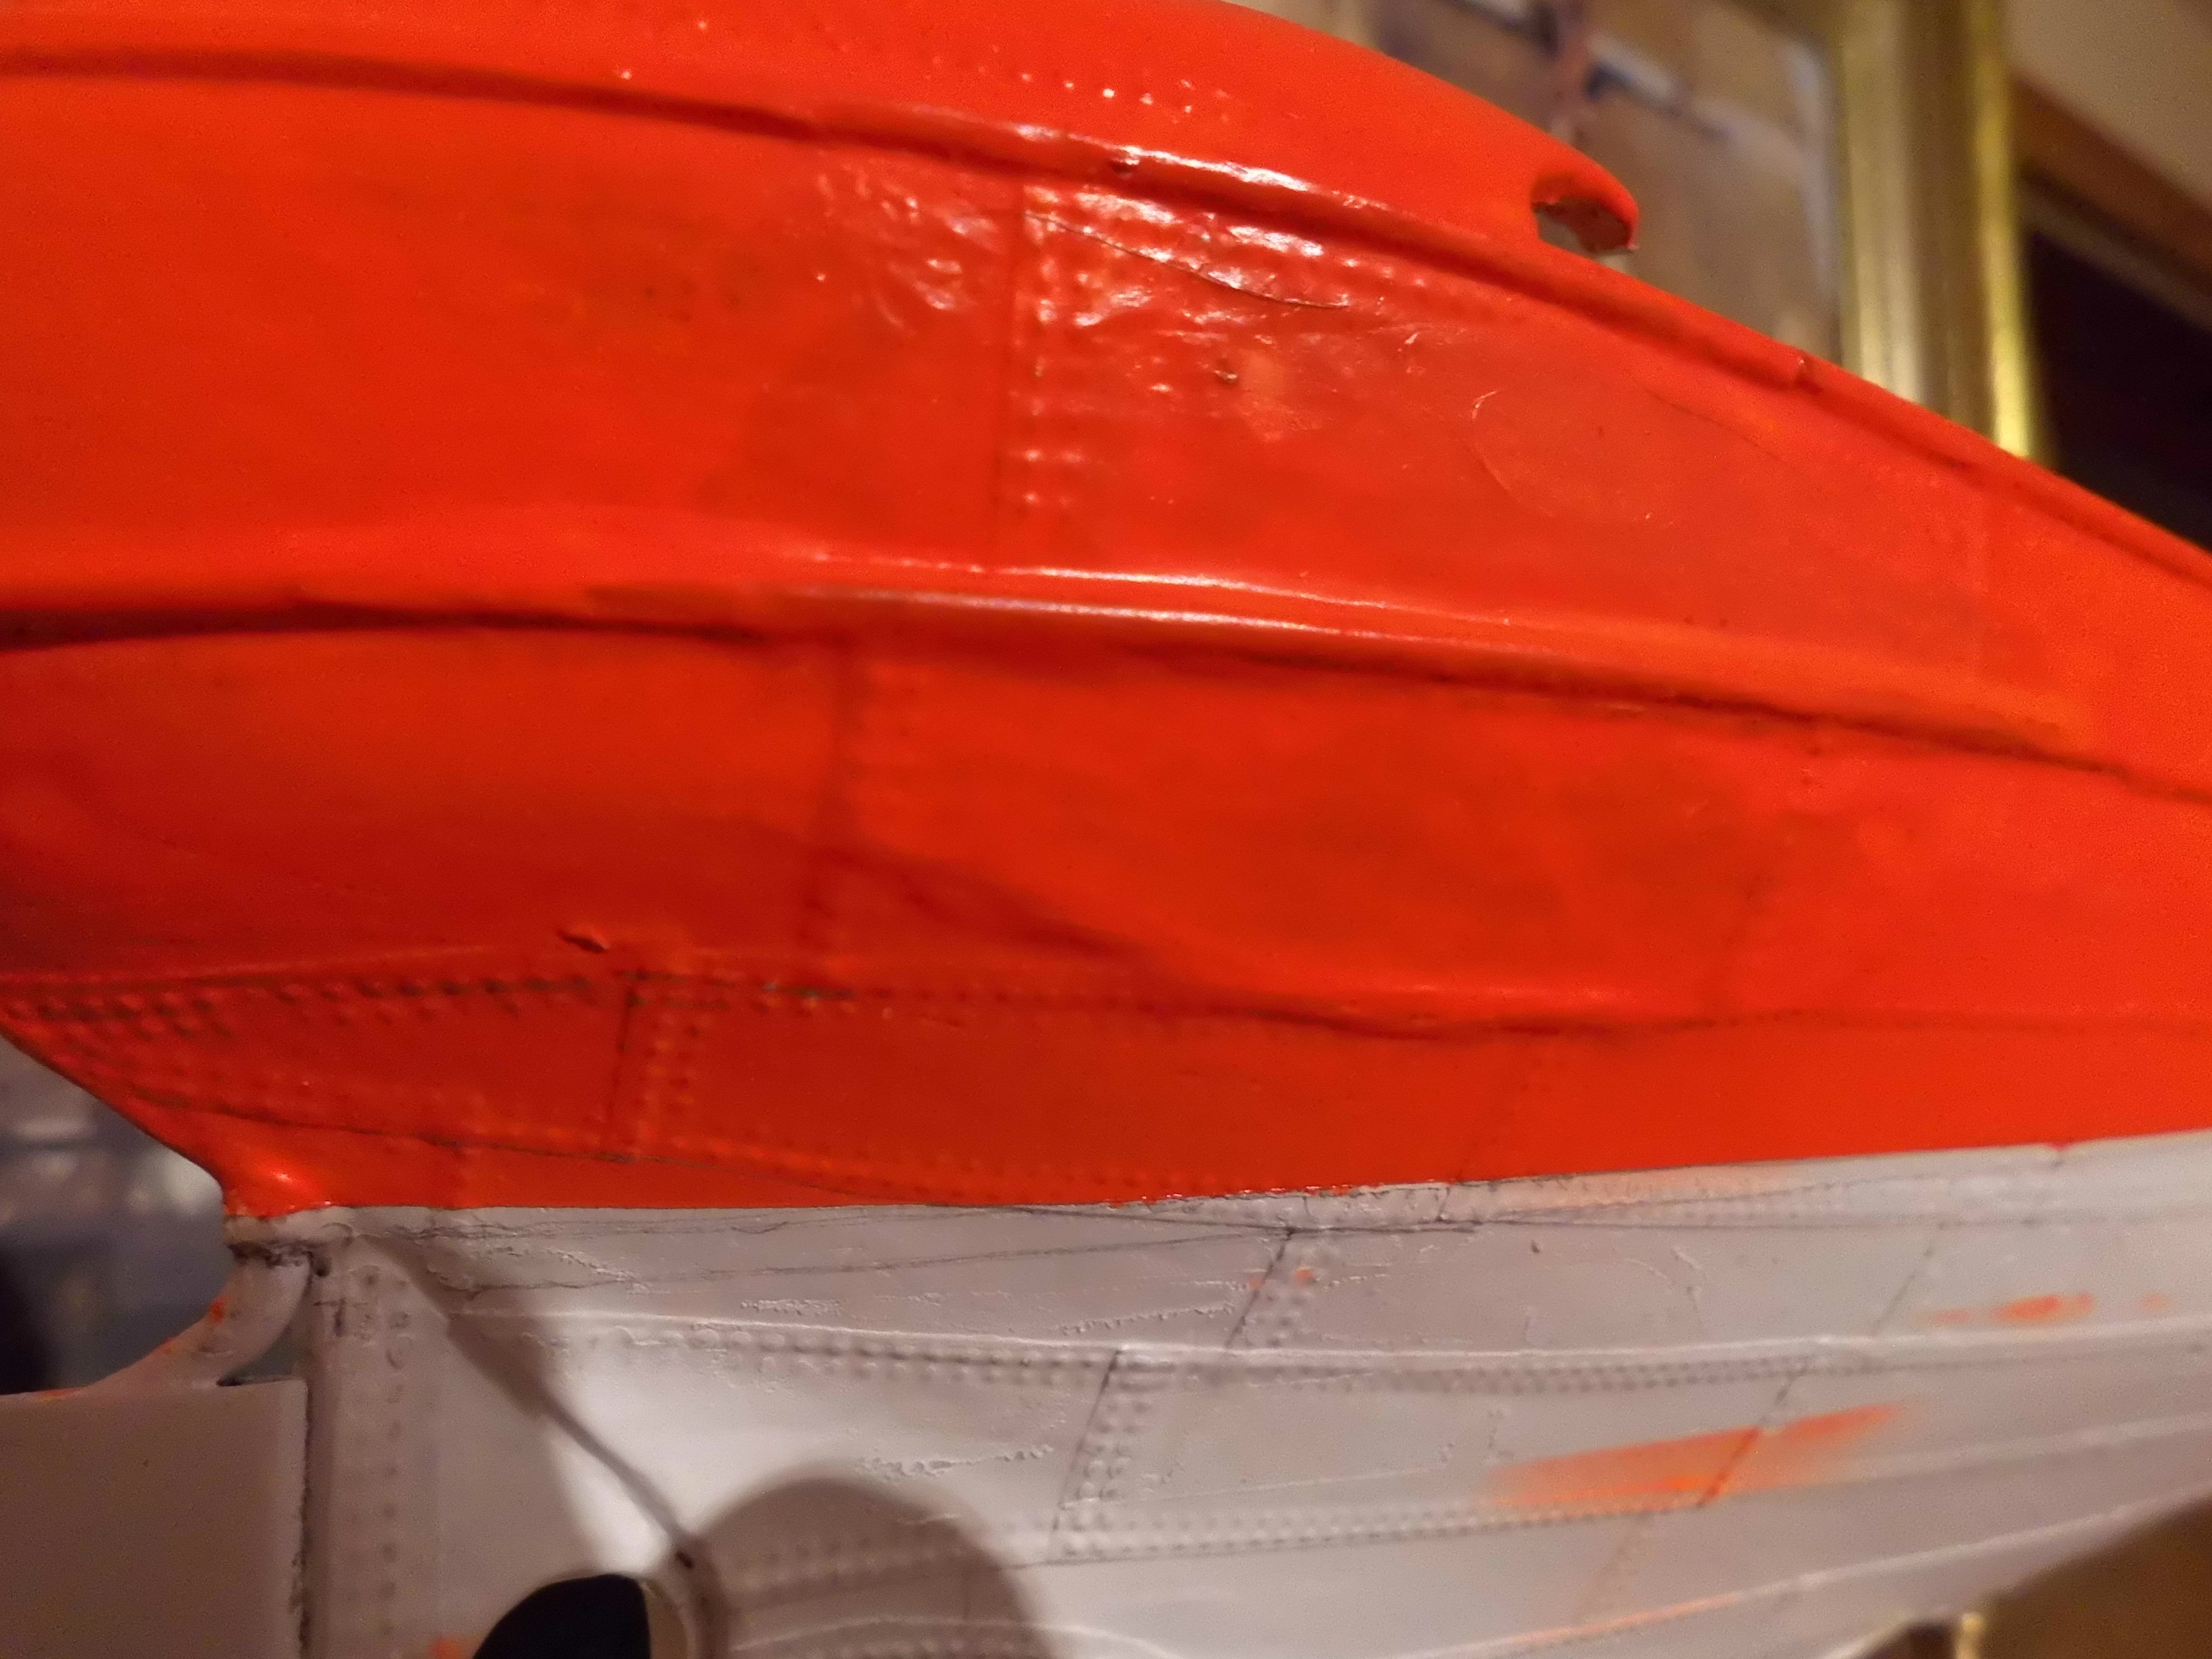
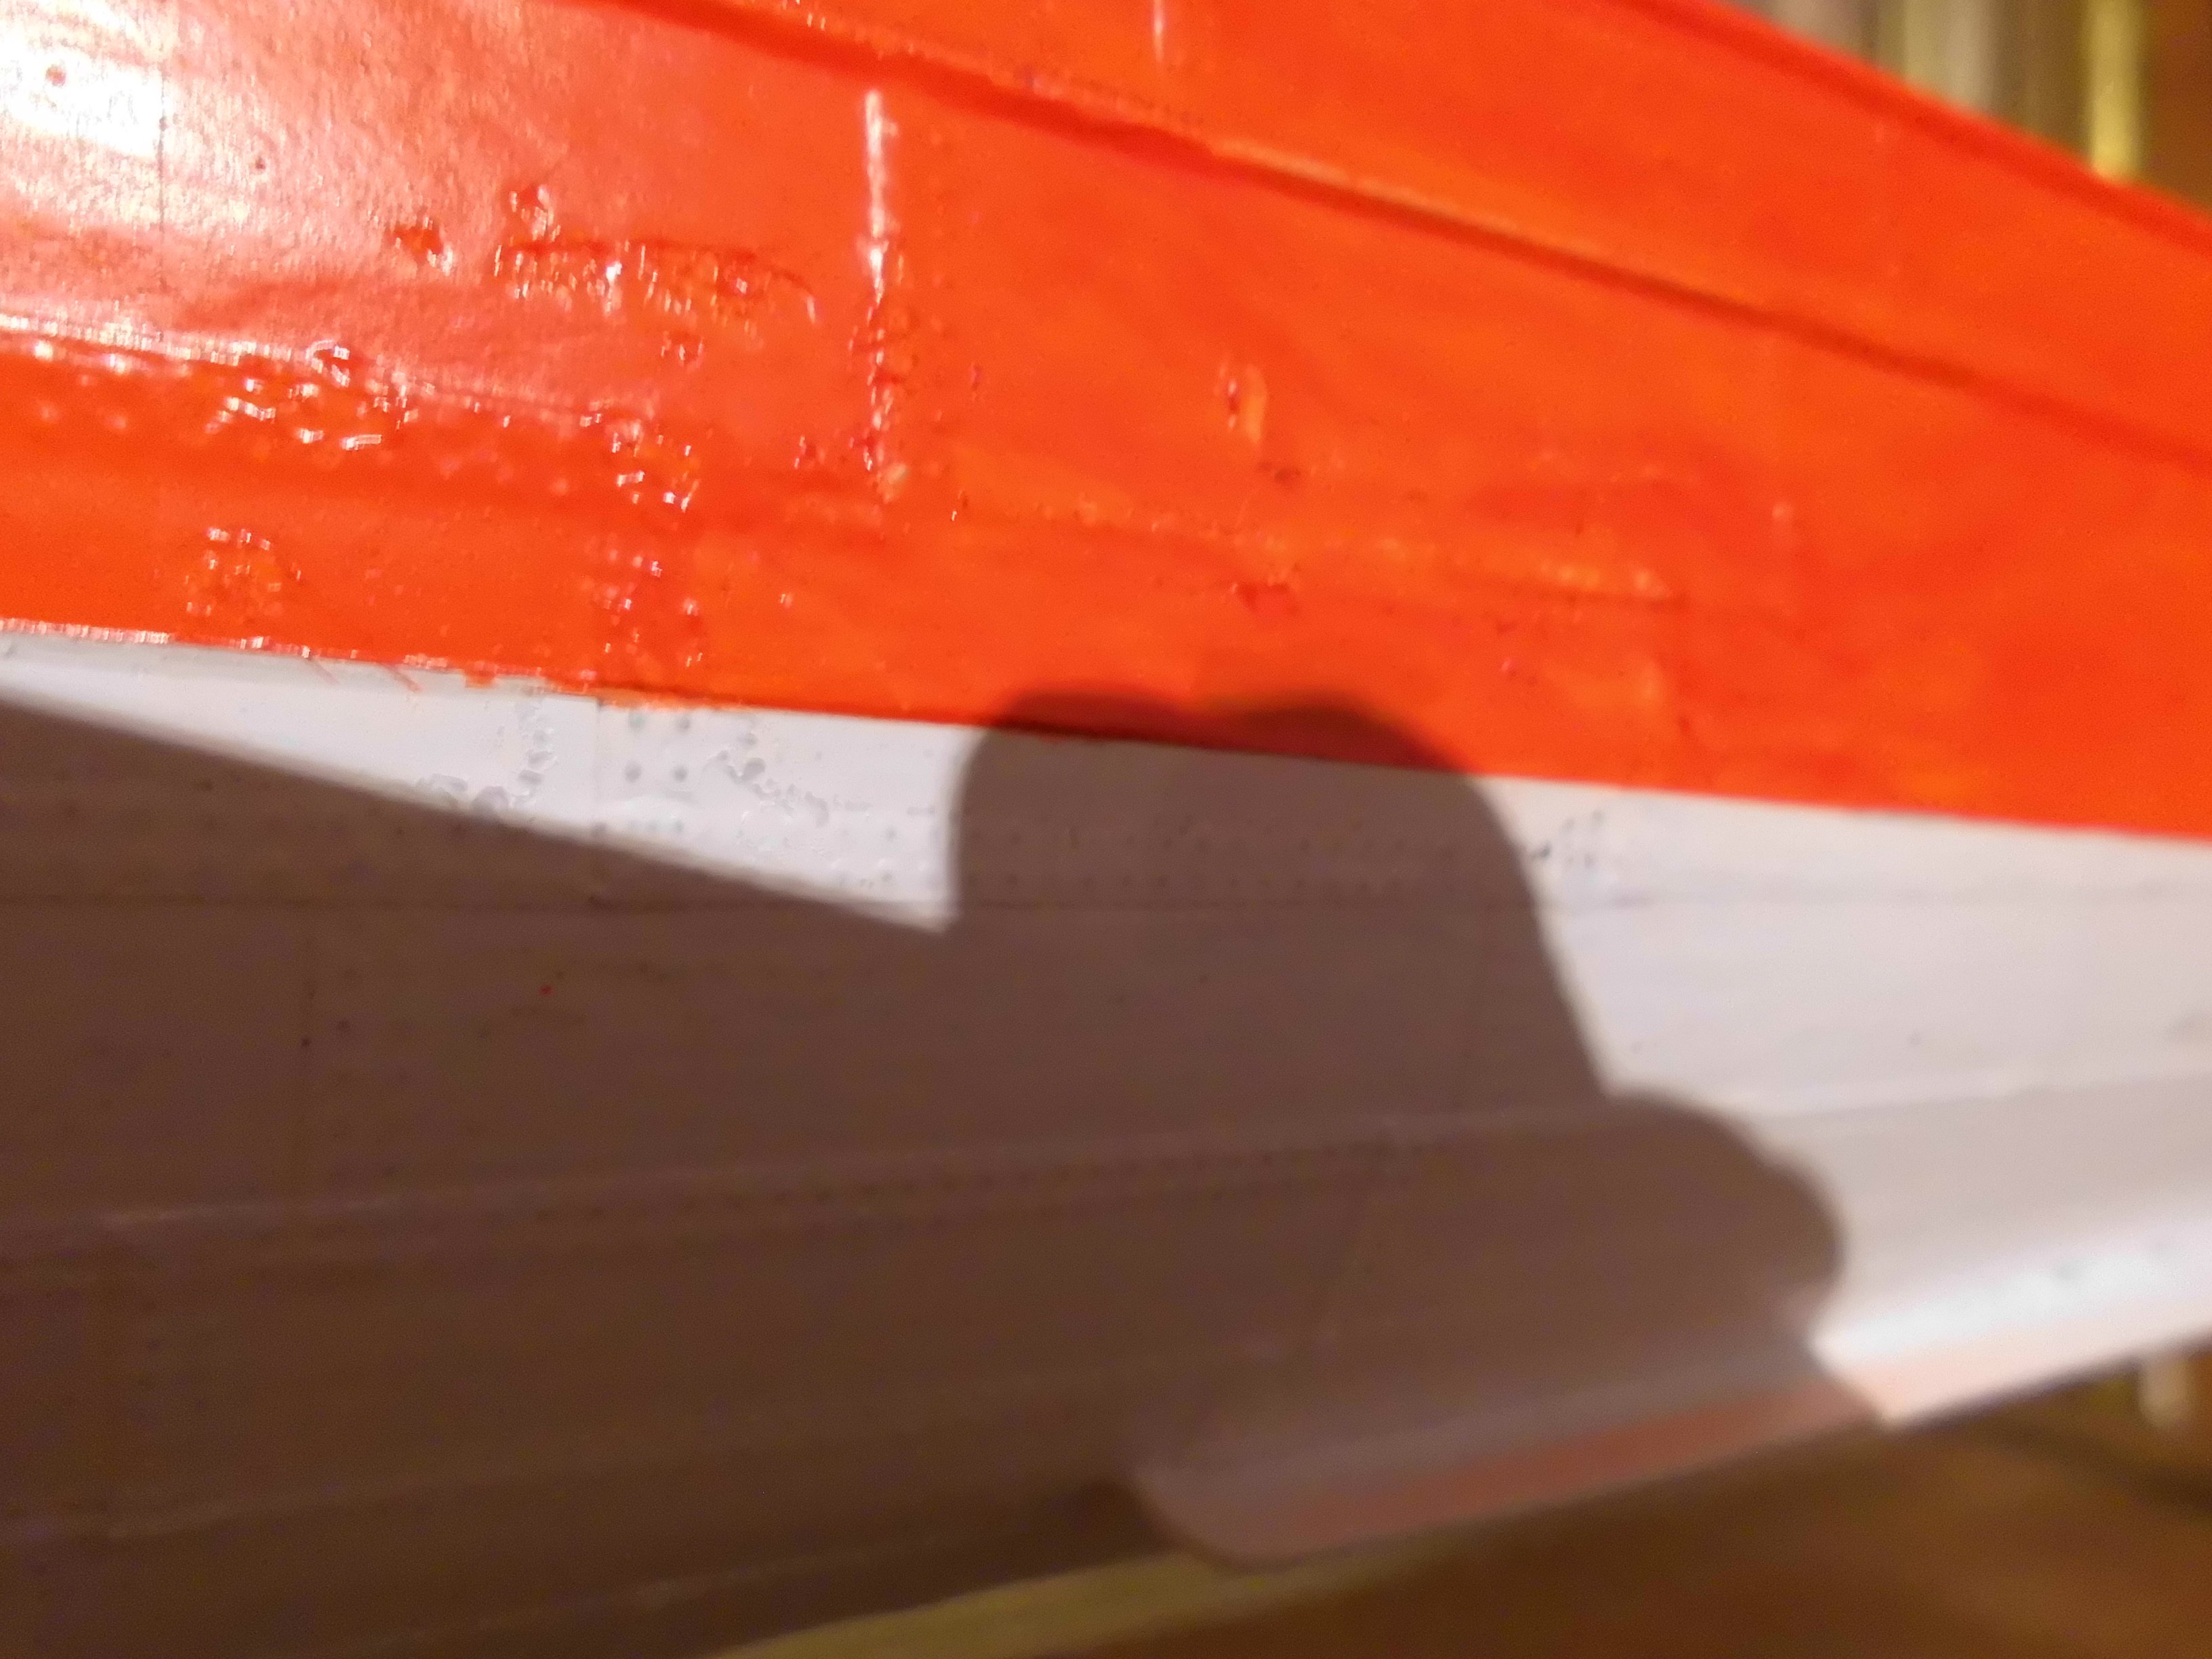
Update
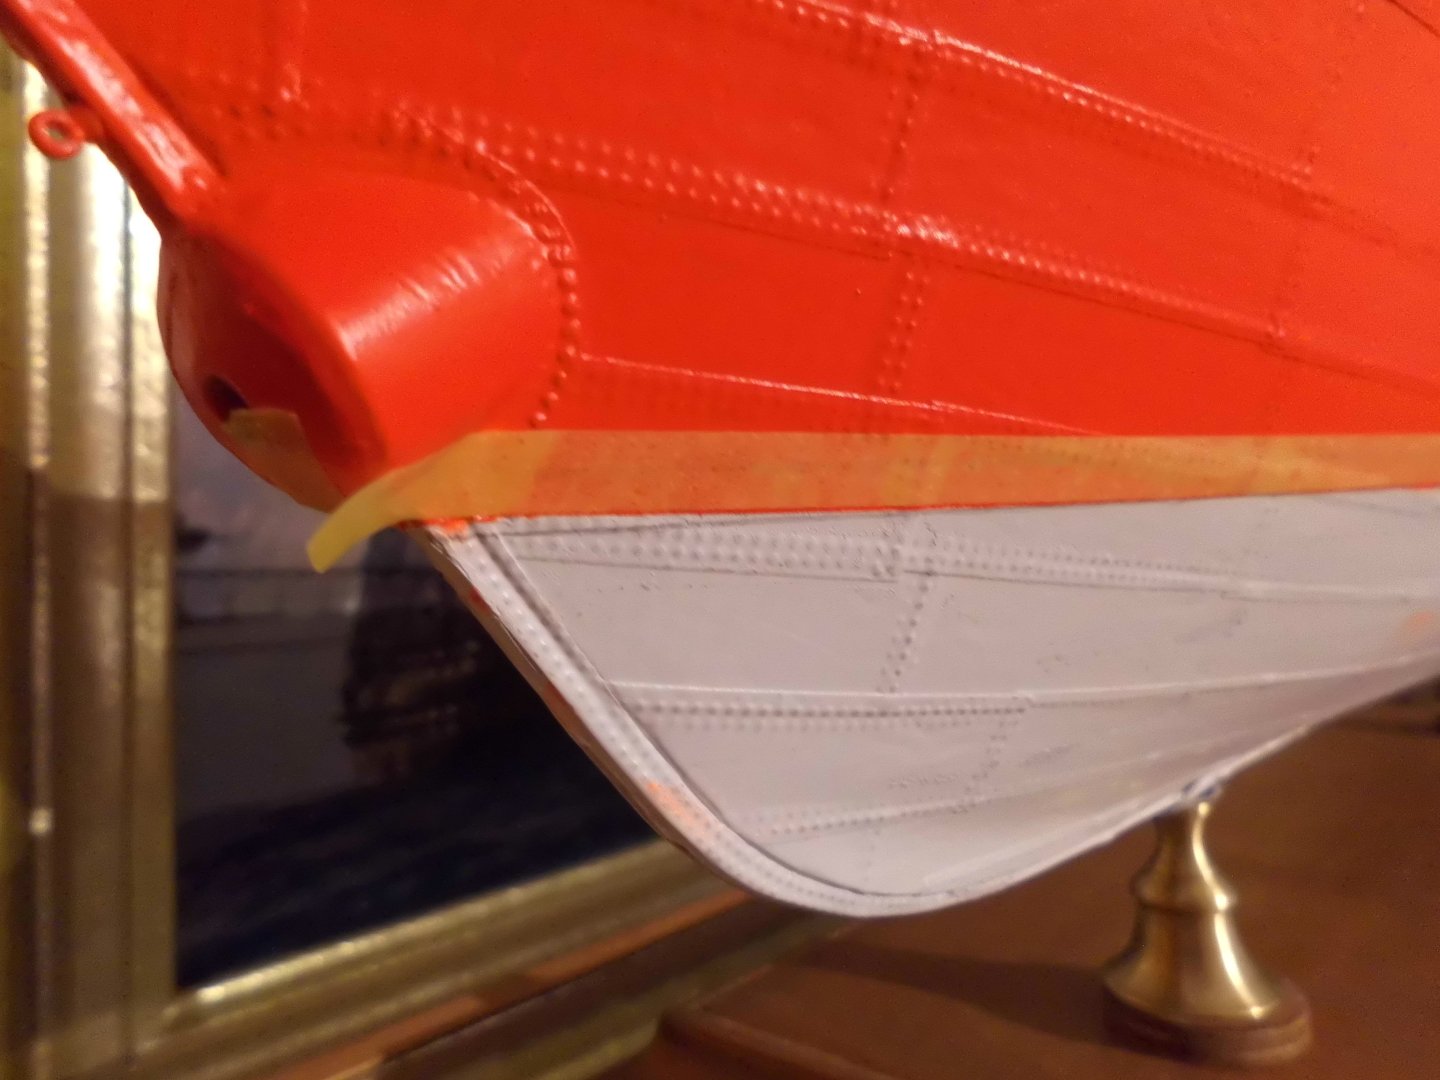
except for the black underwater coating I´ve got the paint on. I think that I will never again apply this bright red signal coating. Once a mistake is made ( I sprayed over several tmes) it ca`nt be corrected propperly. Unfortunately I did not see that the paint started running on the far side. I did`nt hesitate to carefully wipe off the concerned area with a soft cloth, but the red paint had also solved the underneath primer. Now there are some ugly patches on the stb. side. Hopefully I`ll get that mended a bit later on, if not it will conncidered as wear effect, with other paints on other models I never ran into such trouble with the paint coat before, and I was so pleased that before that all had worked out well so far.
Nils

Port view and front view is all OK

here the ugly patches (aft stb. and stb. mid side )

-
-
Nice videos Eberhard,
thanks for sharing, good old Swiss machinery ....
Sorry for wrong and corrigated first name
Nils
- mtaylor, mbp521, FriedClams and 1 other
-
4
-
Good day and thank you John,
today its a bit warmer outside, and I think I`ll start with the painting of the hull outside under my carport today. Yesterday I did all the masking already, and I plan to do the syray coat of adhesion promoter (explosive fumes ! ) and the primer spray-coating. I`ll give the hull a day for curing out well, and then mark the waterline for spraying and prior limiting the upper bright red coat area.
Nils
- Retired guy, Canute, Jack12477 and 4 others
-
7
-
Update
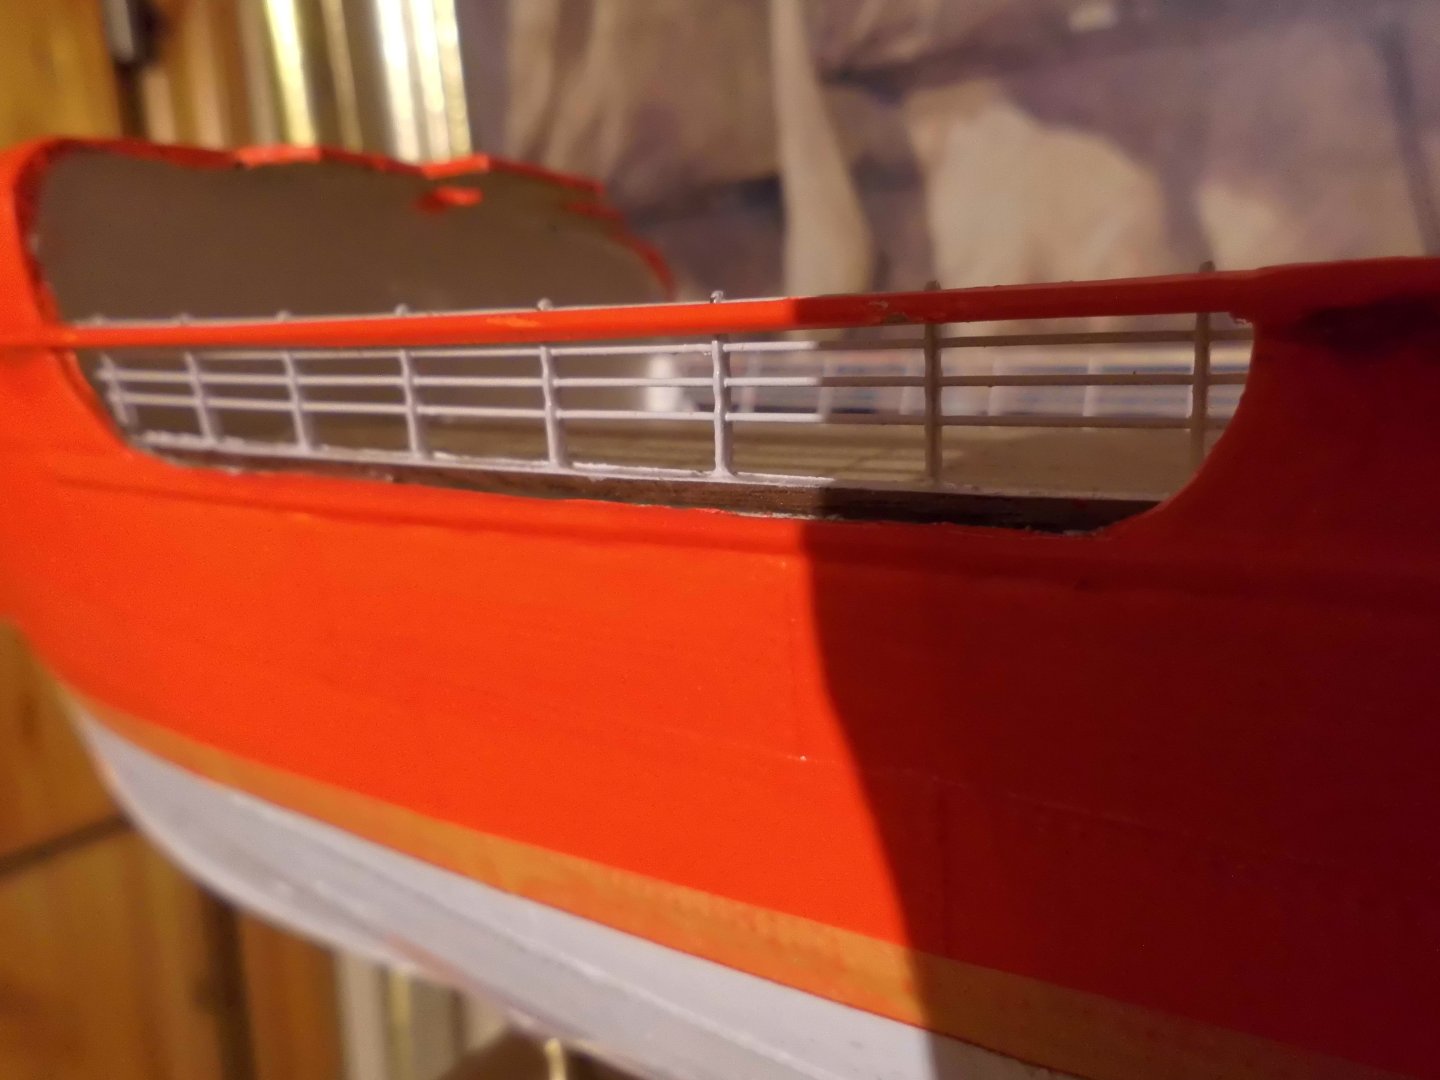
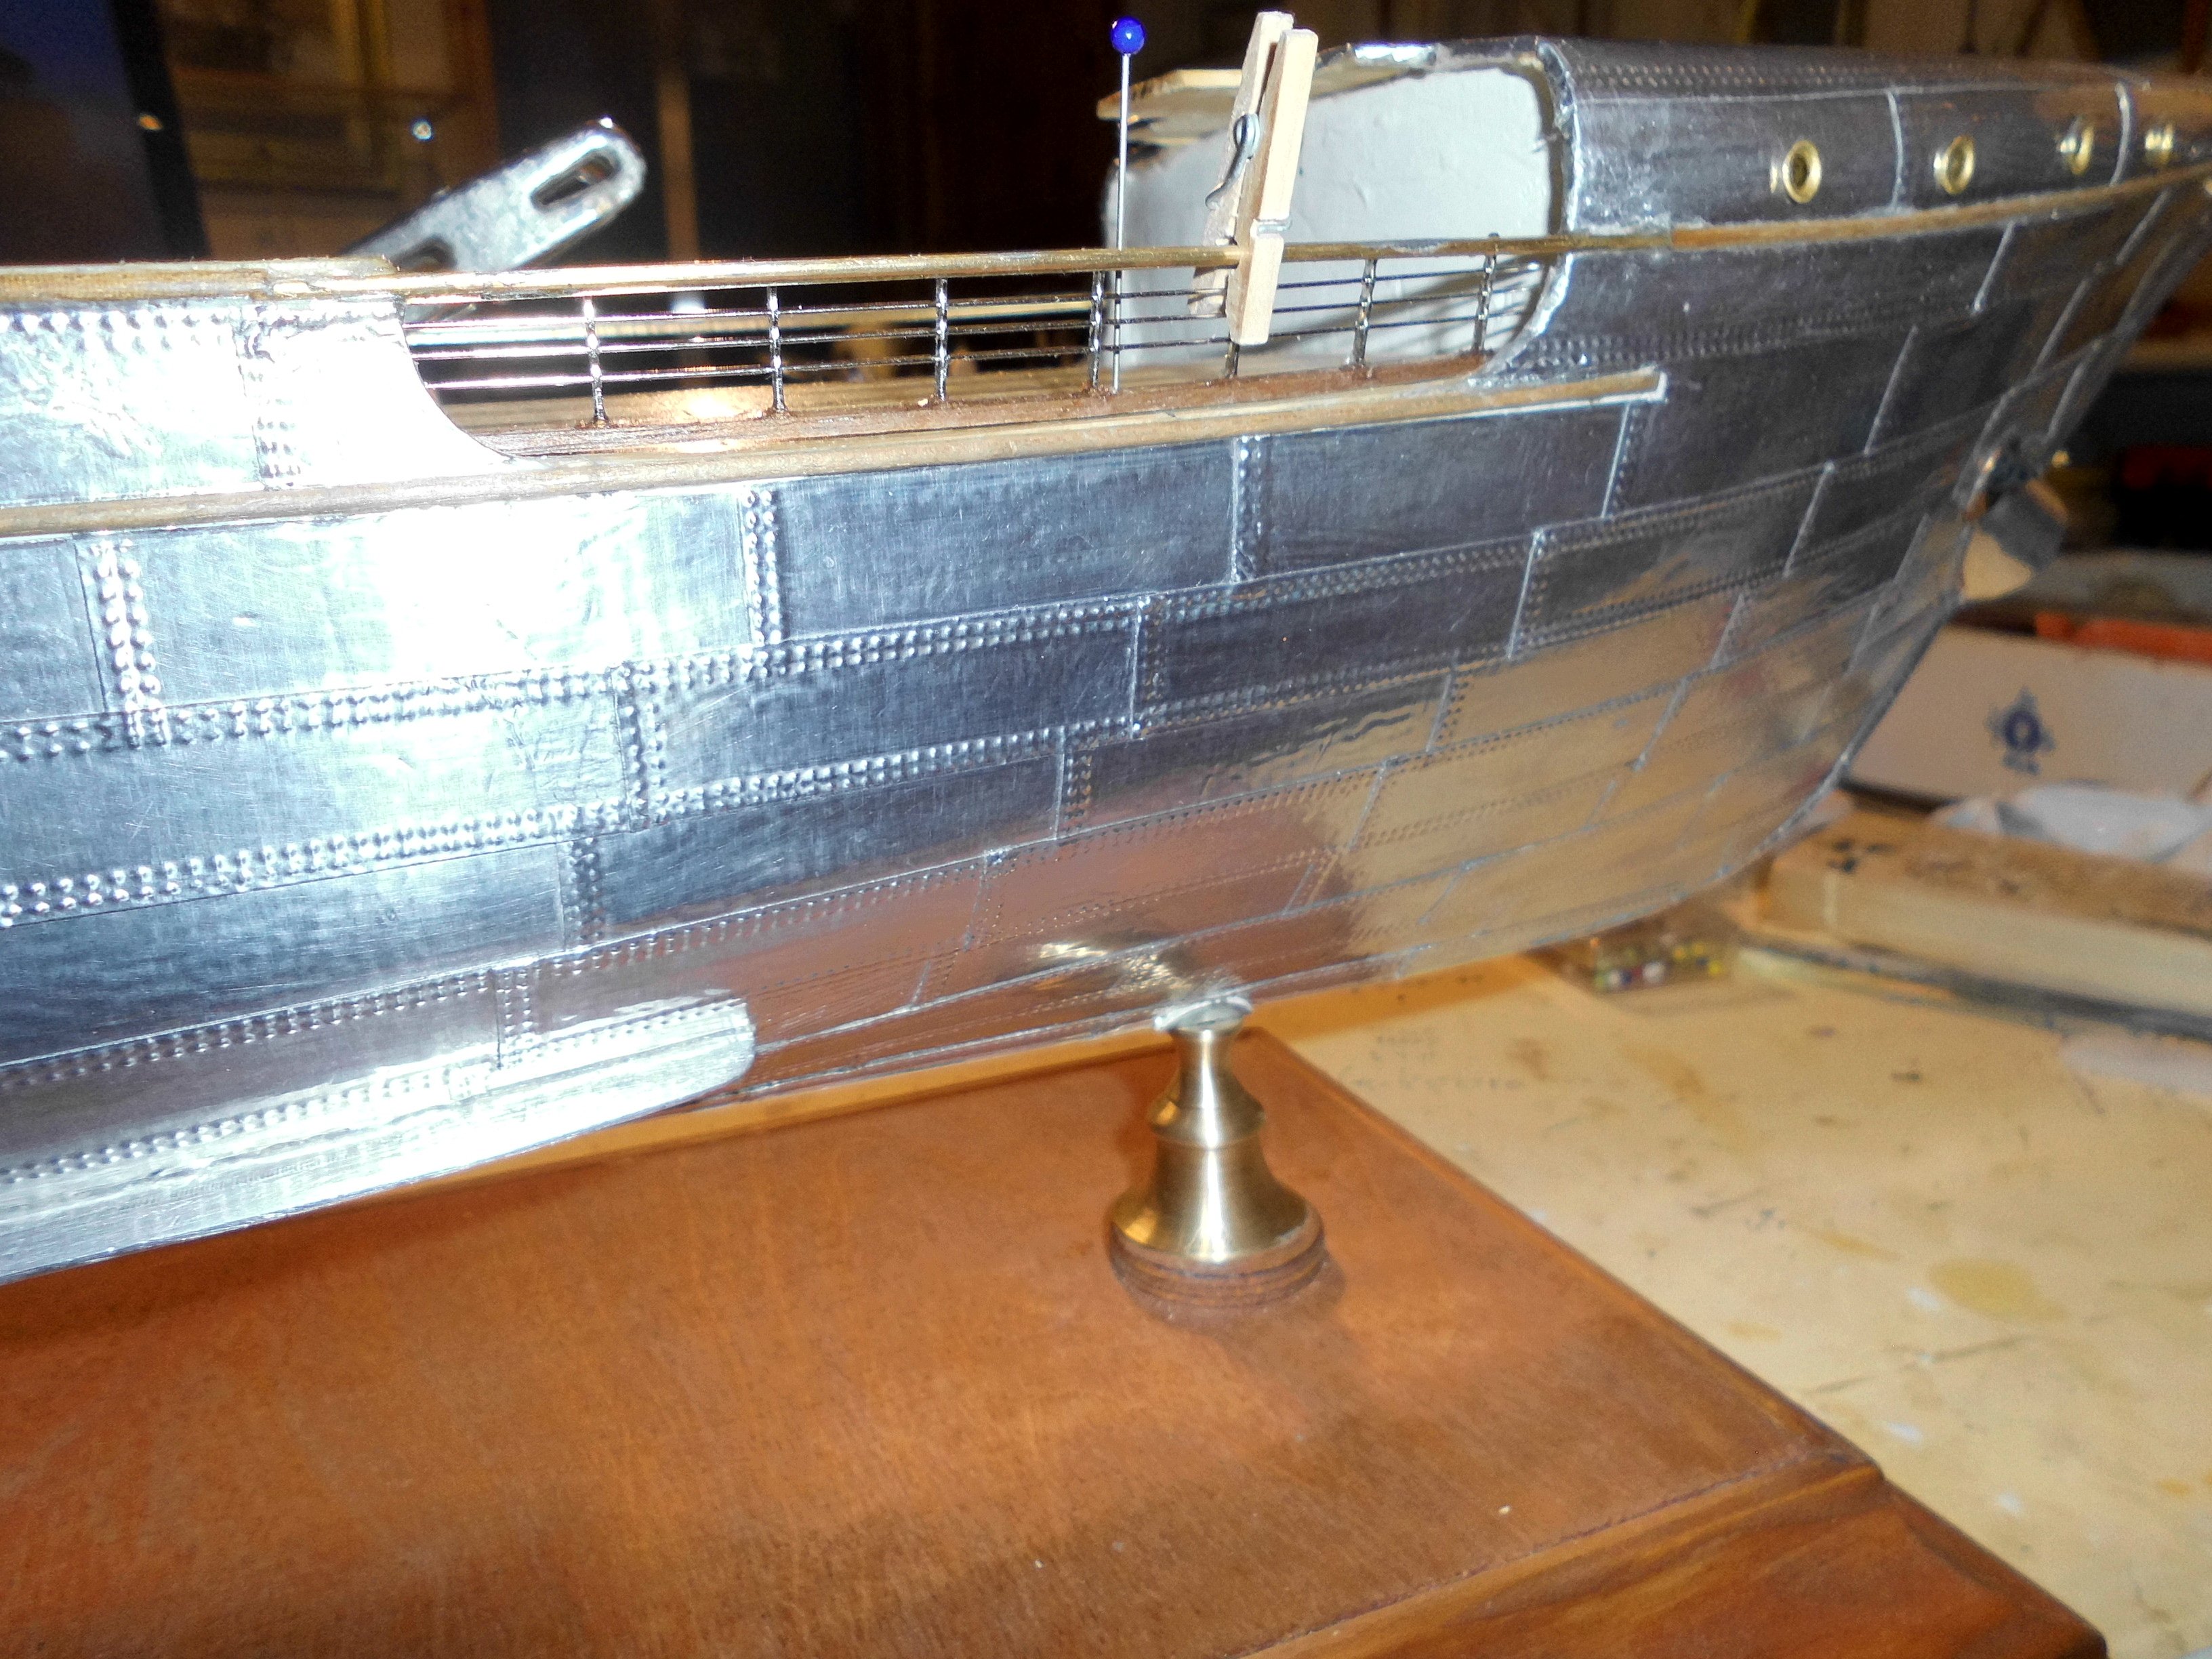
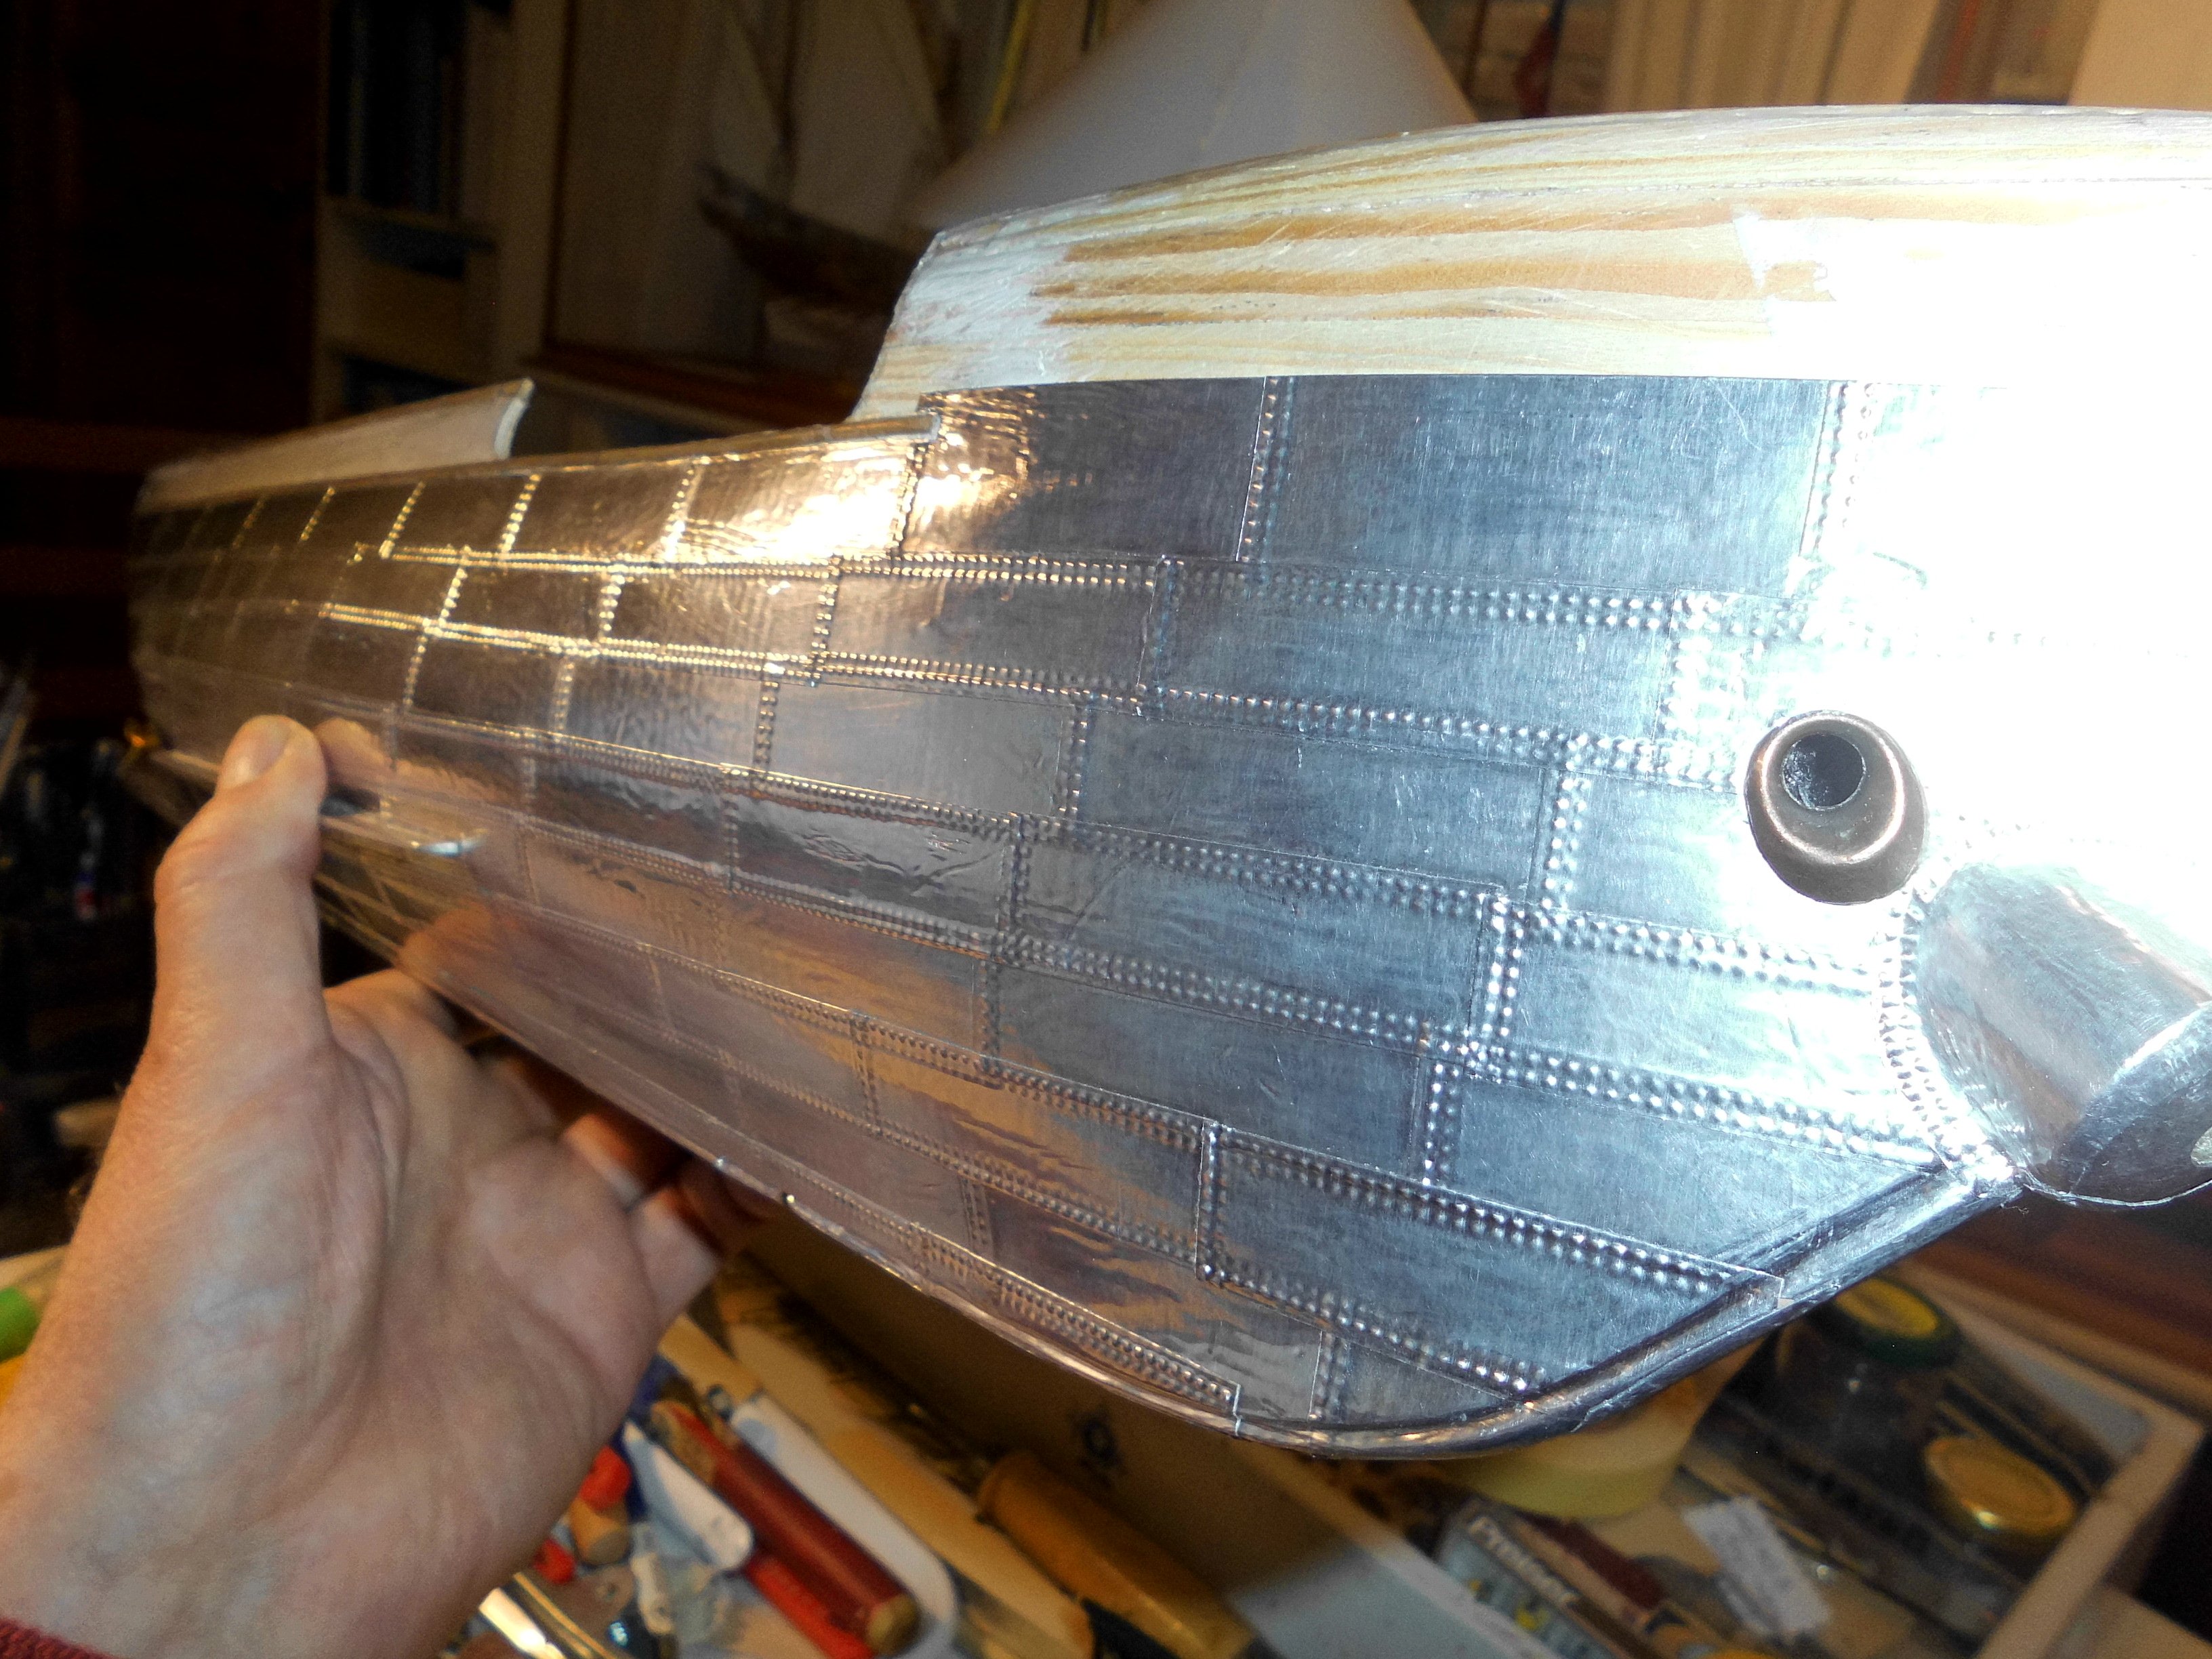
the upper forecastle portholes are mounted after plating this area, and the Stb waist reling is dry fitted. Also the area for the sprit bumpkin and its fastening eyebolts and stays.
Aft deck the template for the breakwater is being estimated for fit. I am eager to get all the hull-related plating complete in order to continue with the painting job and the ELBE 1 name decals.
For making the decals I got a great support from another MSW fellow builder. Here credit and thanks go to "Retired Guy", Richard for all his help. That gave me confidence to try and make my own decals instead of using larger sticker letters ( problems with the structured hull surface )
Nils

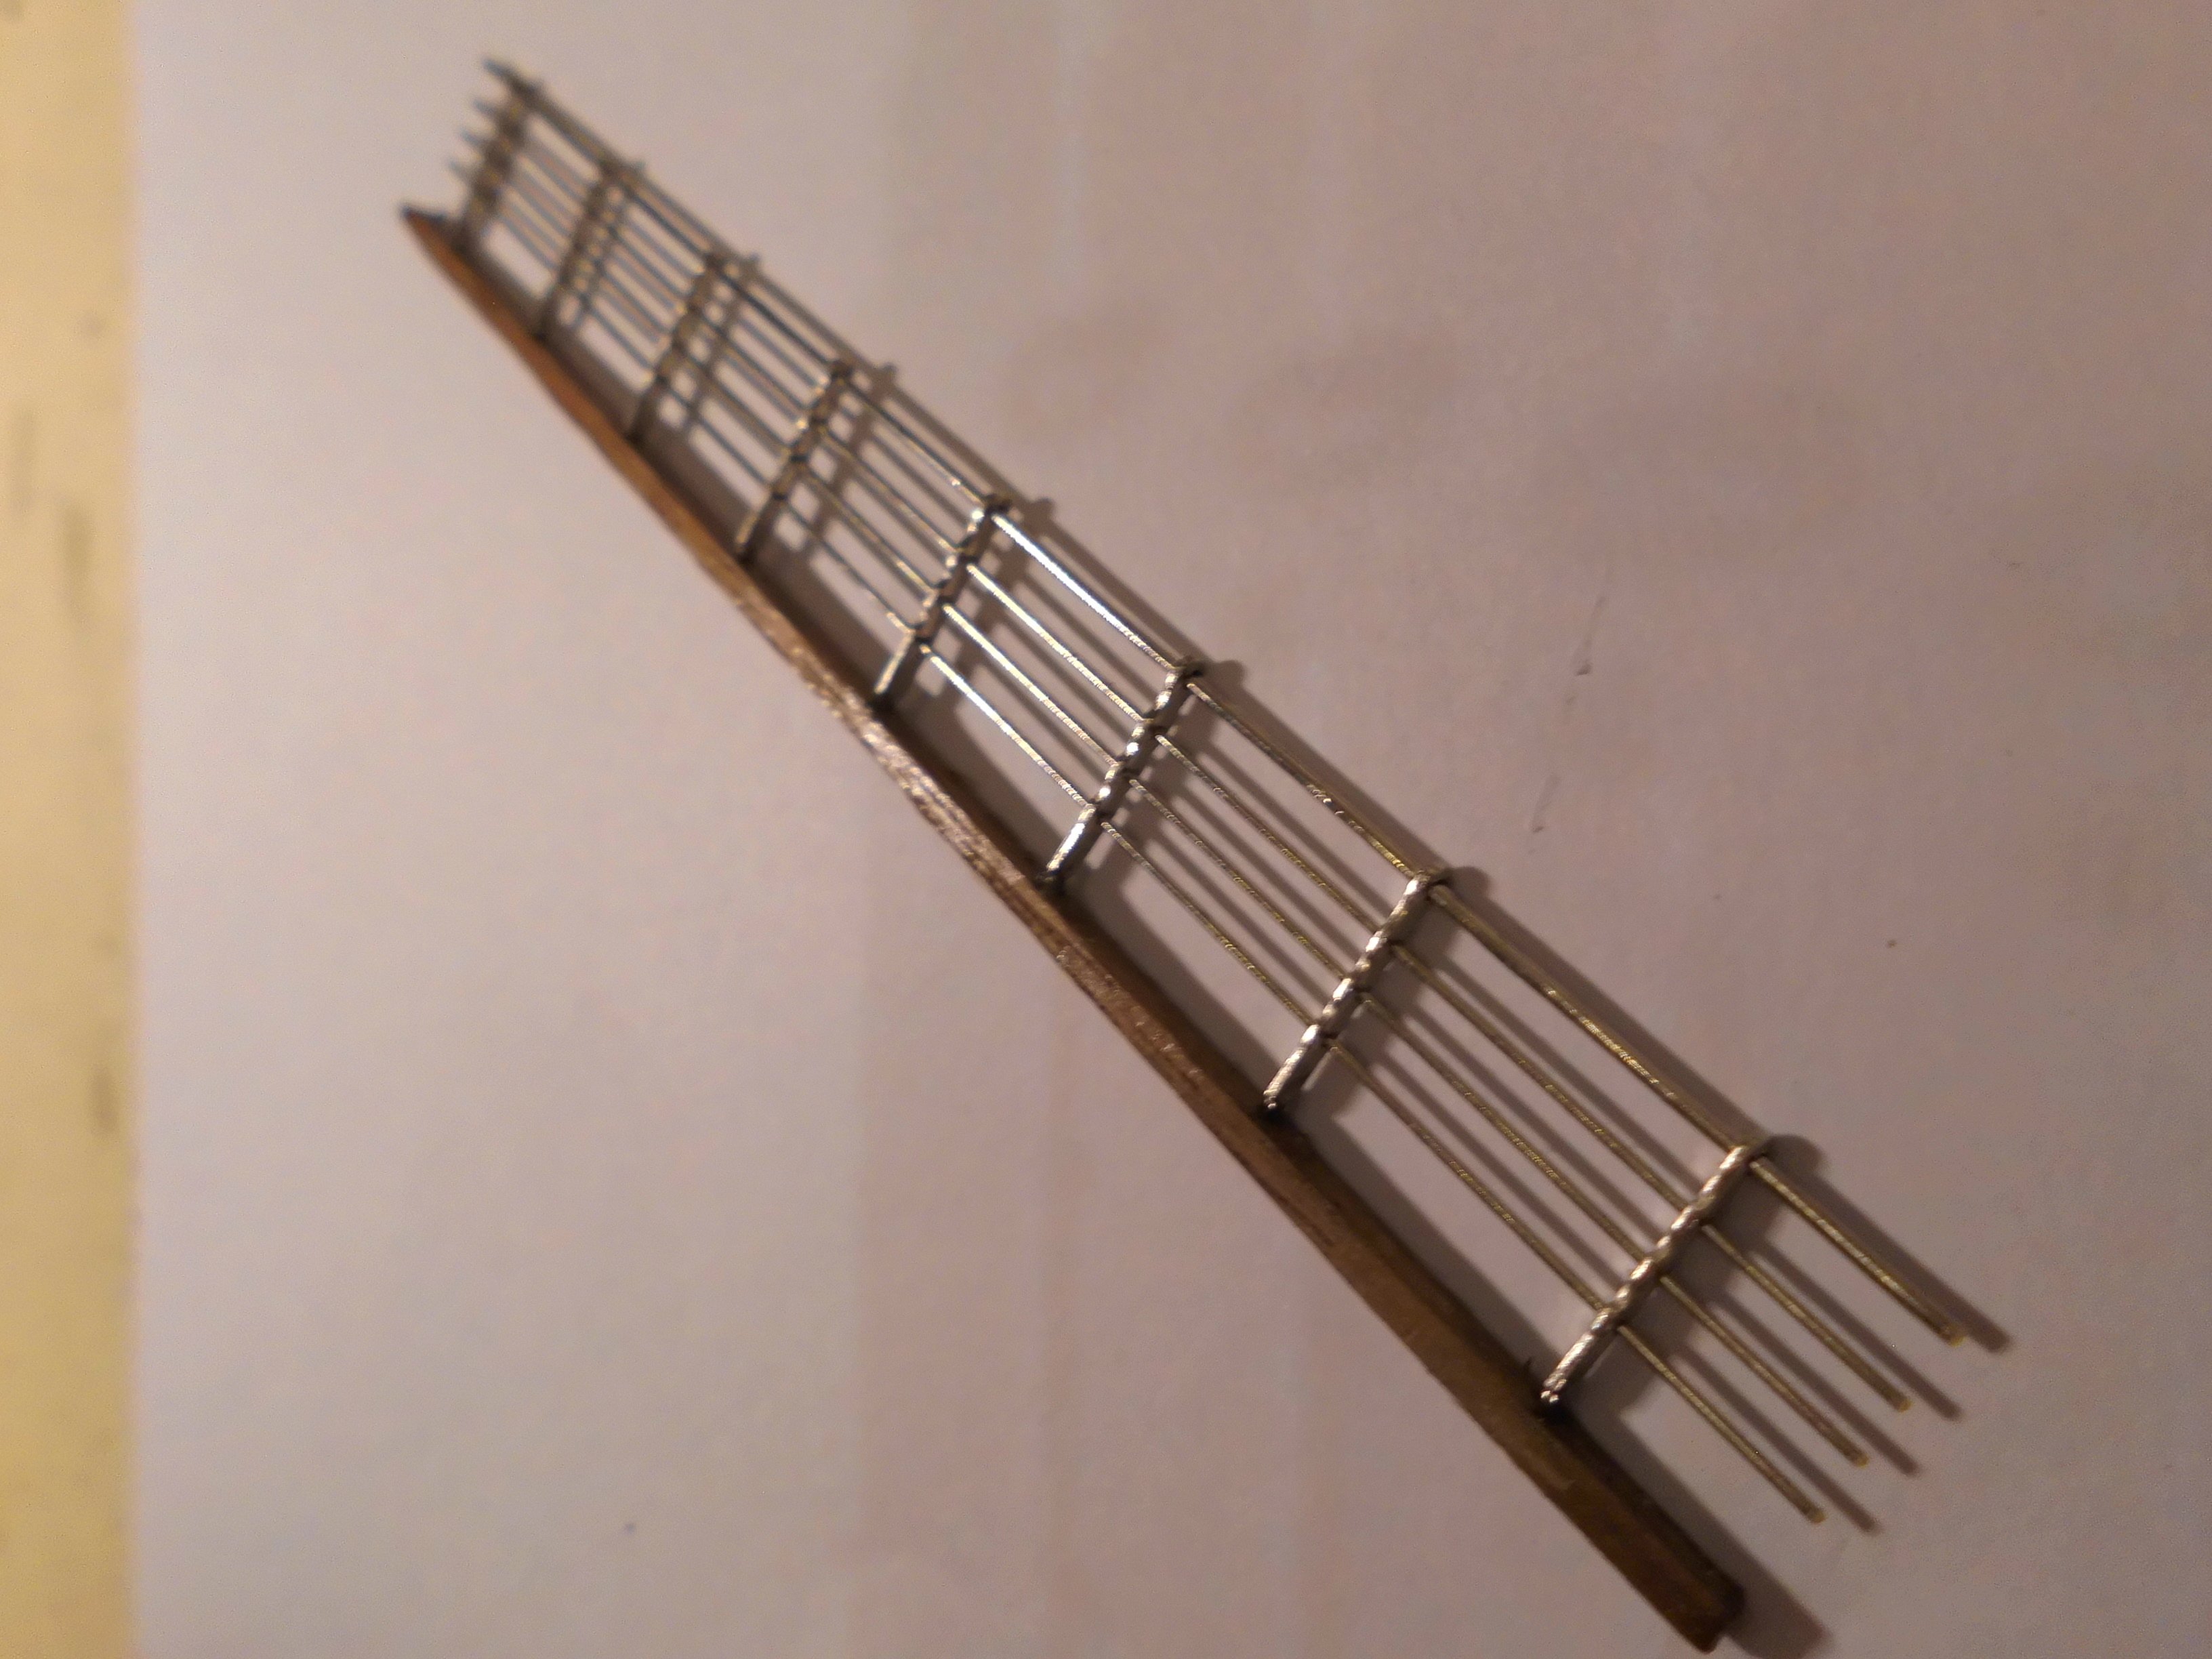
The Railing is from Aronaut- Modellbau in brass and nickel plated. the wooden fastening rail underneath is to get the correct hight


the aft breakwater will be mounted in this area. The blank space in the plating ( aft round between the rails ) will take up the 5mm small sticker-letters for the name "Bürgermeister Oswald" and the homeport "Cuxhaven" after painting.
-
Update
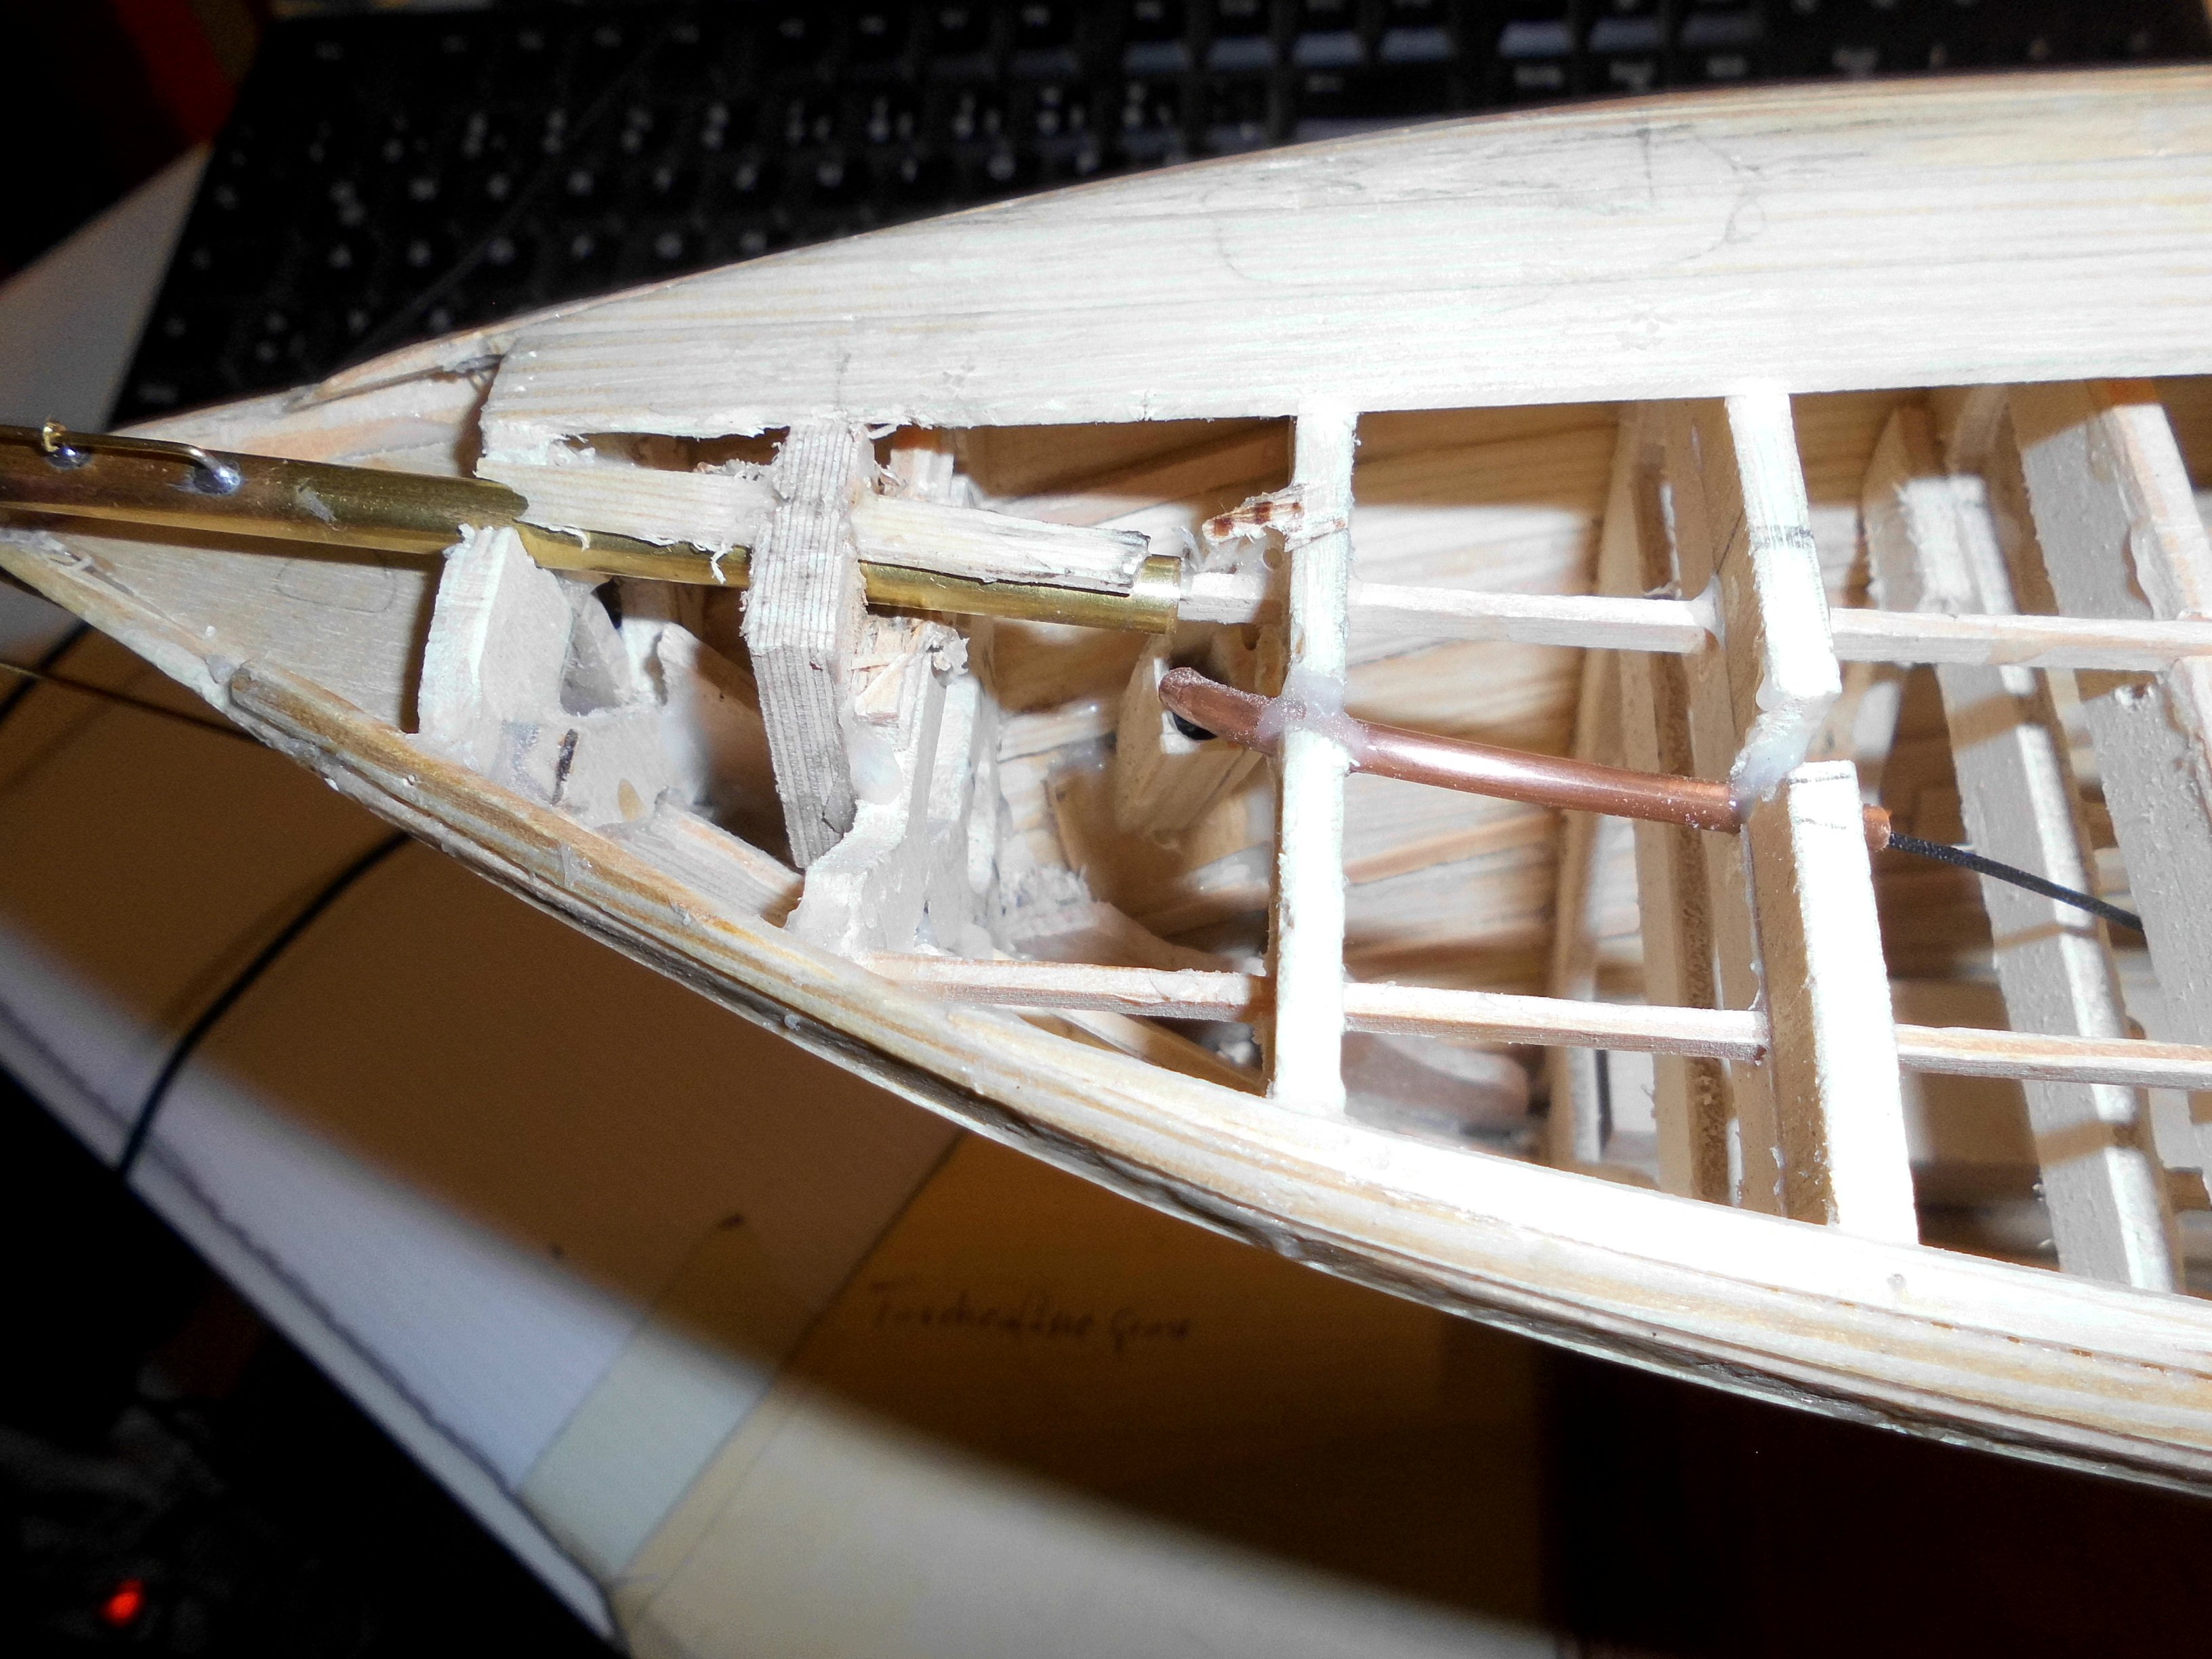
yesterday I made the fastening (still removable) of the stb side anchor. Because when the forecastle-deck is on, there will be no more access to the fastening line (no visable chain here), and the line is running in a curved thin copper tube, leading the line to midship area where the end will be fastend using a spring to the frame somewhere. That gives a little springload to the line and keeps the anchor well in contact with the achor fairlead.
Also in accordance with the plan drawing, a rather short bumpkin with fastening points, a handrail on top and an eyebolt to the ships stern frontside was made. Also a non spanable metal bupkin stay
Nils
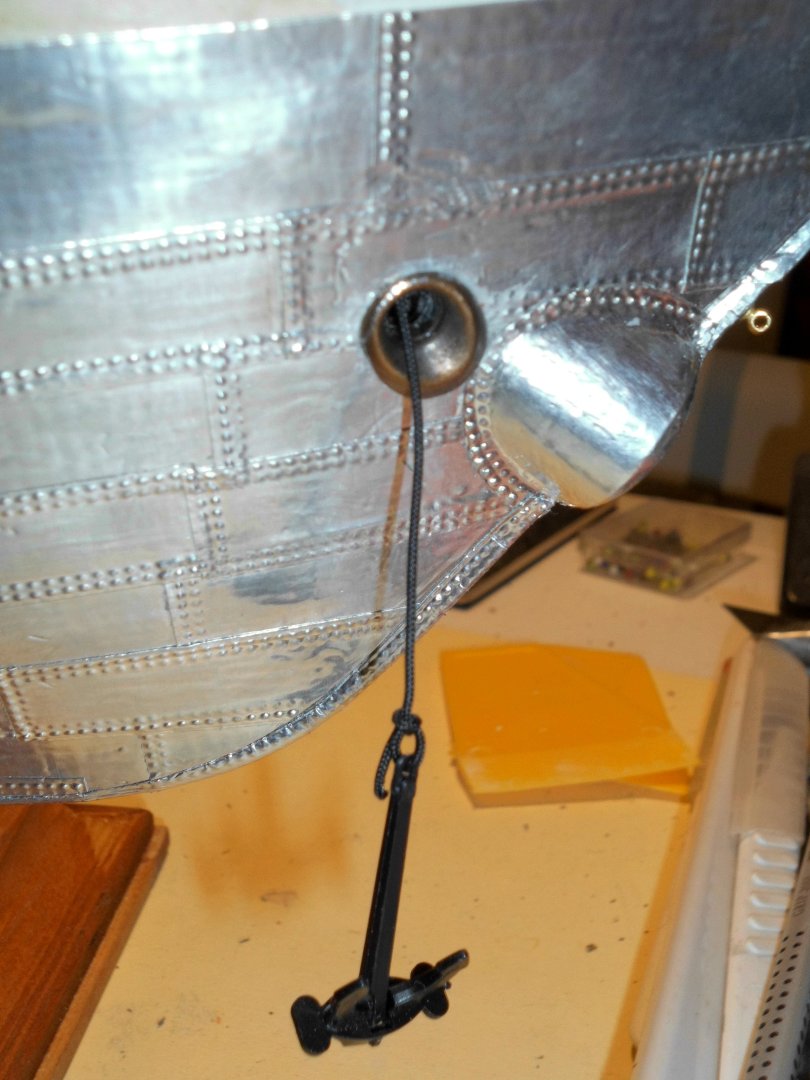
here the anchor line, and the eyebolt (upper right side) for the waterstay

copper lad-tube for the line
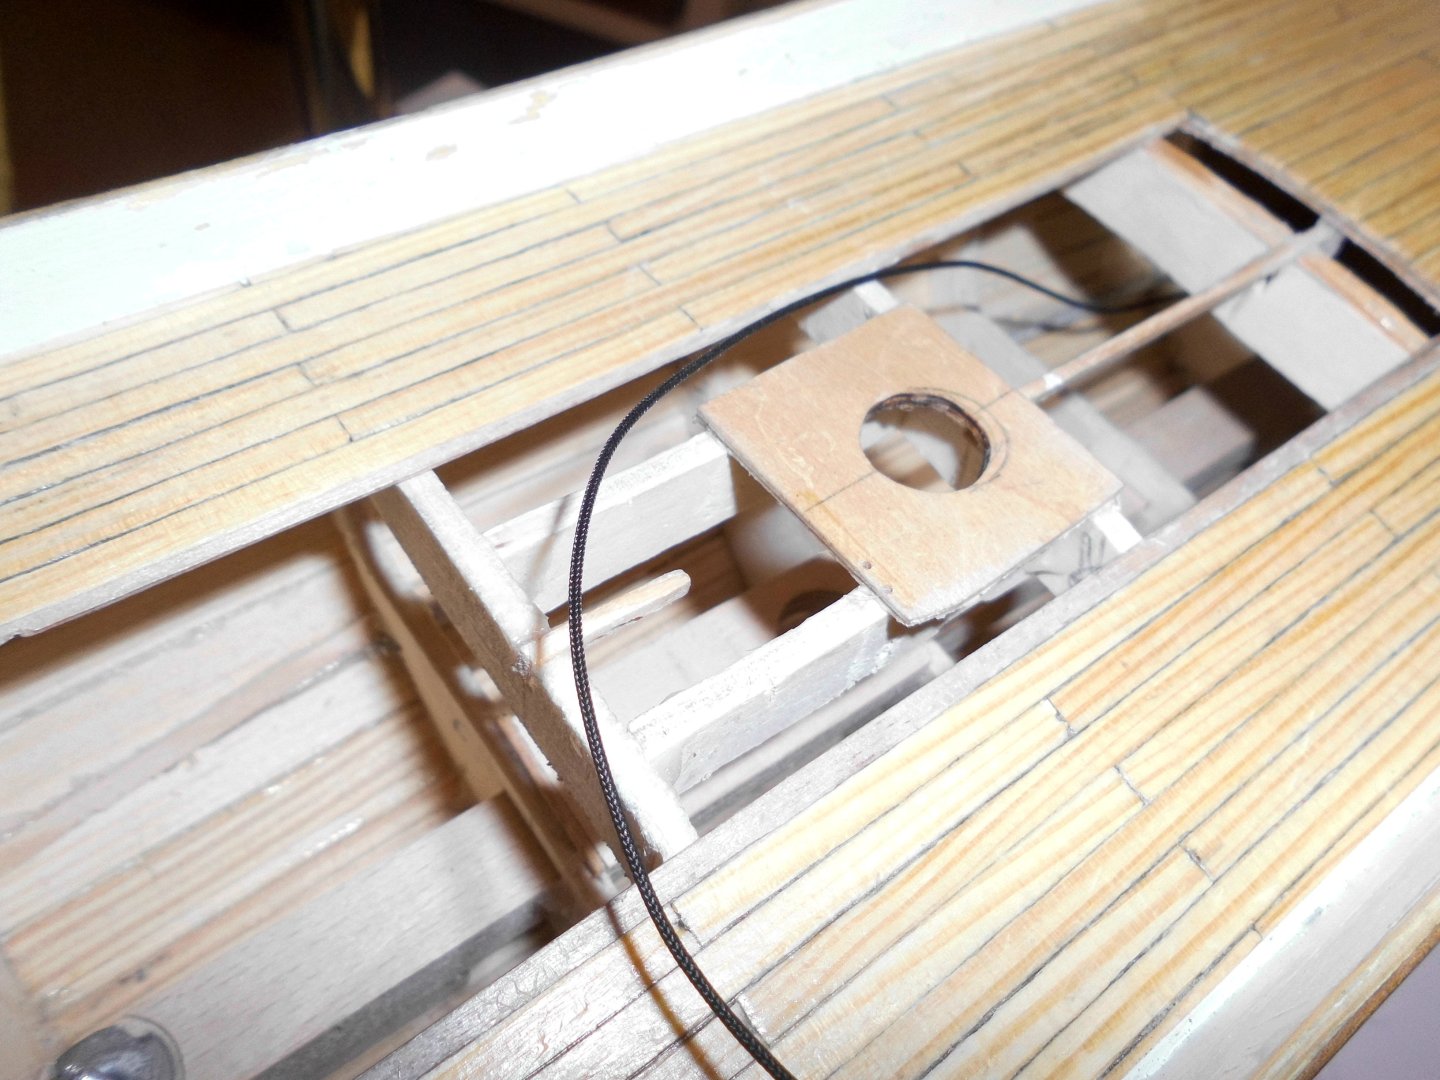
the line goes to the mid ship for fastening with a spring. The plate with the 13mm boring will adjust the lighttower later on. The deck is in 4mm wide pine-strips and black pencil "caulking" at the plank contact lines
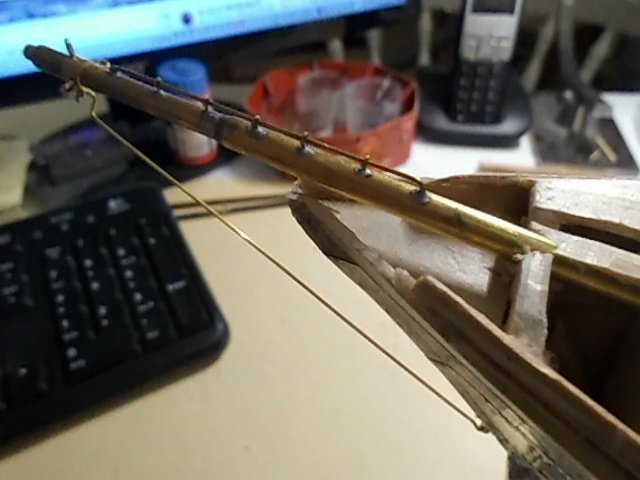
waterstay with fastening points and topside handrail
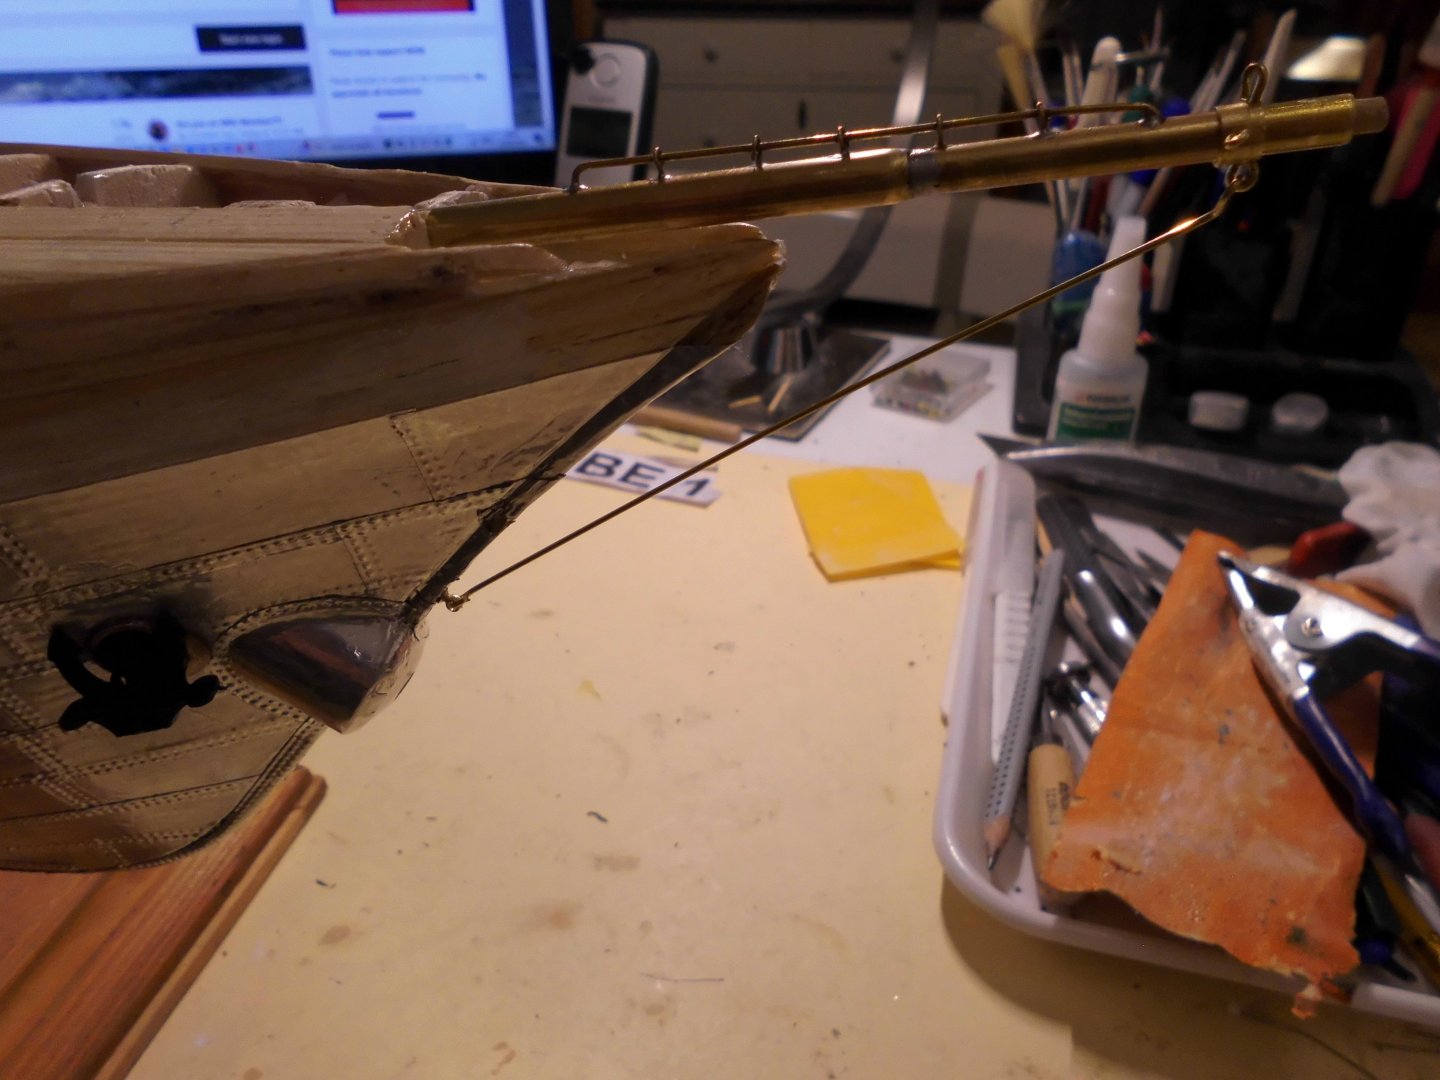
side anchor when pulled up and waterstay in dryfit
-
Hi Richard and John,
Richard
I`ve sent you a PM this morning, relating to that issue....
John,
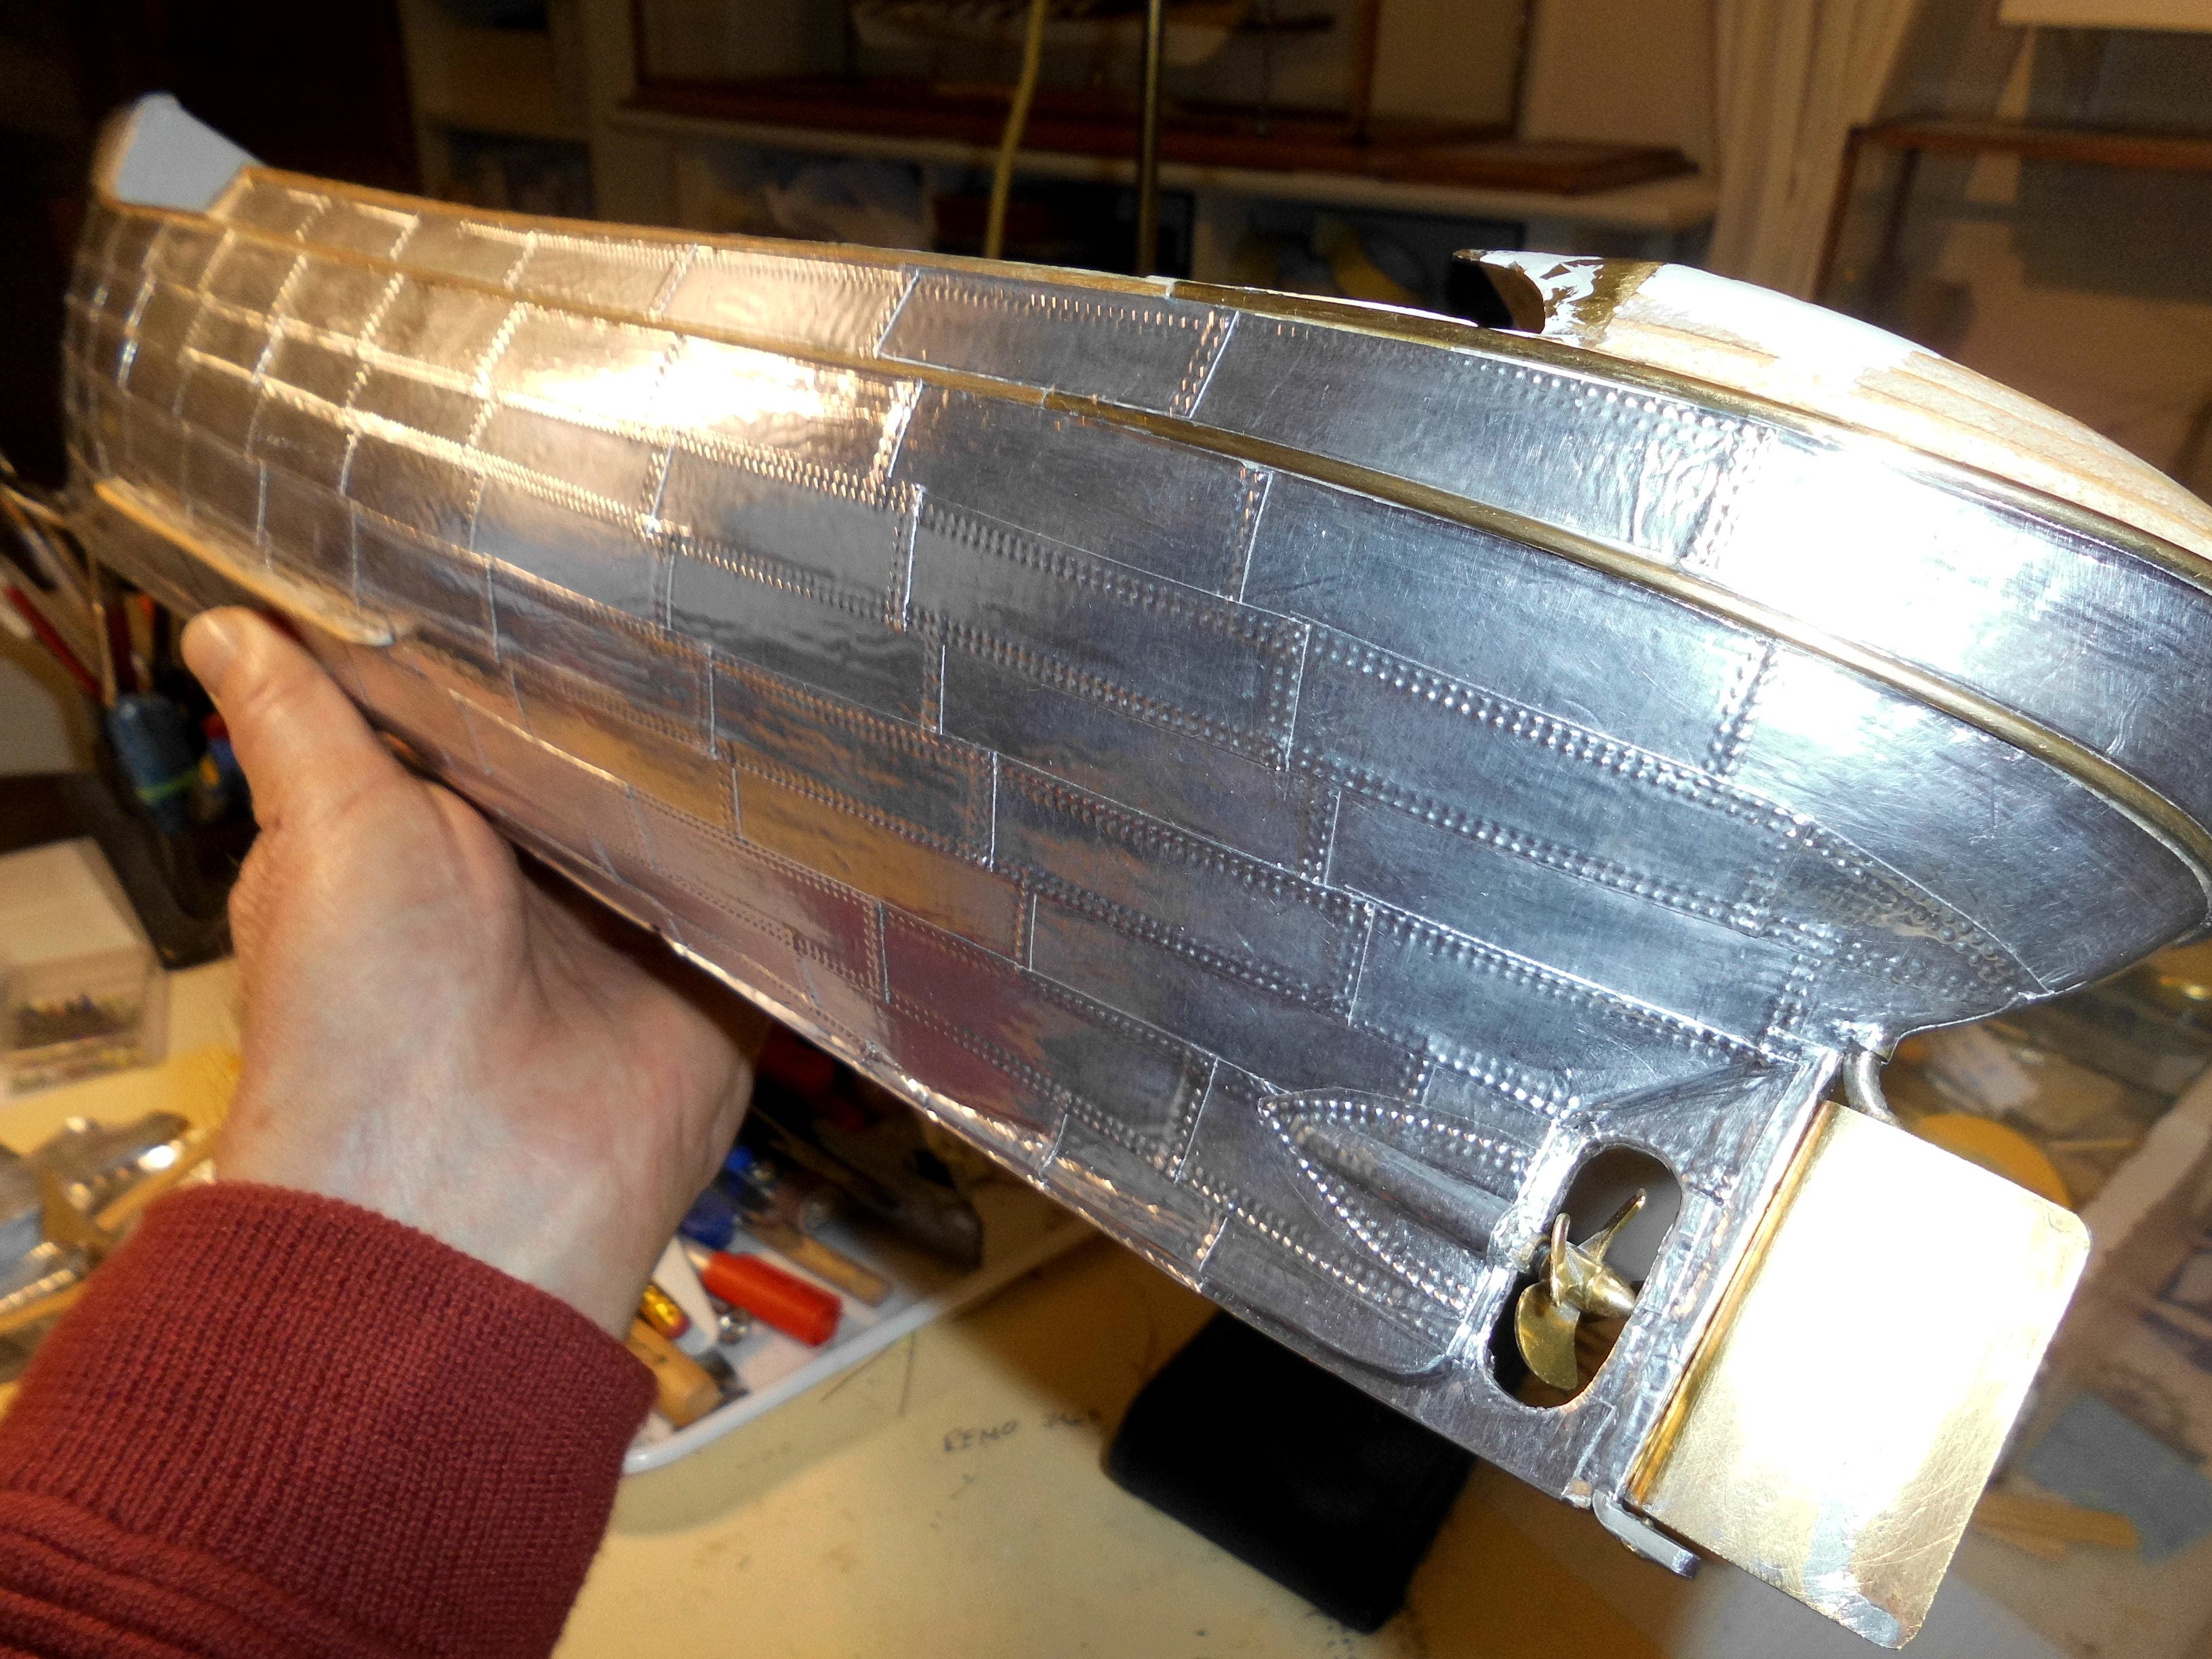
its already the 6th ships plating I got out of that aluminiun original 50m foil roll, never thought it would last so long
Nils
- Canute, Retired guy, Jack12477 and 1 other
-
4
-
-
Thats a beautiful build Jeff,
Congratulations to finishing this project. Your lightship is great. I like the superstructure and the fitting out very much. The lighting of the pictures is also very nice
Nils
- Jeff preisler and Canute
-
1
-
 1
1


ELBE 1 1948 by Mirabell61 - scale 1:87 - Lightship
in - Build logs for subjects built 1901 - Present Day
Posted
Hi Gary,
and thanks for your words, Yes , it was tricky with the rub rail underneath, I thought self adhesive stickers or cut out decals would be OK, but all wrong, finaly I made the letters from white painted and self adhesive thin aluminium foil, and that sticks to the hull contours like hell. I made the lettering a bit larger than the plan shows, (like the ship has in reality ), in fact its nearly from the top bulwark grab rail down to 10 mm over the waterline (on the model)
Nils