


Mirabell61
-
Posts
7,401 -
Joined
-
Last visited
Content Type
Profiles
Forums
Gallery
Events
Posts posted by Mirabell61
-
-
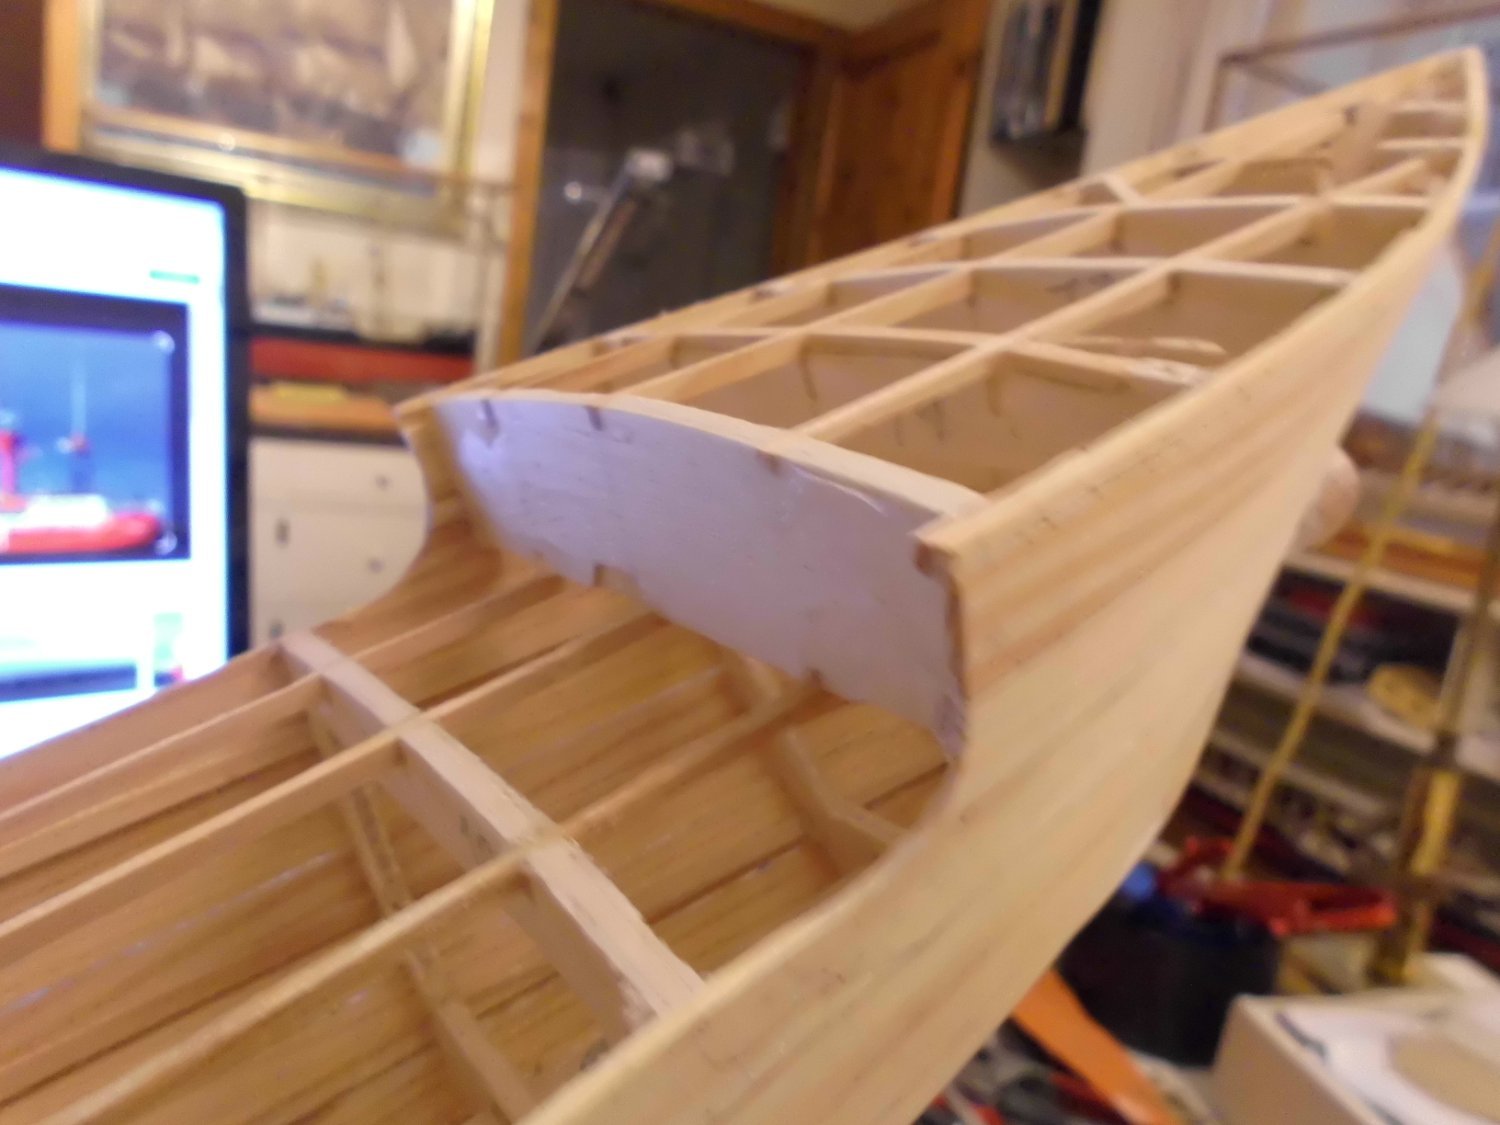
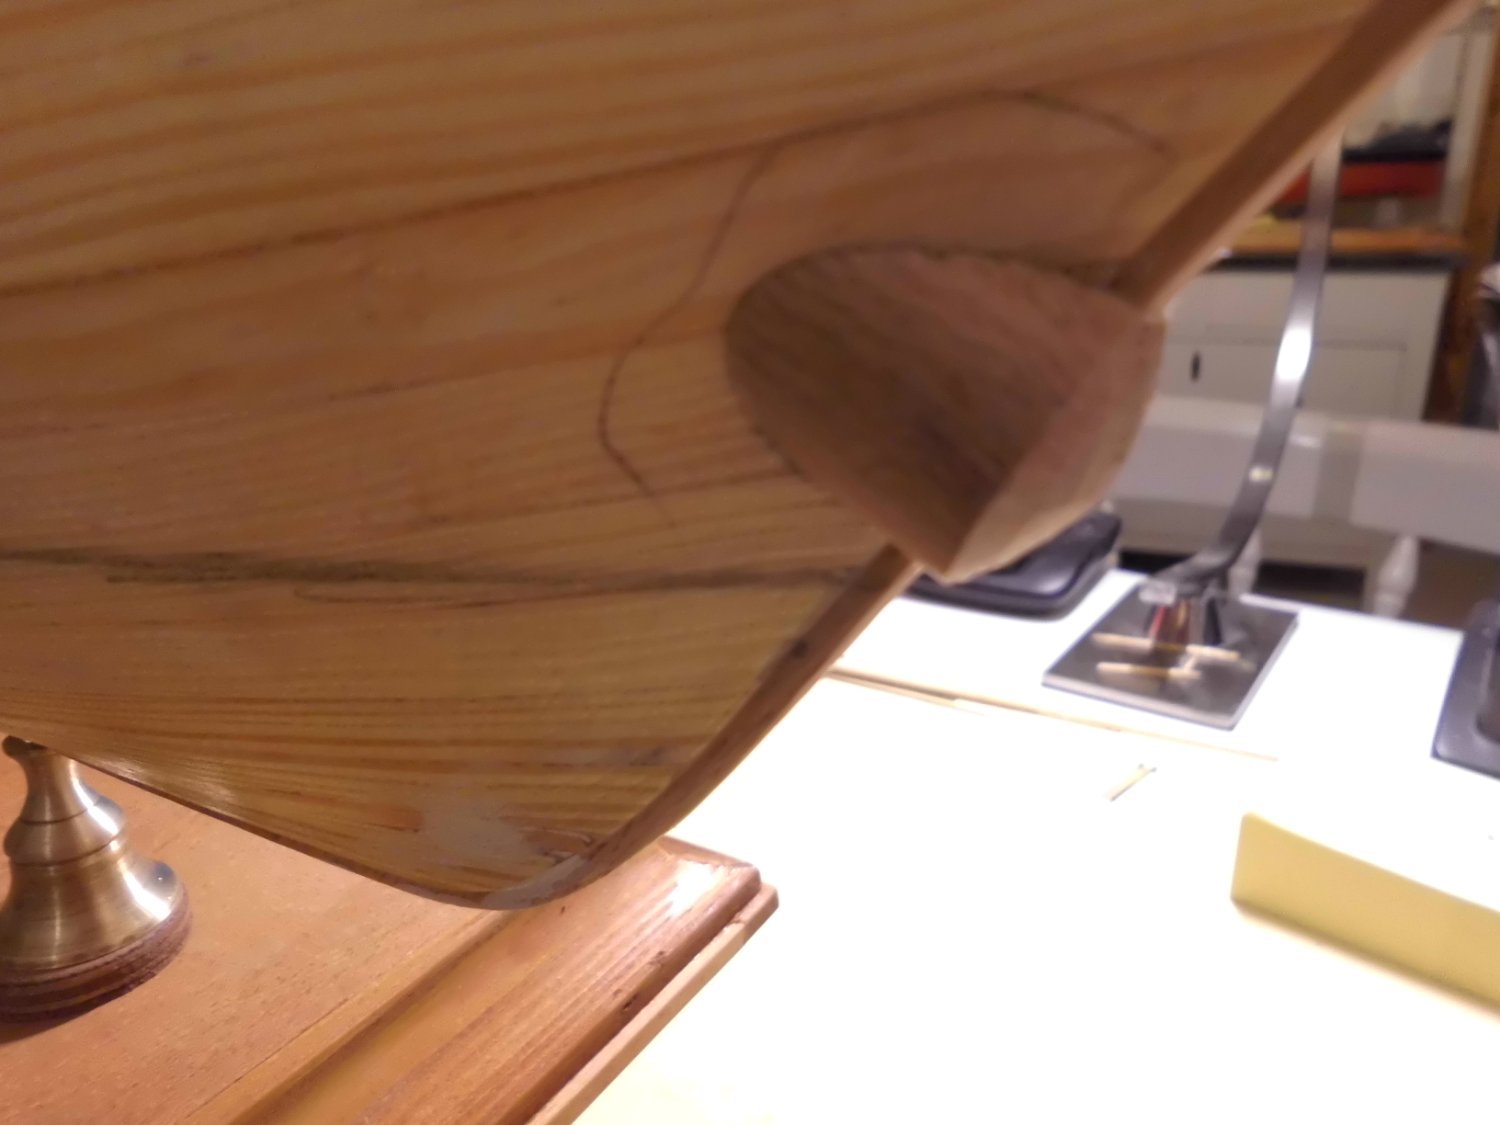
Update
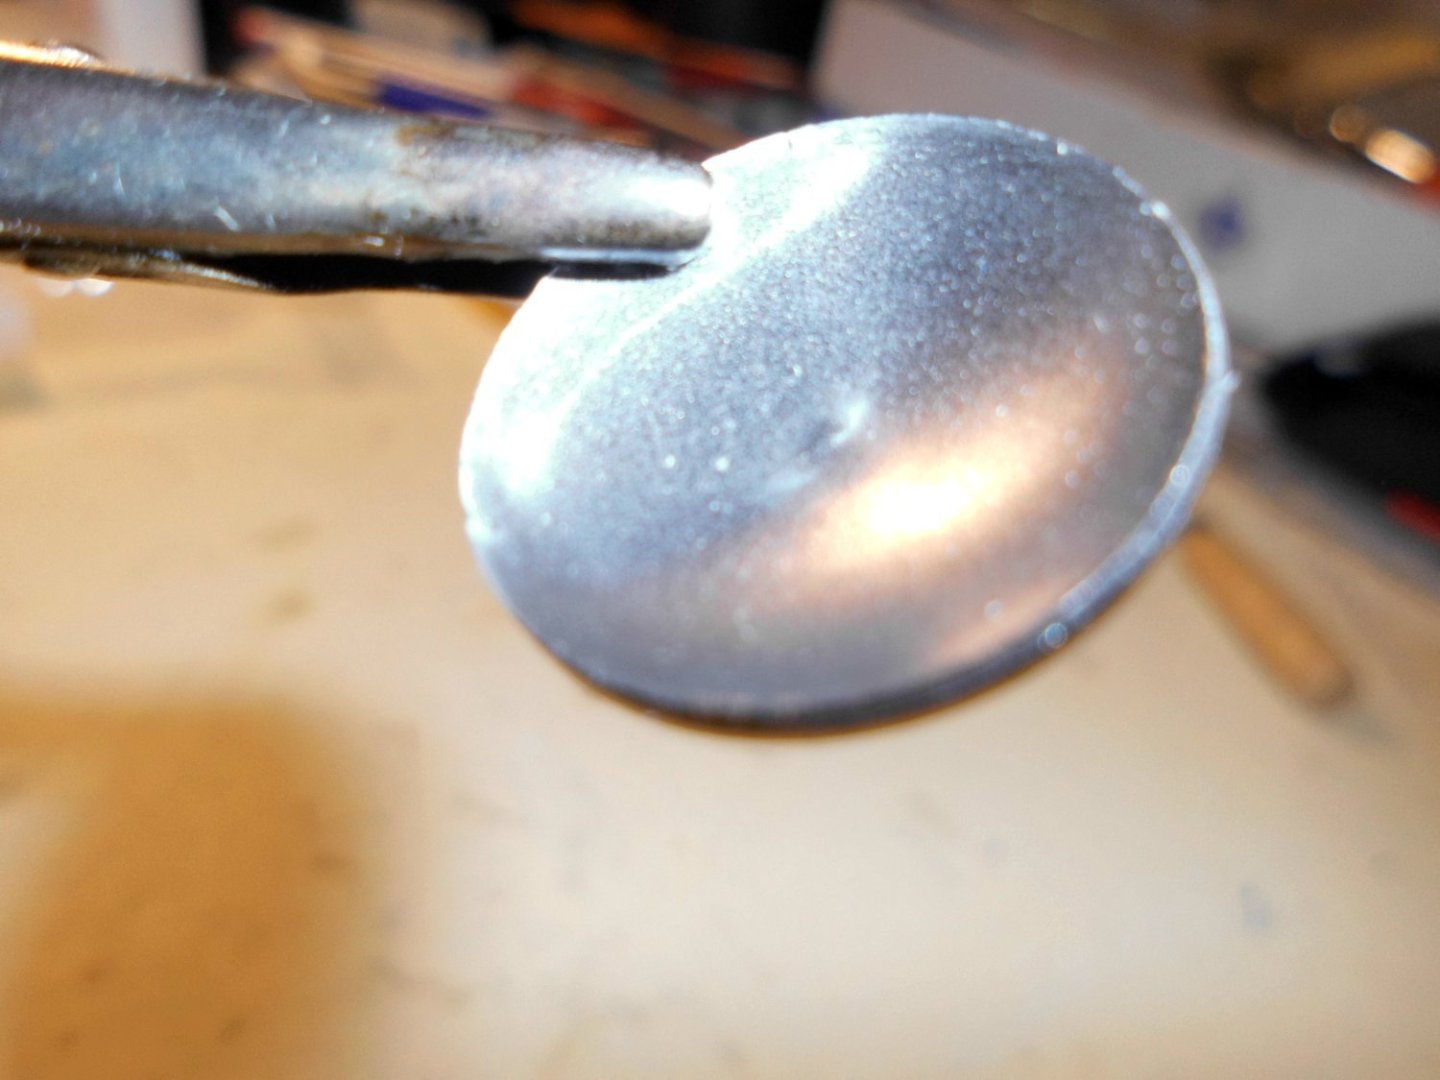
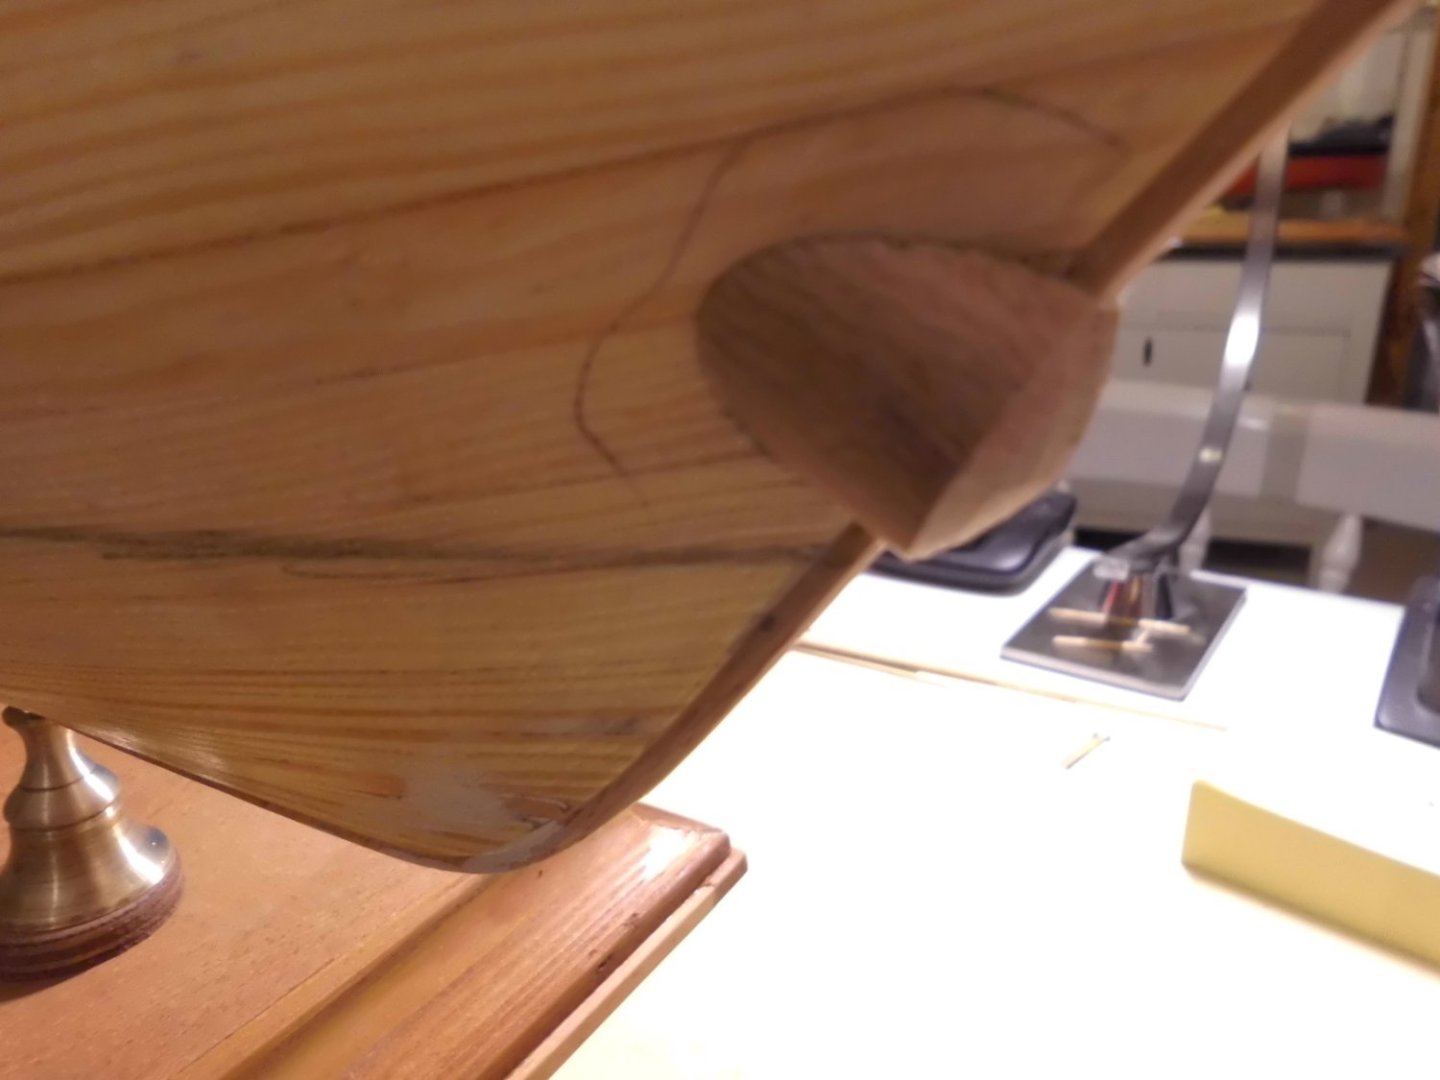
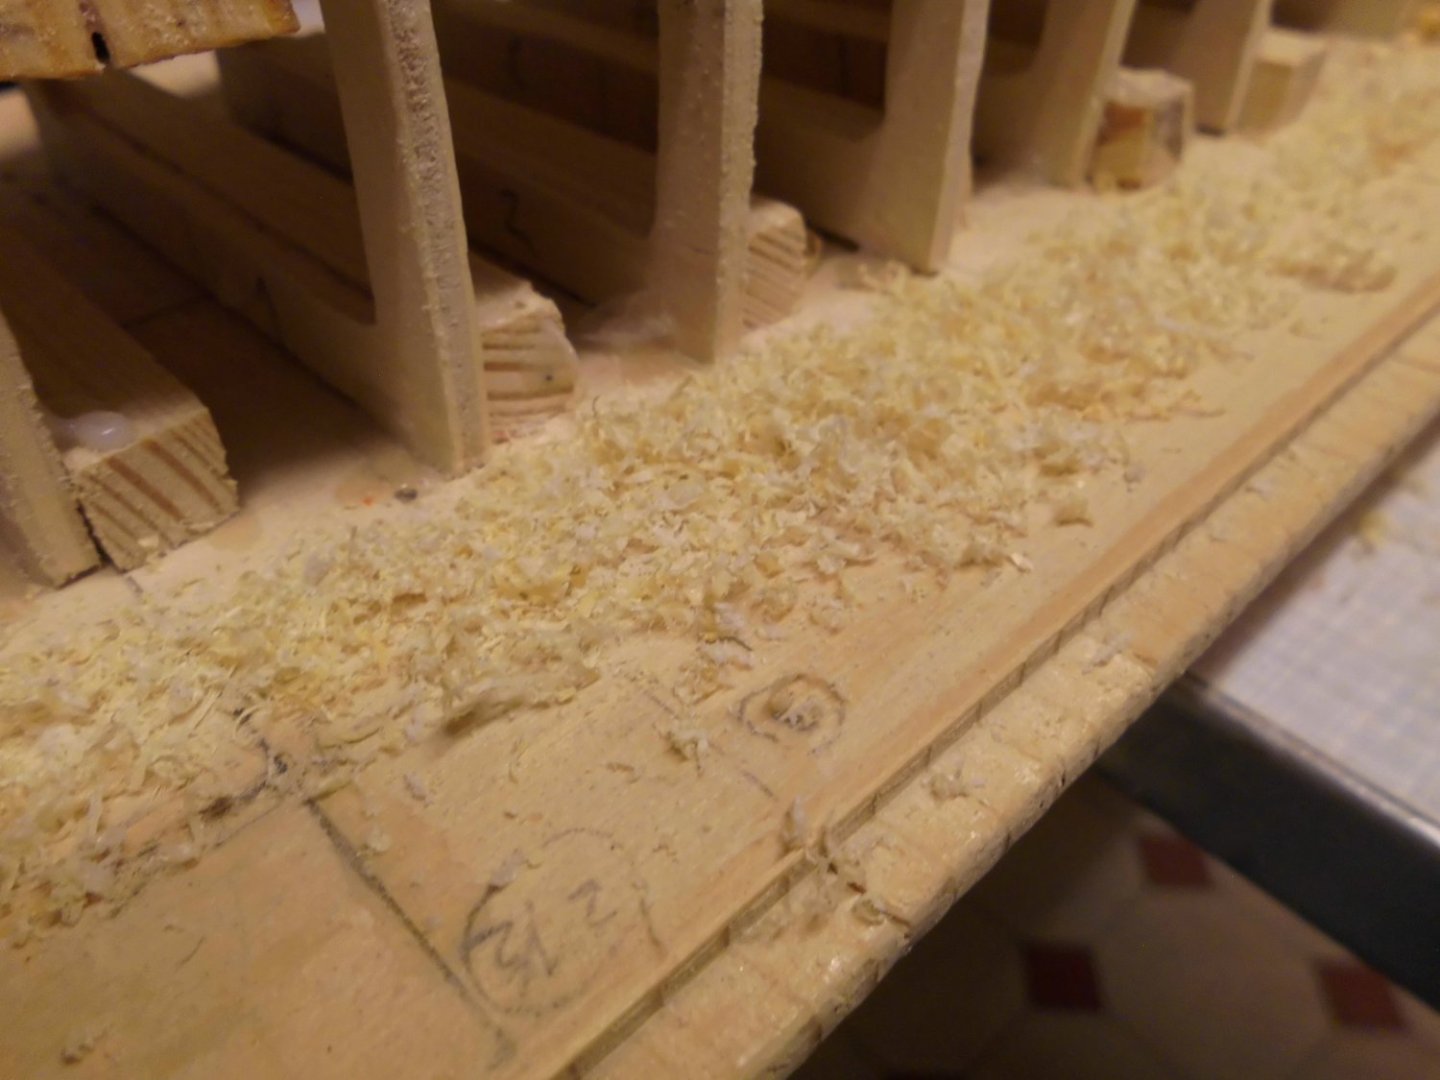
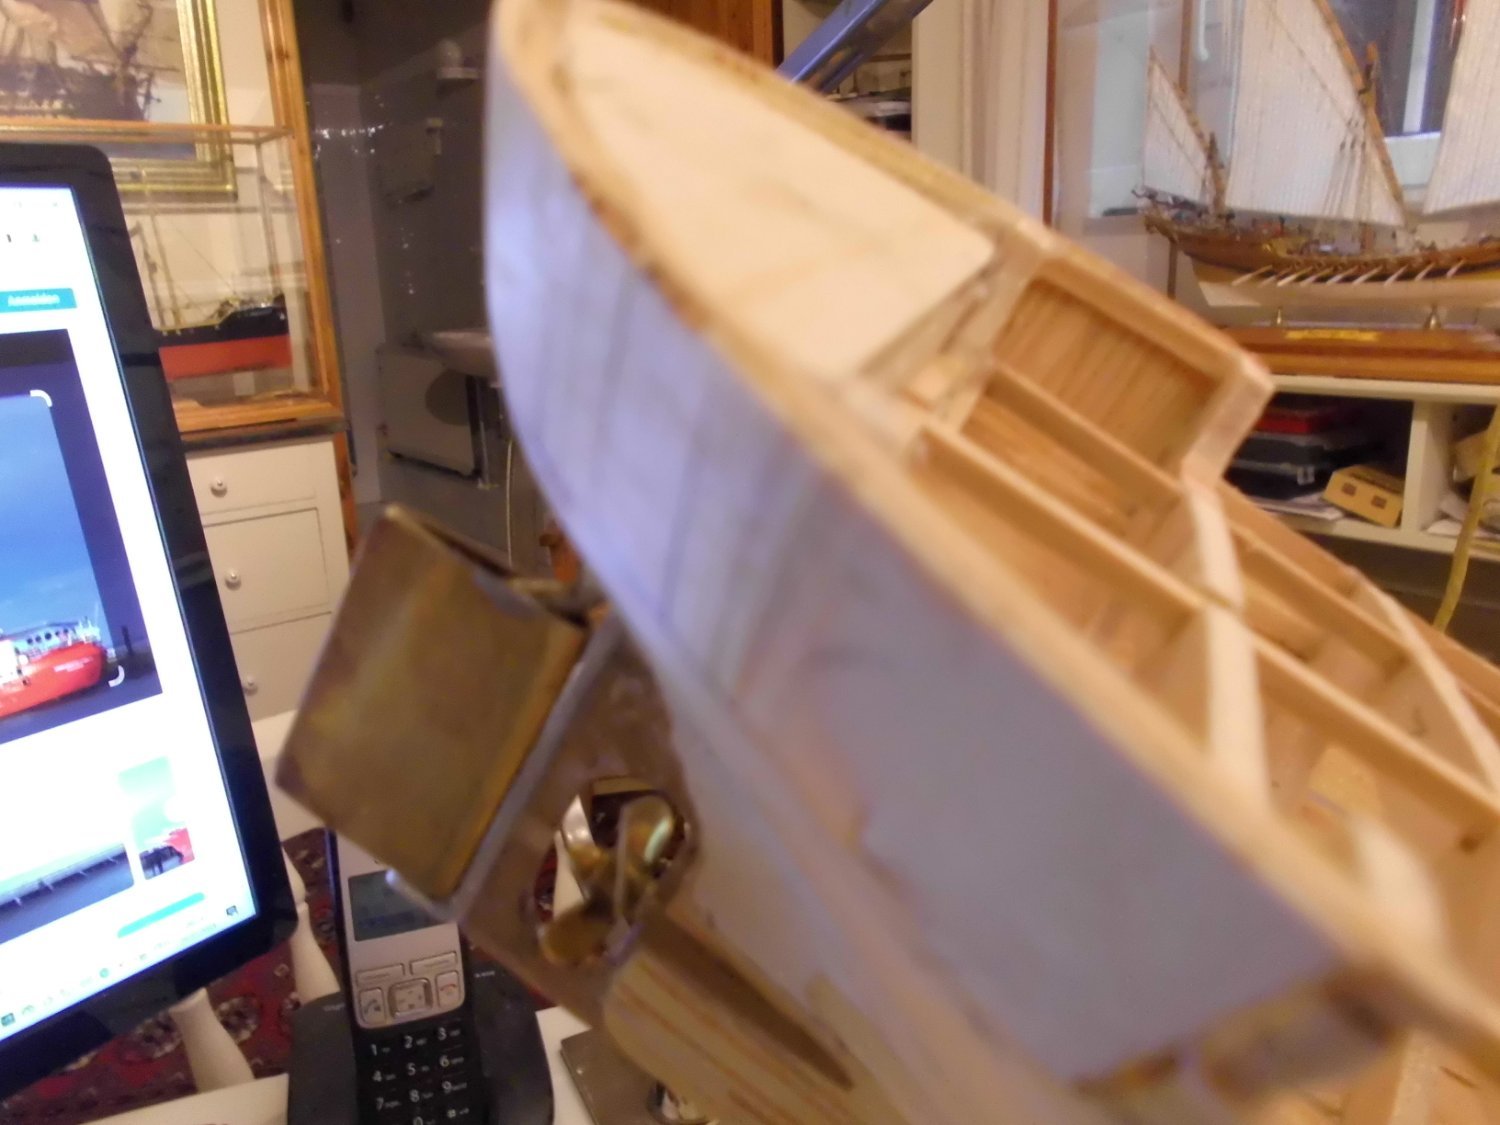
for the rounded areas I found a solution. It`s going to be a mix of planking (forecastle), and balsa fillers combined with brass curved sheet plate
Nils

in the narrow roundings I used 3mm wide strips, in the more flat areas 8mm and 10mm strips
there is a supporting framework installed
for the poop 5 stacks of balsa combined with with a brass sheet part
- vaddoc, FriedClams, mtaylor and 10 others
-
 13
13
-
nice progress Mike,
Nils
-
Thank you John,
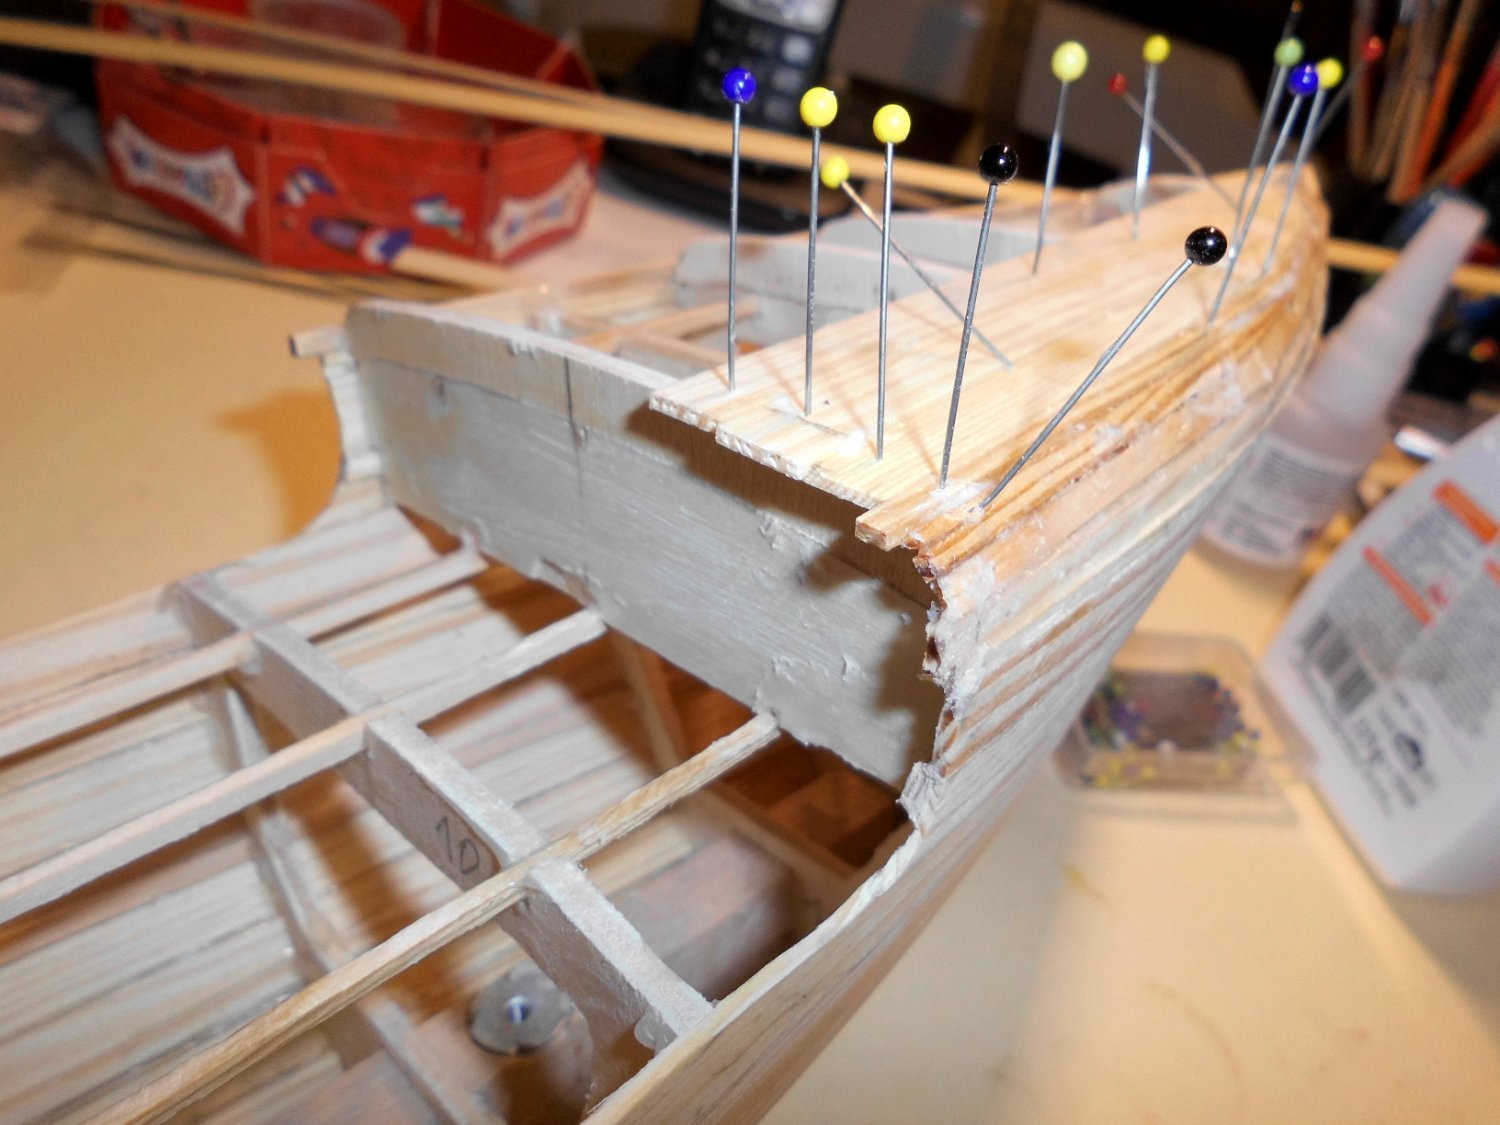
in the moment I`m a bit stuck with considering the construction of the upper poop and forecastle top rounding covers. Of course one way would be to shape balsa support parts, but I would rather have smaller frameworks to shape by means of planking the 3-dimentional areas .....
Nils


- GrandpaPhil, vaddoc, Jack12477 and 10 others
-
13
-
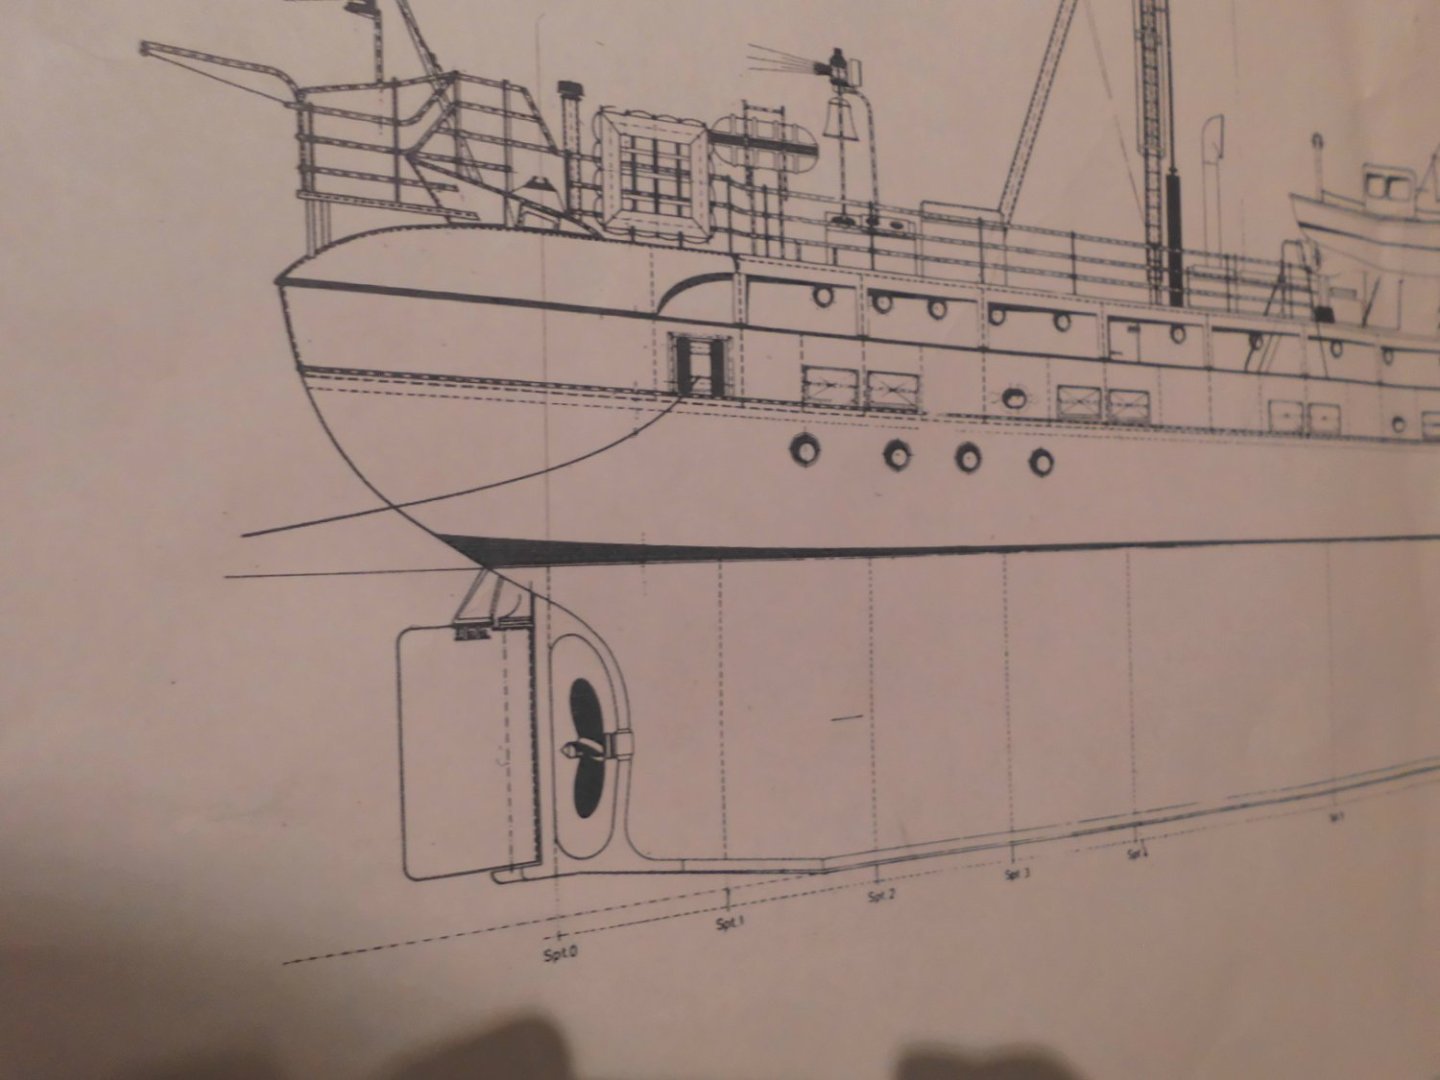
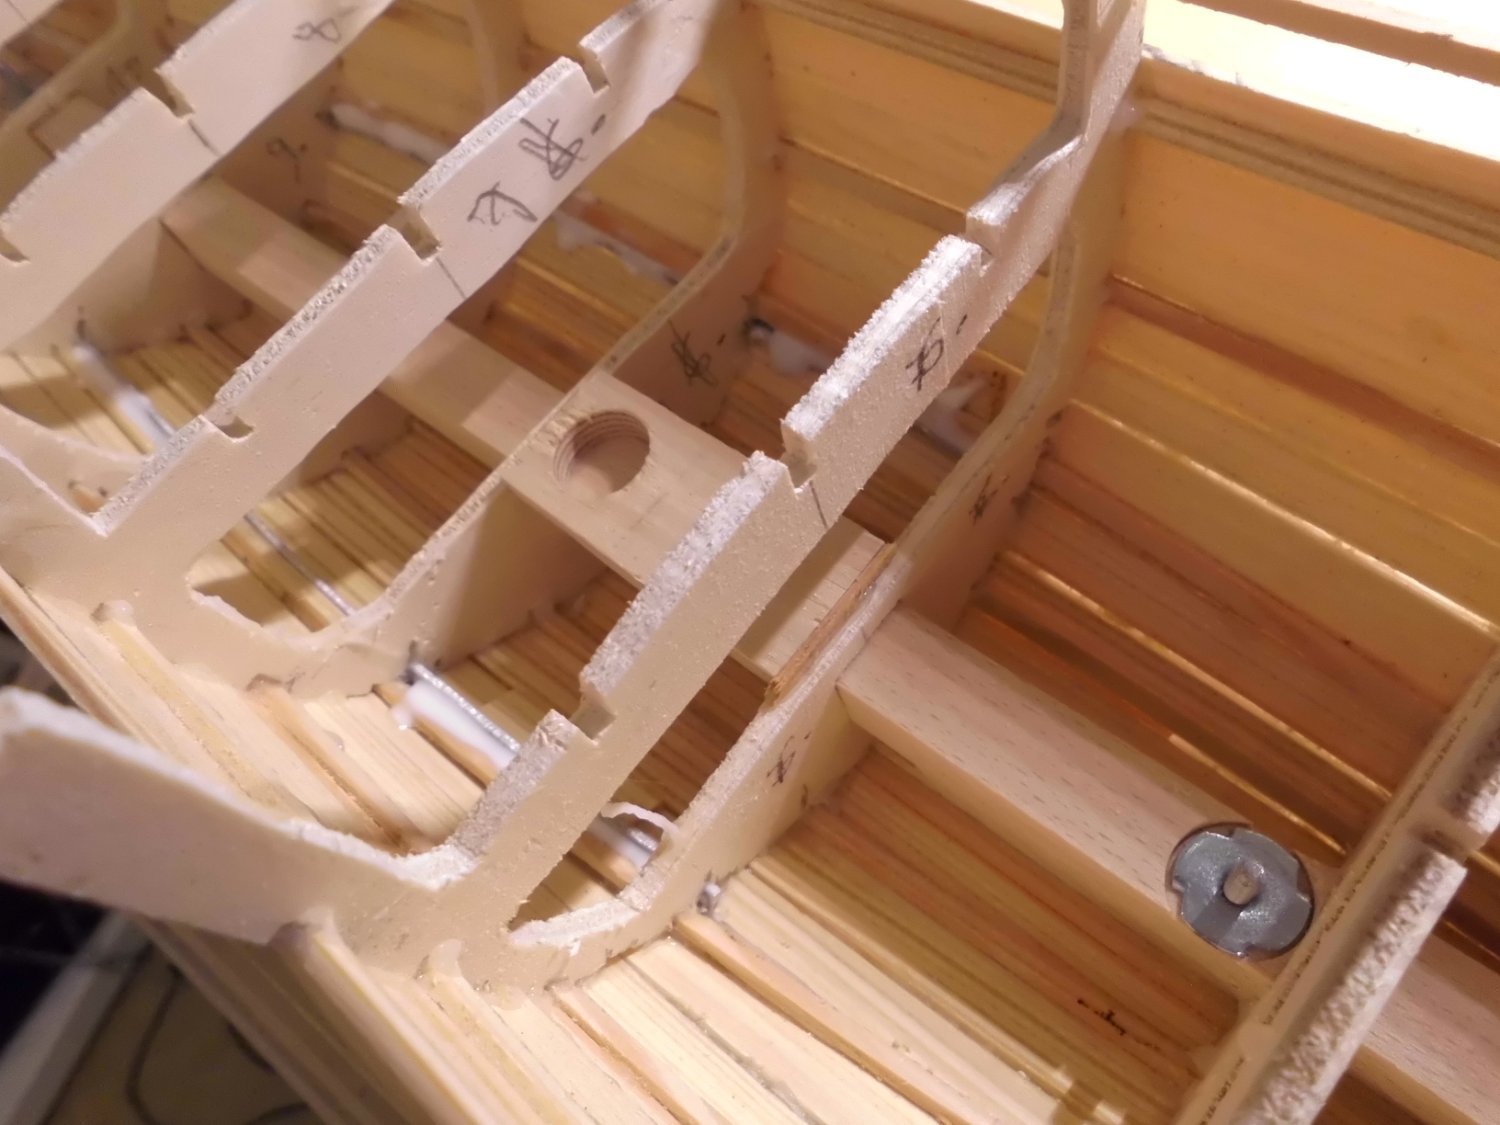
Update
today the deck beams were installed, and the overstanding upper frameportions cut off.
I also received the steel concave shield 21,3mm diam. of the mushroom anchor, for soldering on the anchorshaft
Nils

the deckbeams for forecastle and the main deck are on

this is a pressed and cut out steel round 21,3mm Diam.
-
-
-
-
Thank you very much Ken,
yes, I think that is also one reason why a few light-ships were tranformed into 3 mast sailing barks, after they were taken out of duty.
the "Alexander von Humboldt" was built as a German lightship, with birthname "Reserve Sonderborg", in 1906 and later transformed to the well known 3 mast bark with the green sails
Nils
.jpg.9b6085a184a783d446cc7502308030f4.jpg)
Alexander von Humboldt (former lightship)
- Canute, Retired guy, Oboship and 3 others
-
6
-
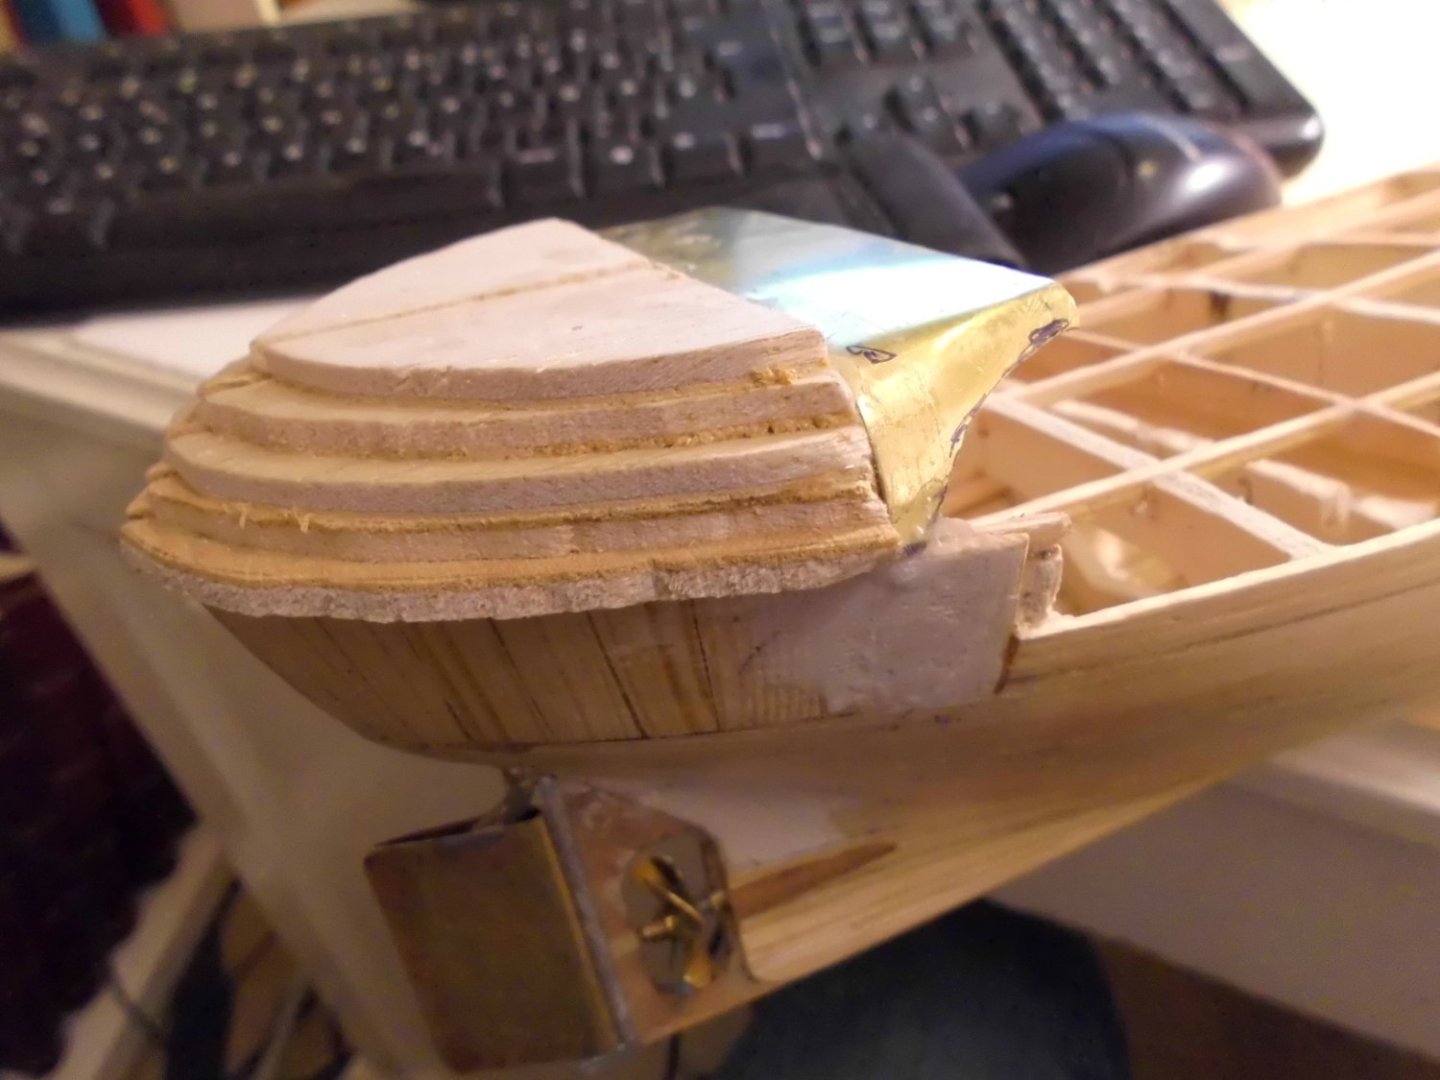
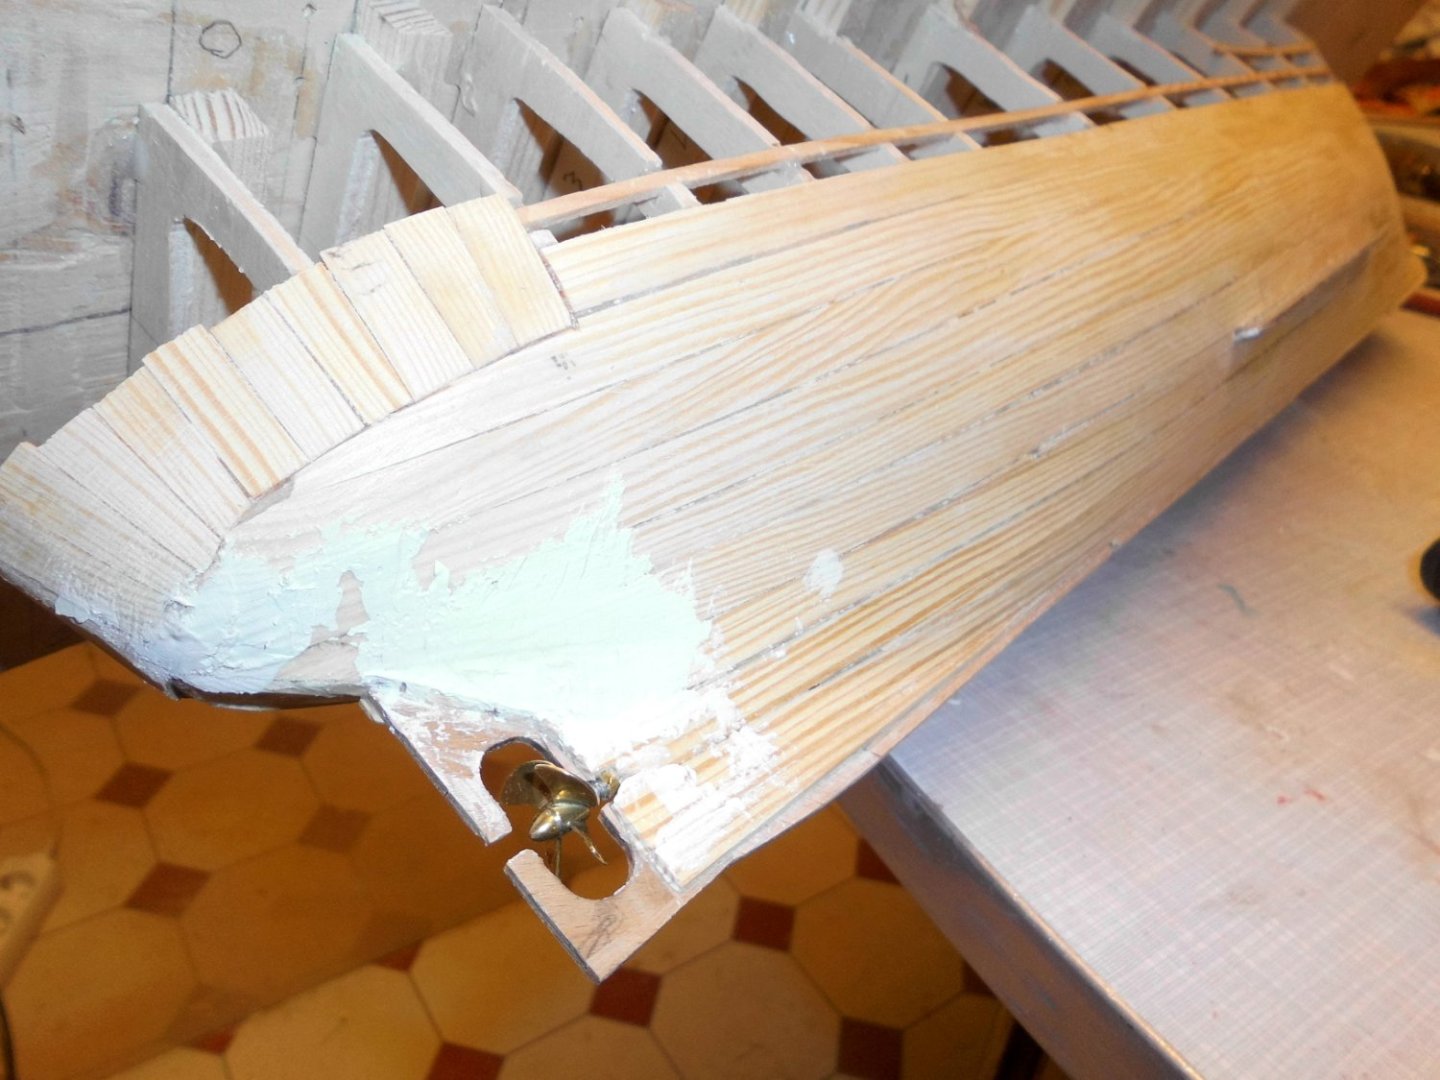
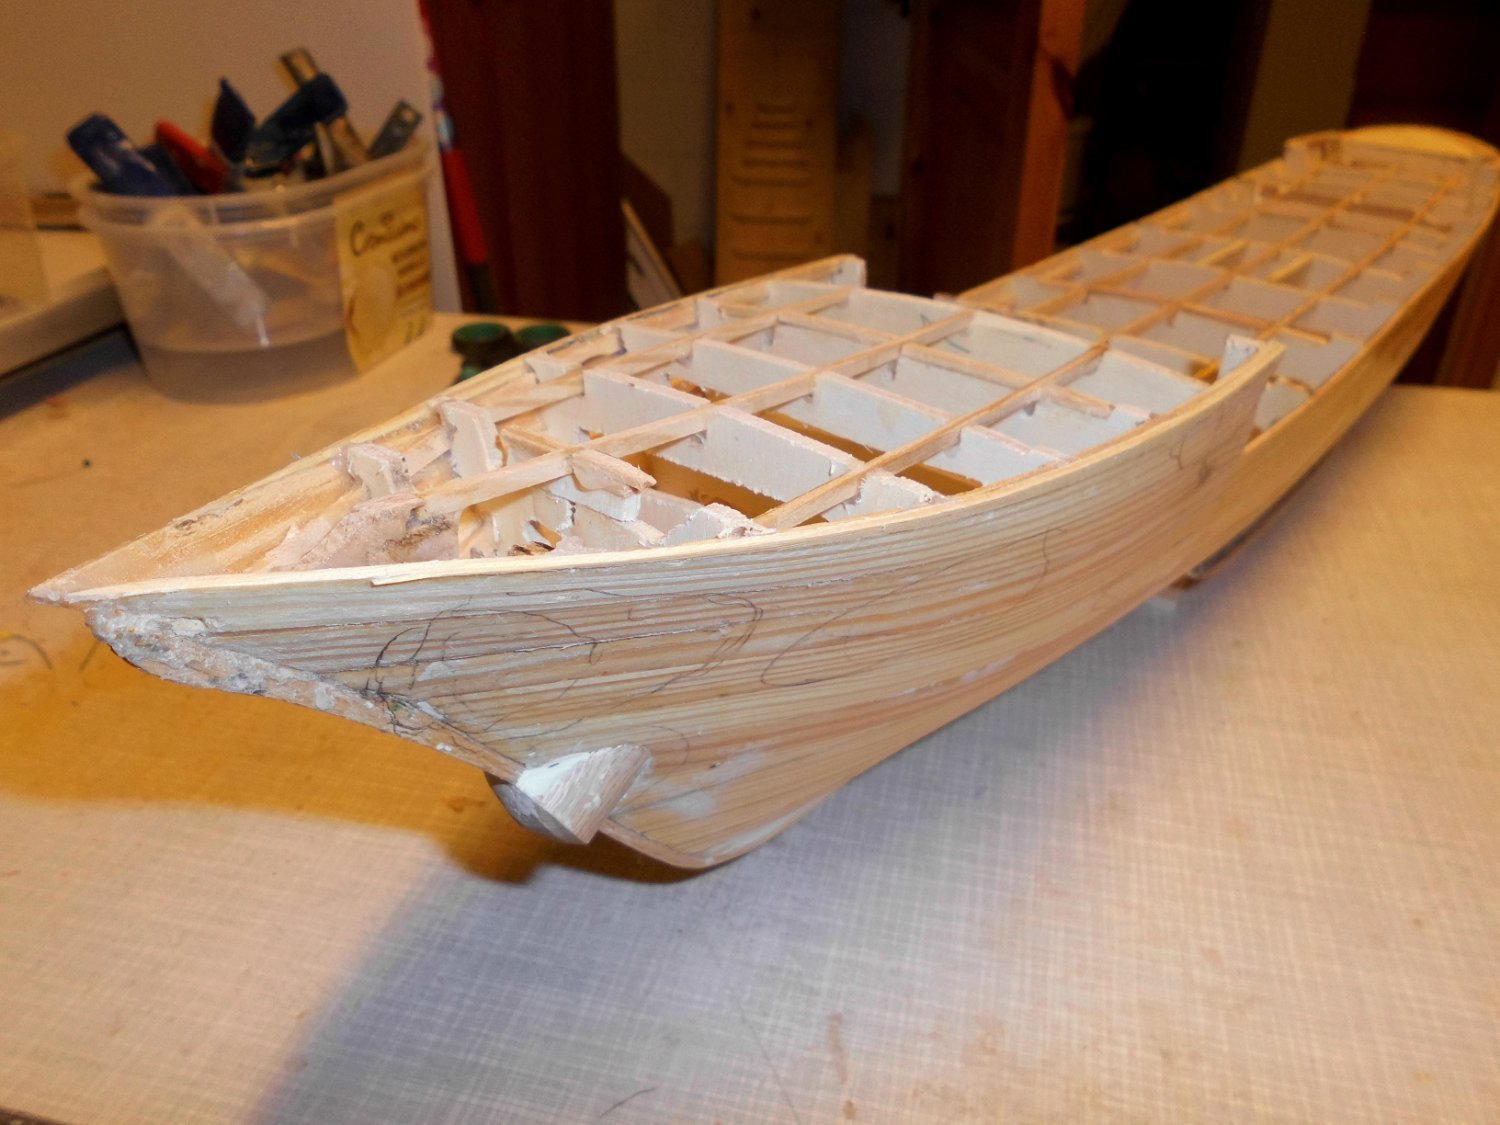
Update.
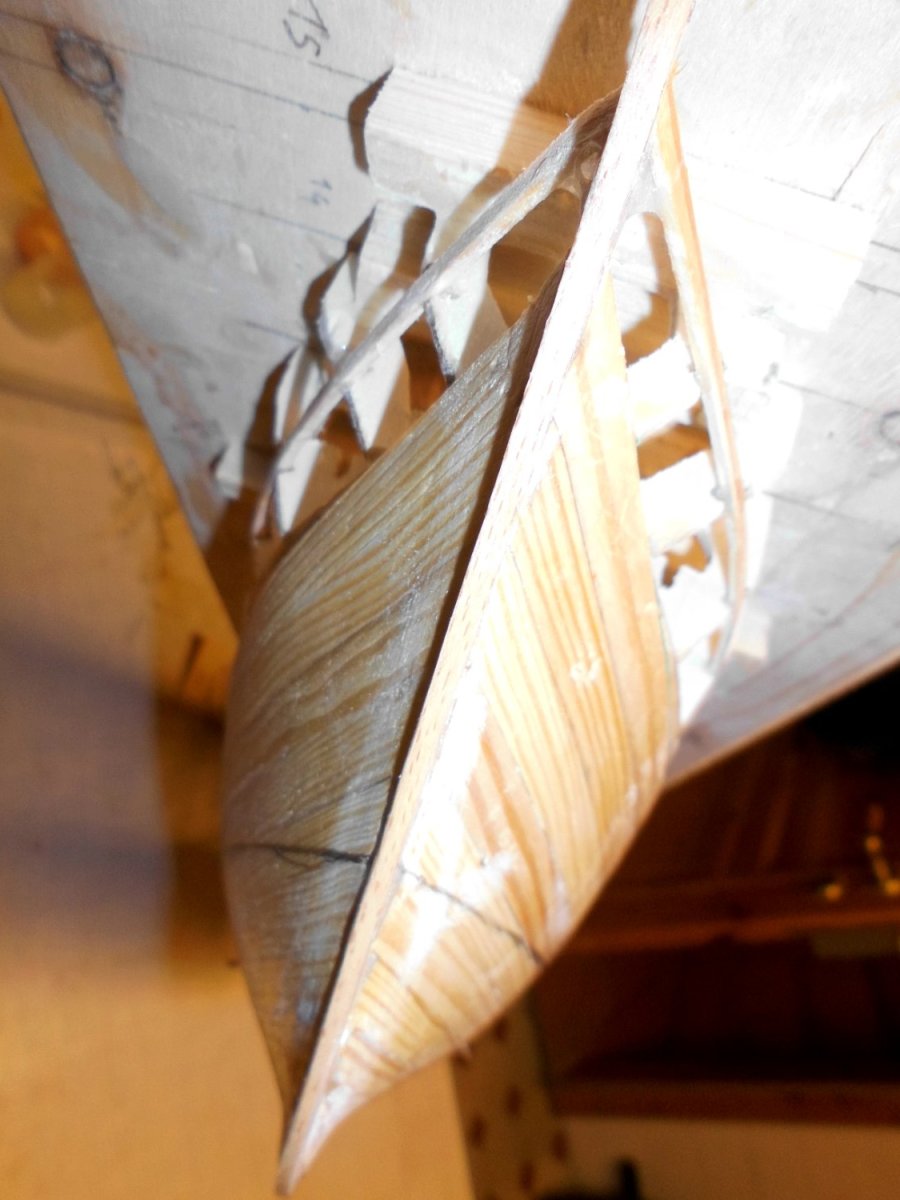
Today I took her (cut) off the build platform, and had my first look into the hull, am pleased with it so far.
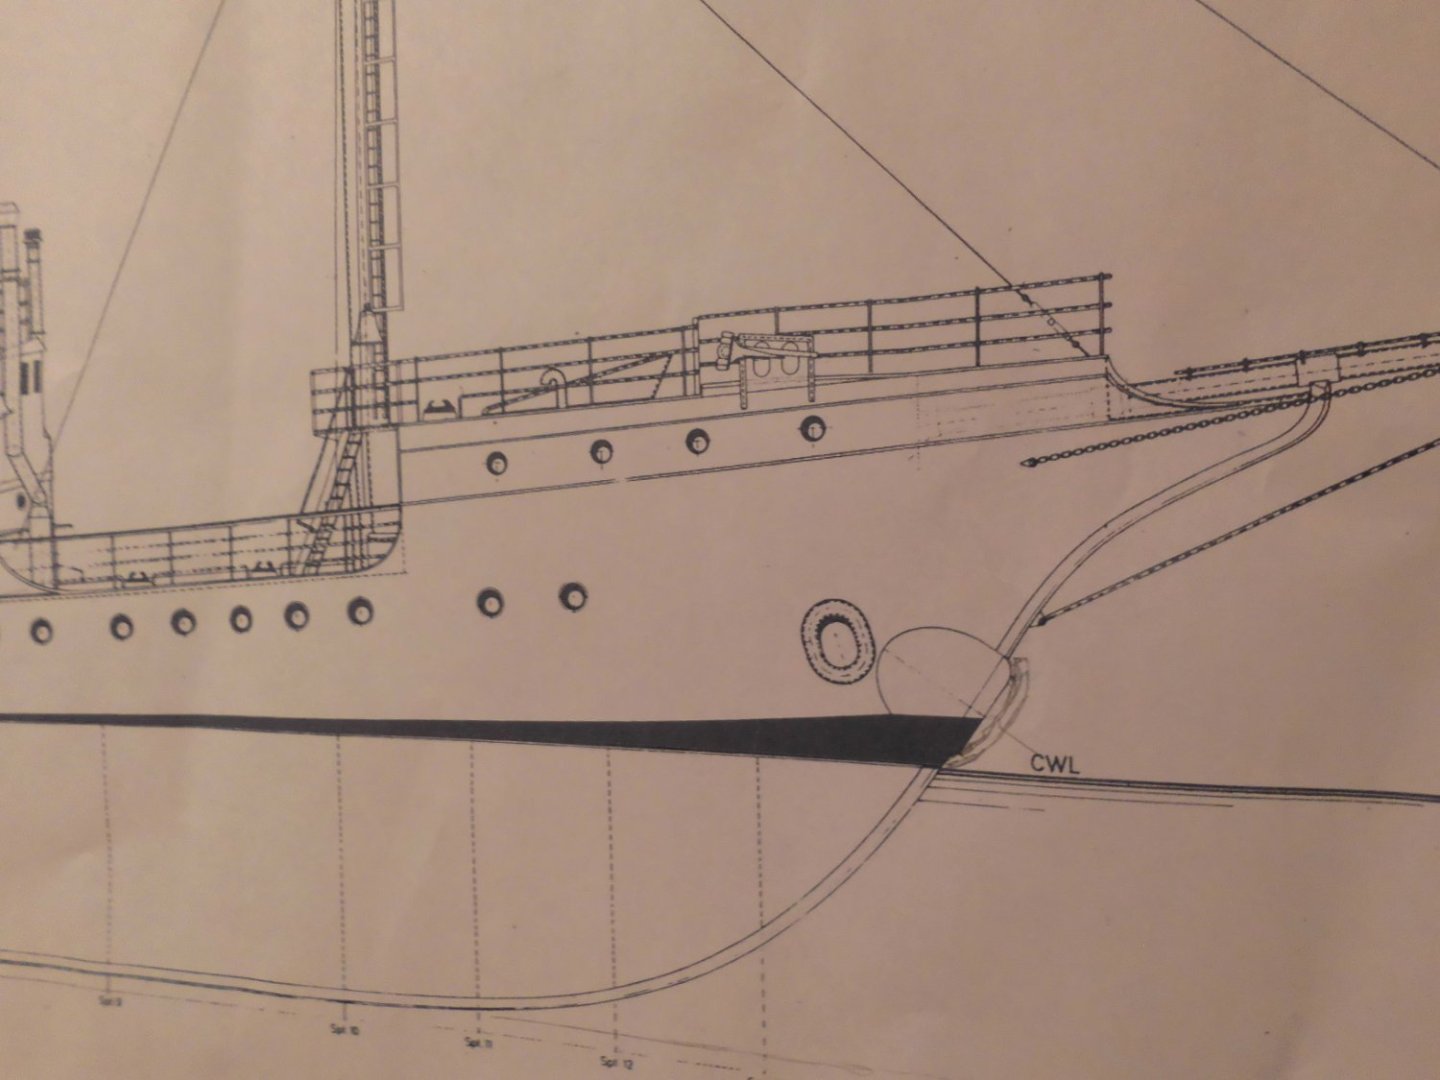
Outside against the bow-post and the side skin I installed the integrated round pod that later on takes up the mushroom typ anchor, (3 tons in real weight).
Its the first time she settles on her own standplate
Nils

the pod for the mushroom anchor later on. It faces downwards to a certain angle and ends a bit above the waterline
its made from 20mm round beechwood. The face is light convex, as it fits neatly into the concave shape anchor
the overstanding upper frames will be cut off
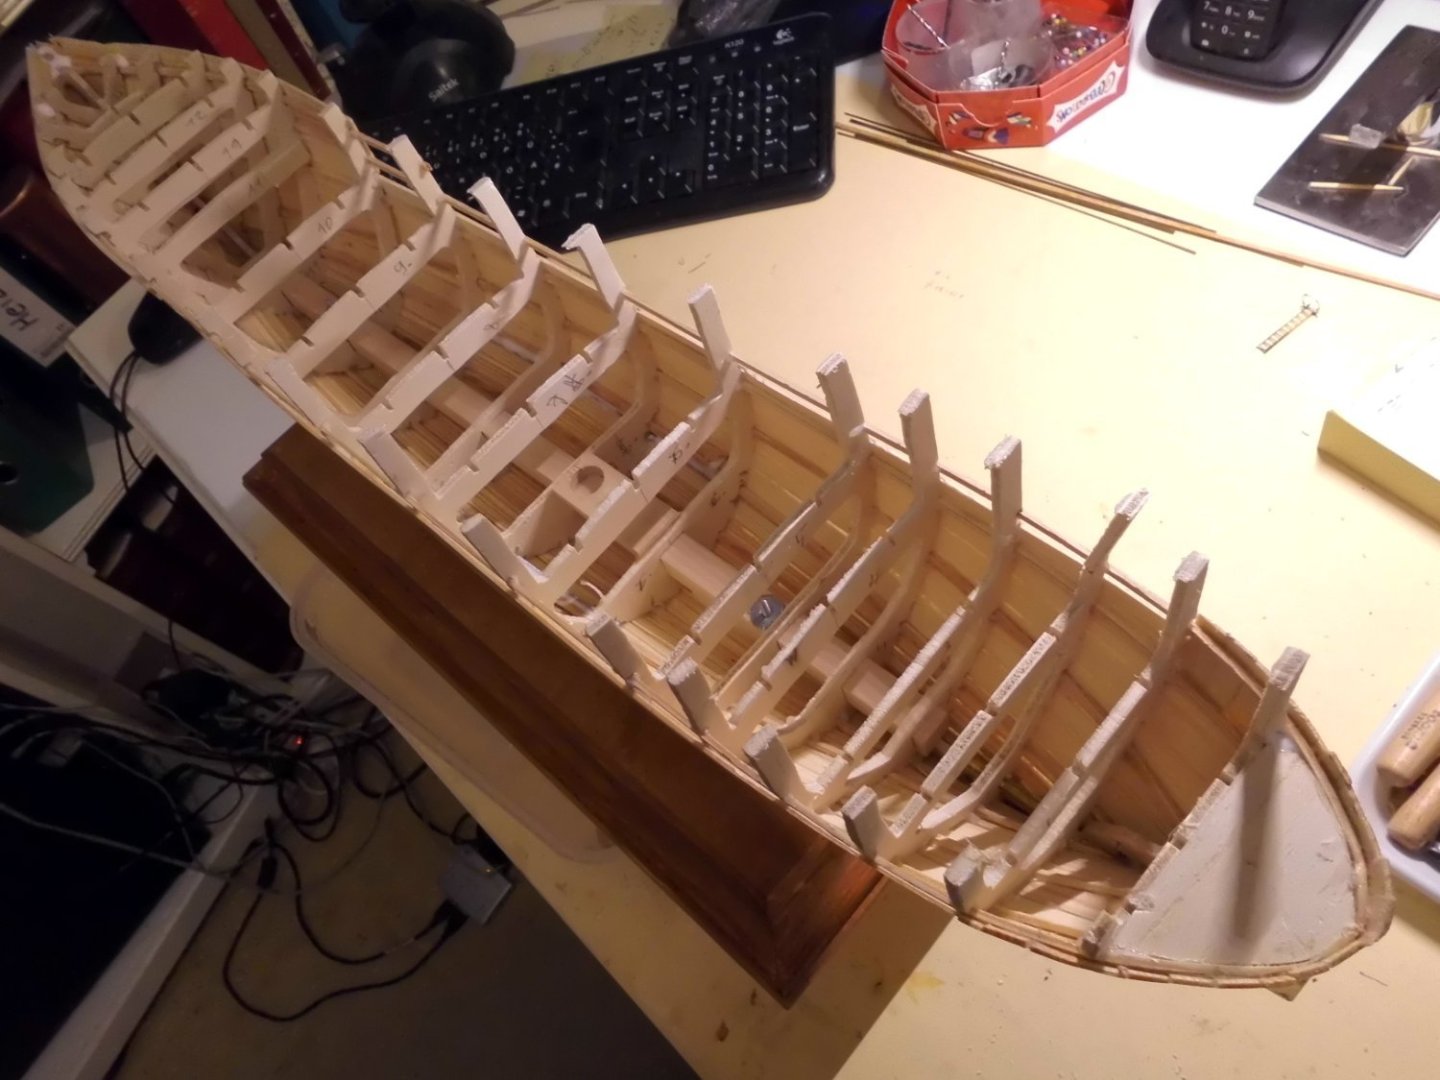
a sight into the hull

here to be seen one of the spindle counter nuts, and the resting foot lug for the light towers stand tube. This is also why I built in the squarebar on the topside of the keel
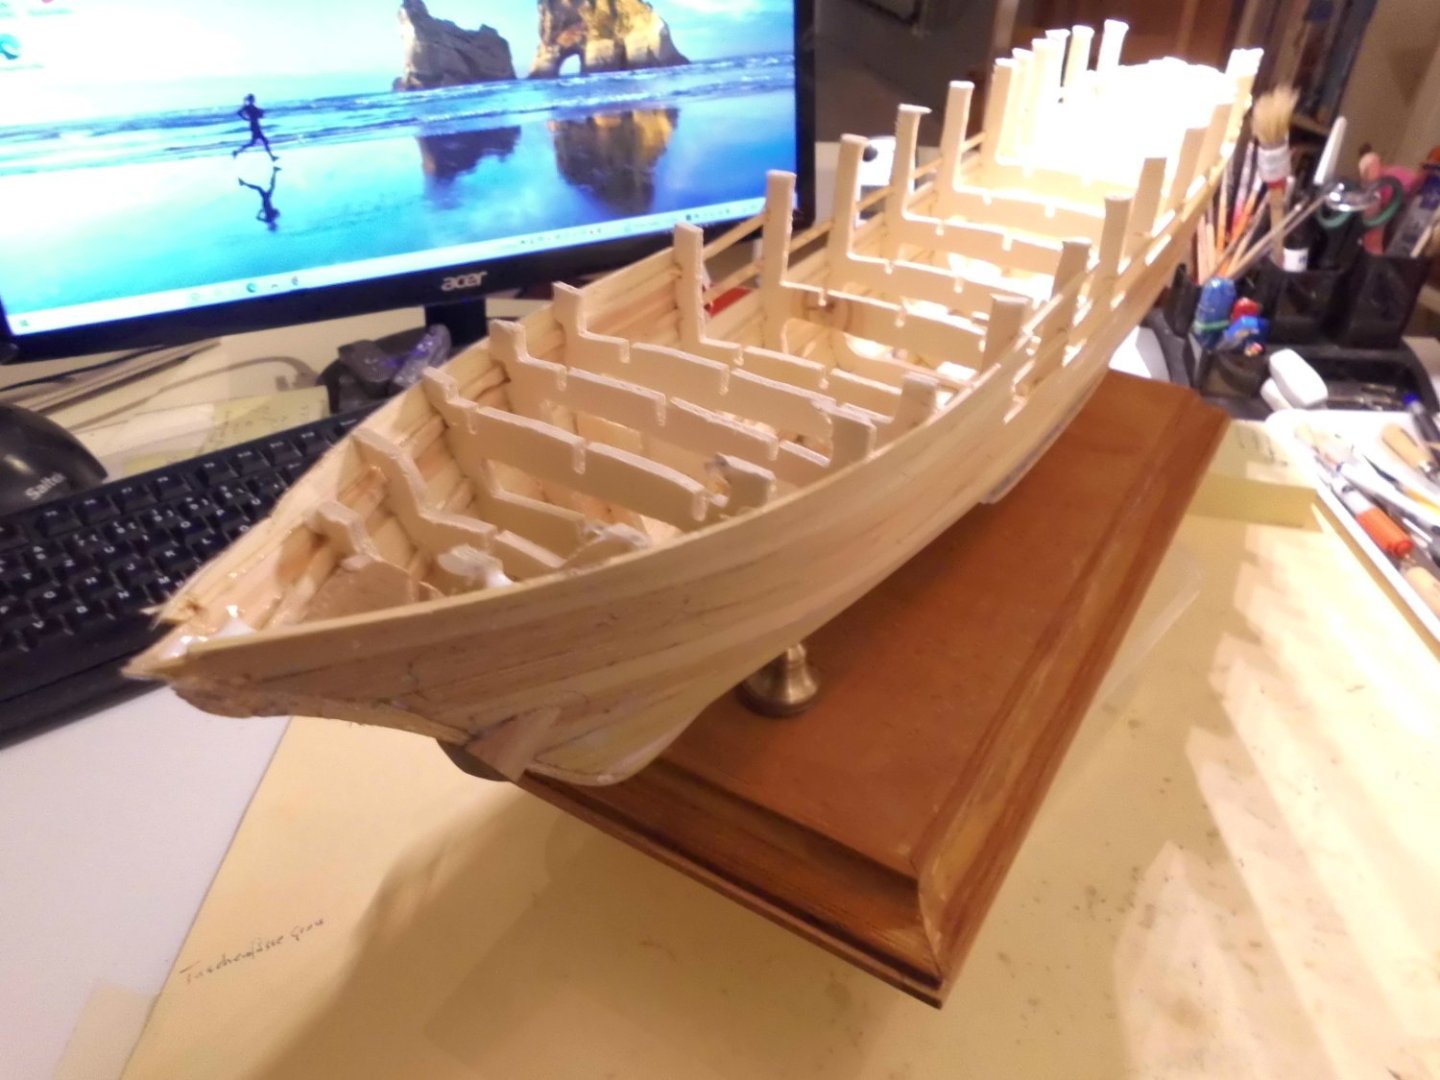
the shining through narrow plank gaps are filled with white cured wood glue. the hull at this degree of building is extreme light
- vaddoc, FriedClams, Valeriy V and 10 others
-
13
-
-
-
thank you very much Roel,
Nils
- Jack12477, Retired guy, mtaylor and 1 other
-
4
-
Many thanks Keith, John and Yves,
Keith,
I`m pleased that you look up the log reguraly, stay tuned
John,
yes, the blades were used already on my "5 Elbe" and "Ergenstrasse" hulls, without intermediate, sharpening
Yves,
right , once I used scrapers, I would`nt want to miss them for my builds
Nils
- Retired guy, yvesvidal, FriedClams and 3 others
-
6
-
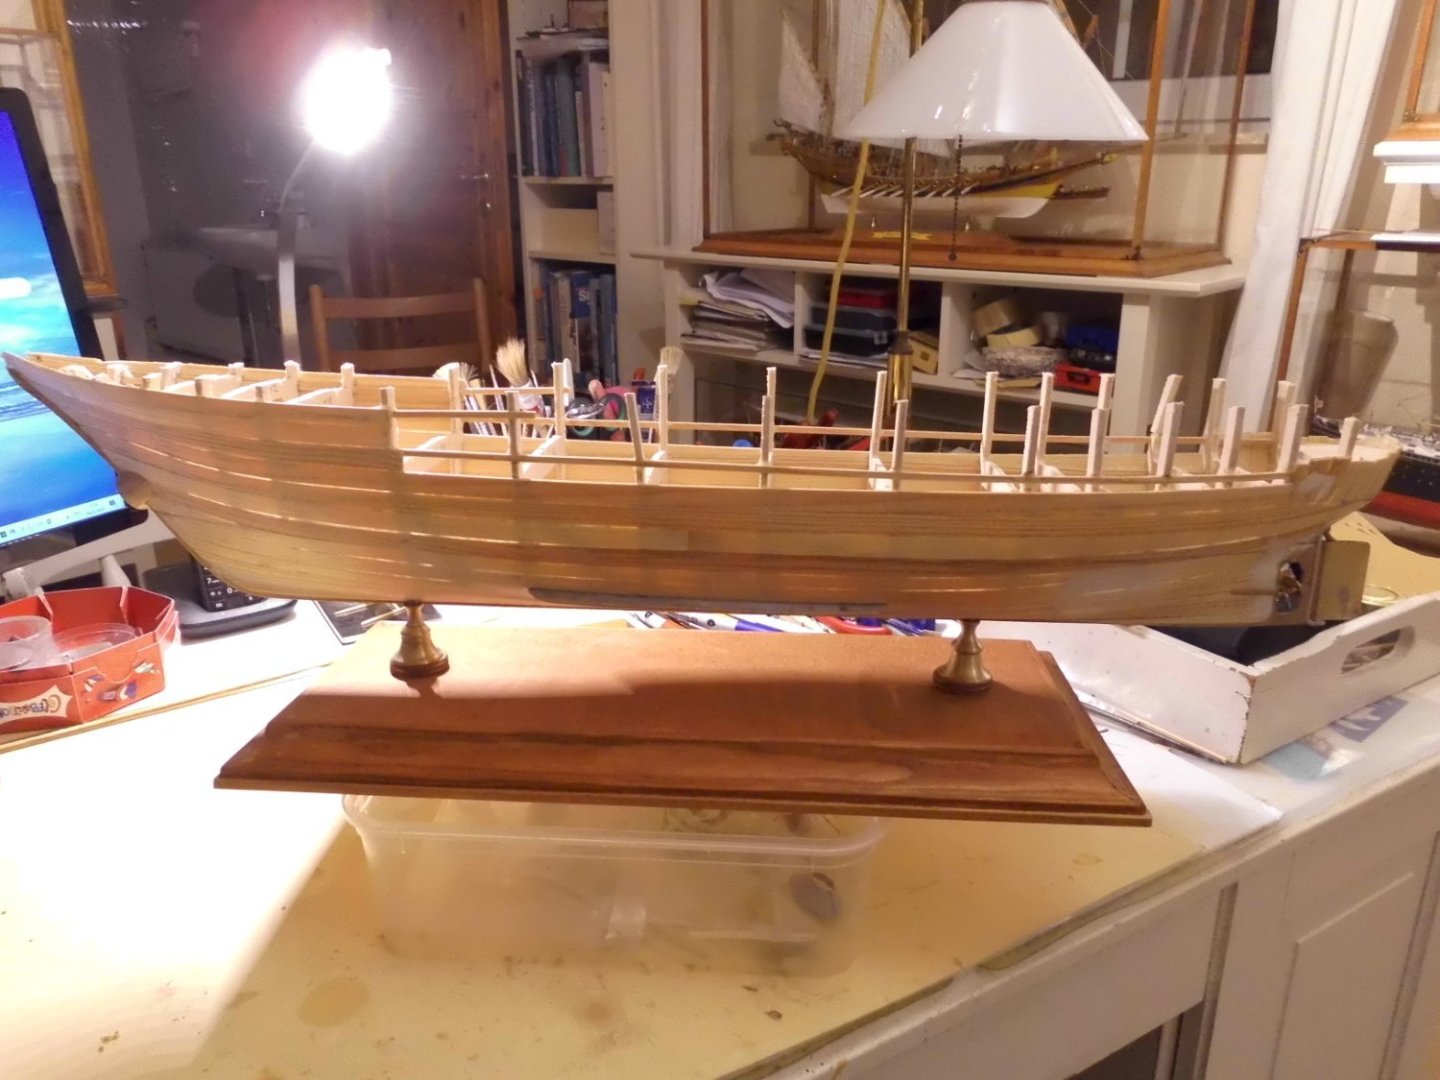
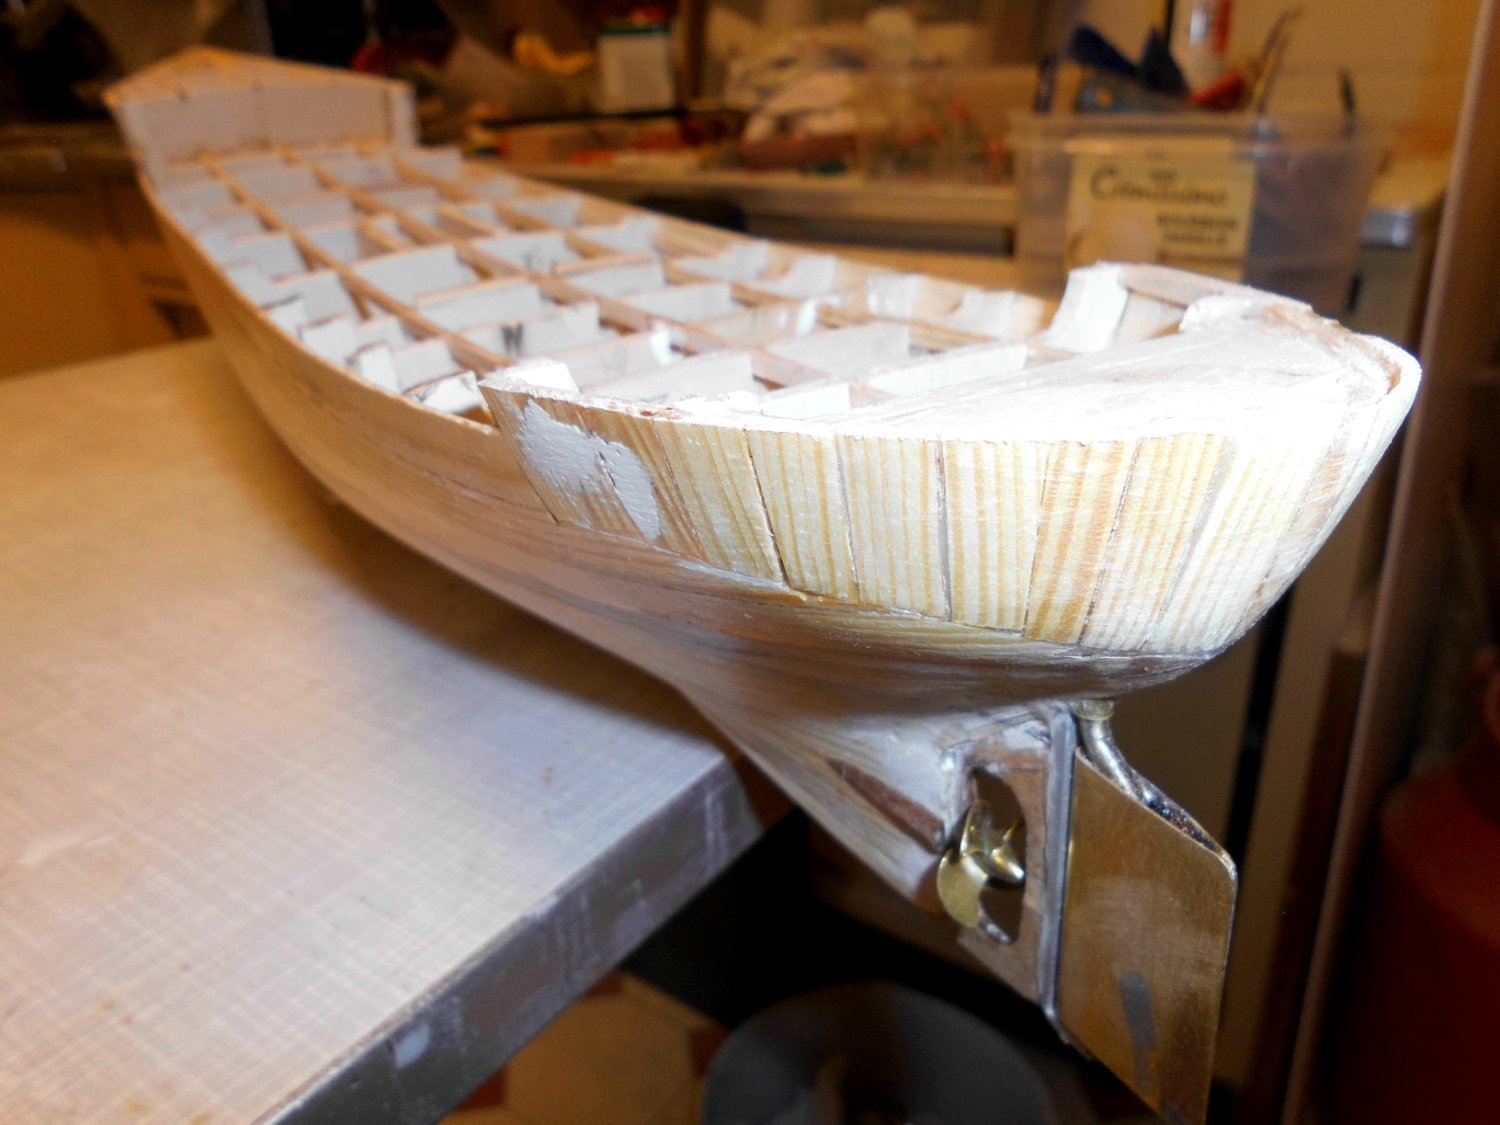
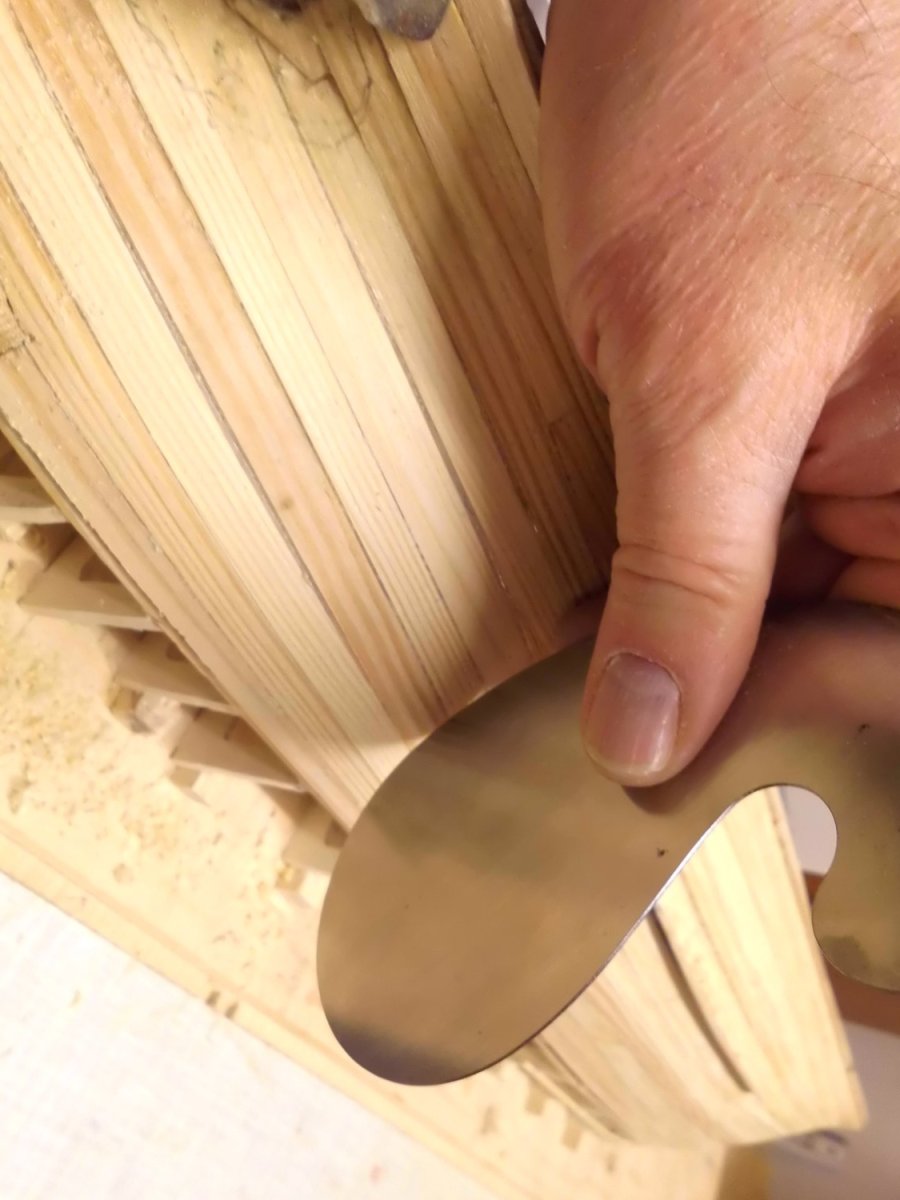
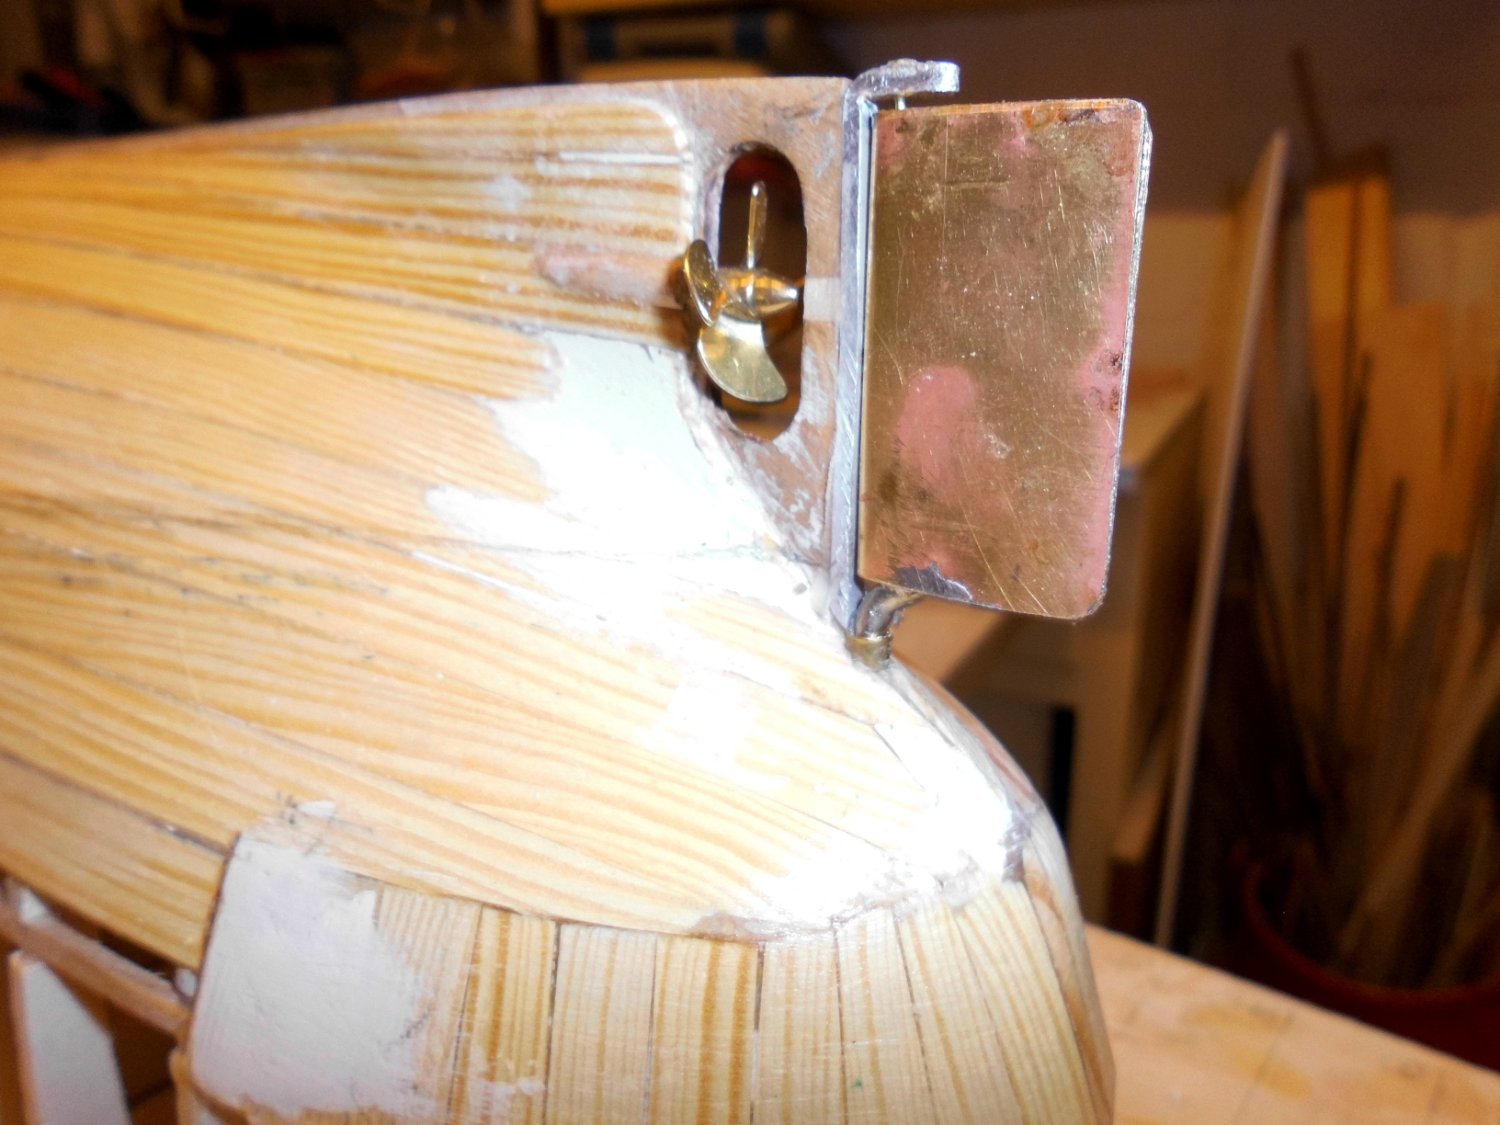
Update
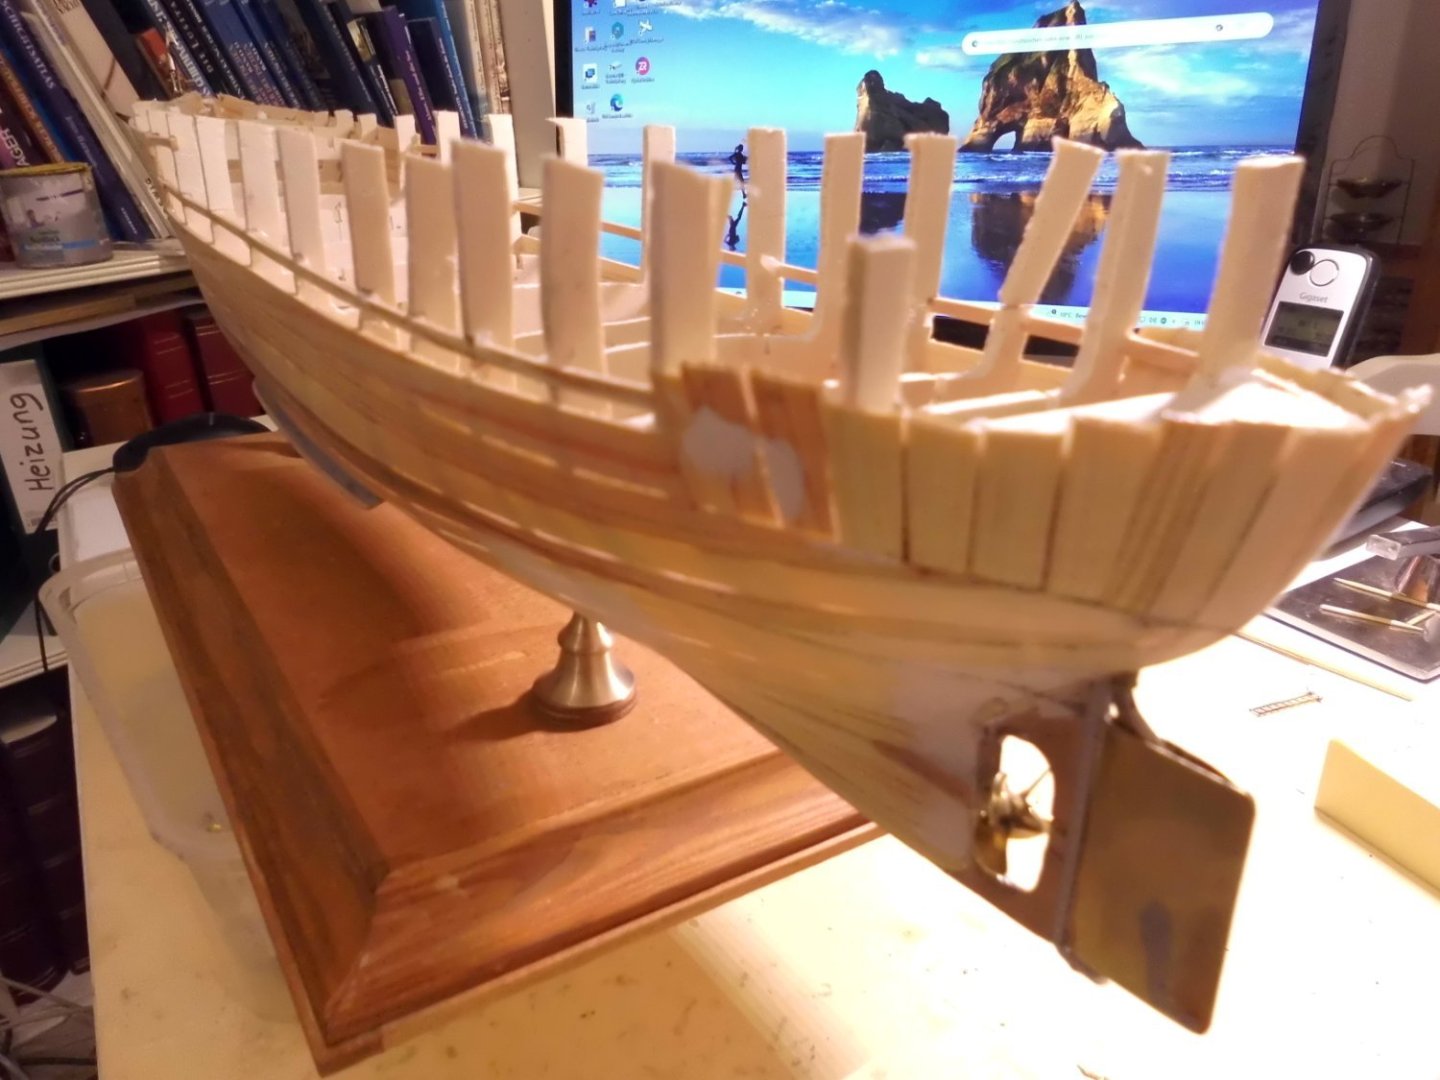
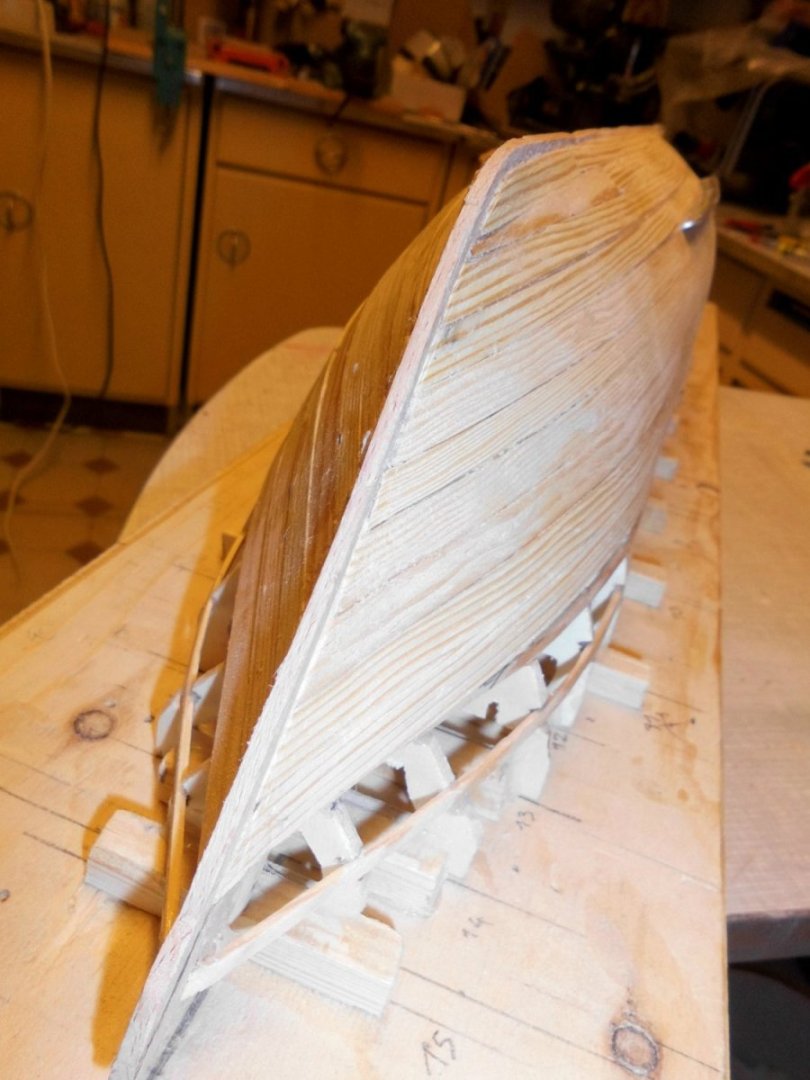
did some more scraping on the hull, also built in the prop and the rudder
Nils

the scraping method is a very good way to take off a minimum of the planks thickness. I use 3 different scraping sharp edged blades
the scraping chips are are very thin. The advantage vs. sanding is : no dust created

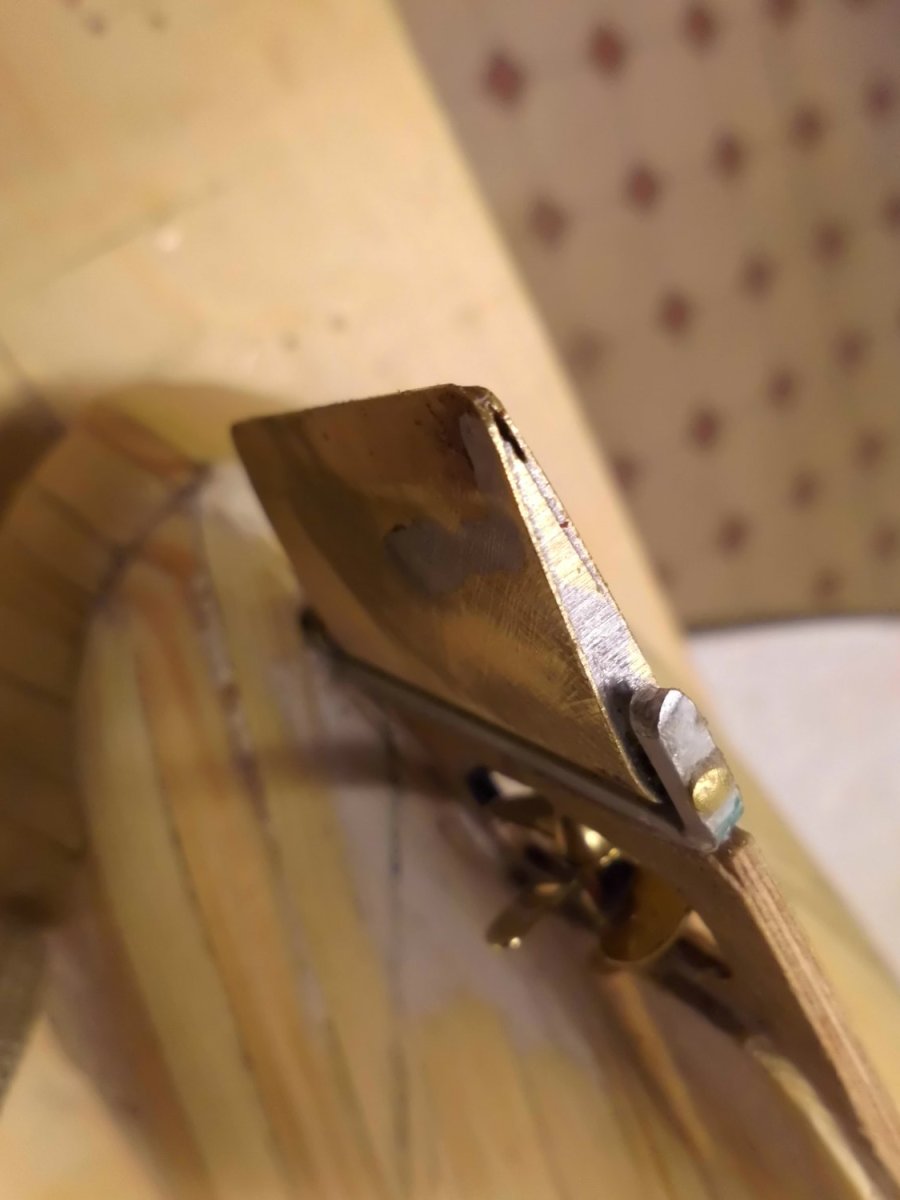
the rudder is made and soldered from brass sheet The gap in the stempost is closed now
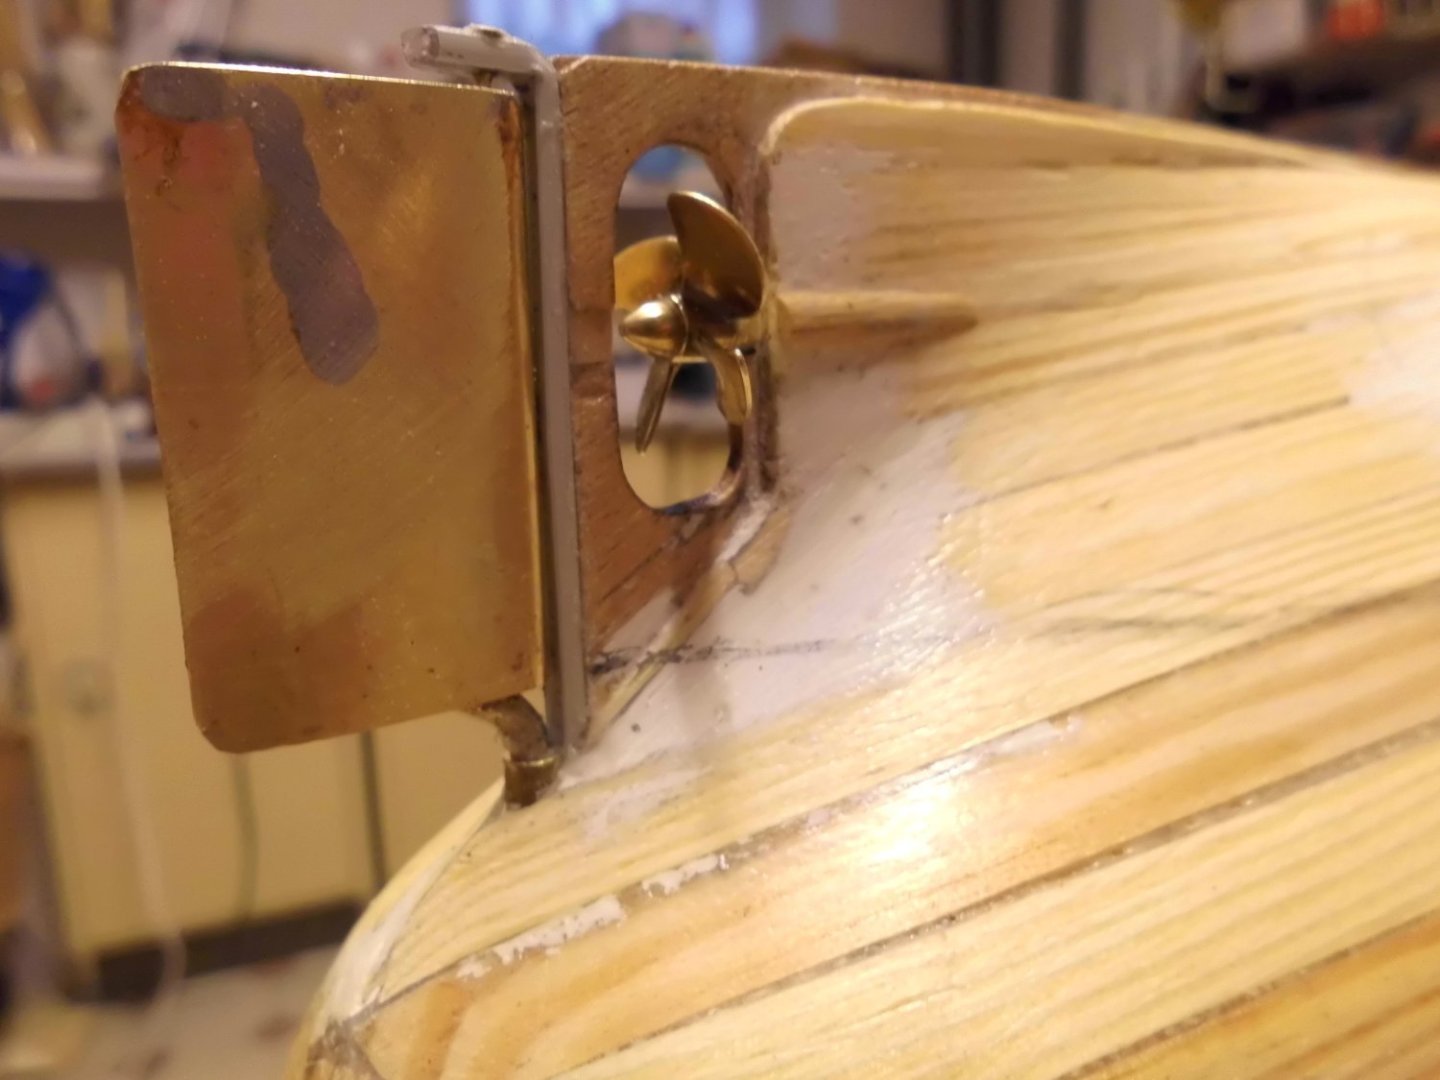
the rudder is fully workable, but it now ca`nt be removed any more unless desoldering
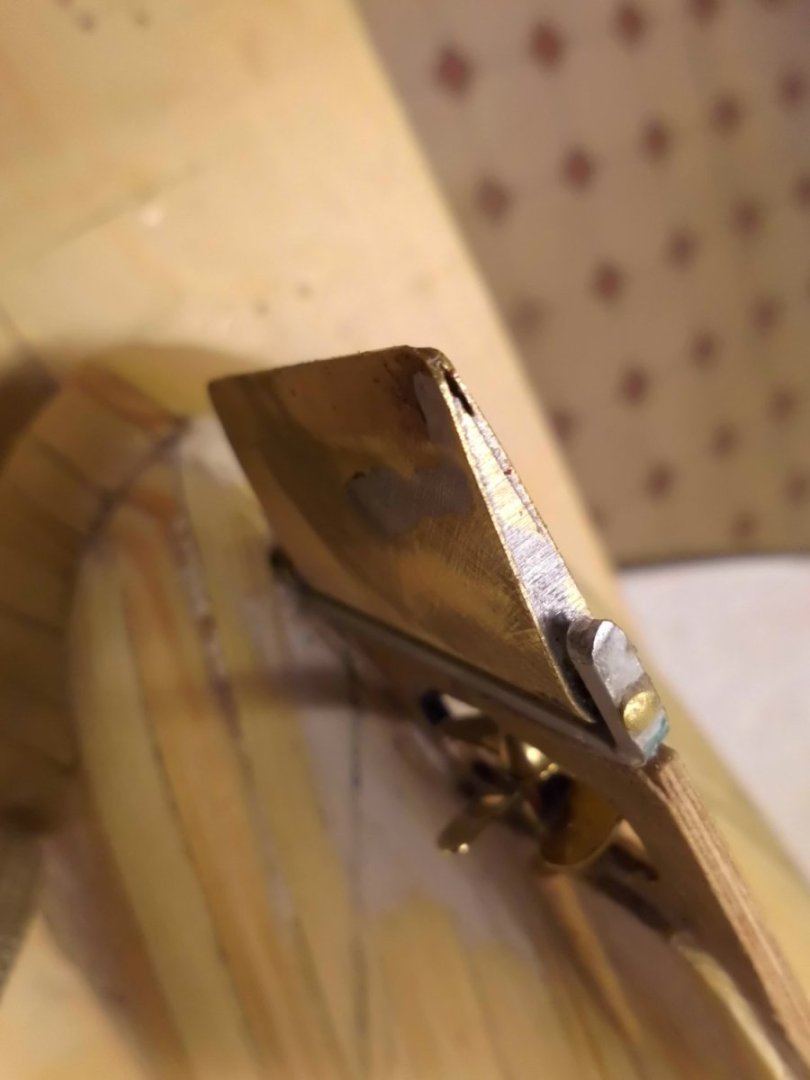
I fixed a metal edge to the keel and the stem in order to give more solid hold

The preliminary pencil-waterline is marked up
- mtaylor, Retired guy, wefalck and 14 others
-
17
-
Thank you very much John,
Nils
- mtaylor, Retired guy and Canute
-
3
-
Thank you very much Veszett,
Nils
- mtaylor, Canute and Retired guy
-
3
-
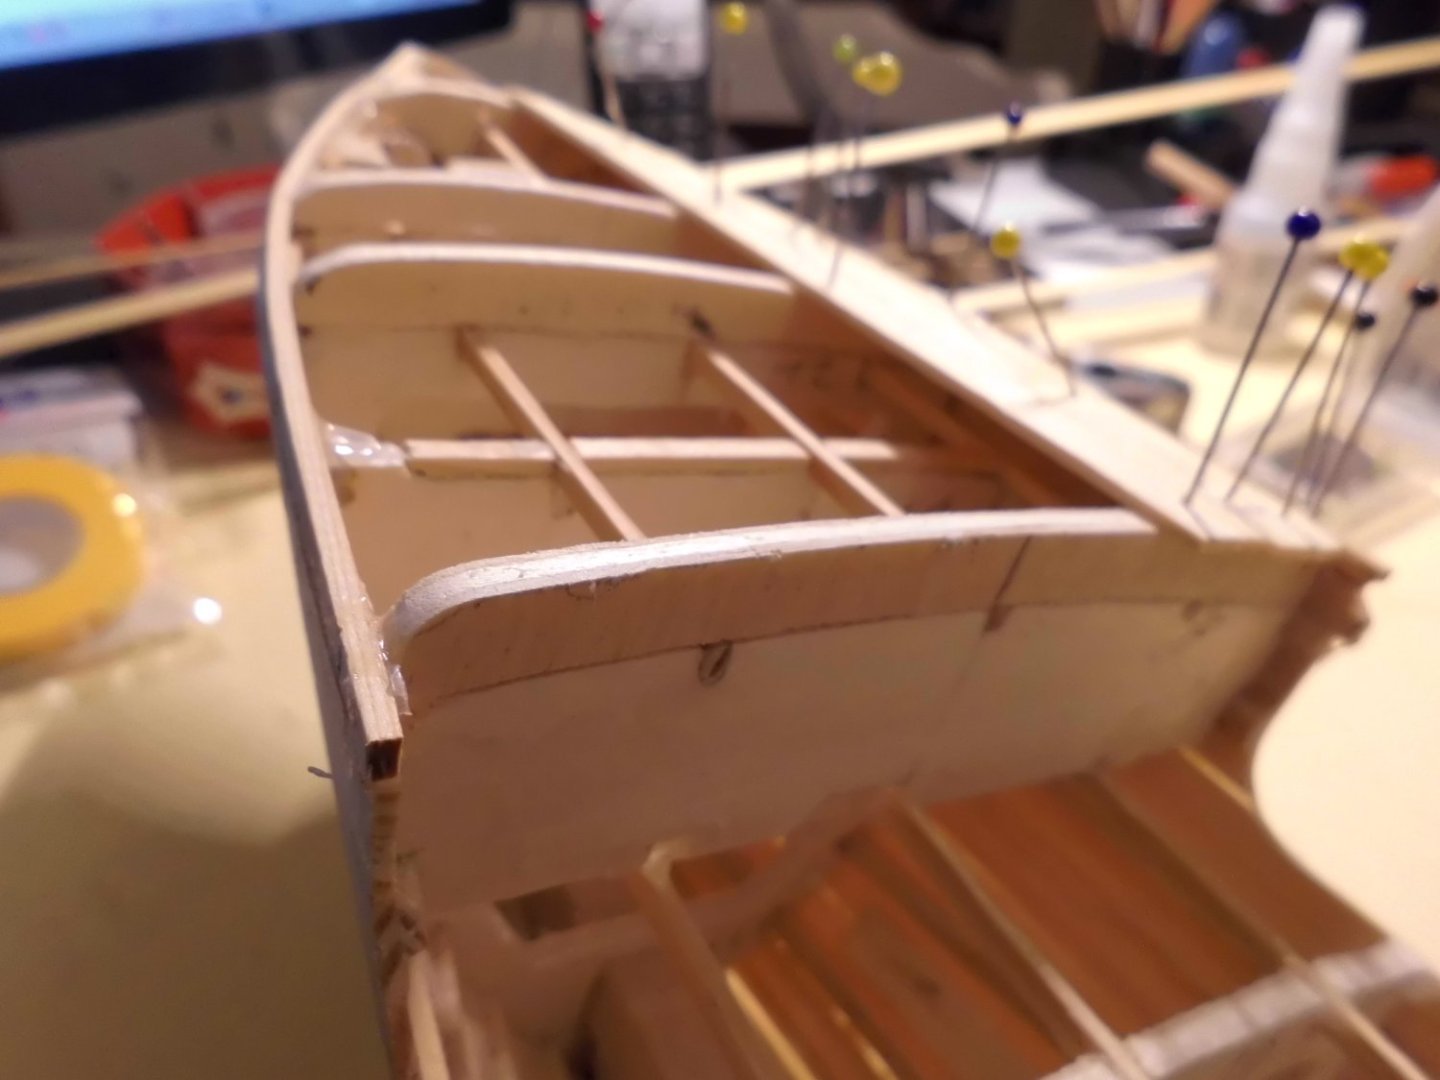
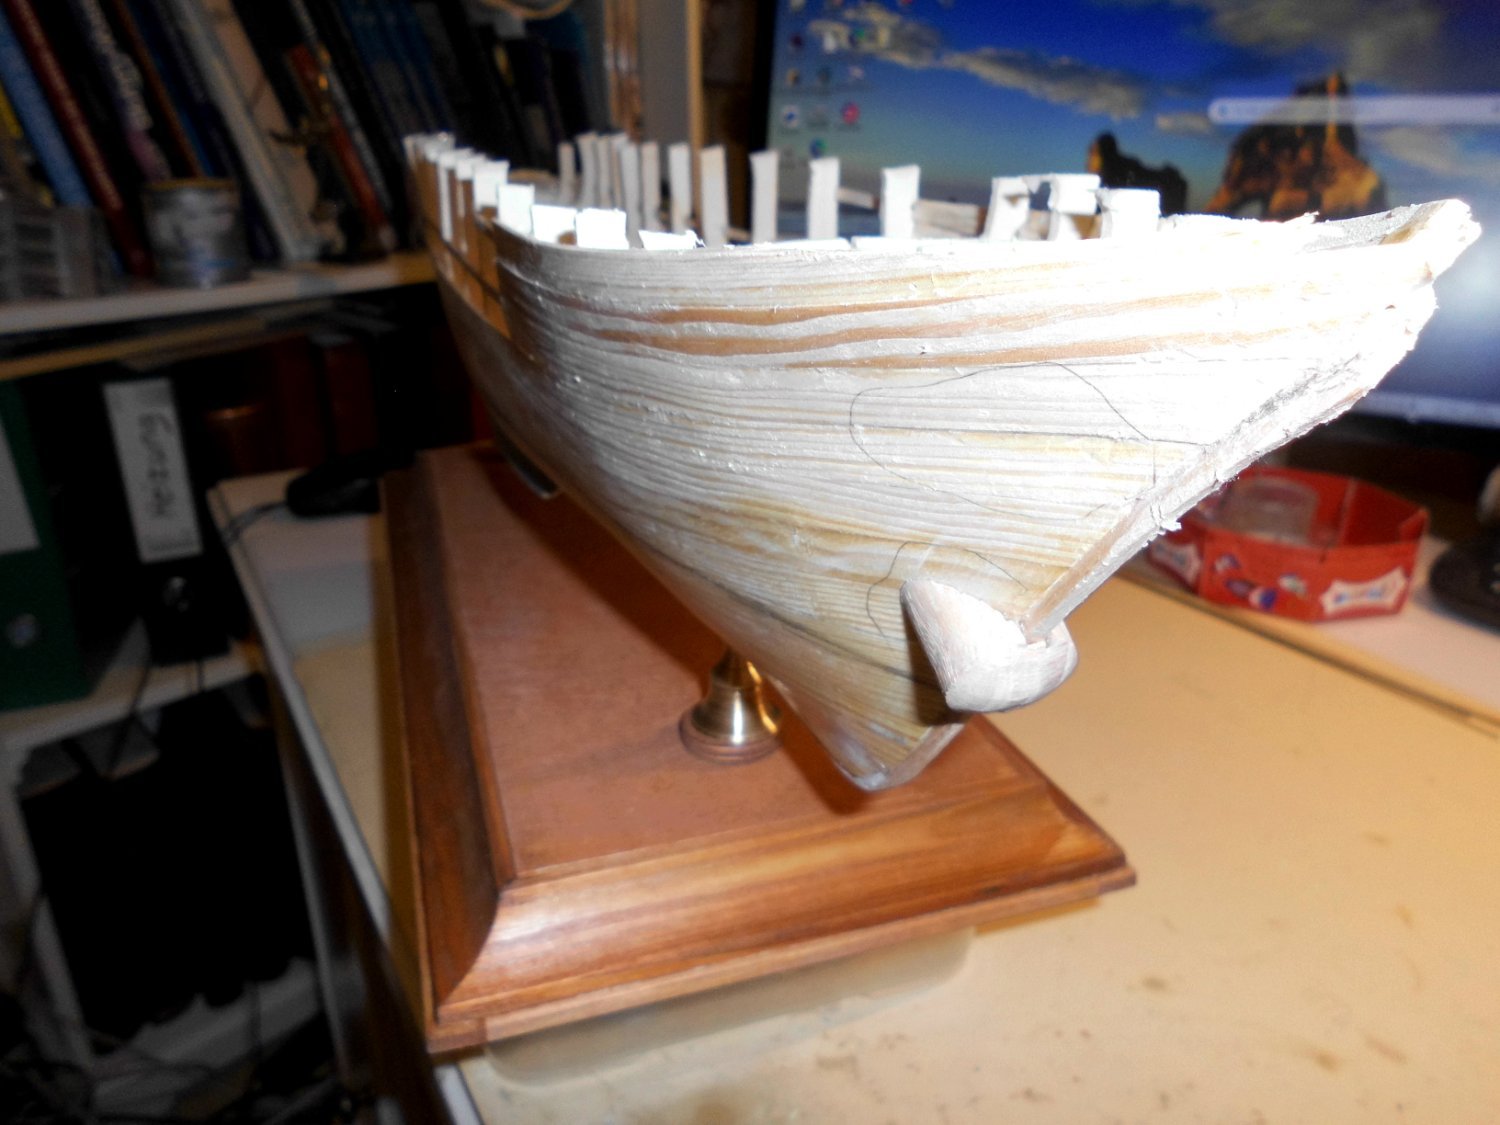
Update
all stb. planks are on now except for the bulwarks. On the port side there are still two planks to be placed in the keel area. The planks are scraped and sanded. A few touch ups with filler in the aft area are neccessary. Aft the prop is preliminary mounted. I had to cut out the stem, because I had forgotten to insert the prop-rod into the shaft. Will close the gap later on. There are only very few touch-ups required. Before the bulwarks are done I have to do and plank the deck.
Nils
waiting for doing the rudder assemly
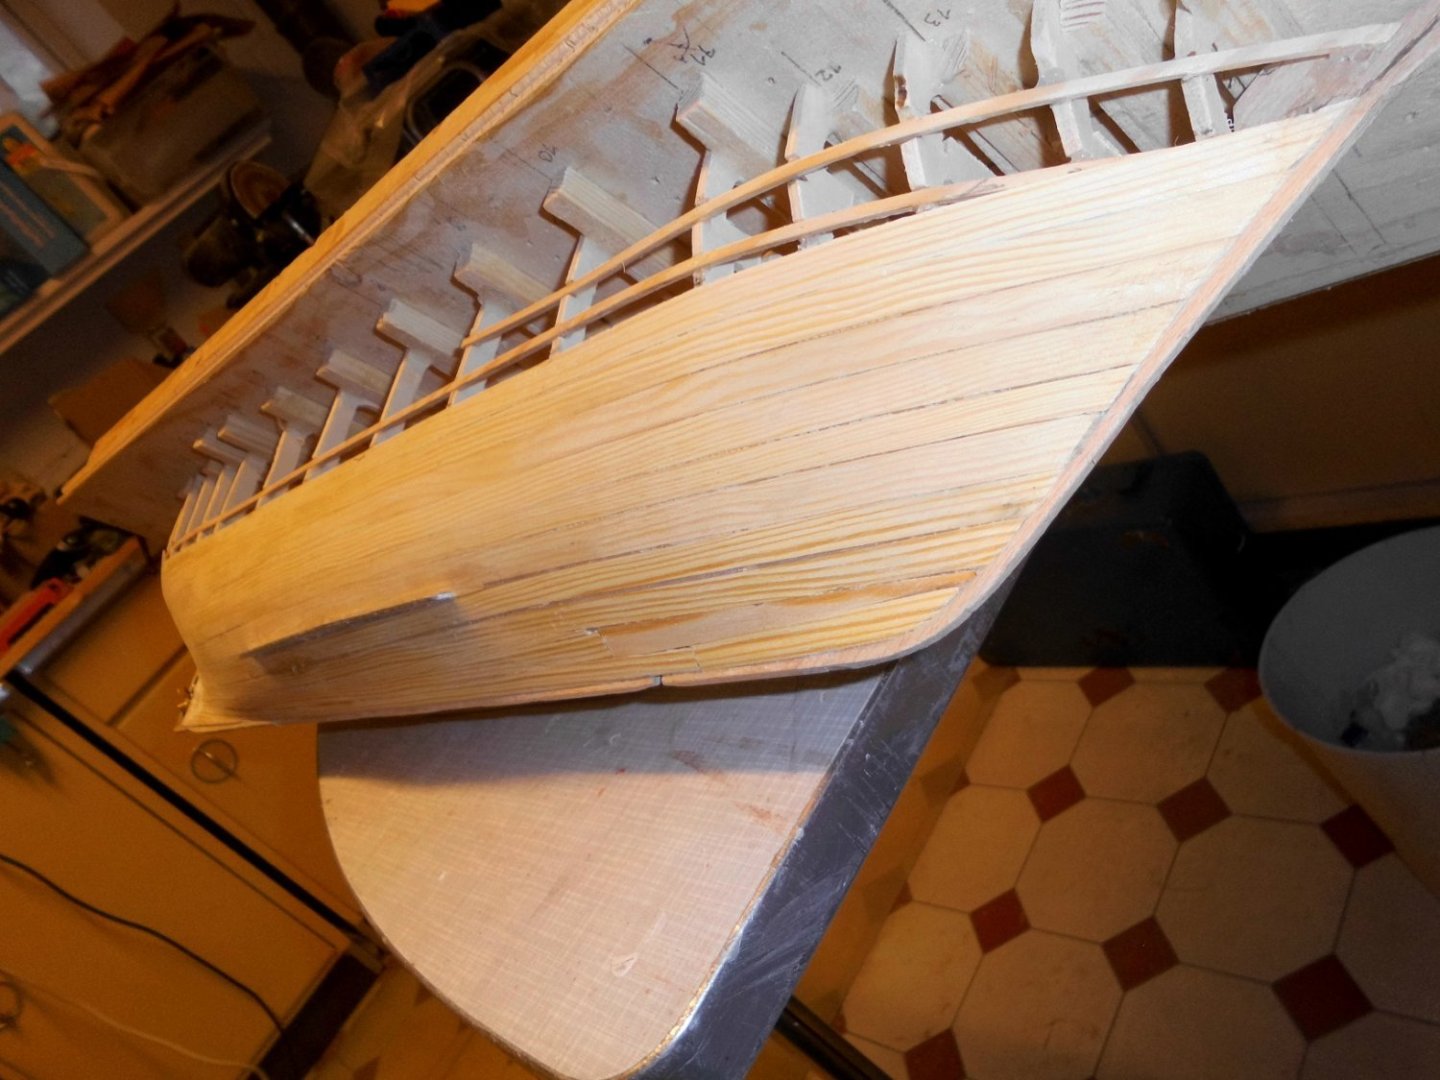
I`m pleased with the planking, ten planks on the sides so far, all worked out like it should be. The forecastle sides must still be planked. There are two little outcuts in the keel-lne where the stand`s spindles will go through Later on
The one-layer planking is smooth and true shape with the frames. The hull is strong and sturdy and very light, no warping to be seen
- Canute, Retired guy, Valeriy V and 10 others
-
13
-
Super working B.E.
The pinnace looks great.
How did the removal of the plug frames work out ?, you replaced the prior frames with the stripe frames
Nils
- Theodosius, Moonbug and mtaylor
-
3
-
Thanks for that idea Roel,
I looked up your "Chaconia build" also relating to the built in mesh, a great model I must say !
Nils
- Jack12477, Glen McGuire, Canute and 1 other
-
4
-
-
Update
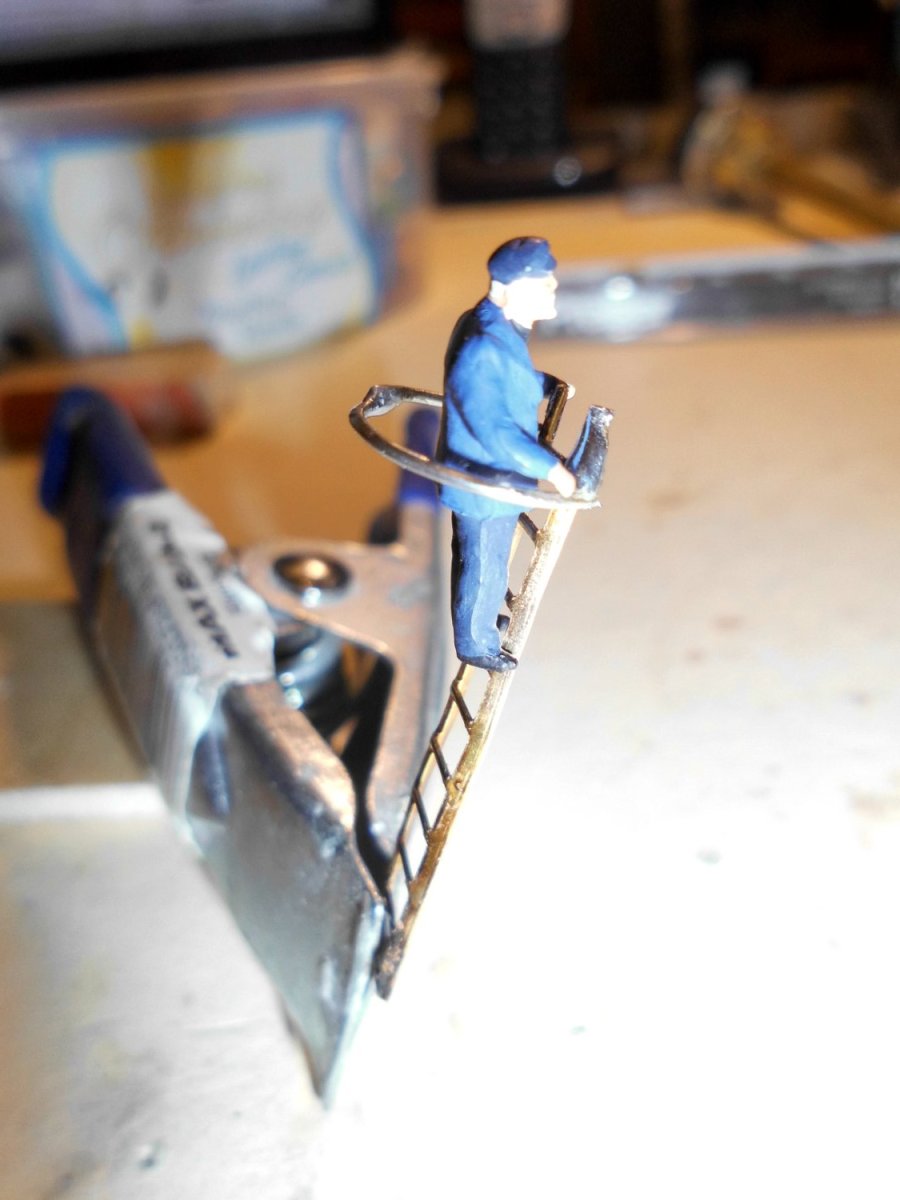
made a little dummy trial for the ladders and the back safety harness-ring in H0 scale
Nils
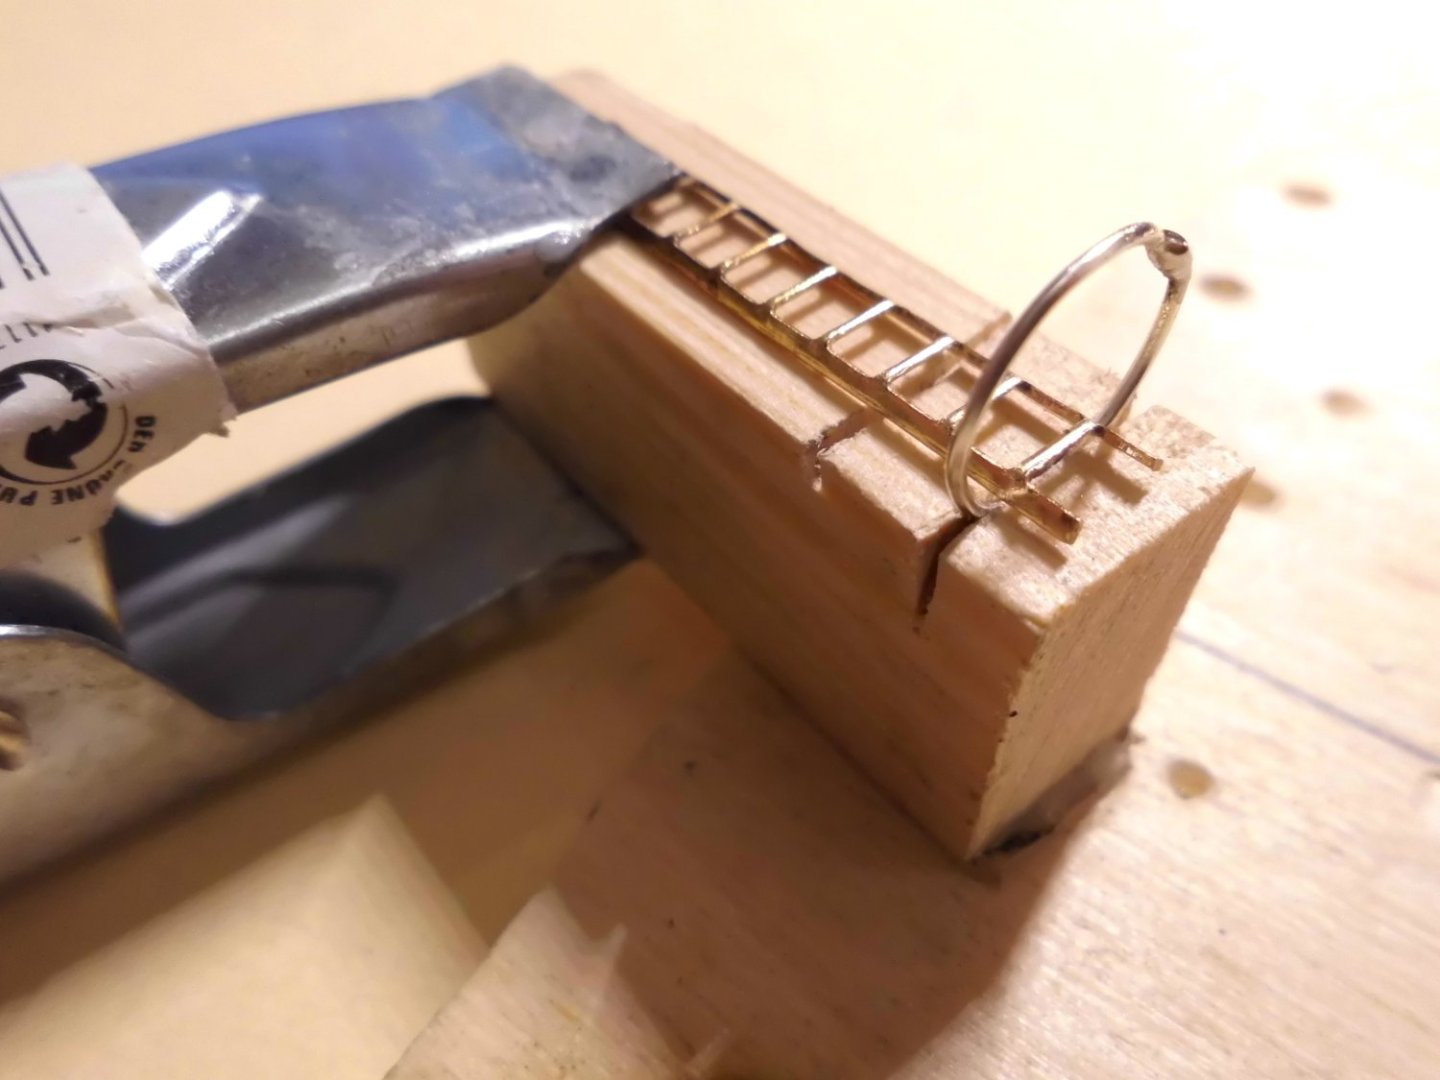
a 6mm wide brass ladder combined with 12 mm backrings (solder) will do ....

this enables sufficiant safe climb up
- mtaylor, yvesvidal, GrandpaPhil and 9 others
-
12
-
Thanks Pacific,
I`m pleased that you like the recent build log progress ....
Nils
- mtaylor, Glen McGuire and Canute
-
3
-
Hi Robert,
very well done boat. Those self-configurated figures are great looking.
Nils
-
Hello Uwe,
many thanks for your suggestion in cutting out a bit of mesh from household articles...
I had "Fliegengitter, Teesieb. etc." in mind first of all anyhow, but that would have required a round U-profile rail on the bottom side of the platform as well as an upside down U-rail on the top side as to make a sort of a framework fot inserting the mesh. I was afraid that bringing in too much heat into the construction and that already placed soldering points would open uncontrolled.
Yes I`ve been applying the vertical stern planking already on my other models, and it works well. I intend to bend the bumper-rails from halfround brass profile, at least in the rounding areas and the remaining side rails will be from same sized halfround wooden shape.
Nils


ELBE 1 1948 by Mirabell61 - scale 1:87 - Lightship
in - Build logs for subjects built 1901 - Present Day
Posted
right John,
I feel the spheric planking is a real task, but makeable, and it takes a bit longer ....
Nils