Kevin-the-lubber
-
Posts
1,232 -
Joined
-
Last visited
Content Type
Profiles
Forums
Gallery
Events
Everything posted by Kevin-the-lubber
-
 Ps. I don’t use sharpies or any other kind of normal permanent marker pen, for that very reason (I use them all the time for plant pot labels and you’re right, they fade to grey within a year). I use Pentel acrylic art pens, I can’t say whether they have the same issue, only that none of the ‘pen-painted’ parts I’ve been handled this morning, at least some of which were painted a year or more back, have lost their blackness. BTW, as I’m writing, I also bought a pack of spare ‘nibs’ for the pens, so I can trim one to a very fine point. They go feathery quite quickly but I just trim off the feathers. I’ve found black and gold pens are excellent. Other colours seem to be less opaque so I stick with paints for these.
- 2,699 replies
-
- 5
-

-
- heller
- soleil royal
- (and 9 more)
-
I think that's come out very well indeed Marc. Your opening line about the coated wire resonated, I think I found the same on my CS cathead levers, the blacking just rubbed off, and I resorted to using a black acrylic marker pen. I like that it adds more or less zero 'paint' thickness, but the downside is that it has a sheen to it, though this can be made matt with lacquer.
- 2,699 replies
-
- 6
-
-

-
- heller
- soleil royal
- (and 9 more)
-
Redoing Oseberg
Kevin-the-lubber replied to KrisWood's topic in CAD and 3D Modelling/Drafting Plans with Software
Glad you’ve got it figured. That’s quite a different way to how I’d do this in F360 and it would probably just confuse the issue by getting into that. Can I ask, what are you aiming for as an end product? A CNC-milled kit, or something like that? -
Redoing Oseberg
Kevin-the-lubber replied to KrisWood's topic in CAD and 3D Modelling/Drafting Plans with Software
In what way are you stumped? I don’t use Rhino, only F360, but the principles are broadly the same. -
Just a brief note that I've parked the CS for now. The delicacy of some parts of the masts and yards was becoming a bit trying and I'll come back to it with fresh eyes at a later point.
- 444 replies
-
- 1
-
-
- Cutty Sark
- Revell
- (and 2 more)
-
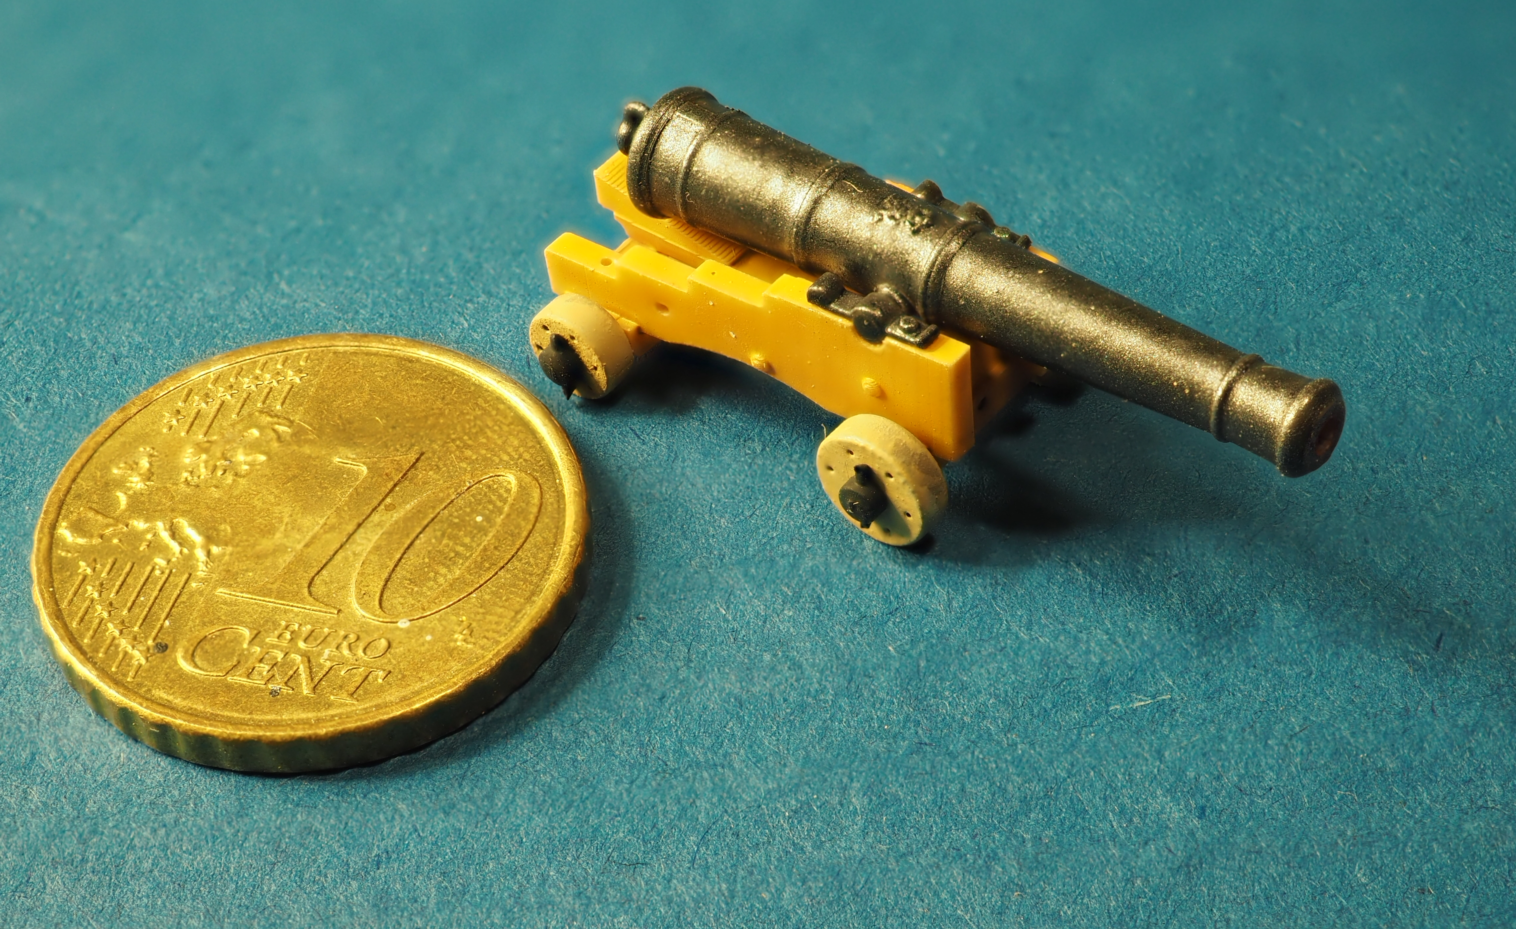
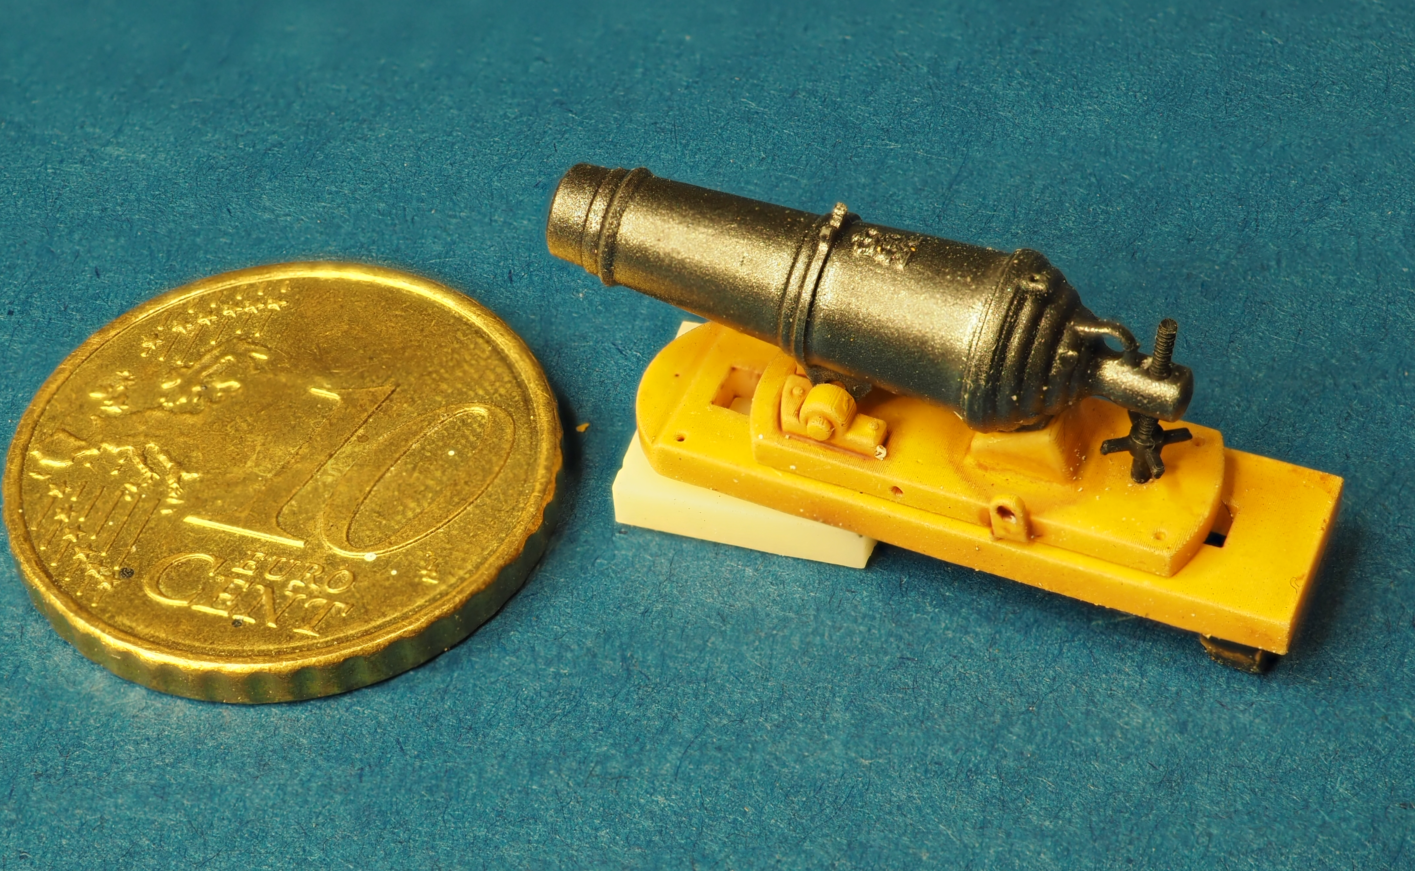
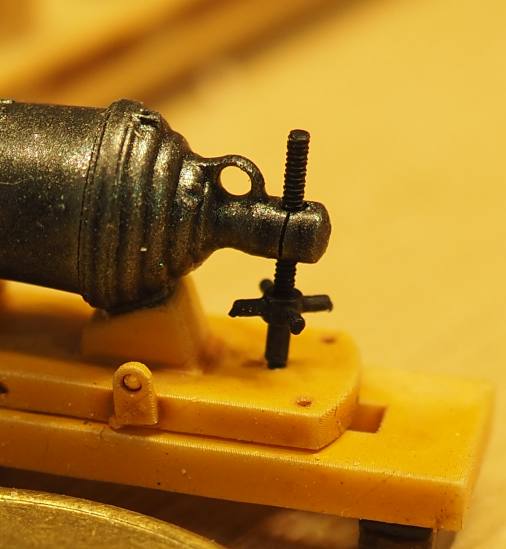
Despite semi-retiring recently, I still don't seem to make much progress on my models. However, I've completed the remaining 1:100 guns, being faithful to McKay. I changed the design of the carriage to get cleaner lines for cotter pins that go through the axles, I think that'll do now. The carronades were a nice little project and that really is a M0.6 threaded adjustment screw 🤪.


-
Ouch, hope you have a really great outcome without too much pain along the way.
- 114 replies
-
- 3
-
-
- Cutty Sark
- plastic
- (and 4 more)
-
This one can probably be filed under “teachings about the sucking of eggs”, but as a one-time metalworker can I add a little bit of info. The wire you’re using looks like cold-drawn brass stock, meaning it’s pulled through a former to get its diameter. This causes the grain crystals to get elongated (oh look at me, showing off that I paid attention at college!) which makes it springy and harder to shape. If you heat it to about “ouch, that hurt”, and let it cool it’ll be annealed and hold its form, but my memory is that brass work hardens very easily, so keep that in mind. Or you can fish out the little bundle of mild steel 0.5mm gunport lid wires in the Heller victory kit (so I assume also in the SR), which seemed to be already annealed. Either that or the quality was so poor that it worked in our favour.
- 2,699 replies
-
- 7
-

-
-
- heller
- soleil royal
- (and 9 more)
-
Apologies if I'm misunderstanding but isn't that table the wrong way round? I don't think the sail material would get thicker as the scale gets smaller! I don't know what the sailcloth thickness would be at 1:1 but if I assume roughly 1mm, then: Scale mm inch 1:1 1.000 0.0394 1:24 0.042 0.0016 1:48 0.021 0.0008 1:64 0.016 0.0006 1:72 0.014 0.0005 1:96 0.010 0.0004 1:200 0.005 0.0002 1:350 0.003 0.0001 Tissue is about 0.05mm so true to scale at 1:24, though it seems to give quite a credible representation at other scales.
- 114 replies
-
- 3
-
-
- Cutty Sark
- plastic
- (and 4 more)
-
I'd say listen to your gut. This is rich coming from me, but there it is. If I eventually decide to put sails on mine I will copy Marco's method (Bruma) as his sails are far and away the best that I've seen. But if you go down that road, take a look at the timeline on his log between starting to make the sails and finishing. My personal view is that cloth is no more realistic than the plastic. Even the thinnest fabric is too thick. But you may well get a good result by doing what your wife suggests but using EZE Tissue (you'll find it on ebay). However, I sense that you want to complete this kit and then see where you go next, and the quickest route is the plastic. The funny thing is that I don't think I've seen them on a single build here, so while we all think they'll look terrible, who knows, maybe they wouldn't look that bad.
- 114 replies
-
- 2
-
-
- Cutty Sark
- plastic
- (and 4 more)
-
That's very appealing but a fair bit more expensive. I guess you get what you pay for. However I fear it'll take something to persuade the admiral to sail again any time soon, more my thing that hers.
- 114 replies
-
- 1
-
-
- Cutty Sark
- plastic
- (and 4 more)
-
We’ve done a three cruises in the last few years, personally I think there’s a fine line between it being a glorified passenger ferry and a floating hotel. The last one (Norwegian fjords) was very much towards the ferry end of the spectrum and I doubt we’ll do another any time soon. Here in the UK there’s a much more affordable way of living onboard and seeing new places - canal boats! You’re making great progress David, I’d again say just plough ahead and use this as a fun starter. For the future, I can 100% confirm that bigger is better. I finished making some carronades yesterday, printed them and thought how fantastic they’ll look on my 1/100 victory, until I realised I’d forgotten to scale down from 1/48. But who has space for a 6 foot model! I think the sweet spot is about 3 feet long and the largest scale possible against that final length.
- 114 replies
-
- 1
-
-
- Cutty Sark
- plastic
- (and 4 more)
-
I've had a look at the file, nothing wrong with what you've done there. Though as often seemed to be the case with my own TinkerCad objects, the software says the components are not manifold (there are holes/gaps in the mesh, but the slicer is probably fixing these on the fly). A multi-part will print fine in resin but I think you'd struggle with the library printer. The frames would be about 0.5mm thick but if the finger cross section was like the sketch i.e. create a mortice and tenon, there would be enough heft in the frame for it to not be that delicate. It's ages since I used TinkerCad and I can't remember how much scope there is for dimension-driven design.

- 536 replies
-
- 5
-
-
- Quadrireme
- radio
- (and 1 more)
-
I bet most of us won’t see 60 again. David, great job so far and, at the risk of seeming contrarian, I’d say keep plowing ahead without getting distracted by detail or precision. There lies an enormous rabbit hole and once you start trying to be true to the ship or even true to scale, it’s very easy to become bogged down. I’d also point you at a build log of the Heller HMS Victory by Bill, and also his Soliel Royale (just search the forum), not because they will help with the CS, but because they demonstrate just how good a result you can get if you just crack on and keep the aftermarket’s and modifications to a minimum.
- 114 replies
-
- 4
-
-
- Cutty Sark
- plastic
- (and 4 more)
-
Tuppence from me: yes, print the fingers separately and, while you’re at it, think about splitting the fingers into two parts, the outer frame and inner insert. It’s not much work, design-wise, and you’ll get lovely sharp paint lines.
- 536 replies
-
- 3
-
-
- Quadrireme
- radio
- (and 1 more)
-
What an interesting project! And very nicely printed, I don’t see any supports scars anywhere. I couldn’t hear or see any gears grinding but have been told by a pro that candle wax is a great lubricant for 3d printed gears, if you are having that problem. I’ve been meaning to try it on my rope seizing machine but as I’ve parked the Cutty Sark for now that may be a while.
- 399 replies
-
- 2
-
-
-
- cutty sark
- revell
- (and 2 more)
-
Bill, is everything so far part of the kit, i.e. the boards, ring bolts? The re-washed deck was definitely a good choice, it looks very much like the deck on the actual Cutty Sark and I think you’ve got the colouring spot-on.
-
Over here you can buy decal paper by the sheet off eBay. But wouldn’t you want/need the setting liquids? In passing, my own recent foray into water slide decals hasn’t been particularly successful, they wrinkle and the ink rubs off, and I’ve parked it for a rainy day. I may be misunderstanding the exercise but couldn’t you make card or paper stencils instead? You can cut those using the laser for precision. Two or three masks (layers) with positioning points etc.
- 536 replies
-
- 4
-
-
- Quadrireme
- radio
- (and 1 more)
-
Laptop recommendations?
Kevin-the-lubber replied to Mike Shea's topic in CAD and 3D Modelling/Drafting Plans with Software
About a year ago I bought a used Dell Precision 7720 17.3" Laptop: Intel i7, 500GB SSD, 16GB, P3000 for about £650, including a 1 year warranty. It copes just fine with Fusion 360 and the various graphics packages I occasionally use. I wanted the big screen for 3D modelling, so while it is indeed a laptop, I wouldn't want to be carrying this around a lot. But as a portable hi-spec computer its' great. -
I’ve found Inkscape is easier for getting what I wanted and it’s free. None of the graphics packages seem very easy though.
- 536 replies
-
- 4
-
-
- Quadrireme
- radio
- (and 1 more)
-
Obviously I went to a better school 🤣. Gosh, I haven't thought about that for years, but yes, wasn't it amazing seeing the swarf coming off in a perfect spiral. Personally I loved (in later life) machining brass or bronze. The colour of freshly cut, un-oxidised brass is a little bit magical. Anyway, back to the point; I know nothing about galleons but wouldn't there have been a chappie or two on a steering platform at the stern, who could by definition see past the prow?
- 536 replies
-
- 5
-
-
- Quadrireme
- radio
- (and 1 more)
-
That’s hilarious - I also have one of those, somewhere. Made at about the same age, 14 or 15, in the metalwork class. For some reason what always stuck in my mind was the magic of knurling, and brazing the head to the handle. Looks like you made a nice job of yours!
- 536 replies
-
- 4
-
-
- Quadrireme
- radio
- (and 1 more)
-
Well done Bill, it’s an amazing achievements to do even one of these big kits in 3 or 4 years, but to do two, and to do both to such a high standard - I take my hat off to you. I really like the figure on the ratlines. That one in particular gives a sense of scale, and I must remember that for the future. I’ve just ‘followed’ your Endeavour and will be watching that with huge interest, partly because it’s a ship I’d like to one day build (along with the ‘Terror’) and partly because you’re venturing into wood.
- 1,508 replies
-
- 2
-
-
- Le Soleil Royal
- Heller
- (and 1 more)
-
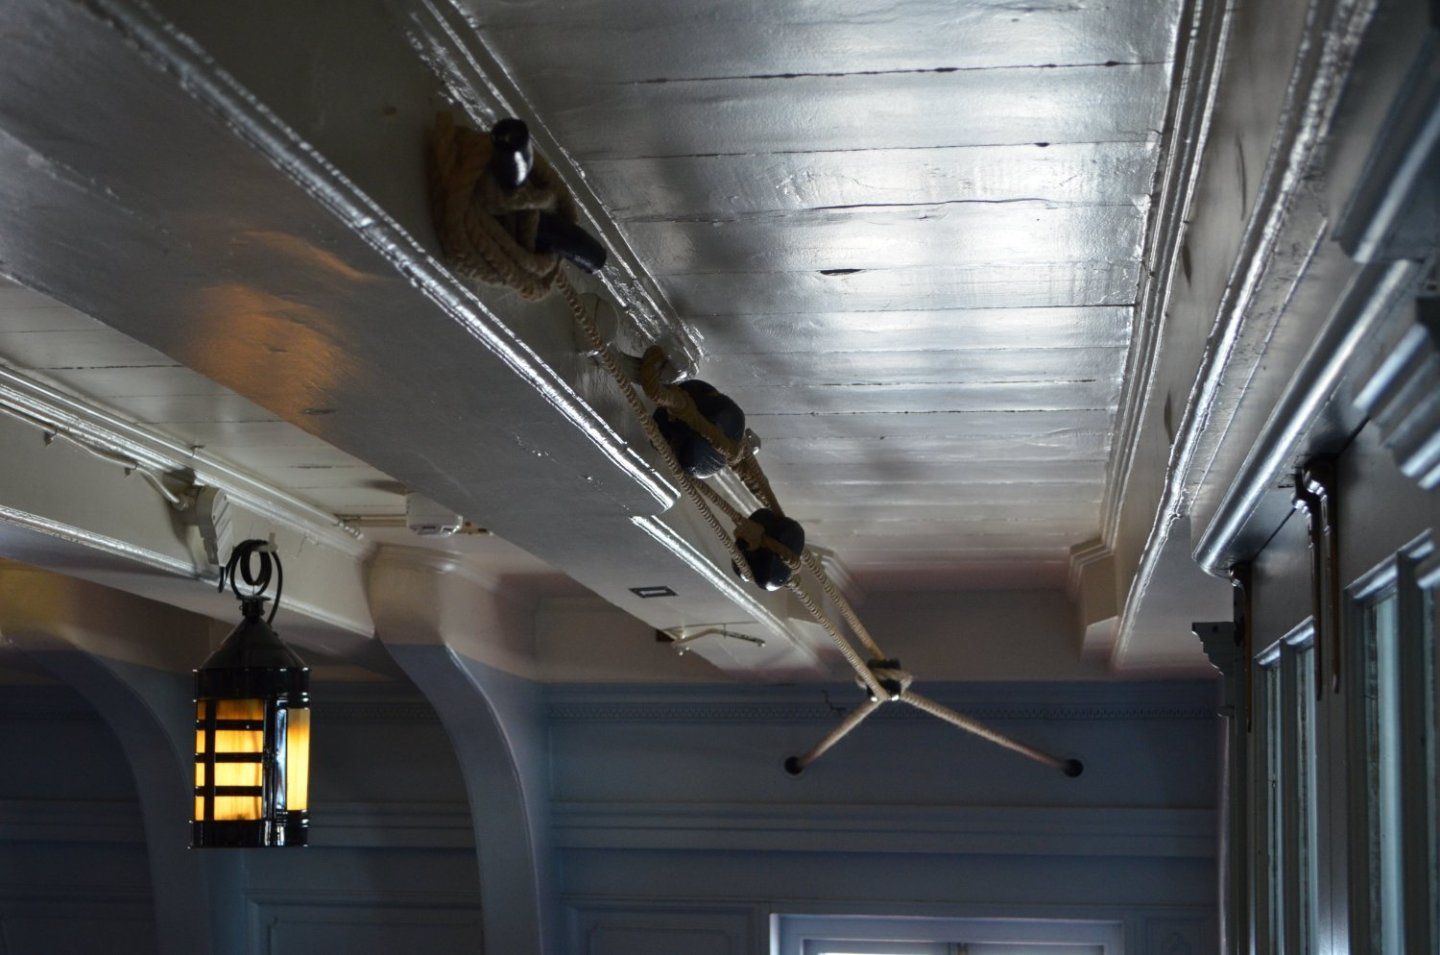
Ditto, great find Bill, I'll watch that properly this evening. I thought Patrick O'Brien describes things like the knock down walls and ductwork somewhere in the Aubrey/Maturin series but it might have been in the Bolitho series by Alexander Kent (who I've just discovered was actually Douglas Reeman, who also wrote gazillions of books set in WW2 books). Either way, when I last went to the Victory a couple of years back I was struck by how close-fitting all the officer quarters "walls" were, some seriously good carpenters back then. Look at the RH side in the photo, the brass bits are the hinges. I also remember feeling a bit of a cool breeze right down in the depths of the hold, though I bet it was hot as hell on a gun deck in battle.
- 1,508 replies
-
- 1
-
-
- Le Soleil Royal
- Heller
- (and 1 more)
-
Those are wonderful looking blocks Dan, I was about to ask if they were CNC-ed wood, but saw from your site that they are resin. Doing them in sets is a clever idea.