HOLIDAY DONATION DRIVE - SUPPORT MSW - DO YOUR PART TO KEEP THIS GREAT FORUM GOING! (Only 72 donations so far out of 49,000 members - Can we at least get 100? C'mon guys!)
×

Vladimir_Wairoa
-
Posts
1,566 -
Joined
-
Last visited
Content Type
Profiles
Forums
Gallery
Events
Everything posted by Vladimir_Wairoa
-
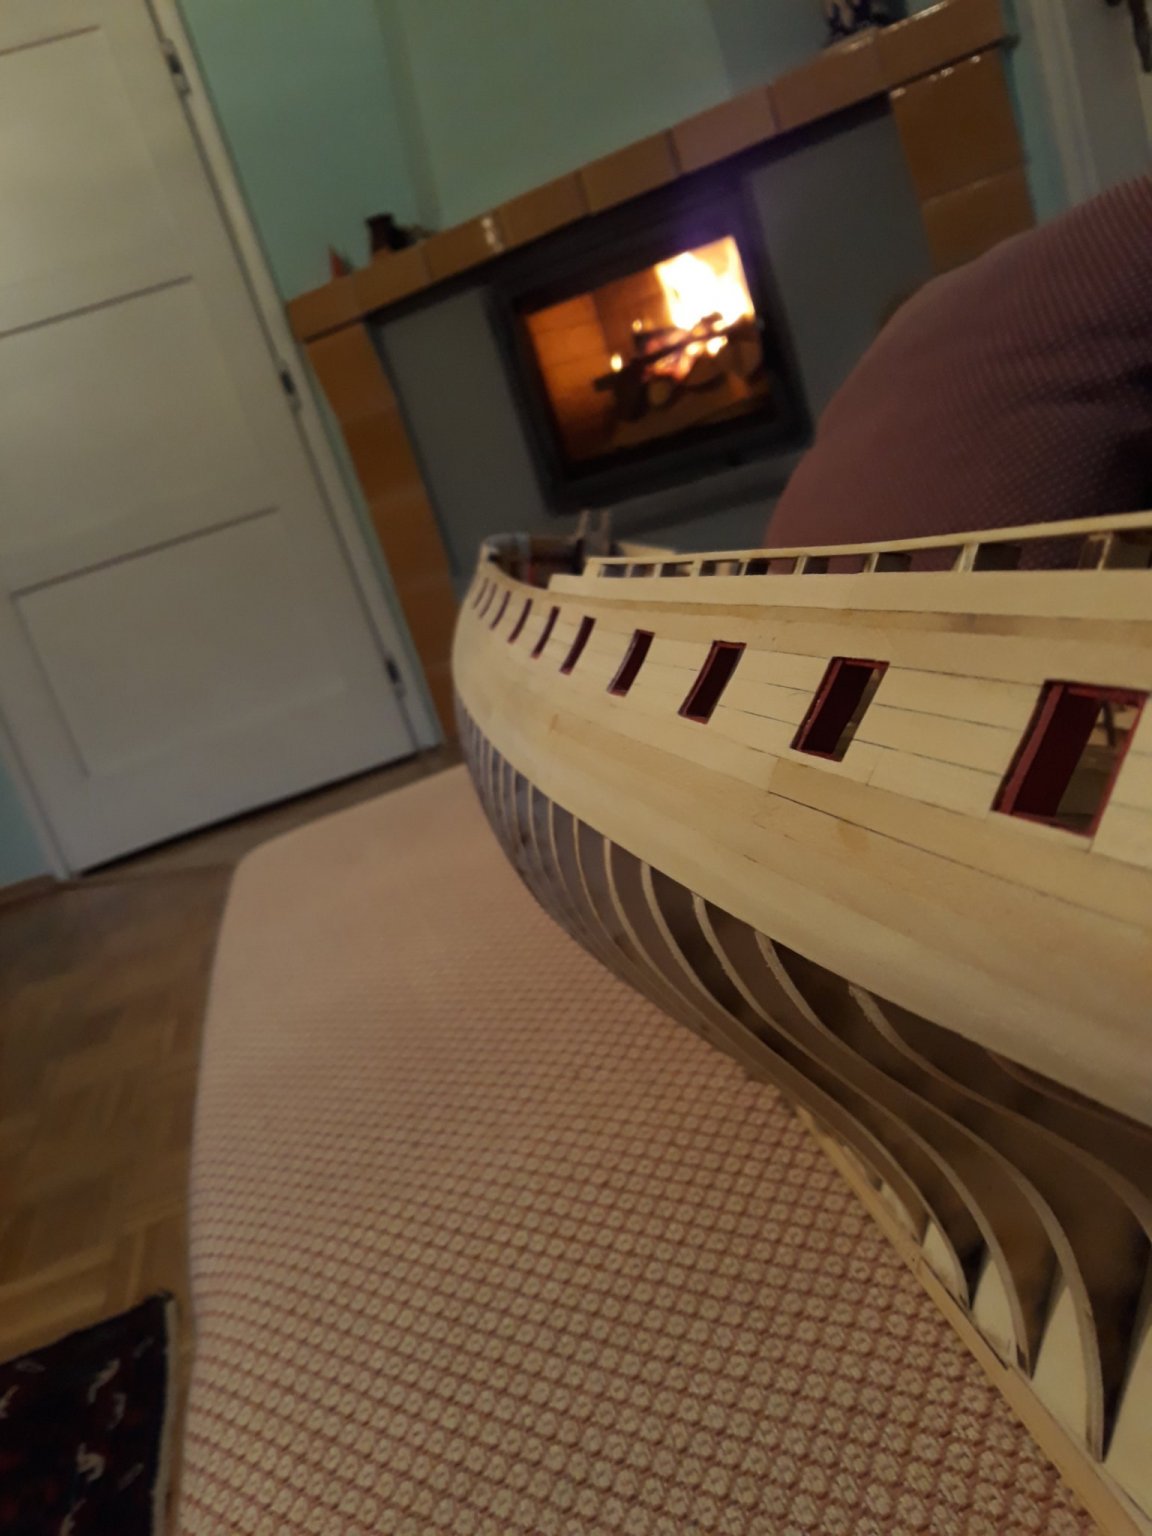
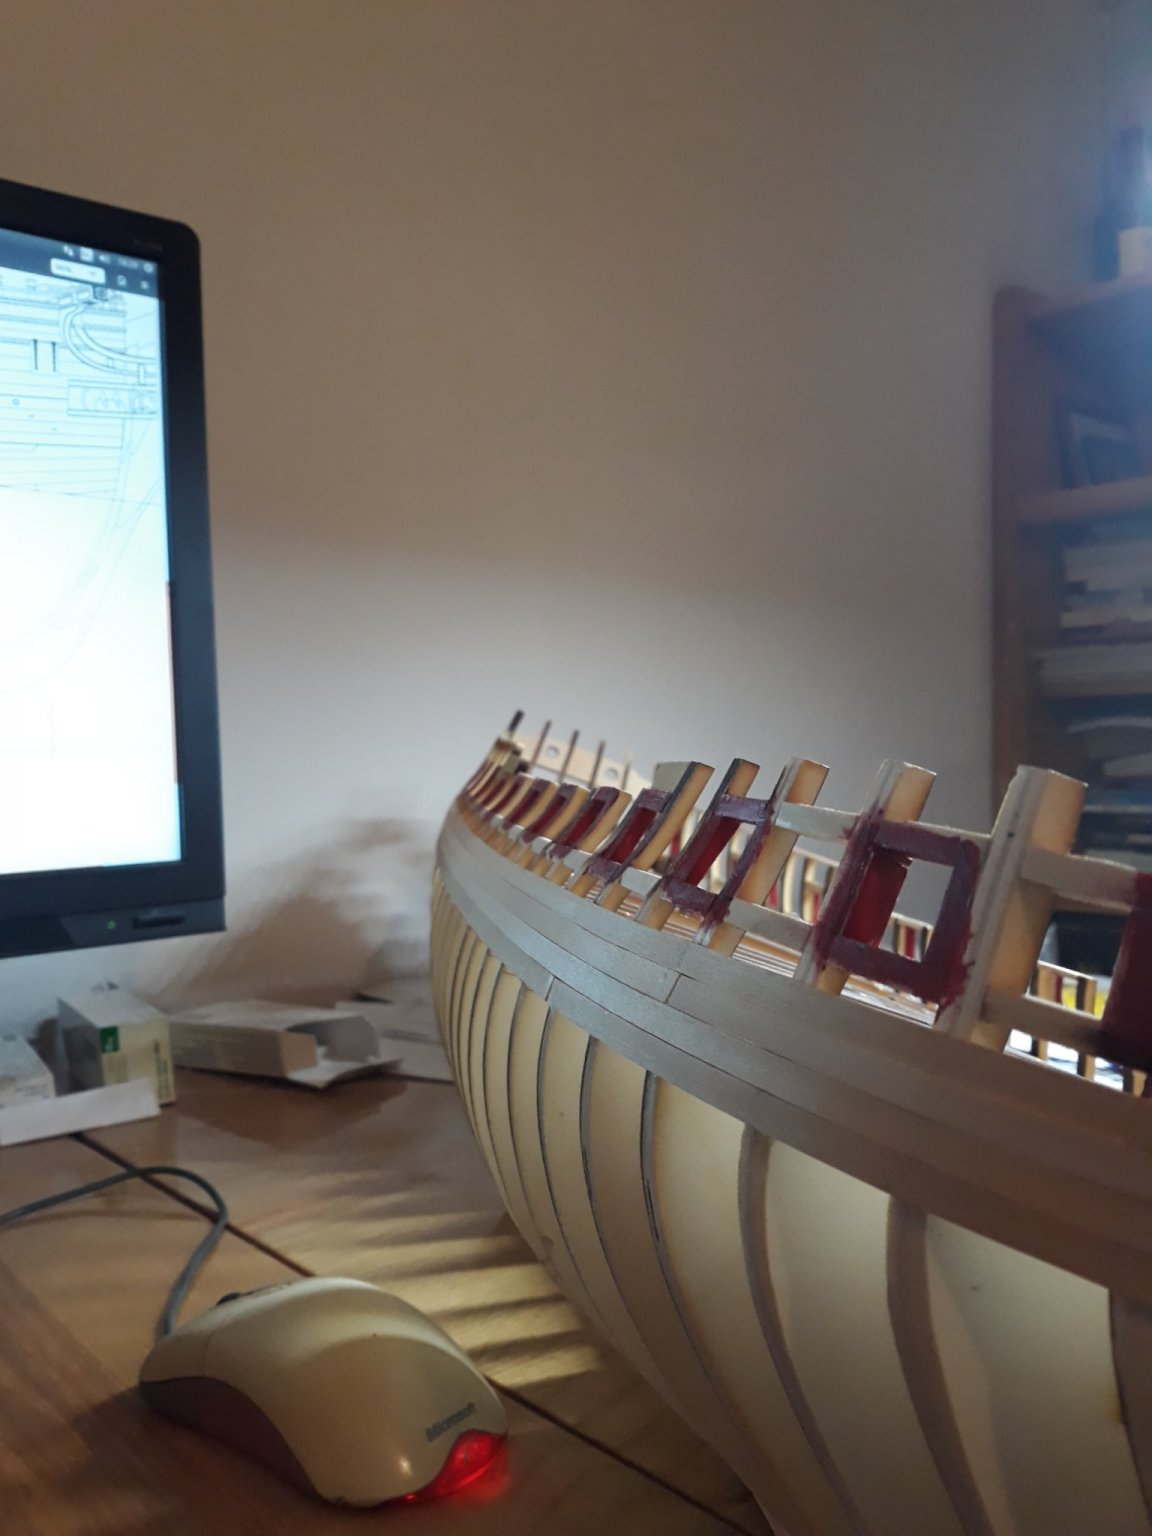
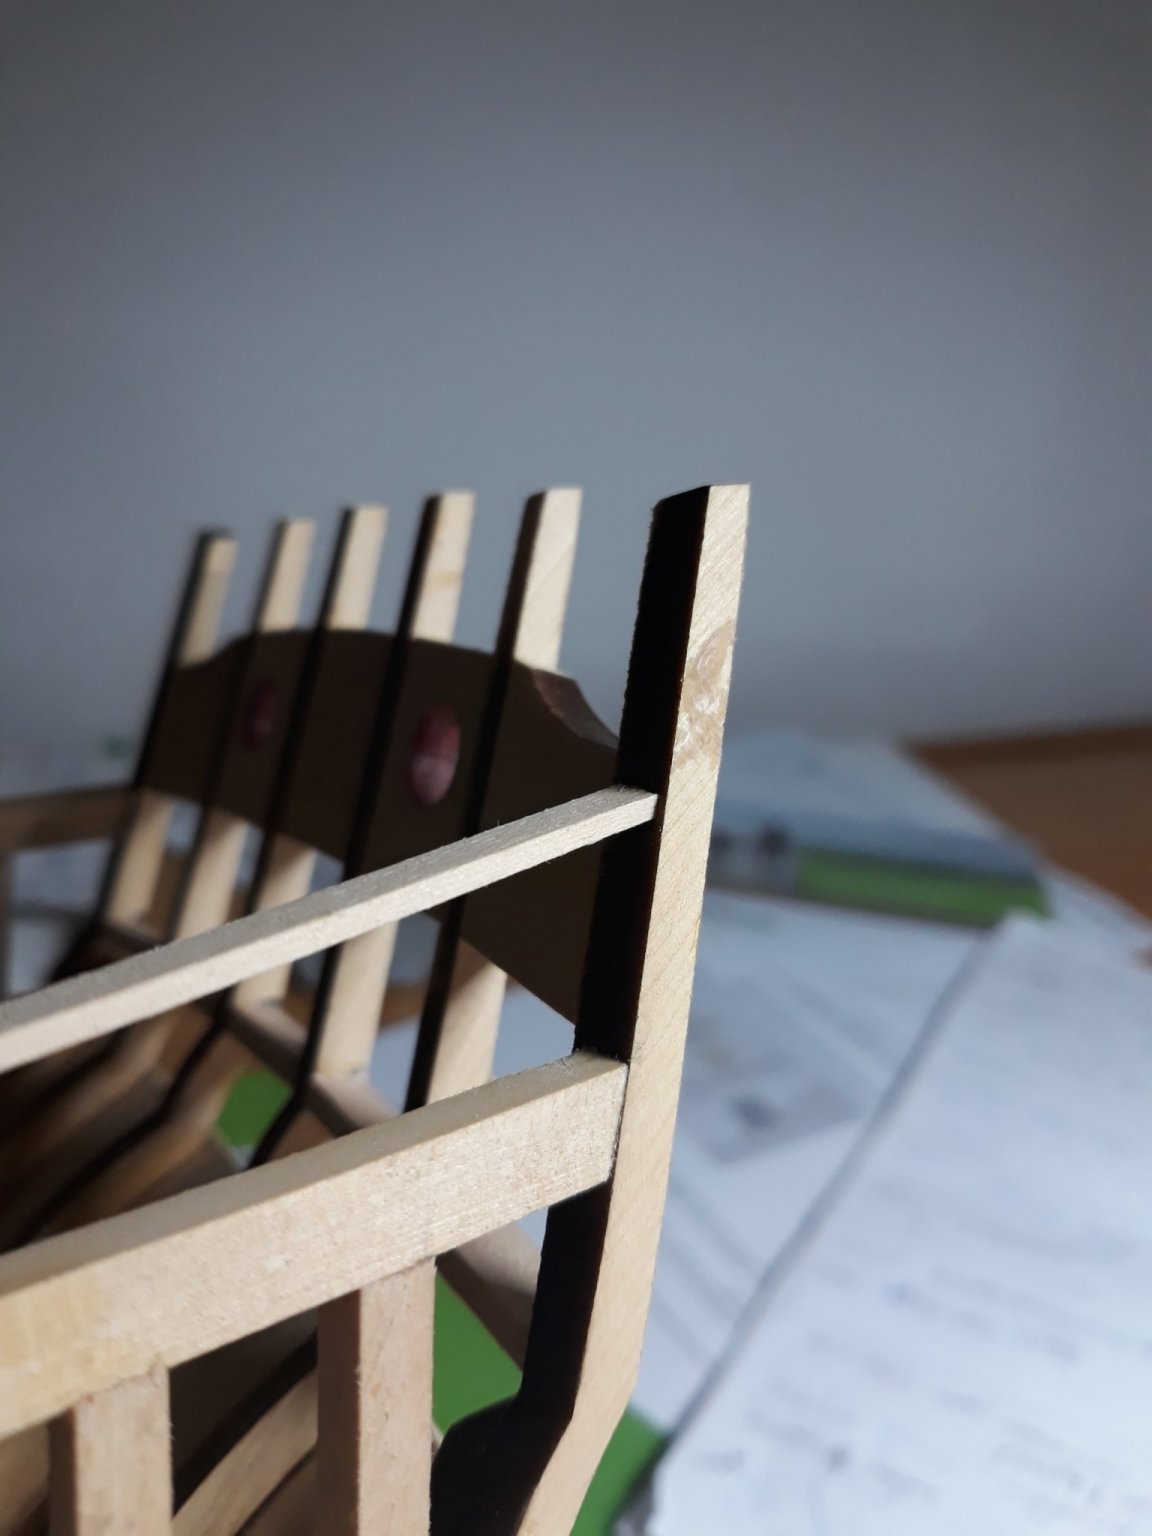
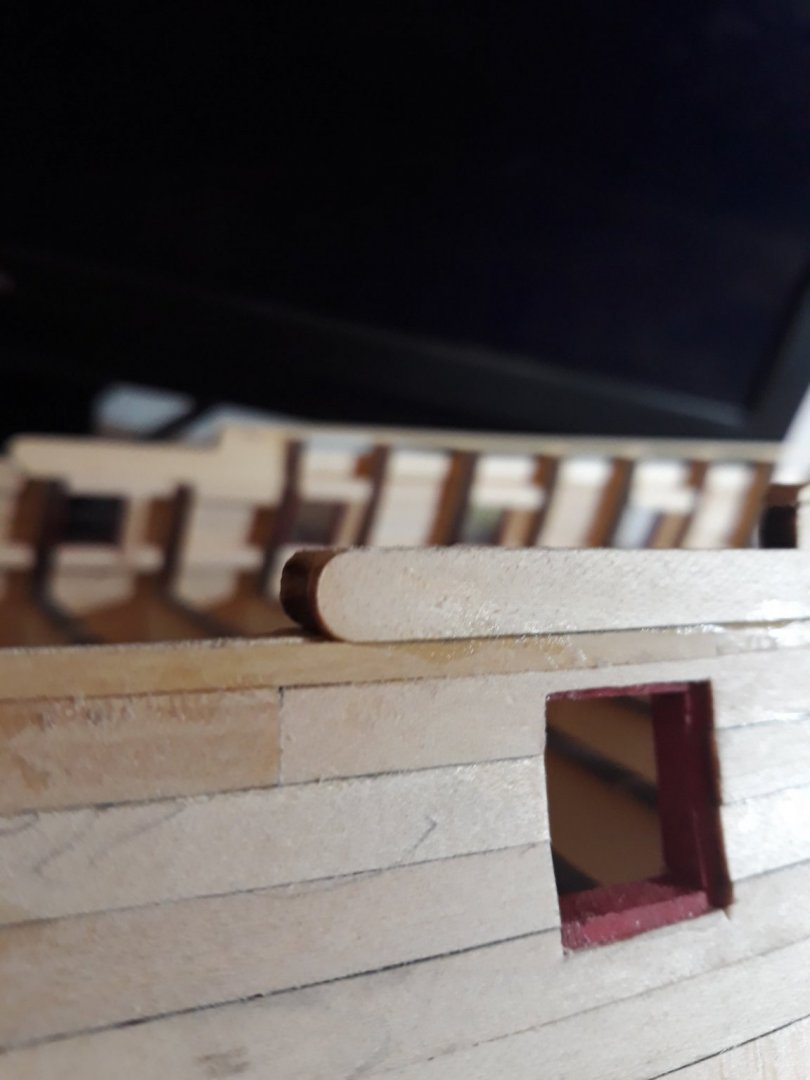
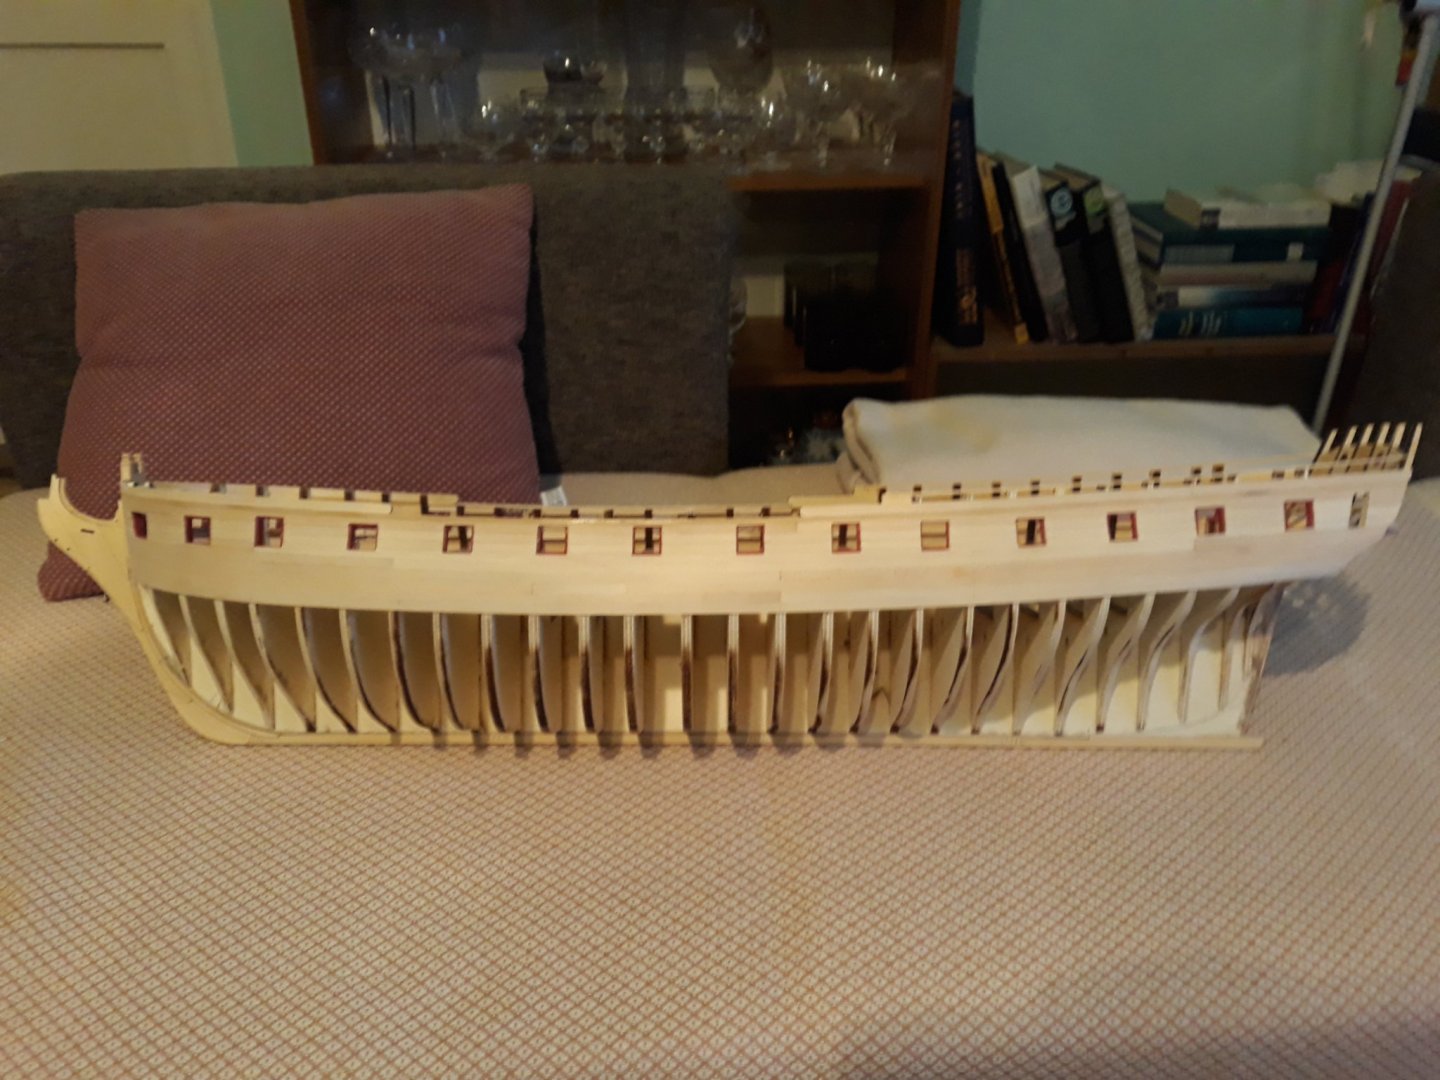
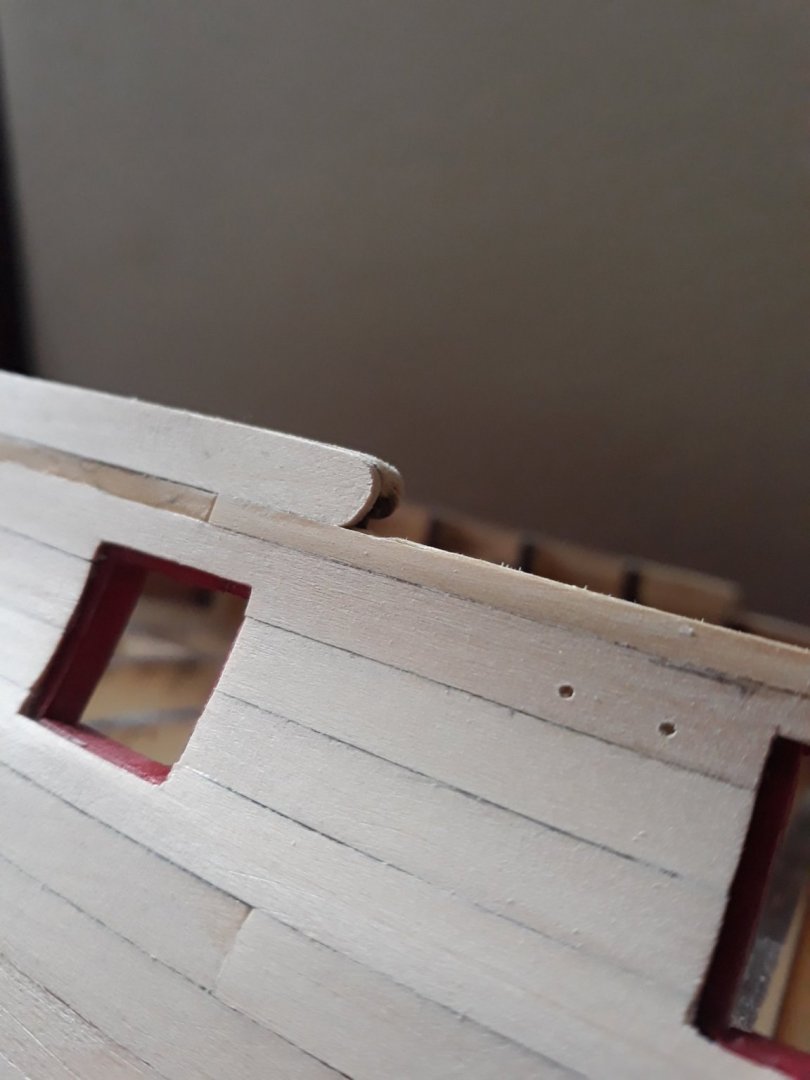
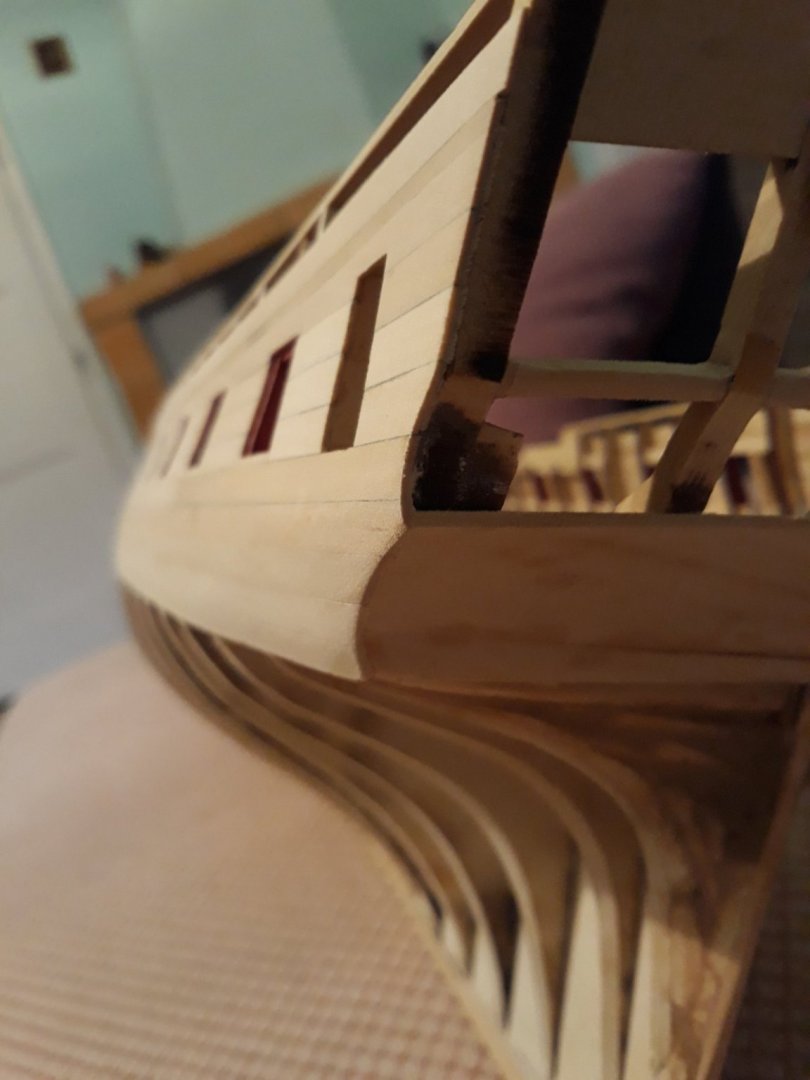
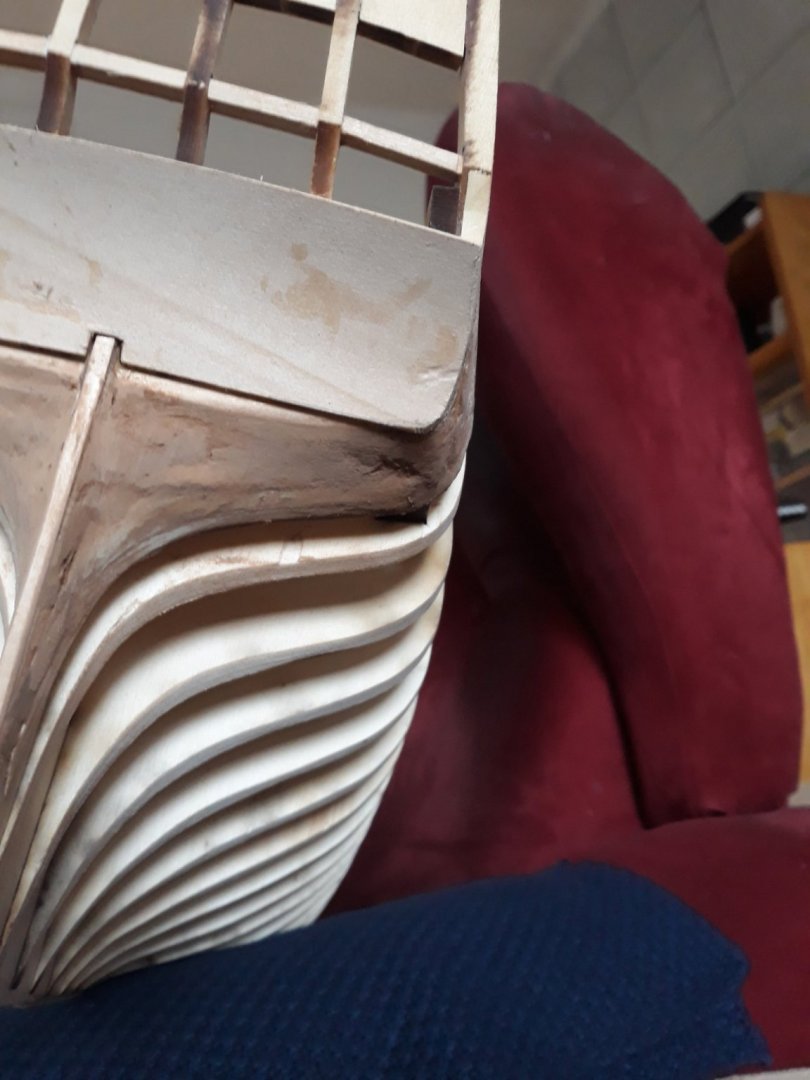
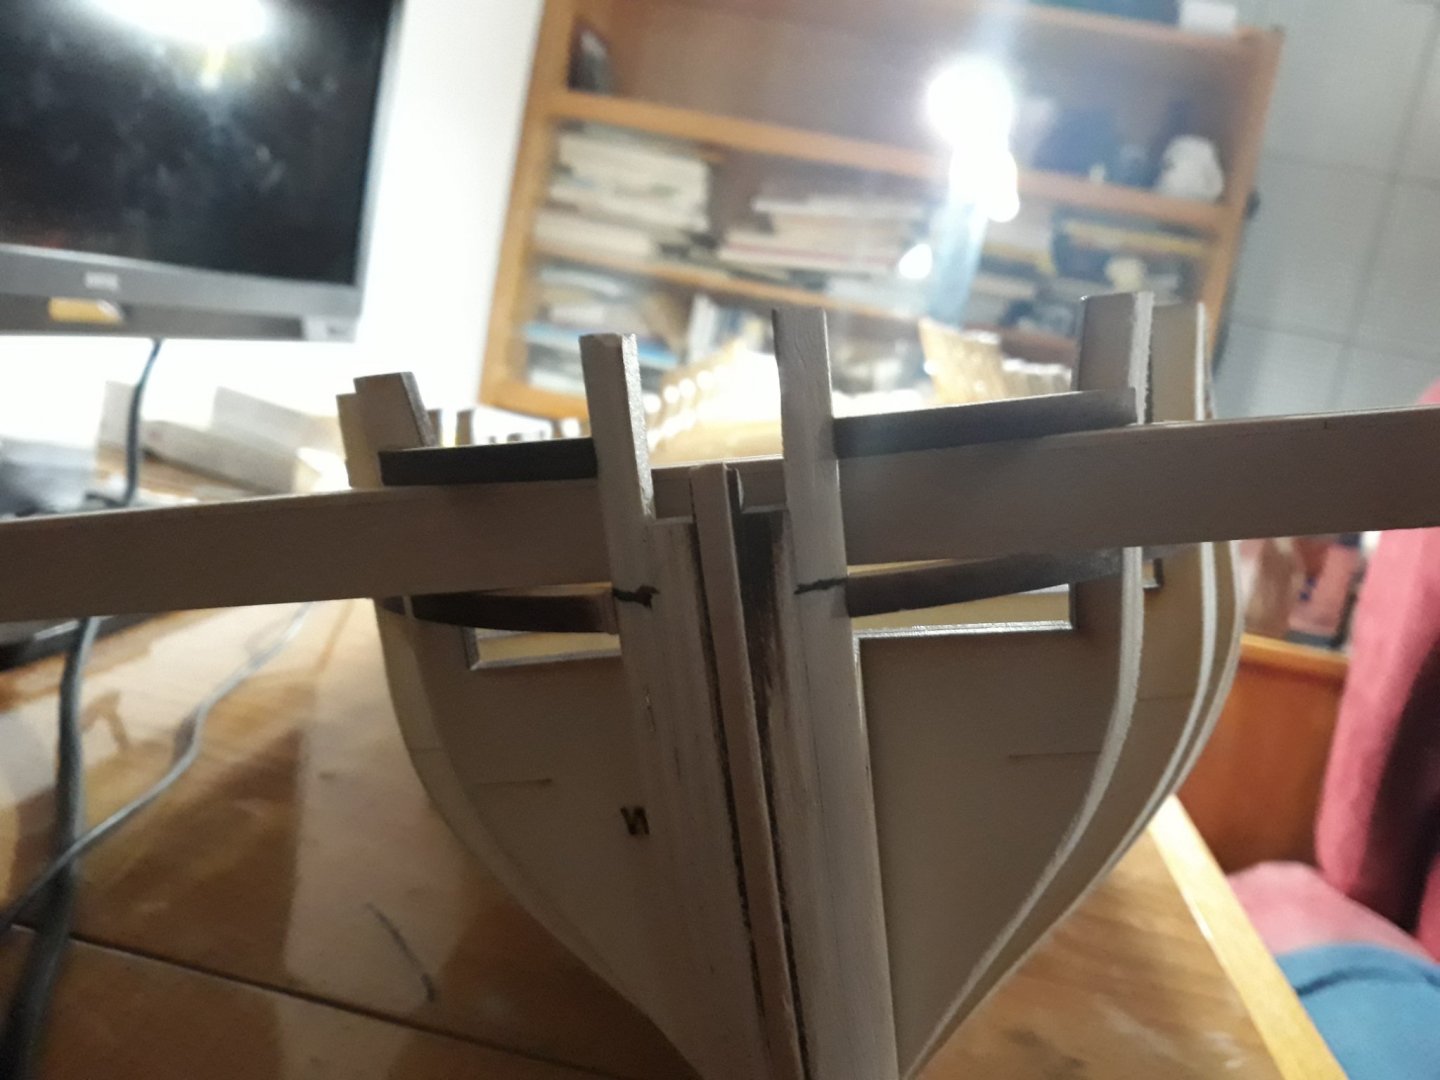
 Gentlemen, I slowed down a bit , made some dust. I corrected stern and removed 2 planks that go later on. I feel i must clarify my approach before it causes some misunderstanding... I said i dont have or intend to build Winnie to Chucks highest expectations with all fancy bells and whistles along the way as I am limitated by material I have or I will try to make myself...its all learning and part of fun isnt it? that It suppsed to be. I mean of course i will follow plan as close as possible and best i can. But i reserve for myself to make here and there shortcuts where it is covered by sticker or something like that. To clarify that it is not to show some sort of ignorance or harming Winnie - well from ones view it can be seem like that but i will reserve that opinion to oneself. I probably even shouldnt be here as this is advanced modeling and i am just a beginner though. So what the point of learning than? Well plenty - i learn proper planking and i go according to plan Chucks and your guidance guys. I dont have different planks than 6 mm - but i have those for entire boat so i had to accomidate thin 3 mm strike along to fit the measuring - it ensured that very top plank lines perfectly up to the toprail - again this whole will be thankfully covered by frezie sticker so i am happy that thin strake wont be seen. that strak is from Chucks cedar 3rd part so I can say that my Winnie has got original wood - its still plenty there left for fancy mouldings....so ...I did my best at upper planking. I dint have different measure timbers nor wider one so i couldnt try to do those fancy angles around port openings...i can live with that. Went slowly and tried to seam tightly and tried to cut gunports openings as precisely as possible. It was quite challenging. After two or thre I found a way how to mark and cut and It went better... I cant do better i guess for all i wrote i would say i can live with something like my own Winnie, probably ugly duck sort of for small shotcuts, but I would like Chuck to put up with some small hidden shortcuts ... as much as those will do the exact or good for winnie or shortuts where those can be - but i state it is not something to be followed. ...so first coat is on now black line to follow for next few days first I have to make those two planks that narrows into one - as I will make 2 more lines downwards the hull and - for that narrow ones i had to order an extra wood. i also need to sand off some center of bulkheads for marks i will need to make later. that would be counting and recounting as my wide is hust a tad wiser than supoosed to...i would sand off atill a little on a port side bow but im scared i took alread too much so i dont want to hollow that plank entirely. that was a mistake i made as port opening glued off and i put it back a littel too much elaning out so those two planks didnt meet exactly rather way off...also two planks at starboard bow side are not as tight as should be - after sanding it is now visible ... seam a bit thicer.this is hell of a price to pay to each unfocus on this job grrr. photography is a sharp and uncompromising judge - sight can forgive a lot. and You can see I crushed one part of bollard :(( but i hope to repair it and glue that corner back shouldnt be that tough...fingers crossed. I dont consider black line sifficult after I finised all this. that is for couple of days now. good luck with all yours! sorry for elaborate..))
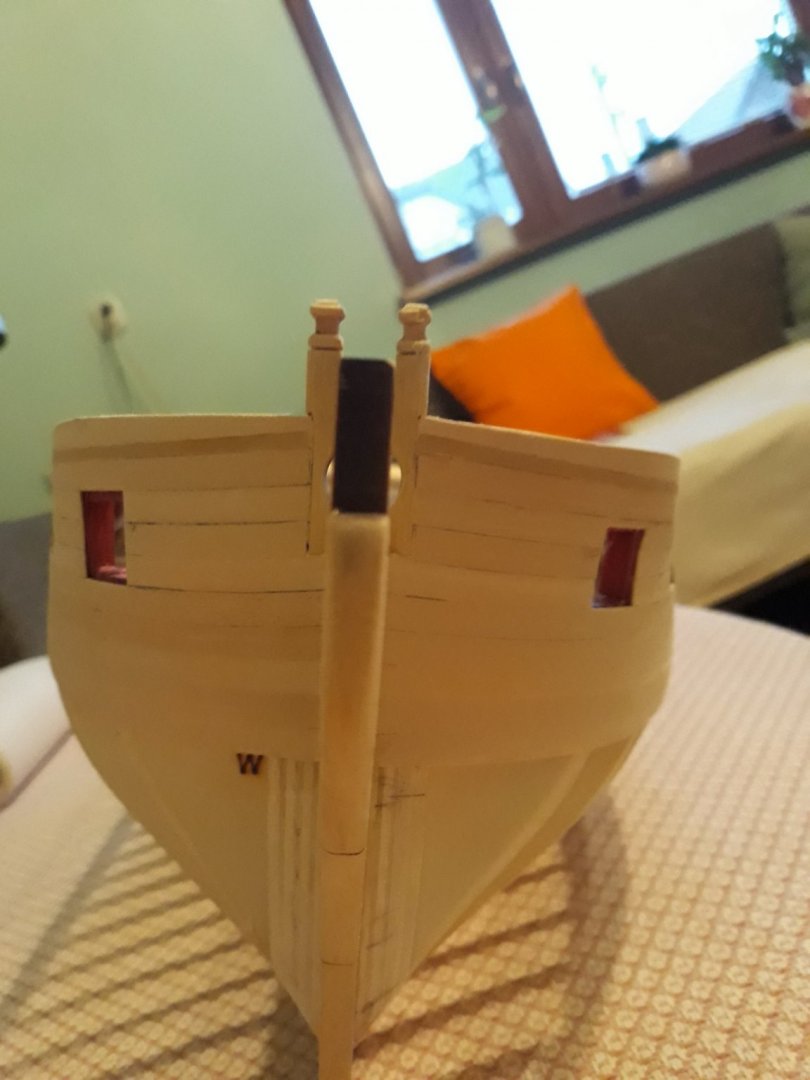


-
Oh I see what you mean. Silly of me. Thank you for notice Chuck. I need to slow definitely.
-
Thank you Ron @Chuck. Happy new year to you as well. Well having everybody around its probably part of that confidence. Frankly, i hate slow working , but i try not to work when having bad day ...i tend to get past least likable work as quick as possible. Learning heck of a lot as i observe works of every Others and Chucks. But speed and my inpatiency has its drawbacks. Every small shortcut that is not thought out pays dearly, and makes it even longer to fix or worse - unfixable. So... i finished both 4 plabks lines..and reached the point i can decide where next. i think will continue peculiar planking up towards rails. .... . Enjoy yours its gorgeous. If things go as thought , i plan to finish planking and probably gallery will see . Than i have other things to do around spring so before summer i would order parts 4 &5 and carvings in one delivery. Well planning as ahead with this corona stuff is stupid idea anyway. Keep safe. V.


-
Beautiful stern planking preparation Ron. Something i didnt manage to achieve as i wanted. Vlad.
-
Good day all. Am I doing alright ? I cant stress more how much i love this project. Im bending strips on violin bending iron and its adding up so fast! Made first wale strips in 1 hour. No need to clamp as much as strips are bended properly. I intend to follow Chucks guidance and line up down each strip with pencik down the hull. I havevto recount it as my steips are umiform 6 mm and I dont have tools to cut them stright . Its my first real ship to make and second at all. As i said at the beginning, i am building Winnie with batch of leftovers lime strips. Thry are approx 6 mm wide so i will modify original different wides of planks and i will measure upwards pkanks so frezies will match . Im not likely to invest much apart of original parts from Syrenmodel. Thank you V.


-
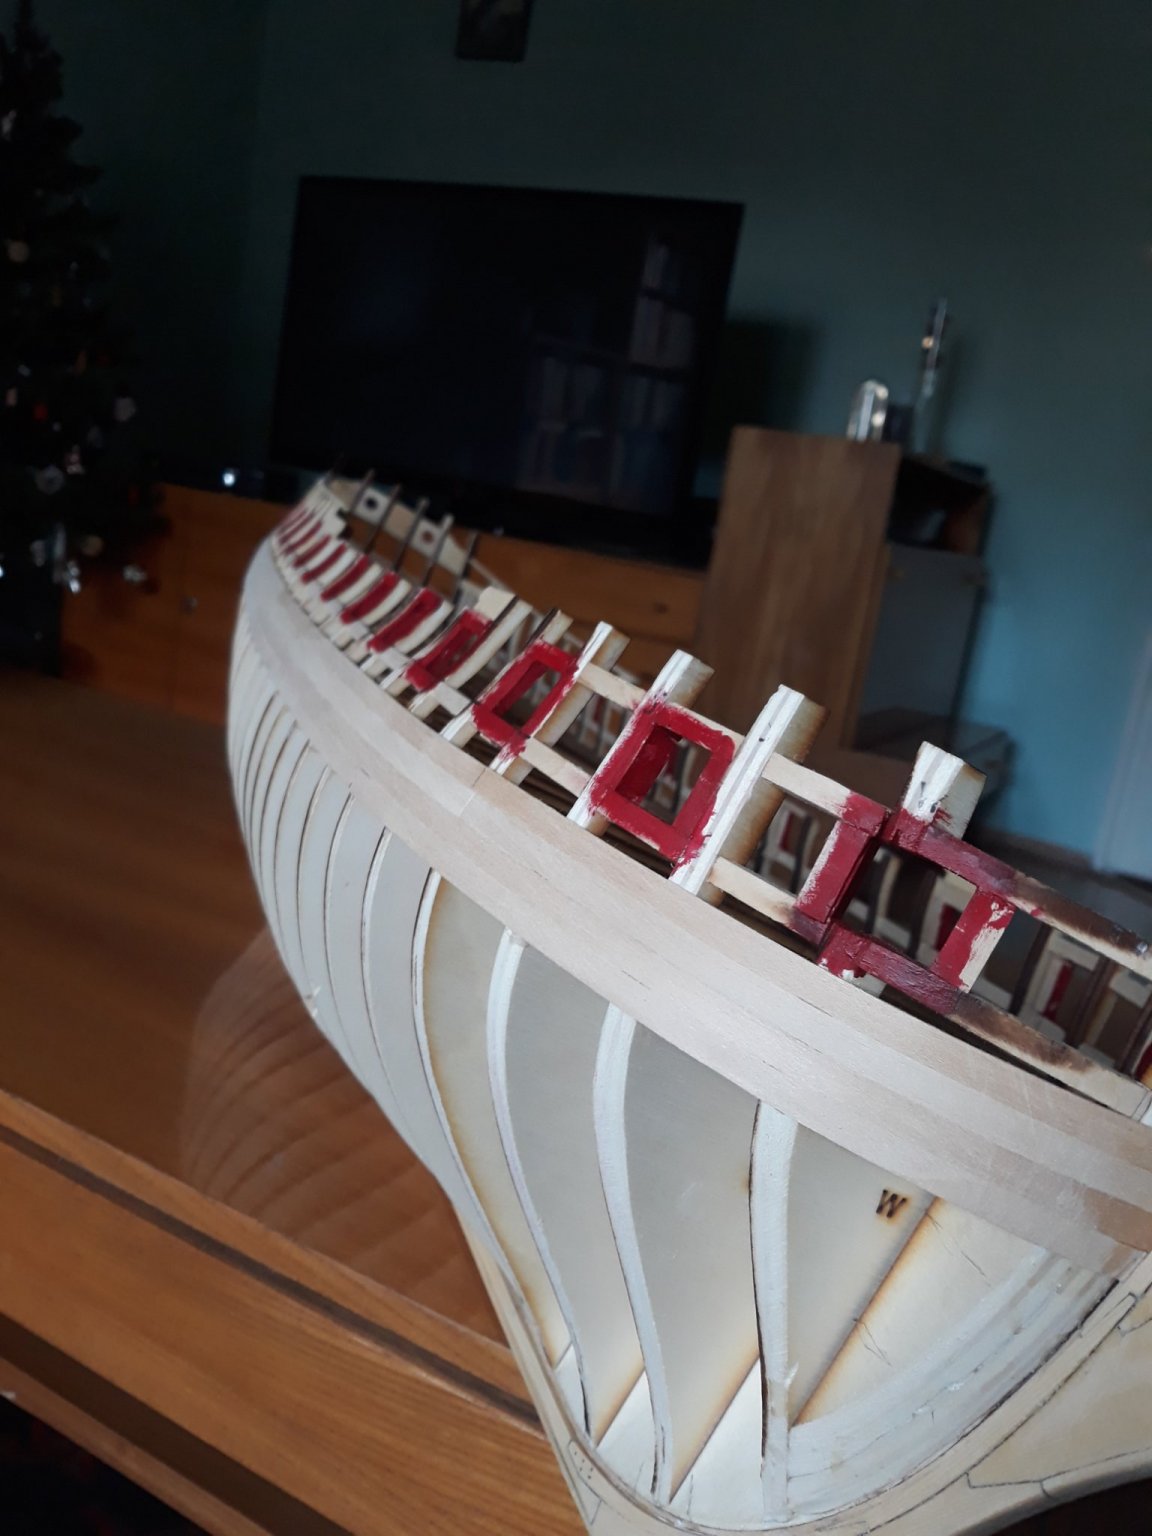
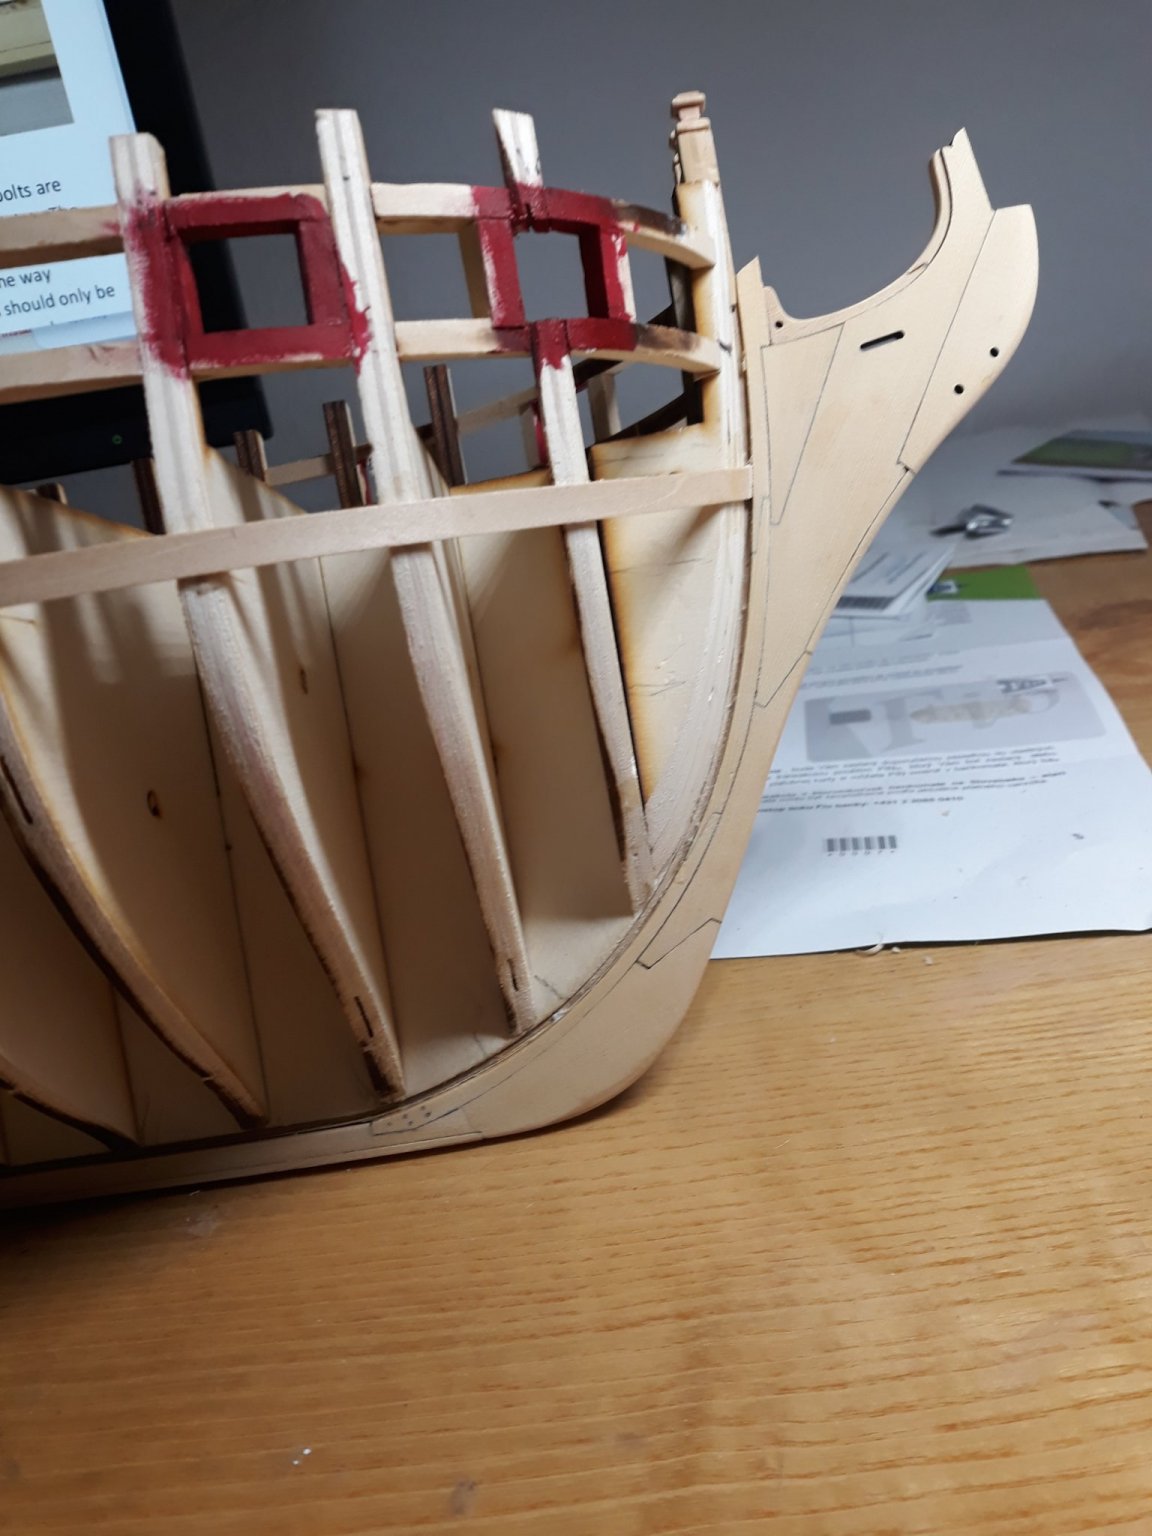
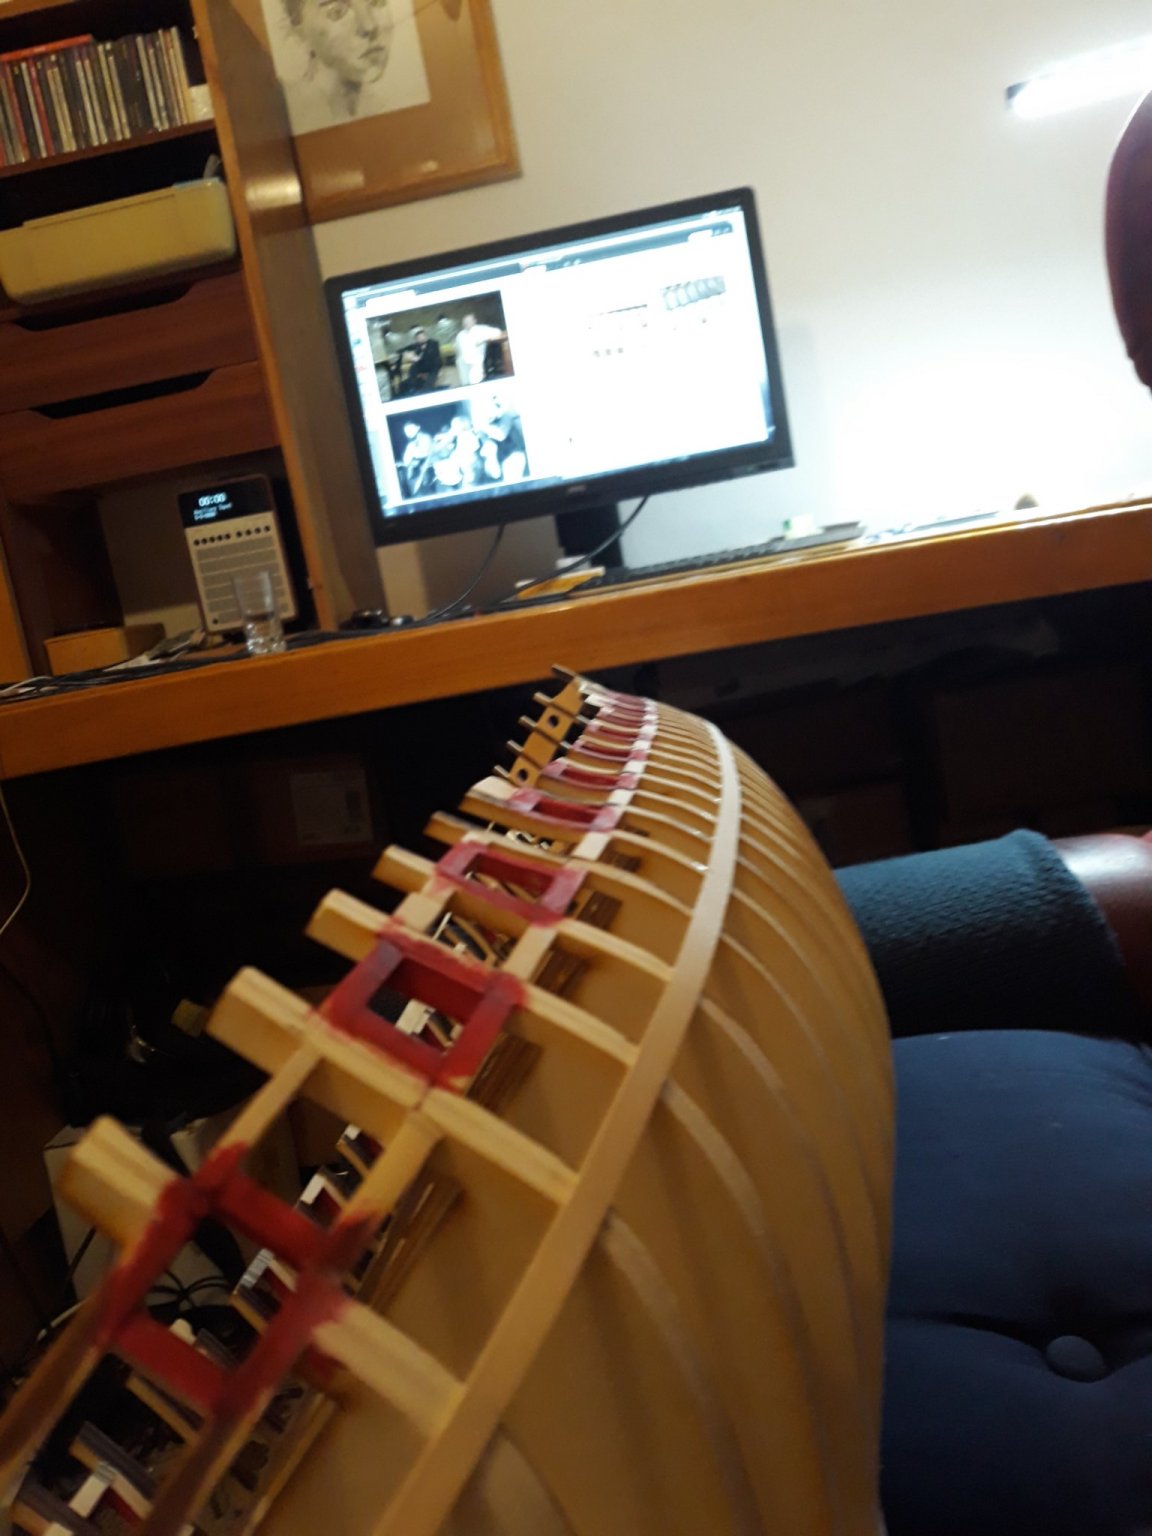
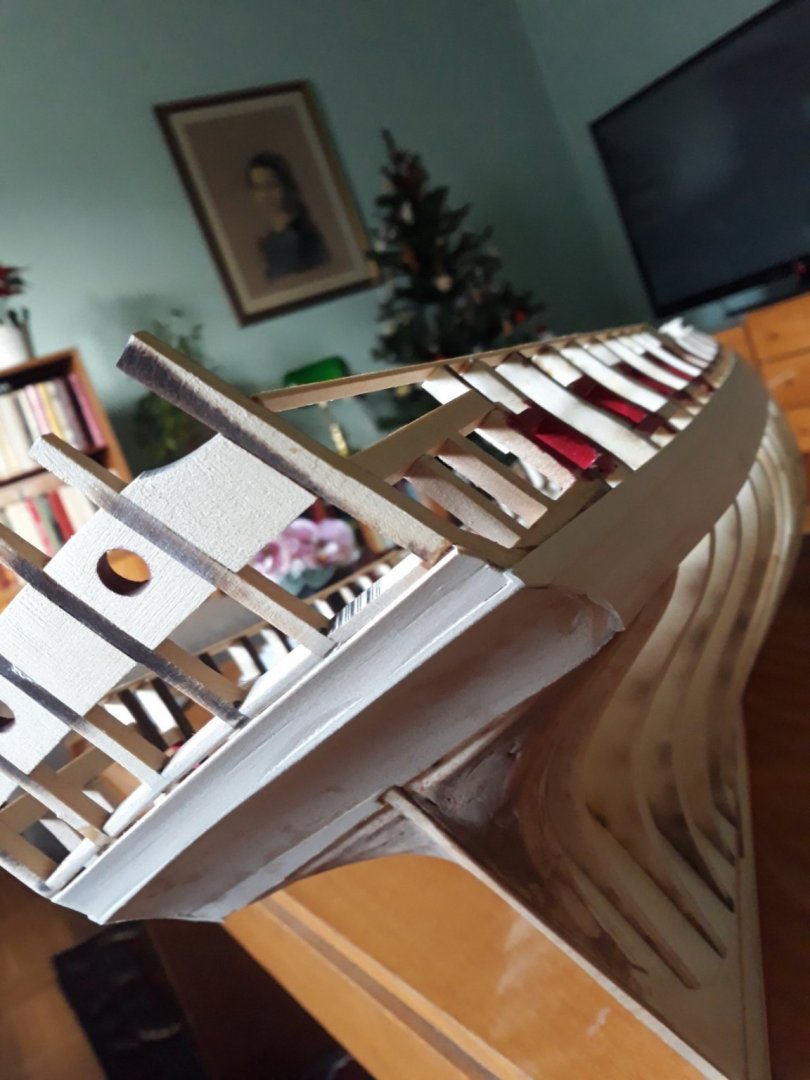
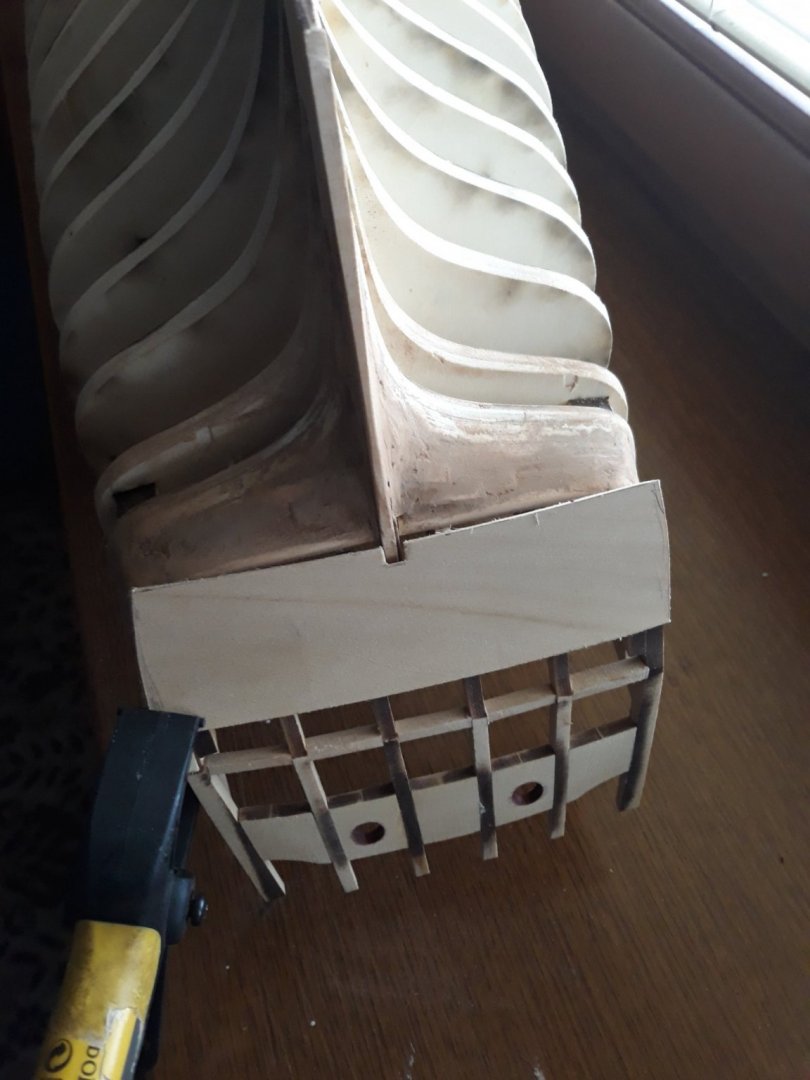
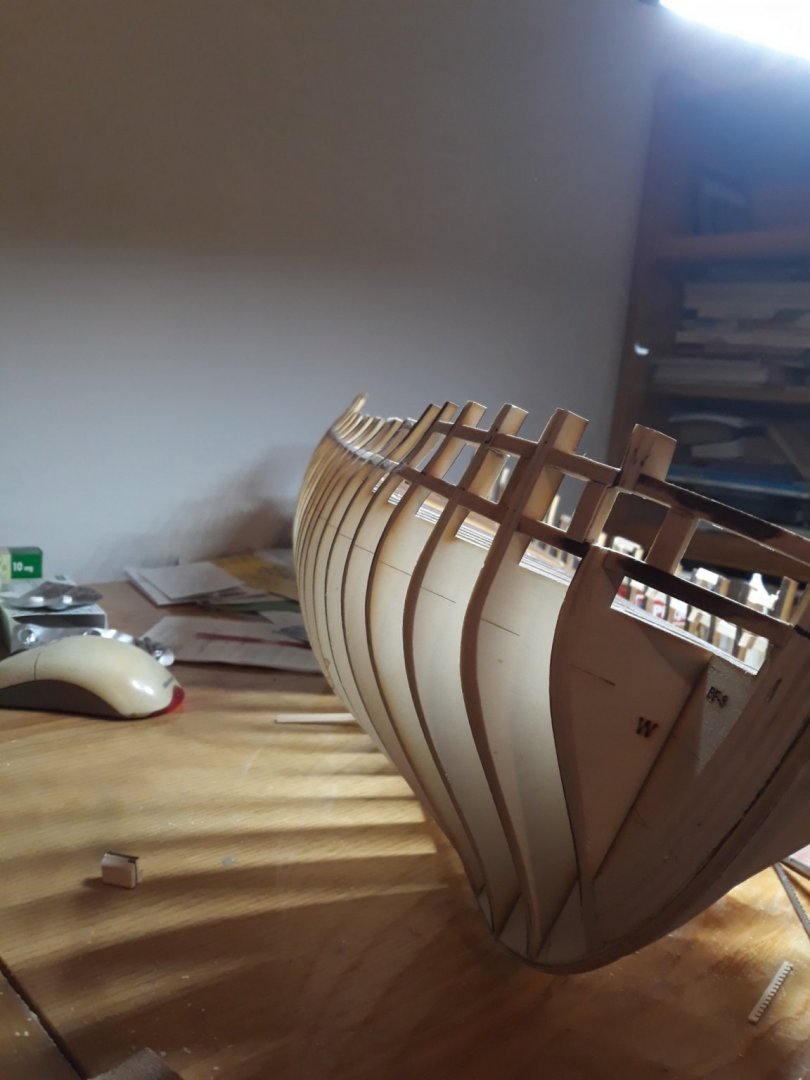
Dear fellow builders ...in progress. Few mistakes here and there. Shortcut! As i didnt purchase part 2 i made stern planking already - as there will be sticker i didnt bother making it piece by piece. Apology. I also sealed bulkheads fully towards end as i always struggle that part. Stern plank shoud end up in sharp angle rhis looks like bluenose intend to correct it when planking and with sticker. Hopefully. 😕 now keel to be attached and ready for fun to start :))


-
way ahead of mine but soo much to look forward to
- 1,784 replies
-
- 1
-

-
- winchelsea
- Syren Ship Model Company
- (and 1 more)
-
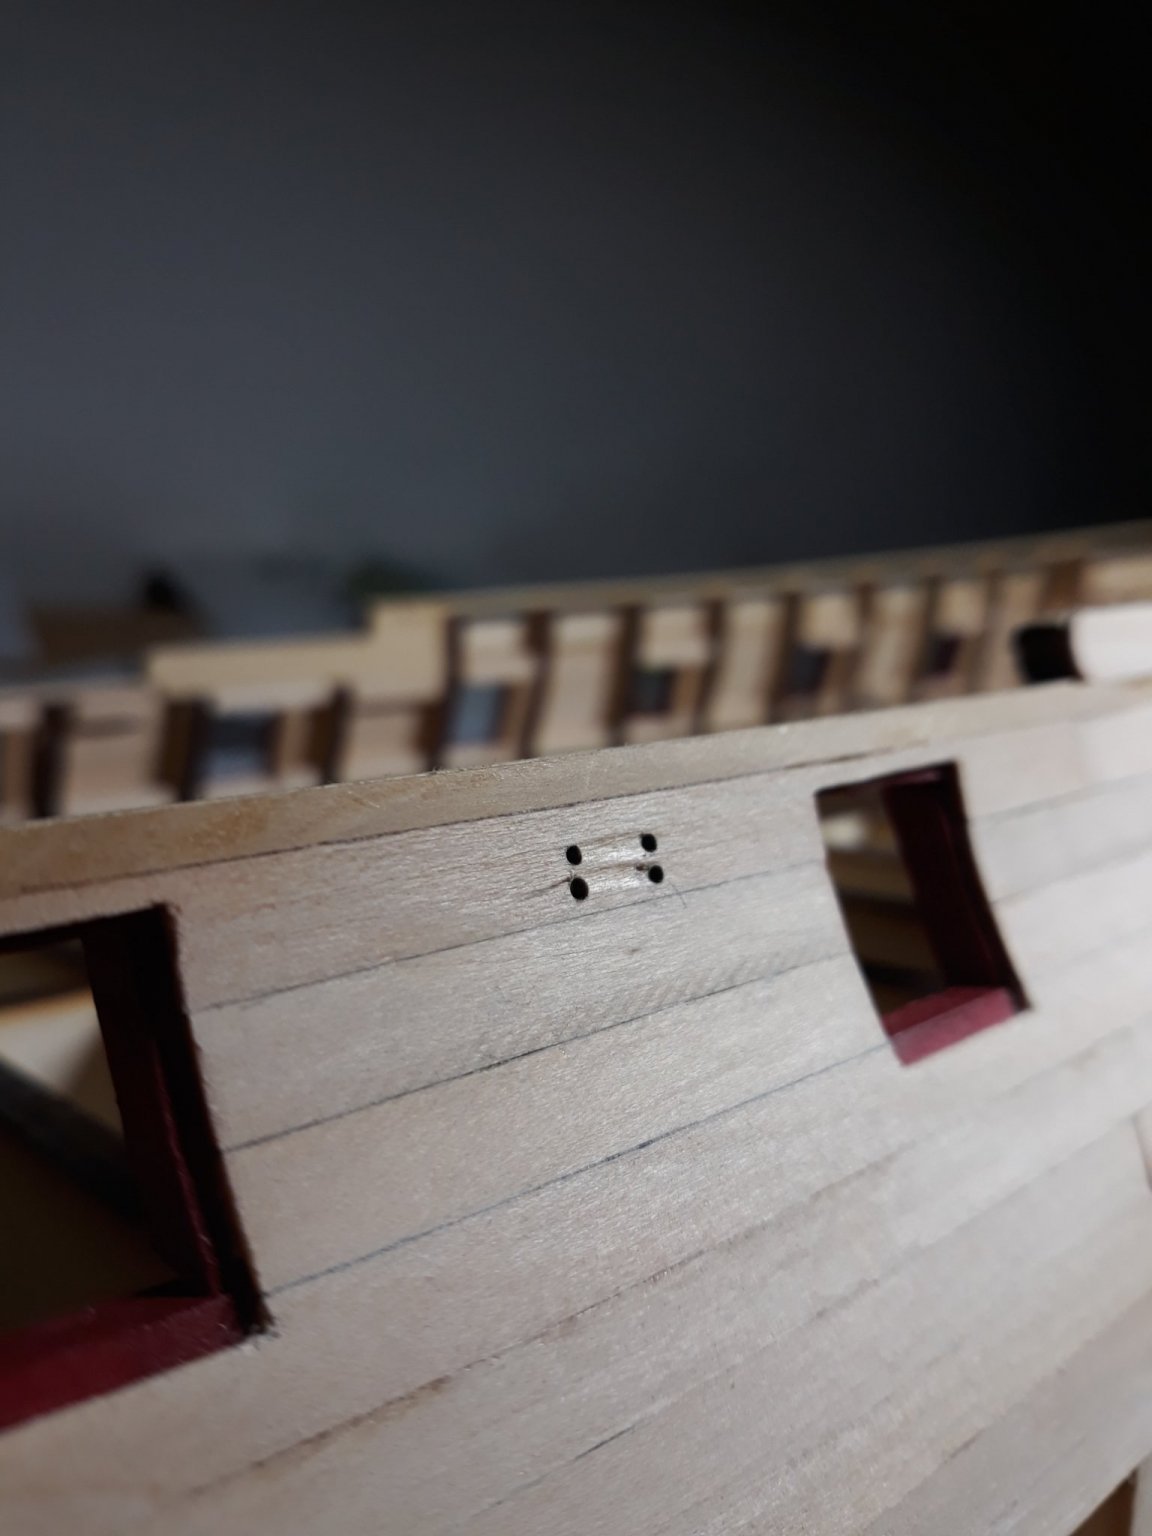
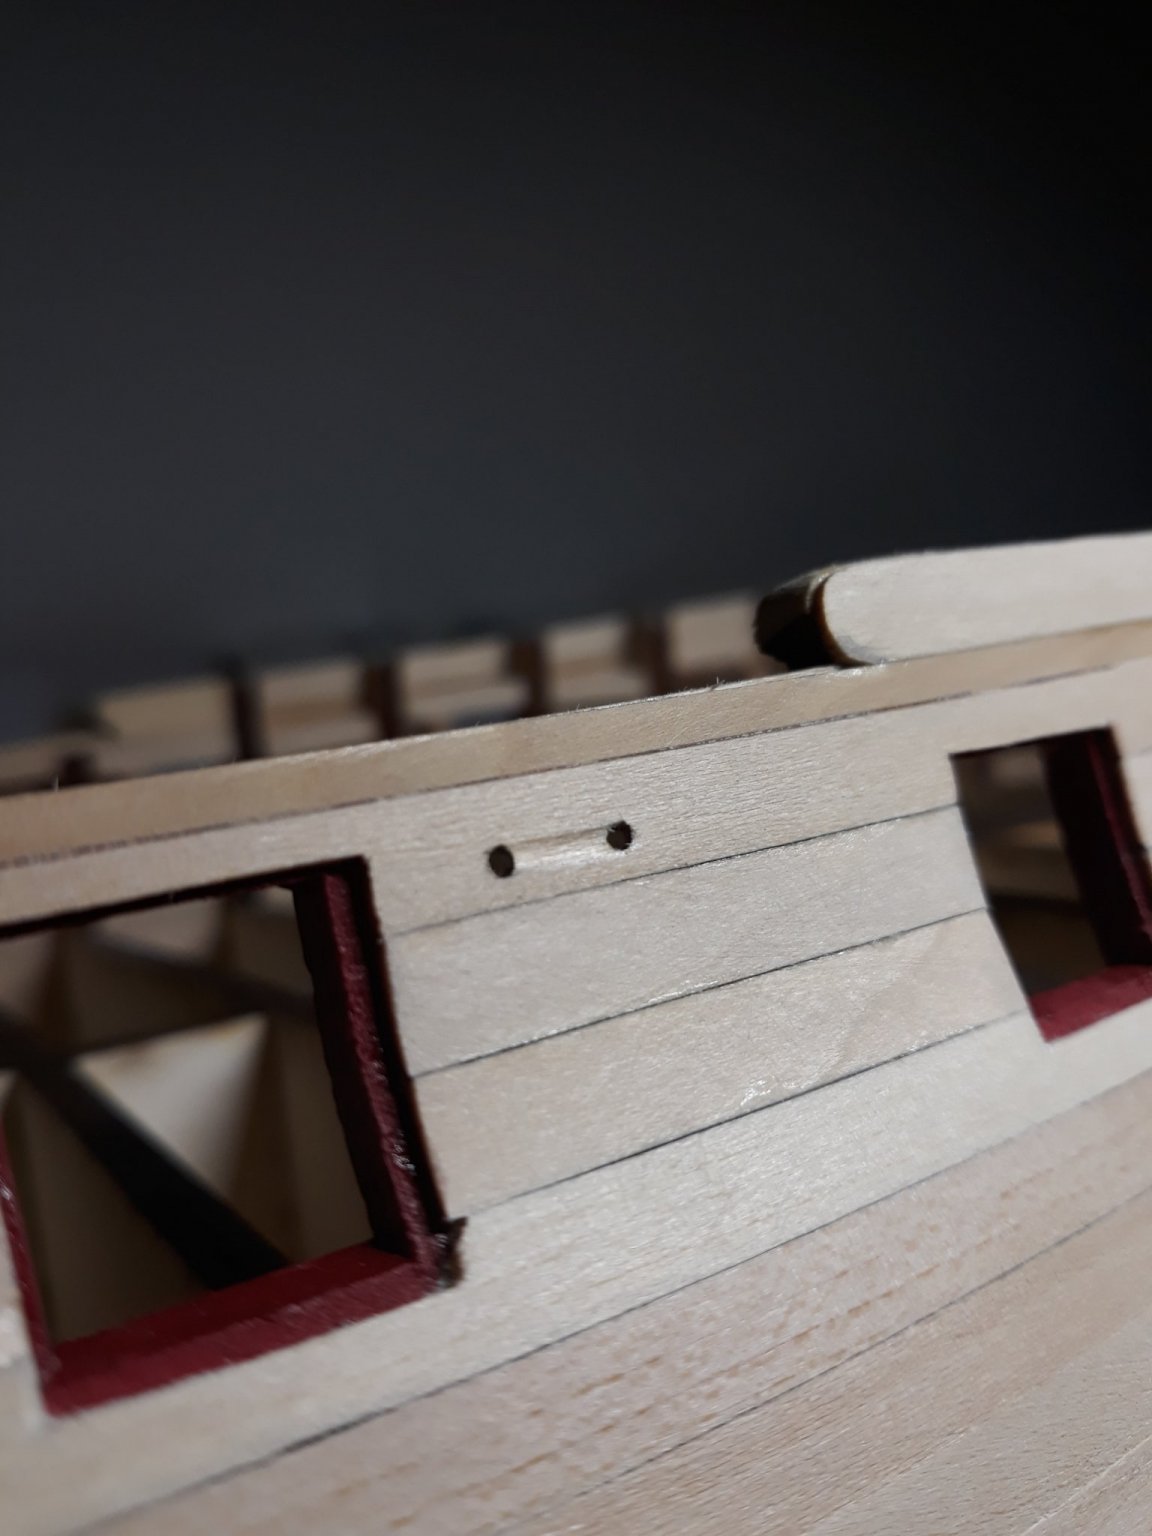
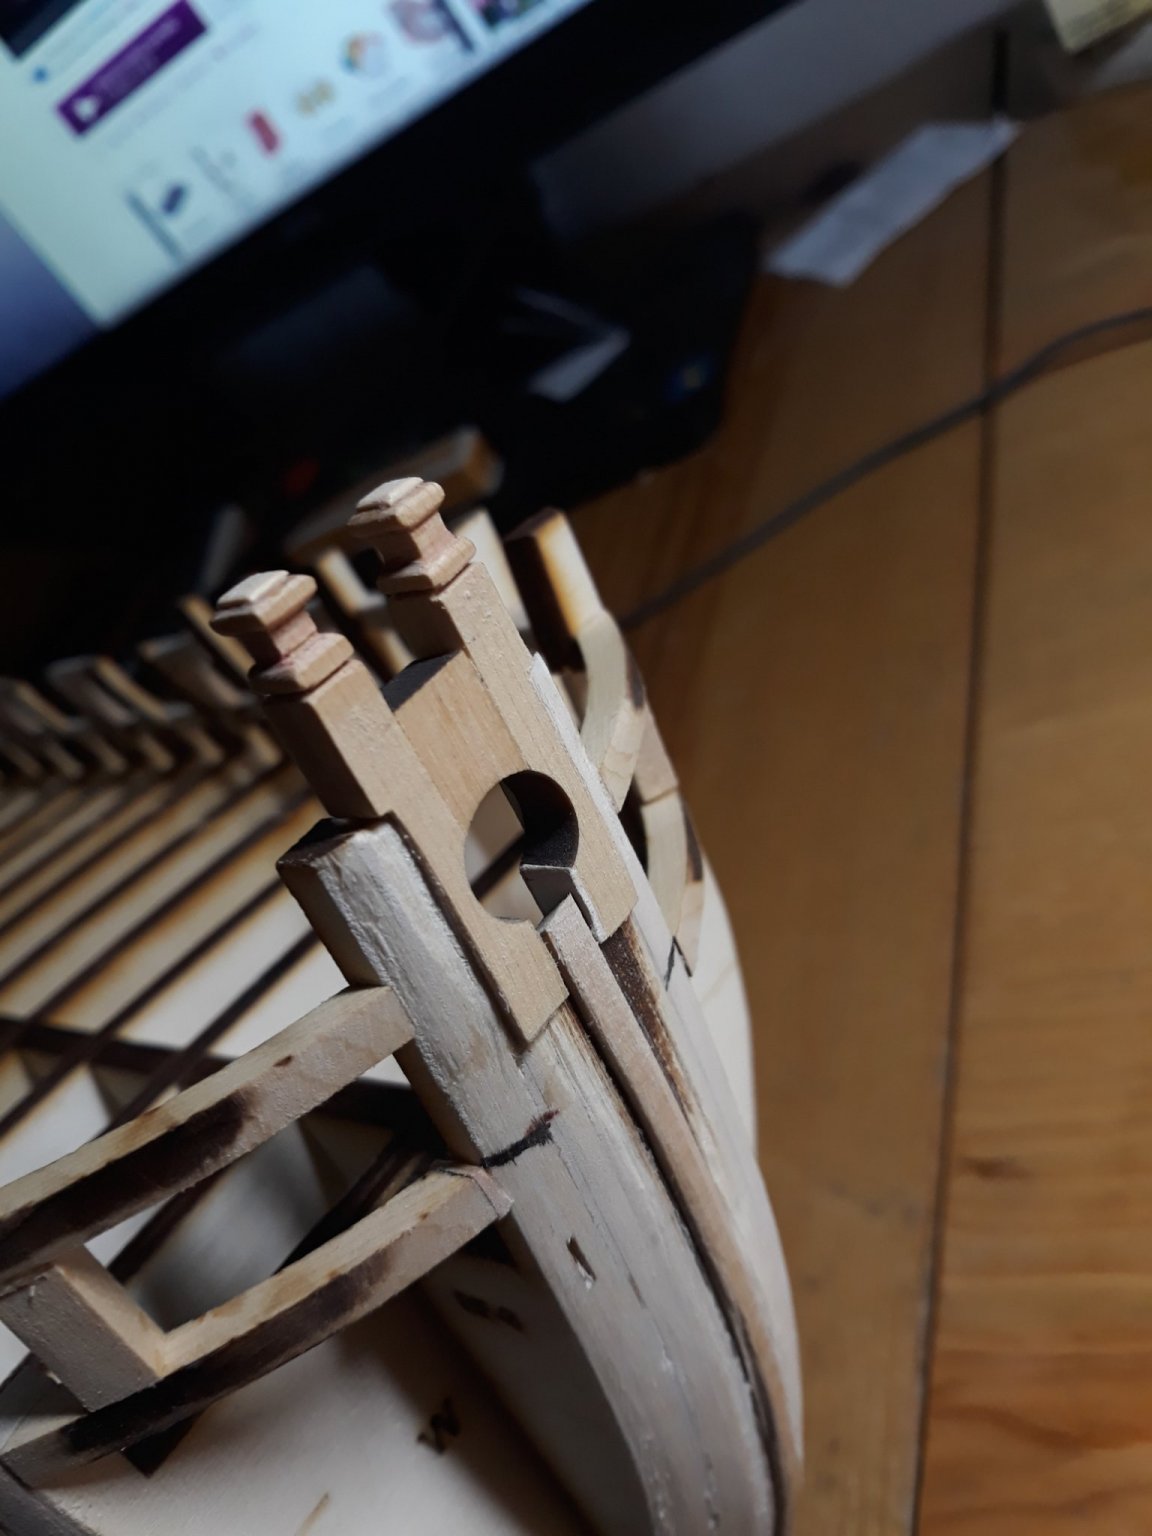
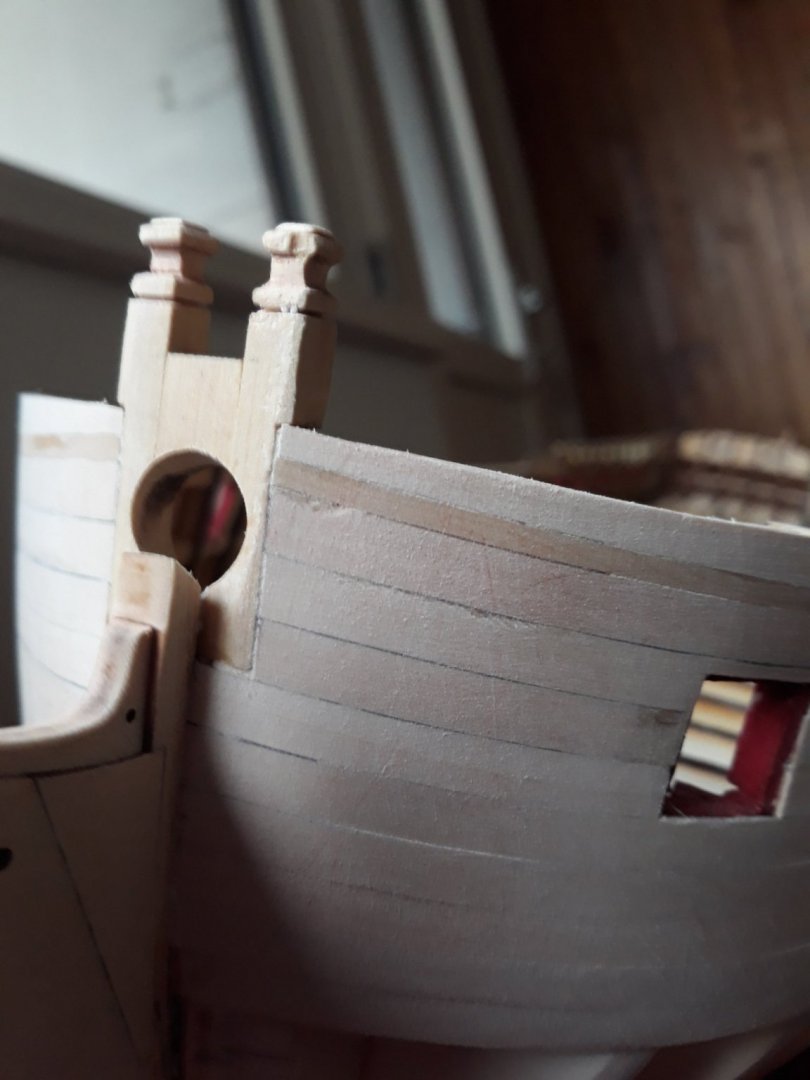
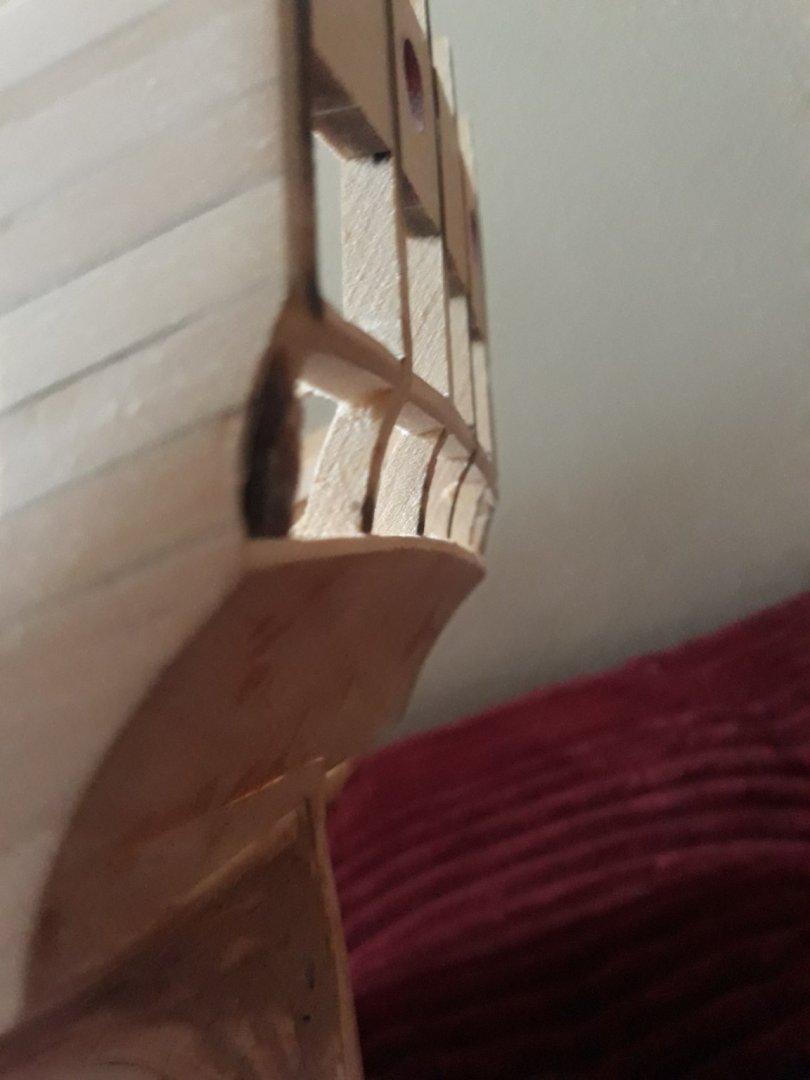
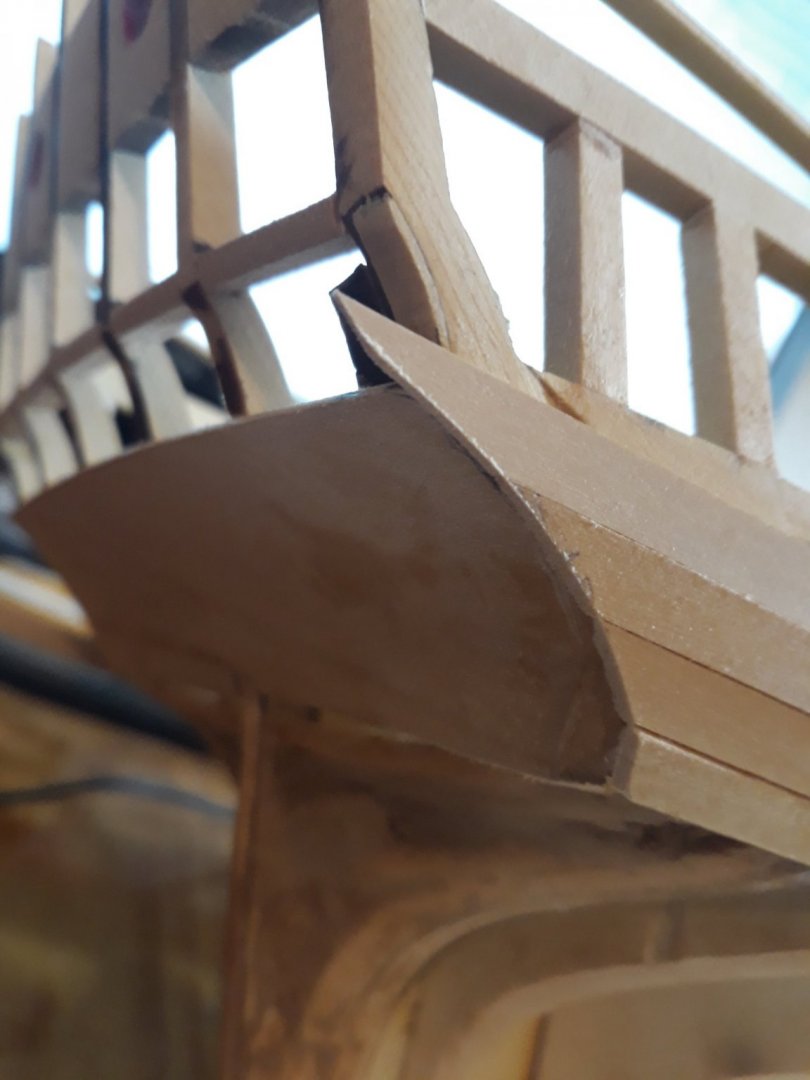
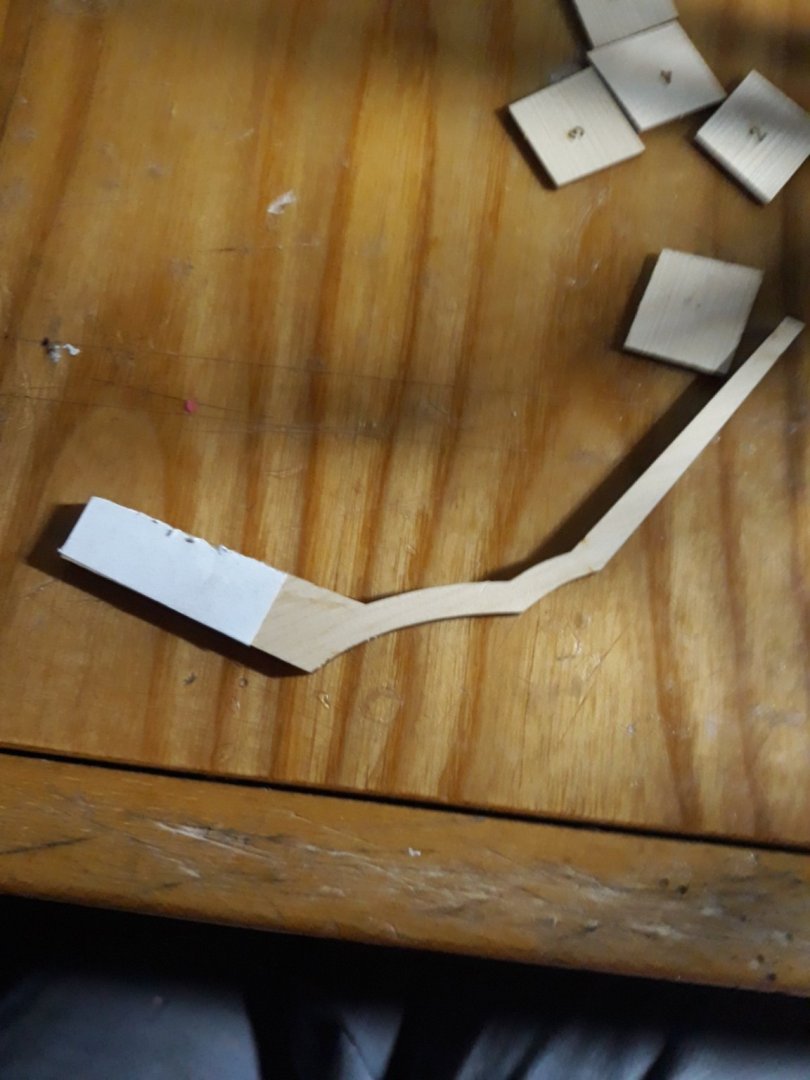
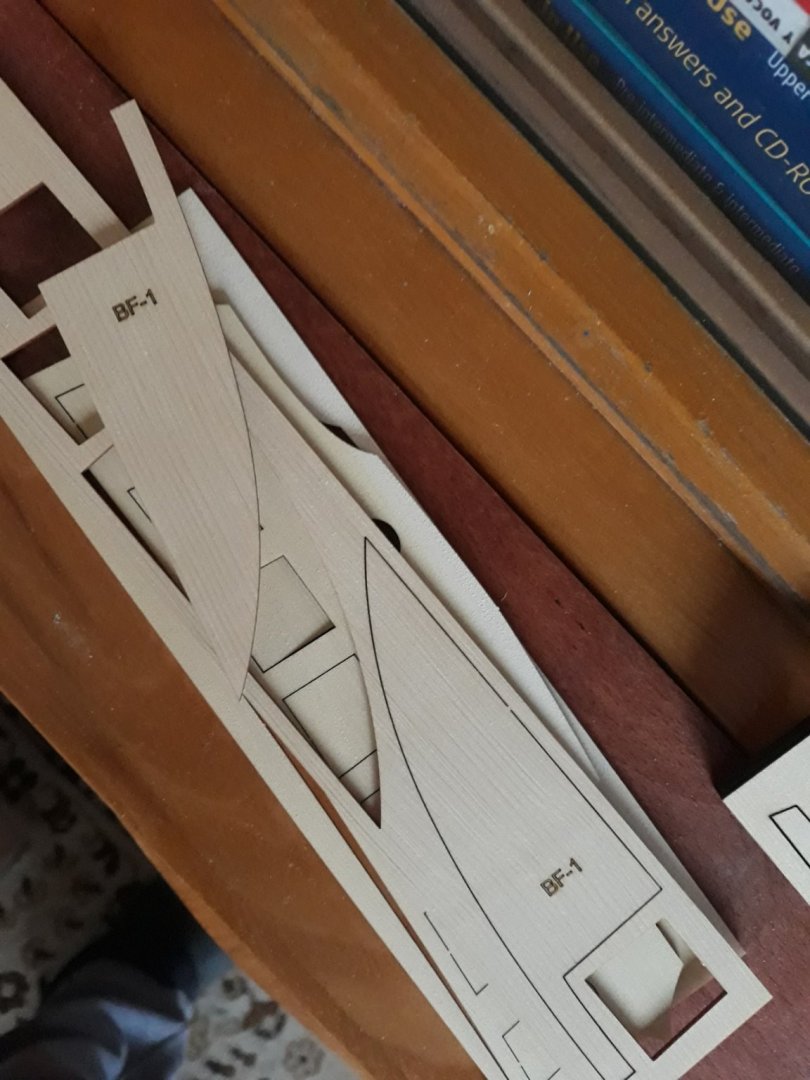
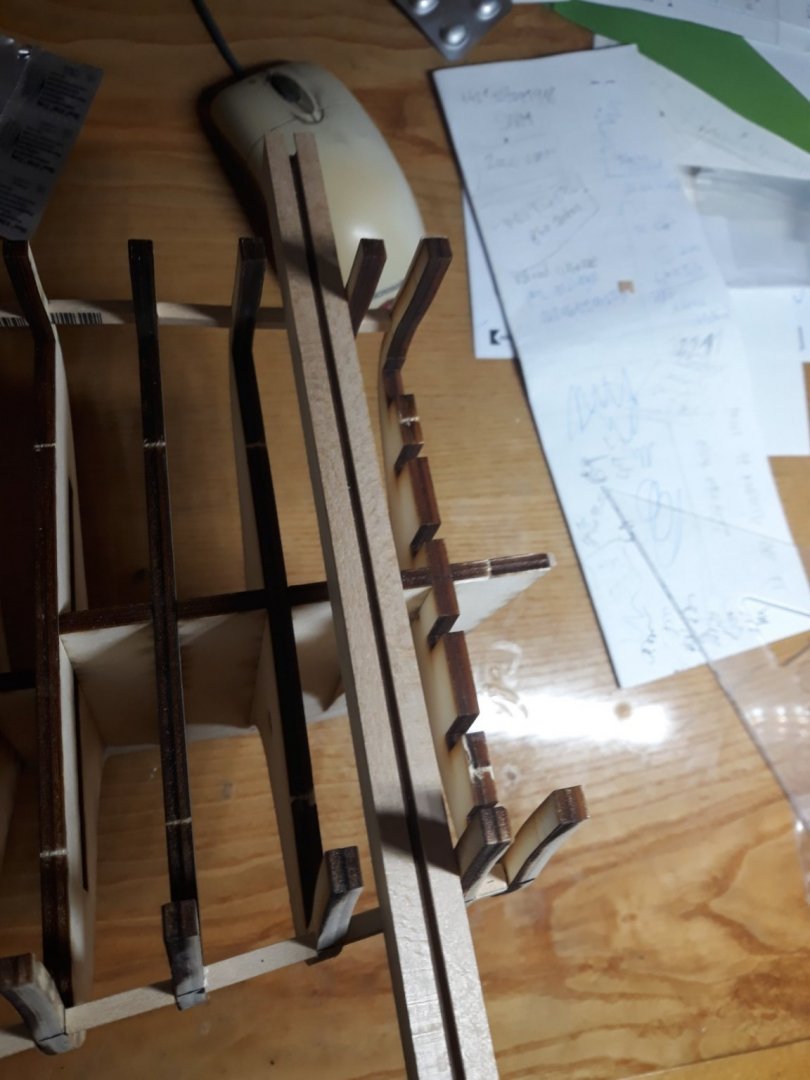
Enough for today. Very slow important work done. Bollards ( without bowsprit angle ) & windows seals secured. As bf1 missing Found other way -not to cut from ply but from bollards. ://


-
happy new year !
-
Thank you Chuck.
-
extremely classy Ron im picking up the clues Vlad
-
very classy Jeff. Beautiful craftsmaship .
-
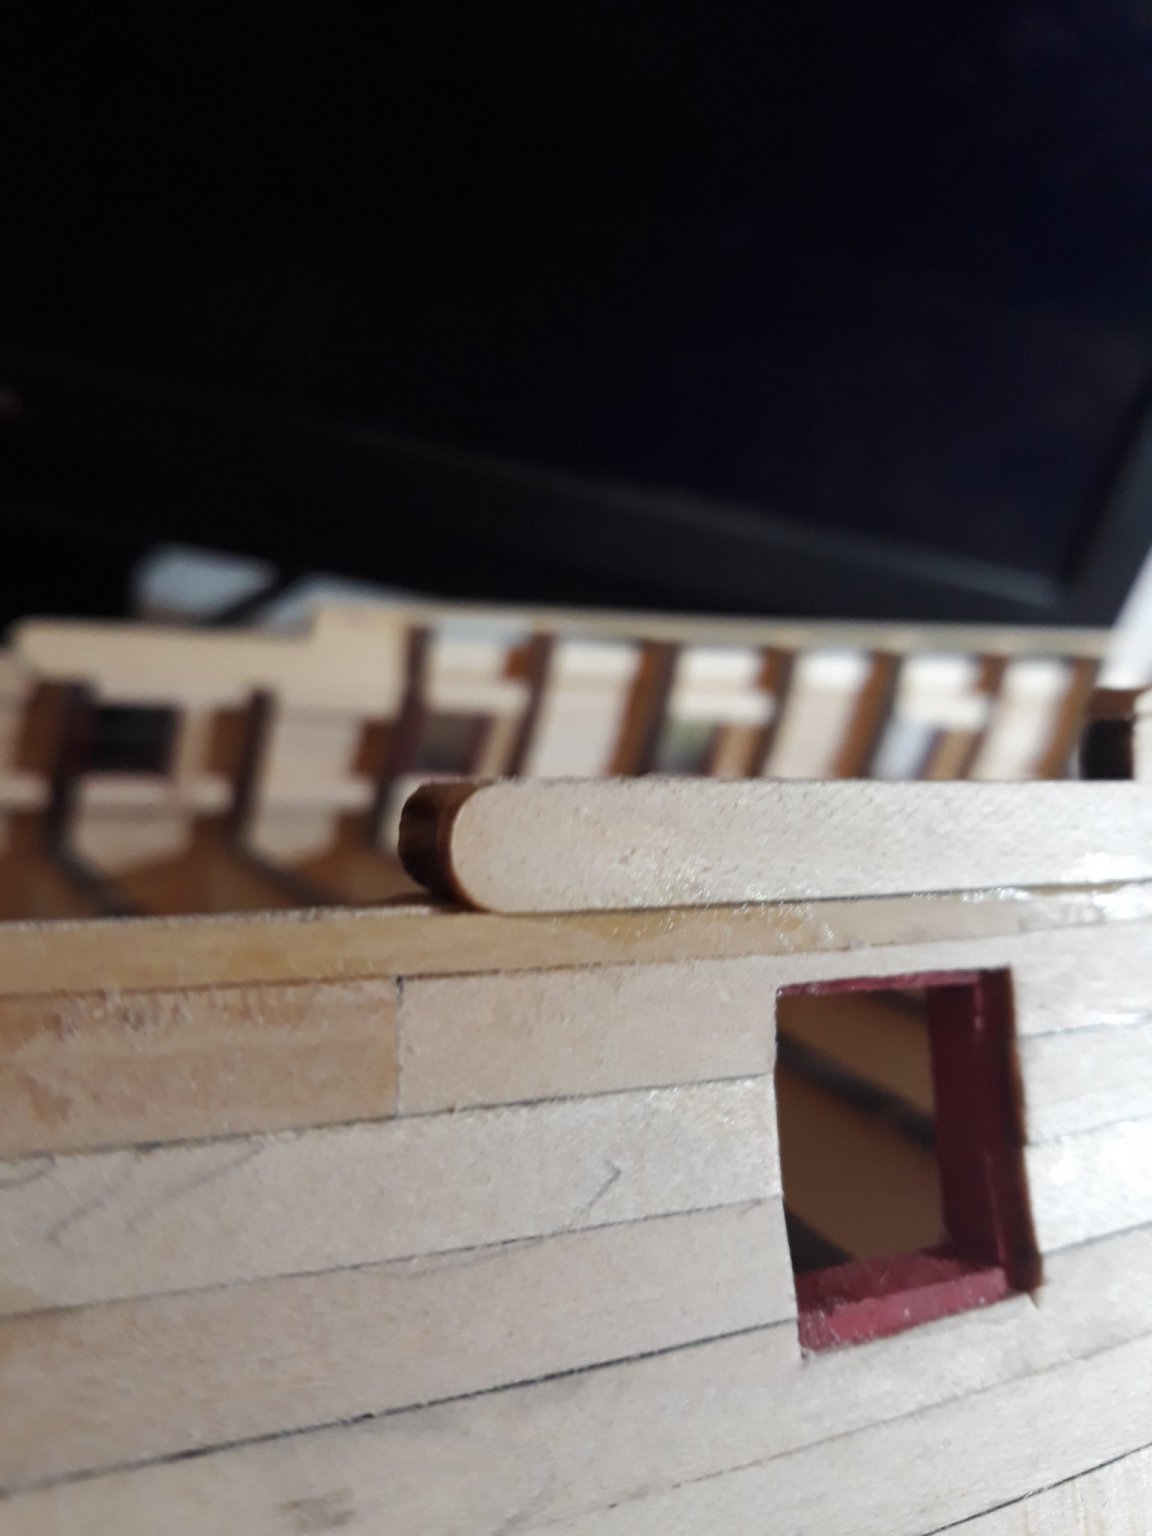
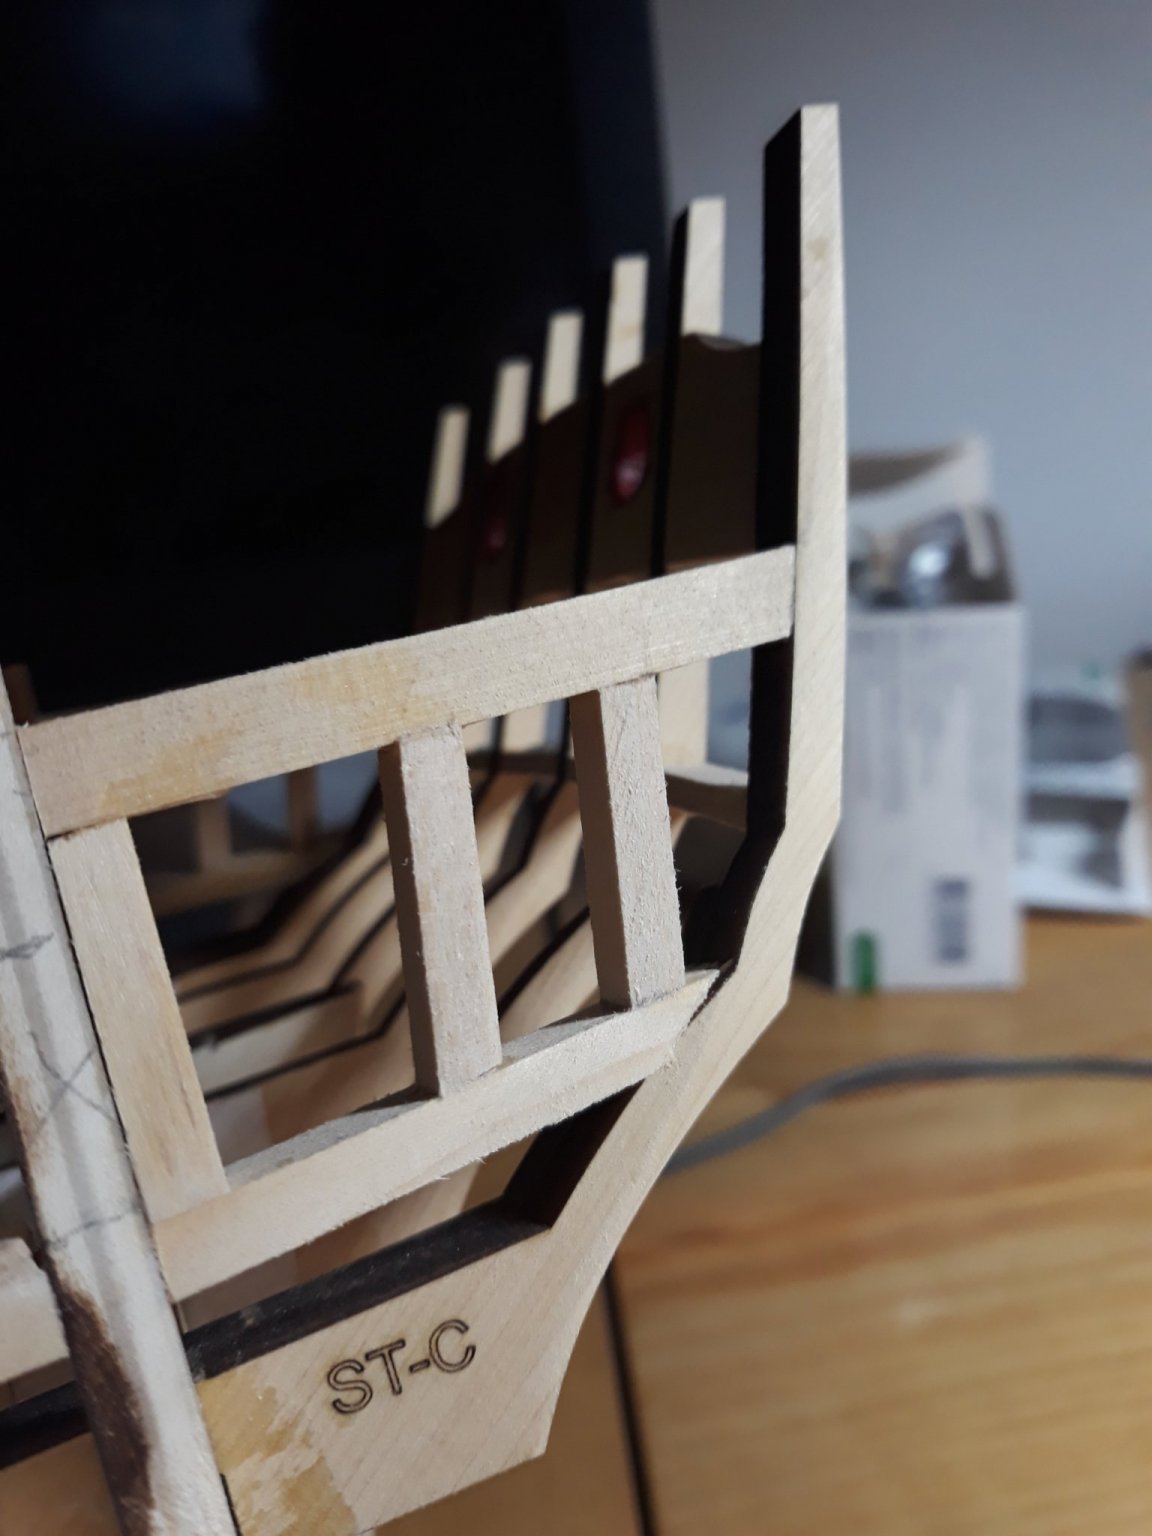
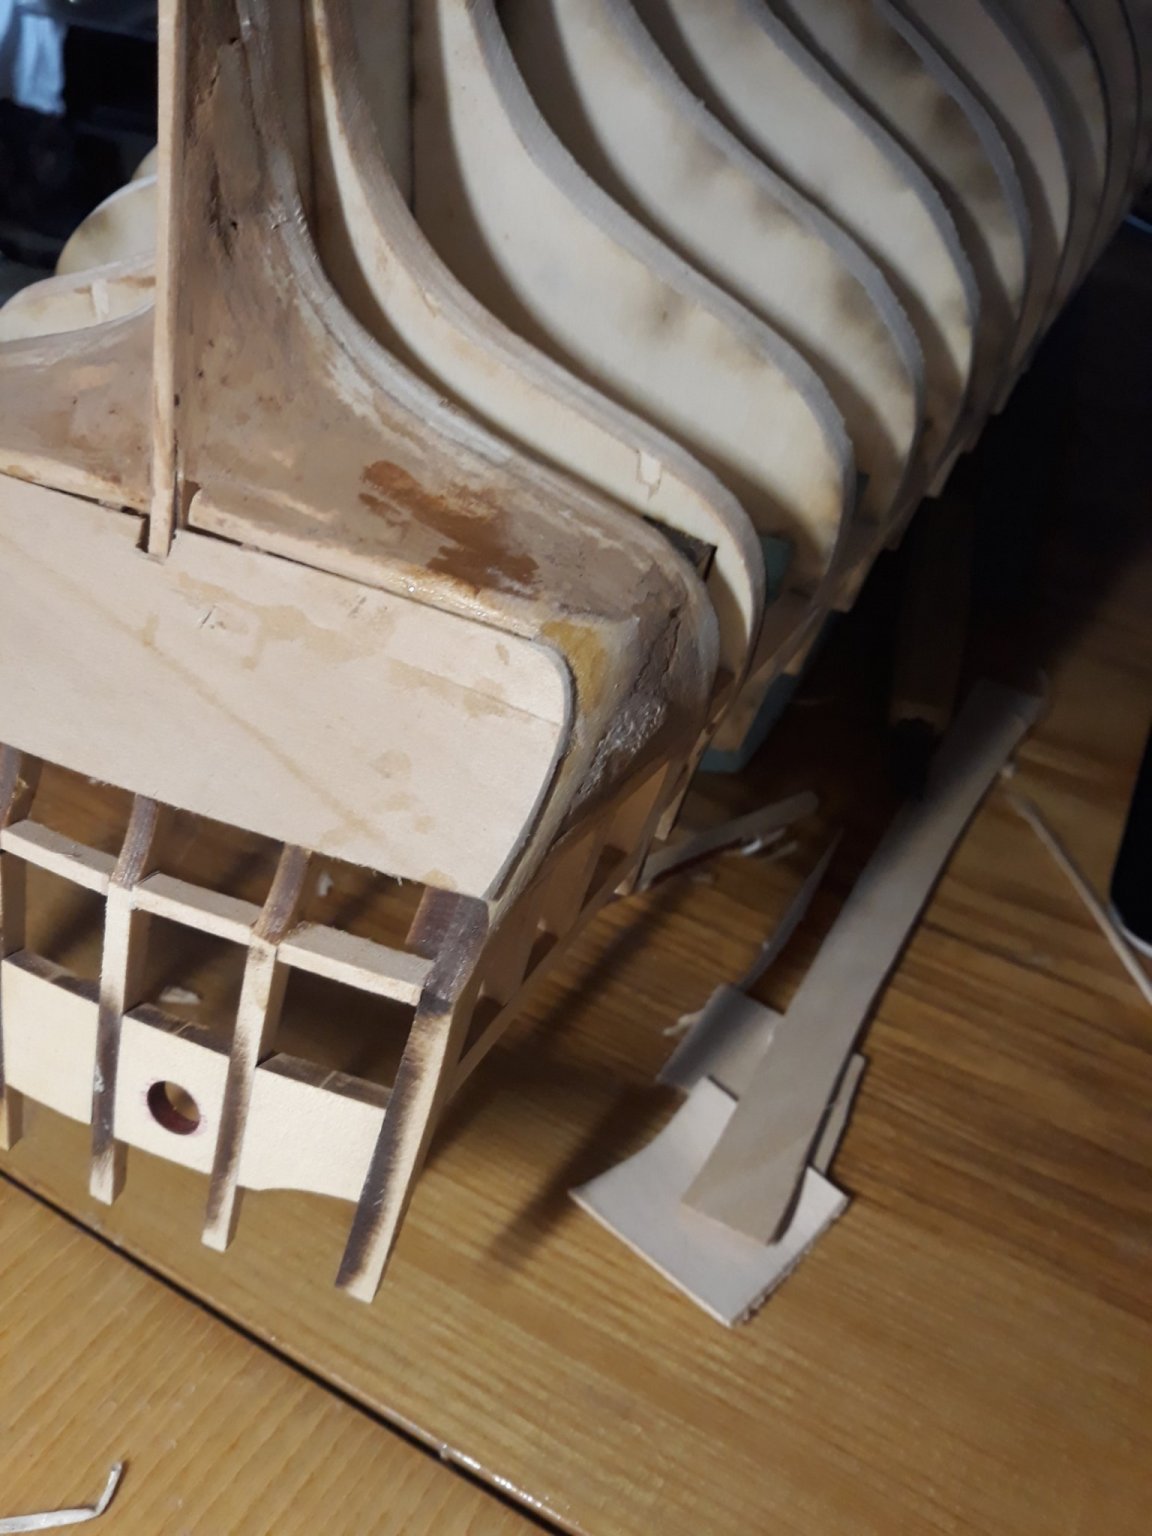
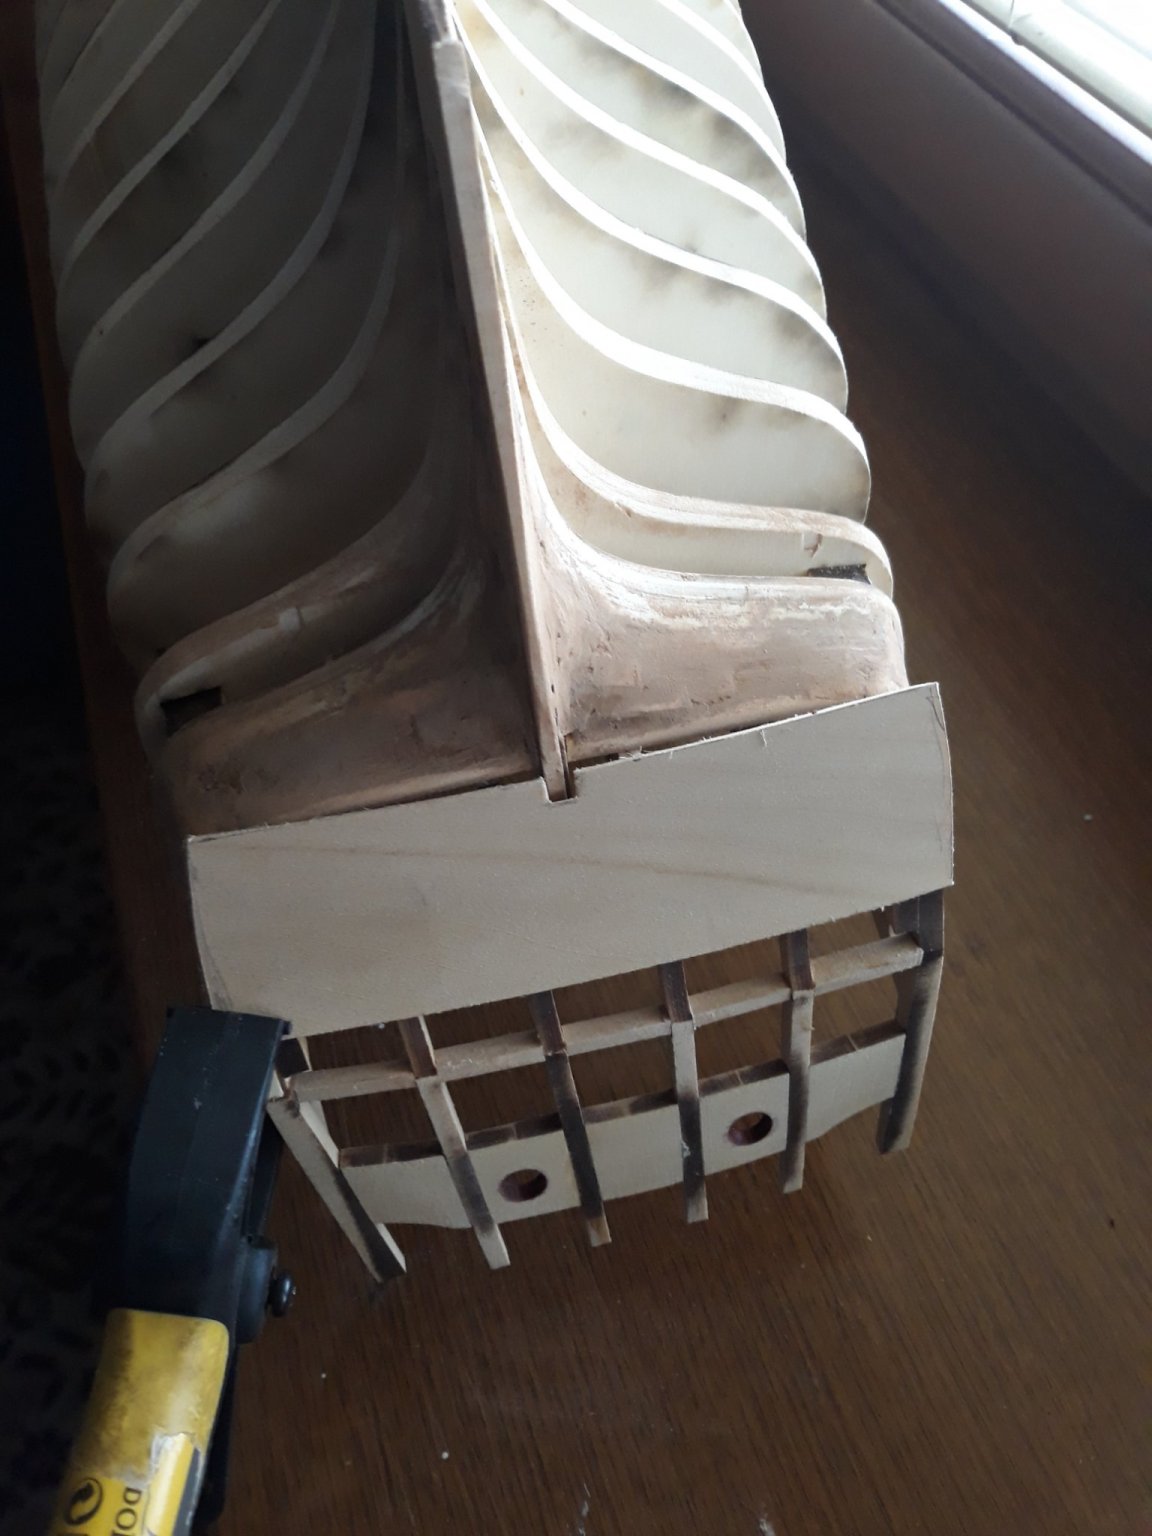
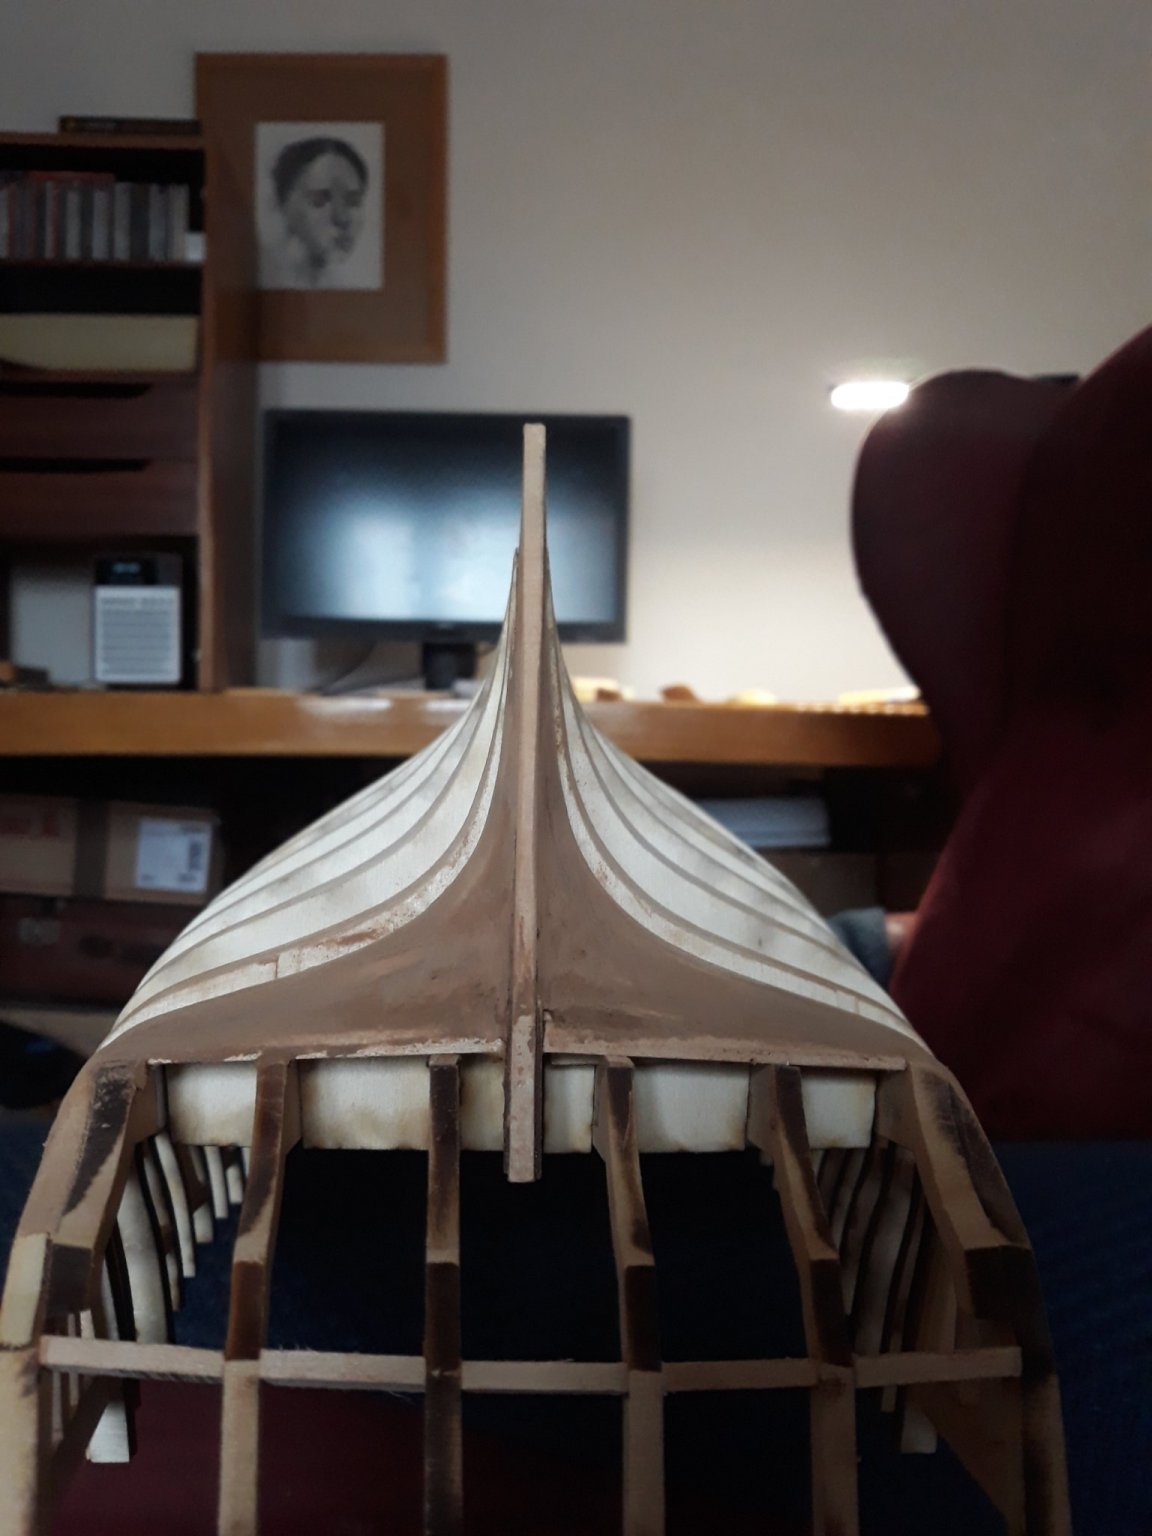
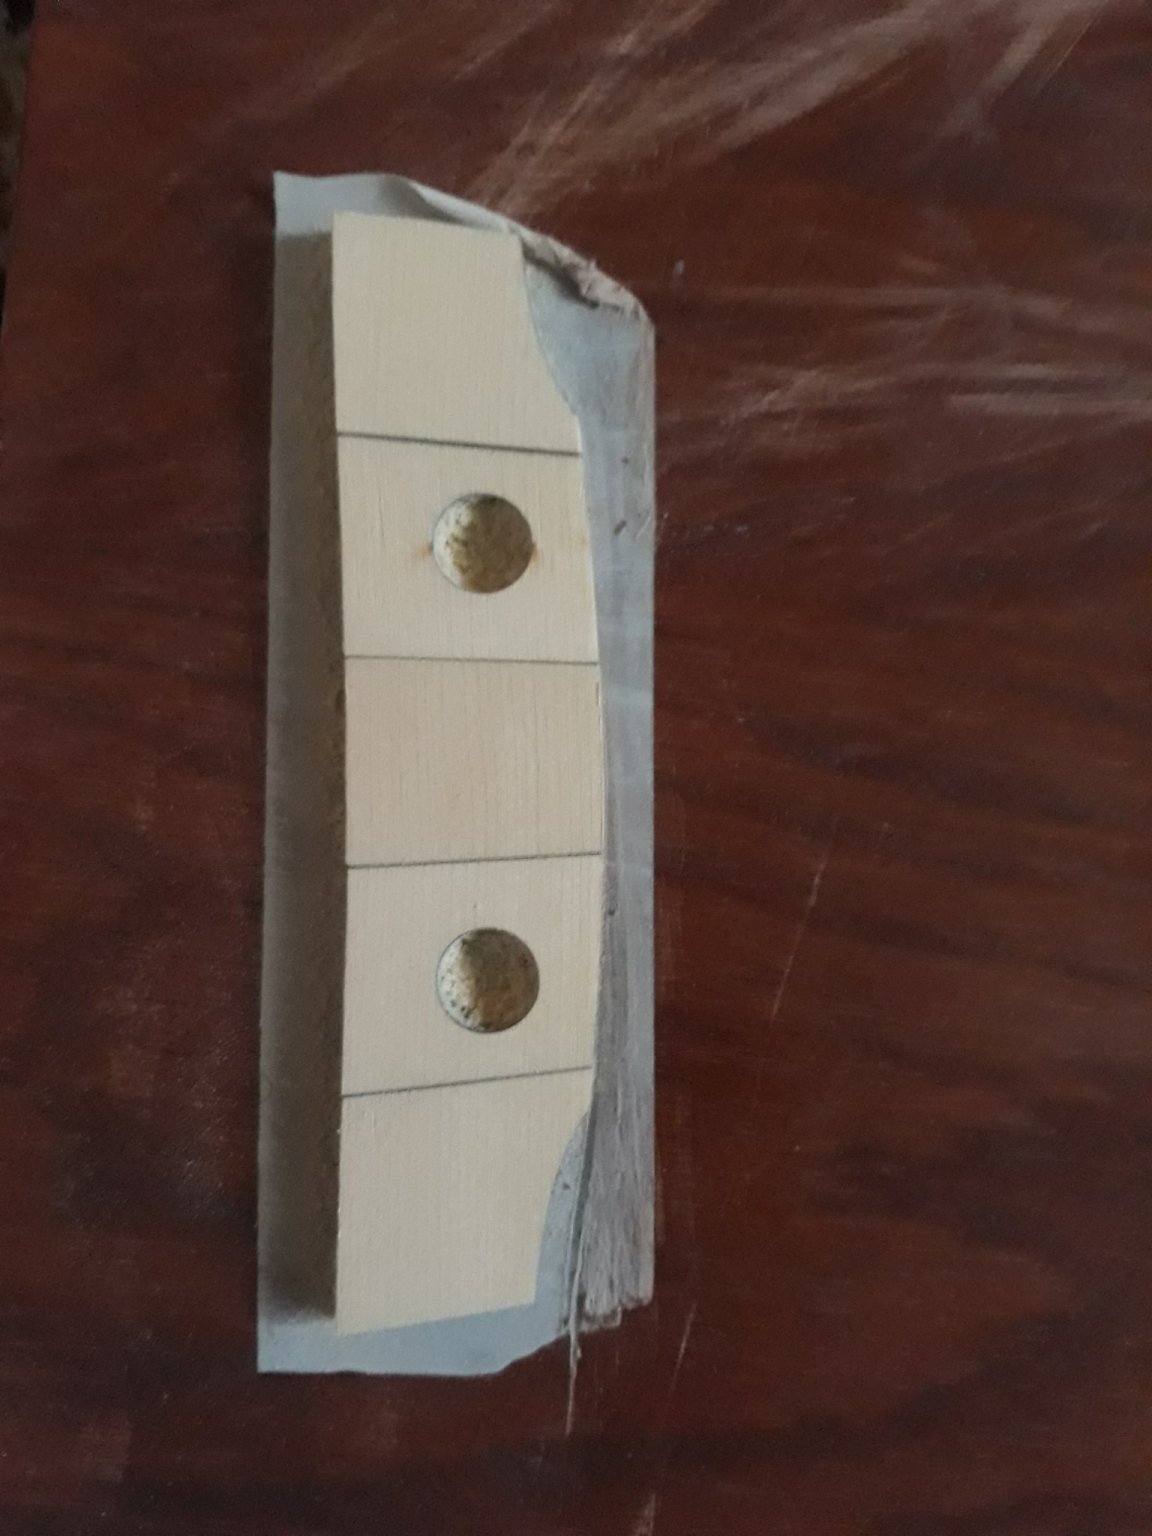
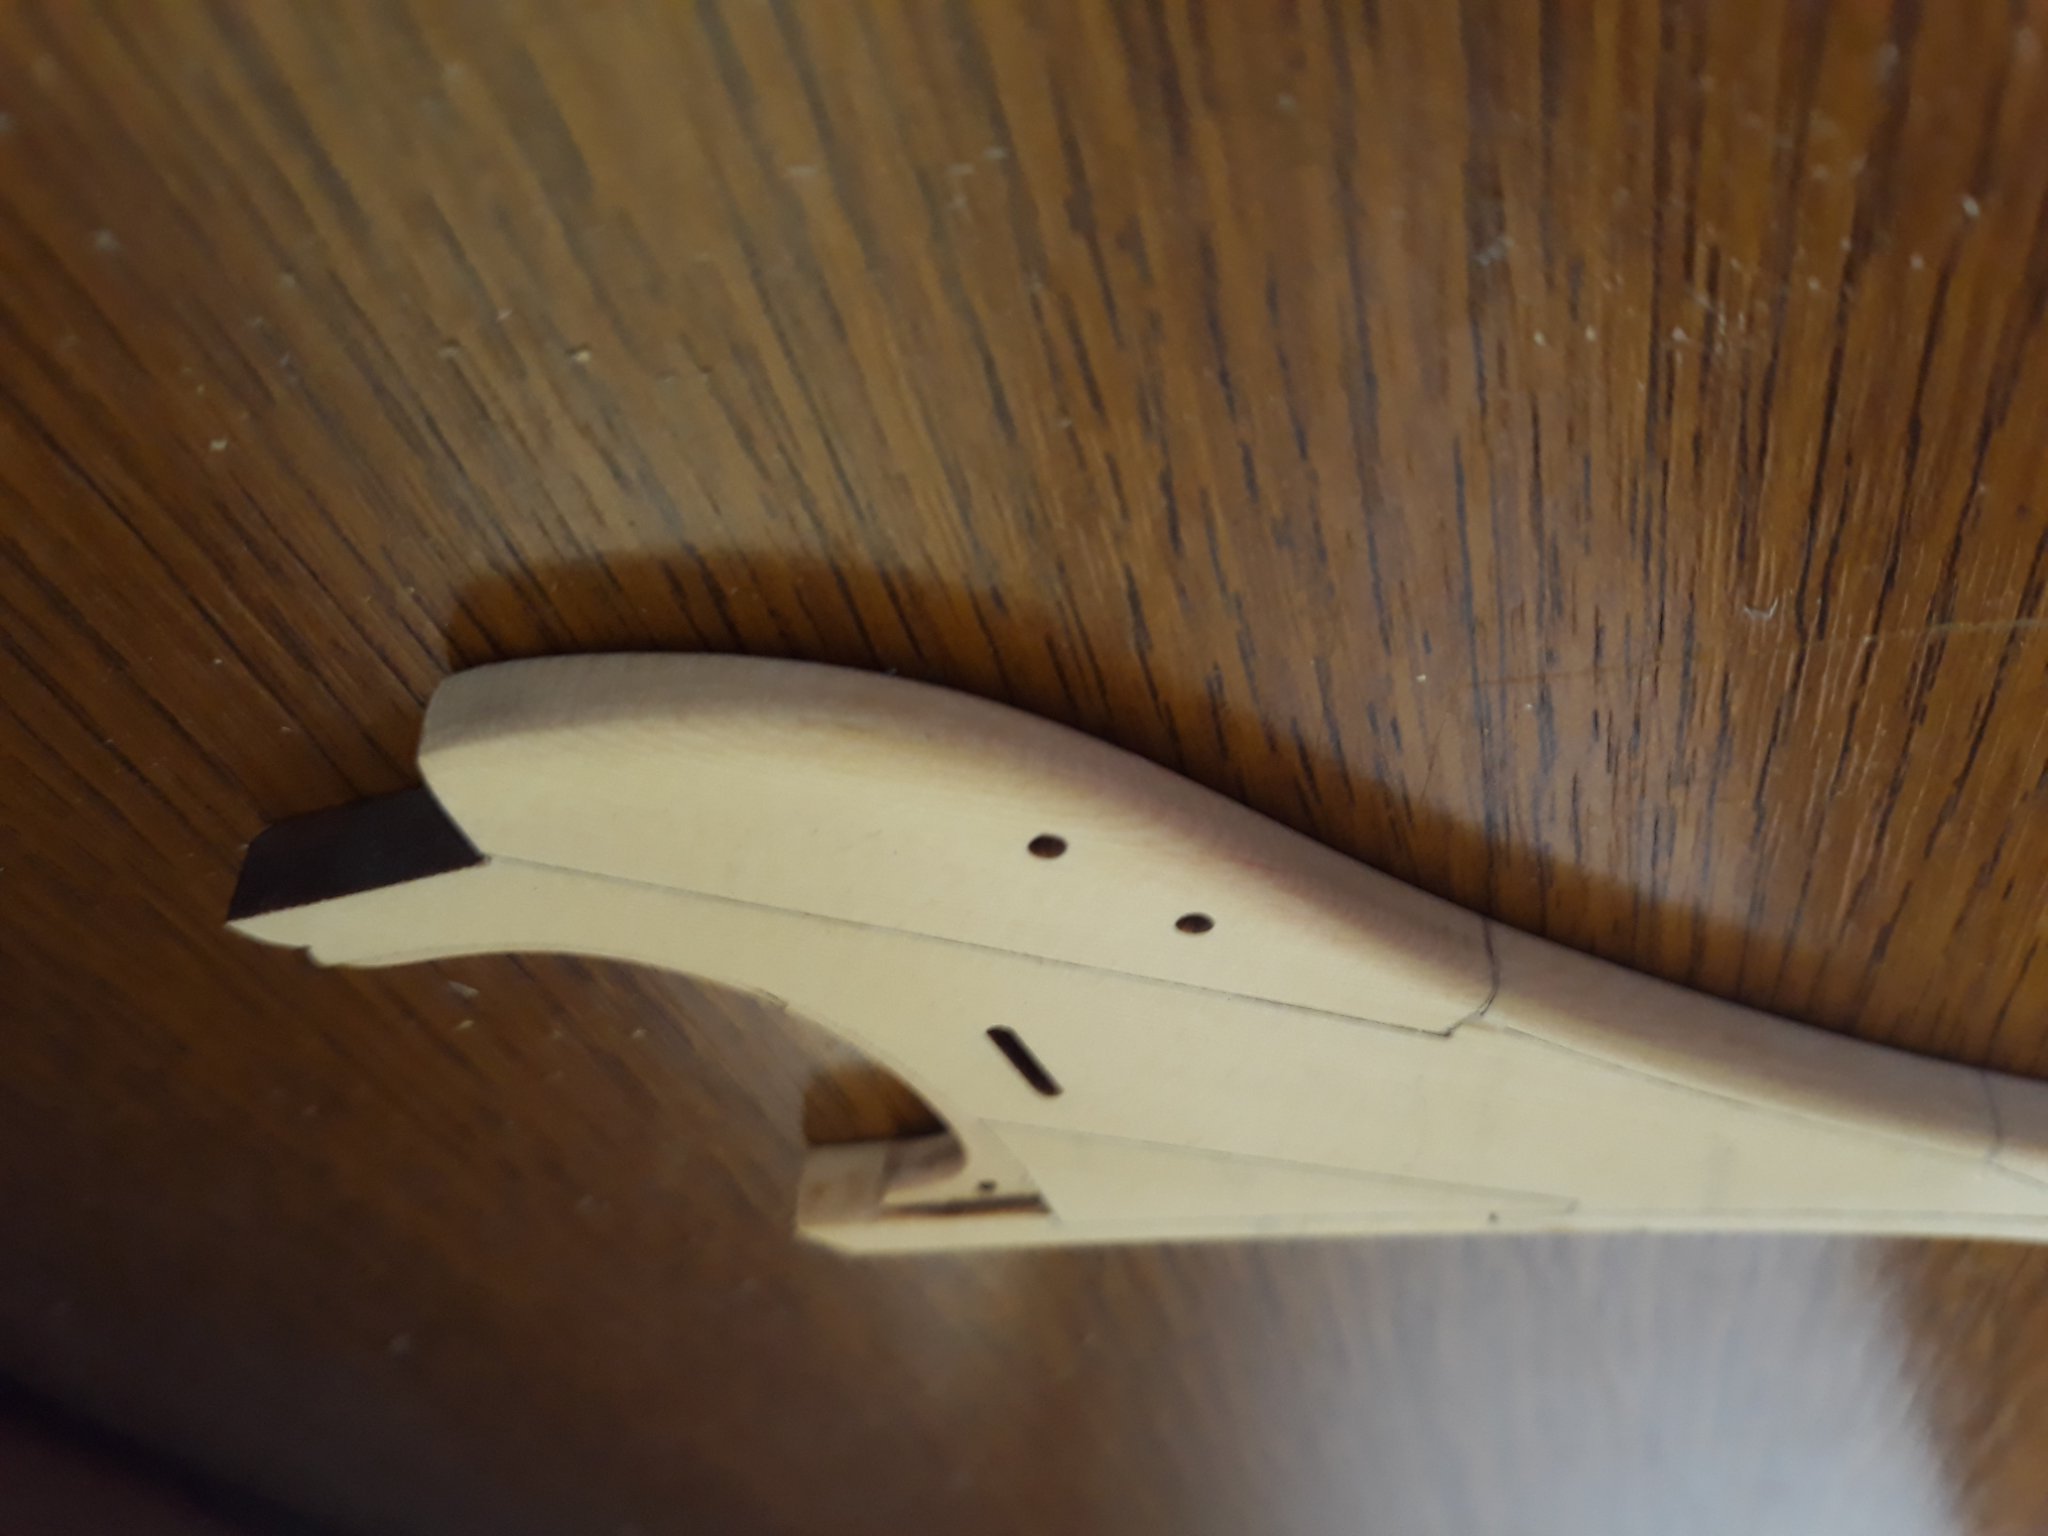
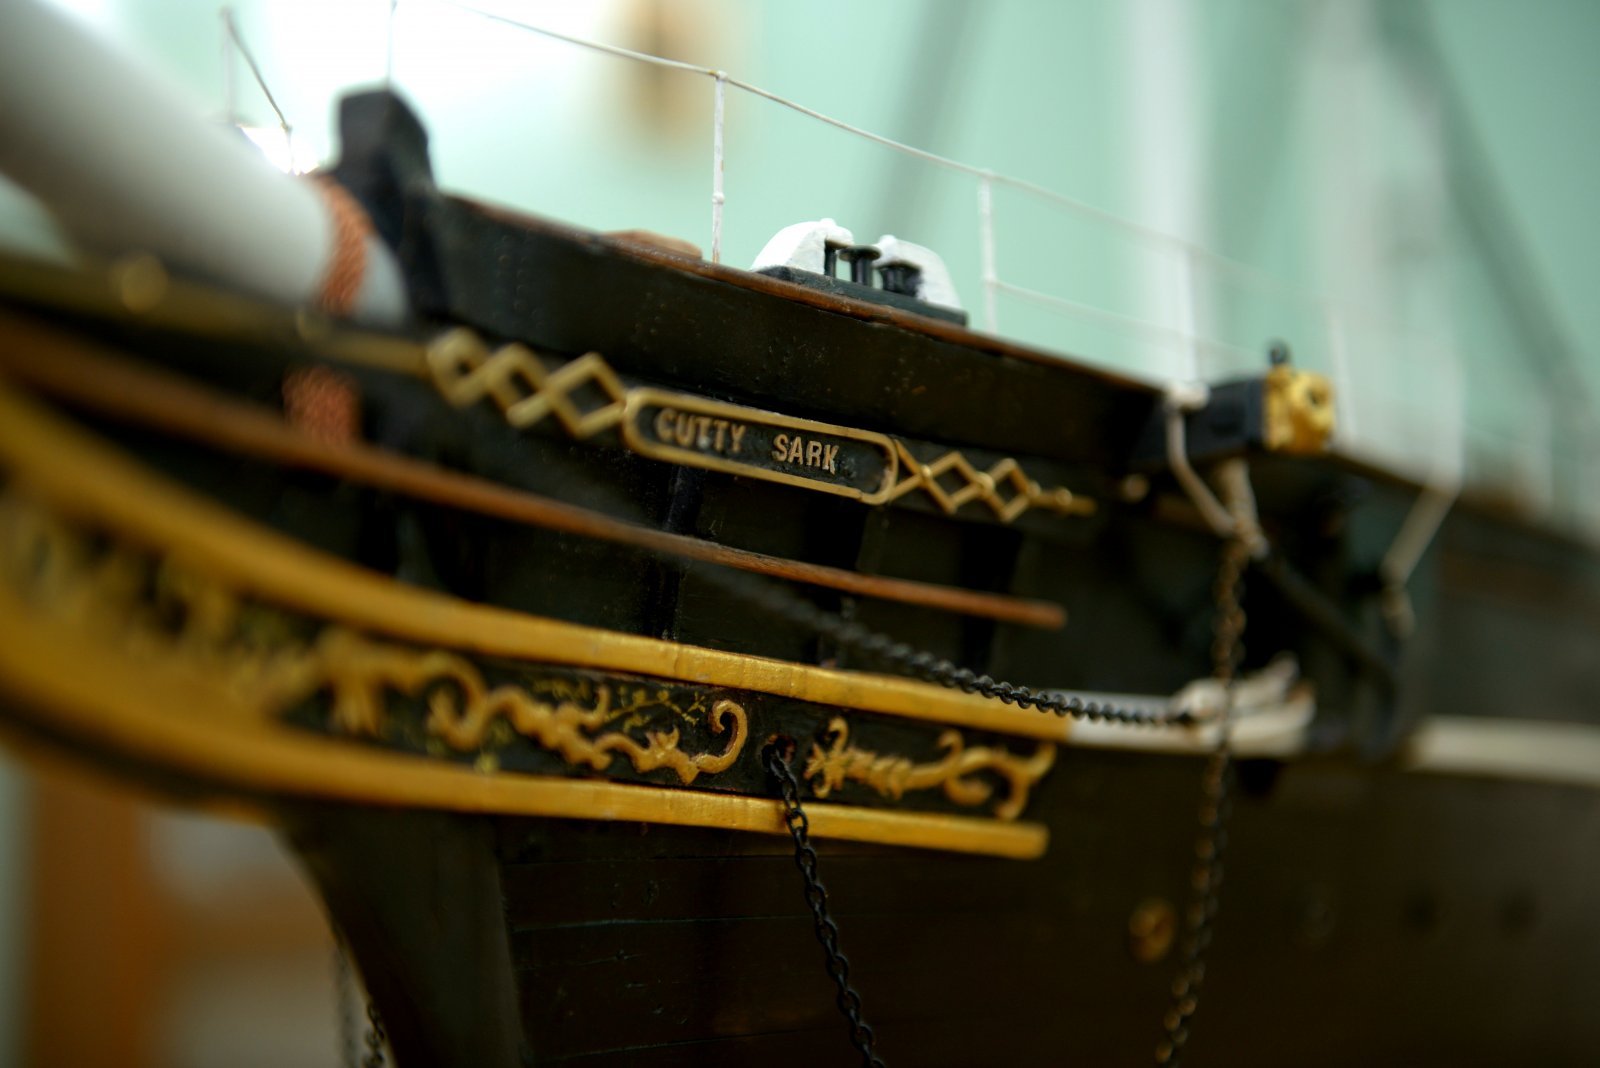
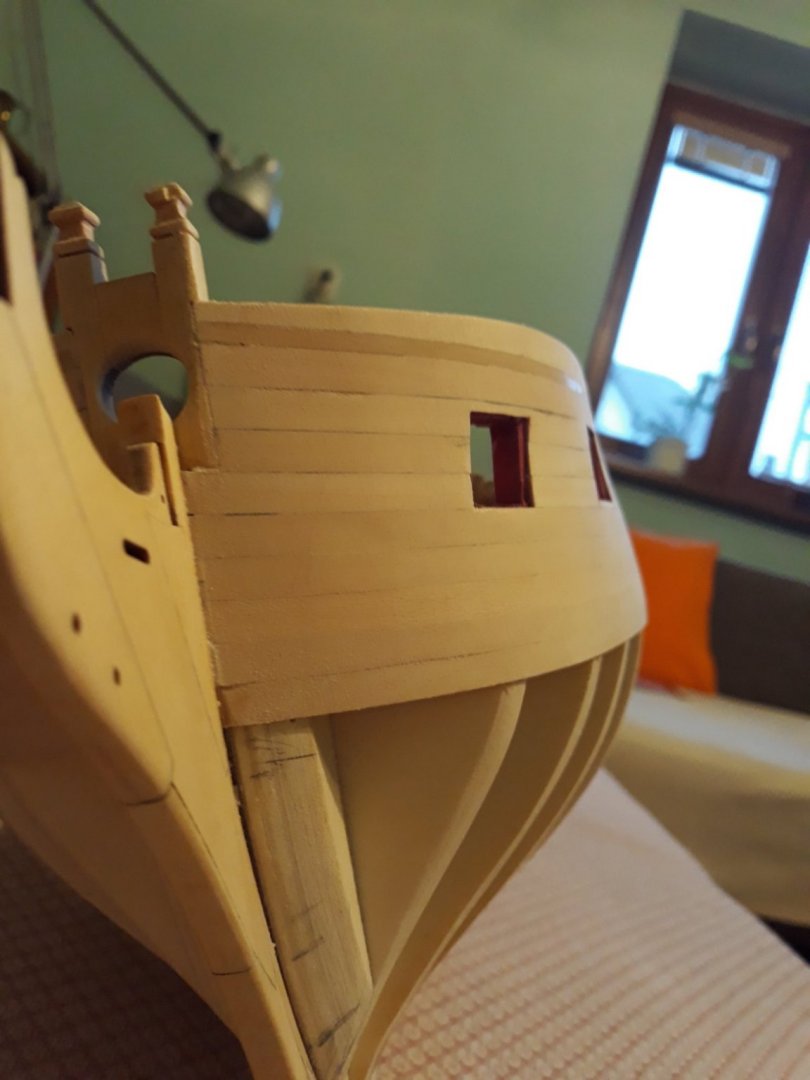
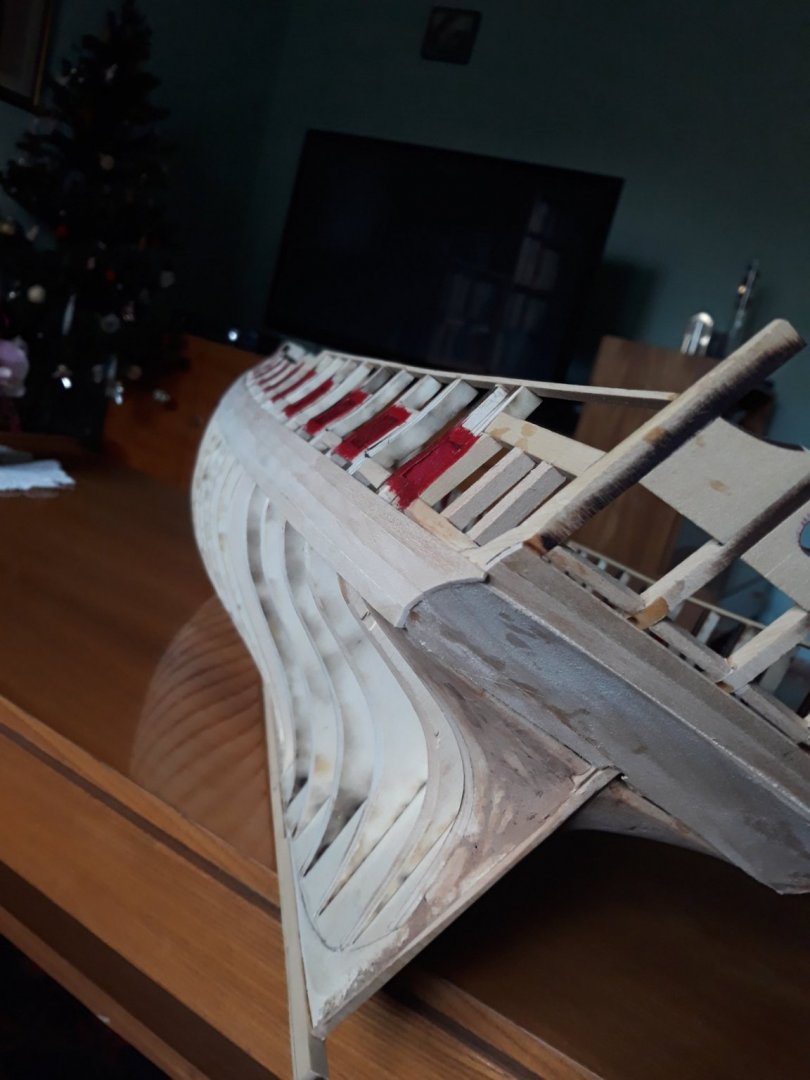
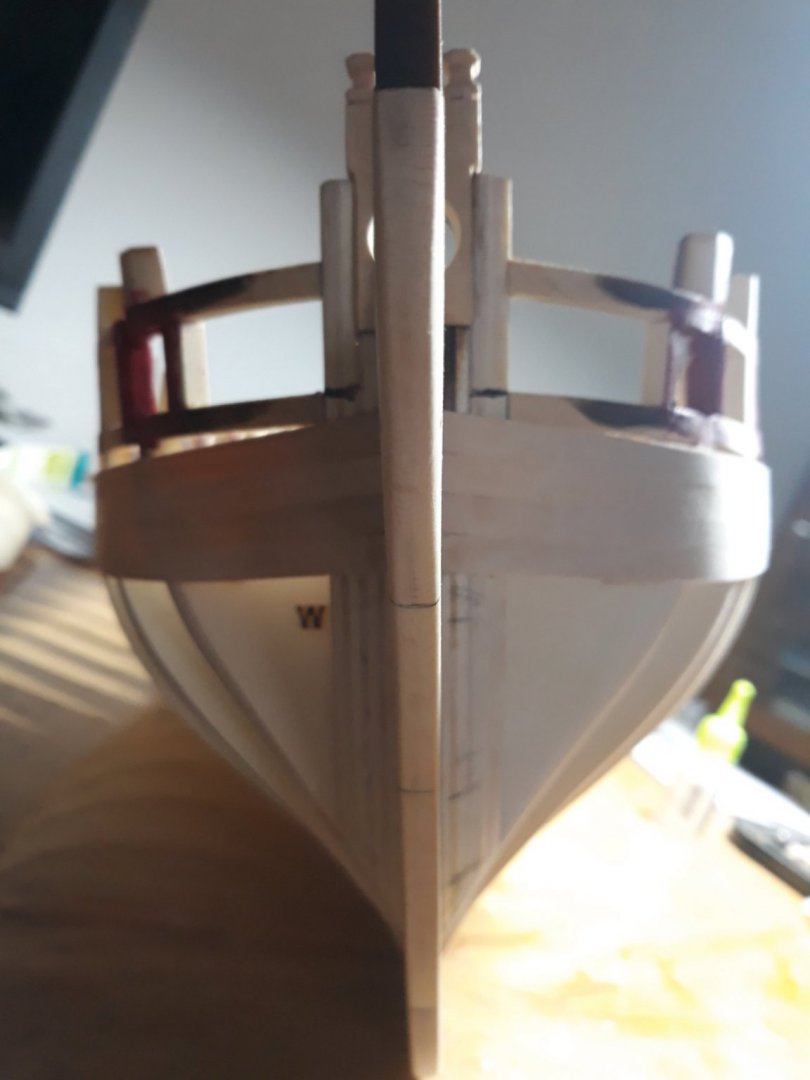
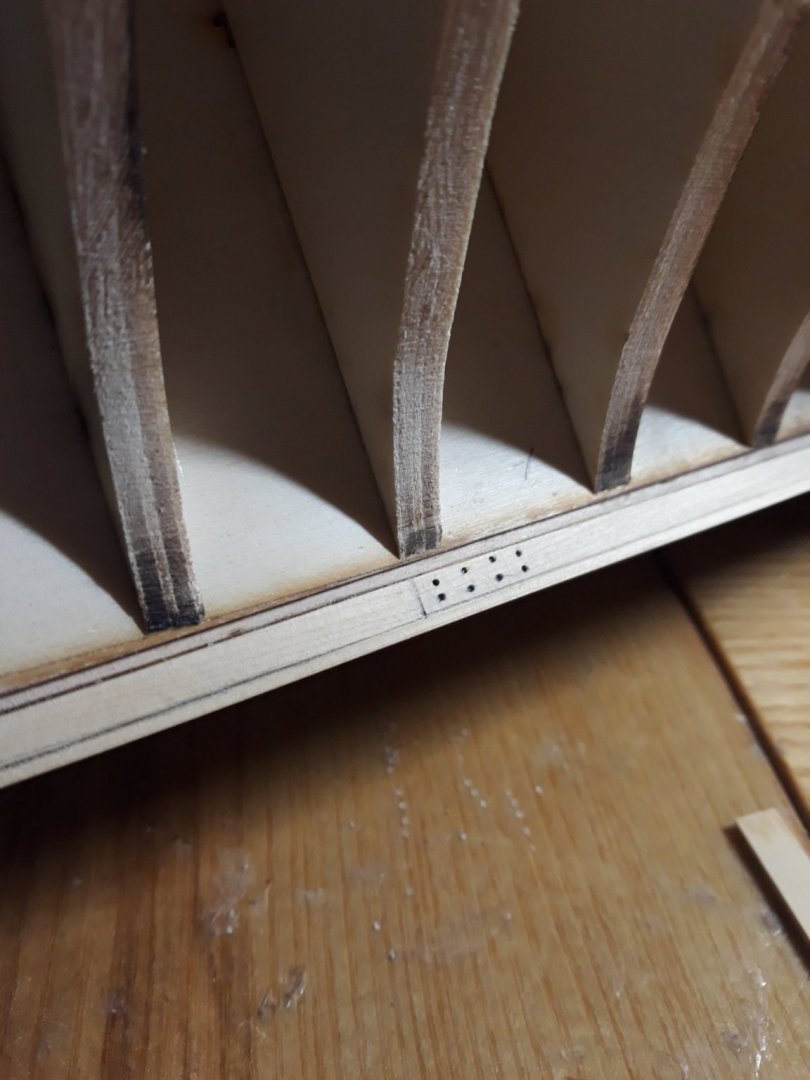
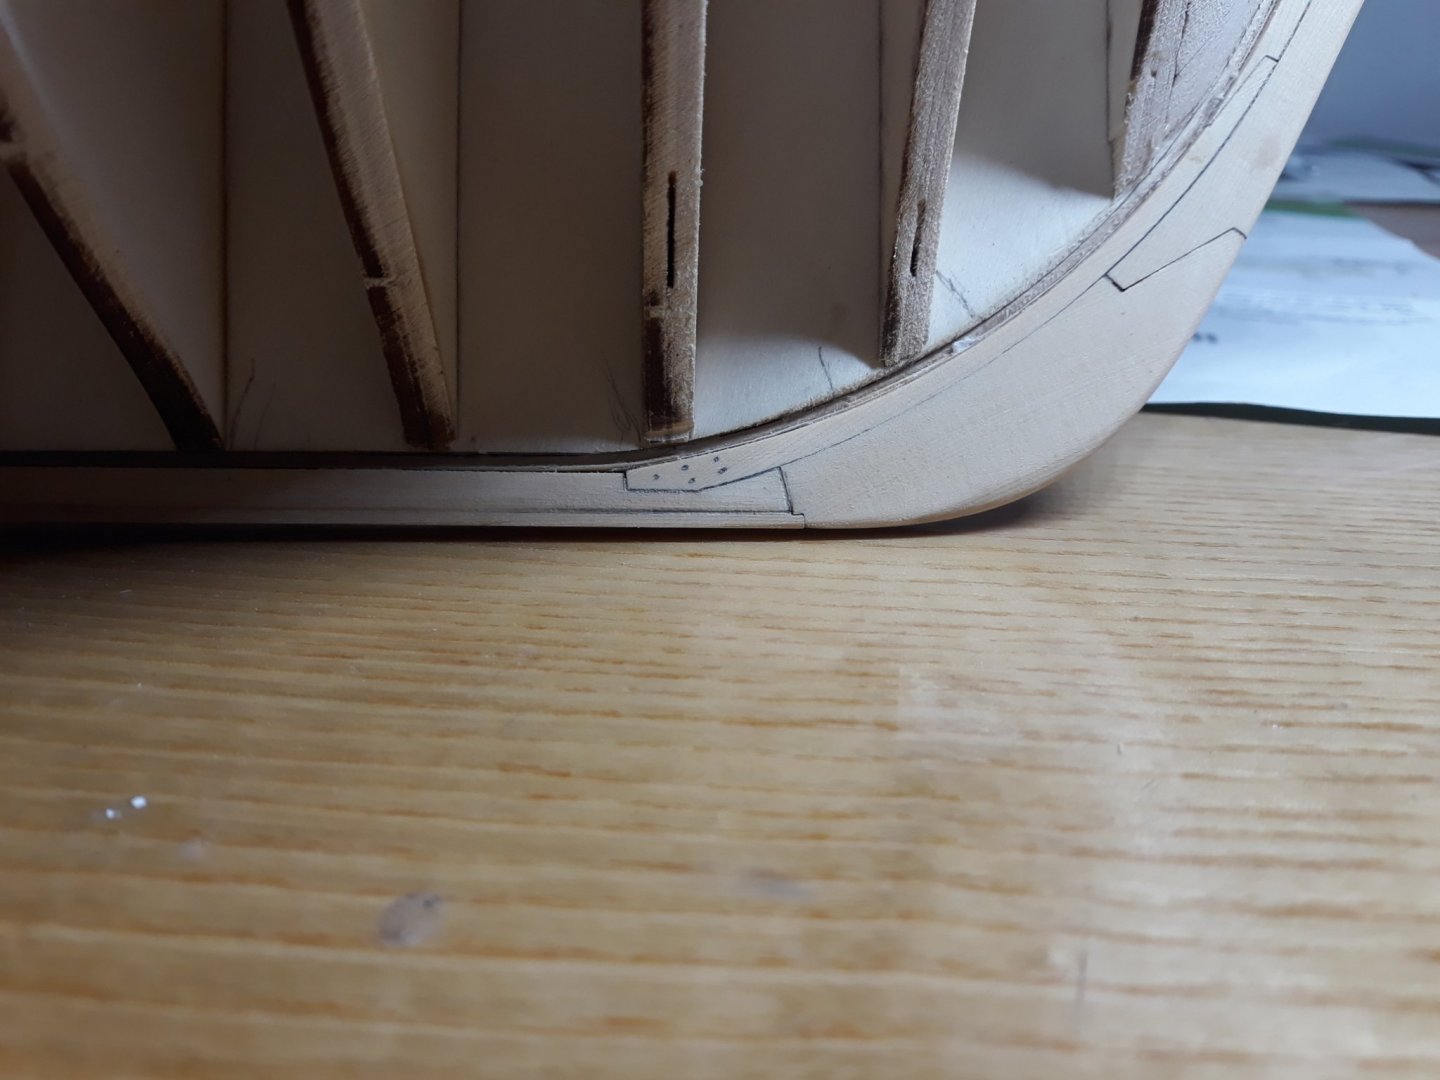
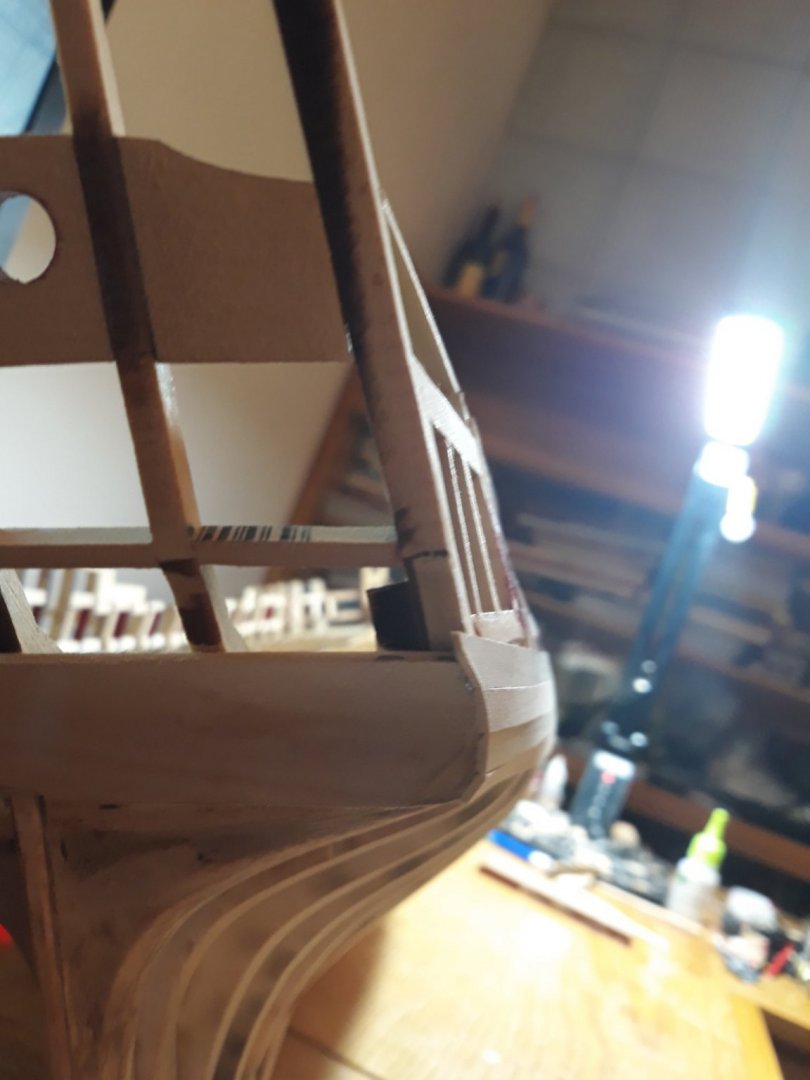
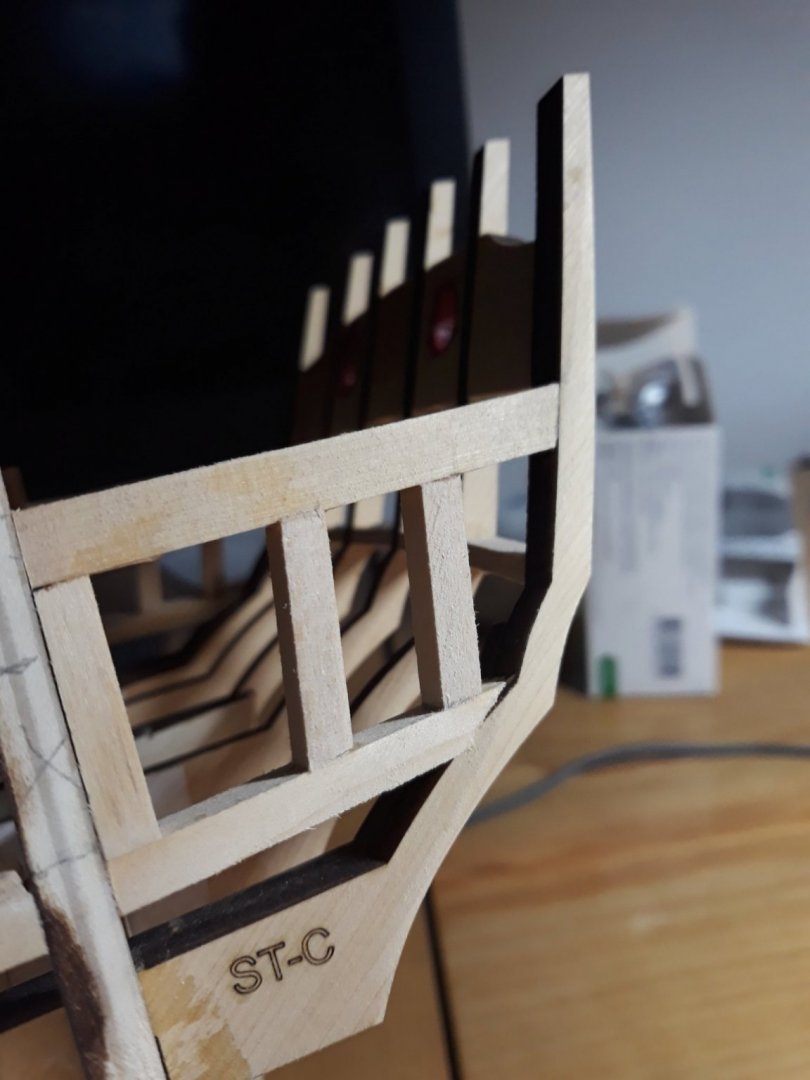
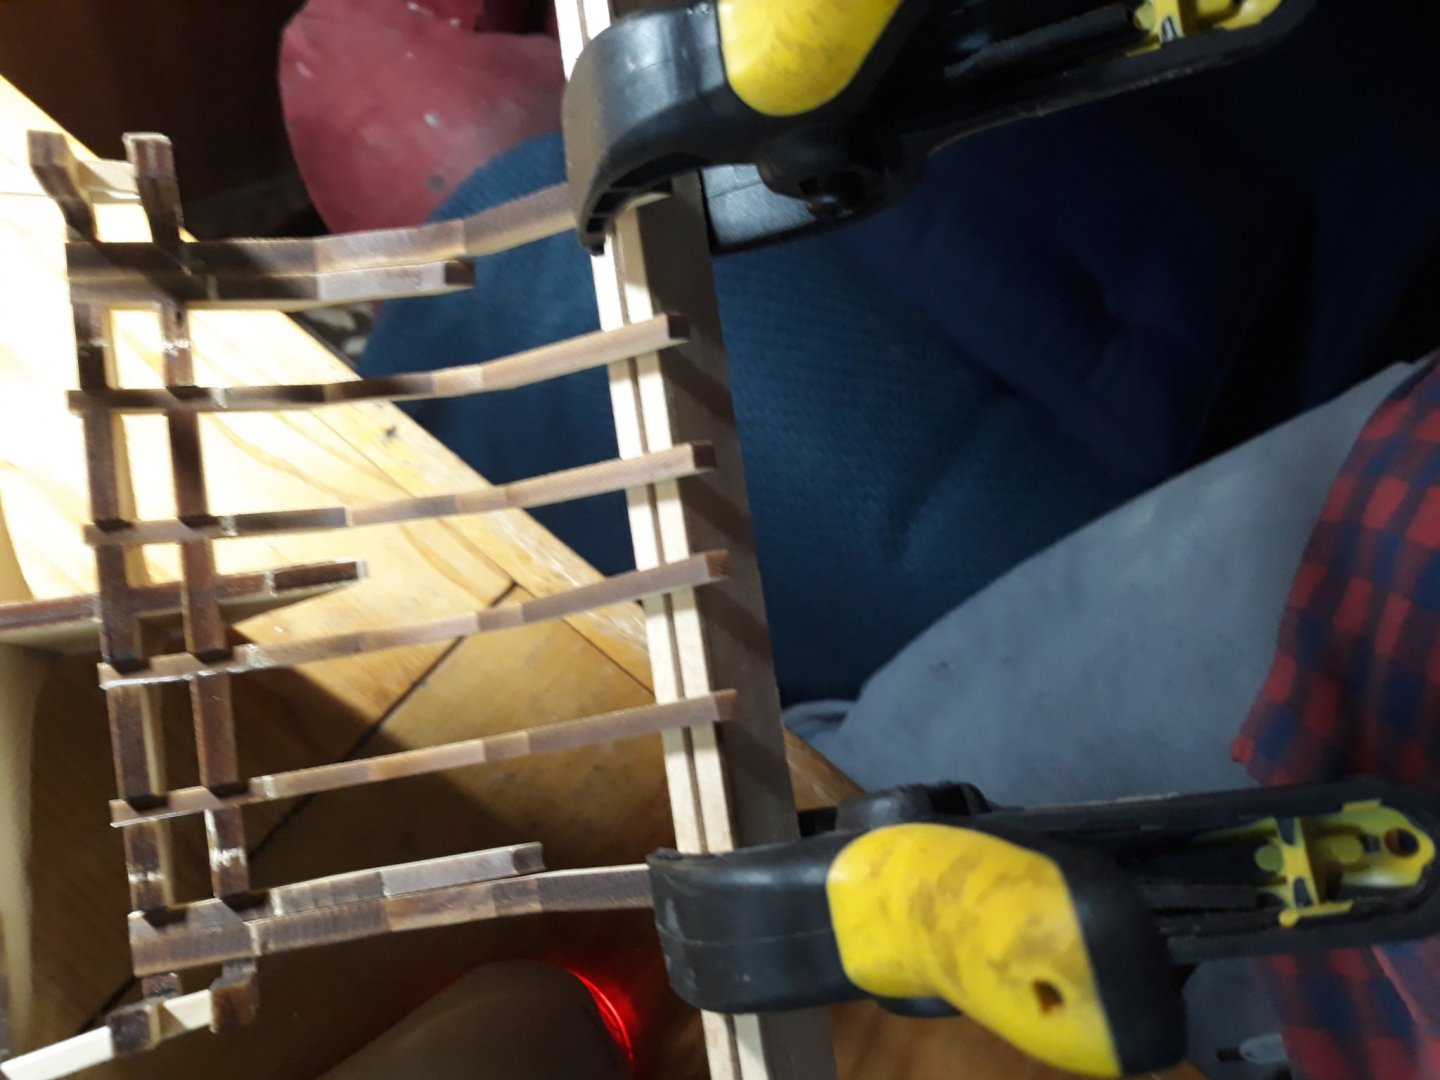
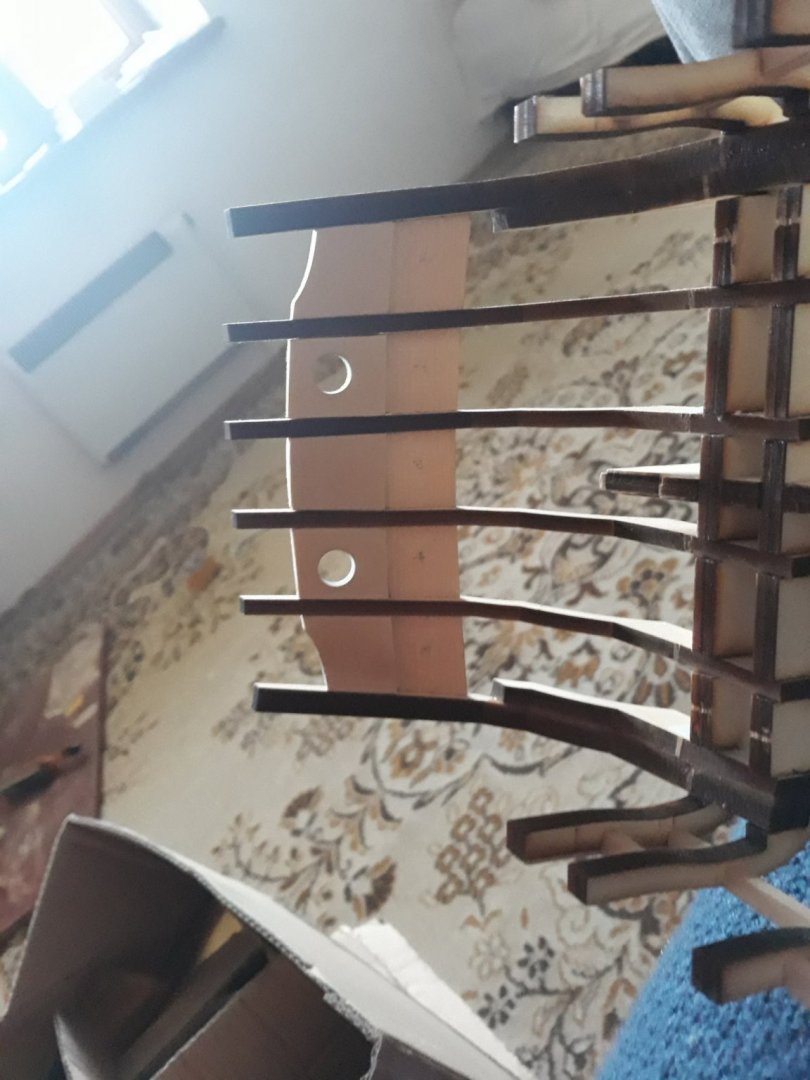
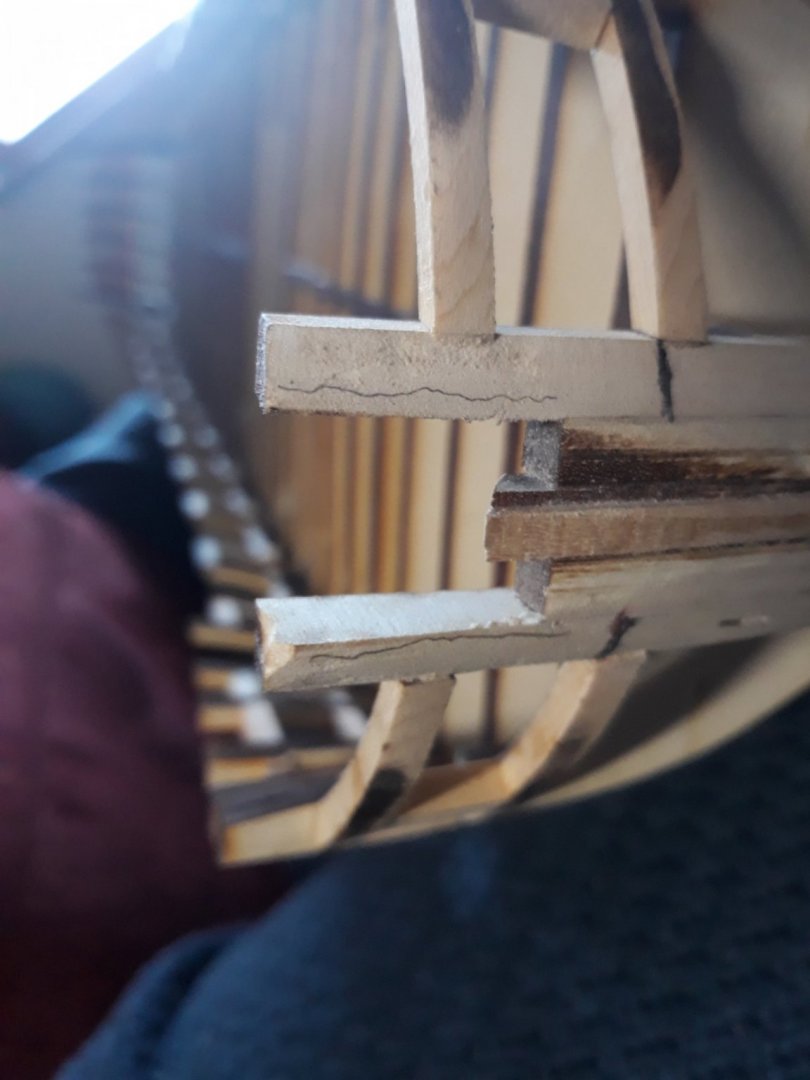
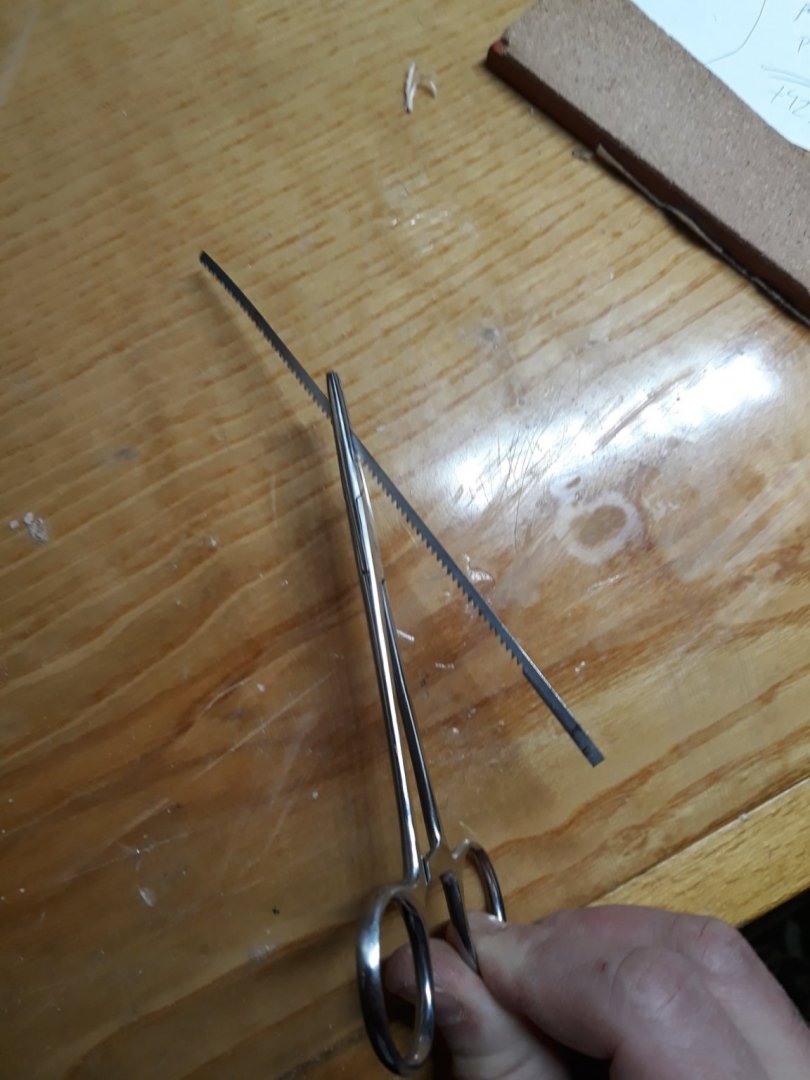
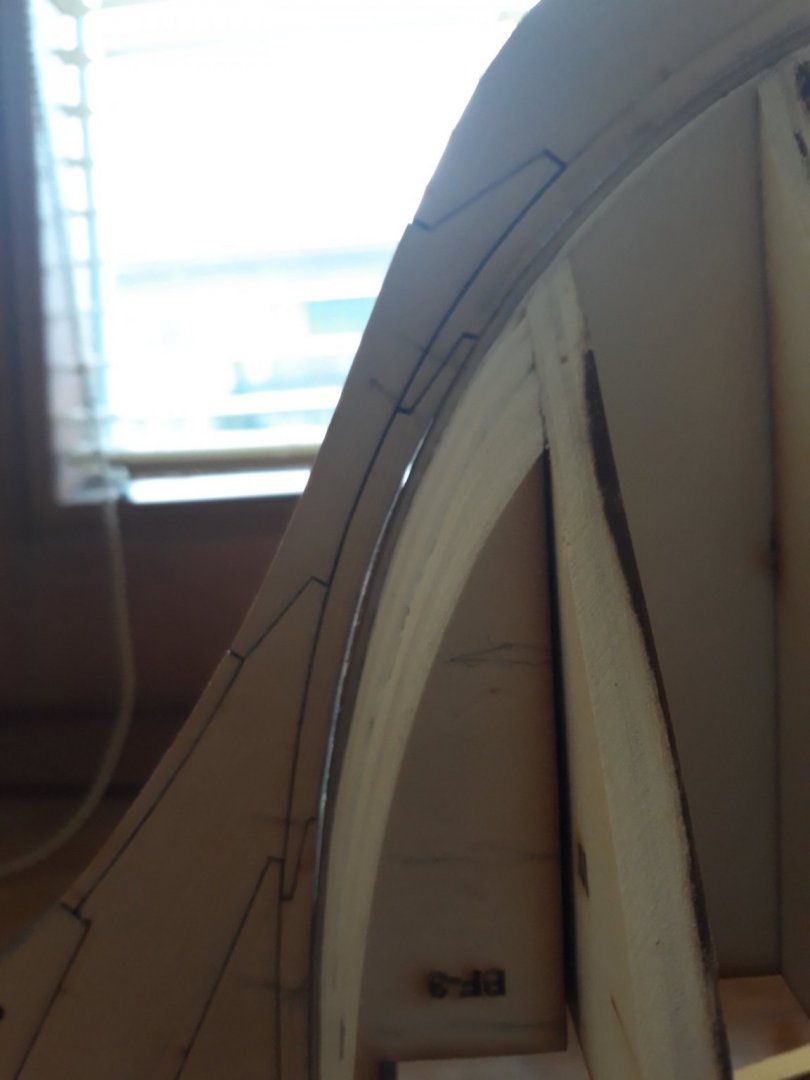
Happy new year everyone! Posting sime pics with showing my way in case it could help somone . As work is progressing at full speed in shipyard. I havent come into much tricky part so far to ask about with such great tutorial plan and i can always observe others way of working. but this is gonna change soon as i run into part 2. I am close to wrapping part one though. Just painting and few installments on gallery. Gallery - i first secured 2 side pieces( st- c ) and used clamps and straight timber to set guide for others. Than i glued up some paper to make some pieces snugged fit. That worked for me quite well. I must say i really enjoy working without keel installed at this point as i can move skeleton to my liking and work even in by bed :D. Well I decided continue this way up to finish first part and last will be attaching keel. I run into one problem Chuck wont be entirely happy about. There is always curvature stem gap so i had to fair from stem - i did probably little too much there which cut off almost half from that beautiful joints. I can live with that as i prefer stem to be stuck with all its round surface firmly. But doung it it also ensures rabbet line to be uniformly wide which is important. As much as i feared fairing glued extentions, it want finally that bad. I worked with knife to bring it as low as possible before i sanded. With baswood easy. I must say that Cedar that came in is very unique wood i never experienced such. Very stiff. I mean very. I was happy to make extentions with basswood i would struggle cutting and smoothing that alaskan cedar- another thing. I would probably invest as time goes in some sort of right angle electic sander. It consumes most of time to try to maintain straignt line it manually and its pain wirh end grains and small oarts. Not bad much with bigger parts. . Well i guess it wont be needed thst much from now on :D. I have another conundrum to solve. I realised i missed to gkue bf part 1 . So gap between main bollards is narrower for that measures. I will have to rasp off from there than. Fingers crossed. Now to finish sternpost and to paint. Boklards than and keel at the end. Am i correct with windows position? . Thank you all a lot for view etc..and take care.oh look what saw i made out of clamping scissors. Vlad.


-
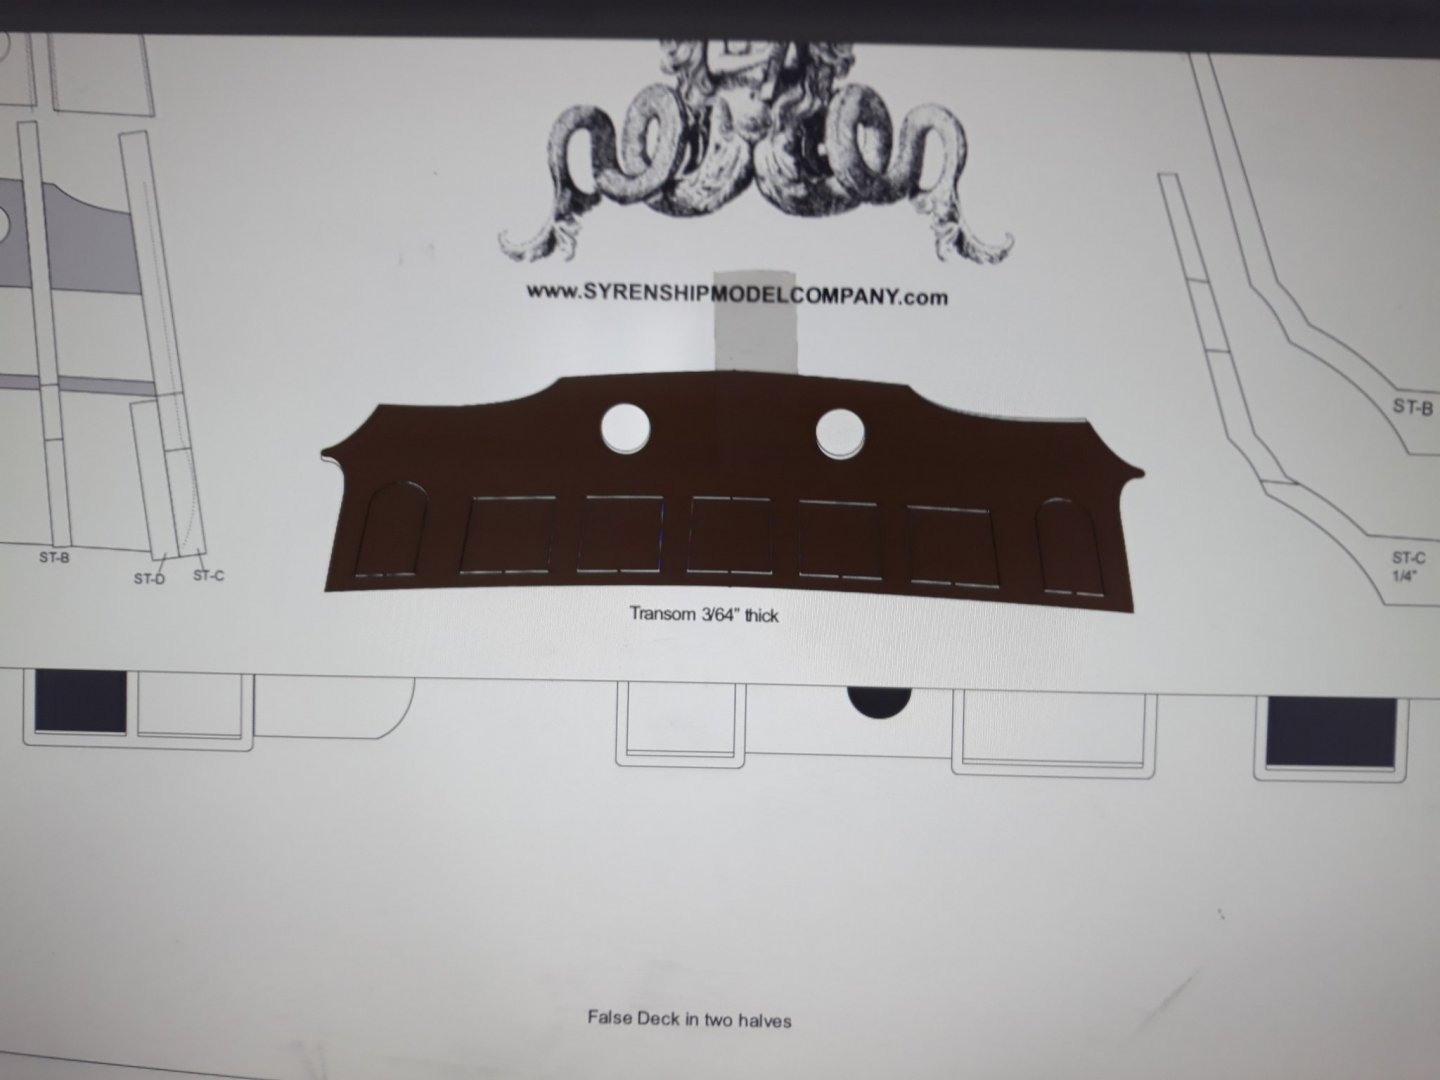
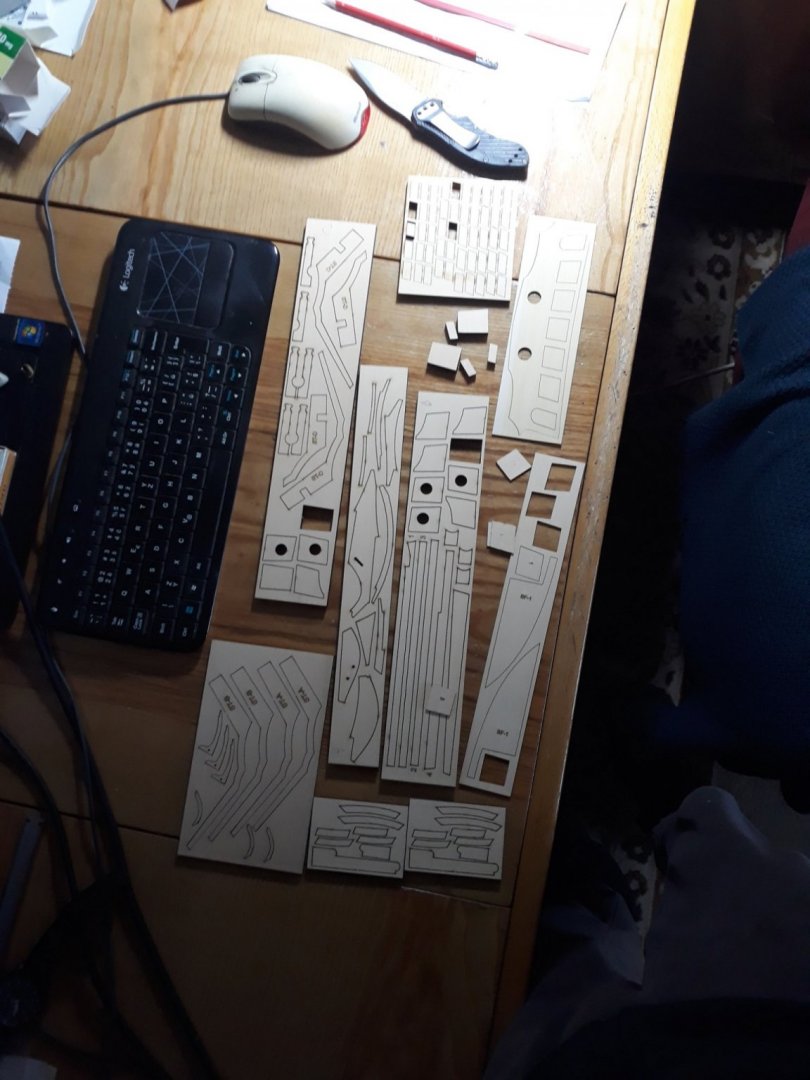
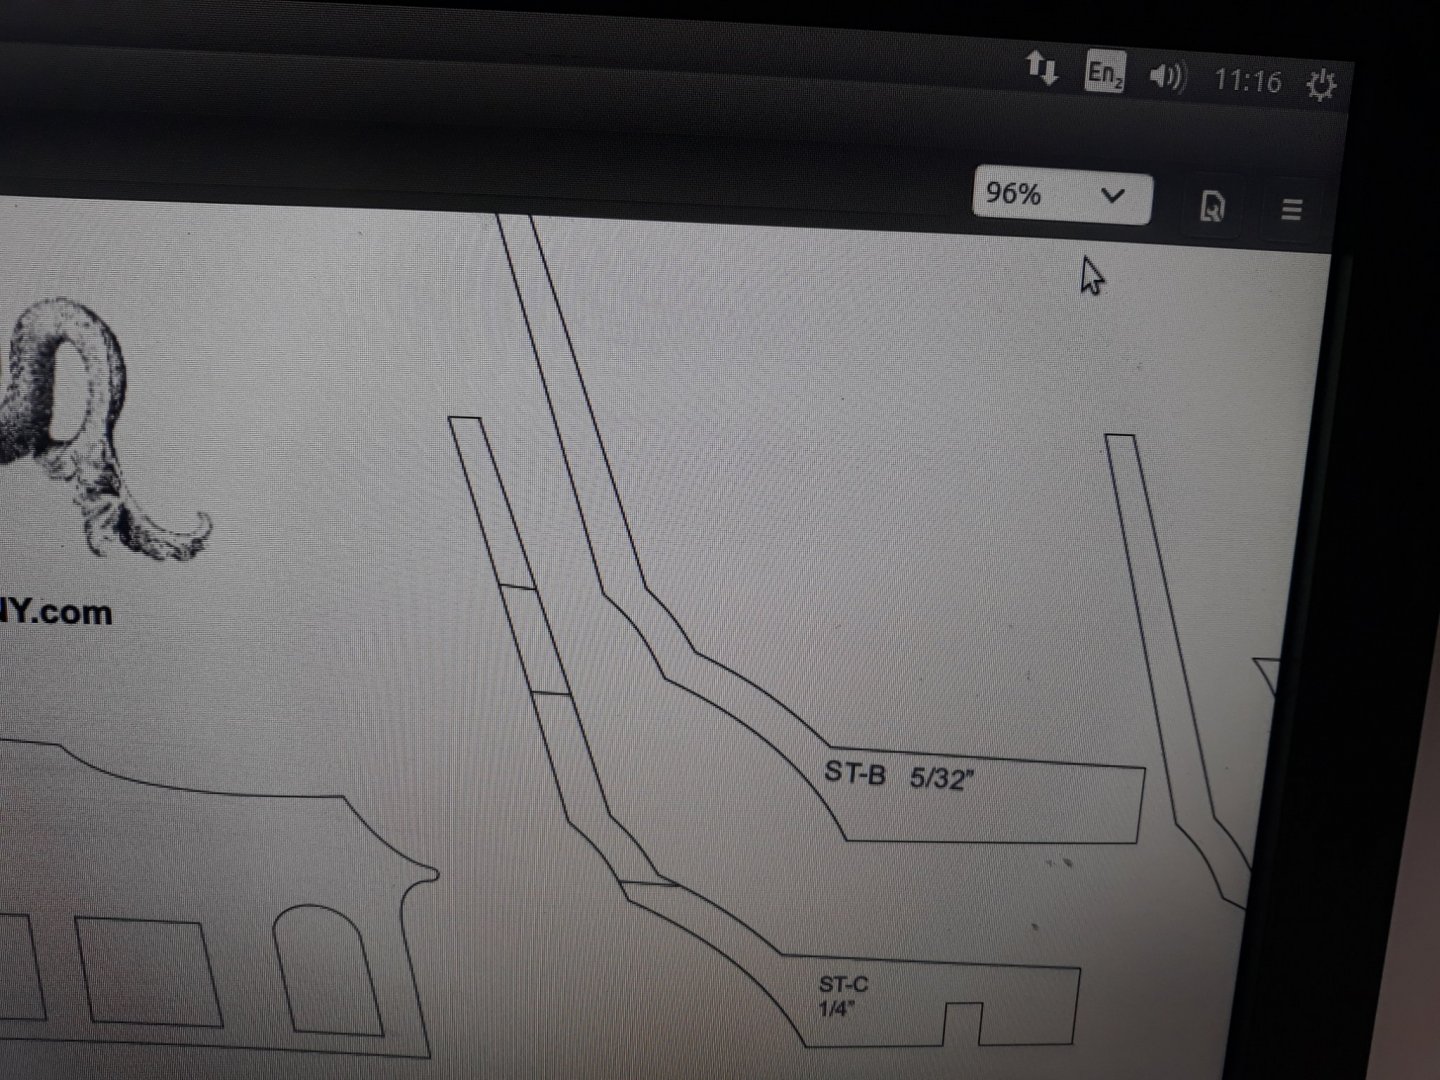
Dear all ,It is here! And...... it matches the bulkheads I got cut from a friend when I shrink plan on monitor to 96% ! So all work wasnt useless.! Cant say how happy i am. I must say those are such great parts, even timbers i already made myself for cannon windows are there in plenty. Main Bollards in parts in case of mistake wow! So i can use those timbers anywhere else i would need to. Thank you Chuck. So now keel is gonna to be made and move forwwards towards finishing part 1, before I head towards hull planking.
-
just a little bit of patience Ron:)) first custom fee payments etc...so few more days. i feel your curiosity im probably anxious ...working on stand atm.
-
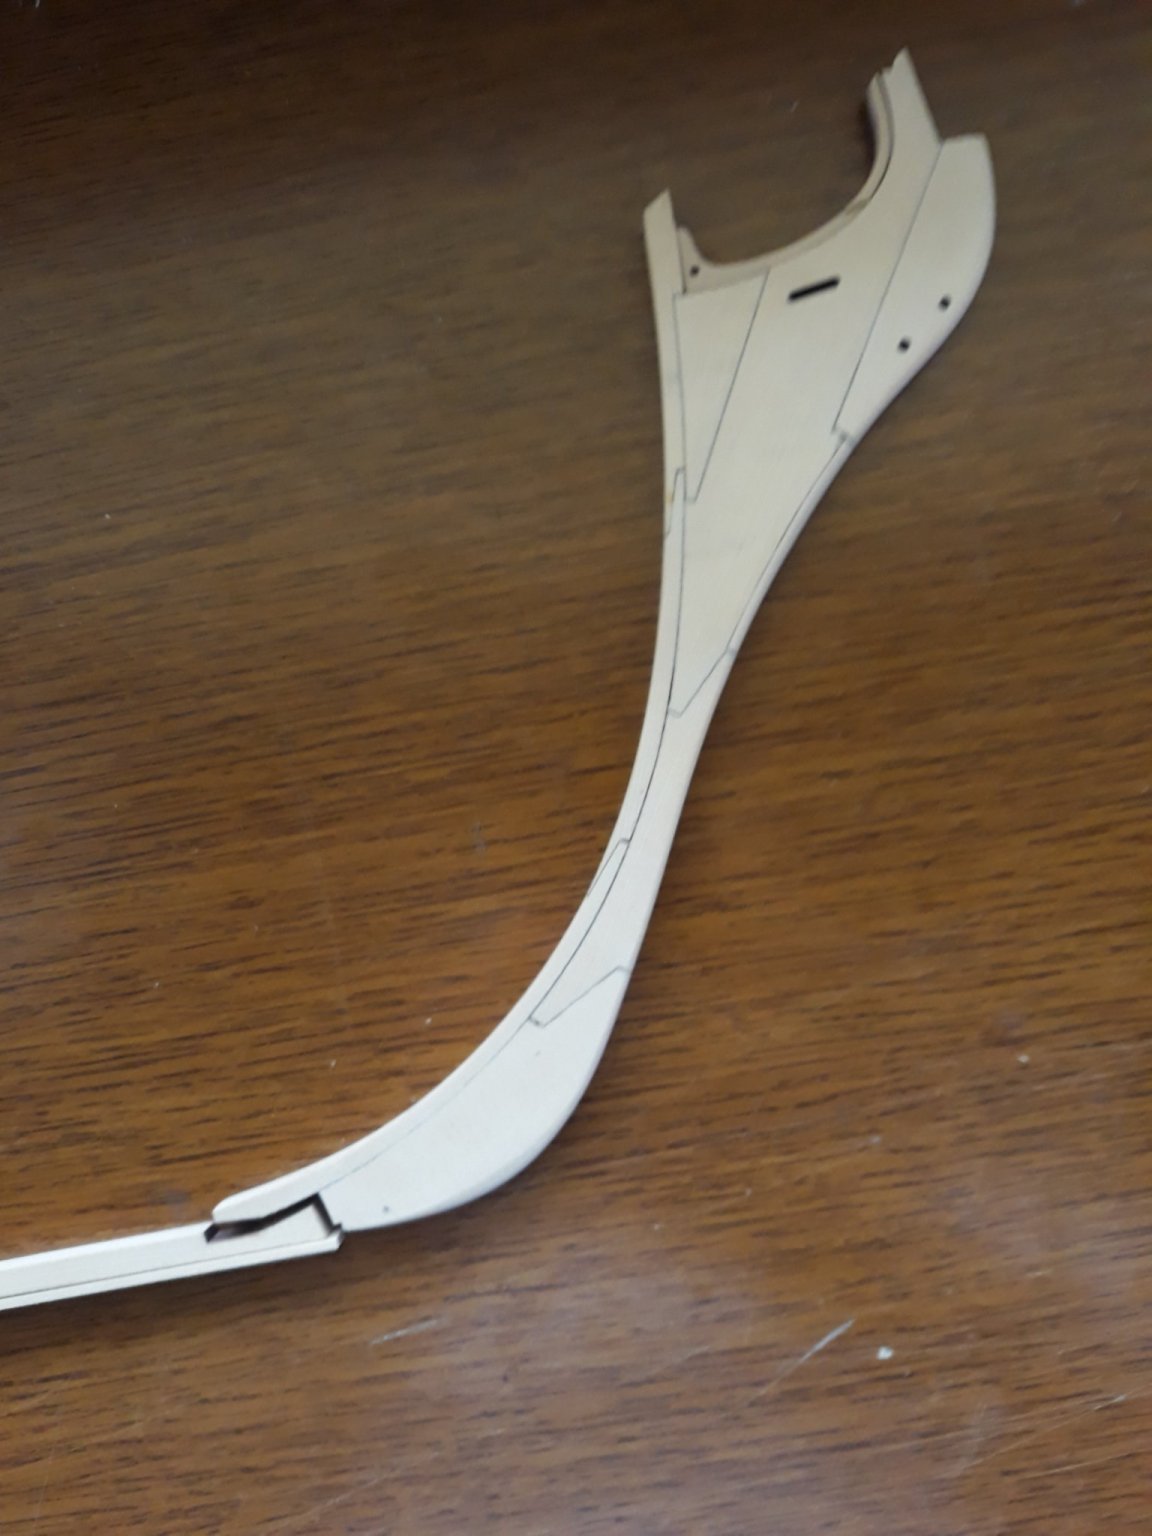
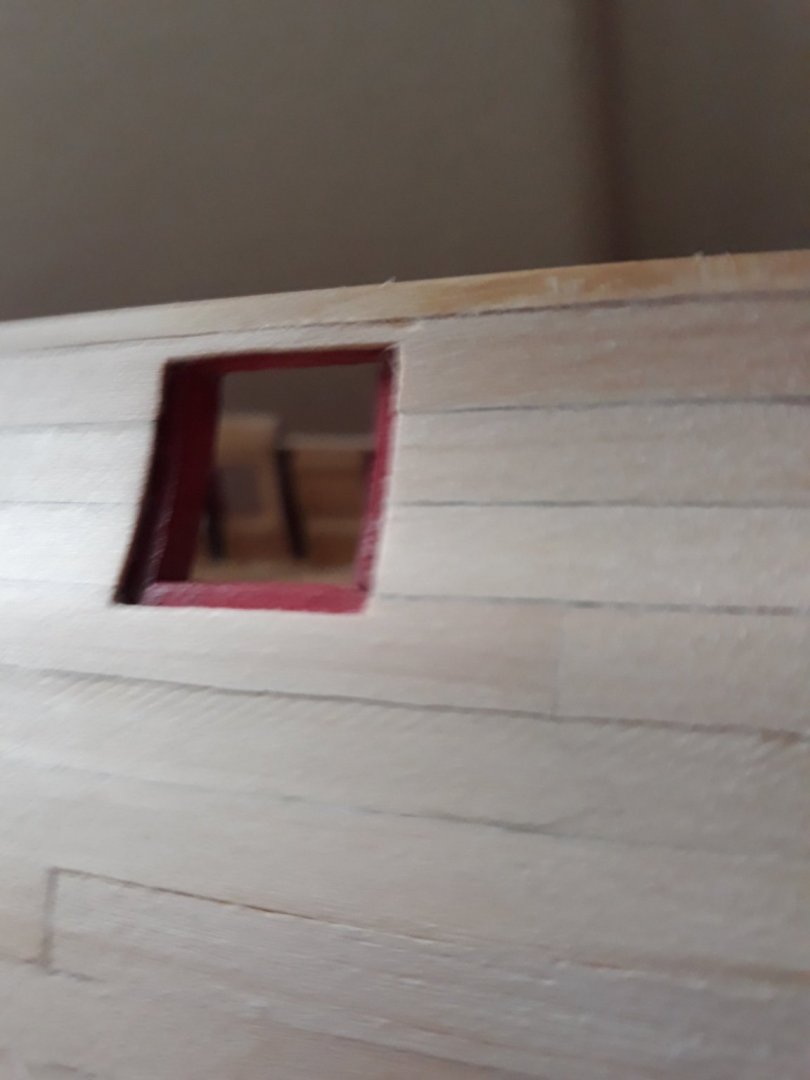
good day all just a quick update here, I got a message from customs today to pick the parcel from U.S. gosh what a relief, cant wait though to see it and measure !!! my scaling doubts etc... and continue. meanwhile i settled on red shades. it will be carmine like, more vith violet, darker pigment in it, here is the pic. no matter what angle light is affecting it a bit, its a color Chuck put on cheerful. slifghly subtler than shiny red. happy holidays vlad

-
Veery pretty Mtthias. congratulations !just wow
-
i love to see old lovely transferring methods... tedious but there something into it wishing all luck V.
-
Kathy i built mine (1:24 ) in 11 months :)) enjoy the built its lovely princess.
- 48 replies
-
- 1
-
-
- Cutty Sark
- Artesania Latina
- (and 1 more)
-
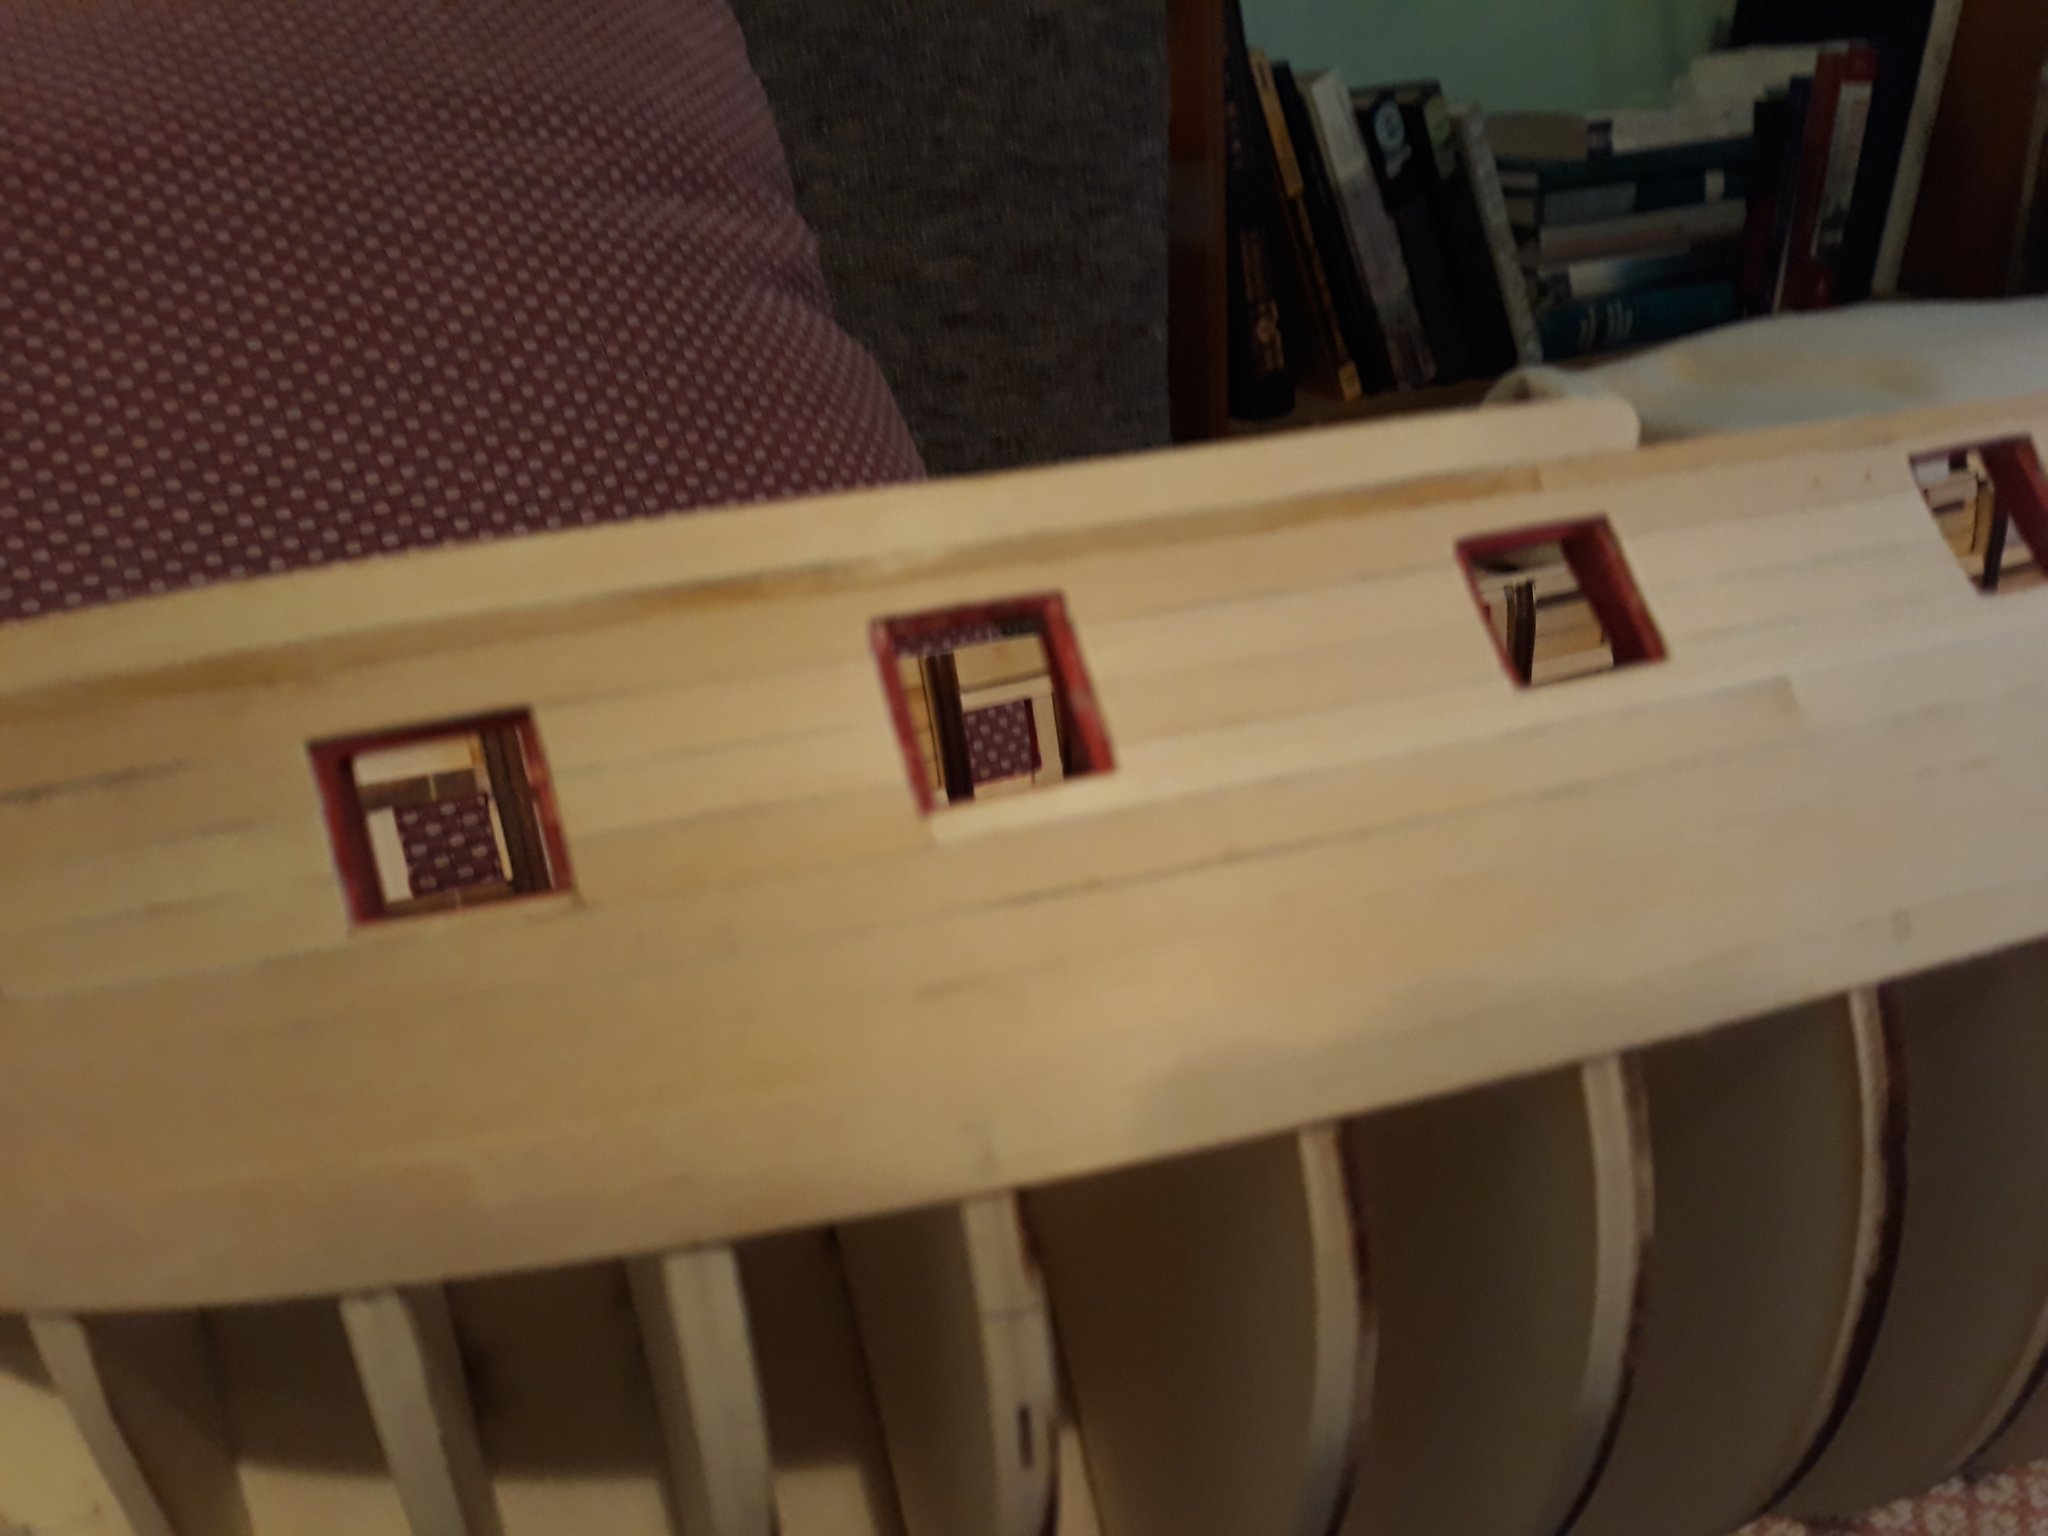
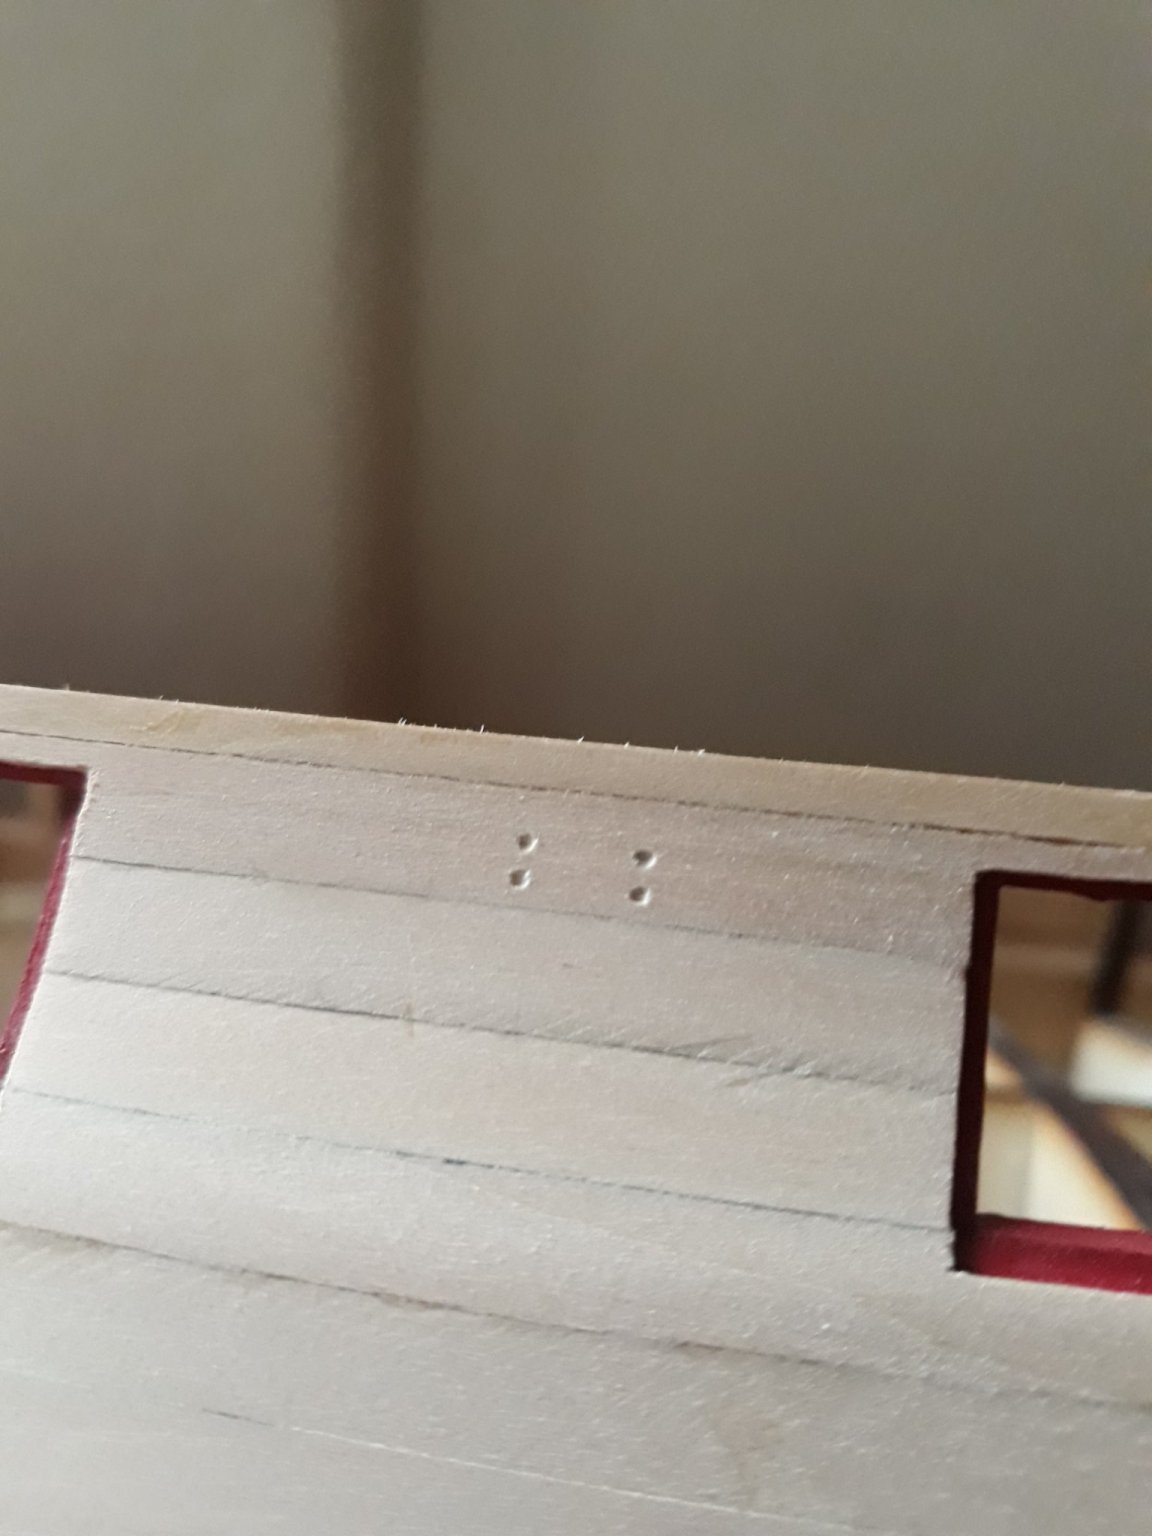
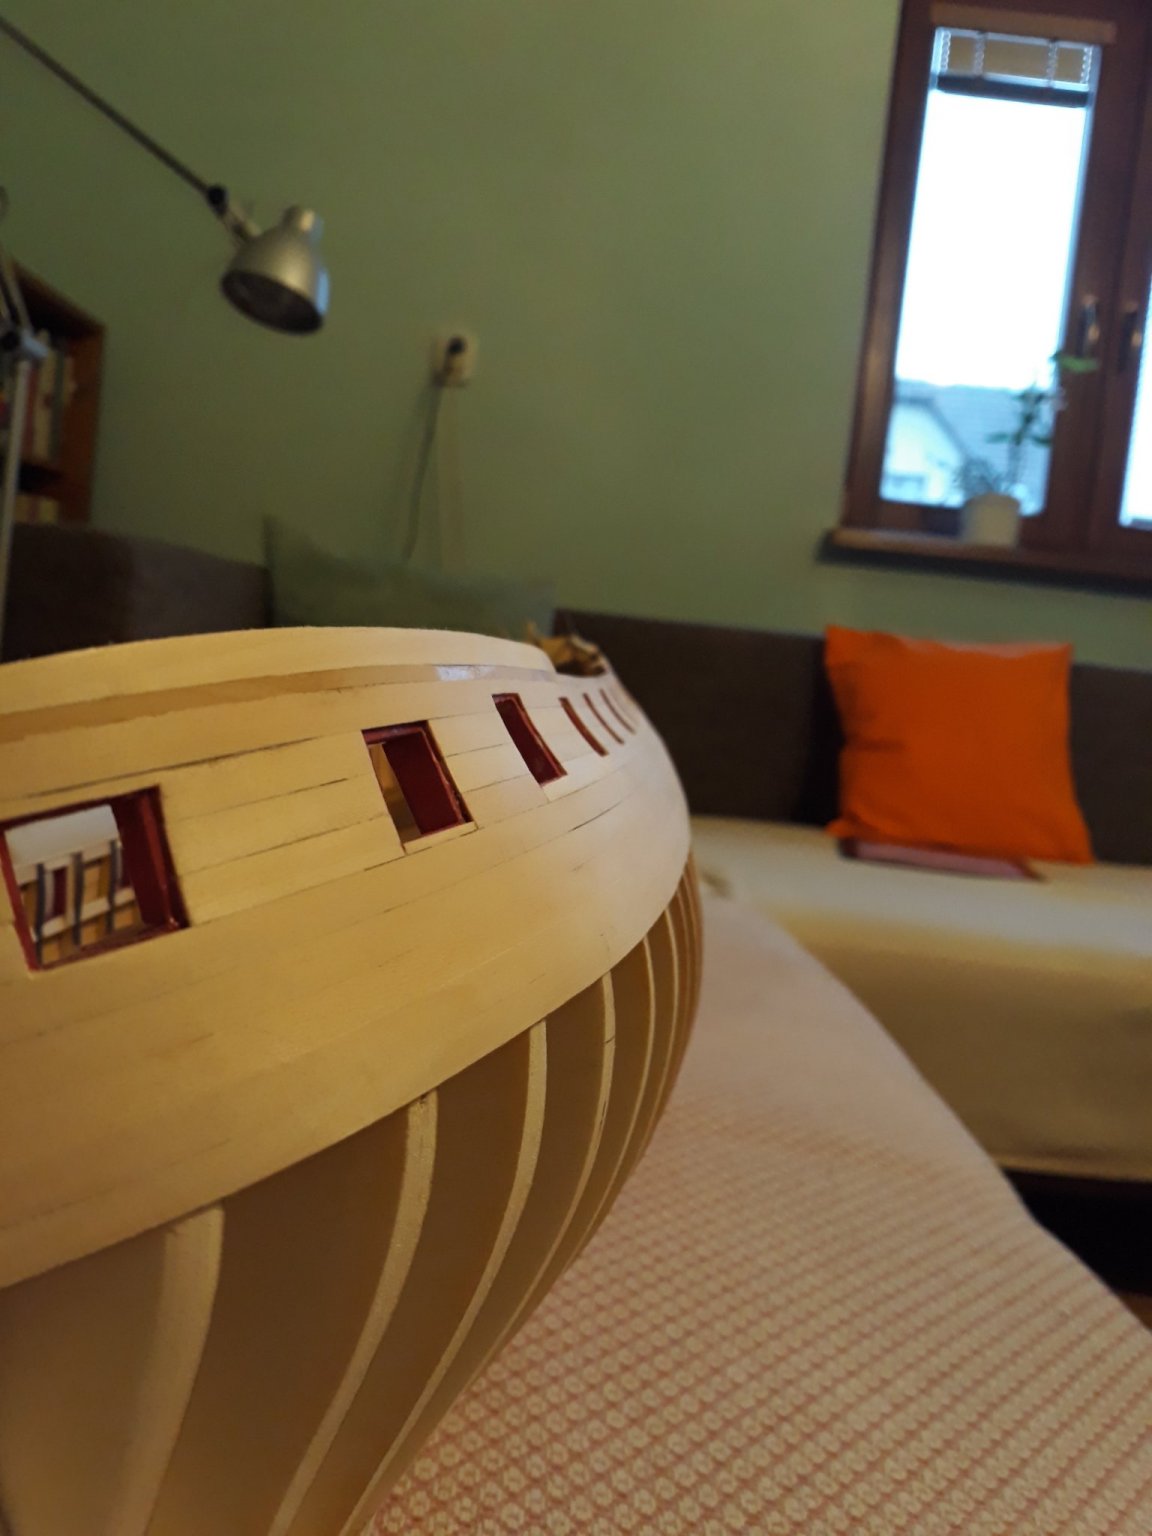
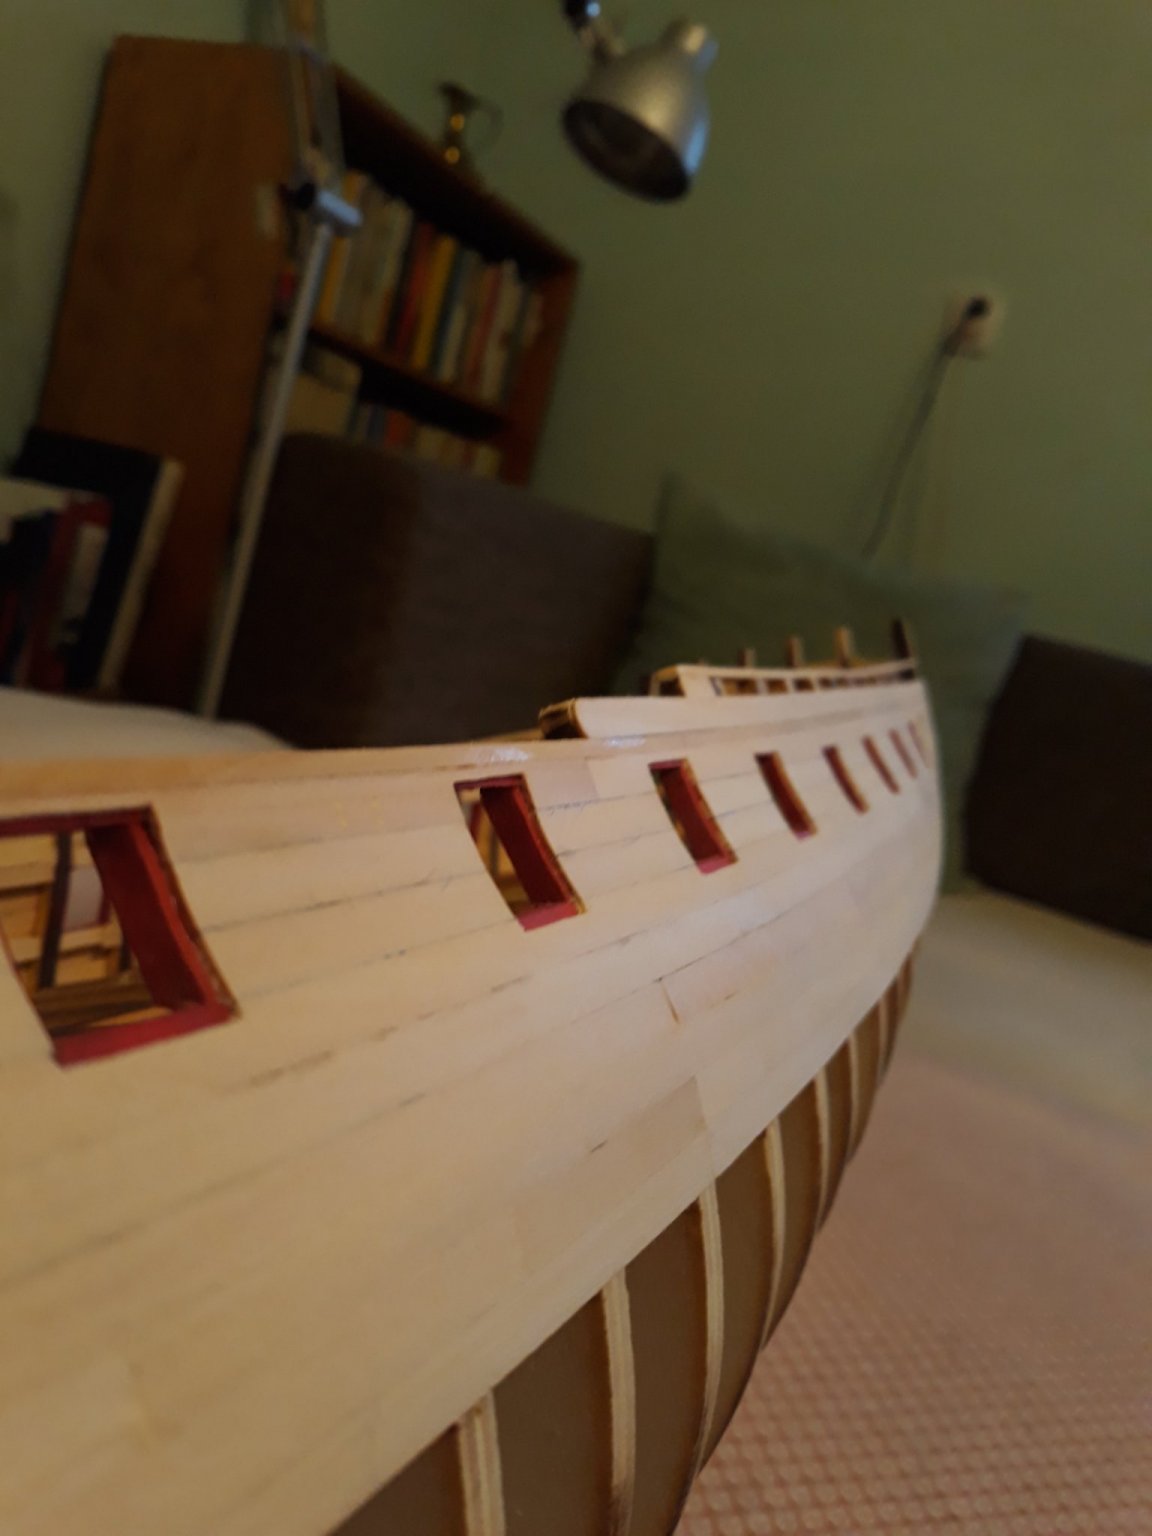
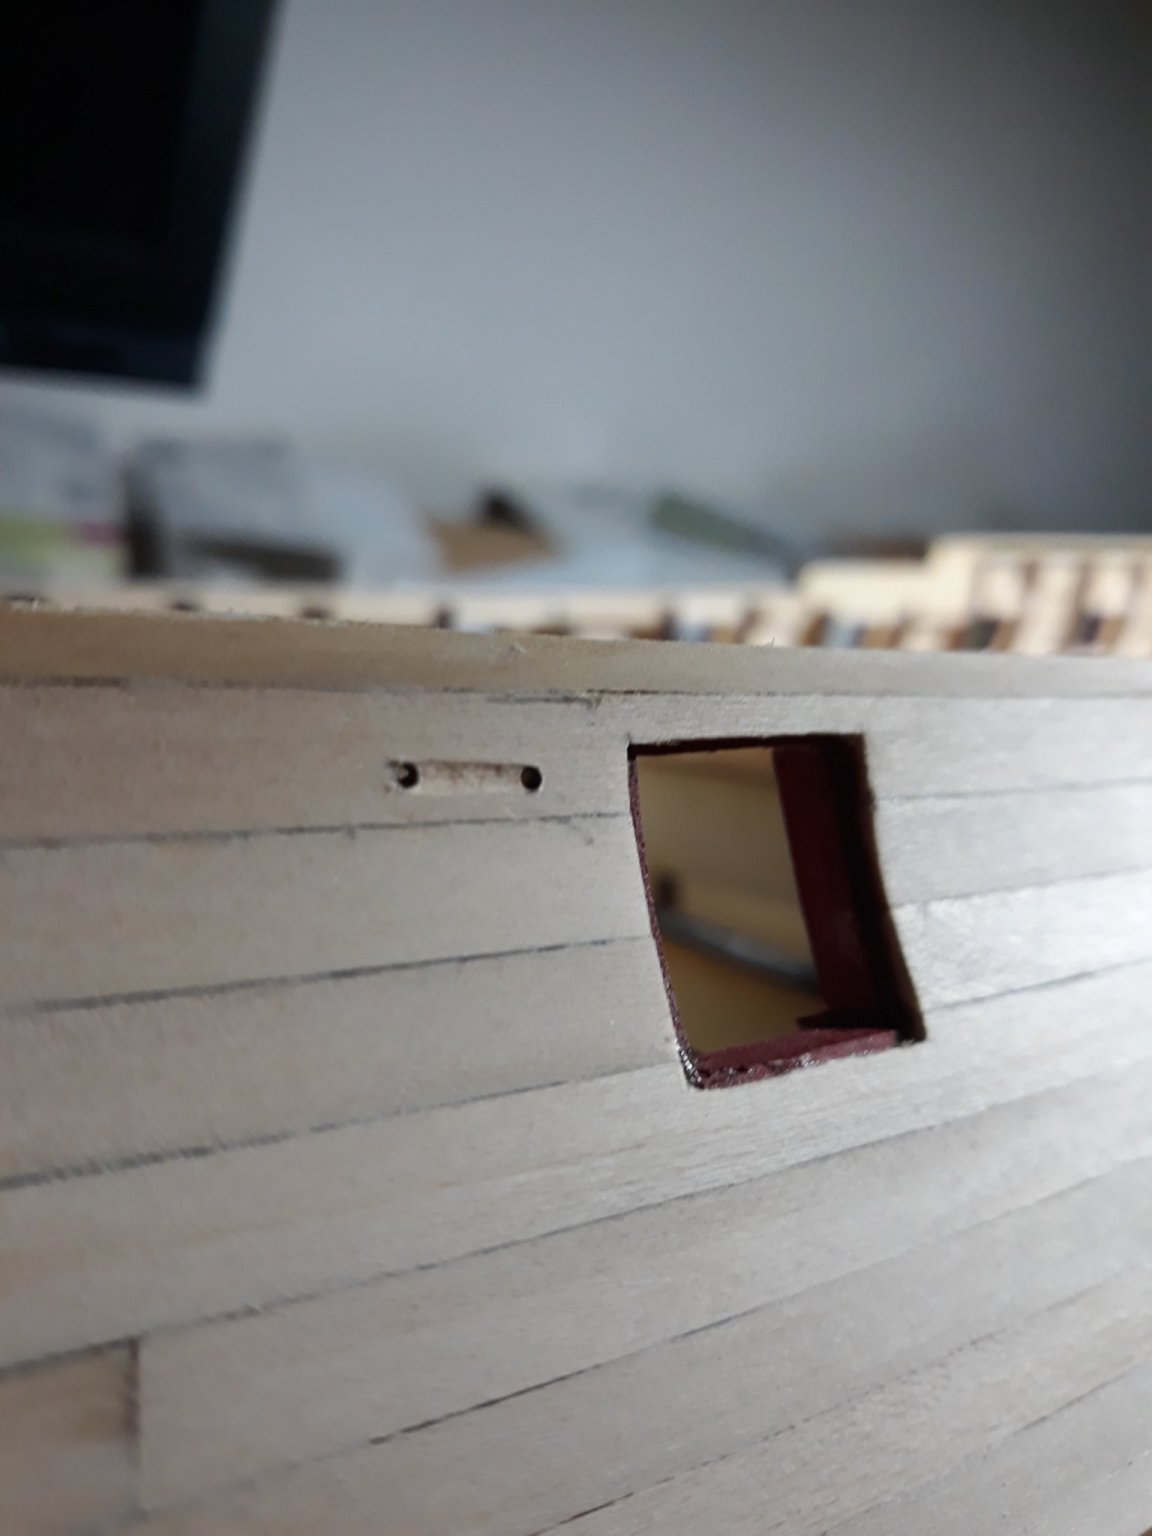
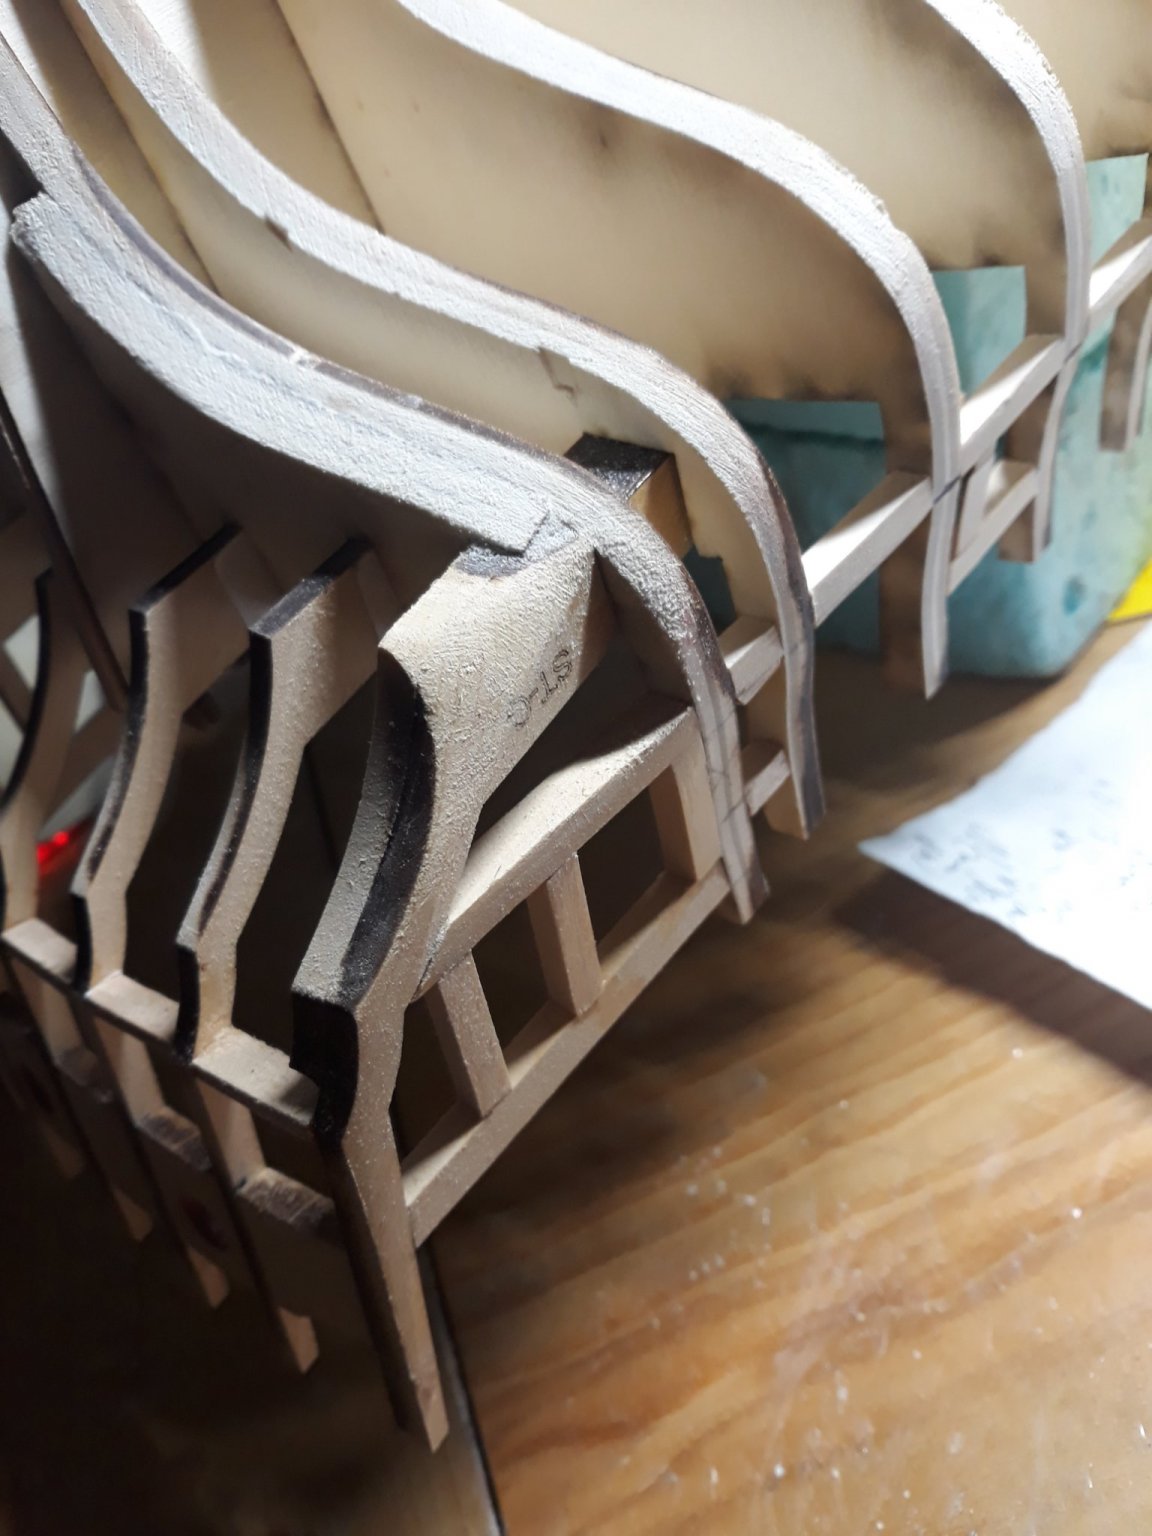
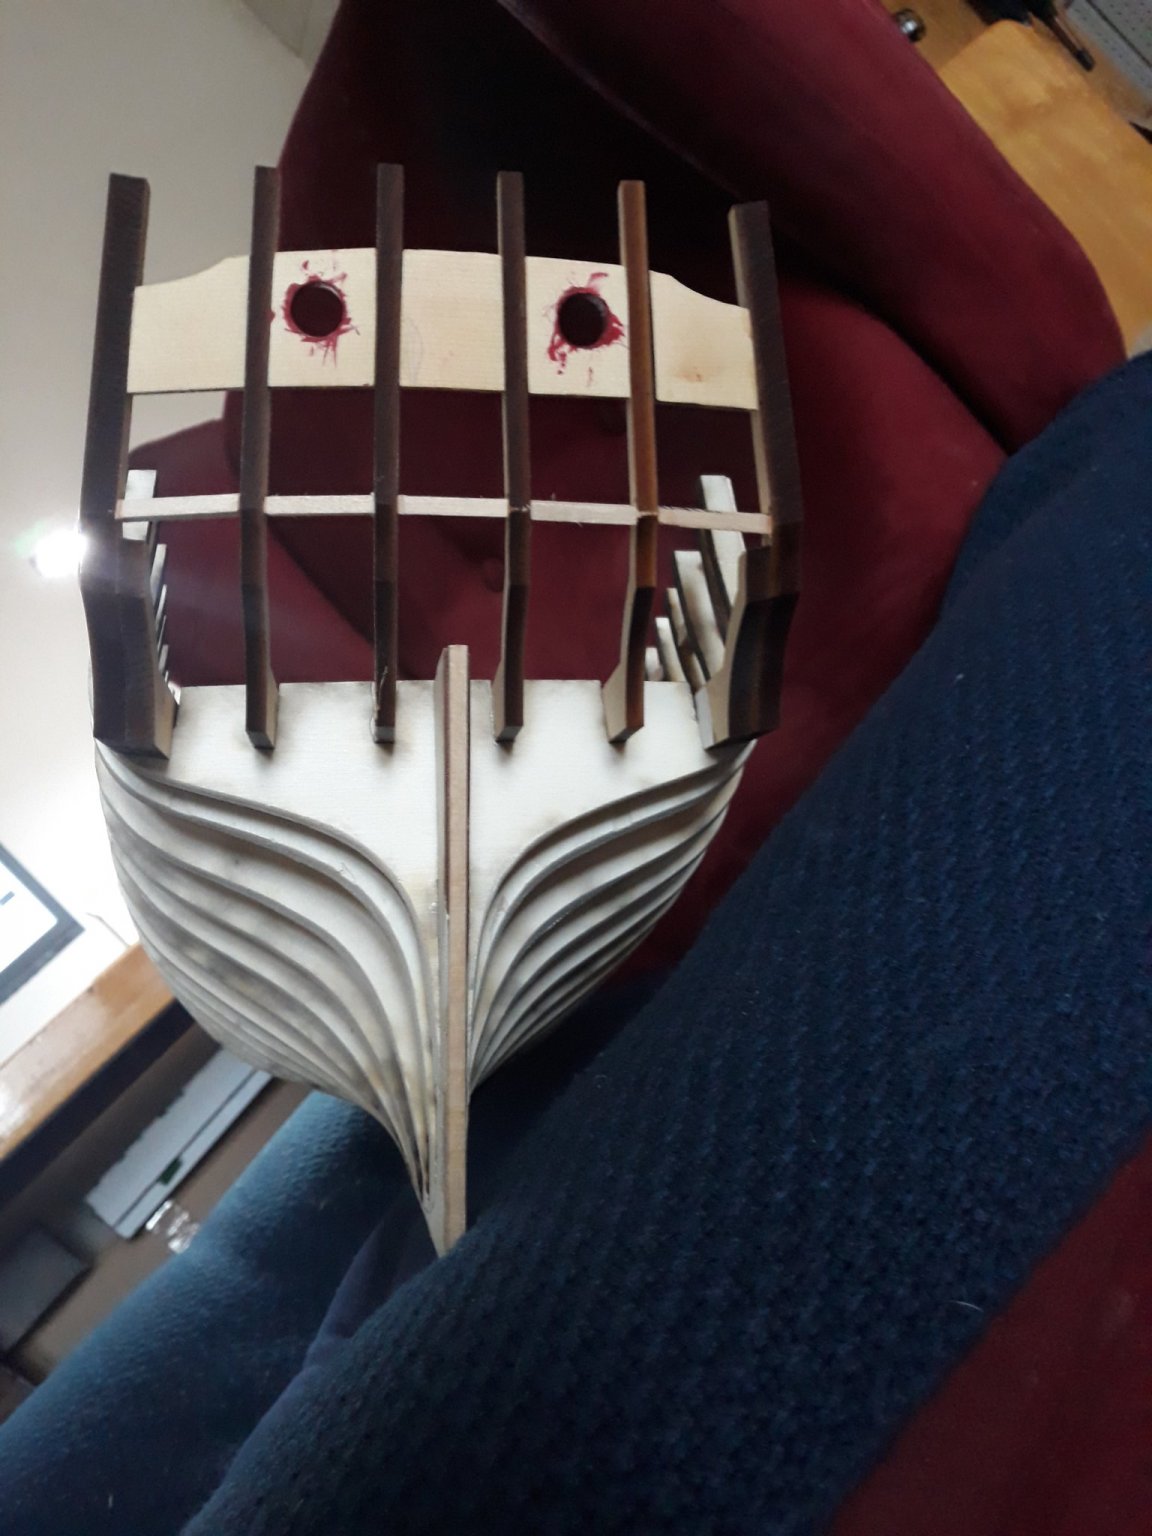
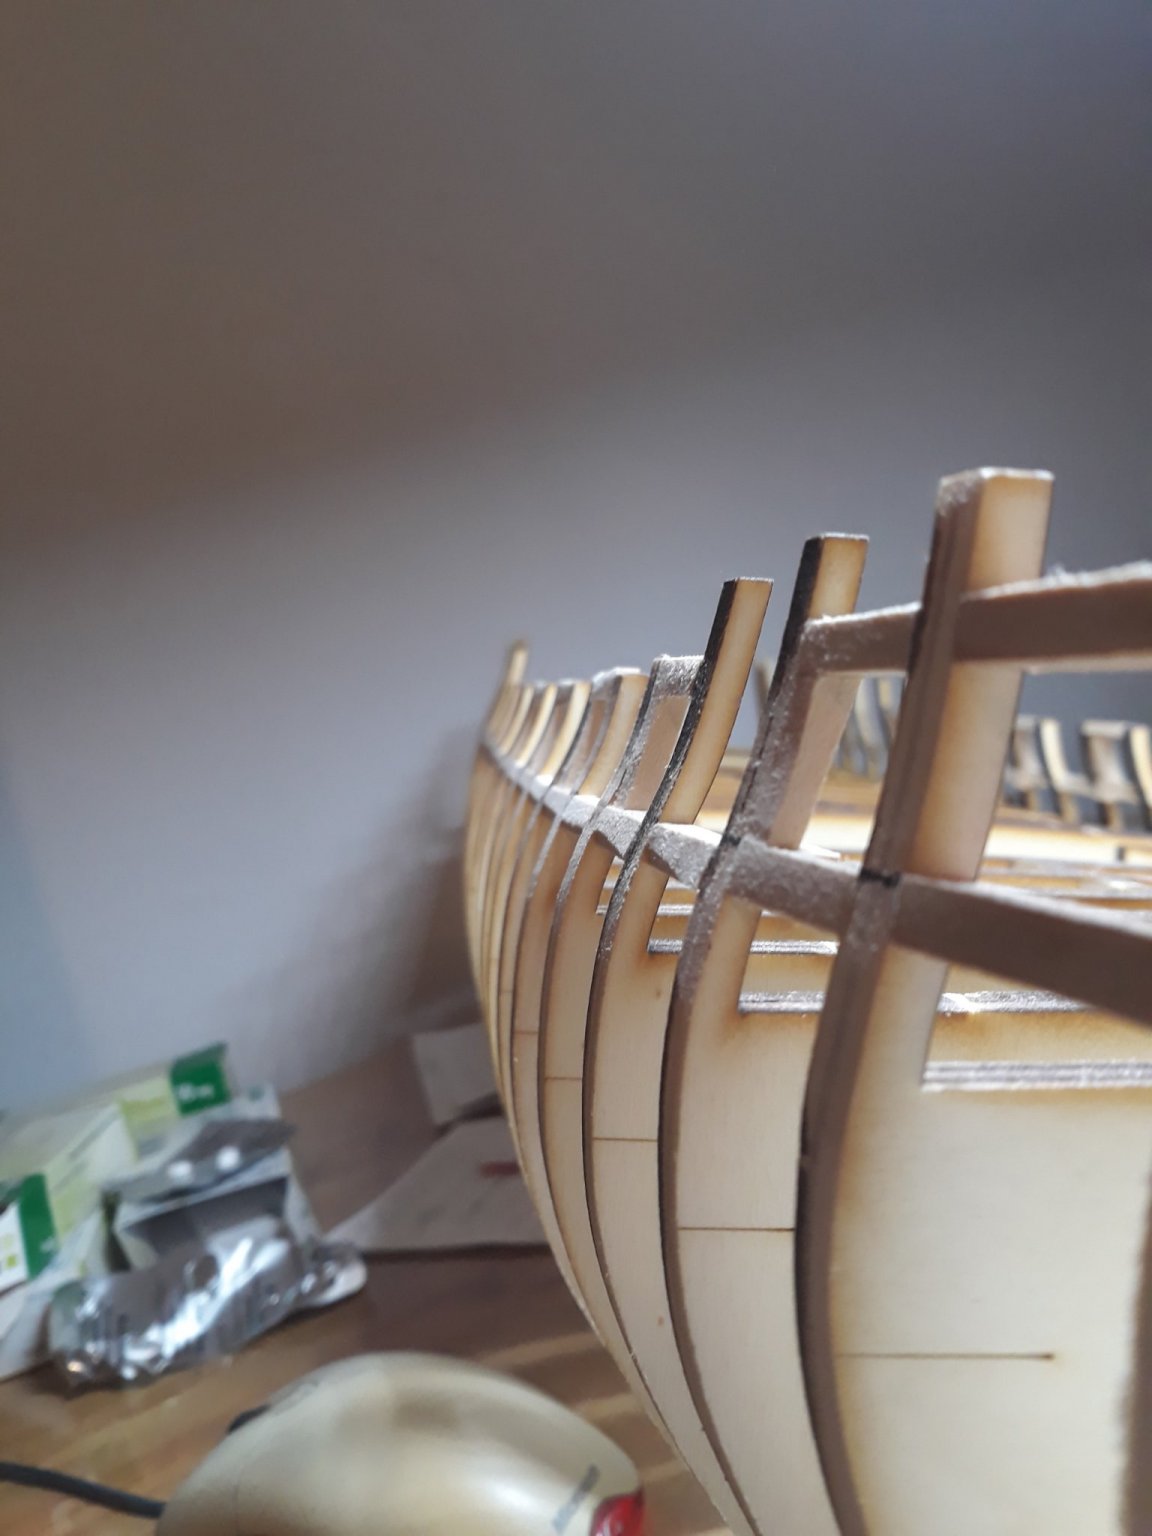
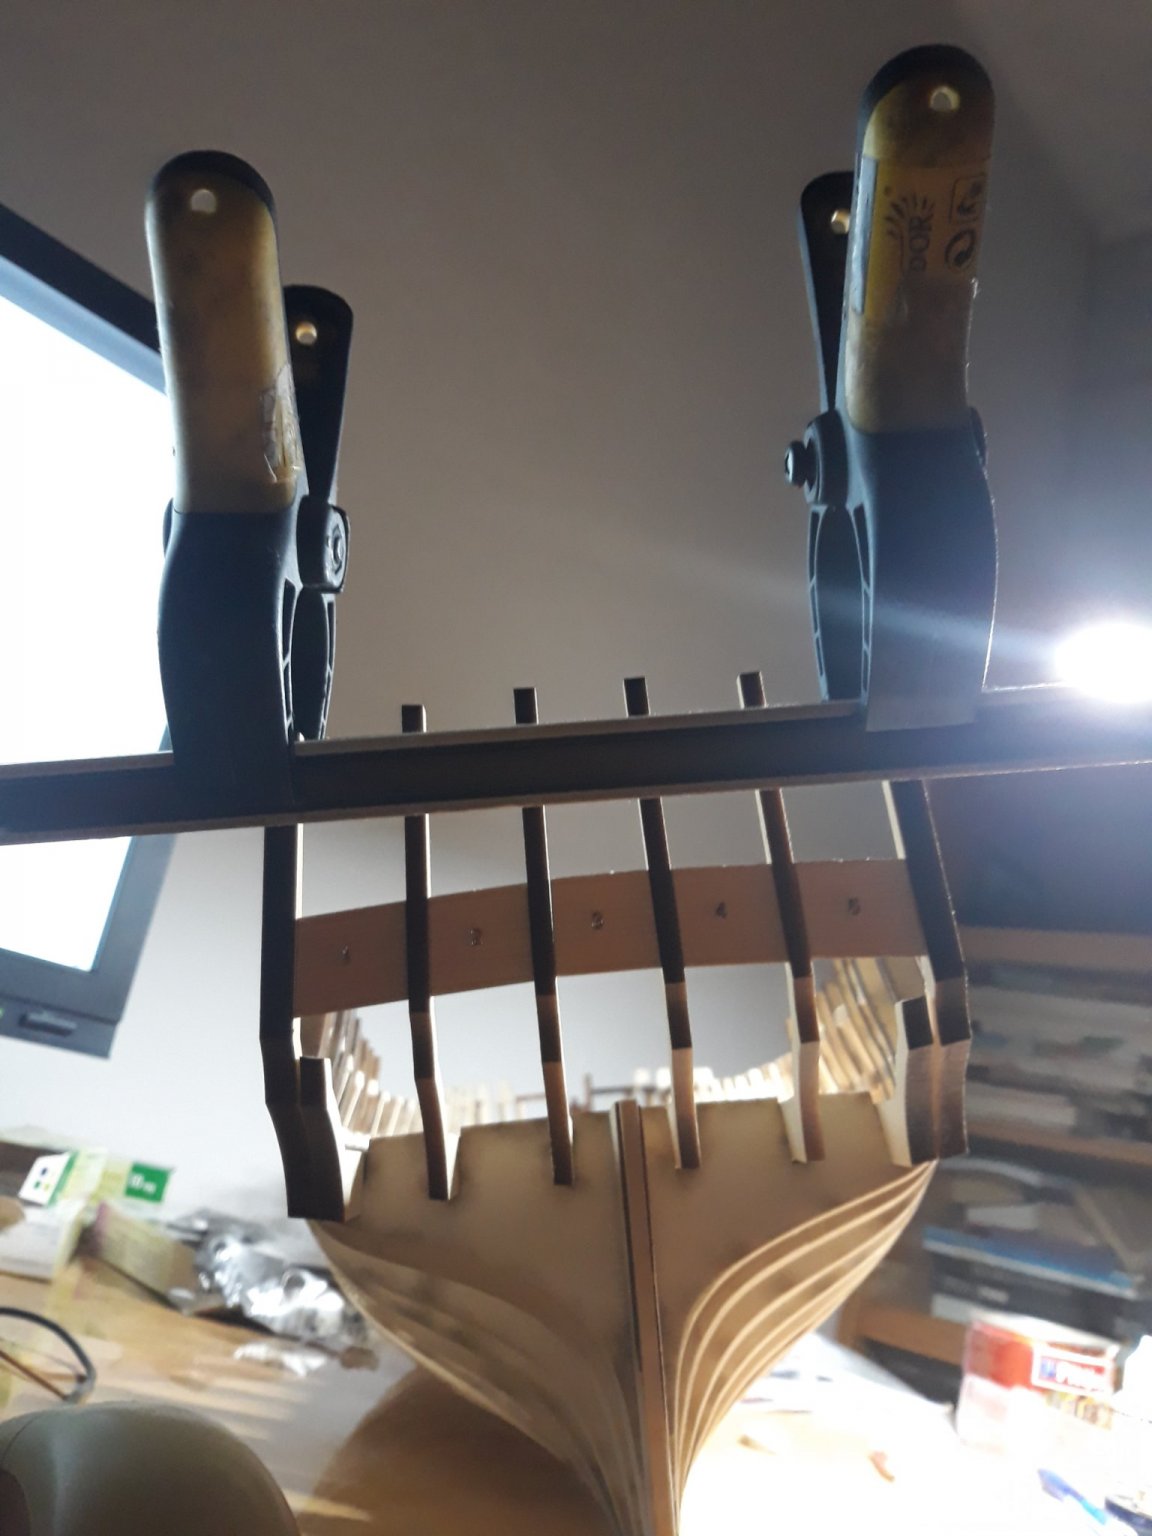
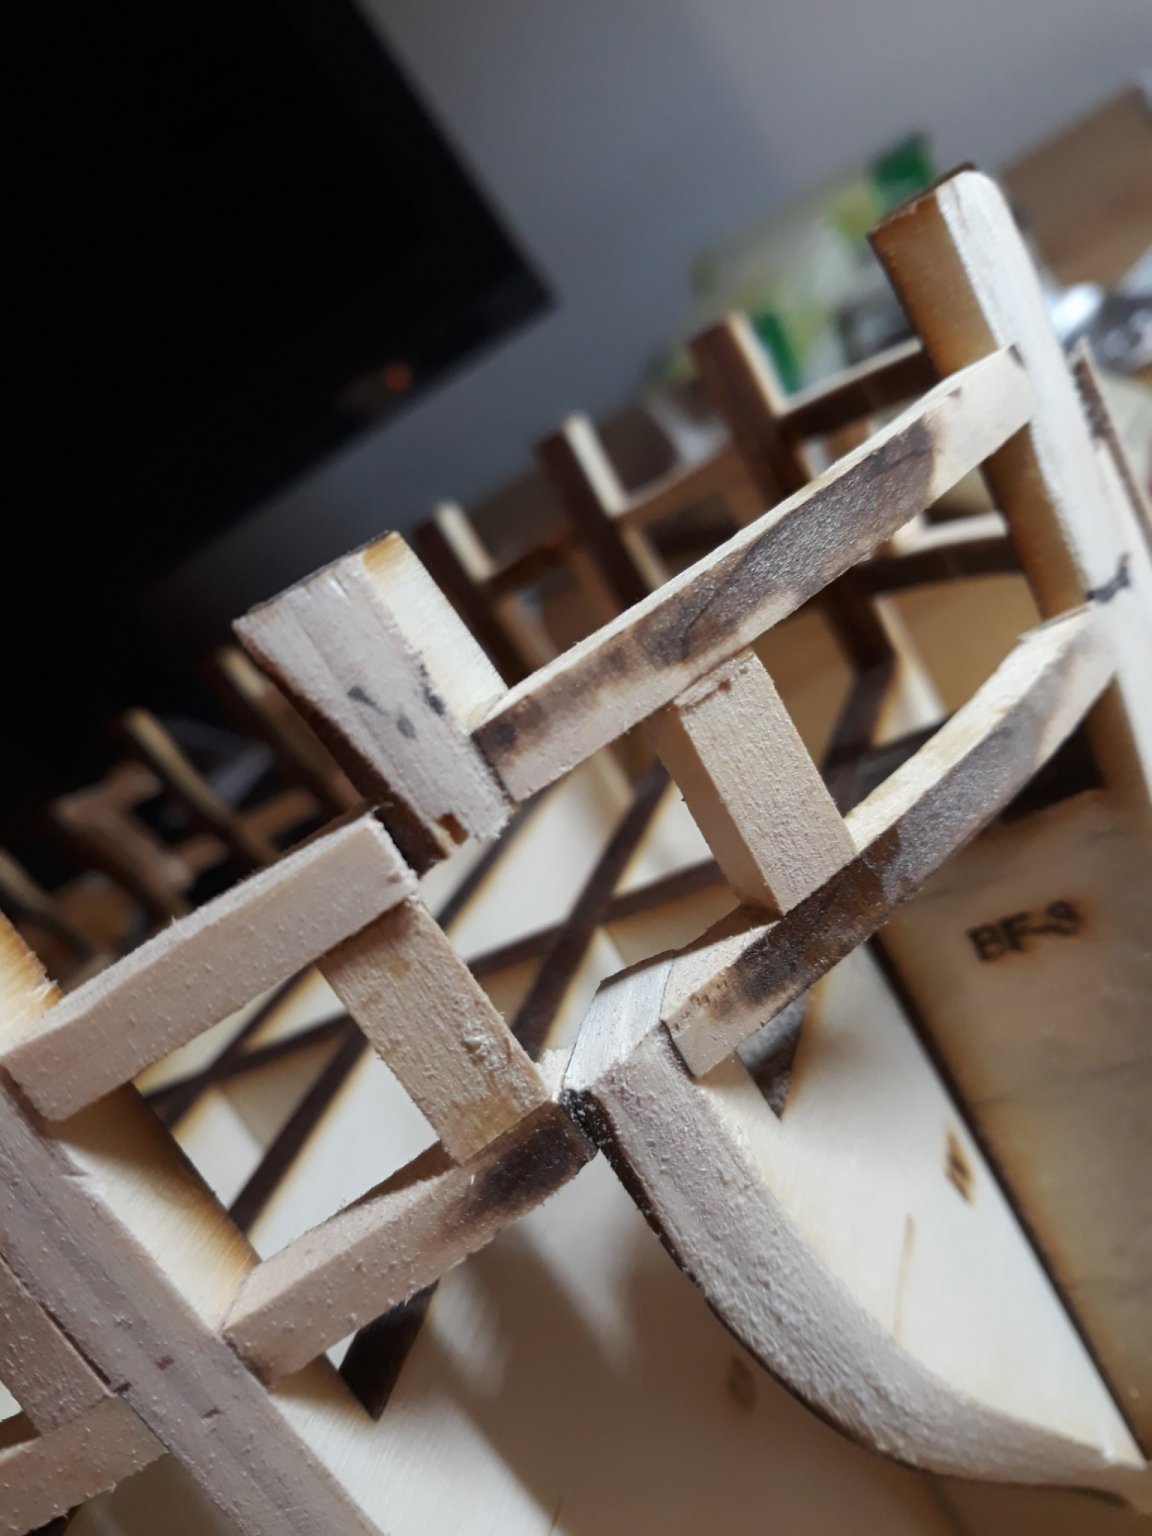
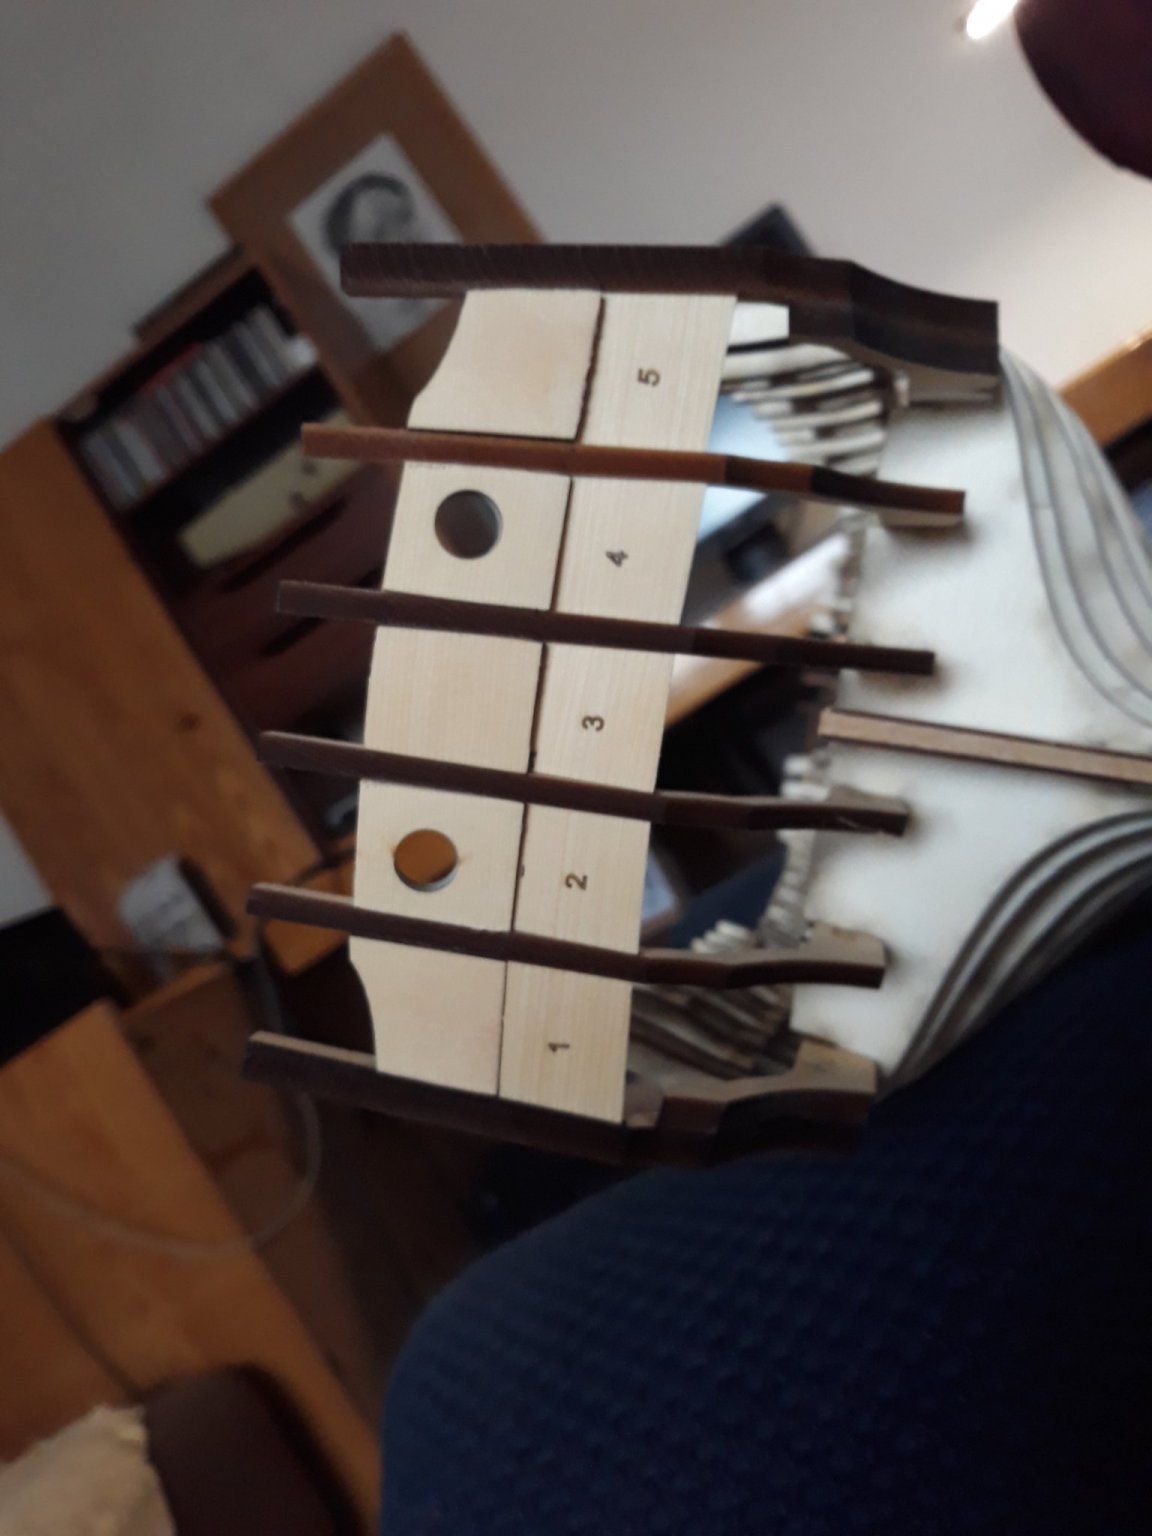
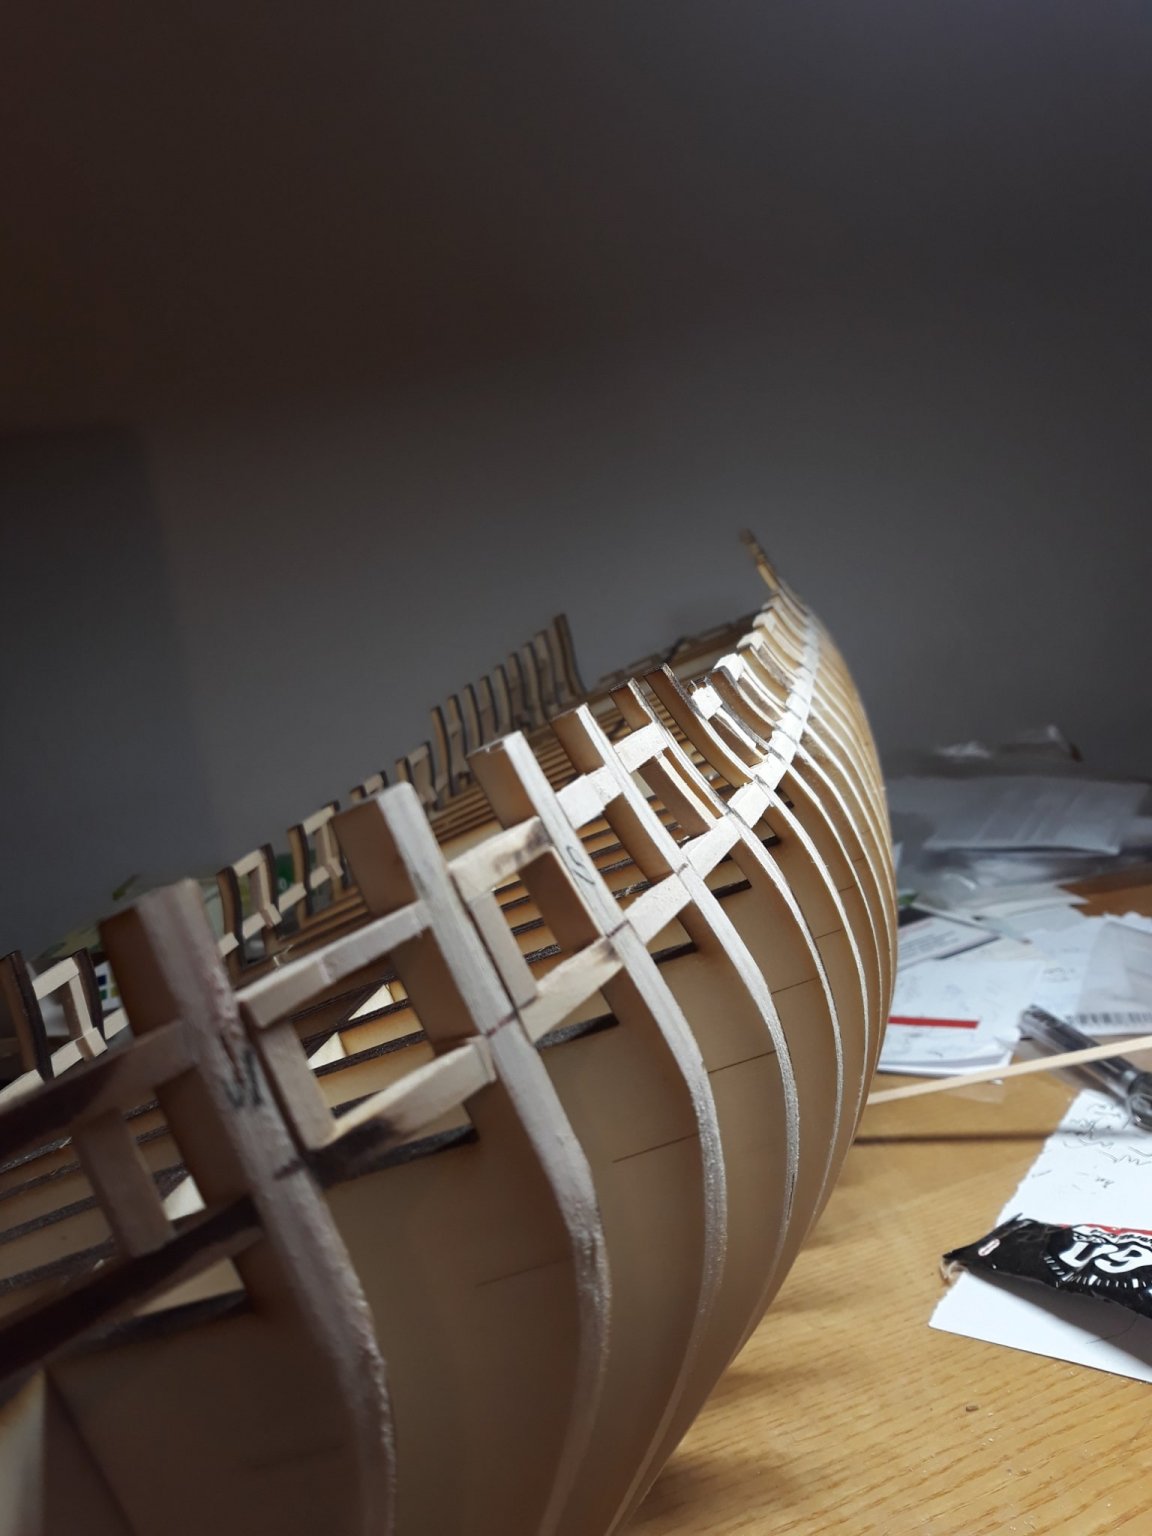
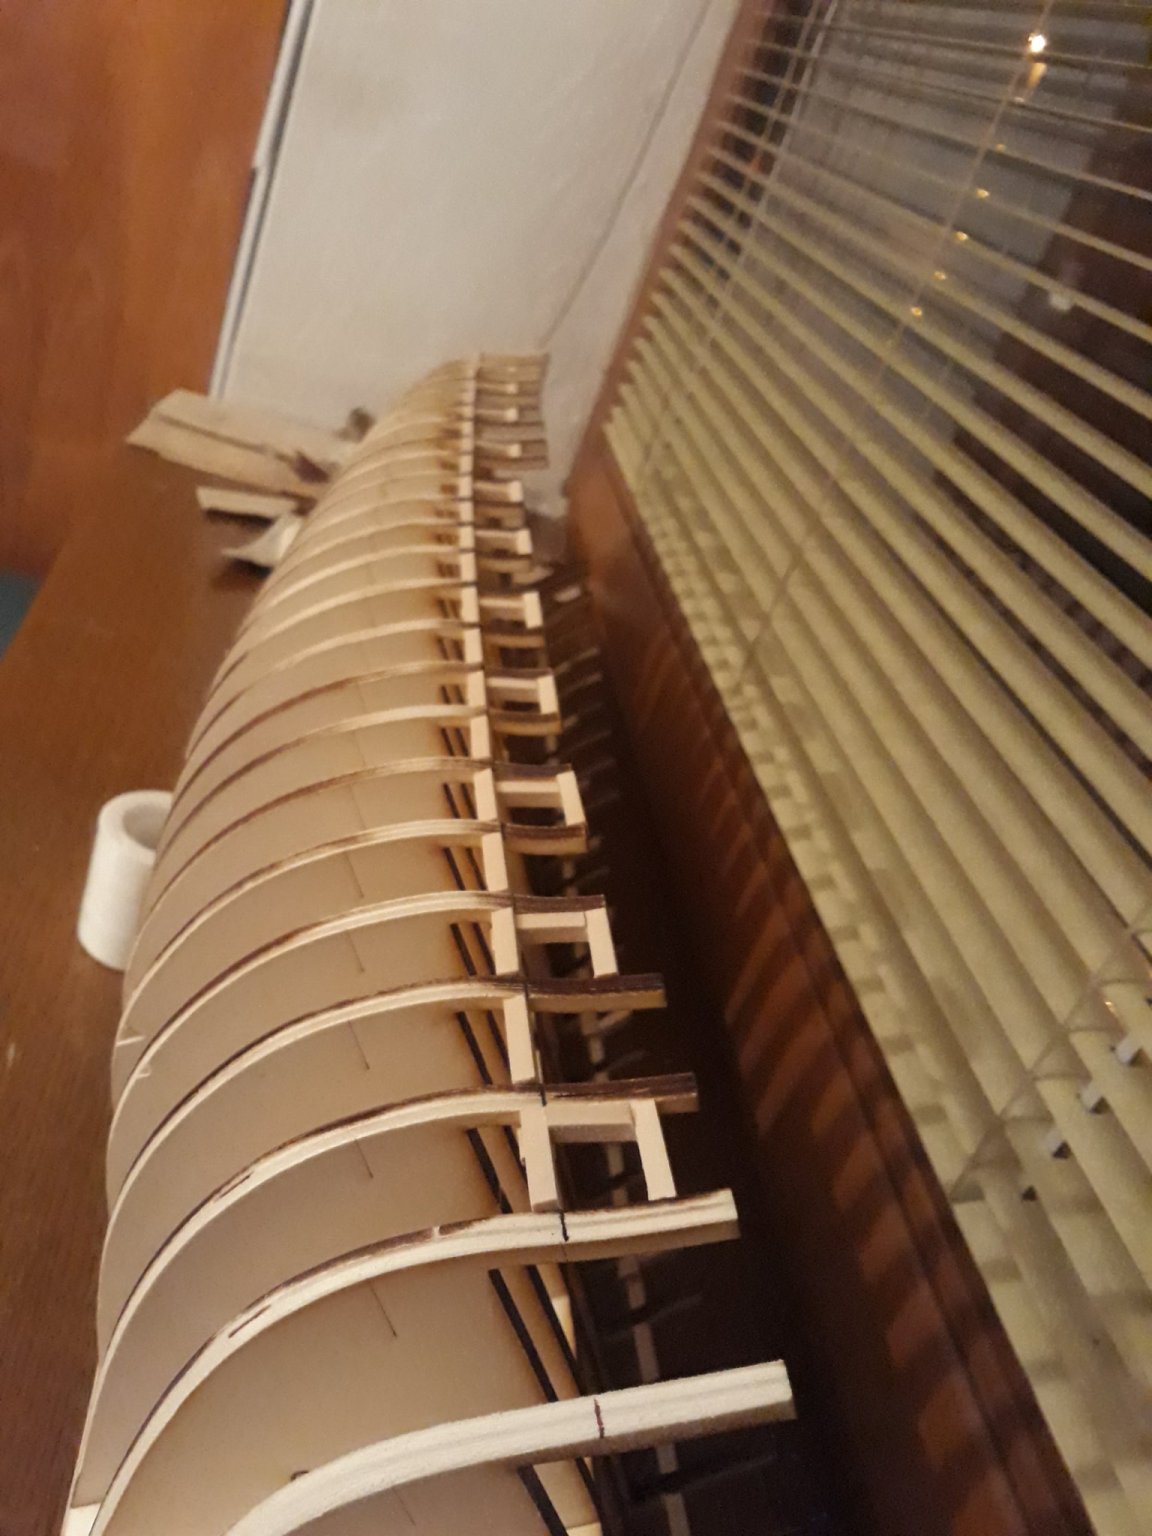
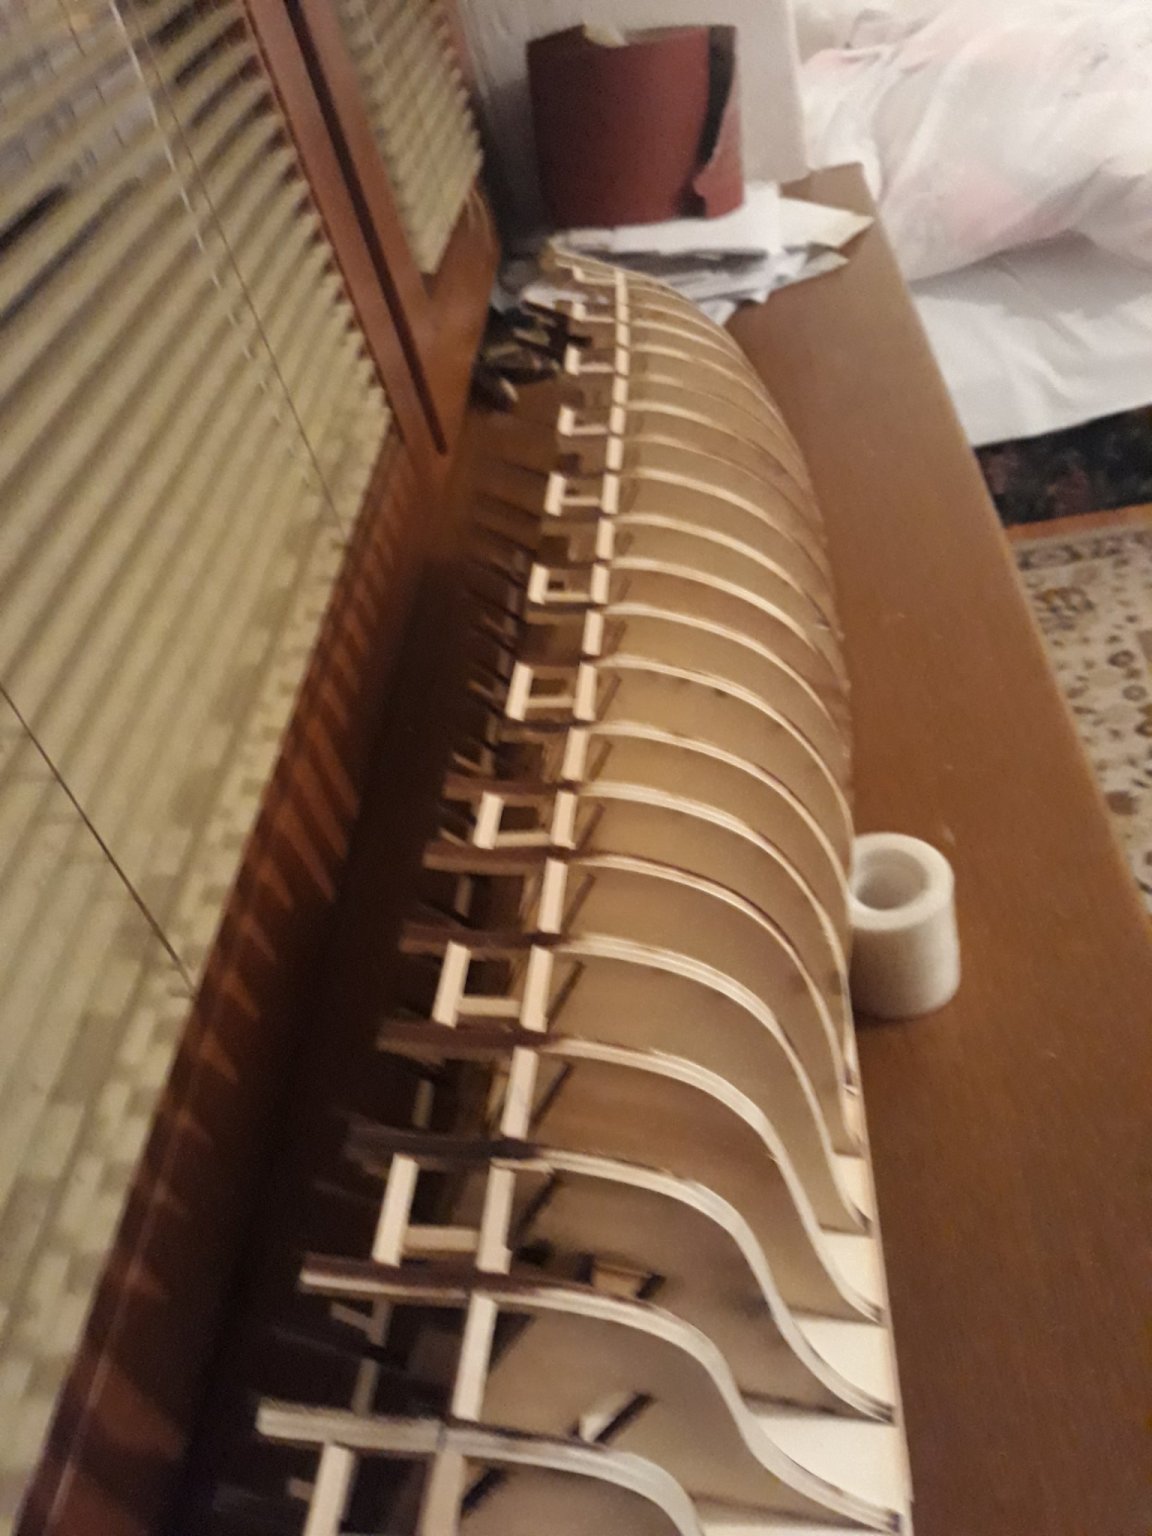
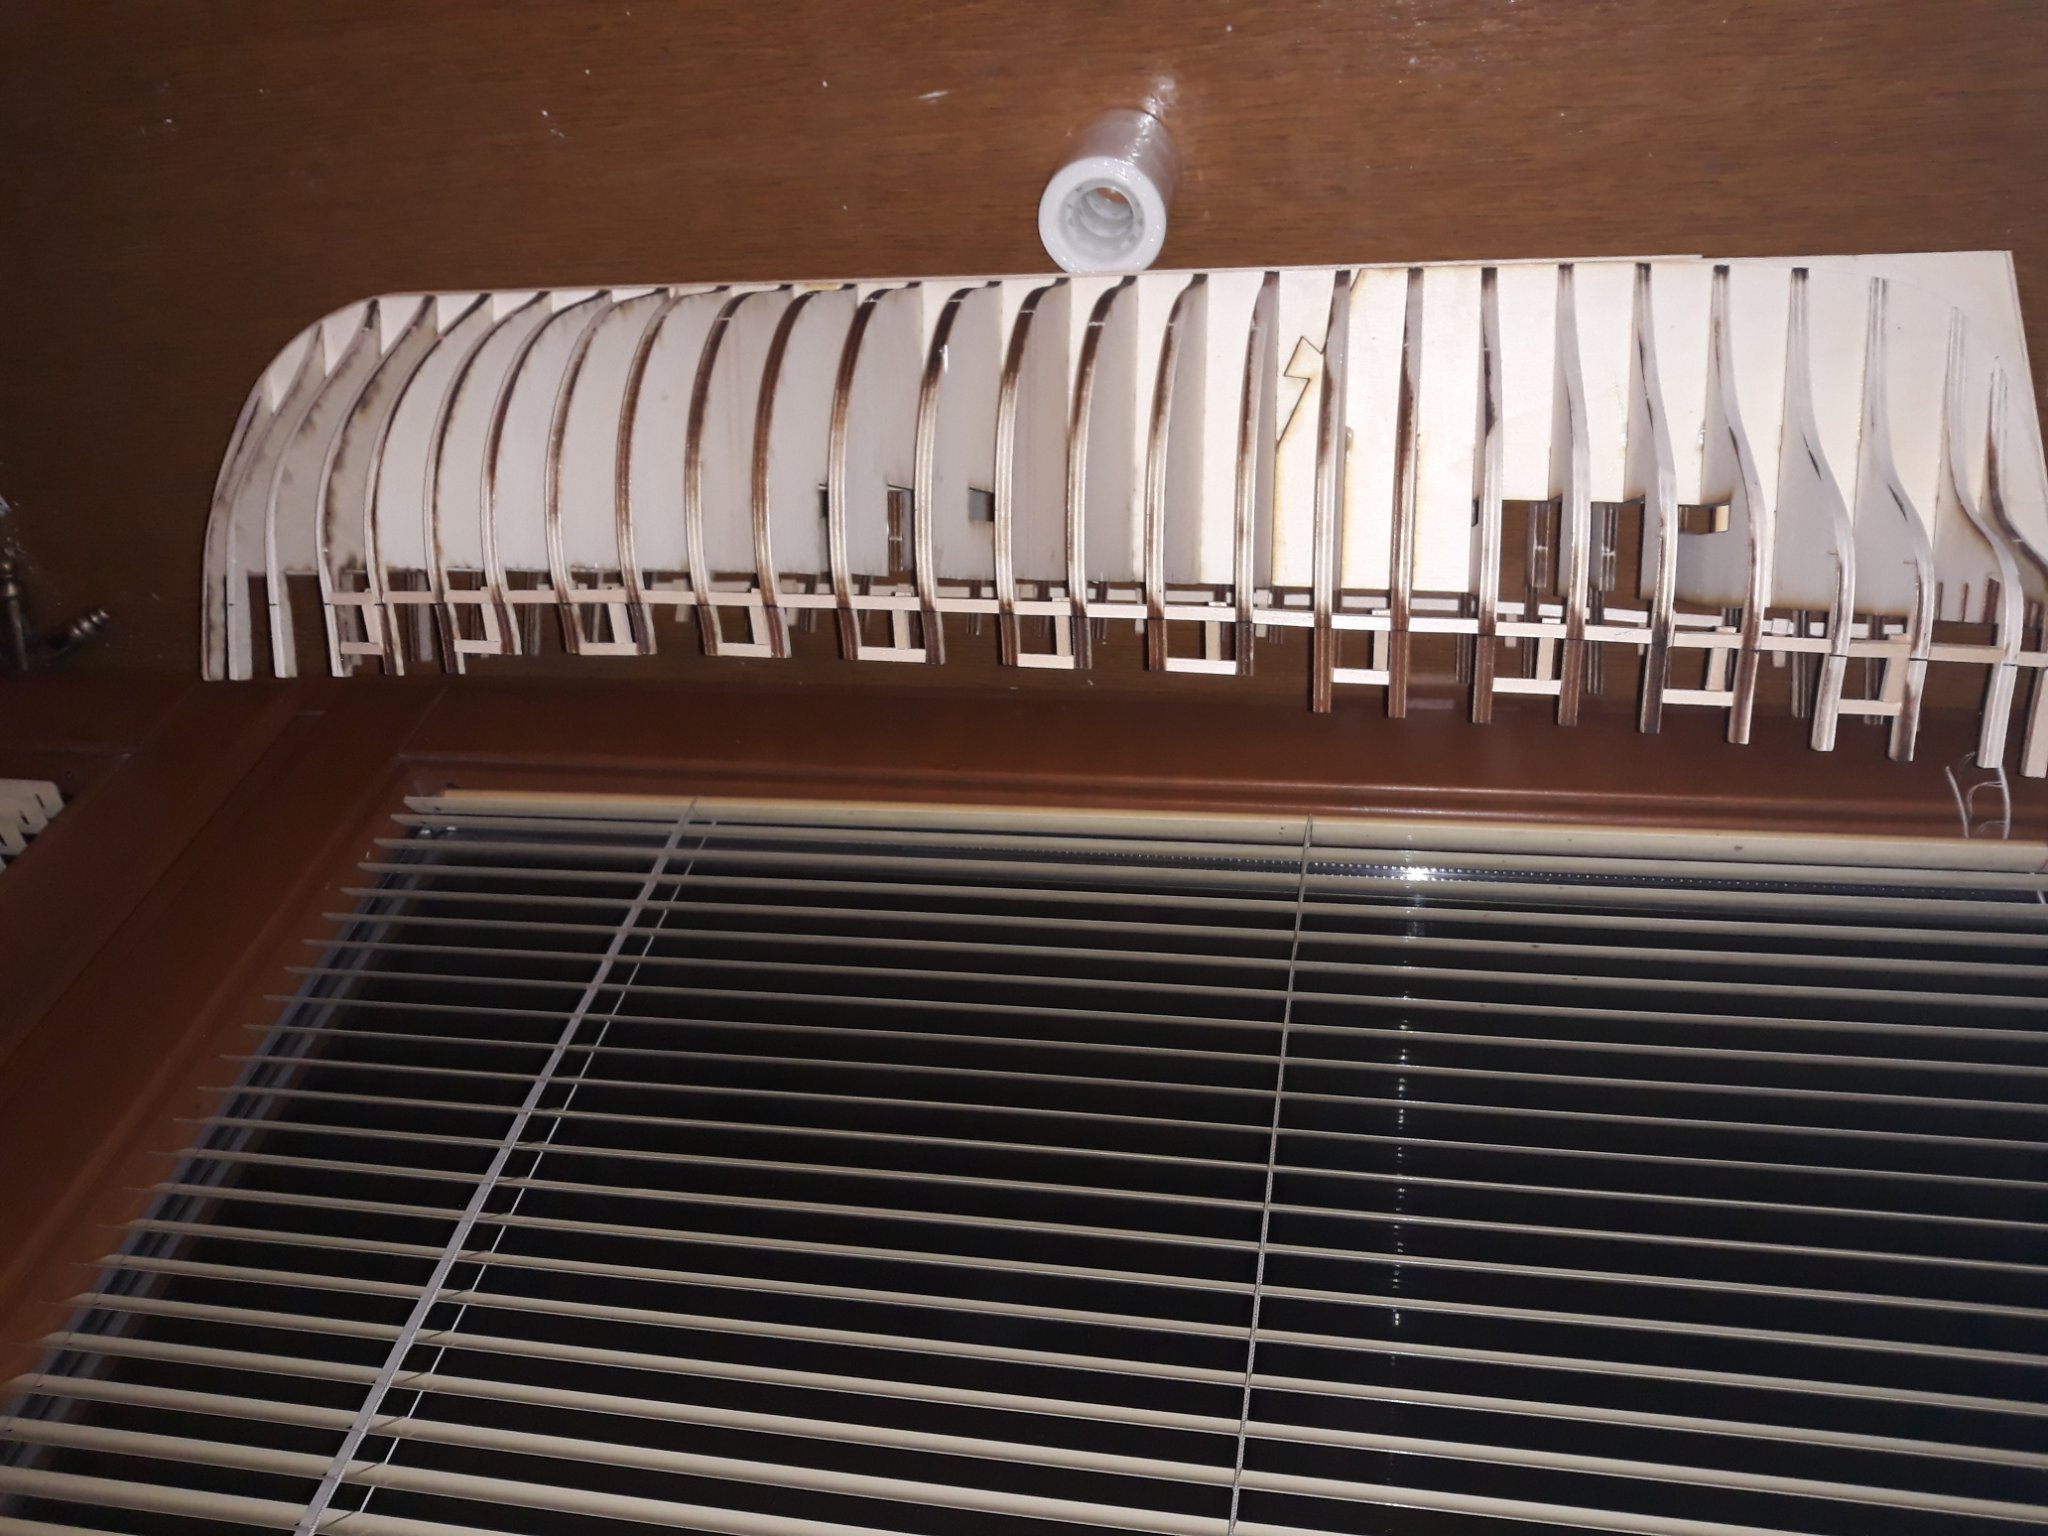
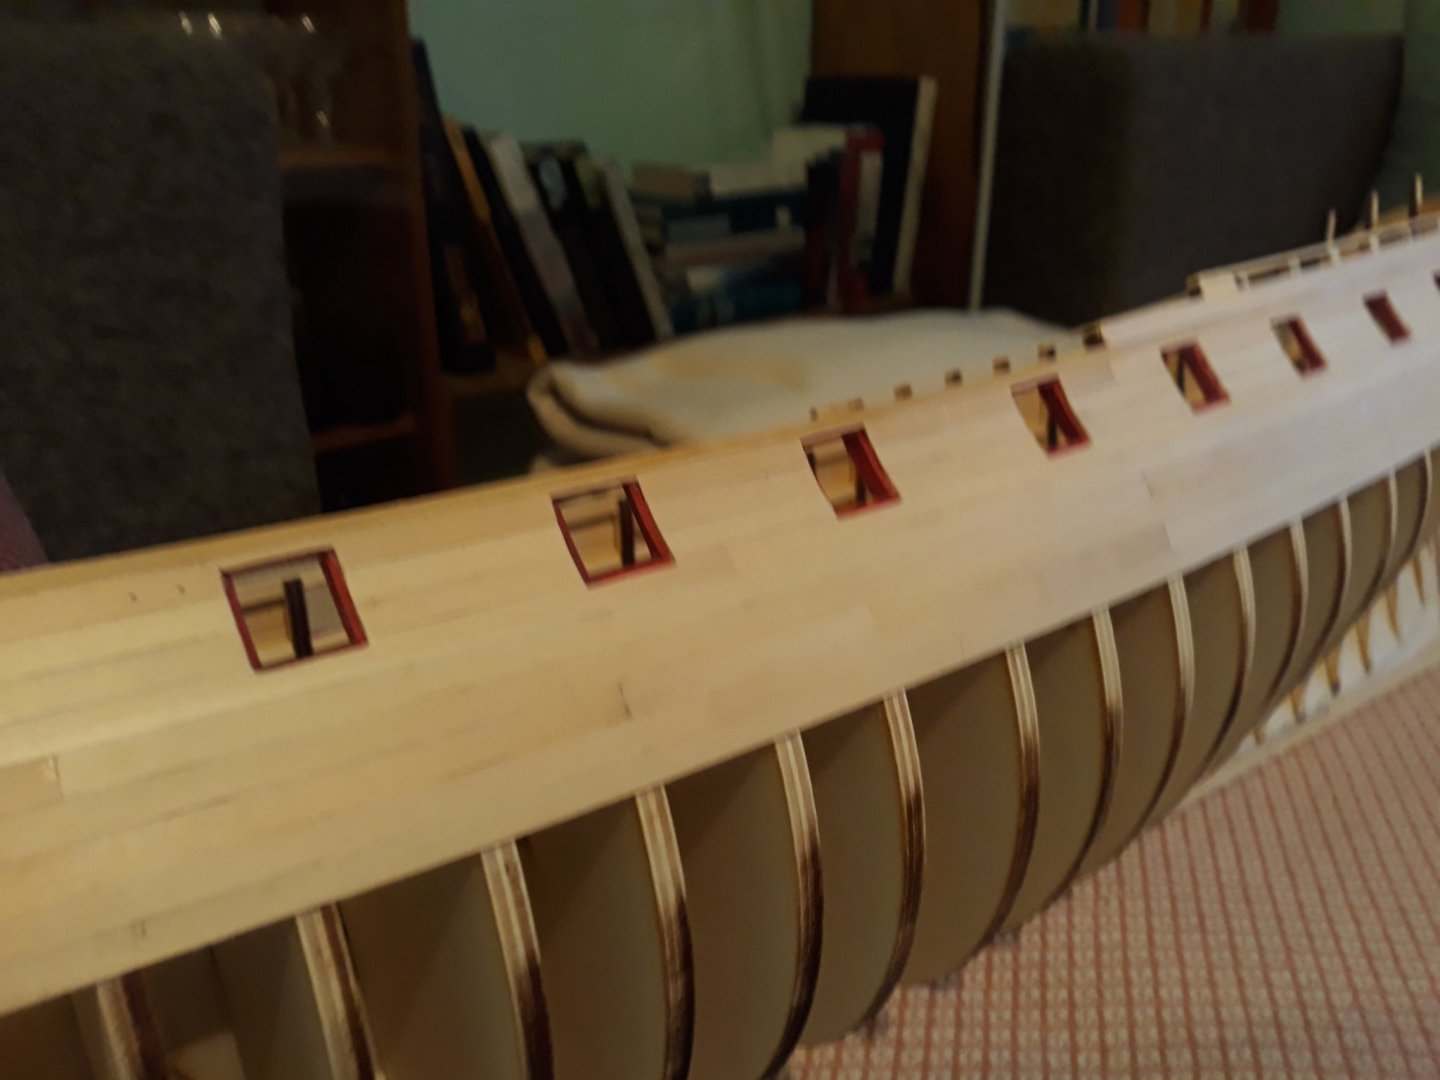
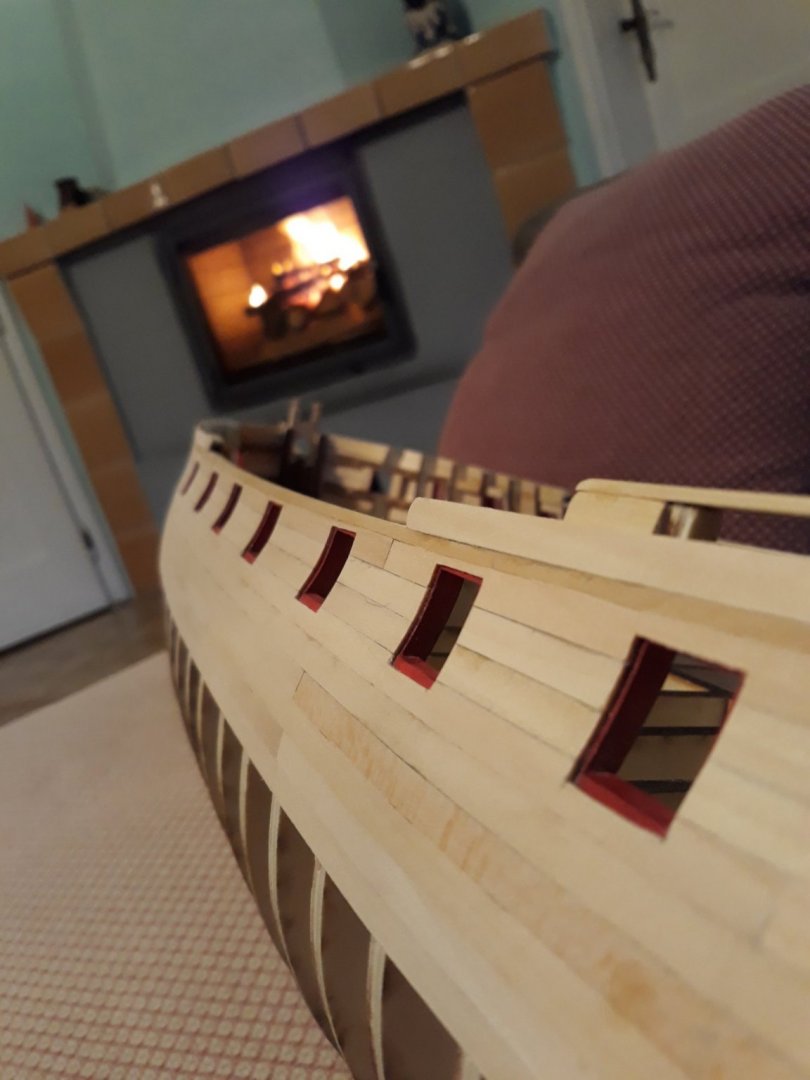
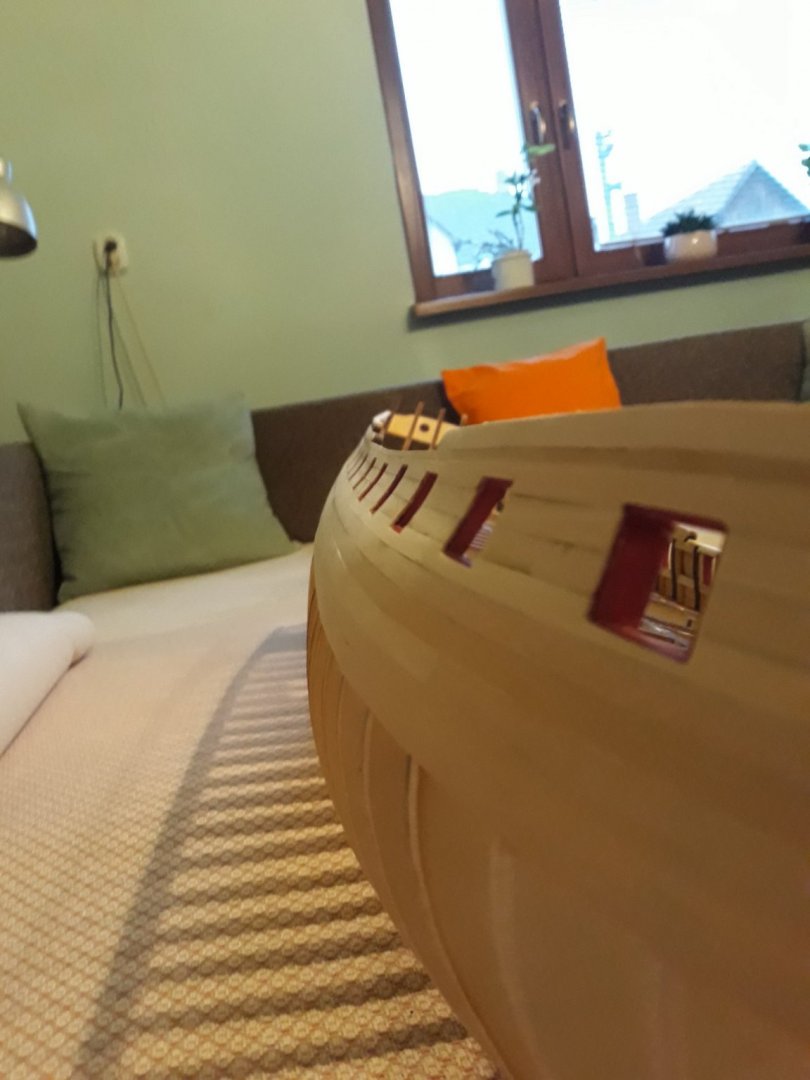
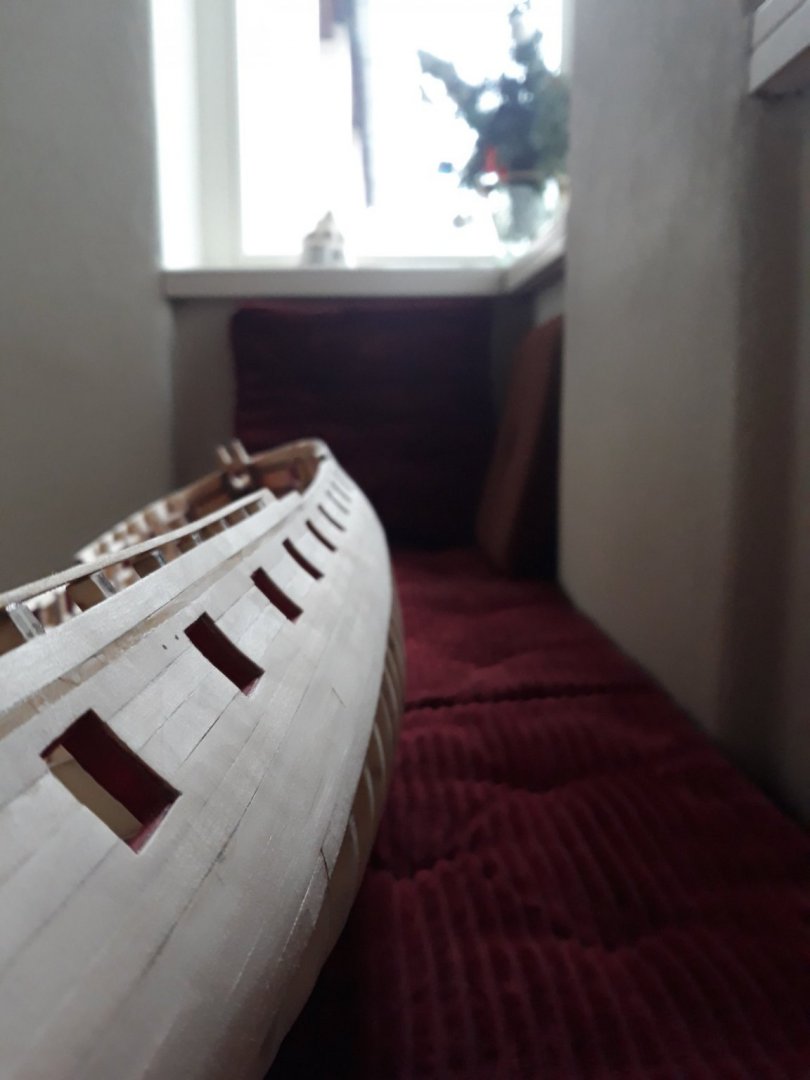
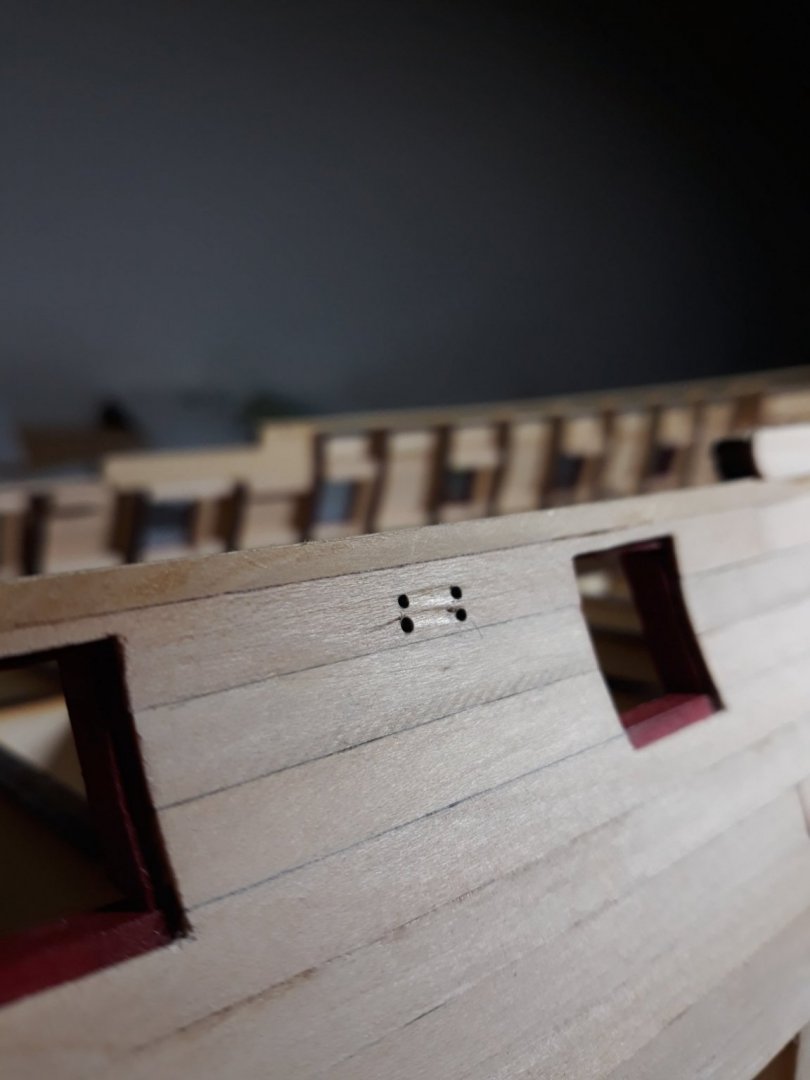
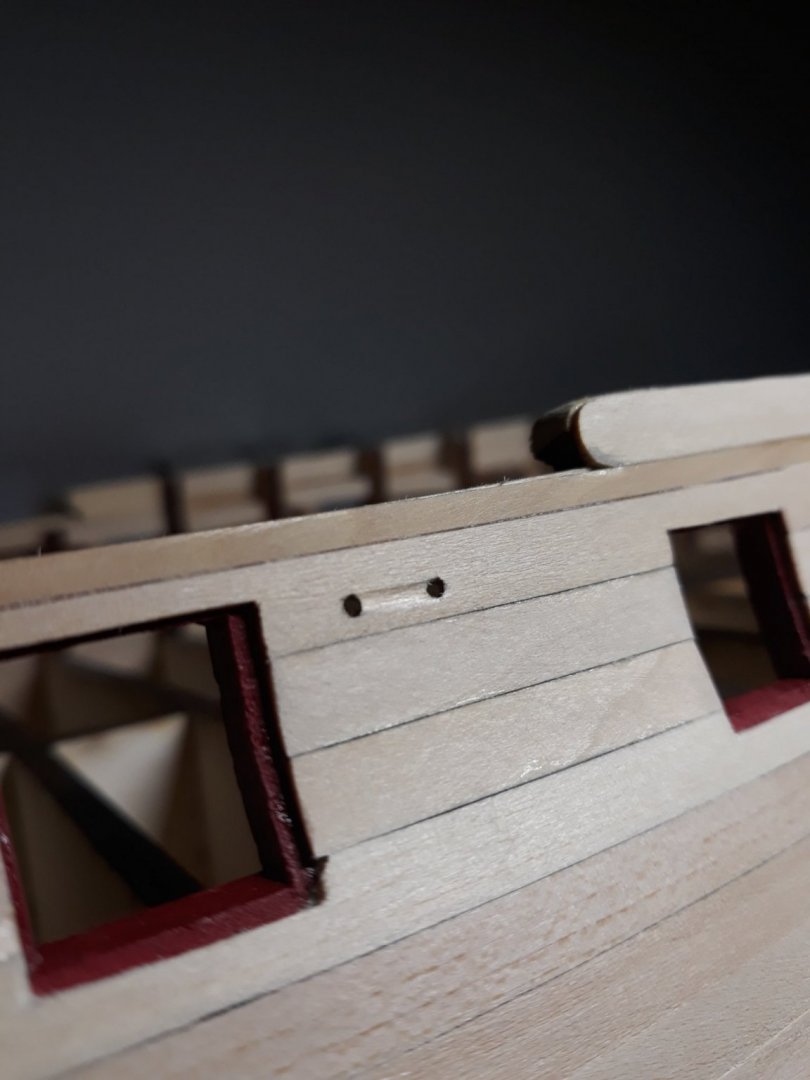
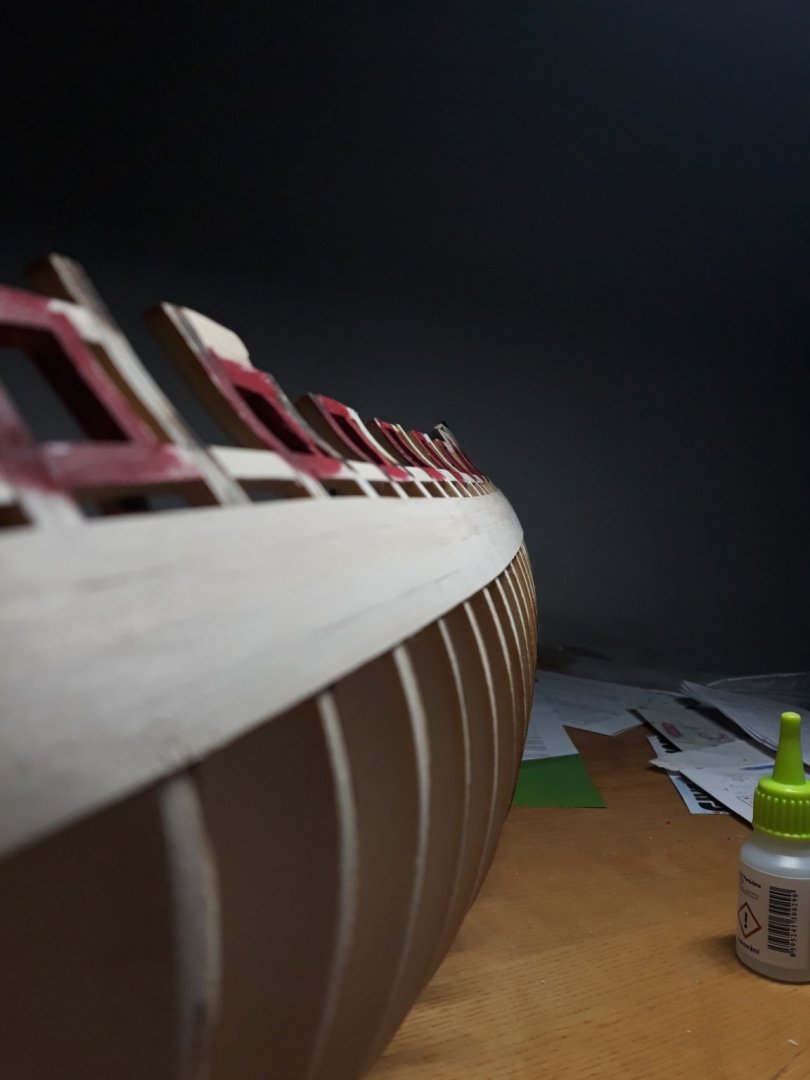
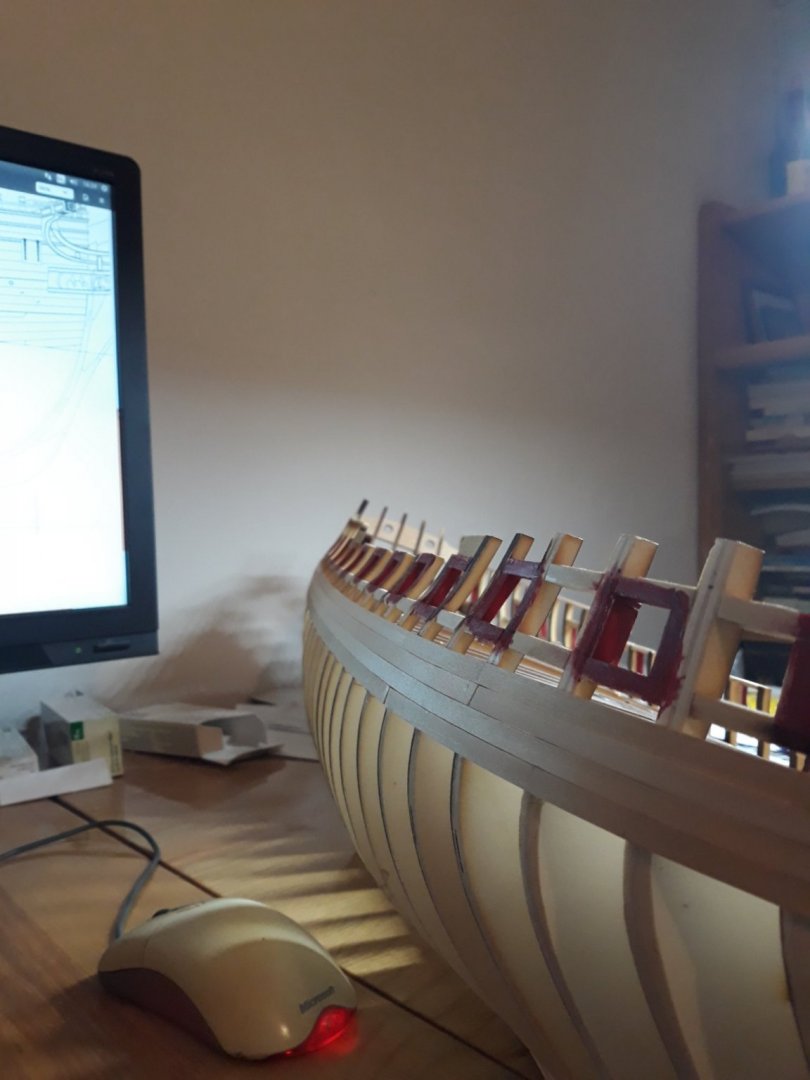
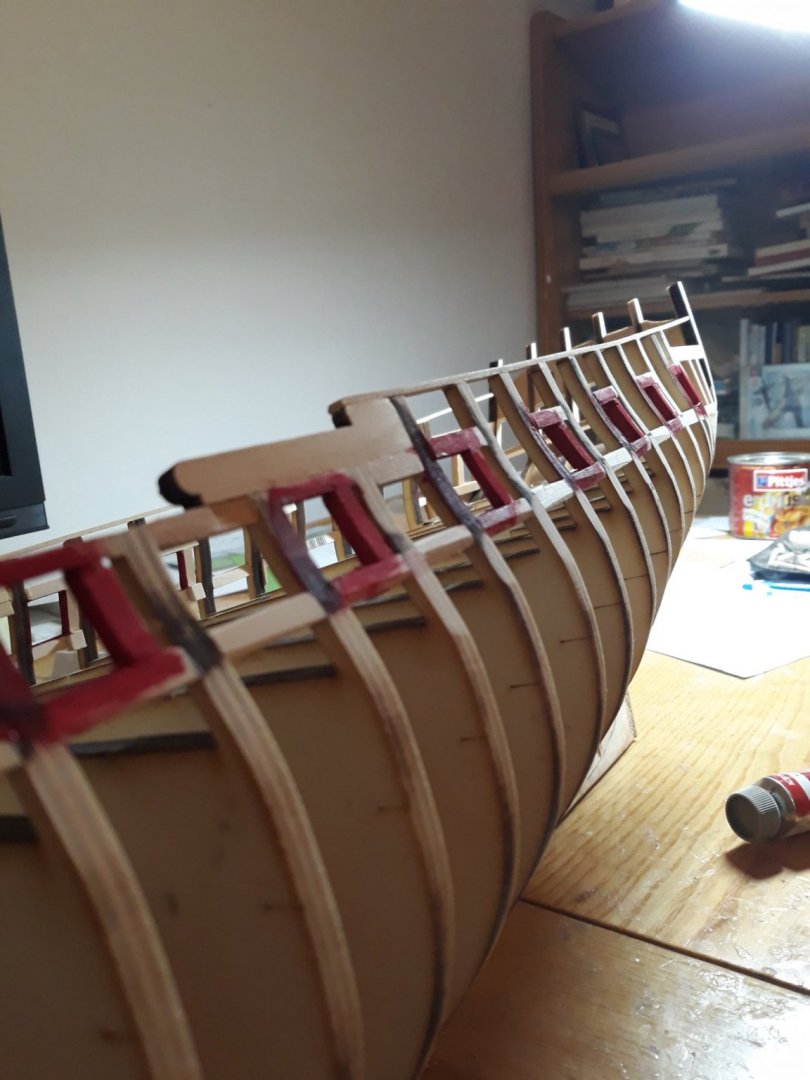
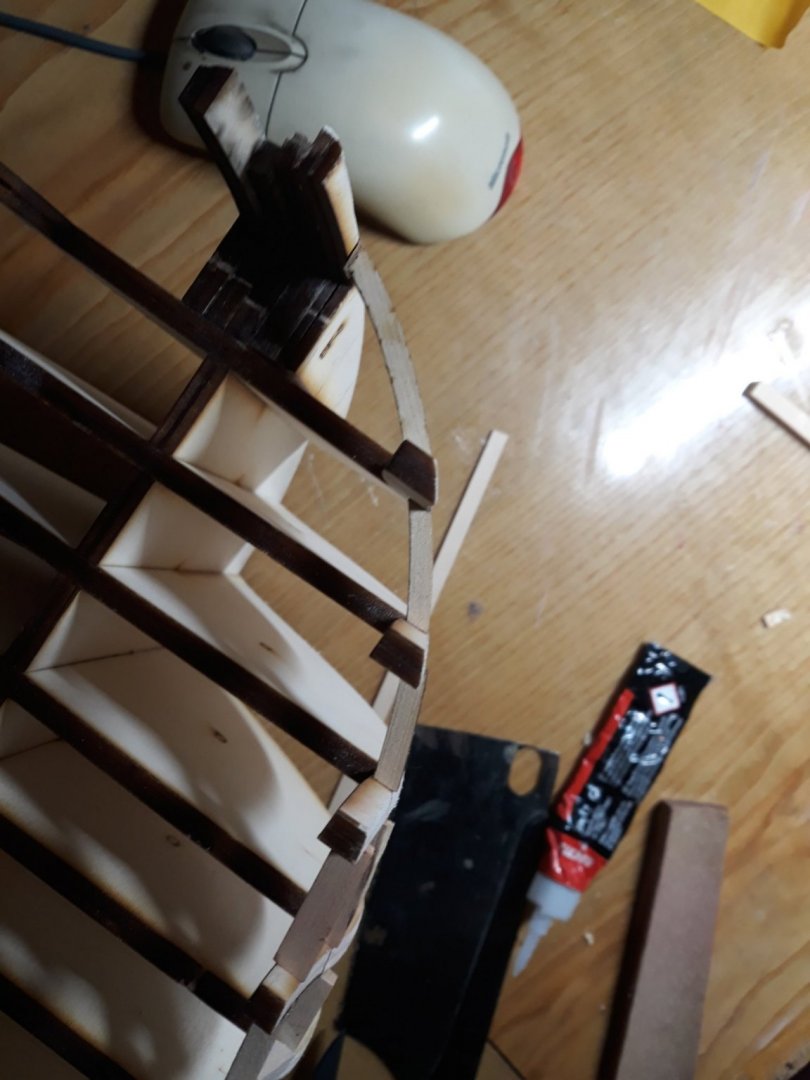
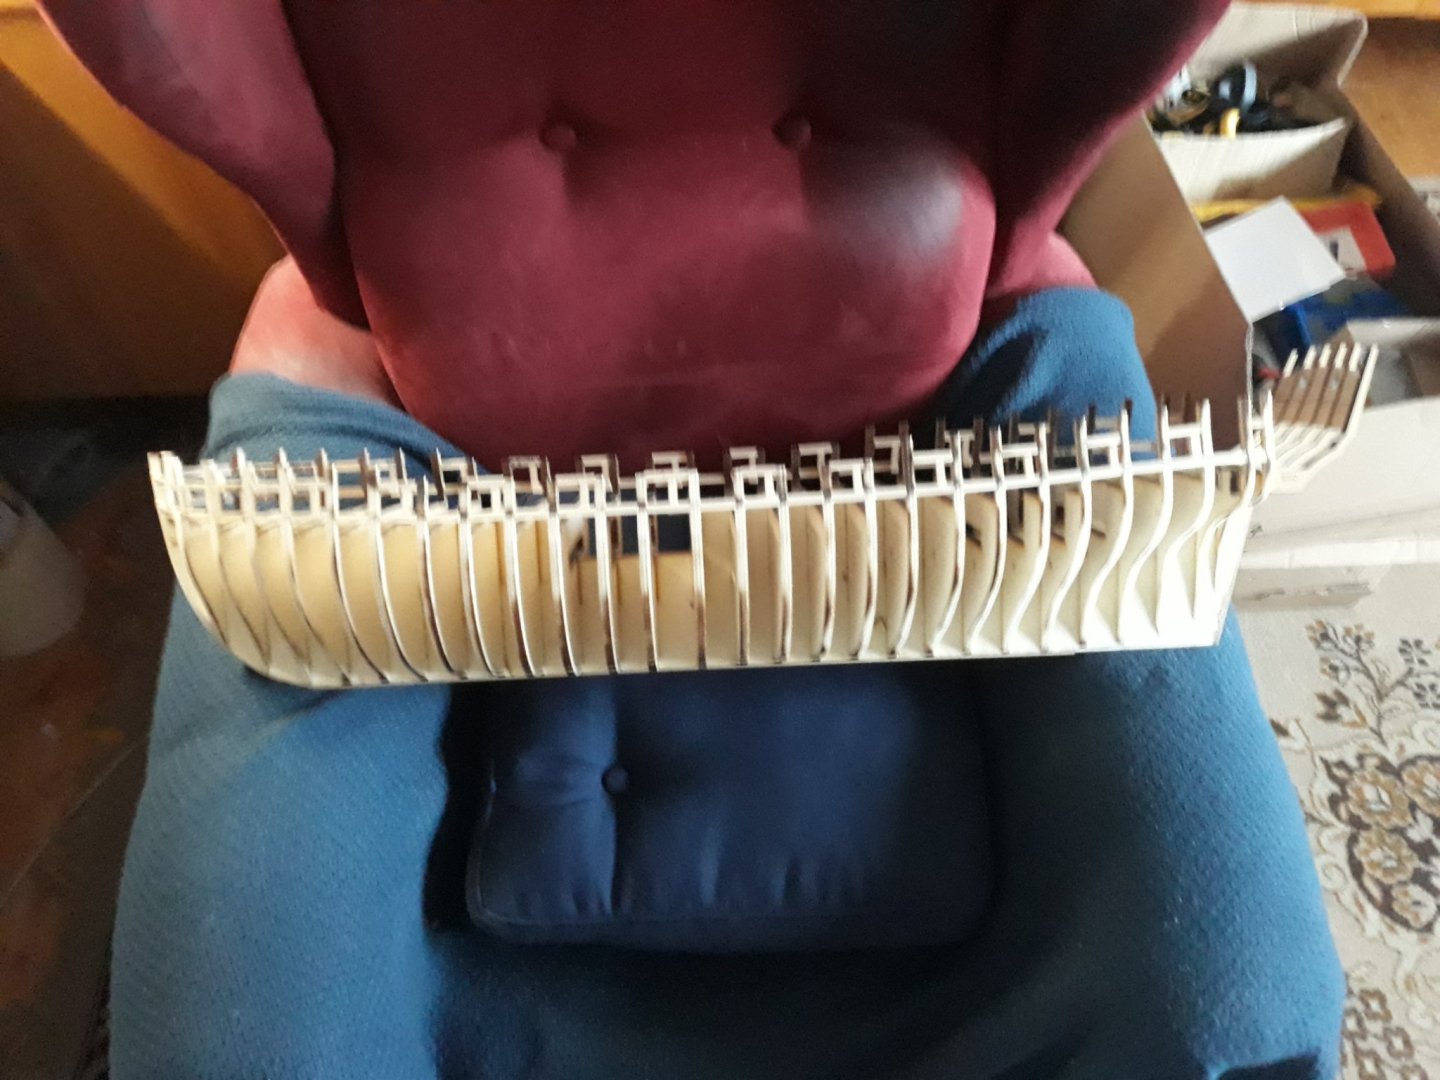
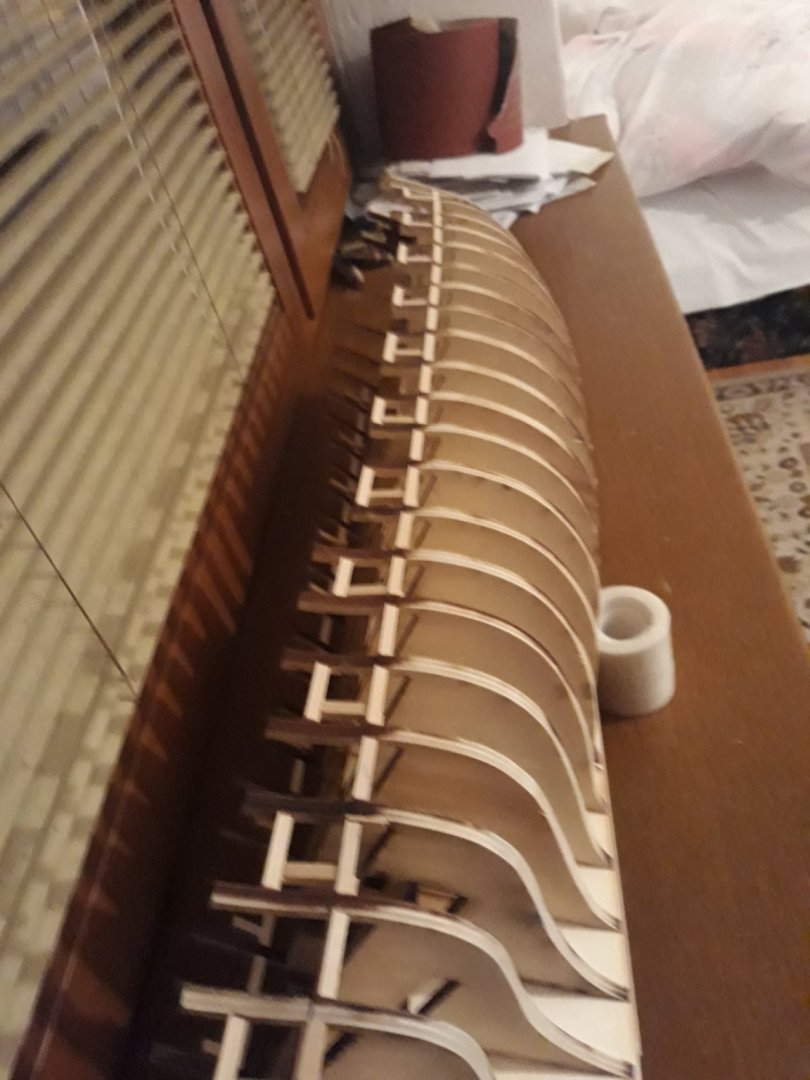
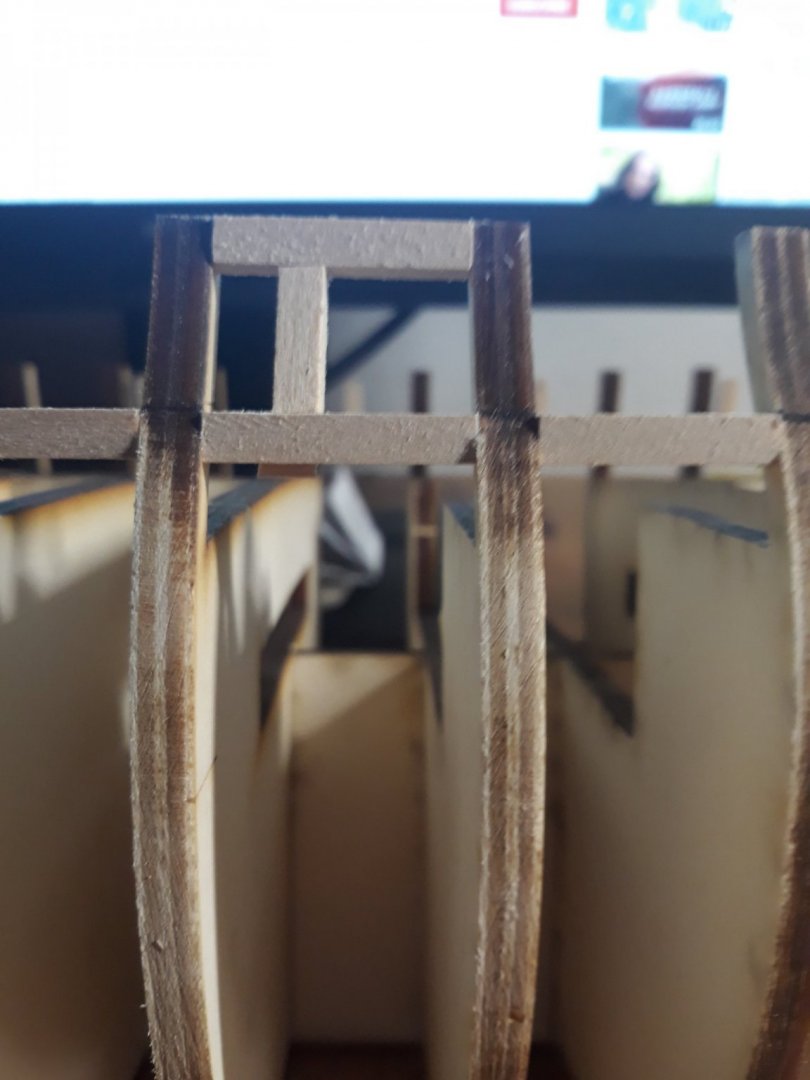
Good weekend folks, gunports are ready ( apart of three at bow which should come later... ) I took veeeeery slow aporoach with those ( 3 days :)) as instantly understood that even slight not sqaured line would destroy line shape in planking from every point so i tried my best ( complaints to my eyesight:)) firstly i checked bottom of boat to see if rabbet line is straight ( as i dont have keel yet secured)....i unglued one piece of these sticks as straighten shape - and then glued back one that fit correct shape. then i Slowly found my way and after some initial struggle and unsucessful attempts to get shortcuts by batch i found out that measuring every piece with pencil is fastest and shortest method. I made square mold with shape of sunports so that gave measure and shape easily. I made sure to sand endings as flat as possible so they could stick to the surface as tightly as possible as i dont want them to unglue when sanding. Im still scared how i am supoosed to sand them safely. :)) maybe someone has a safe hint? i have to read Chucks amazing tutorial closely. From here i take a xmass break and wish Everyone safe healthy and merry christmas ! So i can start after christmas with upcoming parts and with pleasant work comparing to theese two initial tortures ..i look forward to keel stern structure and paintm after that i smell horror because someone call it "fun part" - panking but frok gunports line i see all of them will have to be bent ;D so scared. Thank you for comments etc...and enjoy the pics.


-
Rhank you JJ, i will sure look into it.appreciated Vlad
-
Well i may change the mind im mesmerized by darker look lately with white windows as shown on i think Jj winnie. i may darken hull by a bit to get something similar to cherry. and for gunports im picking now simple acryl cadmium red from winsor newton, i hope it will be dark red by a lot if i dont dilute it too much. .but thats quite a long ahead ..:) so i may be one of those that would like it to look darker than rather light colored. in not there yet so depends how luck plays on :)) v.
-
oh flawless! fantastic stuff. congratulations.
-
is this a cherry one Rusty? so pretty !
- 642 replies
-
- 1
-
-
- winchelsea
- Syren Ship Model Company
- (and 1 more)