

Vladimir_Wairoa
-
Posts
1,508 -
Joined
-
Last visited
Content Type
Profiles
Forums
Gallery
Events
Posts posted by Vladimir_Wairoa
-
-
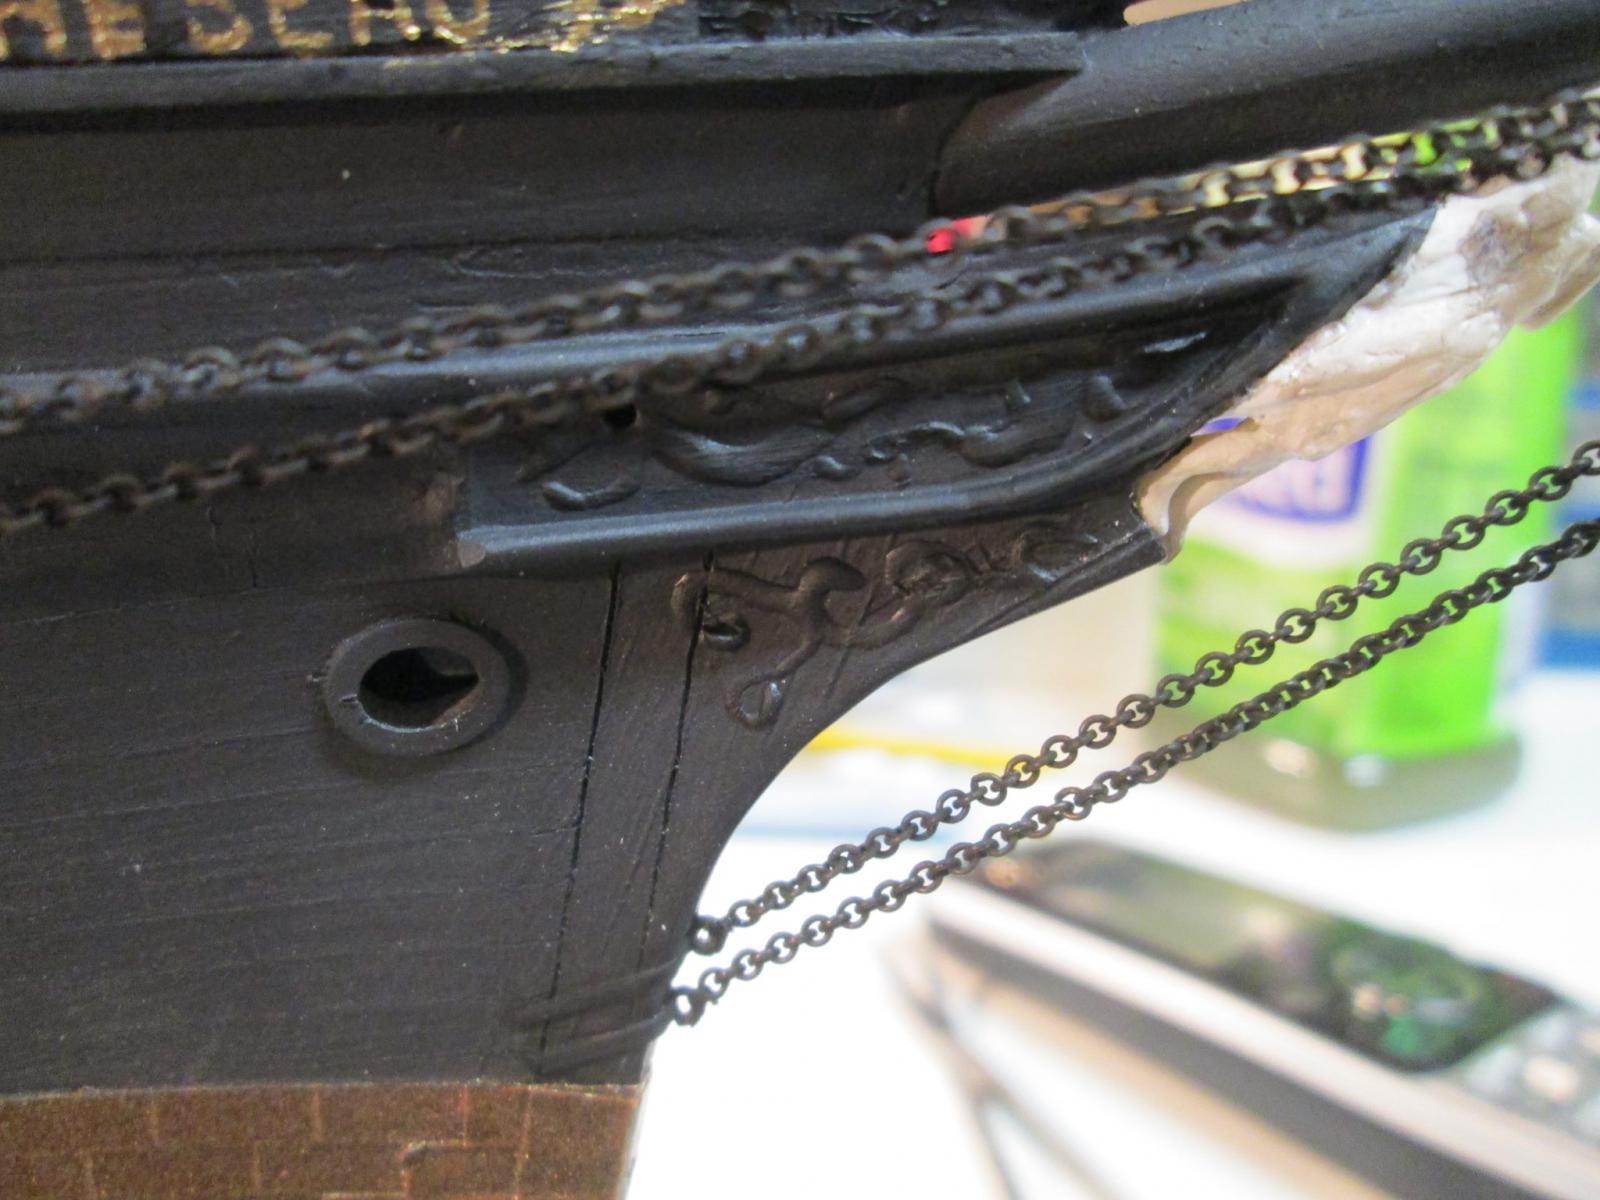
On 9/15/2013 at 11:02 PM, rwiederrich said:
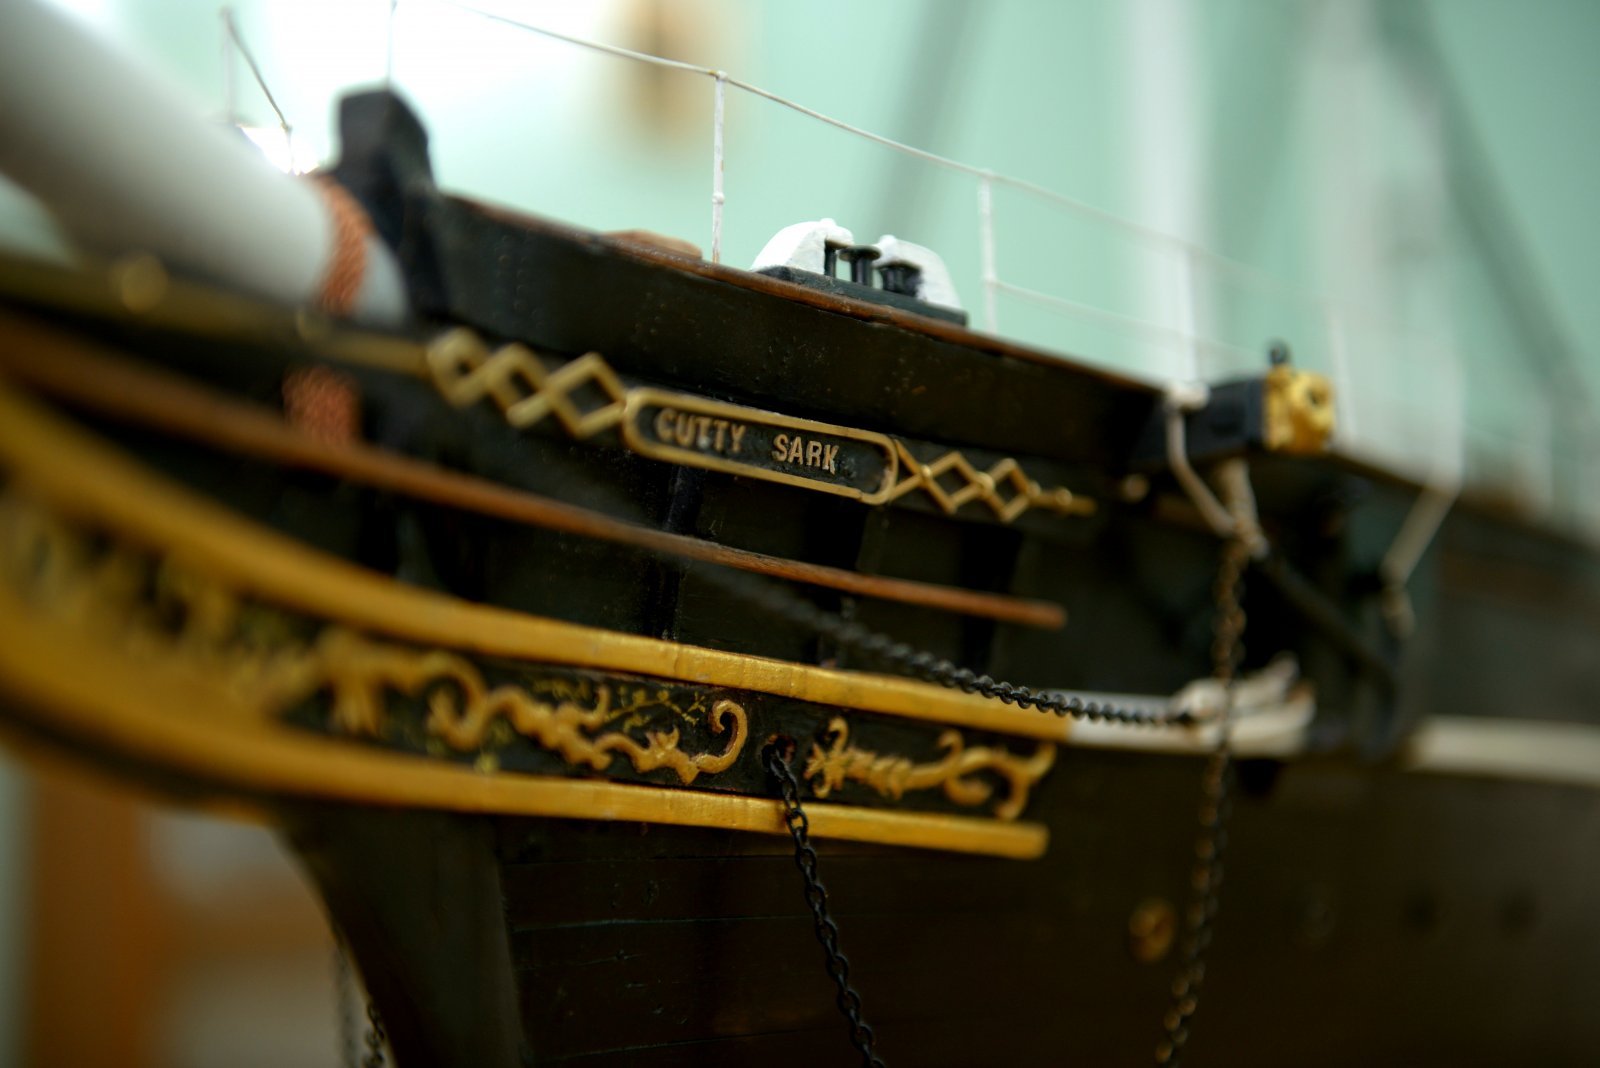
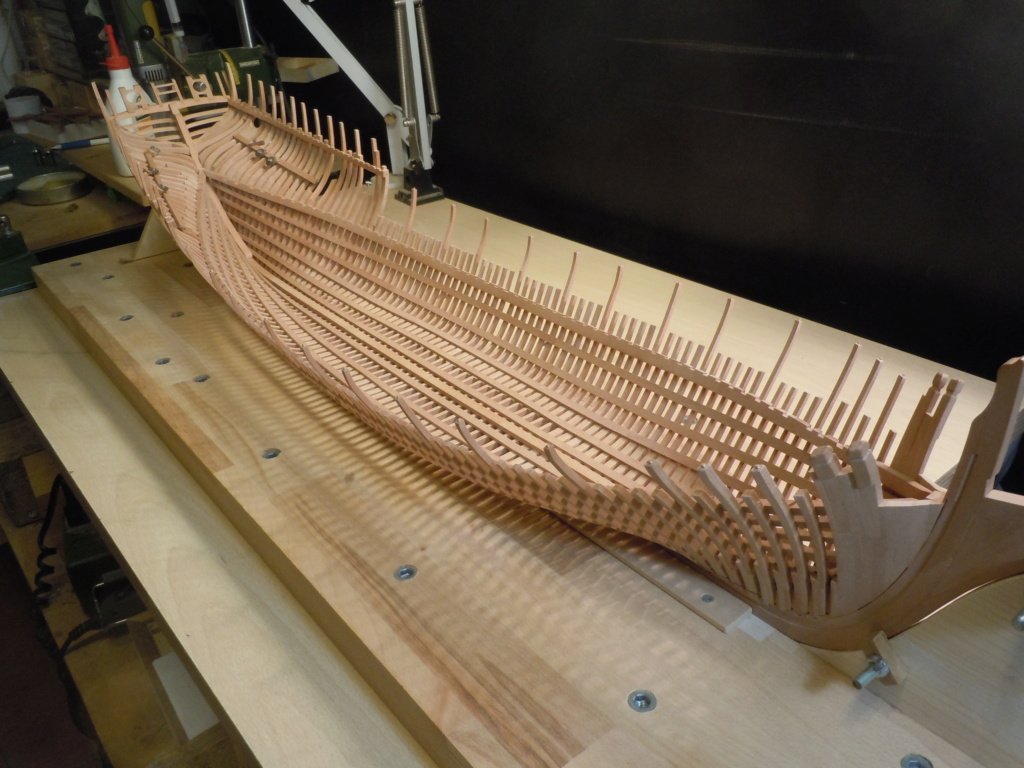
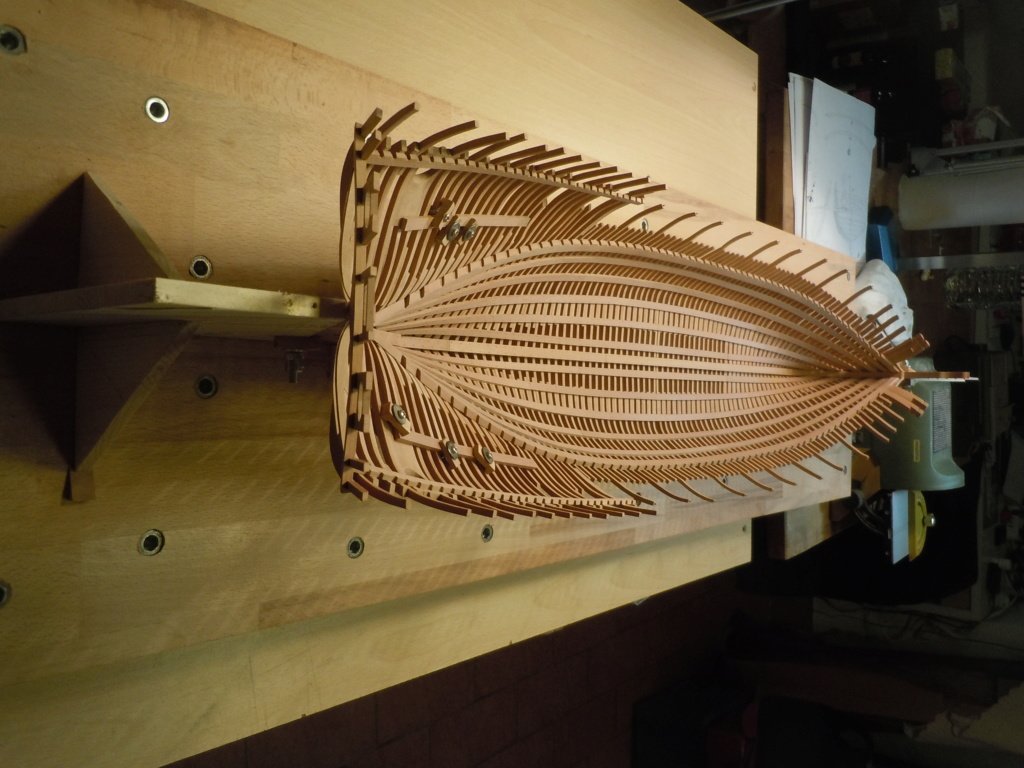
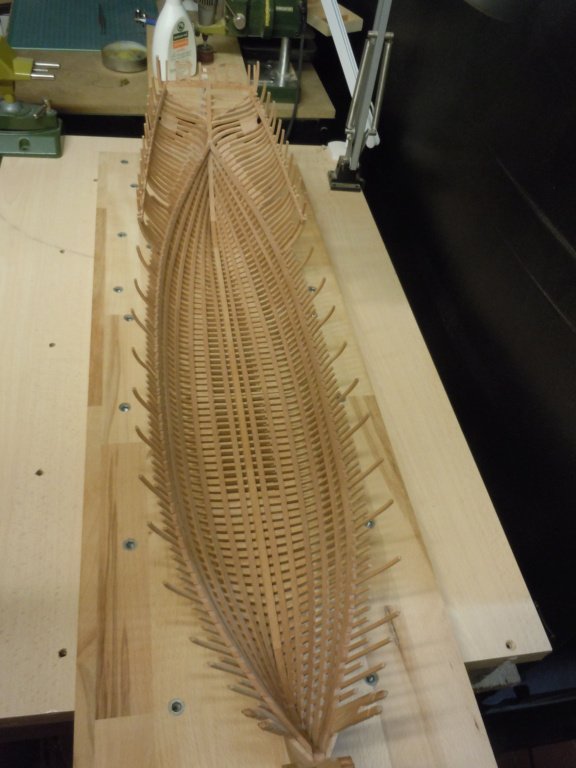
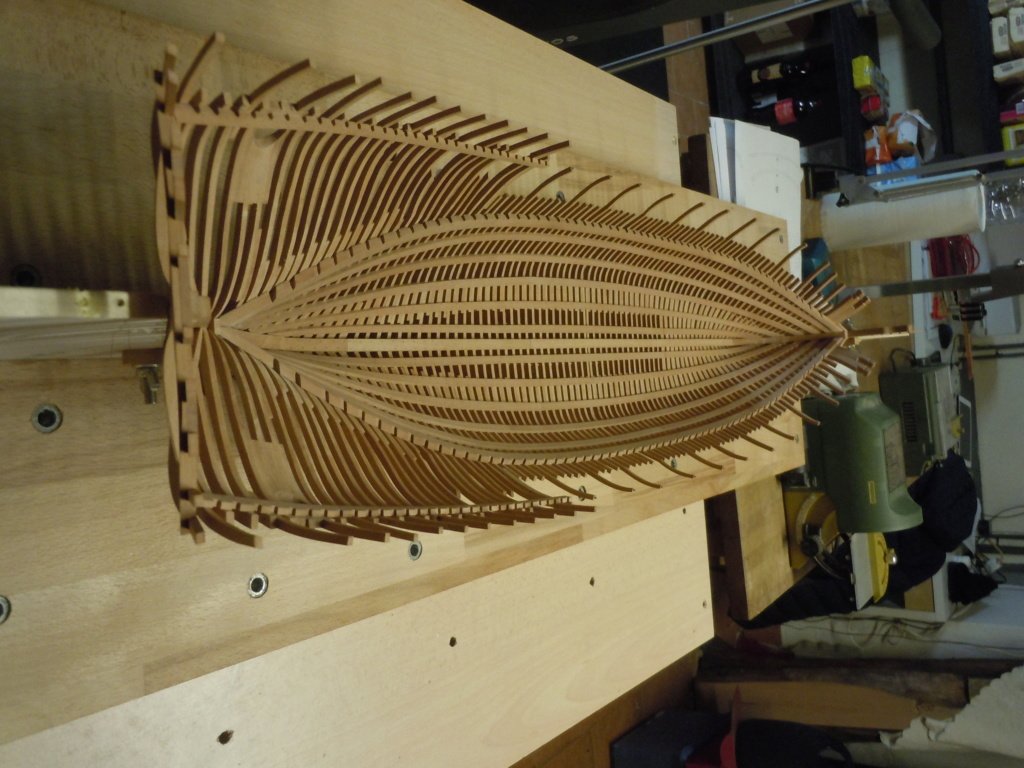
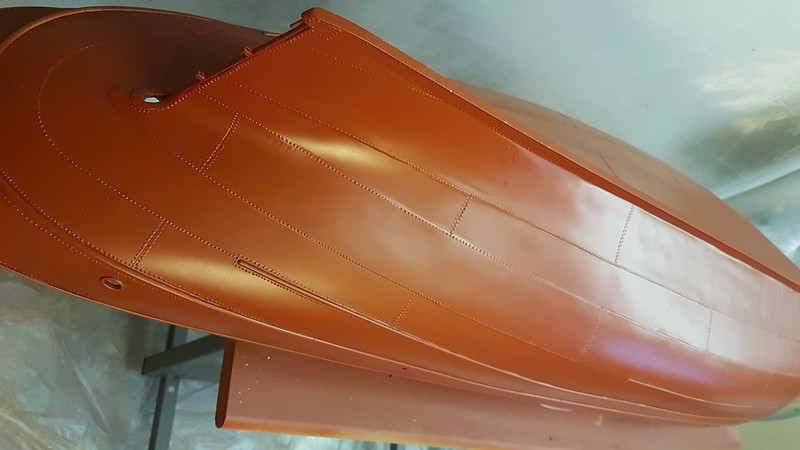
I finished the starboard side first and will soon begin the port. I typically do things in a routine order and in small pieces so as to give the illusion of completing things fast.
Here are some more pics of the head gear too.


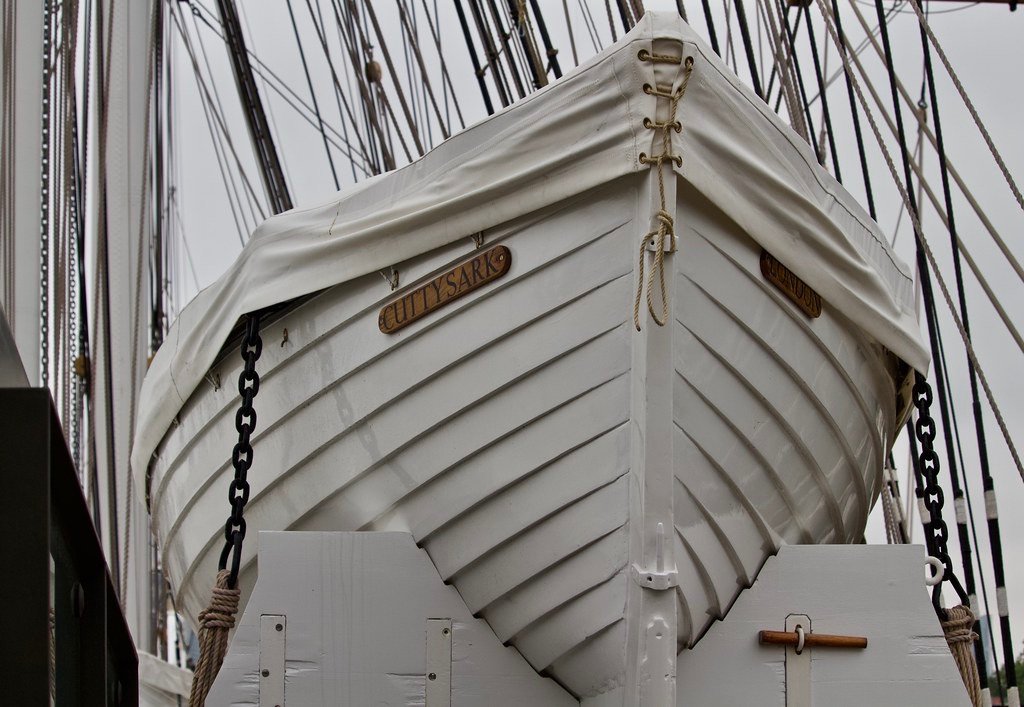
Neat bow Rob. Ornamentation and use of cs.
- druxey, Keith Black and gieb8688
-
 3
3
-
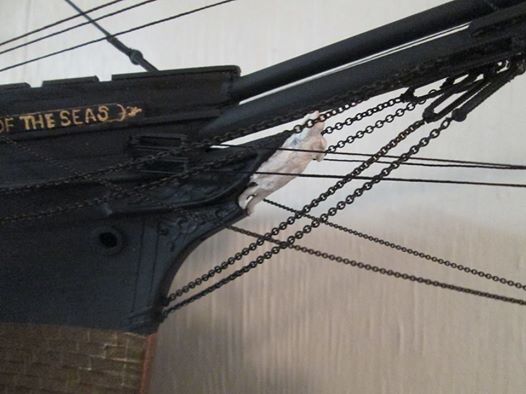
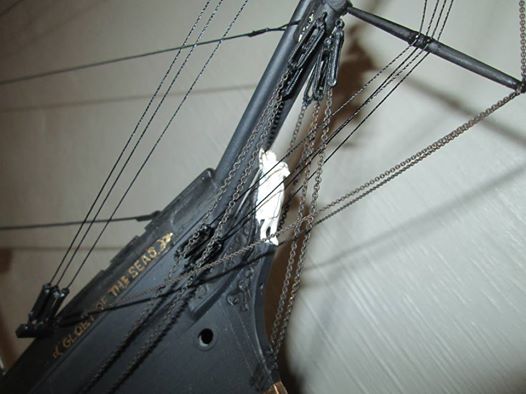
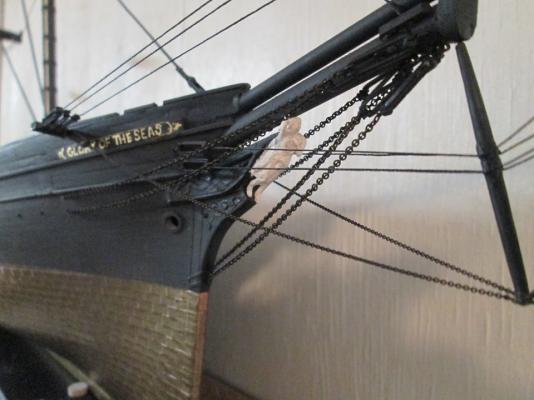
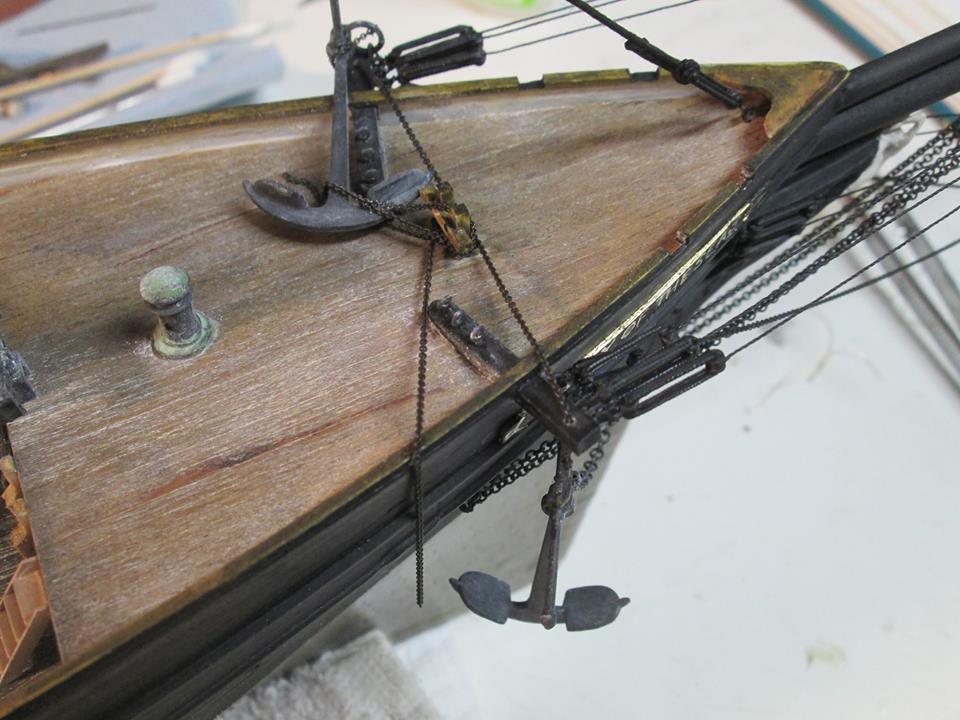
3 hours ago, rwiederrich said:
Thanks Vladimir...for the wonderful compliment. I love Donald McKay clippers...I've scratch built a few. This one being particularly special....because I actually recovered artifacts of her from her resting place. How cool is that?
Thanks for looking in and the most appreciated compliment.
Rob
i kno i know. i have checked all of them
") From her resting place? are you deep diver or did i miss something on this chain?
From her resting place? are you deep diver or did i miss something on this chain?
its very cool indeed. Im in awe that modeling is pretty much art rpetty much traveling back in time and romantically resurrecting history etc....at
east for me....fyi , i have few weeks till I finish cutty and . guess what. Plans for flying fish already on the way to me.
I m happy i could count you as a foremost source of helping hand if needed advice. but i am gonna read prior to that few books about that. as much as i adore cutty sark in its own way, and hate diffficulty she posses with all the ornametation, apart of innovations she represents boyous era of wealth in its own way. Mckays clippers represents in my opinion what would be called today understated timeless beauty, not trying to show off wealth by overdecoration but simply represented by sharp design without any need of further decorations. yet still decks and cabins pretty much represents clear typical design of new world era with wooden knees, very different from what was going on in wuoprw. i have to study this more im just observing those designs and trying to guess....but that long poop deck and mizzen mast in middle of it is georgous...must be probably genuine design isnt it?
-
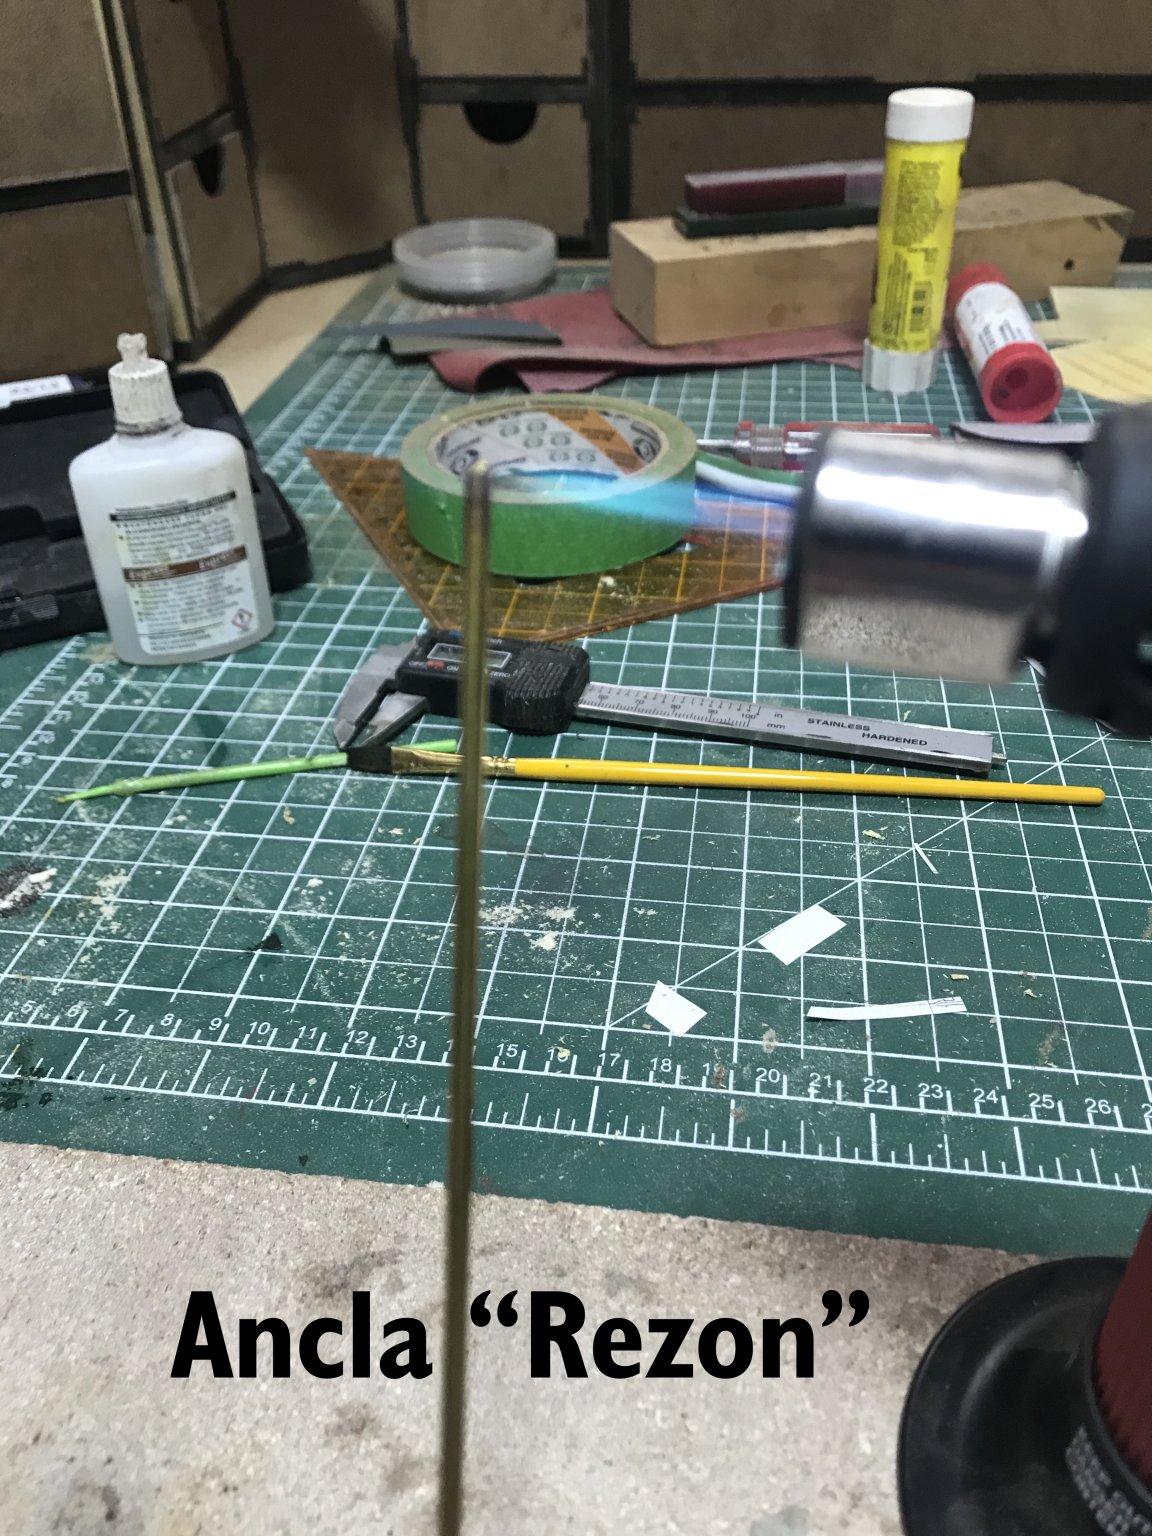
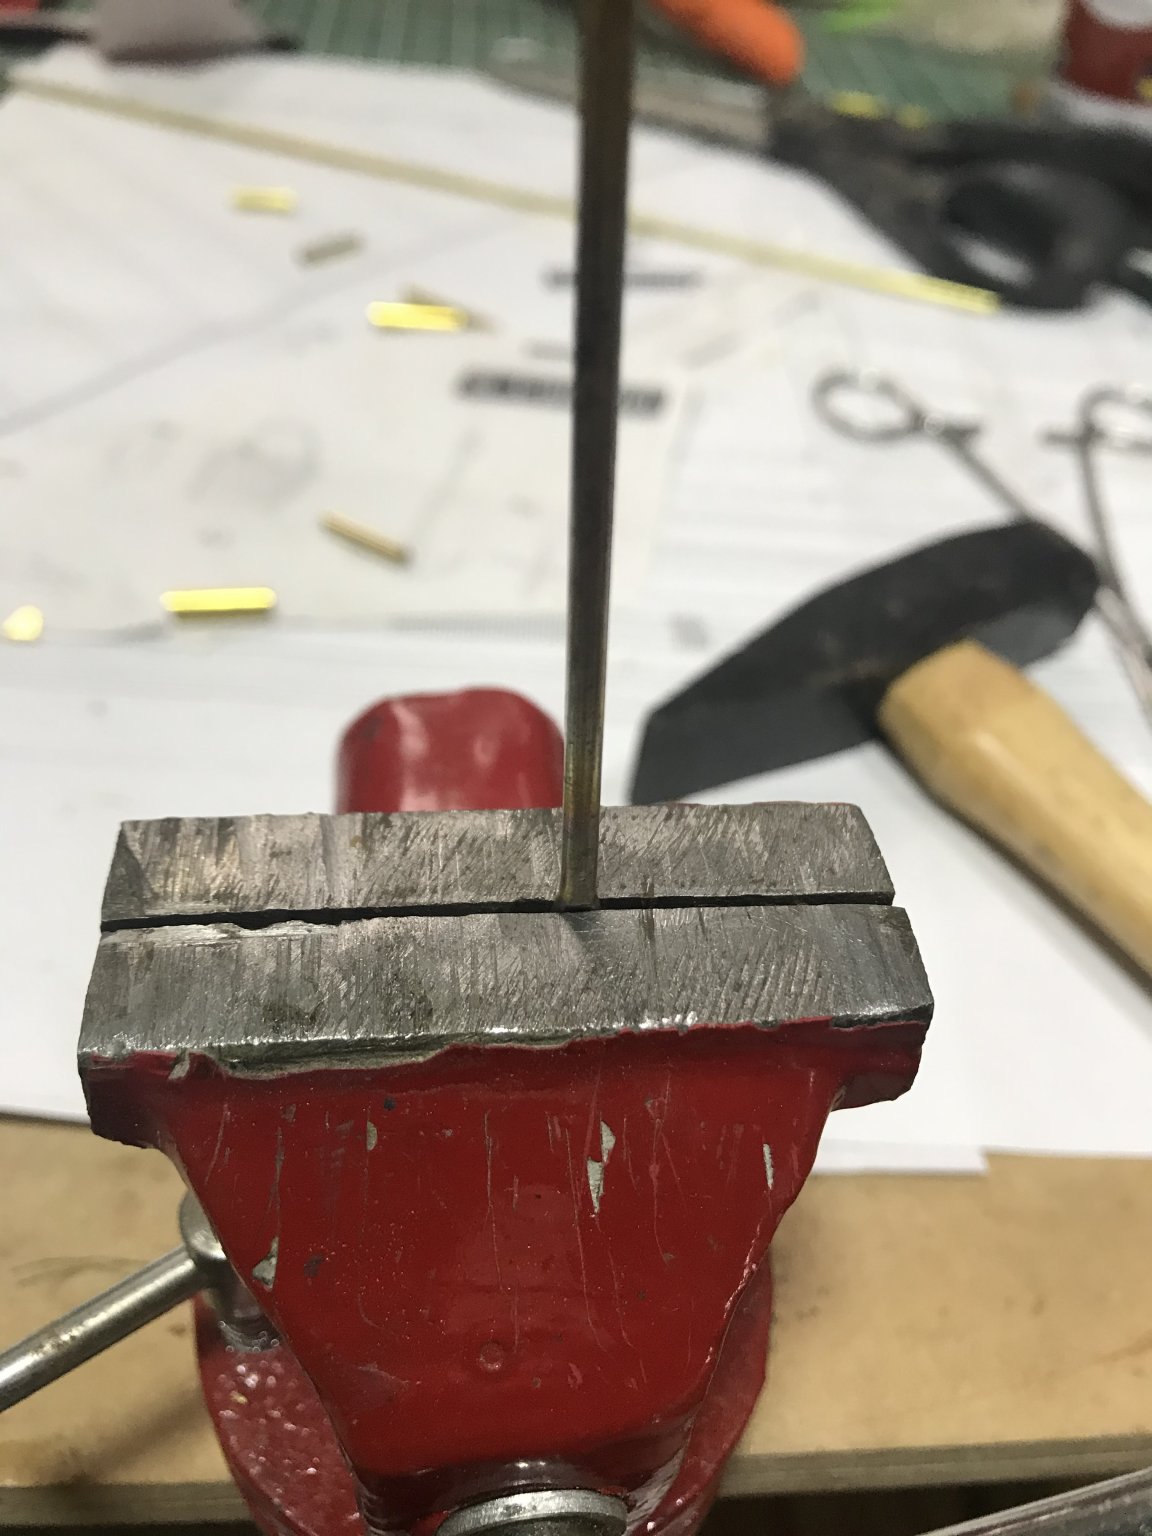
7 hours ago, Hellmuht Schrader said:
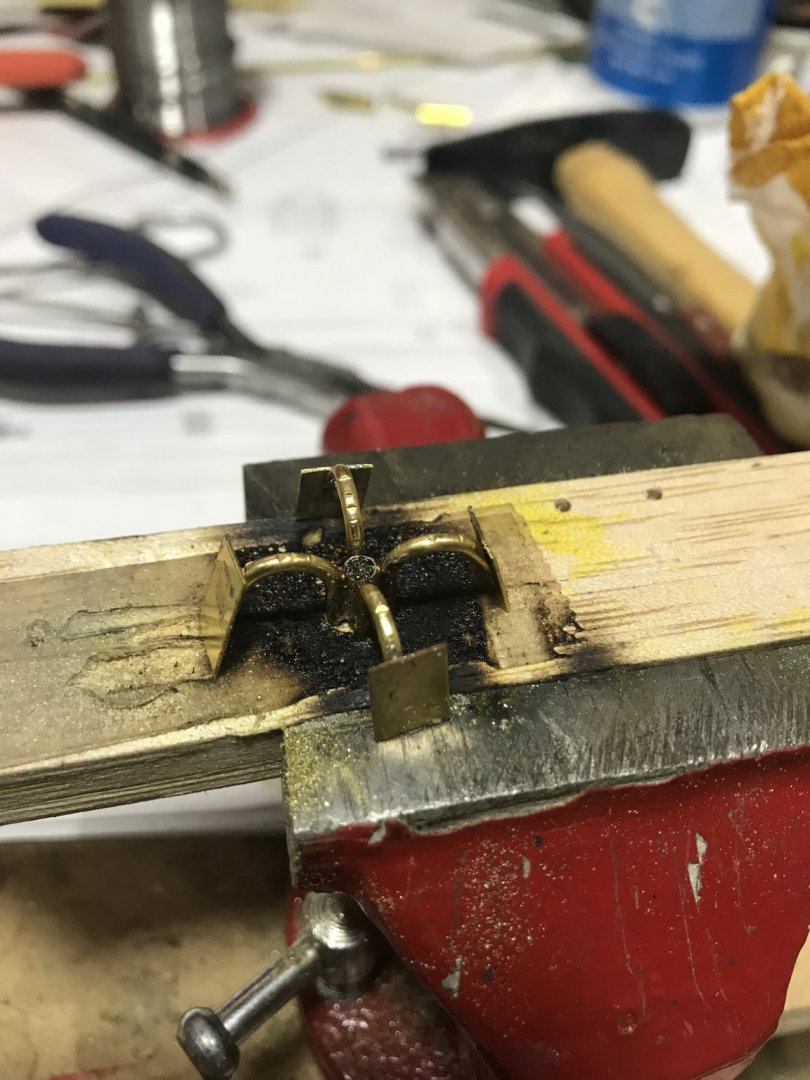
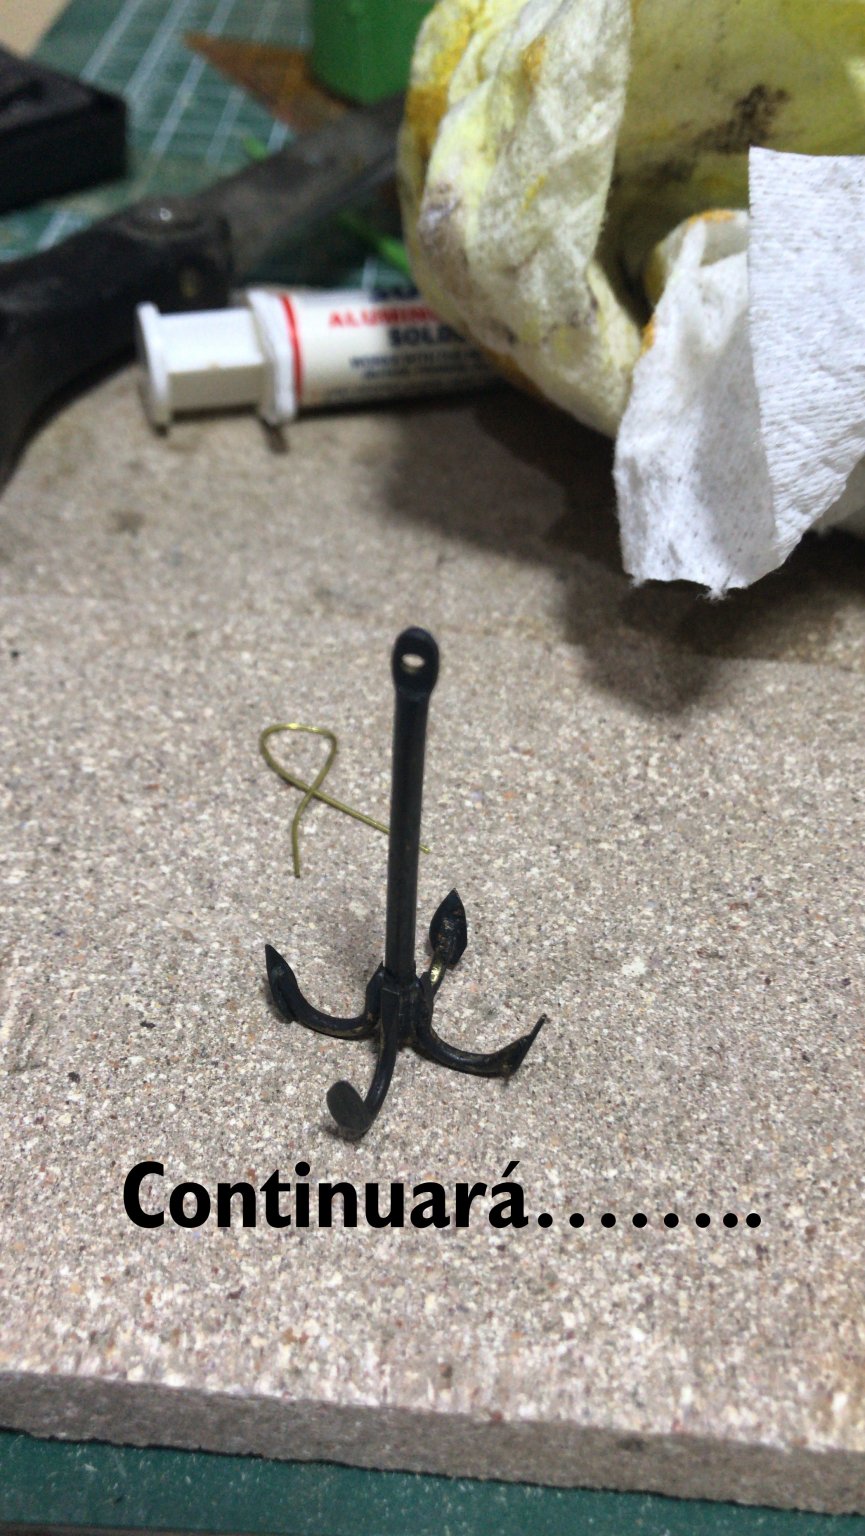
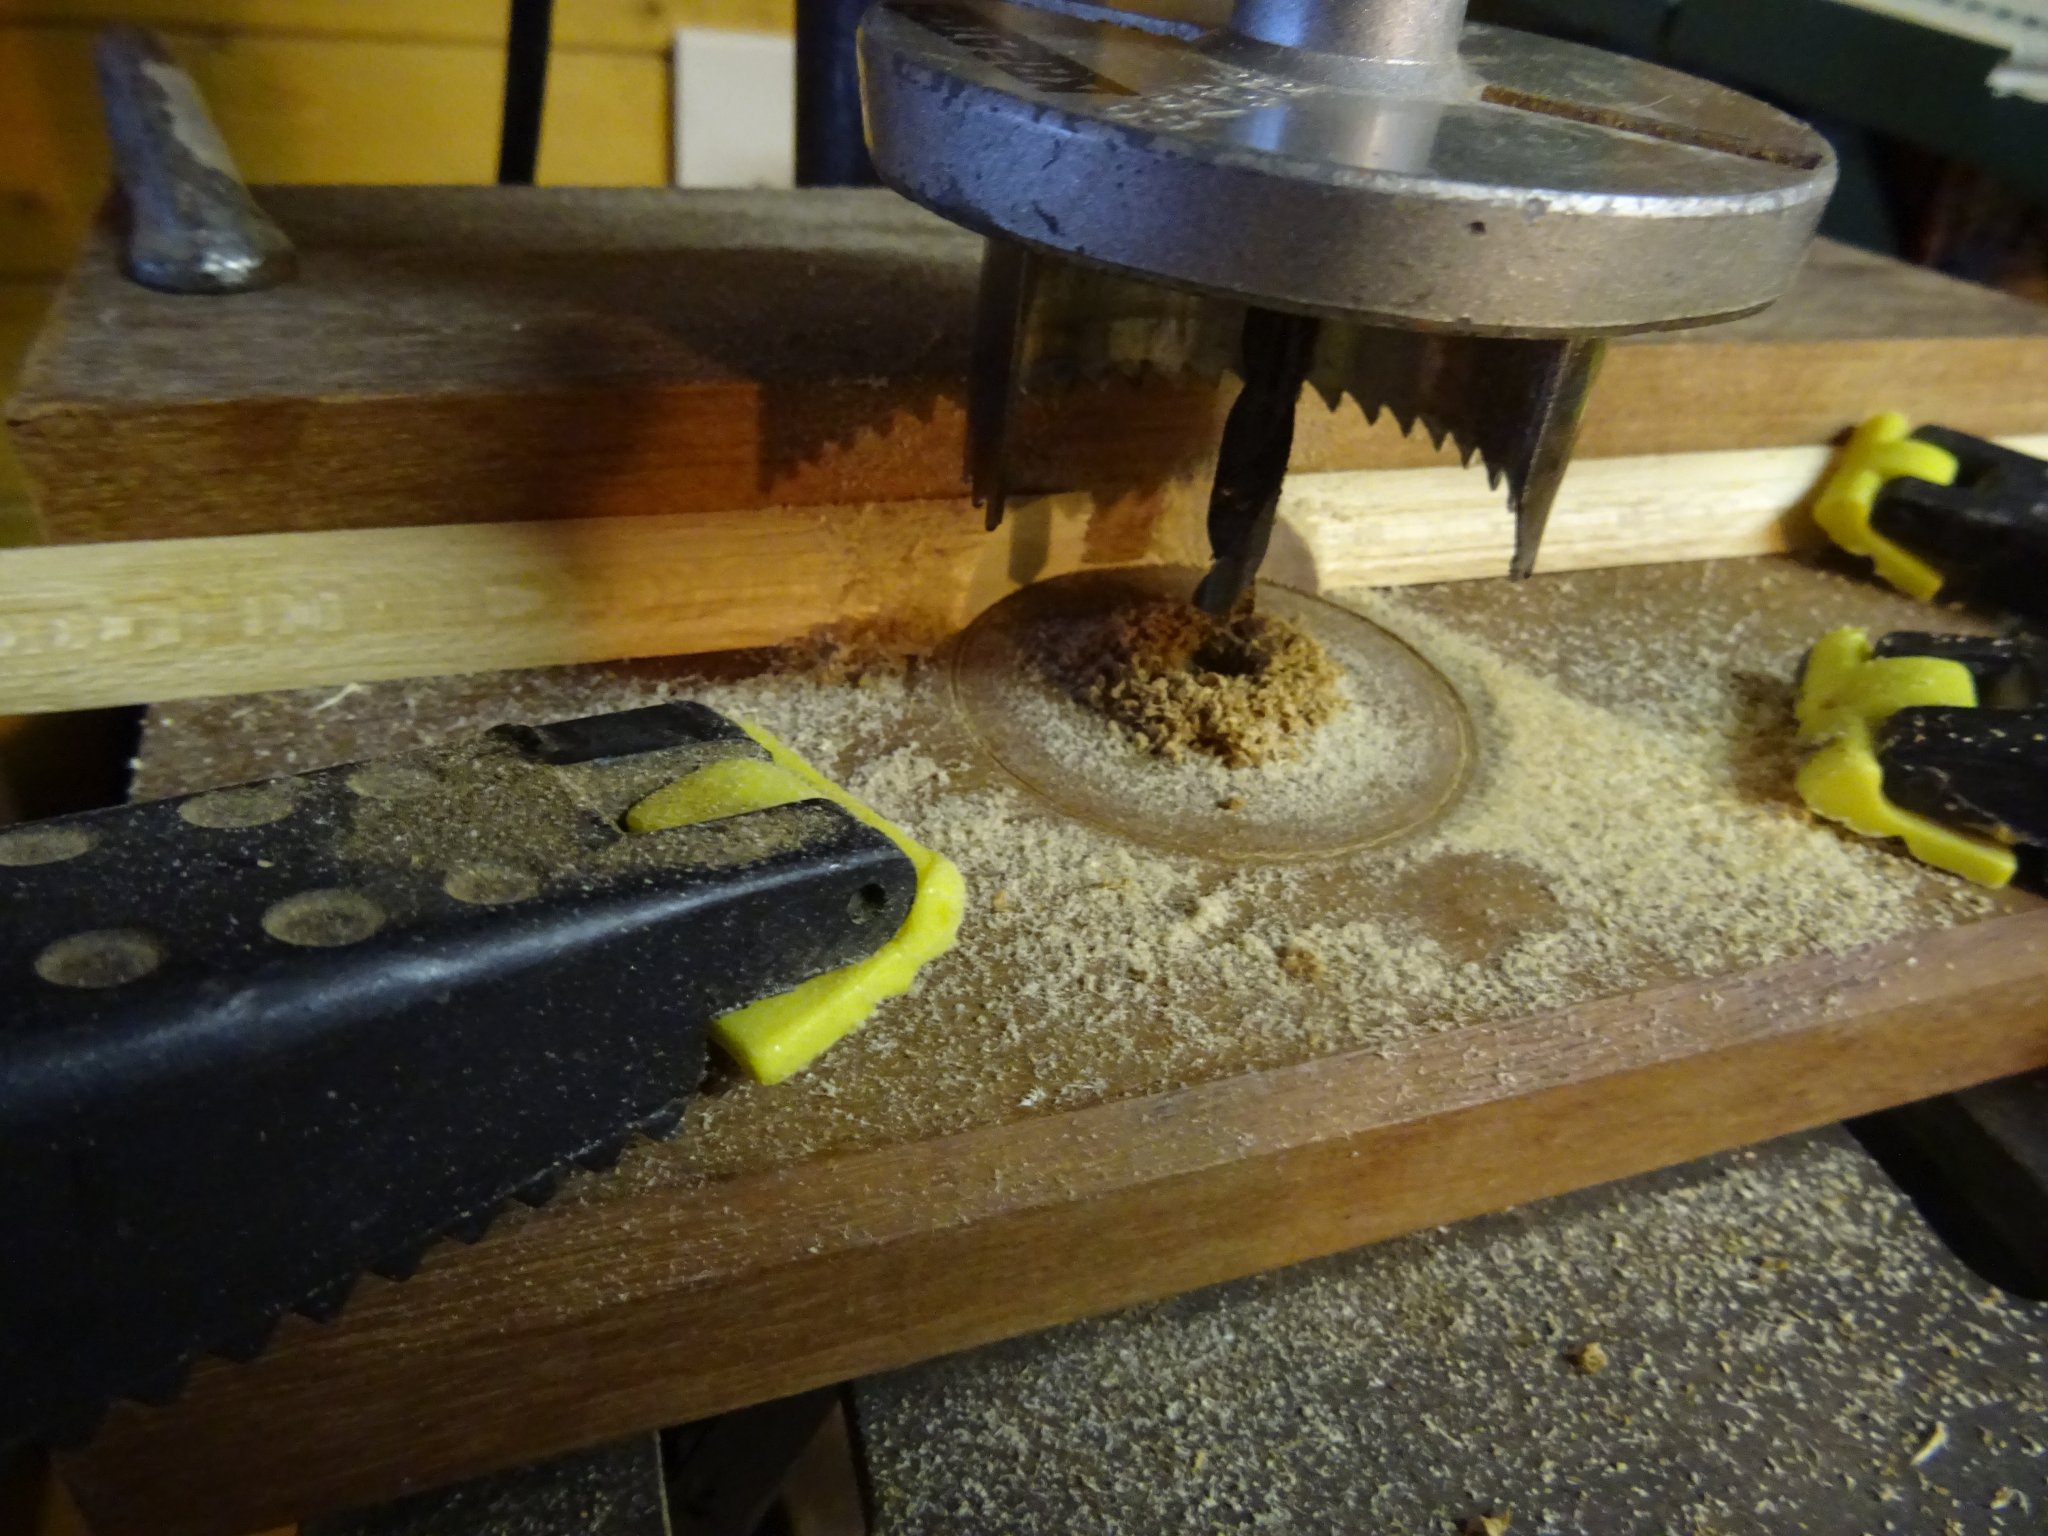
Anchor grapnel.......
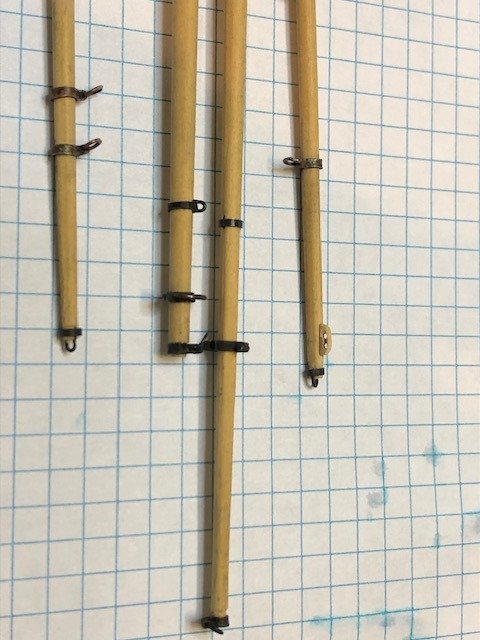
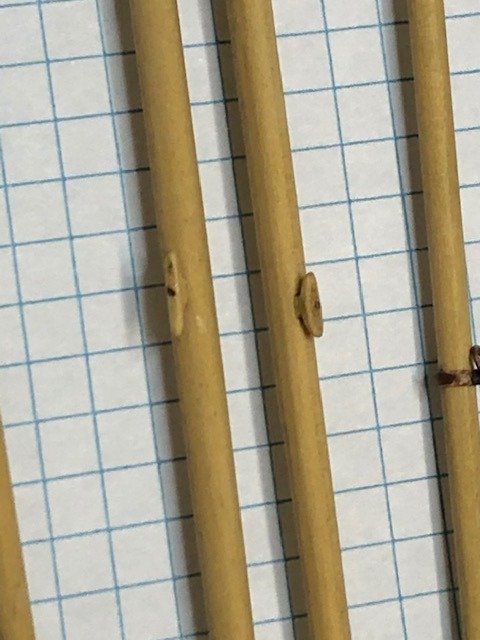
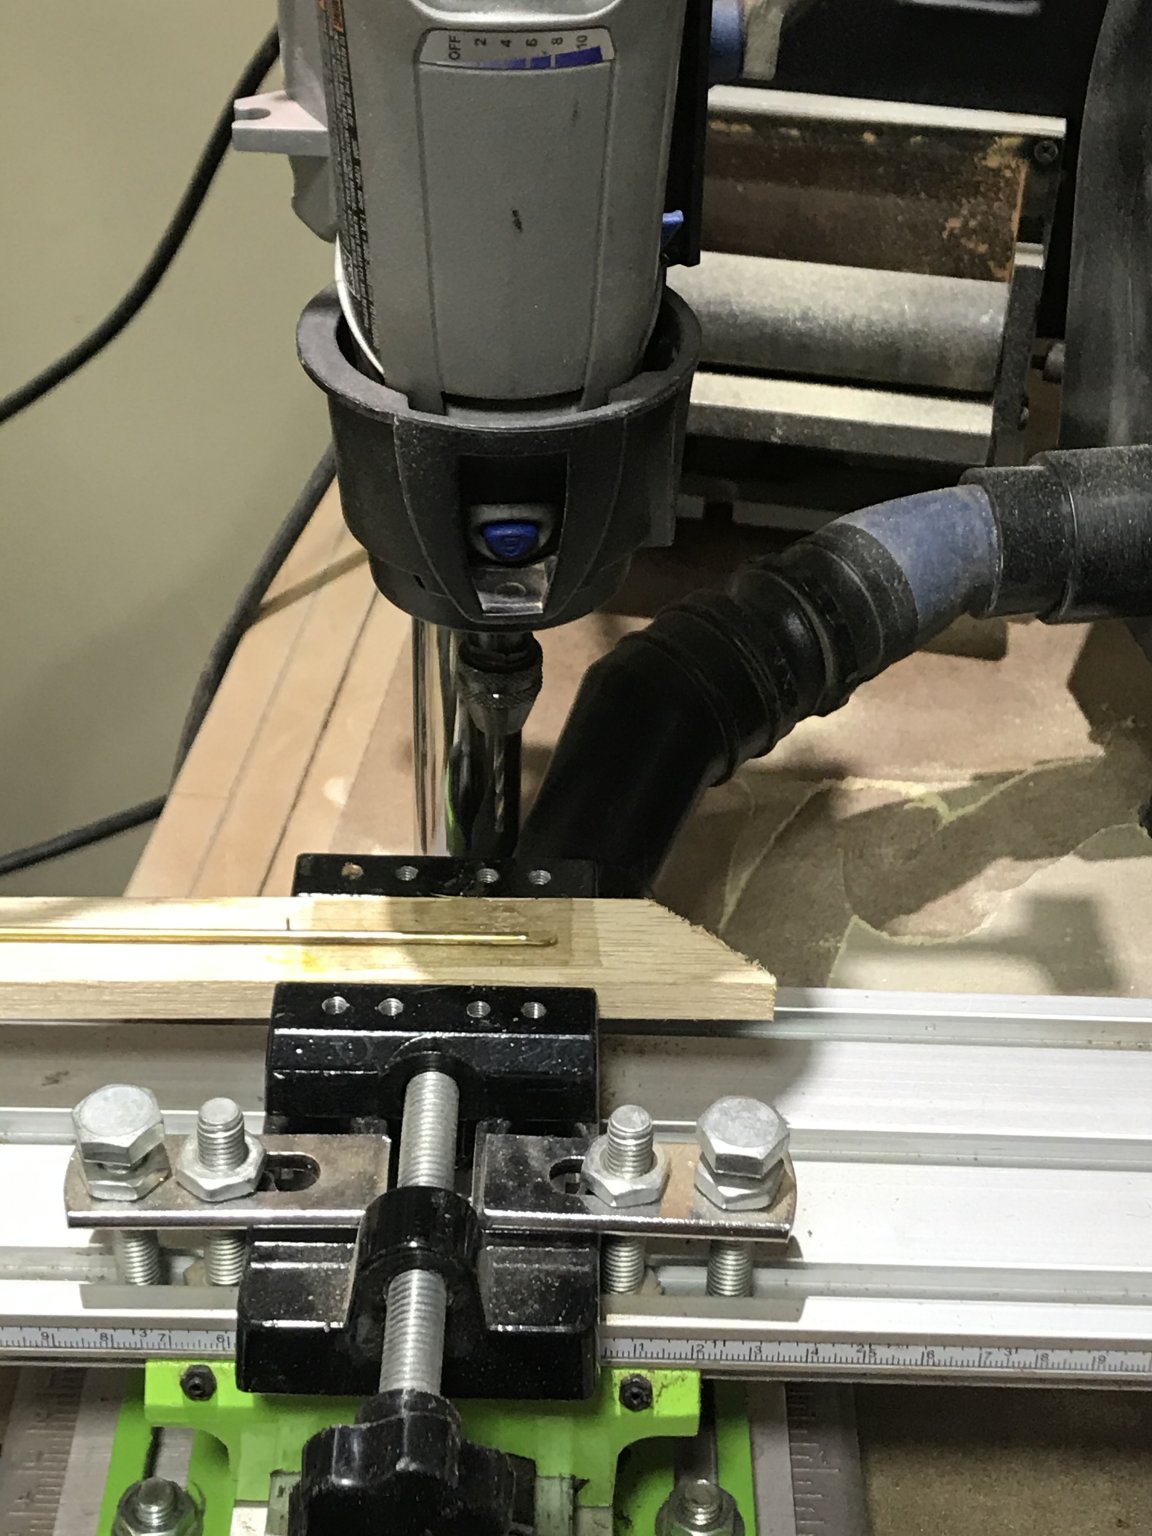
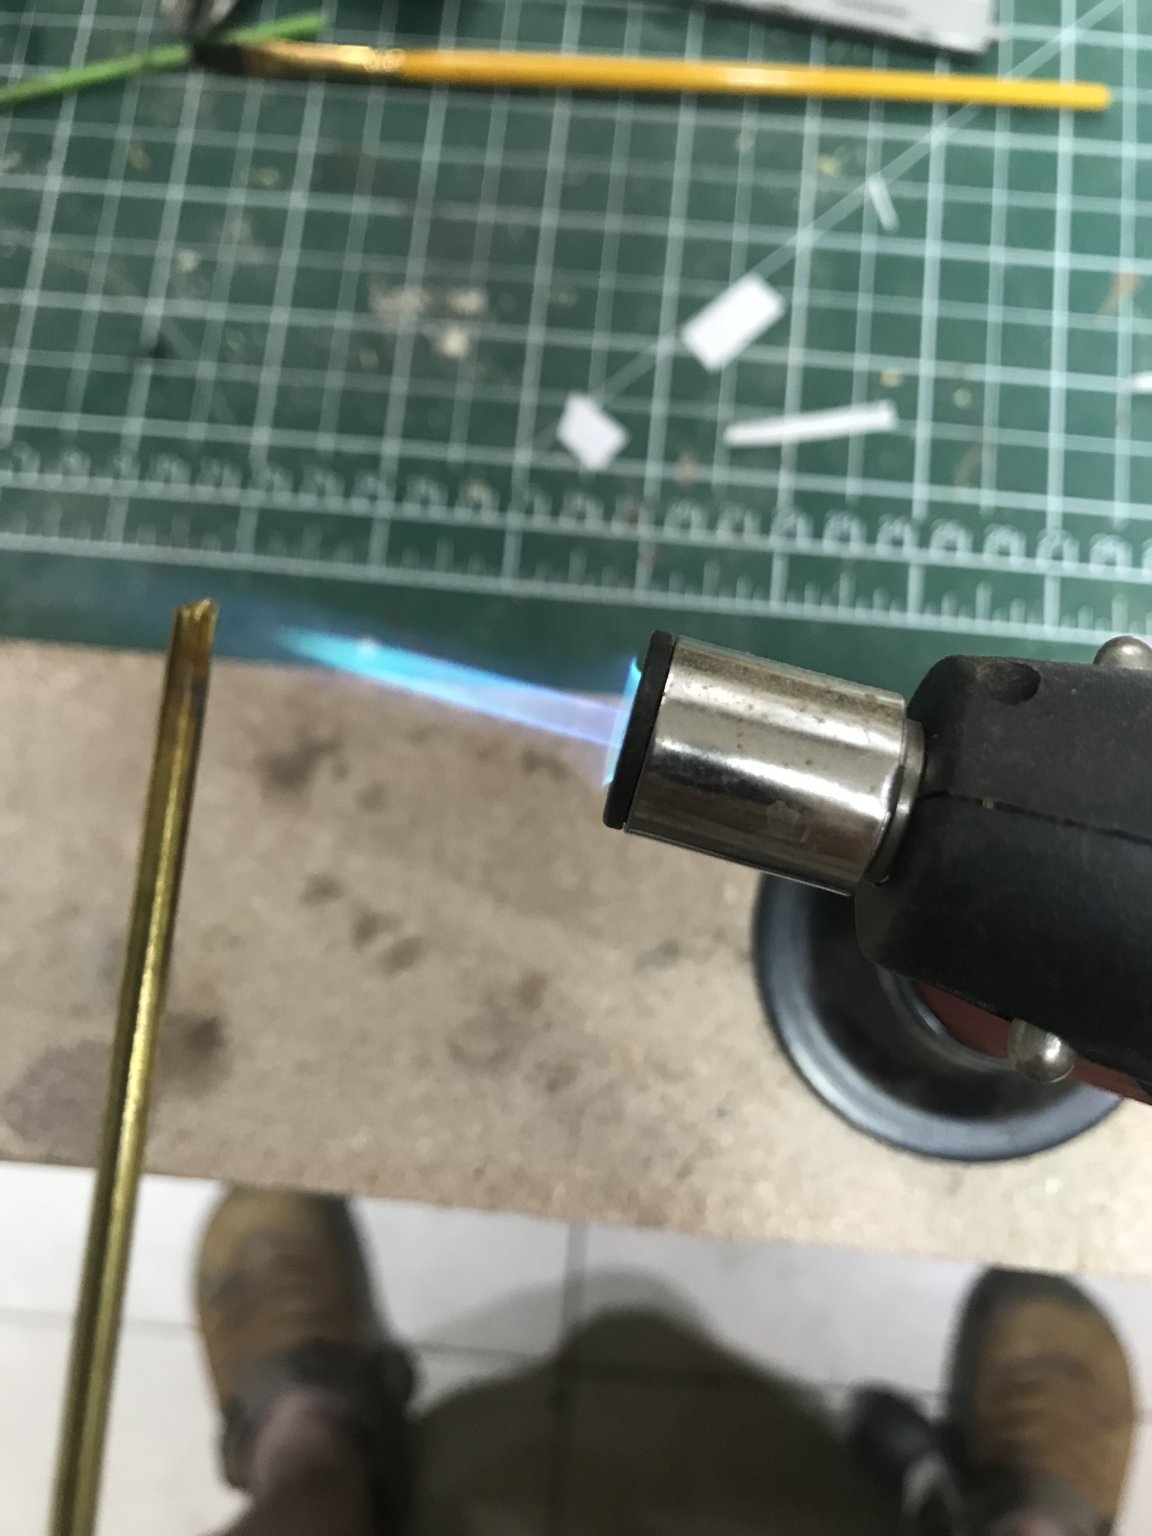
This piece has some difficulty since we have to weld 8 pieces in a little space. Producing heat that will pump out those pieces that are already welded. So I decided to make a “mold” where all pieces can be “secured” ....... Two pieces of wood with 5 holes.... 1 for the central piece an 4 for the hooks.
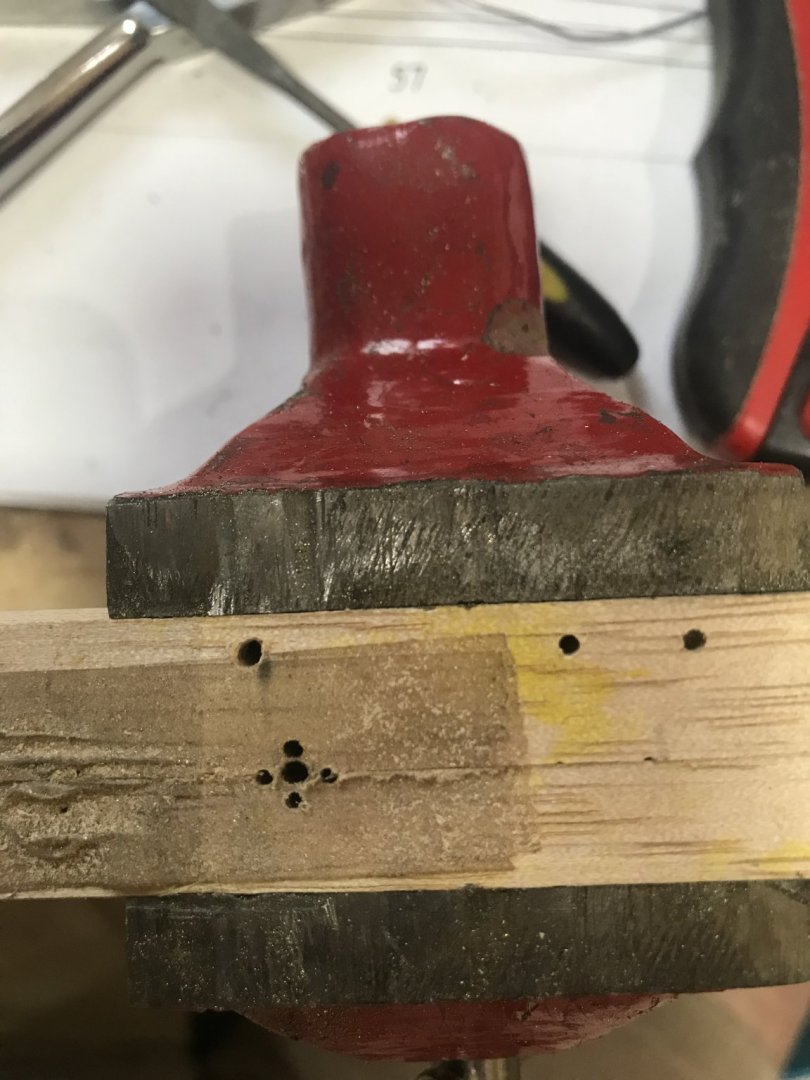
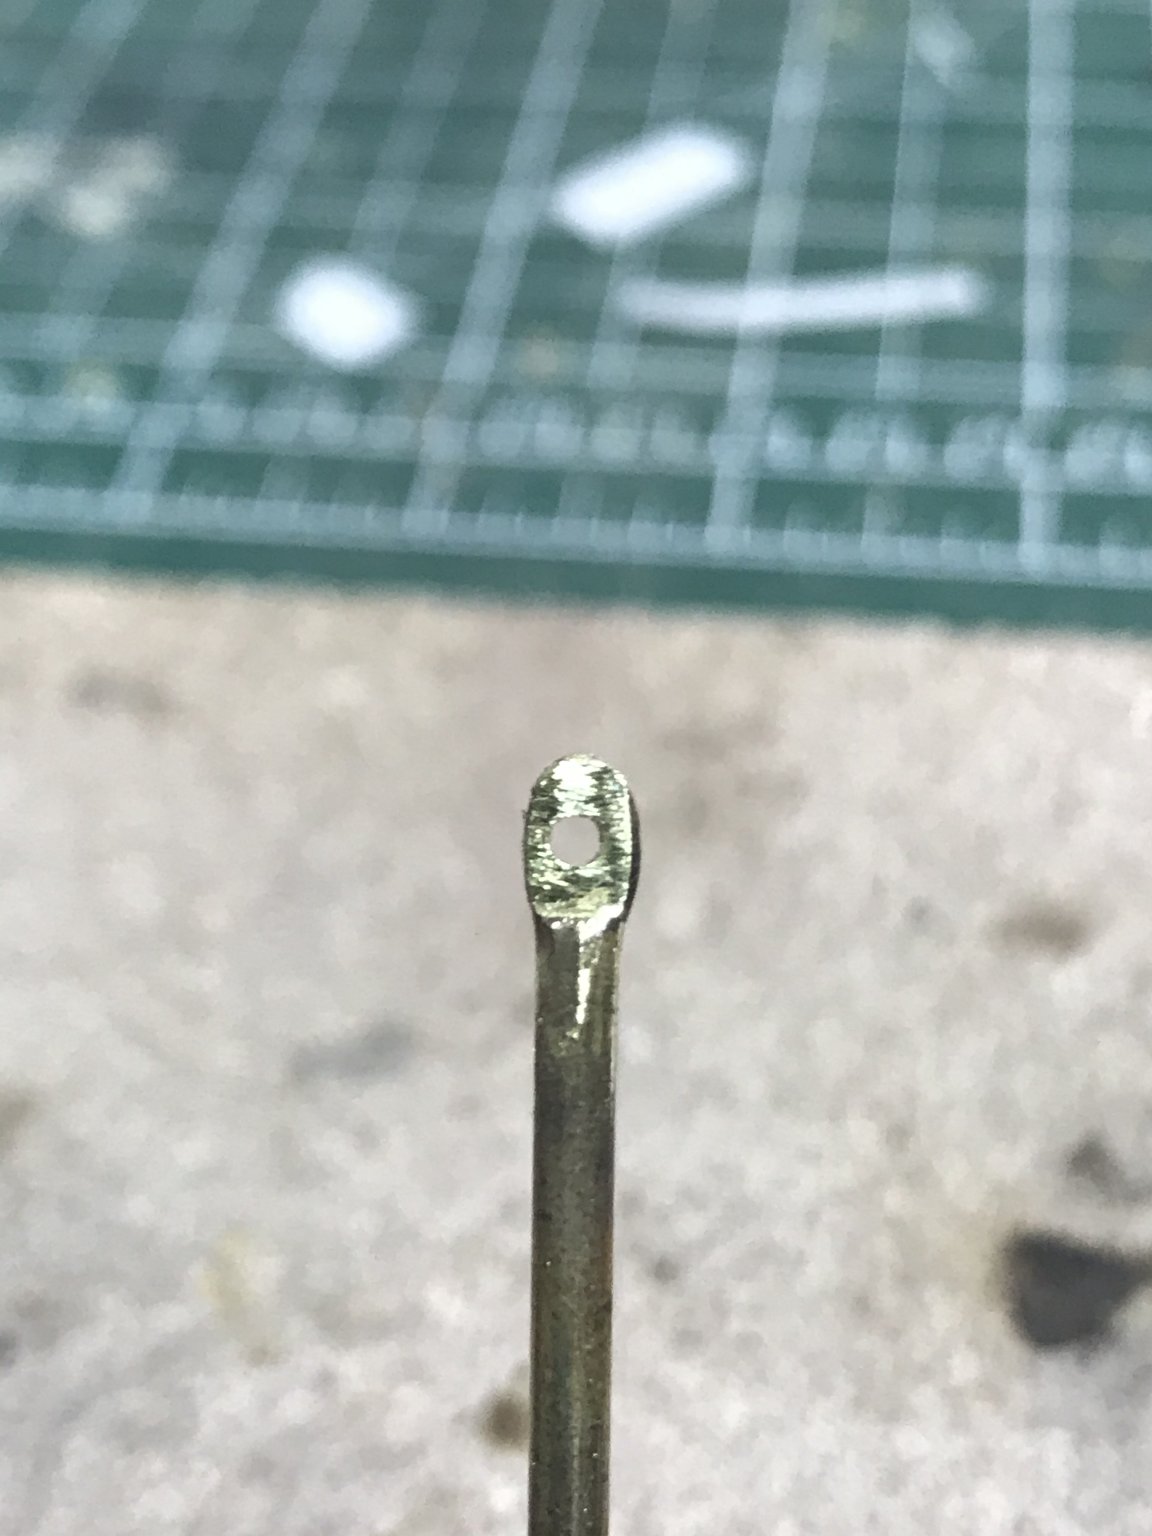
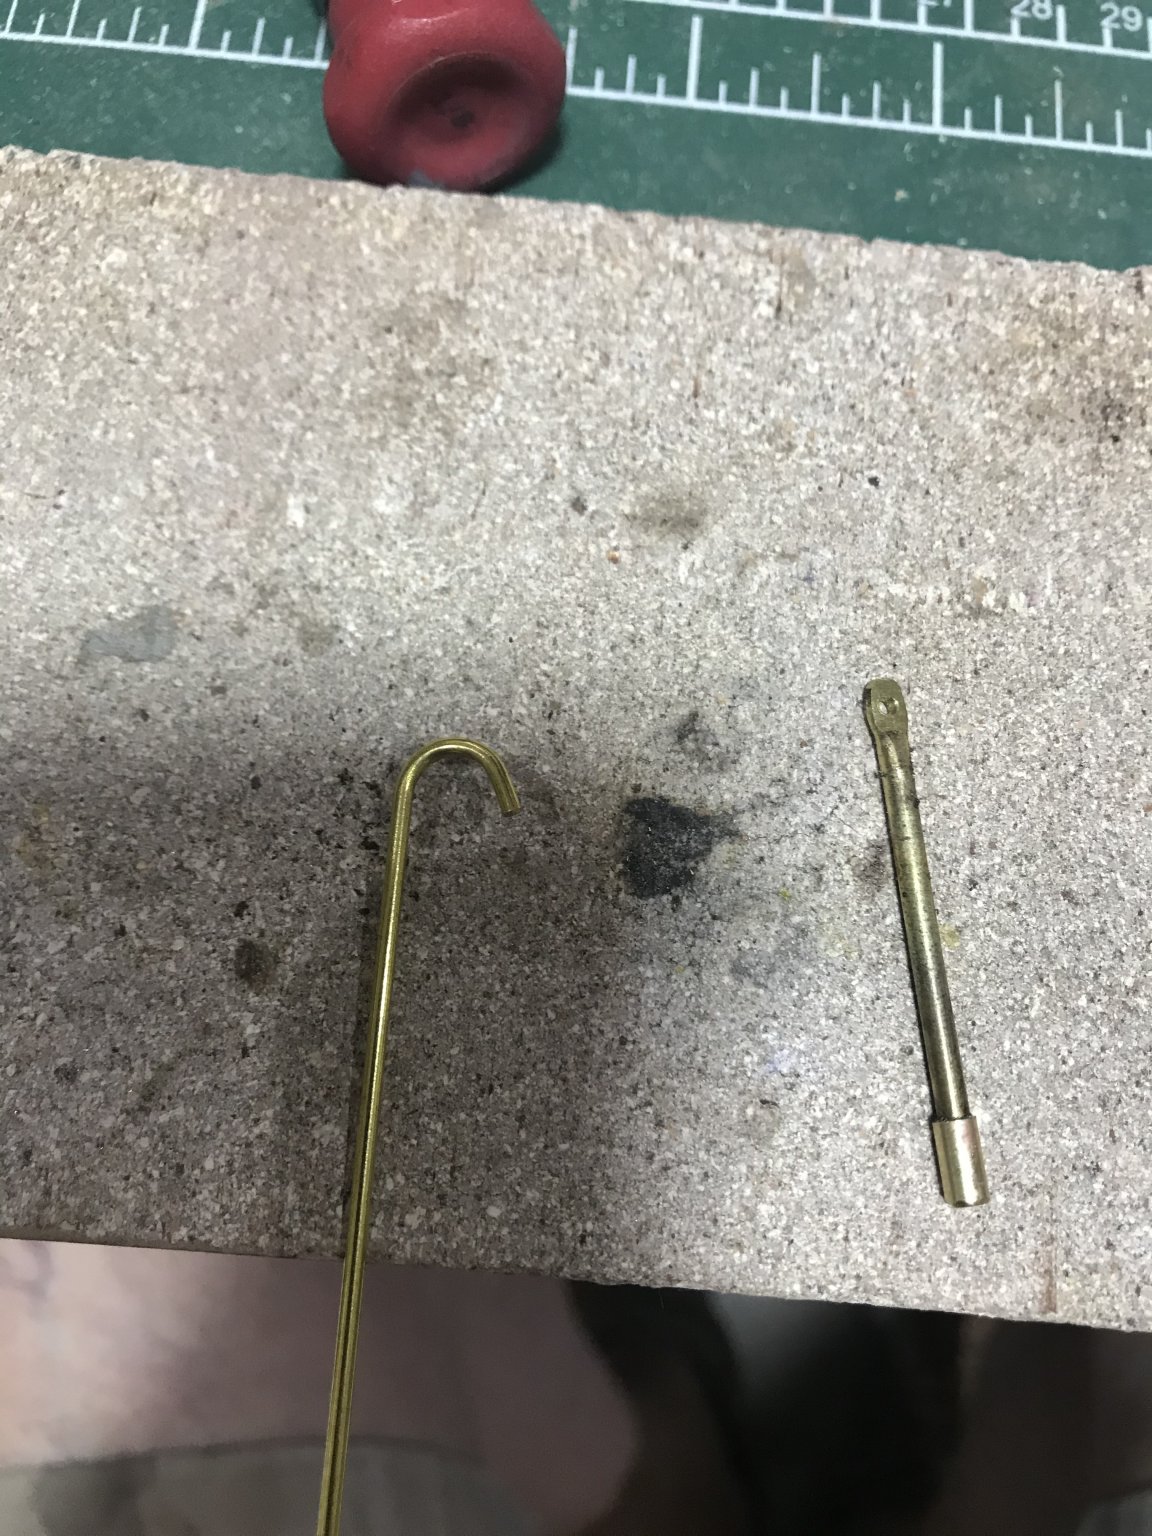
One 2 mm wire heated in one of its ends......

Smashed.....

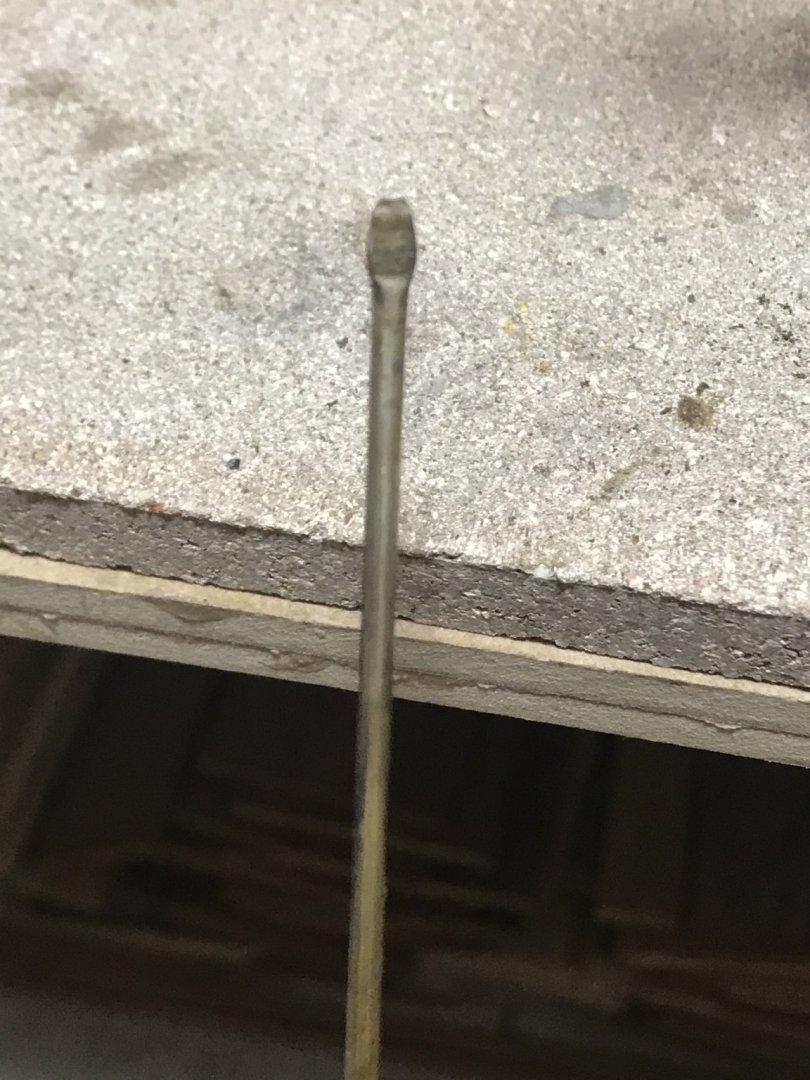
Its hole....


A little tube in the other end and hooks in 1 mm wire....
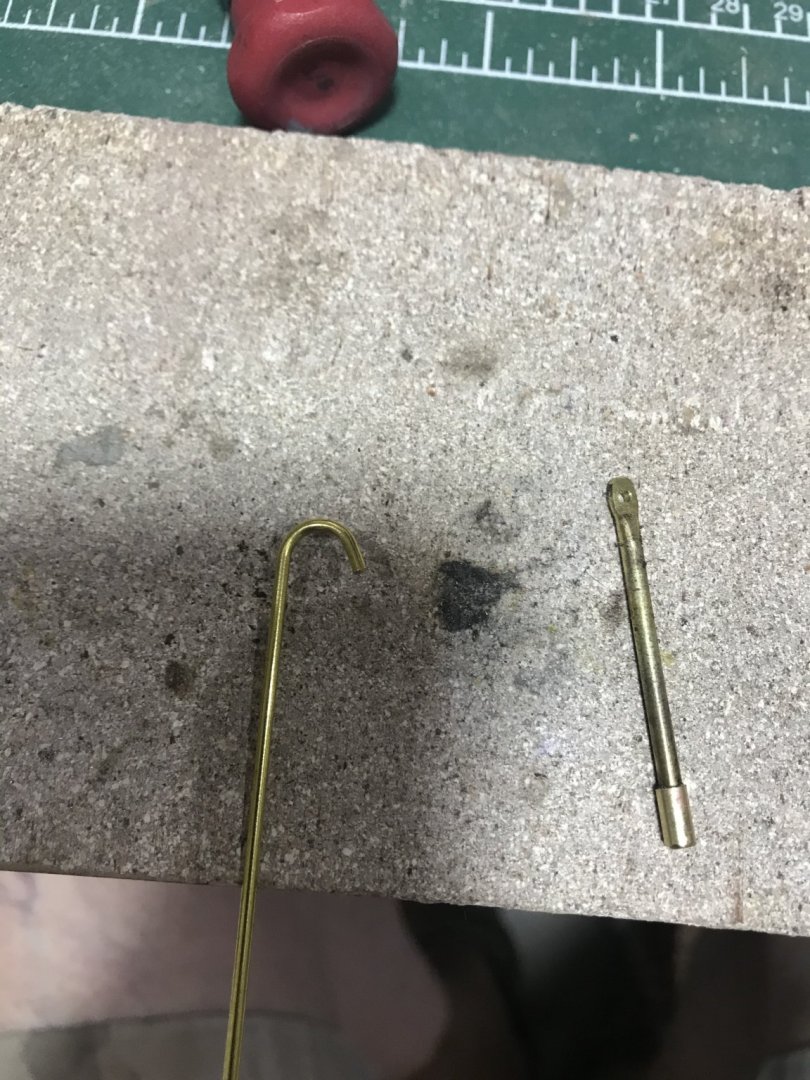
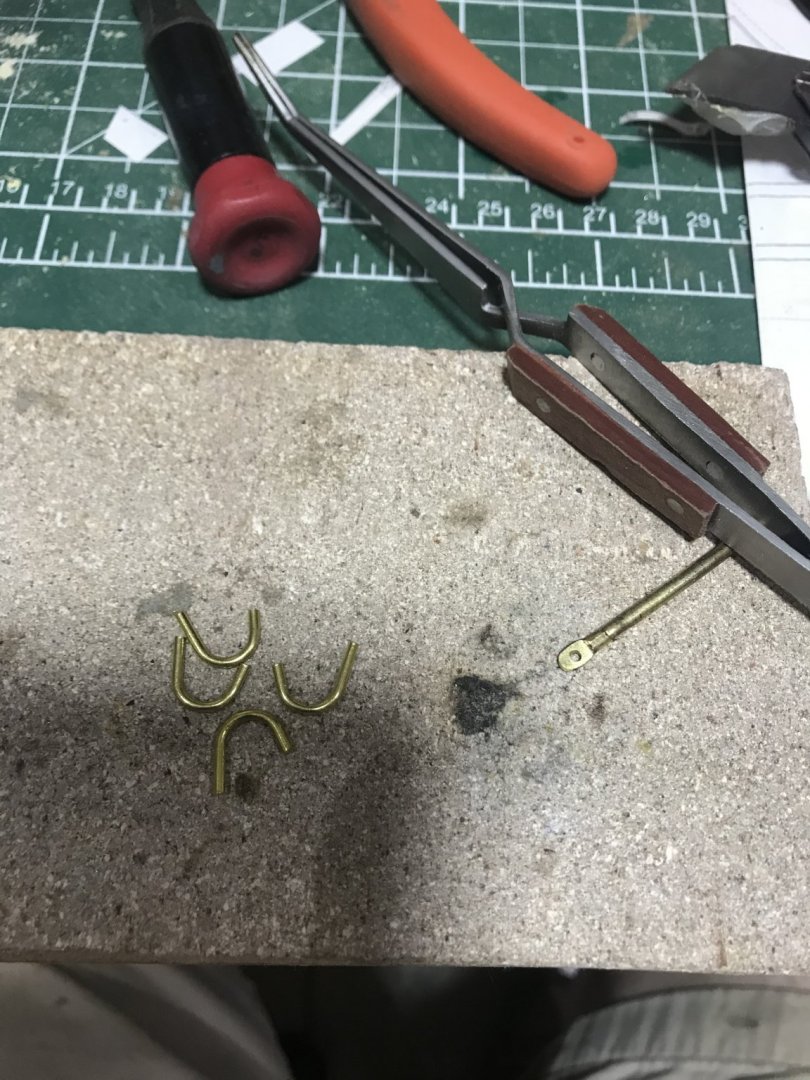
All pieces in the “mold”. Secured an welded......
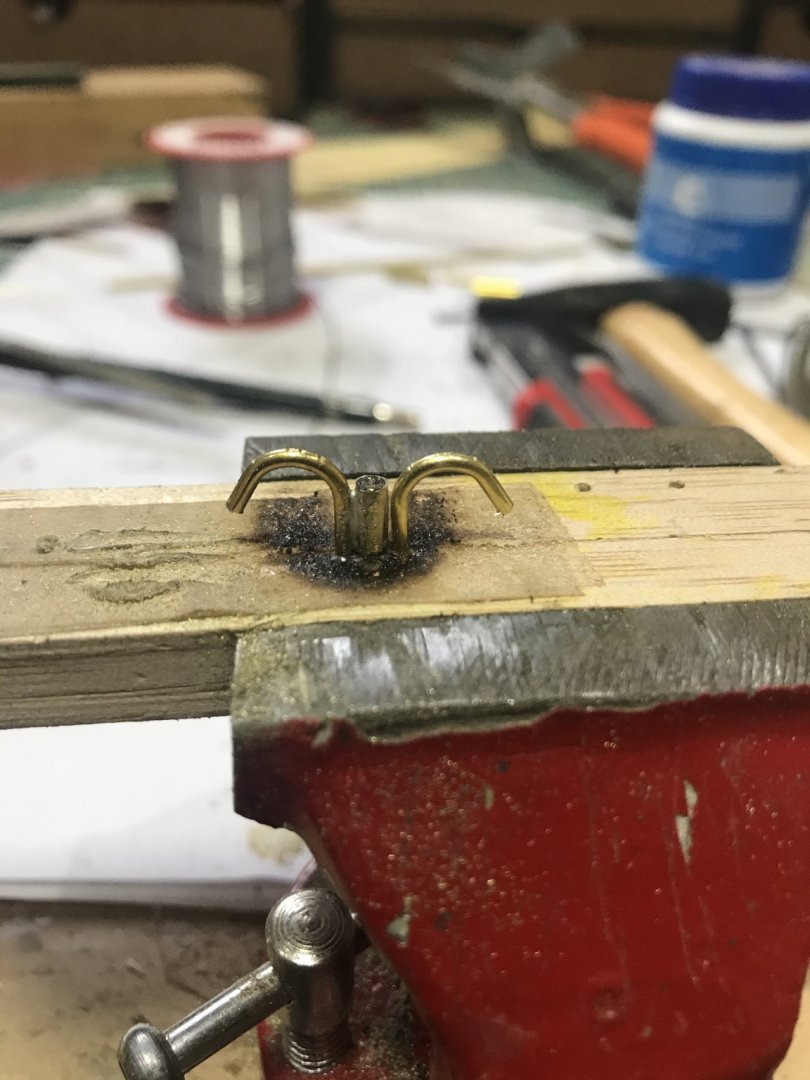
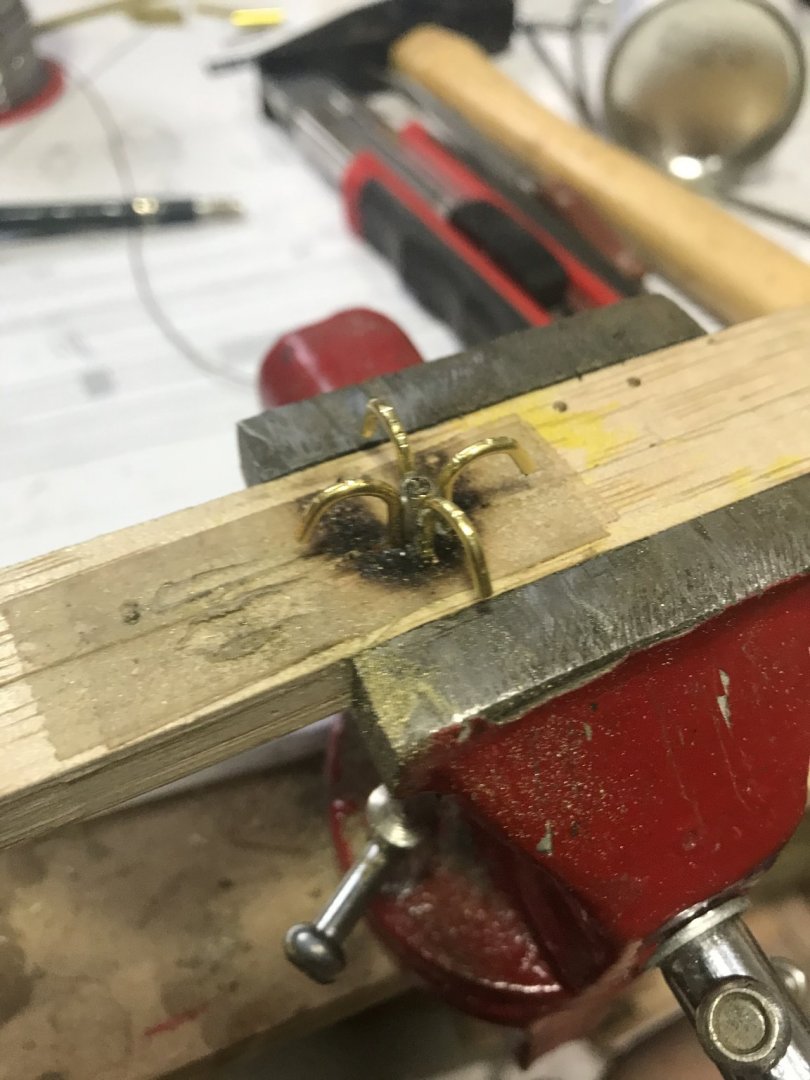
So far... so good...
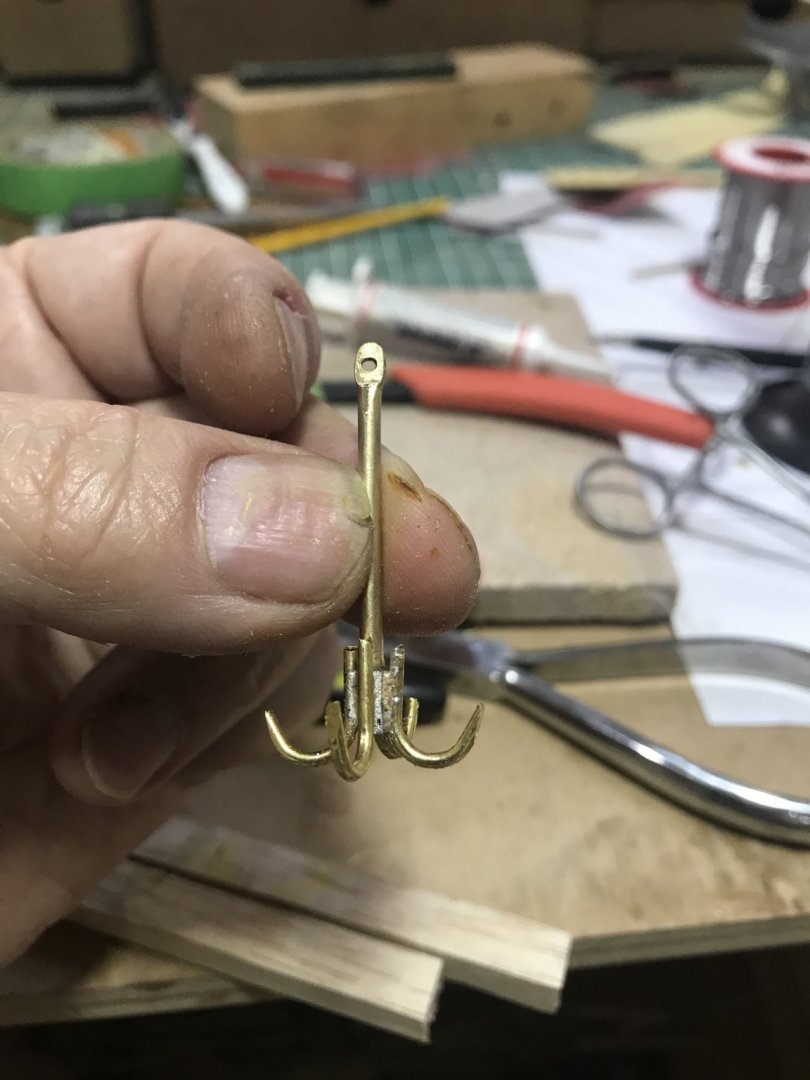
Tips.....
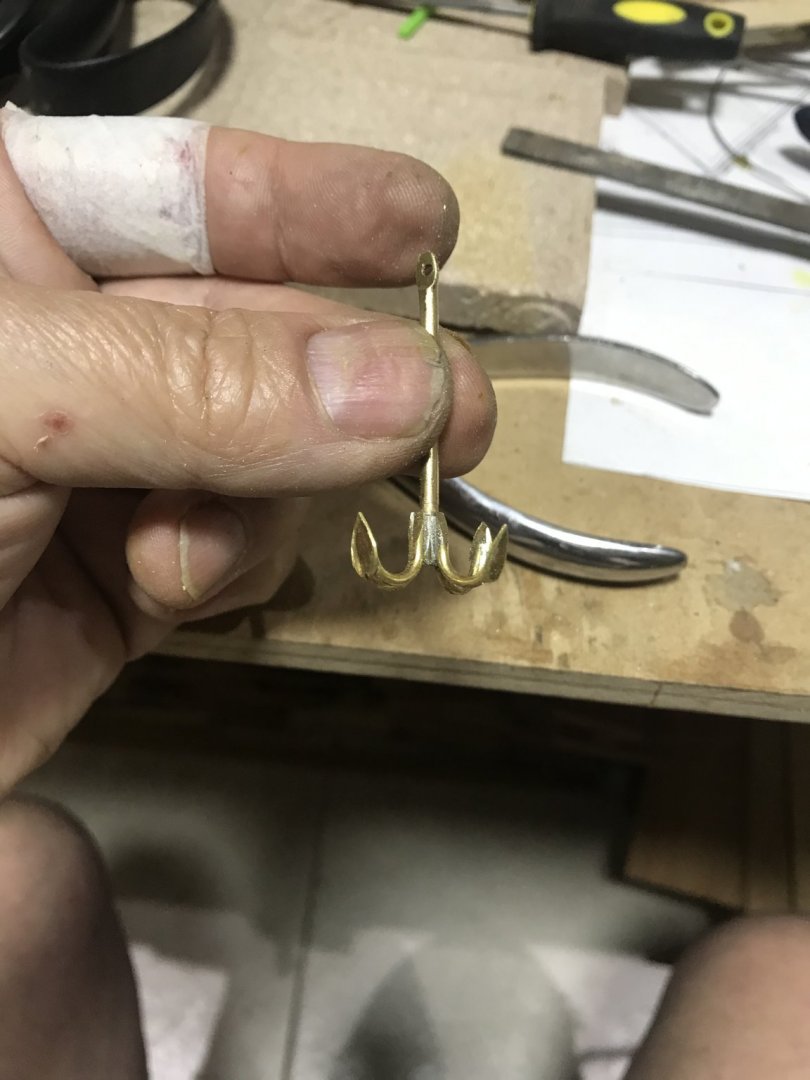
And blued.....It is done


Hello Sir this is wow!
- tkay11, Tony Hunt, GrandpaPhil and 1 other
-
4
-
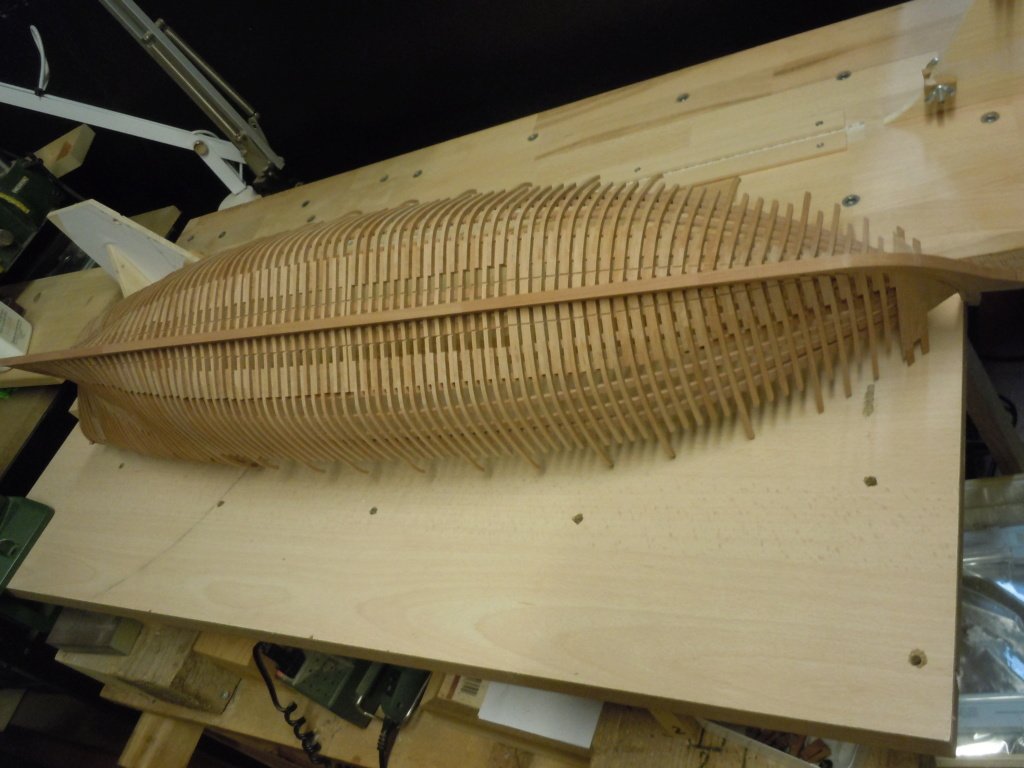
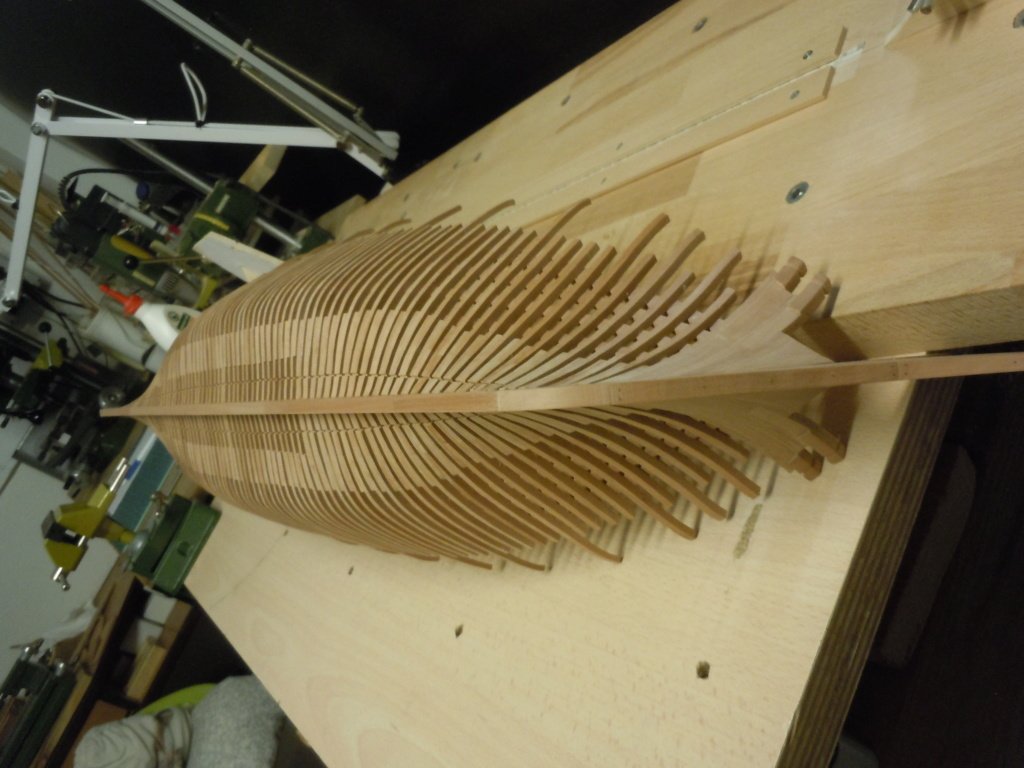
On 4/6/2020 at 2:42 AM, rwiederrich said:
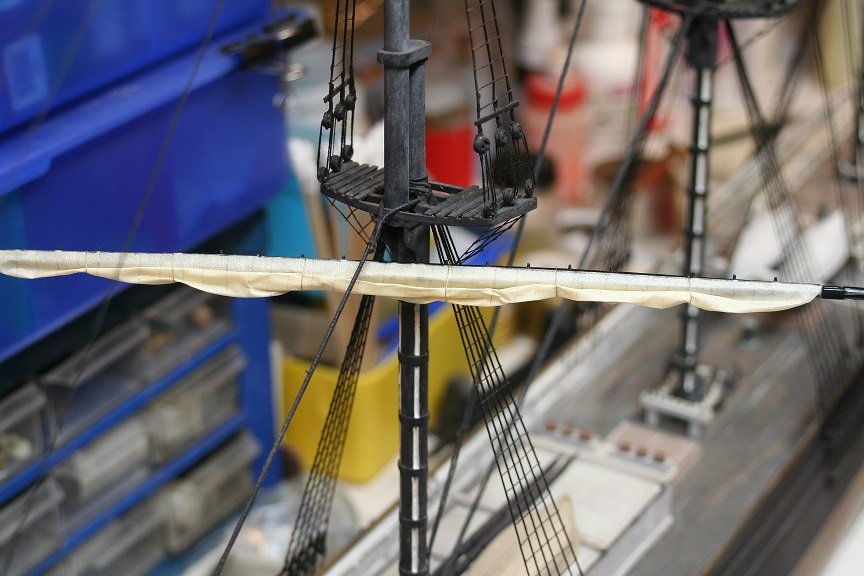
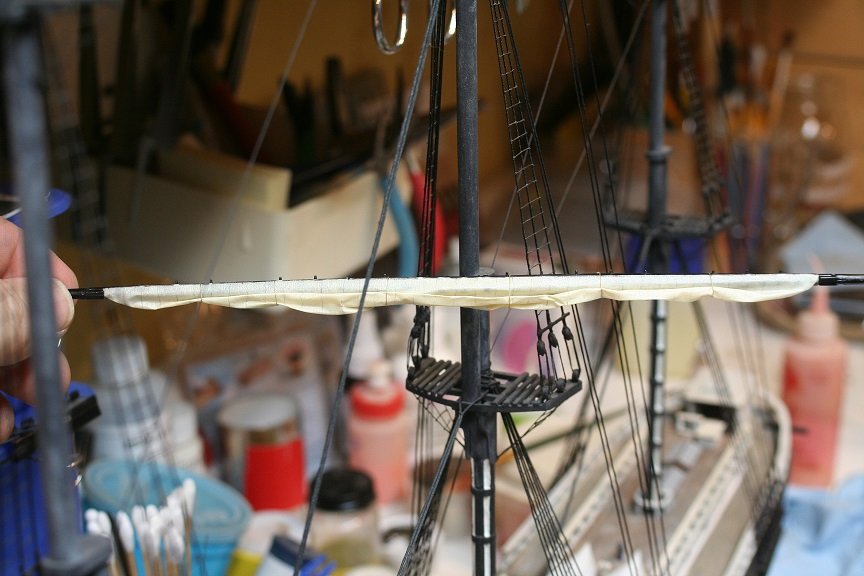
I worked on some mock-ups for the furled sails for the Glory of the Seas....
Rob
amazing sails Rob. I just recently discovered Mr. McKays clippers and im totaly blown away. watching.
- Keith Black and KeithAug
-
2
-
-
On 5/5/2020 at 4:27 AM, Kevin Kenny said:
Just the rudder to build and install
lovely boats Kevin, i consider myself just a unskilled kid of modeling and have been building first clinker lately, i ican tell you it was tougher for me than planking 3.half meter cutty sark mamooth. and yet i did not succeed at the edges but i will get better next time. i will try maybe this method when not clinker .
-
10 minutes ago, English Rebel said:
Just read your build and I must say you are very resourceful. Good work.
Alan
Hello ,thank you Alan, by resoyrceful you meant all kinds of old screws, rivets, mechanical watches and so oj that i use ? Well haha i try to imagine before i build how to easy process - and its not always leading to good rulesults but works another time. I try to use as much as old stuff around house and its part of my fun to make use of old things.
stay tuned.
-
8 hours ago, Sailor1234567890 said:
Does she have removable thwarts or was that just part of your simplification of it?
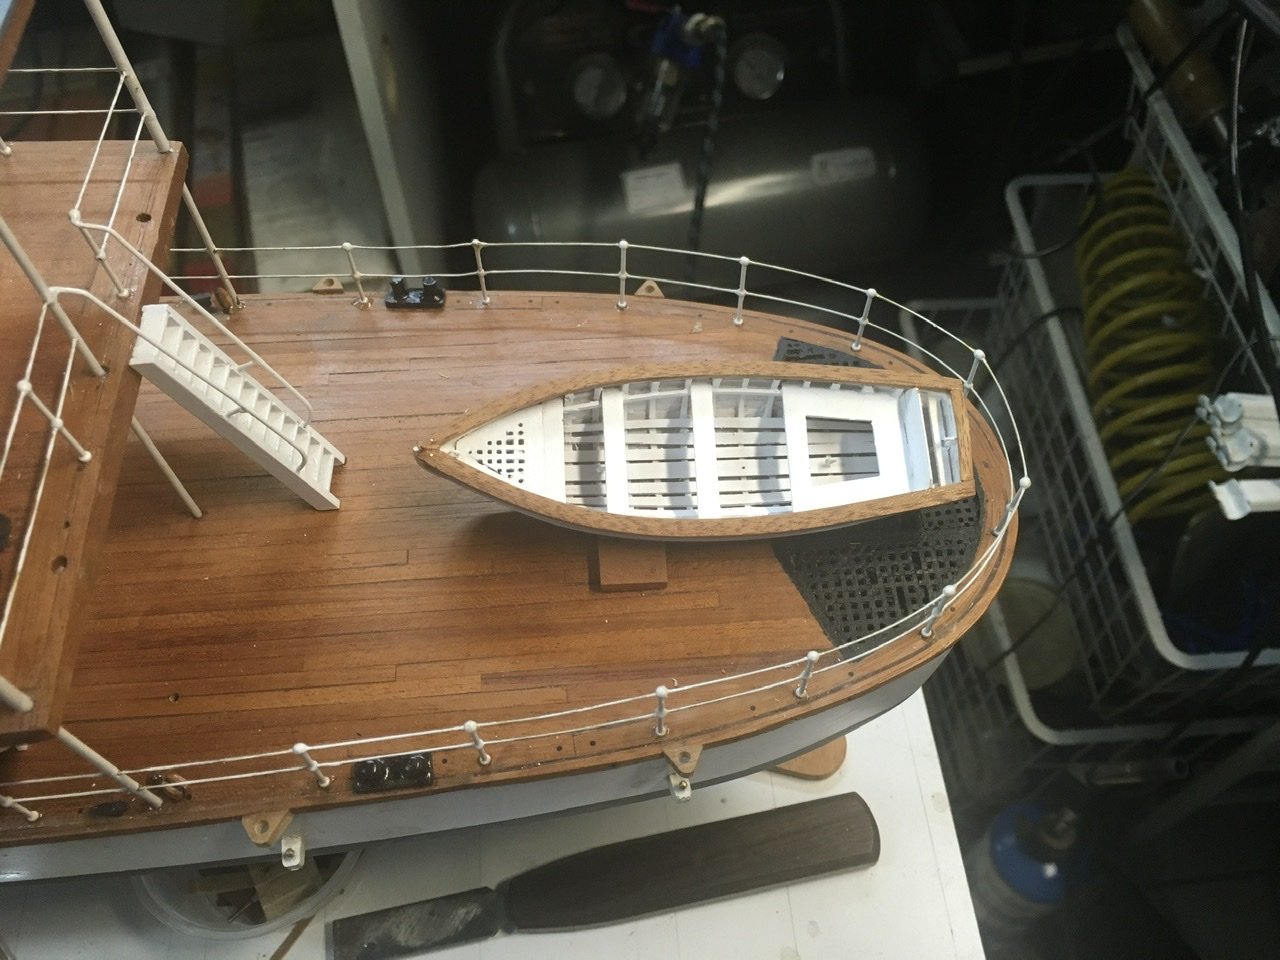
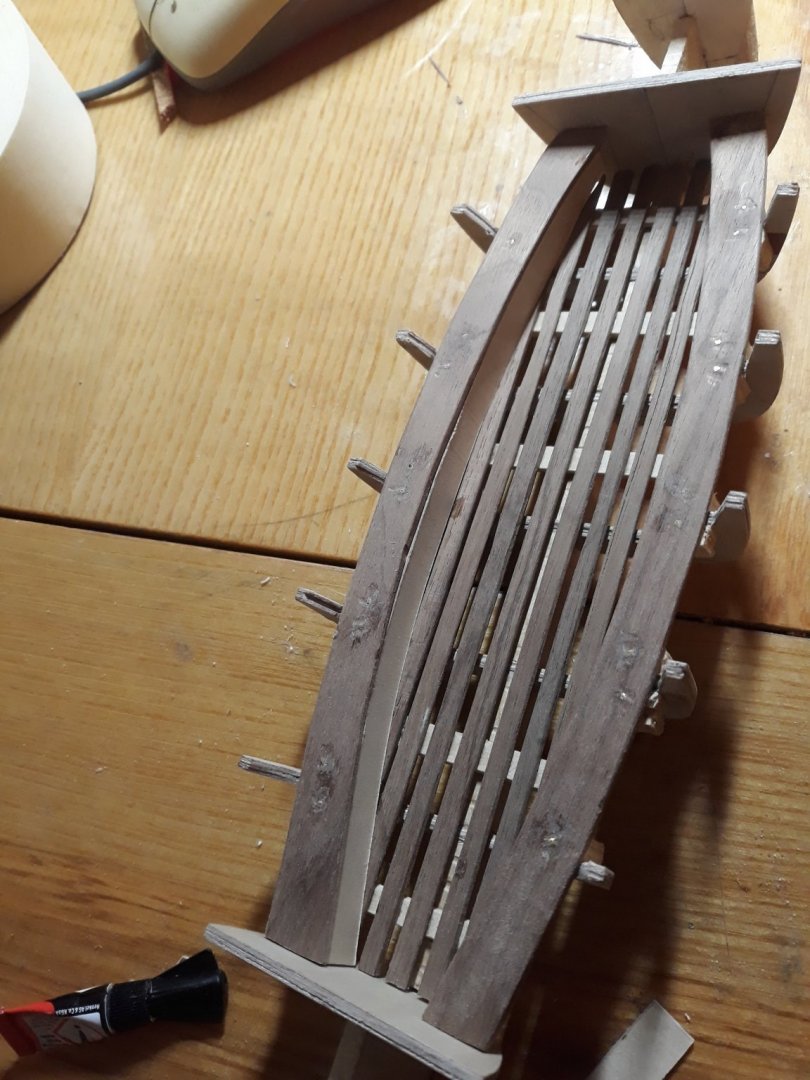
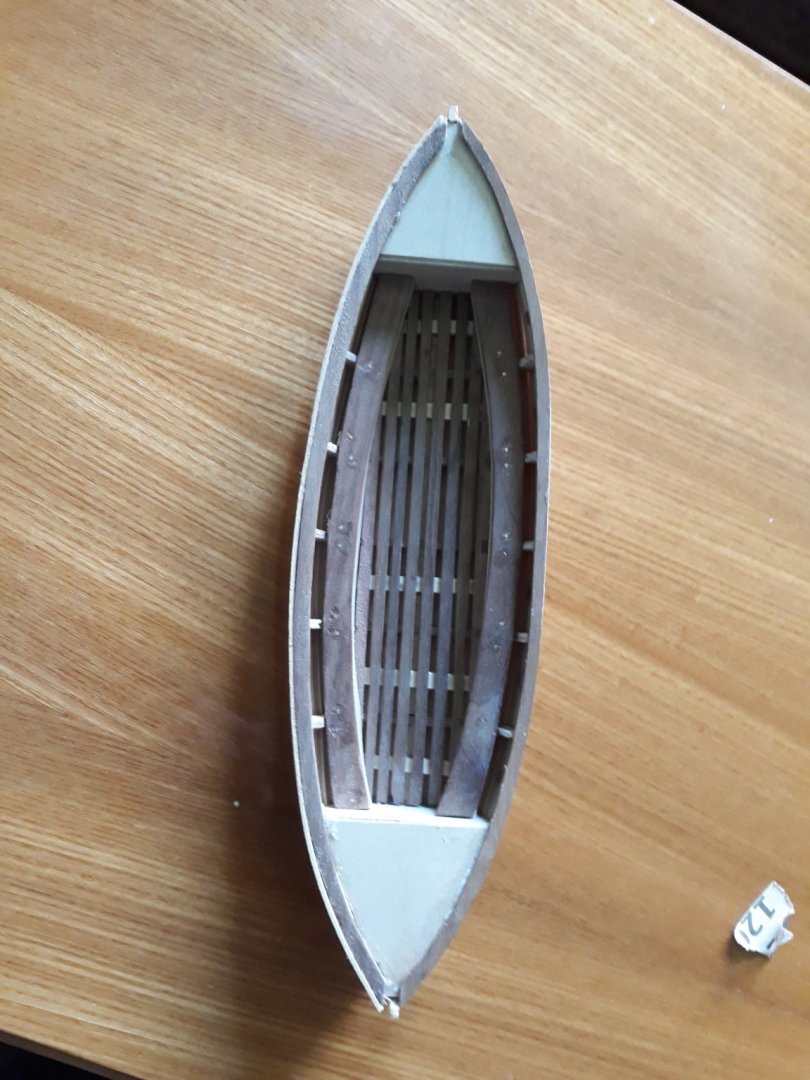
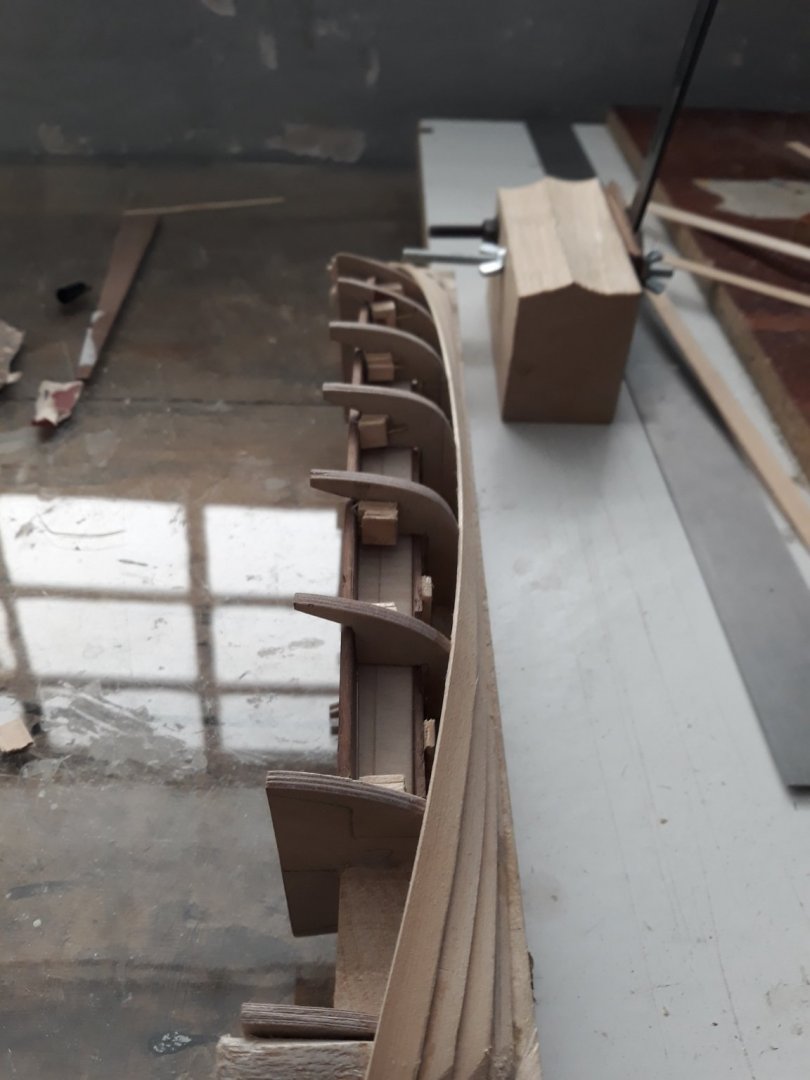
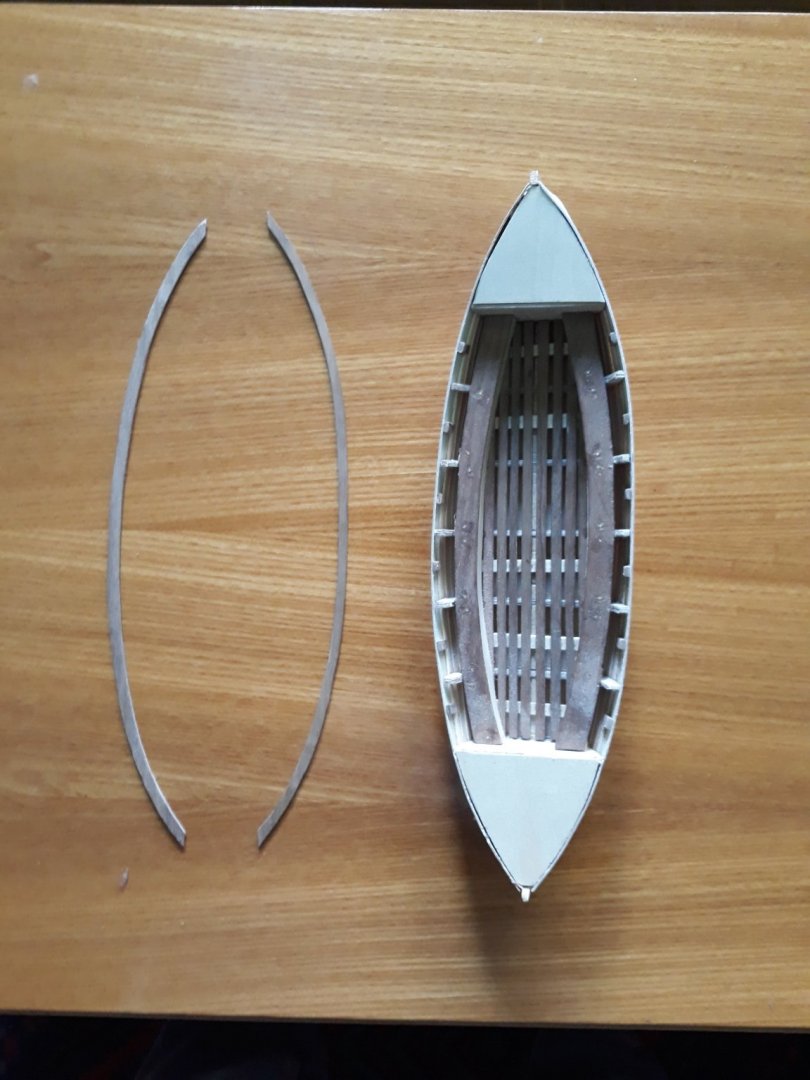
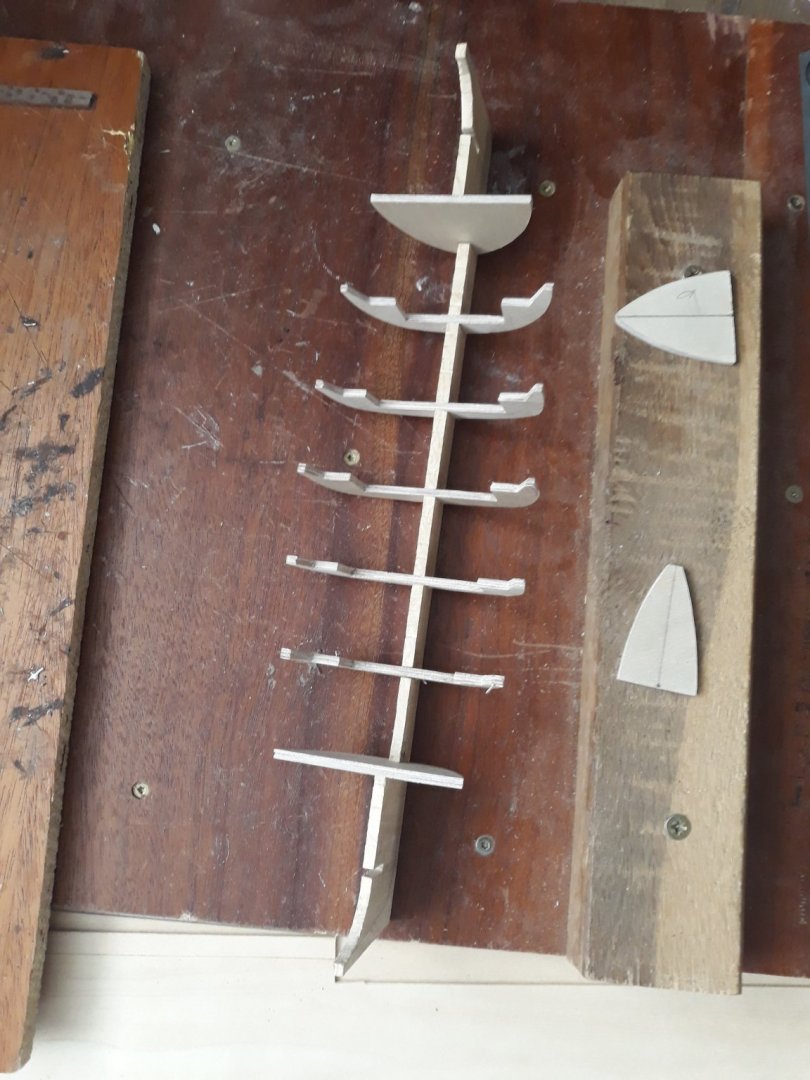
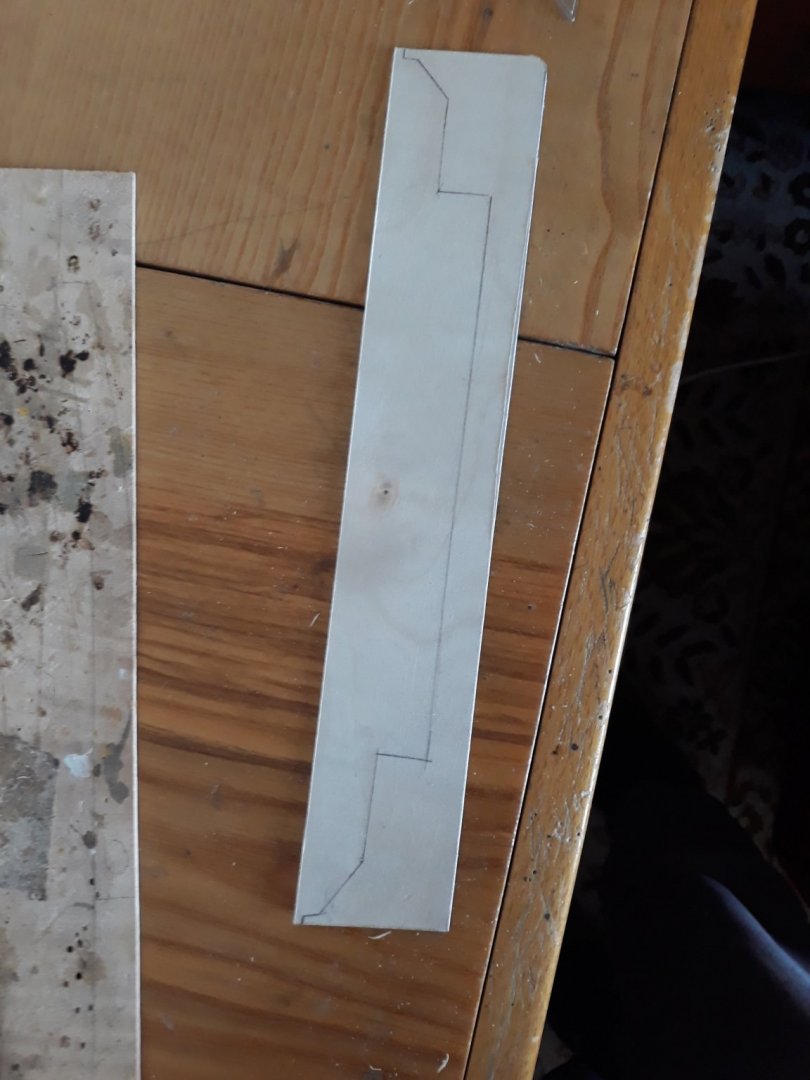
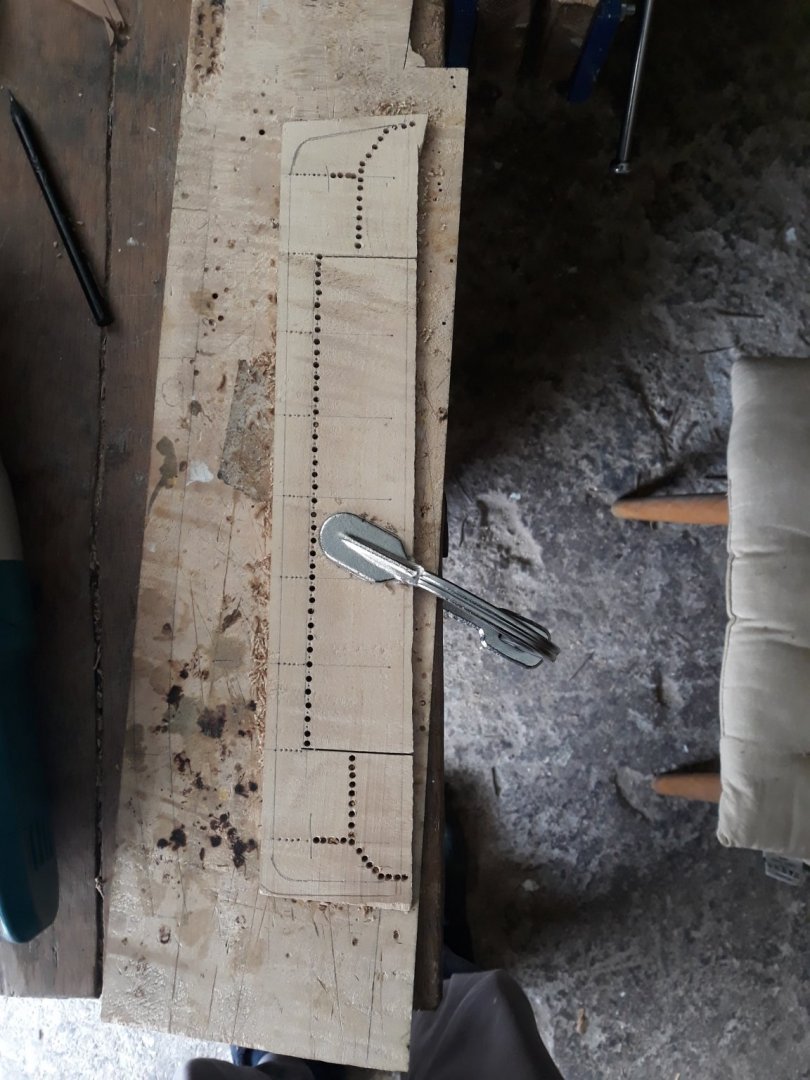
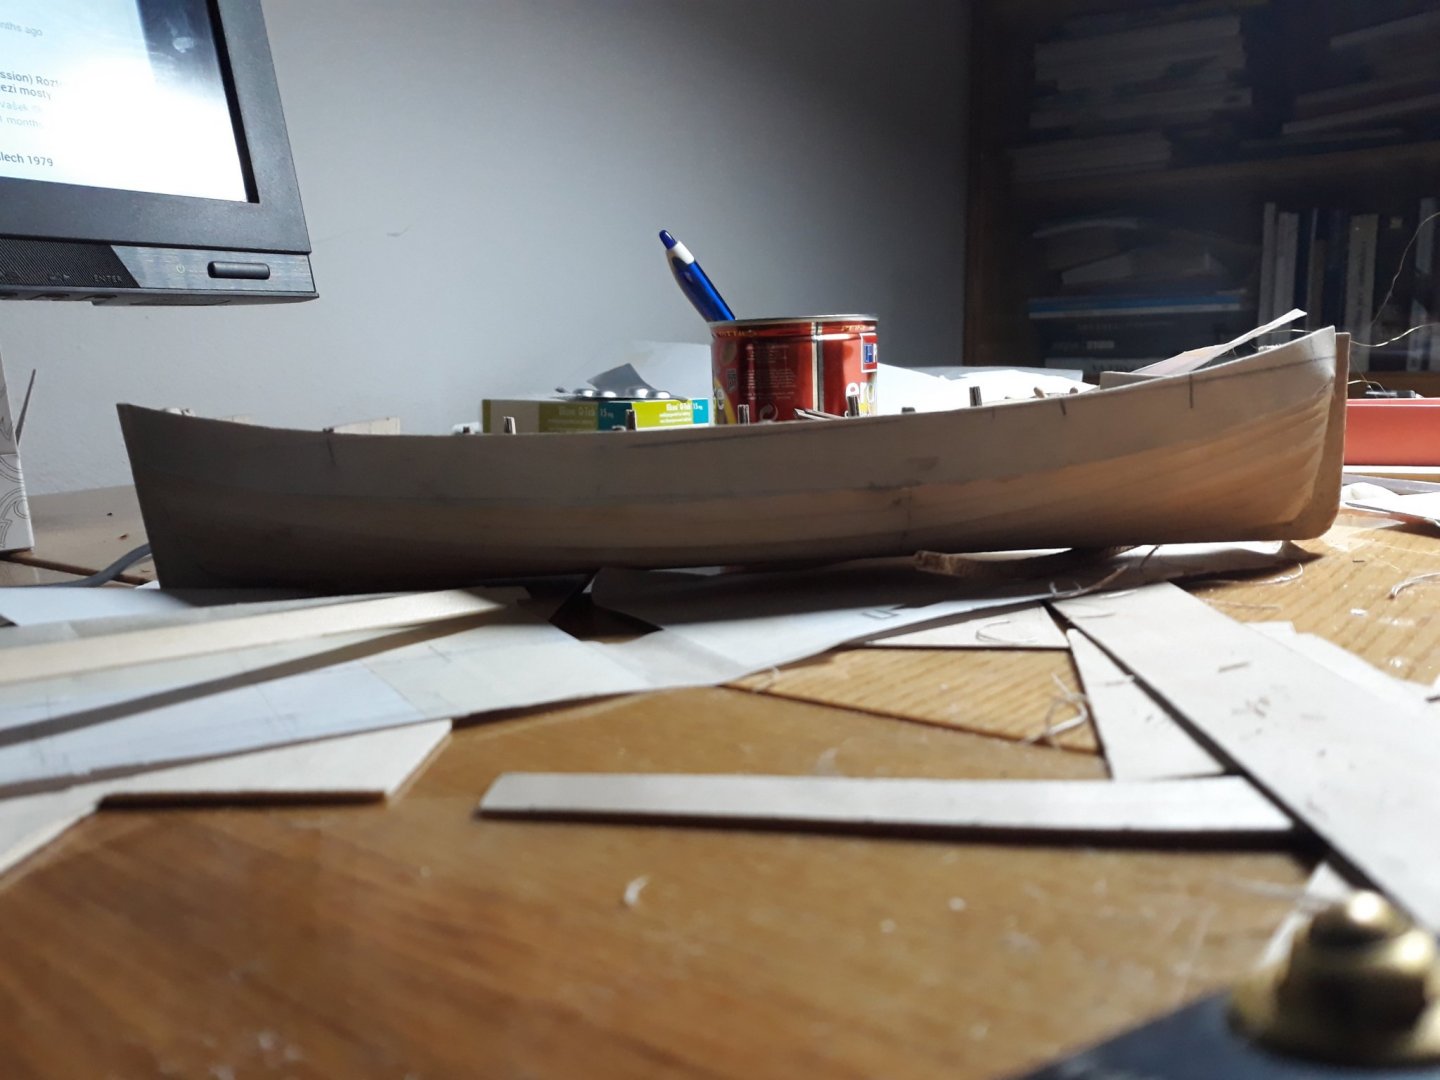
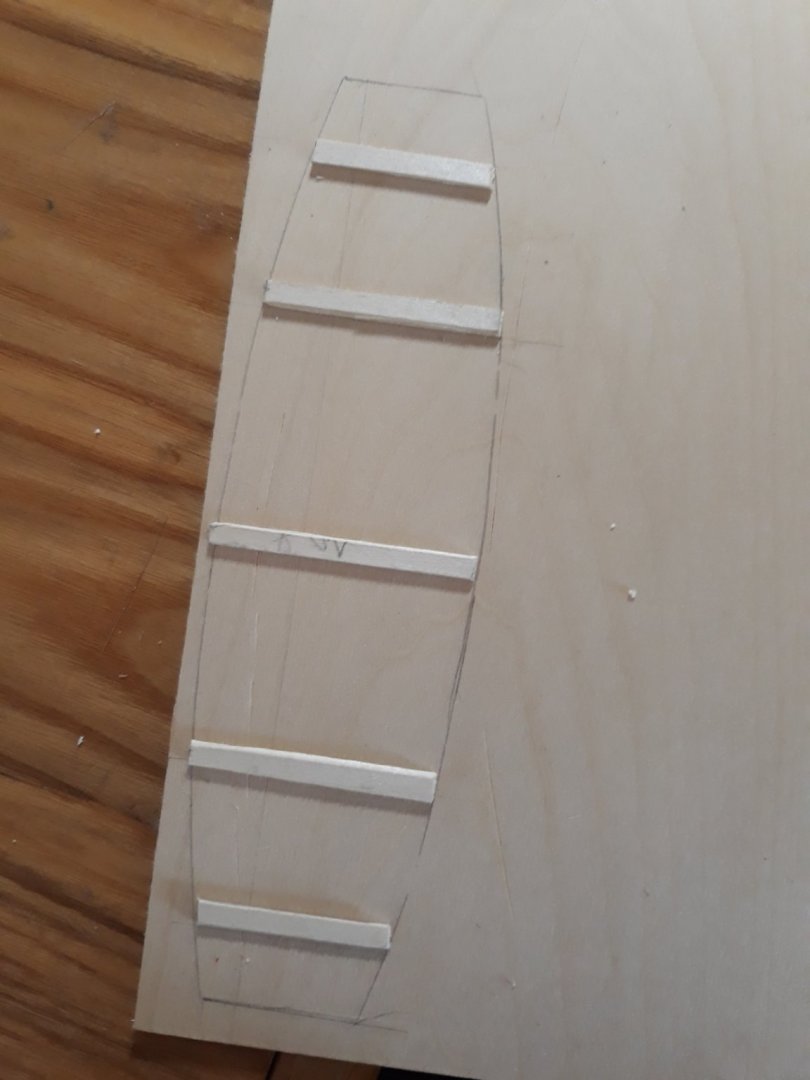
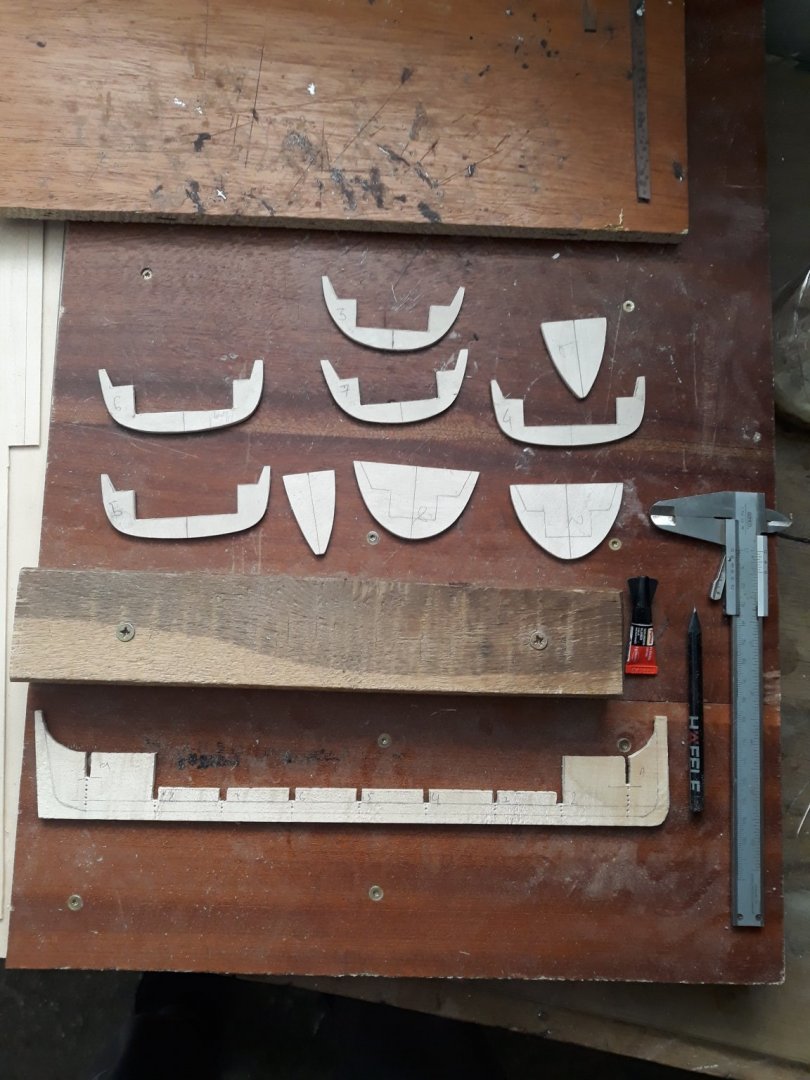
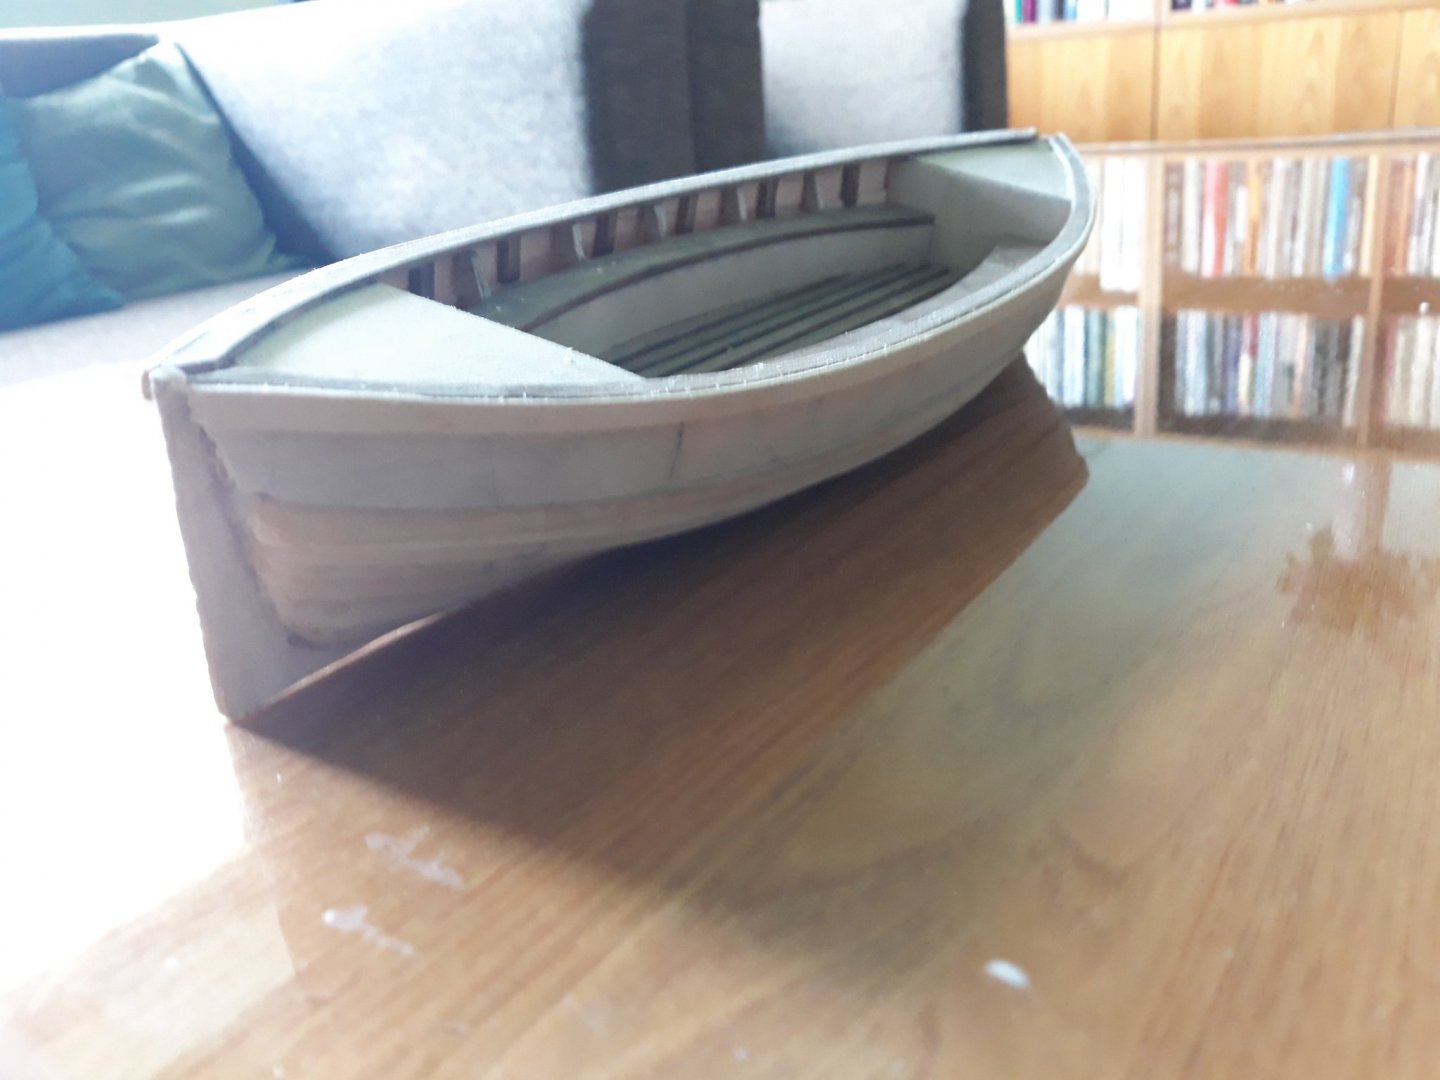
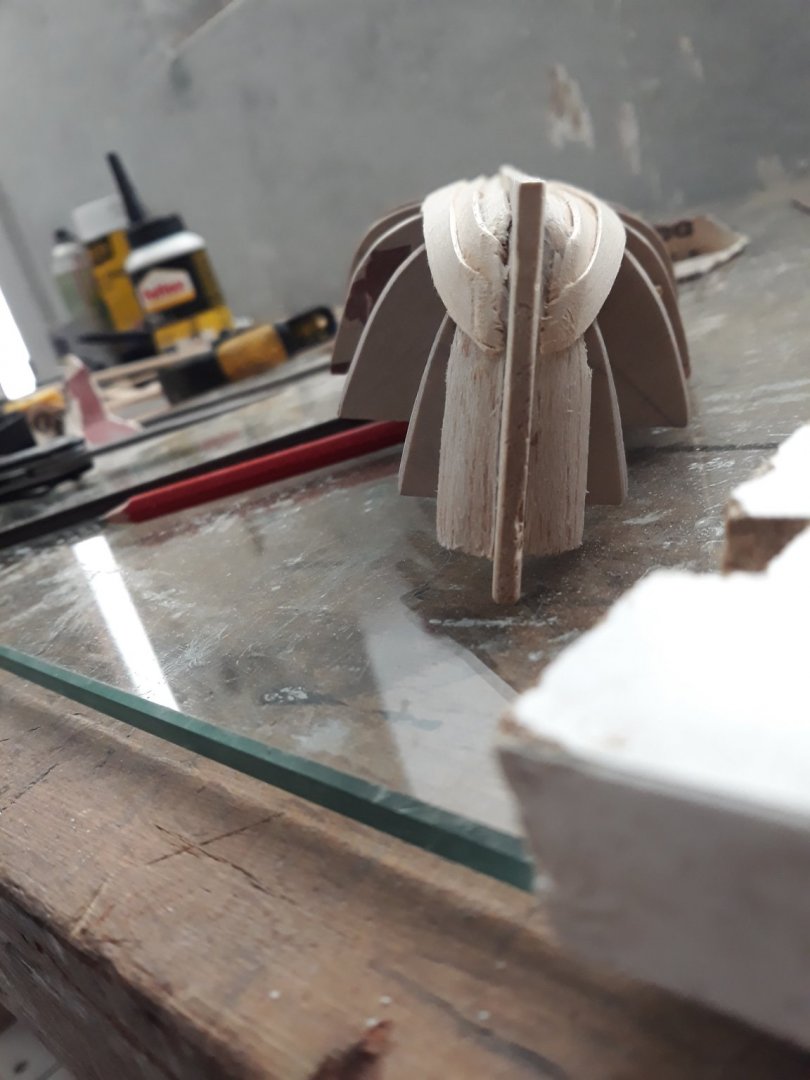
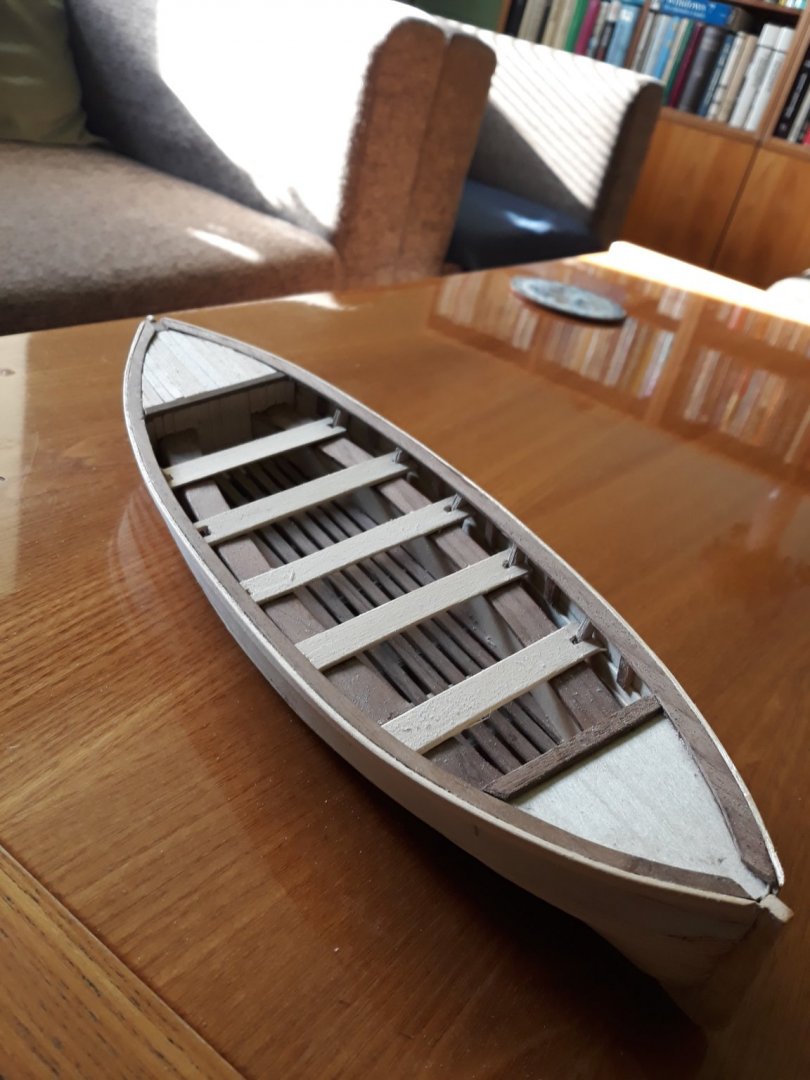
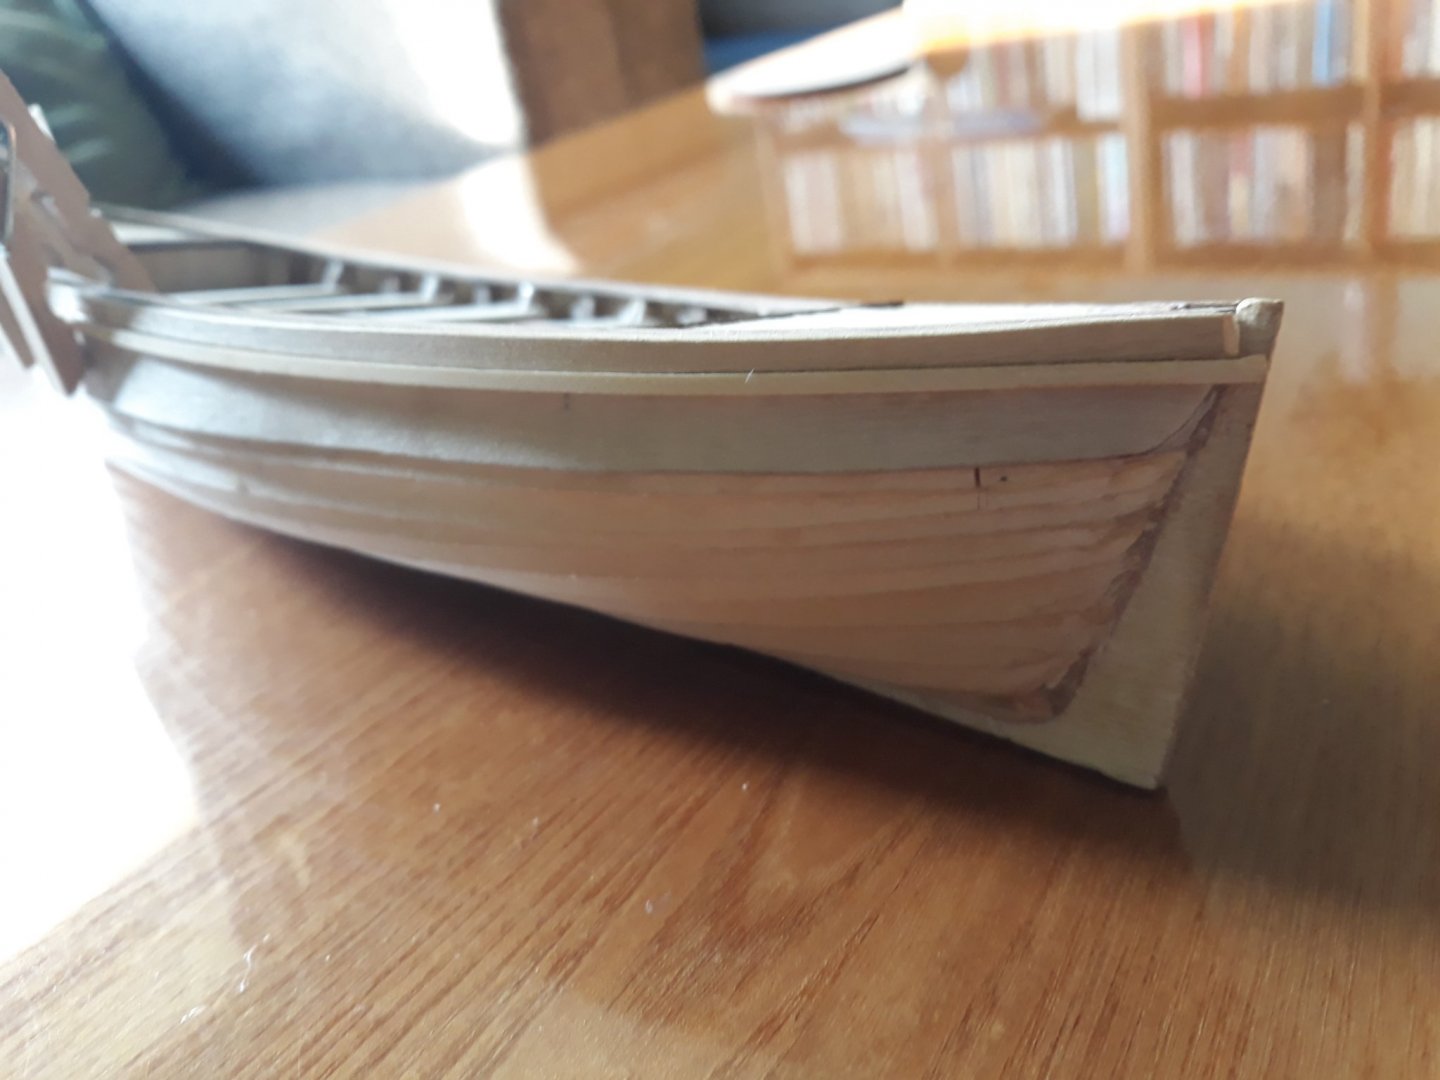
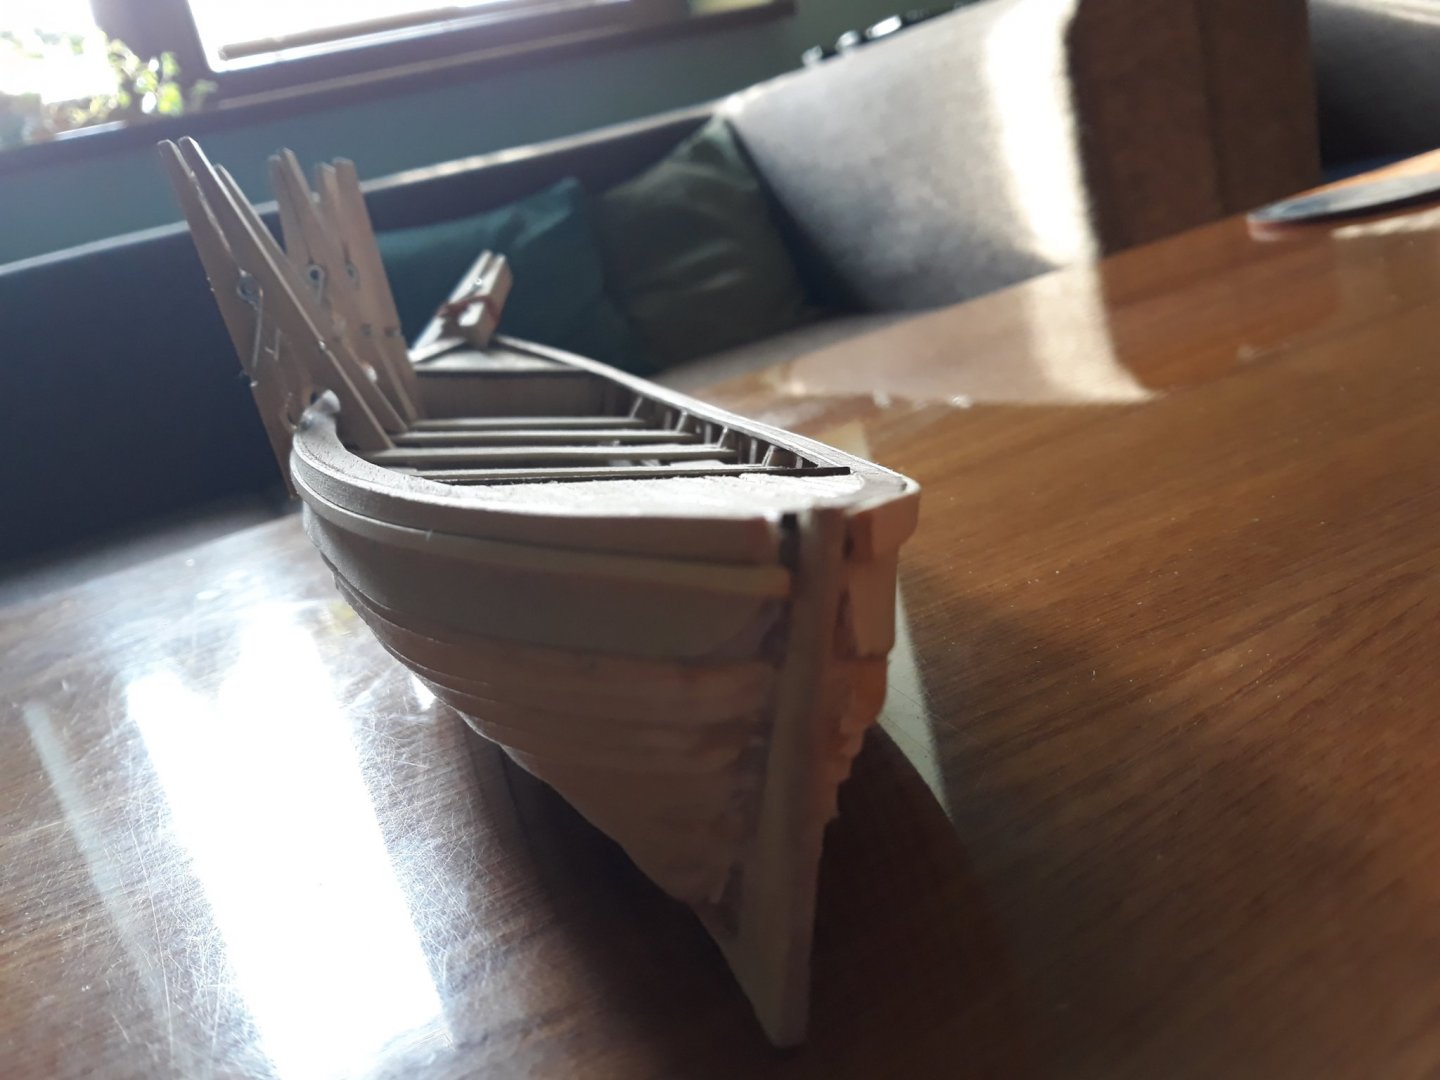
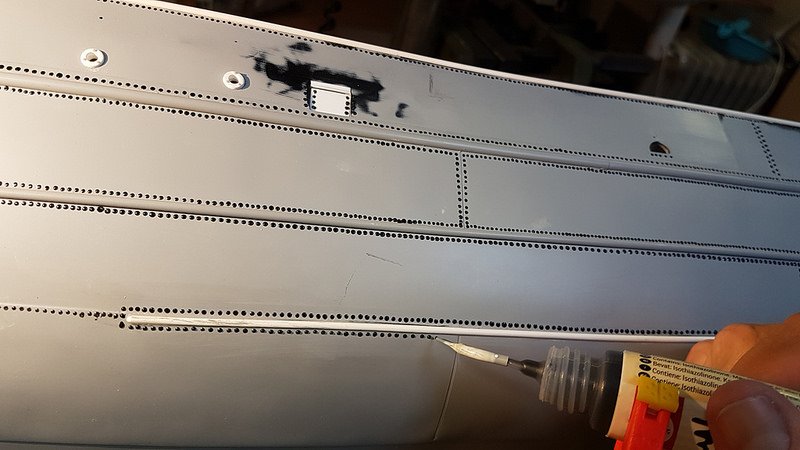
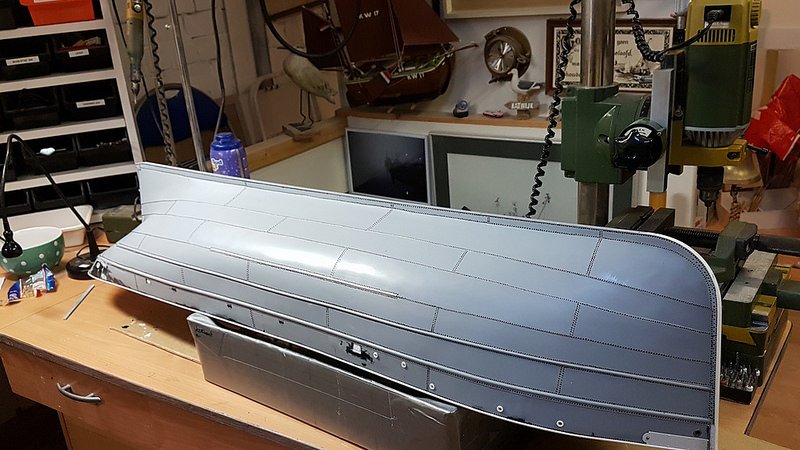
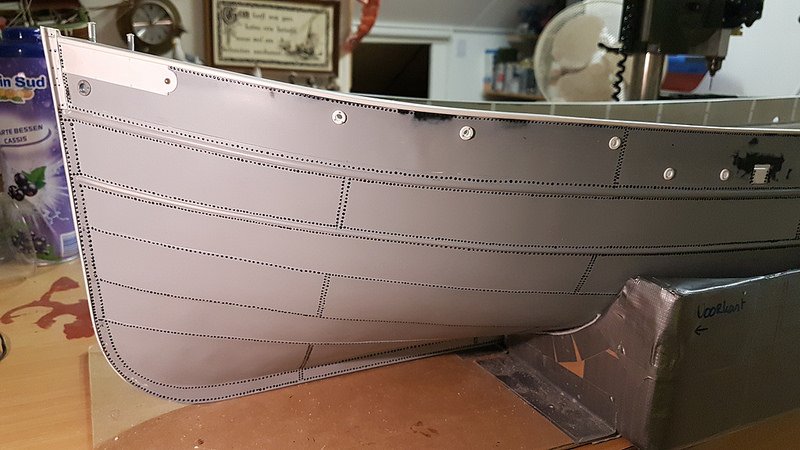
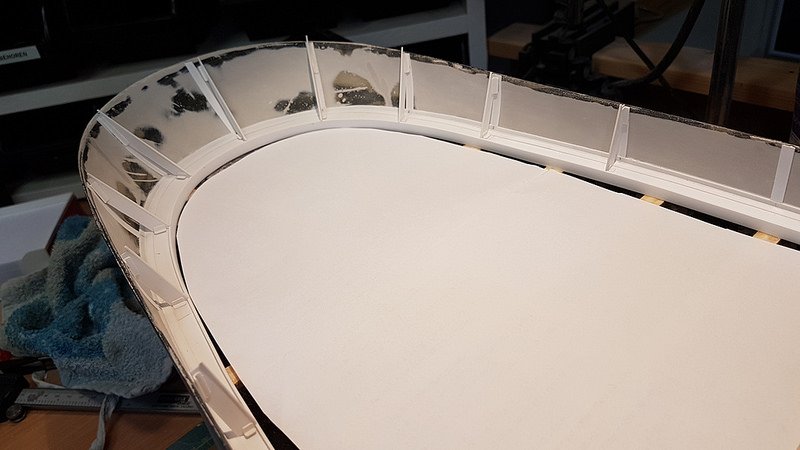
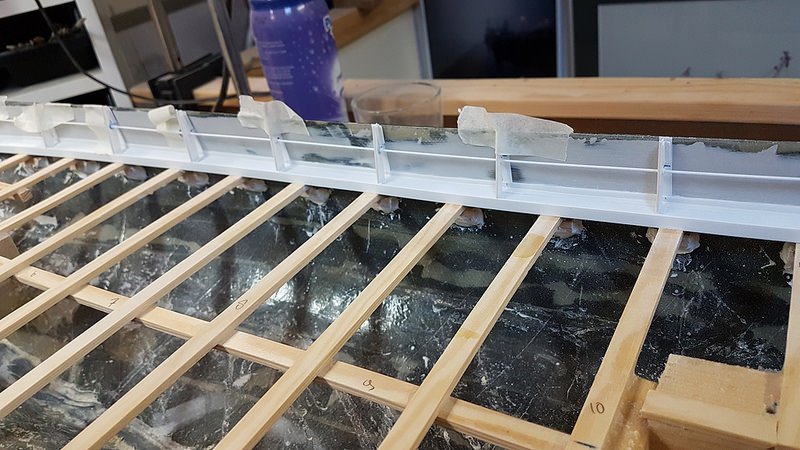
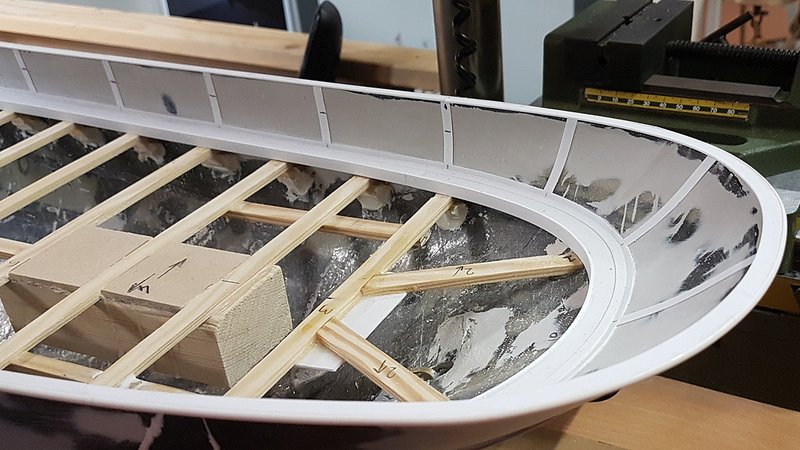
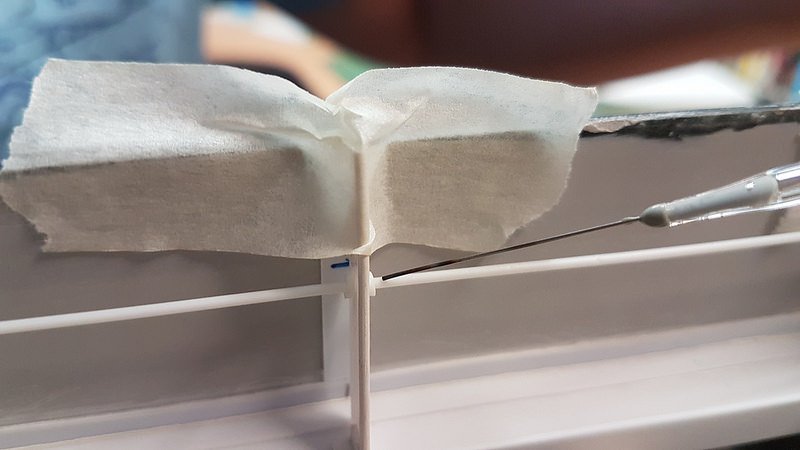
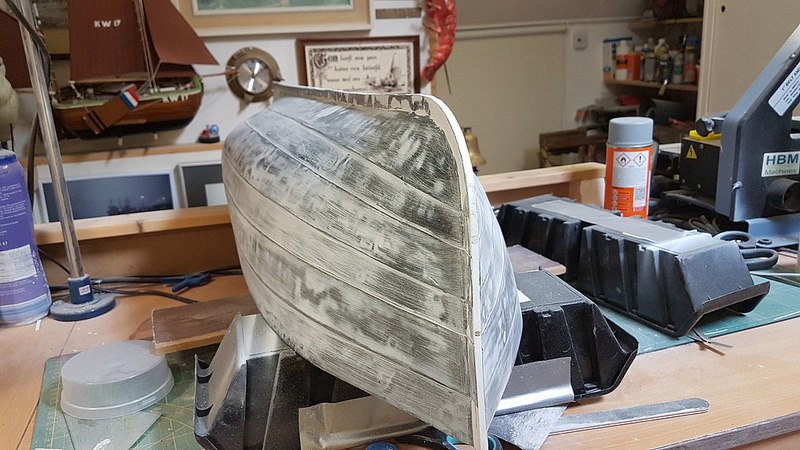
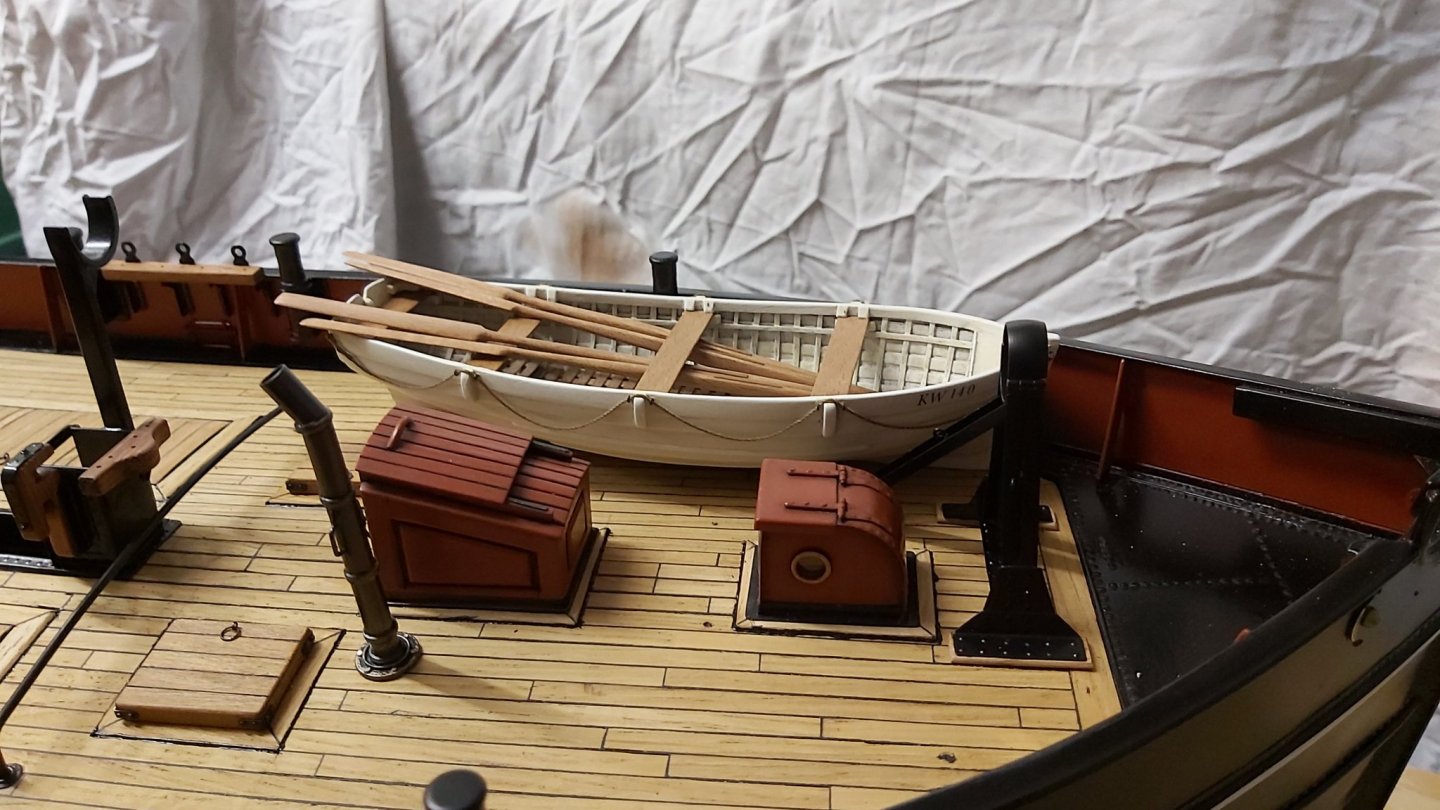
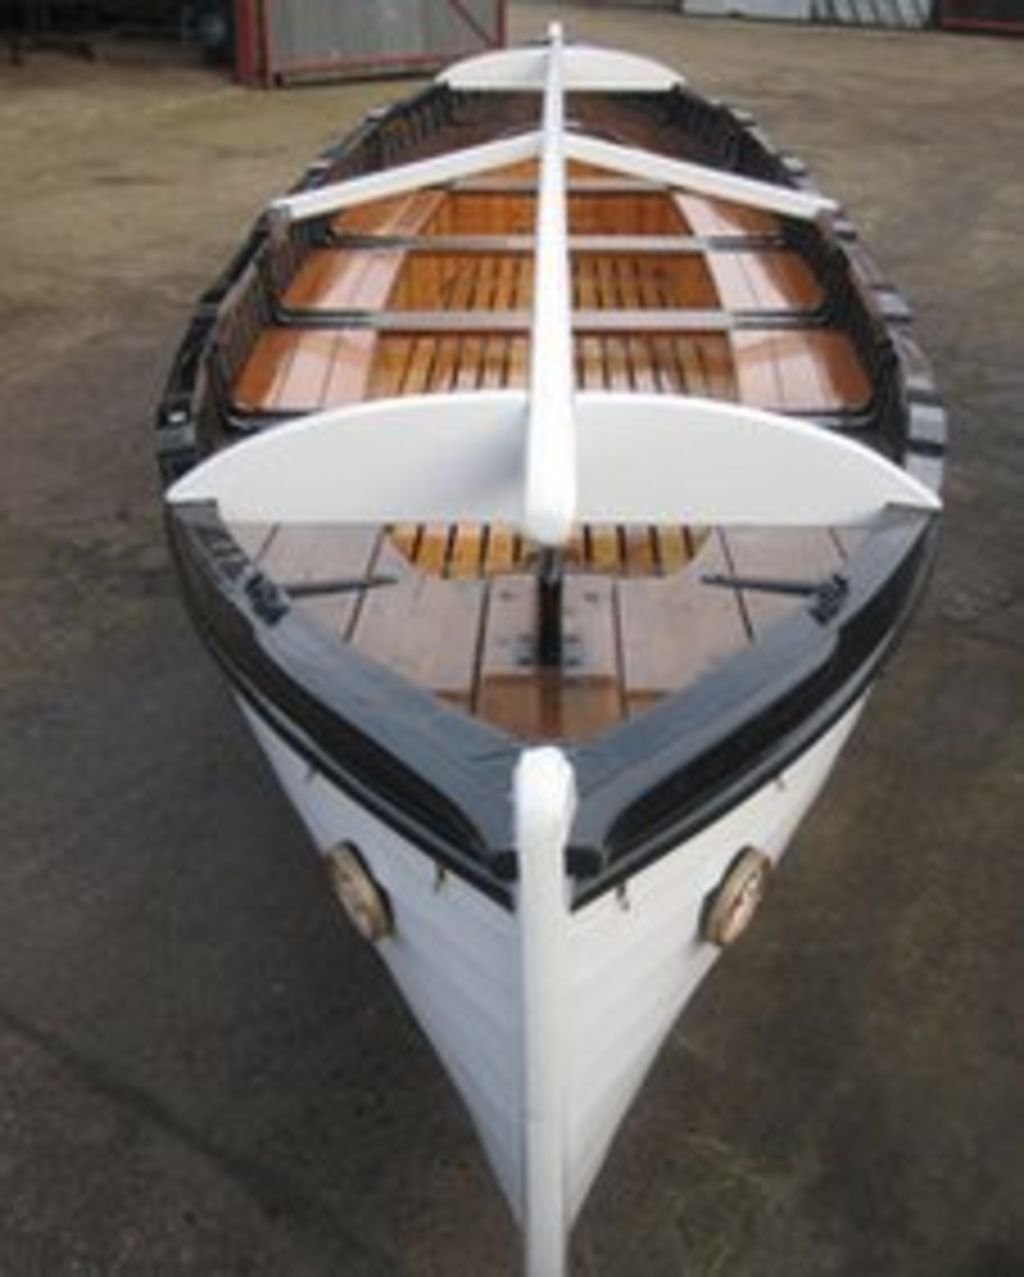
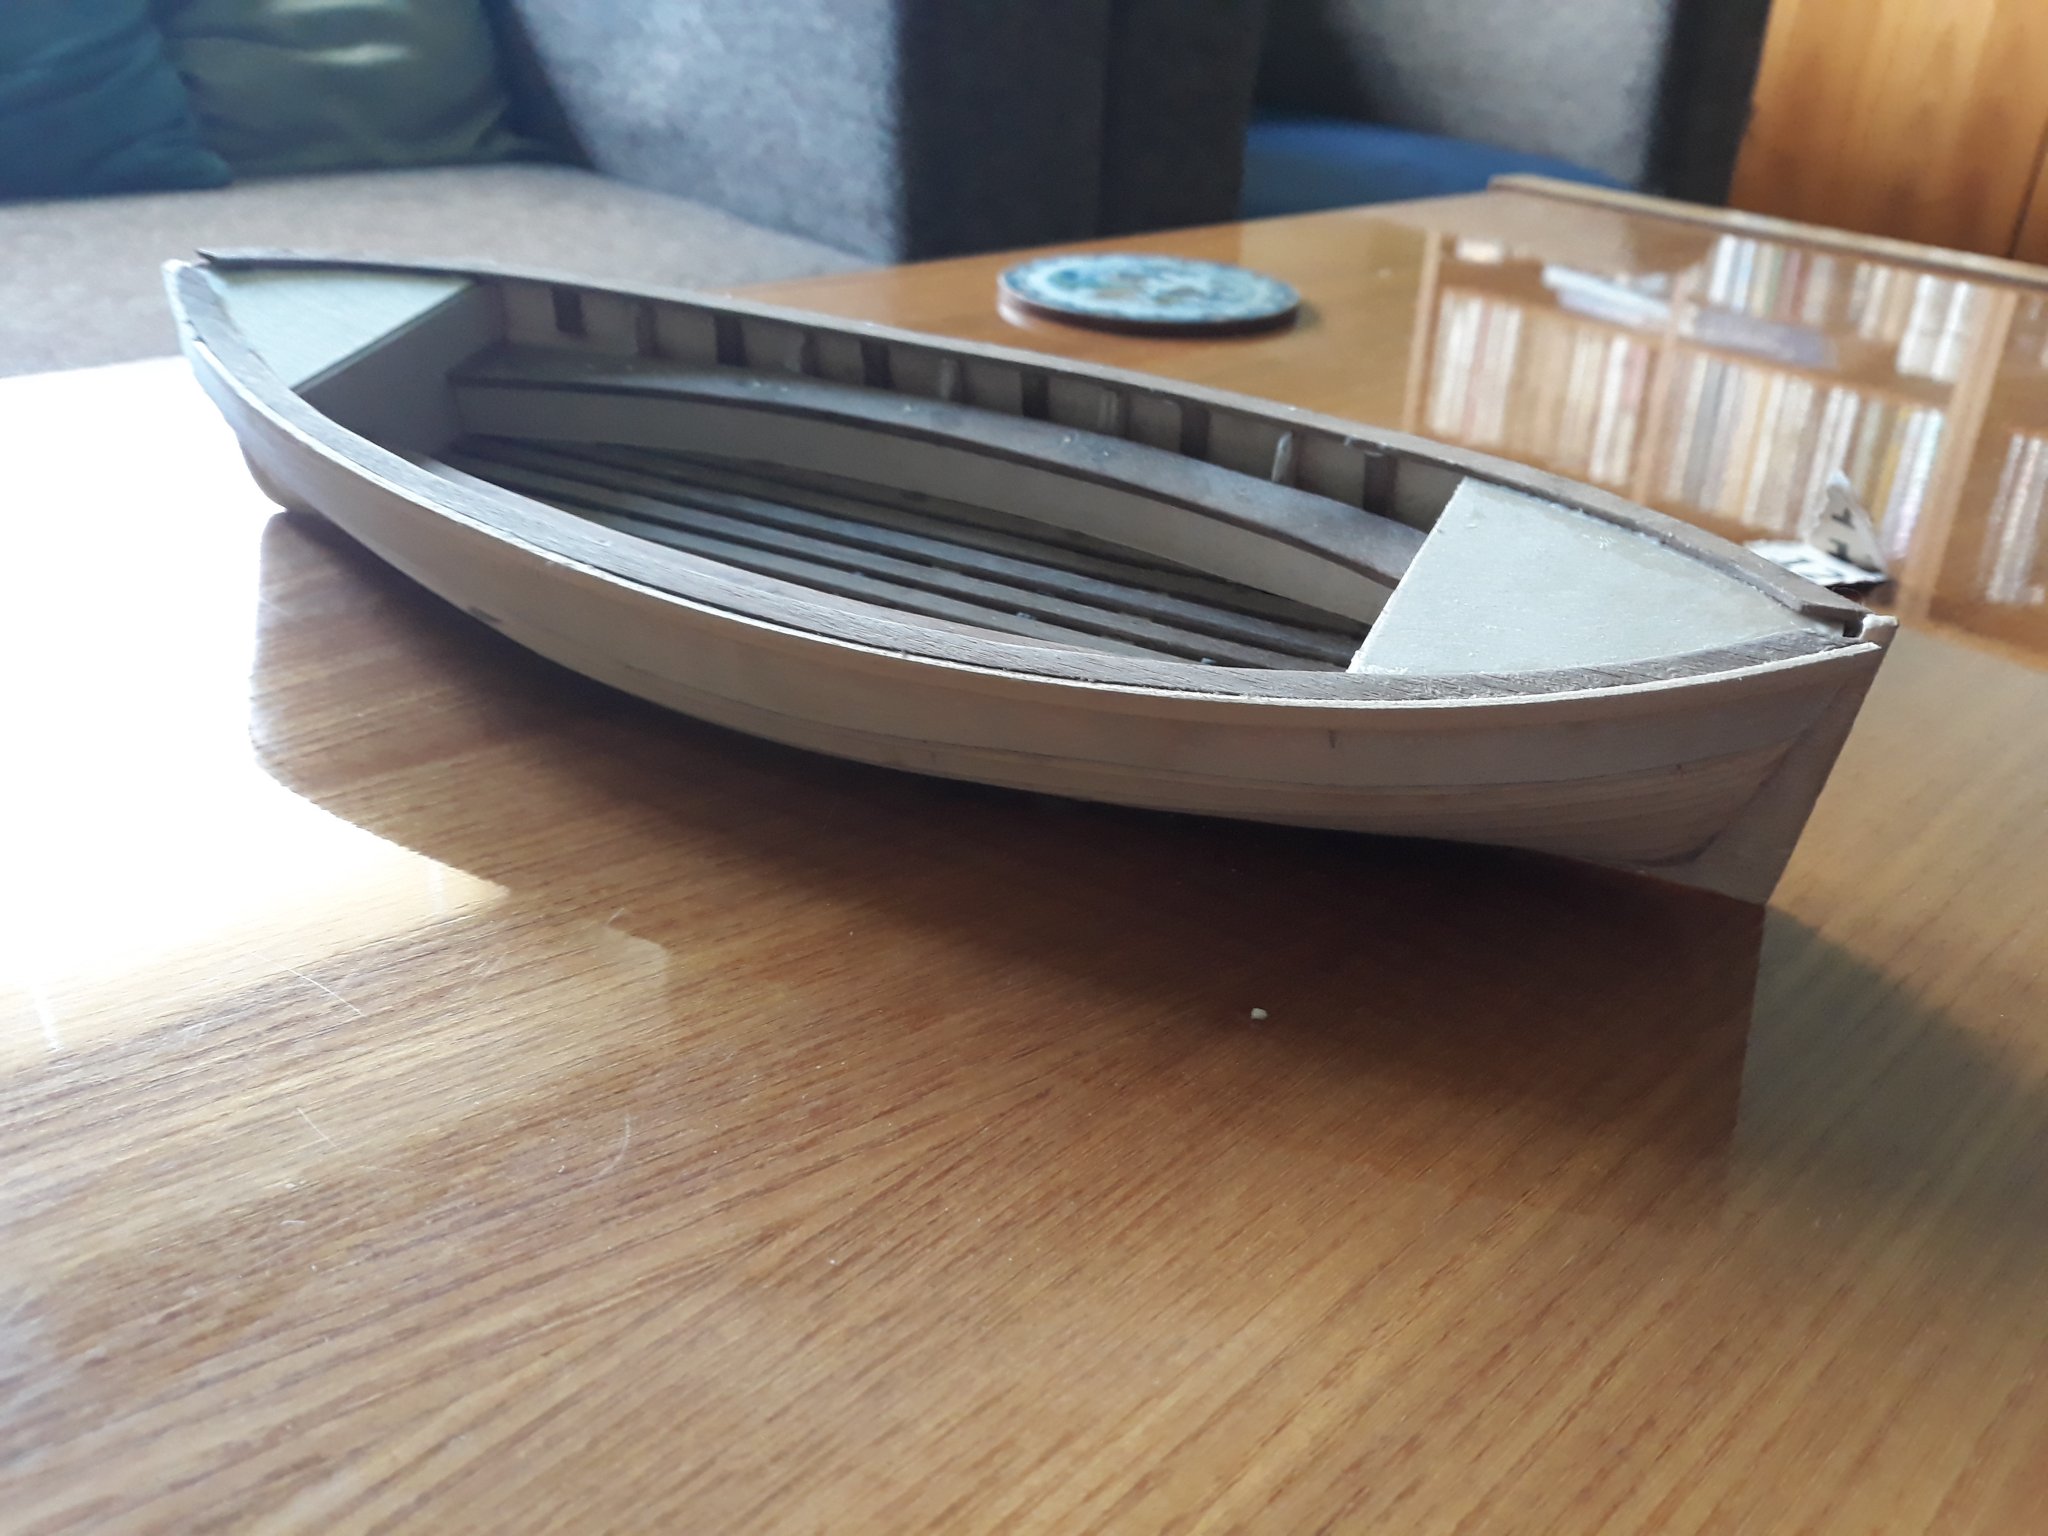
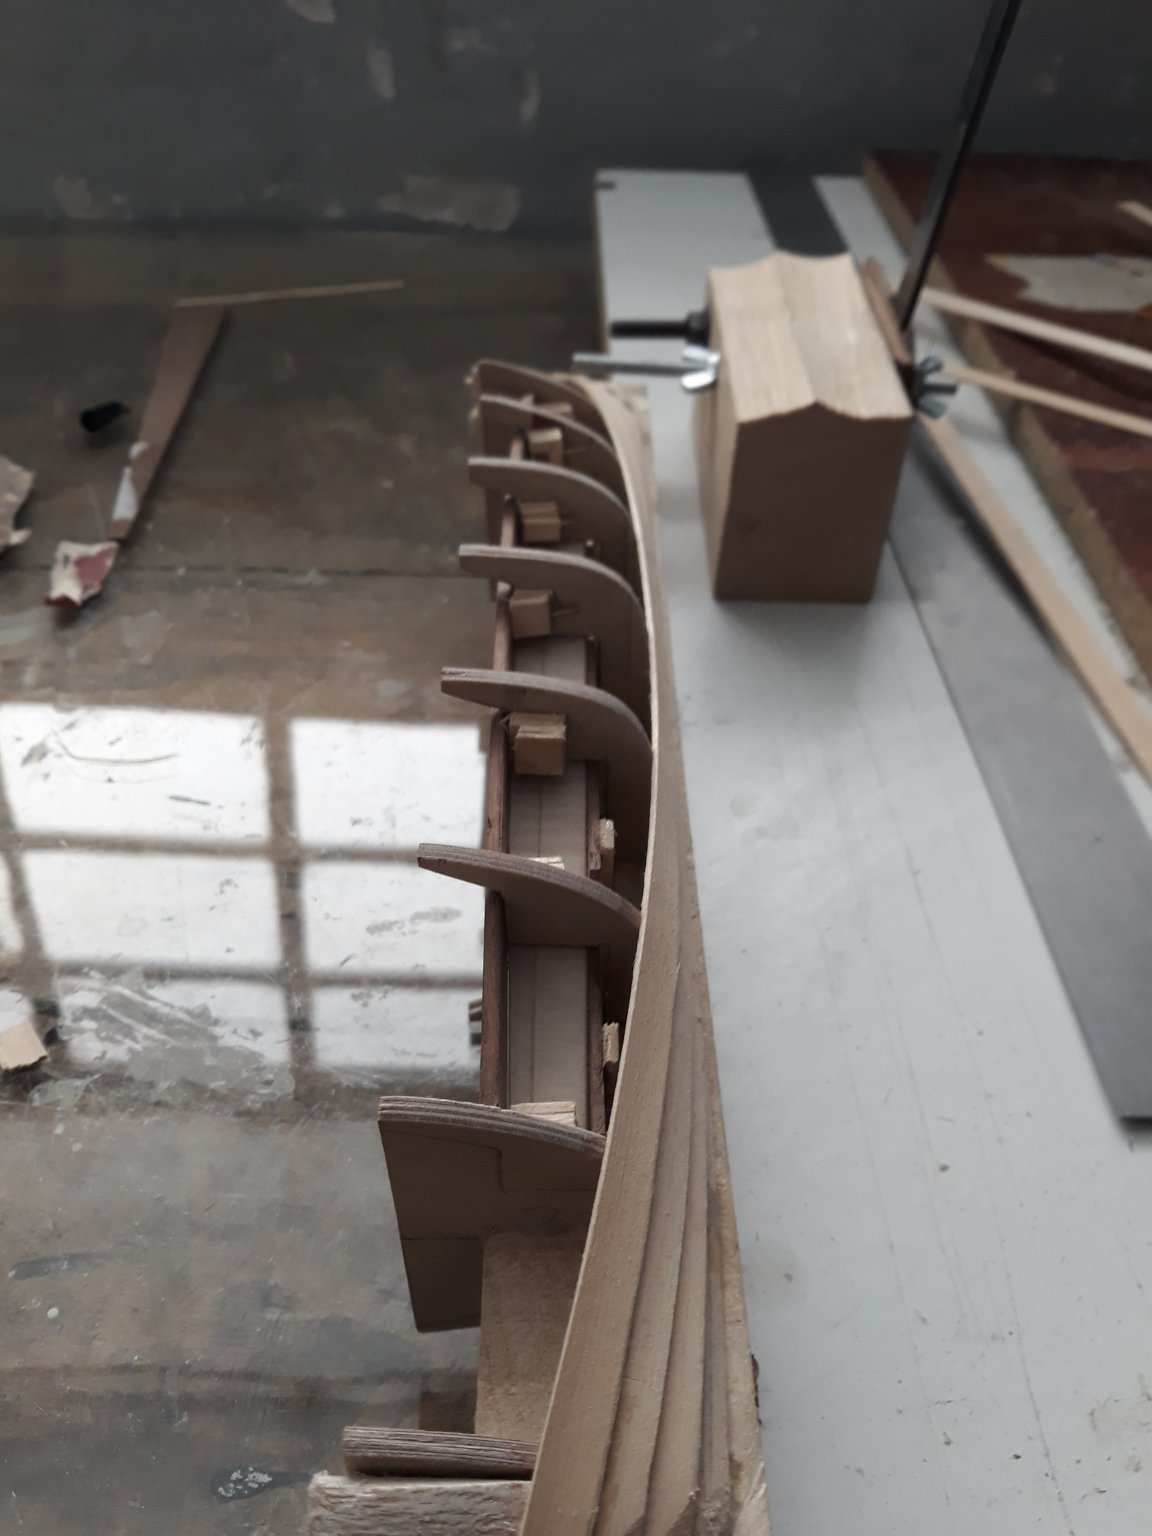
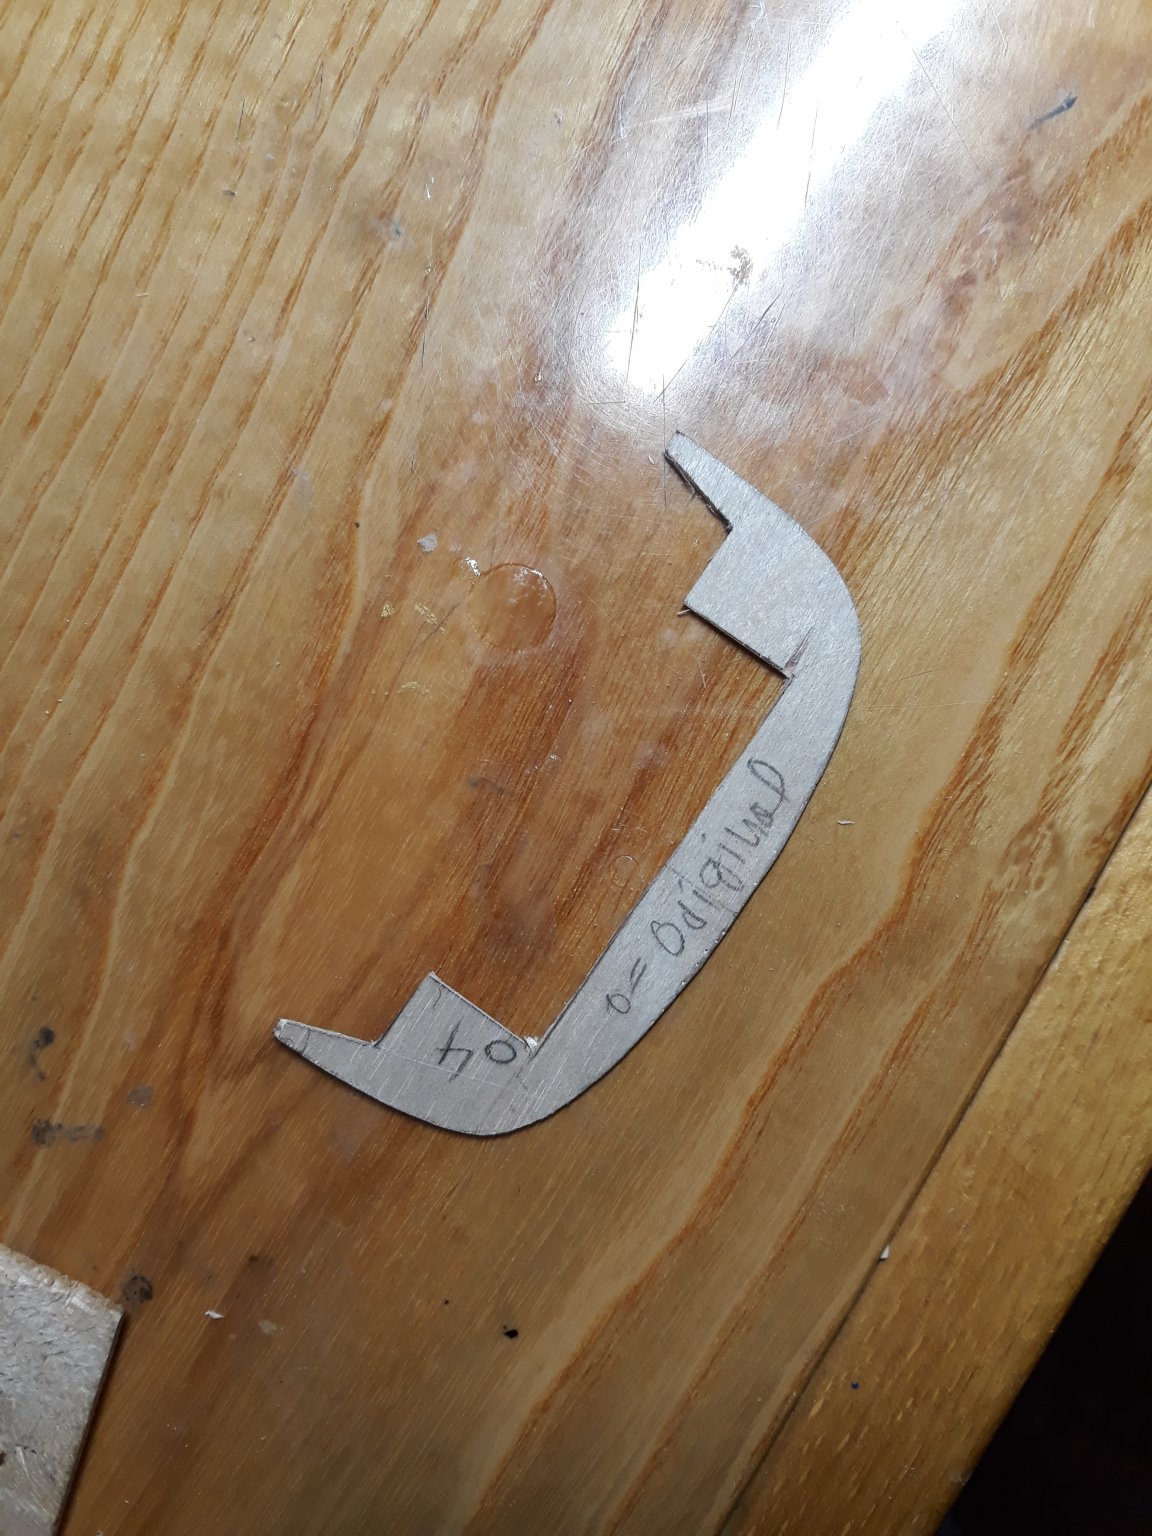
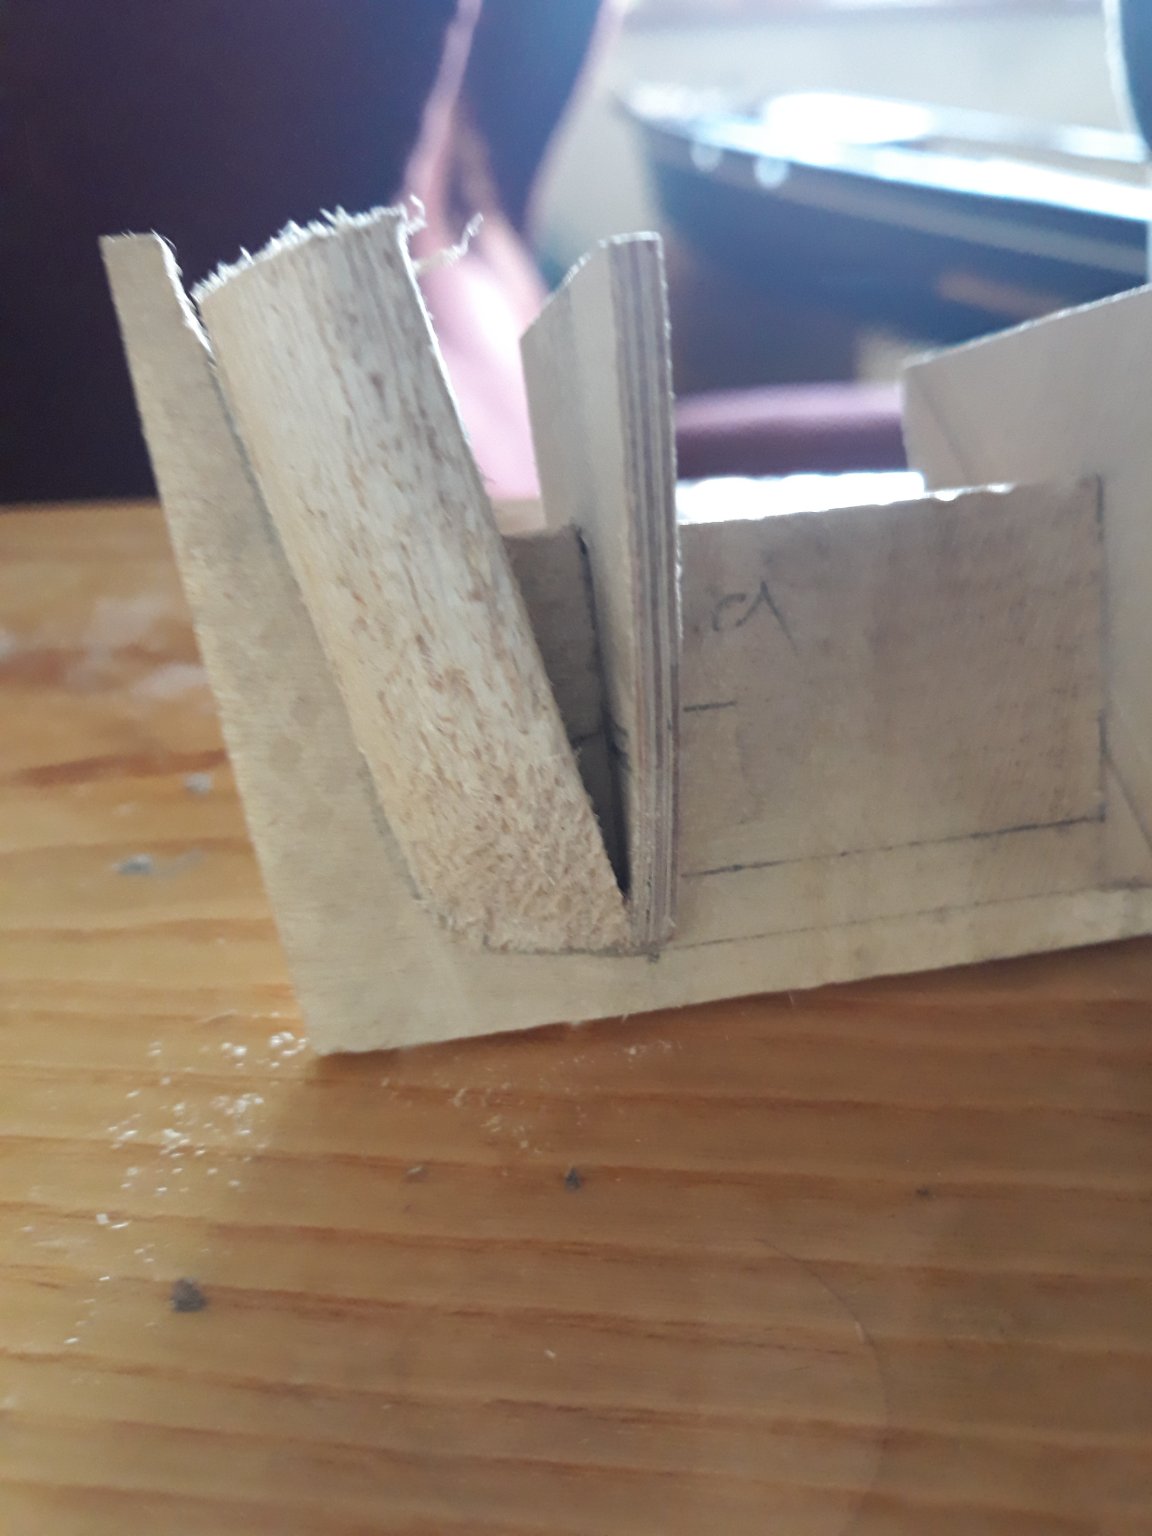
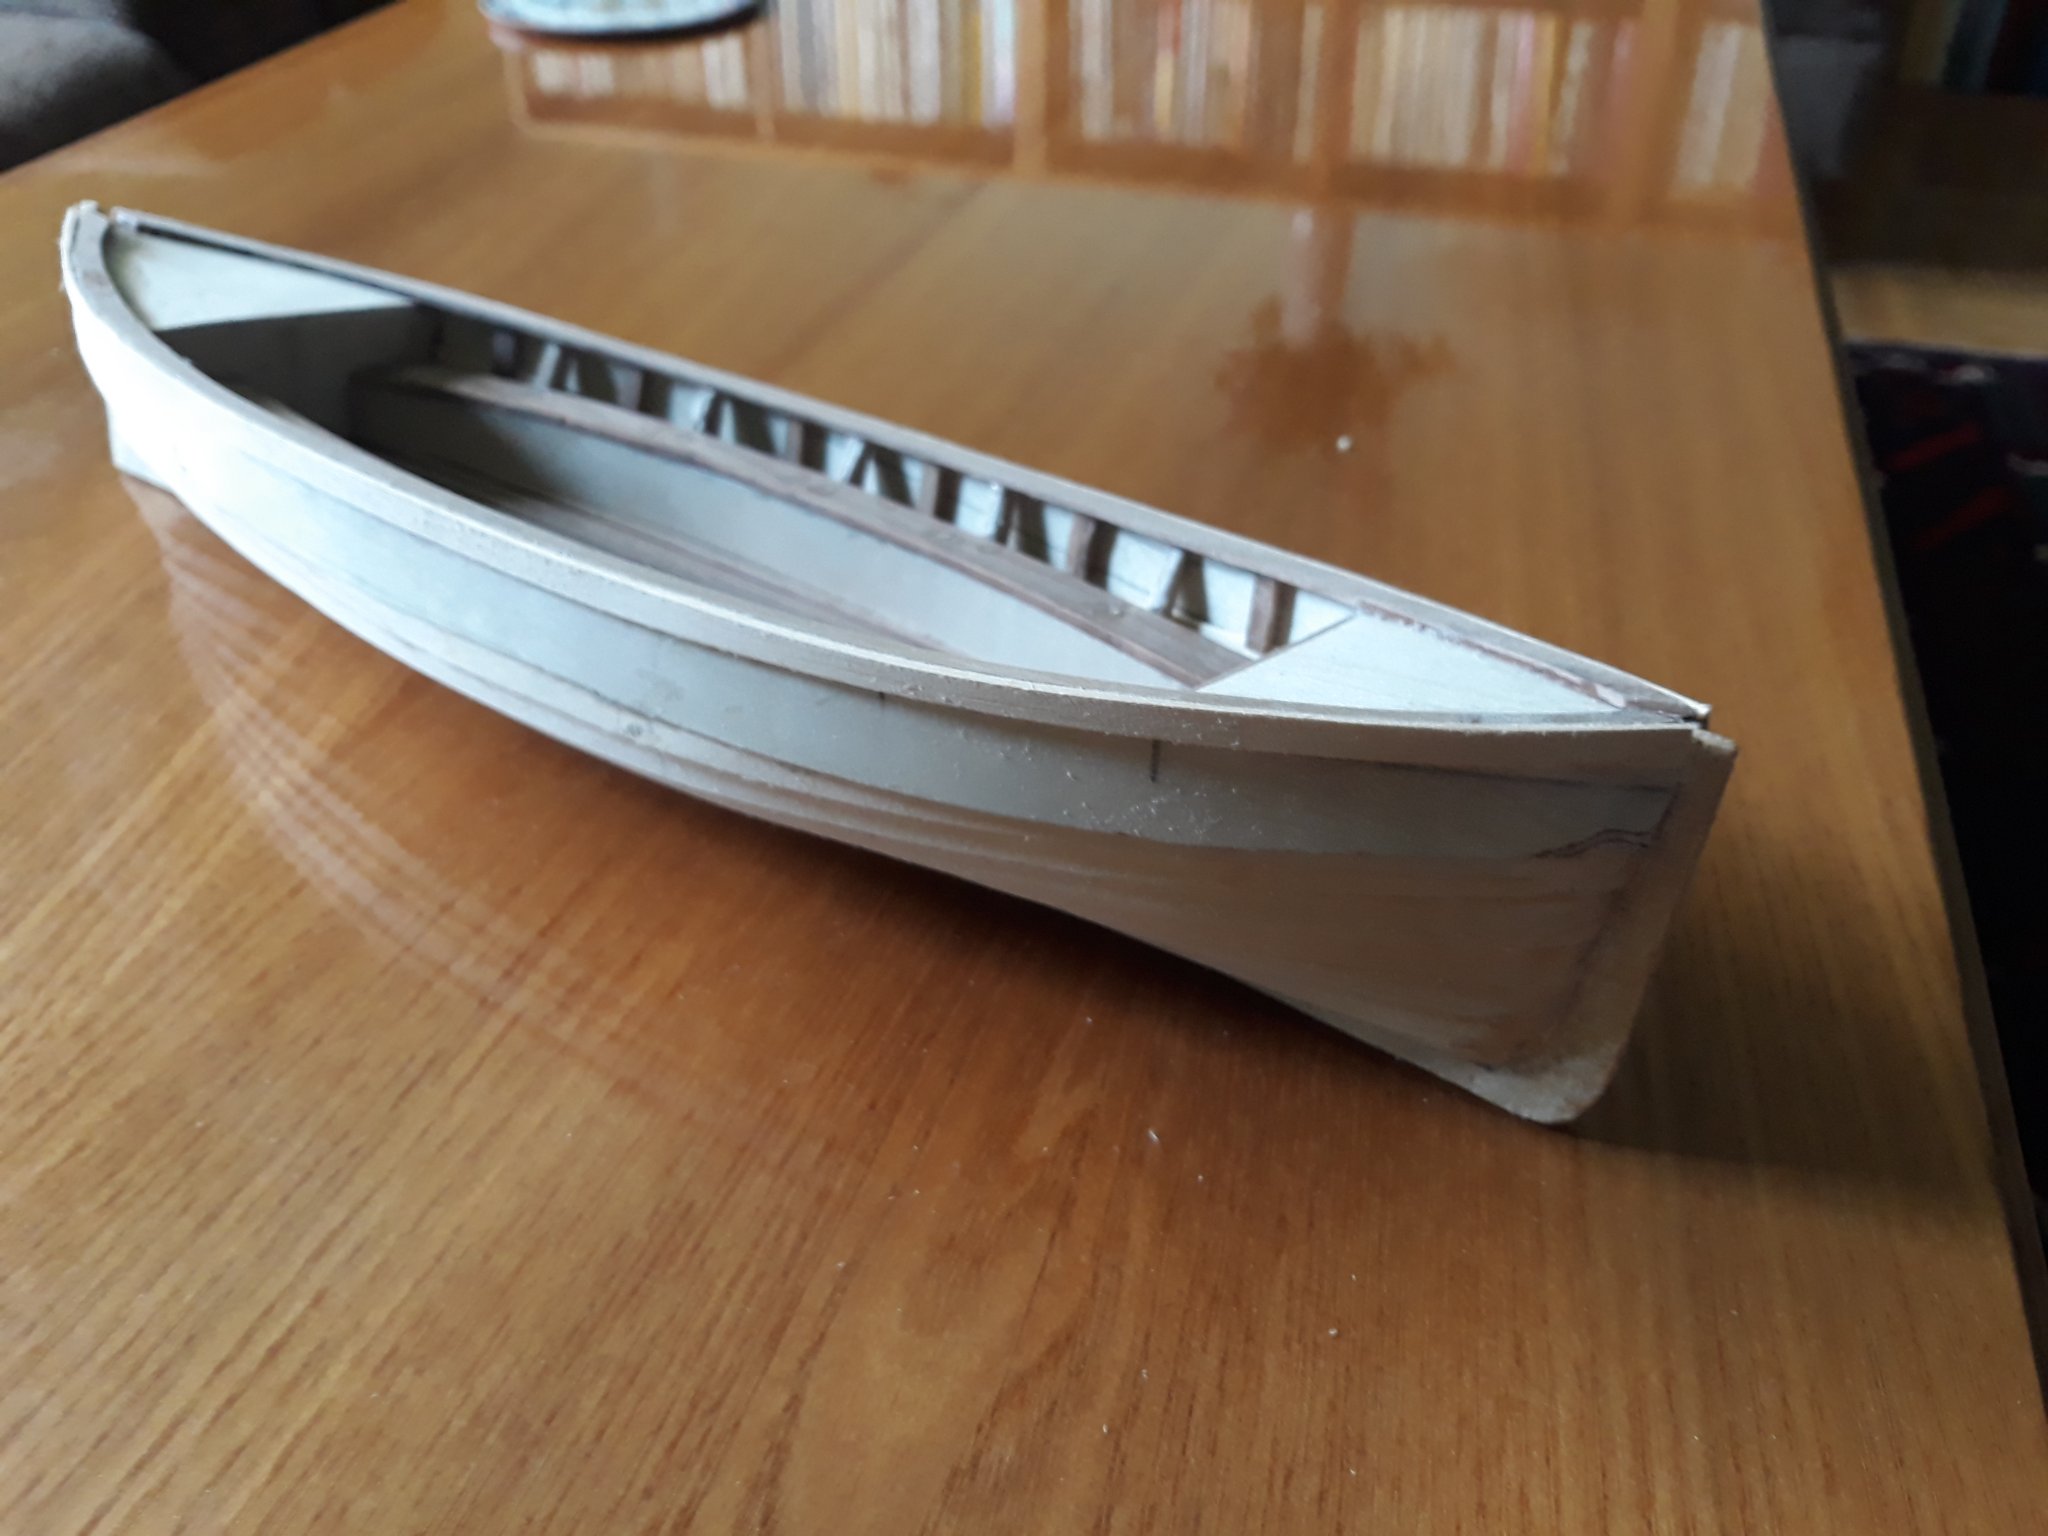
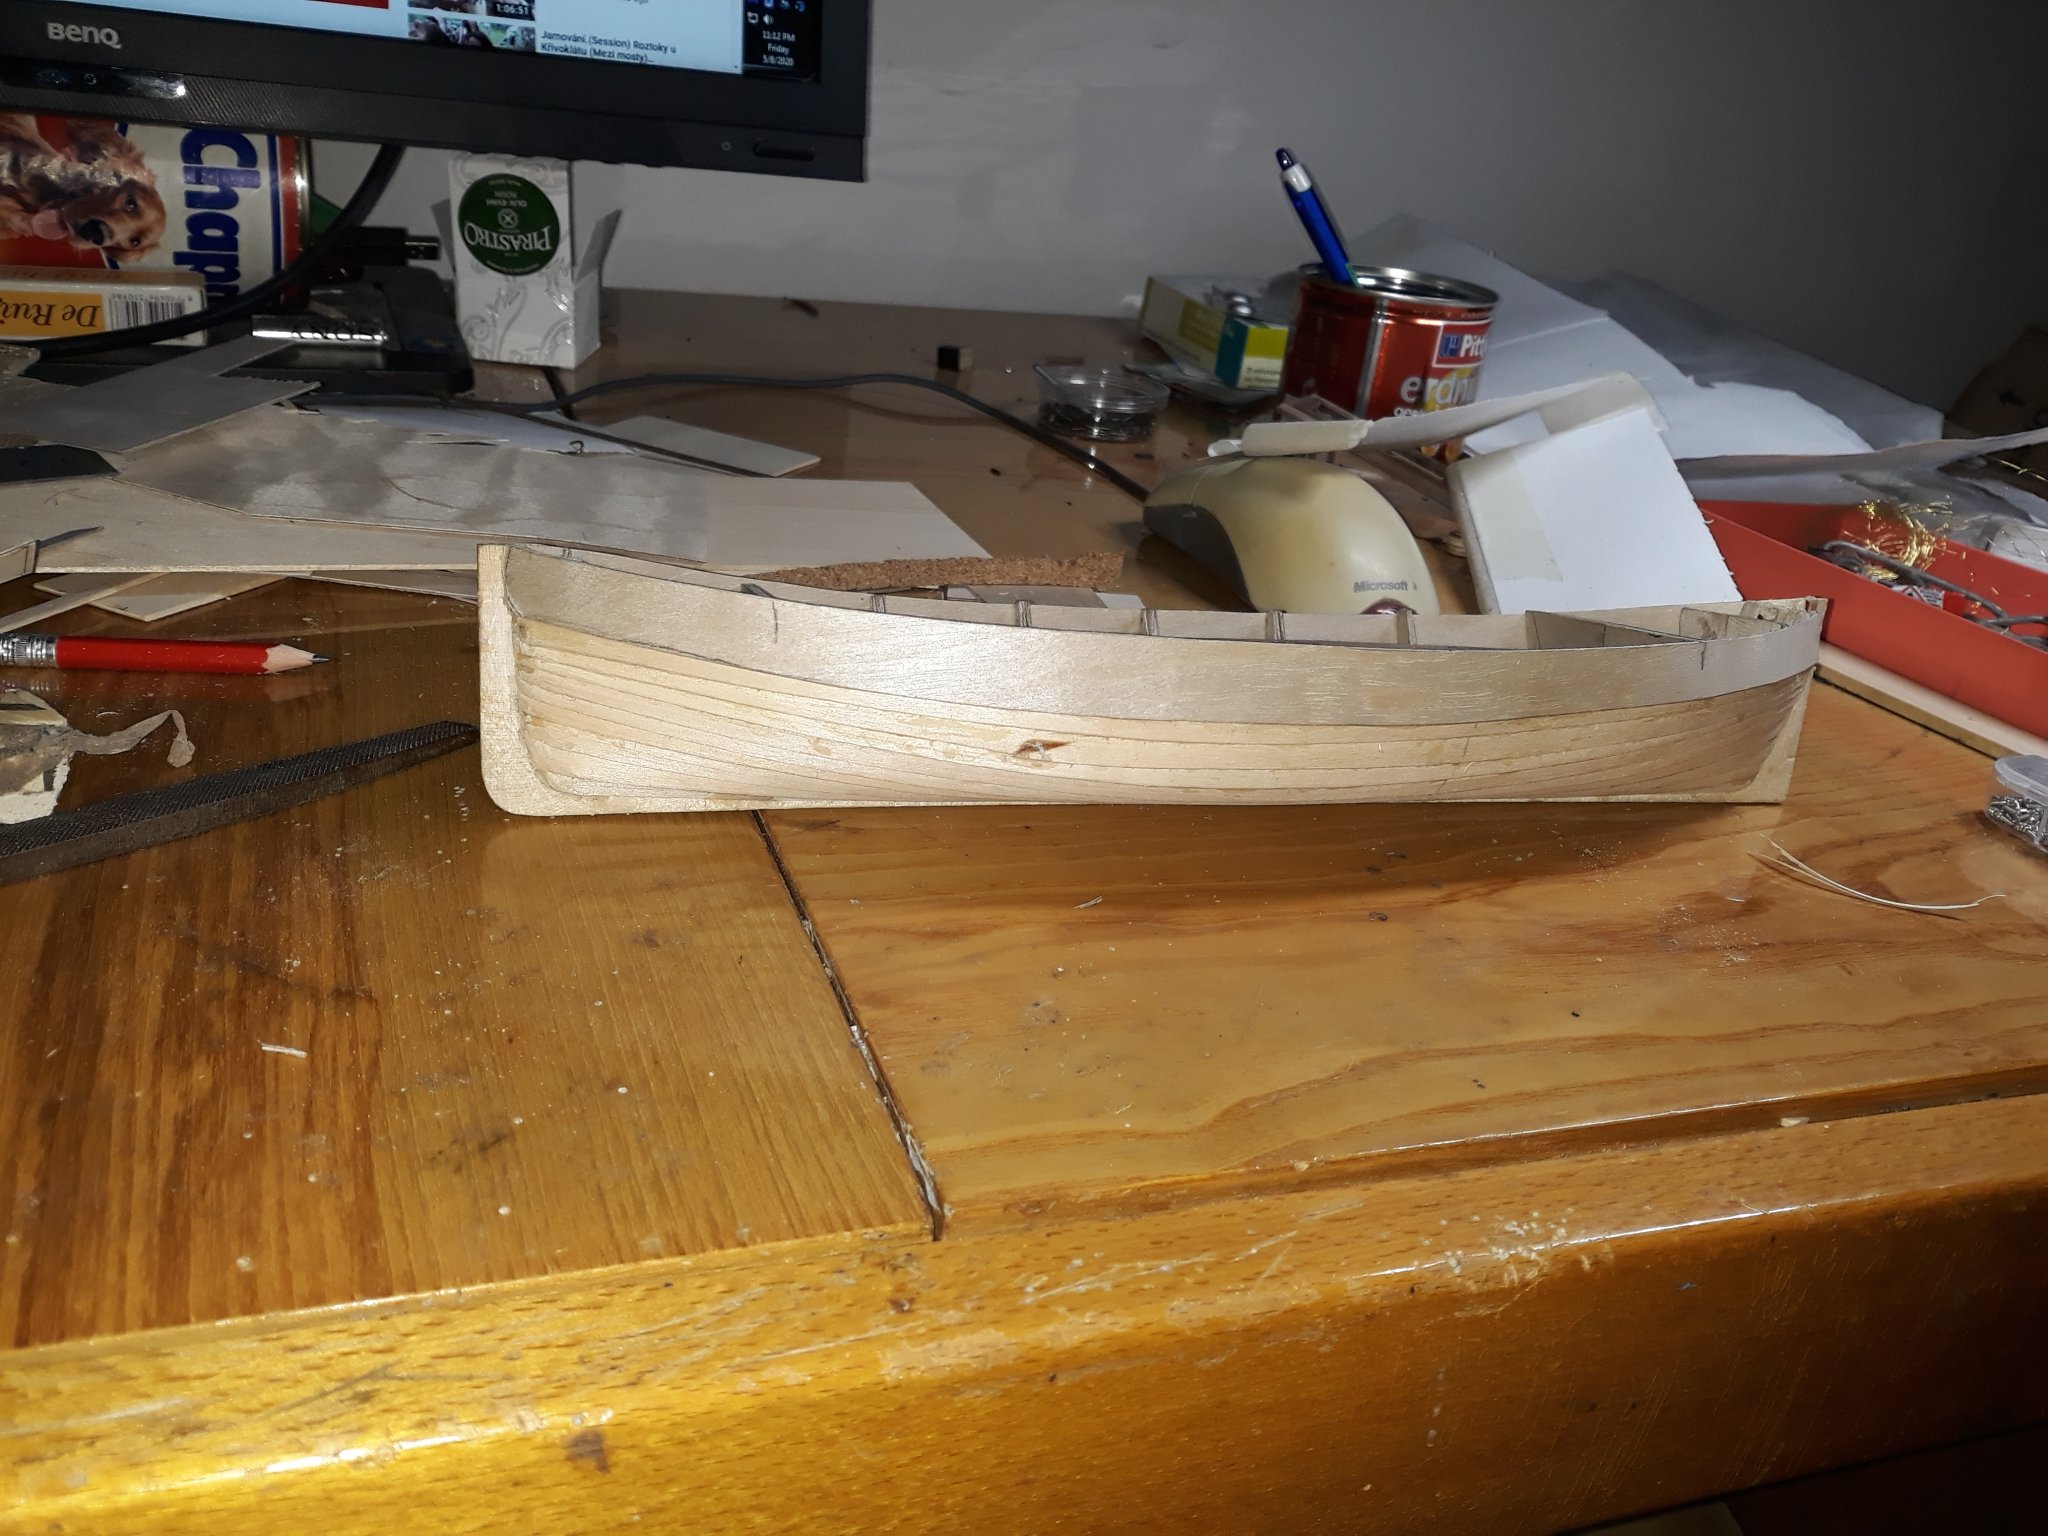
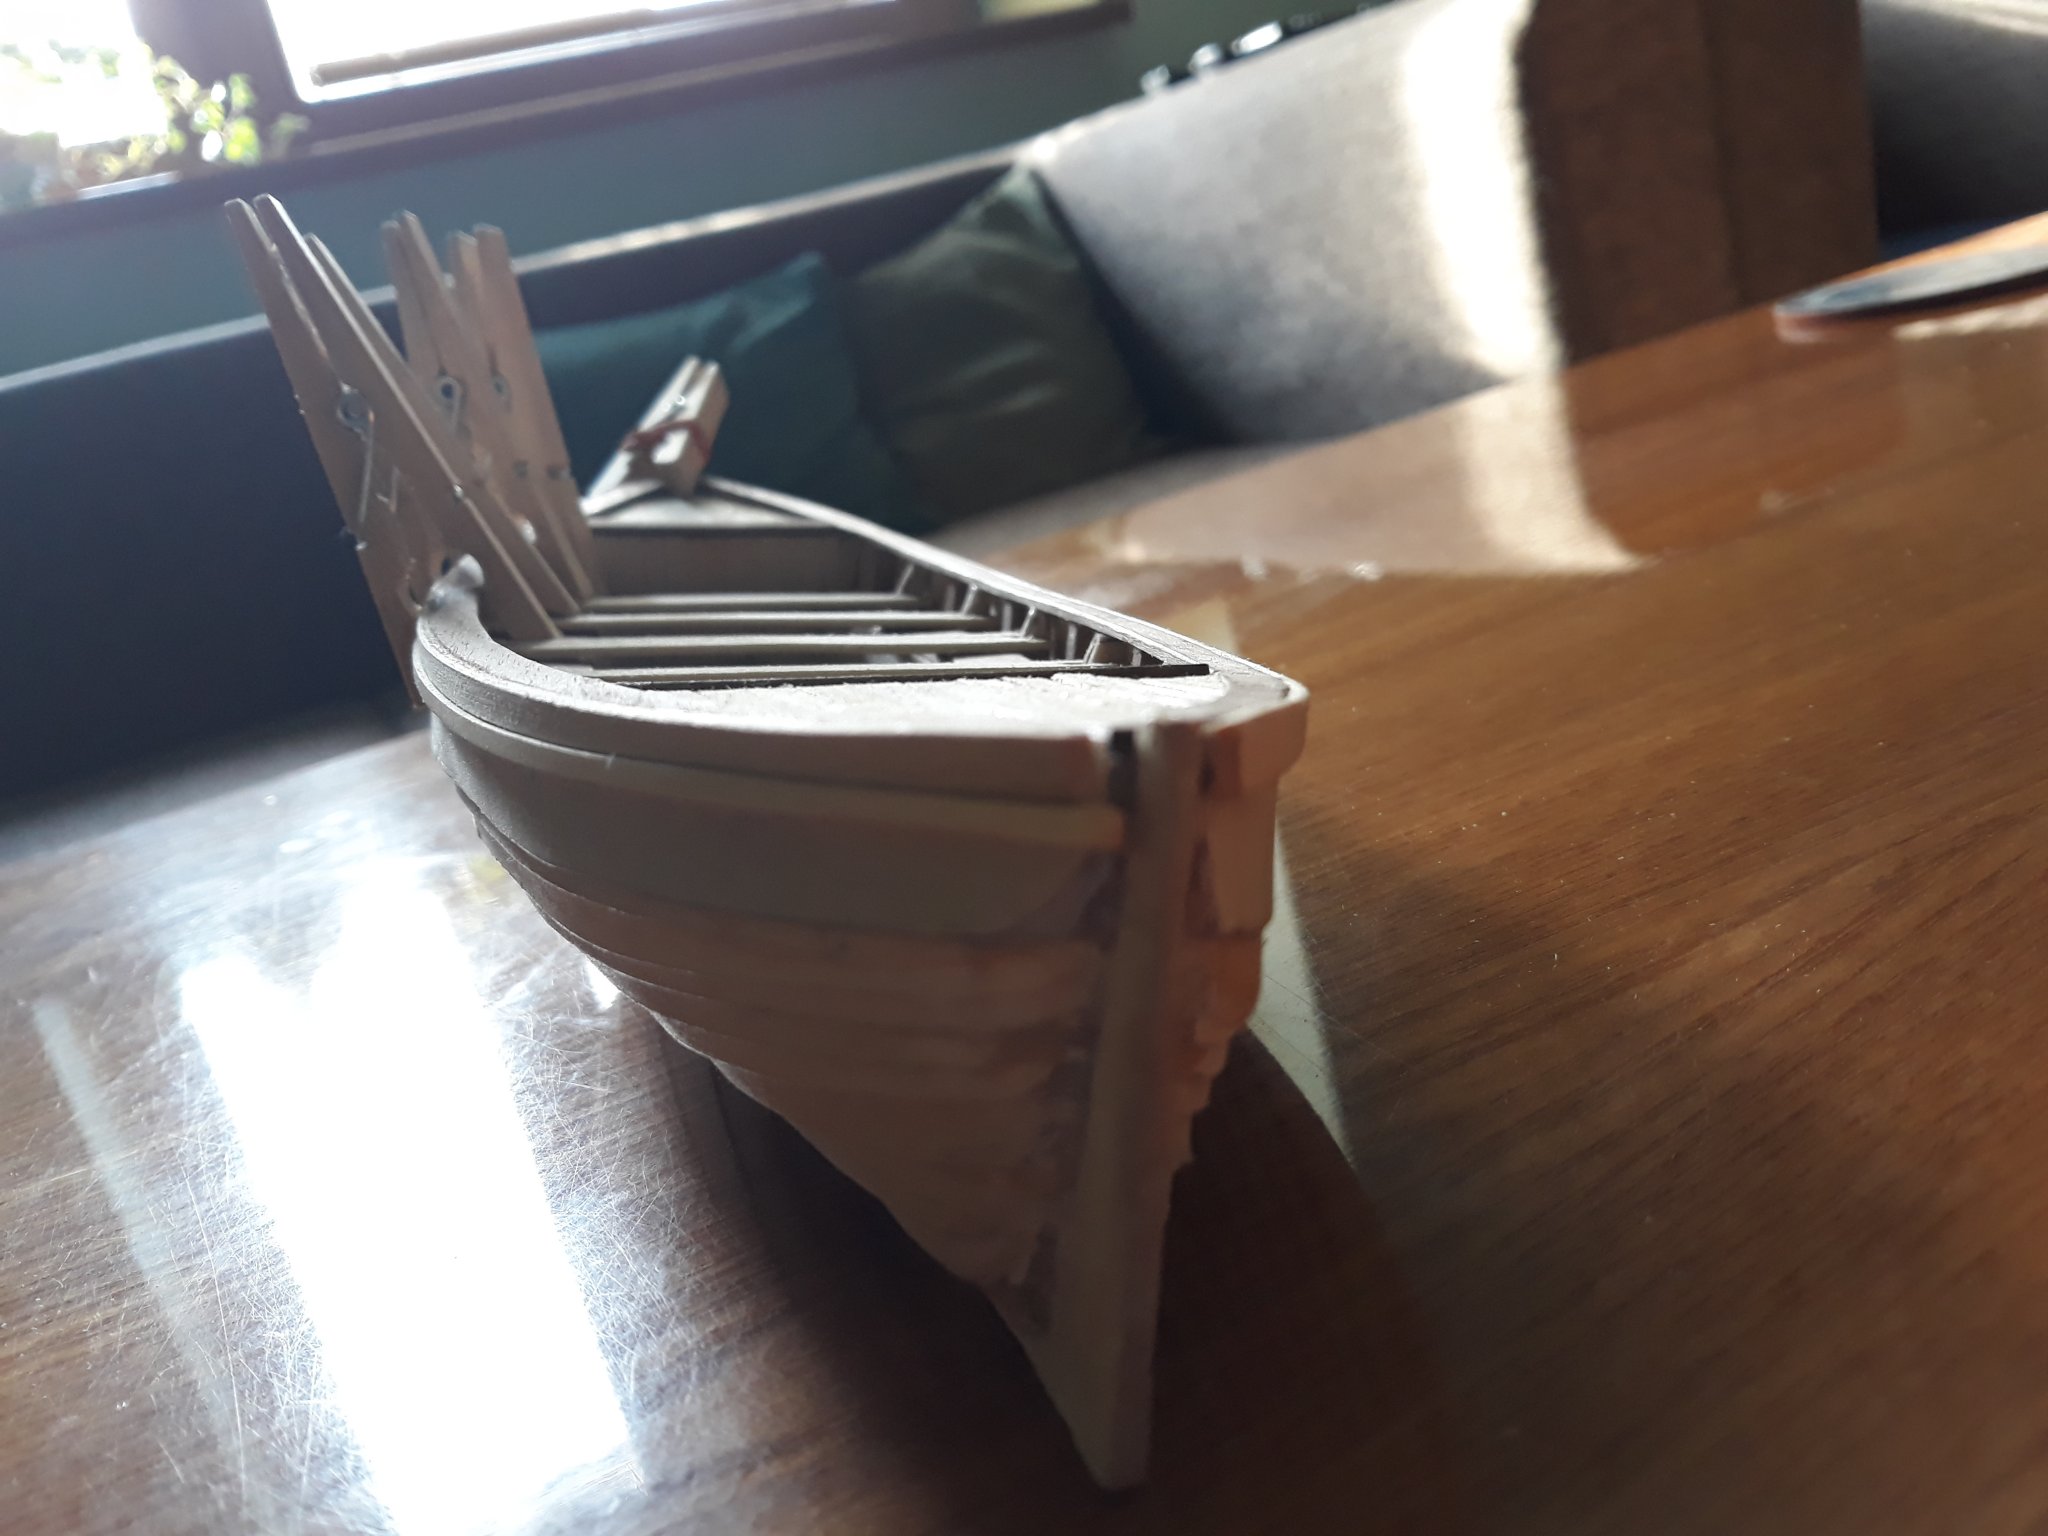
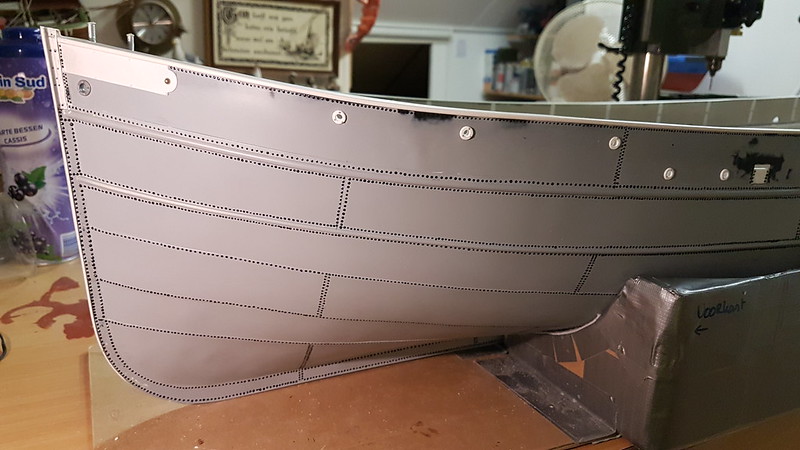
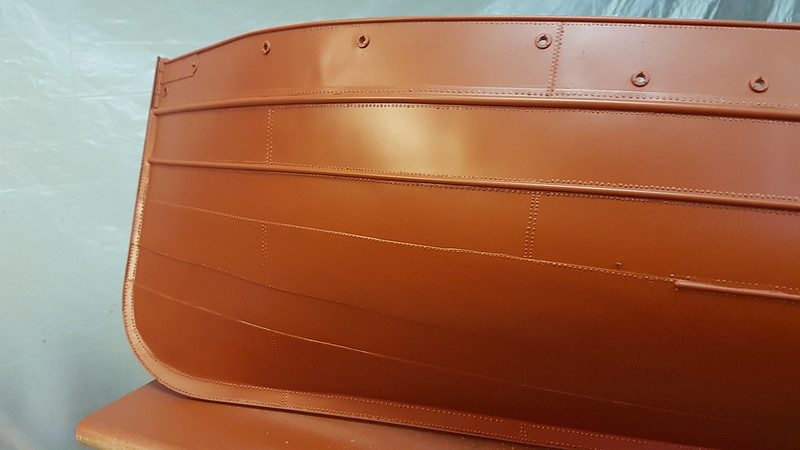
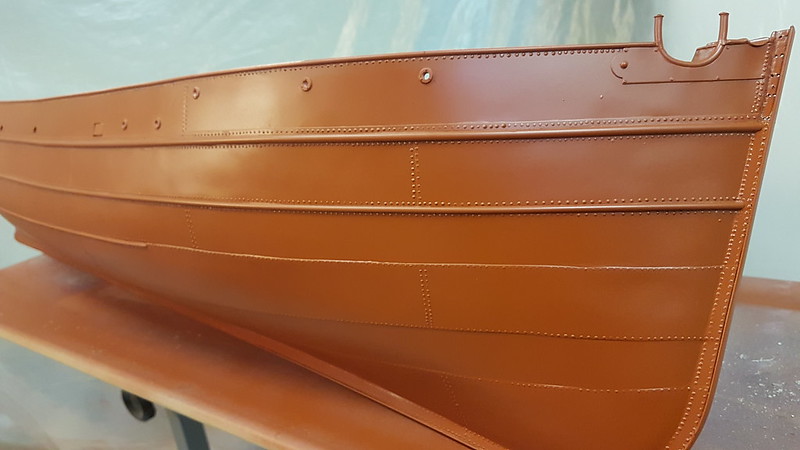
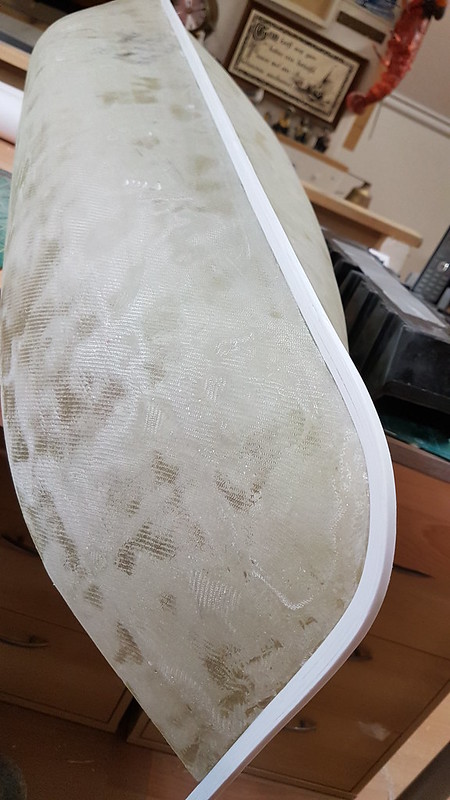
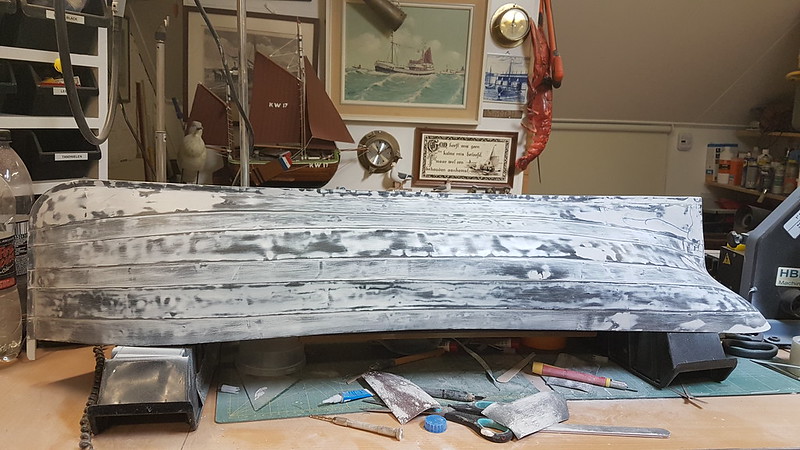
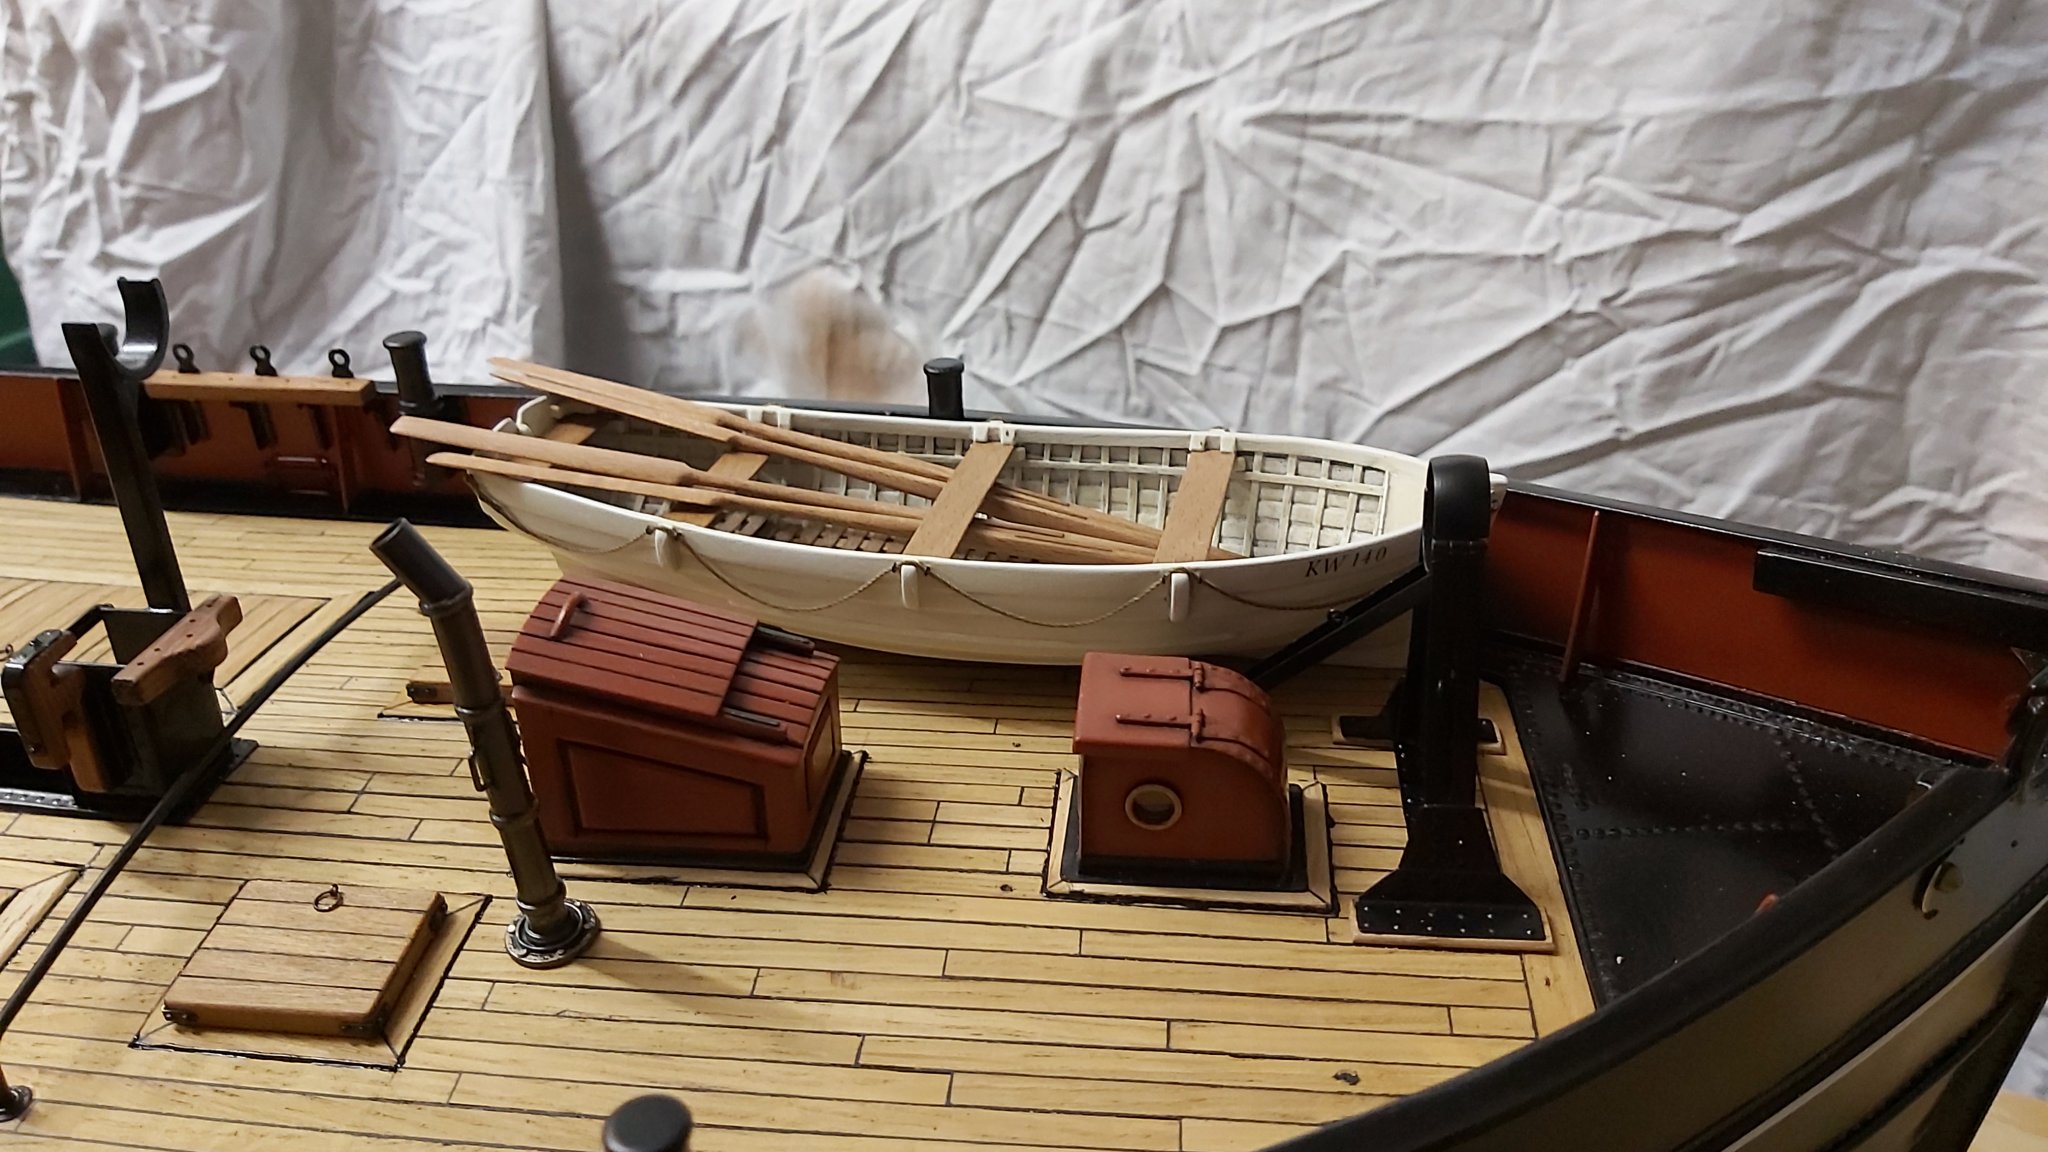
Hello, She certainly does not. I am gonna mask that half mortise with metal knees to imitate original. not yet finished though. I mean interior of original is different by plces right behind nose and butt. i did not cut 2 nd and pre - last bulkhead as i got inspiration from one build of titqnic lifeboat. i made sure outer dimensions of boat are pretty true relative to scale - 25" length beam size and depth 3,7 cm. that was my aim foremost.
putting coat on her today.
by the way floks this is slight offtopic question if someone could help me. is there any shop/ supplier selling model shipways plans in europe-land or GB? i would be very thankfull if someone might know.
cheers Vlad

-
Hello, looking forward to your progress with this ship. gool luck . Vlad
-
47 minutes ago, Maury S said:
All the work is done on the booms and gaffs (except the parrals, which can't be put on 'til the spars are ready to go onto the masts).
This includes the throat halyard iron work on the gaffs, sheet wyes, peak halyard wyes, bands, cleats, staples and the topsail sheet sheave.

Maury
Very nice Maury, inspiring stuff. good luck with further ongoing. Vlad
-
Good weekend and health everyone.
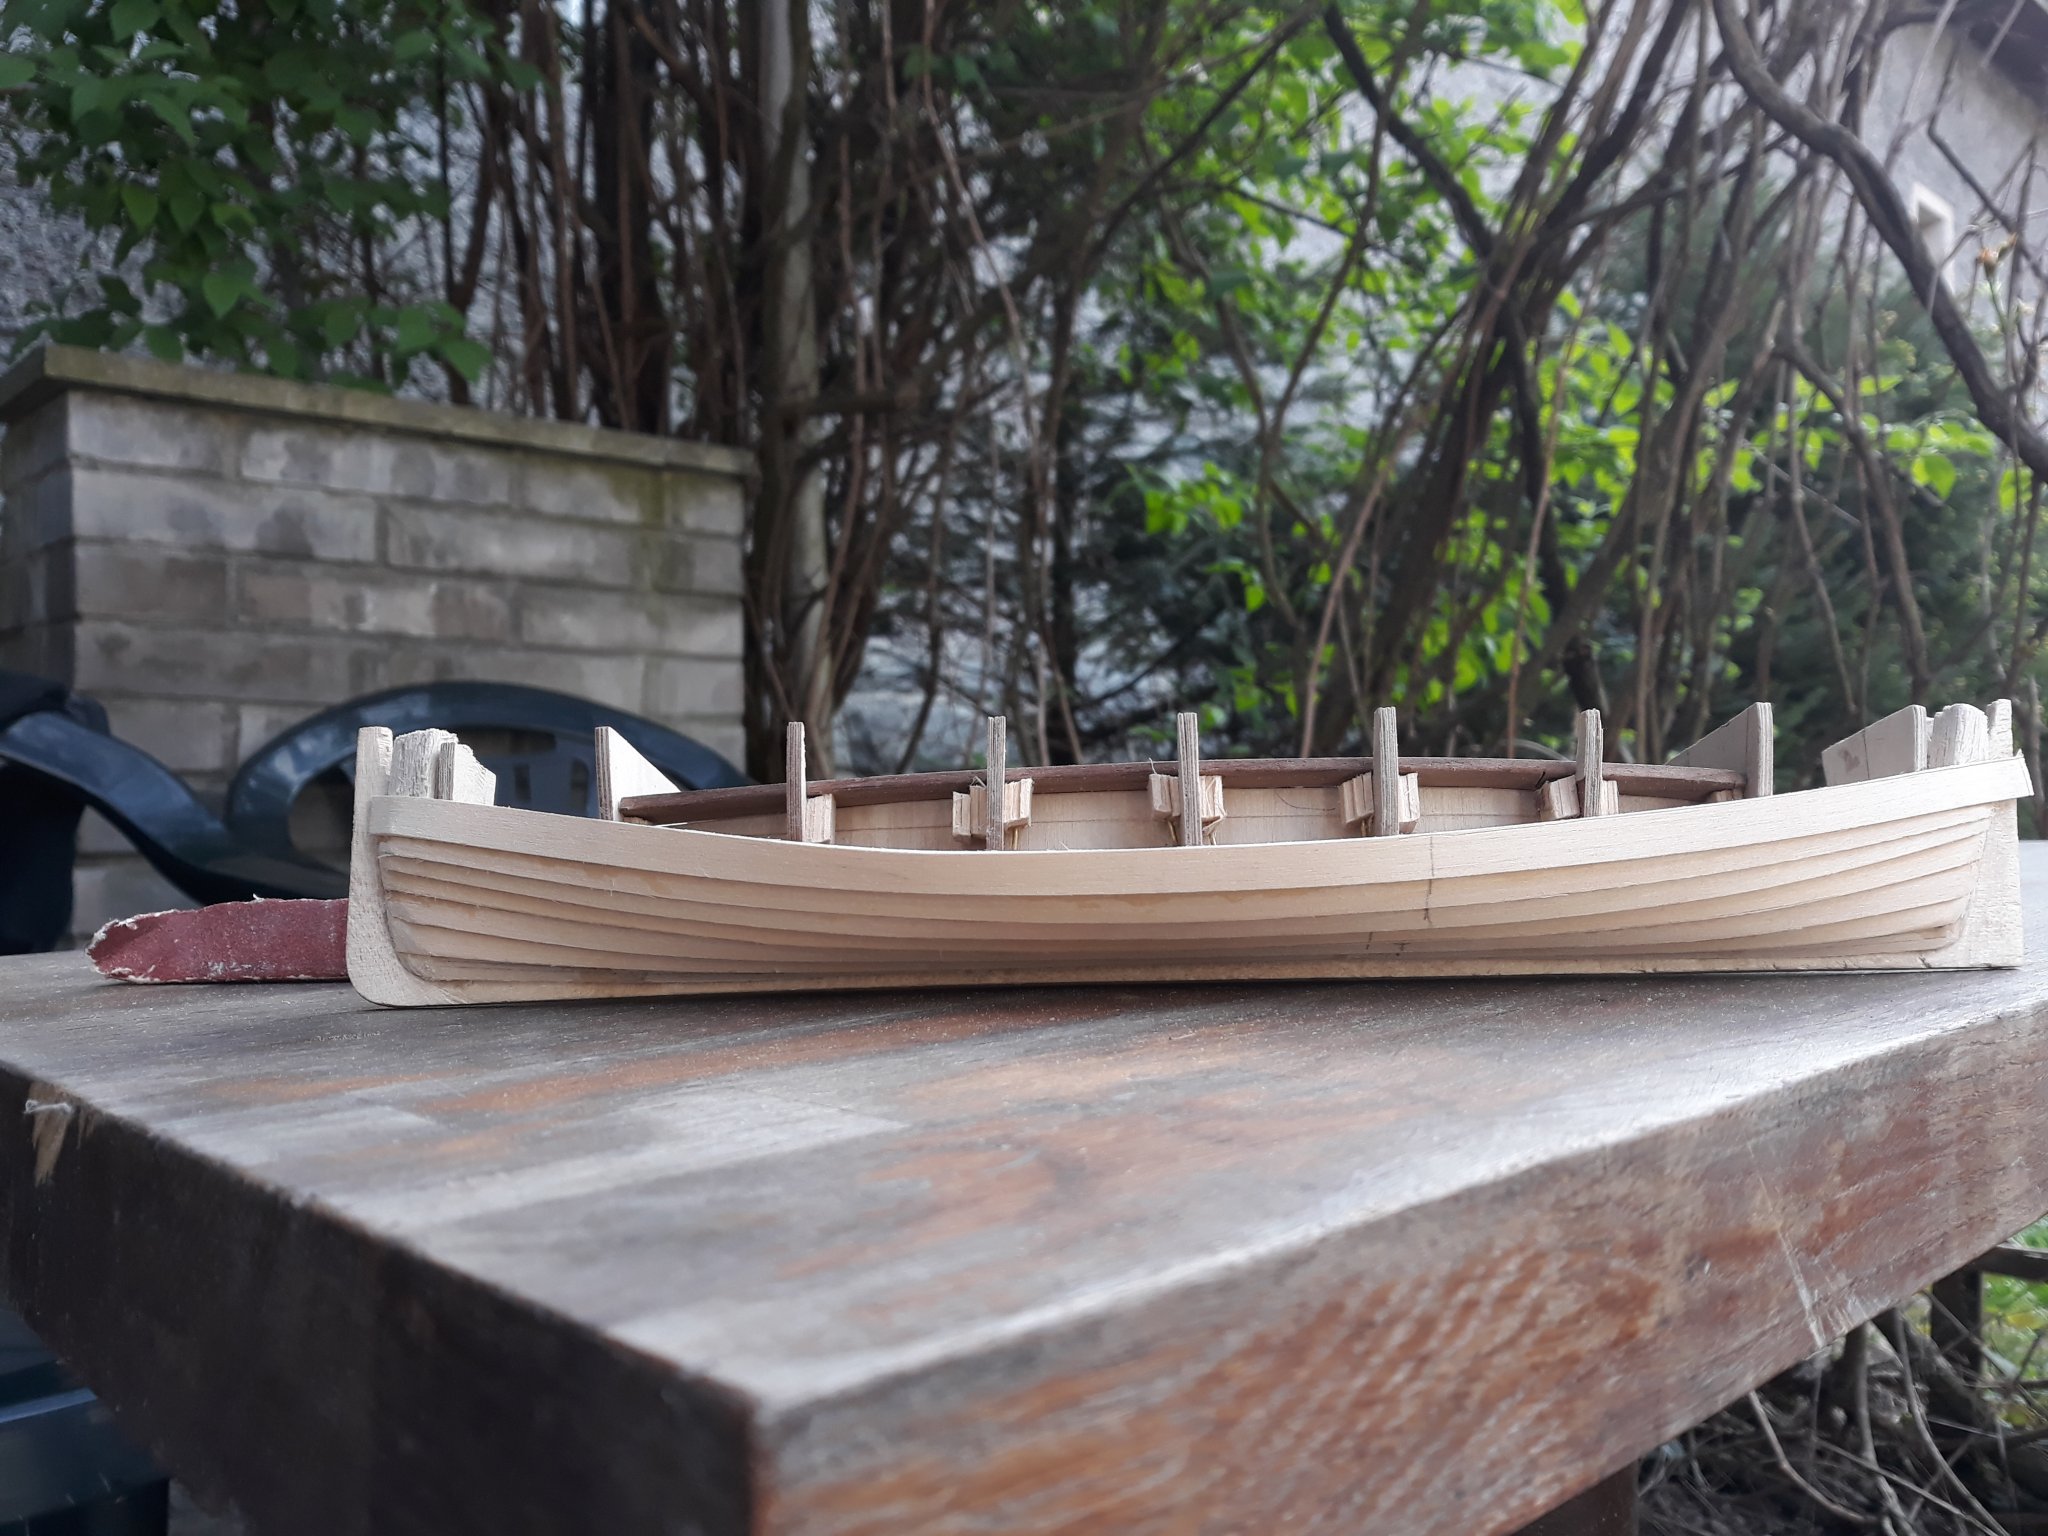
cathedral of the oceans got a baby.
lifeboat.
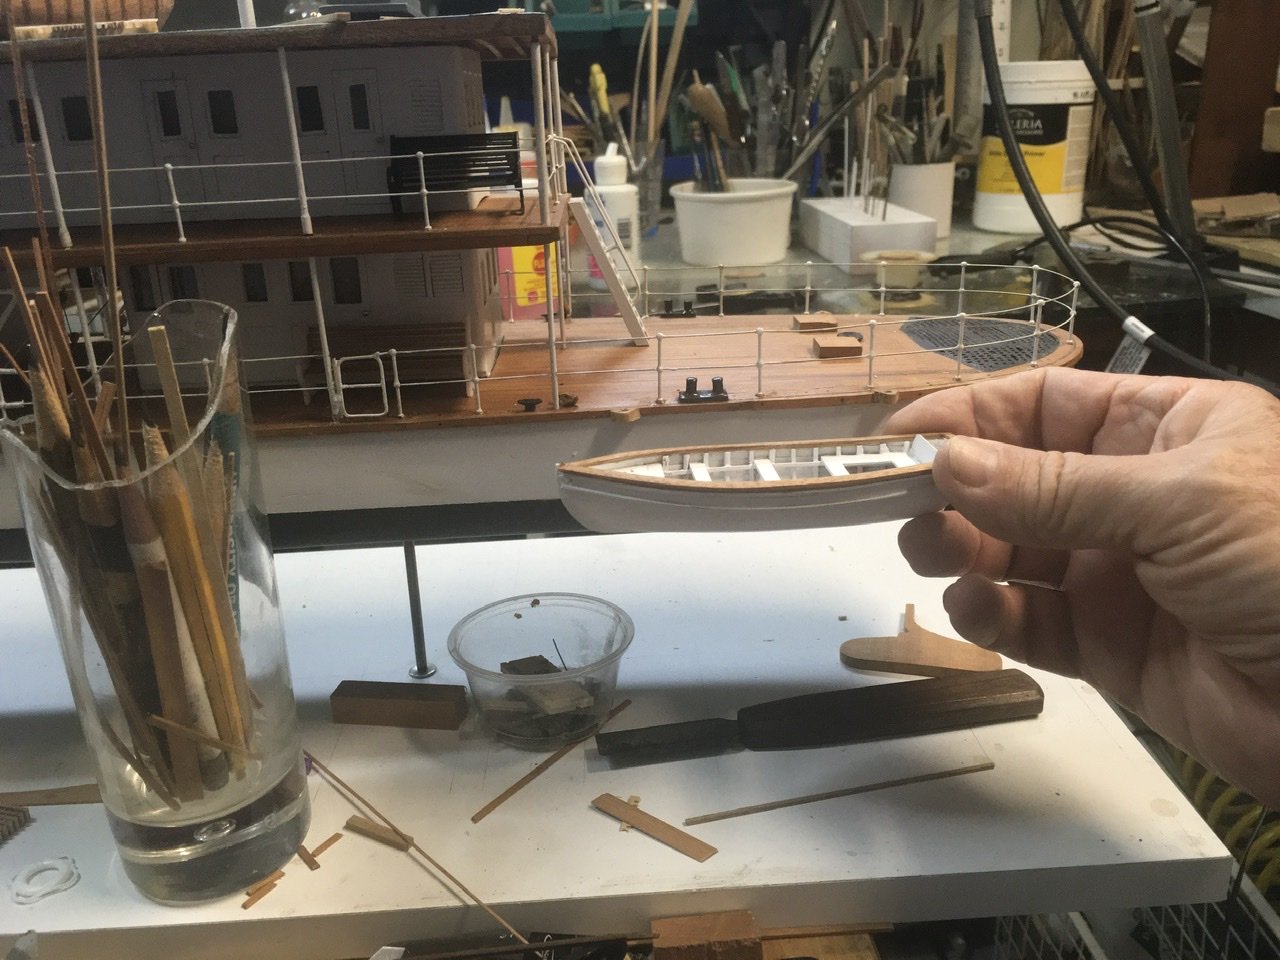
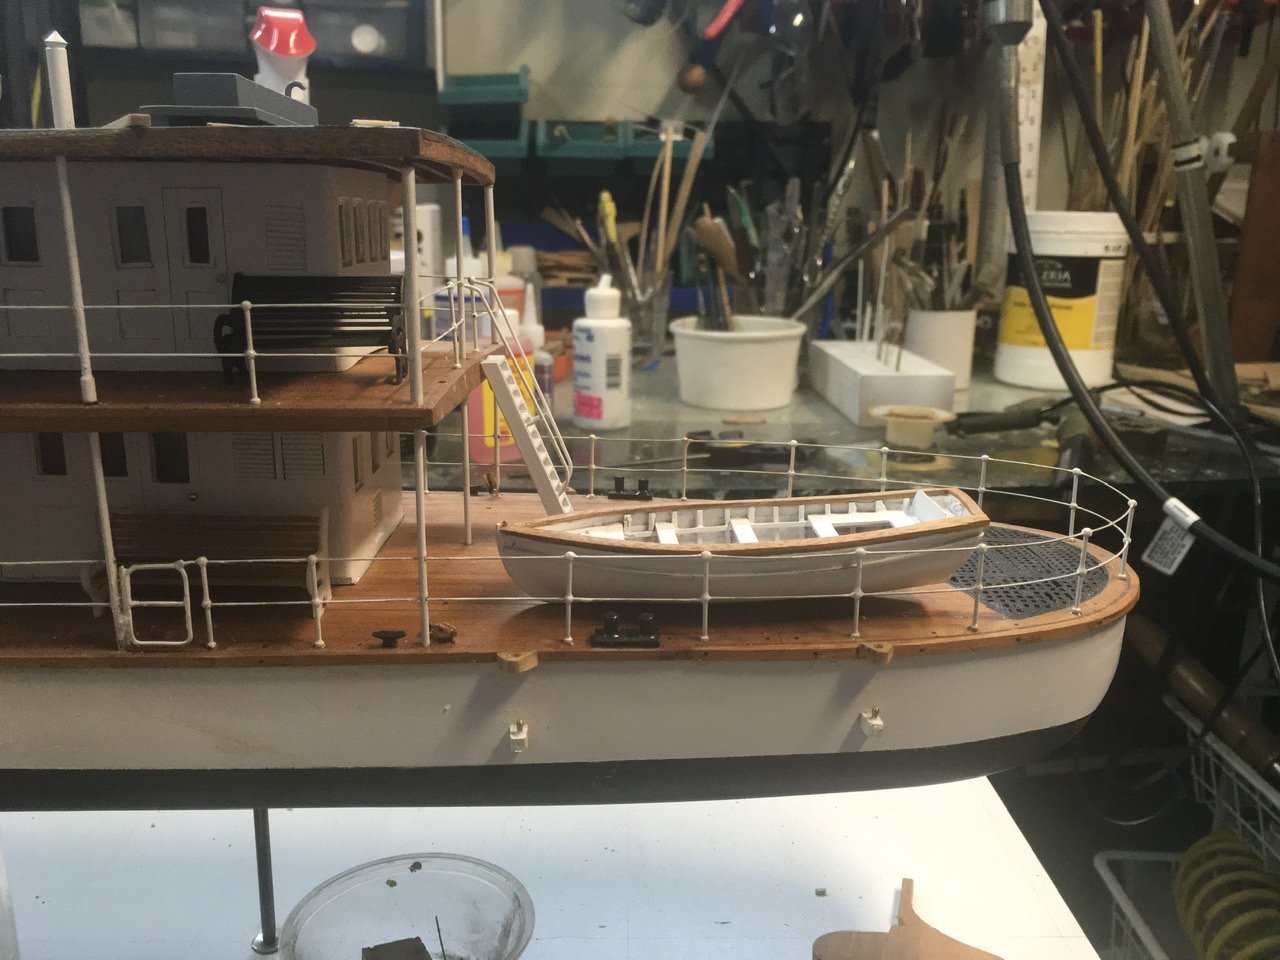
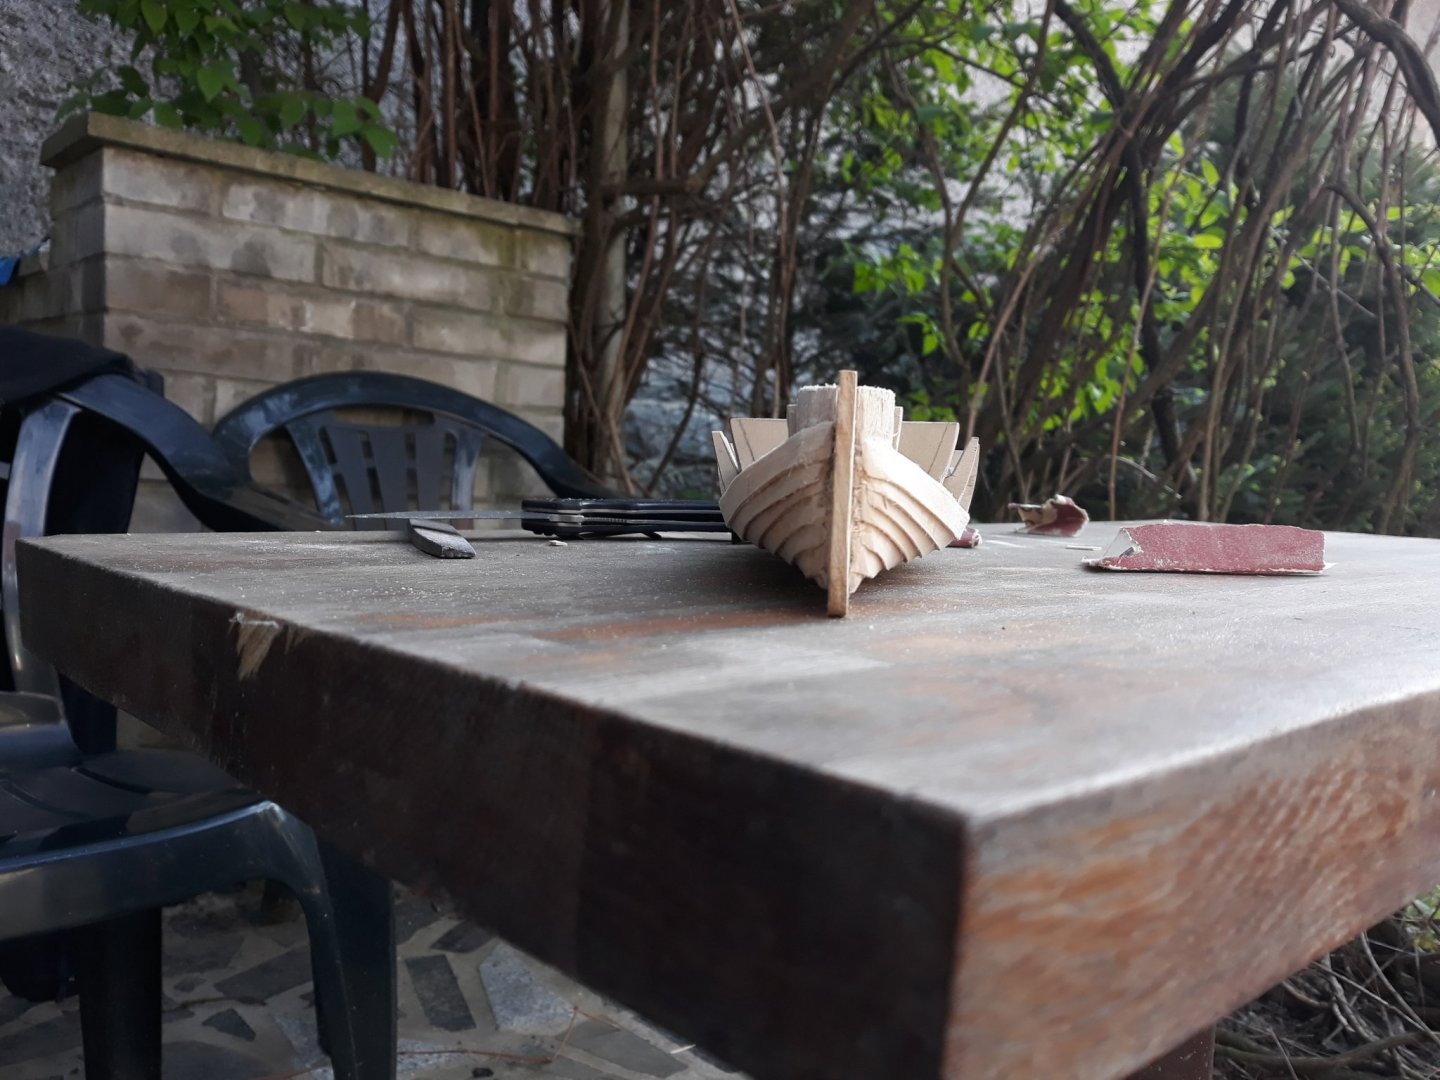
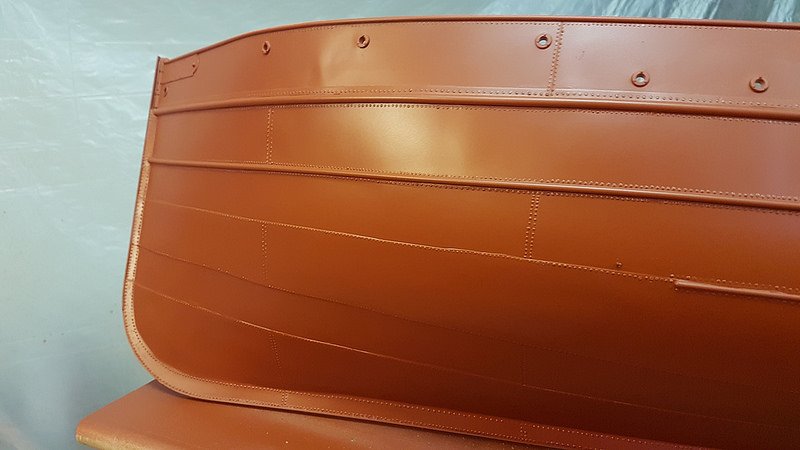
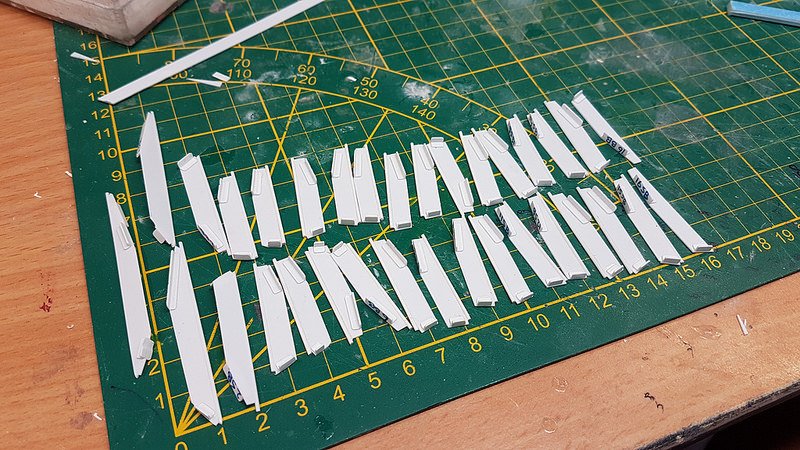
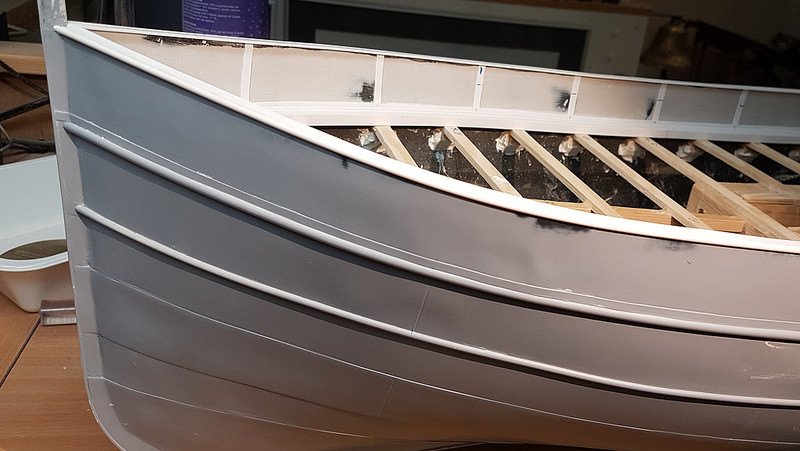
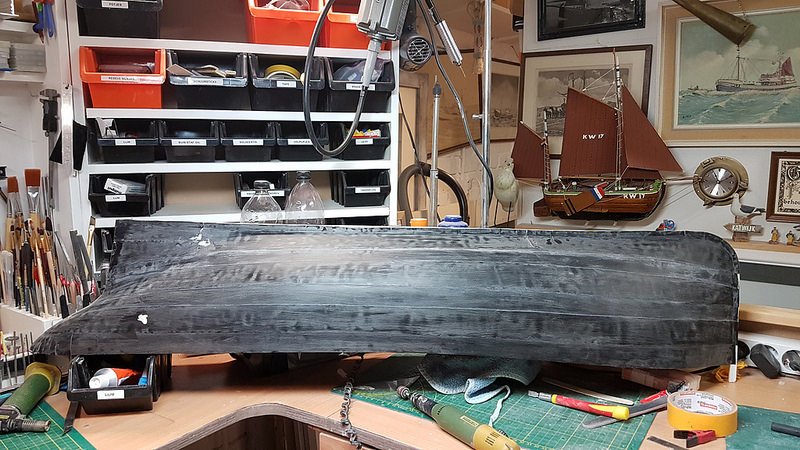
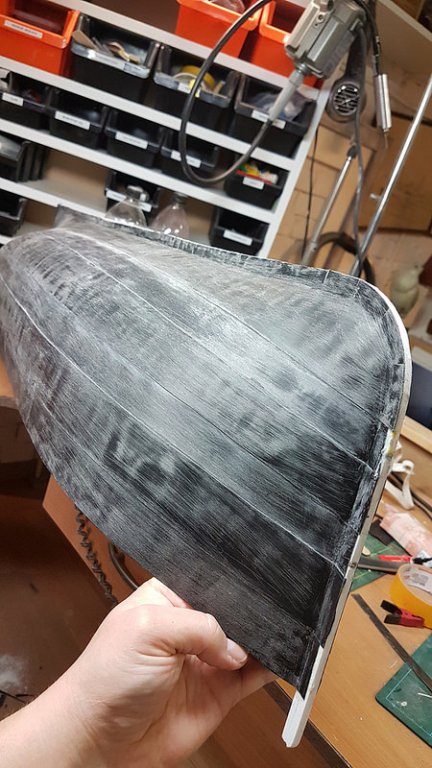
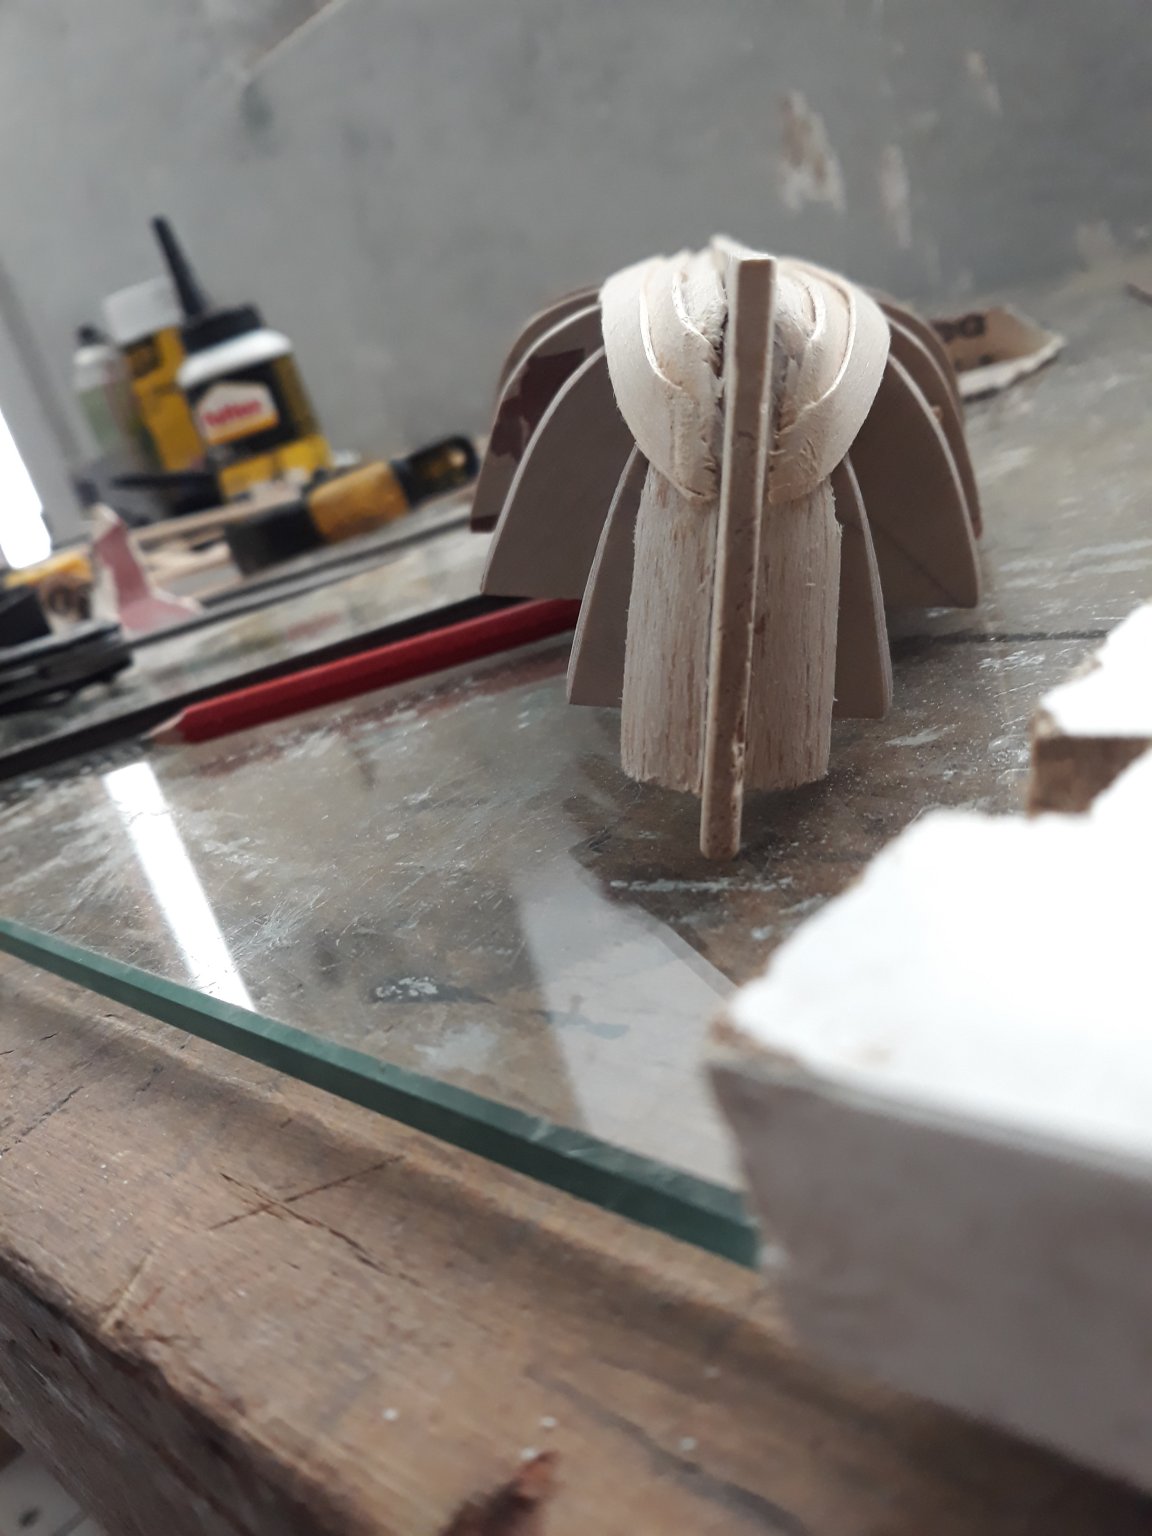
what a tour de force. Its my first clinker please bear with me. Far from perfect though at the edges but i like boat enormously as learnt plenty. Finally small modeling didnt escape me,:) I found free plan with exact measures as on cutty , but i modified/simplify interior design a bit...
") . Sorry. many thanks for any comment etc...cant wait to put coat on. 3 days from drawing board to boat. Have good weekend.
. Sorry. many thanks for any comment etc...cant wait to put coat on. 3 days from drawing board to boat. Have good weekend.
.


- paulsutcliffe, G.L., gieb8688 and 4 others
-
7
-
-
5 hours ago, G.L. said:
No problem, Vladimir, go ahead!
By the way, I follow your Cutty Sark project with much interest. Impressive work that you do there.
Heeey Thank you ! you must know interest all of you guys helps me to commit ro her and keep going and not to give up. she is a love / pain relation to me
. gonna start on display. that would be welcome distraction from all suffer with bow finally amusing parts . Fair wind!
-
-
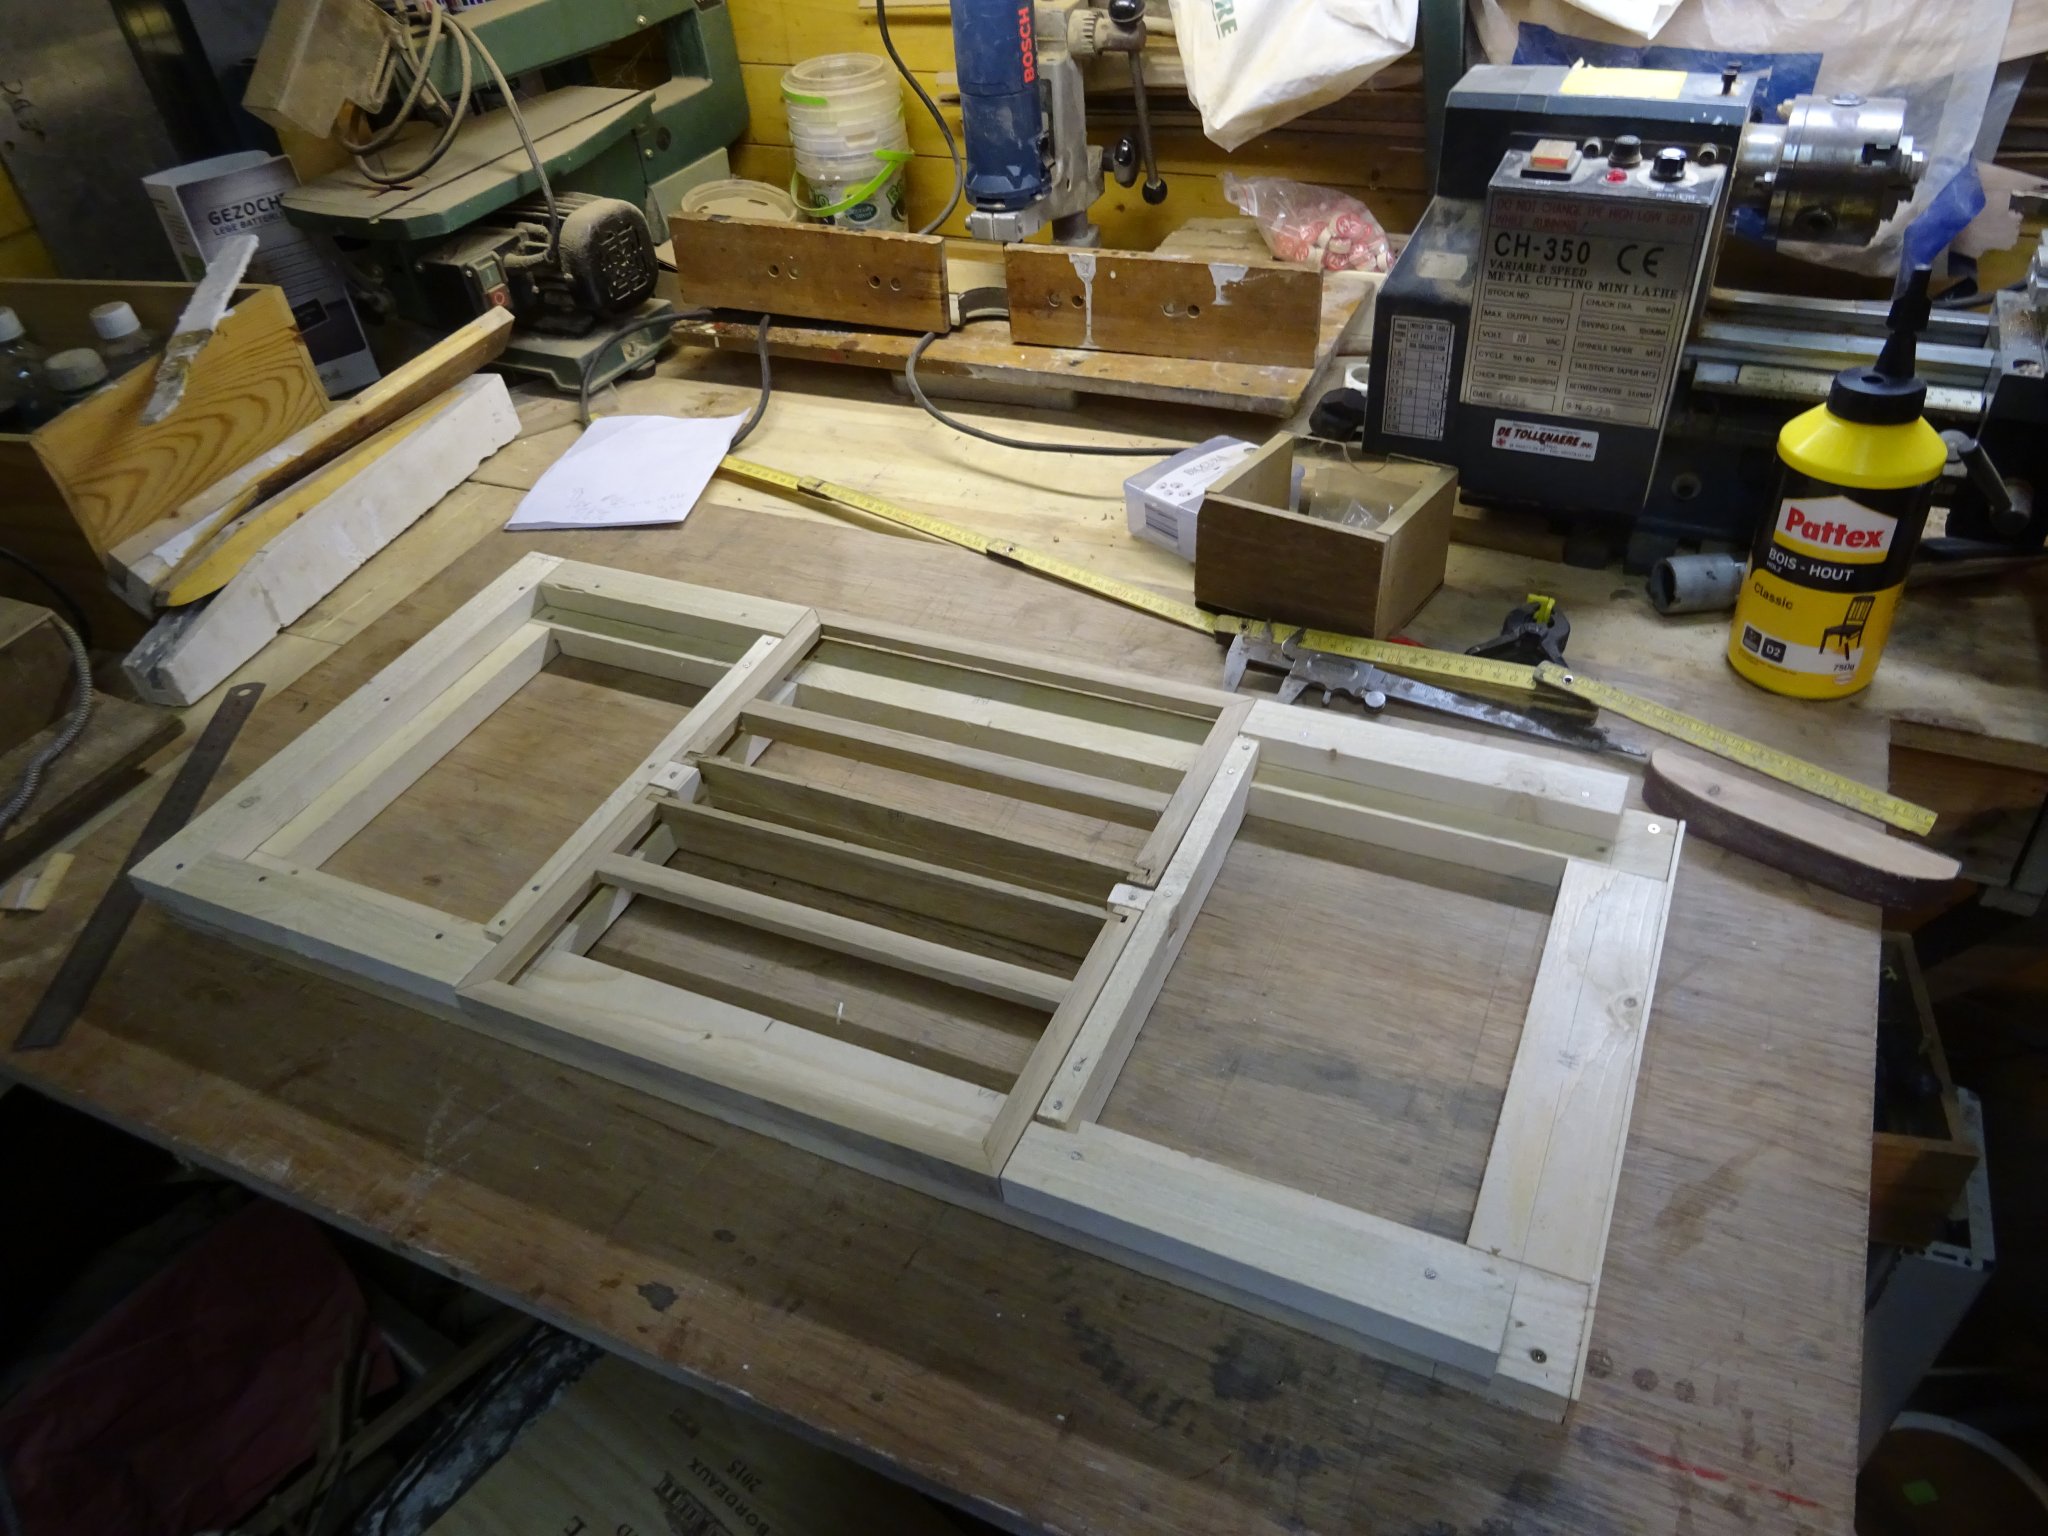
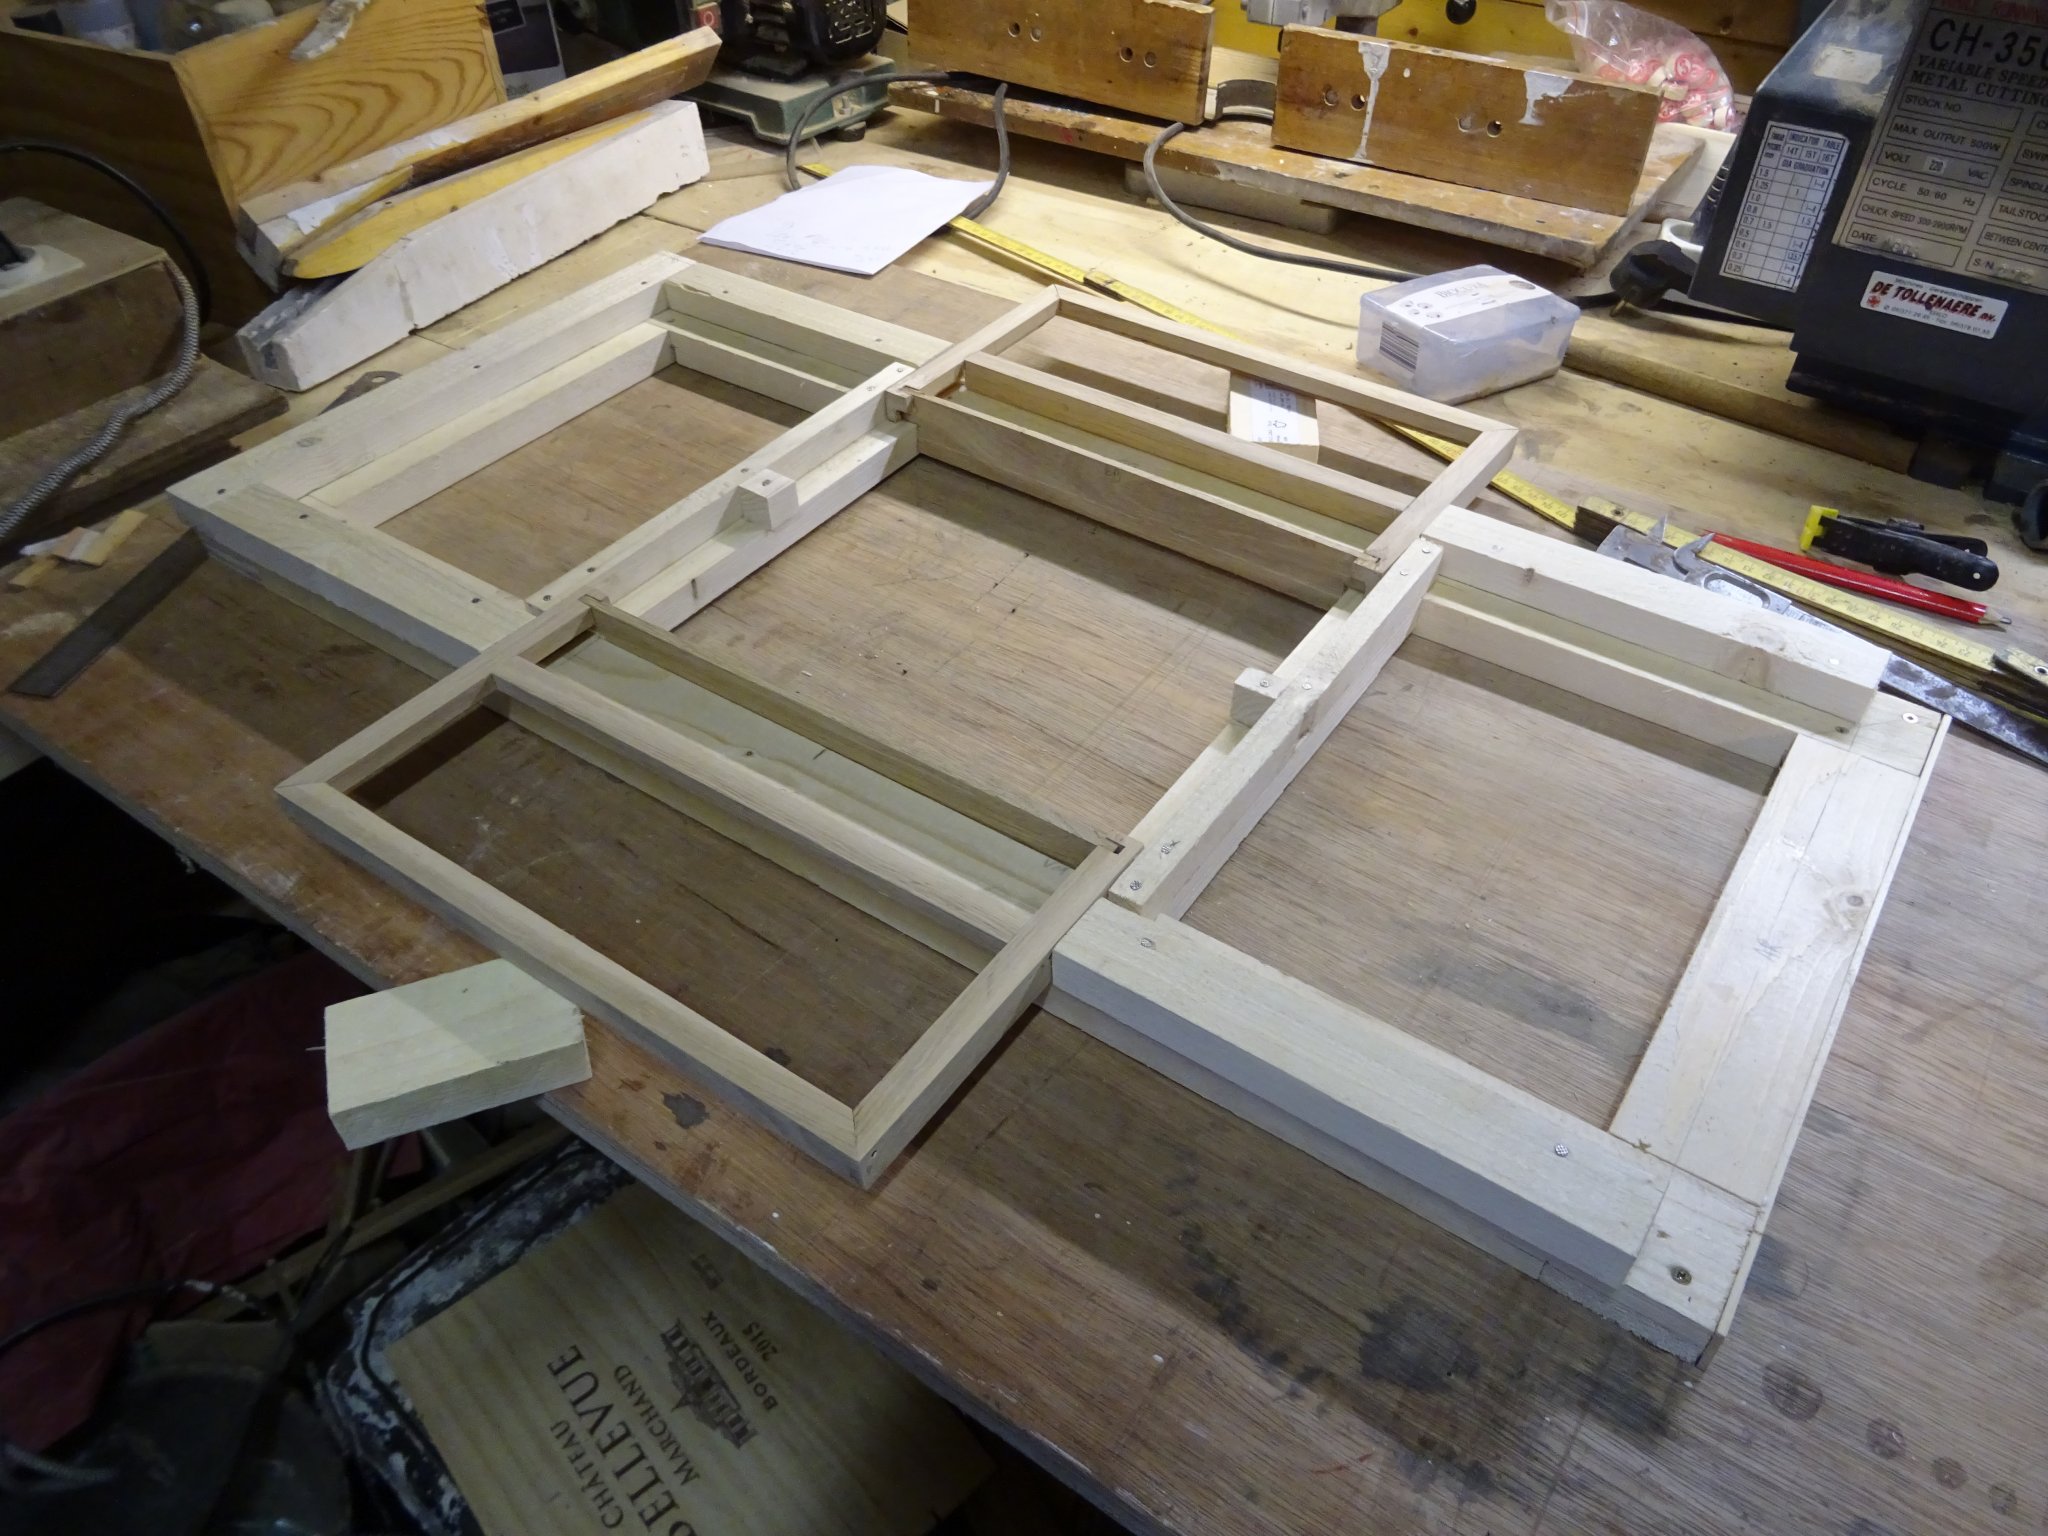
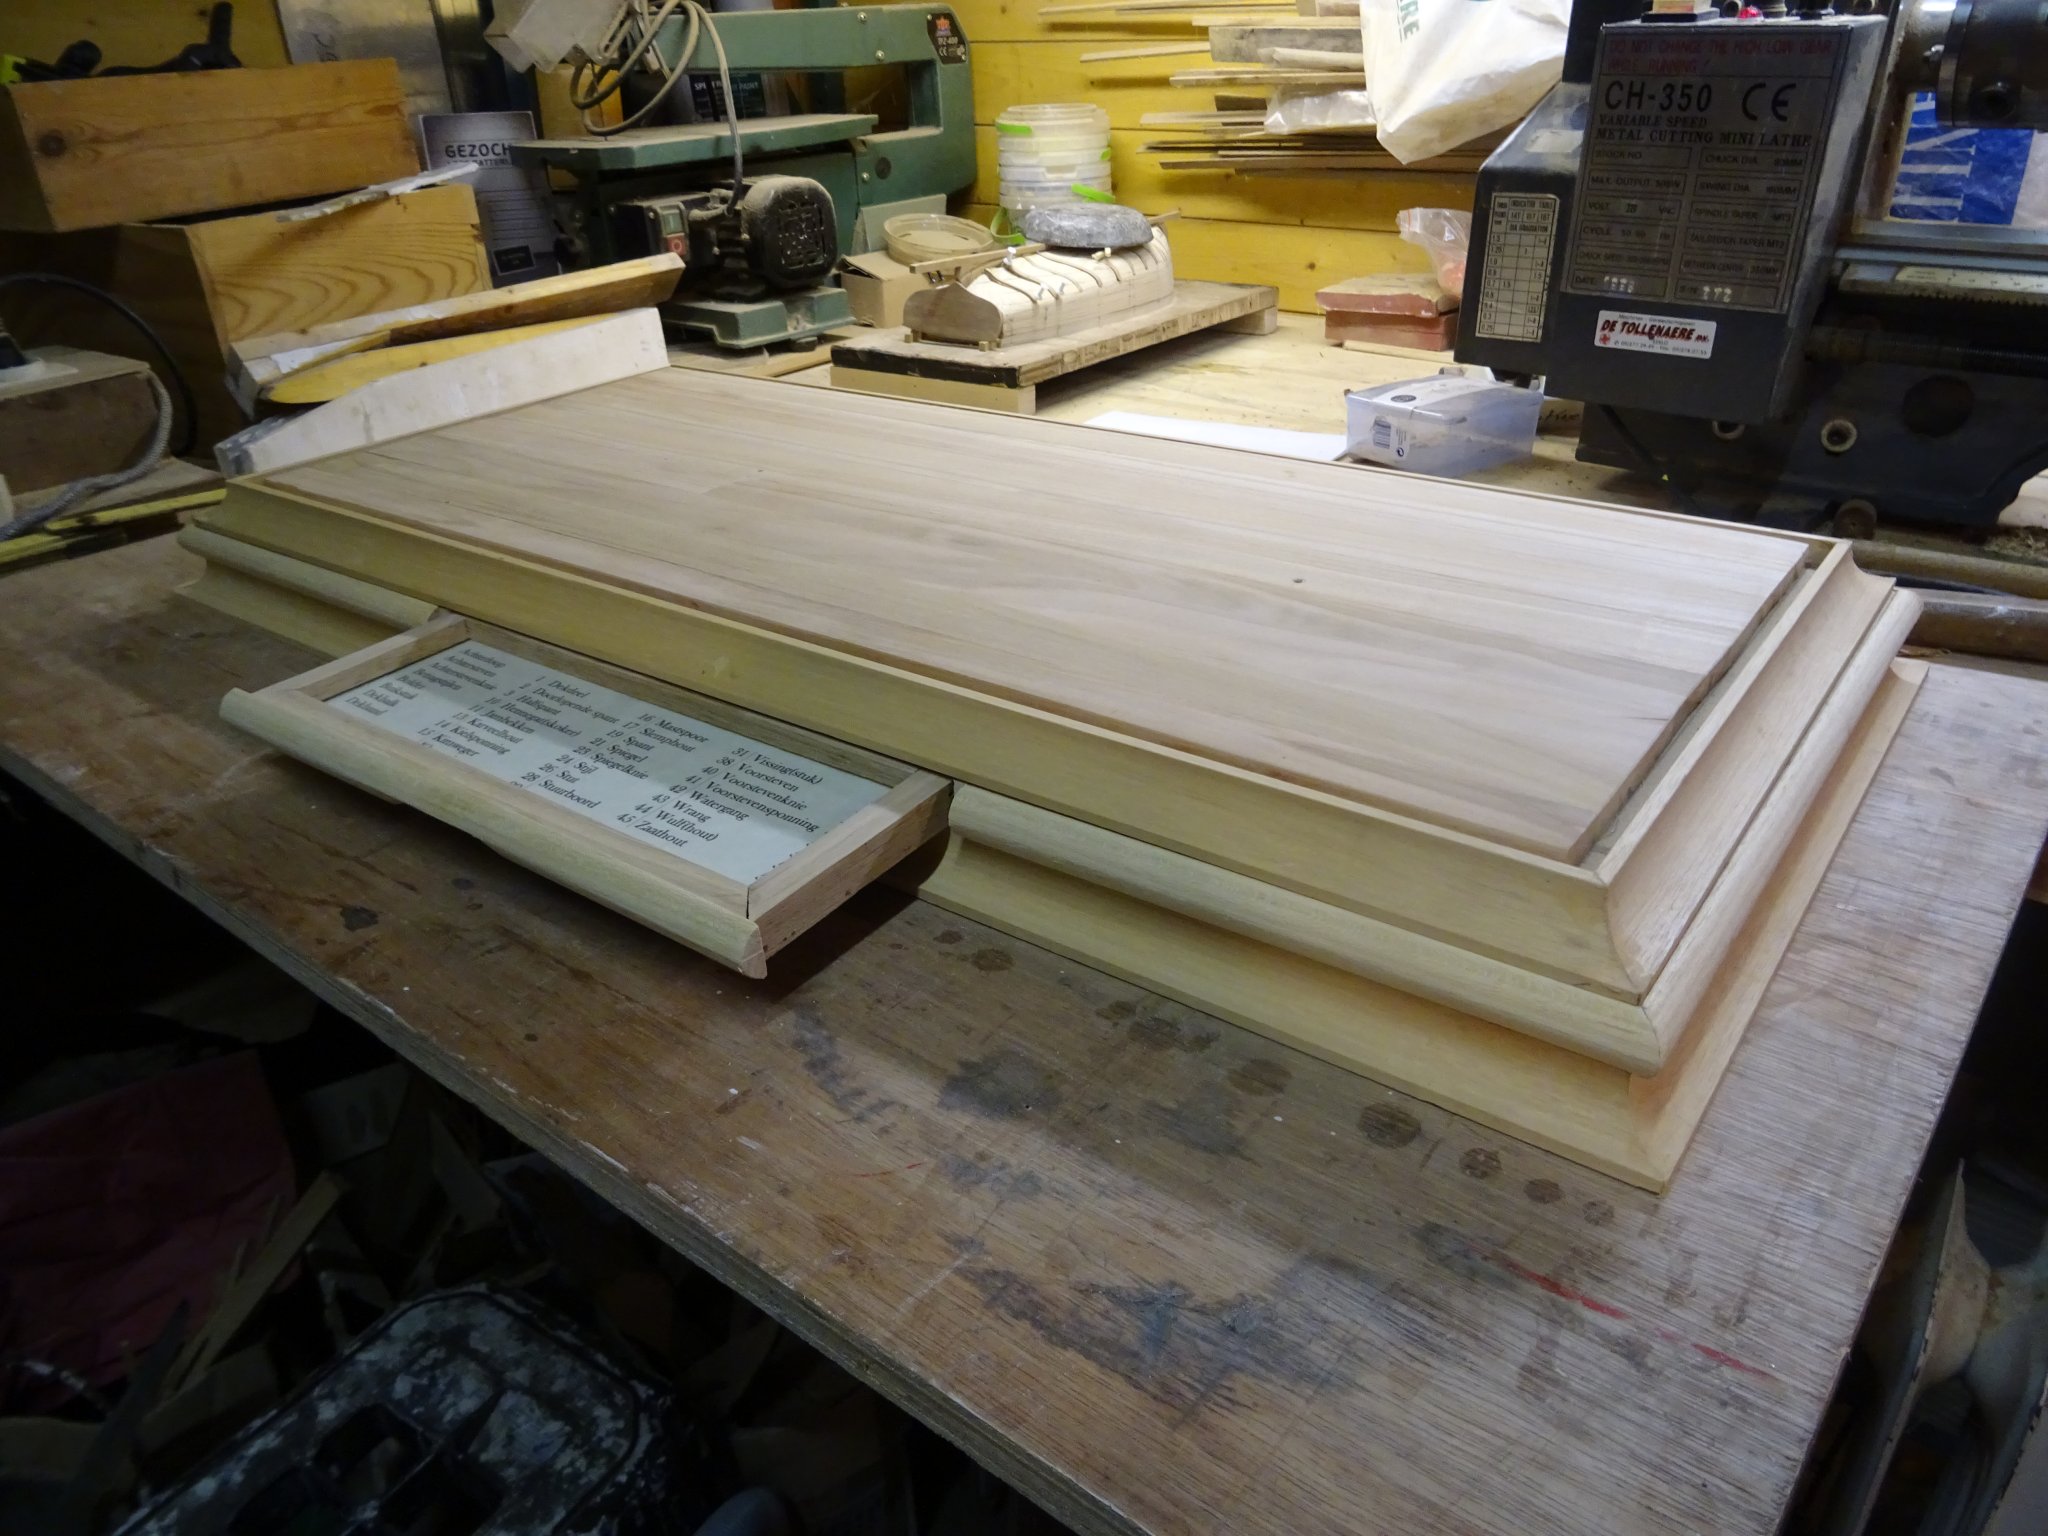
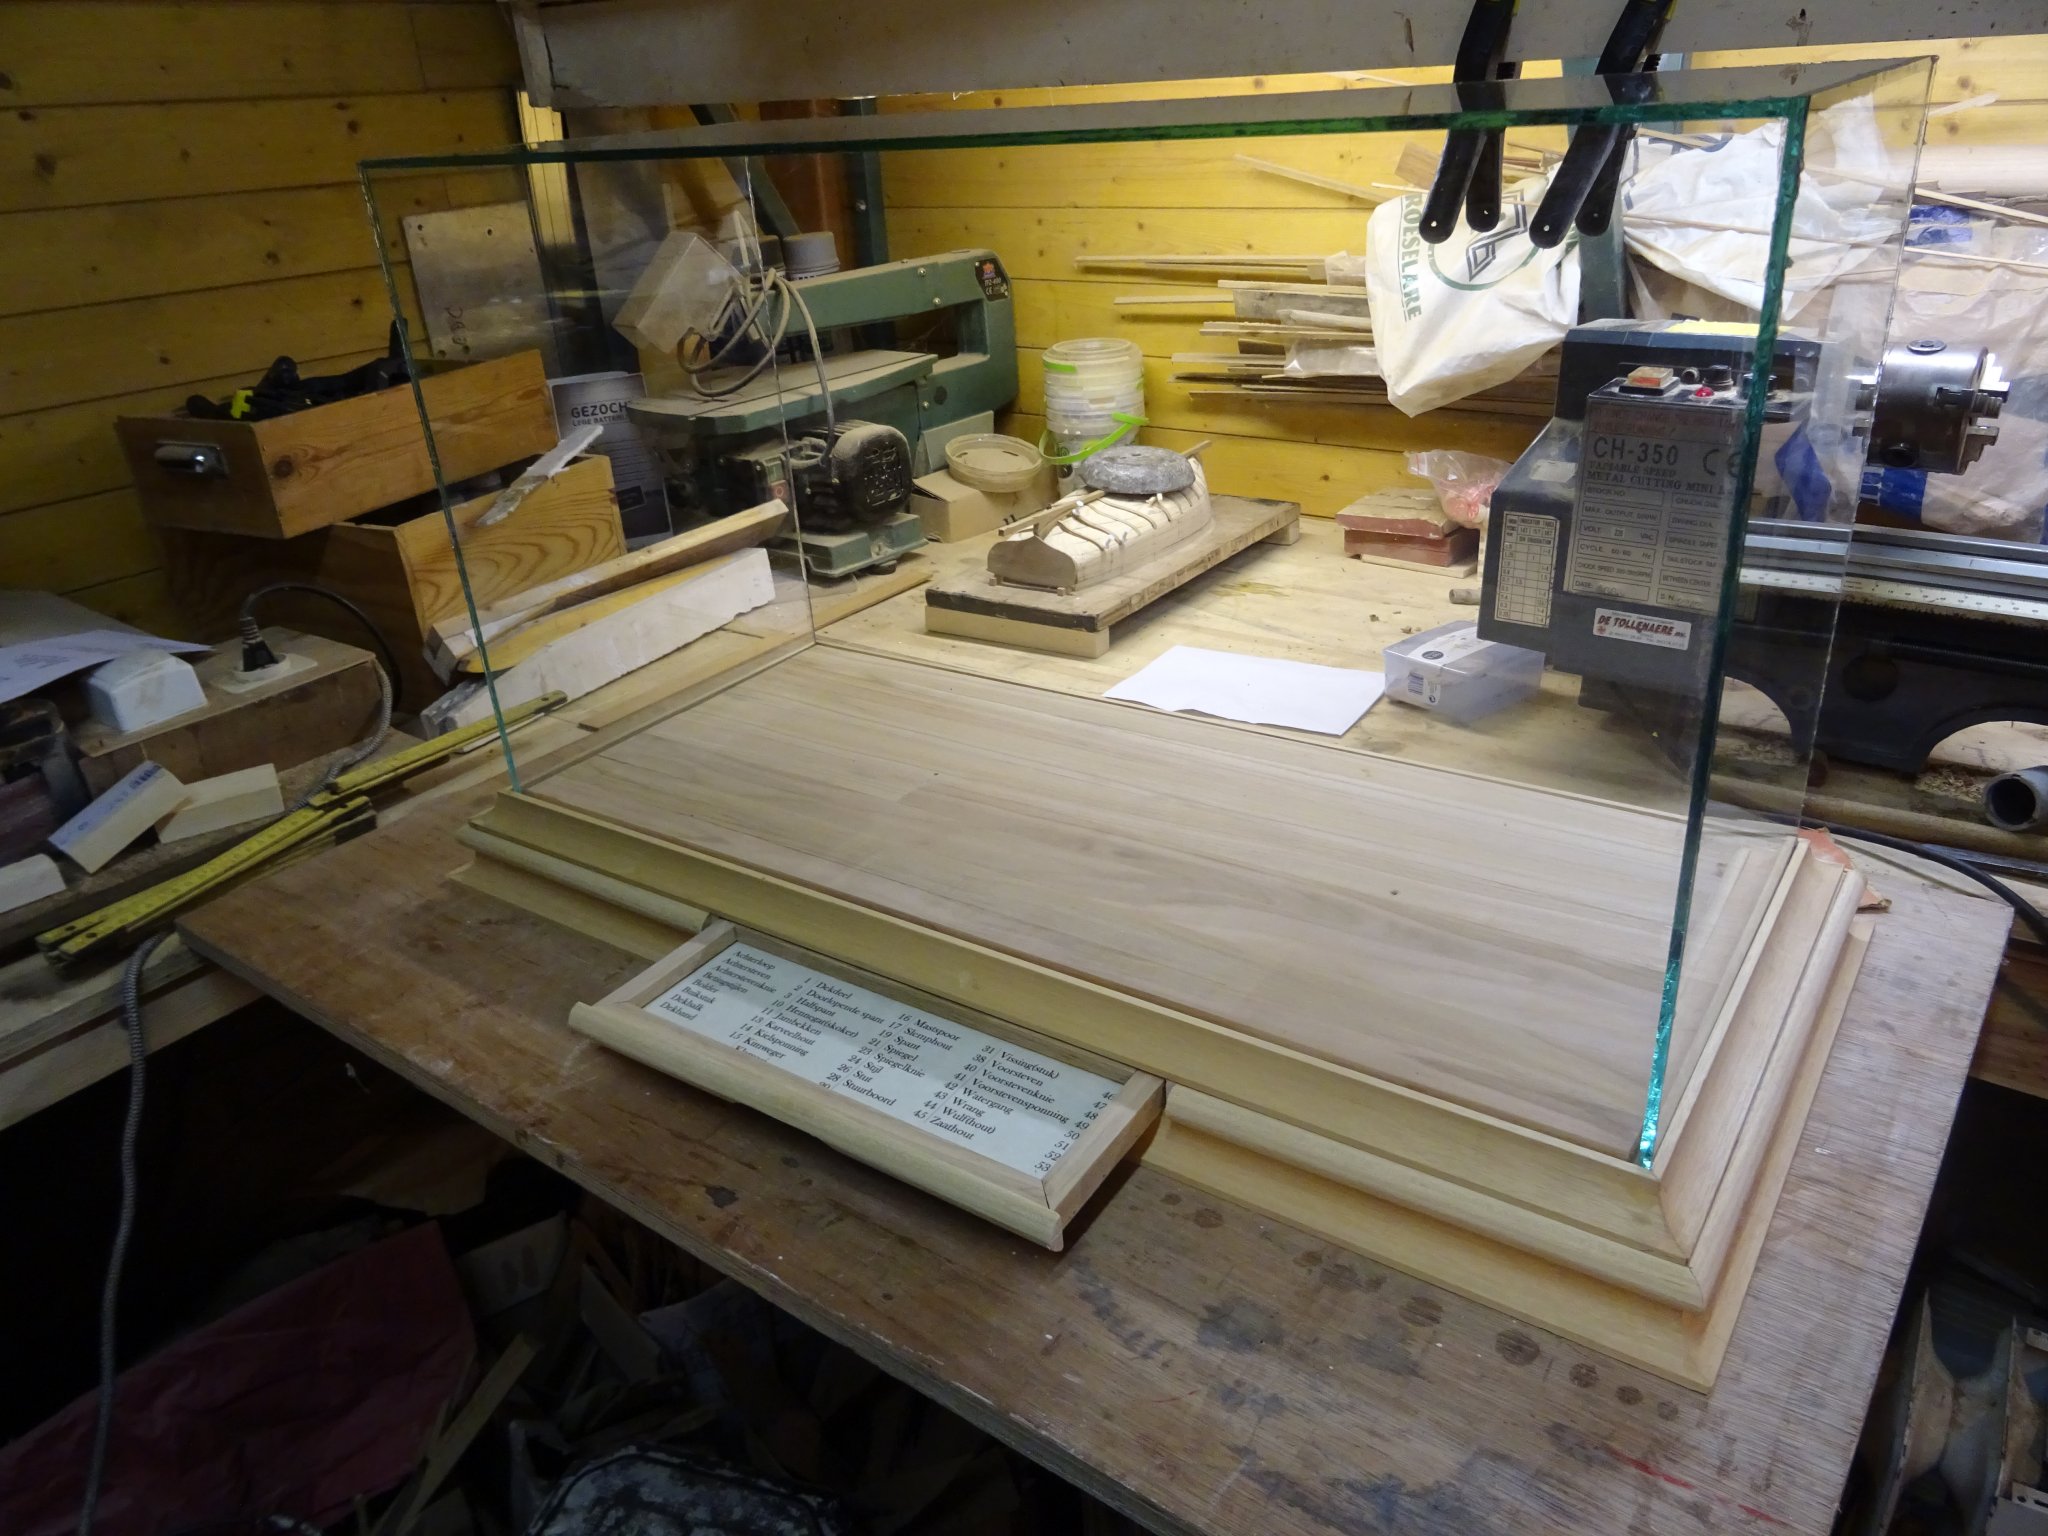
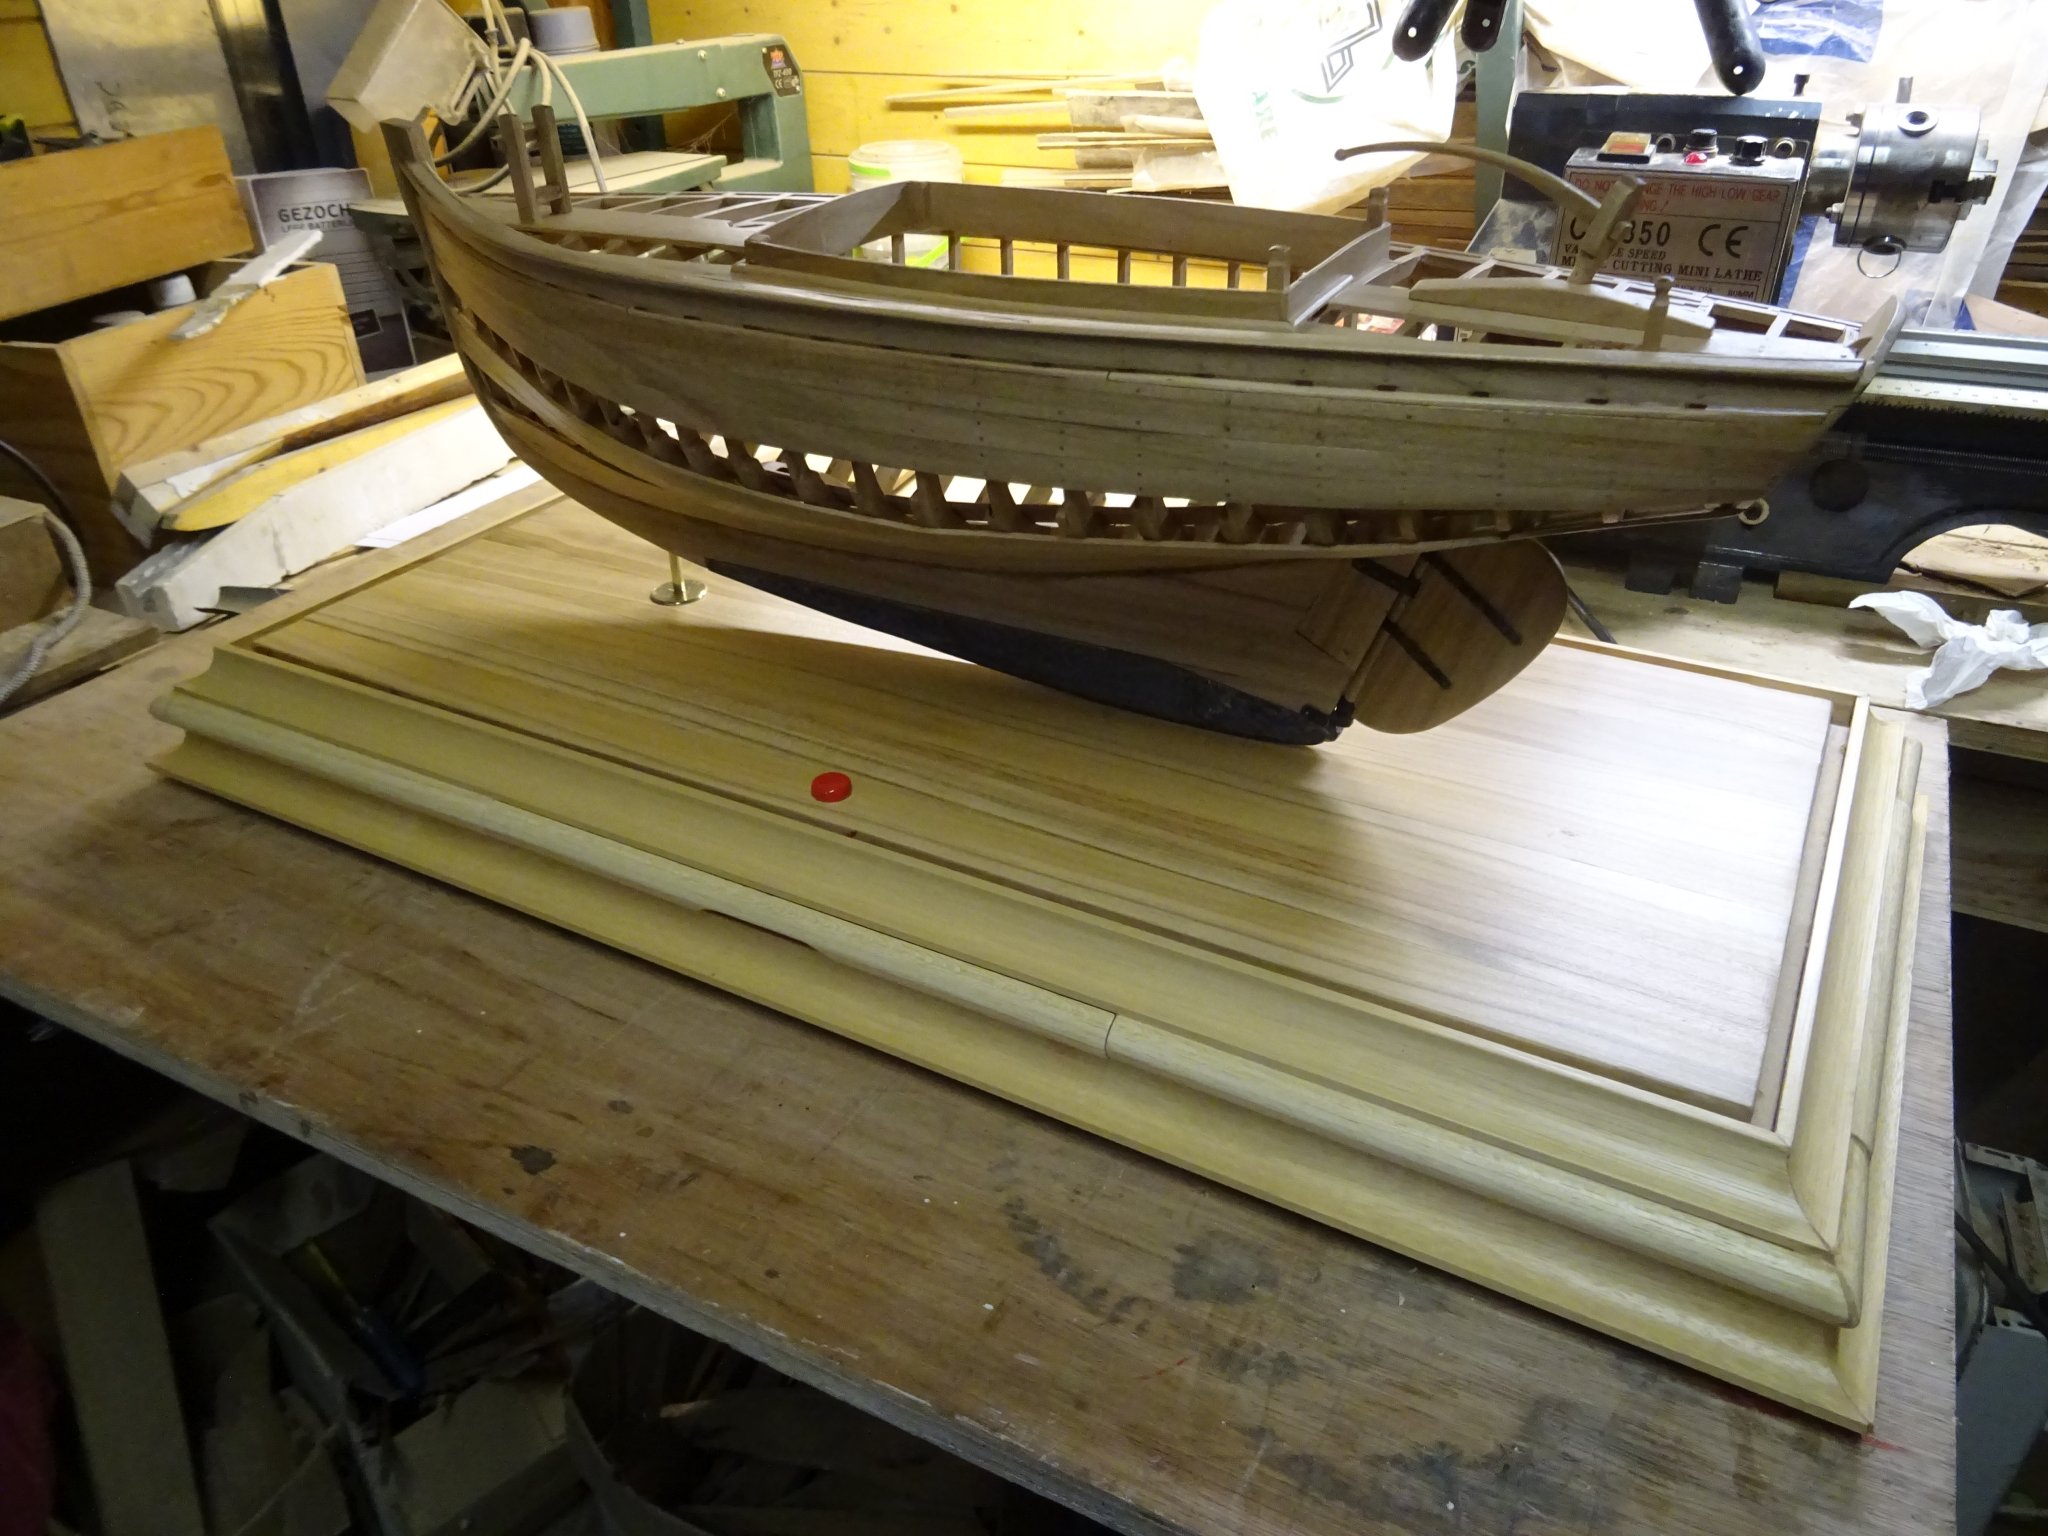
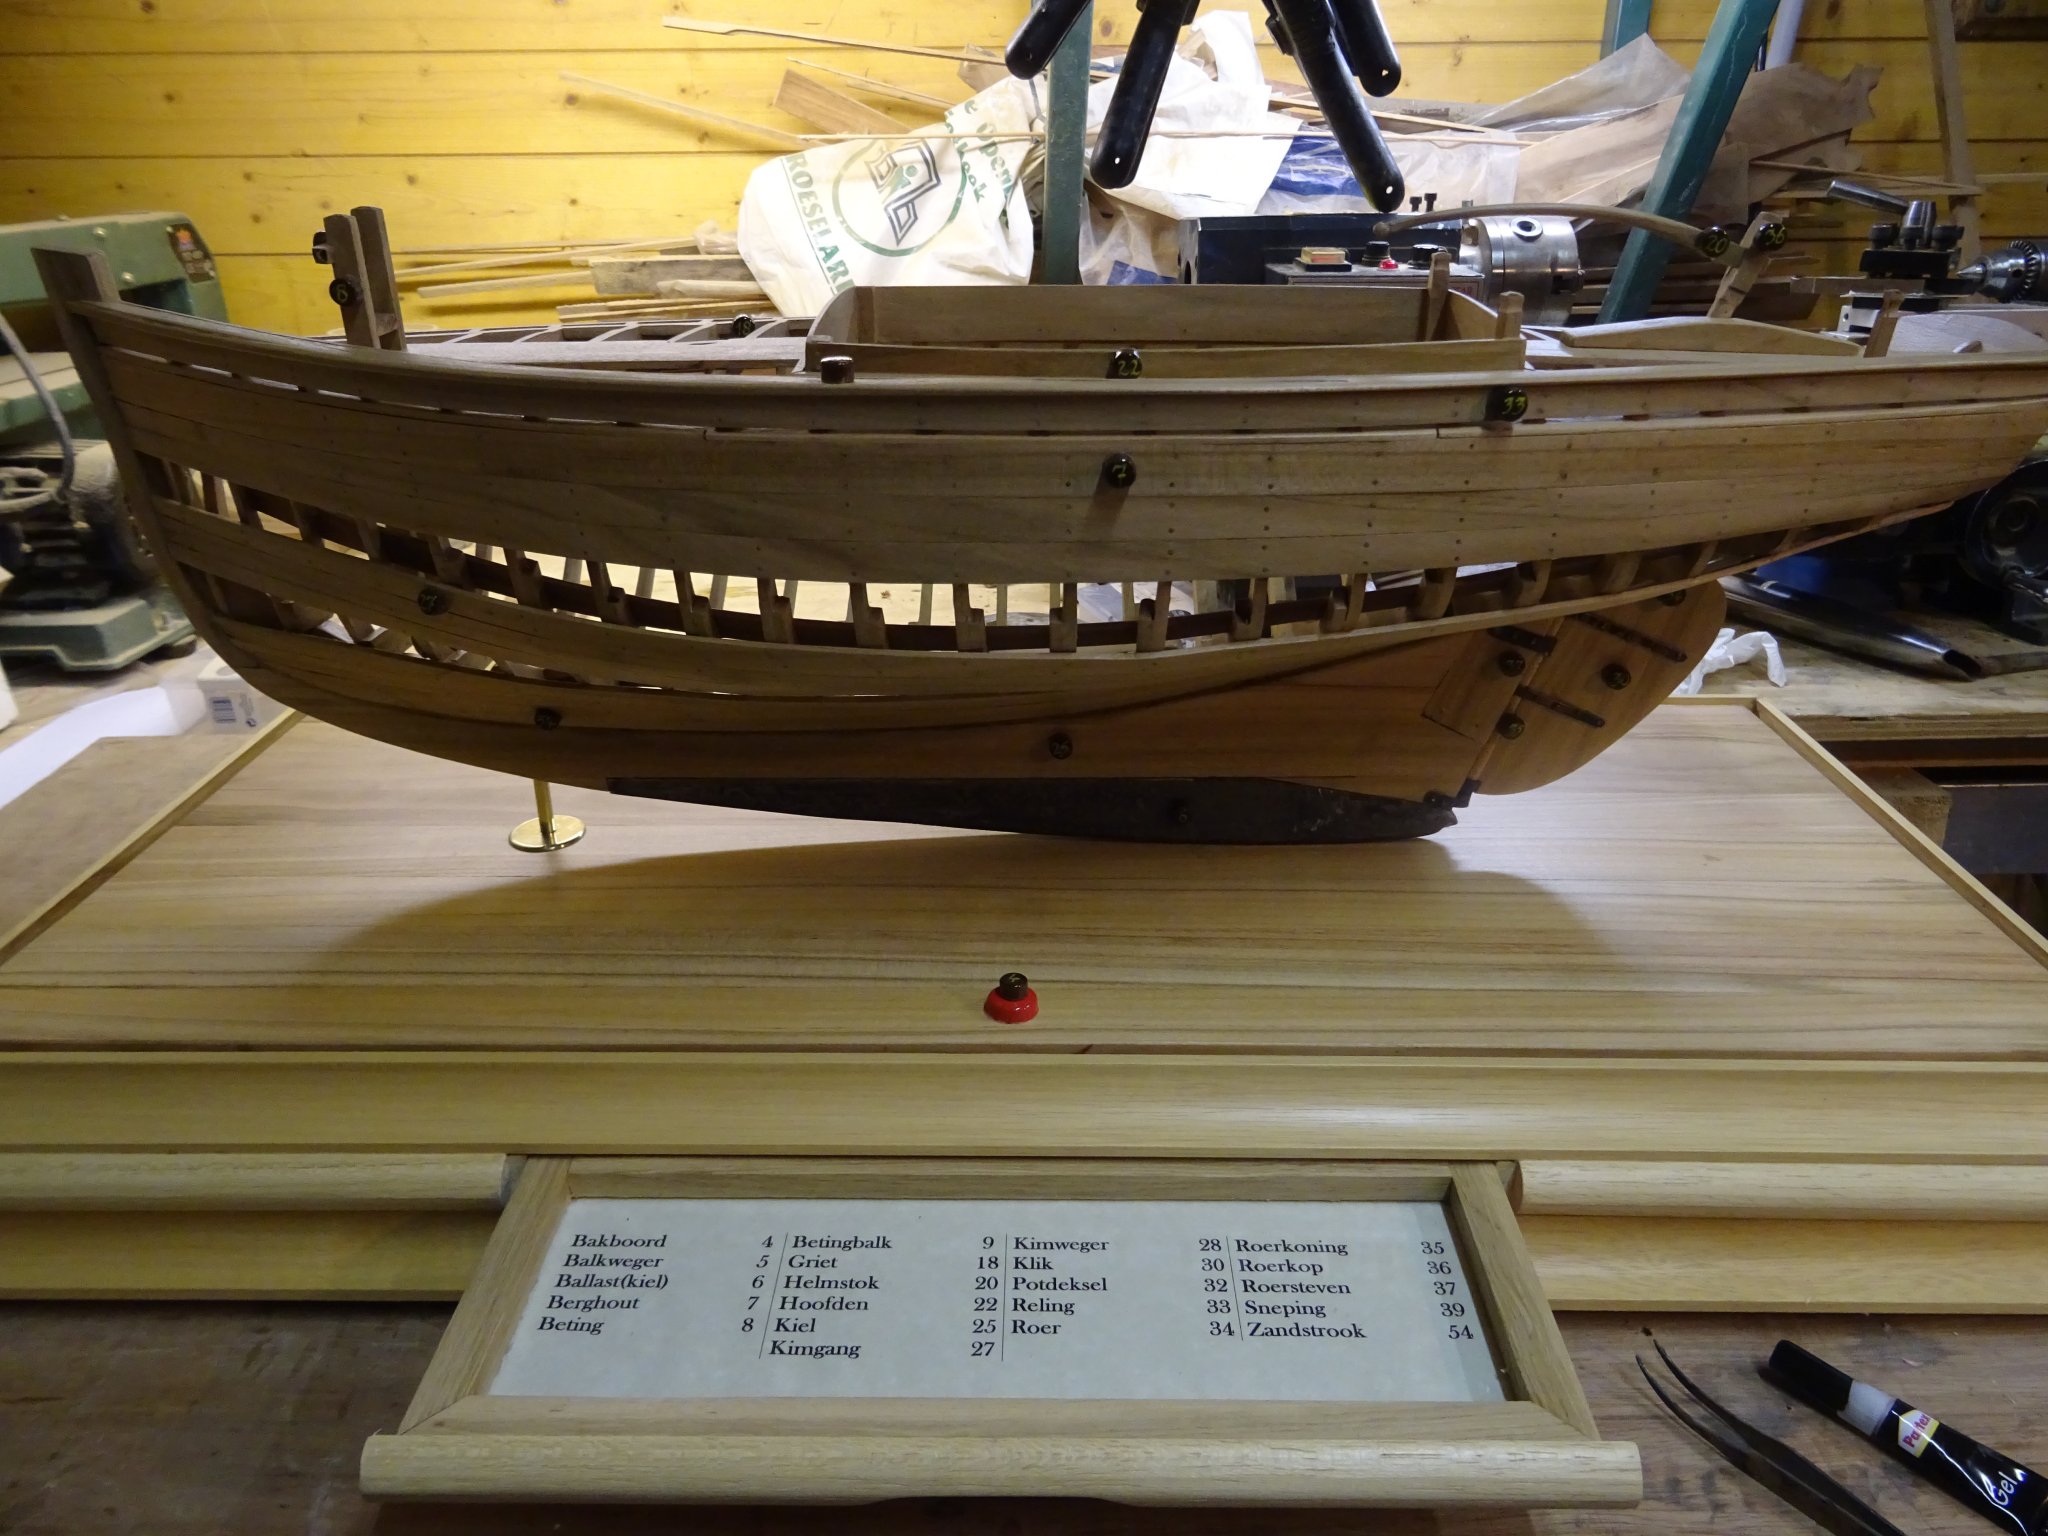
On 4/18/2020 at 10:11 AM, G.L. said:
The base for my drawers is a deal frame.
On that base I build two drawers. Here you see them in closed condition.
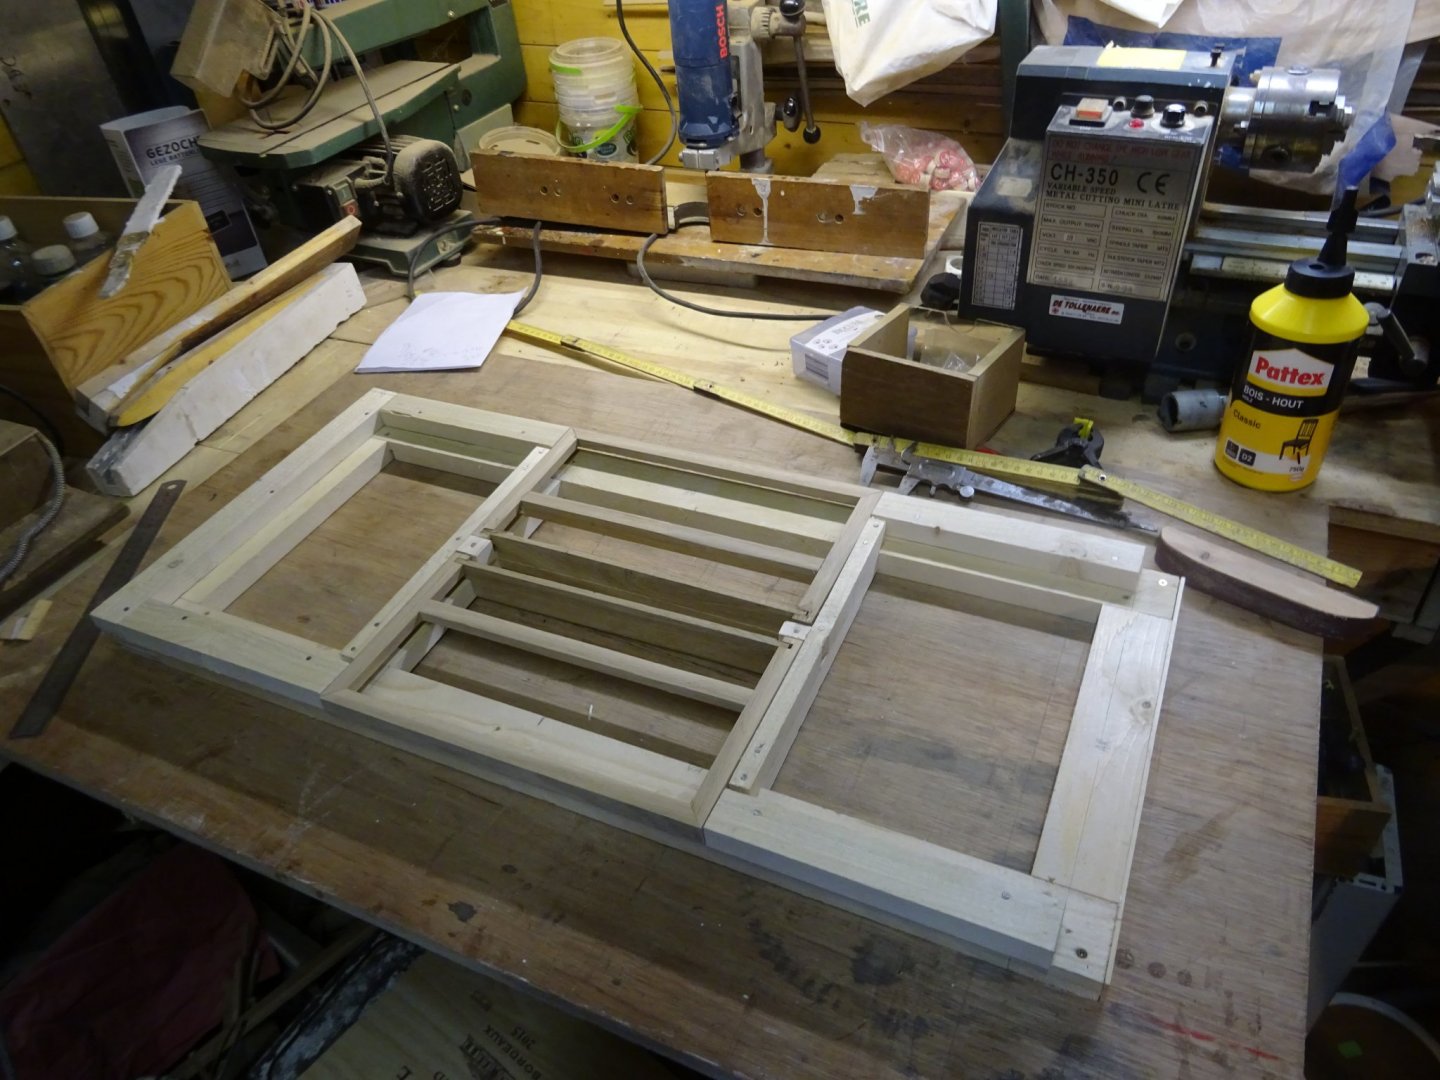
And here they are open. A stop plank at the inside prevents it from being pulled out completely. The right side of the frame is still open. There is space for a third drawer, but that is for the next chapter.

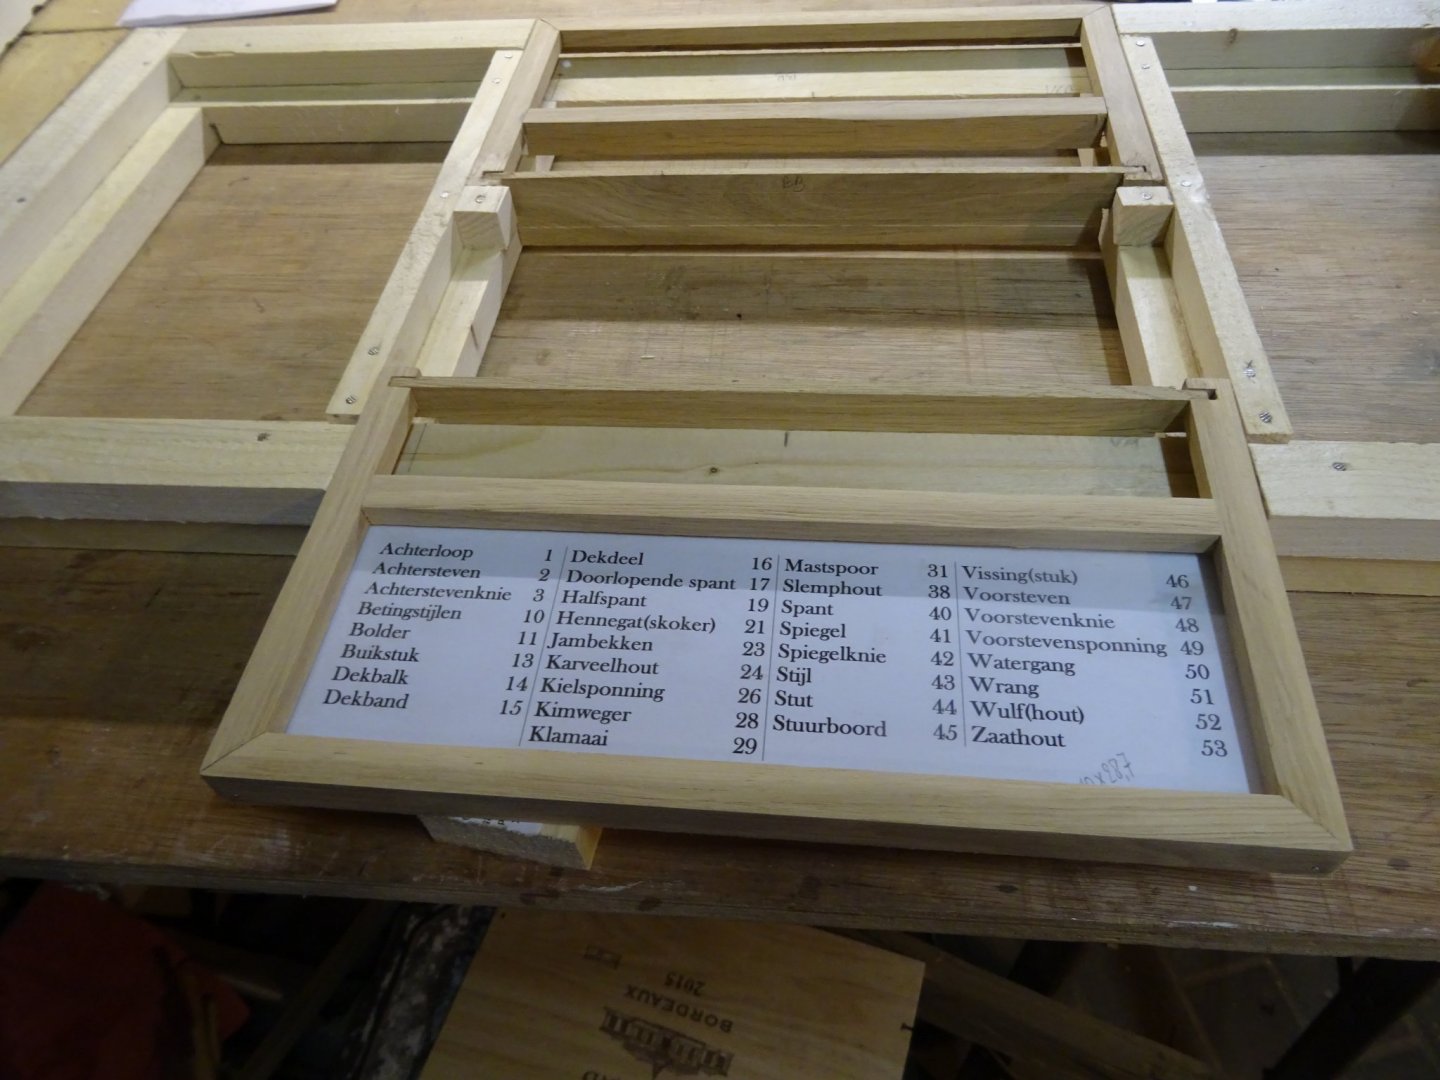
Here is the starboard drawer with a copy of the glossary list in it. The final lists will be printed on more retro looking paper and they will be covered by glass.
Now the pine frame has to be hidden by a round frame. I make that frame by gluing two quarter rounds together to a half round.
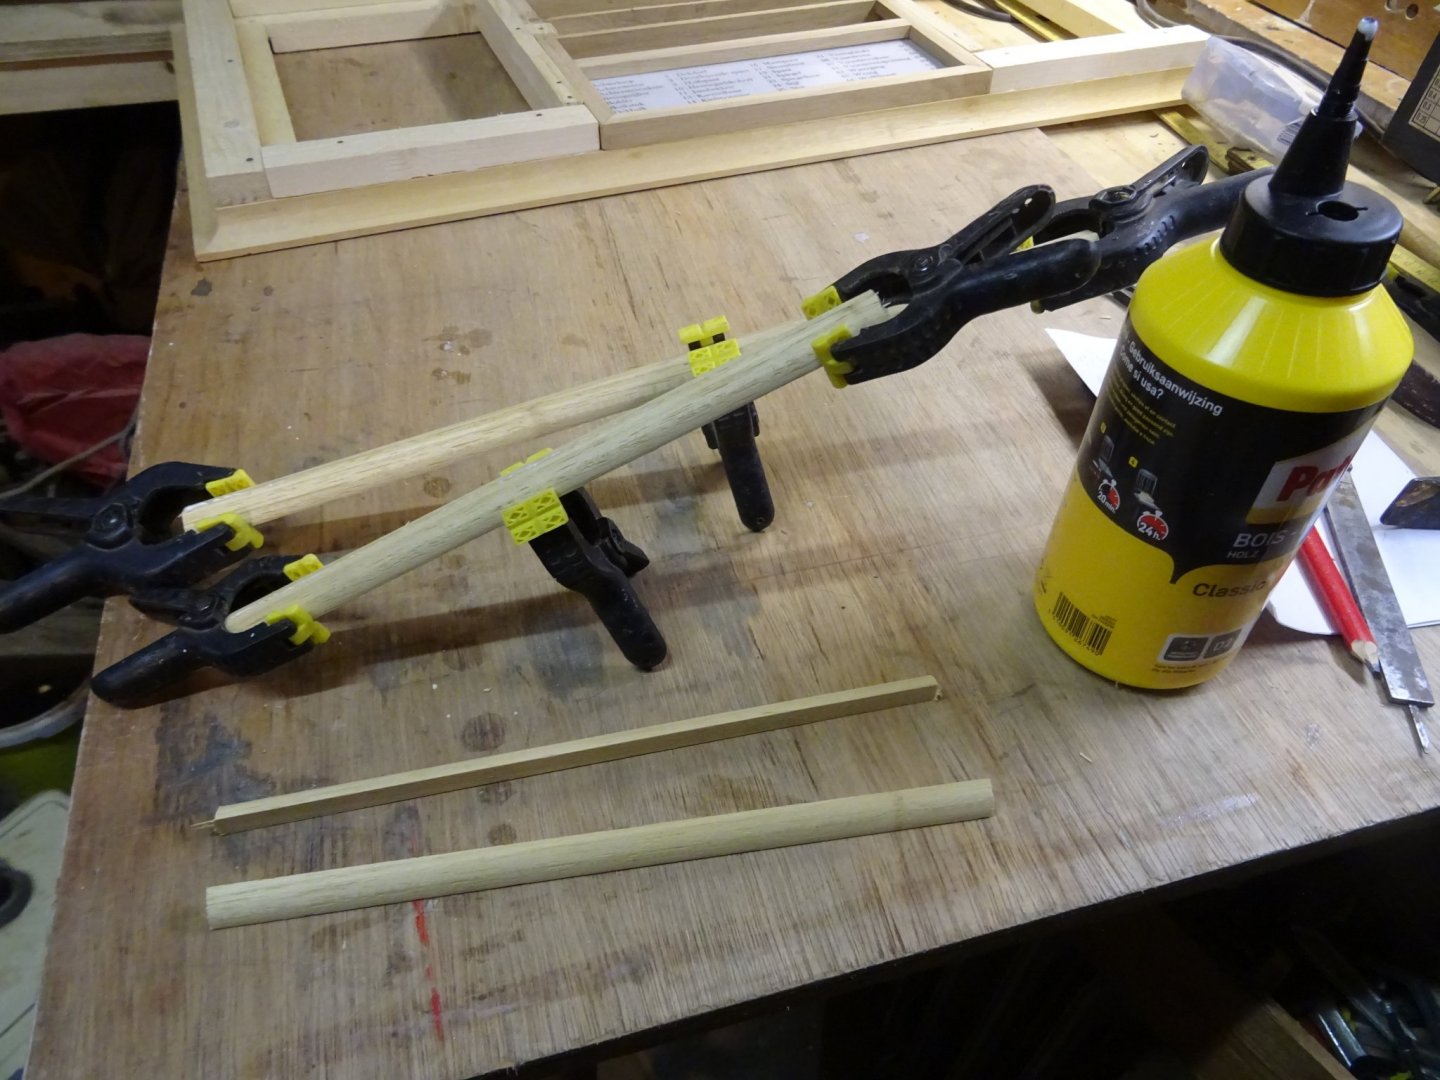
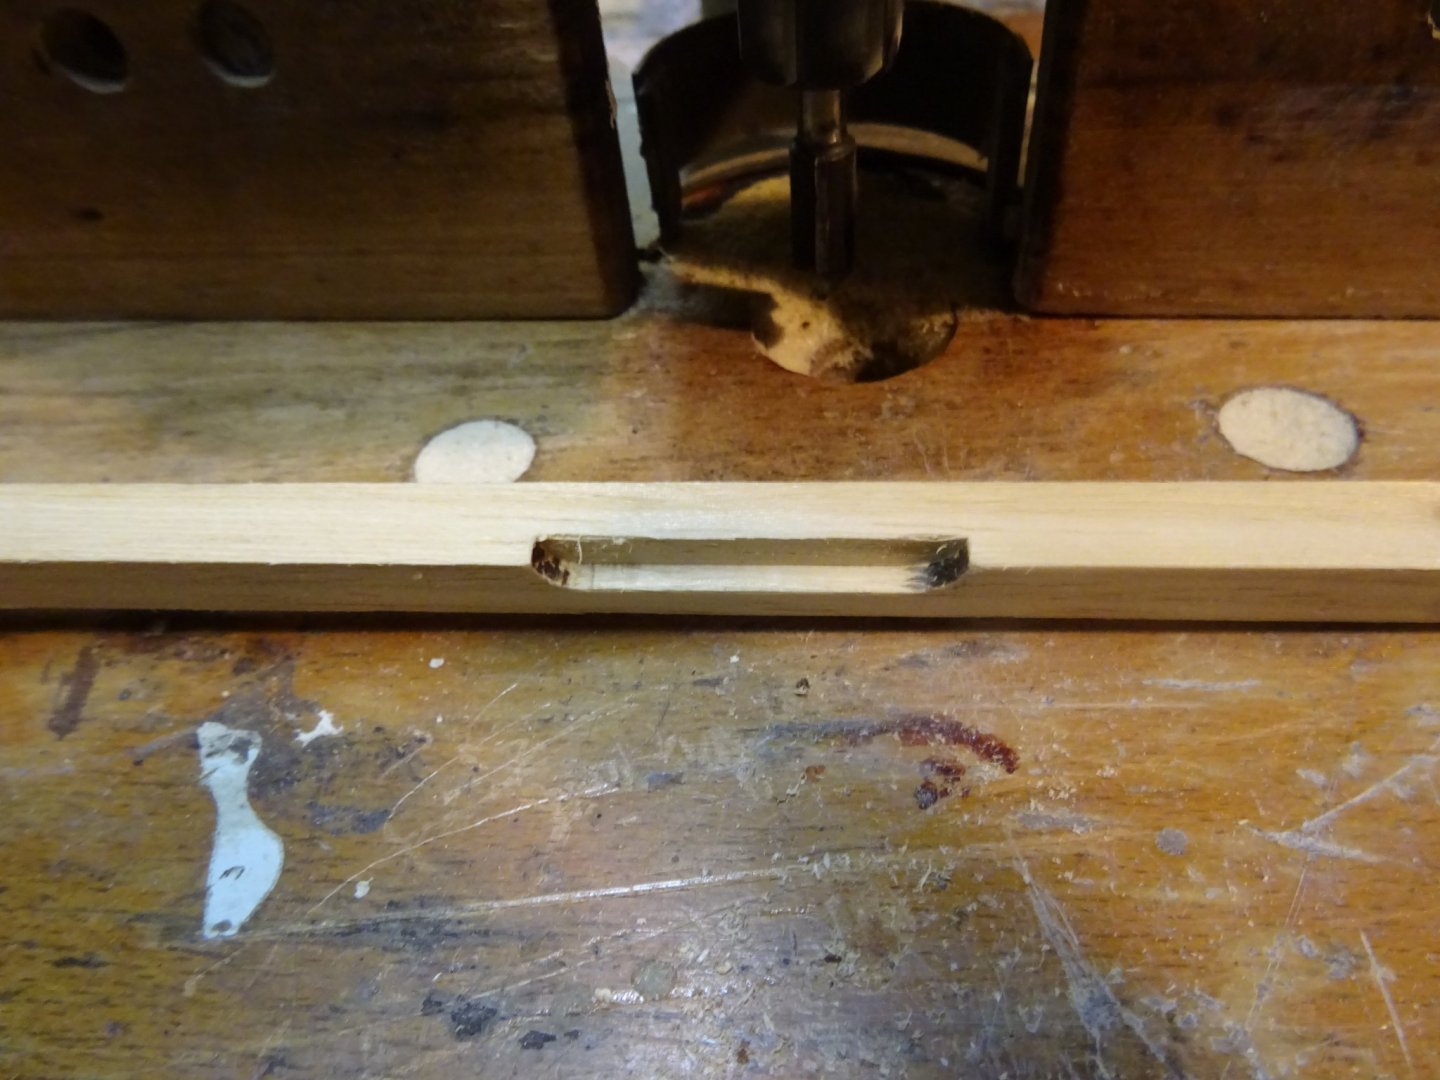
For the drawers, I mill a groove in the upper quarter round before gluing it.
The lower quarter is sawn/drilled in half with a drill clock to have a half round cut.

Then it is glued together to a half round frame.

And that is how it looks on the drawer:

Gluing the round frames around the display board.

That is how it looks with the drawer closed ...

... and open ...

... and with the dust case.

Here with the model on it.

The small brown buttons on the model are the numbers that indicate the different parts which are named in the glossary. In the front, in the middle, you see a red button. At the other side of the board is an equal green button. They indicate the port- and starboard side of the boat. I consider those two also as two important parts of the boat which should to be known by every aspirant sailor or boat builder.

Next week I will deal with the third and final chapter of this build: The encyclopedia.
Thank you for reading
Thank you to follow
Thank you for the likes
and thank you for your constructive comments,
Till next week and keep it healthy!
Fantastic and inspirational stuff Geert, congratulation !
- mtaylor and Mirabell61
-
2
-
On 9/9/2018 at 12:39 AM, kees de mol said:
New progress on the herringlugger. I started to finish the outside of the hull with thousands of 'fake' rivets. For these rivets I used some glue or paint for clothes. I also gave the hull a solid layer of primer to seal the rivets. In reality the ship would have more, much more rivets but I keep it this way. Iam afraid more rivets will do more harm then good. Now I have the idea off a riveted hull without turning it into a hedgehog or something.
I am also starting to sealize that this ship take much more time than the smaller models that i built earlier. It seems like evything takes twice as much time. But fortunately the challenge remains great and I enjoy the building of the model and the thinking out of everything.
Thanks for watching, commenting and hitting the like button.
(Updates will take a bit longer in the future. After working as a volunteer now since January with elderly people with dementia, I got a job as a student nurse at a big healthcare organization. This after more than six years of being not capable of working because of my bad health. The training will start in february. I thank my wife, my friends and God (and offcoarse the elderly people for stealing my heart😍) for these opportunities after so long being sick)


beautiful boat and work Kees. riveting adds up omph. eyecatcher.
-
On 5/30/2018 at 11:48 PM, kees de mol said:
Weer heel wat werk verzet aan de logger. De goot voor afvoer van buiswater is helemaal klaar en hierna ben ik alle staanders gaan inmeten en maken voor tegen de verschansing. Deze blijven nog losneembaar zodat ik ze straks los van de romp kan spuiten . Hierna ben ik begonnen aan de lastige klus van het potdeksel, maar dat ging gelukkig wel heel goed.
Translation kindly provided by Cog

Quite a lot of work done. The scuppers are finished, and after that I started measuring the braces for the bulwarks. These will remain removable for the time being, so I can spray them seperately from, the hull. After that I started on the "potdeksel" (don't know what it means in Dutch, let alone in English ... it is some kind of lid ...) which went well.

 Ook een nieuwe lijmmethode gebruikt waar ik erg tevreden mee ben
wow this is the way to make complicated stern
-
On 4/9/2018 at 2:13 PM, kees de mol said:
After sanding the hull I placed a keel and I glued strips of thin plastic to simulate the hullplates. After this it was a lot of work to get a nice finish but it worked well.


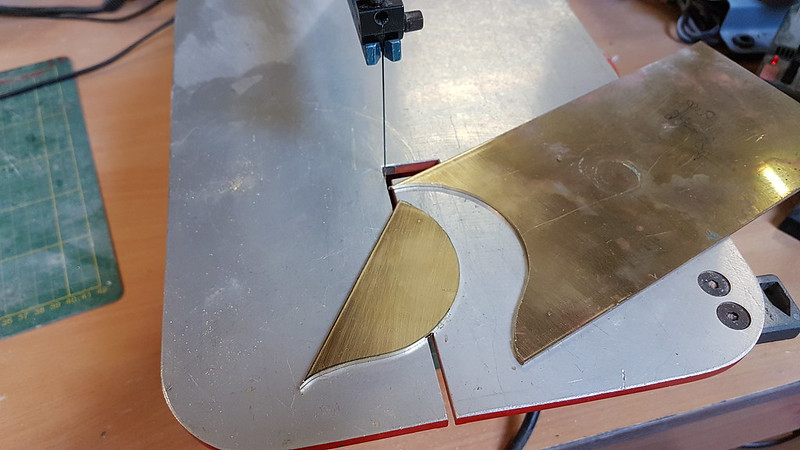
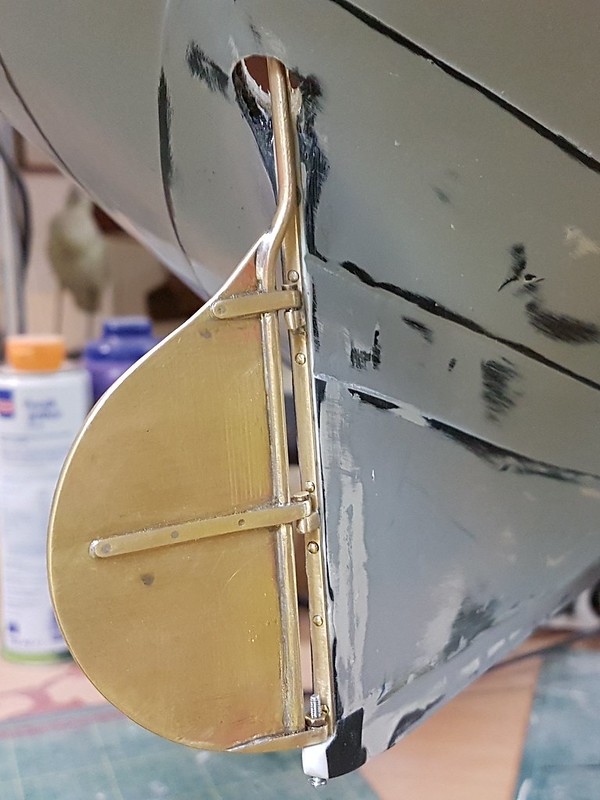
I also made a rudder out of brass
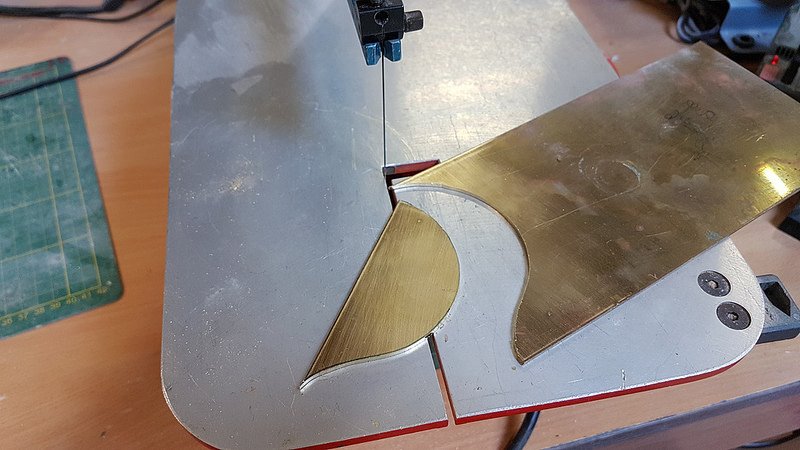

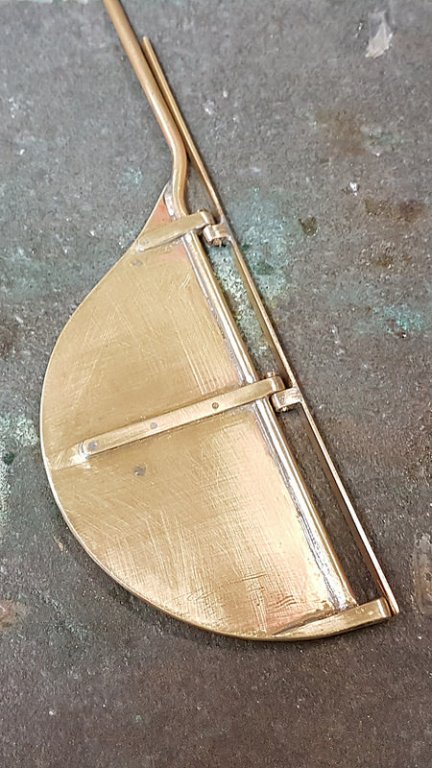
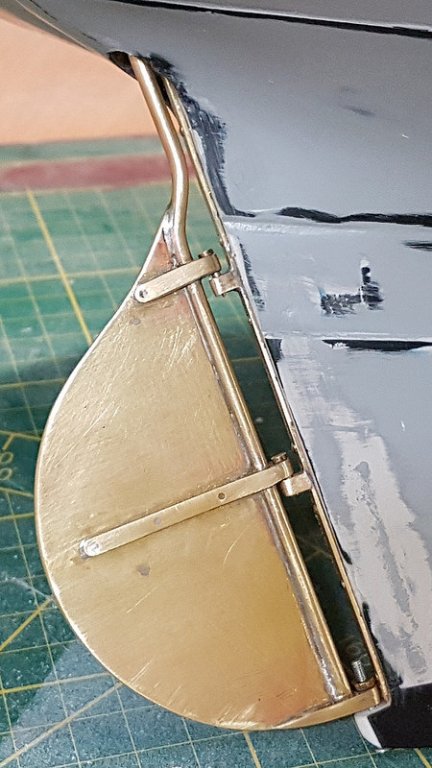

amazing stuff Kees , i am watching
-
4 hours ago, kees de mol said:
Hello Vlad,
Beautyfull model and your skills are very good👍
Maybe you can look in my buildinglog of the Herringlugger KW140 Wilhelmina VII. I've build a lifeboat too and placed some pictures of how I did it. I have some simpele plans too if you like.
Kind regards, Kees
Hi Kees,
oh my thats a beauty. that riveting. oh my. i did try riveting on cutty but faioed so i let it go. i still think i will have to rebuild the nose . but about that later. i wish my skill was at least half of yours. im gonna chek that wilhelmina, im not sure i would not spoil your lifeboat seems its beyond my skill as no bulkheads etc... plan would be beneficial of course though. do you have both ends lifeboat not only transom one? and big thanks for headup . cheers
-
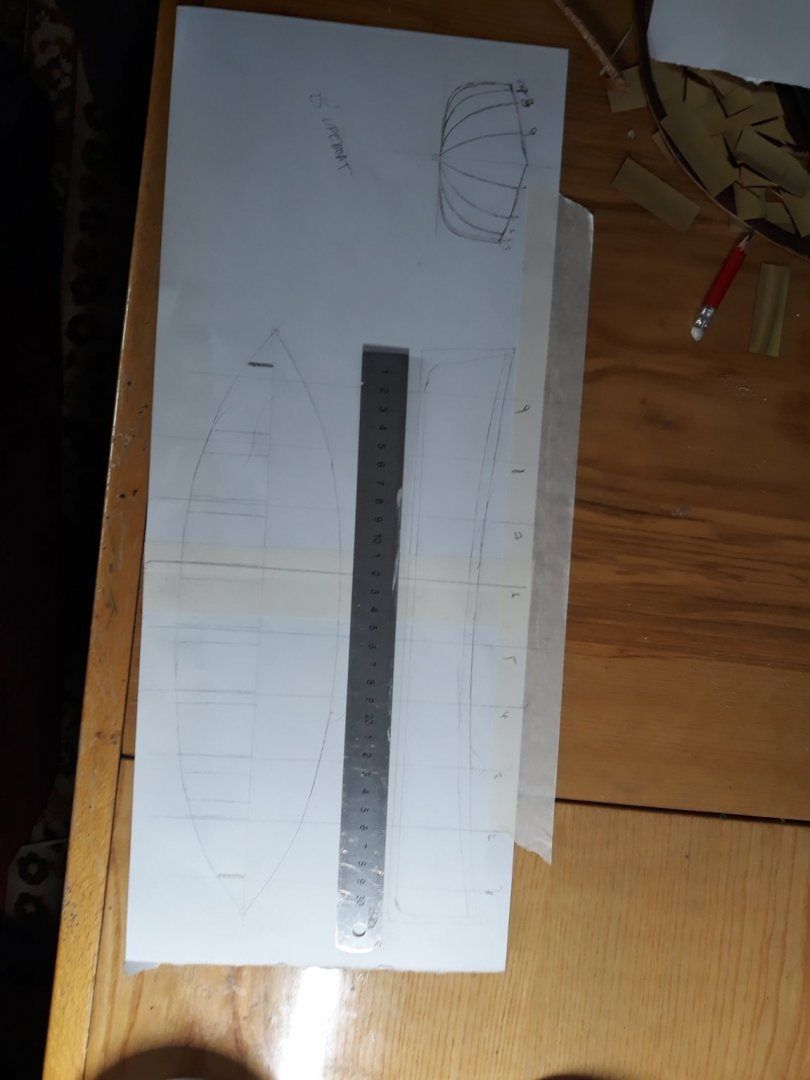
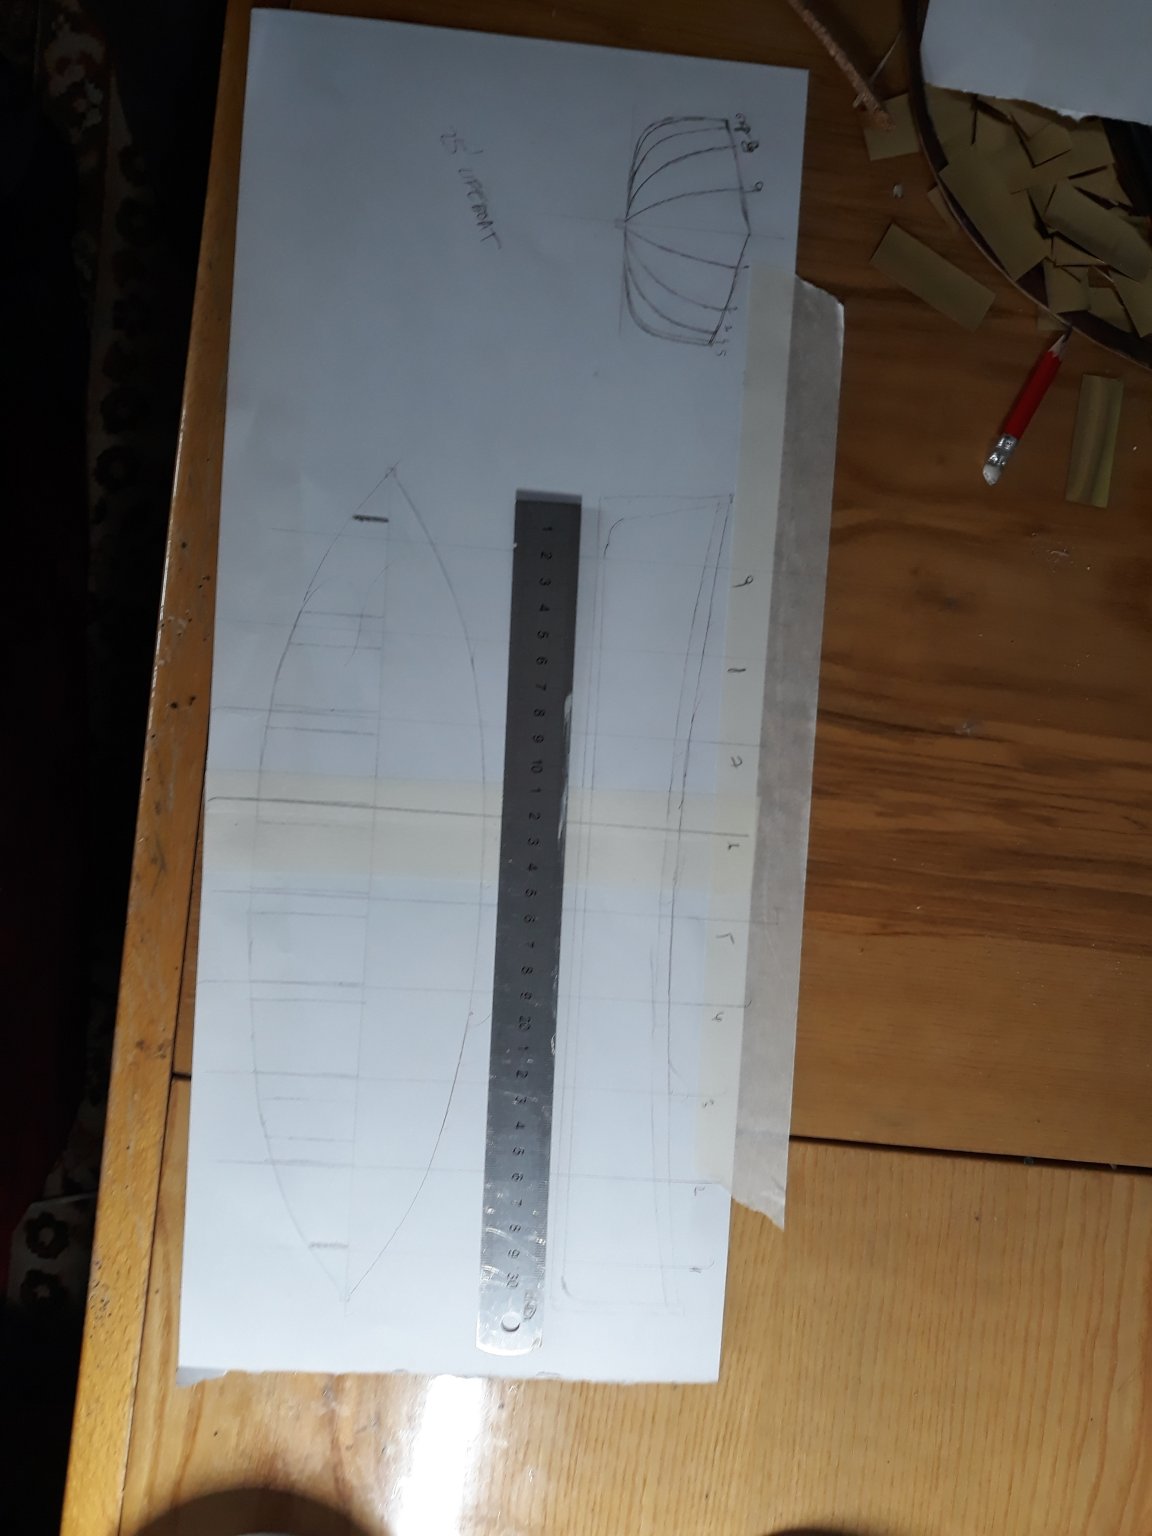
good morning ,
here comes the time ...:))
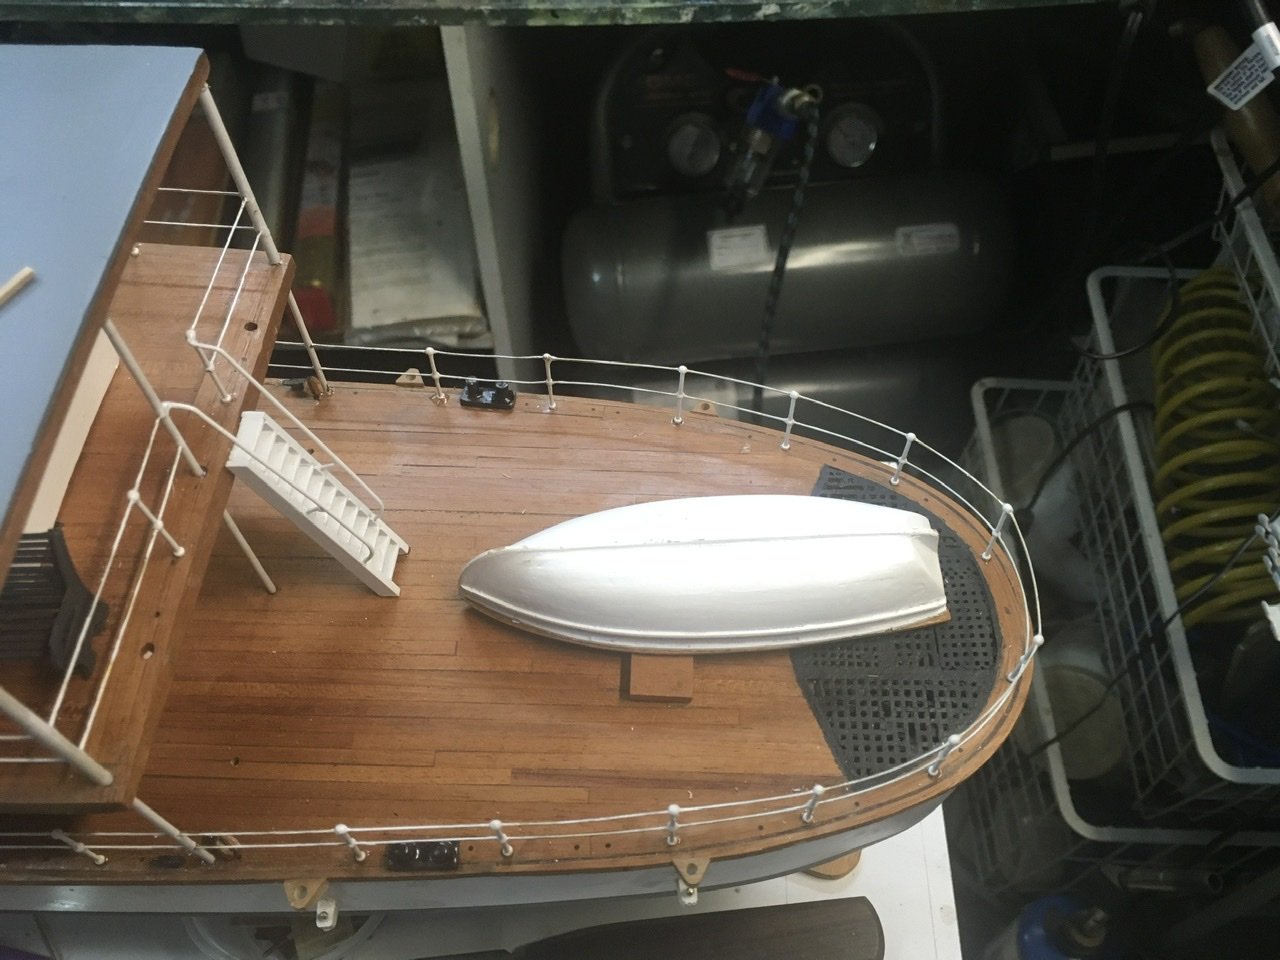
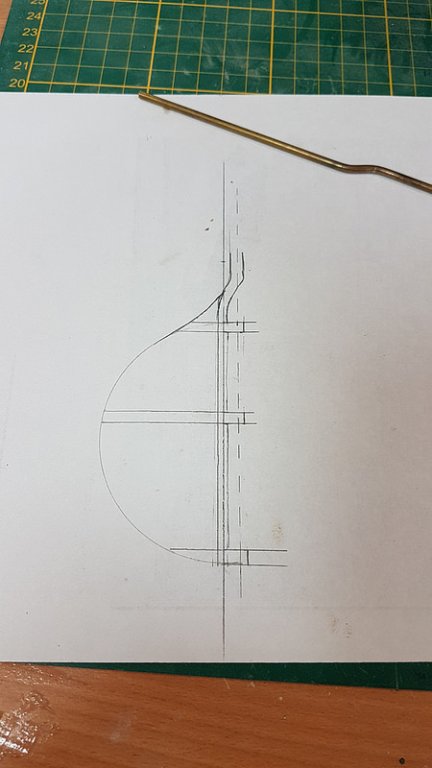
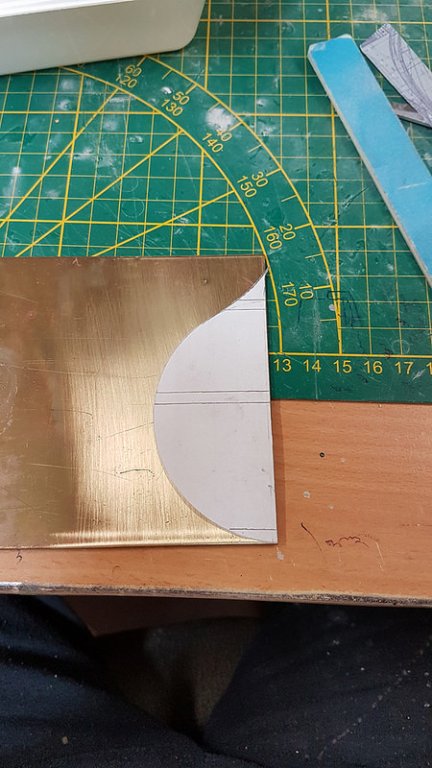
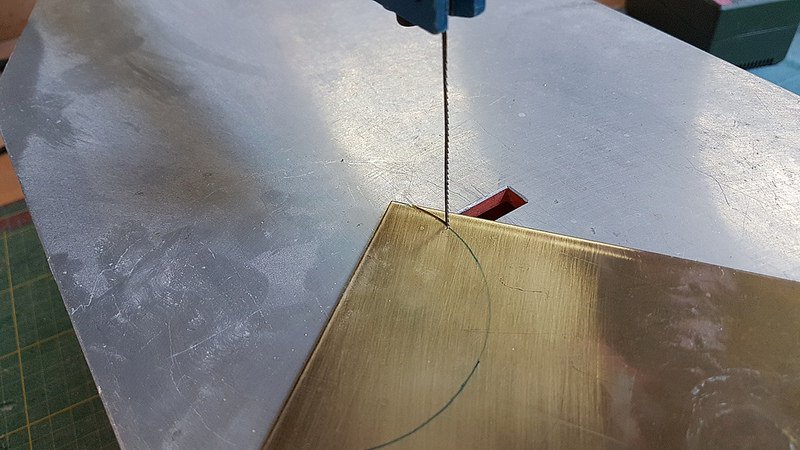
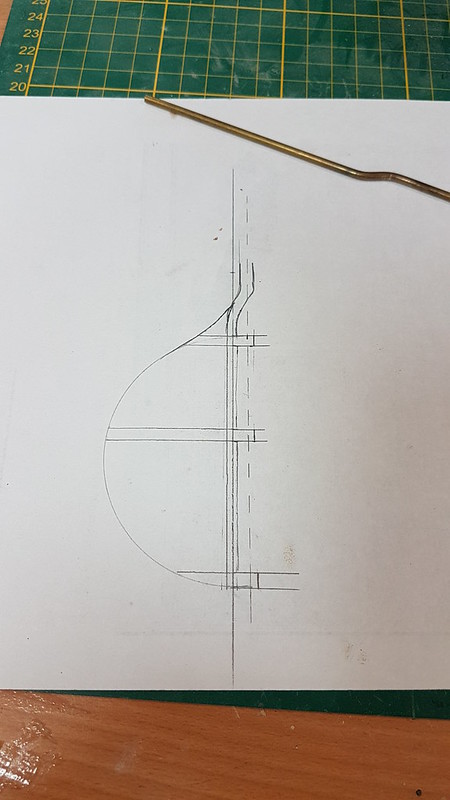
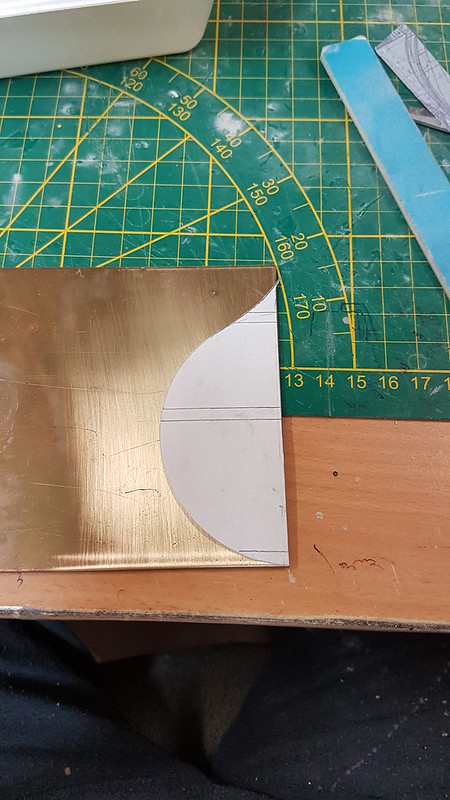
seems i will have to build 2 wooden clinkers .... been snorchling on net if there might be a plan for them , campbel says 25" beam 6.5 " and bepth 3" ....
dirty shortcut will be to take artesania titanic plan and modify keel a bit but eeergh doesnt seem to me likeable. i found some cutter lifeboats from era on maritime museum plans but not sure if applicable there ,,,can probably someone shed some light or suggestion to this topic please ? i believe all the lifeboats were more or less the same so there must be a way ...thanks a milion in advance
Vlad
-
13 hours ago, Mark P said:
Good Evening Vladimir;
You are still making good progress, and your doubled-up deadeyes do seem to look the same proportion on their thickness as the ones in Rob's post showing the originals.
Well done, very glad to see how quickly you are getting on.
All the best,
Mark P
Good Morning Mark thank you I am glad the effort added up.
-
18 hours ago, rwiederrich said:
The scale of this model is amazing...it surely allows you to focus on scale details more accurately. What a job and you are working wonderfully. Great job for sure.
Following with anticipation.
Rob
big thanks for liking and encouragement Rob, I am watching your Great republic in awe , how beautiful paper sails you make and trying to learn from it ....
fair wind to the clippers family
Vlad
-
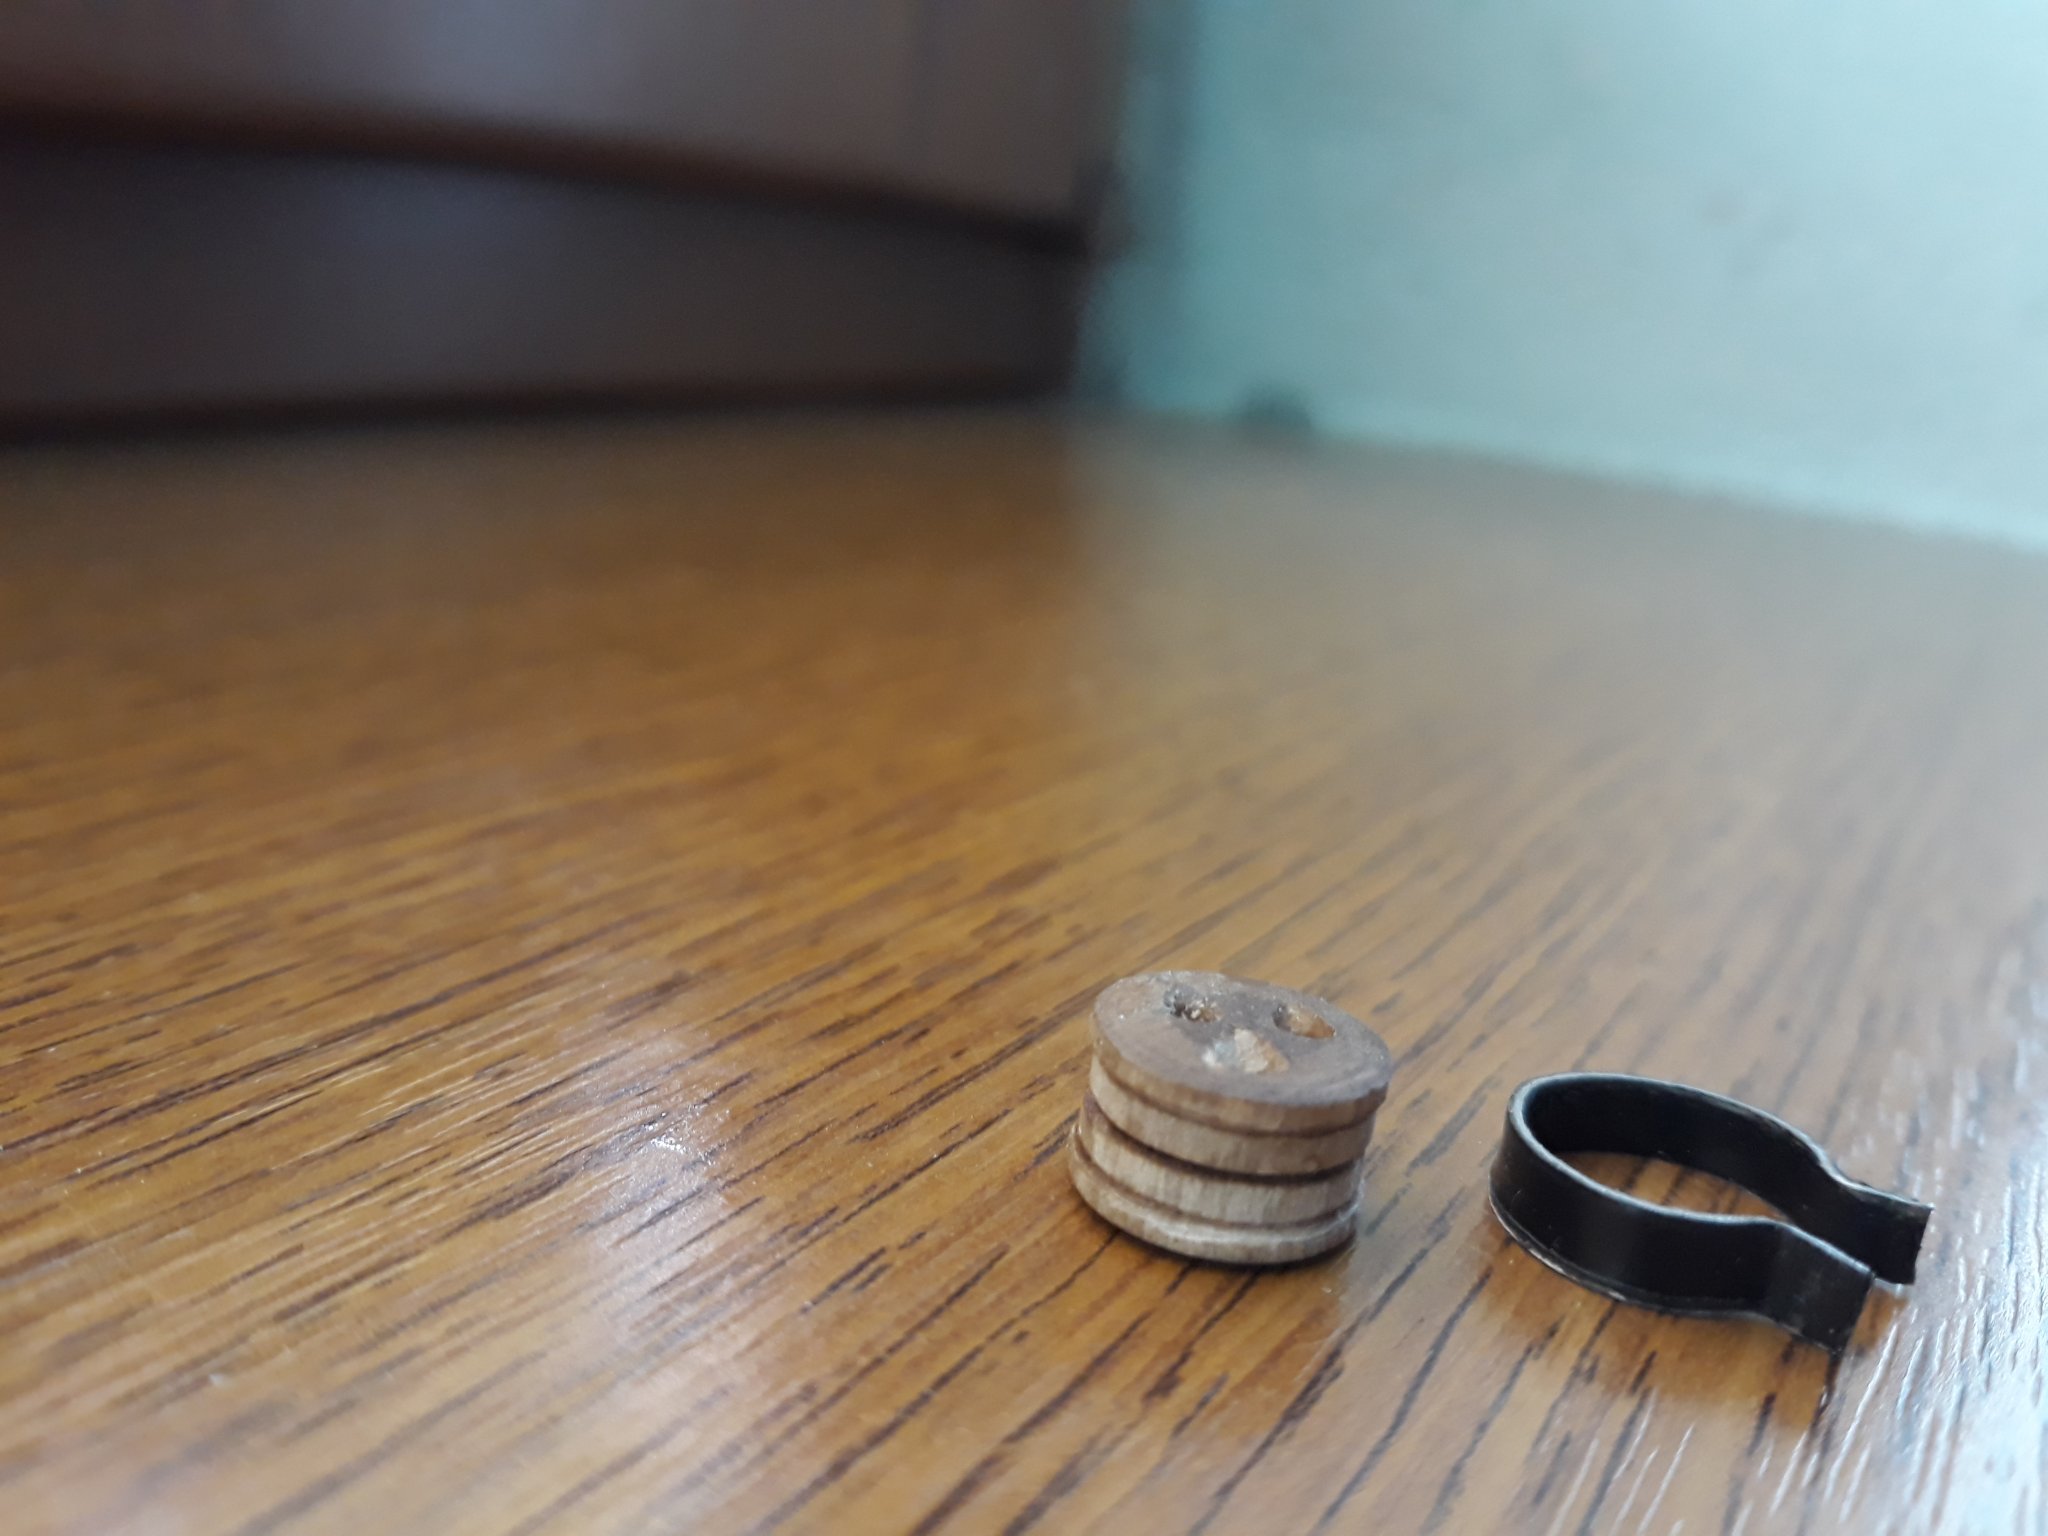
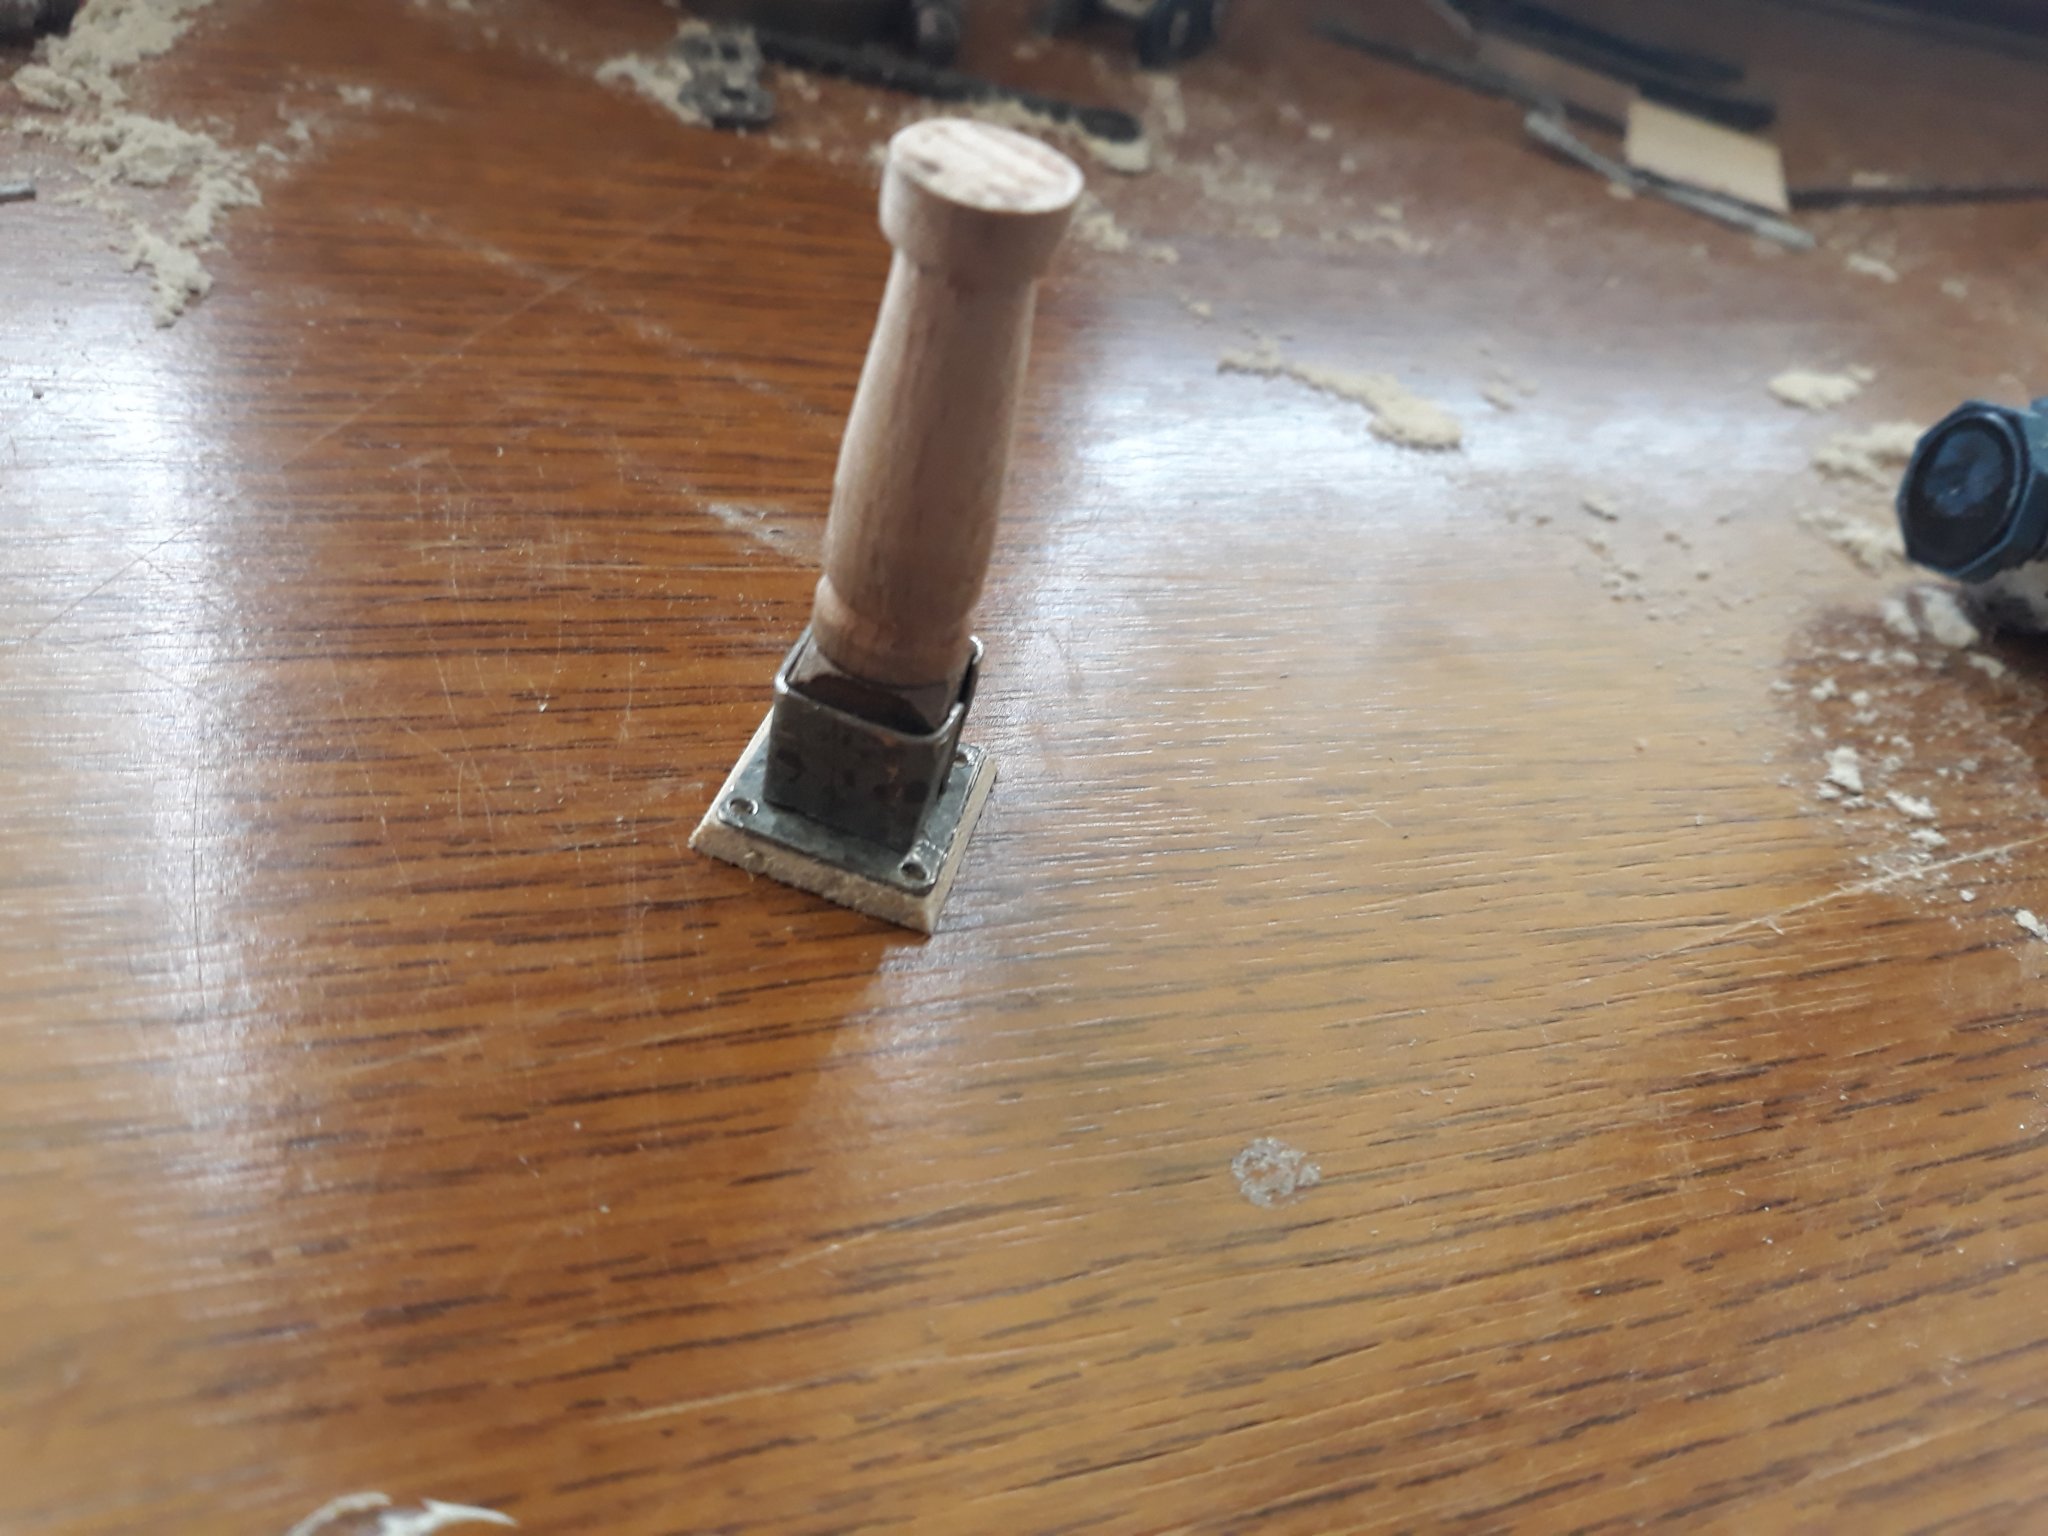
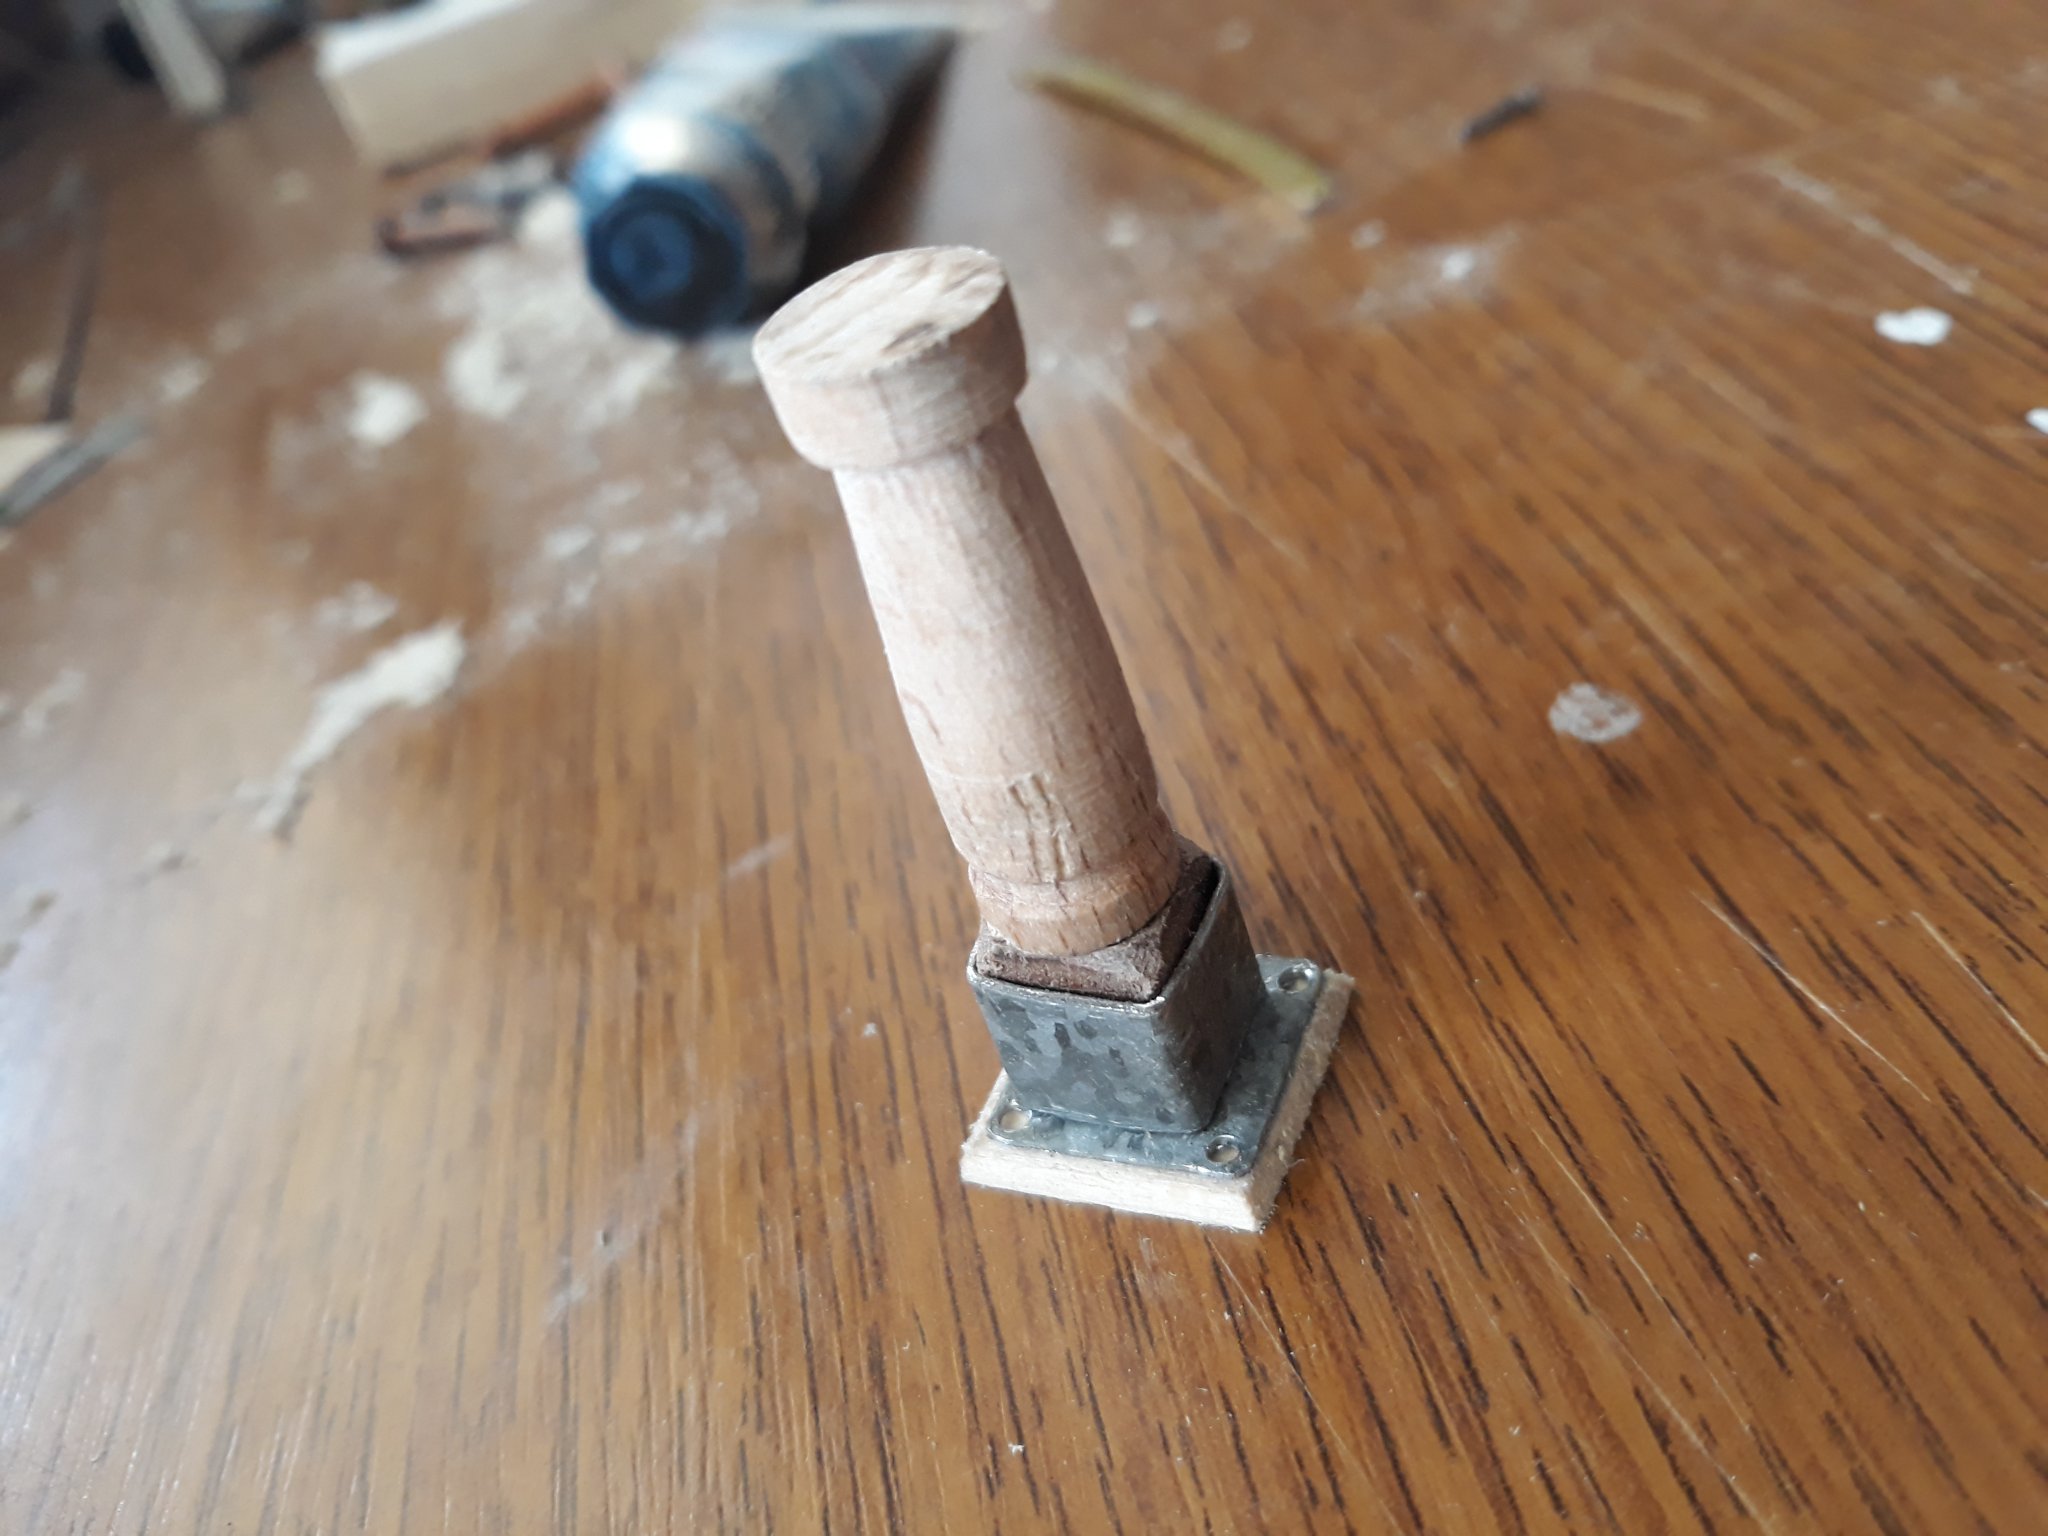
Good afternoon to all,
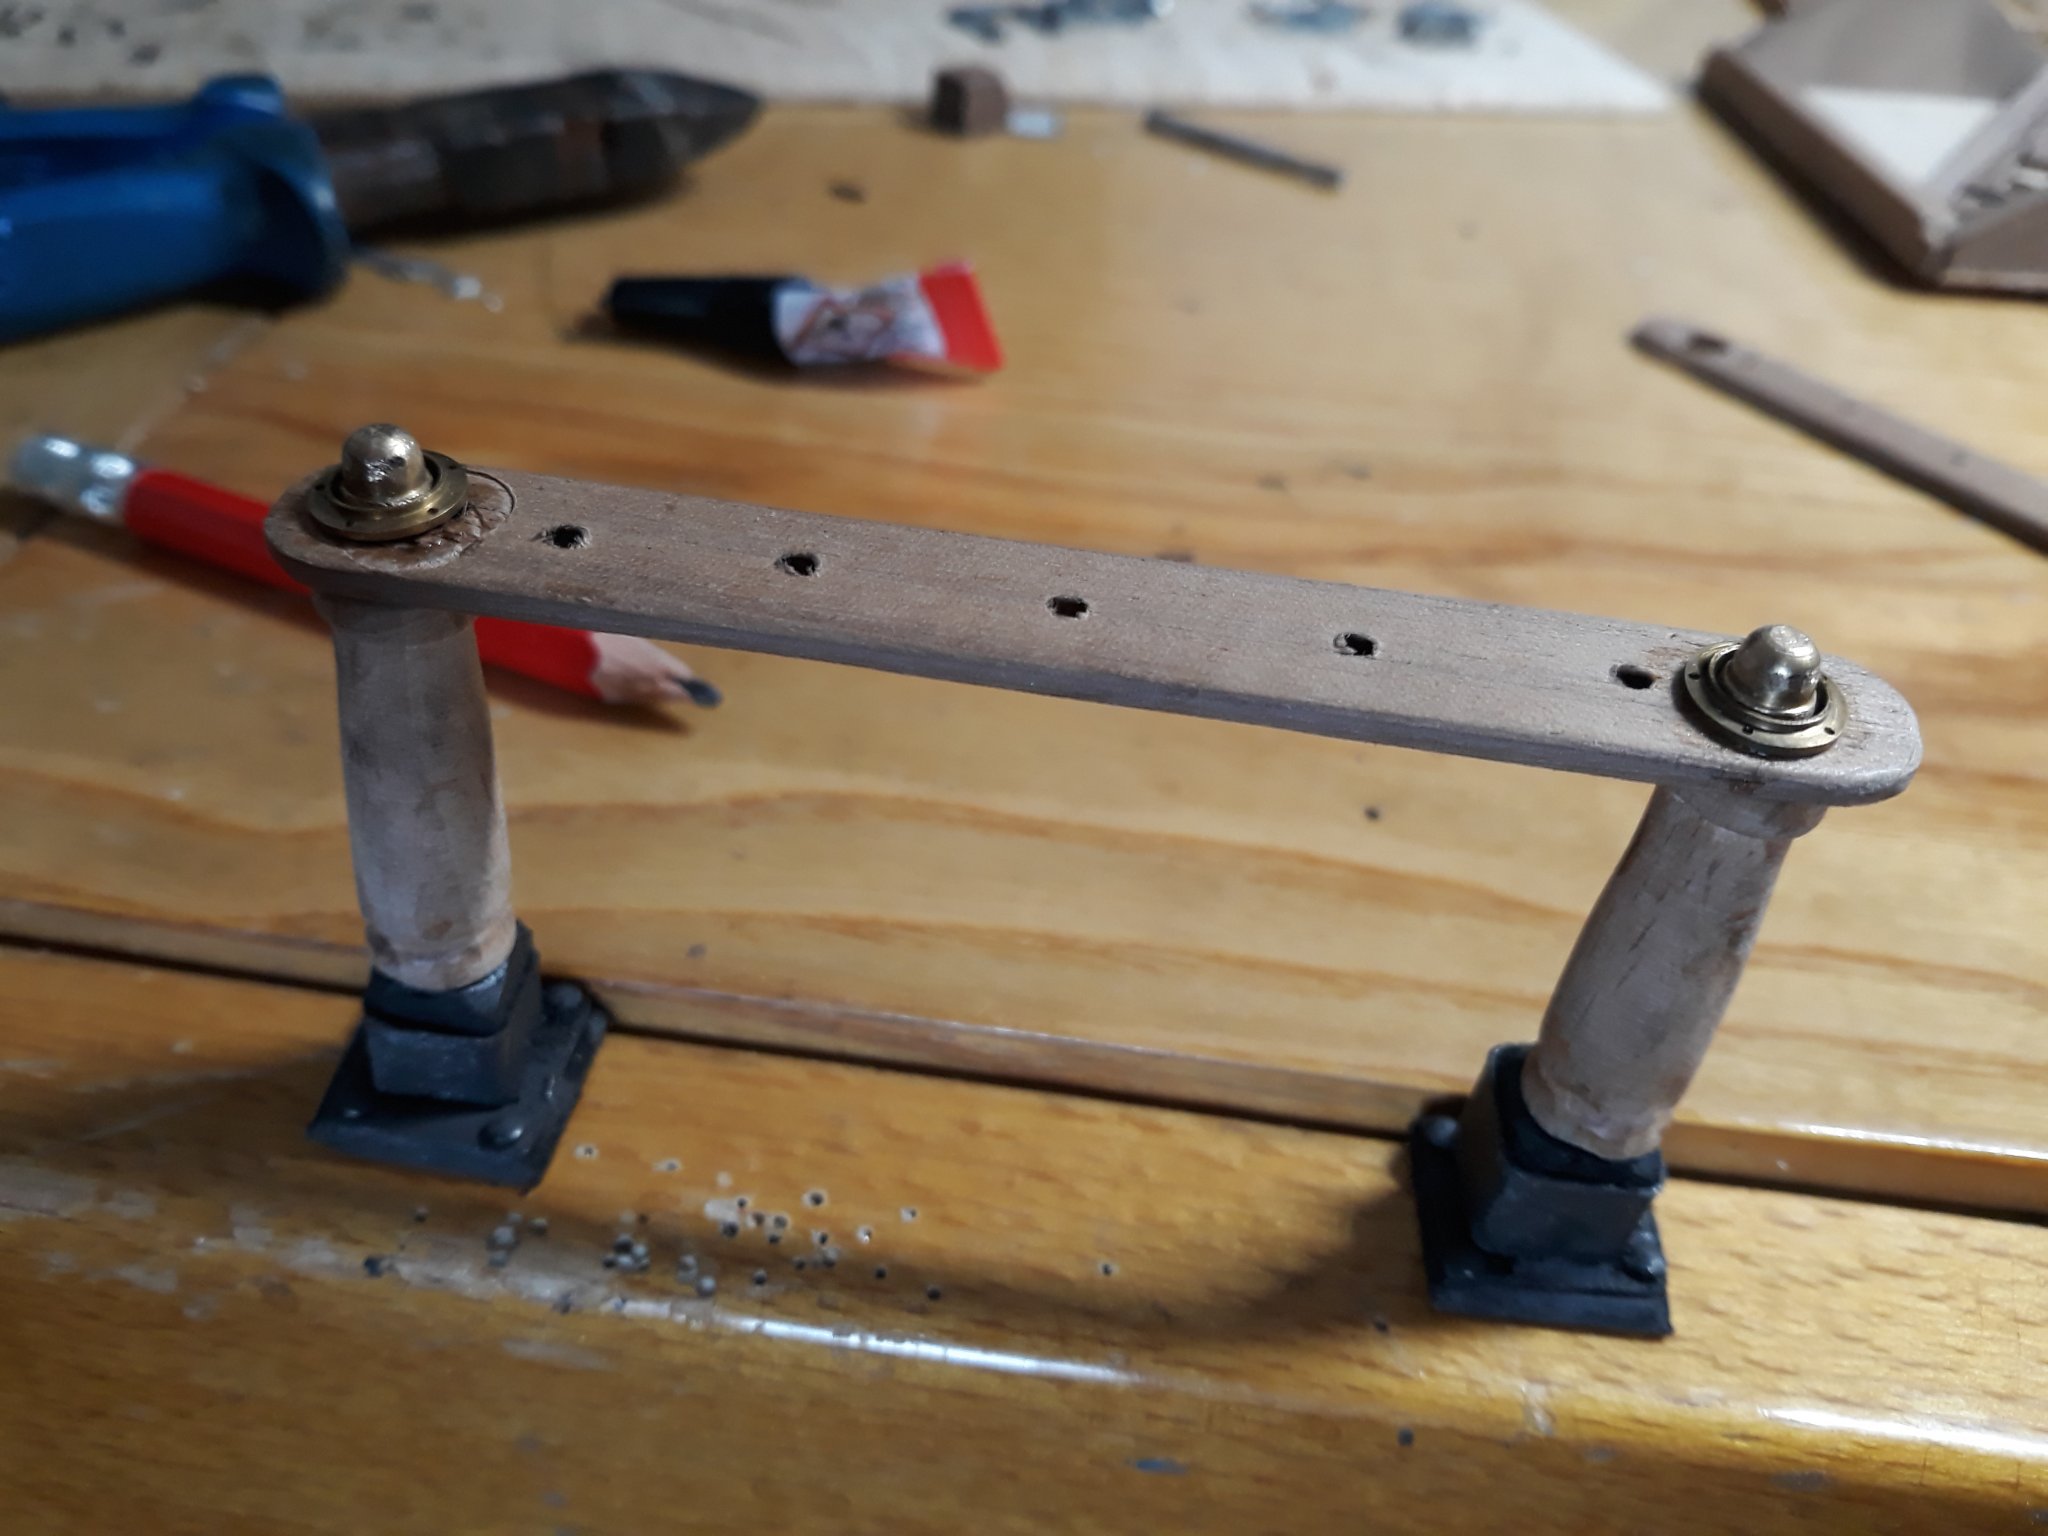
This week was extra productive for me in a positive way, thankfully , i managed to finish fife rails properly to my liking, so only few imoortant things to go before i go rigging yay.
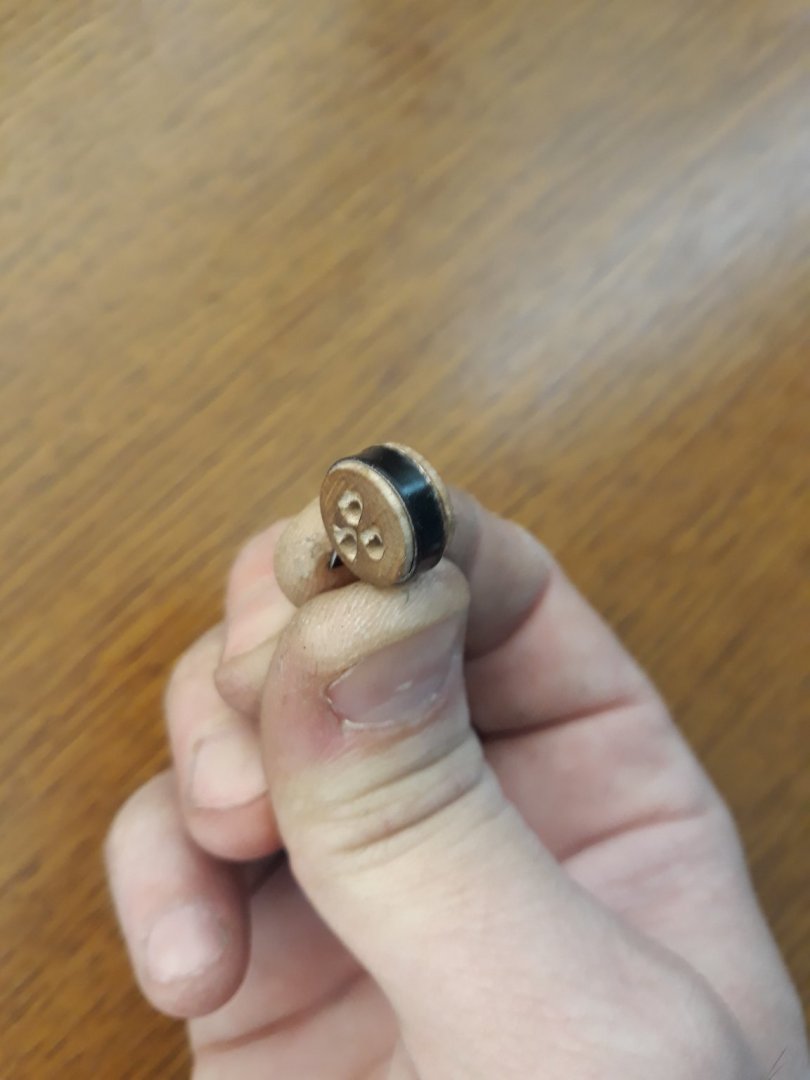
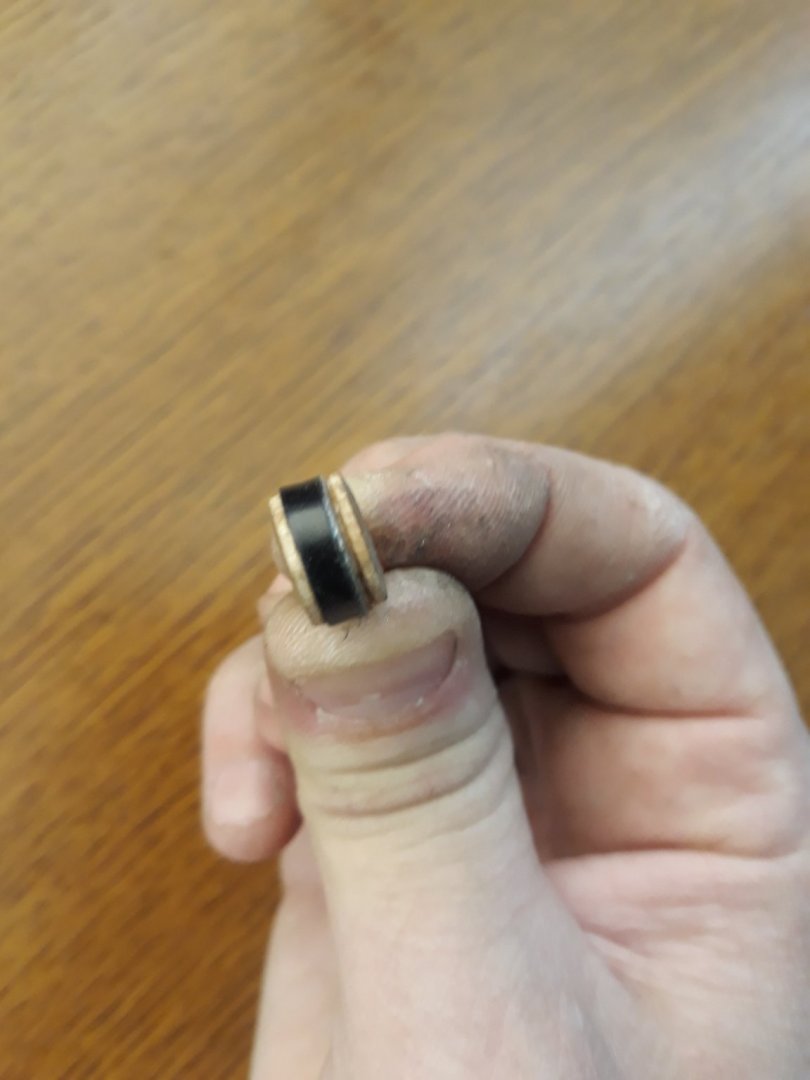
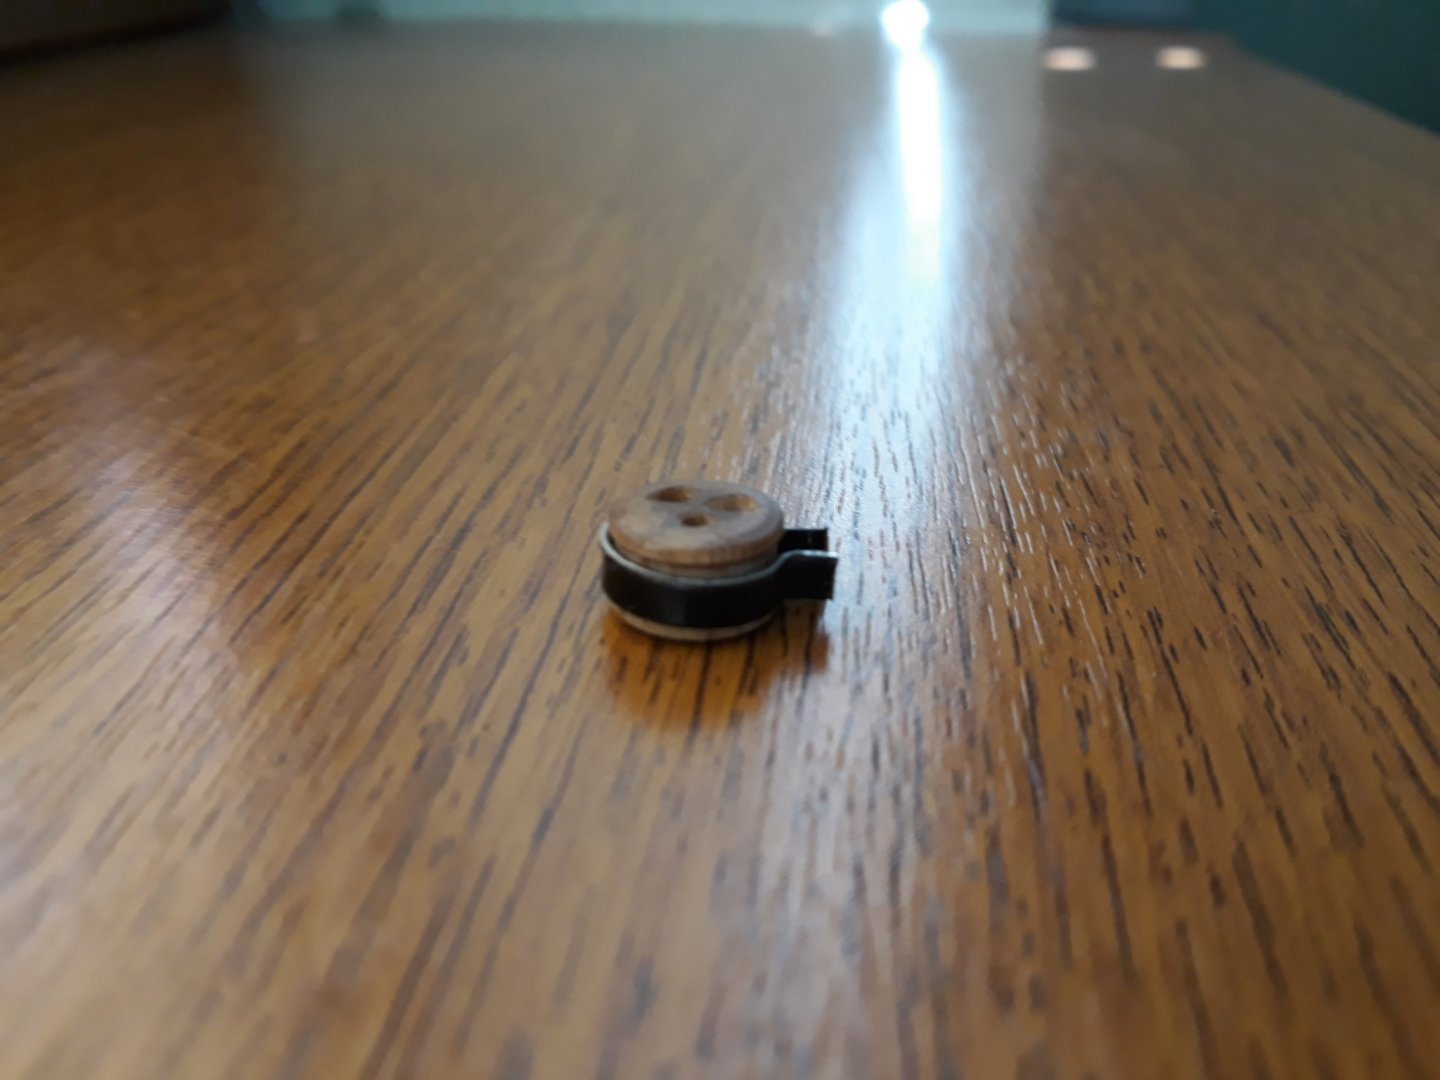
Meanwhile I wasnt too happy or satisfied with how thin deadeyes turned out - and today got one idea how to make proper thick one quite easily even with proper strap tenon line, with gluing up 2 small deadeyes. I did rasped off 1line of deadeye on both ones which made the strap line.... Im quite happy with outcome seem proper to me. What do you think?
So i will be working on them evenings for the rest of the week , as ropes still hasnt come yet. Hope you like the new deadeyes. I decided Cutty deserves better.
awsome thst at this scale one can make deadeyes as original.
Have fine weekend with your projects, take care and stay healthy till situation betters and massive thank you all for comments, interest etc ...
Vlad


-


Glory of the Seas 1869 by rwiederrich - Medium clipper - discontinued in lieu of new log
in - Build logs for subjects built 1851 - 1900
Posted
wow Rob, I cant imagine how I would feel touching that piece of lost/magnificent meaningful history leaving away being it favorite ship. thanks for explaininig. that special meaning to you is understandable.