

Vladimir_Wairoa
-
Posts
1,509 -
Joined
-
Last visited
Content Type
Profiles
Forums
Gallery
Events
Posts posted by Vladimir_Wairoa
-
-
Rob, small joke to stirr up some fun. are you going to build entire McKay fleet ? ithat would be some accomplishment of century but fleet is huge. when i read how great republic ended up only first day after launch in new york dock i couldnt believe my eyes . the feelings of her author must have been - undescribable. i guess the stories of their "life" are probably even more interesting than their appearance. success and fame equals horrifying disasters as well. both extremes. caught a fire day after launch. thats s**t. glory in last minute avoided getting burnt with coal...im almost scared to read further ...to the point , if i understand correctly losing of ship was not thing that would not have been predicted or expected to some point sooner or later / be it sinking due to weather or other misfortune. rapid speed of building wooden boat compensated for that and high prices of ships insurance played important role within "all building/merchant business ". not to mention havoc the sea water and sun played on deck etc. significant reapis and cargo like coal must have damaged inner walls of boat to small or bigger extent....or unrepairable.....crushing sandy soil was general and with serious damage ships were usually sold for friction of price to the third countries. as they would not get insurance credibility nor chance to compete or get to the business....interesting. but burnt total of biggest ship in the worl day after launch is something beyond all luck .
-
2 hours ago, rwiederrich said:
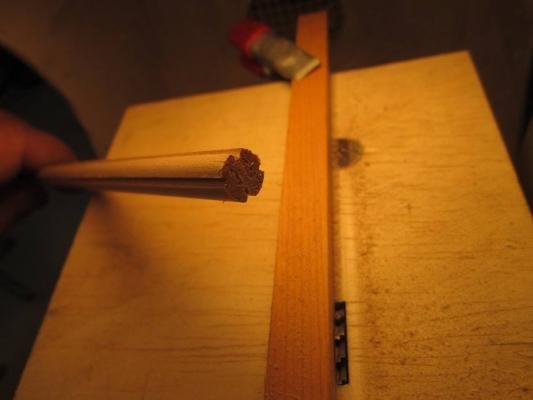
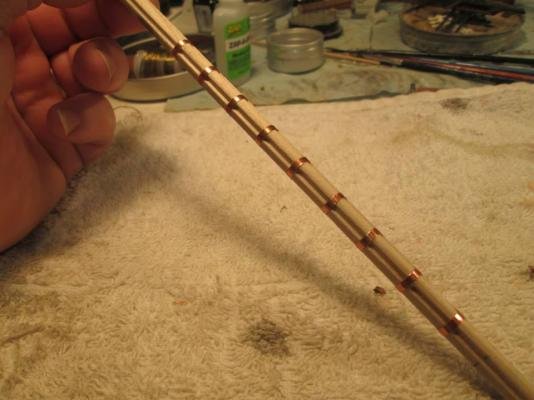
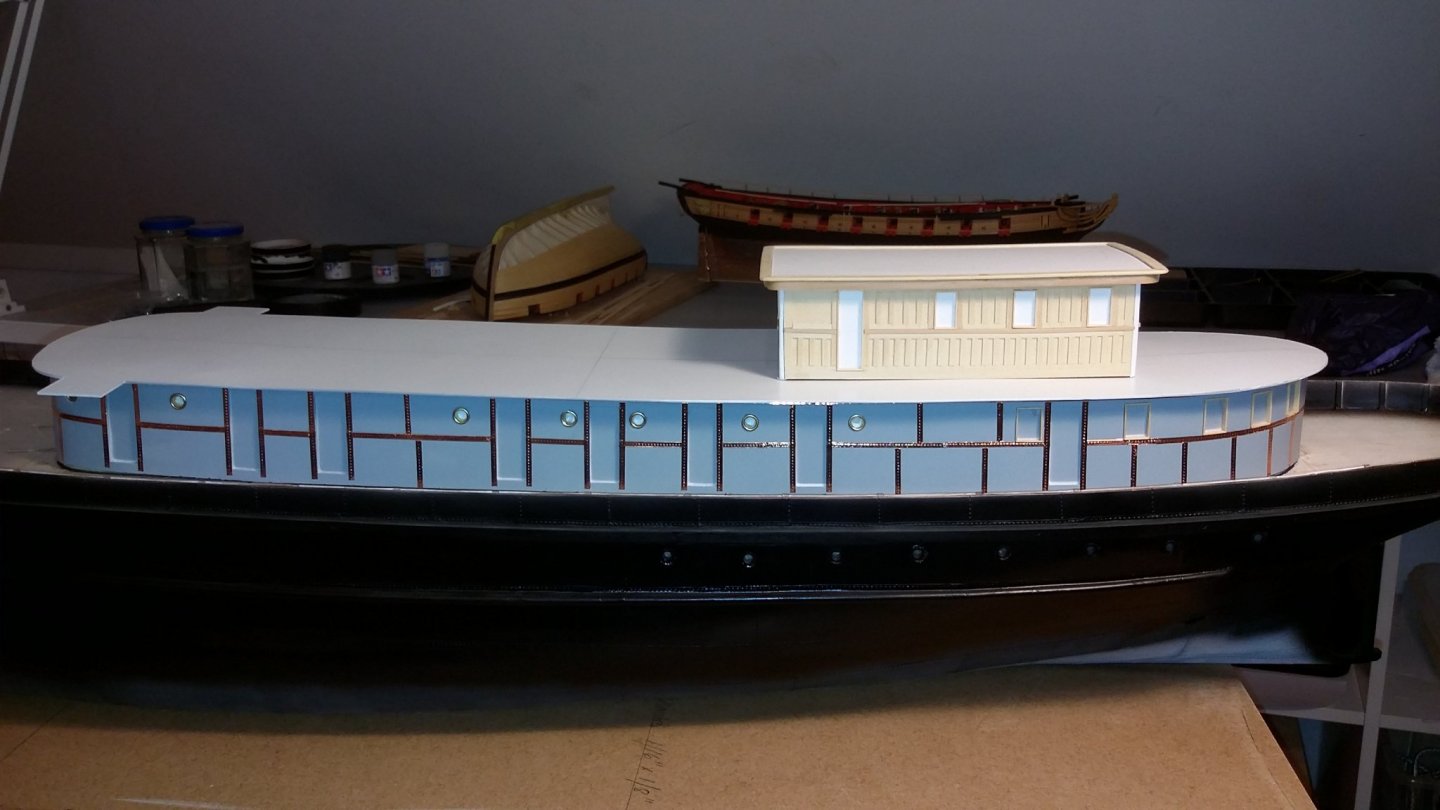
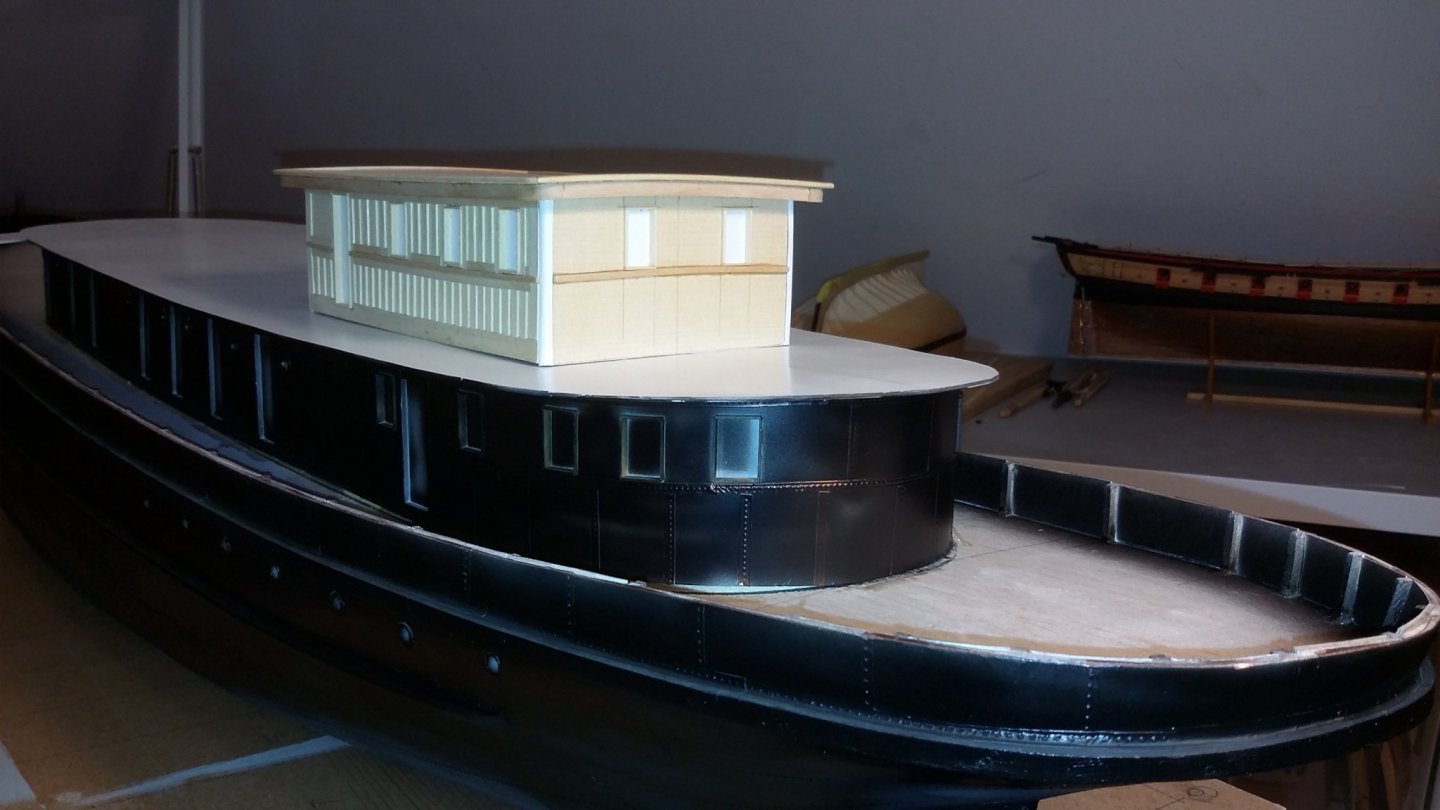
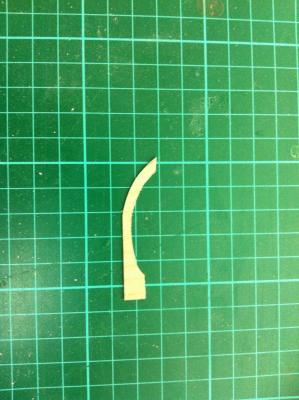
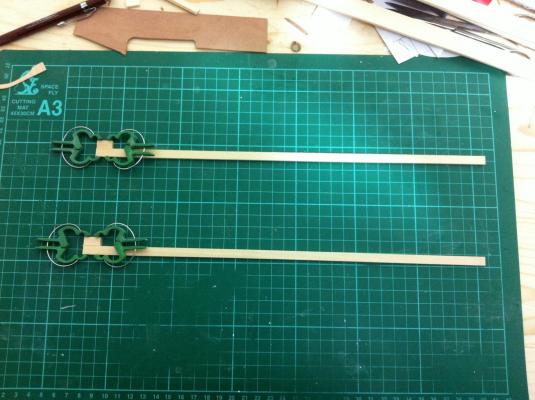
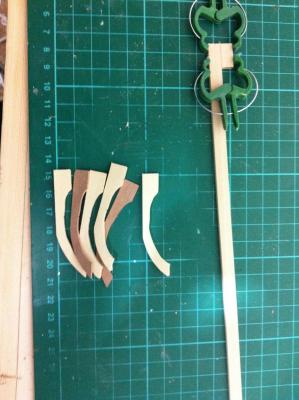
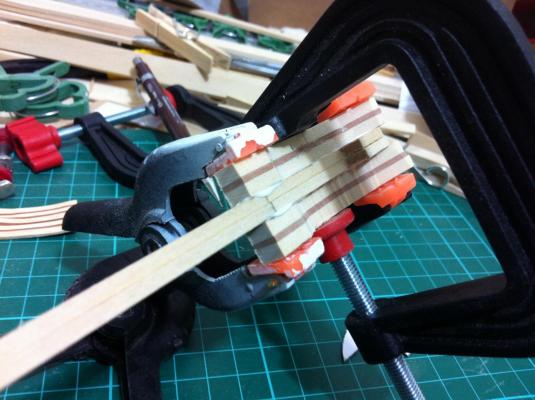
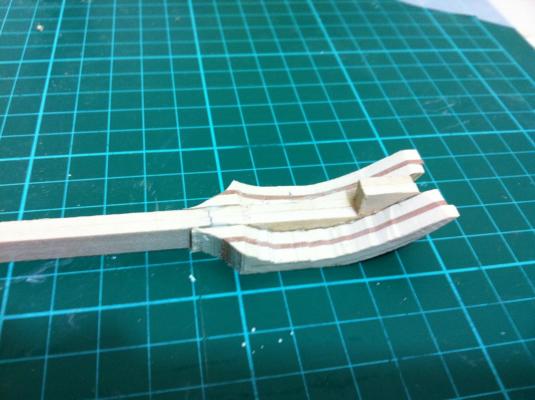
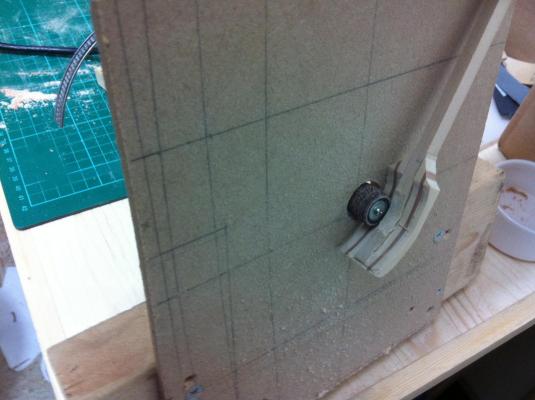
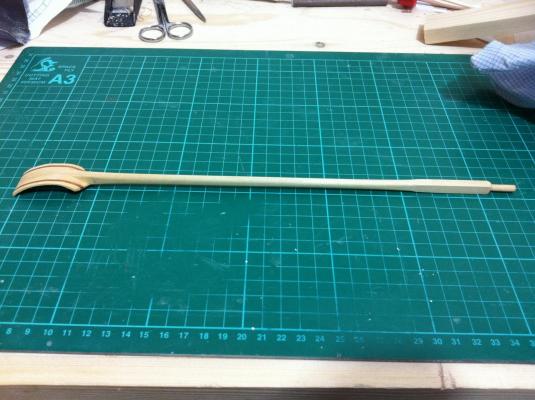
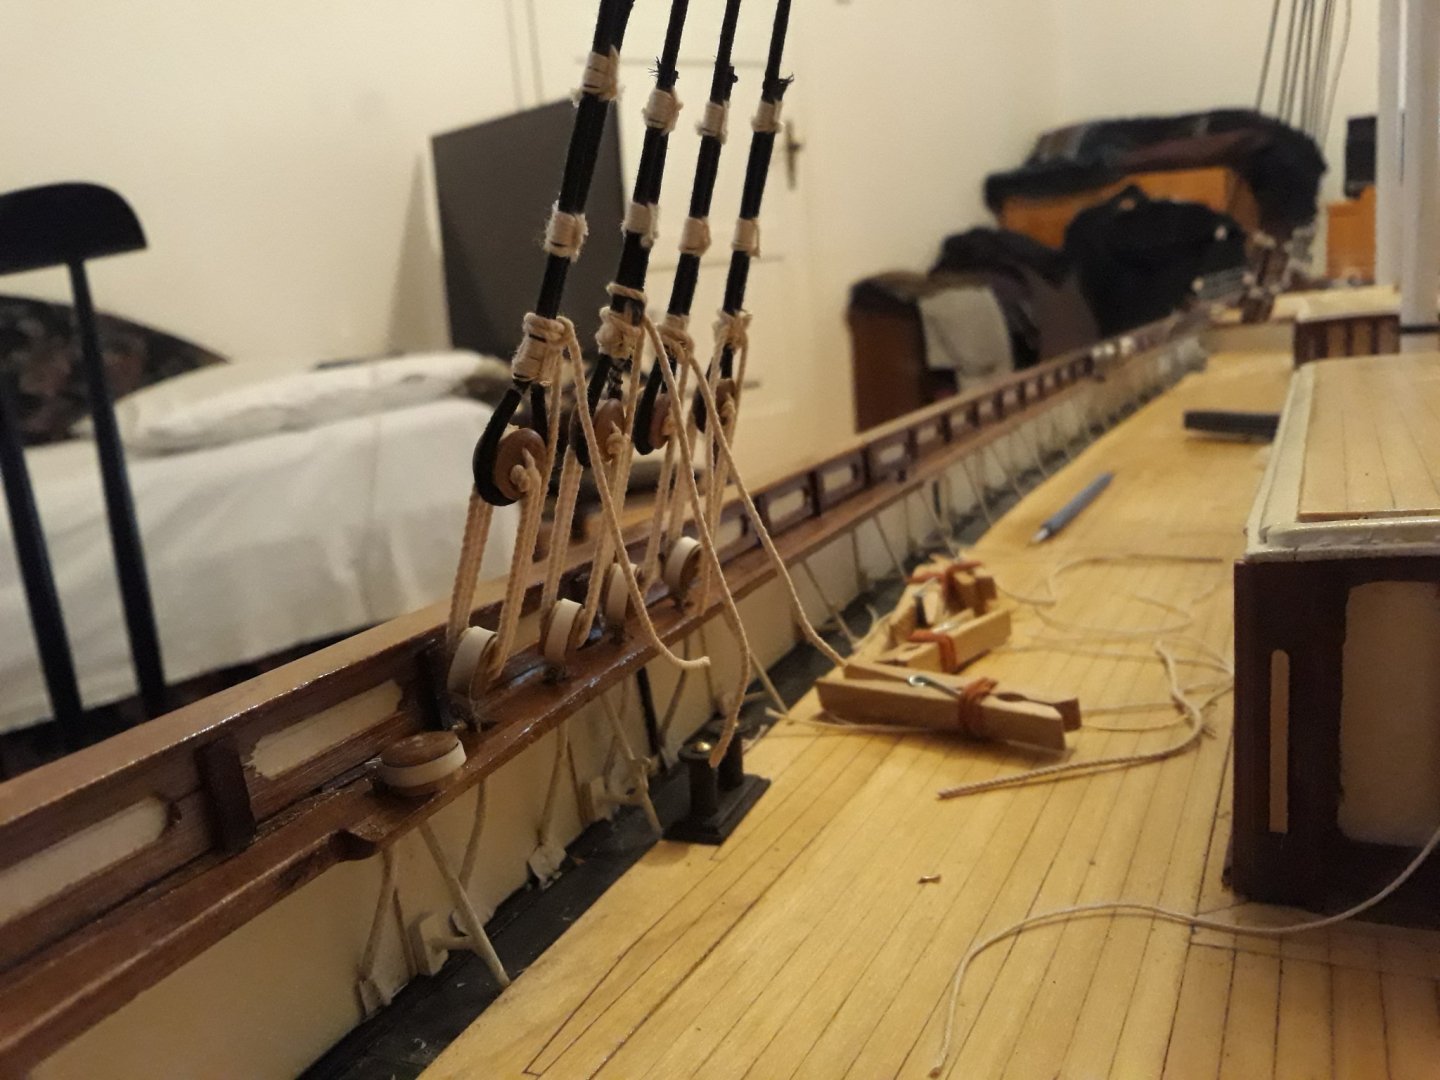
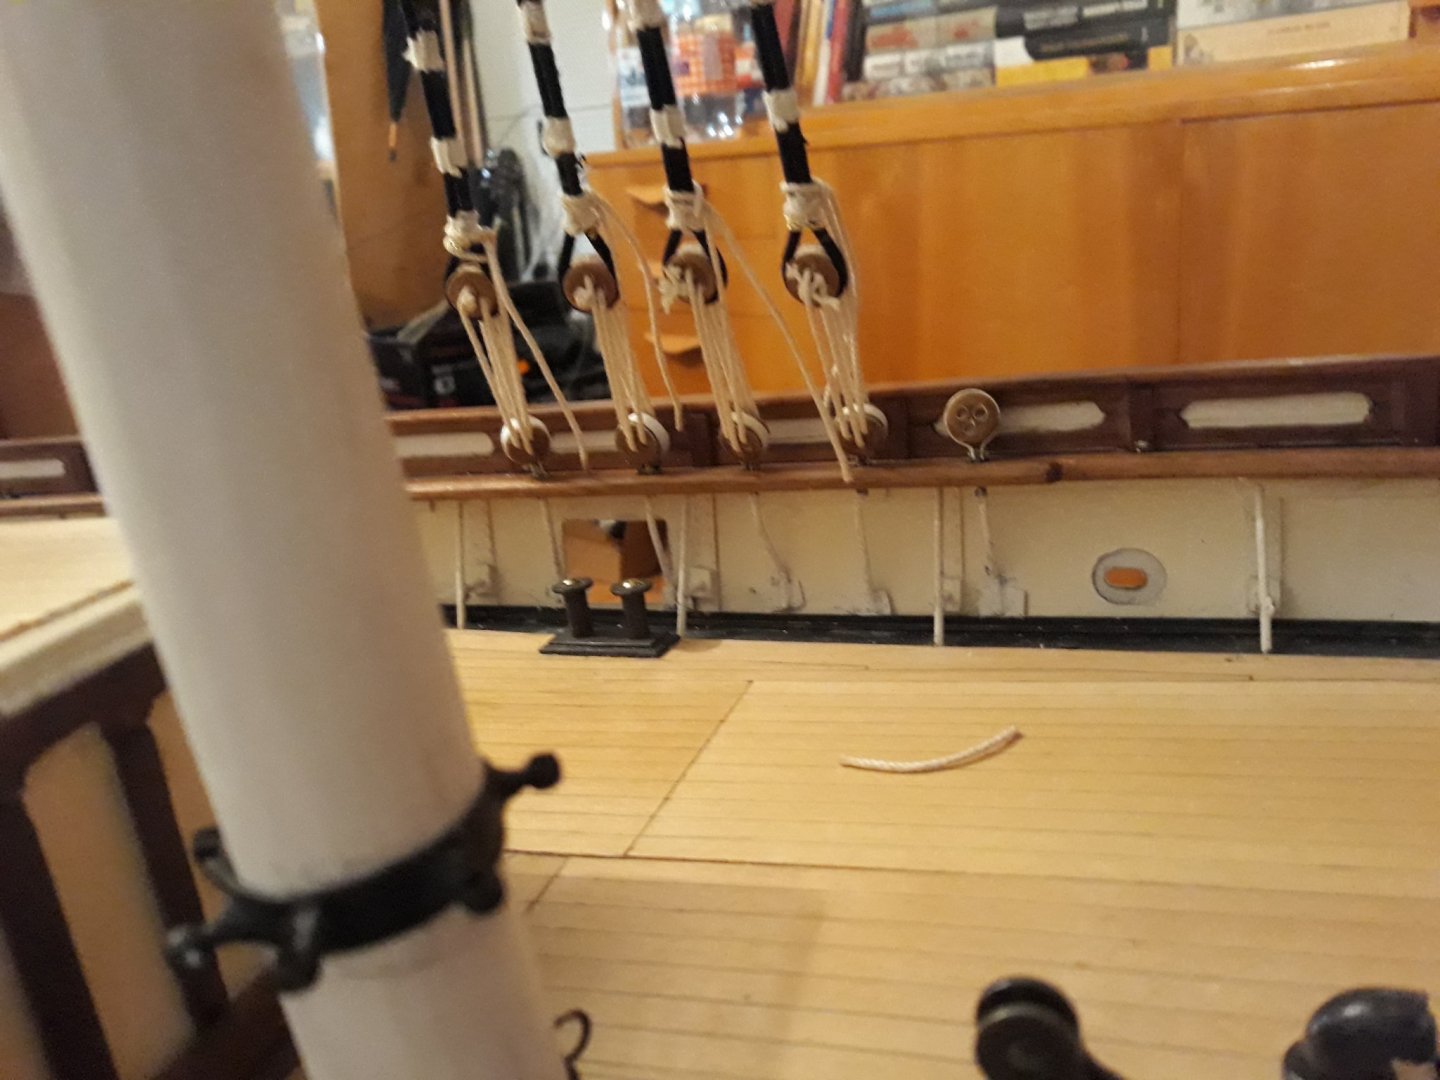
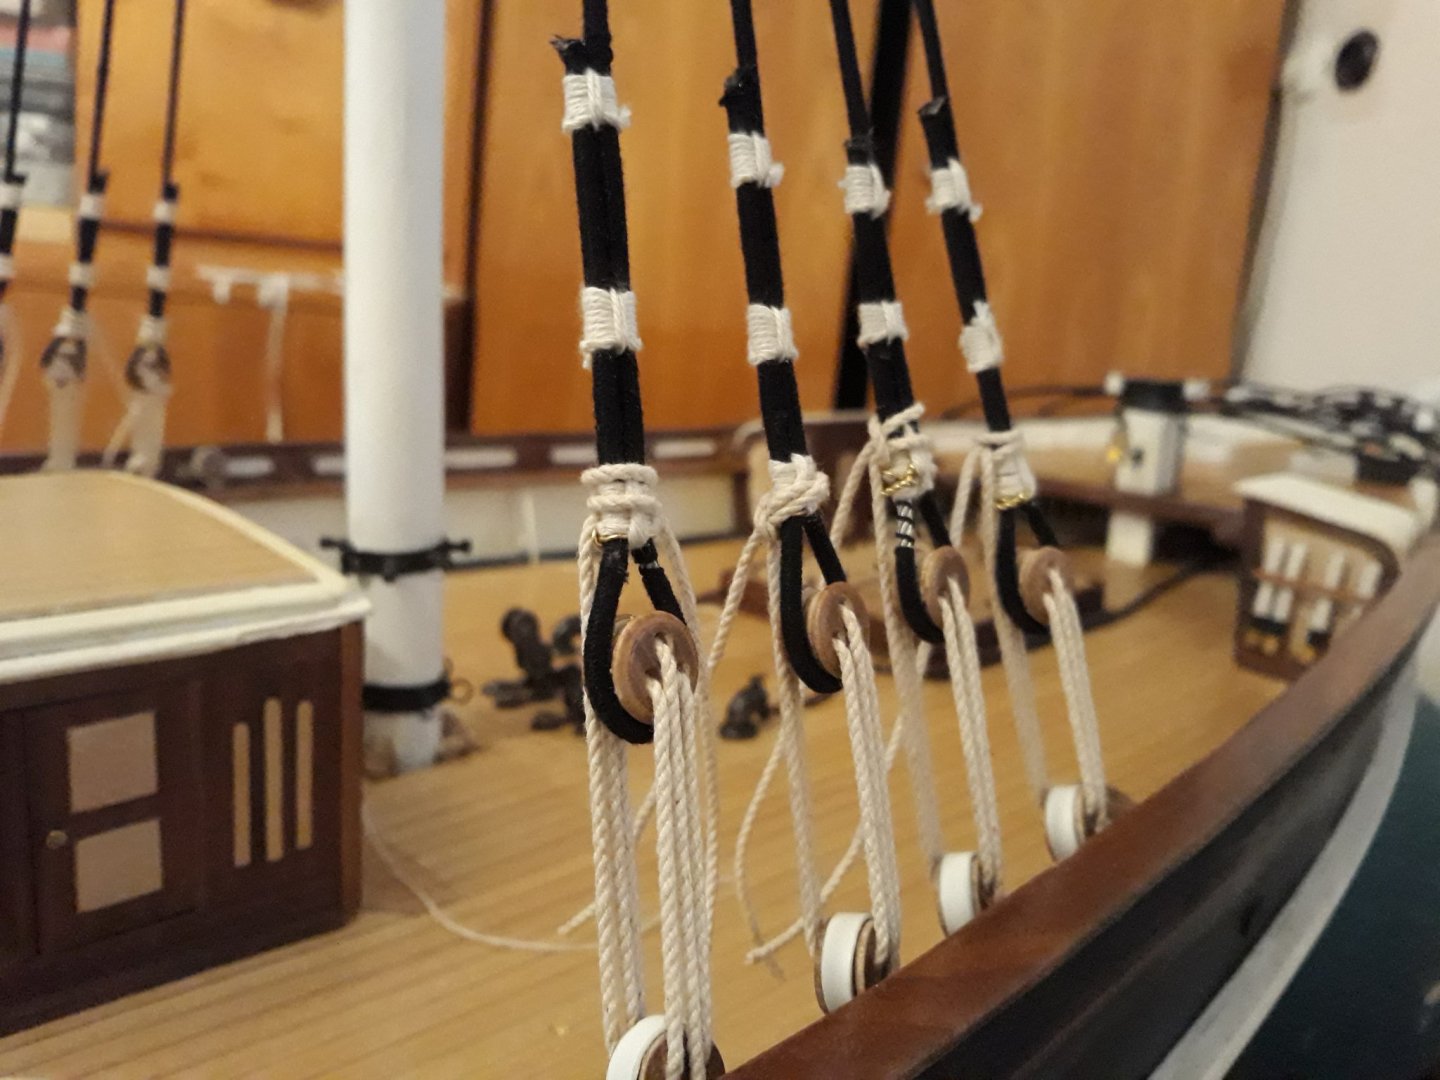
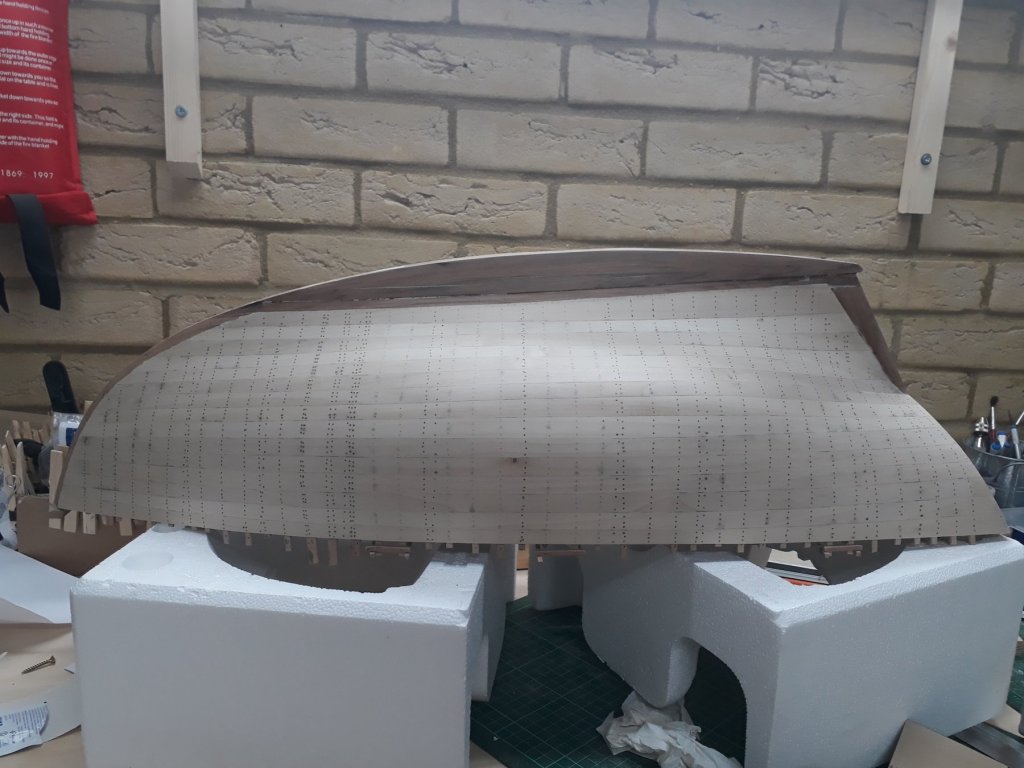
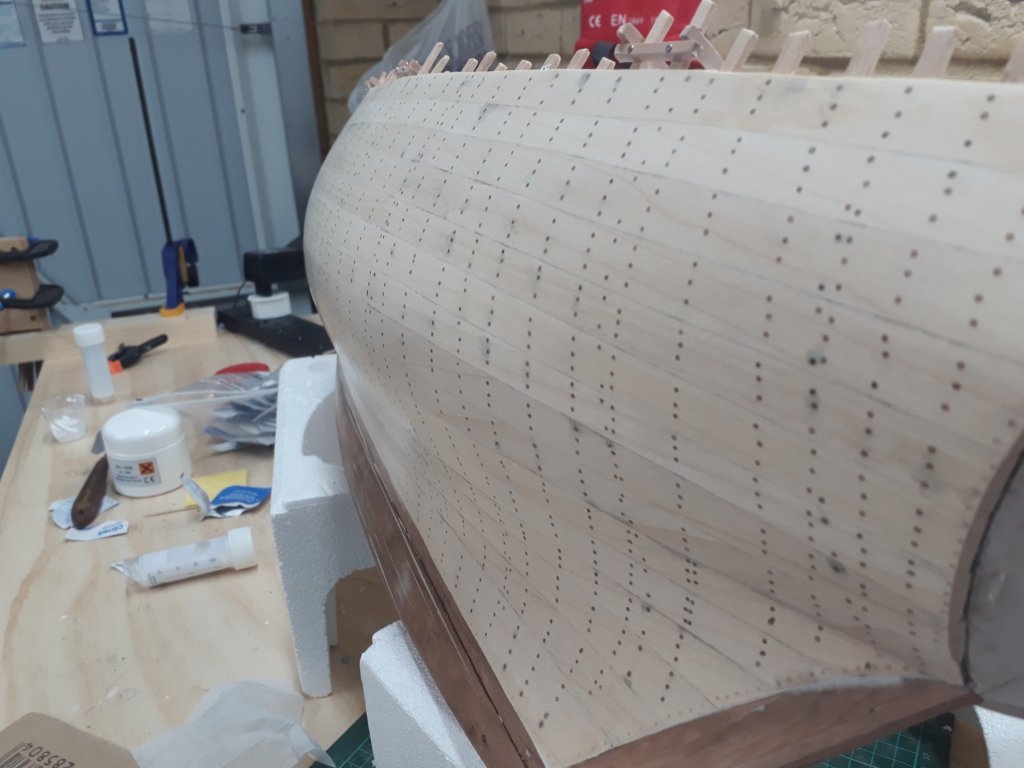
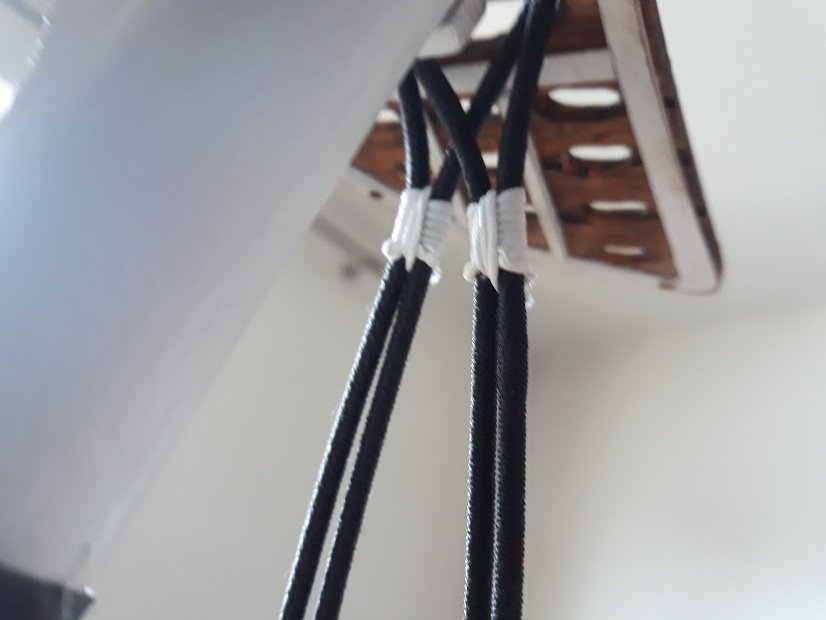
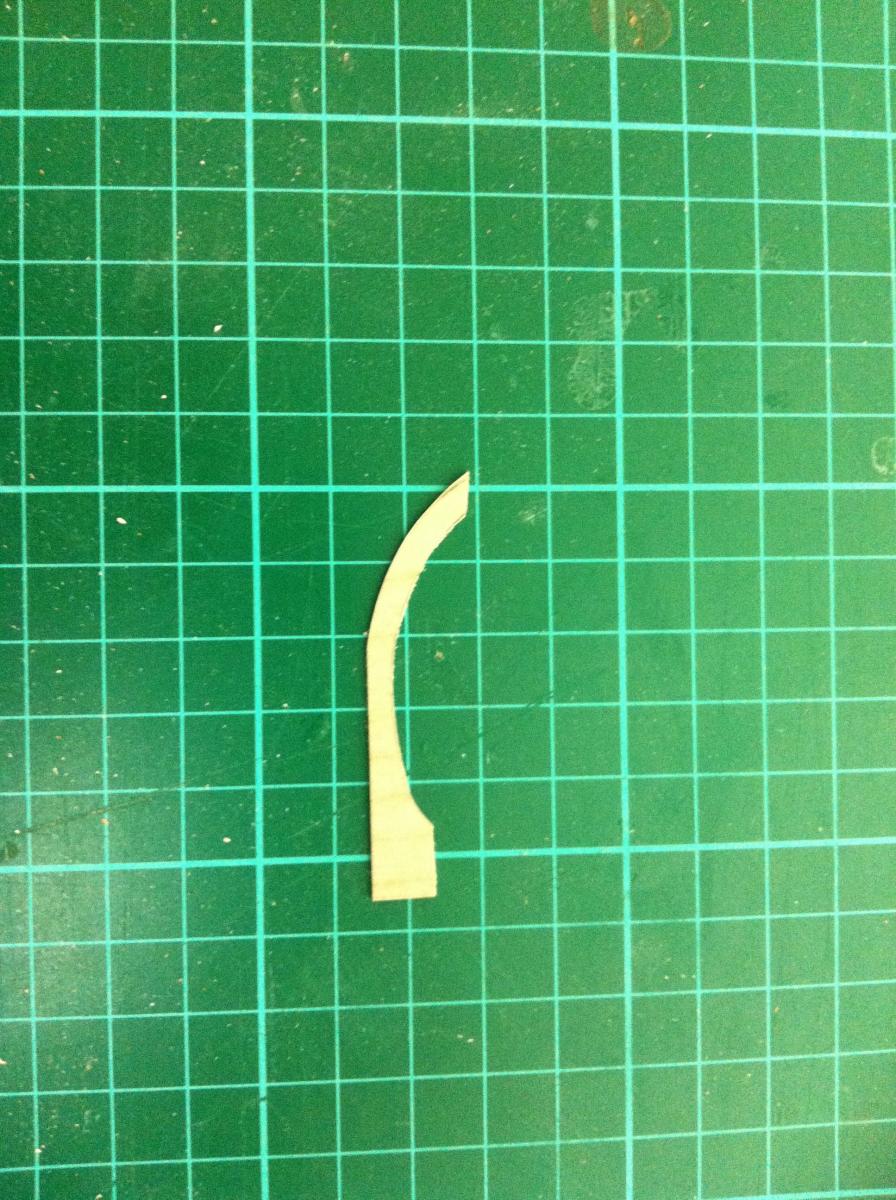
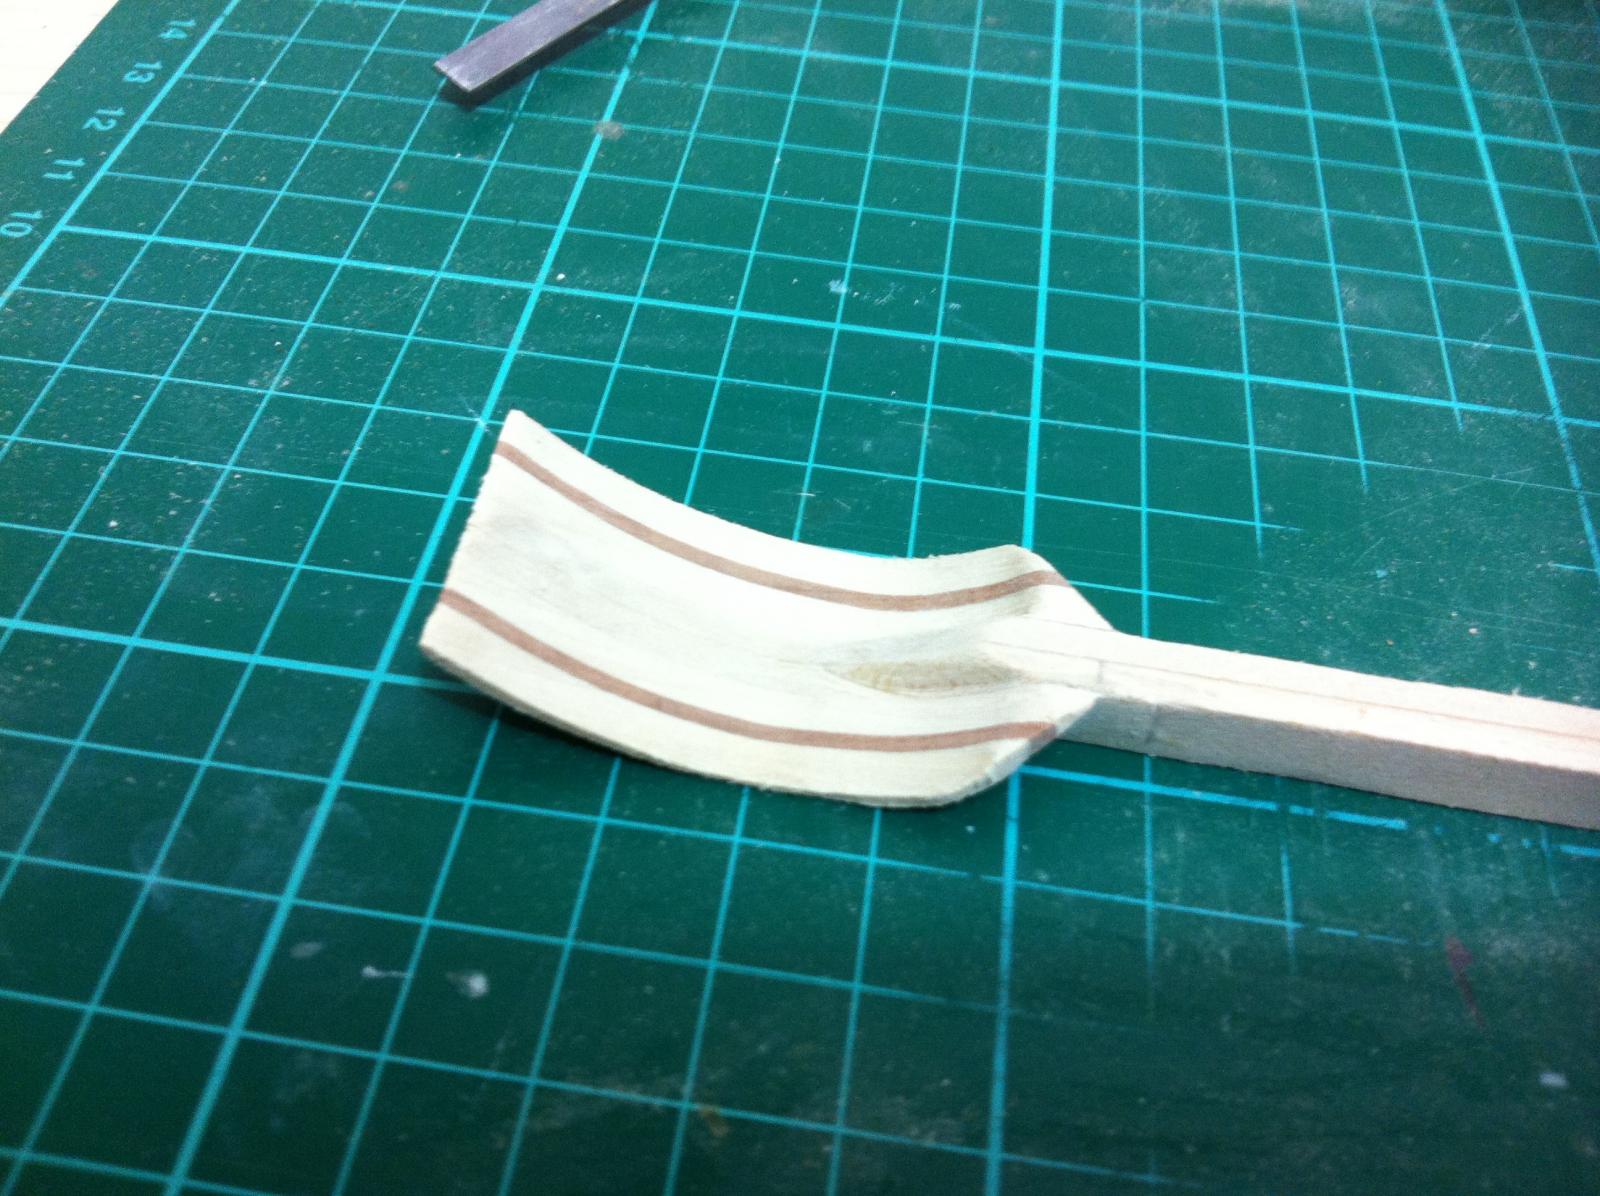
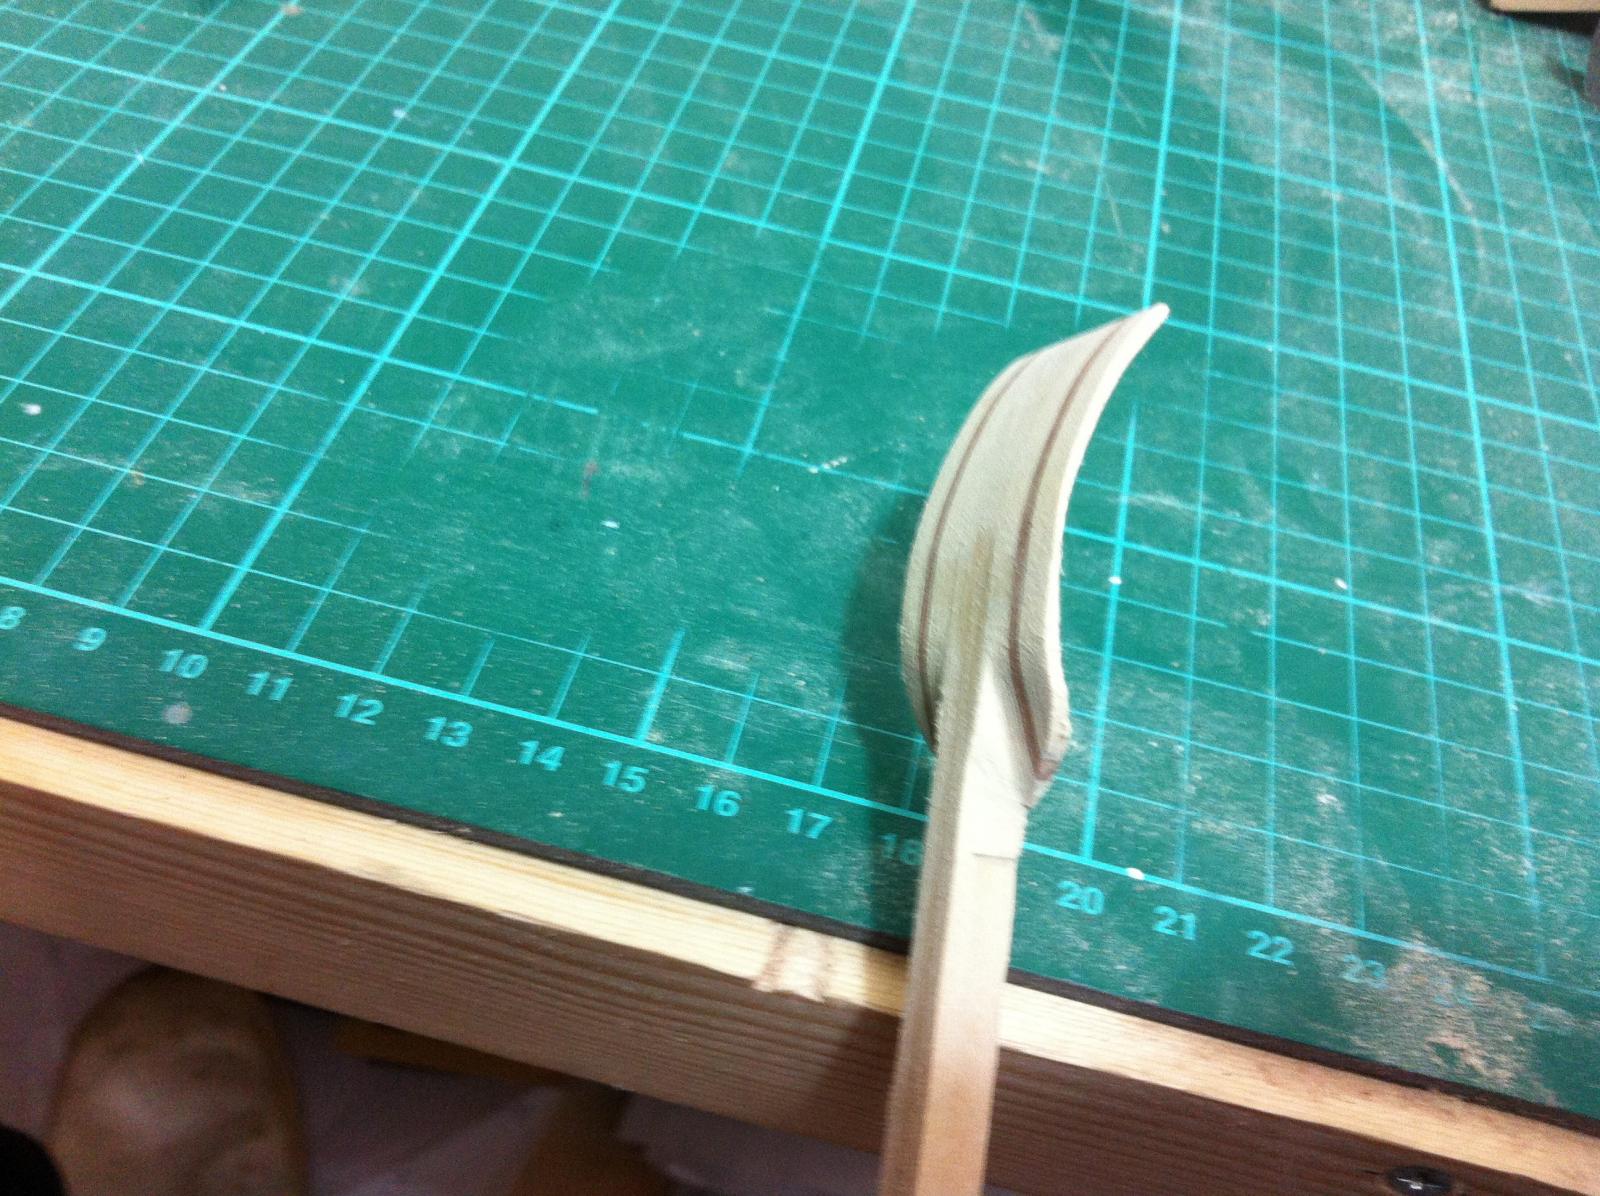
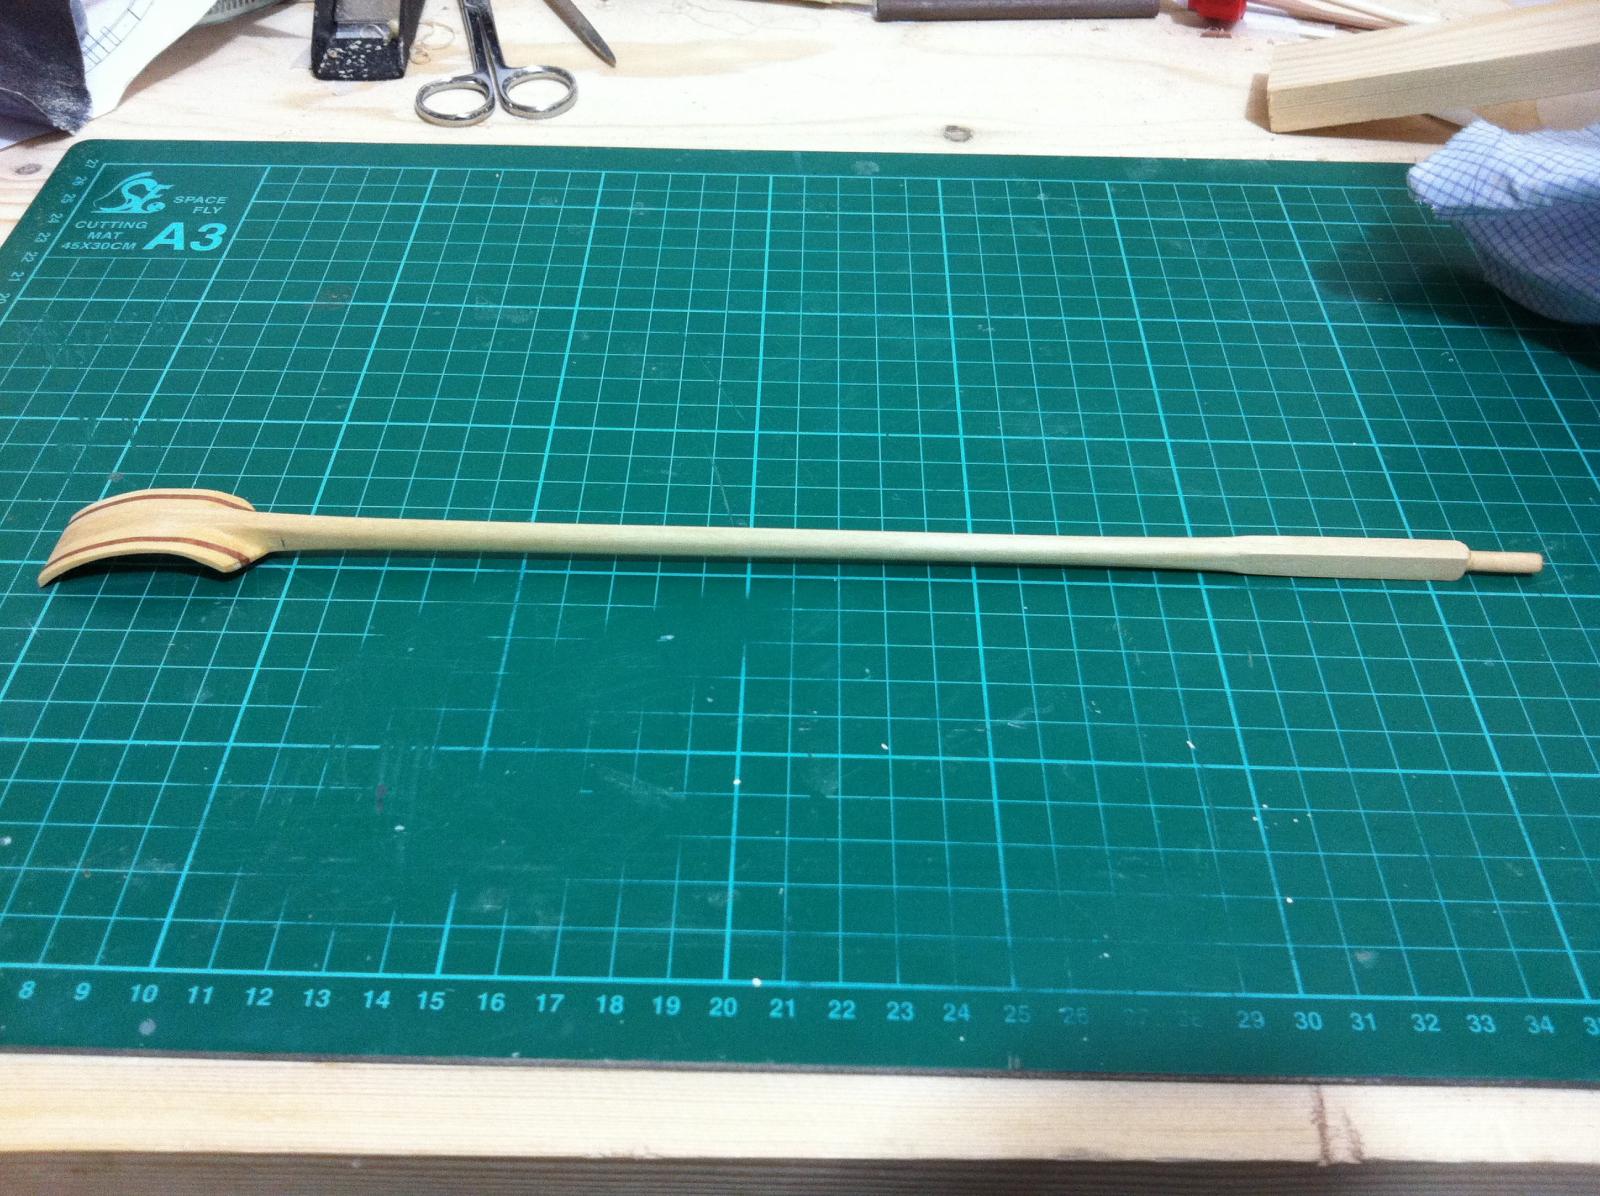
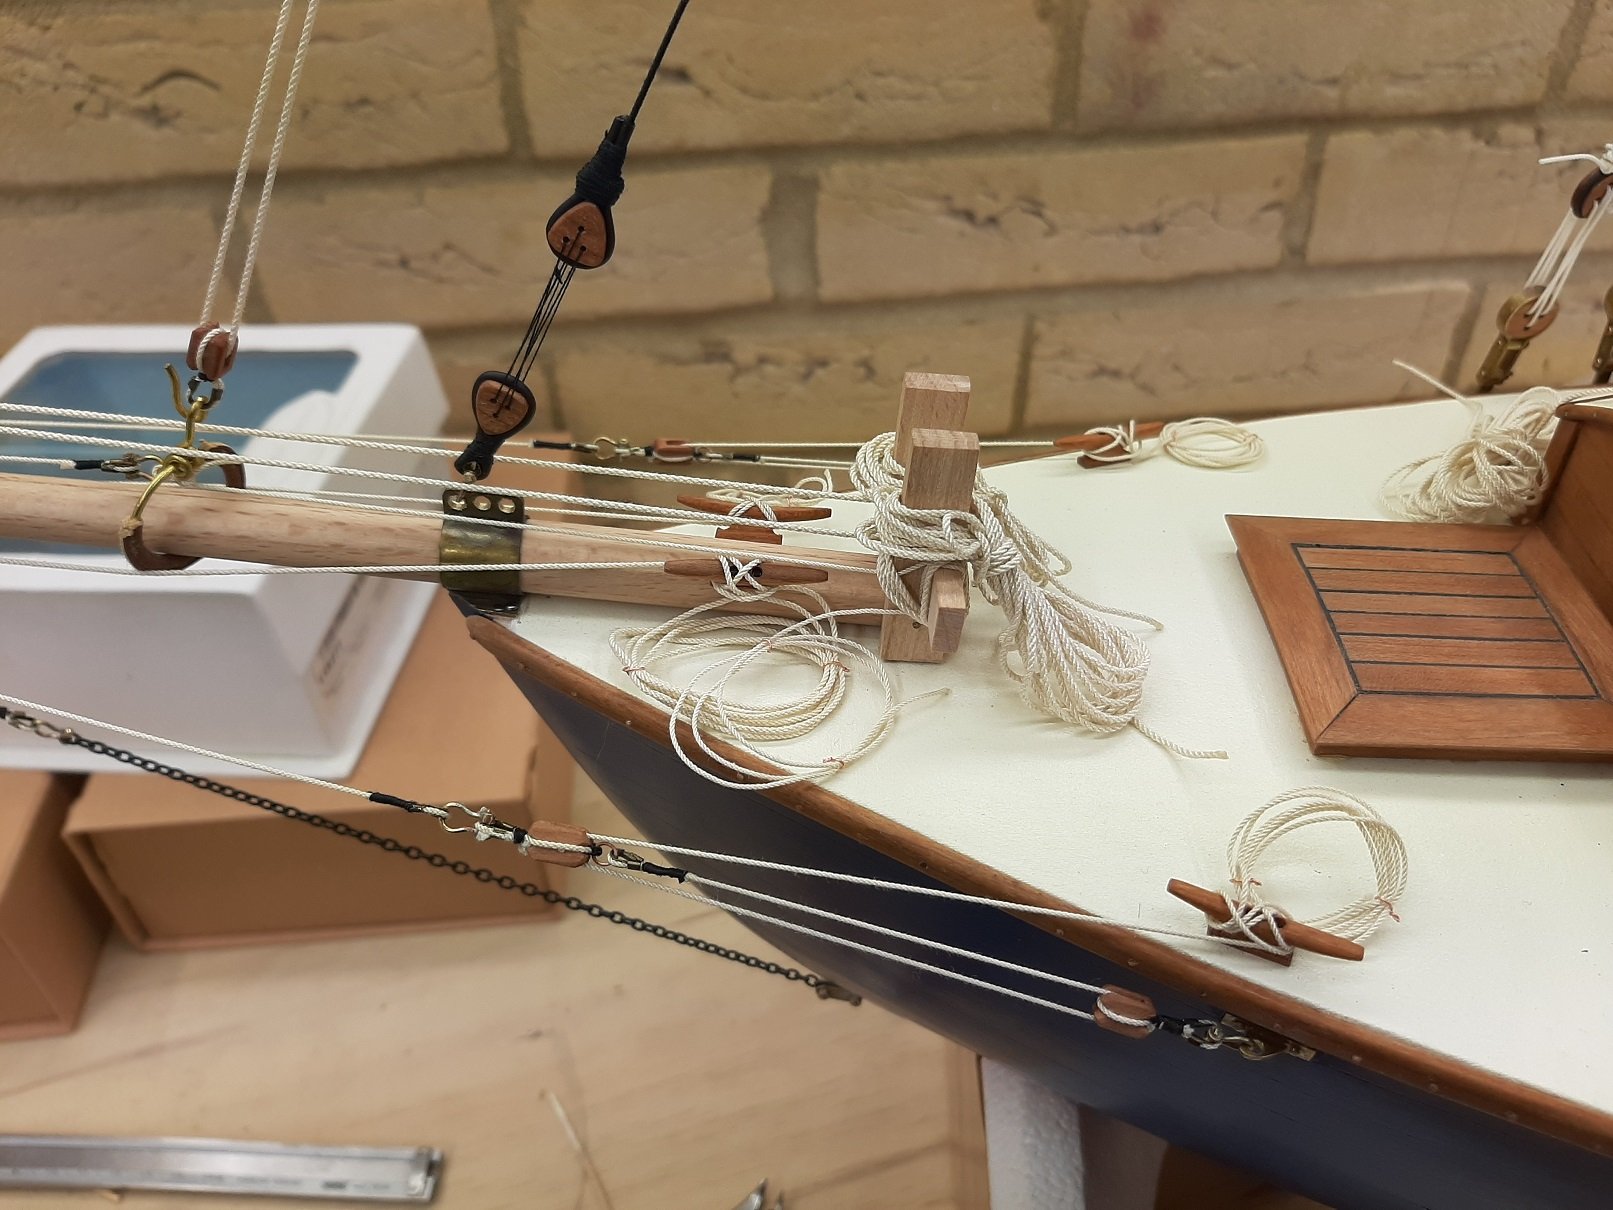
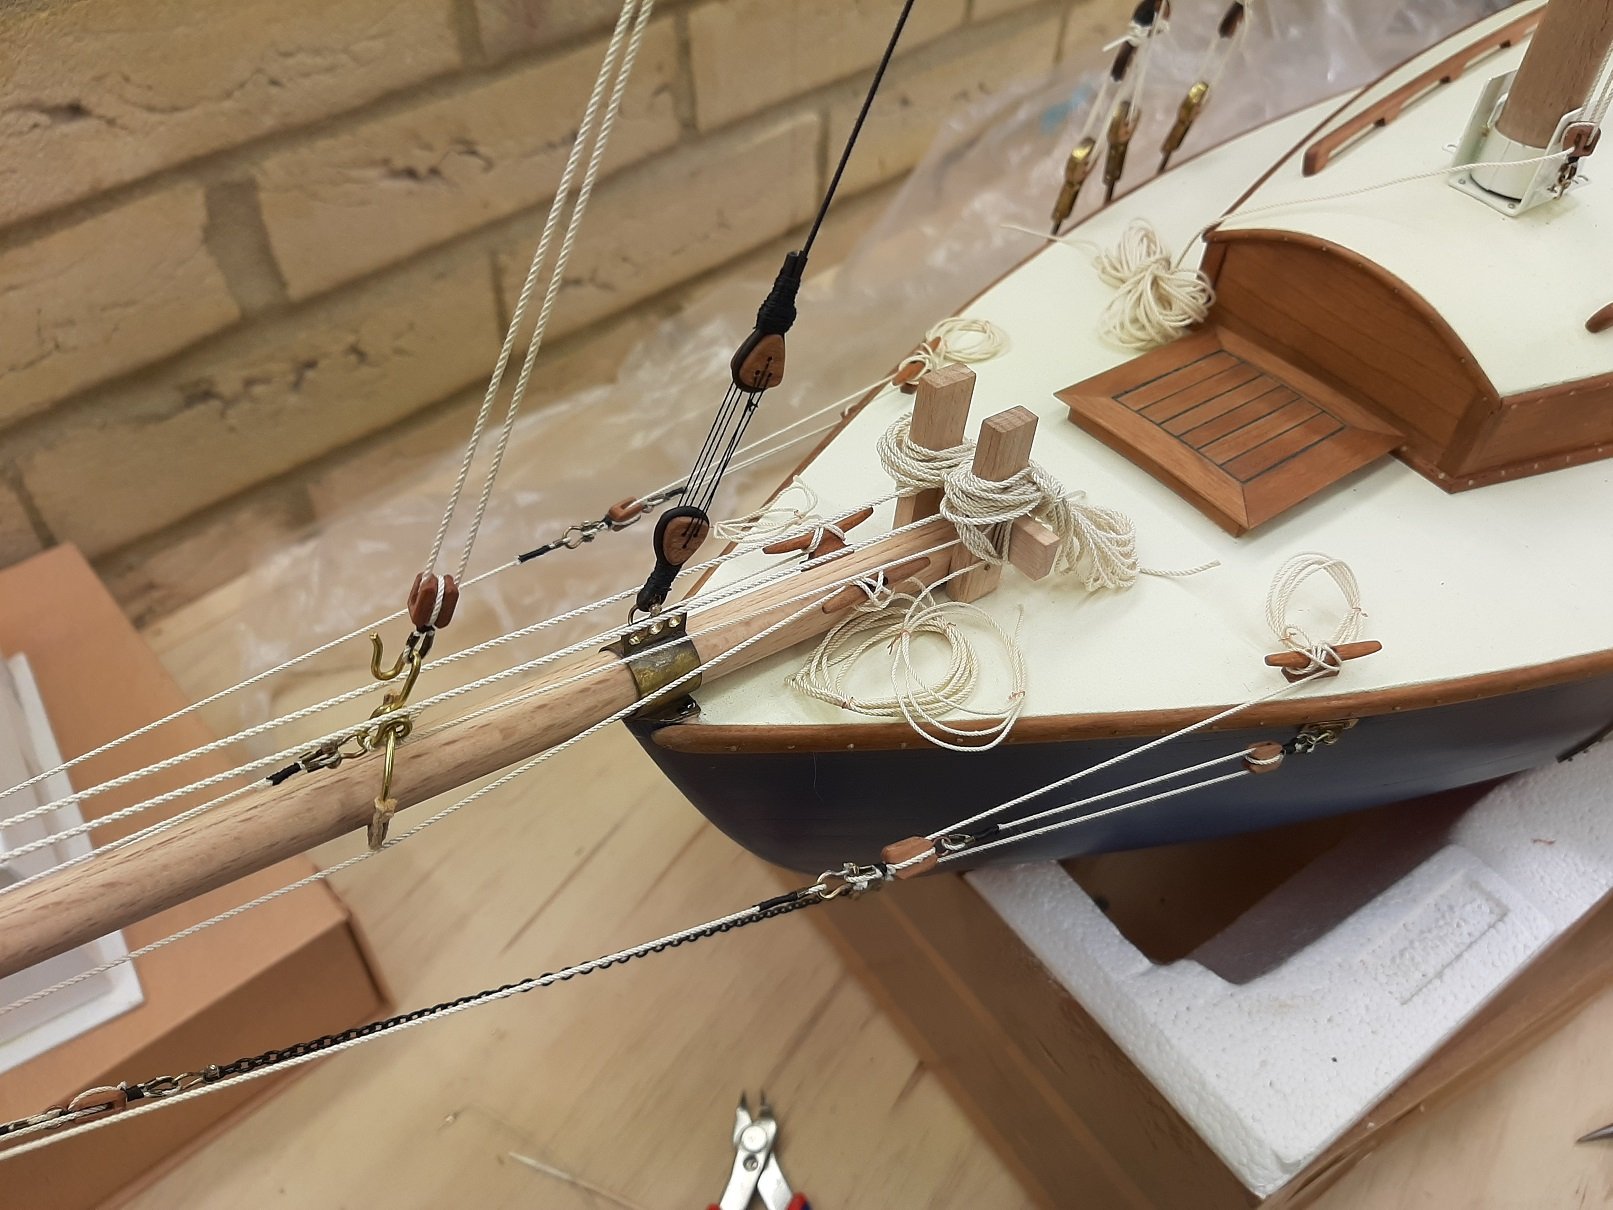
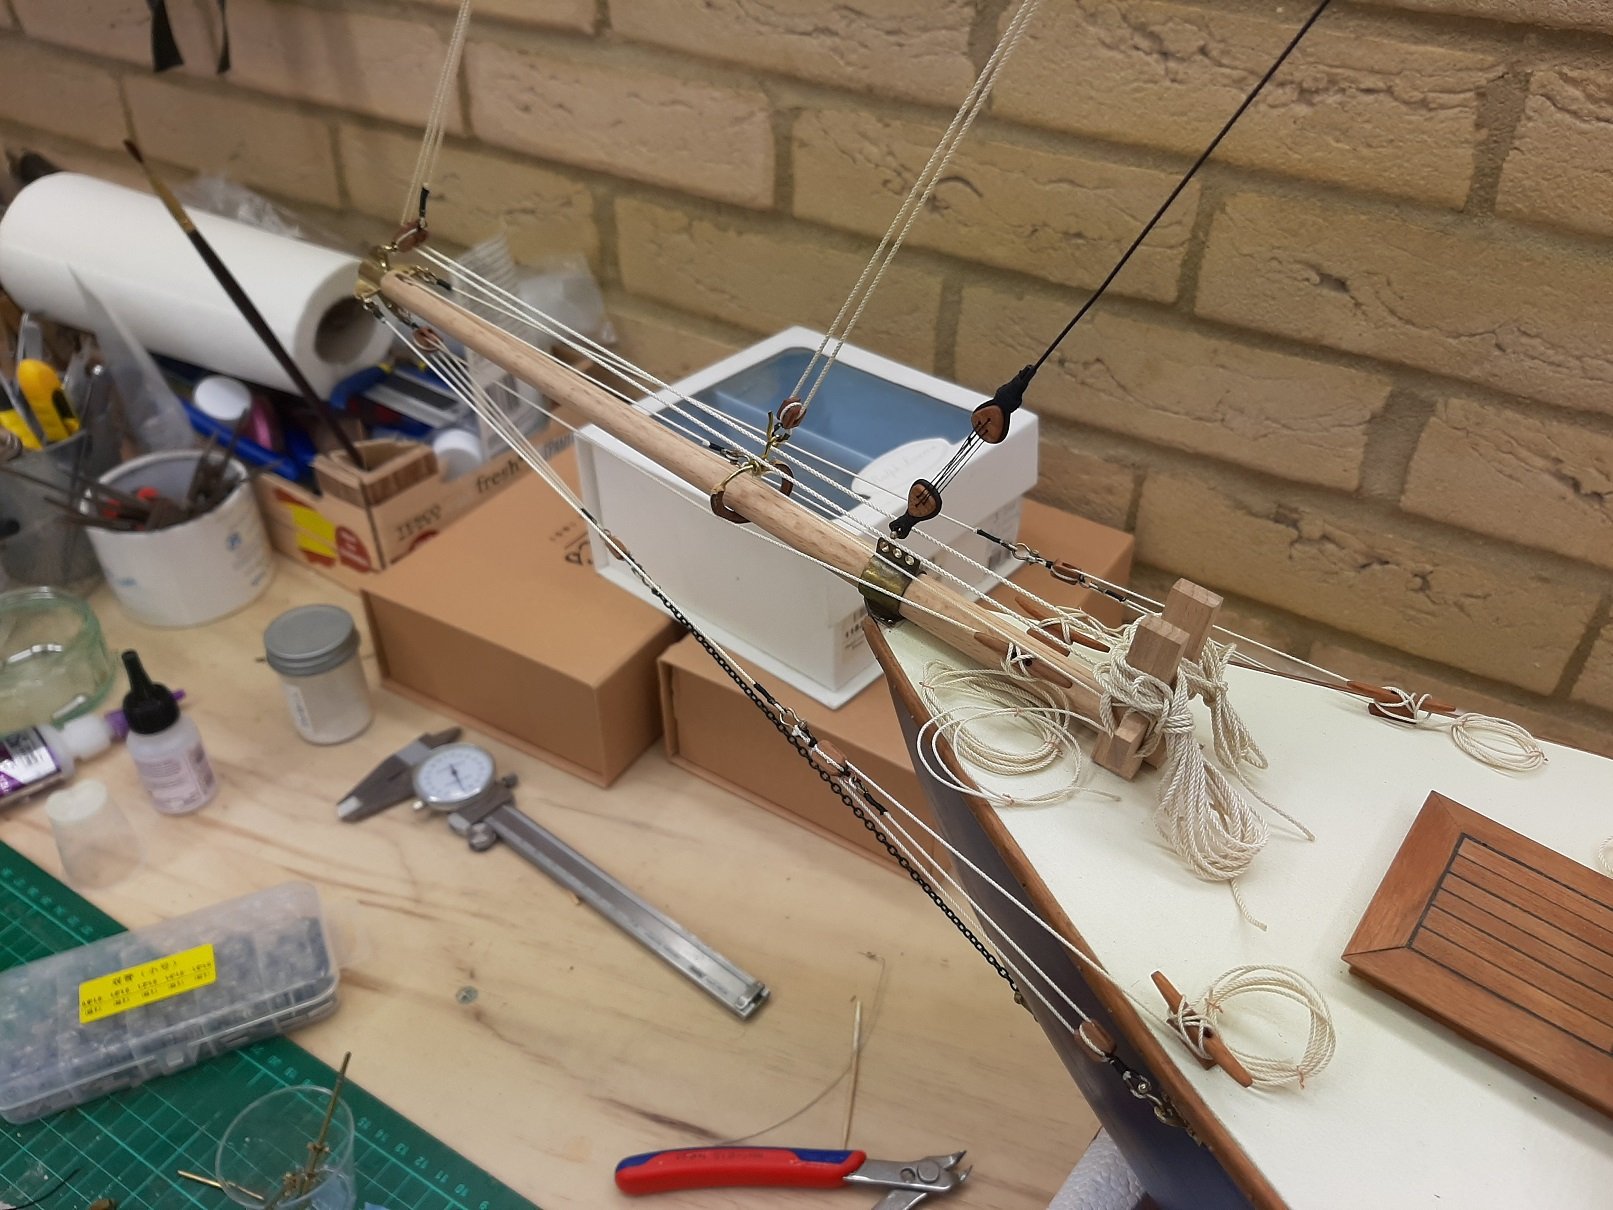
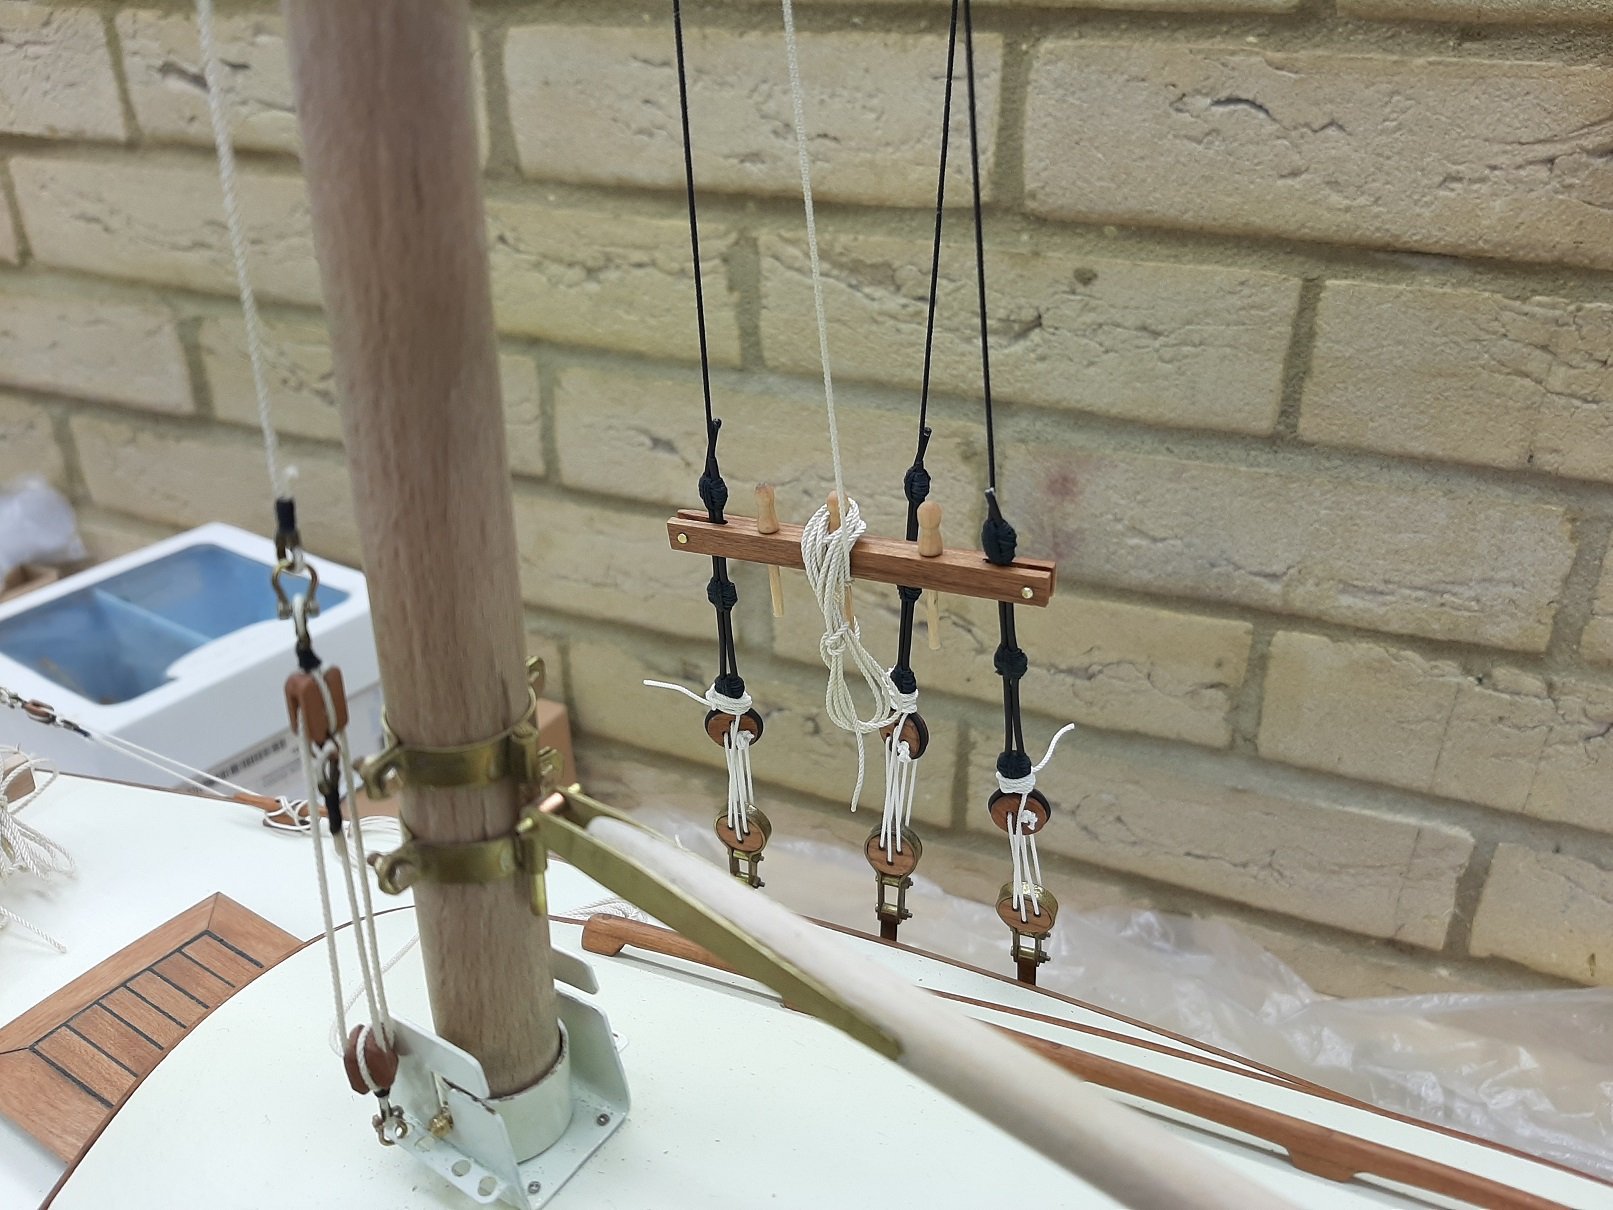
A little info from the past. I wanted to show how I made the composite masts for the Glory of the Sea. They were constructed in similar fashion as those for my Donald McKay build.
I first had to build a table saw for one of my Baldor lathes, that I could use to cut within the dowel and along its shaft a small groove. 4 to be exact, evenly placed around the dowel. This would simulate the external outer portions of the constructed mast. Then I added the fillets to fill in the space so the mast bands would follow symmetrically around the curve of the mast.
Here are a couple of images of the milling and the banding of the composite masts.
Rob
Very nice. Thanks for explanation Rob, you probably dont need to guess hard i am already genuinely in love with Donald Mckays clip. design and art and curious about american way to make clippers...there is quite a few photographs of ship in glory book.
- Keith Black, druxey and KeithAug
-
 3
3
-
Rob ,
i am a actually reading thru Mr Mjedje book - cant help but i must confess that sawn song of D McKay (her being his finest accomplishment) and his unsuccessful effort ( game) to revert his serious debt situation either by trying to sell her or though maiden voayage to San Francisco brings almost tears to eyes or pain. yet honoration of his in San Francisco despite of this setbacks was moving. He was such respectful figure that even fact that almost everything on her was ordered on later pay promise is fascinating read...im glad im not building this ship. i woul weep probably :))) perfect is i can see on your build what ship looked like .
-
Good morning, im updating some work...thanks a lot for watch.

- gieb8688, GrandpaPhil, G.L. and 1 other
-
4
-
On 1/25/2020 at 3:57 PM, svein erik said:
hi again..
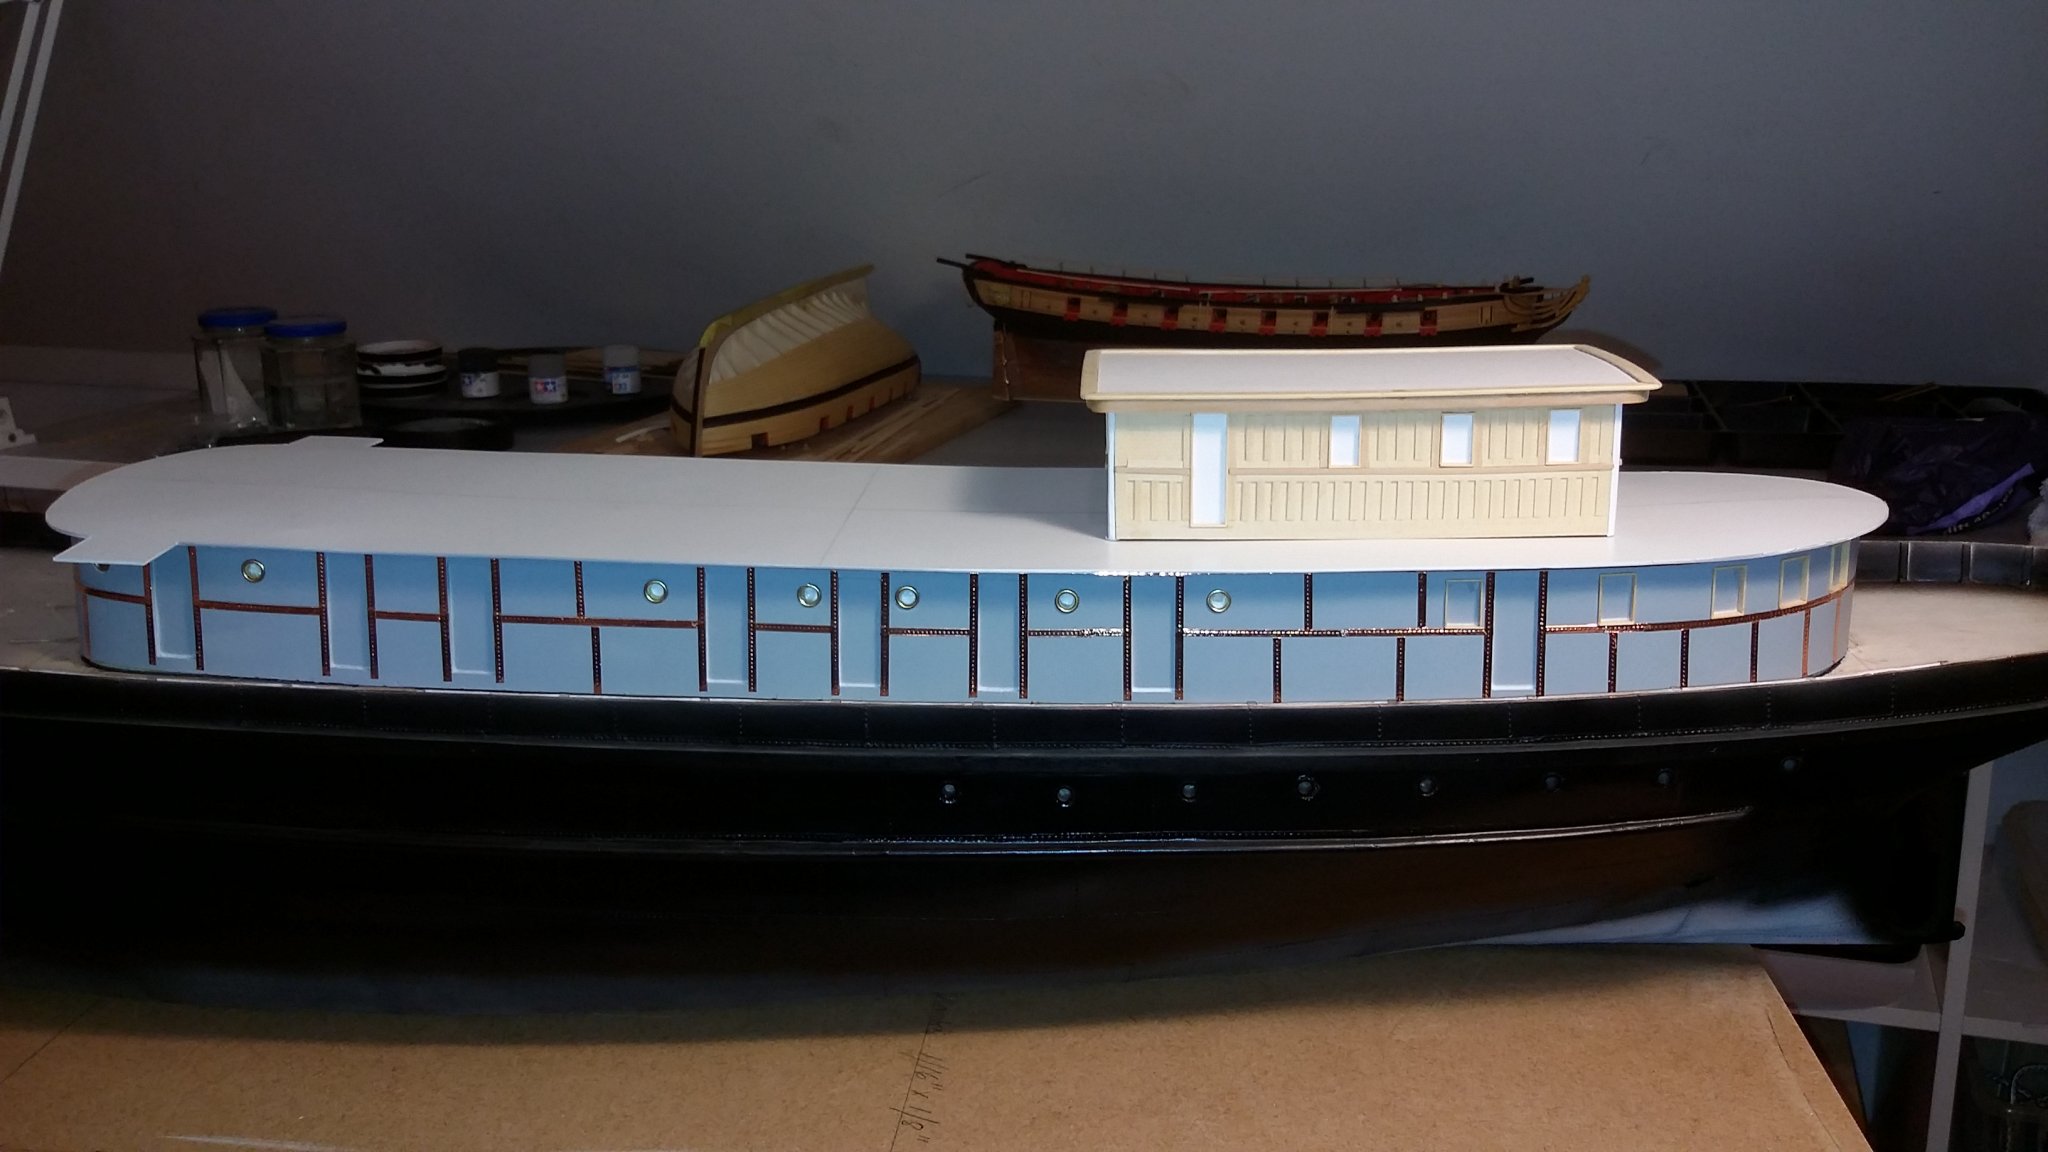
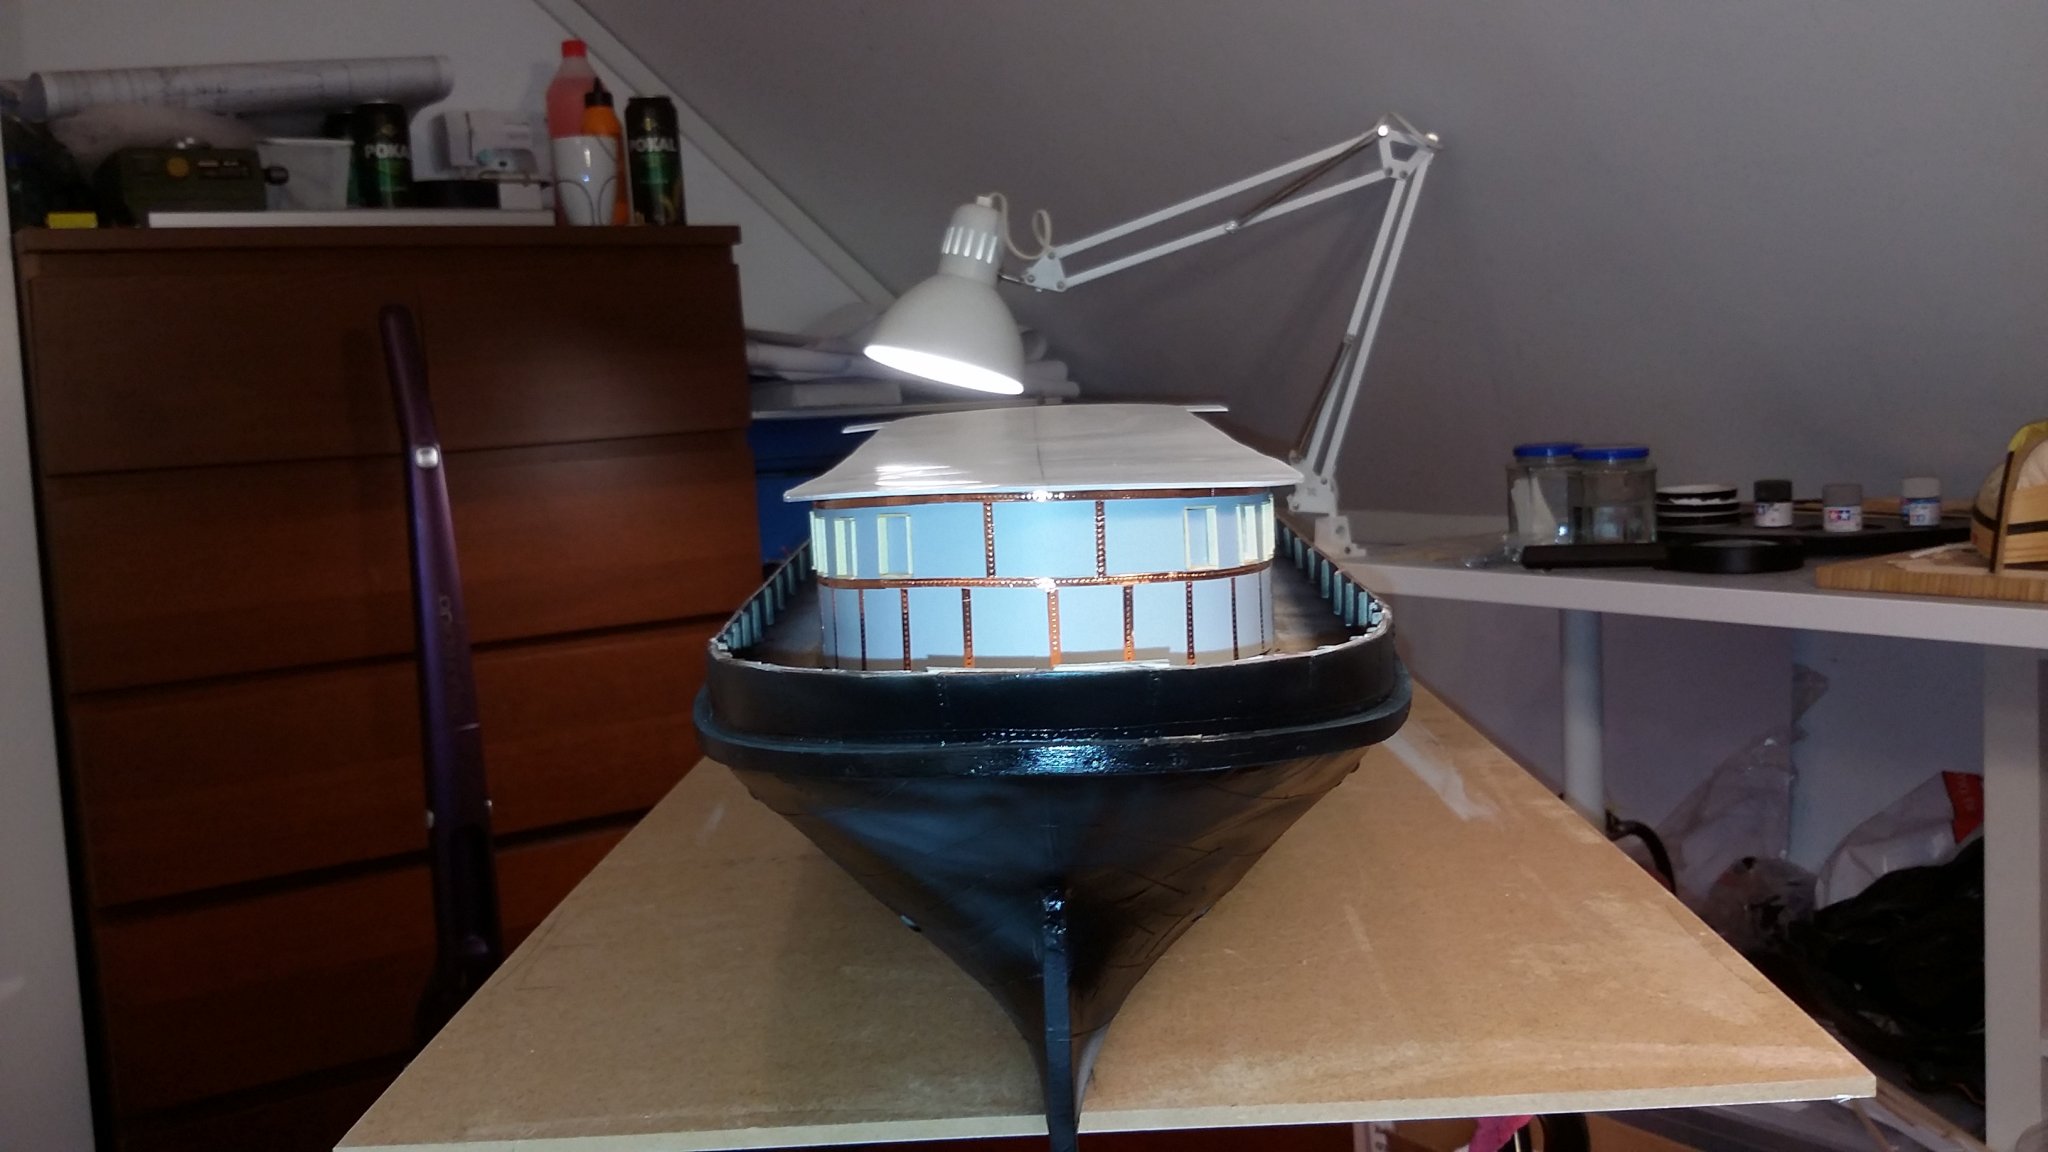
its now time to get some photo out again,
i have get the portholes on ,the first layer of the top coat on the hull is on ,
i also painted the main dekk cabin( yust the first layer) and also the rivitts bands ,
the windowns frames is install .
am working also with upper rear dekk cabin and when this is finish i wil get to work on the front cabin.
svein erik


Hi Erik im so happy someone is building this beautiful boat. splendid work and wishing you sucess , following and looking forward ahead . Vlad
- svein erik, Nirvana, John Cheevers and 4 others
-
7
-
On 3/29/2020 at 10:18 PM, Petit Loir said:
Hello everyone,
I'm happy to have come across the modelshipworld website and feel less lonely in my interest for model boatbuilding, in which I'm a complete novice, albeit with some basic manual skills.
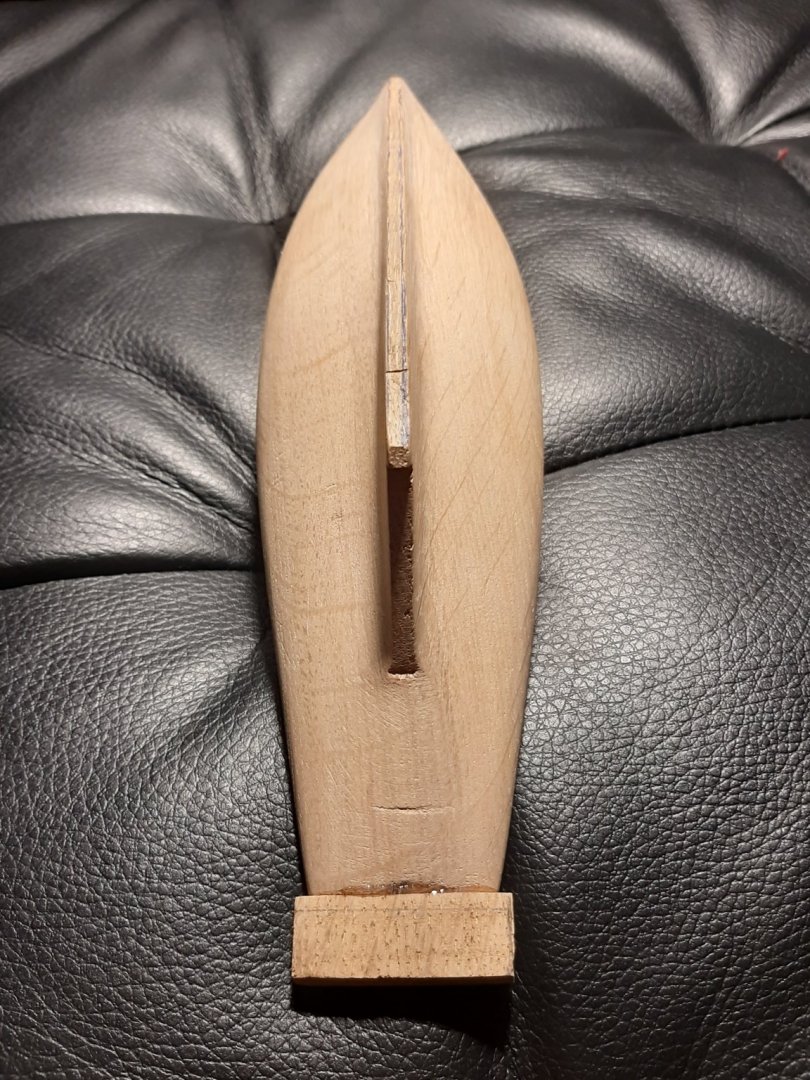
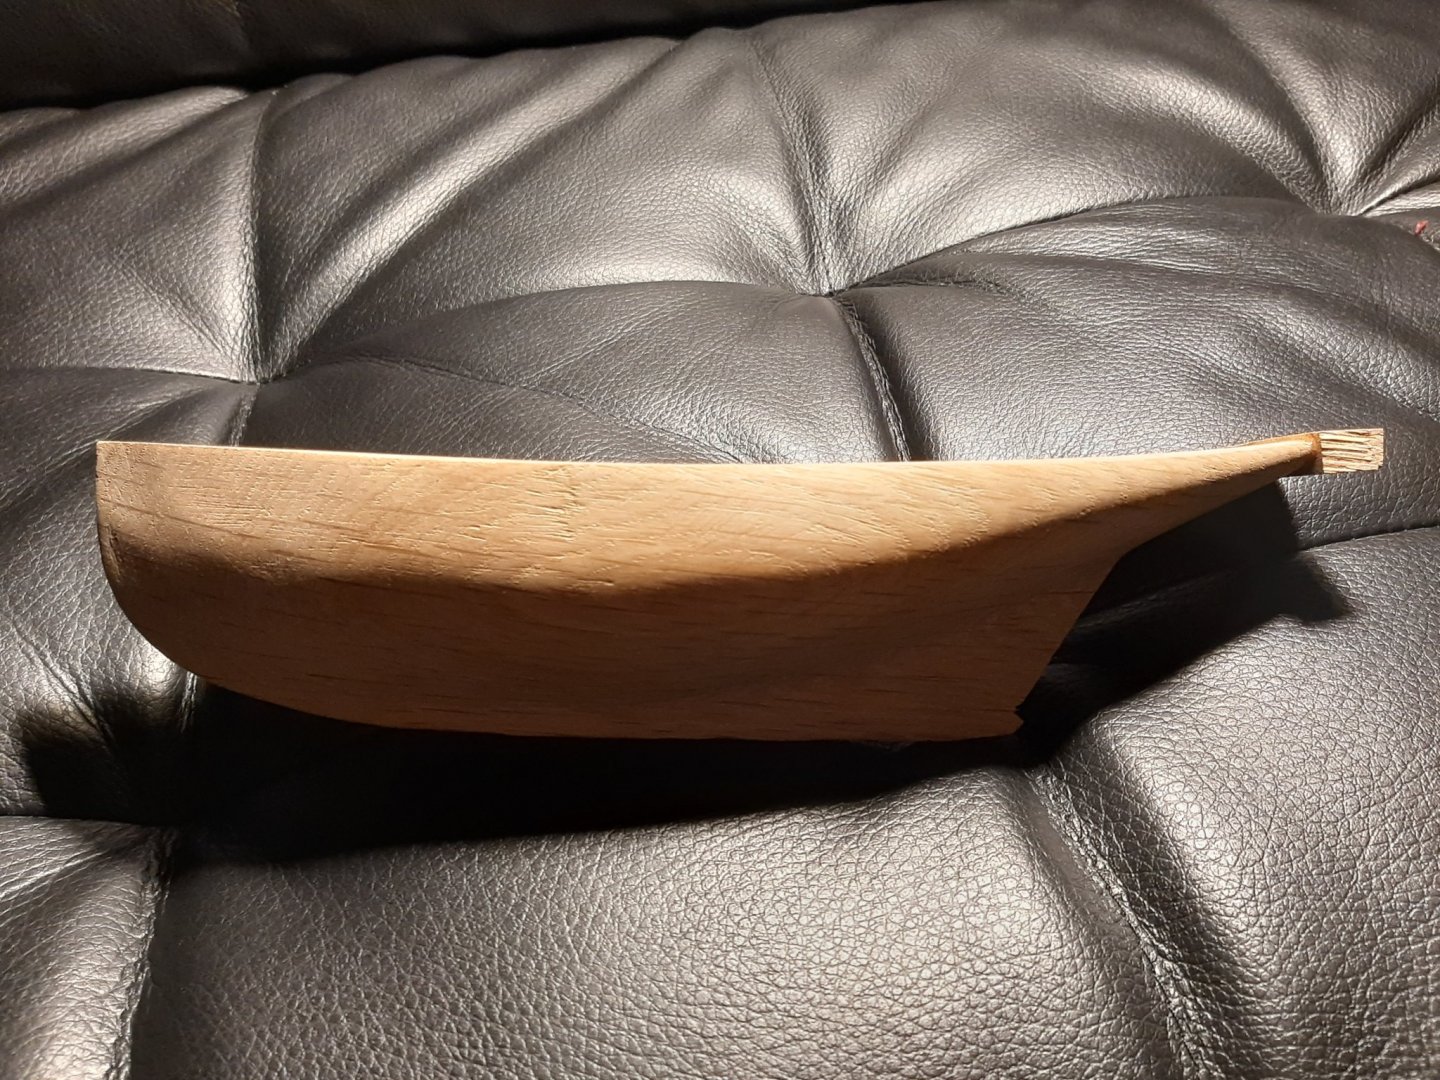
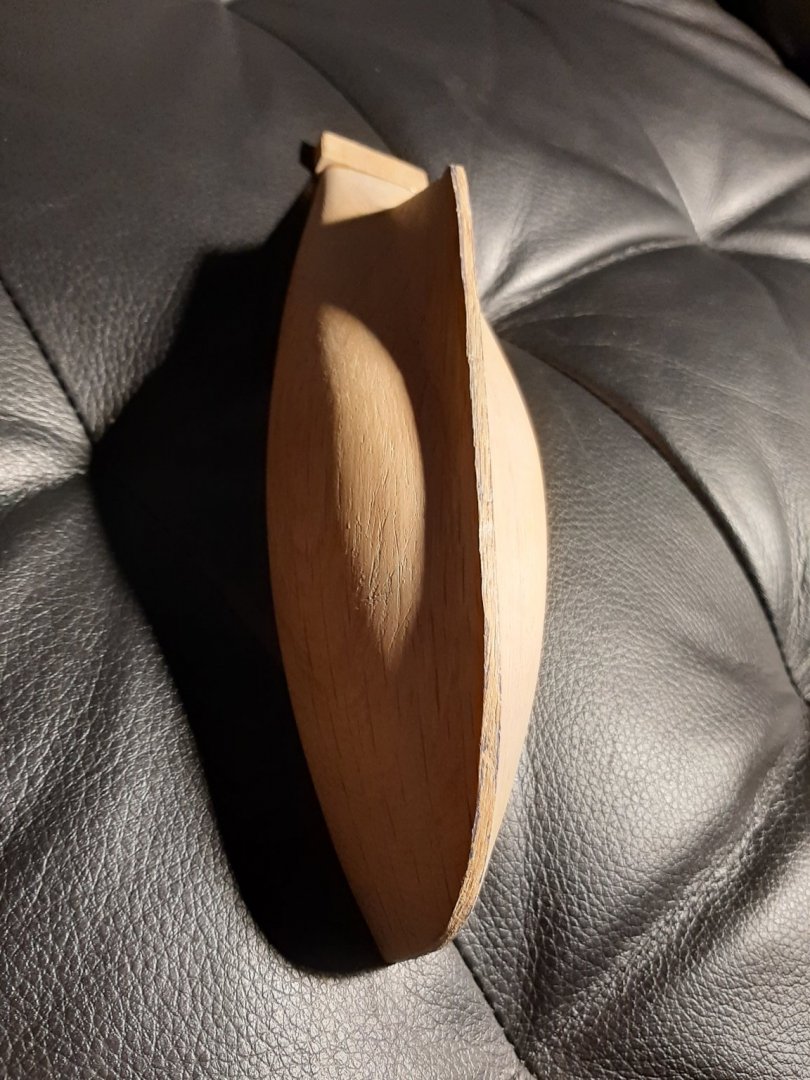
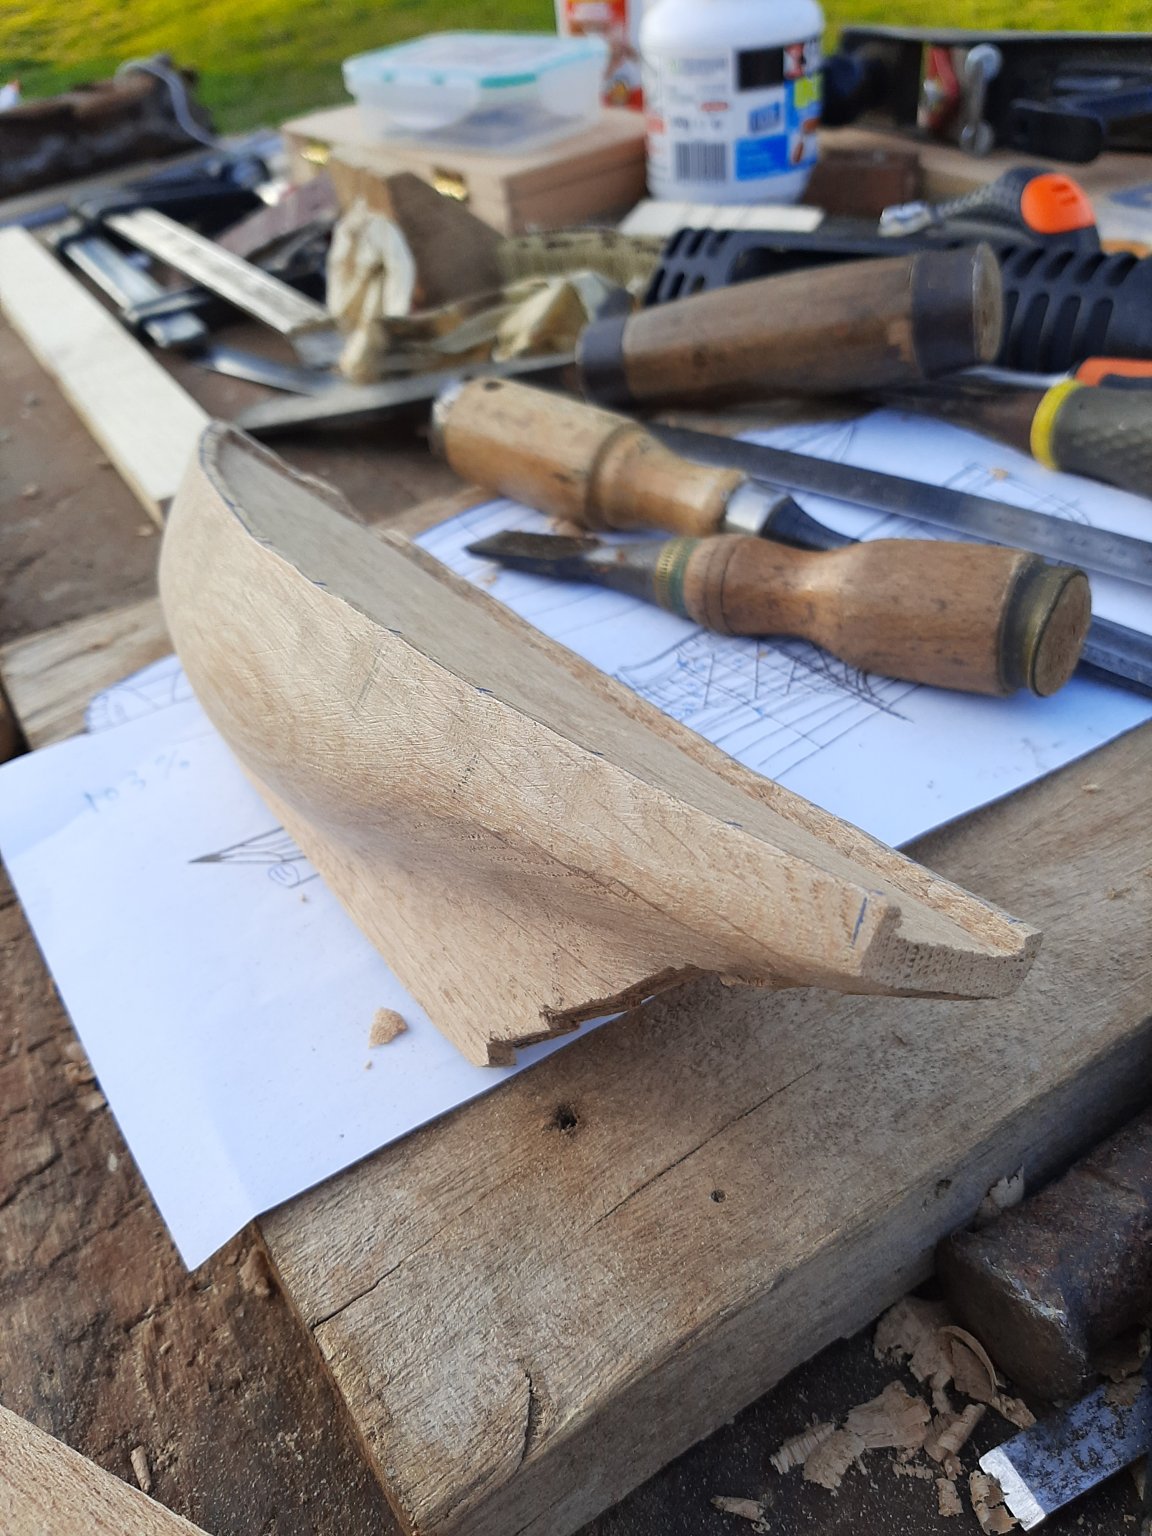
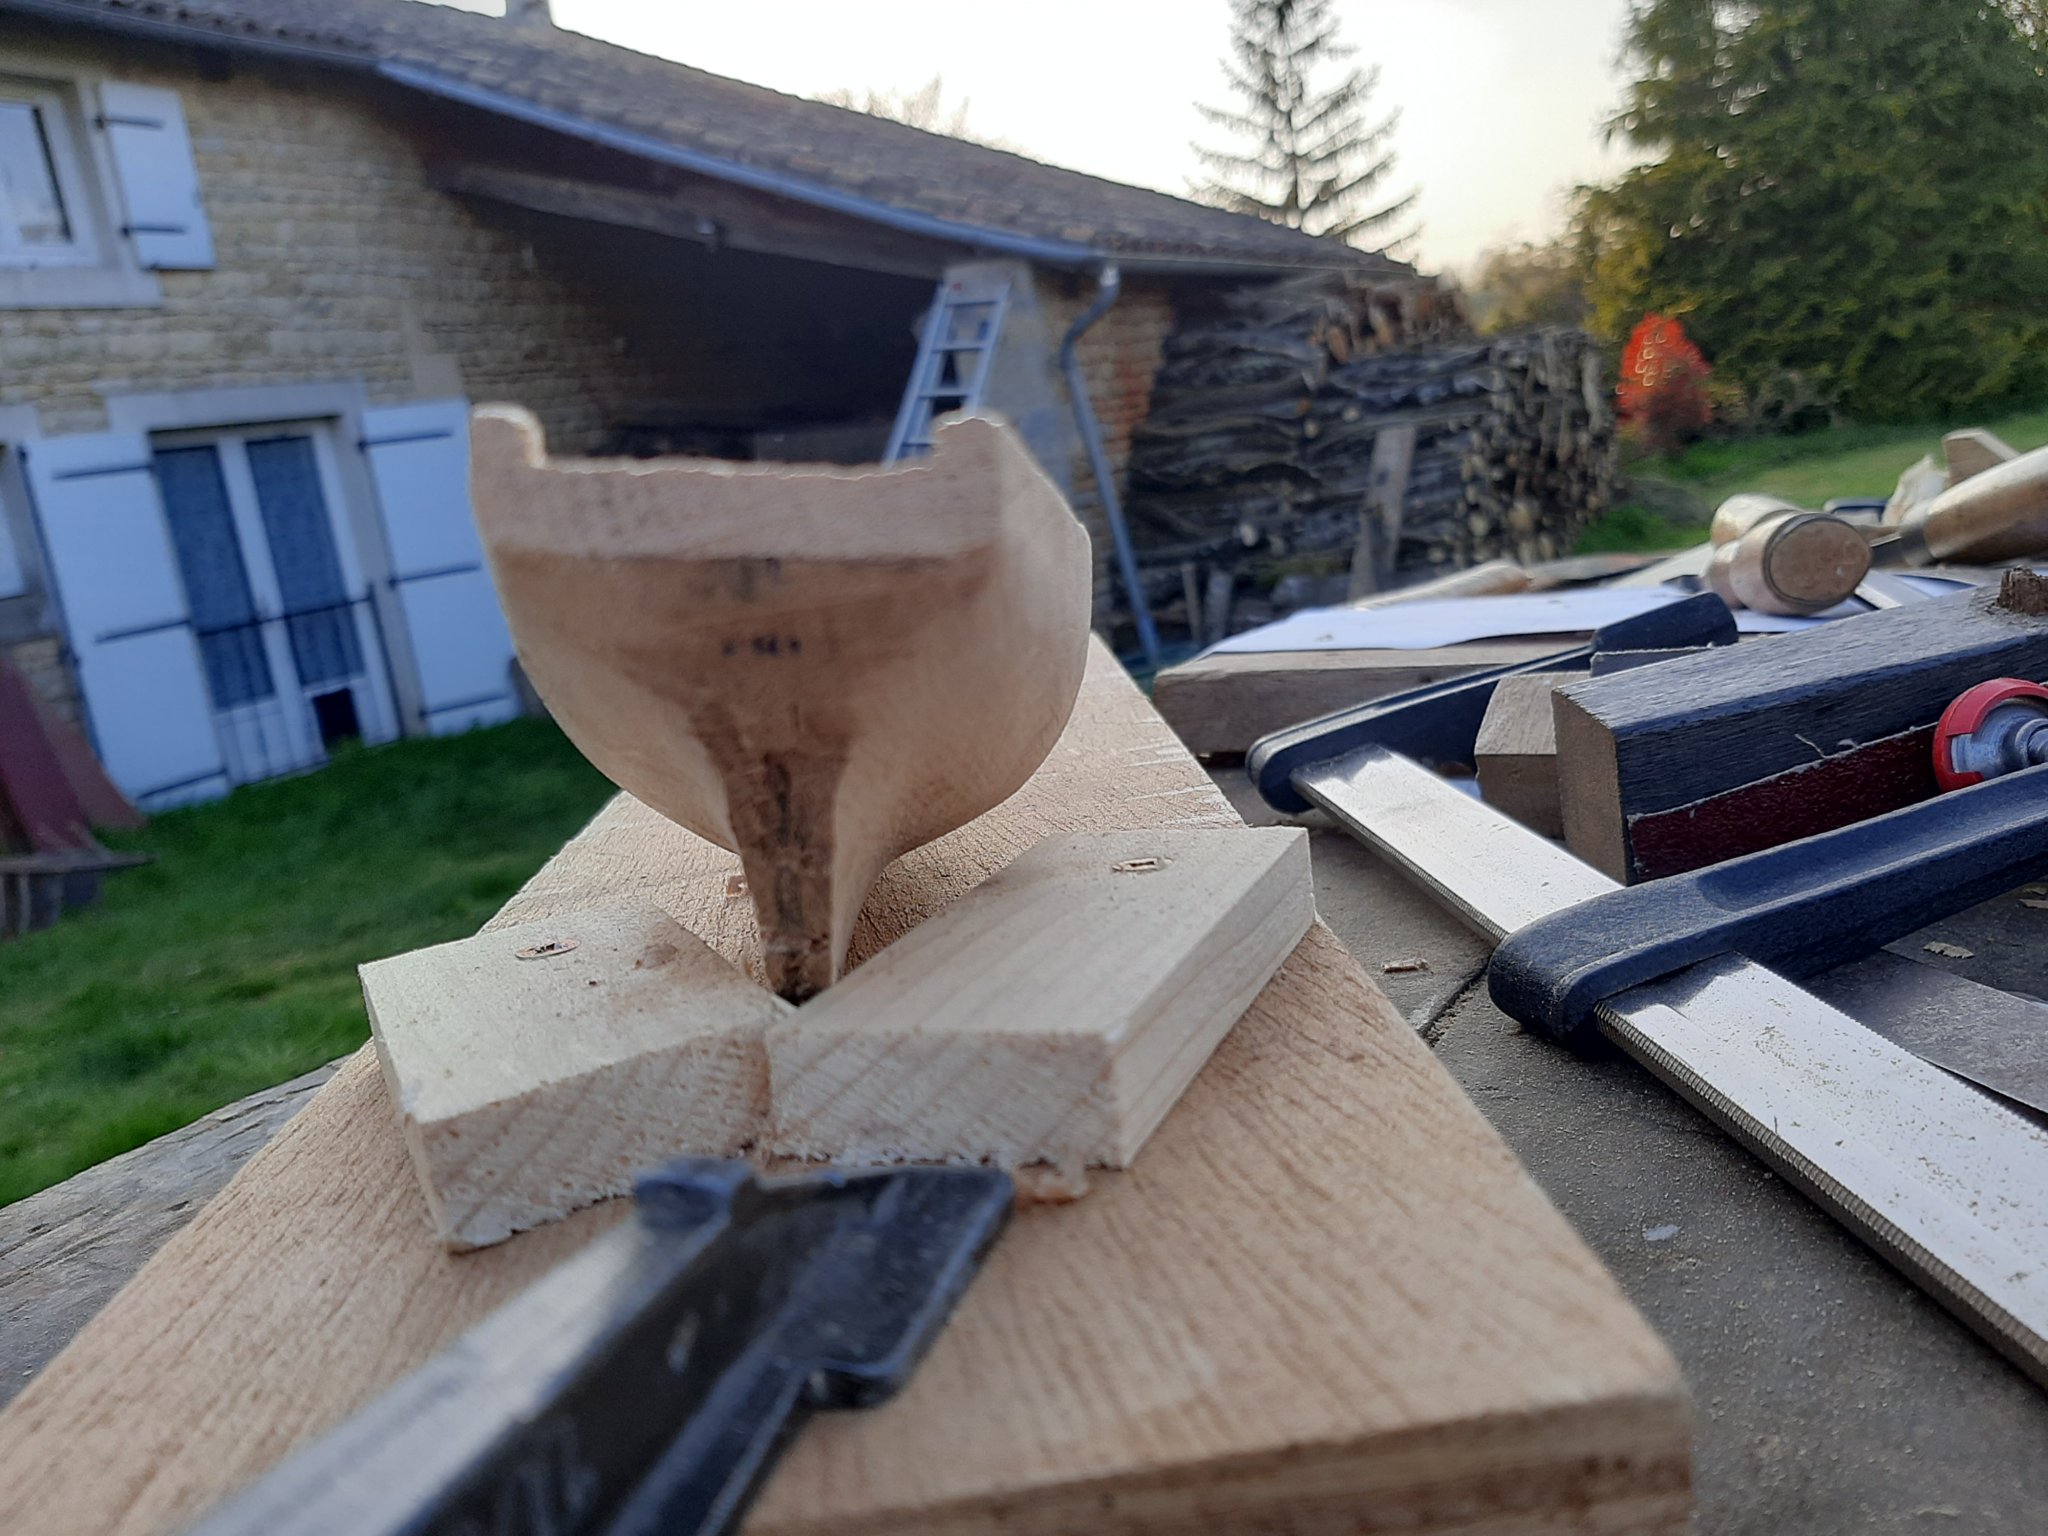
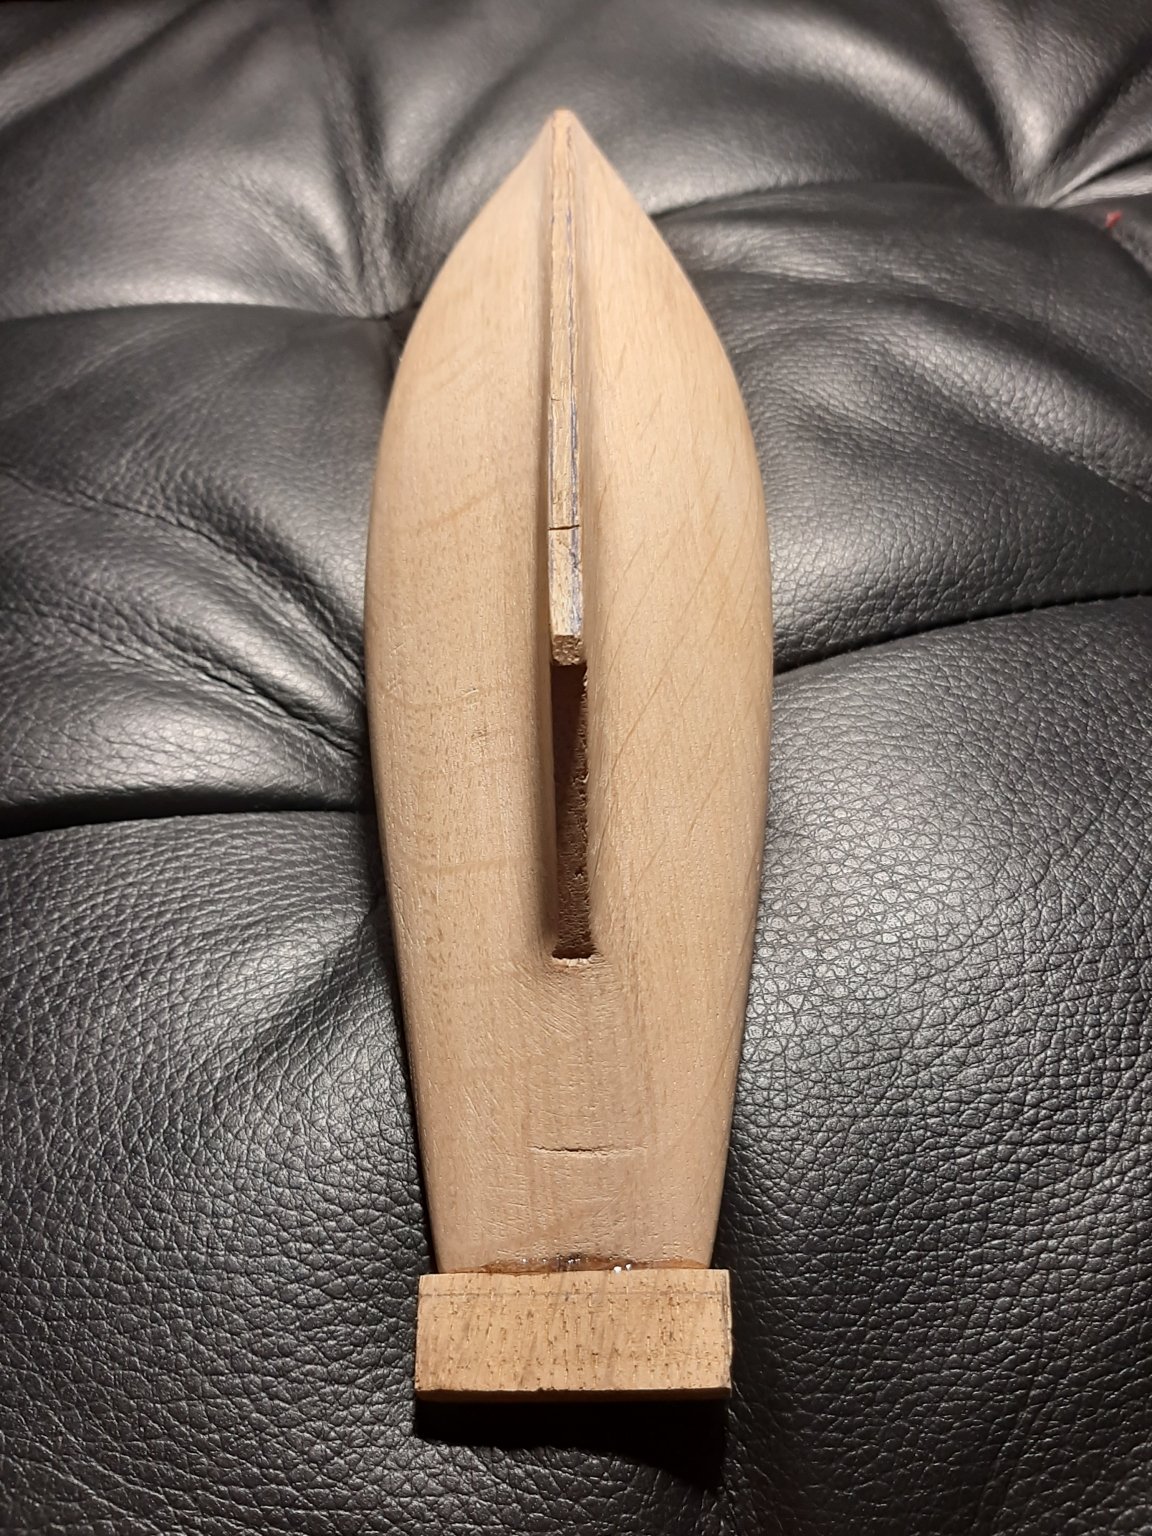
A few photos of my first model boatbuilding project, a bit unorthodox but for some reason I wanted to carve a hull from a solid piece of wood, I had oak on hand. Length 25 cm, scale 1/68 (?).
Progress has sufficiently encouraged me to go forward with a complete build from scratch, I'm now pausing for research and finishing the hull so it truly fits the plan, using card cutouts of the frames for visual reference. I wish to build her historically correct from the time she was a pilot in le Havre, France.
If you have any advice or tips, I'm all ears.
Well done to all model builders who posted their projects, it's inspiring and encouraging, daunting sometimes when I see the superb detail.


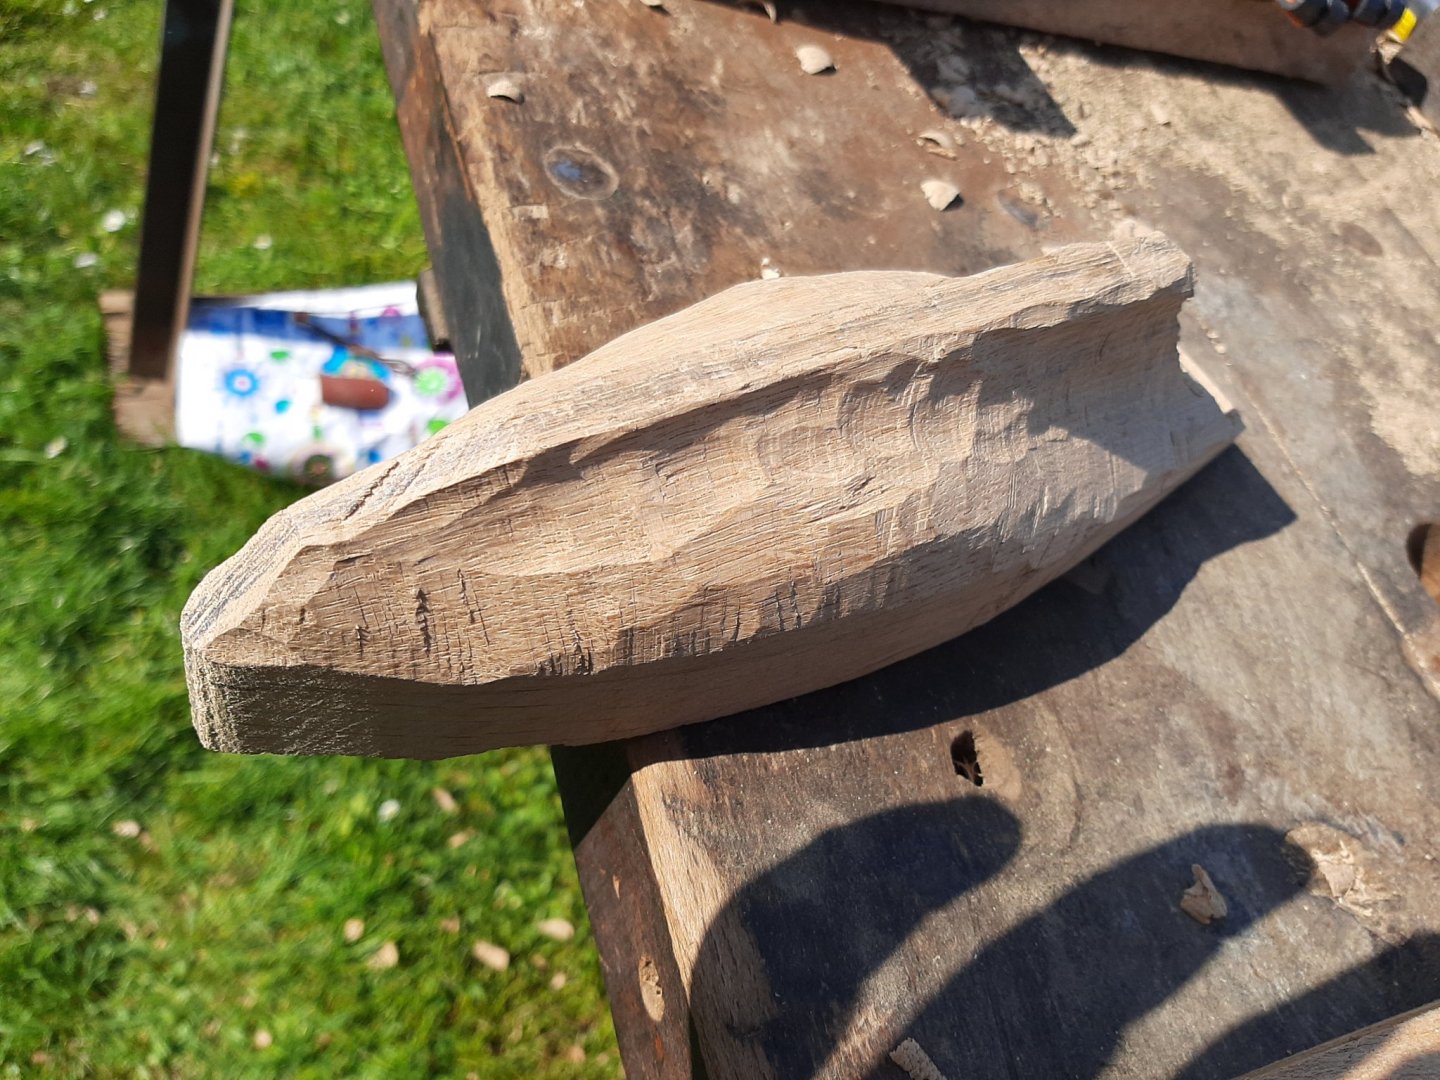

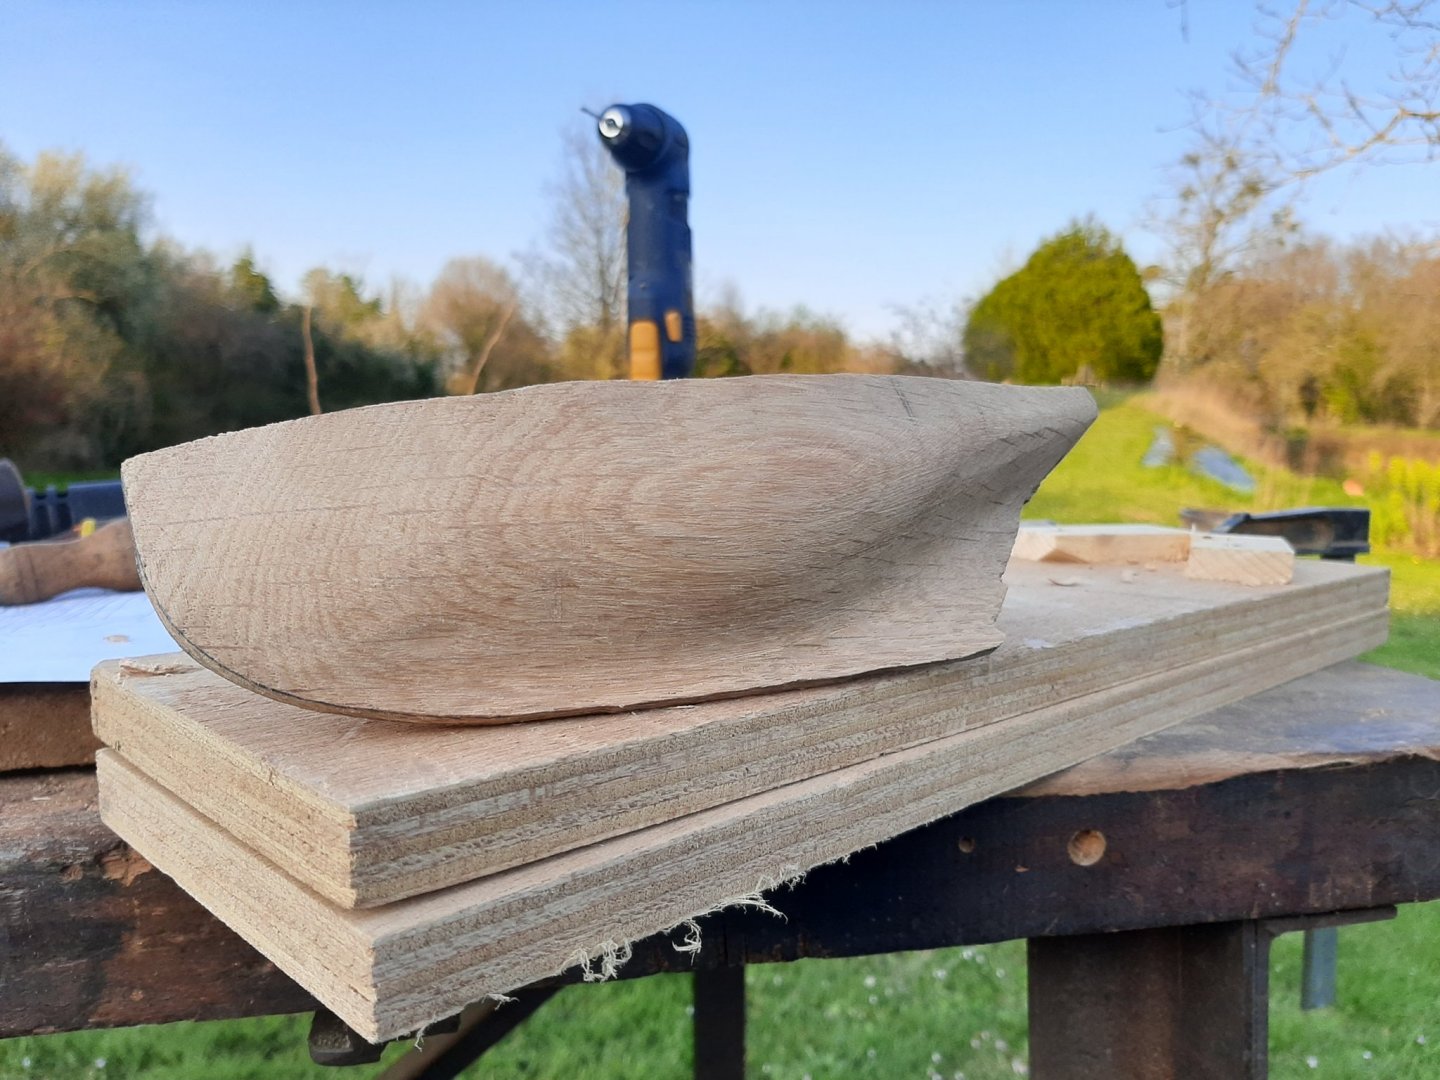


Hello very fine carving . this looks like oak to me, hat off that wood is beast to tackle
") congratulations.
congratulations.
- dvm27, bob from barton, bruce d and 2 others
-
5
-
Hello Nenad, been eyeing your build here and there, hat off in that scale lovely work, go on continue. i am about to fiddle around bowsprit as wel. Vladimir
- mtaylor, popeye the sailor and cog
-
3
-
Splendid work Sir. thanks for sharing.
- Keith Black, KeithAug, JpR62 and 12 others
-
15
-
On 5/16/2020 at 10:02 PM, Kevin said:
good evening everyone
starting from the front i am now working aft to ensure everything is where it should be, but not necessarily complete, taking her outside has allowed me to look for some missing bits and to clean her off again
i never did find the otter board hinges, so make some

glazing of some of the windows using white pva glue
steam winch mounting board is now pinned into position, the winch will be one of the last items to be fitted
and the boat deck supports get a yellow coat, these will be cut to size when the superstructure get fixed on, as they sit on top of the capping rail


This is gorgeous indeed Sir , lovely work, thanks for sharing. steel plates wow .
-
Hat off Sir this is wonderful craftmanship and build. Simply beautiful. Congratulations.
- Blue Ensign, rafine and Moab
-
3
-
-
12 hours ago, English Rebel said:
My hats off to you sir, you are one master model builder. To tackle this from scratch is an epic adventure.
Alan
Hey English Rebel, than kyou for stopping by and nice comment. i am beginner though
I checked your projects, and foud fifie - - that model of amati i am eyeing at as well. I will watch the build! take care
-
-
8 hours ago, vaddoc said:
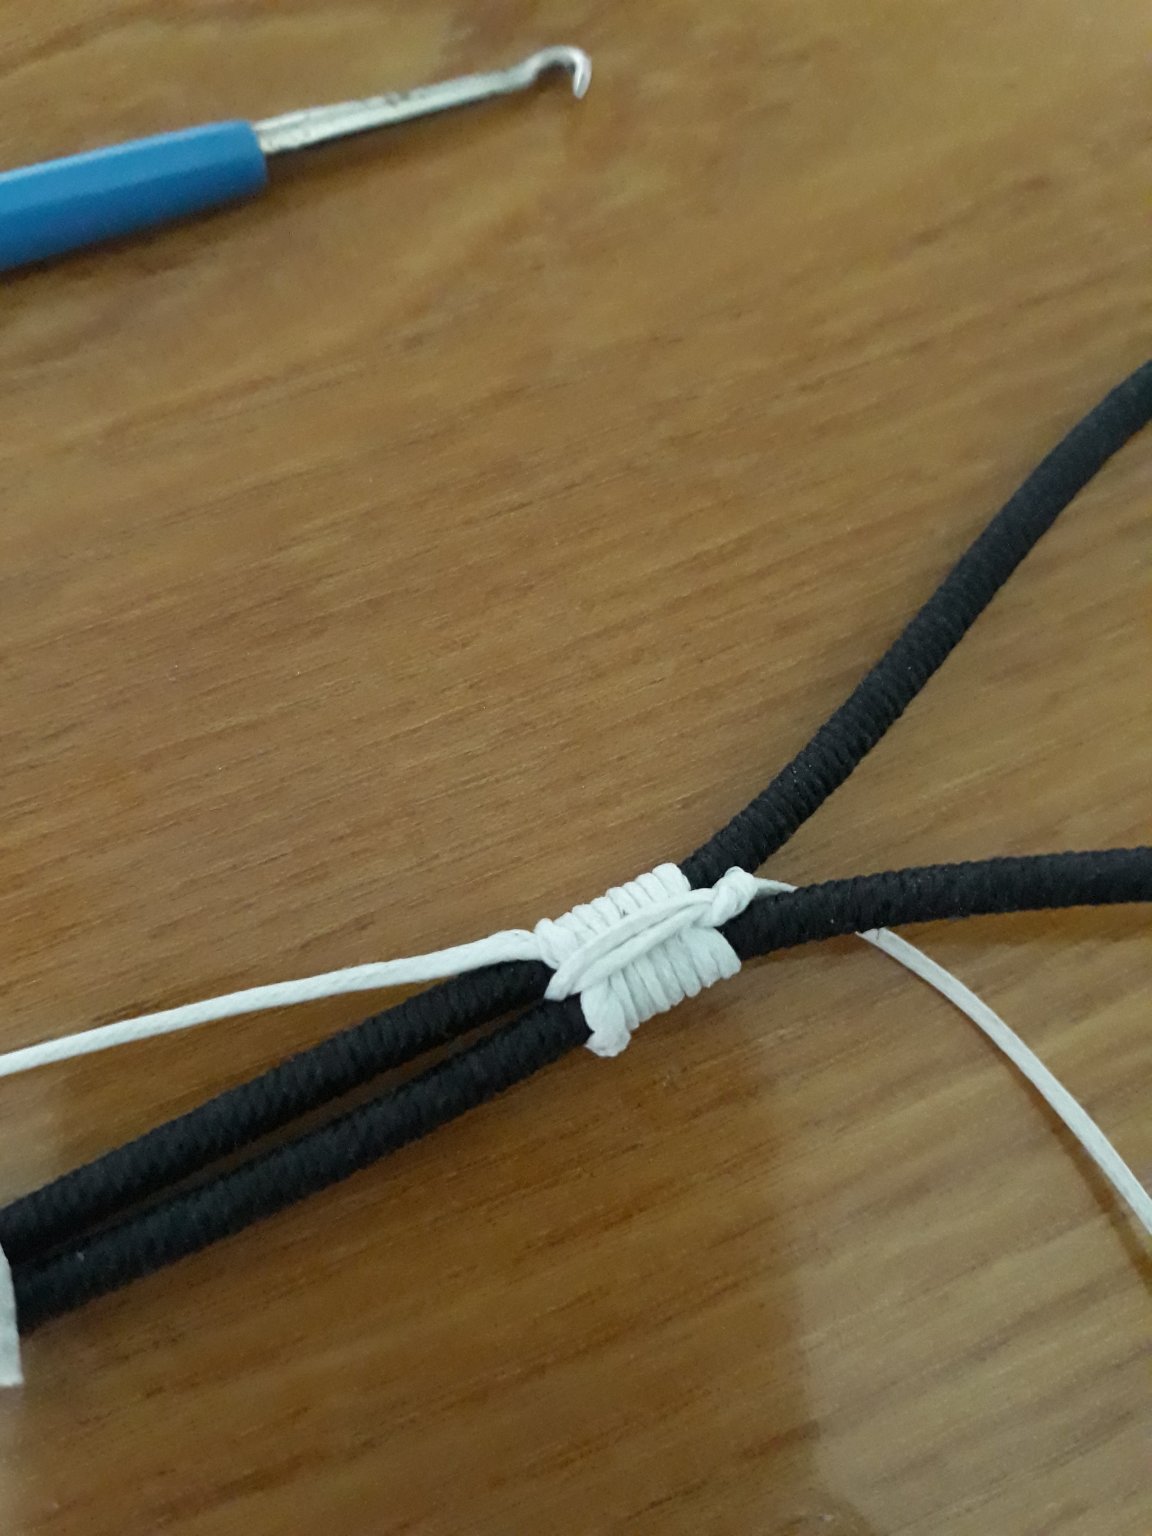
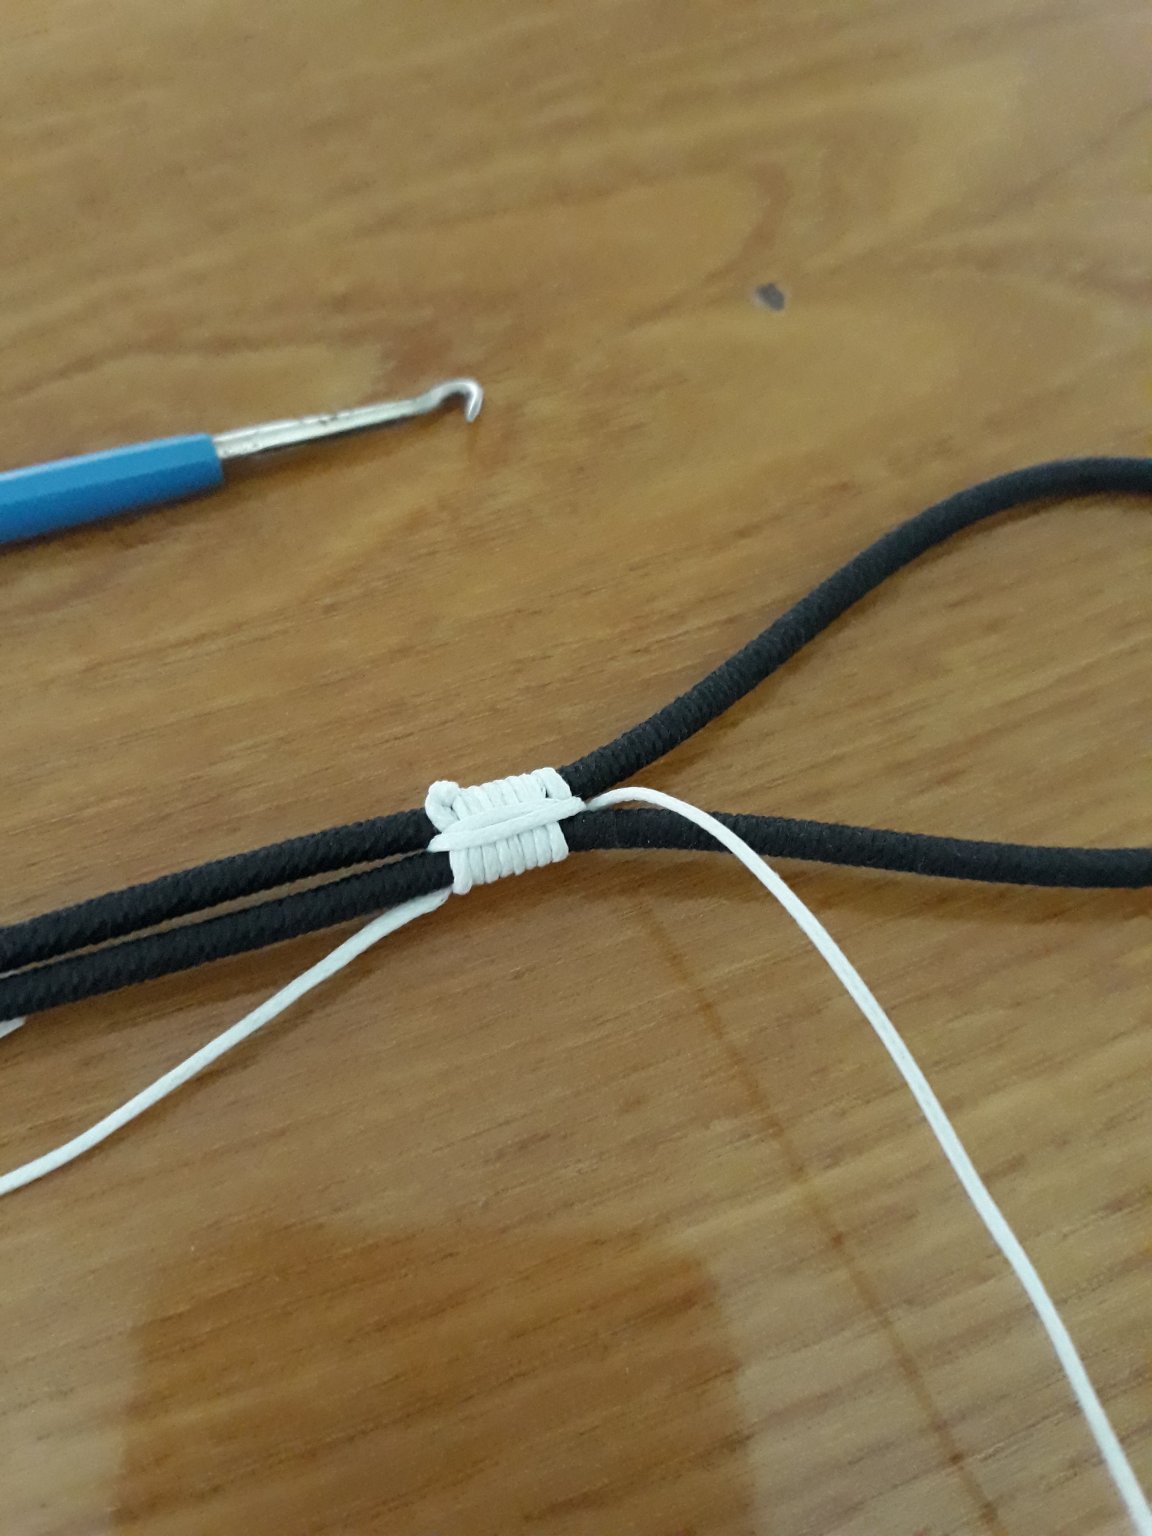
Is your rope 3 strand Vlad? I mean, is your rope made of 3 individually made smaller ropes? If so, splicing is very satisfying and ultimately quick and time effective. If your rope is made from threads, splicing does not work well. I used splicing extensively in the past and that was my experience.
Vaddoc it is 3 individual strand. I will try to learn and put splicing eye for backstays eyes. fingers crossed though :). I was browsing thru your old brilliant sail boat project,you are creative when lack of power tools. - i can definitely cope with that struggle /fun. it is invention of new methods of crafting materials that makes this hobby fun. at least for me.
-
-
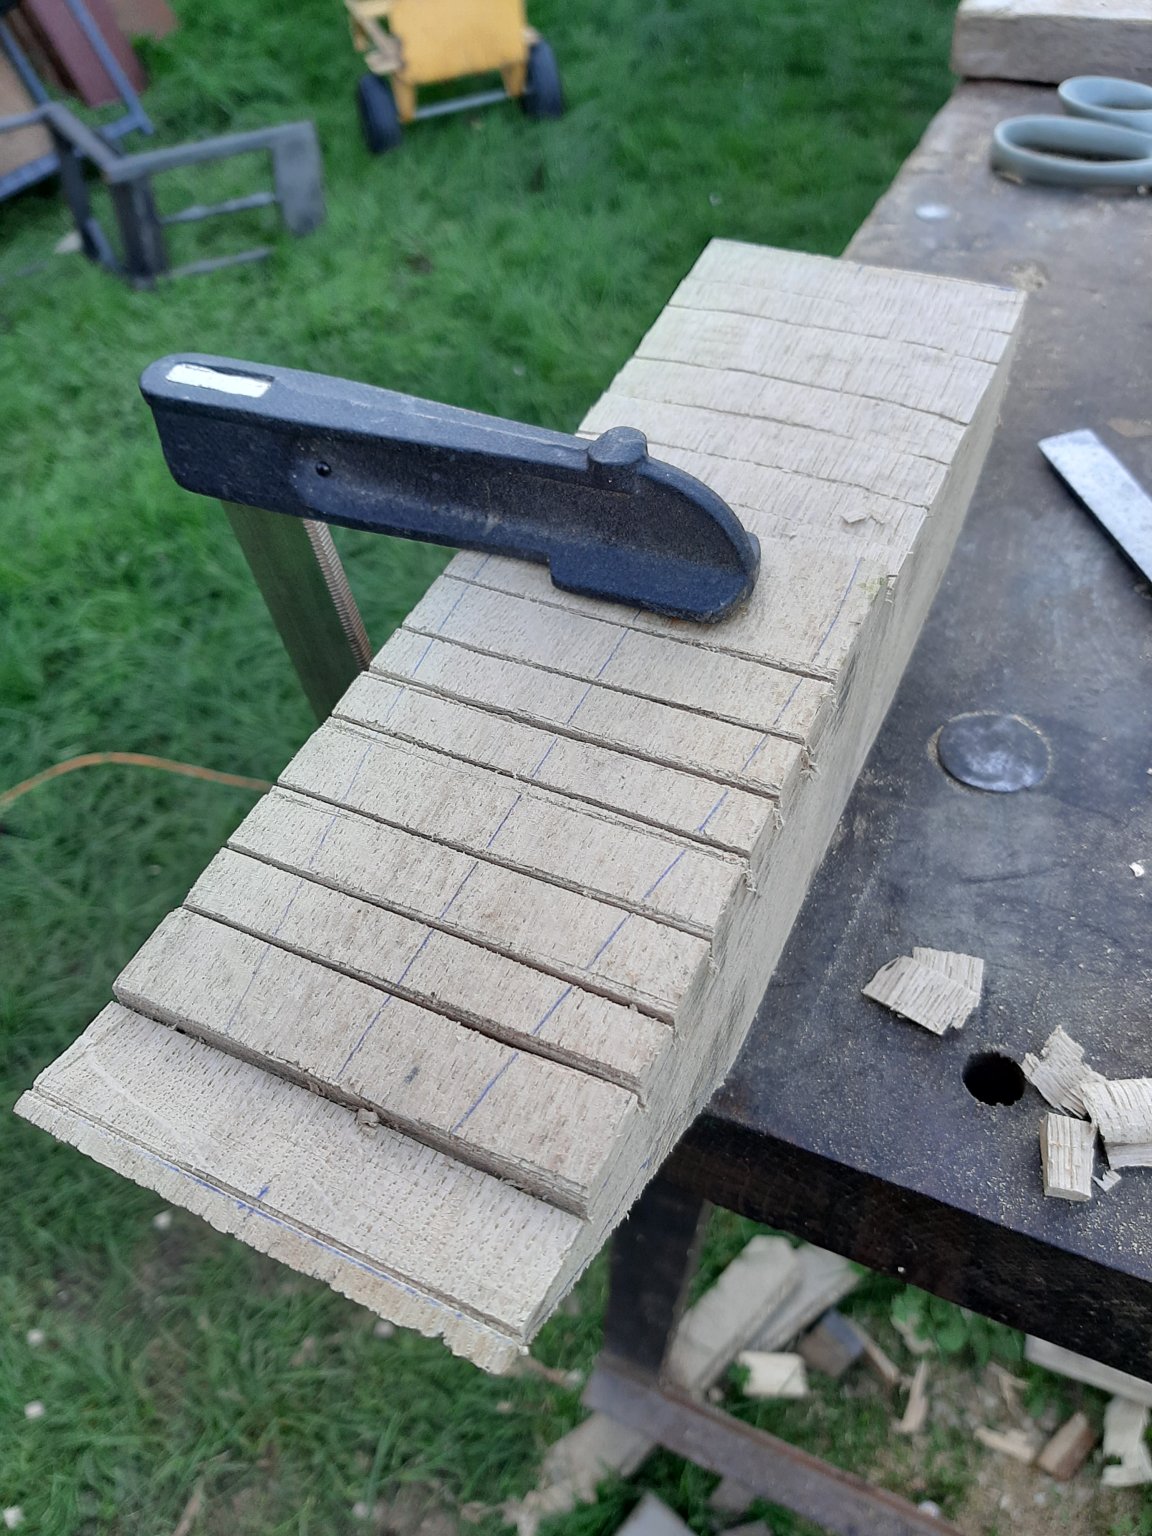
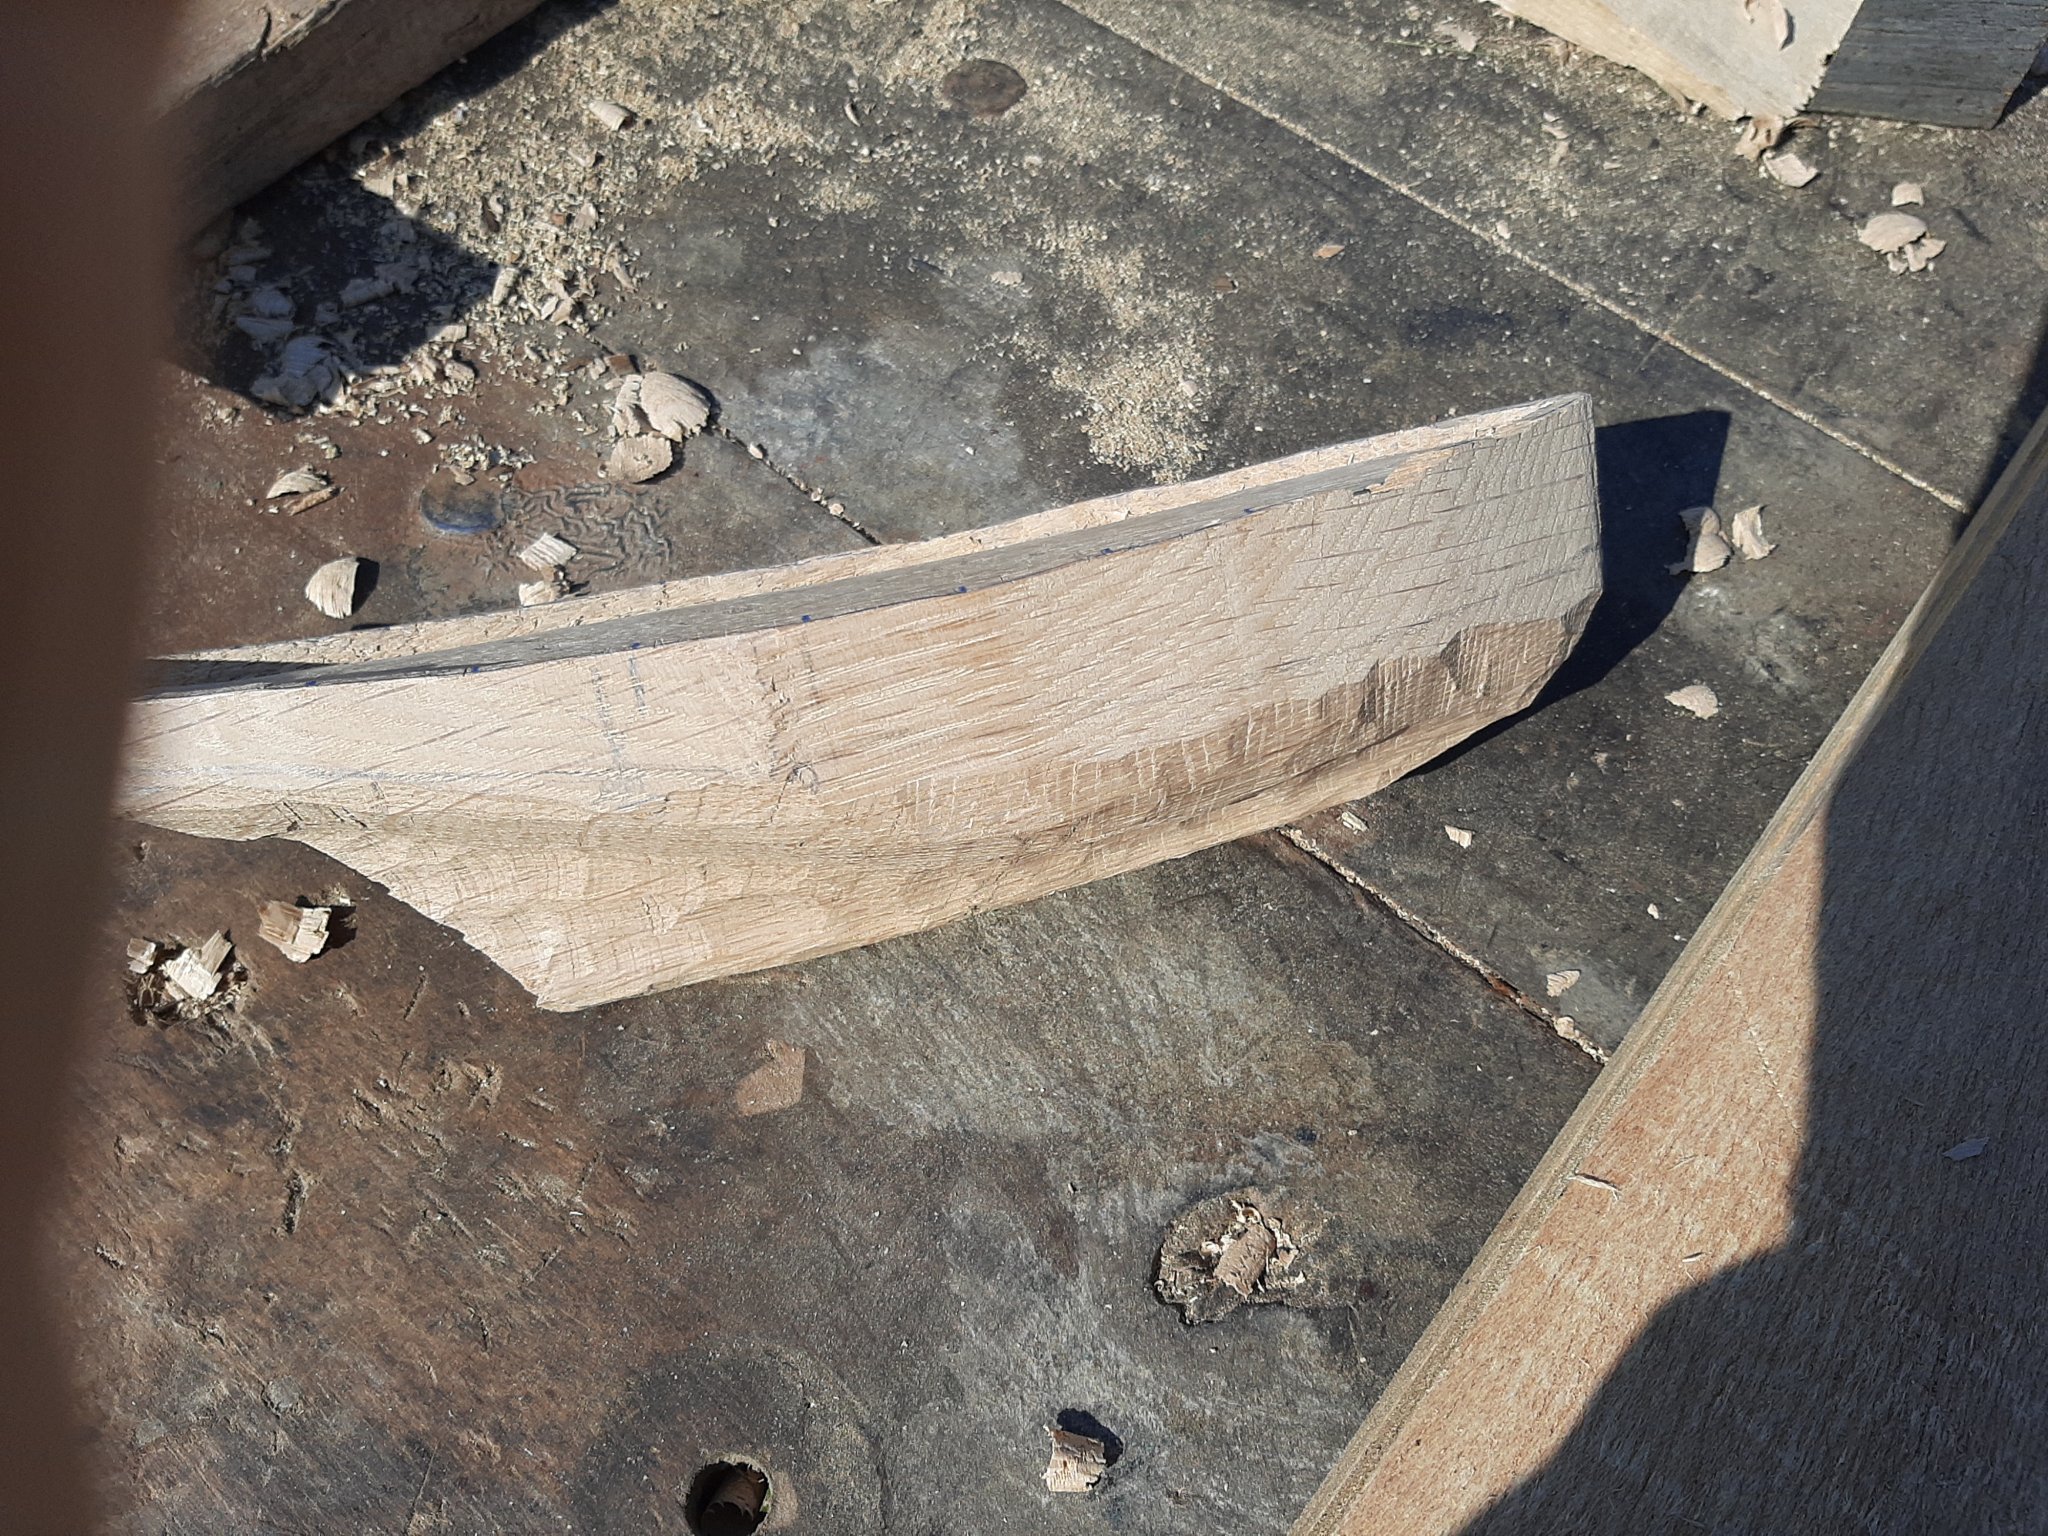
On 2/15/2015 at 11:00 PM, vaddoc said:
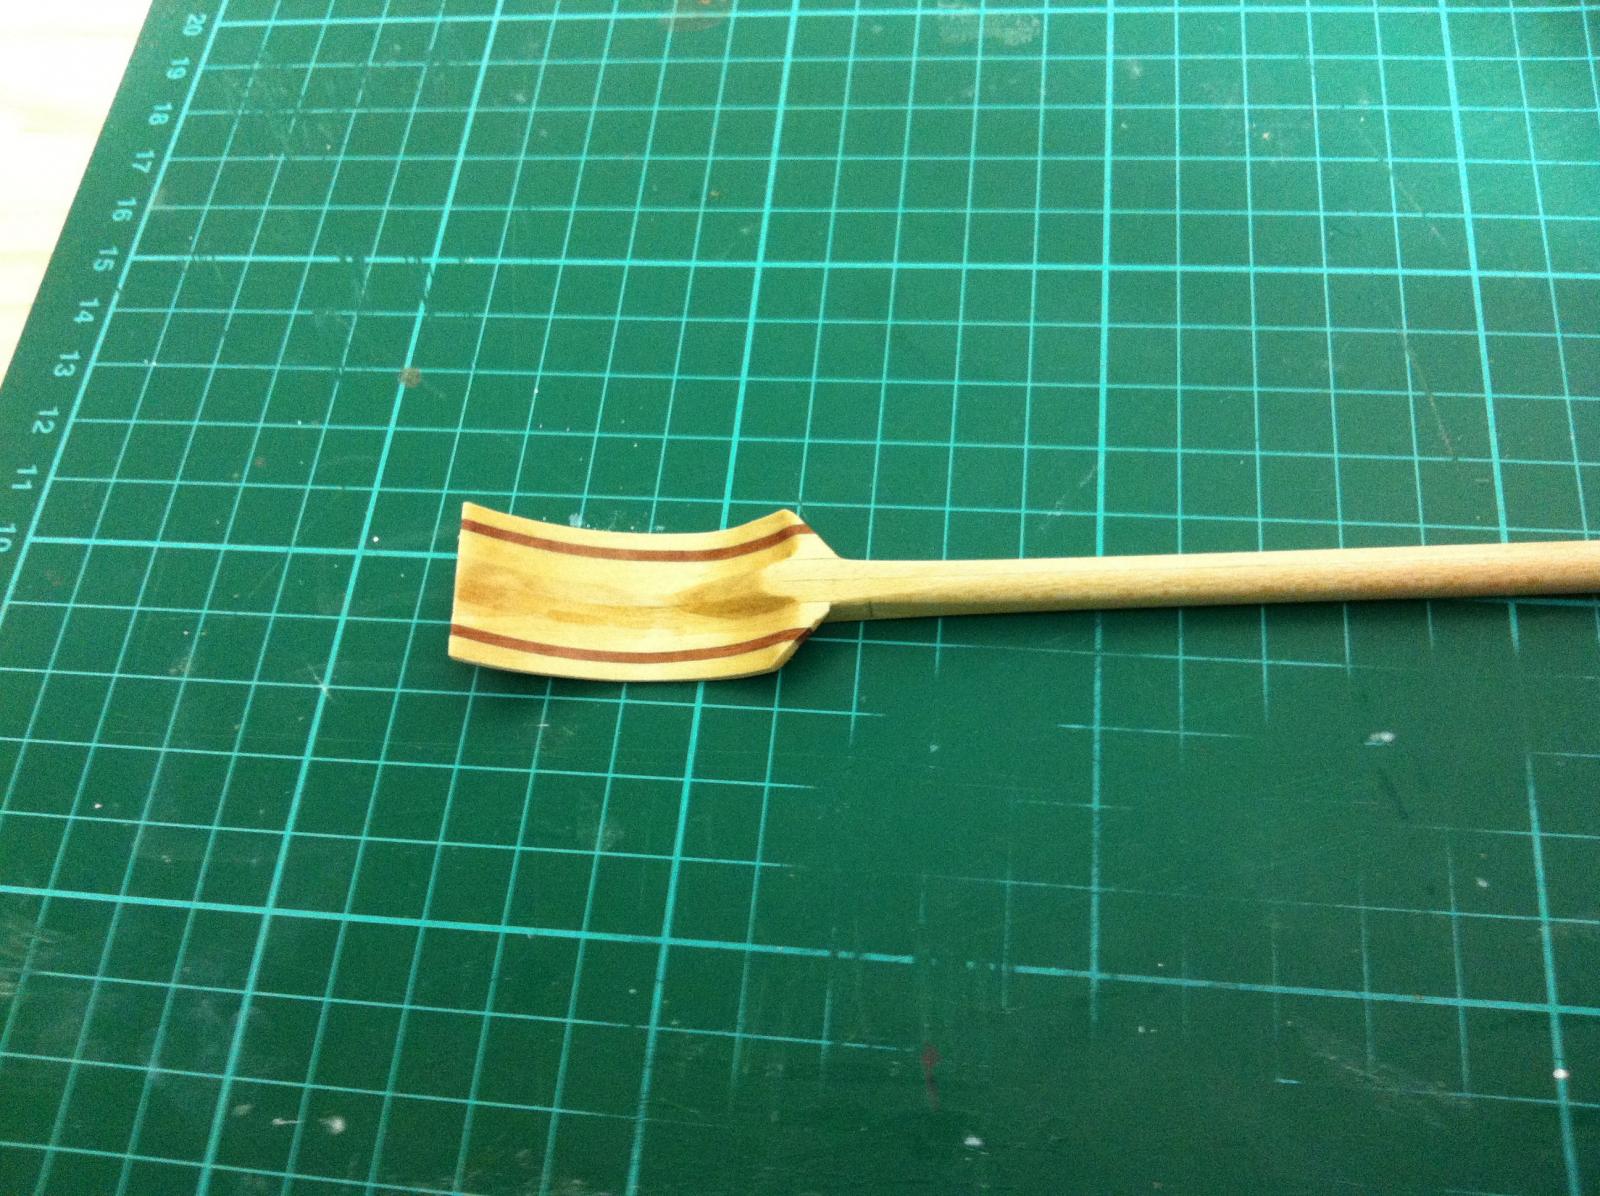
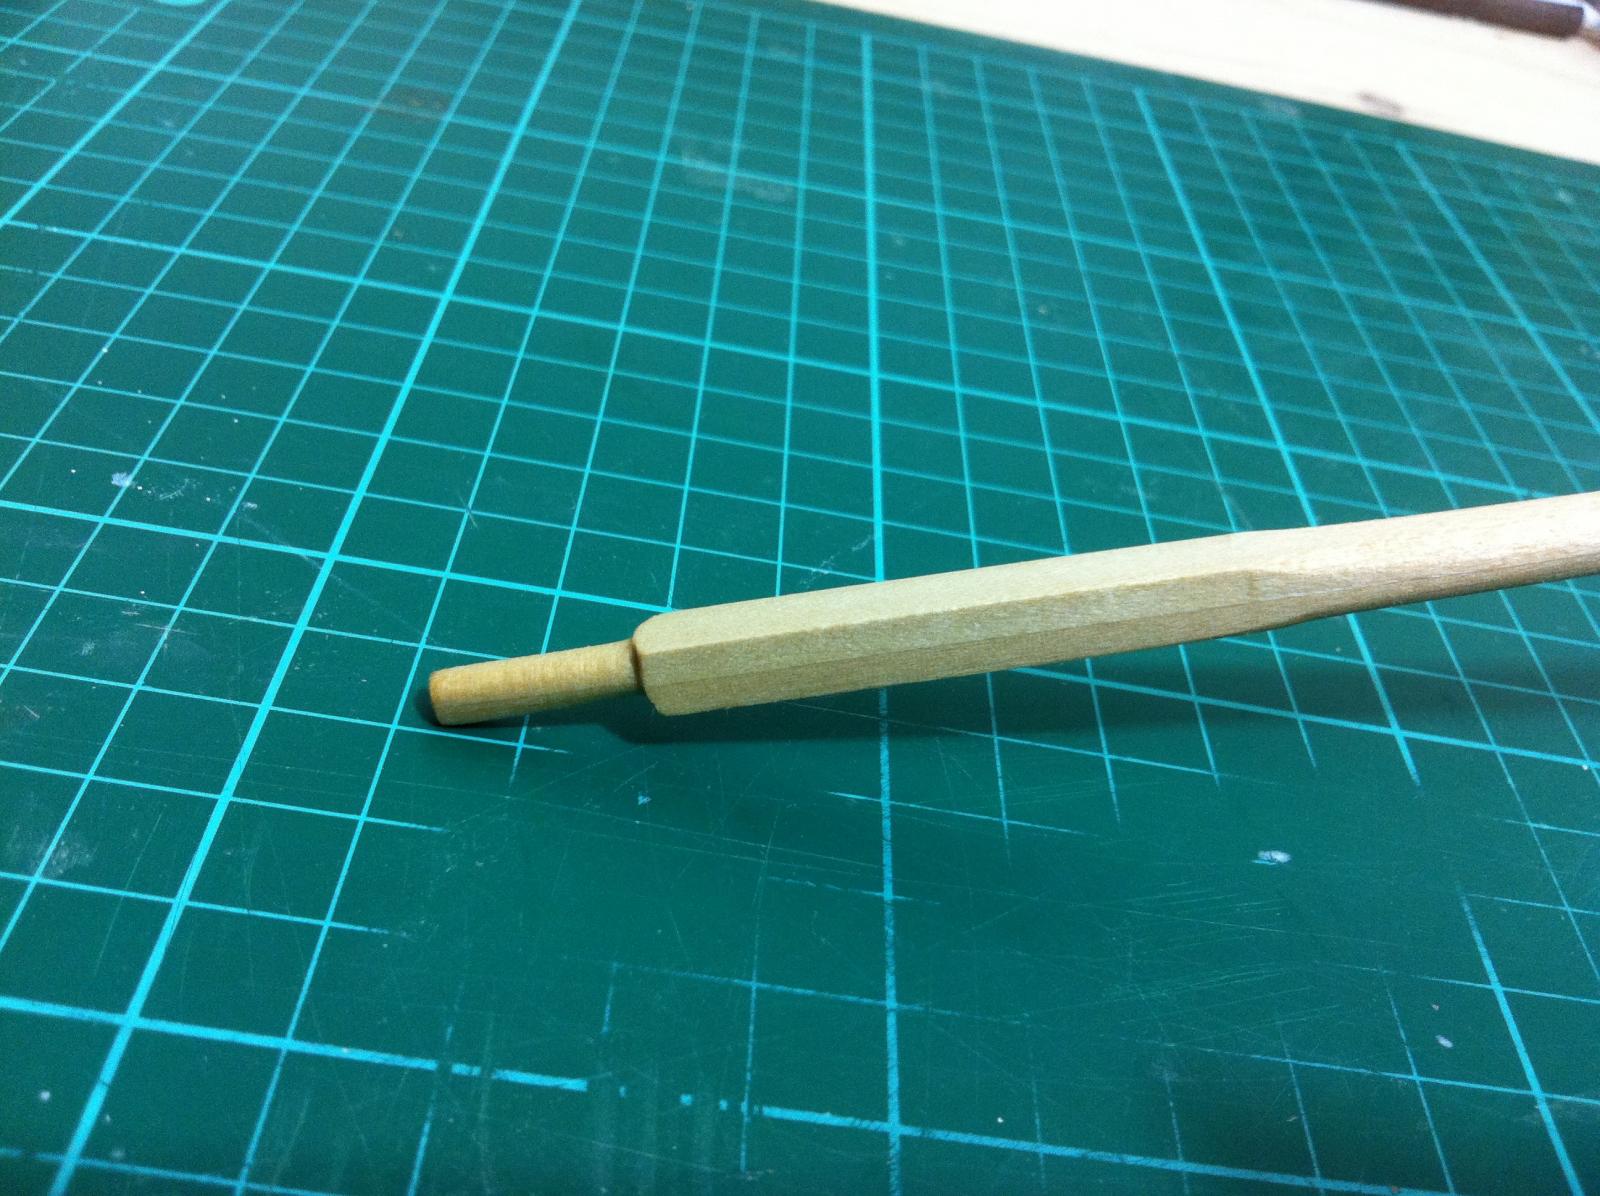
I had another go today making the oars. I watched a video on you tube of a company making high end oars and copied their method. I also found out the maths behind the length oars should have and for this boat its 32 cm, much longer than the first attempt.
First I made a rough pattern of the curve of the blade from scrap plywood.
Then I glued a small piece at the end of the long pieces that will later on be glued together. This because the end of the curve goes beyond the width of the strips. I used lime for two reasons, because it sands easily and also I have lots of it.
I then made some more pieces from the pattern. The darker ones are pear, but these are cut at an angle to the grain so that when all are laminated it will provide some strength against breaking.
All are glued together
And glued again
This is how it looks before the sanding spree
The corners near the shaft where cut off and then carefully the oar was sanded into shape. The improvised table for the Dremel was very useful.
The blade was shaped first and then the shaft.


This is how the oar came out, it certainly looks better.

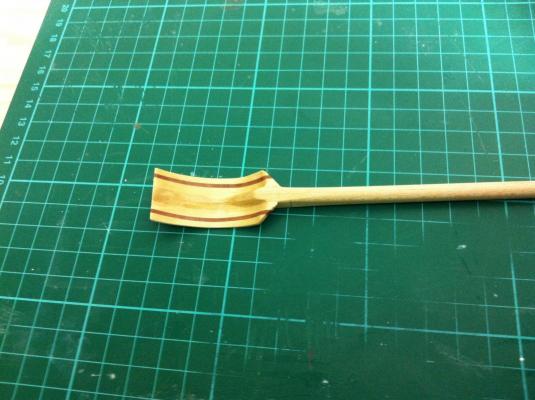

It took half a day to make one oar and the chances of all 6 coming out reasonably alike I think are slim. Might be better to go for flat ones which should be easier to make.
Amazing stuff Vadoc !
-
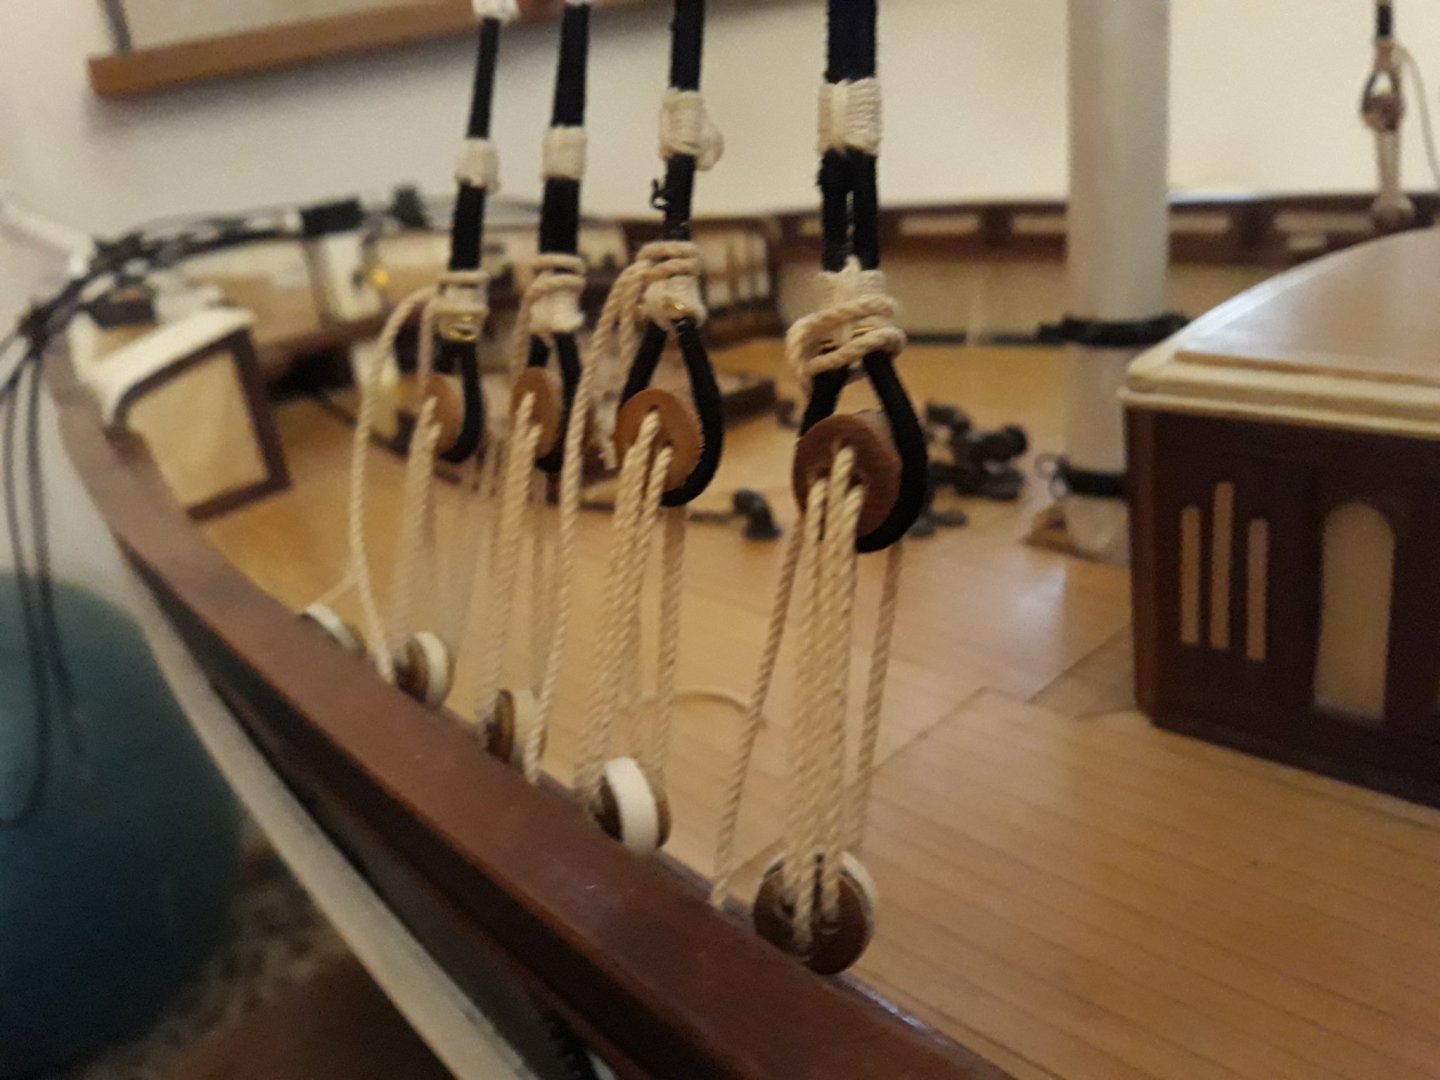
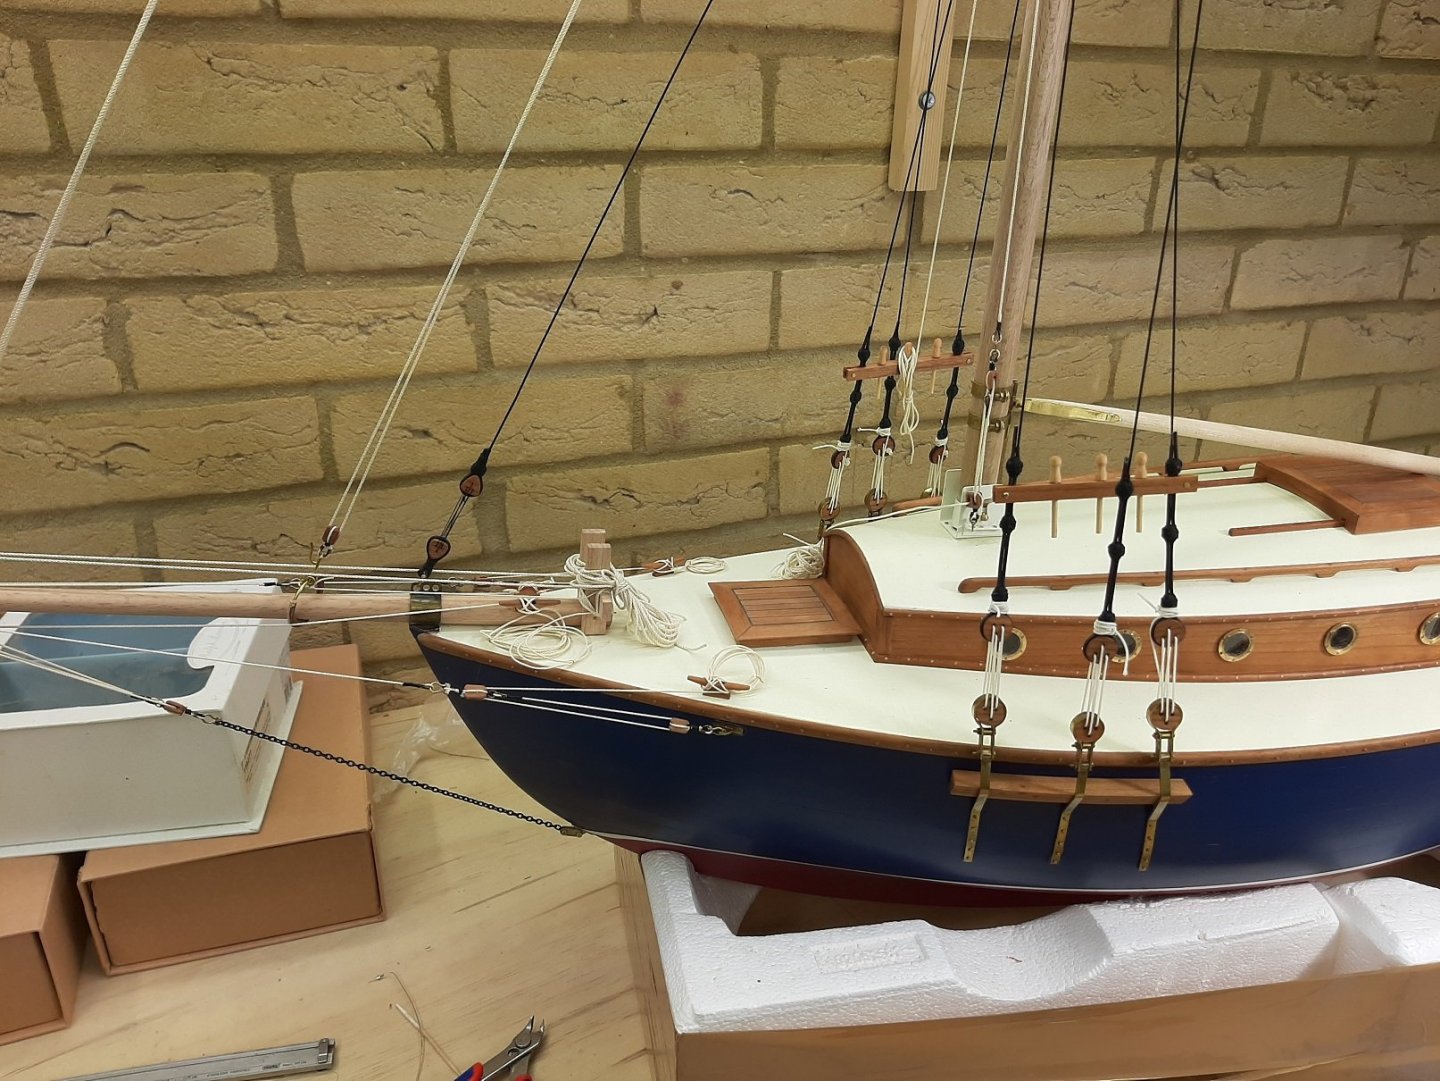
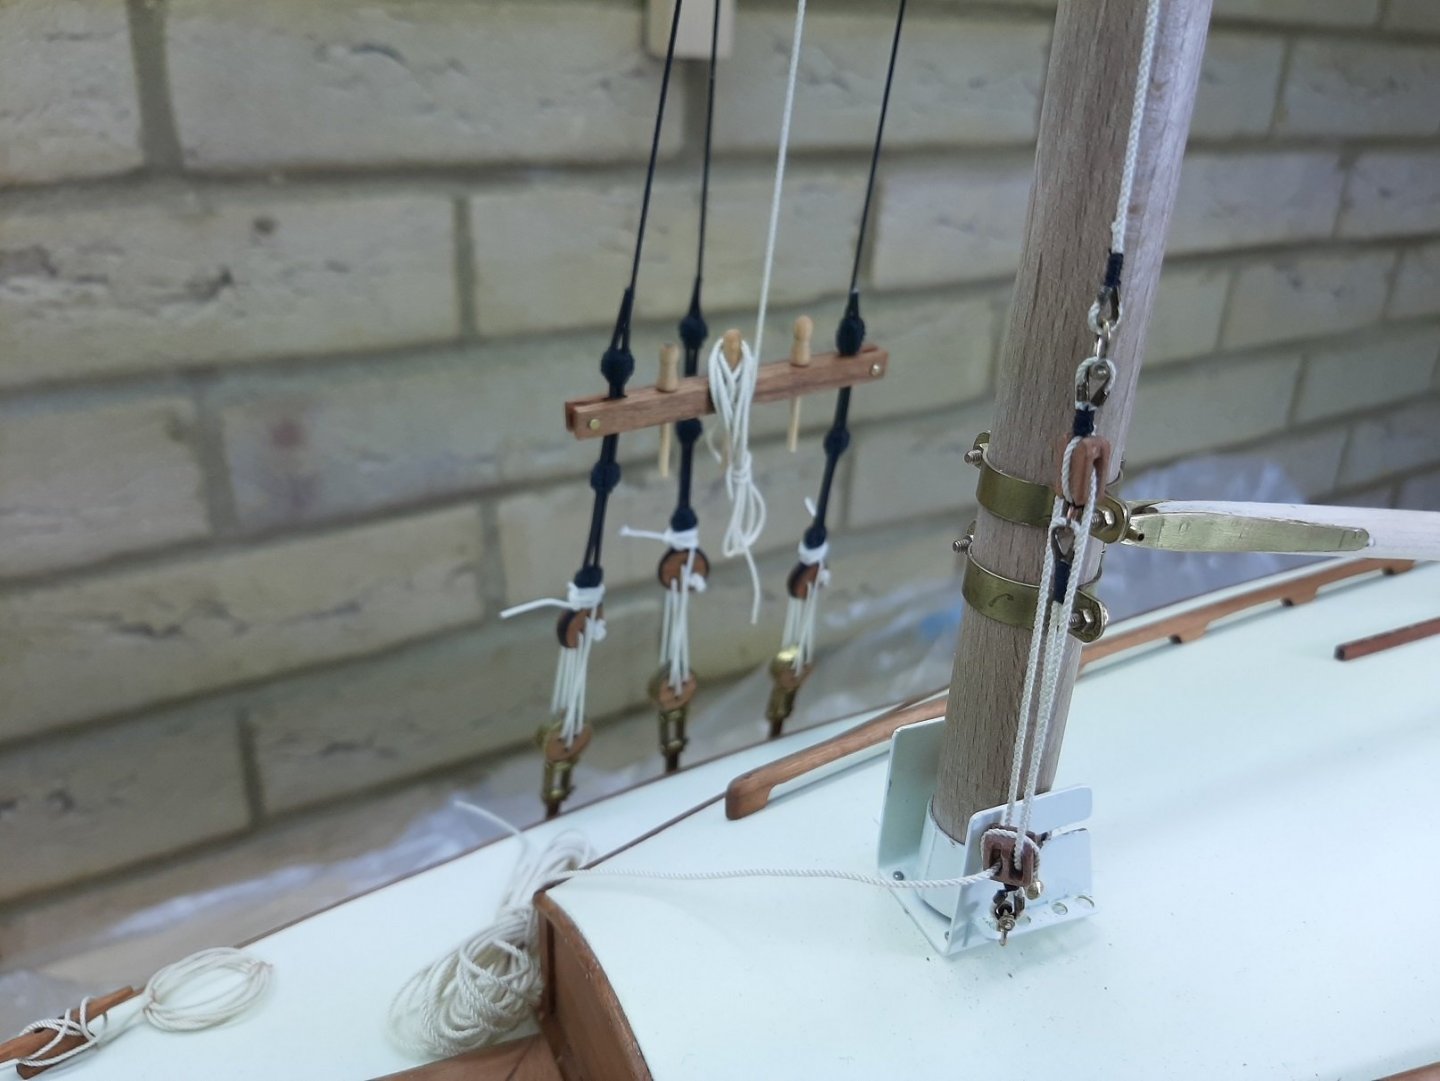
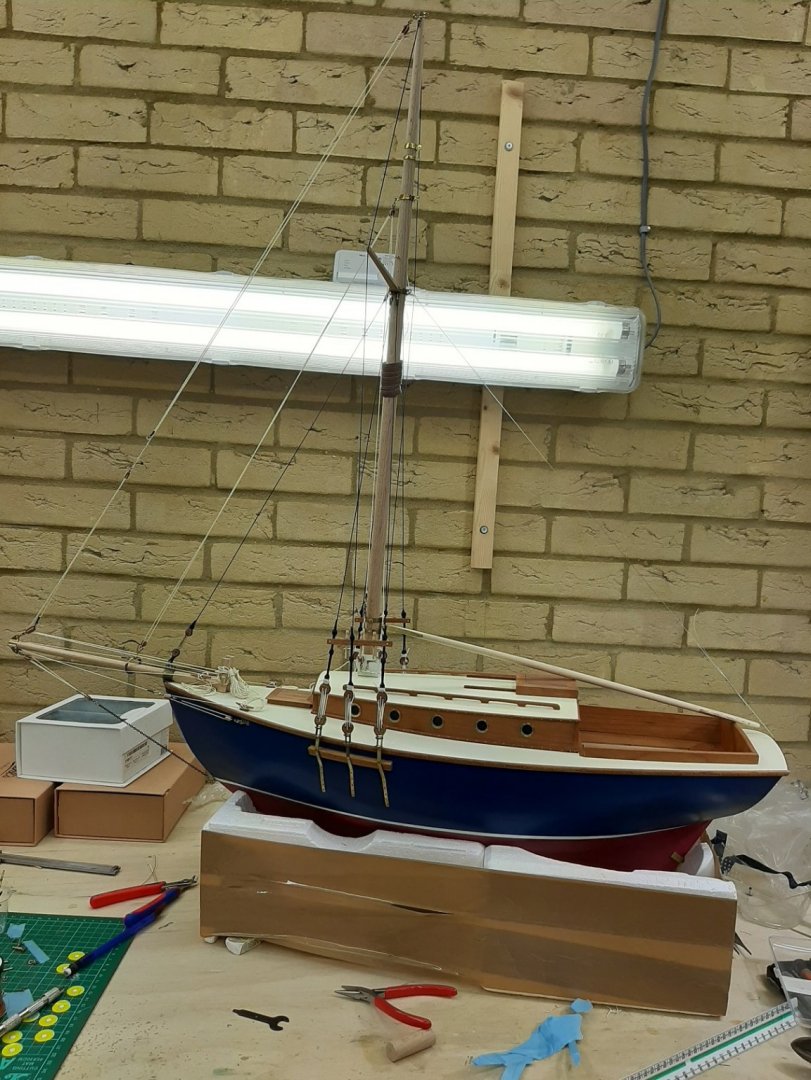
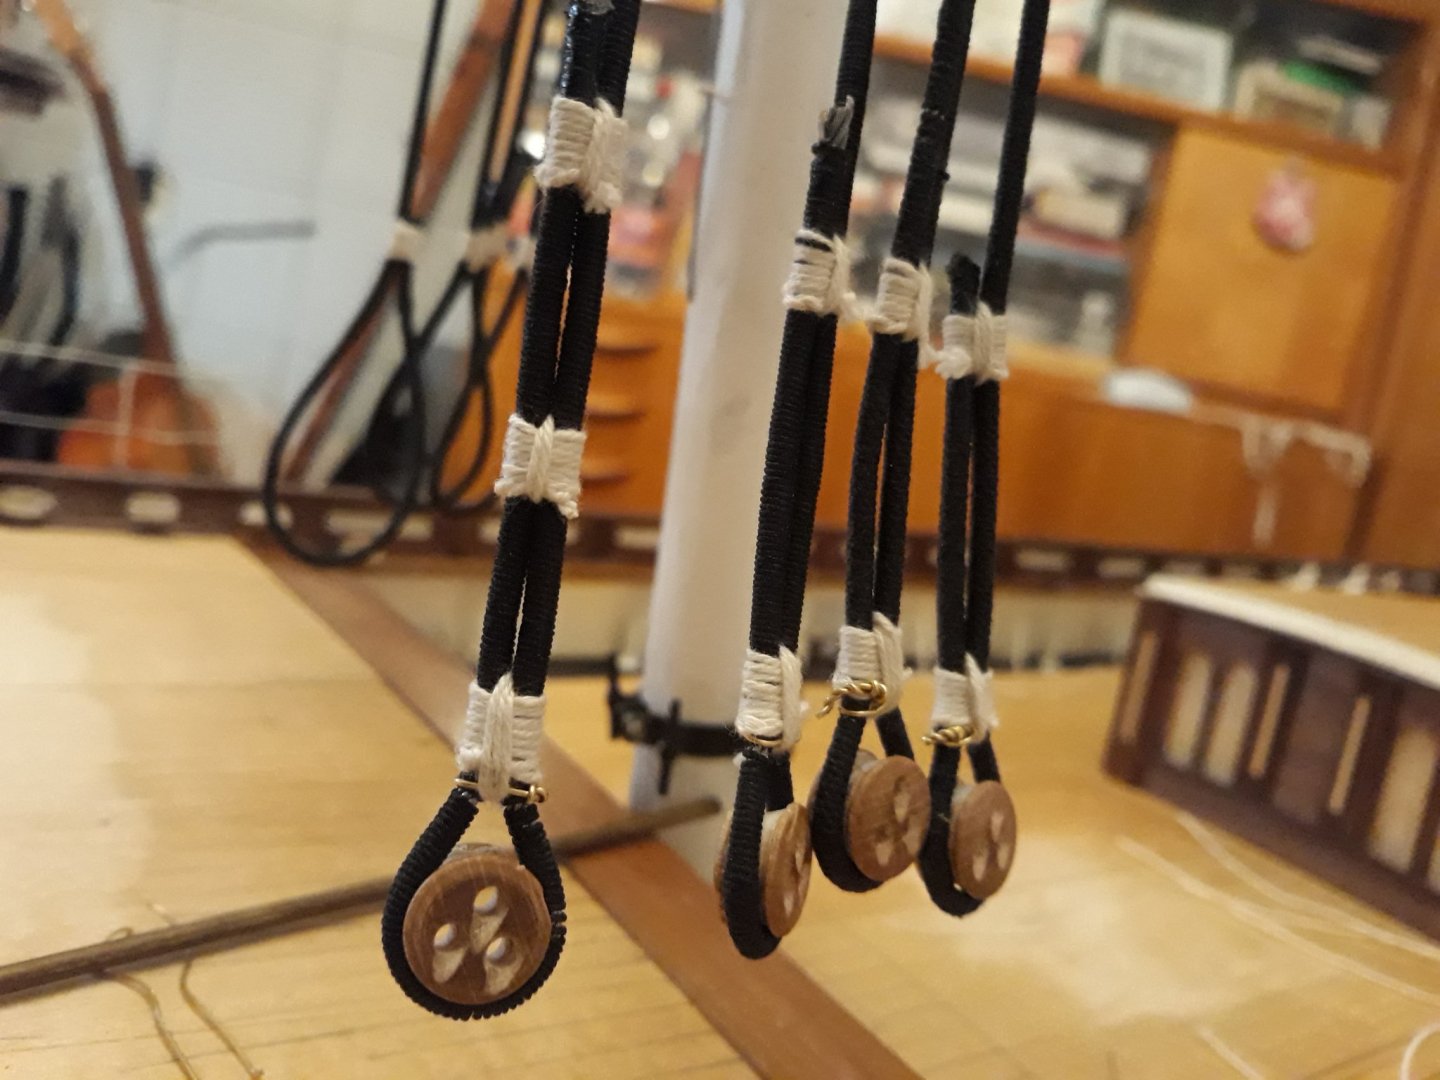
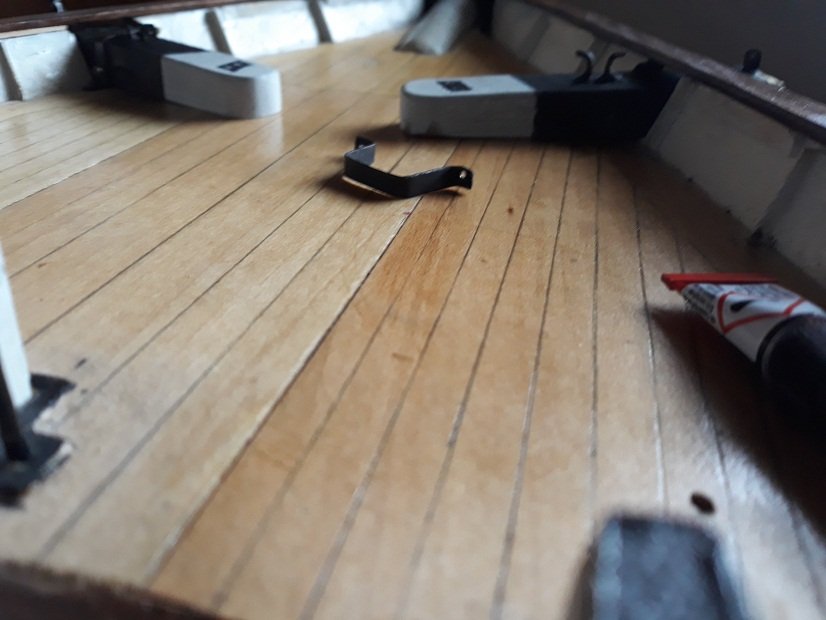
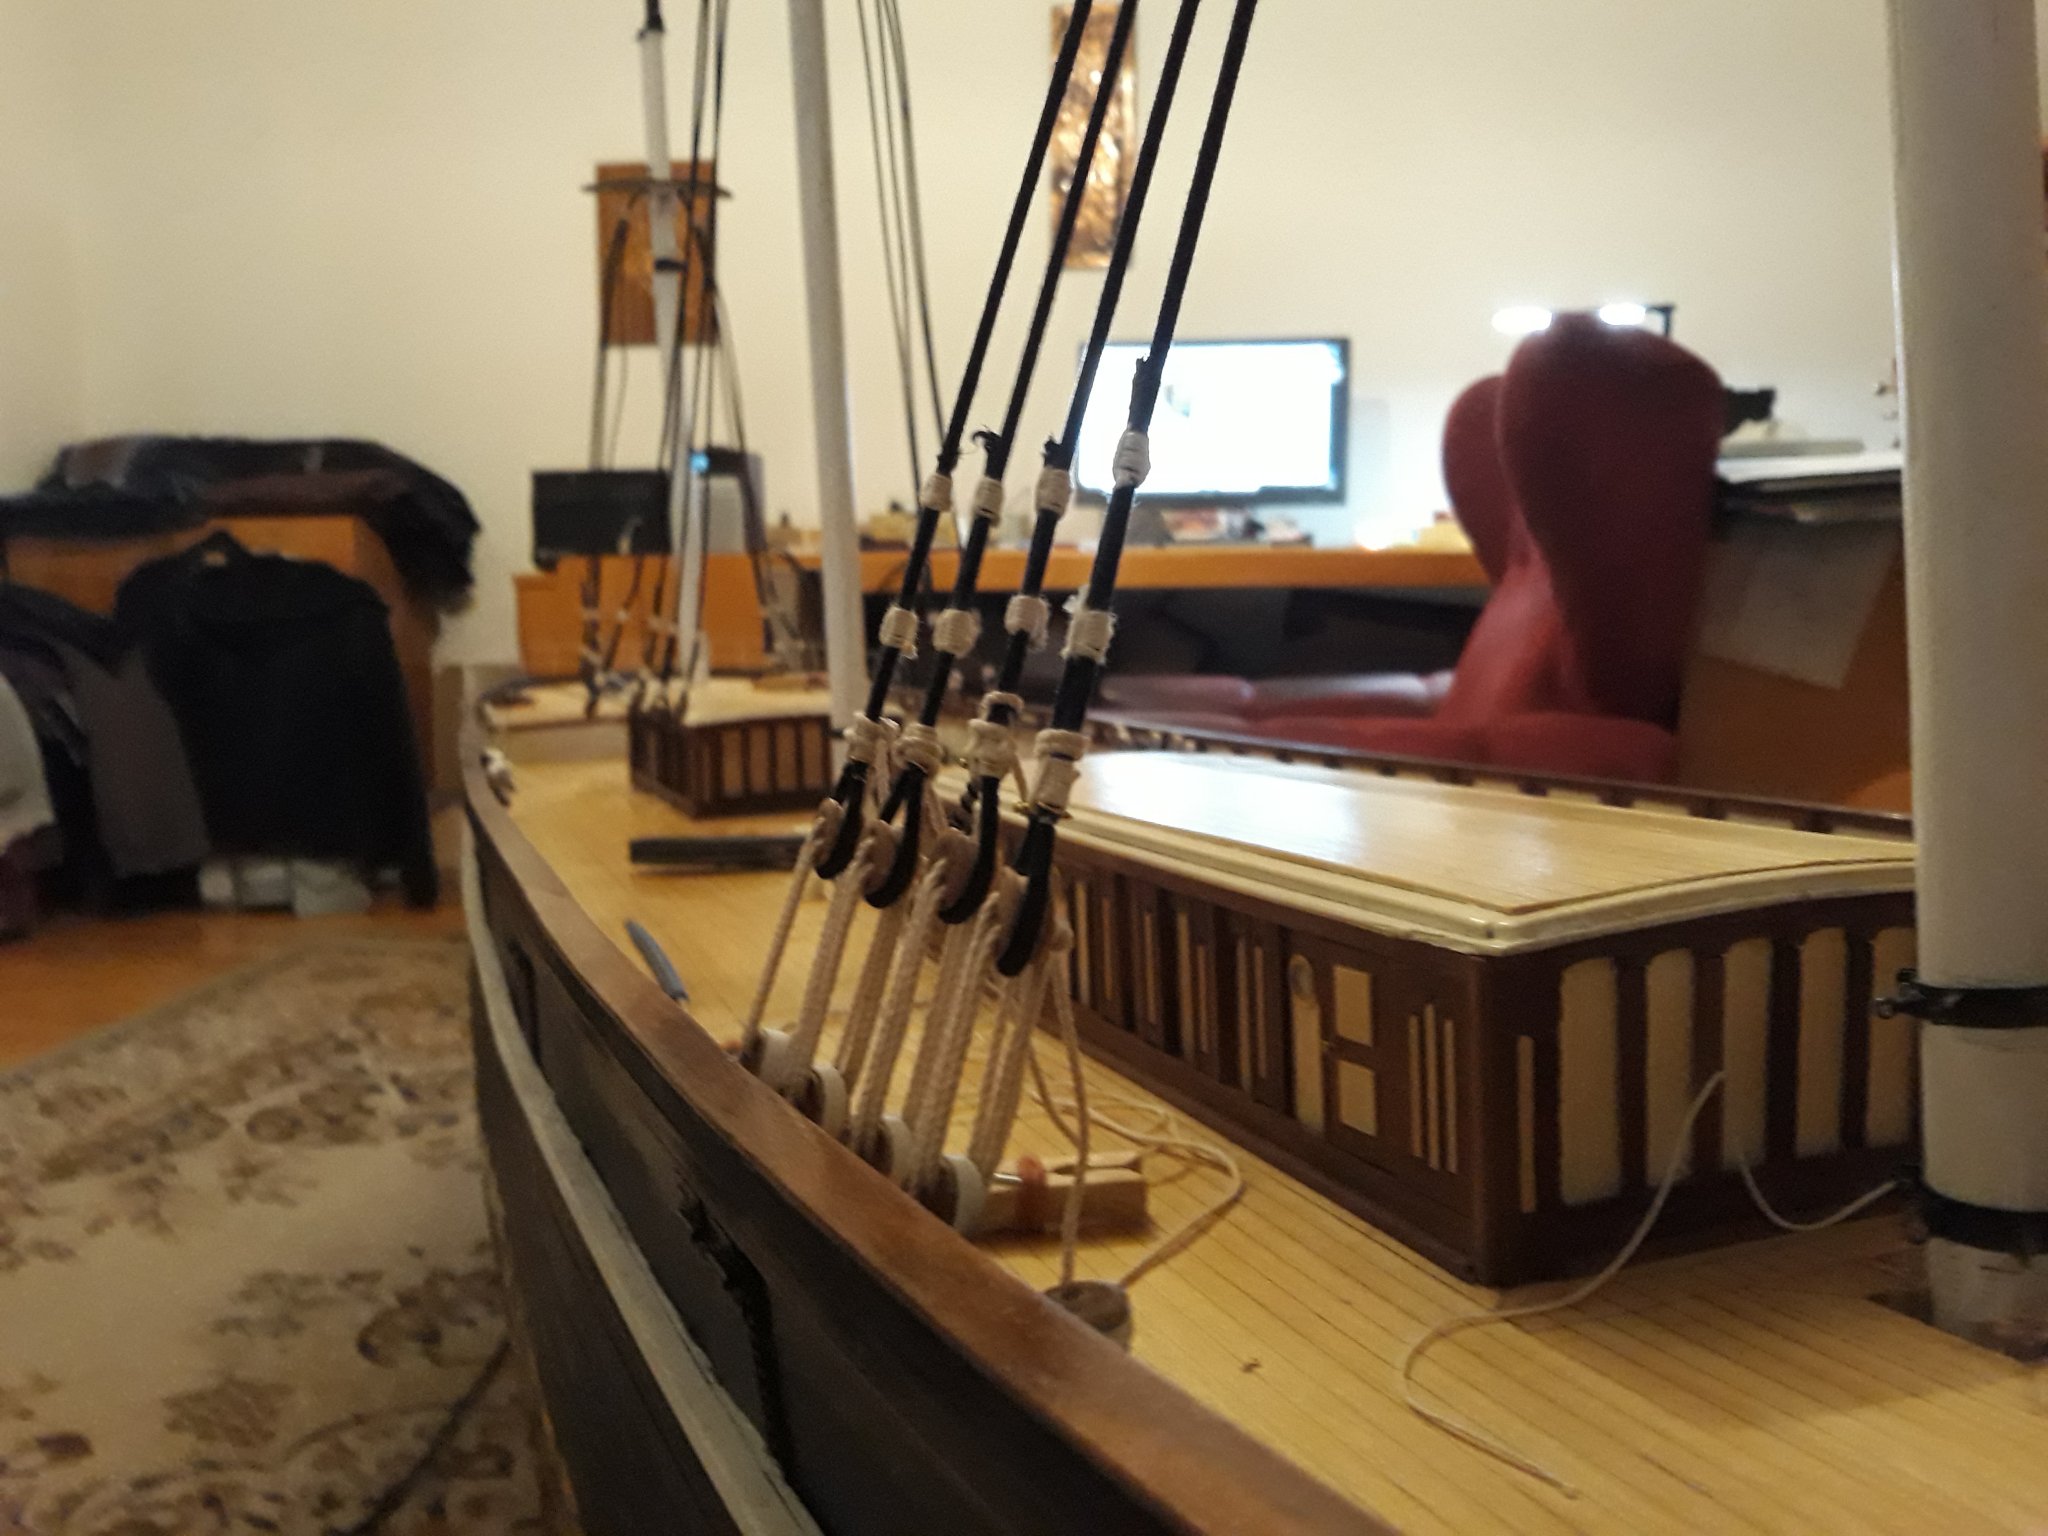
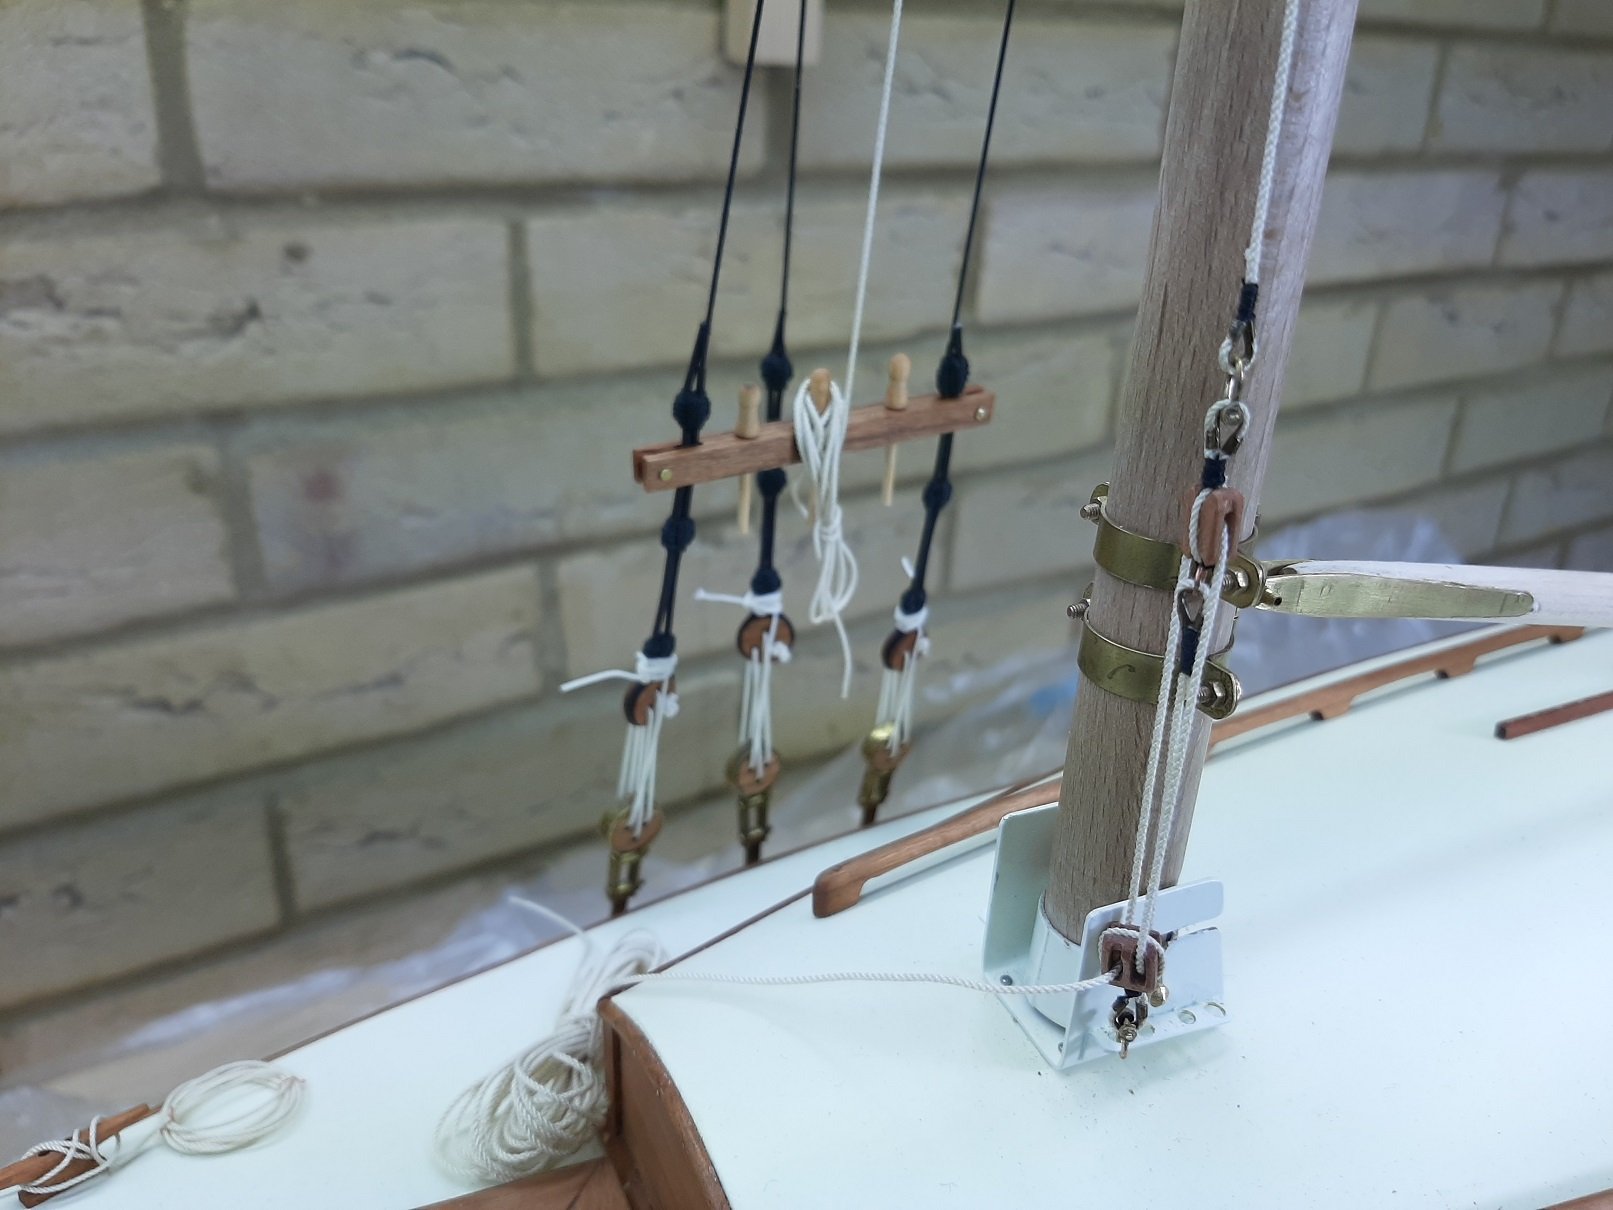
Dear fellows, There is working mess is the shipyard. I cant explain how much beauty and real complete feel rigging adds to the ship. I glad i went for it. Even when ratlines are not there. I was playing with idea tried to splice rope to show off some 3 cord stopper but i was swearing so much i gave up . Not worth hassle with 60 deadeyes i would be probably dead or end up in psychiatric
however it is doable though. I just hope i am doing rigging right. Those colors really match with boat. Not sure if photos show that enough.i am definitely glad for fine lanyard rope. V.

- GrandpaPhil, tasmanian, petervisser and 5 others
-
8
-
by the way spraking of glory here i know but... Did you catch this site Rob? its about cloud but ...within family and utmost interesting. seems like definite about cloud to me.
https://www.sobco.com/ship_model/fc/Lane/Flying_Cloud.htm
-
On 5/15/2020 at 1:42 AM, vaddoc said:
Thank you all for your likes and comments!
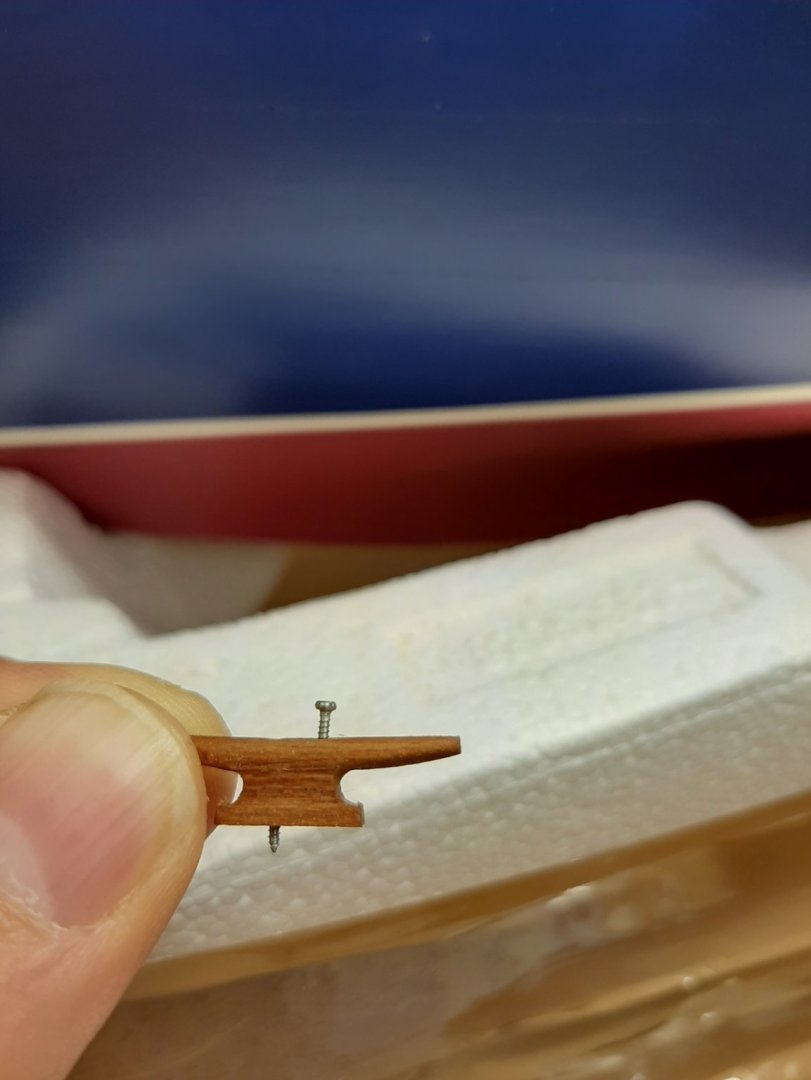
Today I installed a few cleats to tidy up a bit the boat. The cleats are very securely attached with 1 mm stainless steel screws.

The bow looks much more tidy now. I thought of installing a pin rail but I think the heel timbers would certainly be used to tie ropes so maybe it will not be necessary. I am not sure how to arrange the excess rope so for now I used fine copper wire to hold the loops


I also installed pin rails on the shrouds and temporarily the boom, mainly to know were on the mast to install more cleats and pins

The boat is very big so difficult to get it all in a photo
Awesome.
-
On 1/7/2018 at 7:54 PM, vaddoc said:
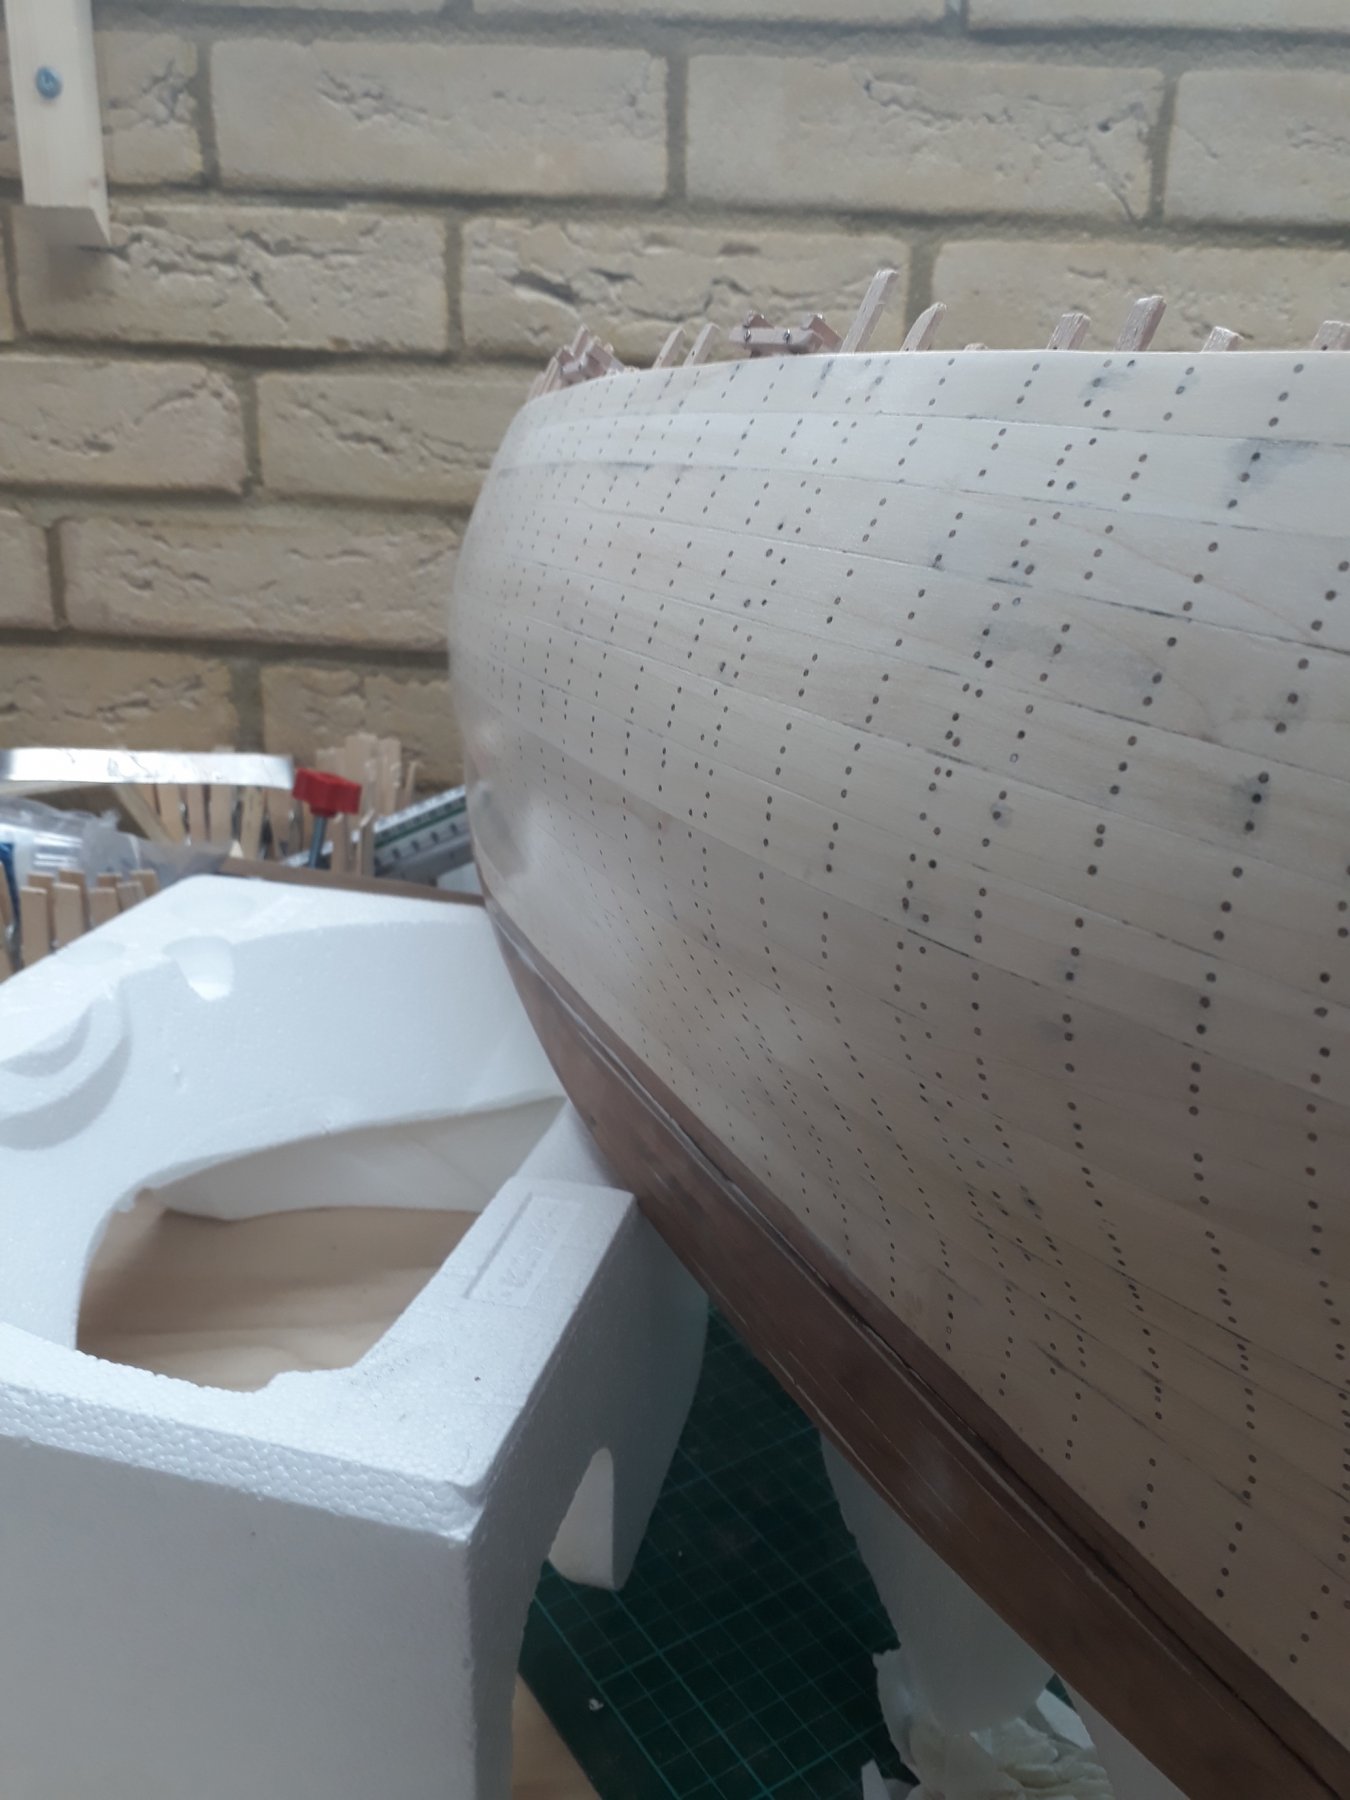
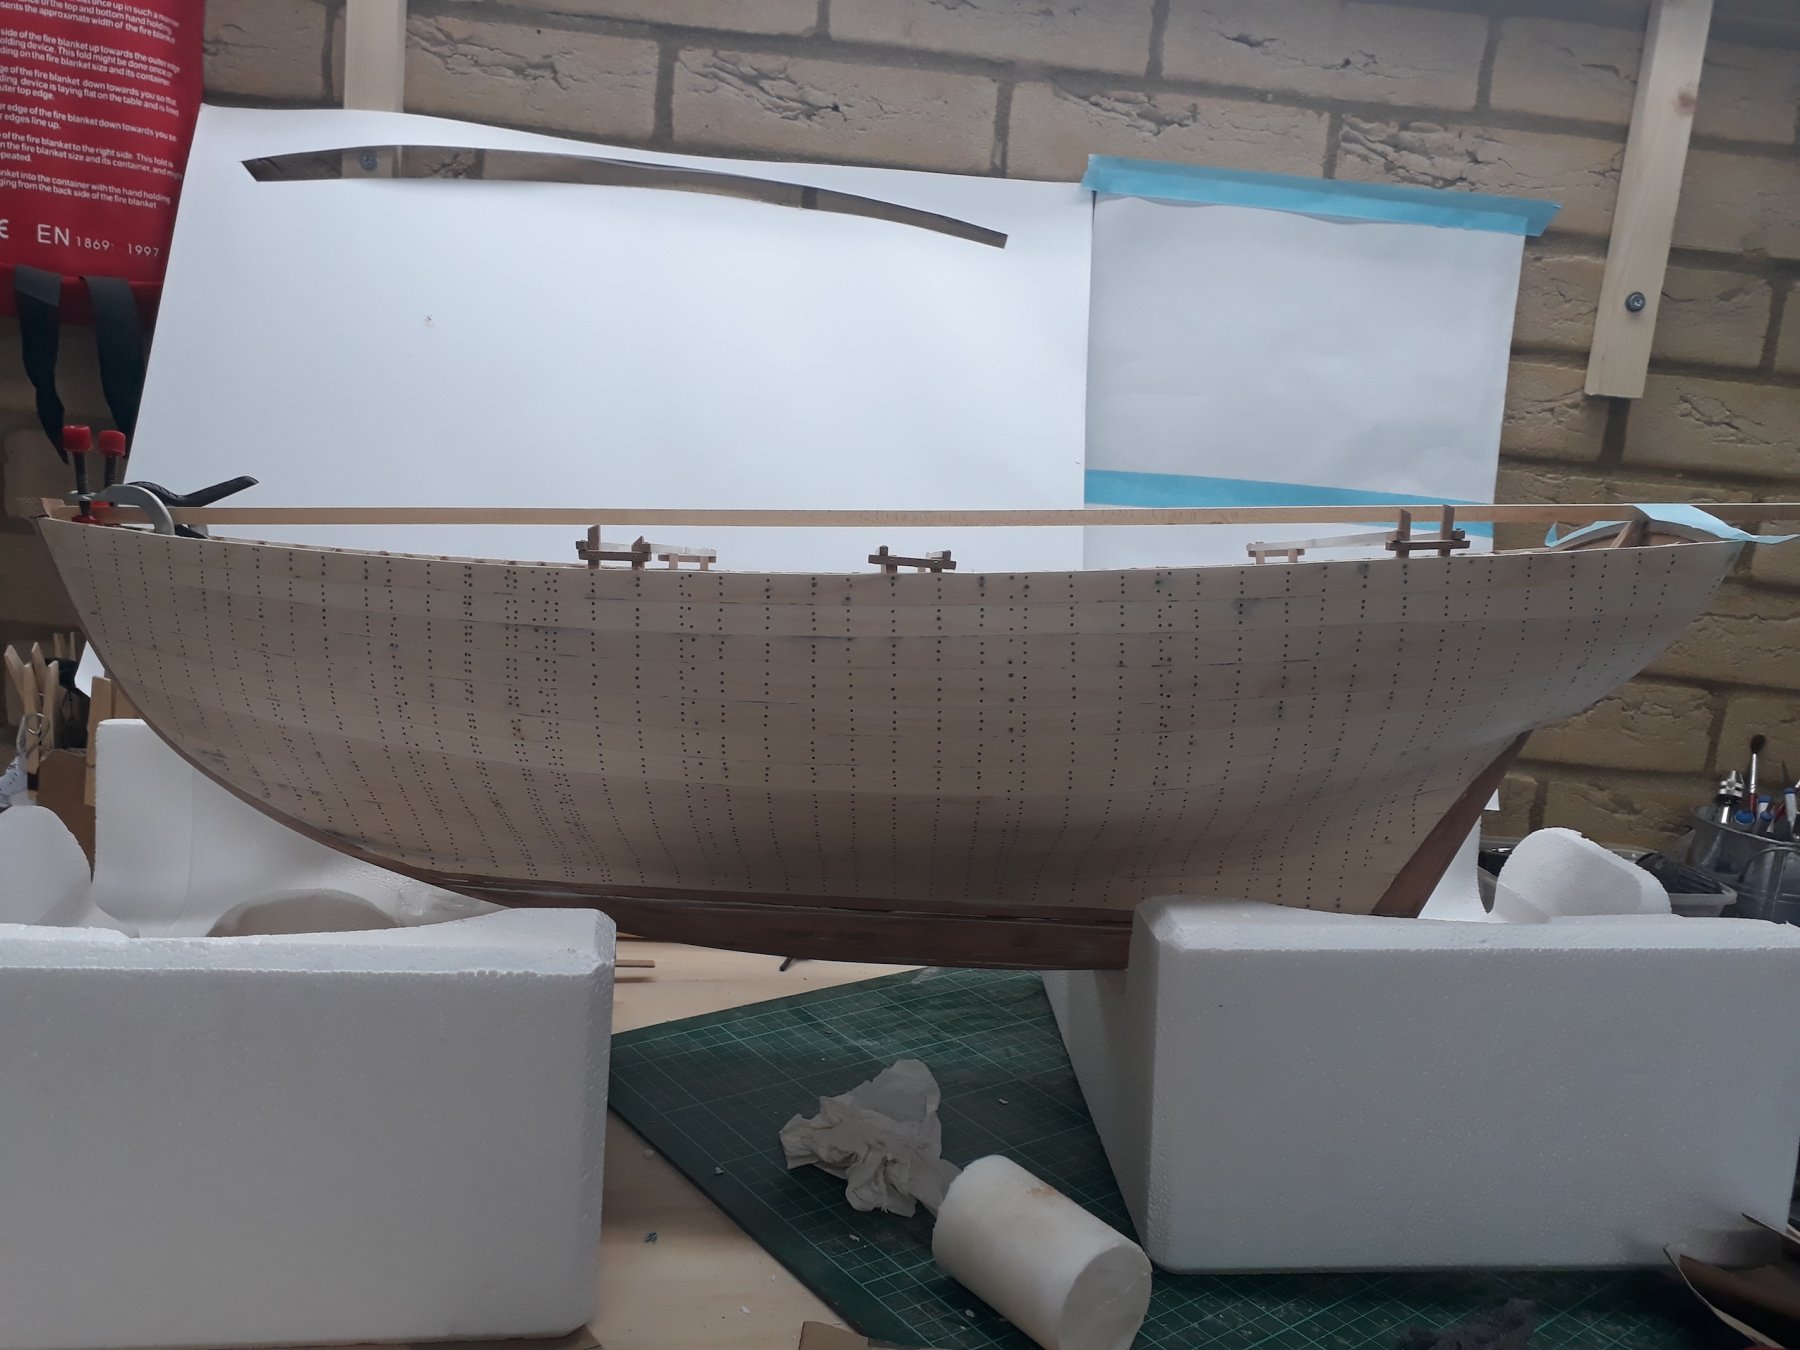
Another milestone reached, the hull is finished!
It took a massive amount of filler to do the job.
Then I applied two coats of sanding sealer, sanding after its coat. Finally, I sanded to 240 grit and then used some 0000 steel wool. The hull is now very smooth, sealed and the imperfections are all filled. Notice that the light reflects off the surface of the hull!

I then cut the ribs flush with the sheer. I left the ones that secure the braces though. I now need to figure out how the deck will work and then start making the beams

.
Hi Vaddoc, there is some really beautiful work here. lovely. Vlad
-
49 minutes ago, vaddoc said:
Just came across you wonderful log, this will be a great model! Clearly you are having to much fun! I think the scale is spot on, you are capturing the feeling of massiveness that you get with these large ships. Looking forward for the rest of this journey.
Hello thank you for warm worlds and stopping by. Well massivenes it is, i self doubt abput my work as it is far from ok but fun and selflikeness is important part otherwise we would not do it. I came thru many phases with her from thrill, doubt, despair, uncertainty, dislike, ...but never regret as when it was worst i kept saying myself. She will outlive you give her most you can
im way closer to wrap than long long ago when started.. Enjoying standing rig massively yes. Thx Have fun yourself.
-
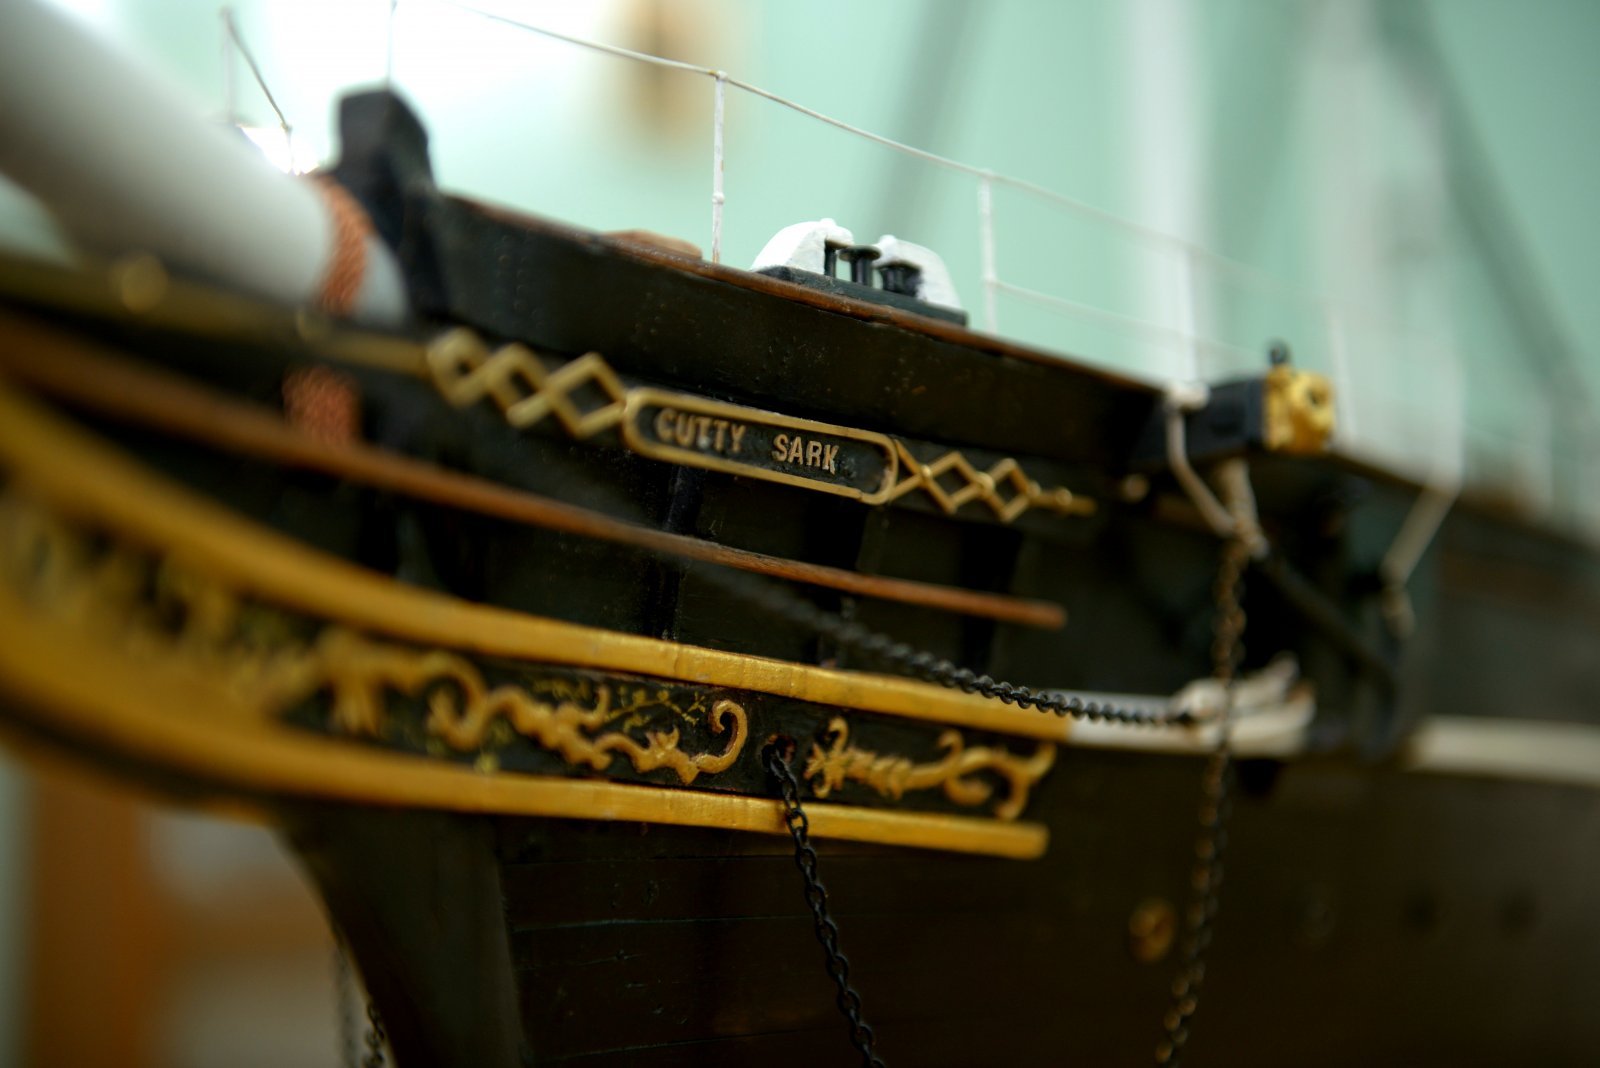
Finally Here we are
Cutty shrouds 5' :))
- mtaylor, GrandpaPhil and gieb8688
-
3
-
Nice sunday to everyone,
its been week I posted an update, but since then hell of a things went on a cutty.
I tried to sum up all important works in pics, as since corona quarantine I am at home with privilege to work a lot more than before I try as much as possible to speed up. Closing up is very near probably one more post before I quit as standing rigging shrouds are already hanging from masts and that would be end of titanic cutty.
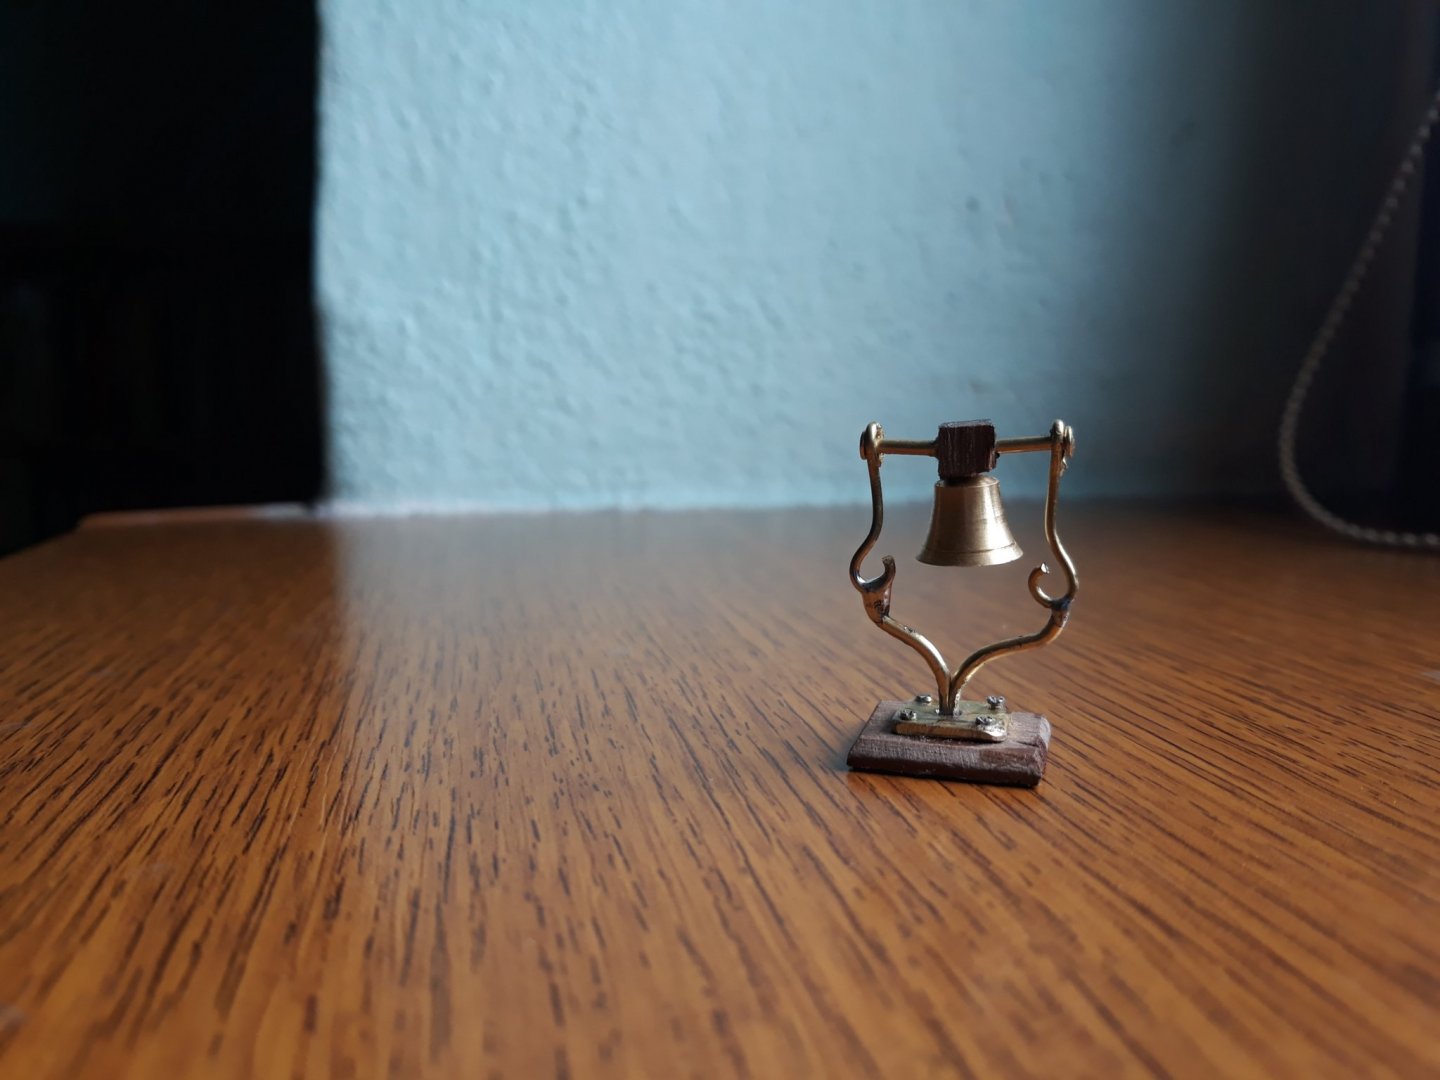
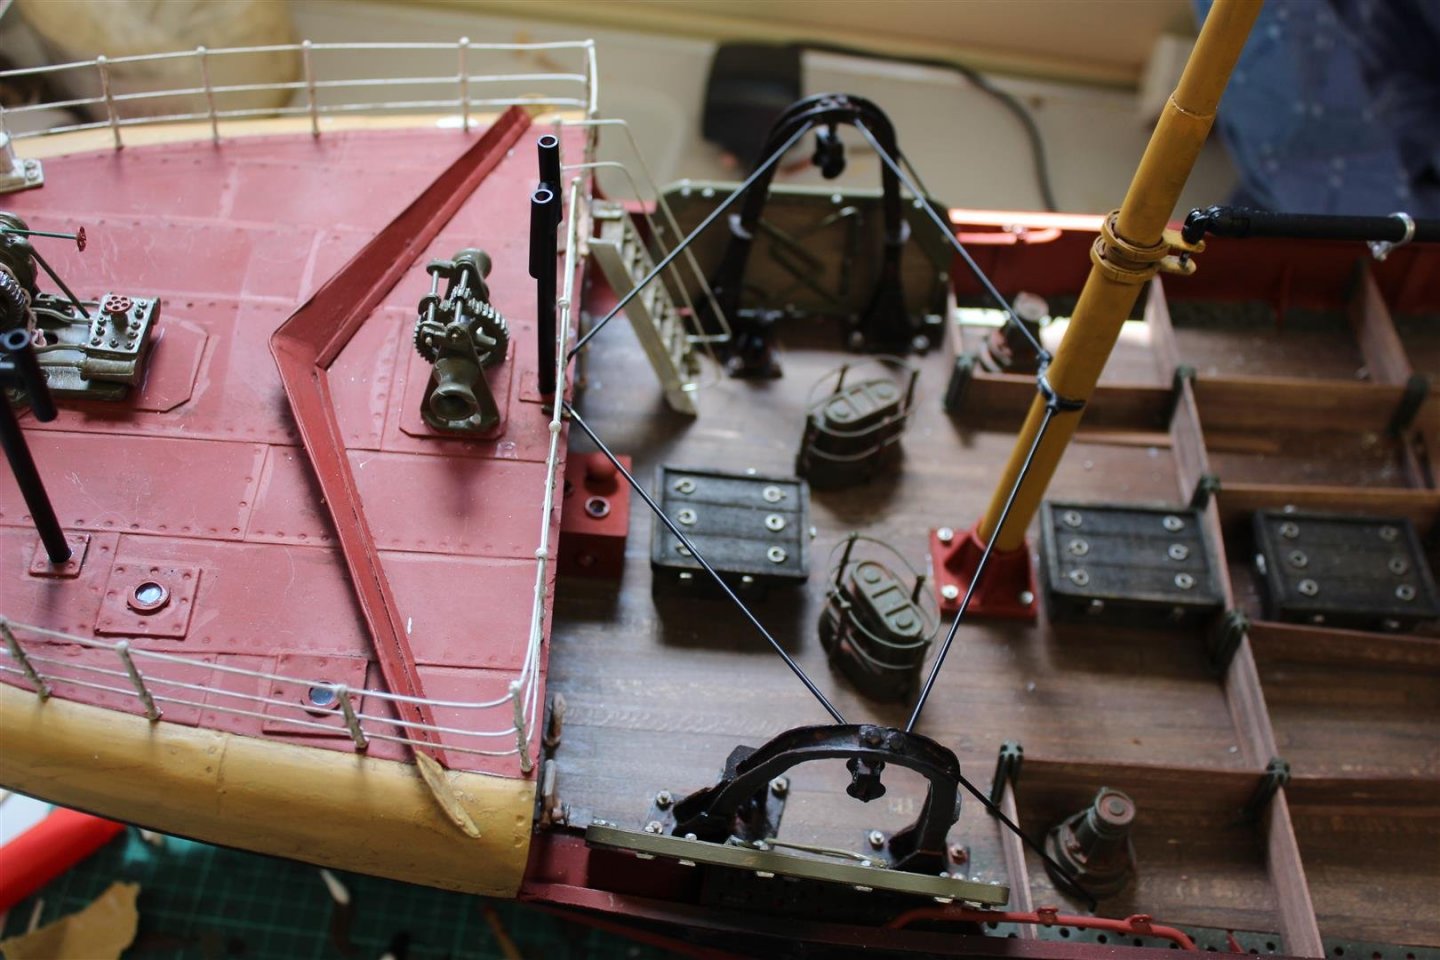
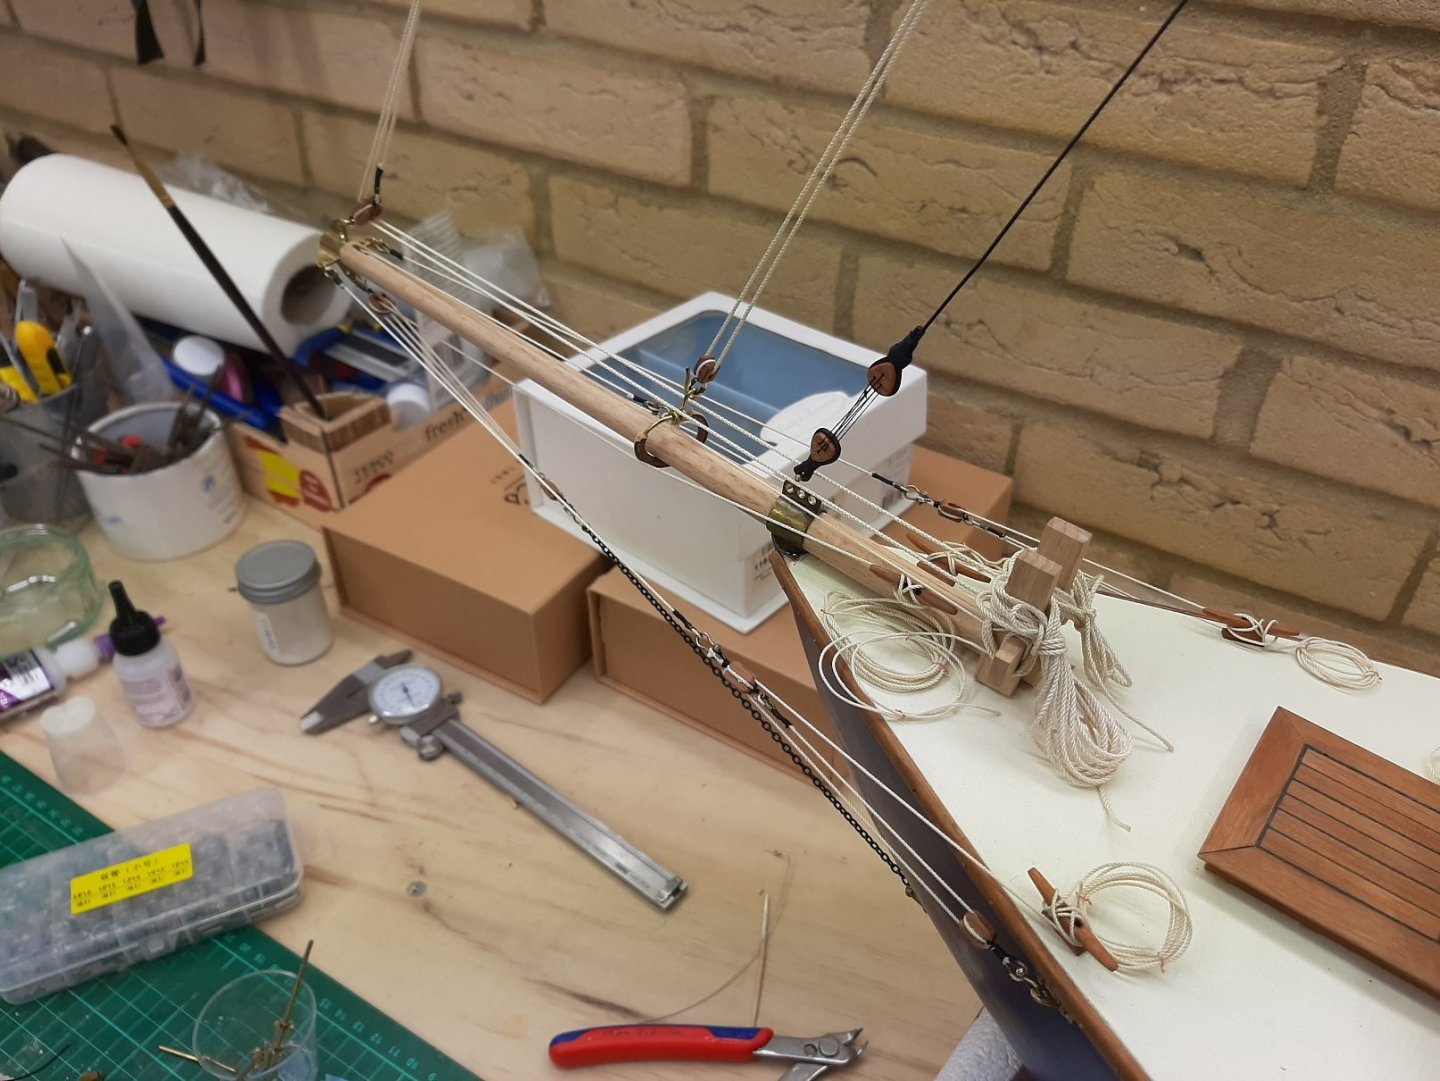
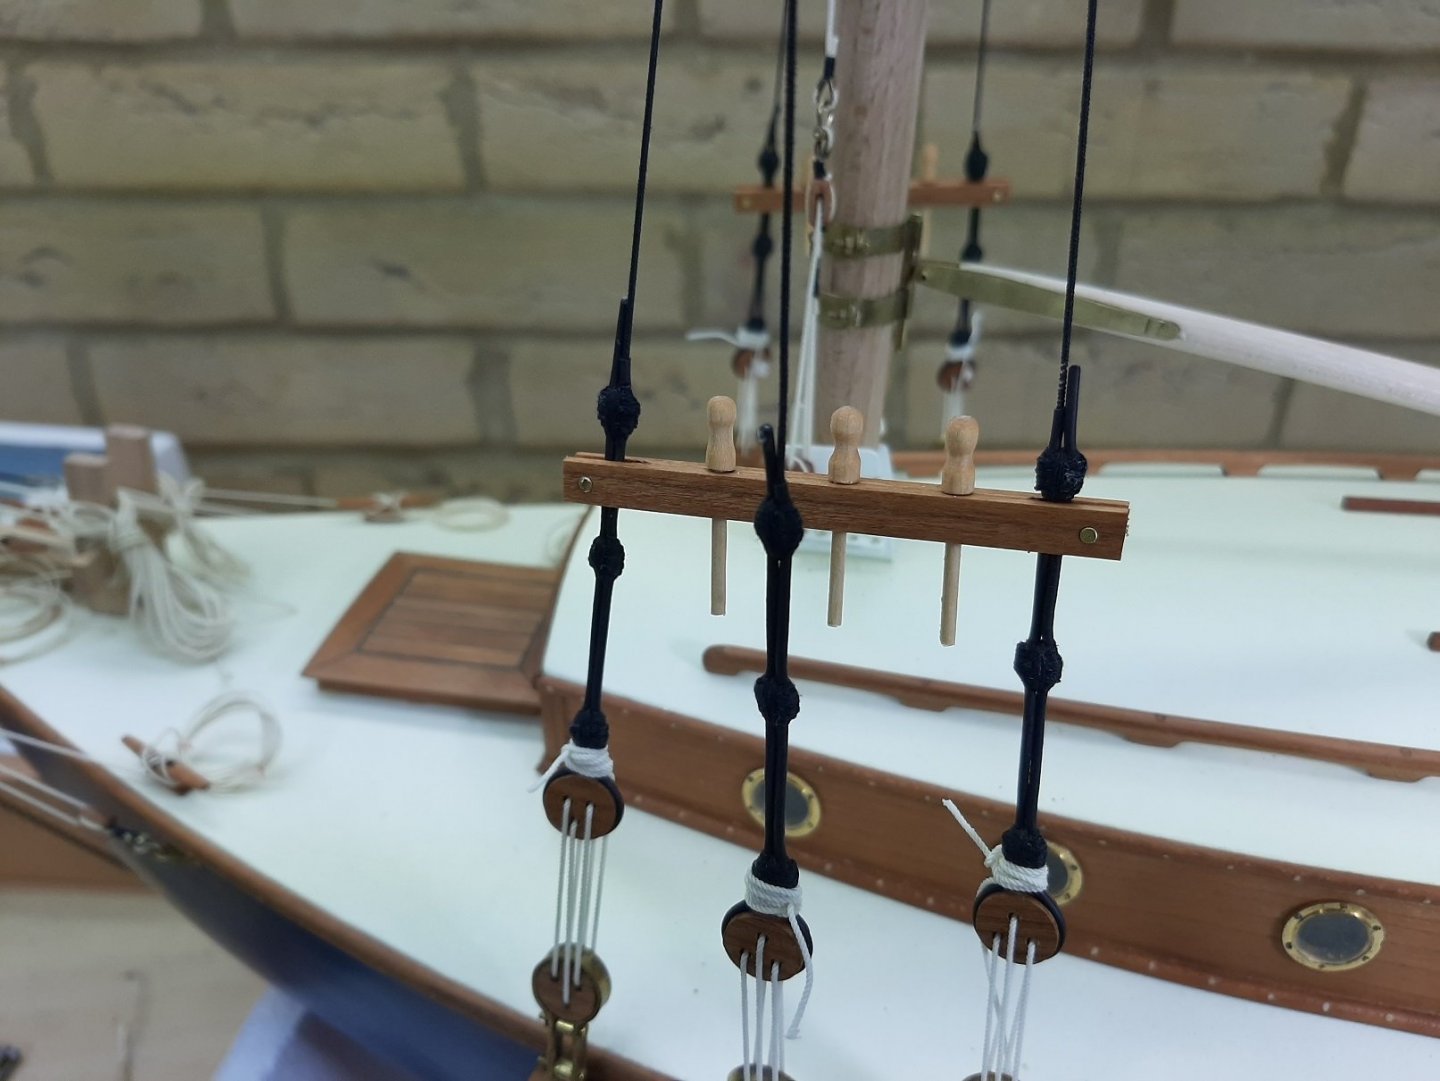
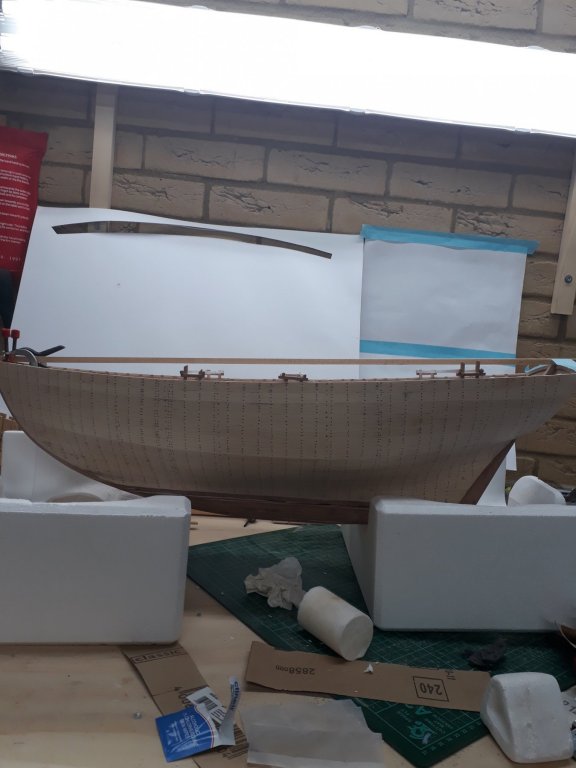
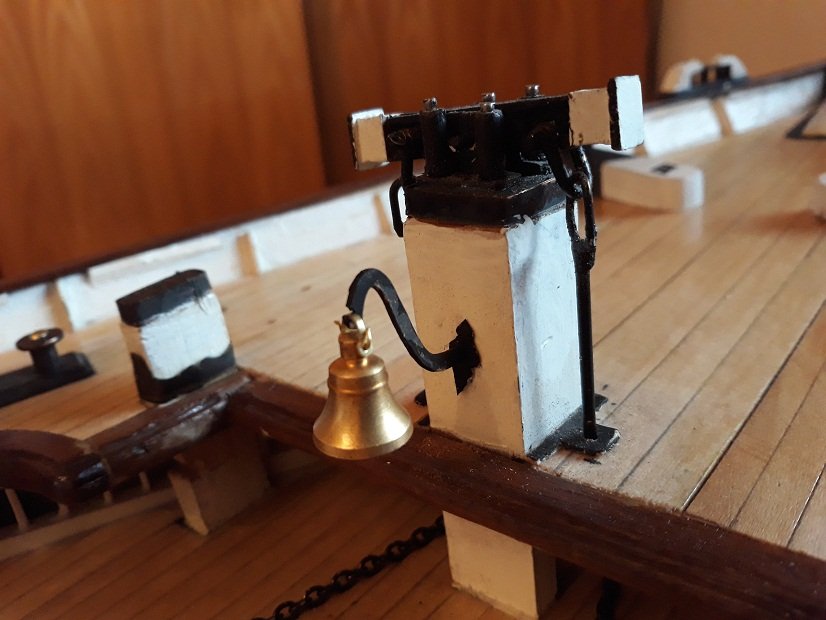
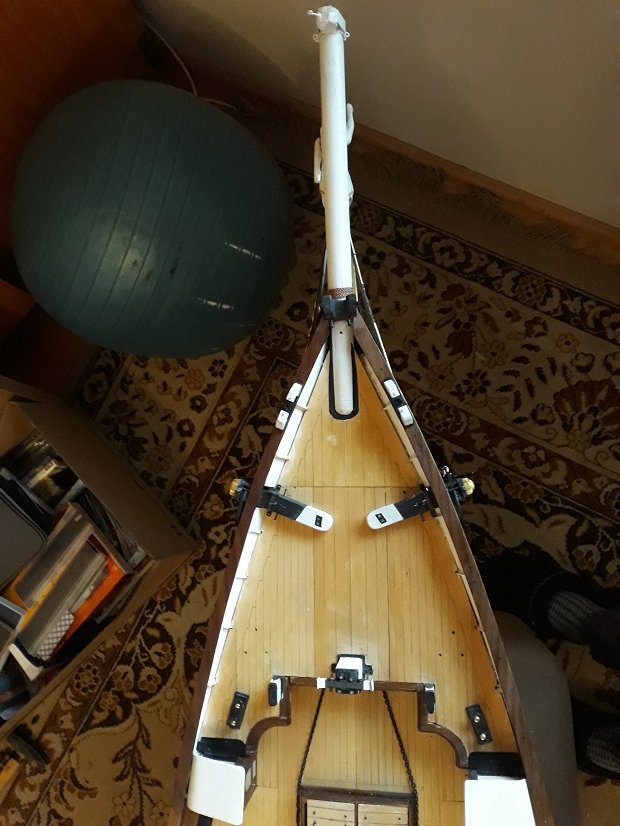
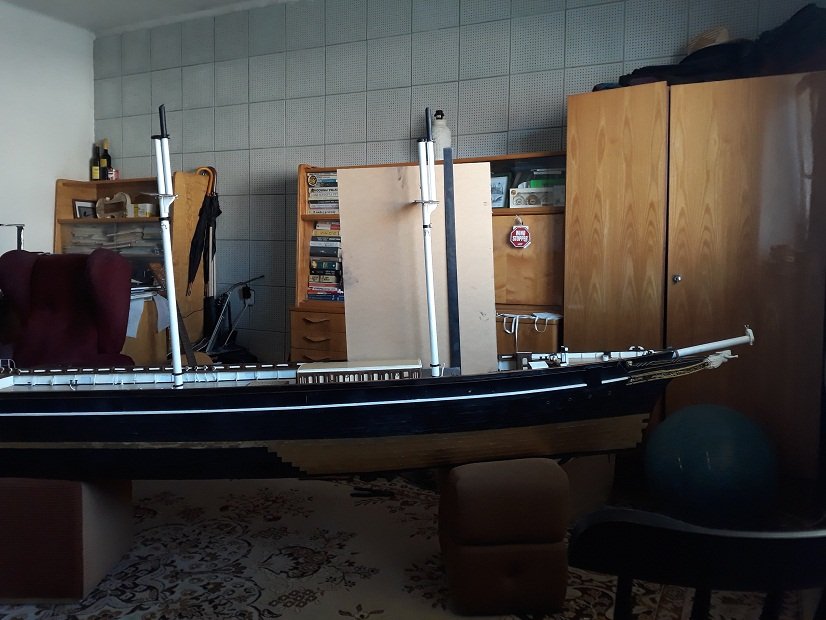
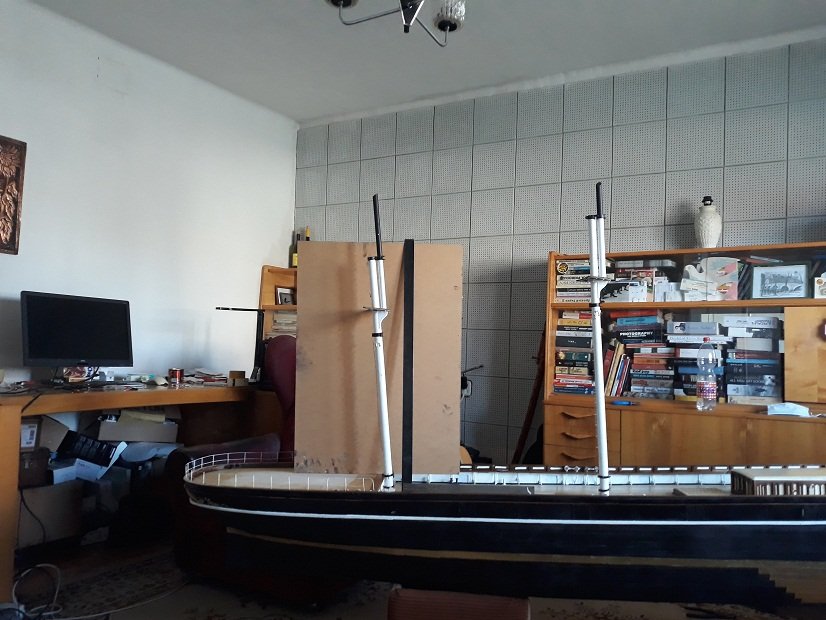
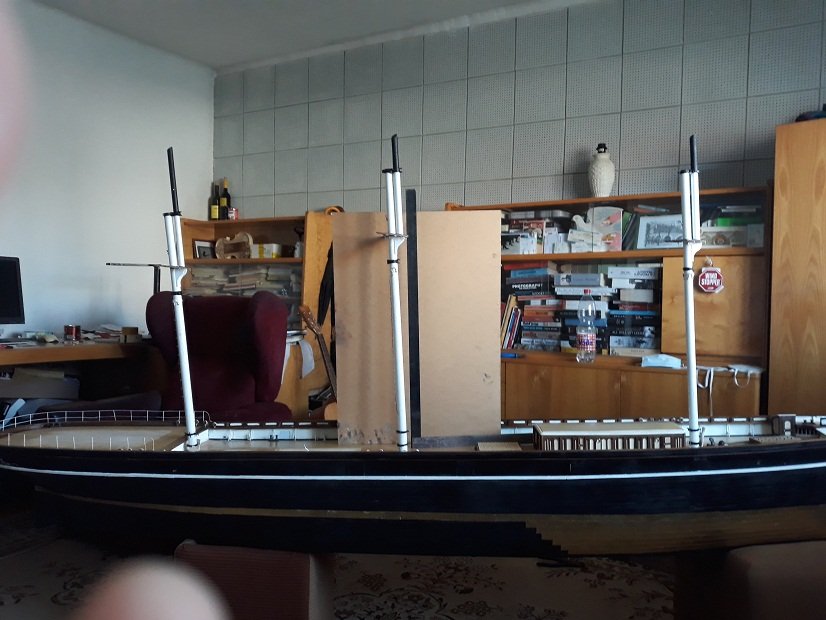
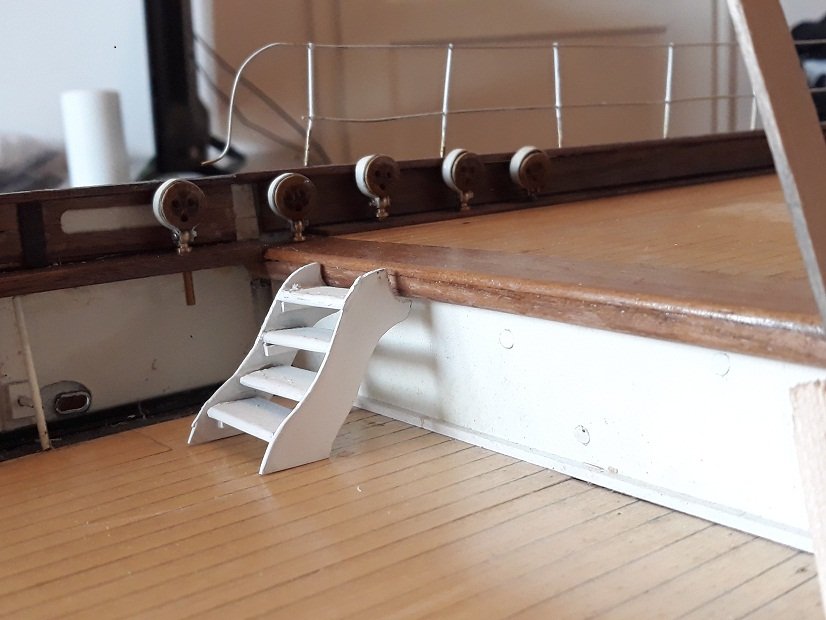
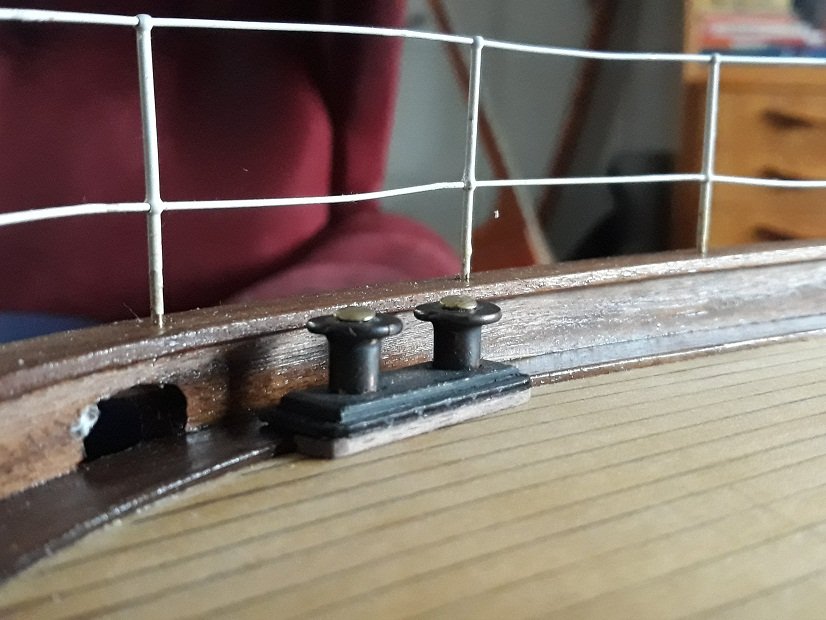
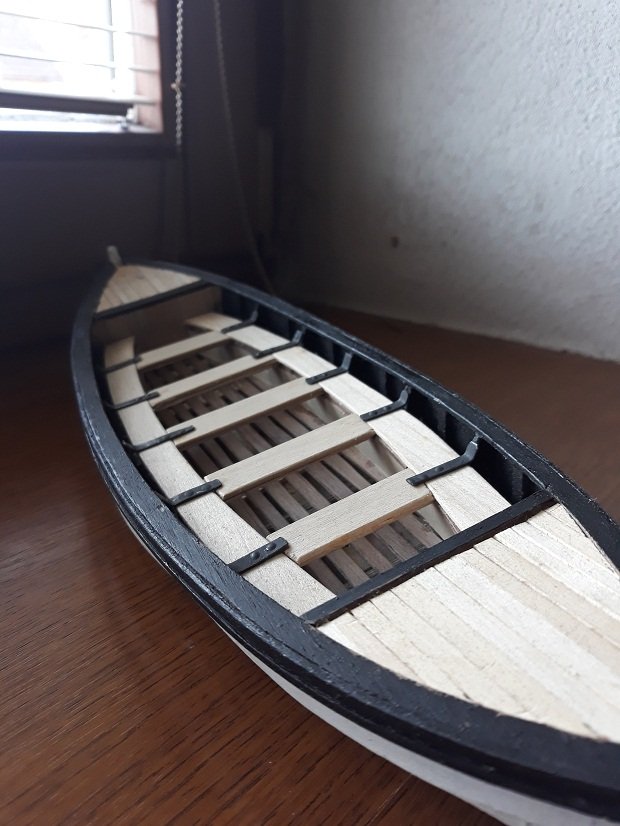
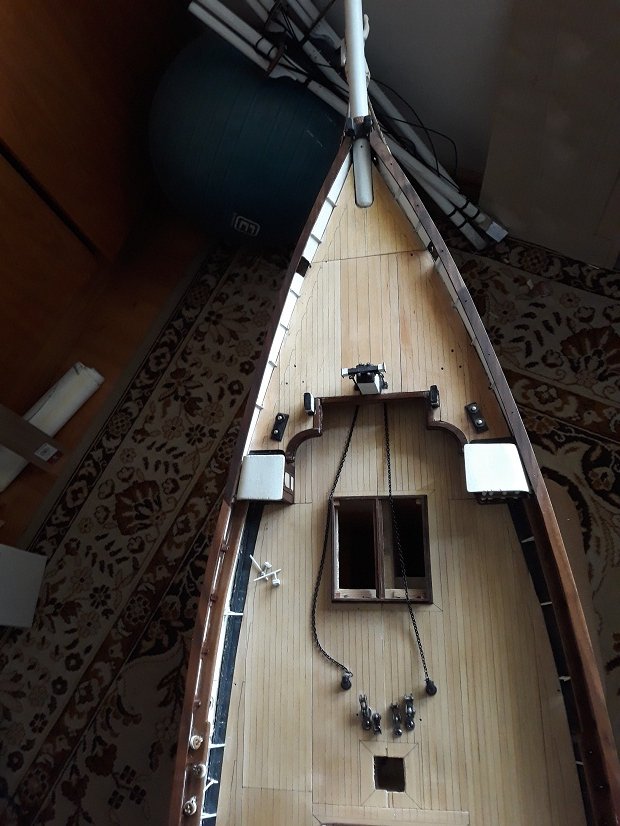
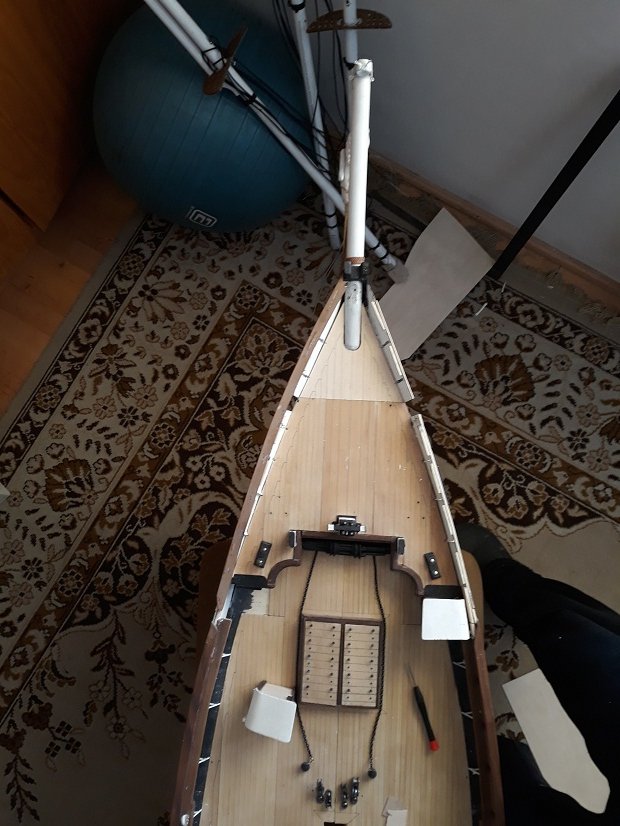
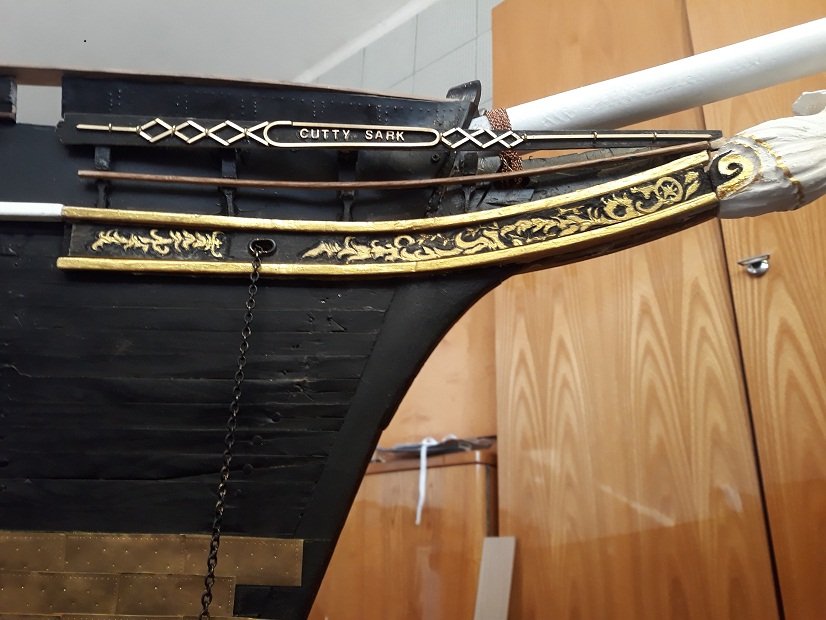
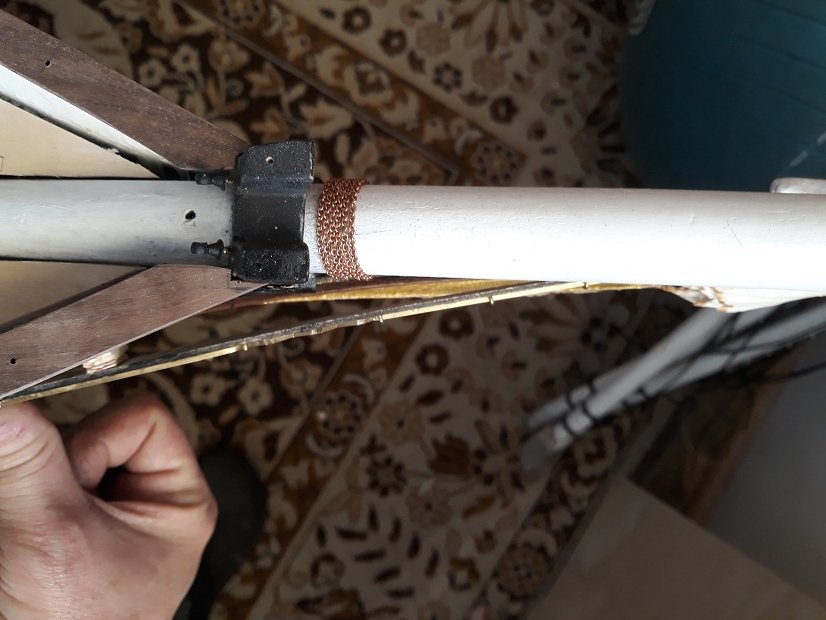
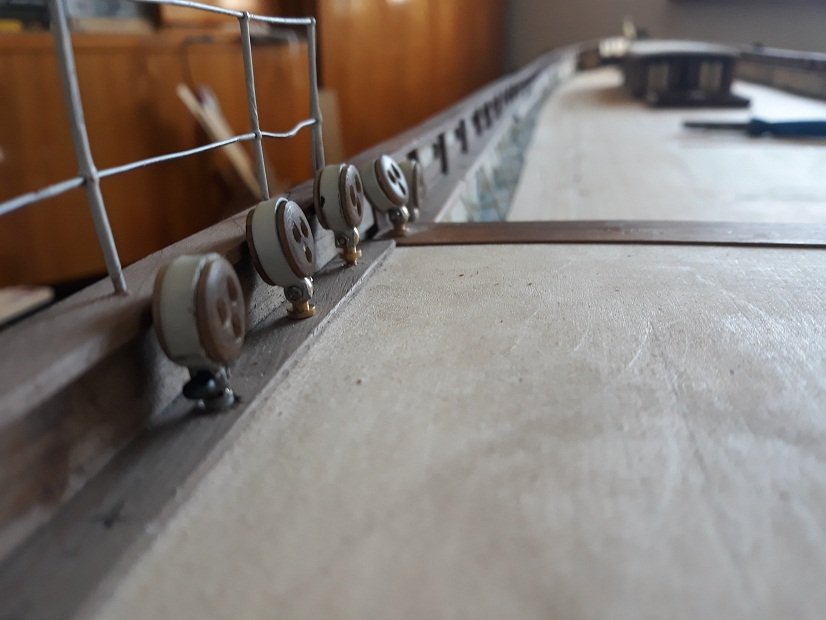
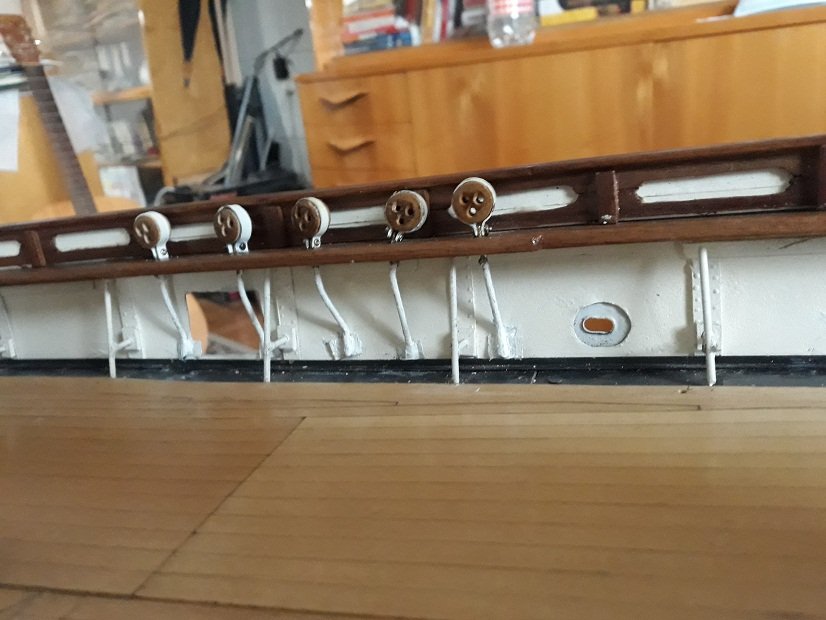
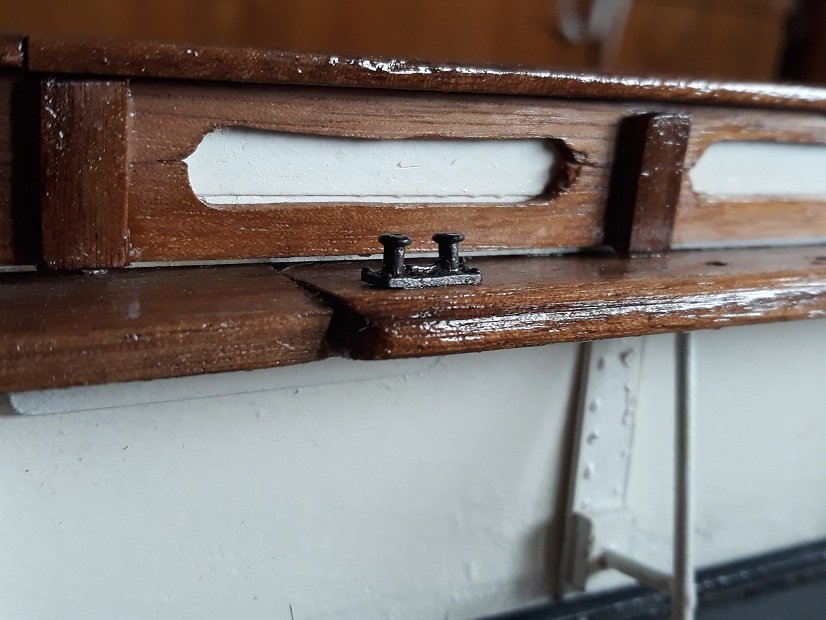
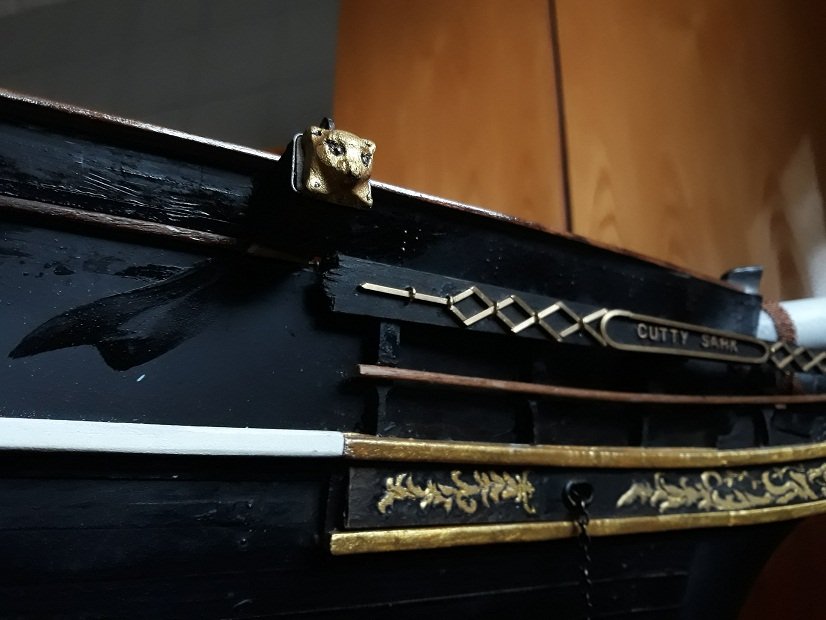
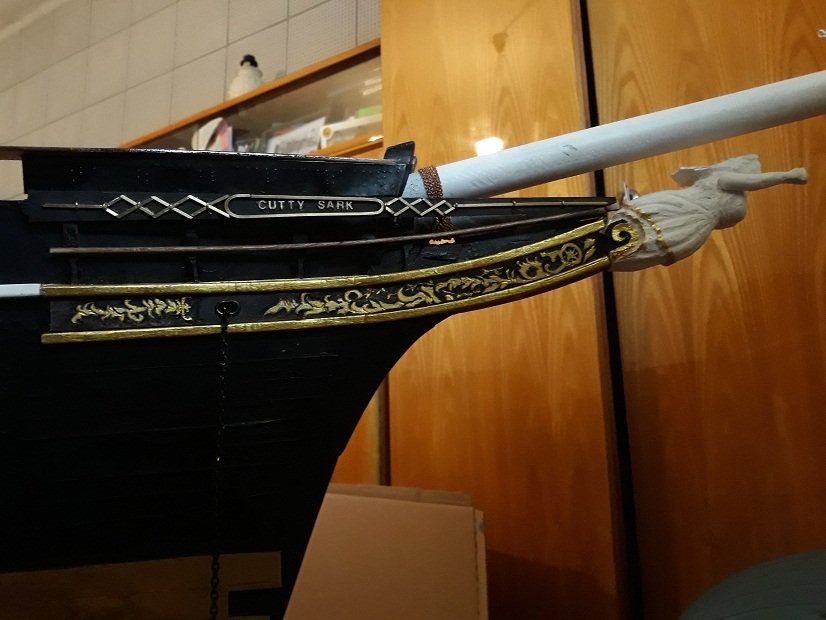
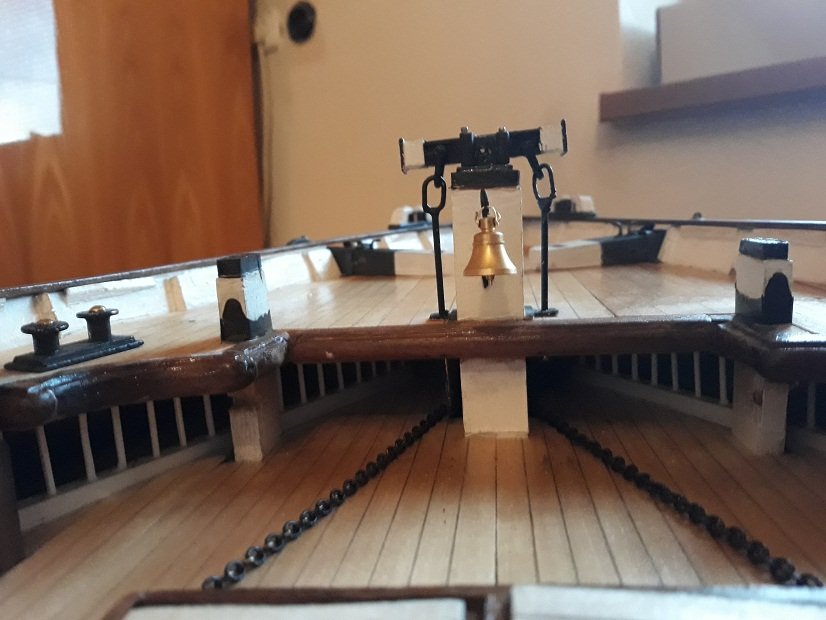
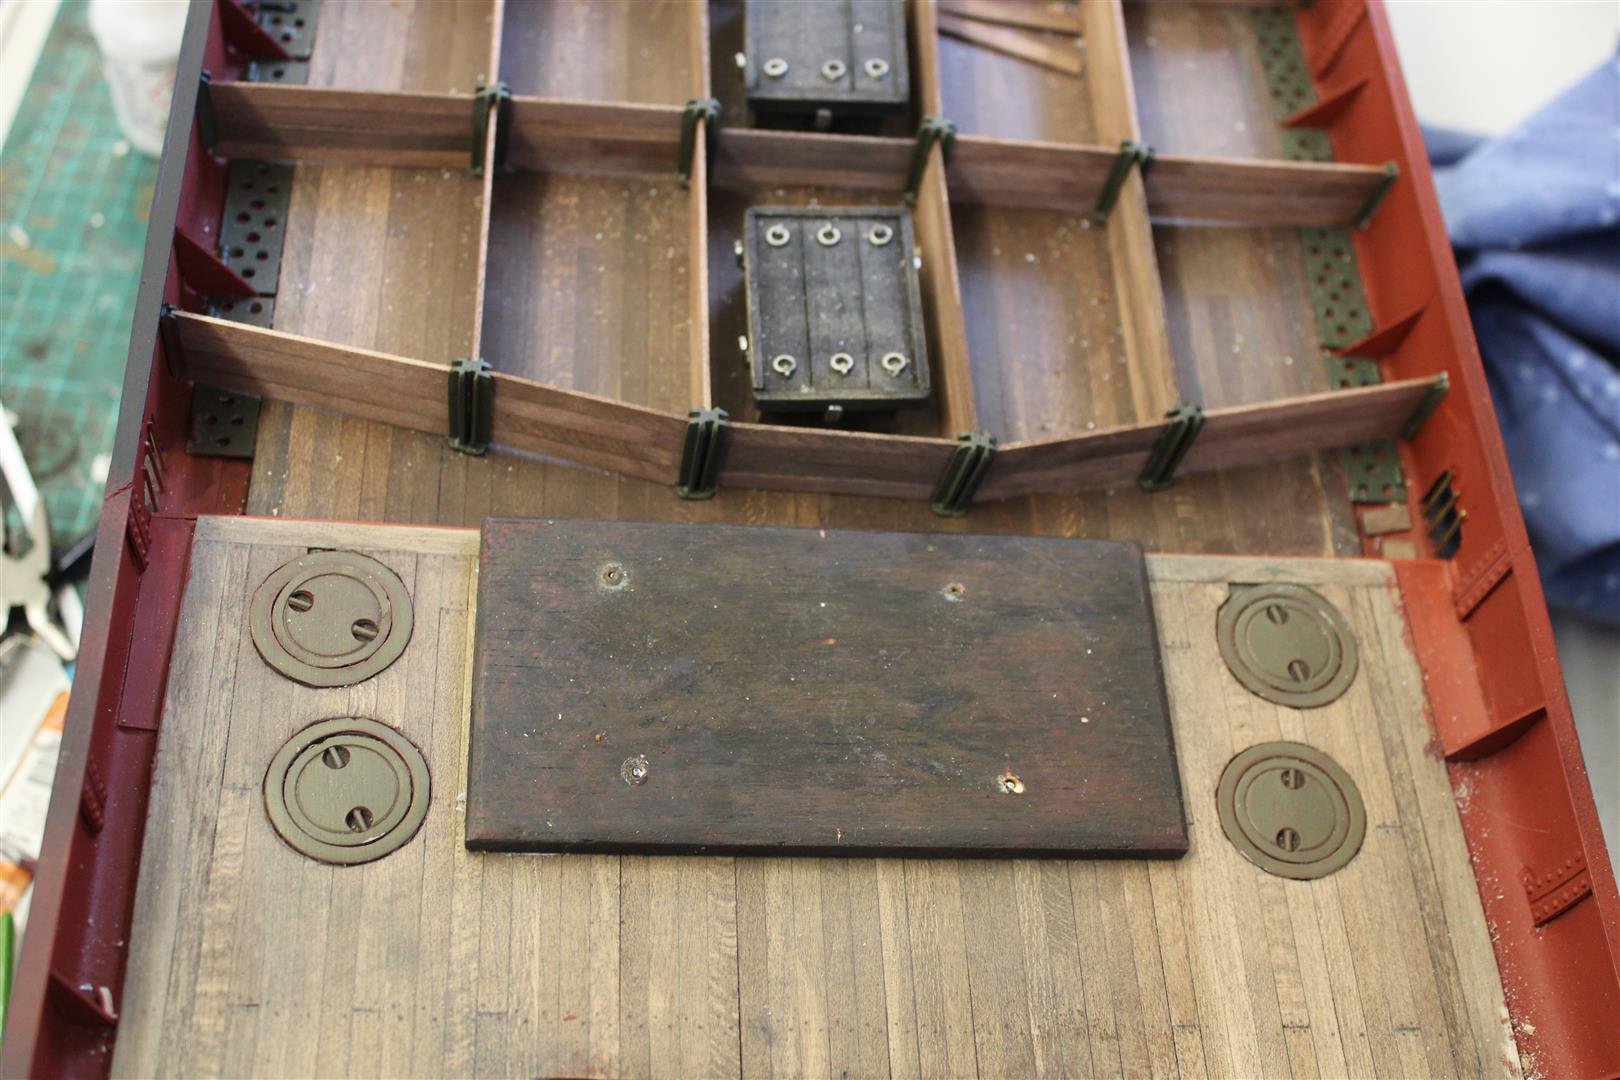
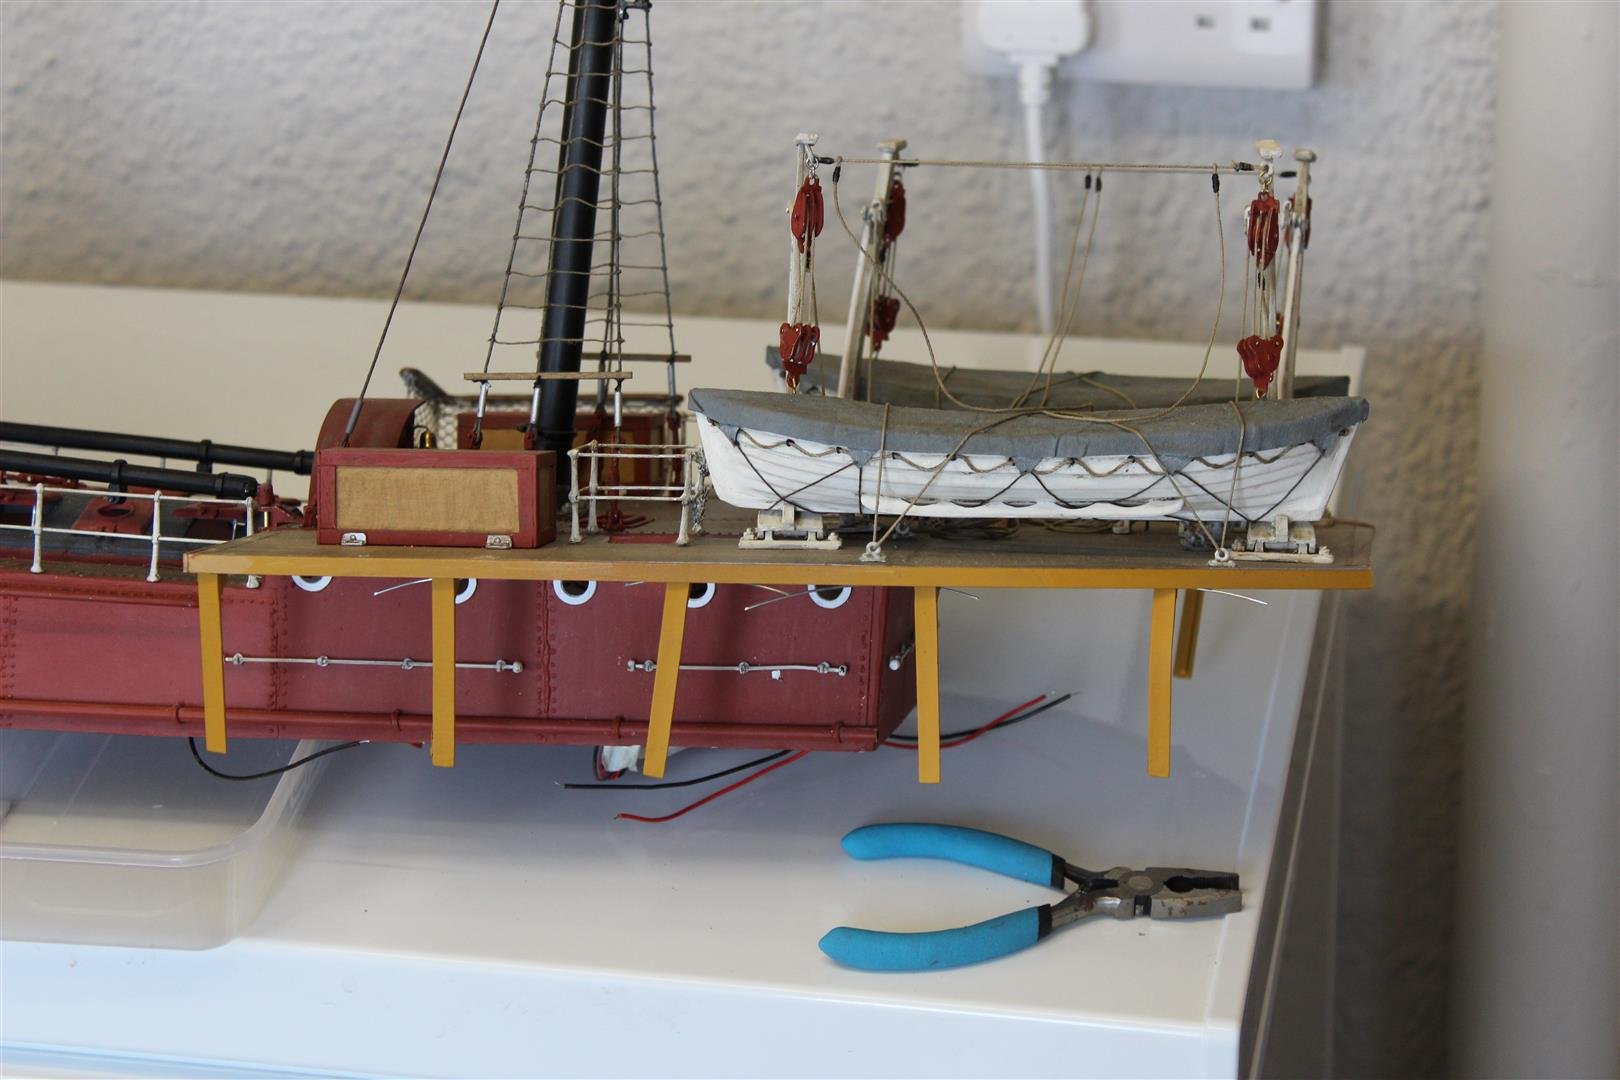
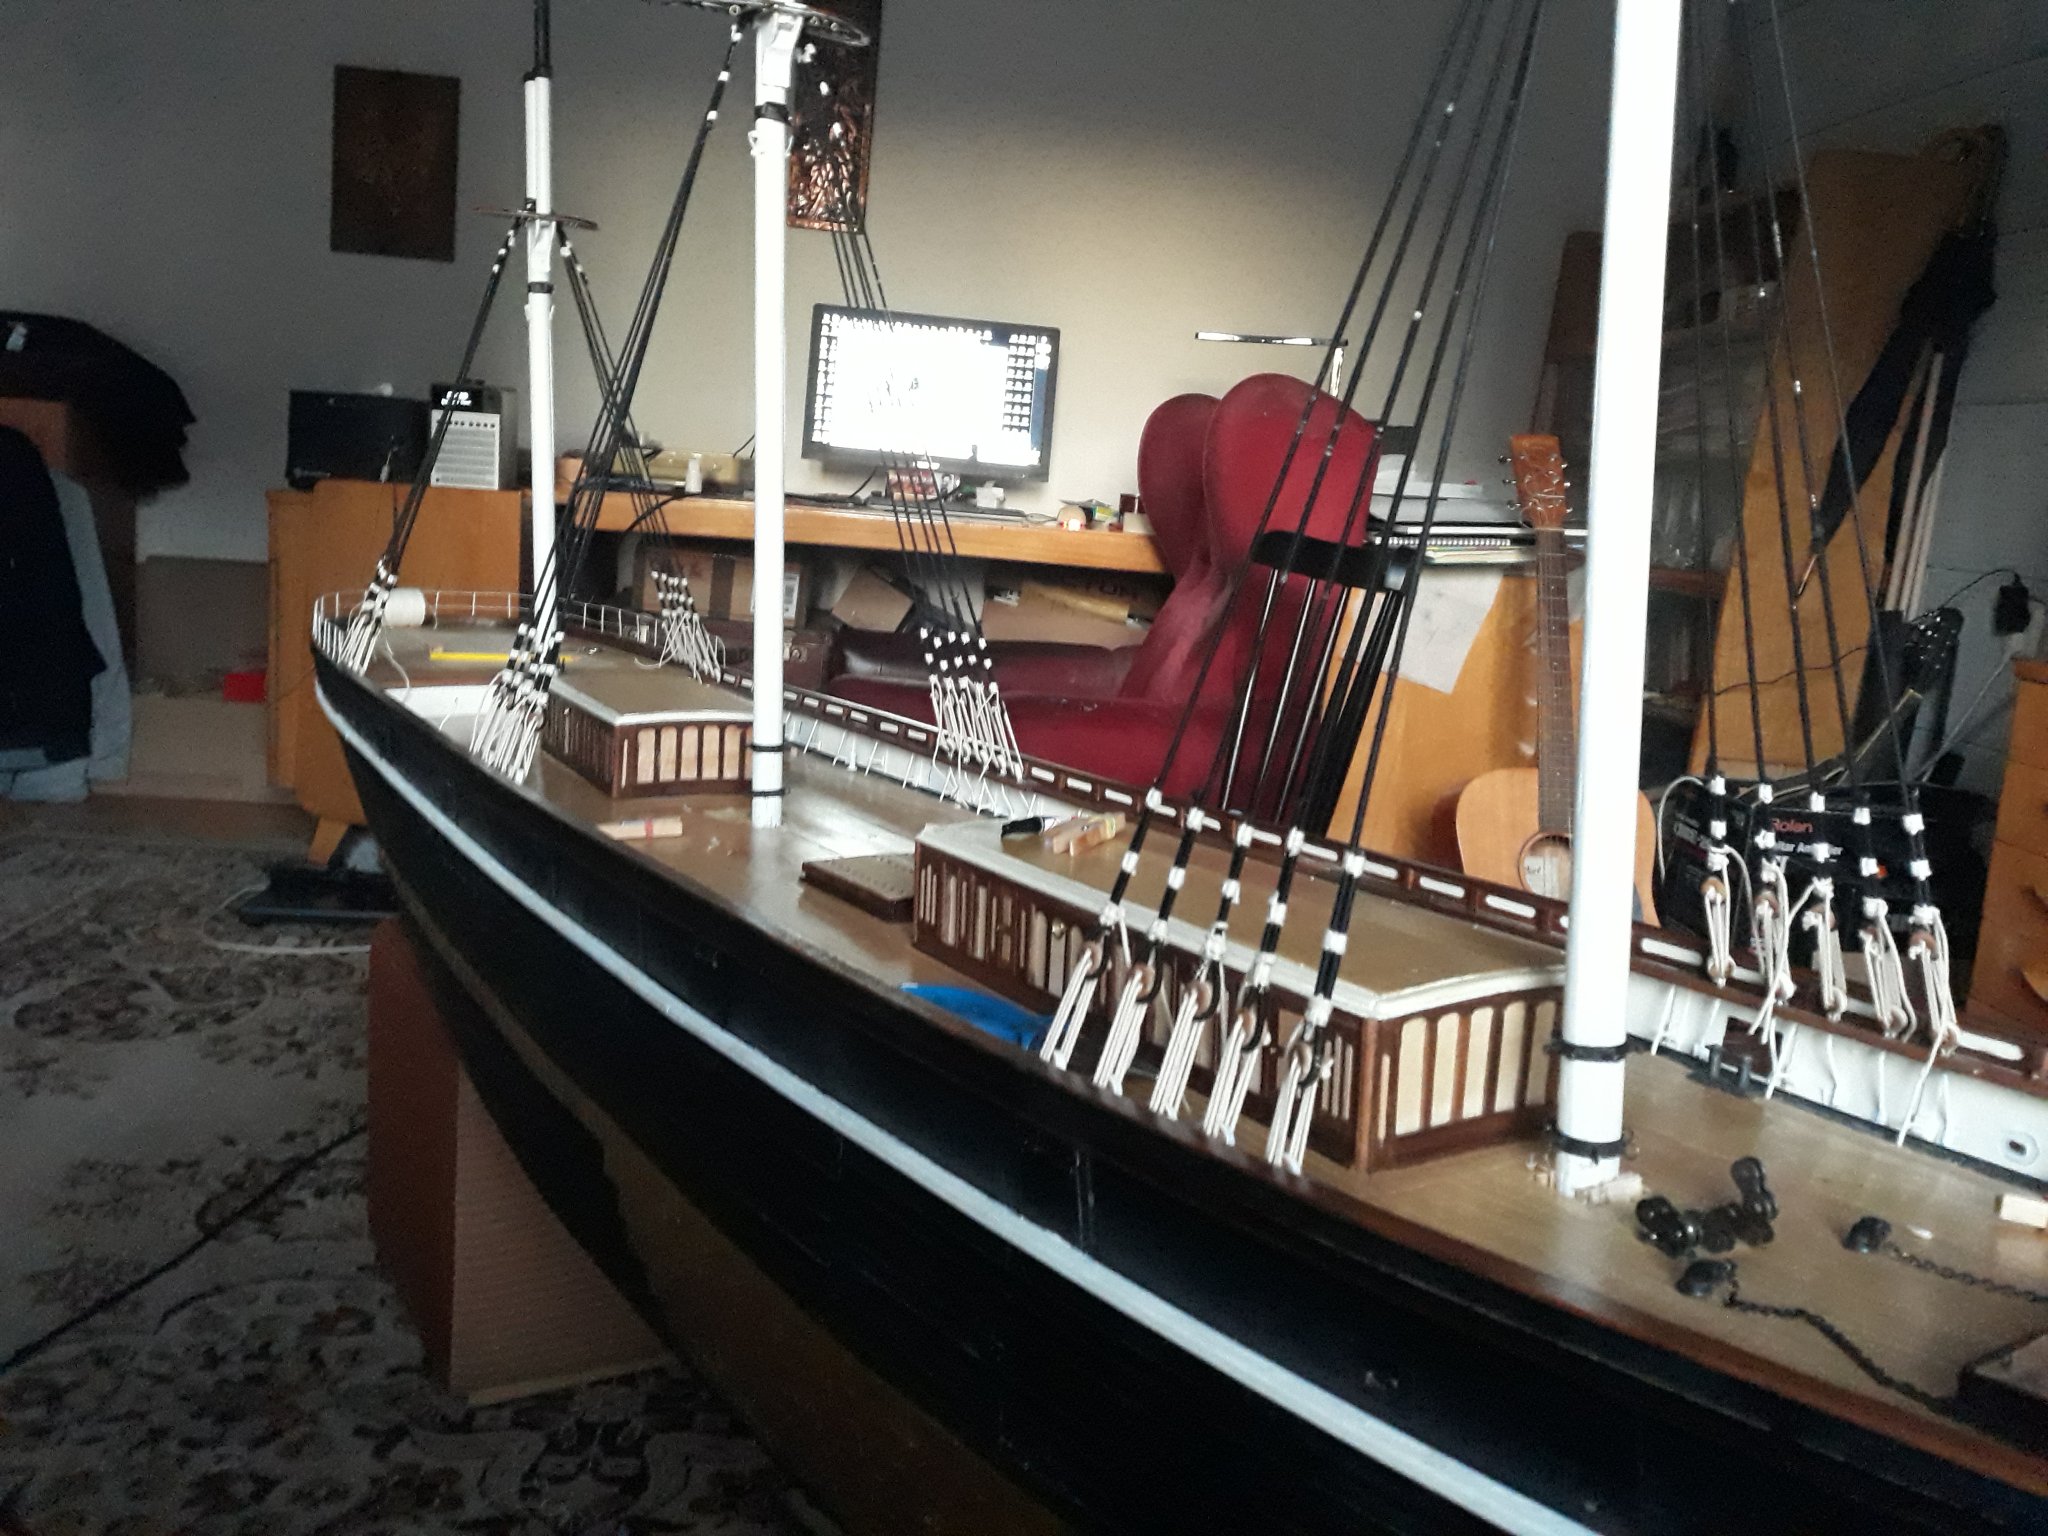
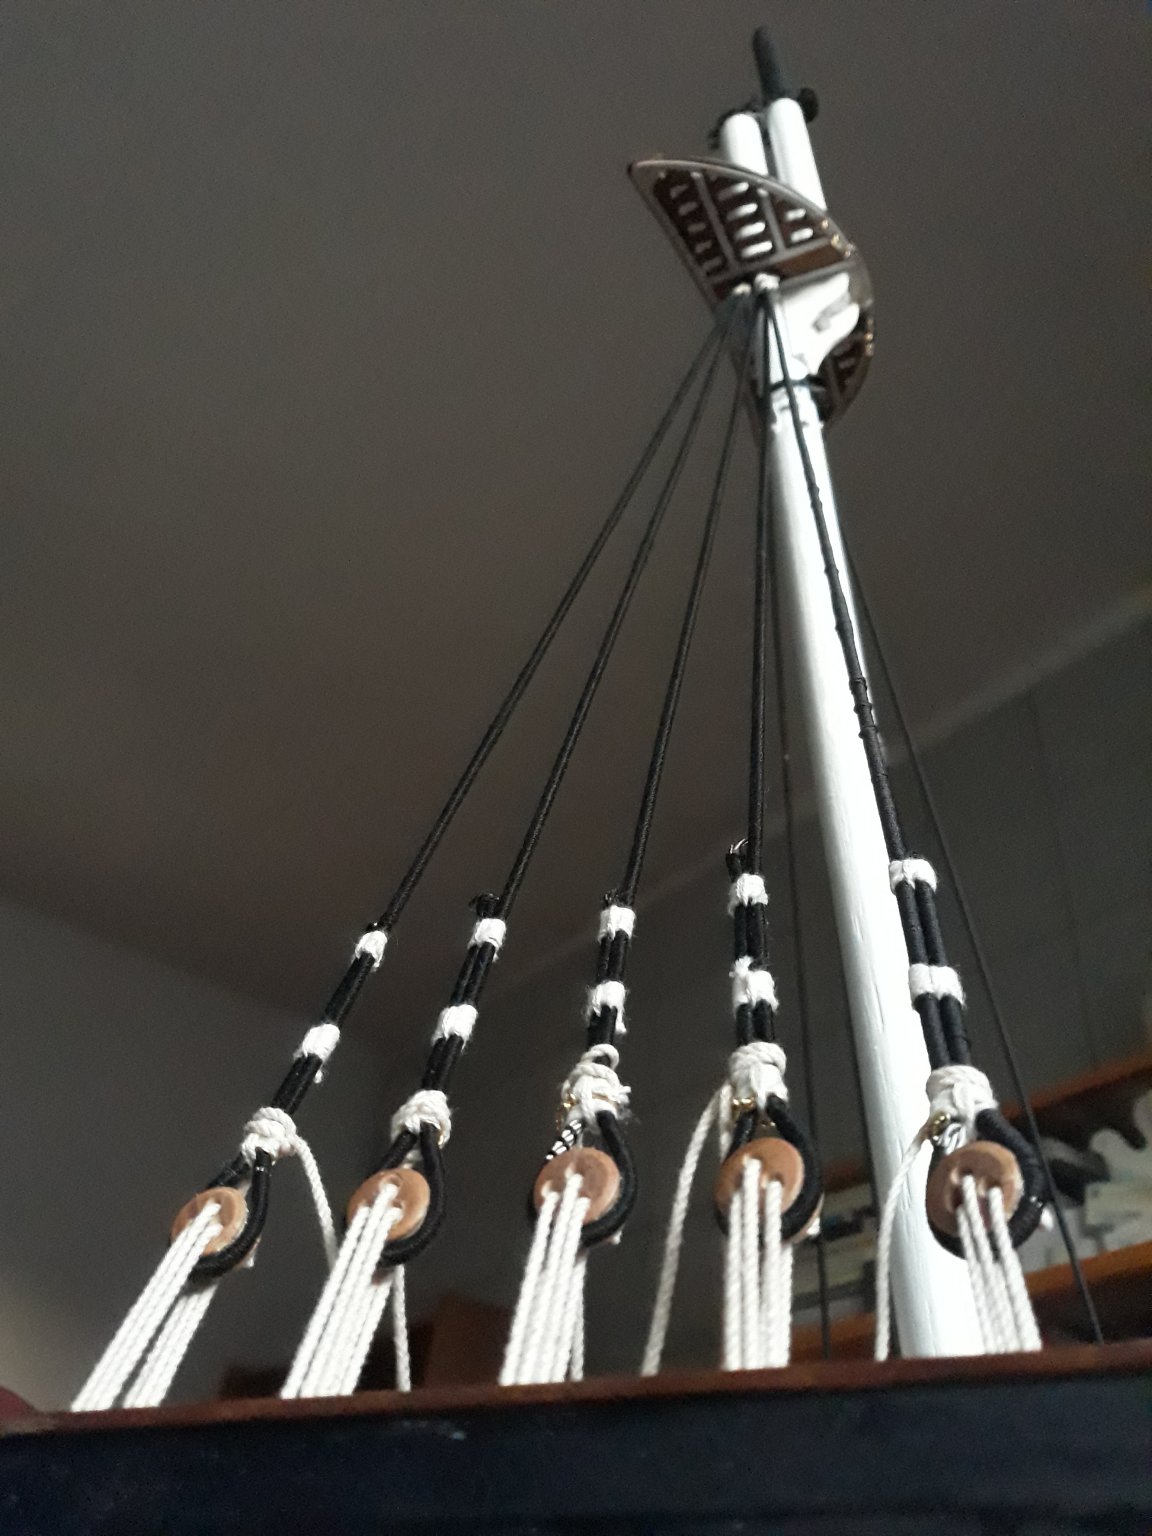
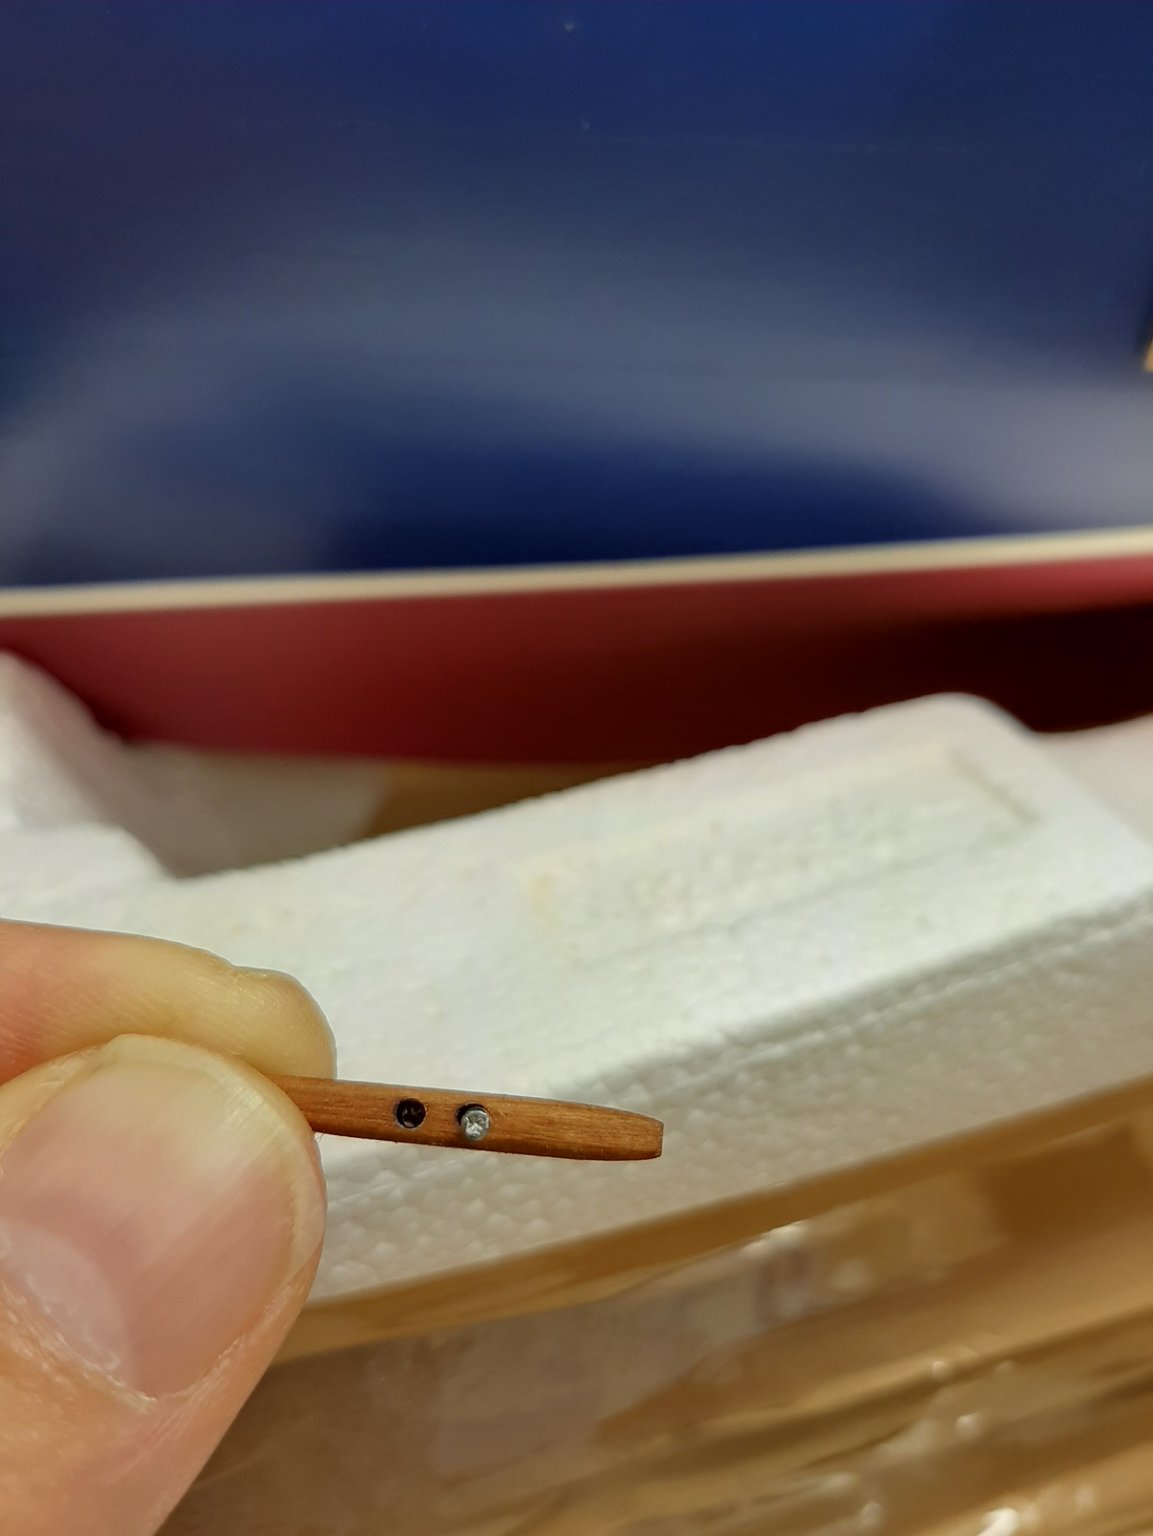
So Masting. Everything will be on pics, so I will try to comment on it. I started final polishing and cleanup of small things and building remaining small parts. As by nature i am very unpatient person, I found workarond how to save a day, usually when I start working I know if day is being dog or sweet. if dog i let it pass as eveything comes up ugly, and when a good day apears I work as much as possible. I made steering wheel bunk, and after securing all deadeyes / bases still to be painted black / I already made shourd ones. After new bow with knightheads, I finished outr side of bulwark rails attaching new wood support and metal plate with simulated rivets which allowed me to remove inner support for rails. I finally removed white ugly wooden supporters of rail underneath from deck side to make bow bulwarks look cleaner. I sanded off down side of catheads to make them unlinary shallower at one side, and put them on place. well as much as I hate glowing surfaces, I did not figure out another protection from dust as varnish. If you have another solution any advice more than welcomed. o I put on deck 5 or so coats of varnish ,more and less diluted and after first 2 I scraped upgrain with razor. I put more work again on lifeboat reworked thwarts blonde and fixed according they should be and put metal knees. installed nameplate and made small fore "spray rail ". Installed bow bell. I made stern gratings cover,..aligned both nameplates in bow according plan so I had to put them a bit outwards .... secured stern bollards, made skylighs, still some things to make. rail winches , beef casks, poop bell...but leeaving as i need more patience
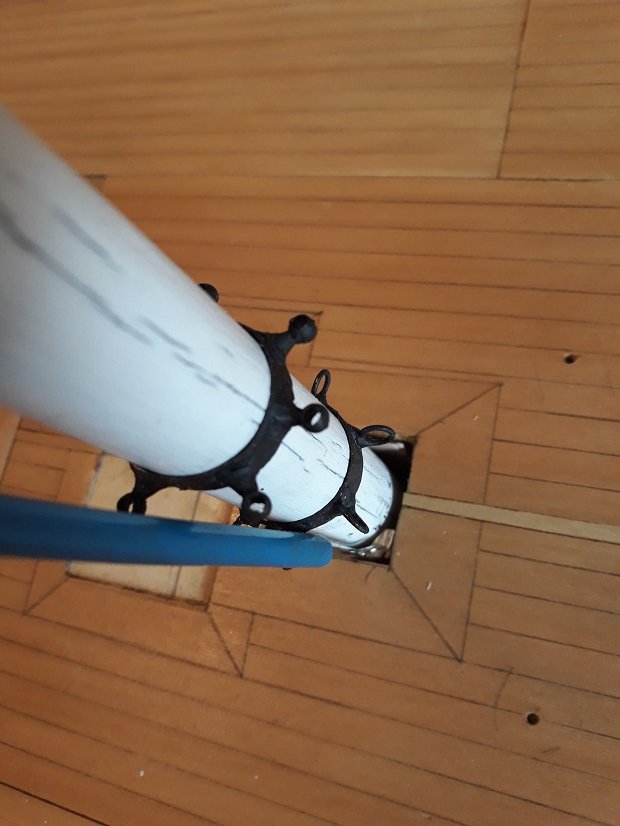
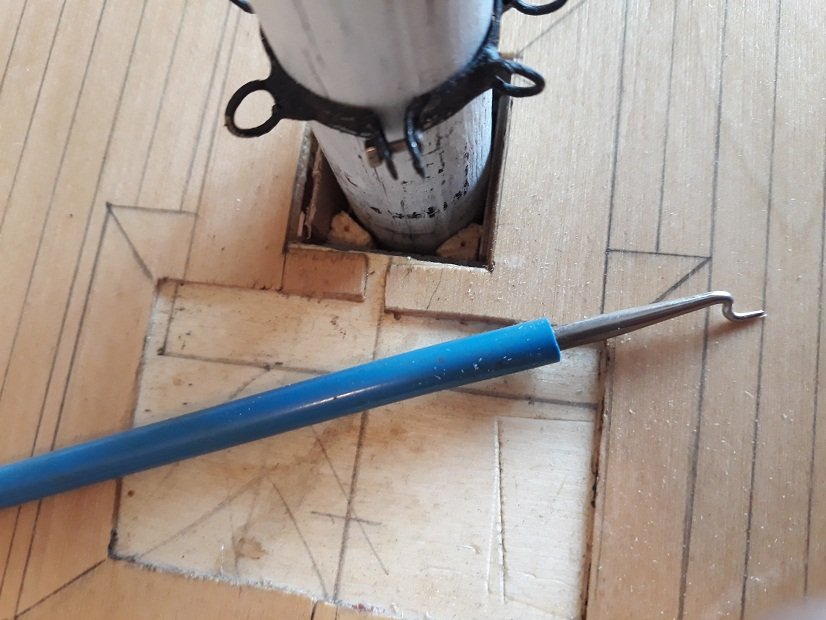
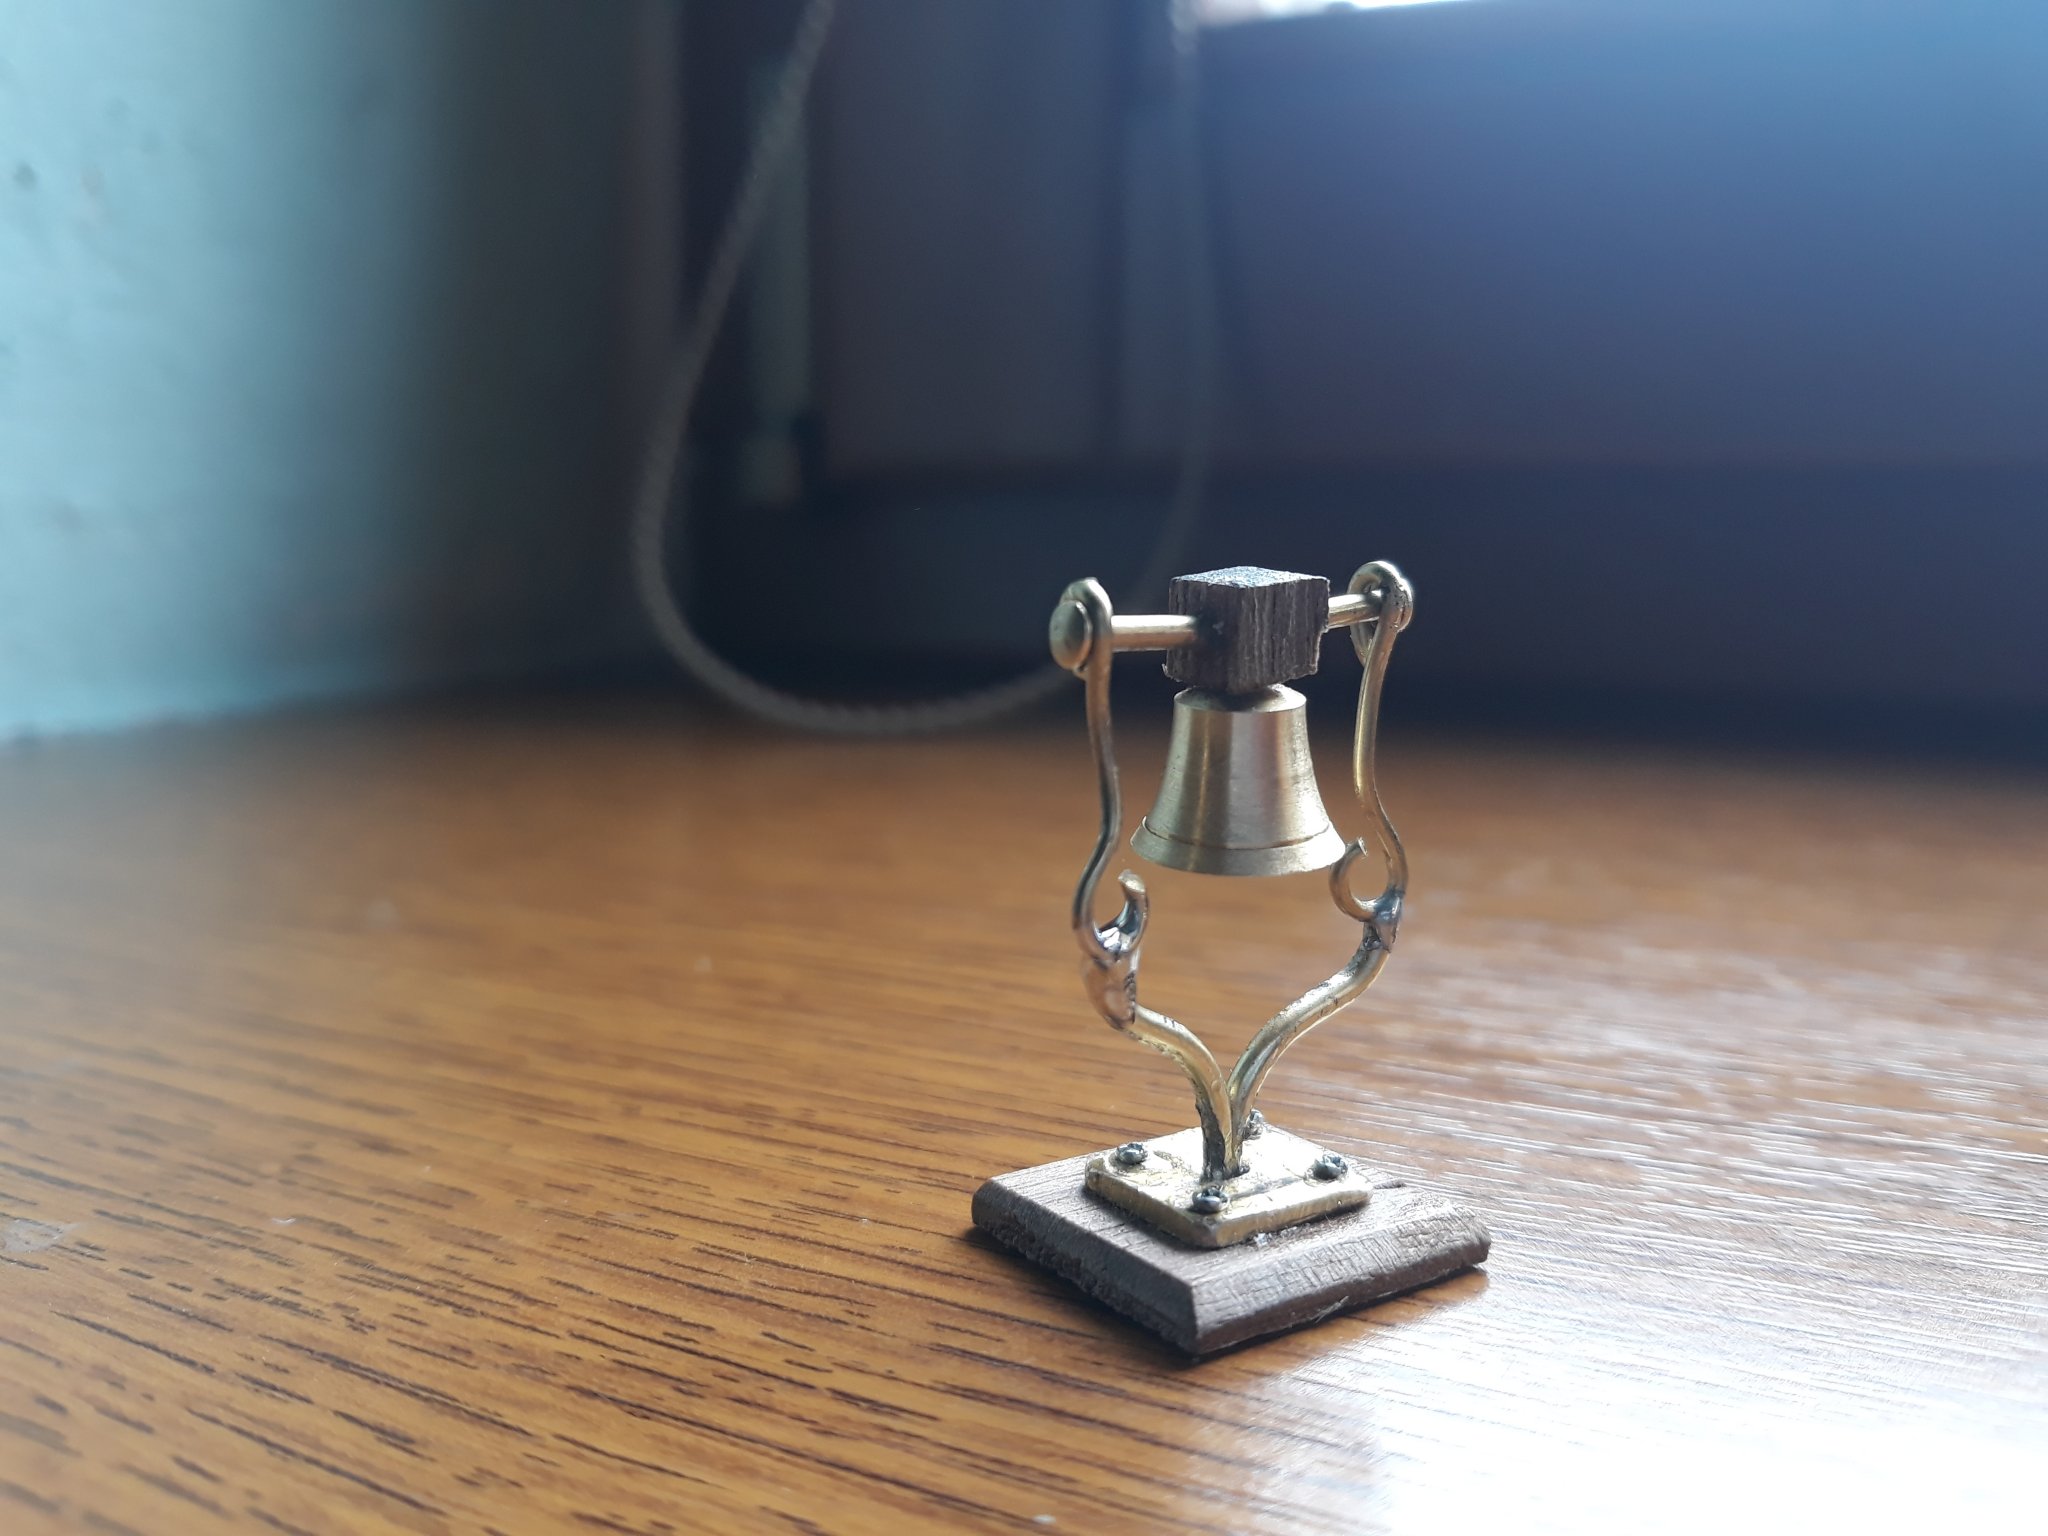
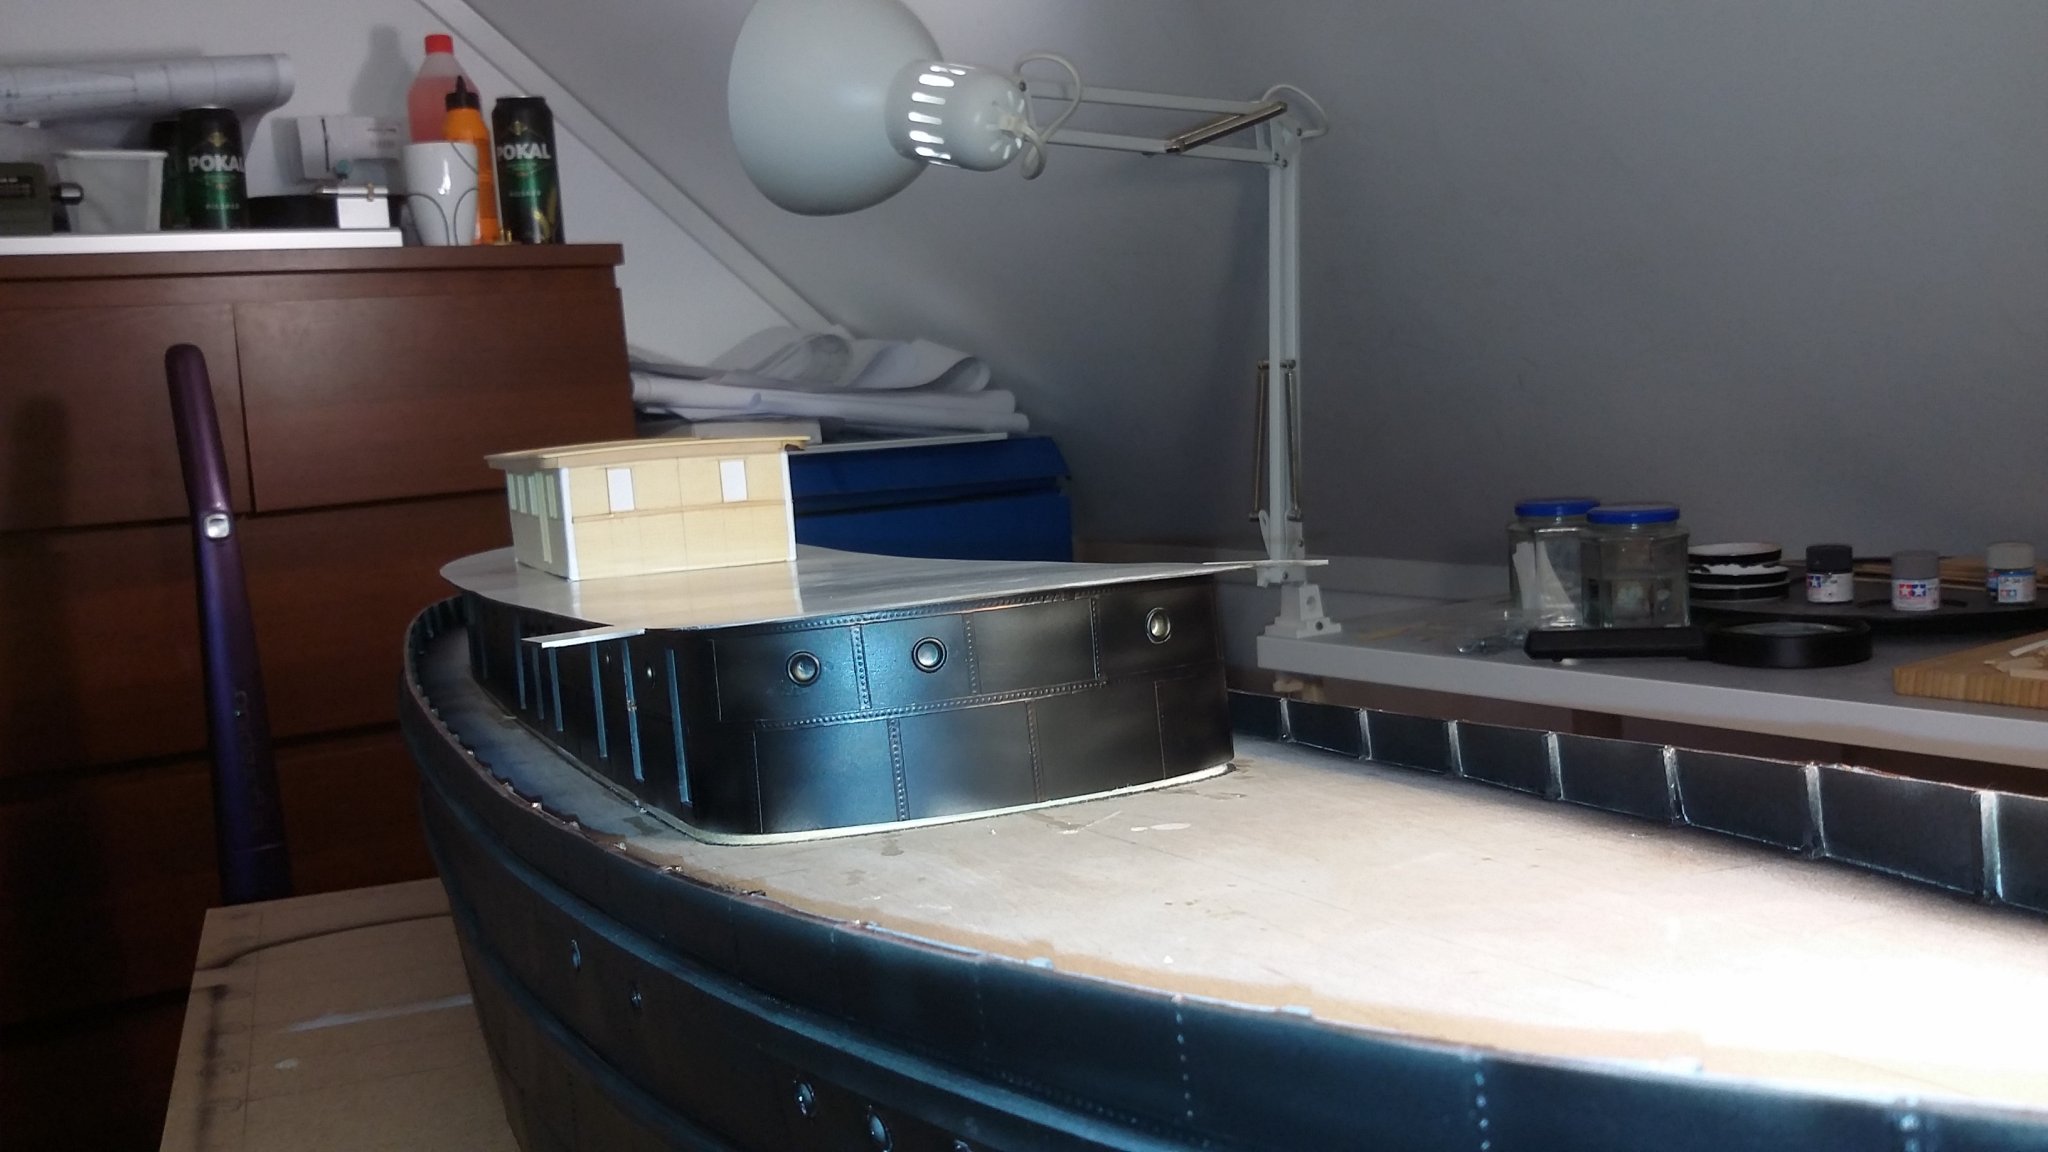
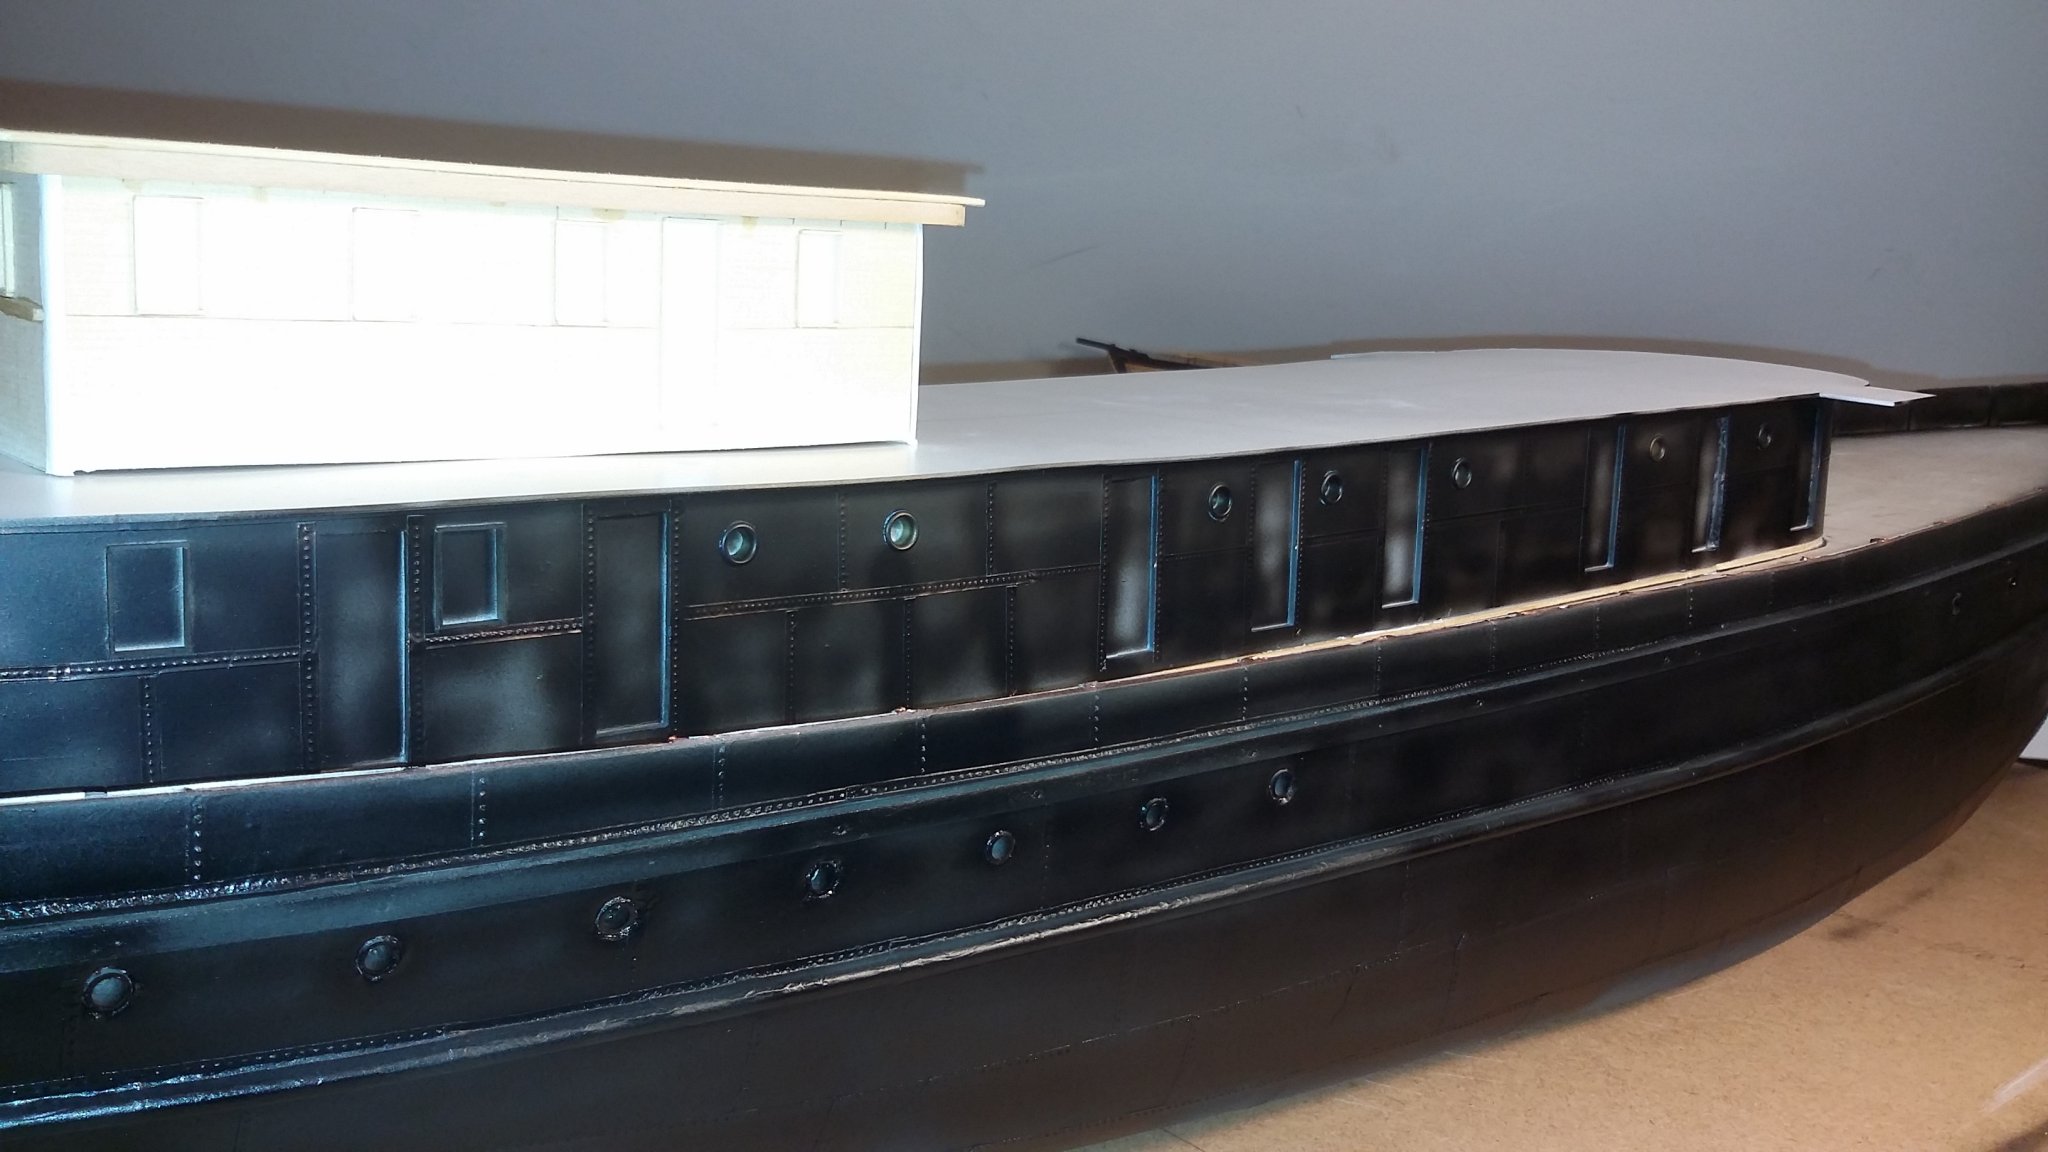
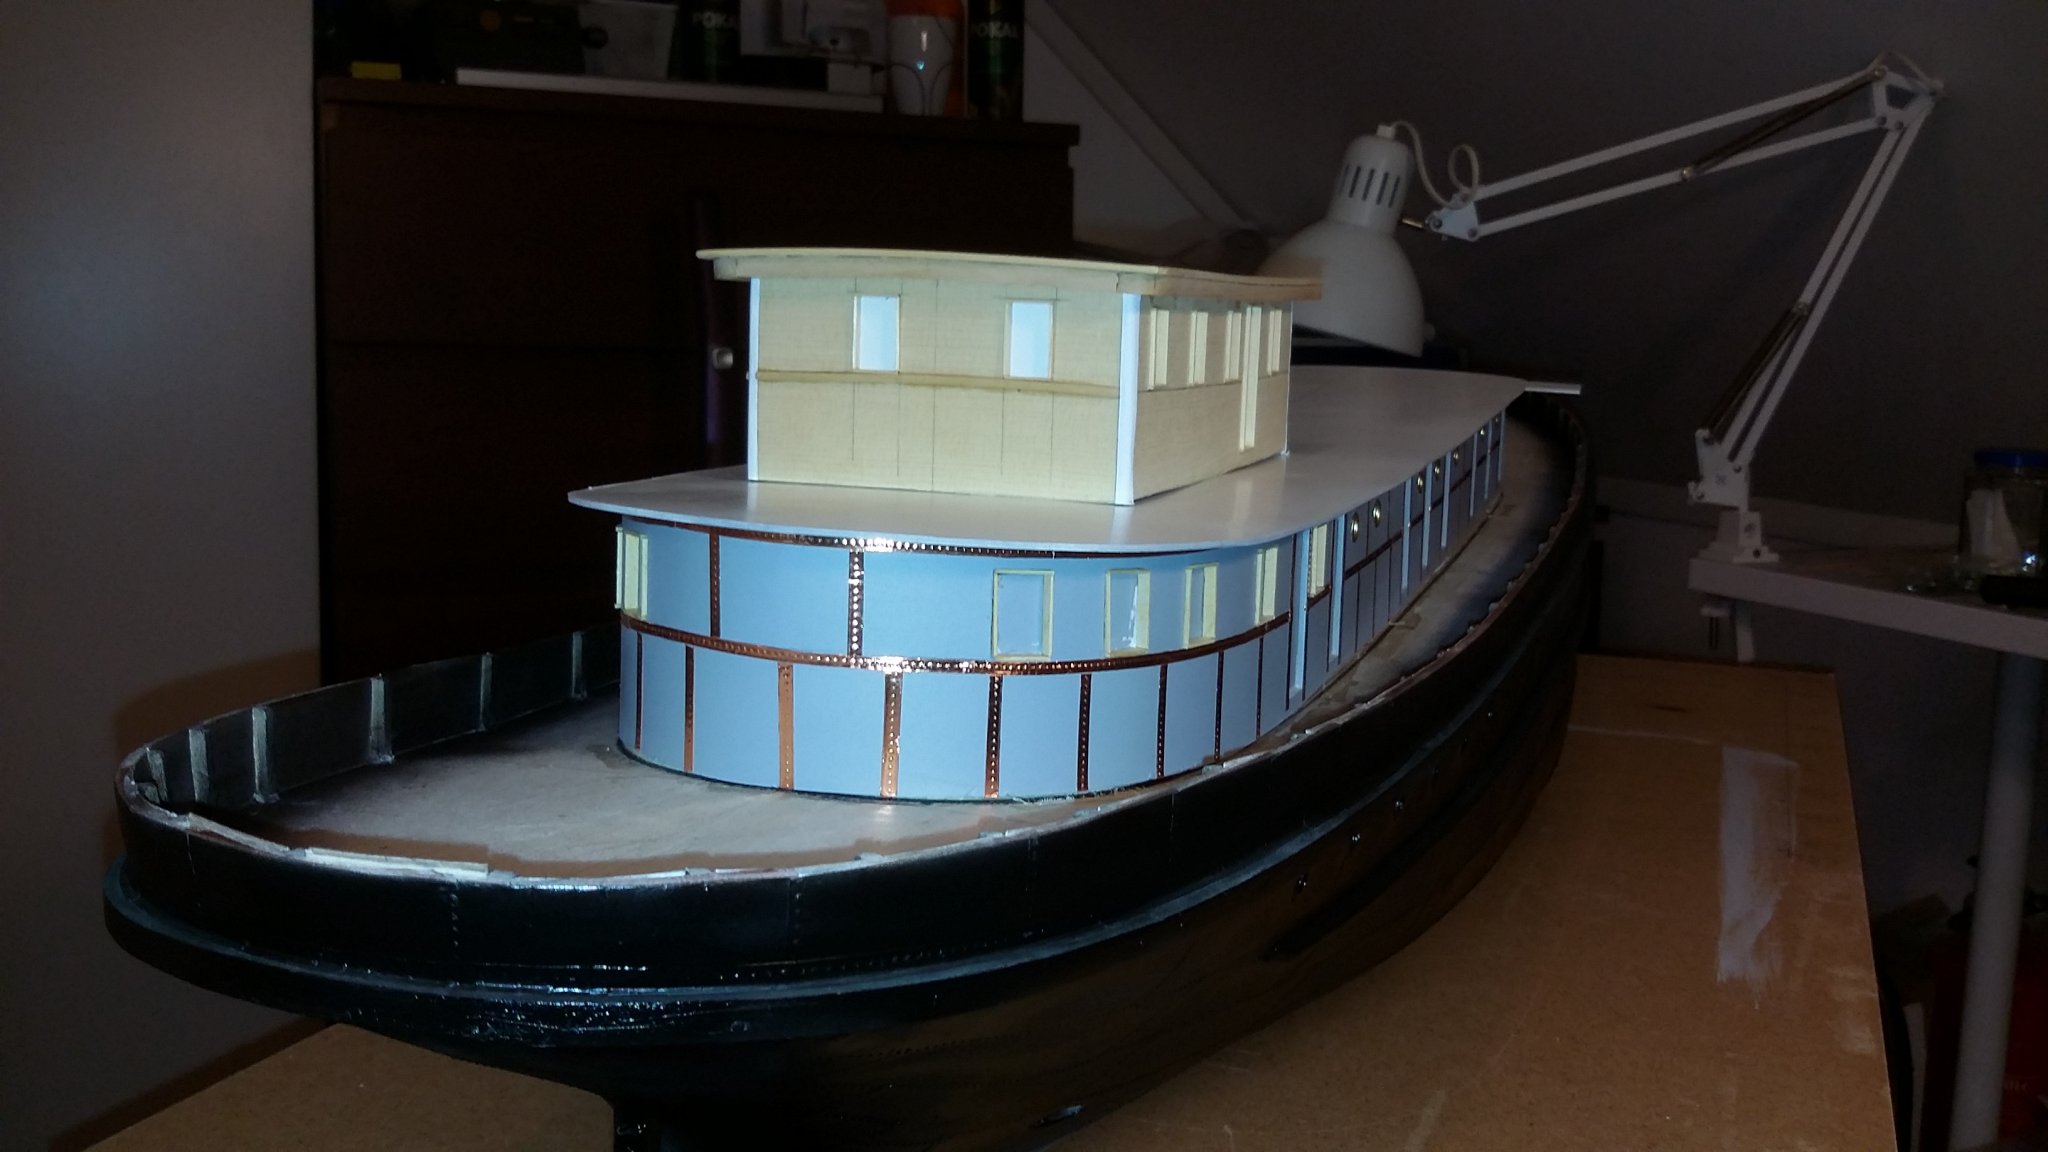
securing masts scared me, as I left them with square holes /stupid idea/ so i had to align them all and instert some triangle wood sticks to secure them . but worked. at this point I started standing rigging. hanged shrouds and seiging them in pairs up masts. still have to put bowsprit chains...i painted stairs white. Next chapter. - rigging.
thats all for this week folks, big thanks for great comments...support, for any remark comment, like etc...and stay healthy!Vlad


- mtaylor, GrandpaPhil, petervisser and 3 others
-
6
-
6 hours ago, Mark P said:
Good Morning Vladimir;
You are still working hard I can see. The speed of progress is remarkable, and I agree with Alan above, your resourcefulness in using other objects as substitutes to obtain the desired look is ingenious.
Keep up the good work.
All the best,
Mark P
Good Afternoon Mark , thanks for such compliments i keep saying interest of all of you guys makes me repair again and keep up. Guess what? Even more has been done. Look where i am. If someone asked why would one bother with big cumbersome scales this photo is answer why... This is payoff for all previous struggle. Well i have to learn another magics though... :) stay healthy!


- GrandpaPhil, mtaylor, gieb8688 and 1 other
-
4


Glory of the Seas 1869 by rwiederrich - Medium clipper - discontinued in lieu of new log
in - Build logs for subjects built 1851 - 1900
Posted
Thanks Rob, it sure is very intreresting reading all of your inputs to the point, im sure i could read it for hours...but sorry i feel I am a bit stealing or little messing your log with general debate so I will slow down a bit. entire fleet that was merely joke as I pointed, thanks for explaining why you picked up boats... by the way. today I received parcel from model shipways with 6 beautiful detailed plans of flying fish. I dont have particular reason for that boat /well I do..even just she is typical representation of McKays design anyway.....apart of records McKazs boats possessed, few of them proved sluggish as well as He embarked glory himself on maiden voyage to San Francisco to fool authorities but he was just a passenger not her master yet he stated himself in papers....Mr. Mjelde writes.... I picked fish just because model shipways has developed amazingly and thoroughly researched updated and laid plans etc. that was most important reason., That would be my 1st McKays vessel to build, I already measured her up, and will go most likely for usual 1.48 scale up from 3rd watter level,.... without masting her in first place...future can deside masting anyway. I intend to make her with significantly slower approach so will take me long i guess with focus on deck wood aesthetics on decks etc..etc... will probably try hull to carve from single block and on that to foolow up ....with my best ability to shine and with idea to keep memory of Donald McKay alive and sound for todays audience in my surrounding. after cutty im turning to the west and Thanks for introducing me to "clipper americana"") Vlad
Vlad