

Rik Thistle
-
Posts
847 -
Joined
-
Last visited
Content Type
Profiles
Forums
Gallery
Events
Posts posted by Rik Thistle
-
-
Eric,
I think the narrower painted lines look neater and less obtrusive, but probably more time consuming to make. Tape will be much quicker to lay down, but could also start to curl up at the edges. Also, would grey paint/tape draw the eye away less?
The electrical snippers give everthing scale....I didn't realise the scenery was smaller than I thought....very impressive.
Richard
- Canute, FriedClams, Jack12477 and 1 other
-
 4
4
-
Eric,
This is all quite fascinating and informative for me, especially since you have a backgound in how landscapes are actually formed.
I look forward to each post (and Comments) on the bridge and tunnel scene taking shape. Keep 'em coming, thanks.
Richard
- Canute, Old Collingwood, Jack12477 and 2 others
-
5
-
Greg,
That is a great result. Very well done.
Richard
- Old Collingwood, Jack12477 and Canute
-
3
-
Threshing machines in Europe were designed to output into sacks.
That rings a bell. I think a tractor and trailer* then carried the sacks from the thresher to the drying building. And then I can sorta recall the labourers taking the sacks on their backs up the stairs to the drying floor where the grain was then spread out.
I now do remember there being neat piles of sacks stored in that building. Sacks played a big part in farm life.
Richard
*Again my memory is a bit fuzzy. Threshing was carried out near the farm buildings so it is possible there was no need for tractor/trailer - rather the labourers walked the short distance to the building with the sacks on their back, or perhaps used a sack trolley - I do remember there being a few sack trolleys about the farm.
- Cathead, Keith Black, Paul Le Wol and 6 others
-
9
-
Eric,
On my Dad's farm (late 1950s/early 1960s) I vaguely remember the grain from the fields being lifted up* in to the first floor (UK terminology) drying loft of one of the large farm buildings where it was then spread out on the wooden floor. Rats and mice were always a problem hence plenty of farm cats.
Once the grain was dry, it was then put in to sacks and slid down a short wooden slide fitted to the bottom of one of the first floor 'doors' onto the trailer positioned underneath where the sacks were stacked up.
*I can't recall how the grain was first lifted up to the drying floor.... racking my memory but nothing yet. As Egilman says, a bucket chain lift could have been used but I don't recall seeing that. I know later in the farm's history there was a Lister bale/sack elevator used for moving heavy items up (and down?). Perhaps something like what is depicted here was used in the earlier days....https://www.alamy.com/stock-photo/straw-elevator.html?sortBy=relevant .... but handling loose grain would still need some kind of container to carry it up there. Maybe the workers carried grain filled containers on their back up the stairs.
Richard
PS: Page 37.... https://wshc.org.uk/wp-content/uploads/2012/08/Wilts-Farmsteads-Char-Statement-2017pt3-504.pdf seems to imply that, in the UK, in the 18th/19th century the grain was lifted up in sacks.
- Egilman, FriedClams, Keith Black and 6 others
-
9
-
Kevin,
This kit looks very interesting. Looking forward to your build.
Richard
- Kevin, Old Collingwood, Jack12477 and 3 others
-
6
-
OK, thanks James.
Richard
- Ryland Craze, mtaylor and robert952
-
3
-
-
I gather life-vests would prevent the rowers in the water to duck through the surf, but on the other hand being knocked unconscious could be fatal.
Yes, good point. I can see that that a life-vest would be a bit cumbersome and a hindrance in certain situations. Mark mentioned that jet-skis were used to quickly get to trouble spots. Those things are quick but every second does count.
Still, a very interesting competitive sport that I wasn't aware existed. I'll keep my eye out for it in the future.
Richard
-
Mark,
It's pretty common for 30-40% of the boats to not finish a race & sometimes worse.
I can believe it!
The sport looks very challenging but must give an enormous buzz to the participants. I can see it is also a great spectacle so am surprised none of the international TV companies have picked it up, or have they?
Richard
PS: No life vests, but I suppose everyone out there can swim like a fish 😉
-
RGL,
This has come up OK
A slight understatement, to put it mildly 🙂
I look forward to seeing the figures working the machinery in the farm yard. Great stuff.
Richard
- Canute, Old Collingwood, Egilman and 1 other
-
4
-
All over Europe, threshing contractors were going around from farm to farm (as were ploughing contractors), as buying threshers (or steam-ploughing sets) would not be economical for individual farms.
Yes, certainly in Scotland the farms tend to be quite small compared to the USA, say. There are sheep farms in the Scottish borders at about 2,000 acres but usually farms are much smaller. There is a tendency now to merge farms (and remove hedgerows) to improve efficiency, but I suspect the large capital equipment is still hired in.
In England, Harry's Farm (https://www.youtube.com/channel/UCFNRLTPU9263dTOYgrVcnHw/videos ) has it own combine harvester but Harry (like Clarkson) has other revenue streams.
Anyway, RGL, thank you for doing this impressive build...it looks superb and has rekindled some very old and fond memories.
Richard
Edit: From Wiki.... https://en.wikipedia.org/wiki/Combine_harvester
History - In 1826 in Scotland, the inventor Reverend Patrick Bell designed a reaper machine, which used the scissors principle of plant cutting (a principle that is used to this day). The Bell machine was pushed by horses. A few Bell machines were available in the United States. In 1835, in the United States, Hiram Moore built and patented the first combine harvester, which was capable of reaping, threshing and winnowing cereal grain. Early versions were pulled by horse, mule or ox teams.
---------
A parallel development in Australia saw the development of the stripper based on the Gallic stripper, by John Ridley and others in South Australia by 1843.
I didn't know any of that....I learn something new every day 😉 I remember we still had a couple of Clydesdale horses on the farm but they were in well deserved retirement. Powerful, friendly animals.
-
RGL,
On my Dad's farm, at harvest time, the thresher used to arrive plus a road going steam tractor.
Once they were hooked up and working, the noise movement, worker activity and 'stoor' was more than a very young child could wish to see. Very happy days.
Richard
-
Jackson,
Another aspect to modelling, which is a very absorbing hobby, is the ability to discuss/share projects with others eg this forum.
I think the 'internet' has added a whole new dimension to the matter as one is now able to retain the individualism of the build whilst immediately discussing it with many others from many lands.
Richard
-
A 1hr video recording by 'Andy's Hobby Headquarters, Arizona' ...
So much to see. Amazing models, dioramas, figures, paints, accessories etc everywhere. Thank you Andy.
Richard
- yvesvidal, Ryland Craze, Canute and 3 others
-
6
-
This link any good?....Archaeologists Find 500-Year-Old Shipwreck in Baltic Sea | Archaeology | Sci-News.com -https://www.sci.news/archaeology/shipwreck-baltic-sea-07431.html
Extract:
“This ship is contemporary to the times of Christopher Columbus and Leonardo Da Vinci, yet it demonstrates a remarkable level of preservation after 500 years at the bottom of the sea, thanks to the cold, brackish waters of the Baltic,” said team member Dr. Rodrigo Pacheco-Ruiz, a maritime archaeologist and deep sea archaeological expert at the University of Southampton.
Richard
Edit: From Feb 2023 ... Shipwreck of 500-Year-Old Floating Castle Found to Contain 'Thrilling Haul' - Newsweek -
https://www.newsweek.com/shipwreck-500-year-old-floating-castle-gribshunden-found-thrilling-haul-1780019- mtaylor, thibaultron and Allegheny
-
3
-
Tim,
I'd be hard pushed to tell the difference between your model and the real thing. What a result.
Richard
- shipman, Old Collingwood, mtaylor and 3 others
-
6
-
Hi all,
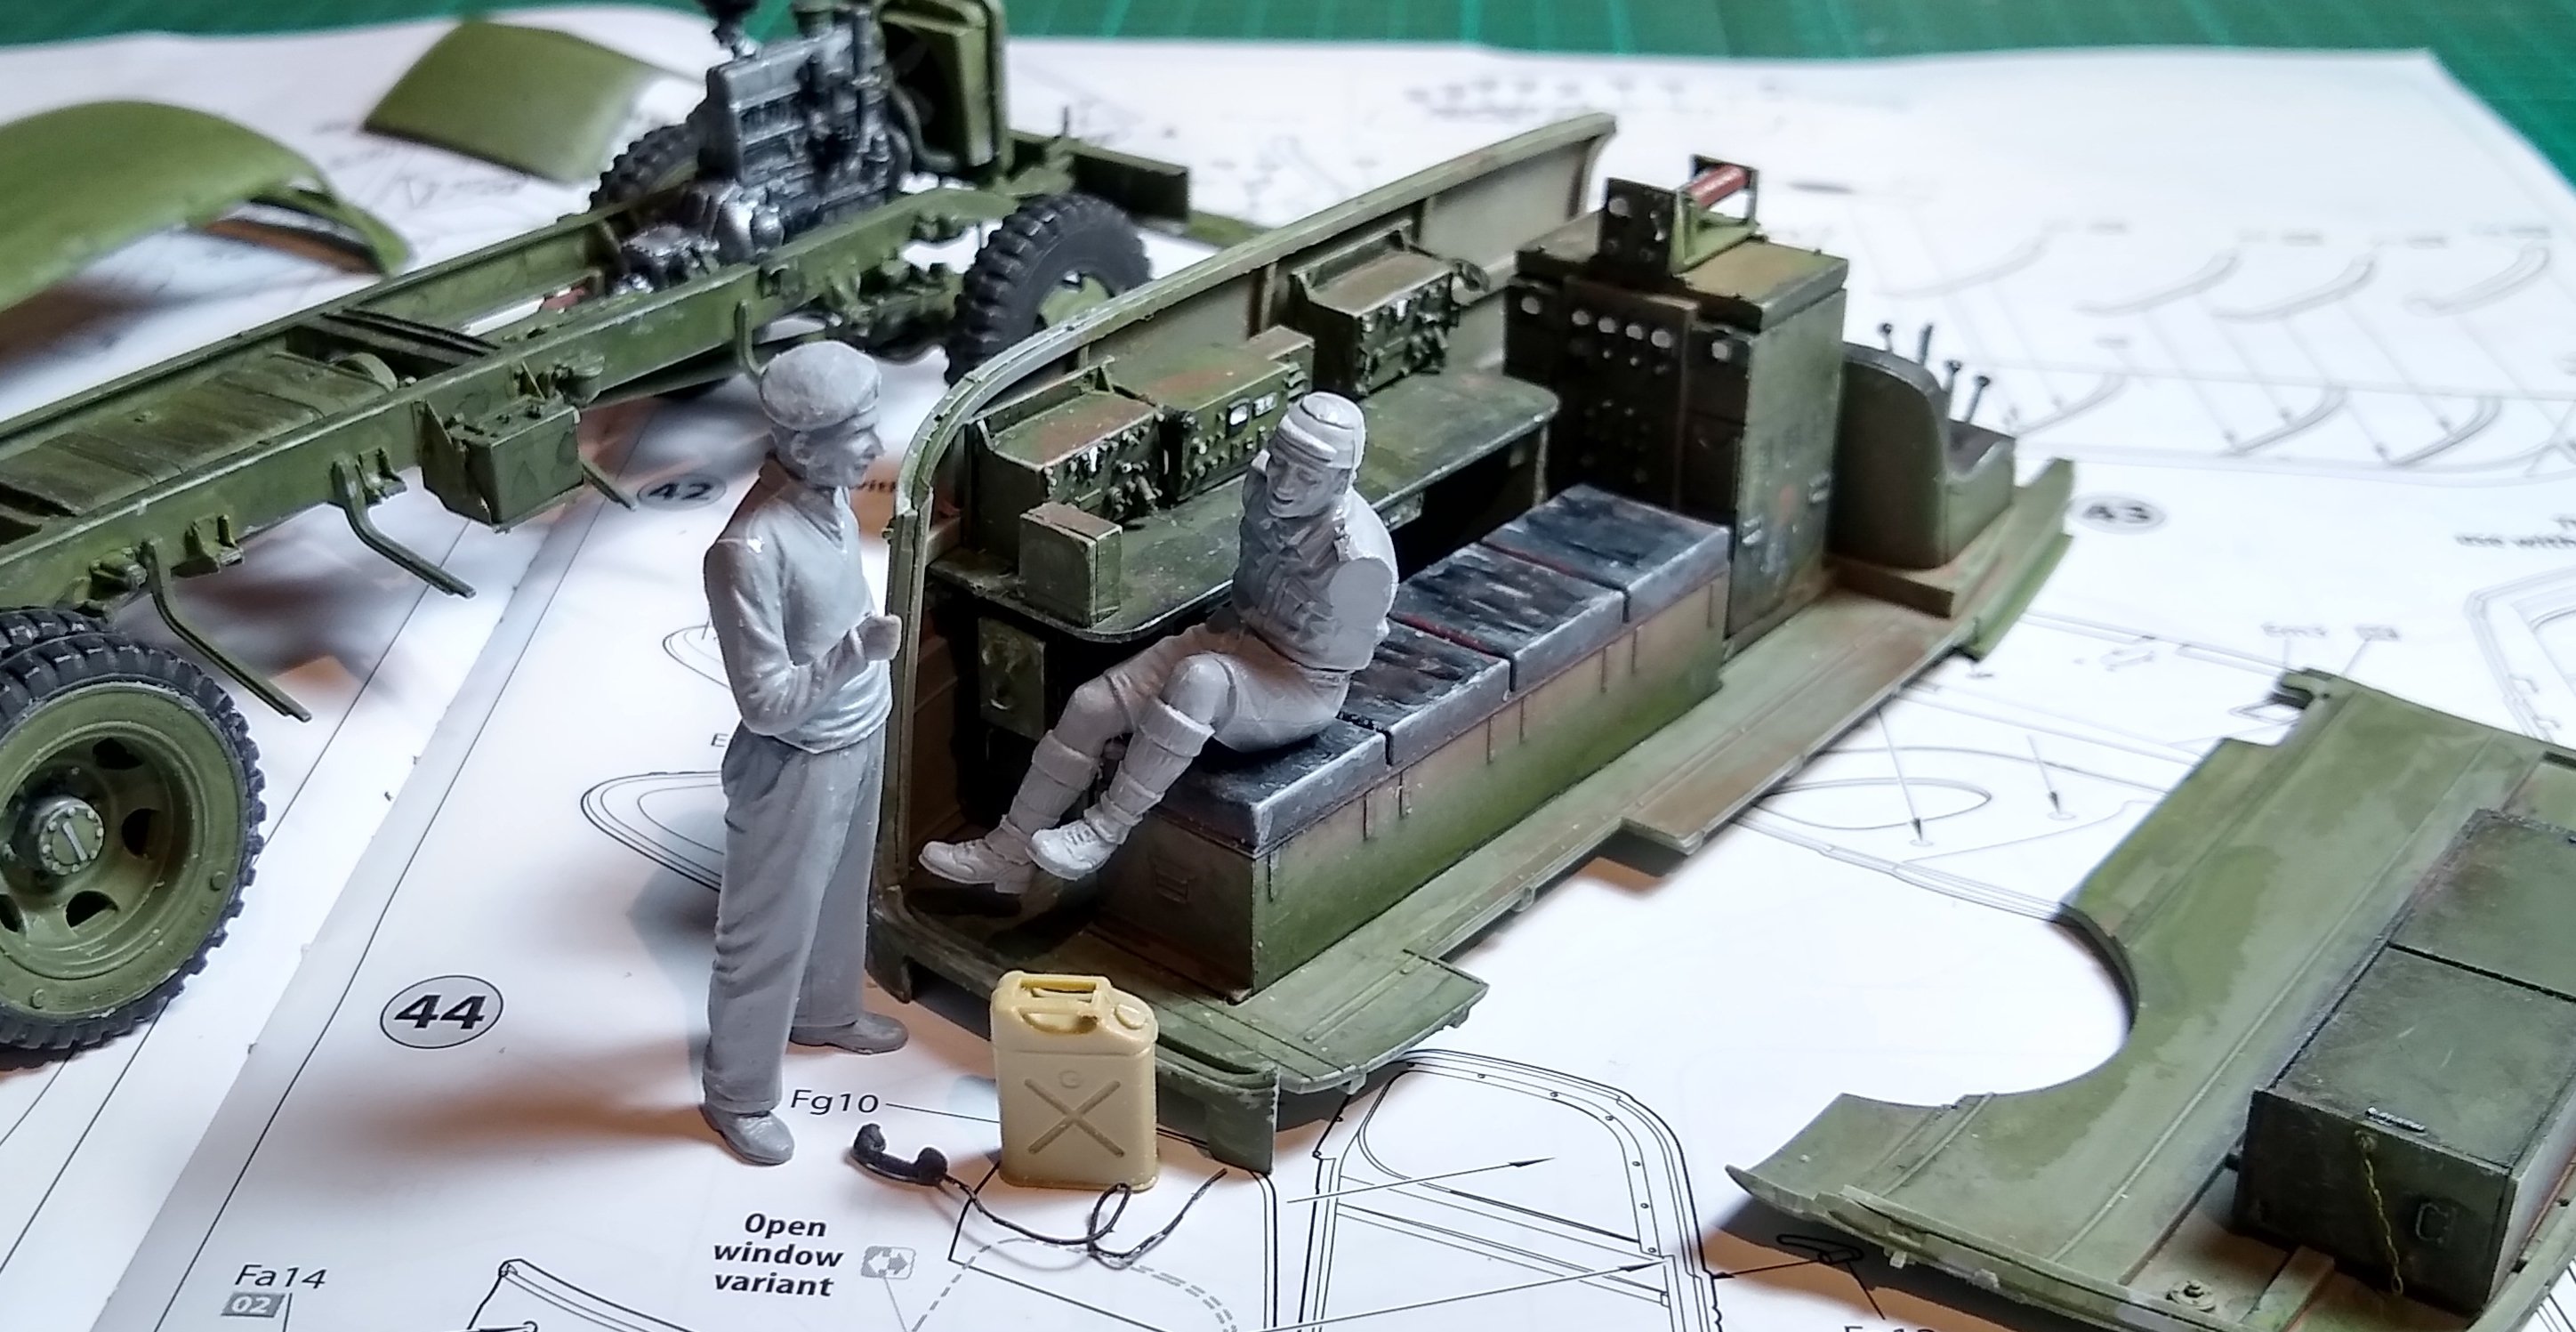
Work continues on the K51 radio truck.
The pic below shows the inside of the truck with all the radio kit installed. I had seen pictures of the radio boxes painted green, so went with that colour. But after having a further look I can now see some images of installations where the boxes were painted black. Black makes more sense since it helps dissipate heat slightly better. I'm still puzzled as to how the radio equipments were kept cool - heat reduces reliability. All that seems to be available is to open the back doors of the vehicle, to let the heat out.
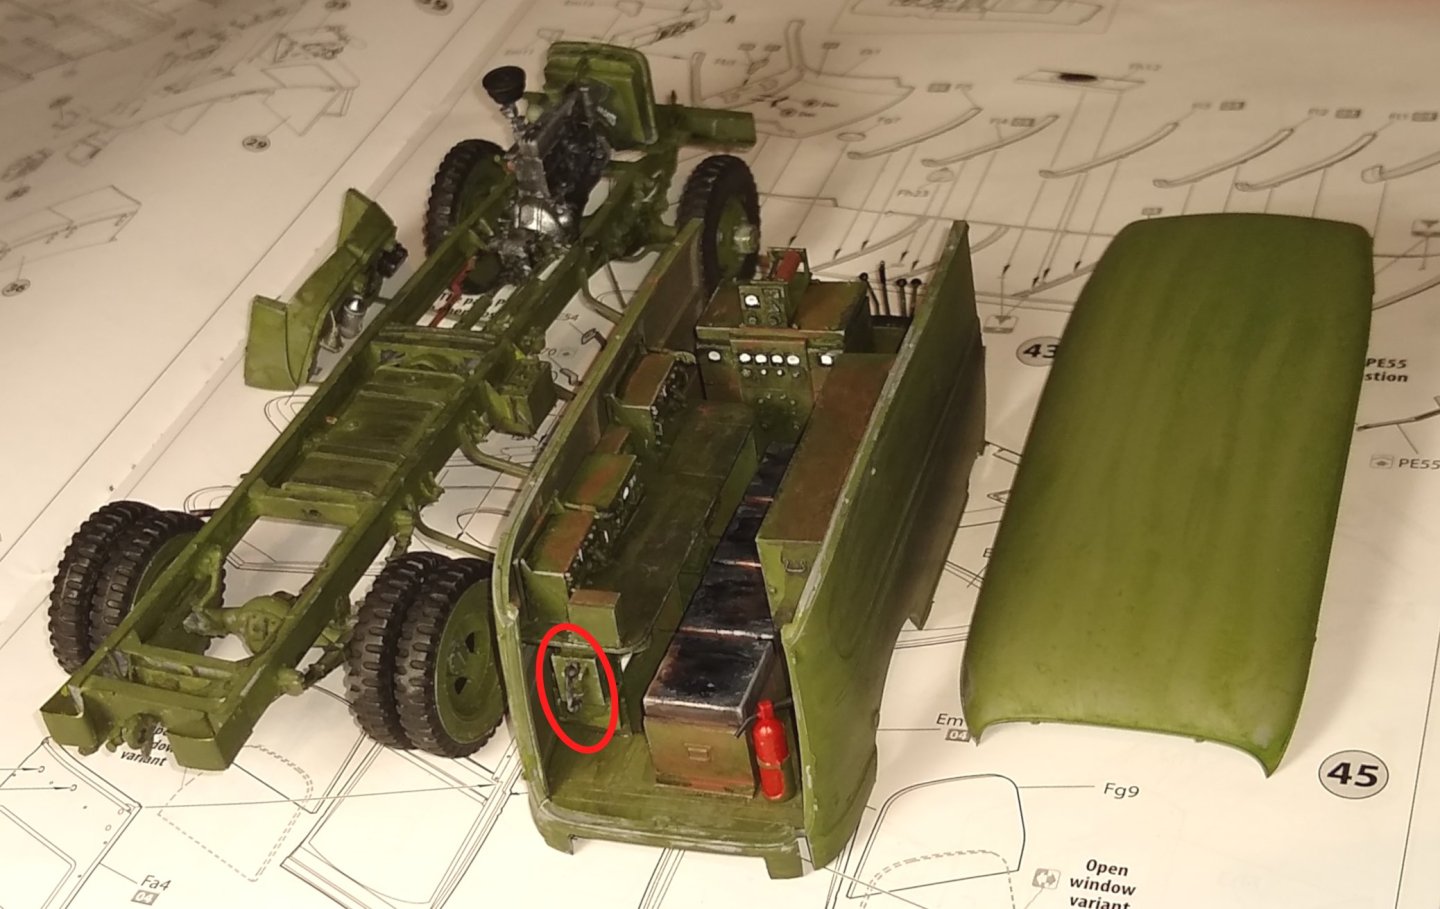
Above, circled in red, is the telephone land line that could be used to communicate directly with HQ by cable. A large reel of telephone cable is attached to the K51 truck's side.
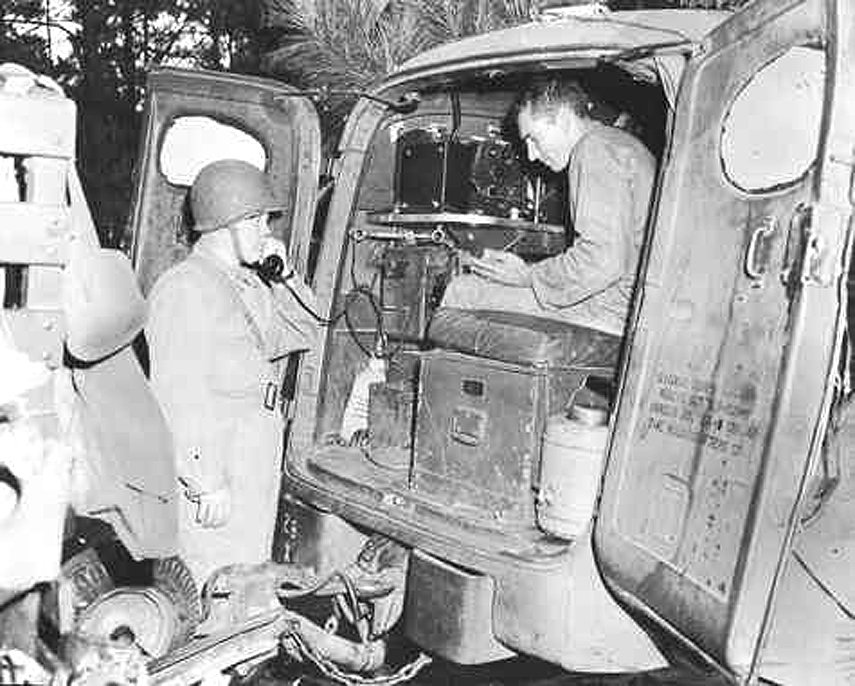
And below a couple of pics of the telephone in use.
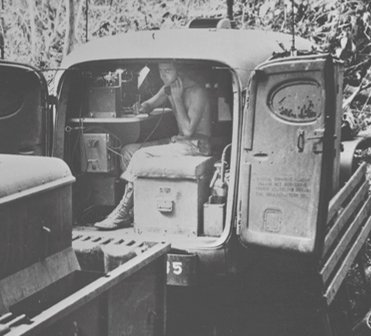
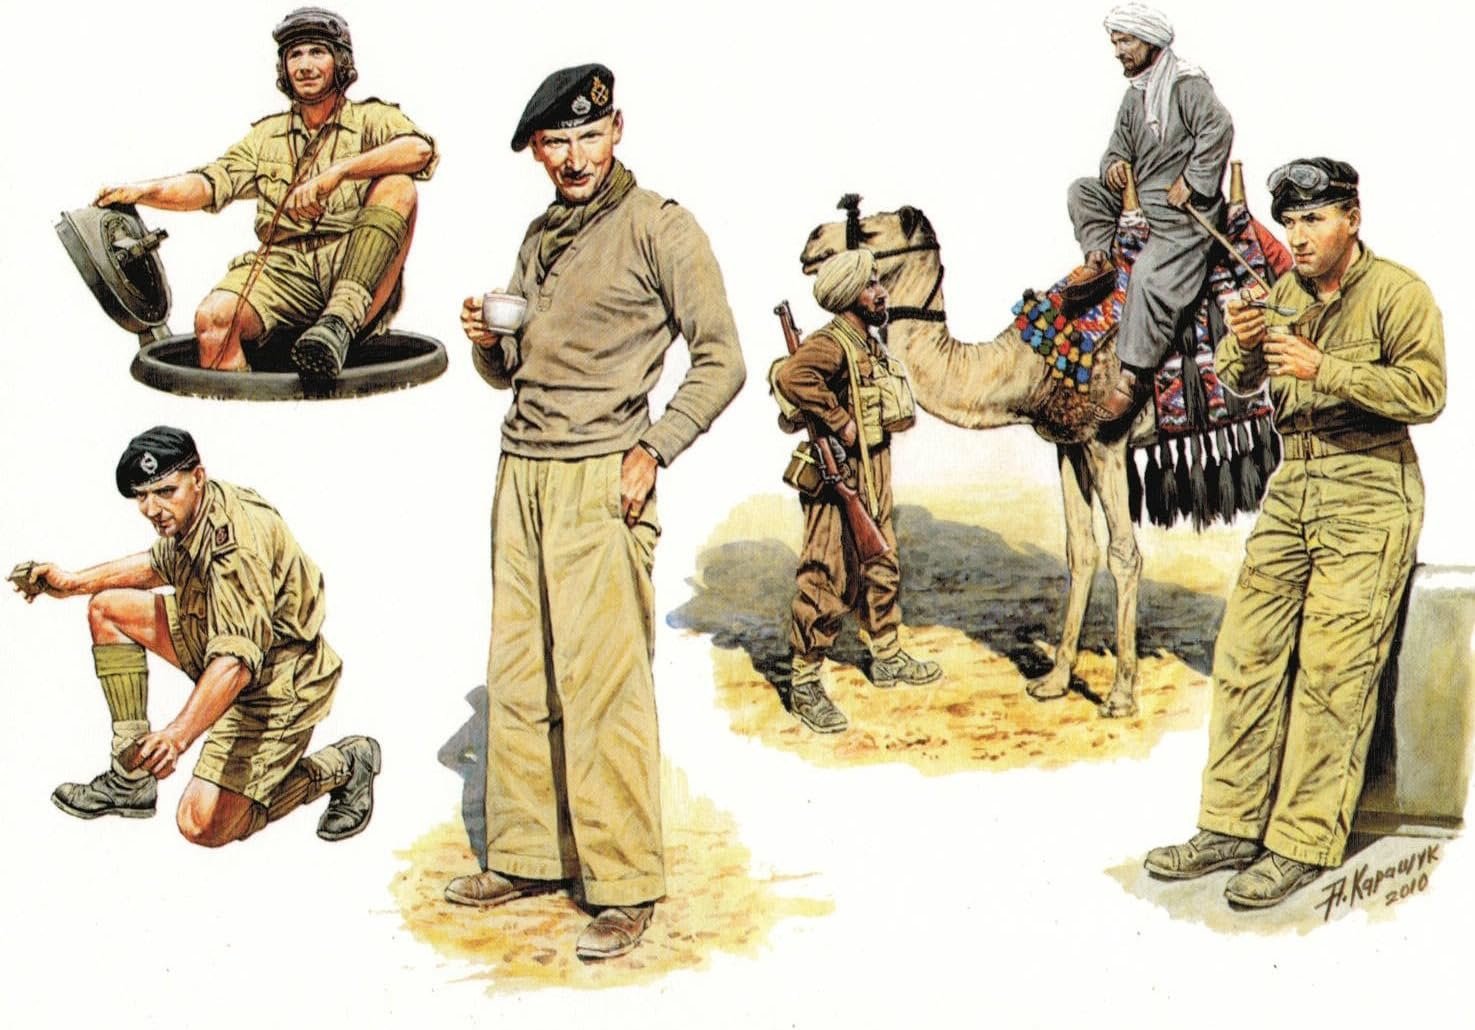
I had planned to make my build a US version, complete with US military figures but could not find any with suitable poses.
However, there is the 'Masterbox 1:35 Scale Commonwealth Armoured Fighting Vehicle Crew' which includes Montgomery and some tank crew.

...and the MiniArt K51 kit does accommodate 5 different users, including the 8th Army ie
- British Forces Radio Station, 8th army sector, Italy, October 1944
- Corps Signals Unit, 2nd Polish Corps, Italy 1944/1945
- 1st Armored Division, 829th Signal Battalion, North Africa, Spring, 1943
- 102nd Infantry Division, European Theatre of Operations, Autumn 1944
- US Marine Corps, 4th Marine Division, Pacific, 1944/1945
So the idea occurred to me that Montgomery (who was active in Italy in 1944 - https://en.wikipedia.org/wiki/Bernard_Montgomery ) and one of his tank Commanders might have commandeered a K51 radio truck for a short while. So I came up with the scenario below.

I can't get the radio operator's feet to fit under the table. But it is reasonable to imagine he would likely have turned to face Montgomery who will be holding the telephone (currently lying at his feet) in his right hand....it was holding a mug of tea. So the final poses will be something similar to above.
The radio operator's left foot is too high so needs a box to rest on...I had thought of using a Jerry Can but I'm not sure that would have been positioned so close to the radio truck as electricity and petrol are a dangerous combination.
OK, that is it for this post. Progress isn't too rapid, but now that I have some figures to work with it might spur me on 😉 - see you in a week or two.
Richard
-
Greg,
So much to take in and enjoy, thank you. I don't know where to even begin looking!
I'd buy a 'How To Build' guide book in an instant.. I just feel this deserves a book.
Richard
- Egilman, RGL, Keith Black and 4 others
-
7
-
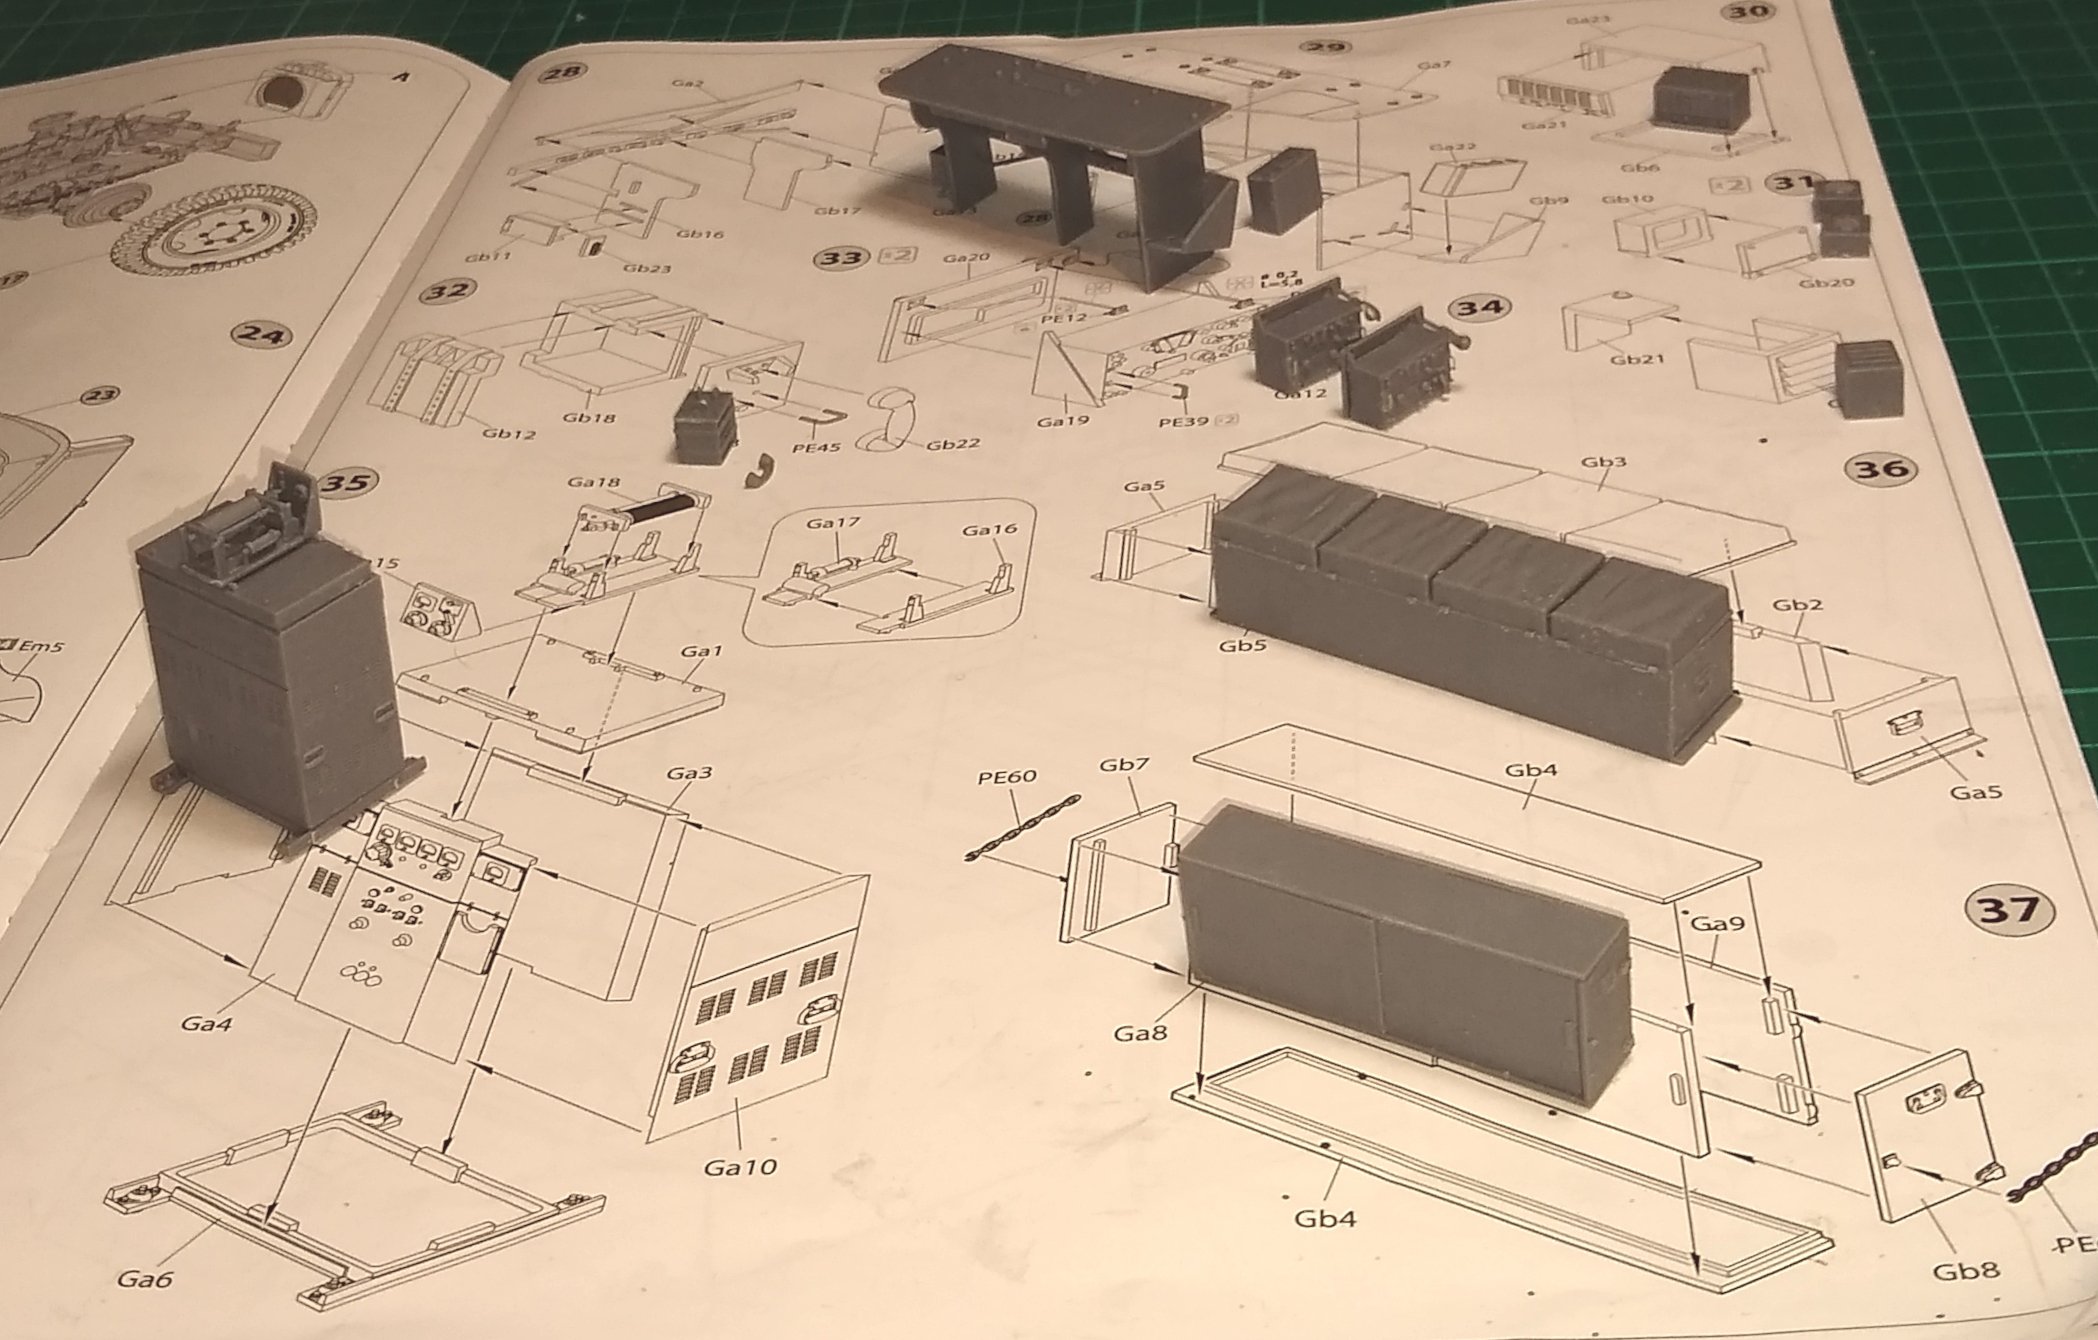
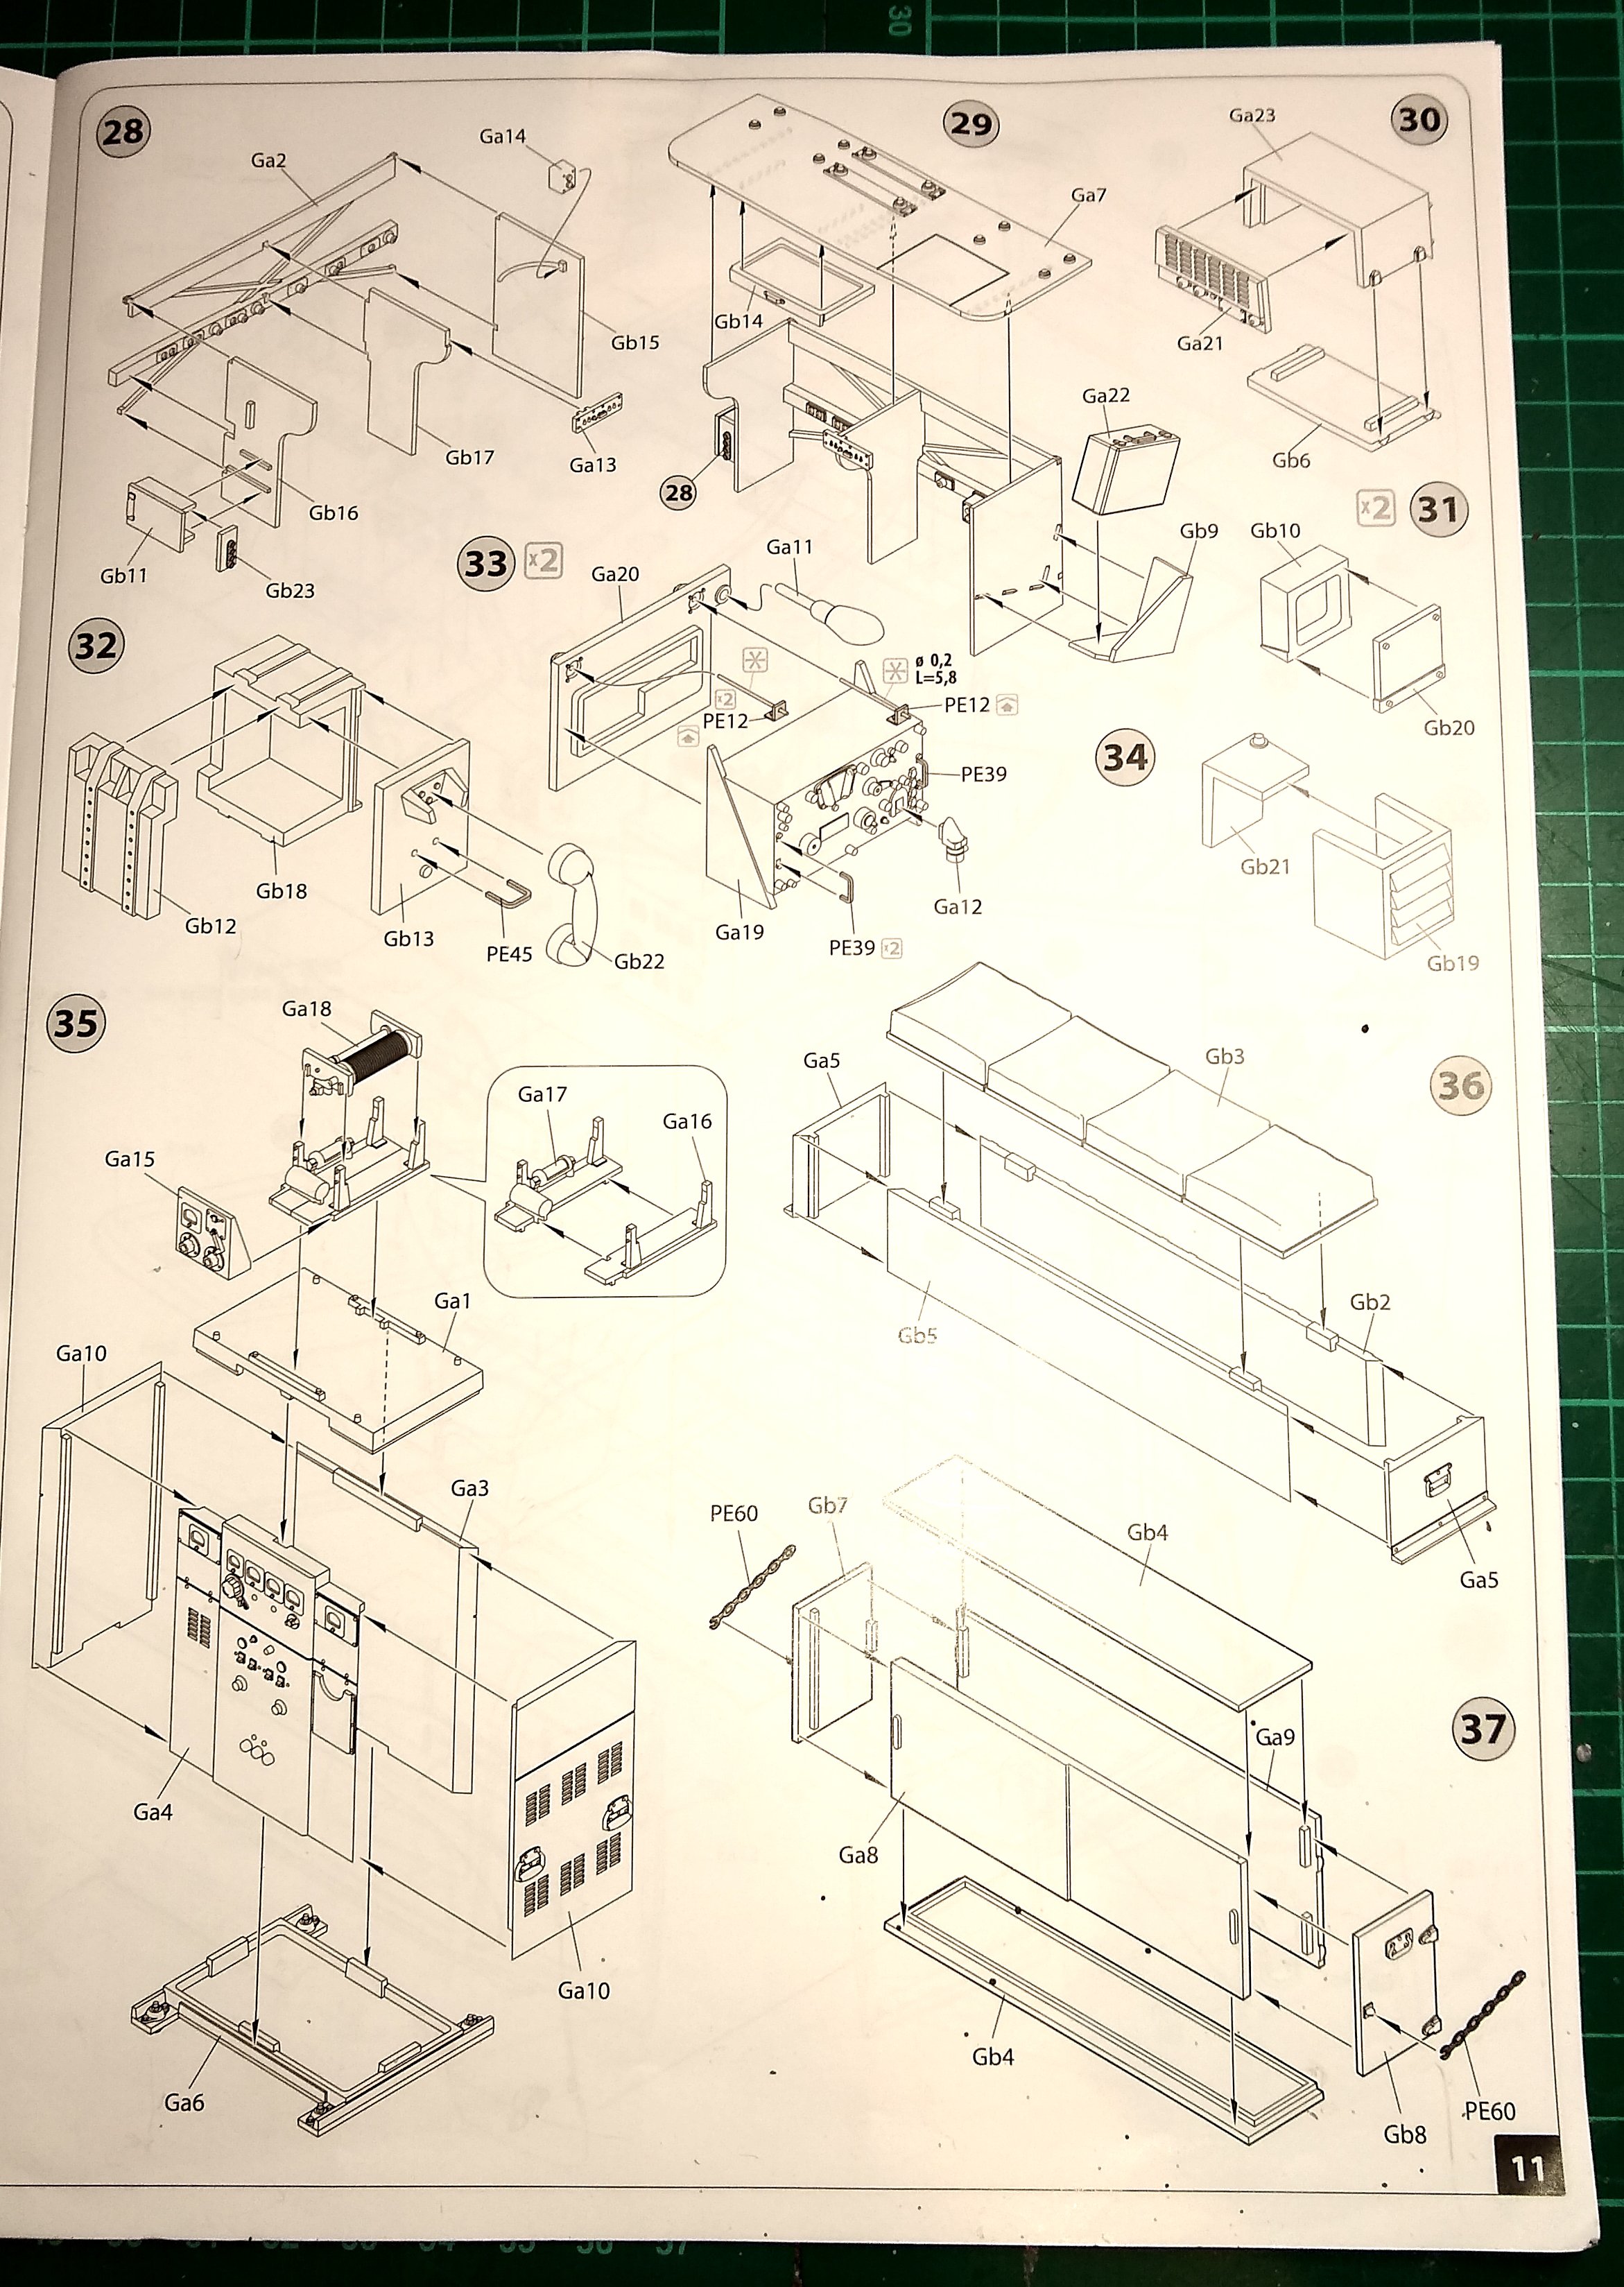
Hi all,
Another short post to keep the build ticking over. Thank you for the Likes and comments.
So, onto the insides of the 'radio shack'.
First thing needed is a table. Space is at a premium so the shack's contents are designed to optimise the available space inside the shack.

Radio equipment can generate a lot of heat so there may be some kind of cooling available inside?...or perhaps they opened the rear doors when possible.

Some more of the shack equipment being readied.

Finally, a quick look at most of what is going to be fitted inside the shack. I've made a guess that the bench seat cushions are black coloured, and possibly leather (?). I need to add some details to the instrument panels, and hang the telephone handset + cable. I don't believe there are any decals for the radio equipment, but there are some for the cabin dashboard.

All for now, back soon.
73s
Richard
PS: CDW, yes, I think that a lot of us have a bits of other nationalities in us these days. It helps keep the gene pool strong 😉
-
CDW,
Mostly bedding plants eg Pansies, Marigolds, Marguerite daisies, etc...and moving some young Foxglove and Lupin plants to better locations (...sometimes their self-seeding locations are ideal, other times not so).
My garden is 'mature rustic' rather than well manicured..... I prefer it this way for two reasons a) it requires less maintenance 😉 and b) the wildlife seem more at home in it.
My location is central Scotland, so we are a few weeks later than the South of England (say) which gets warmer earlier.
Richard
-
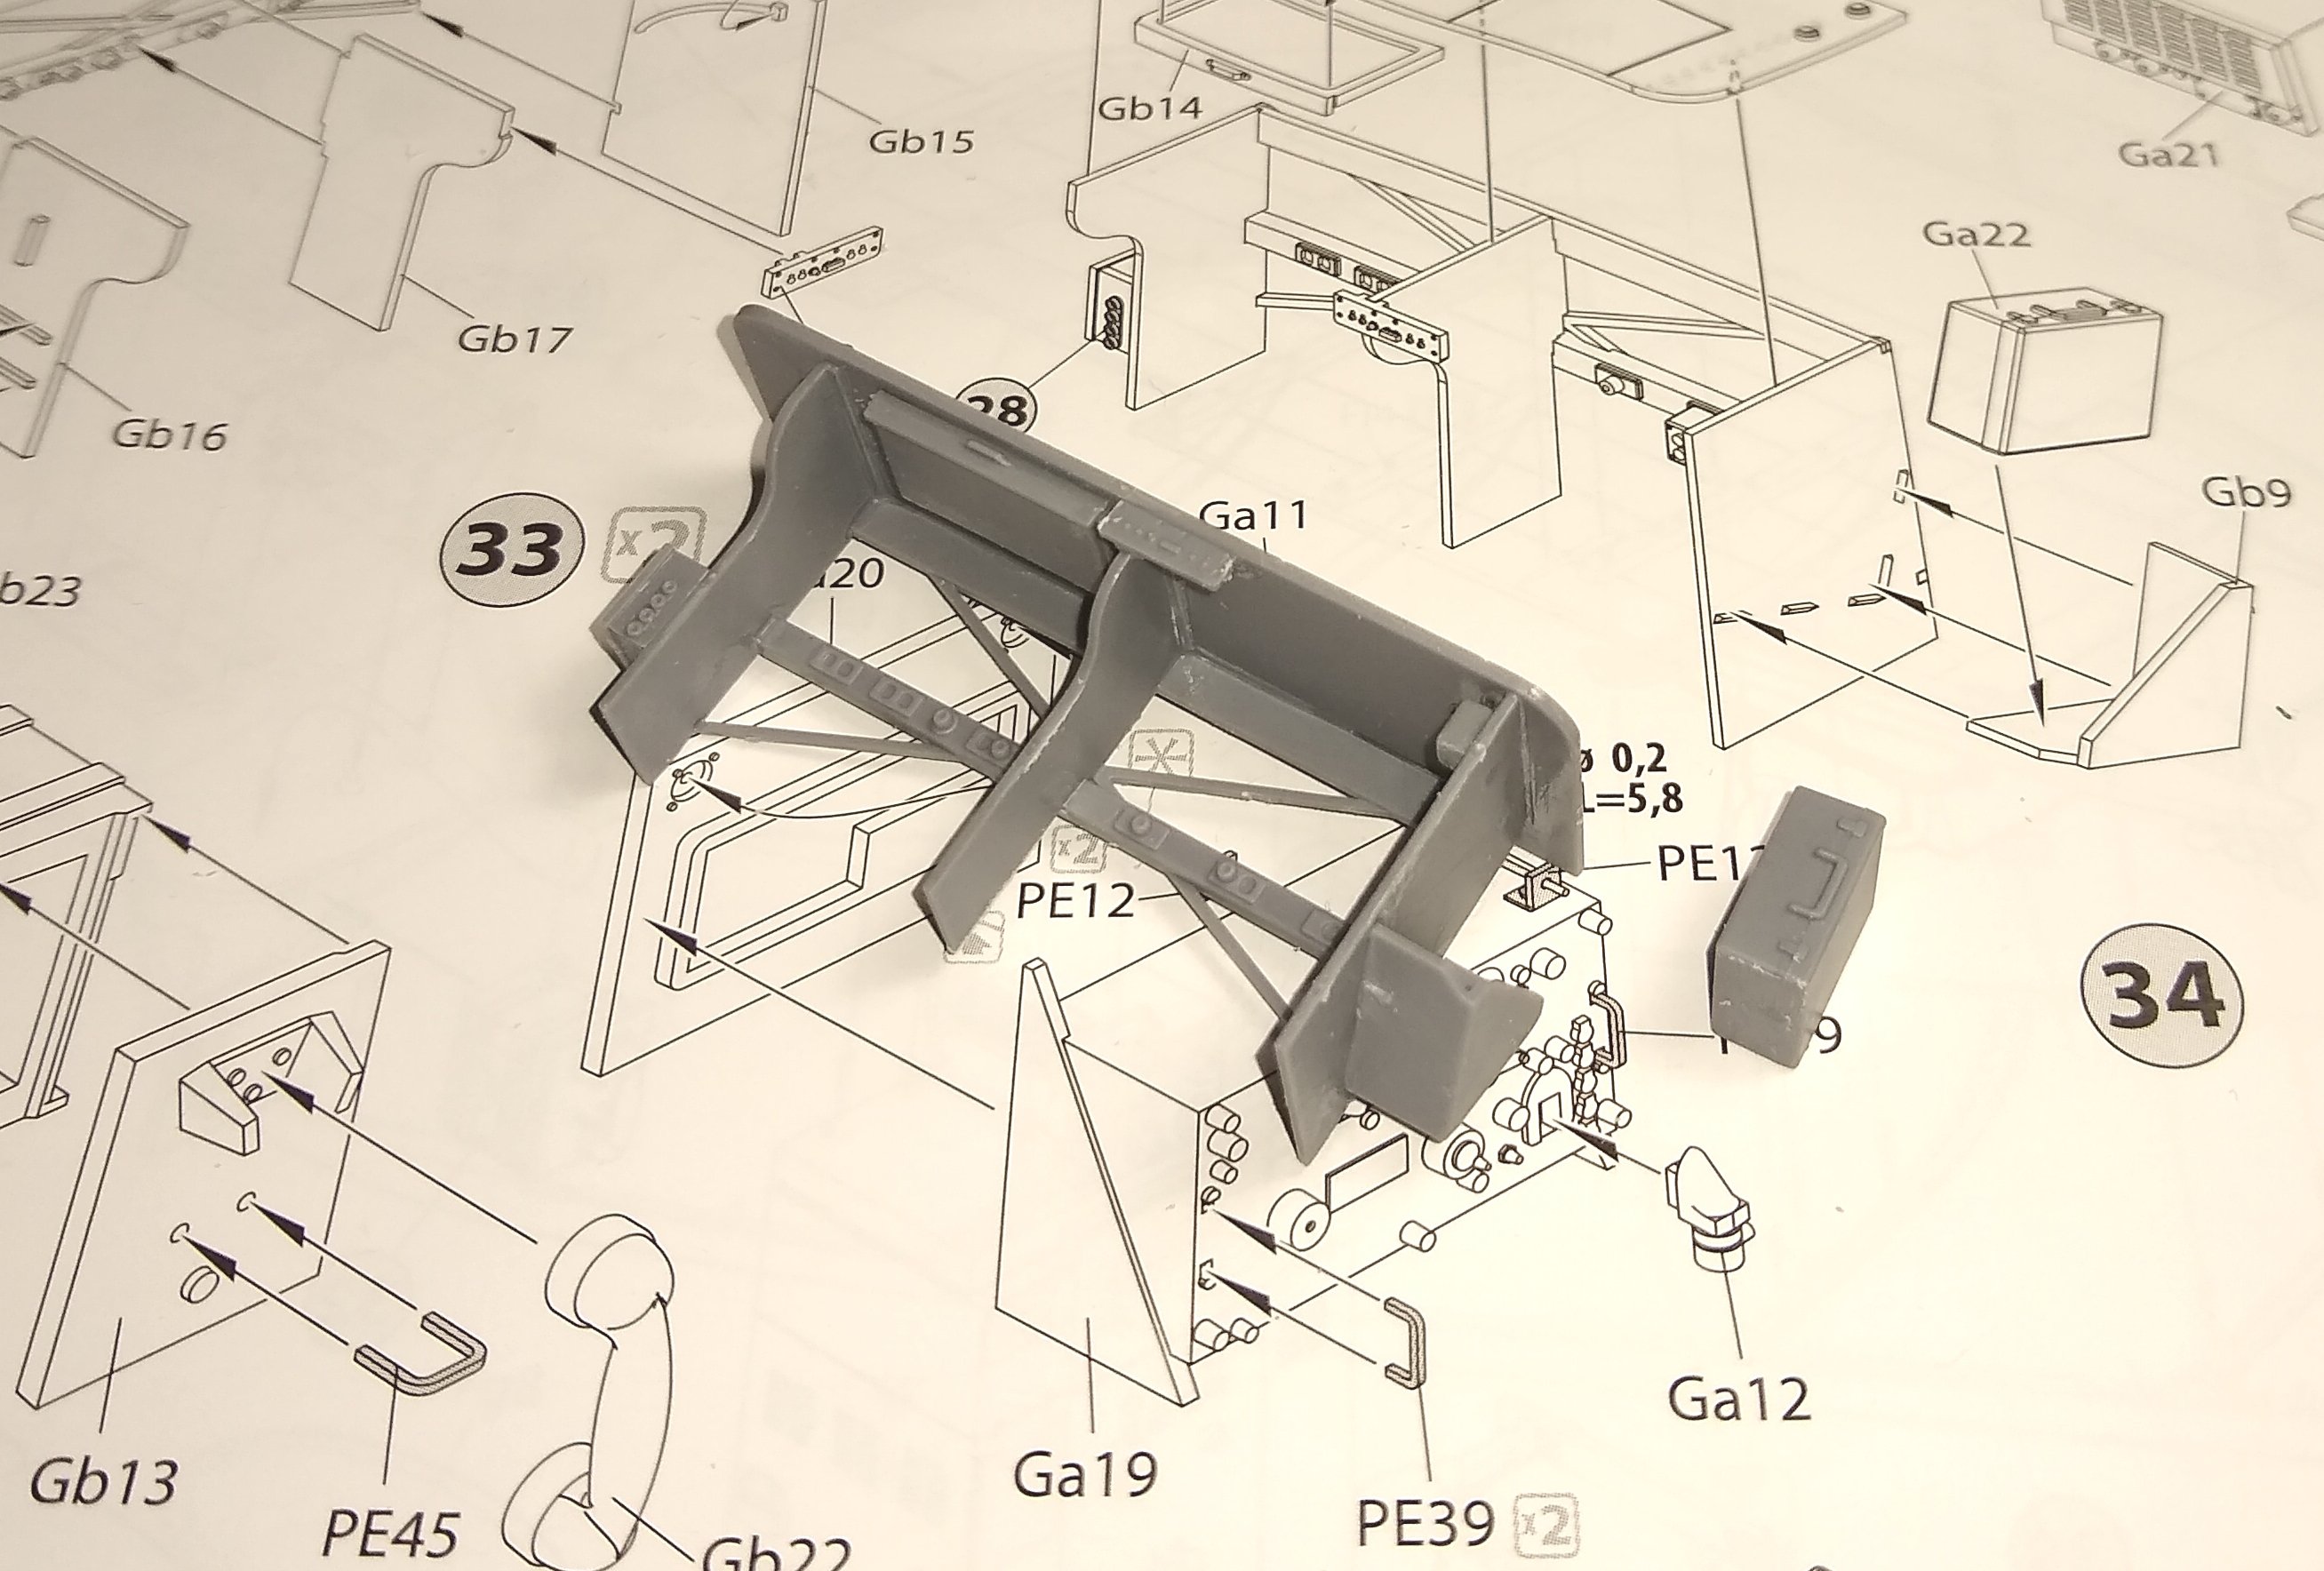
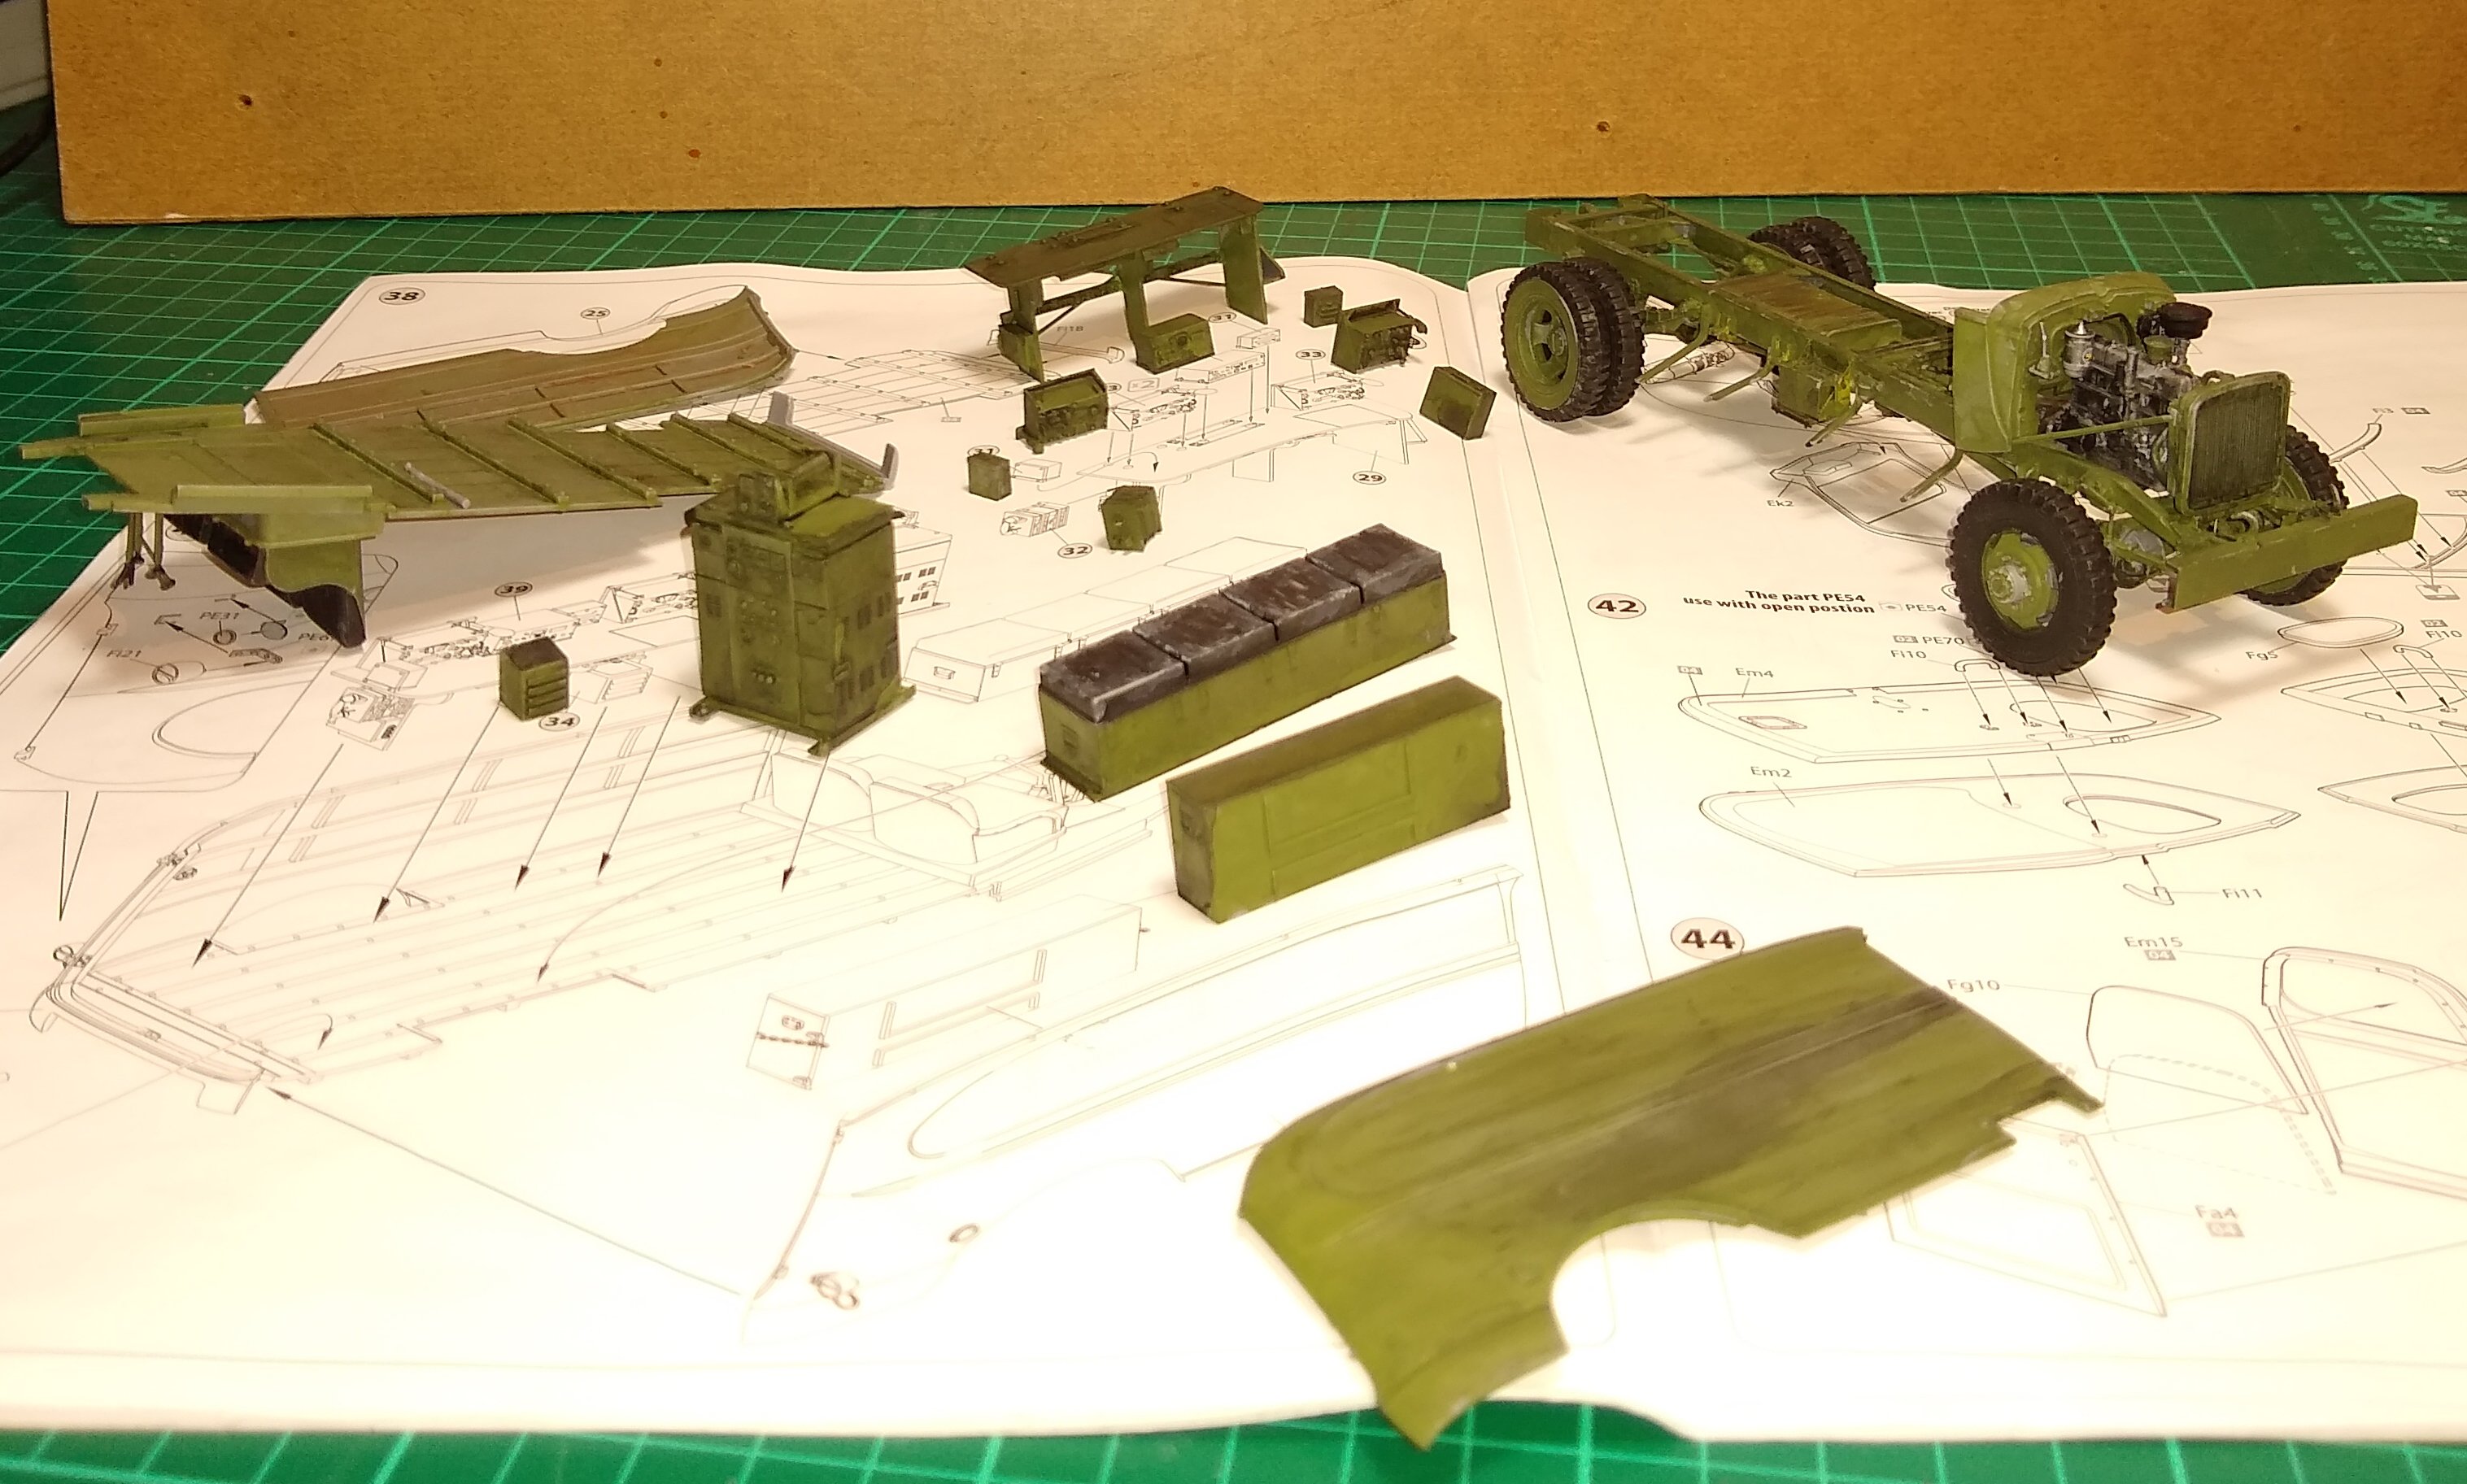
Hi all,
This week, just a quick pic of some sub-assemblies I've made up whilst focusing on gardening/planting duties.
Below, a couple of side panels, the engine bay bulkhead assembly and the floor with seats and control levers added. These will all now be put to one side as I concentrate on the next page of the manual, the radio gear.
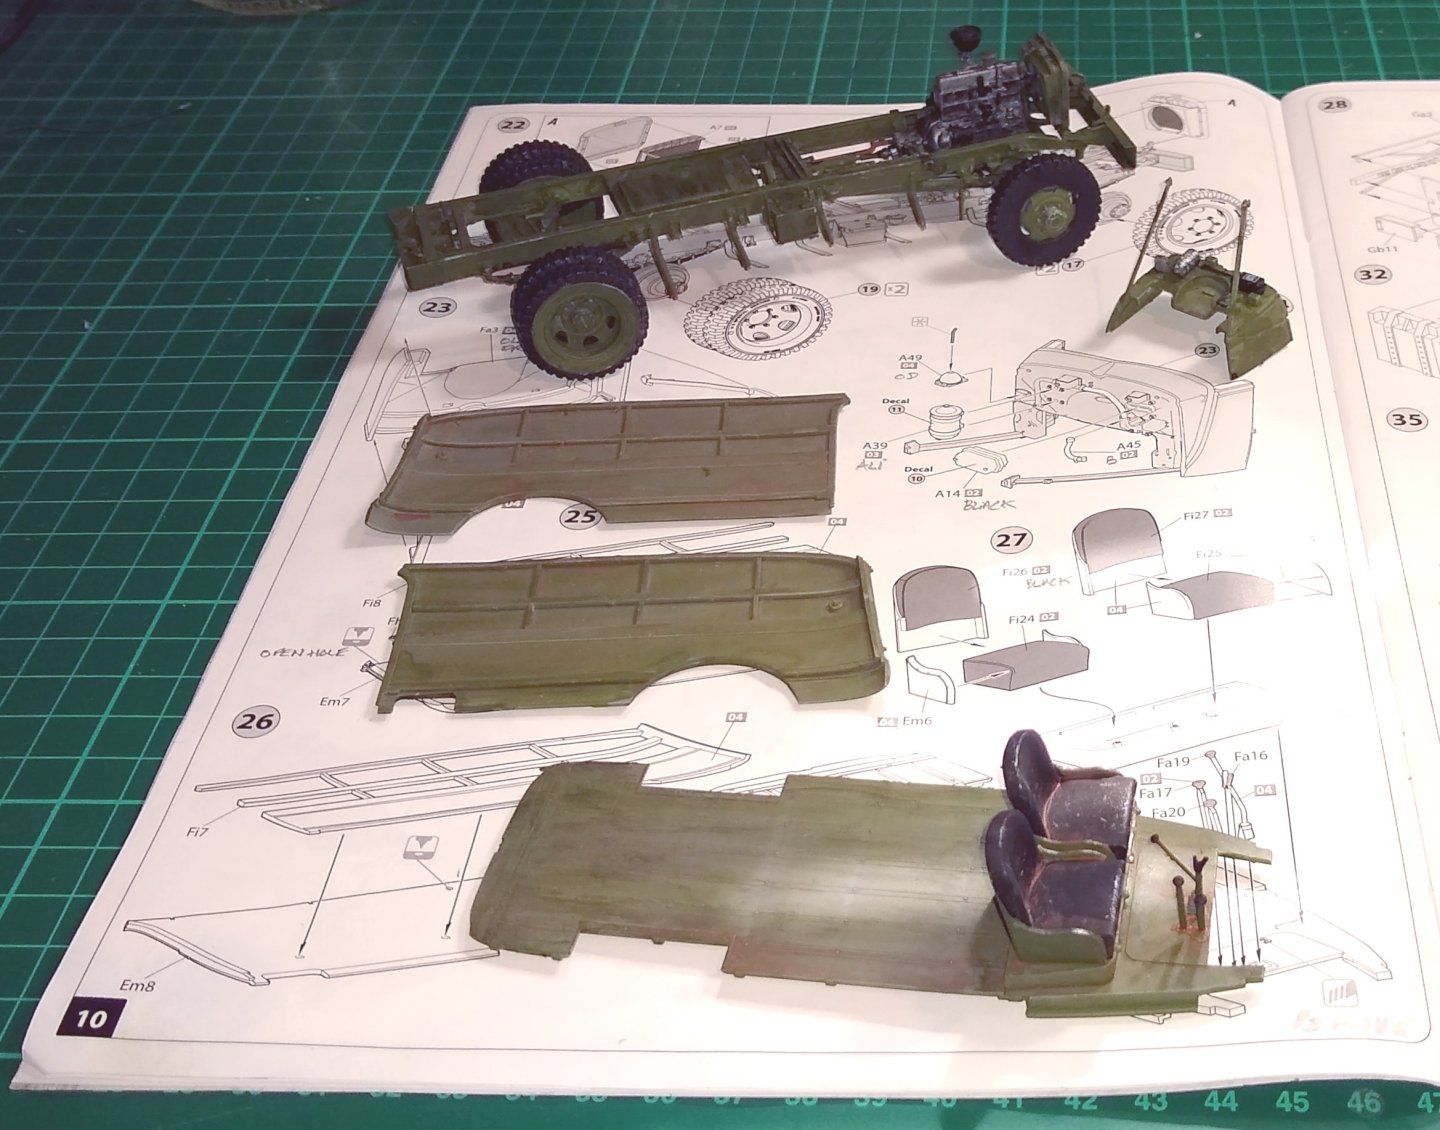
Coming soon, the radio gear and cabinets.

Sorry this is so brief. I hope to get back to longer posts in a few weeks.
Richard
-
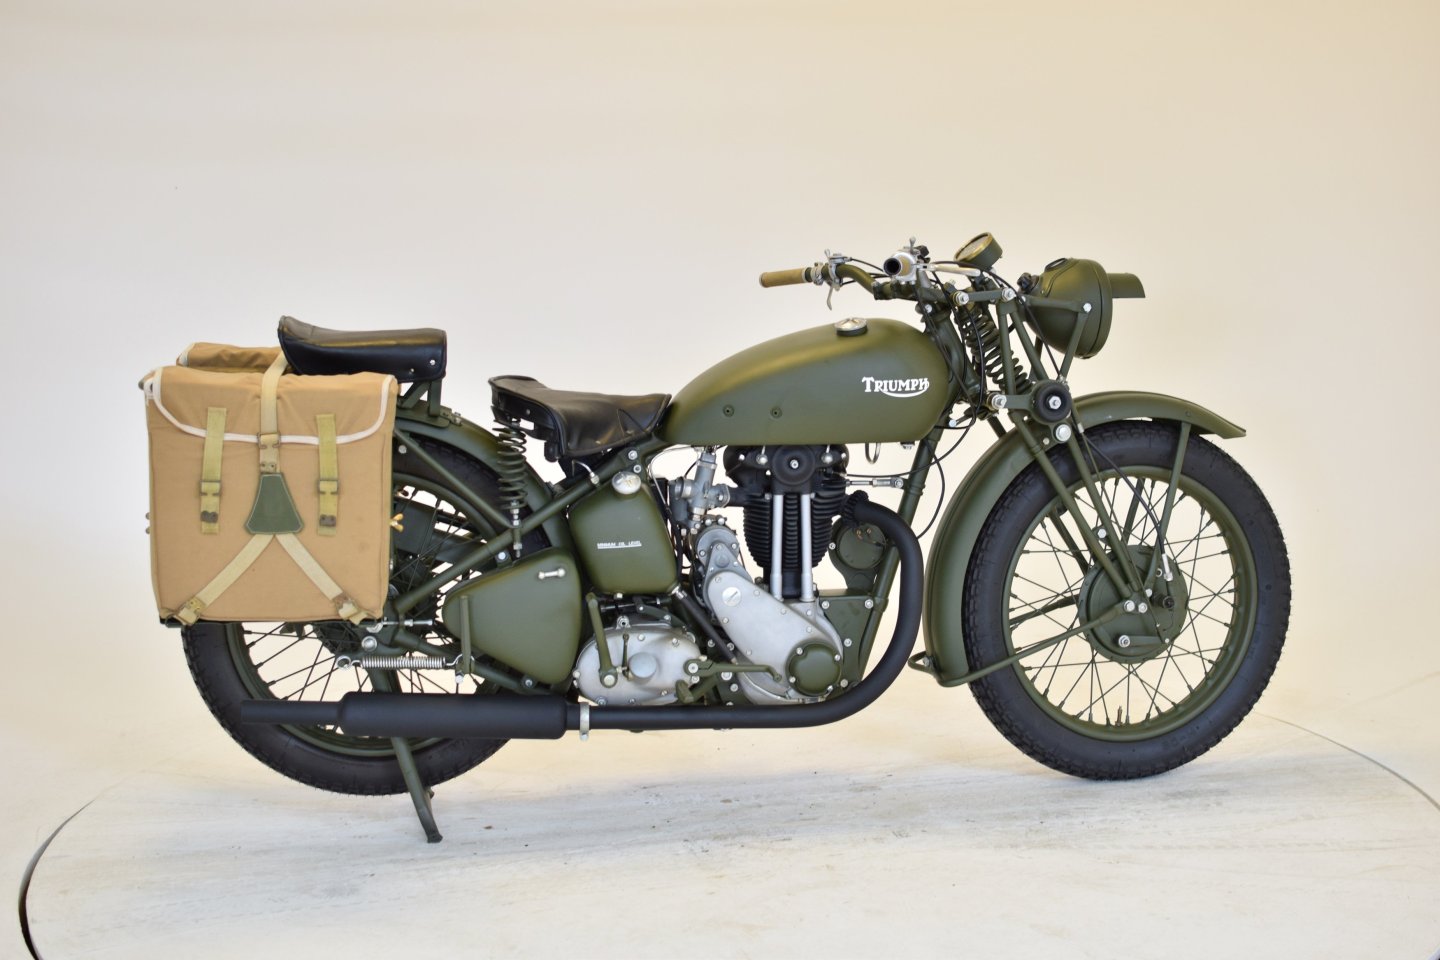
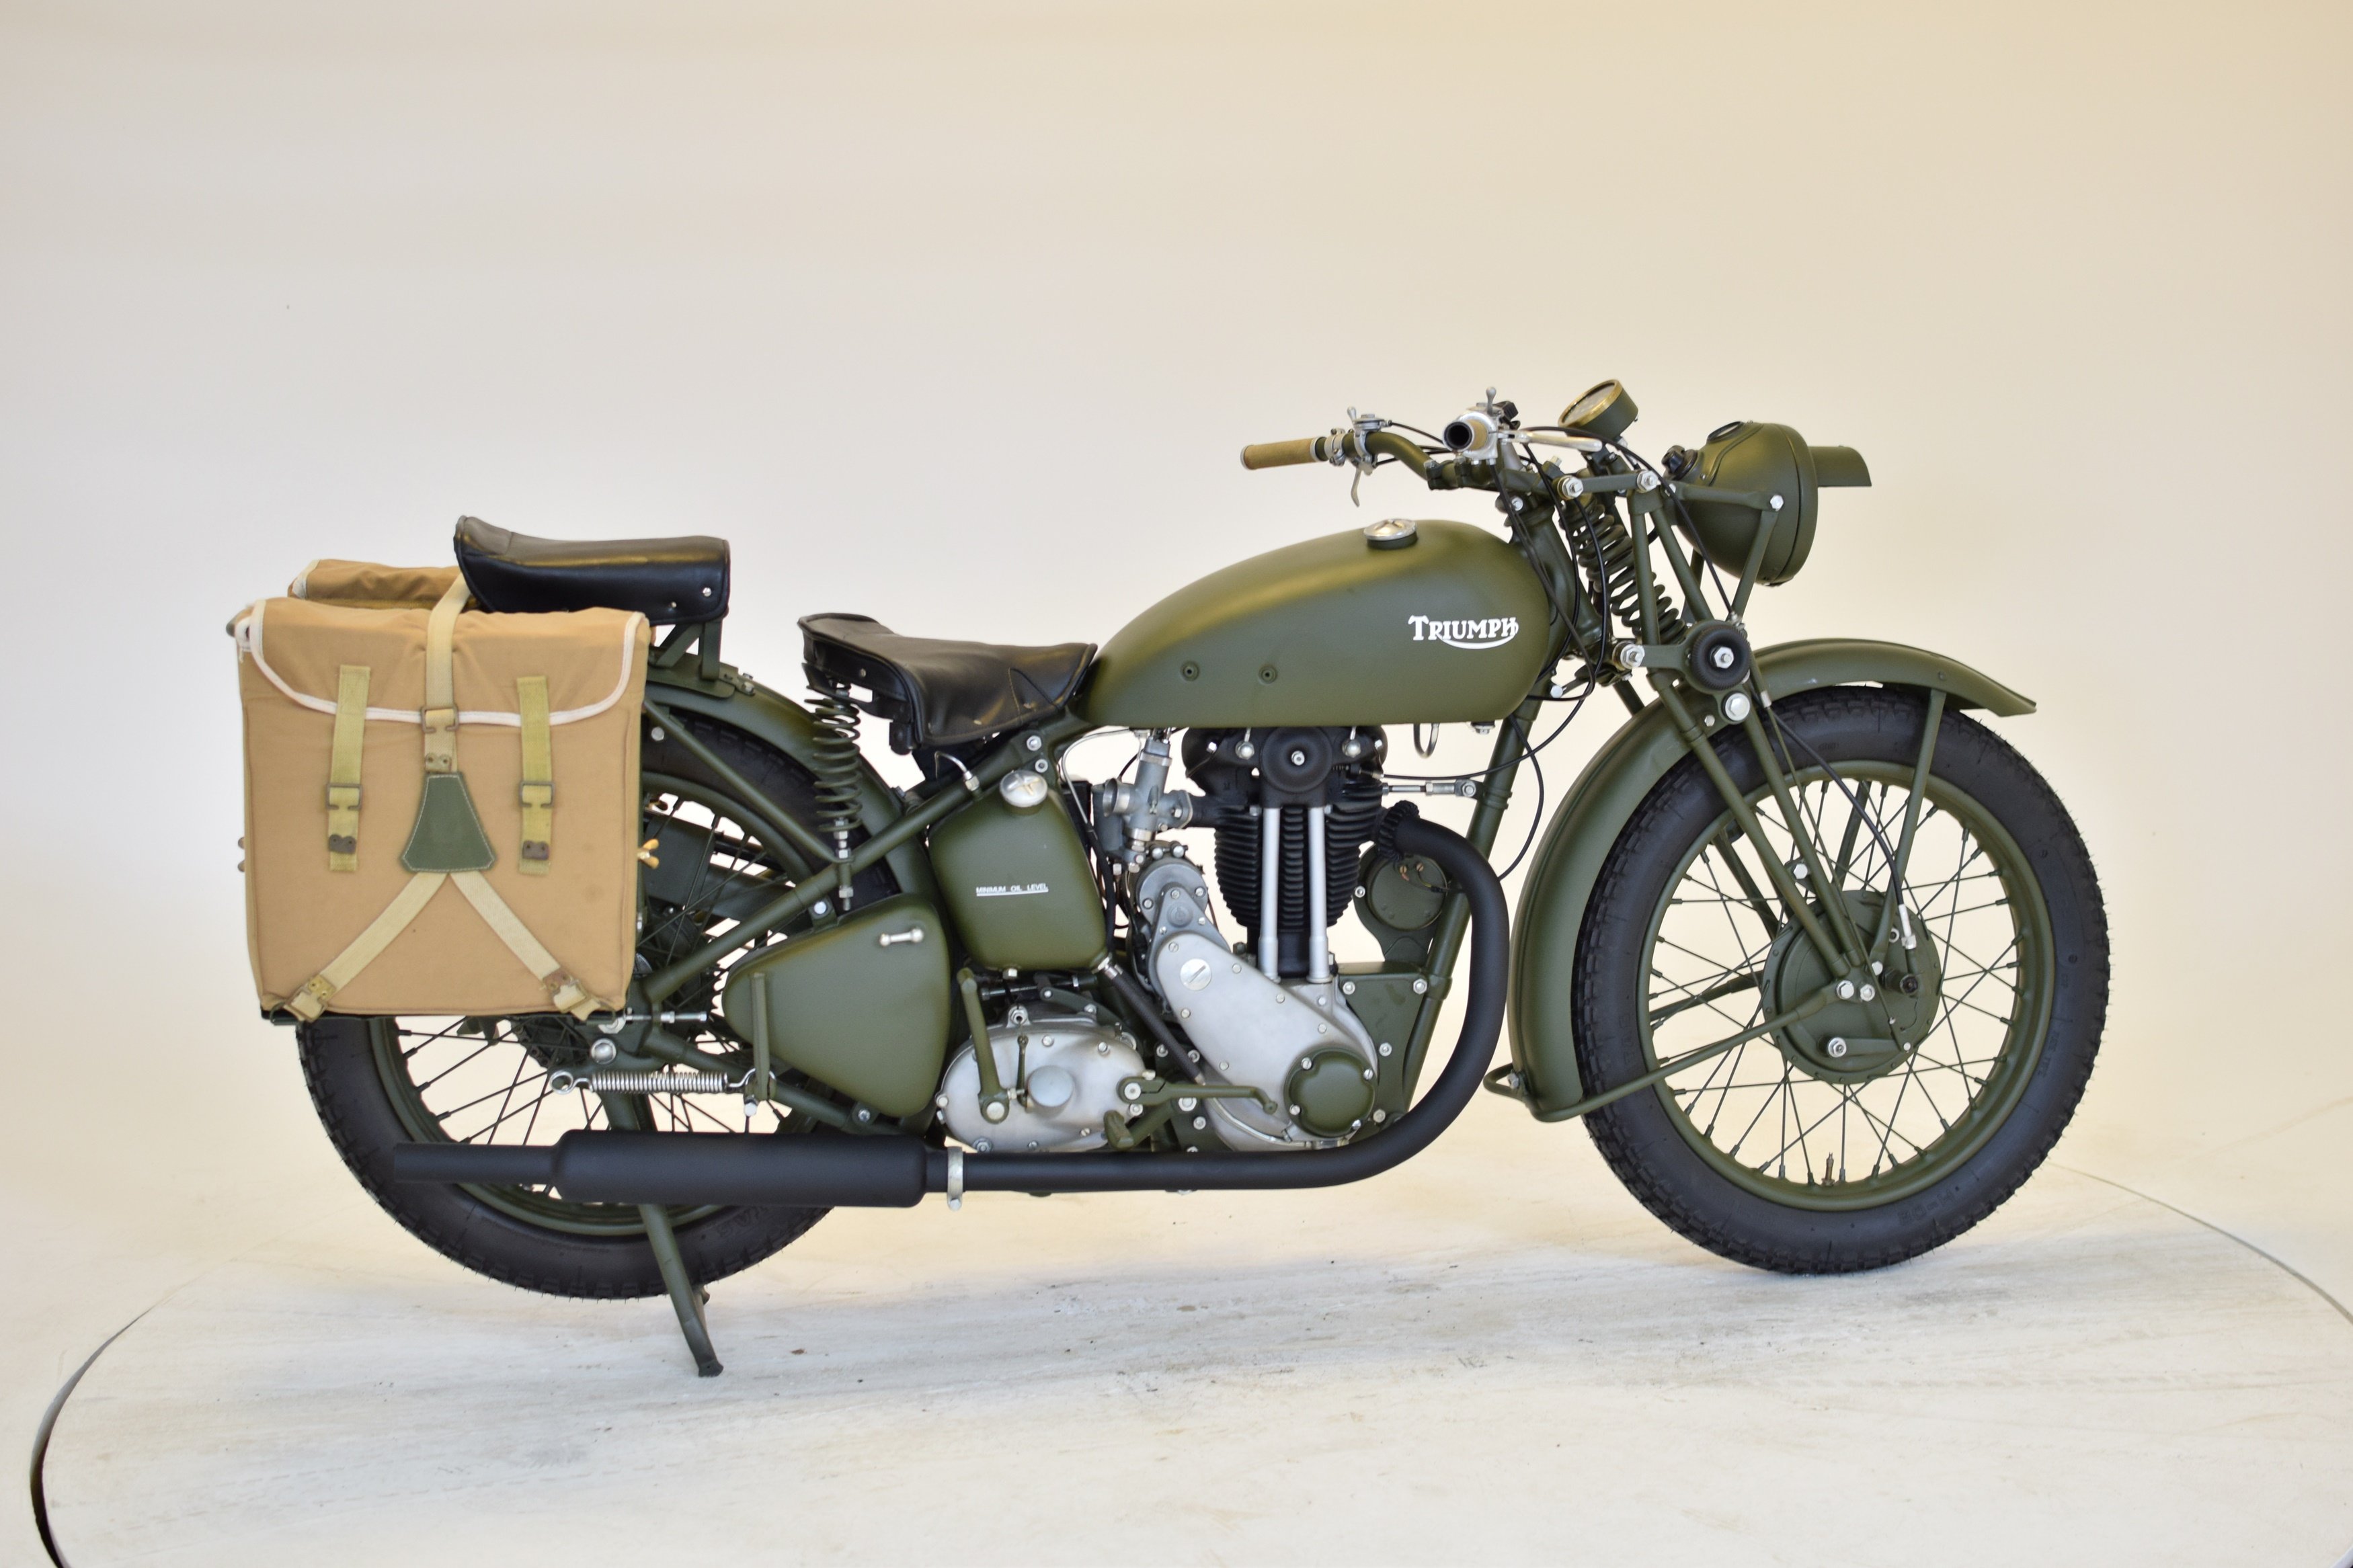
Shipman,
Bonhams - That is indeed a gorgeous looking piece of machinery. Est £6k-£7k seems a bit of a steal, but I don't have a motorcycle background so perhaps there are quite a few still around.
Just found what appears to be, to my untrained eye, an Army version of the same machine.....
1944 Triumph 3HW 350cc Ex National Motorcycle Museum Sold for £12,650, Dec 2020 - https://www.handh.co.uk/auction/lot/149-1944-triumph-3hw--350cc/?lot=51466&sd=1
Richard
-


Ship paintings
in Nautical/Naval History
Posted · Edited by Rik Thistle
Andrew,
Sorry to hear that news about Vegaskip.
His MSW contributions were really quite a joy to look at and imagine how he came to understand the scene he was painting.
Richard