

Mike_H
-
Posts
225 -
Joined
-
Last visited
Content Type
Profiles
Forums
Gallery
Events
Posts posted by Mike_H
-
-
Just found this - or rather something you posted elsewhere. Looking though your log brought back great memories of building my version last year - and we are both in Yorkshire! Anyway your work looks very clean and the hull looks very fine. How are you getting on with the rigging?
cheers
Mike
-
Hi @Dougal Mack. At the end of my build log for Endeavour’s Longboat (link in the sig, below), I took some reasonably high definition photographs that show how I ran the rigging. If you are still looking for guidance that might help. Any other details feel fre to post and tag me,and I’ll see what I can do to help.
-
Only just realised that I did not follow this last year - and now it's finished. Lovely job and interesting to see her "nude" that is, un-painted. Just had a pleasant 20 min scrolling through while I waited for a phone call. Great work.
-
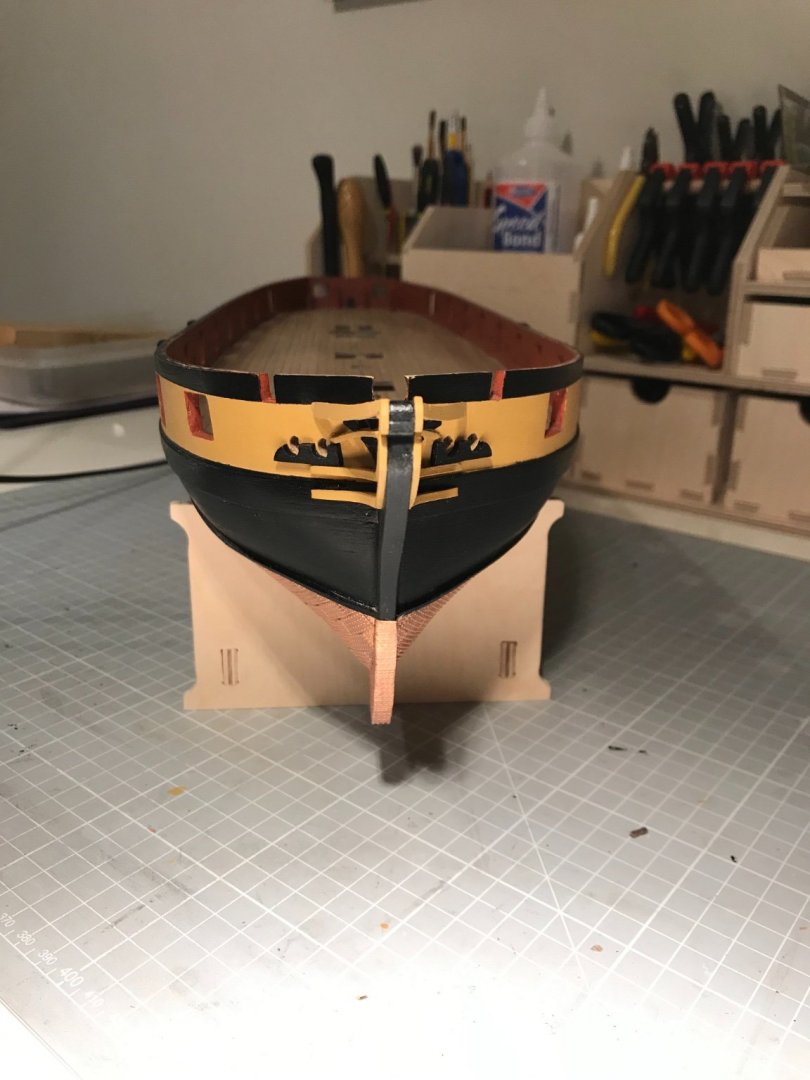
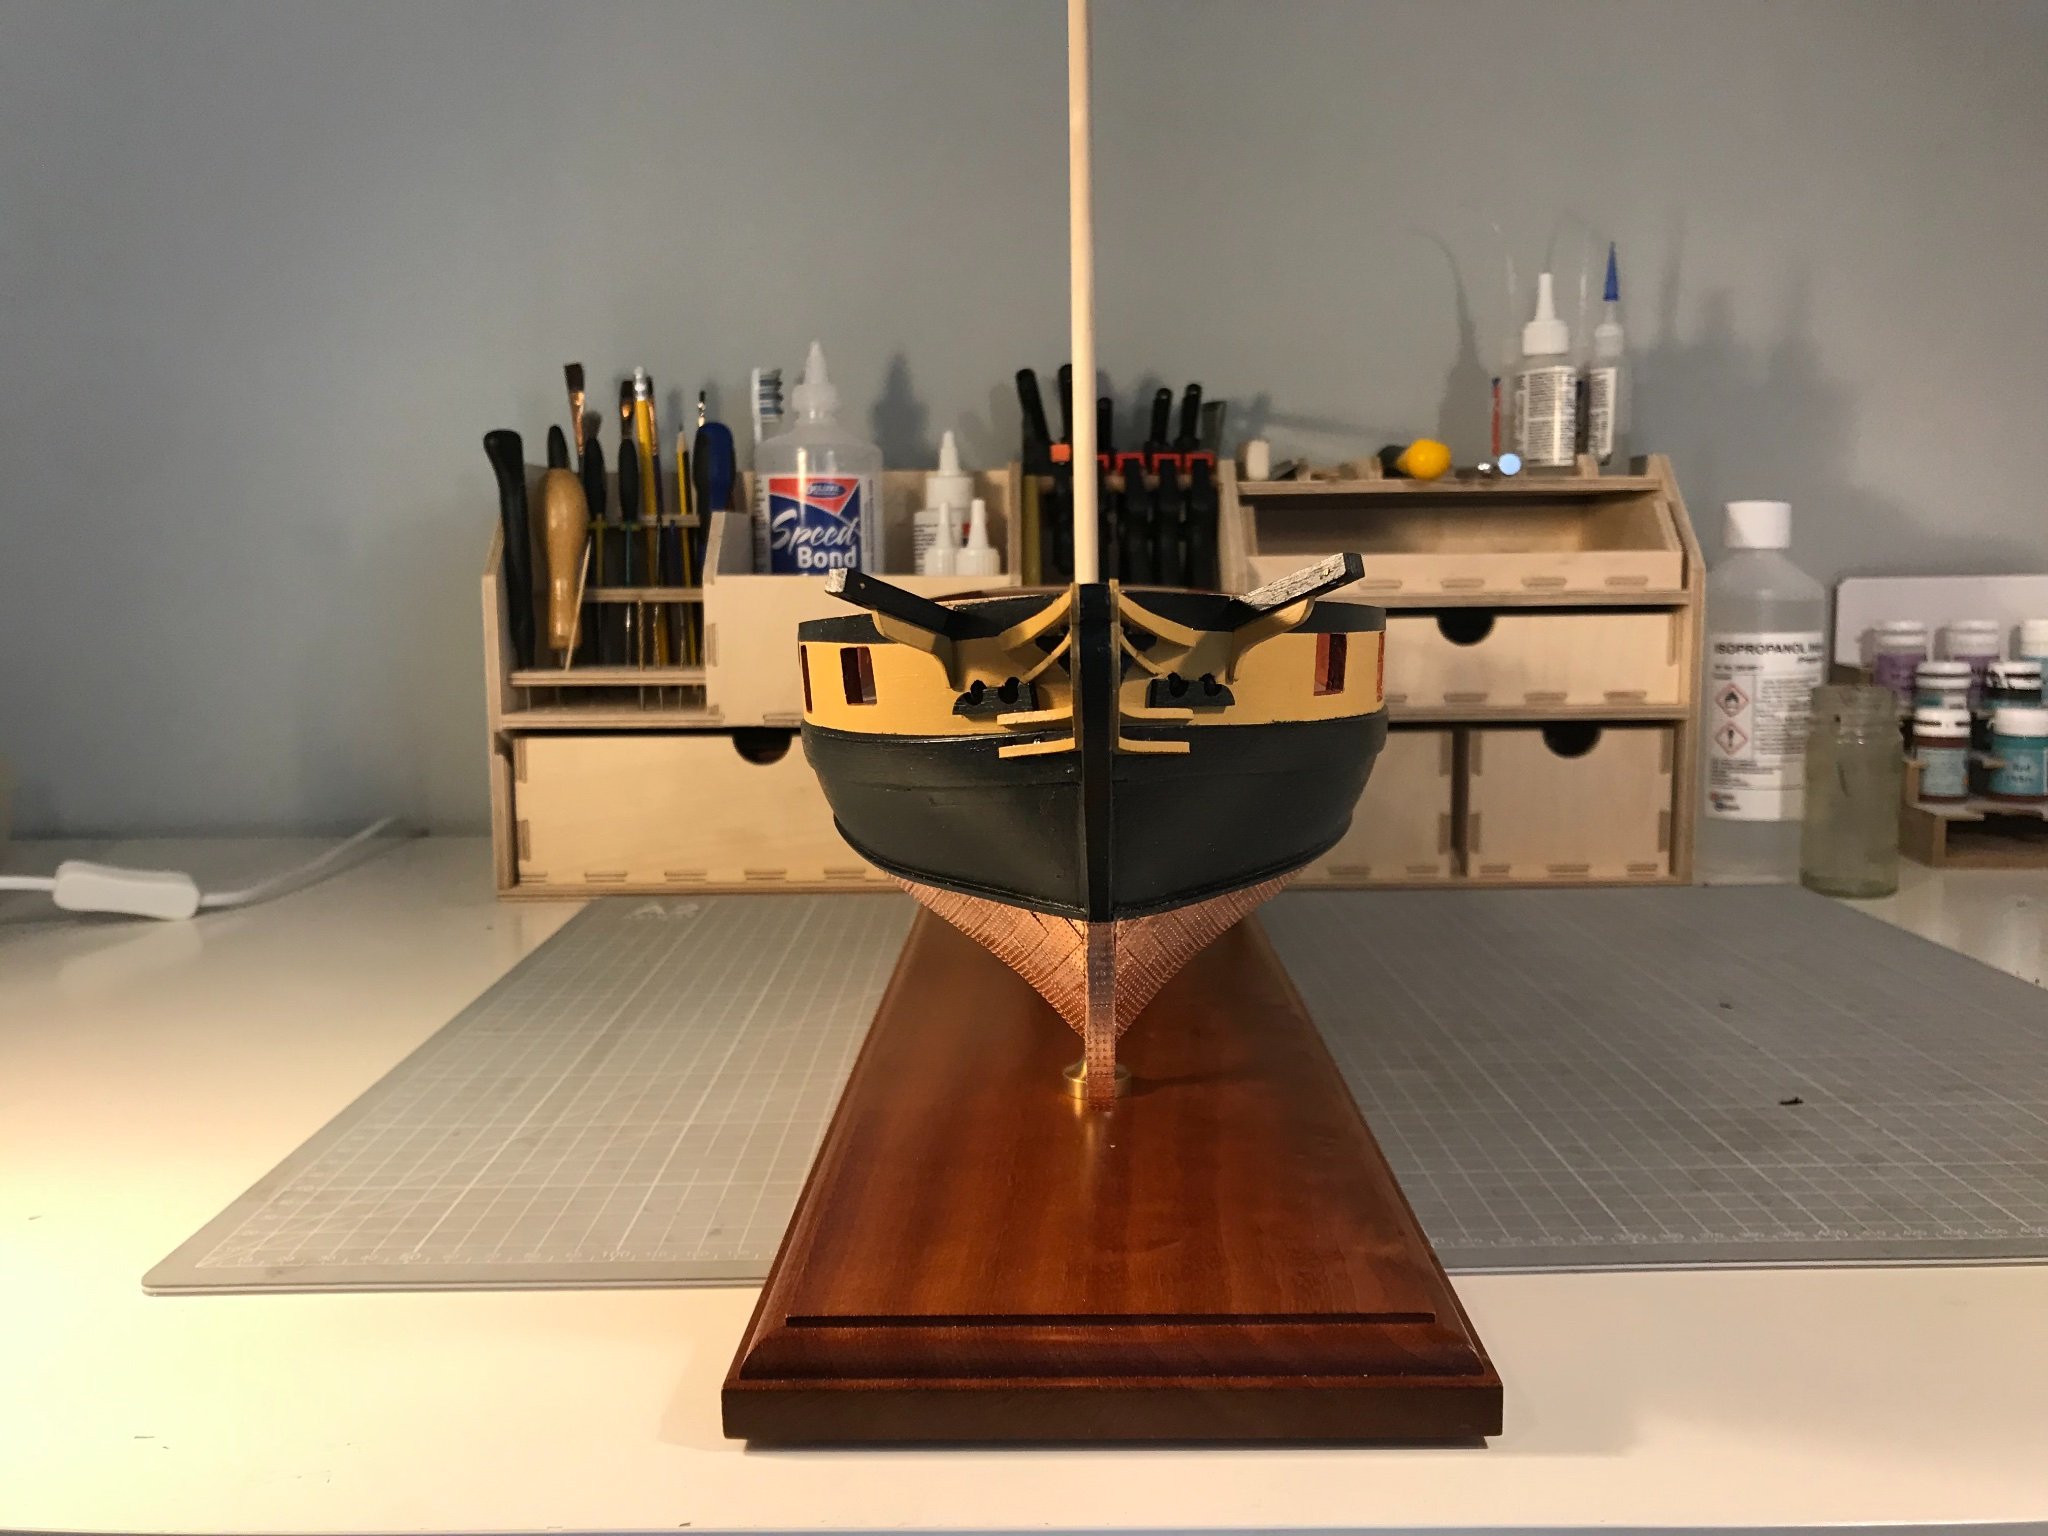
And as a special extra, some months early, I checked the display stand fits. I what to install it permanently at the point when inverting the gull becomes too risky. And as it happens I manage to spring one of the cathead by inverting it to install the bow cheeks. Fixed that with a little thin CA, and can protect them easily enough, so will revert to the cradle until the gunwales are on. But this looks pretty sweet I think:
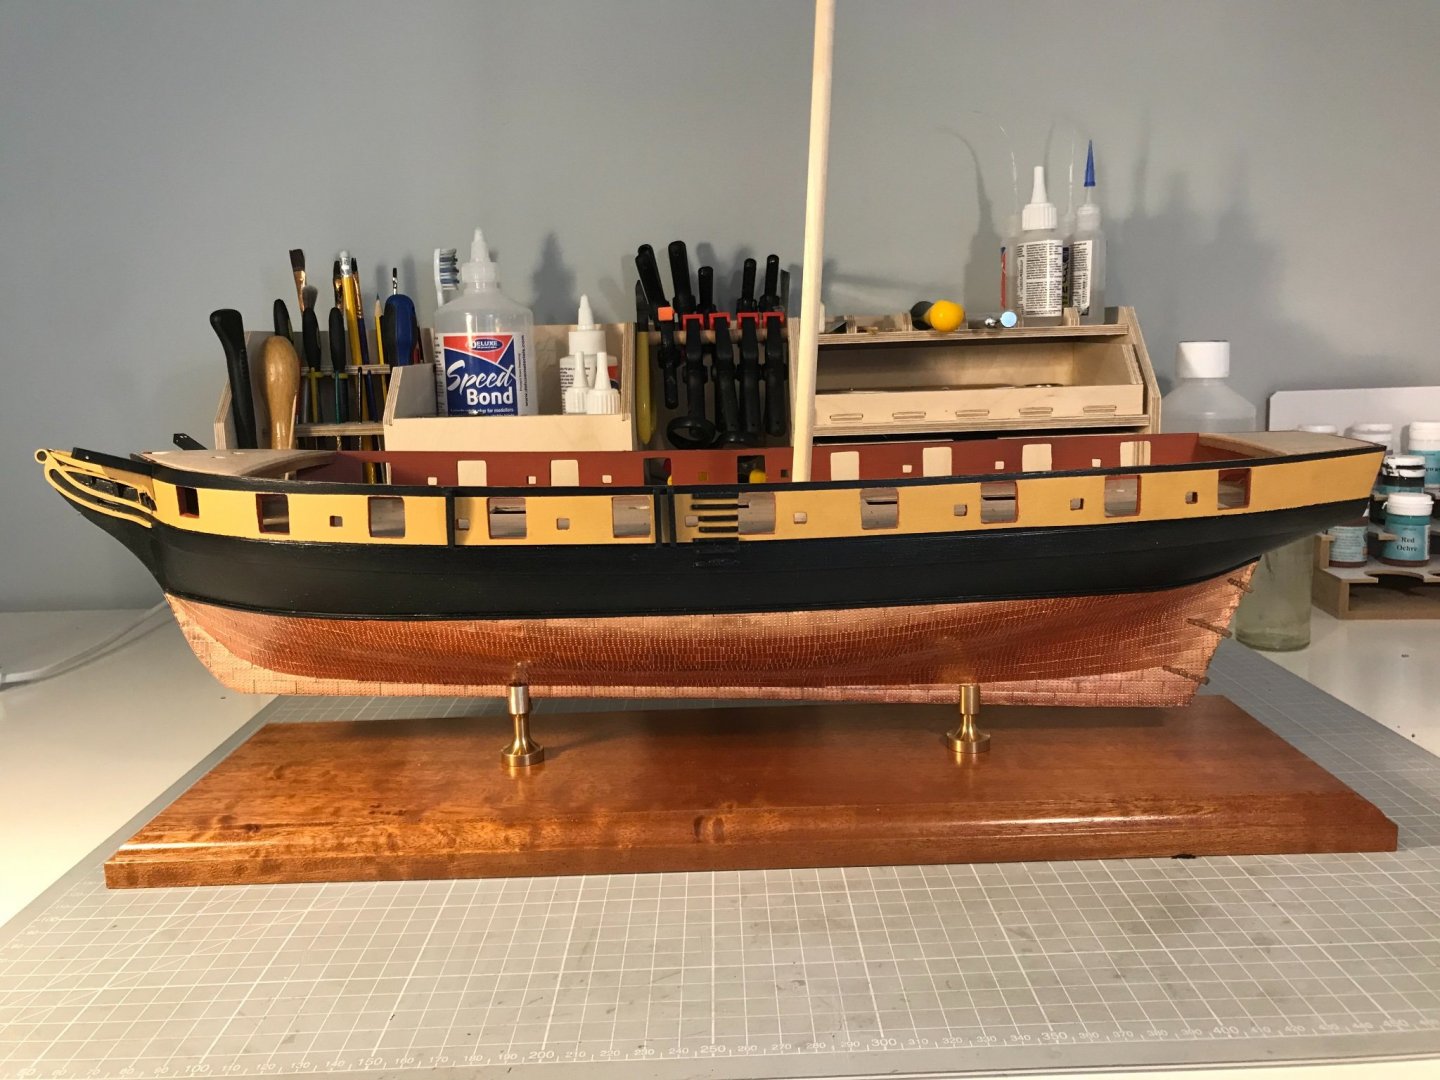

The slots in the columns were just under 5 mm wide, and the copper-coated keel just on 6 mm, so I had to file 1 mm of brass out of the columns. Filing parallel slots with a small file is beyond my skills, but turned out fine, and with a spirit level the pitch of the deck is exactly horizontal at the main mast, and the mast itself (or the place-holder dowel) dead plumb athwart-ships. Those following closely will recall I left two captive nuts under the copper and keel. Two 50 mm bolts come up through the stand and the columns to engage the nuts. Just as sweet as can be.
- GrandpaPhil, Sjors, Beef Wellington and 3 others
-
 6
6
-
And the third instalment: bow cheeks

Not much to it really. Bit of care with the angles to get a good fit.
- AJohnson, CiscoH and Beef Wellington
-
3
-
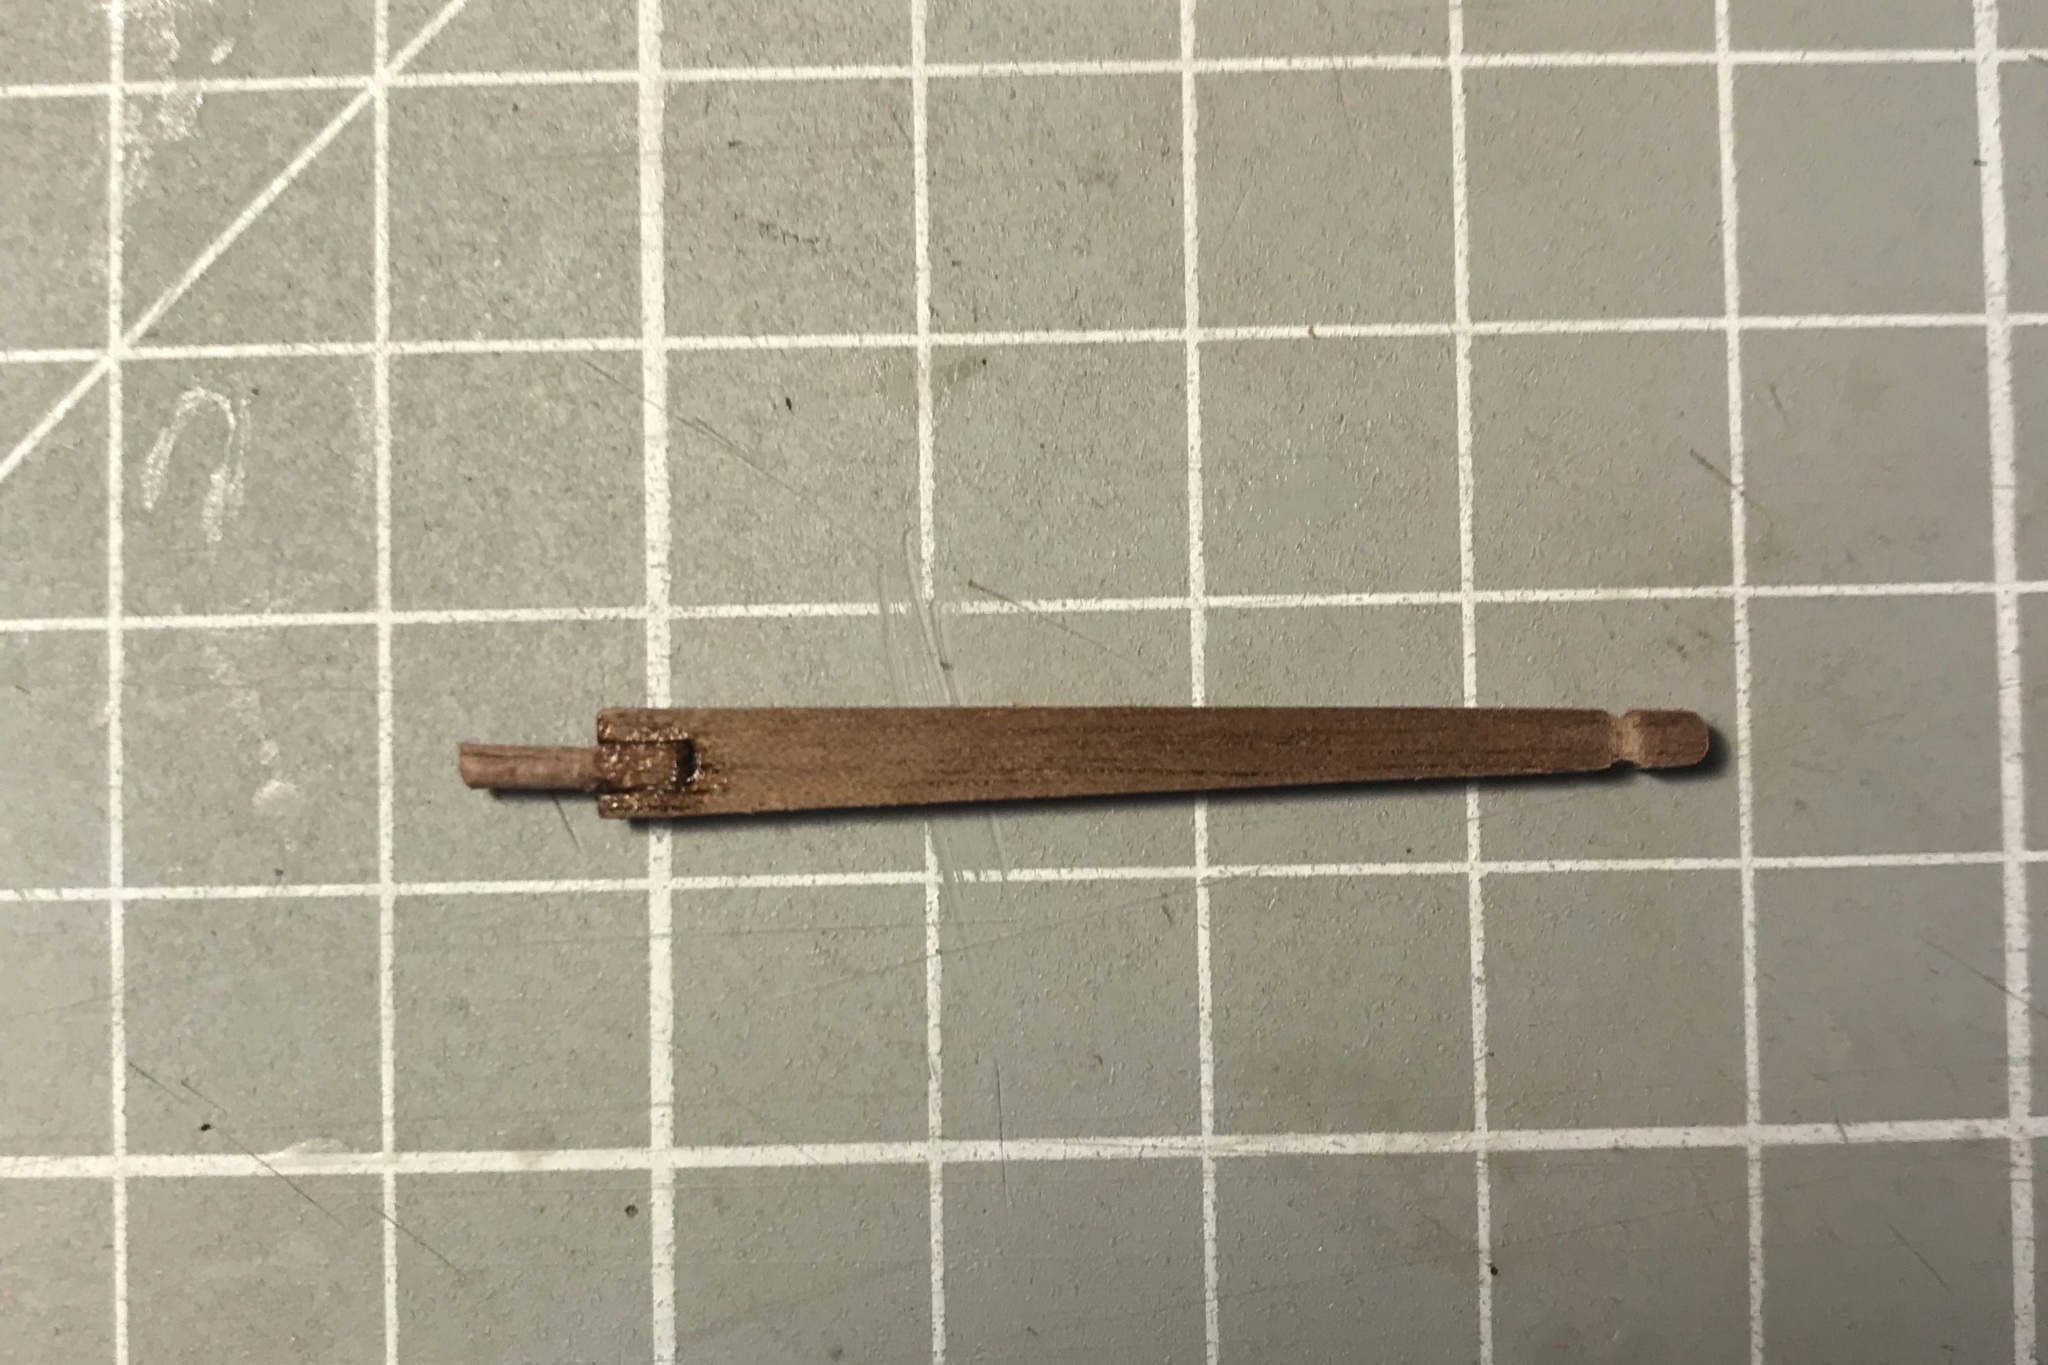
Next - fit the tiller. I deliberately left this until after I had the stern platform assembled to ensure there was no clash. Bit of attention to get the angles right, then I drilled a 1.5 mm hole in the rudder post. In my version of the kit, the tiller is 1.8 mm walnut ply - which does not require pinning with 1 mm wire. However, it presented a problem. To fit to the hole, I rounded off the "spur" removing most of the external ply from it. It then had no strength and "sprung" as I tried to fit it. I spliced in a short length of 1.5x1.5 walnut:
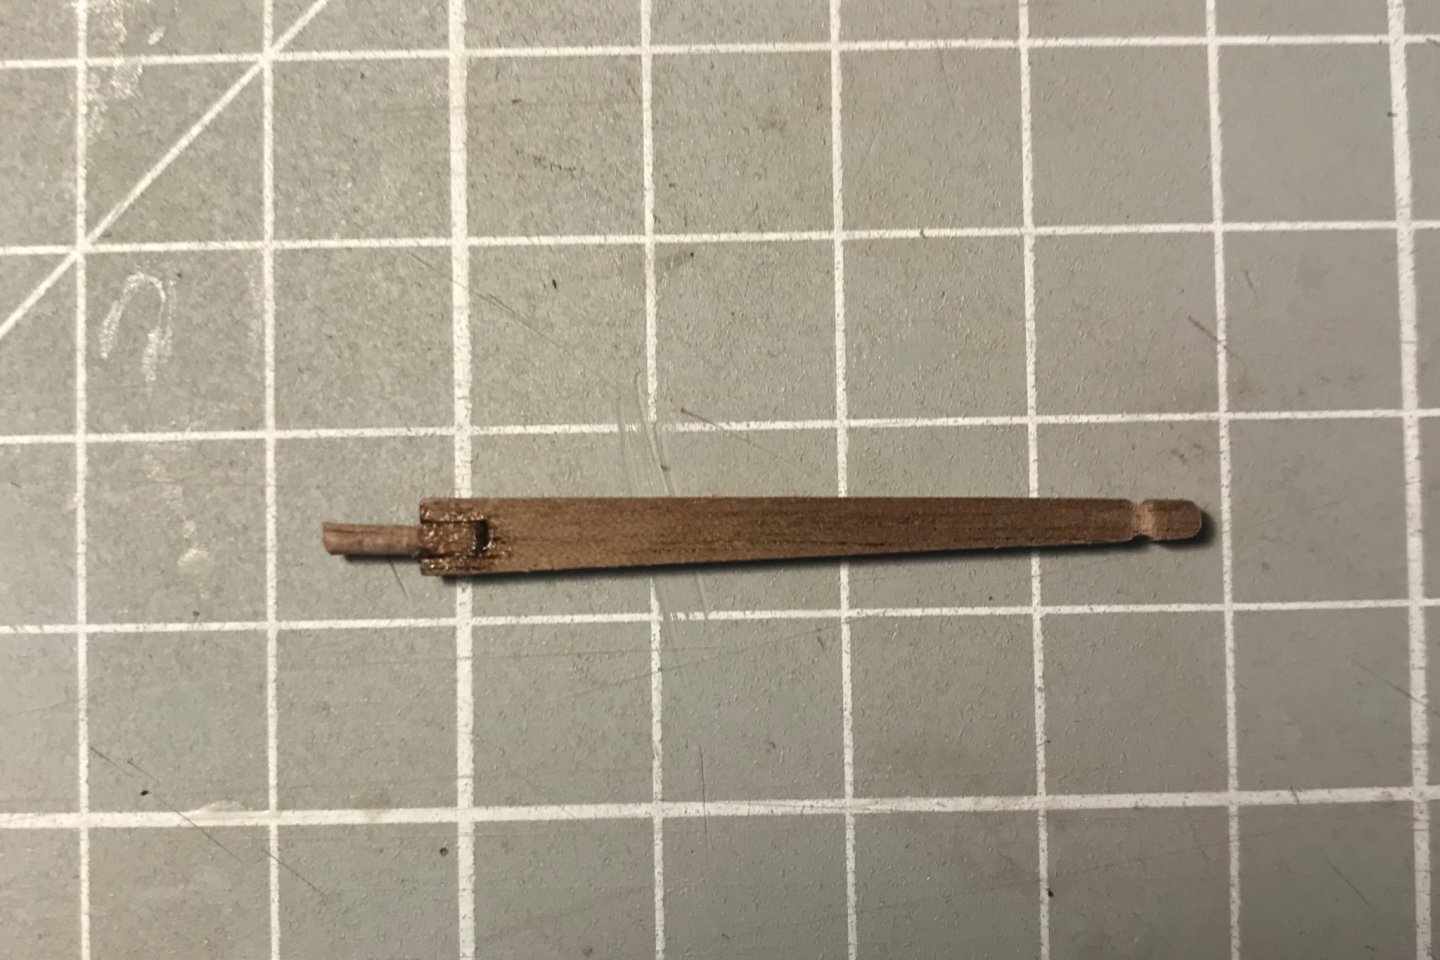
I rounded of the external part with a file. Works just fine

- AJohnson and Beef Wellington
-
2
-
Three updates to offer this week. So here goes.
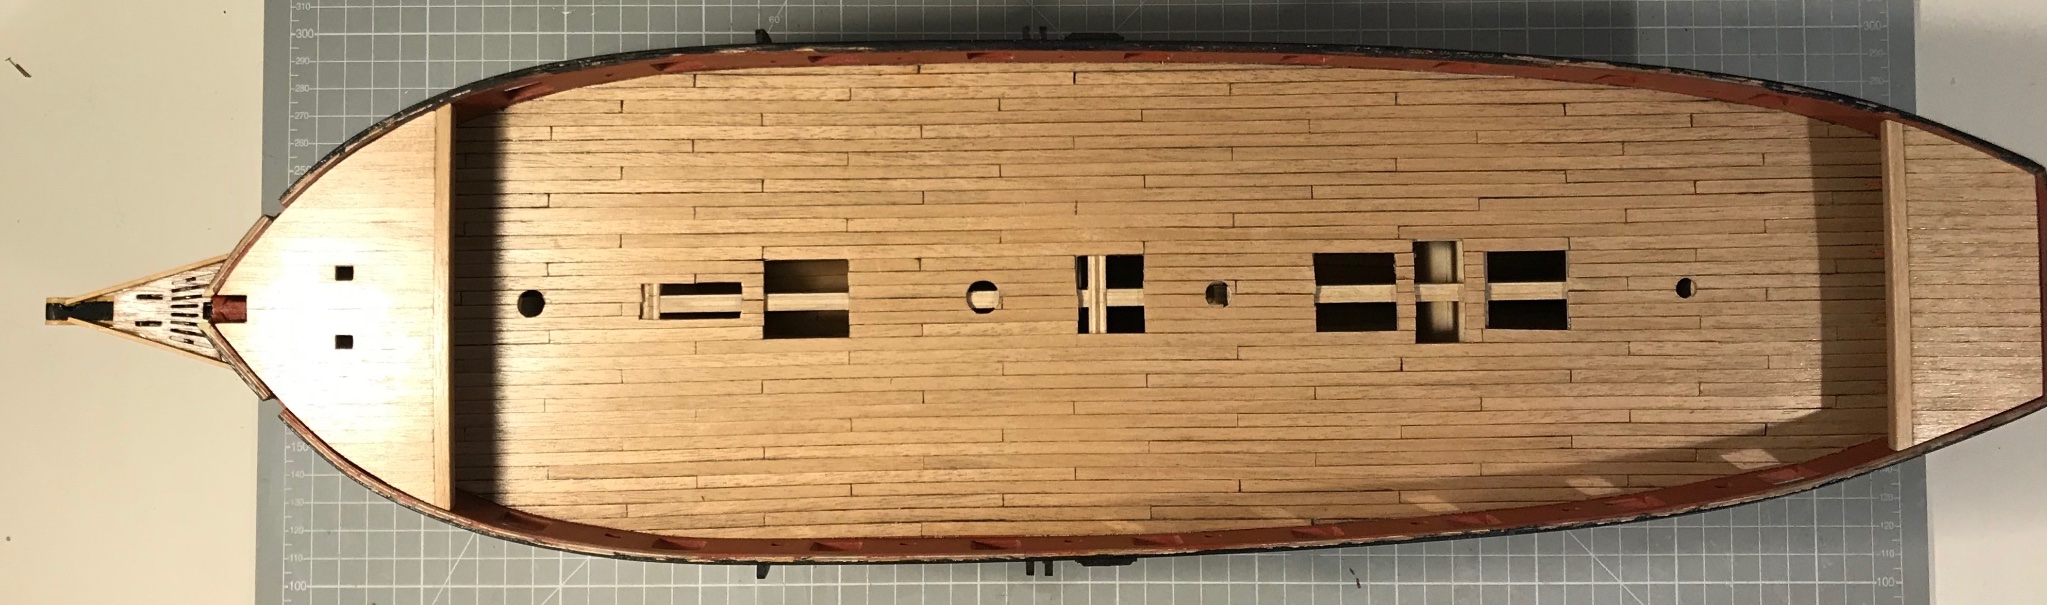
The fore and aft platforms are planked. Given my mixed experience with the main-deck planking, I'm really pleased how this went - with pretty scrappy materials, at that. Just experience I think.

The strip at the bottom is the last remaining piece of tanganyika. Glad I was sparing in its use - because there is none spare. But just check out how straight it is(n't).
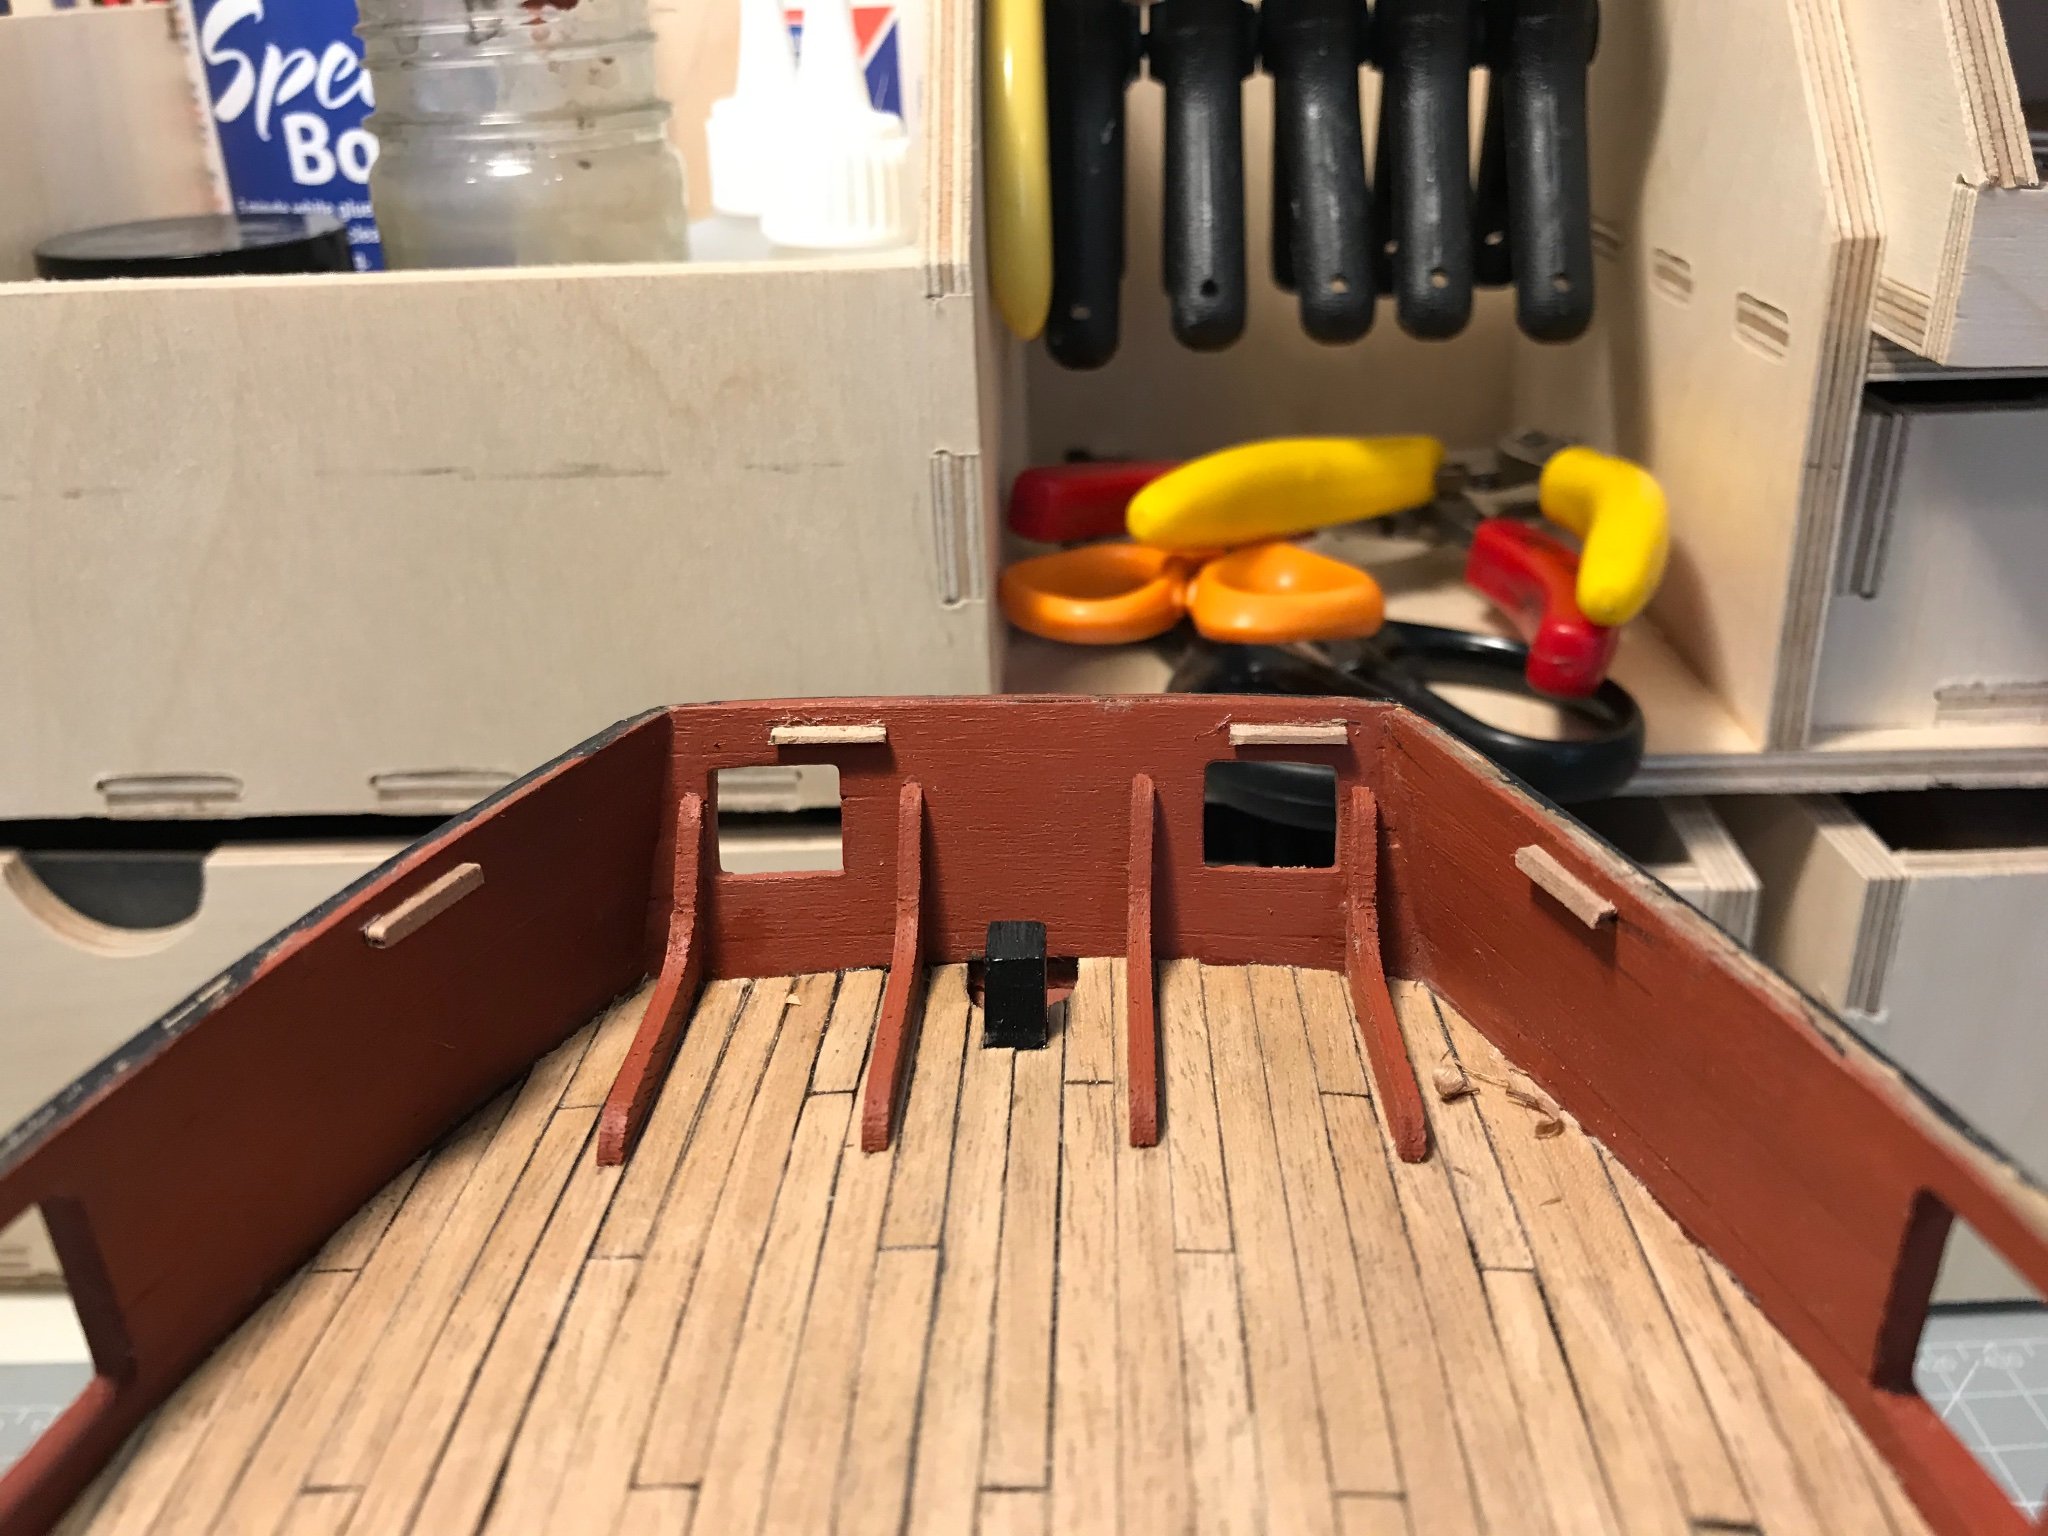
Here are the ledges they sit on (since painted red ochre)

And can I say I love the instruction to "measure accurately 1.8 mm" and mark the location of these ledges. I'm forever measuring things to the nearest 100 microns (that's 4 thou, for the greay-haired, or transatlantic). Anyway, trial and error did the trick (you can even see some evidence of error on the starboard bow)
And (dry) fitted.

-
Welcome! Nothing to be scared of here - just do what you are doing: look at logs and start building. Sometimes I learn enough from others to avoid mistakes, sometimes I don’t. Sometimes I do what the kit instructions say, sometimes I don’t (and not always by accident). Oh, and I love buying tools. I find the Sunday-night ritual of posting to my log really enjoyable. I photograph as I’m going during the week and then instead of clearing my inbox, get my log up to date. And I agree with Eric - take lots of photographs.
cheers, Mike
- druxey, Ryland Craze, Keith Black and 2 others
-
5
-
Wow! You are speeding along! Keep up the good work.
- Sjors and popeye the sailor
-
2
-
-
-
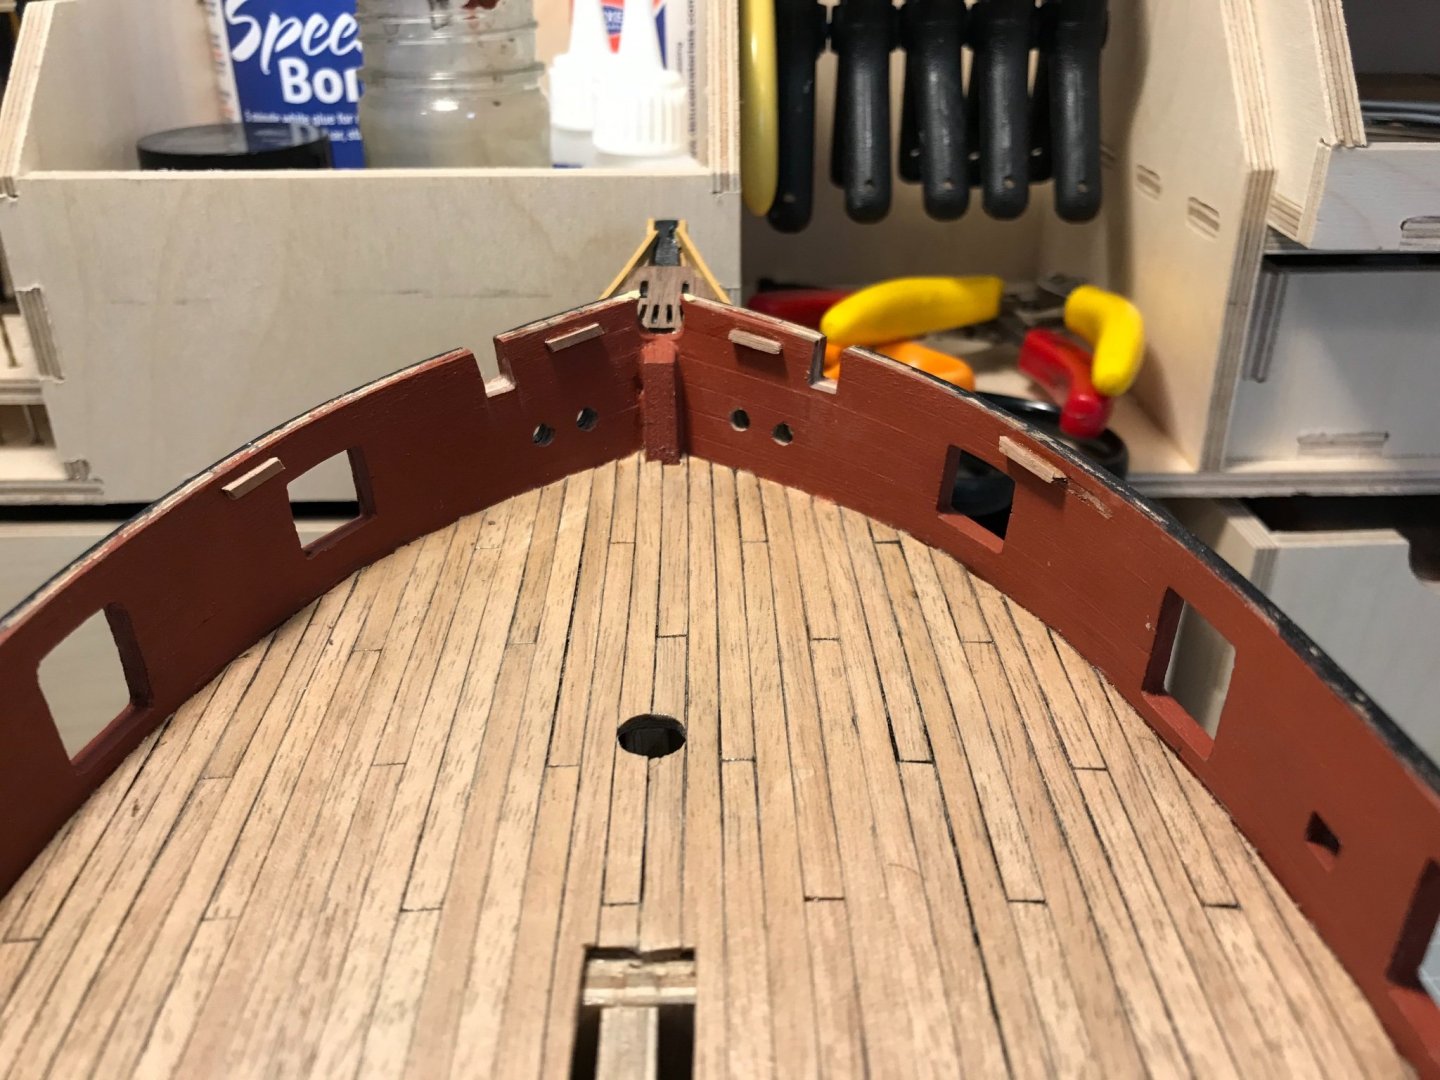
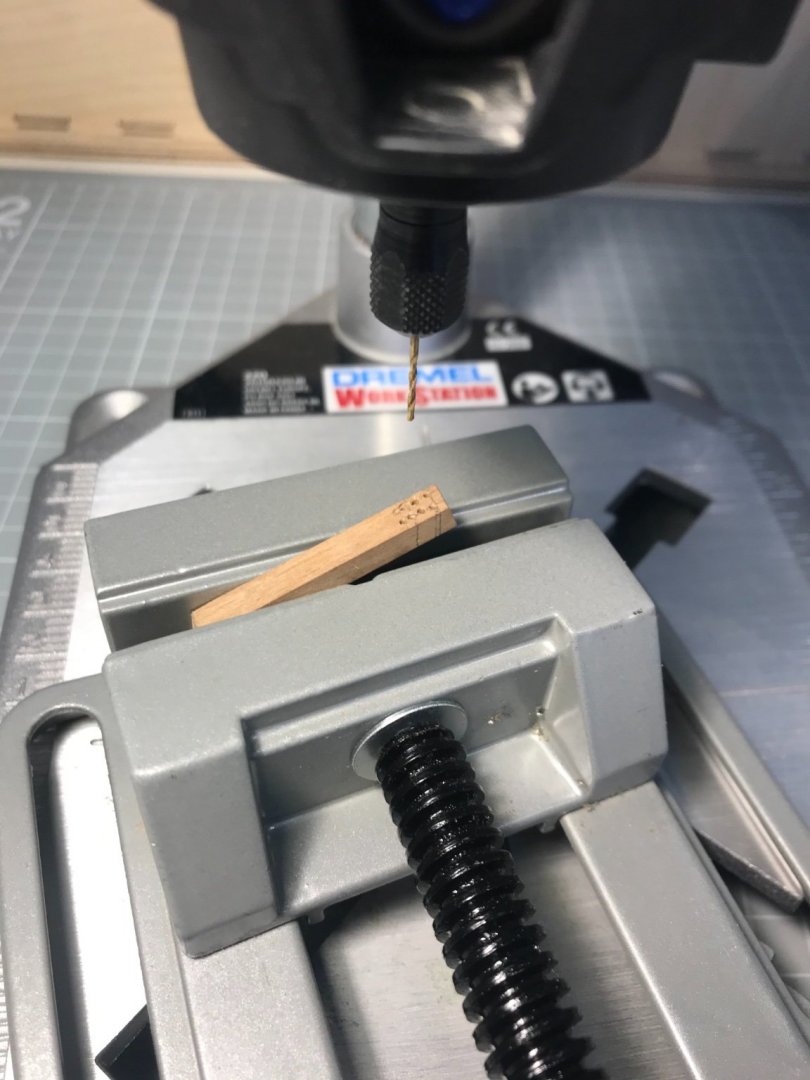
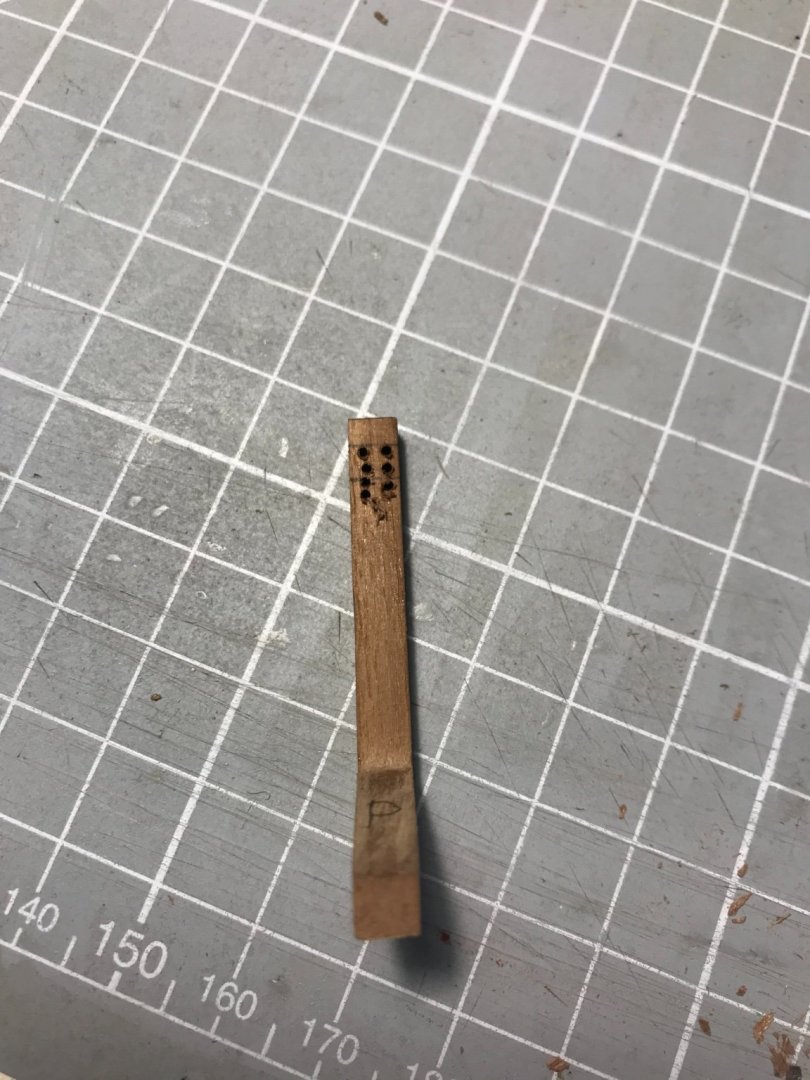
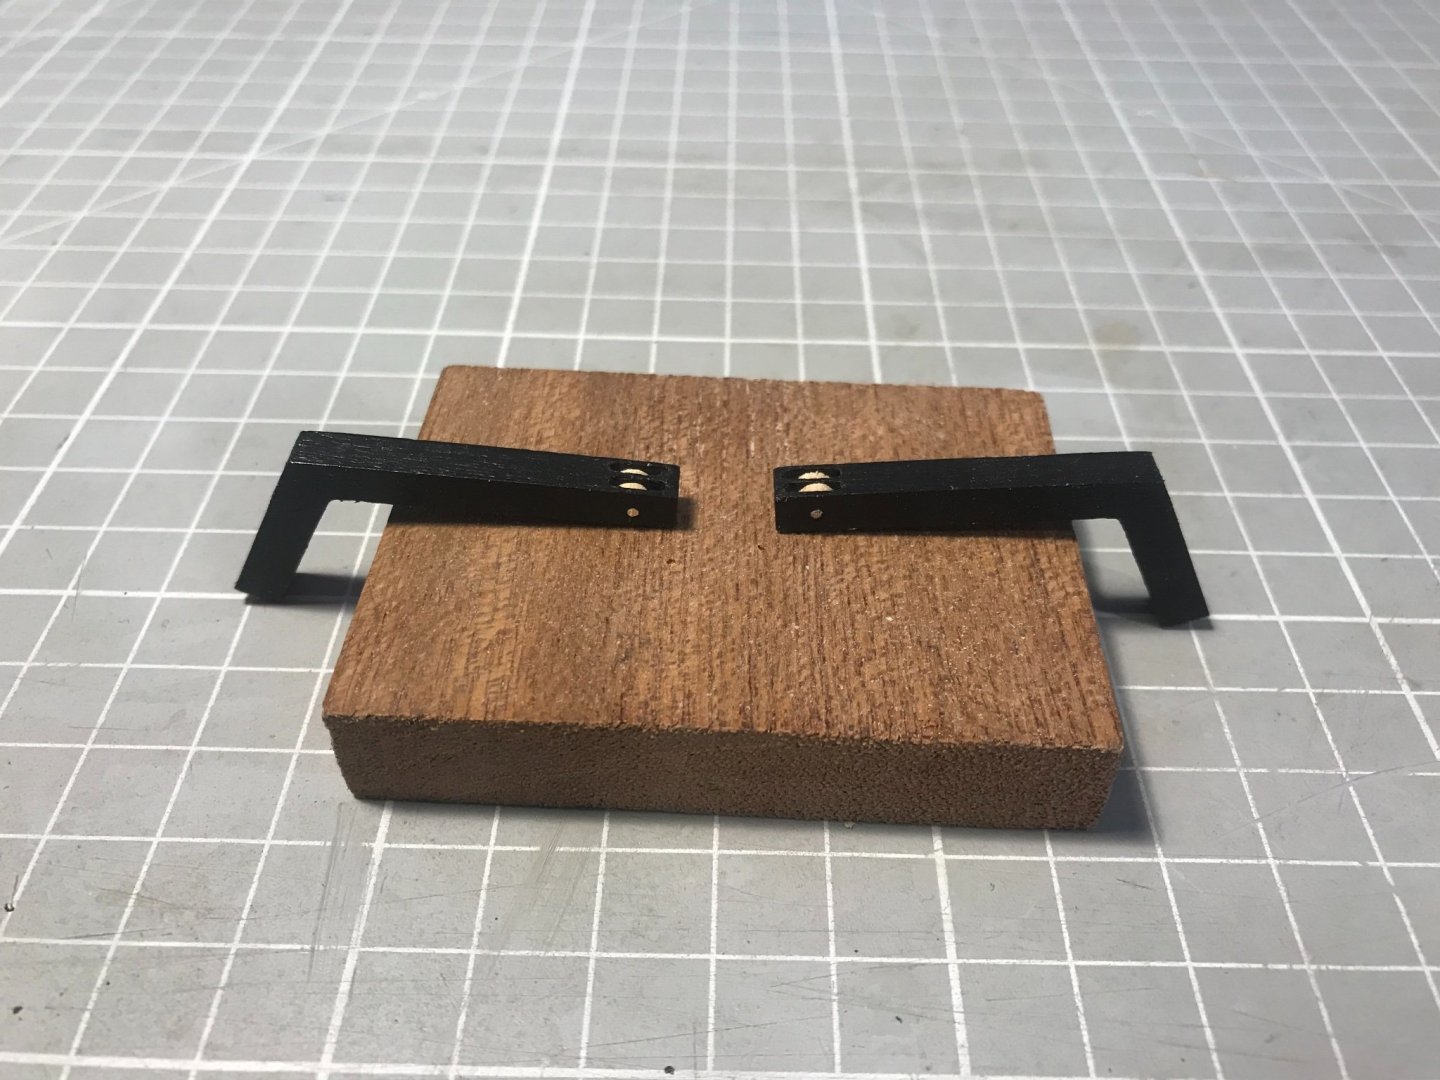
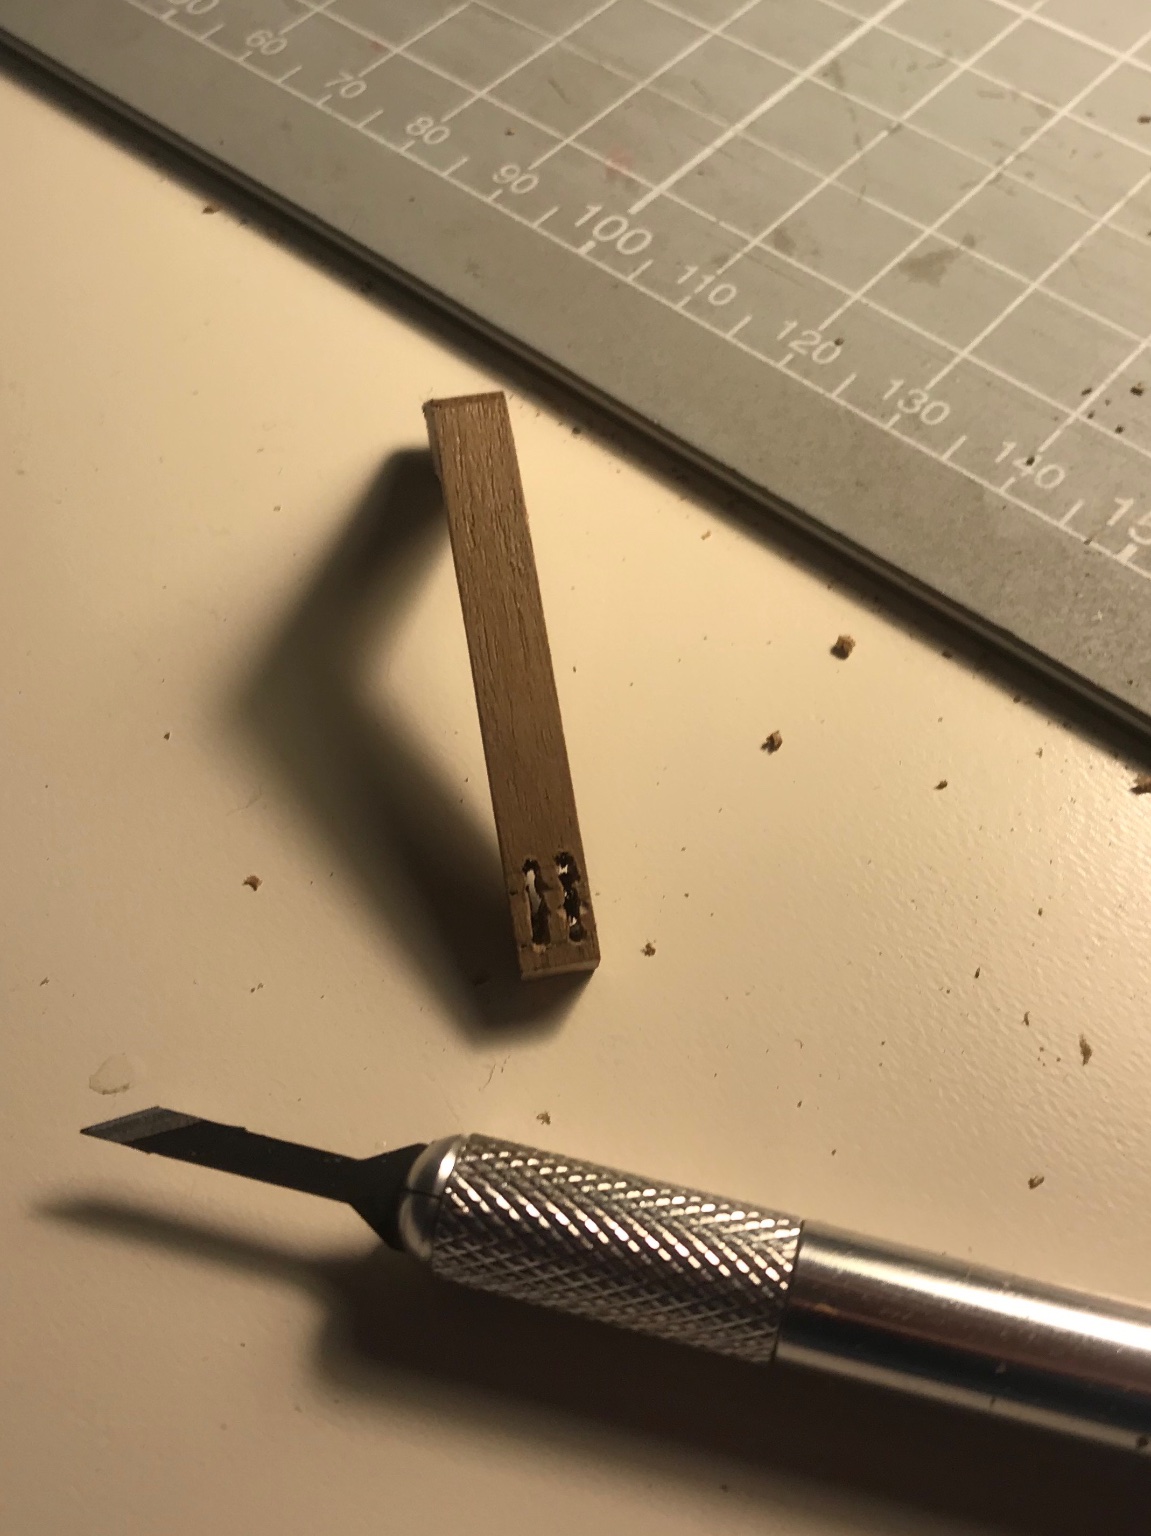
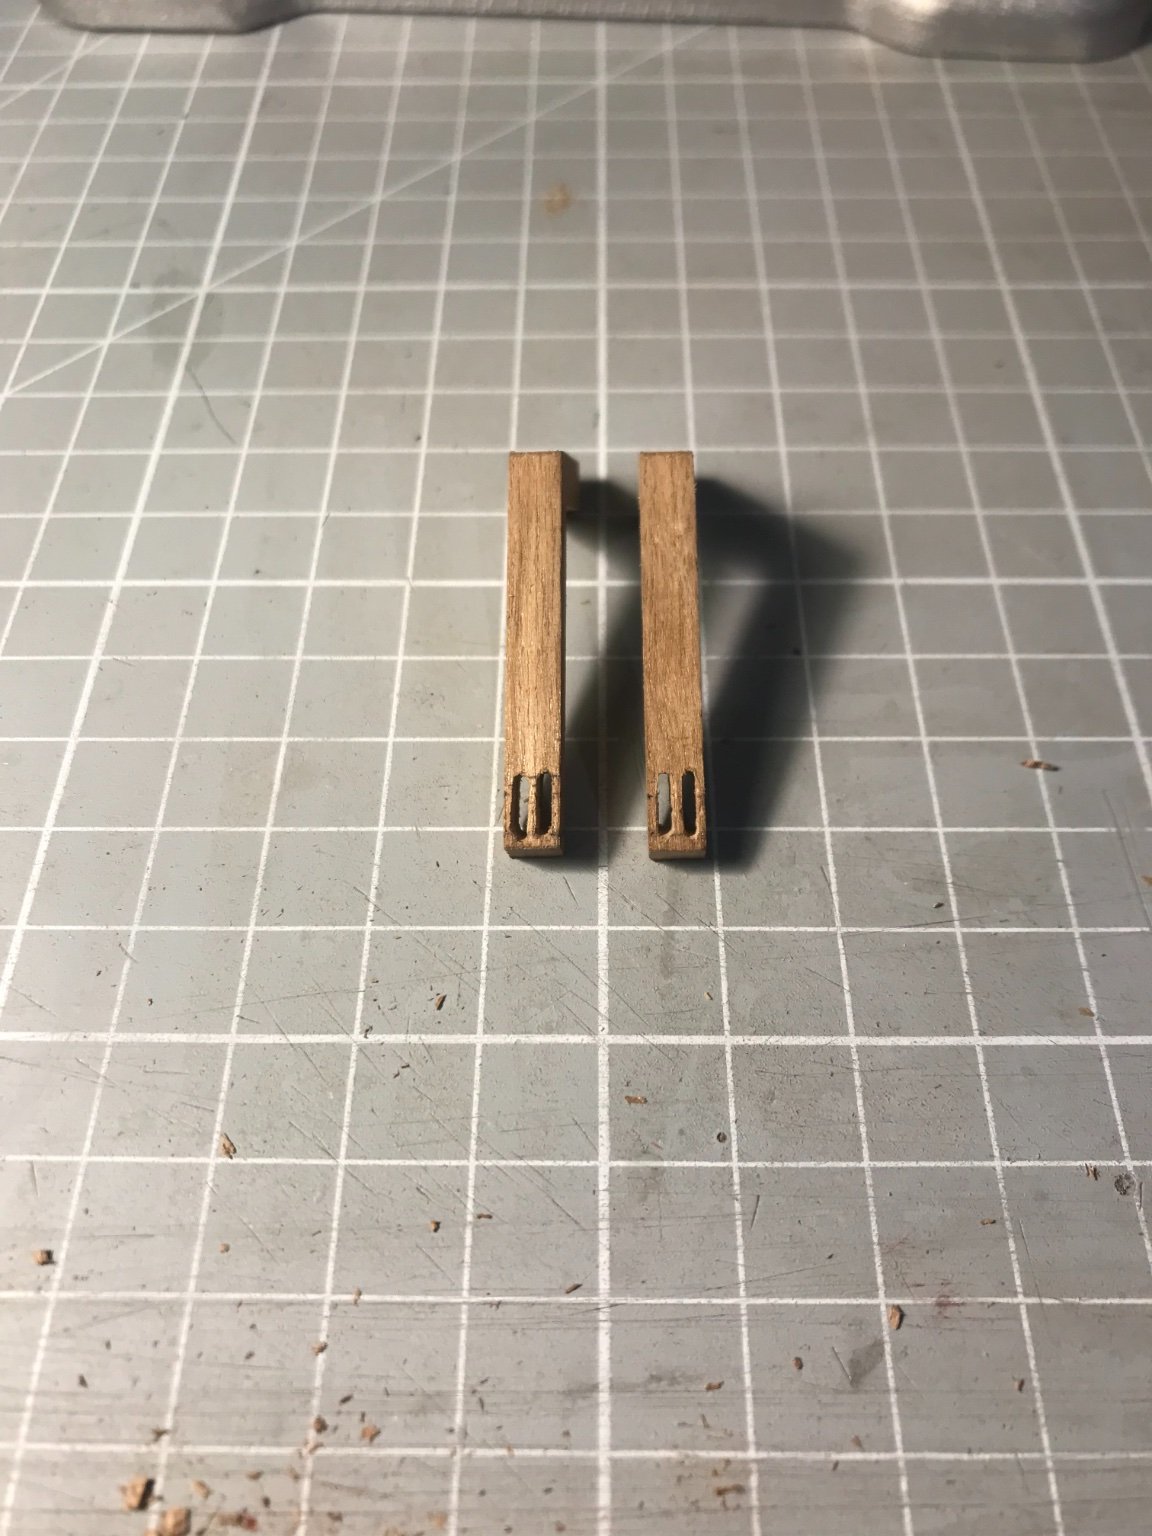
And here are the catheads. For the first time I embellished the kit design: rather than just drilling four holes where the catfall would run through the sheaves, I drilled-out and then-chiselled out slots into which I could fit some sheaves.
Holes drilled at an appropriate angle to be vertical when installed. Reverse side shows that the dremel is only a fair drill press
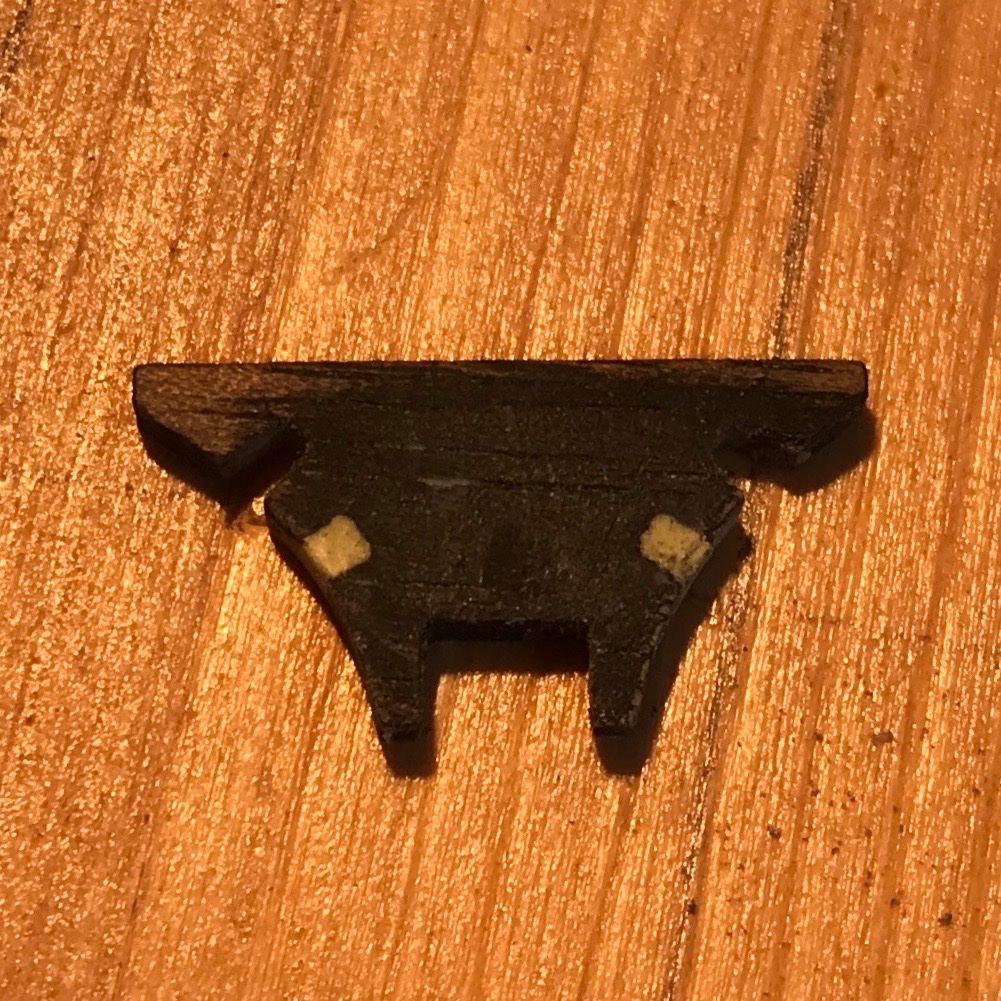
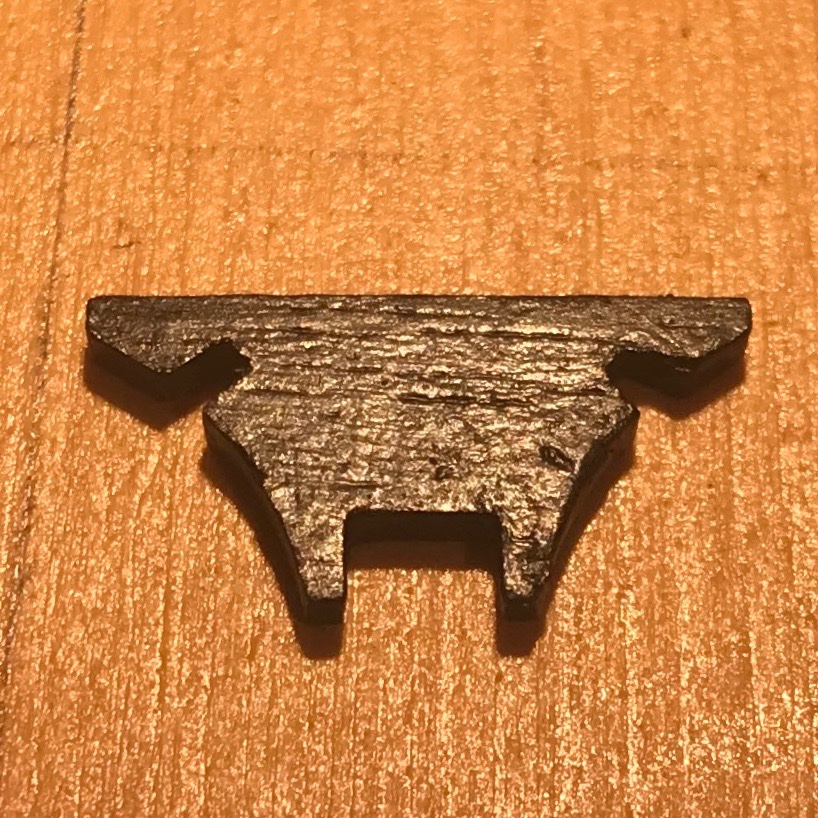
Best description is probably gouge-, not chisel-out the slots.


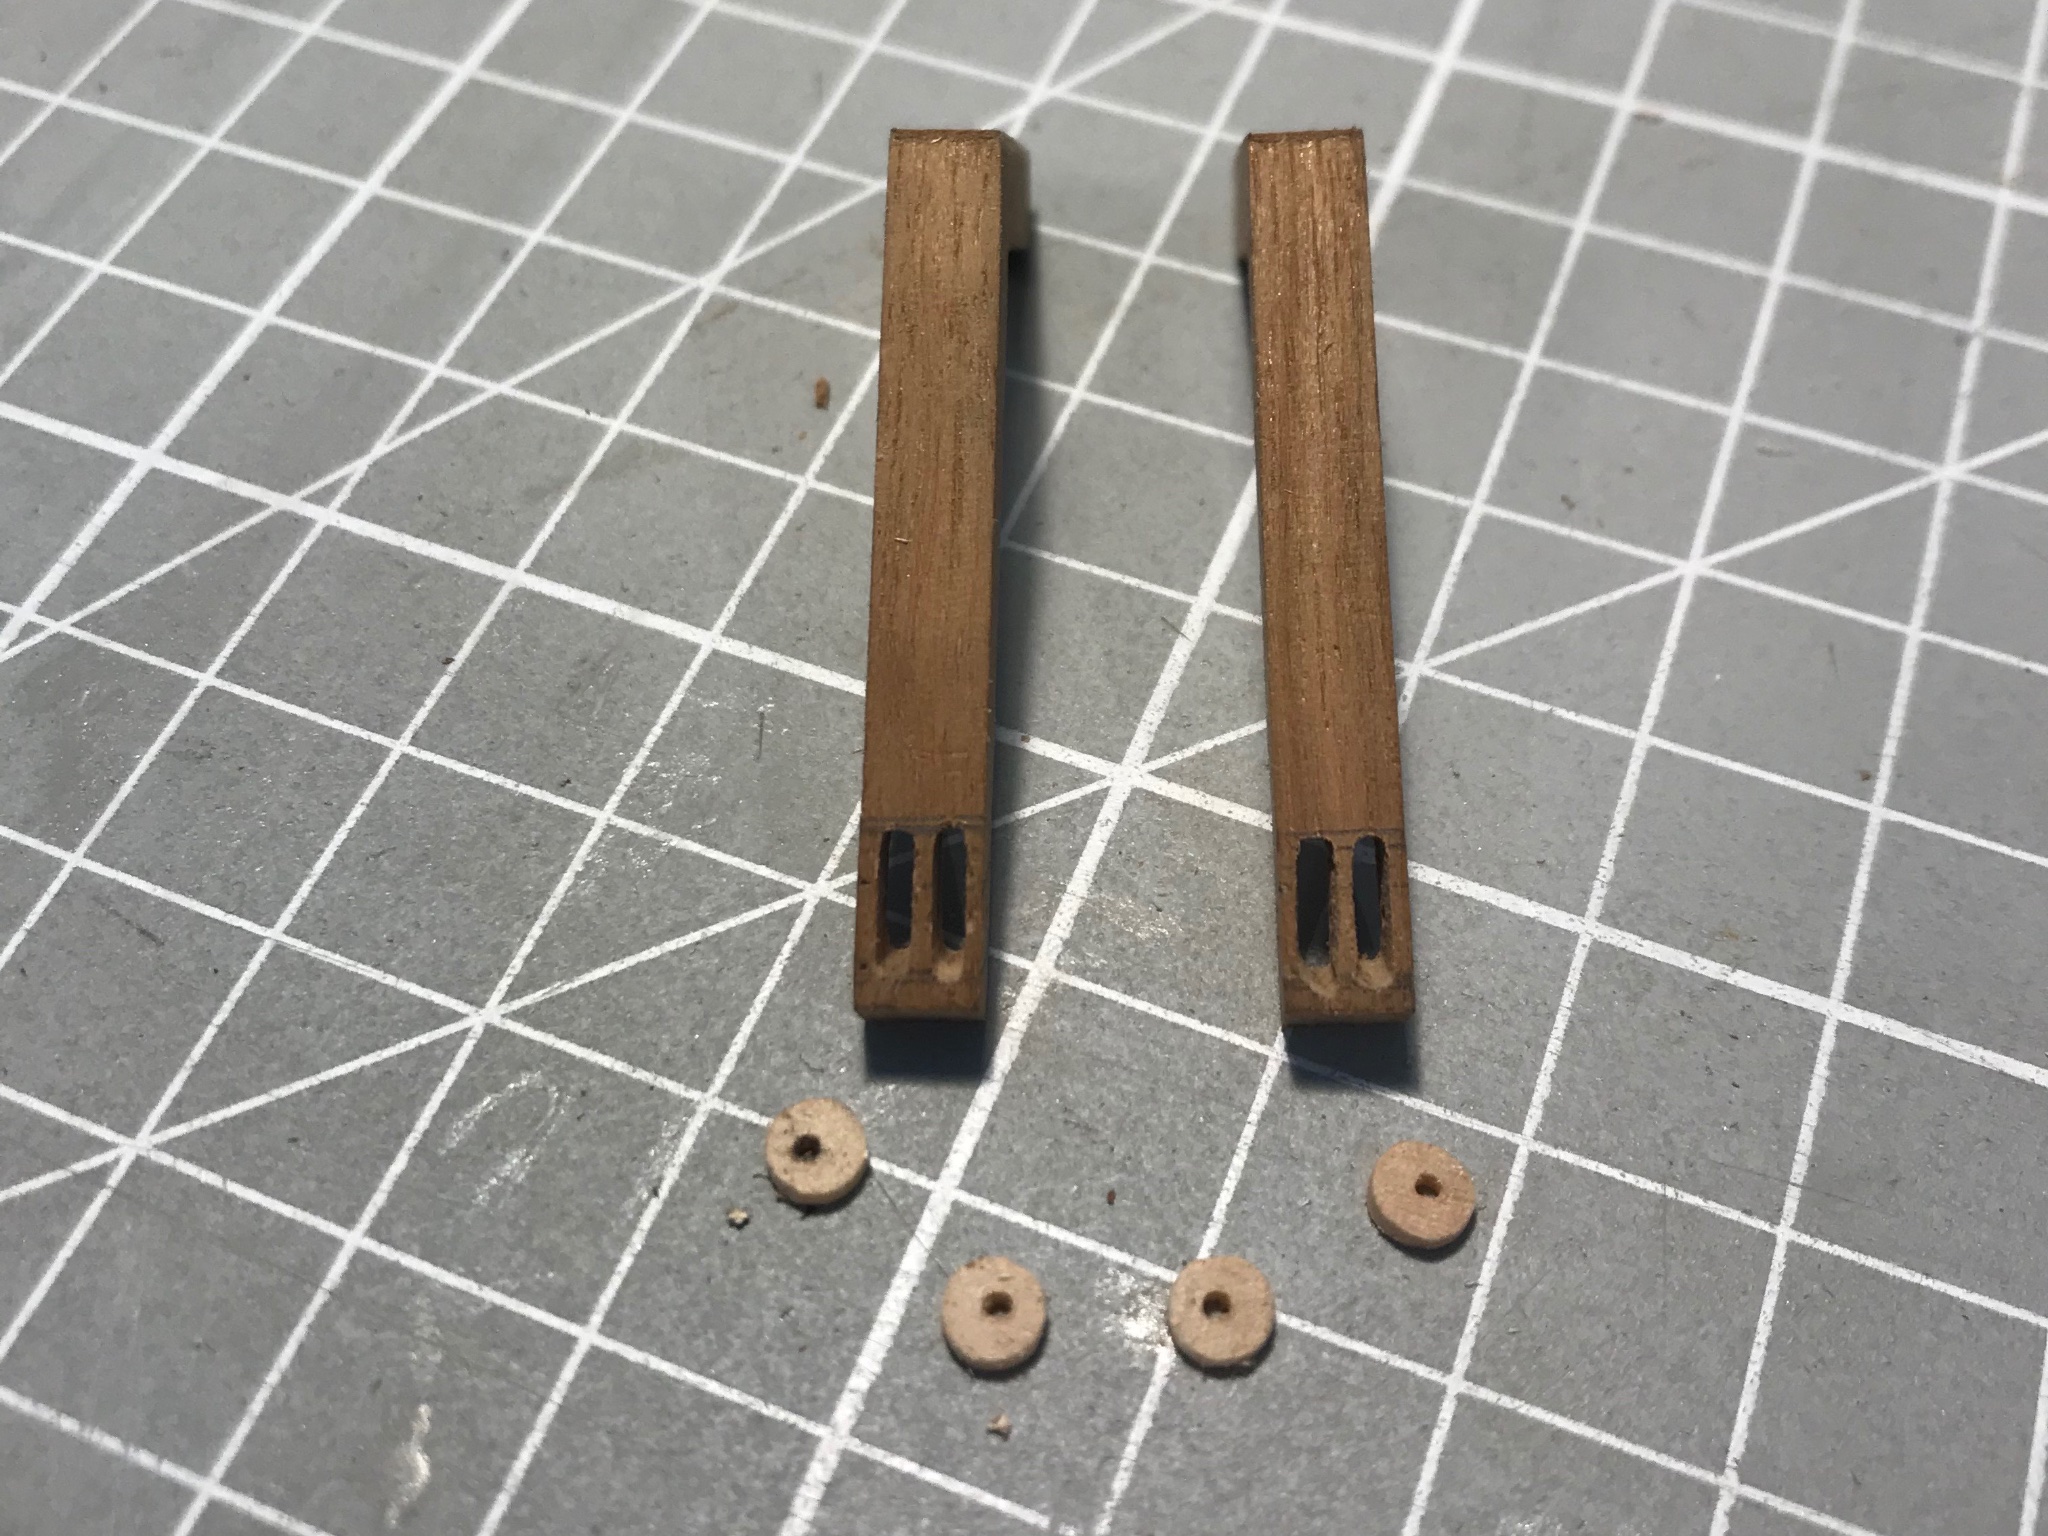
Here they are with 1 mm discs cut from 3 mm dowel. Centering the holes in the discs proved beyond me. A trial fit using two pins (nails) seems to look ok

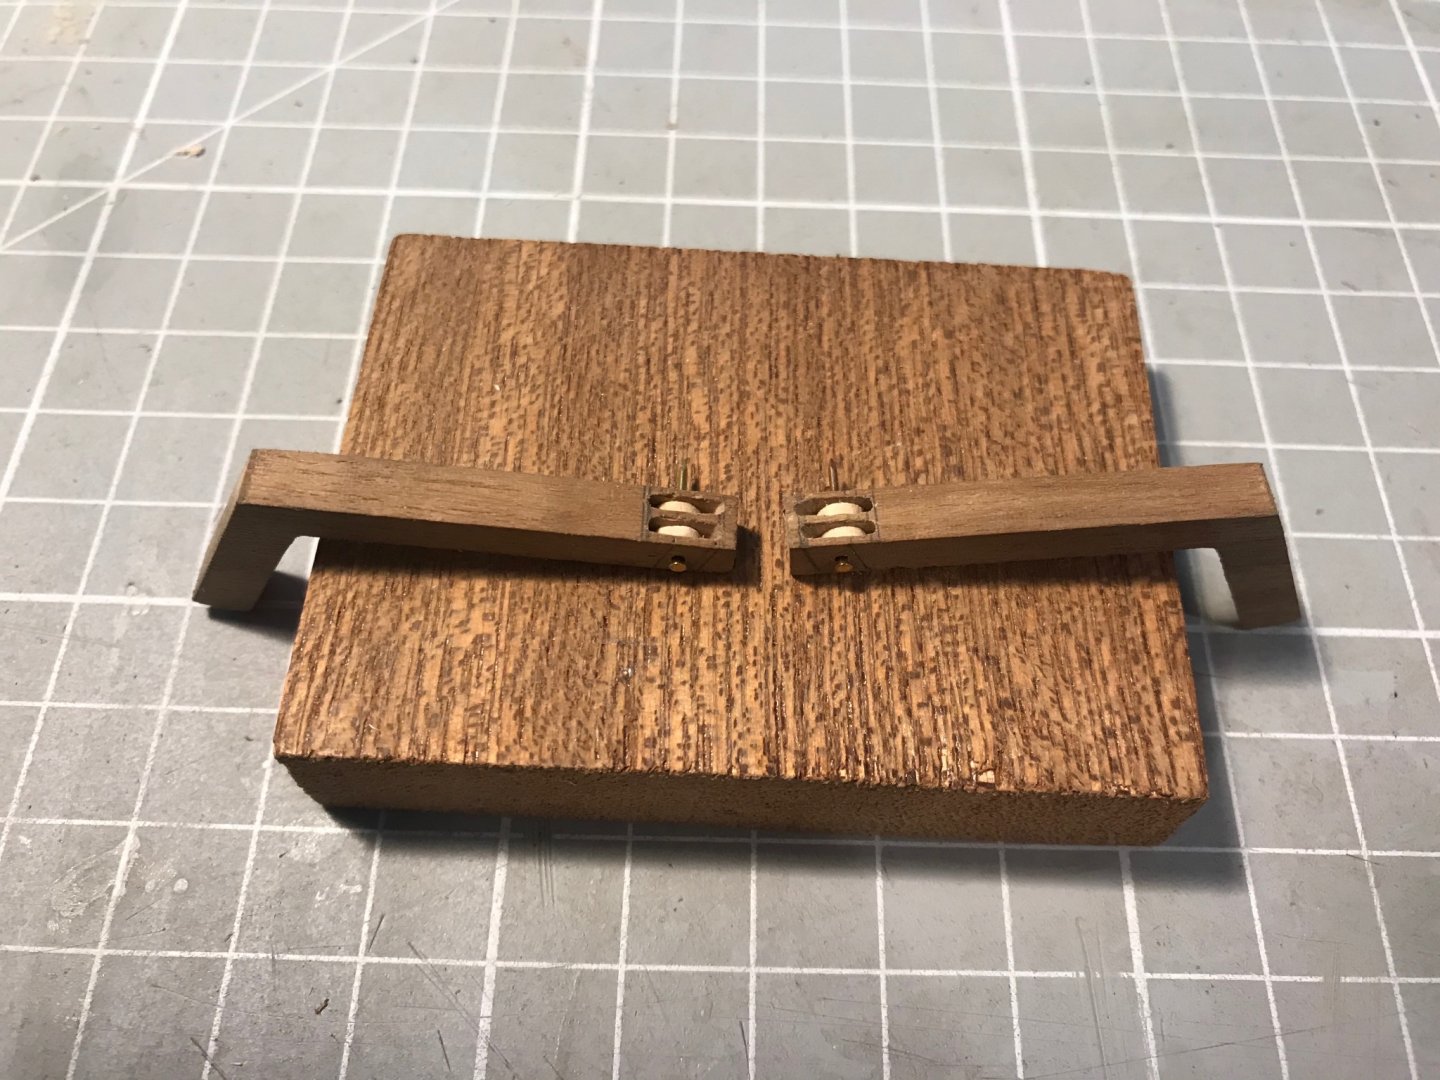
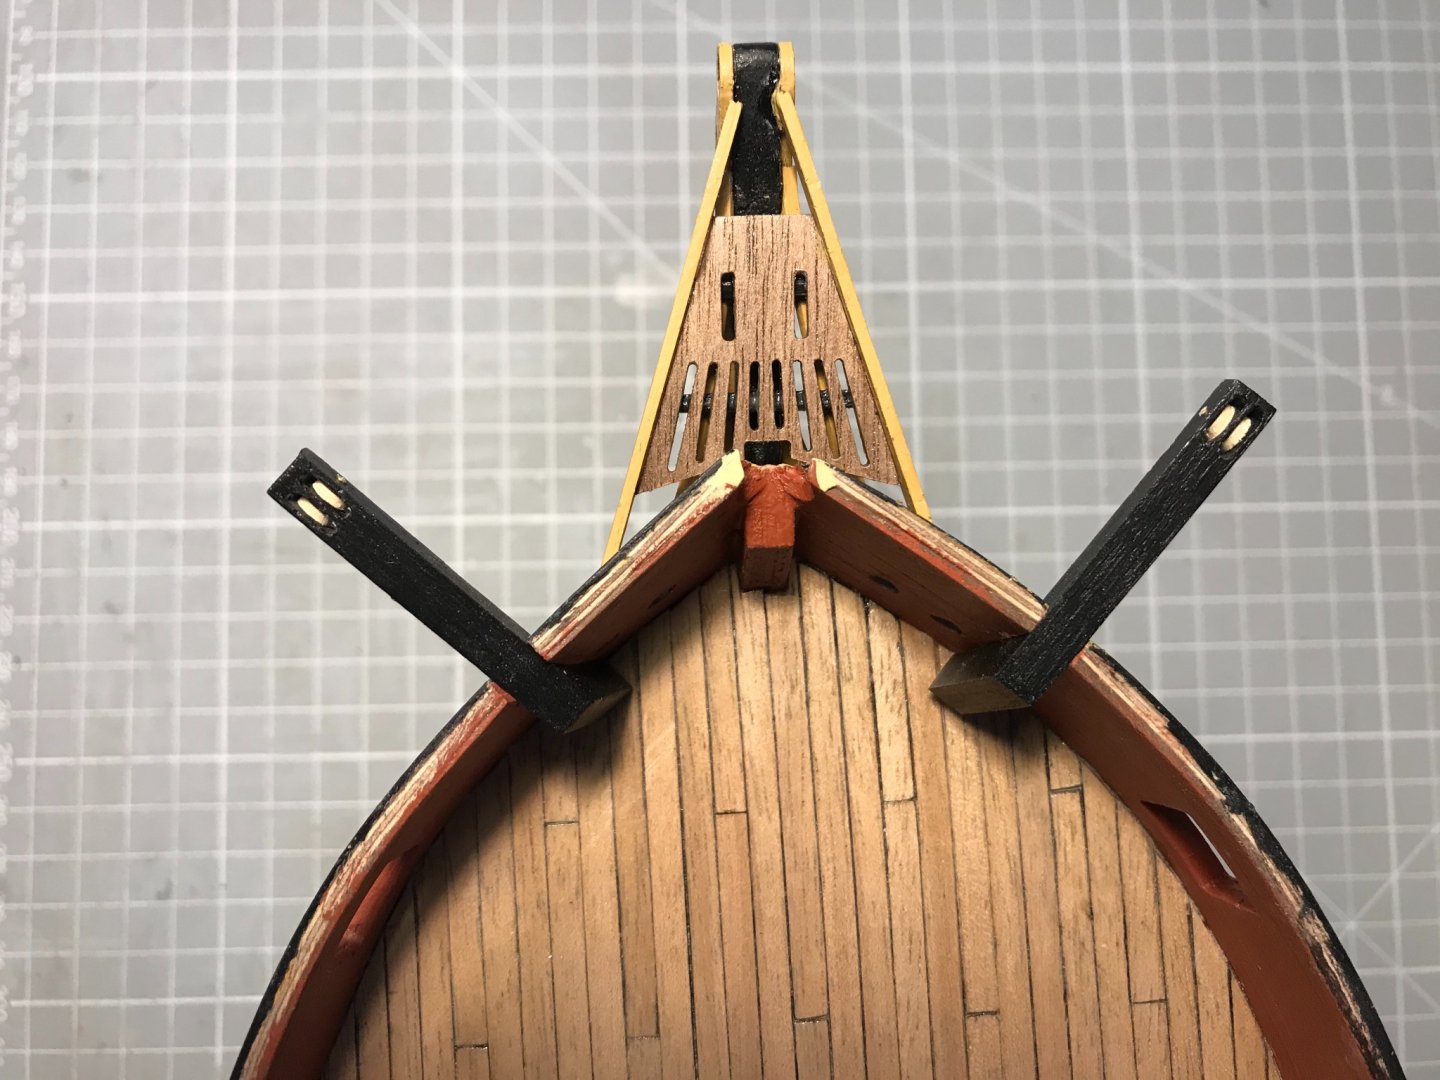
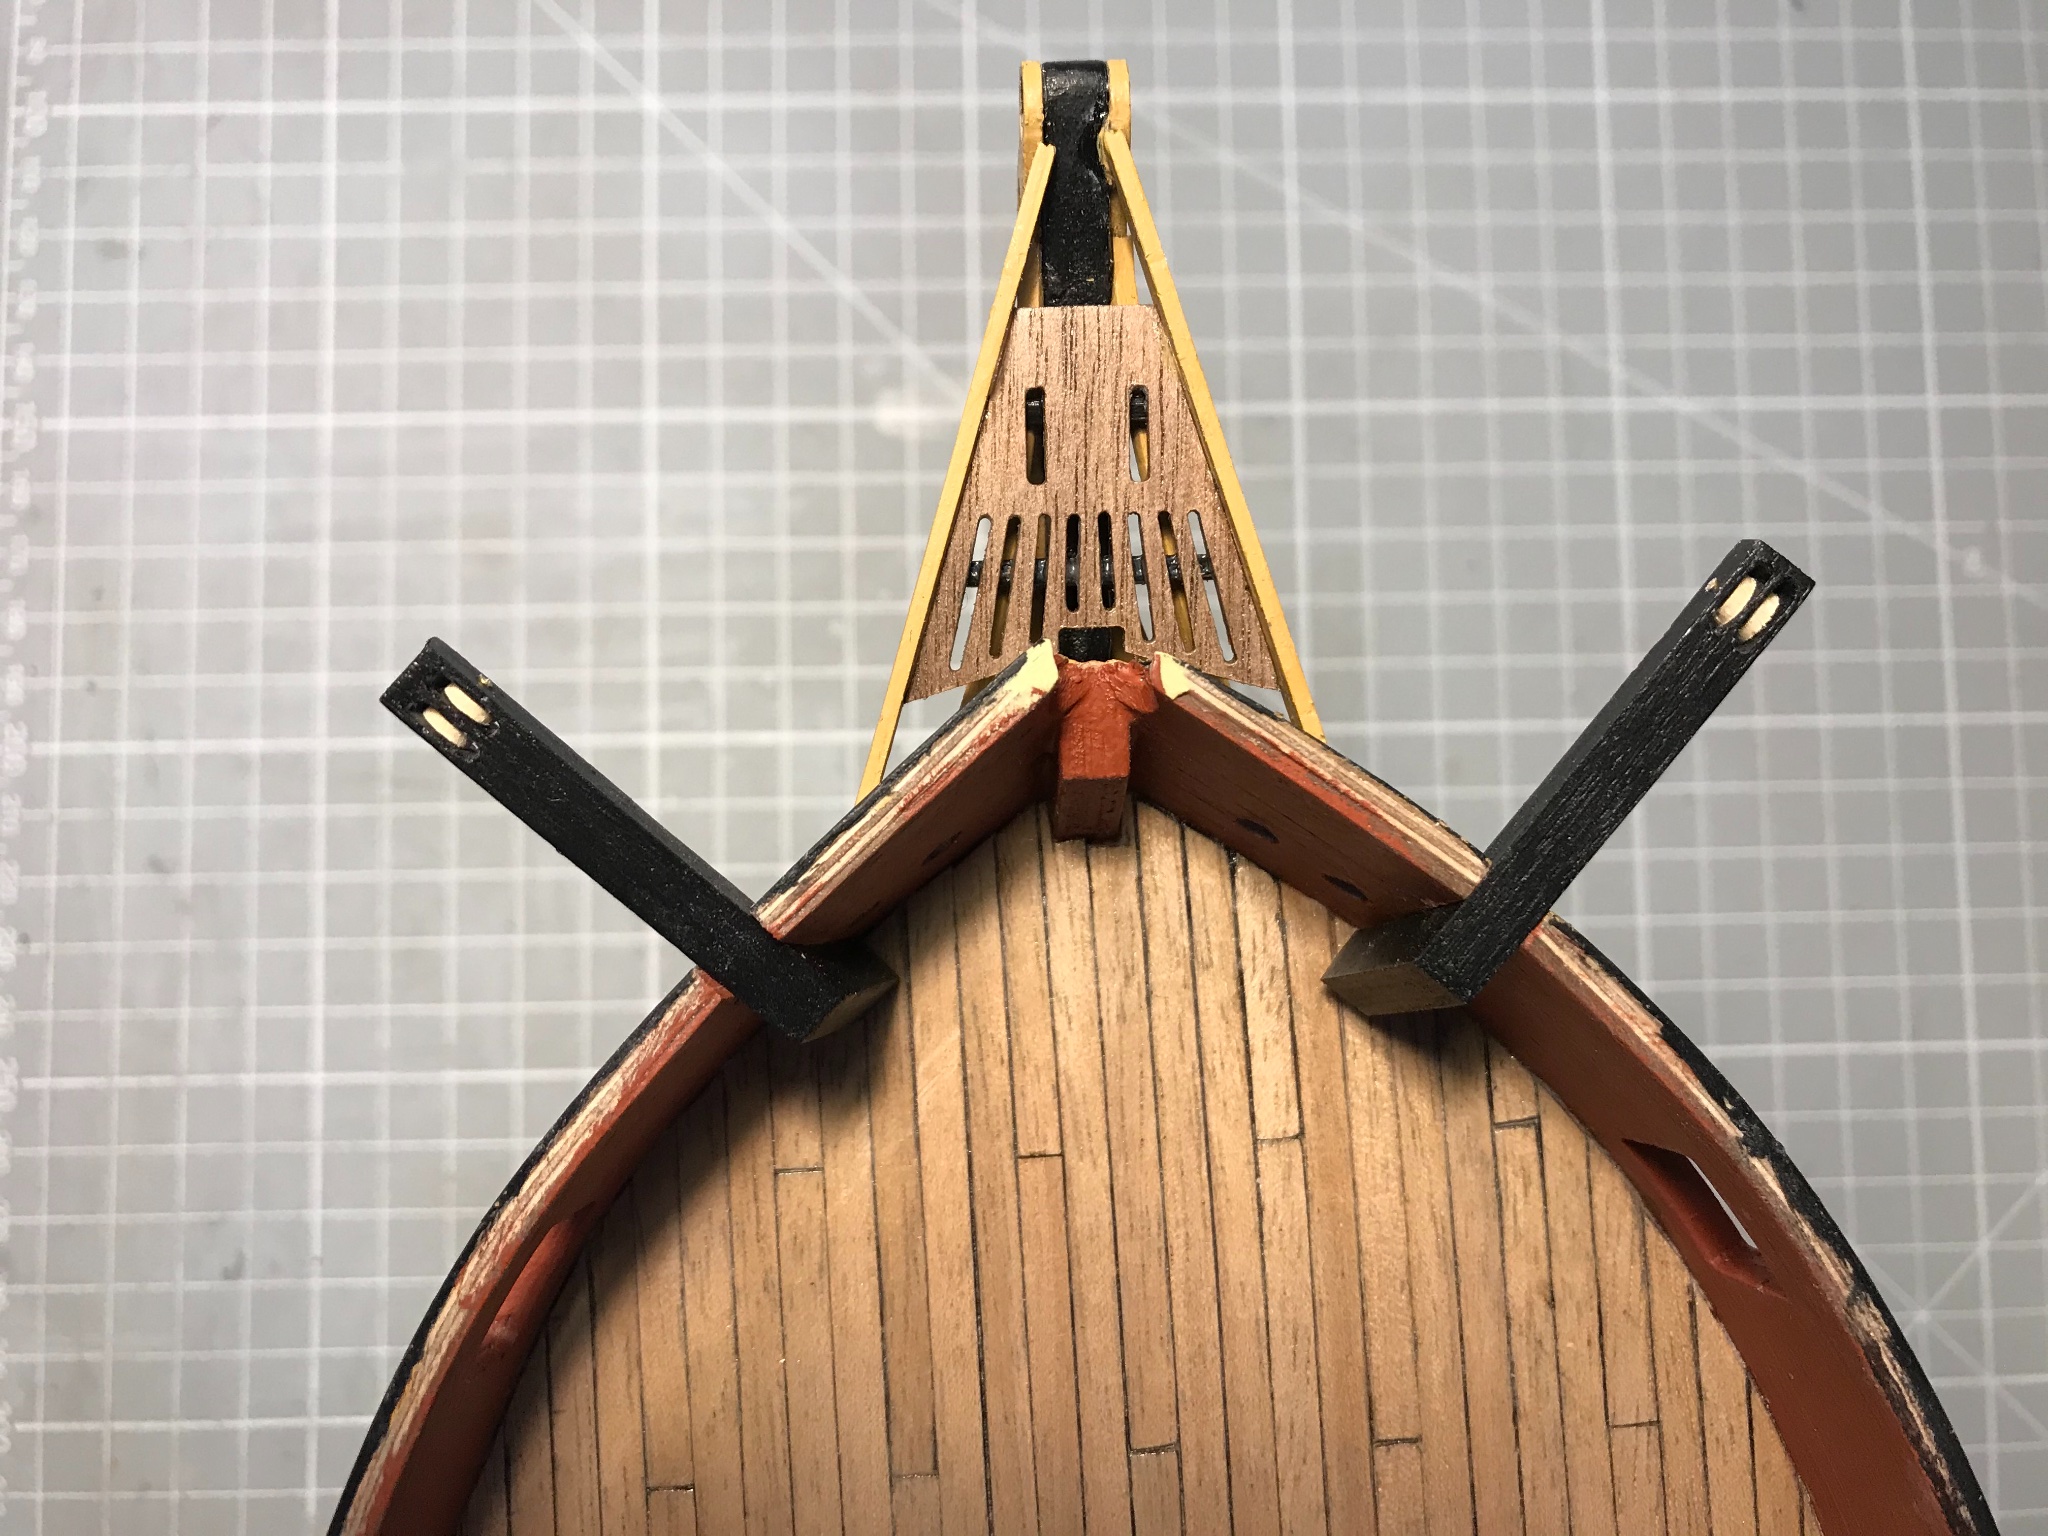
And the finished product now pinned in place with 1 mm brass rod
Quite a lot of fun!
- Wintergreen, BenD, Wahka_est and 5 others
-
8
-
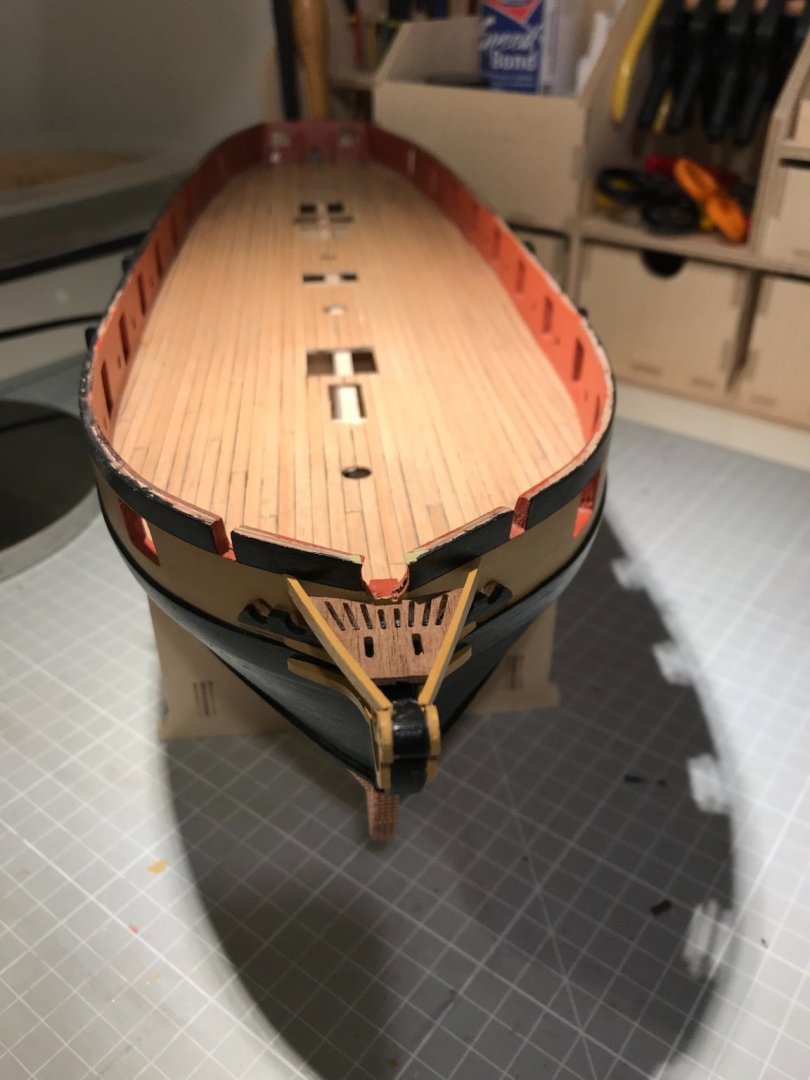
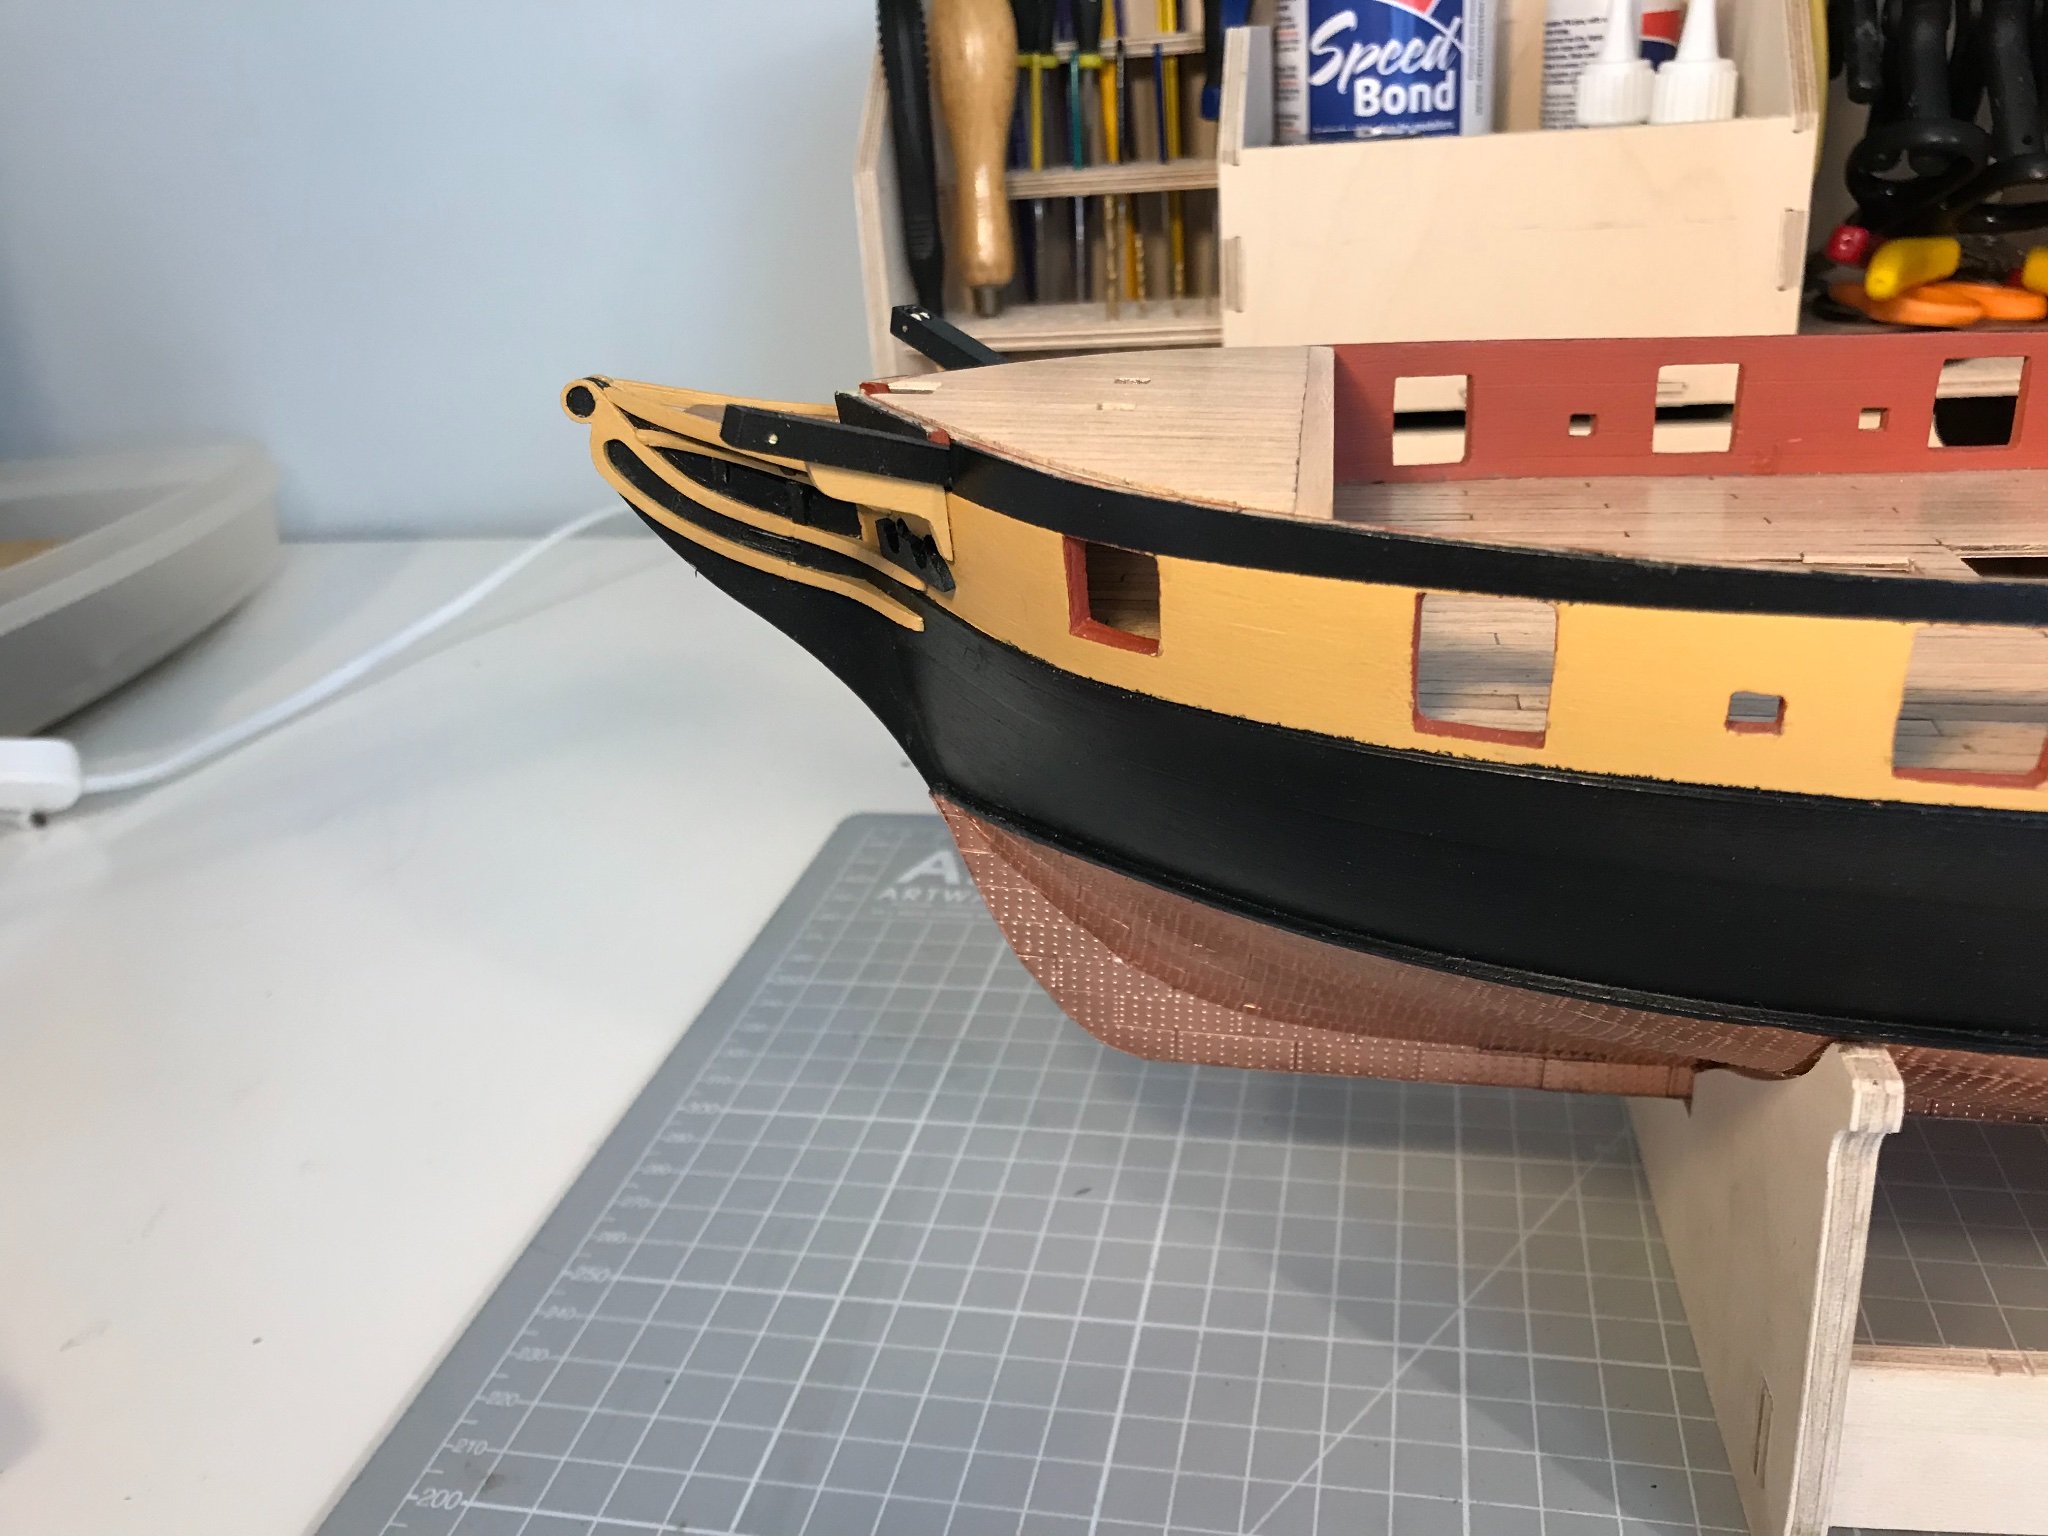
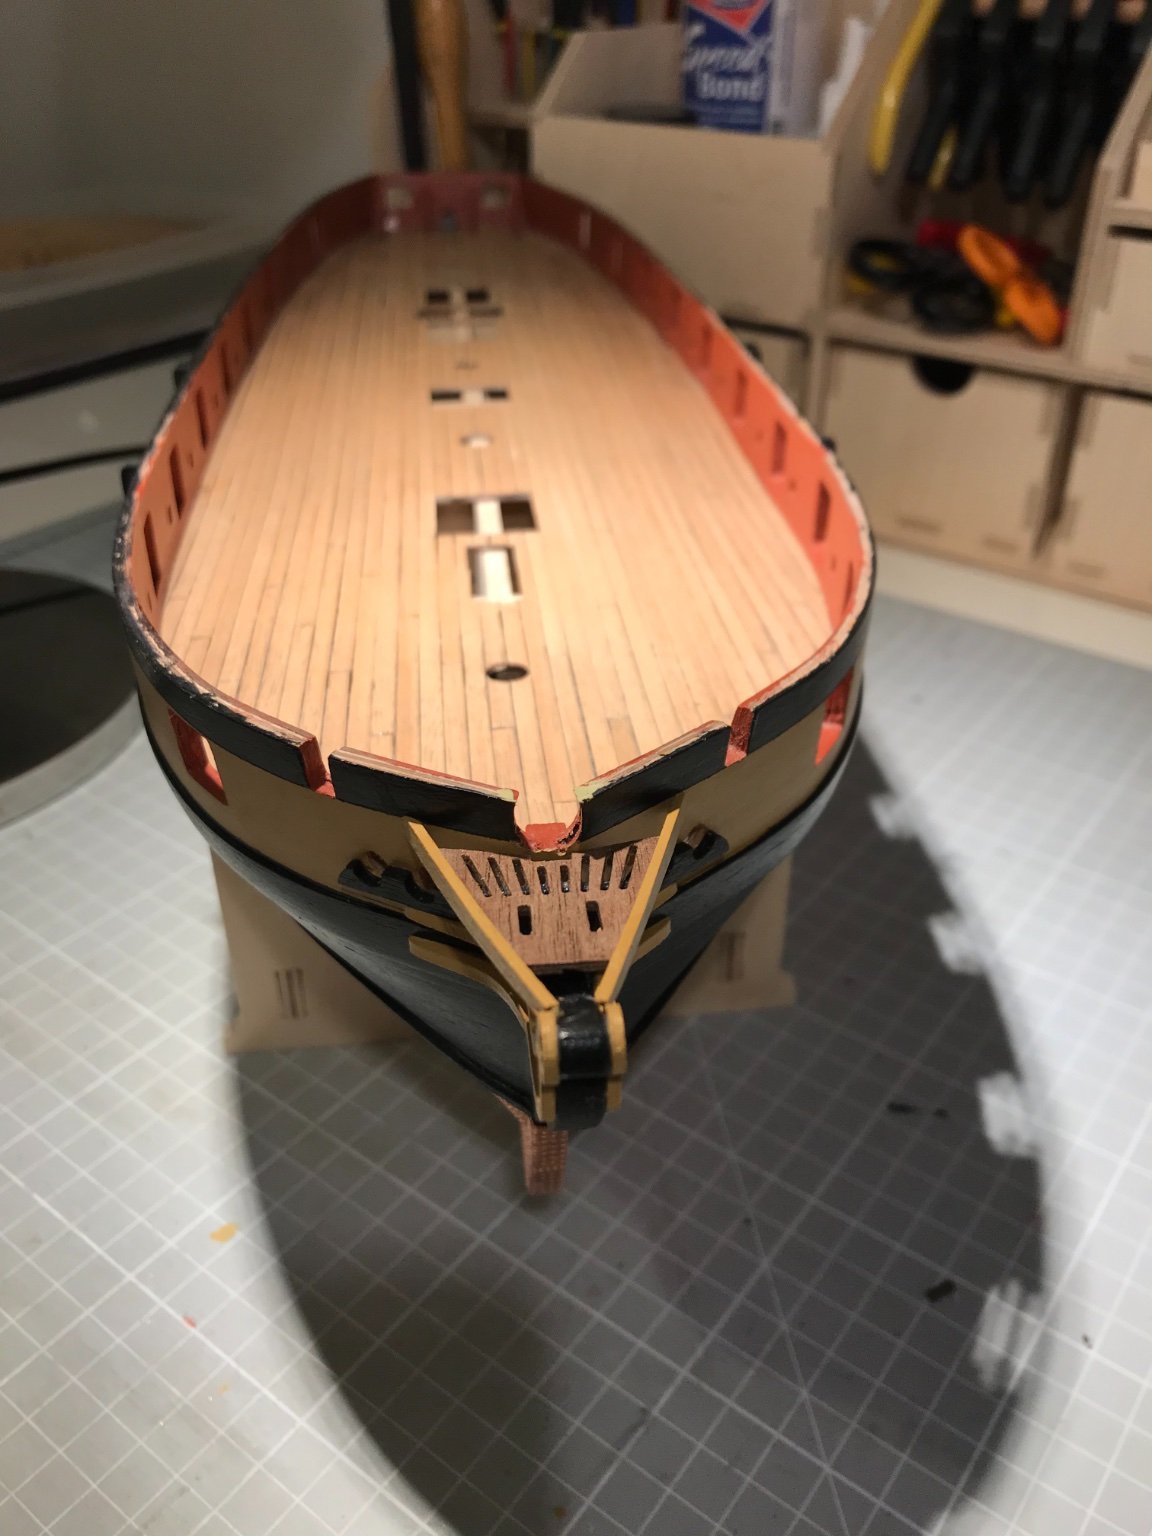
Headworks done. Not trivial as the provided parts and drawings are what a draftsman wold describe as being of nominal scale. Once you work that out, and engage low gear and defensive driving mode, it was all quit pleasing. The bow rails and cheeks go on first, and take quite a lot of sanding (cheeks) and trimming to length (rails) before all is good.
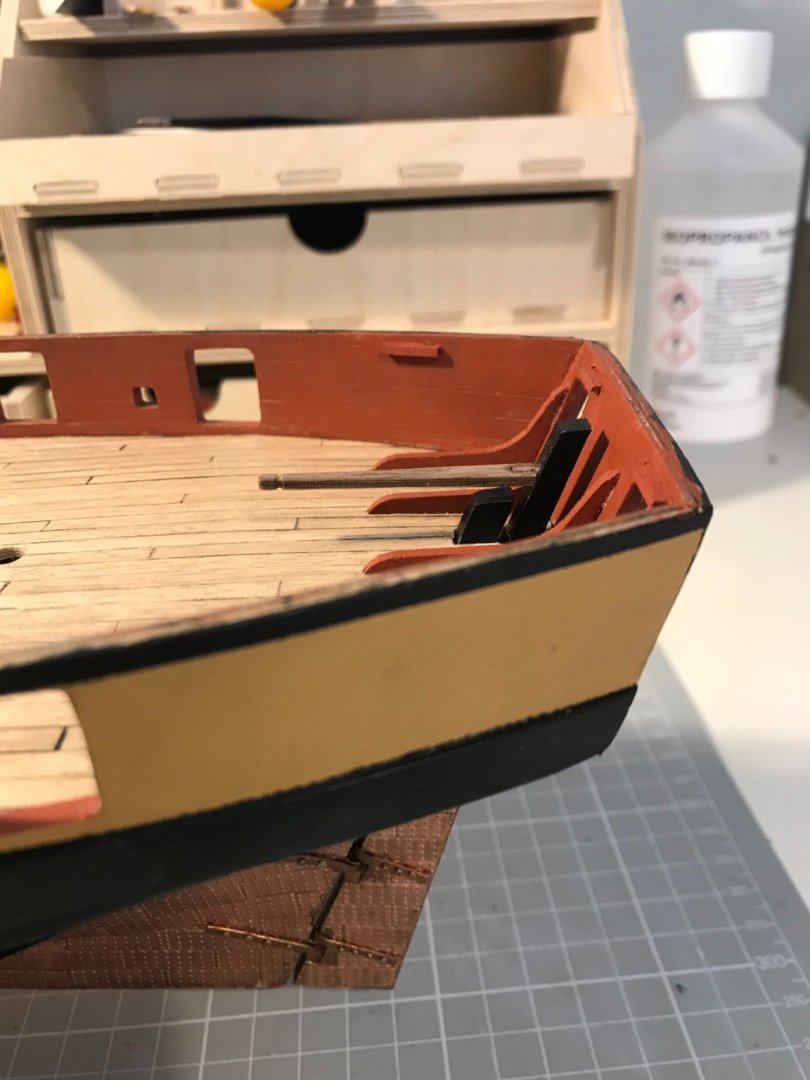
Next comes the "bow head rail frames", or grating supports, as might be said with fewer words. Easy enough to paint and glue, at which point it is apparent that the grating sits much too high (wish I had re-read @Beef Wellington before I glued). The fore support was firmly glued in place so I just took a saw to it, and chopped the top off. For the aft support, I could prise it off, and then filed-out the slot as deep as would allow the support to fit above the bow rail. Photographed it at that point:

That meant that the lower rail slots in the aft support were not in the right place - so I "moved" them, filling the old slots with milliput, sanding down and filing new slots, and then painting, again. Not the RH slot has been eased slightly to allow the rail to rotate
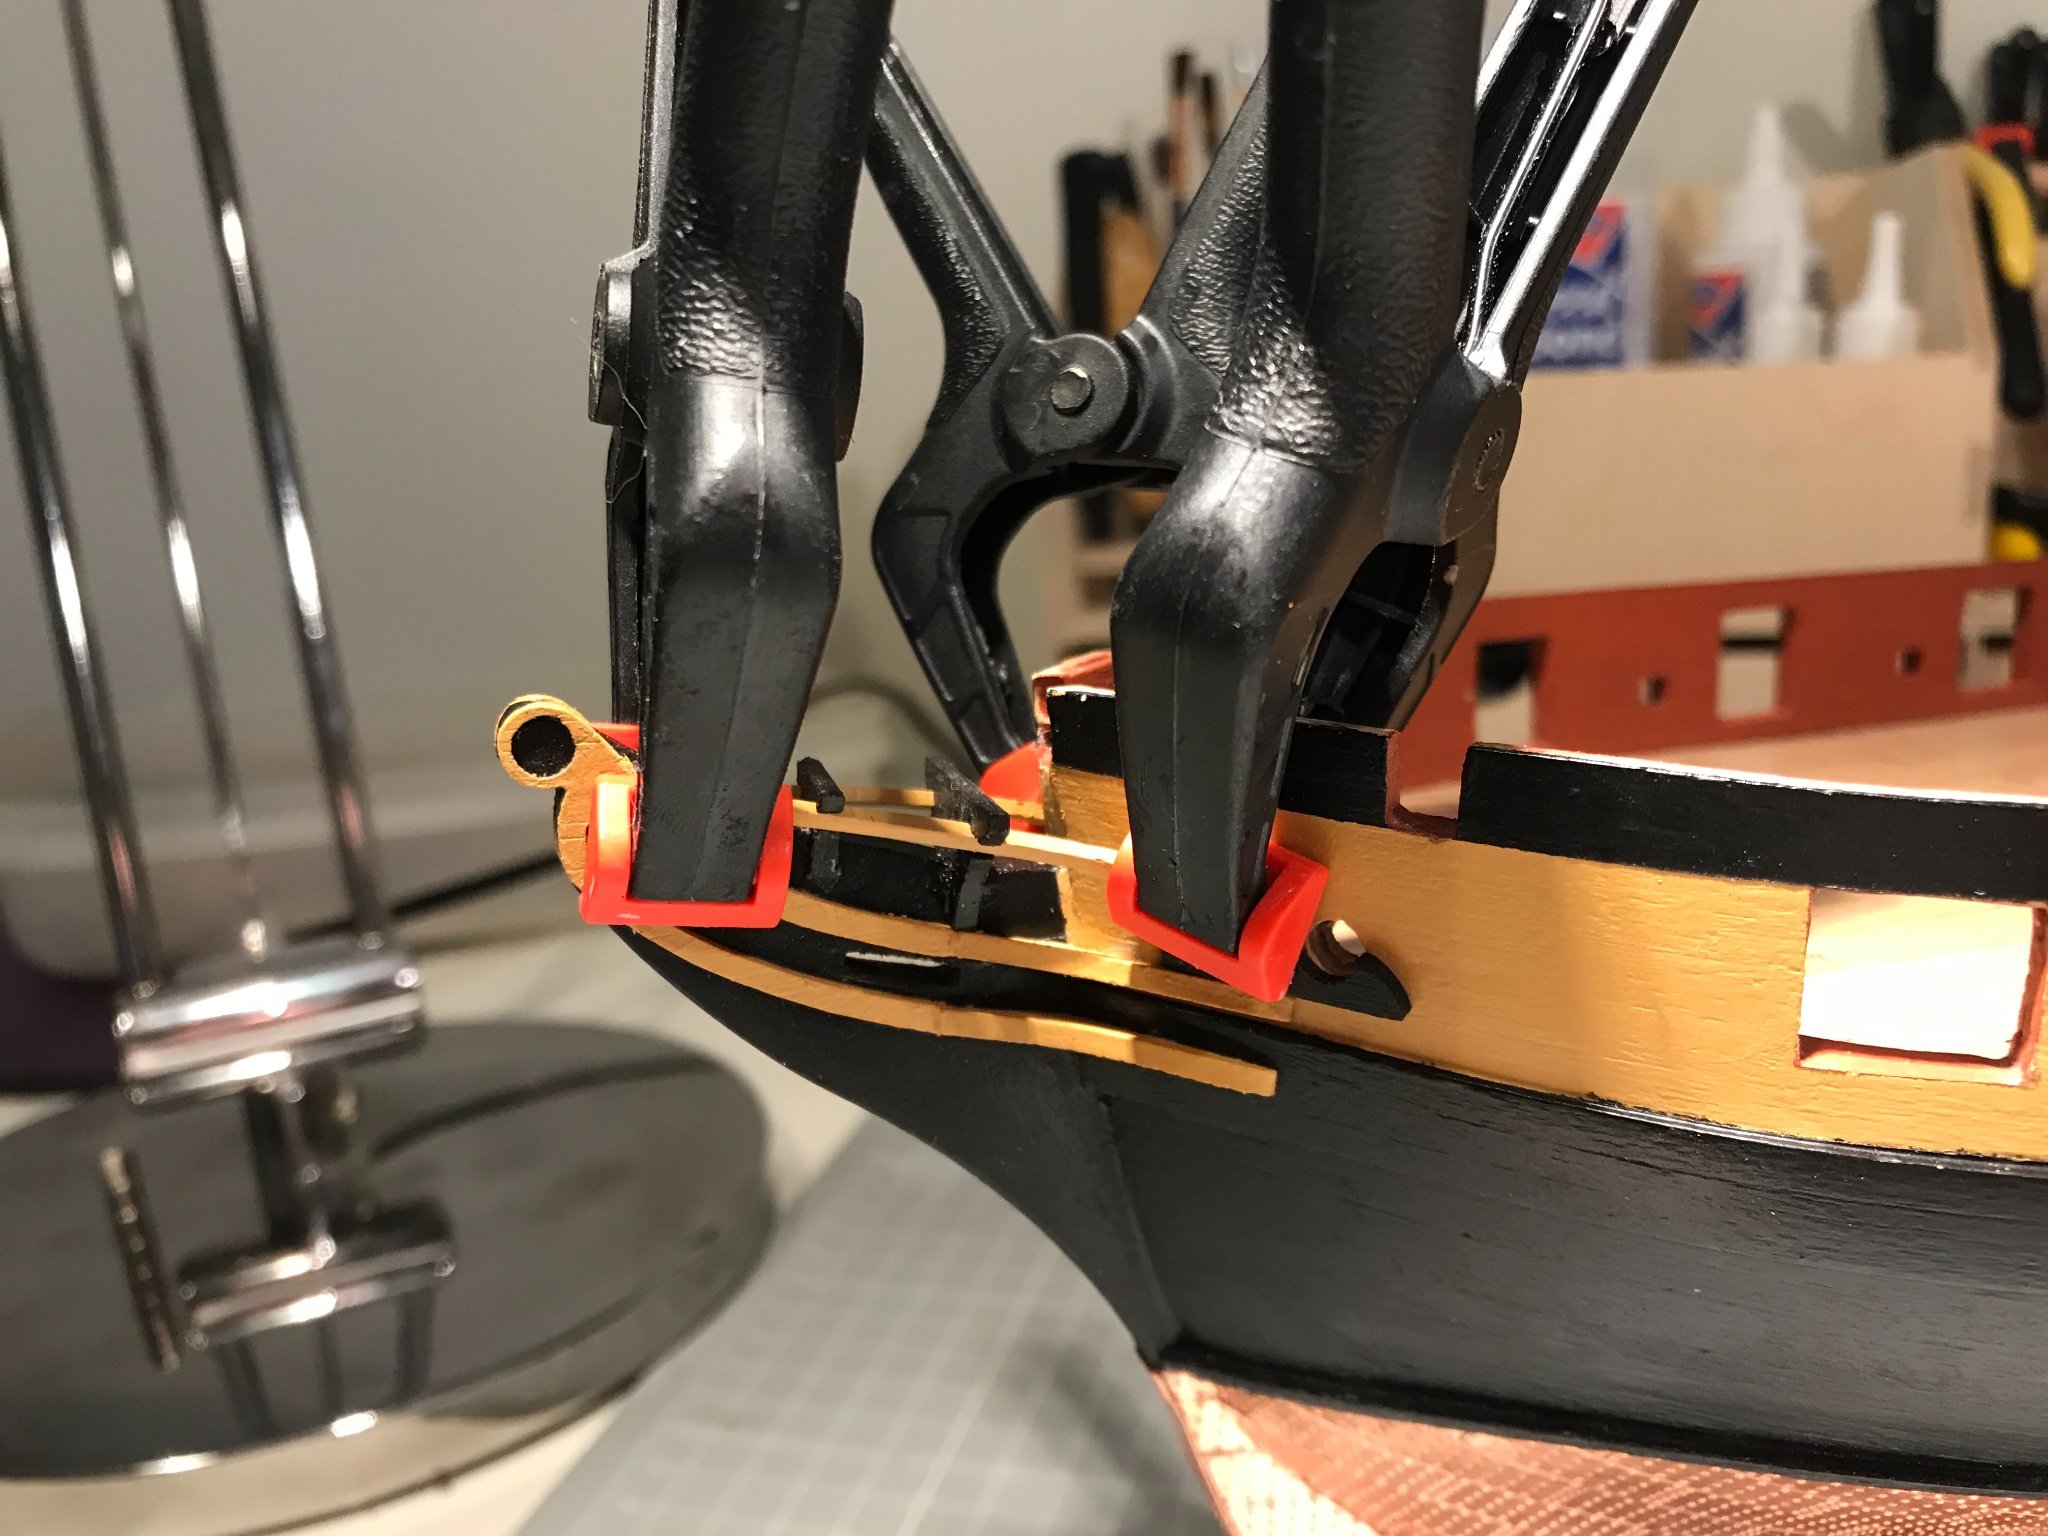
With that, the supports could be glued again and the lower rails added. I used thick CA, but the rails needed a little persuasion to adopt the right position, so needed clamping while the glue set.

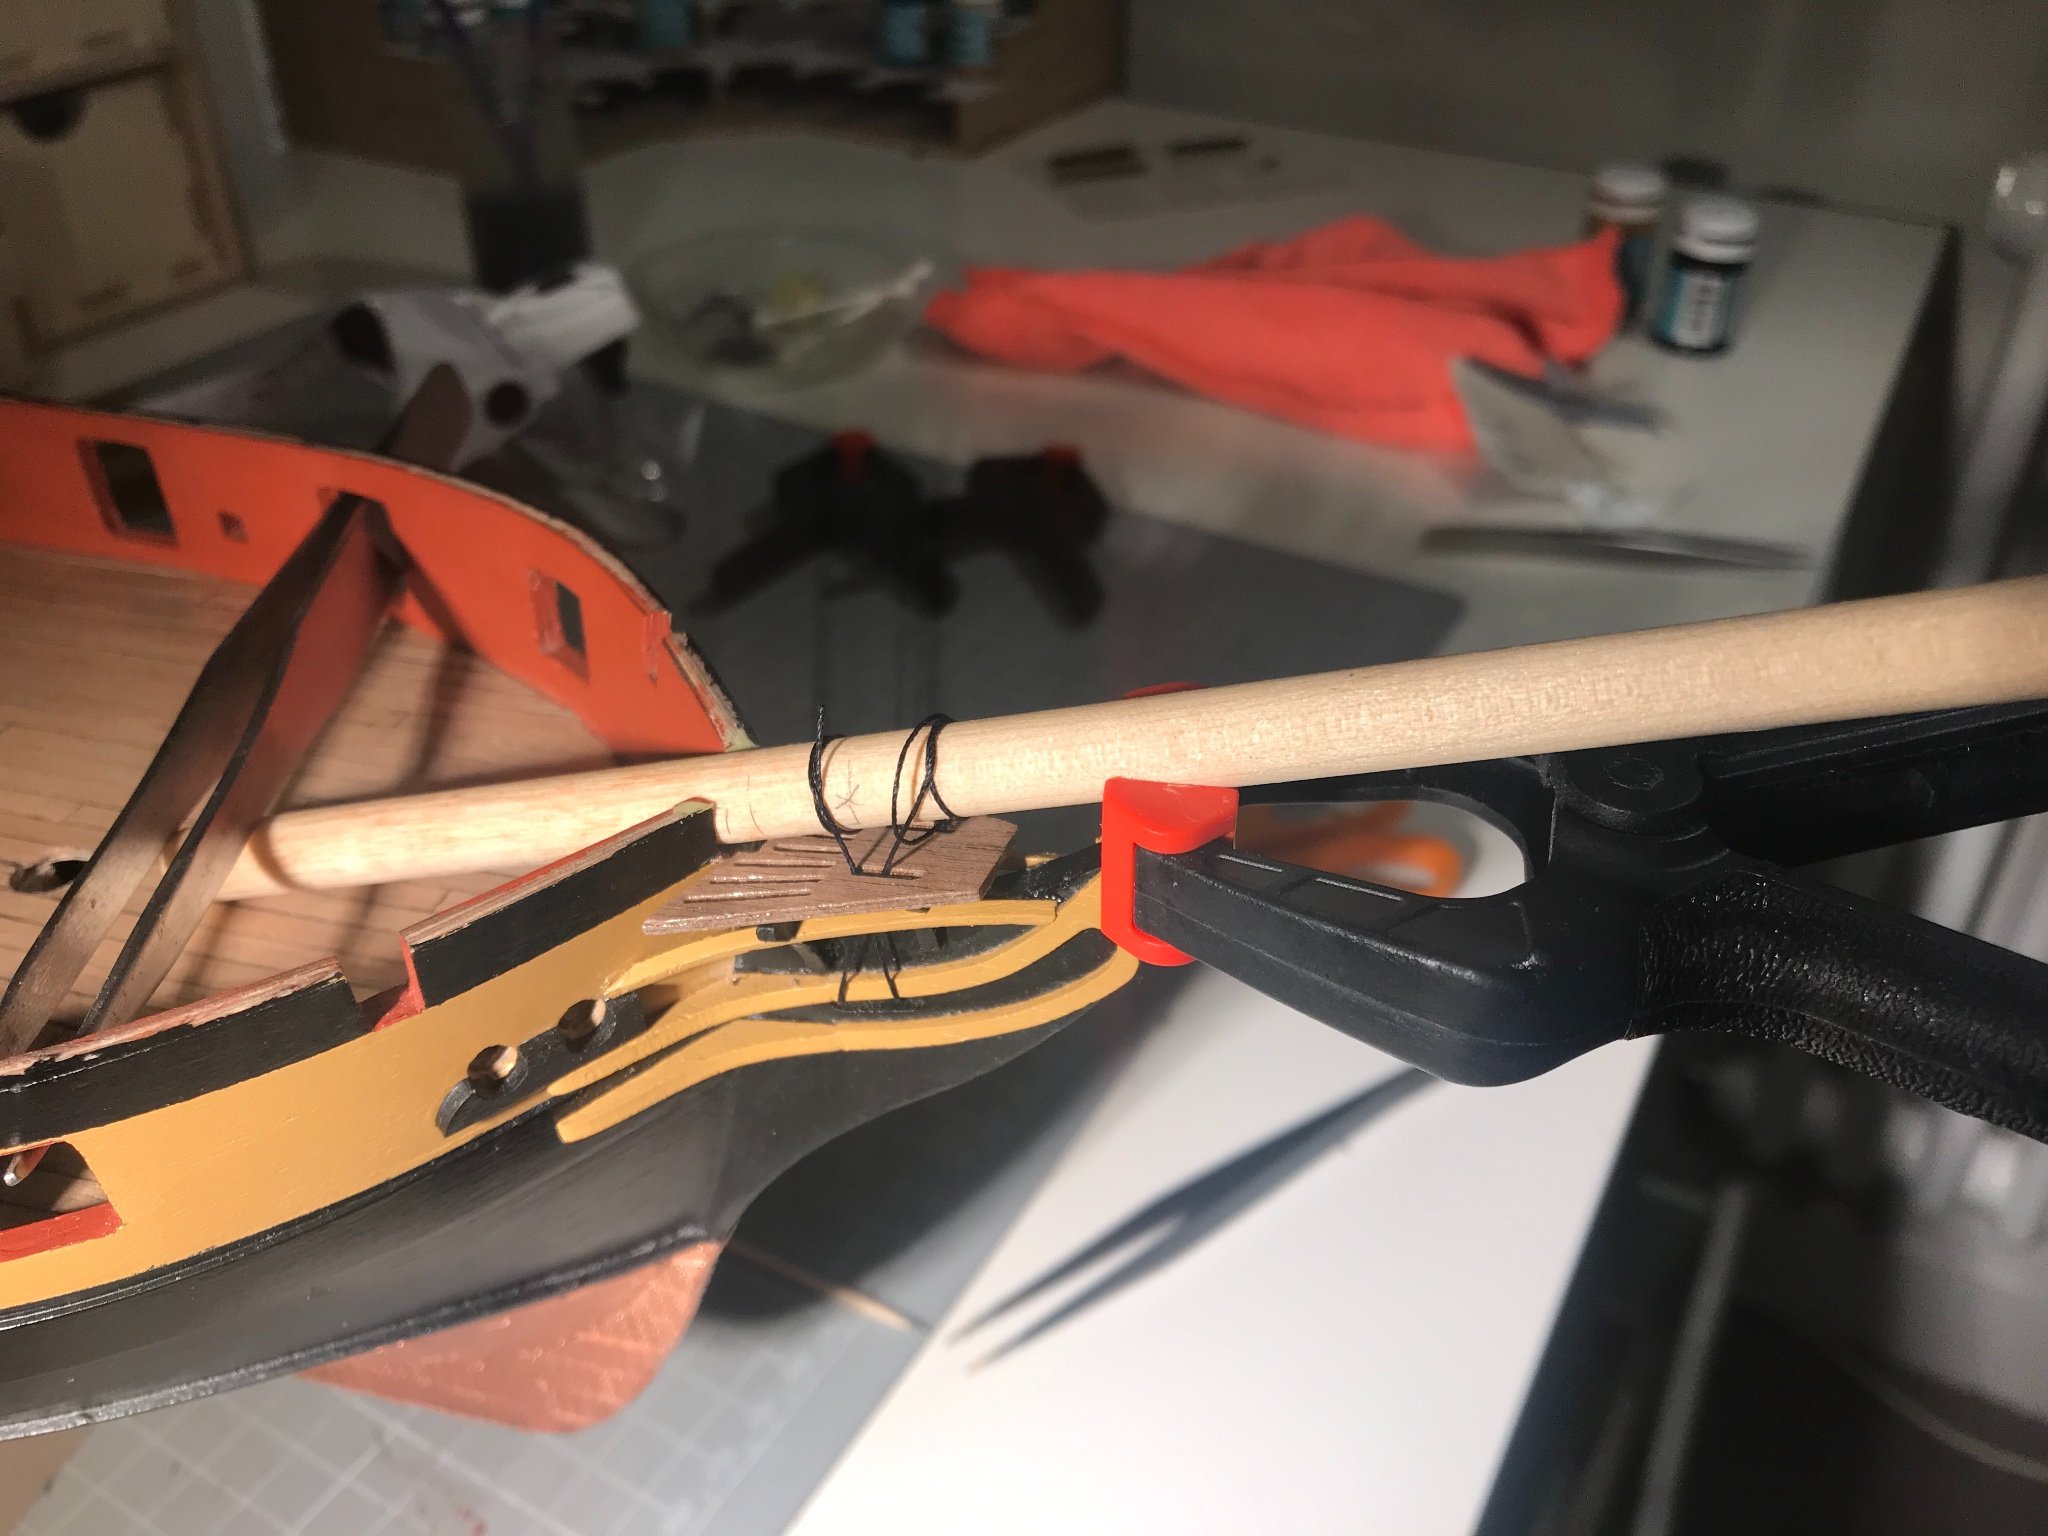
Now, the next job is to fit the grating, but as many have discovered before me, the slots in the grating and in the knee of the head, for the gammoning, do not aline, at all. BUT Petrejus says they shouldn't, because the gammoning is not simply would around the bowsprit and through the slots. Instead they cross over to create an "hour-glass' shape. (Steele say the same, too)
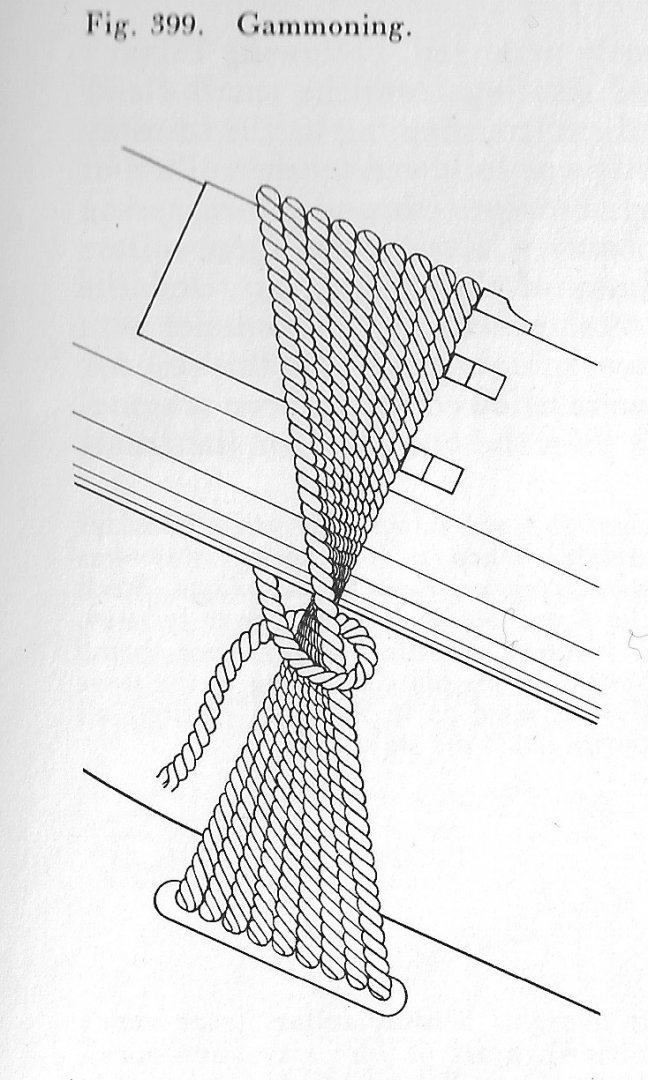
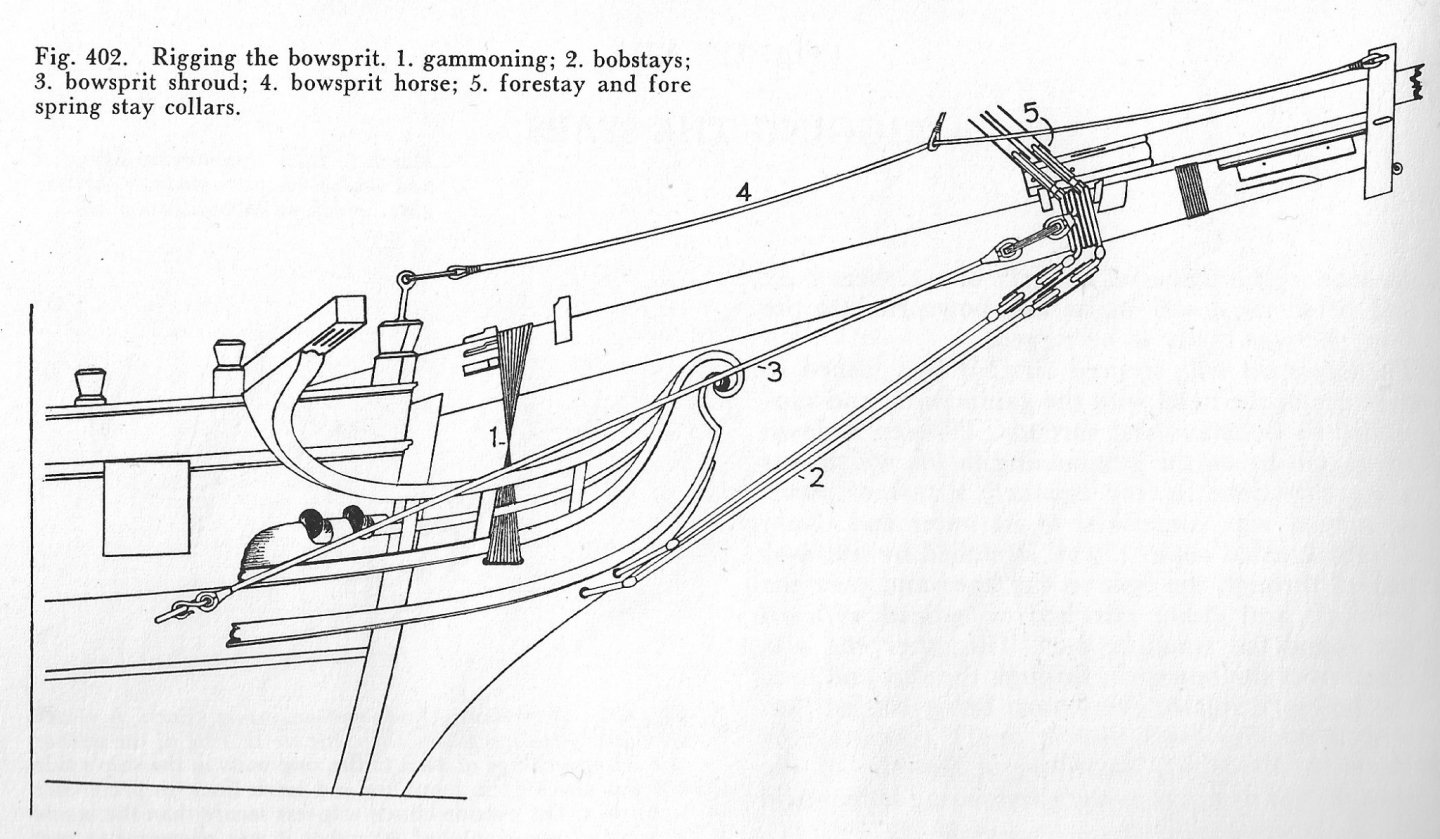
I bit of fiddling with a dummy bowsprit and a bit of thread shows that all is good!
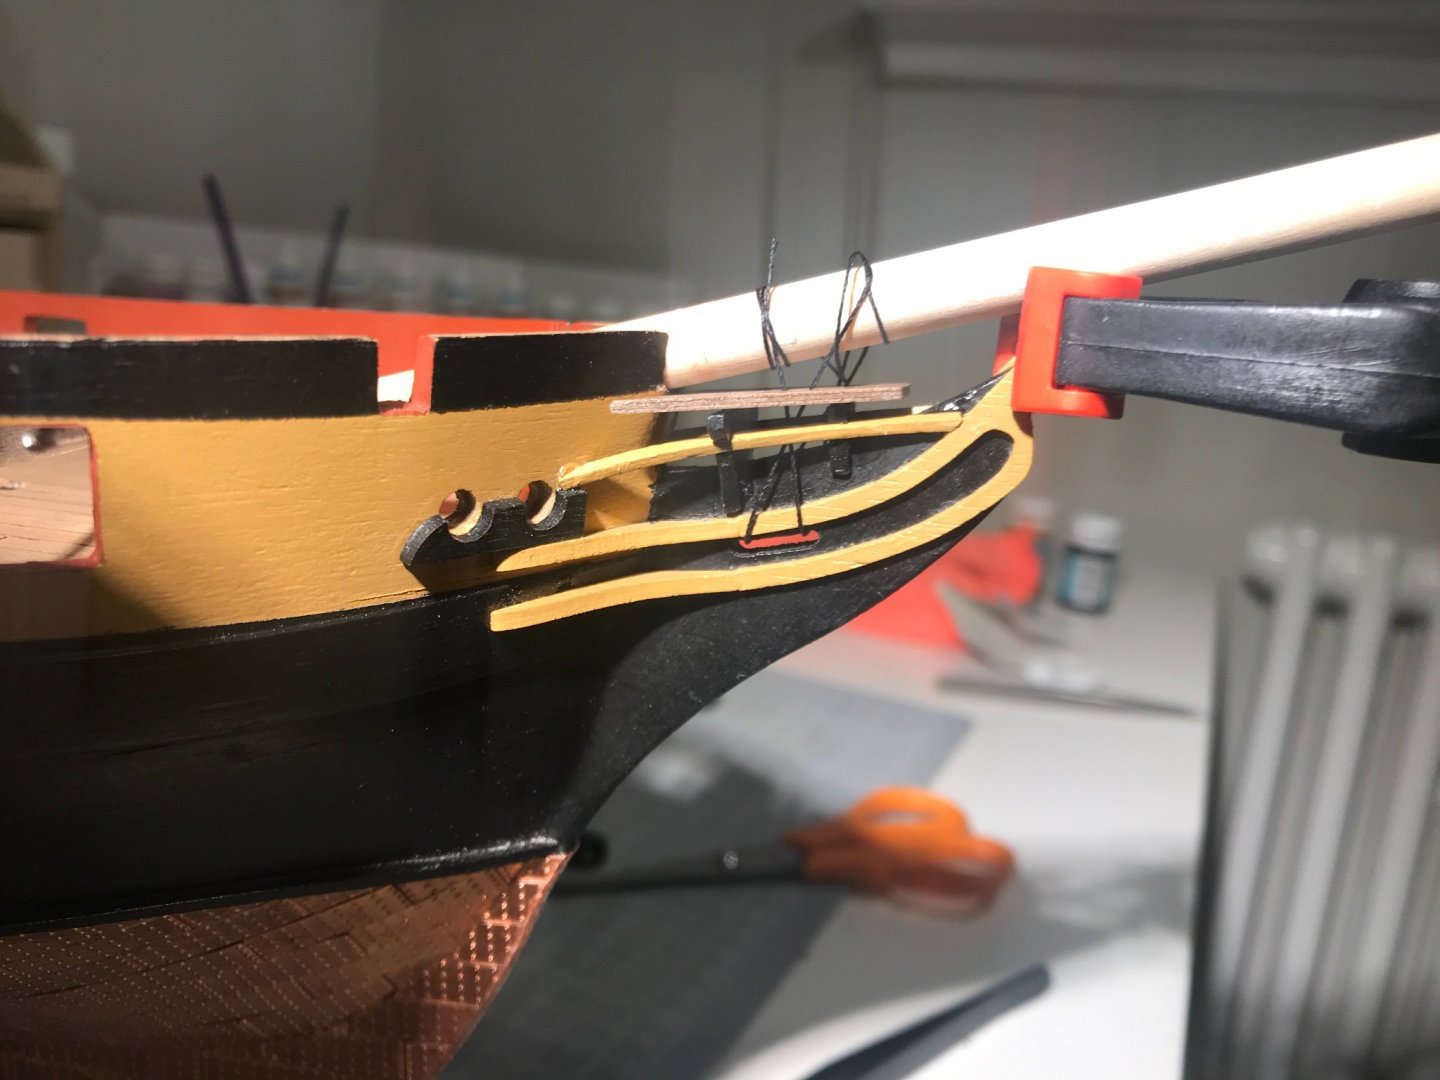

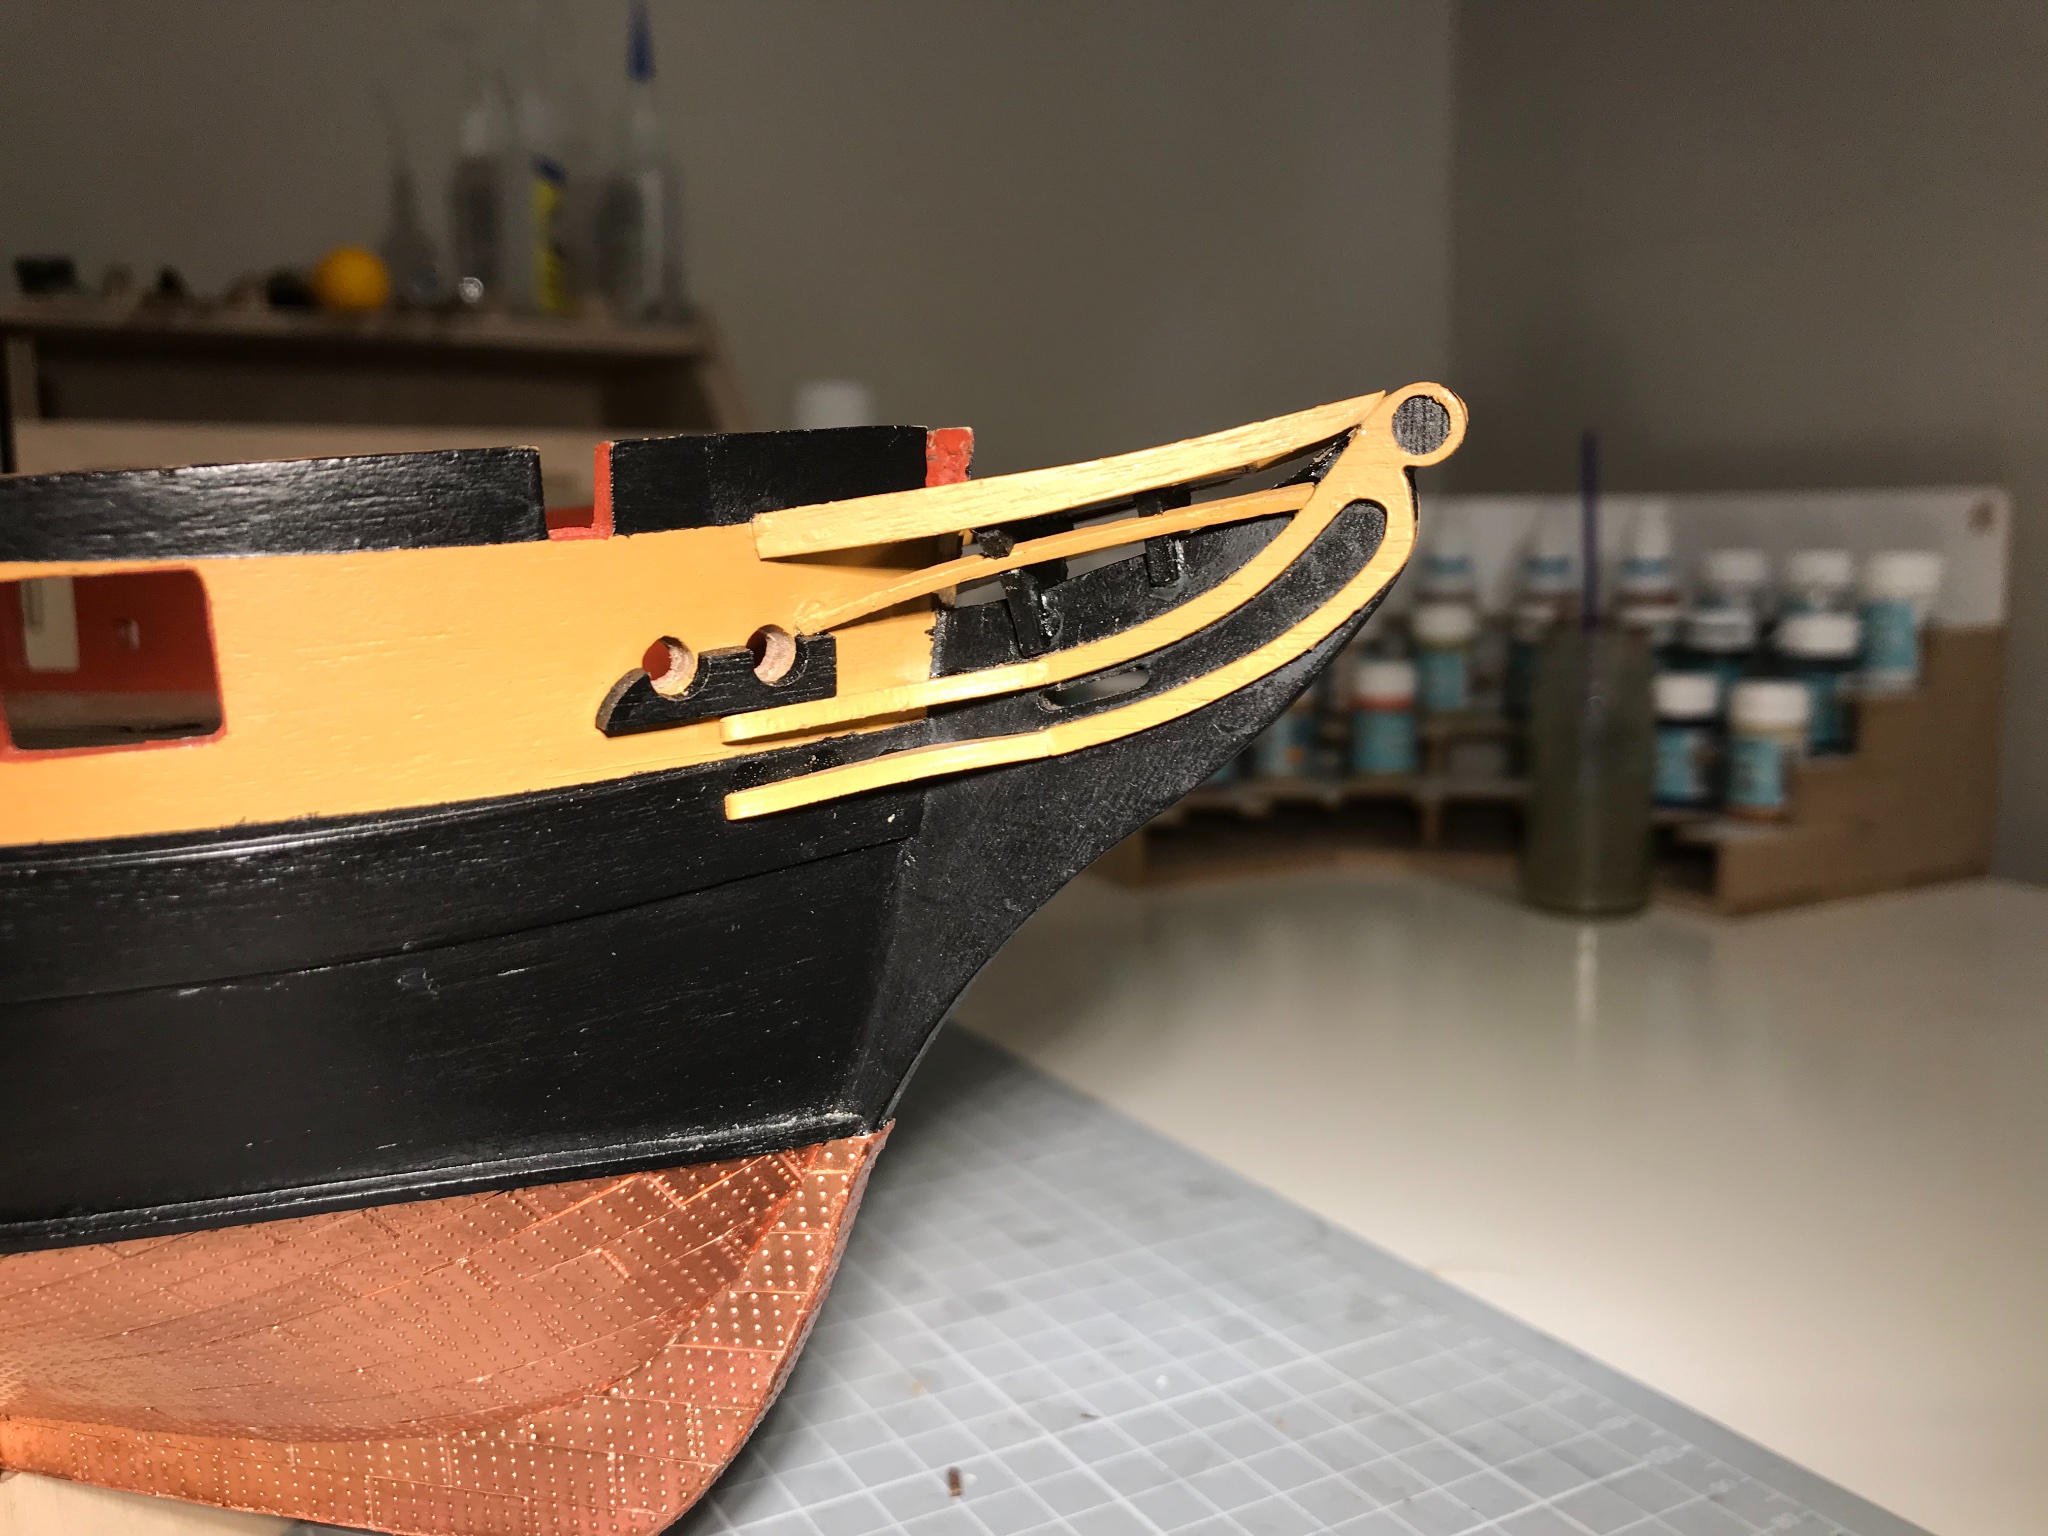
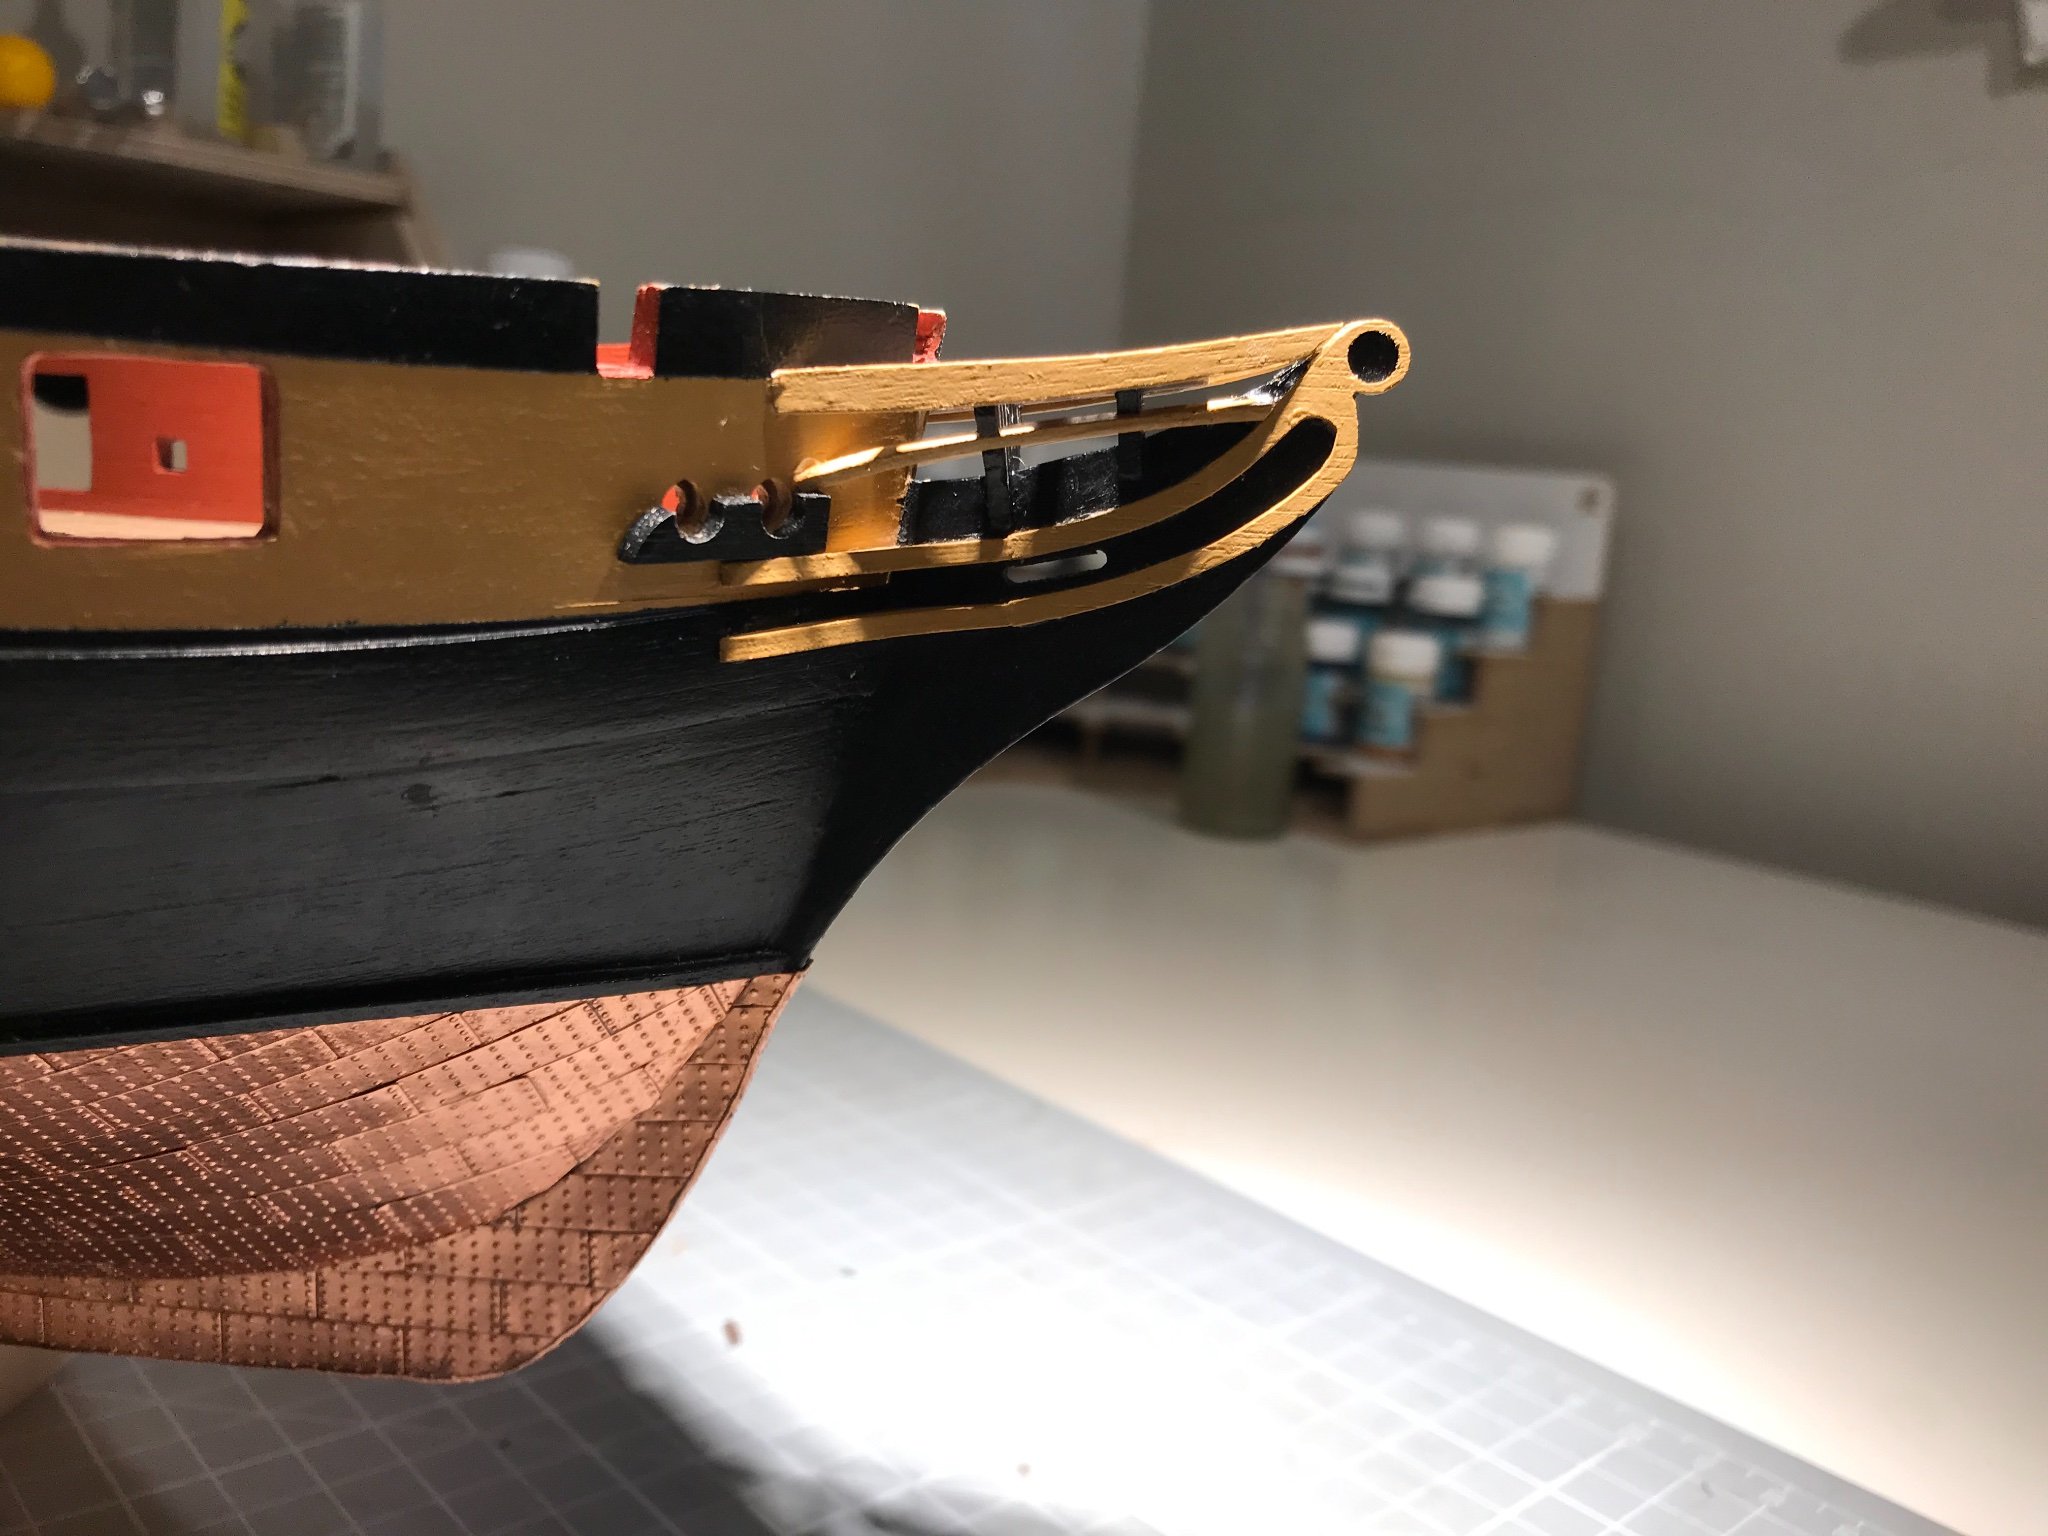
Upper rails to install and then we are done! (naturally I had a glue nightmare at this point, but deep breath, clean it up, all's good)


Quite a lot of fun, really, and IRL it looks good. In these photos you can see that the paint has taken a bit of a hammering, and the glue is not as neat as some manage. I used gloss varnish on the grating, which I think looks great. It should be said that this really was a painstaking process, as a great deal of dry fitting is needed, but you cannot do that for a part until the previous parts are glued and secure. It's a case of gradually trim and sand to shape, paint, wait, glue, wait, repeat six times, on both bows. Fun though, as I say.
Catheads next.
- Beef Wellington, Wahka_est, BenD and 3 others
-
6
-
15 hours ago, Sjors said:
Mike,
What a great job you are doing!
That coppering looks fantastic.
I hope I can do it the same.
What are you using to separate the paint with the copperplates?
Sjors
Hi Sjors
Thanks for the comment. I’m not quite sure what you mean by separate the the paint with the copperplates. If the paint you are referring to is the black-painted hull, then the separation is by a “waterline batten”. In my case a 2x2 mm walnut strip. But if it’s something else do ask. I guess English isn’t your first language but I know from experience that the Dutch are very good at making themselves understood in half a dozen languages.
By the way, my experience of the Dutch was from very near you, I think. I spent a lot of time in Delft and unless I’m mistaken Bleiswijk is nearby. In fact I think I rode my bike through there. If I’m right - small world!
Mike
-
Looks sweet, Sjors. I’ll have to keep moving or you’ll catch me!
Mike
- popeye the sailor and Sjors
-
2
-
On 3/6/2021 at 6:34 PM, James H said:
That development has been sat on that site since Methuselah stalked the earth.
It's a real shame that any new developments/completed projects stalled.
I do remember Chris Watton once telling me that he was once considering HMS Surprise himself.
That is some tease, James. I wonder if @chris watton remembers the conversation and the thought...
- mtaylor, hollowneck and Canute
-
3
-
17 minutes ago, AJohnson said:
Think you have done a great job on the rudder! 👏 I am at that stage on my Bounty build and like you found it hard to get the straps to lay flat on the "bumpy" copper plates; think in hindsight marking out and flatting the "nail heads" on the copper plates would have helped.
Going to follow you with interest, my next project is yet another Snake! 😃
Cheers! I think the real lesson is the more you do, the better you get - so your Snake will be a beauty.
-
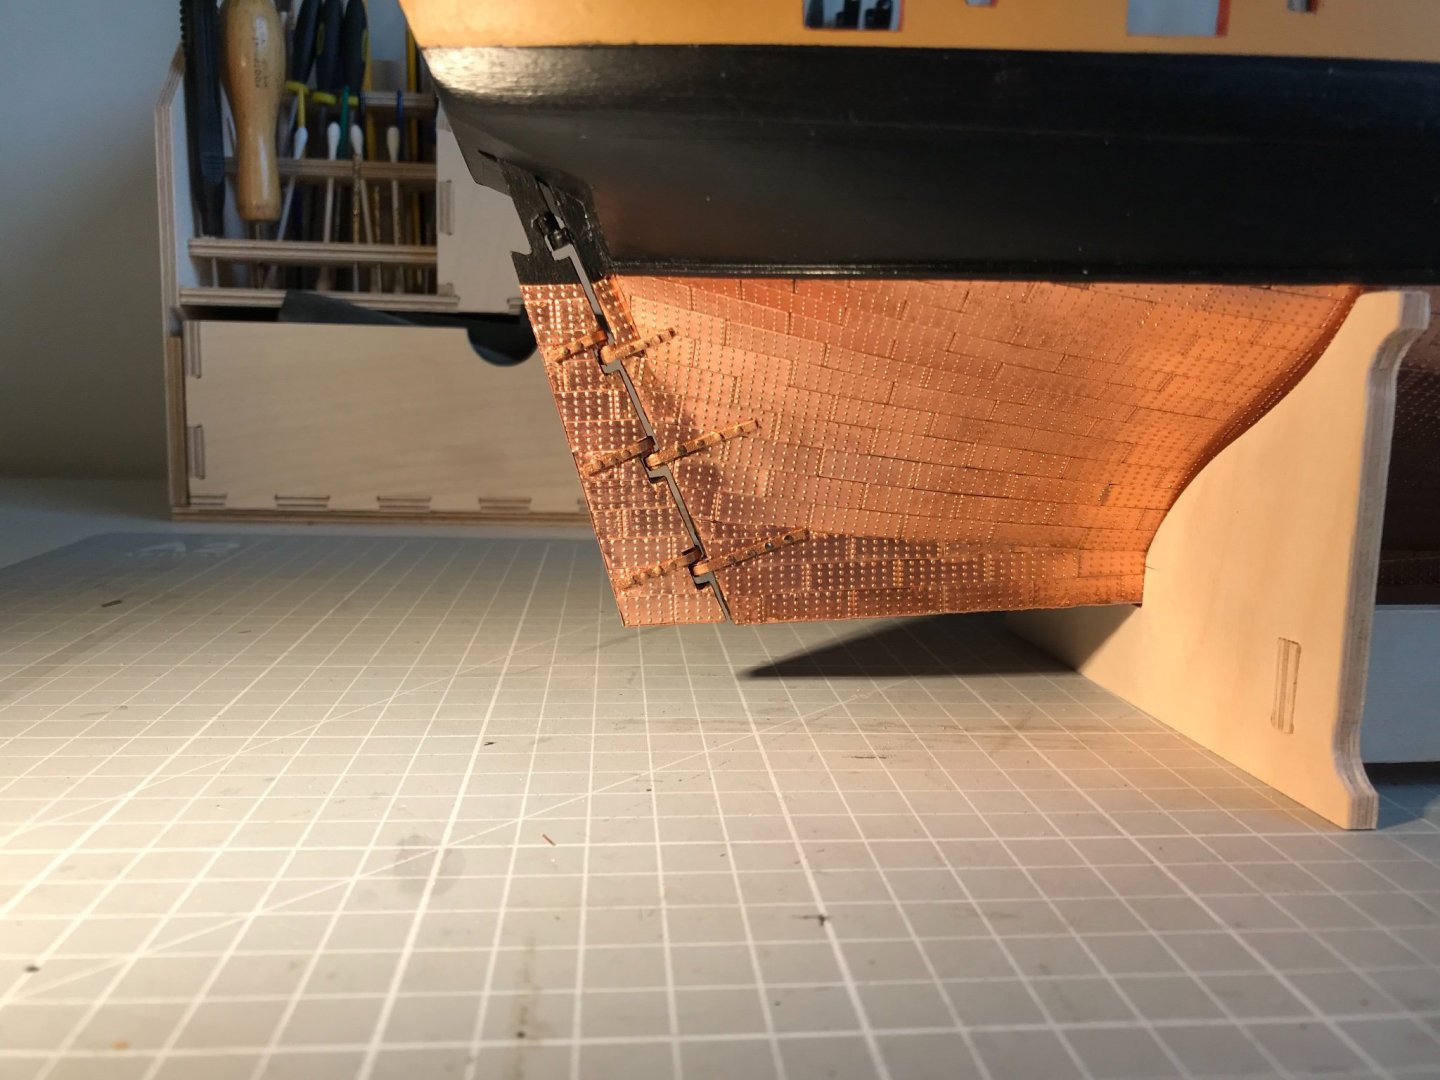
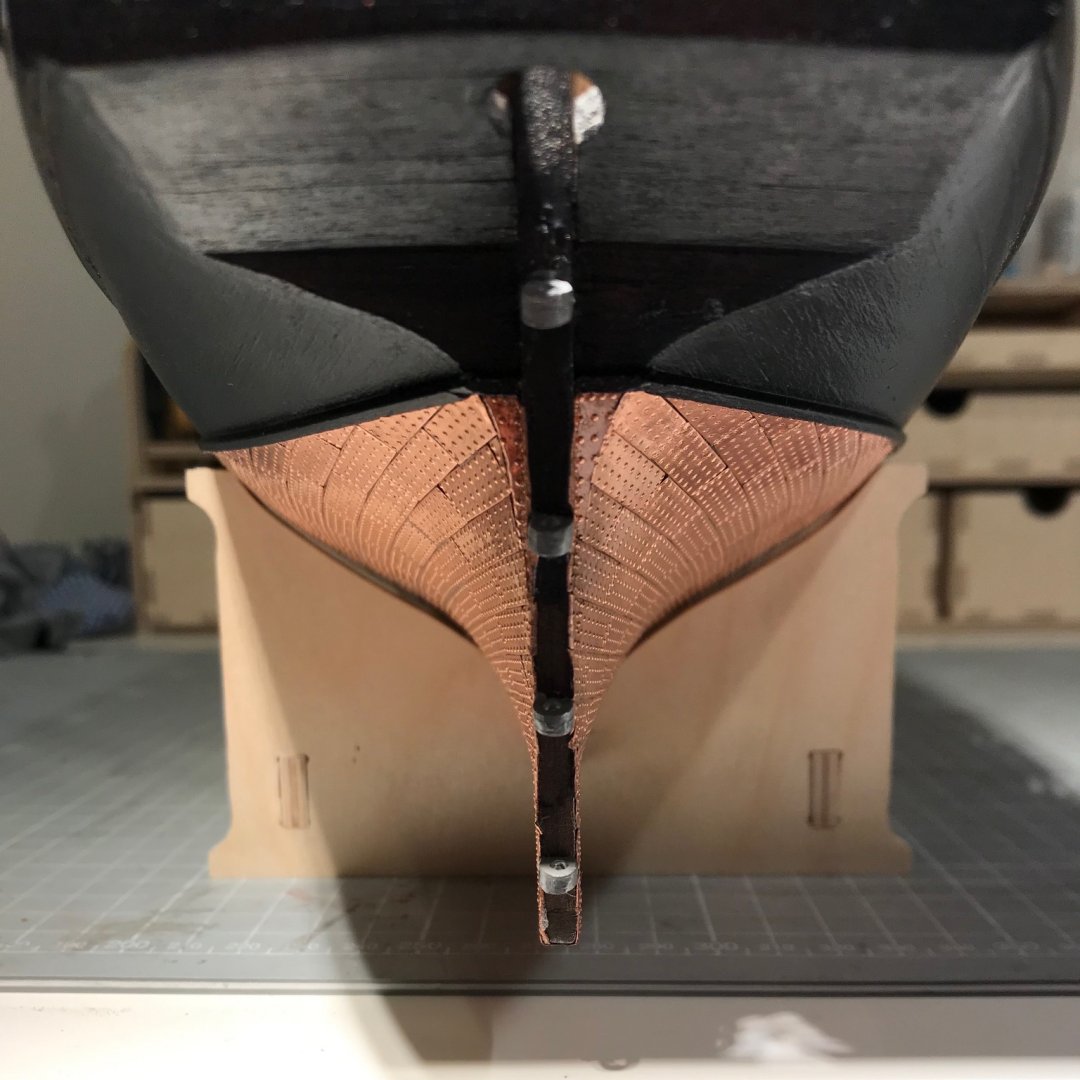
The straps on the gudgeon and pintles (you can never use those words too ofter) are done, and with it everything to do with copper is completed. I'm happy with the outcome, but I must say I found it more frustrating than expected. I attempted to followed Jason's, @Beef Wellington, workflow of: bend strap around a dowel, glue at the bend onto the gudgeon/pintle, drill for a trimmed nail and attach the strap square to the stern-post. In fact I did this on the rudder and I rather messed it up as the glue was remarkably reluctant to bond. This arose because I had pre-painted the straps with undercoat and two coats of copper, and between them adhesion was not strong enough.
On the hull I marked a pencil line square to the sternpost held the strap in place and then marked for drilling at the extreme hole. I trimmed a nail to about 3 mm long, and then inserted. The nail were leftover from my Artesania Latina build as they had round, un-countersunk heads. A 0.7 mm hole gave a slight interference fit with the nail, so no glue was needed. I then did the extreme hole on the reverse side. Drilling and nailing the other holes then completed the strap. The concave nature of the hull naturally pulled the strap tight around the pintle.
Getting the nail heads to sit flat was a struggle and I wasn't willing to brute force them (given my experience with fitting the false deck all those months ago). I also don't much like the paint finish. In retrospect I certainly wouldn't add the the copper paint before attaching. So as in everything to do with this project, I reckon I know a lot more at the end of task than at the beginning.
And here are the results of that journey:


What next? Bow rails I think.
-
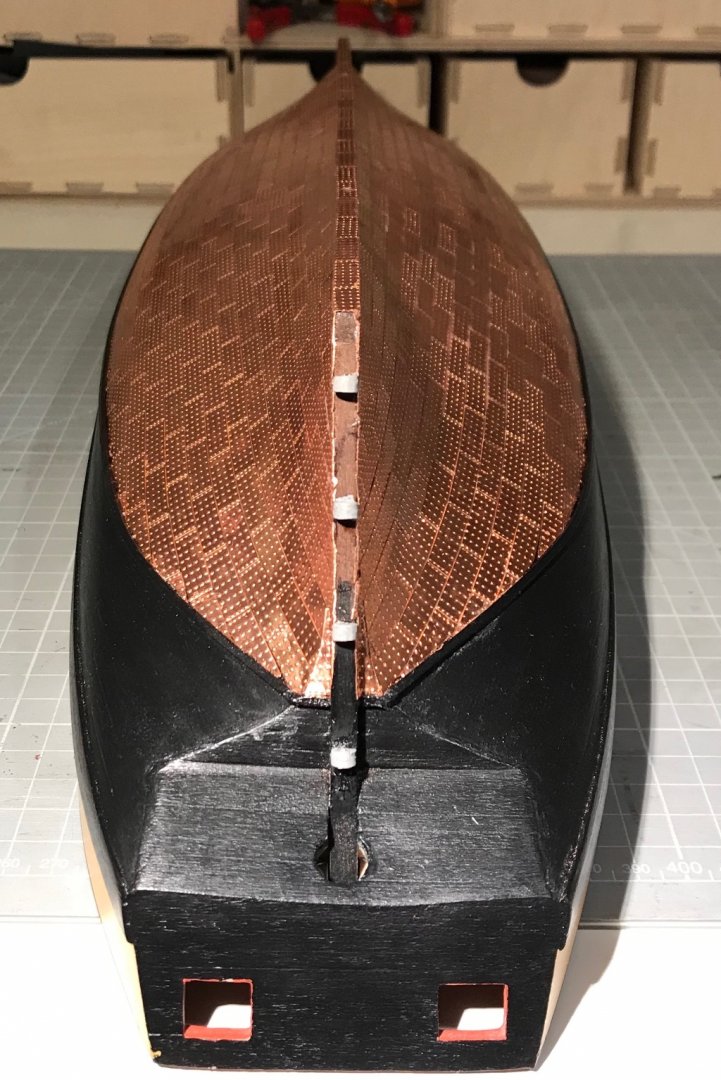
Copper is done! Just need to paint the sternpost, the leading edge of the rudder and the straps, and then attach the straps to the gudgeons and pintles.
The learning:
- 2 drops of thick CA per tile
- hold a tile in place with a finger and a the tips of a pair of tweezers (I reserve a pair for working with CA since then end up with a coating), remove finger, remove tweezers, in that order, or you risk the tiles coming off stuck to your finger
- A little bit of glue seepage occurs - but don't worry (see cleaning!)
- cut with a pair of scissors.
- each tile takes about a minute to lay, unless it needs trimming, then it's about 10 minutes
- the waterline batten makes the final edge pretty easy and hides the inevitable imperfections
- getting a perfectly aligned edge on the sternpost is hard, but I left an overhang and then filed with as small metal file. Worked very well there, and on the rudder. The file tends to wrap the edge of the tile around the edge which is useful...
- the keel, rudder and sternpost are all 5 mm wide, a tile is 0.2 mm thick, so the covered thickness is 5.4 mm, but a tile is 5.6 mm wide, giving a 0.2 mm overhang (more if you have been a bit zealous with the sanding). I tried trimming the tiles but couldn't get the width accurate or indeed the cut edge straight. But really, who cares about 0.2 mm overhang? I would have left it but it was very obvious in the few places where I had sanded too much. I tried filing and it worked a treat, eventually wrapping the tile around those butting up to it
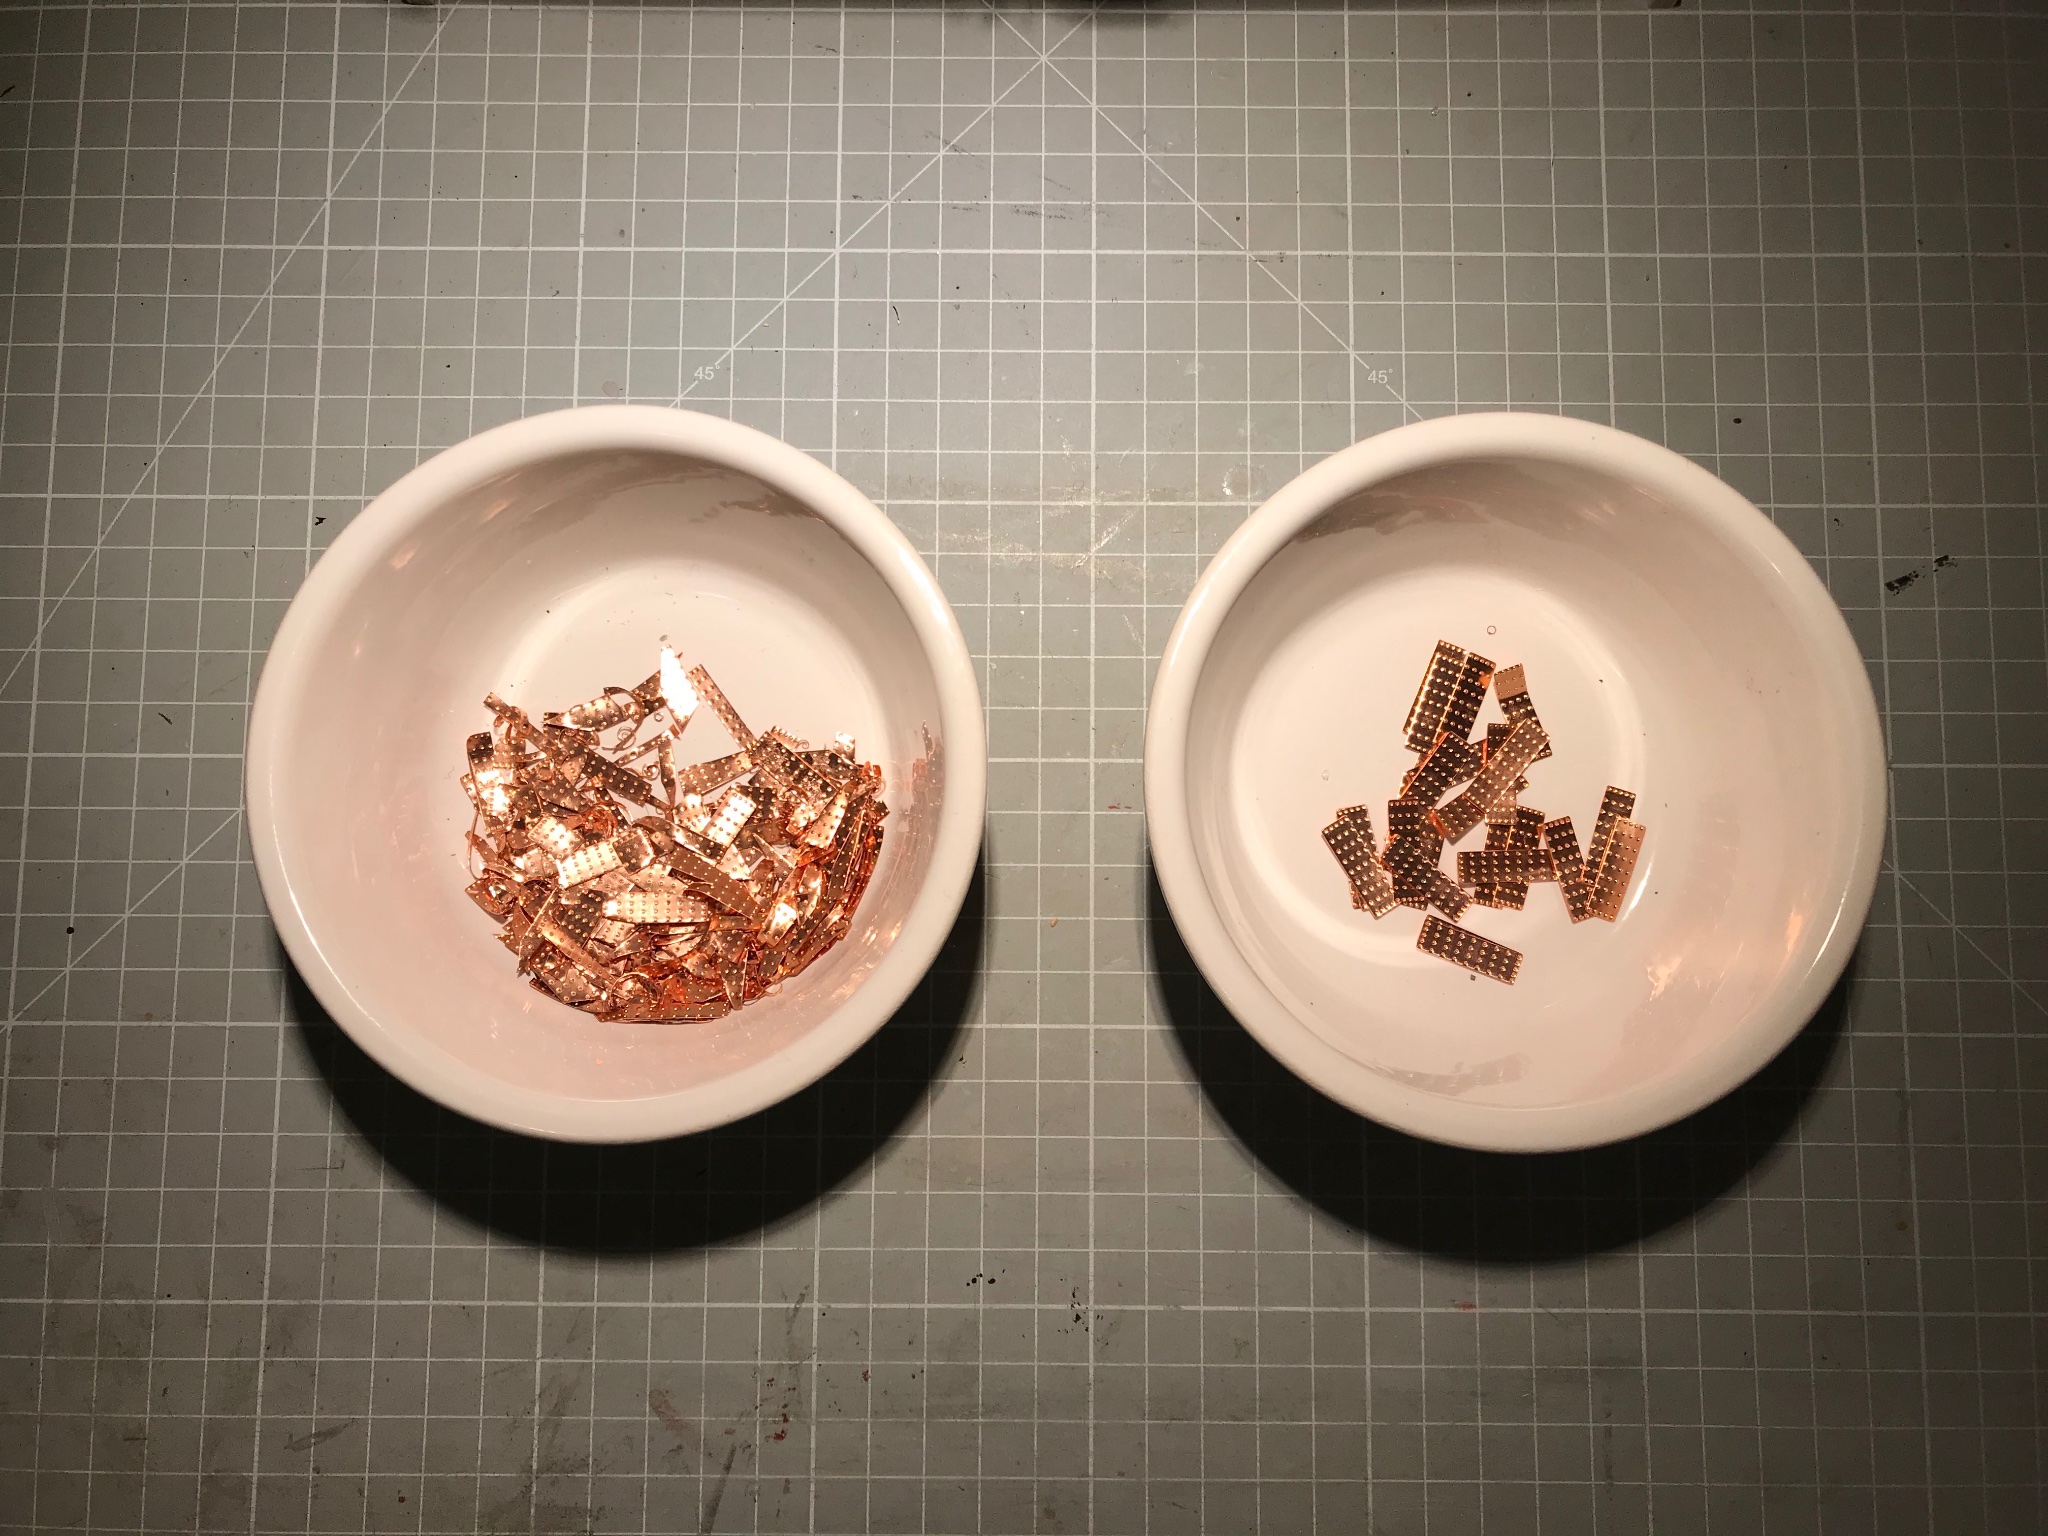
- be sparing and reuse your trimmings, there are very few spare tiles. In the picture below the pot on the left is unused trimmings, and on the right is the remaining tiles (26 of them), and there are about 800 on the ship

So cleaning:
Whatever patina you want on your copper I think you need to get the glue off, and probably the finger grease so I
- soaked a scrap of rag with CA glue remover and gave the copper a good rub down. It took about 5 minutes but i could see the large marks softening and coming off.
- I then soaked another rag in iso-propyl alcohol (propan-2-ol to the chemists - see more in minute) and wiped over again. It came up clean but the tarnish was obvious from some angles and quite blotchy.
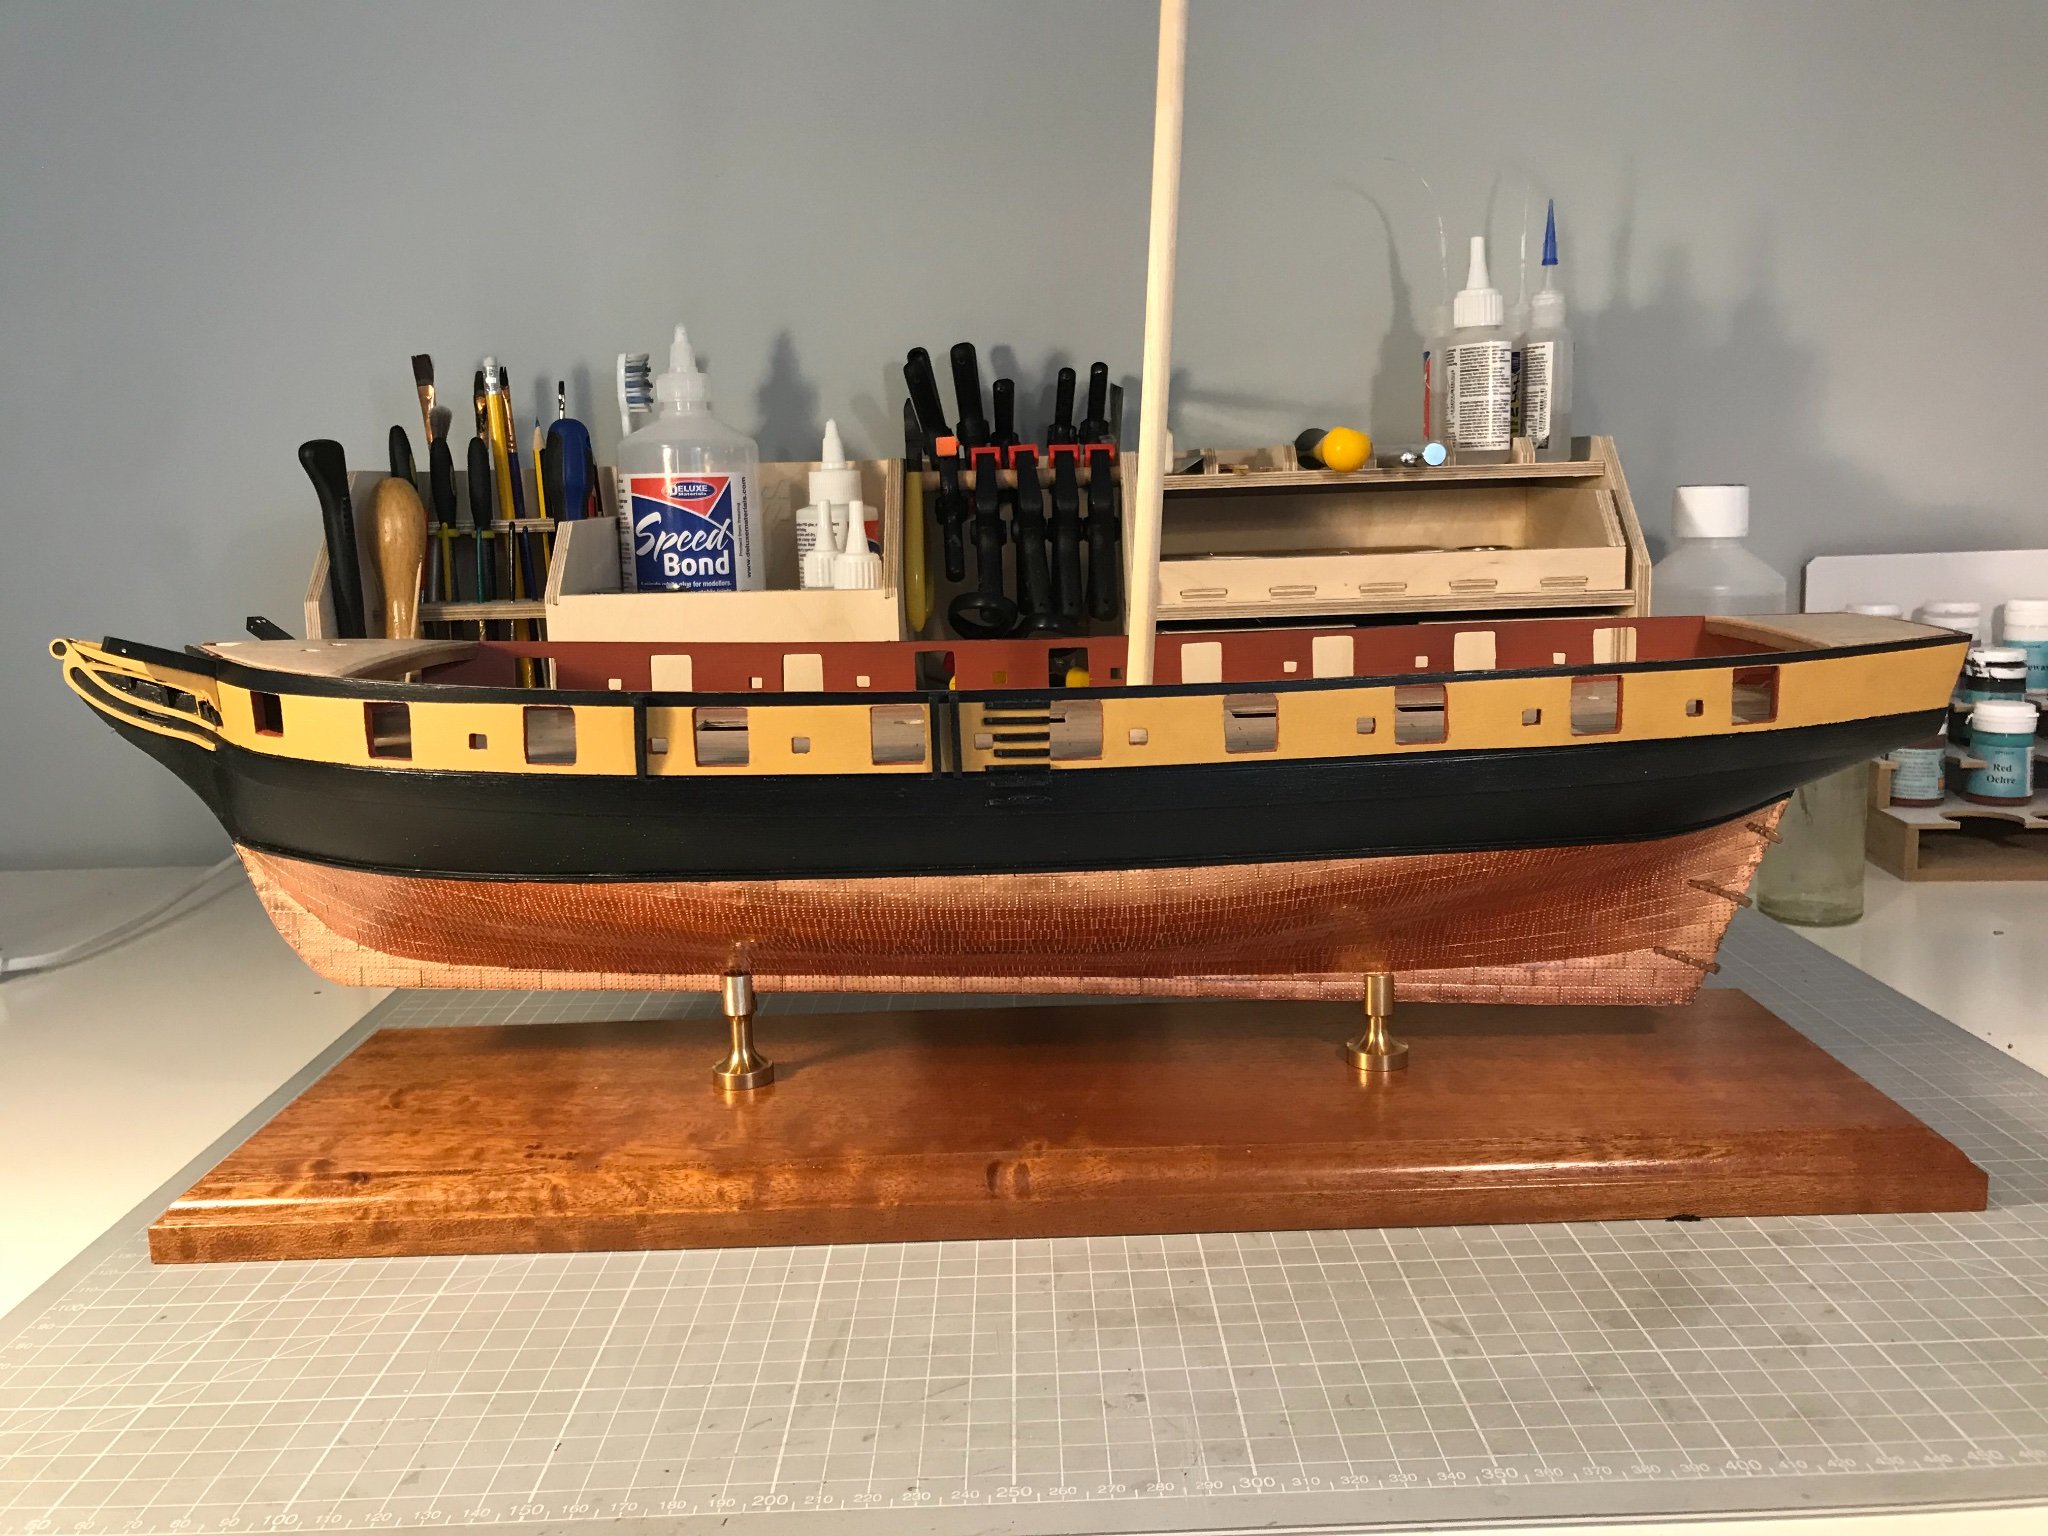
Patina:
You can find many an article on this forum, but most usually conclude that it's a matter of taste. Well my taste owes quite a bit to Patrick O'Brian who refers periodically to a glimpse of salmon-coloured copper appearing as Surprise heels in the wind. I was reluctant to use an abrasive polish as they almost inevitably leave a powdery residue. And, full transparency, I'm a chemical engineer, so chemical cleaning seemed natural. You can find a discussion of "pickling" here where "Sparex" is used to clean brass. Sparex is an expensive form of sodium hydrogen sulphate (NaHSO4), which in turn is a partly neutralised form of sulphuric acid (and much safer in concentrated form). You can buy it very cheaply from pool-supply companies (described as sodium bi-sulphate) where it is sold for lowering the pH of things like hot tubs.
- make up a volume of acidic solution. I use a recycled 600 ml supermarket soup tub. Aim for about 50 ml of NaHSO4 in about 250 ml of hot water (add the powder to the water, not vice versa. This way the solution starts weak and gets more concentrated, where as the other way it starts very concentrated and then weakens. If anything goes wrong, you want the former, not the latter to spill on your workbench). You end up with a solution at roughly pH 1 which is not all that dangerous, but glasses and gloves are called for. I do this at my model building desk, but a a kitchen sink might make more sense.
- make up a volume of alkali solution. About 60 ml of sodium bicarbonate (baking soda) in about 250 ml of hot water - it won't all dissolve but that's ok.
- wearing gloves, dampen a cloth in the acid solution and wipe the copper all over. Don't go crazy and soak the whole ship. I wiped one half of the hull for about 2 minutes, then dunked the cloth again and wiped that half for another 2.
- then take another cloth, and dampen it in the alkali solution and wipe over the acid-treated copper. You will hear a bit of fizzing, nothing worse. You now have copper tiles covered in a dilute sodium sulfate (Na2SO4) solution, which when dry would leave a dusting of white crystals.
- take another cloth soaked in clean water and wipe off the Na2SO4 solution. Dry with a cloth and repeat.
- now do the other half of the hull.
- To dispose of the solutions it seems best to neutralise one with the other. In a sink very gently pour a little of the acid into the alkali container - it will foam like mad, so start very slowly, eventually it will calm down and once you have mixed them all it should be a pretty neutral solution of Na2SO4 that can go down the drain. Rinse out your cloths - I give the acid cloth a slow dunk in the alkali first
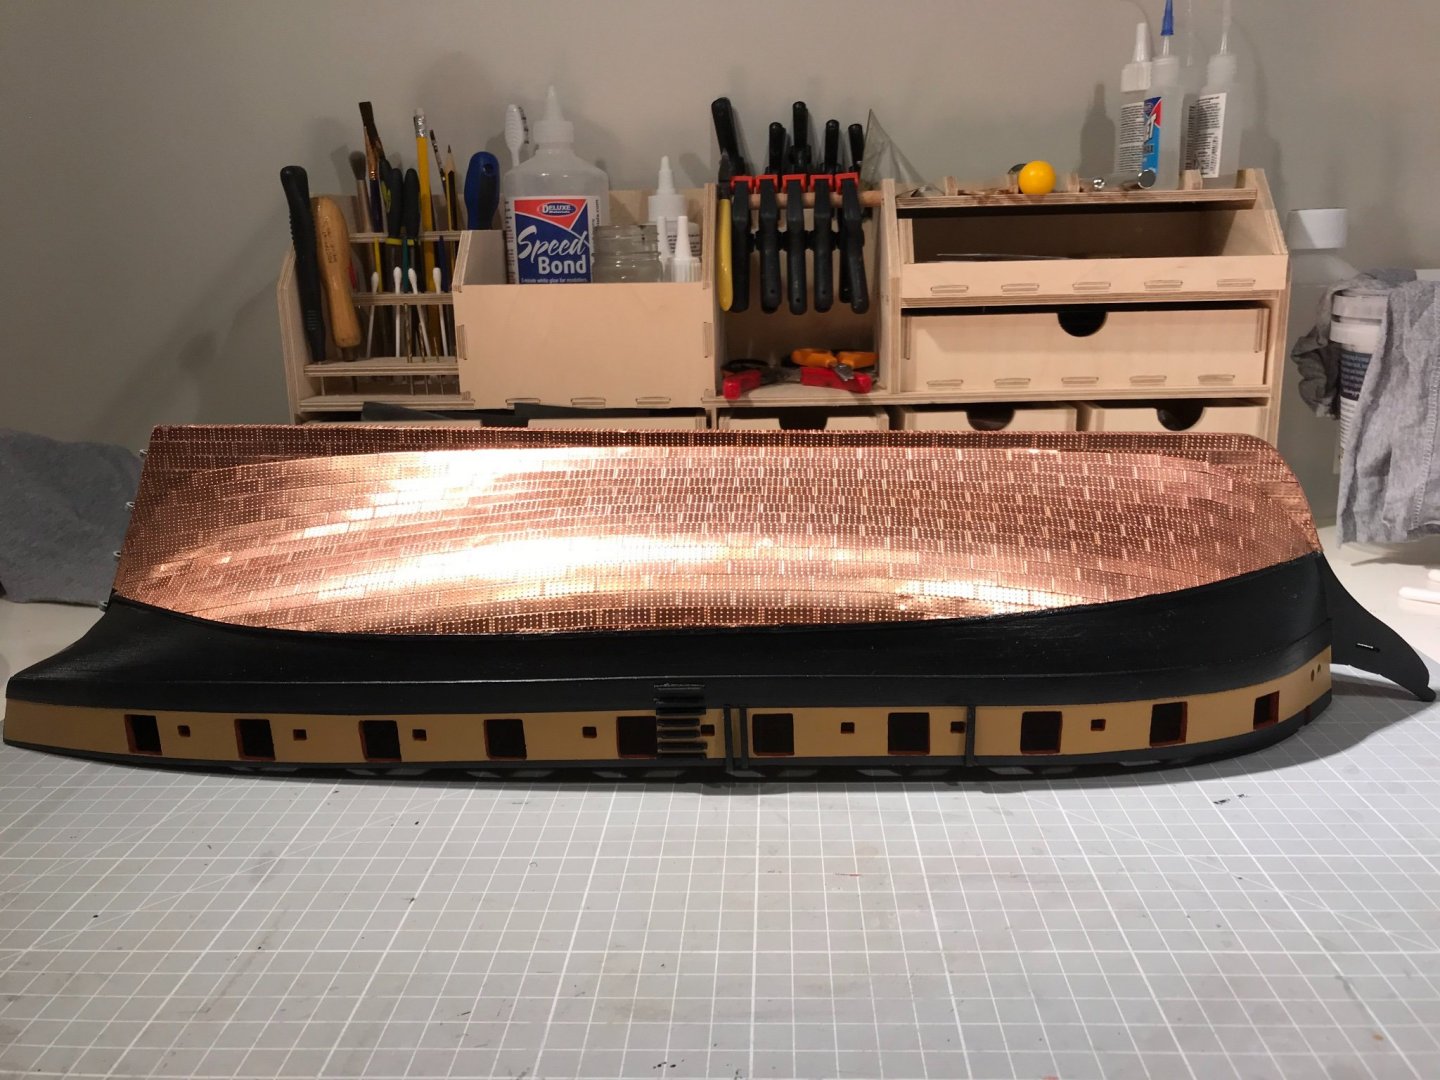
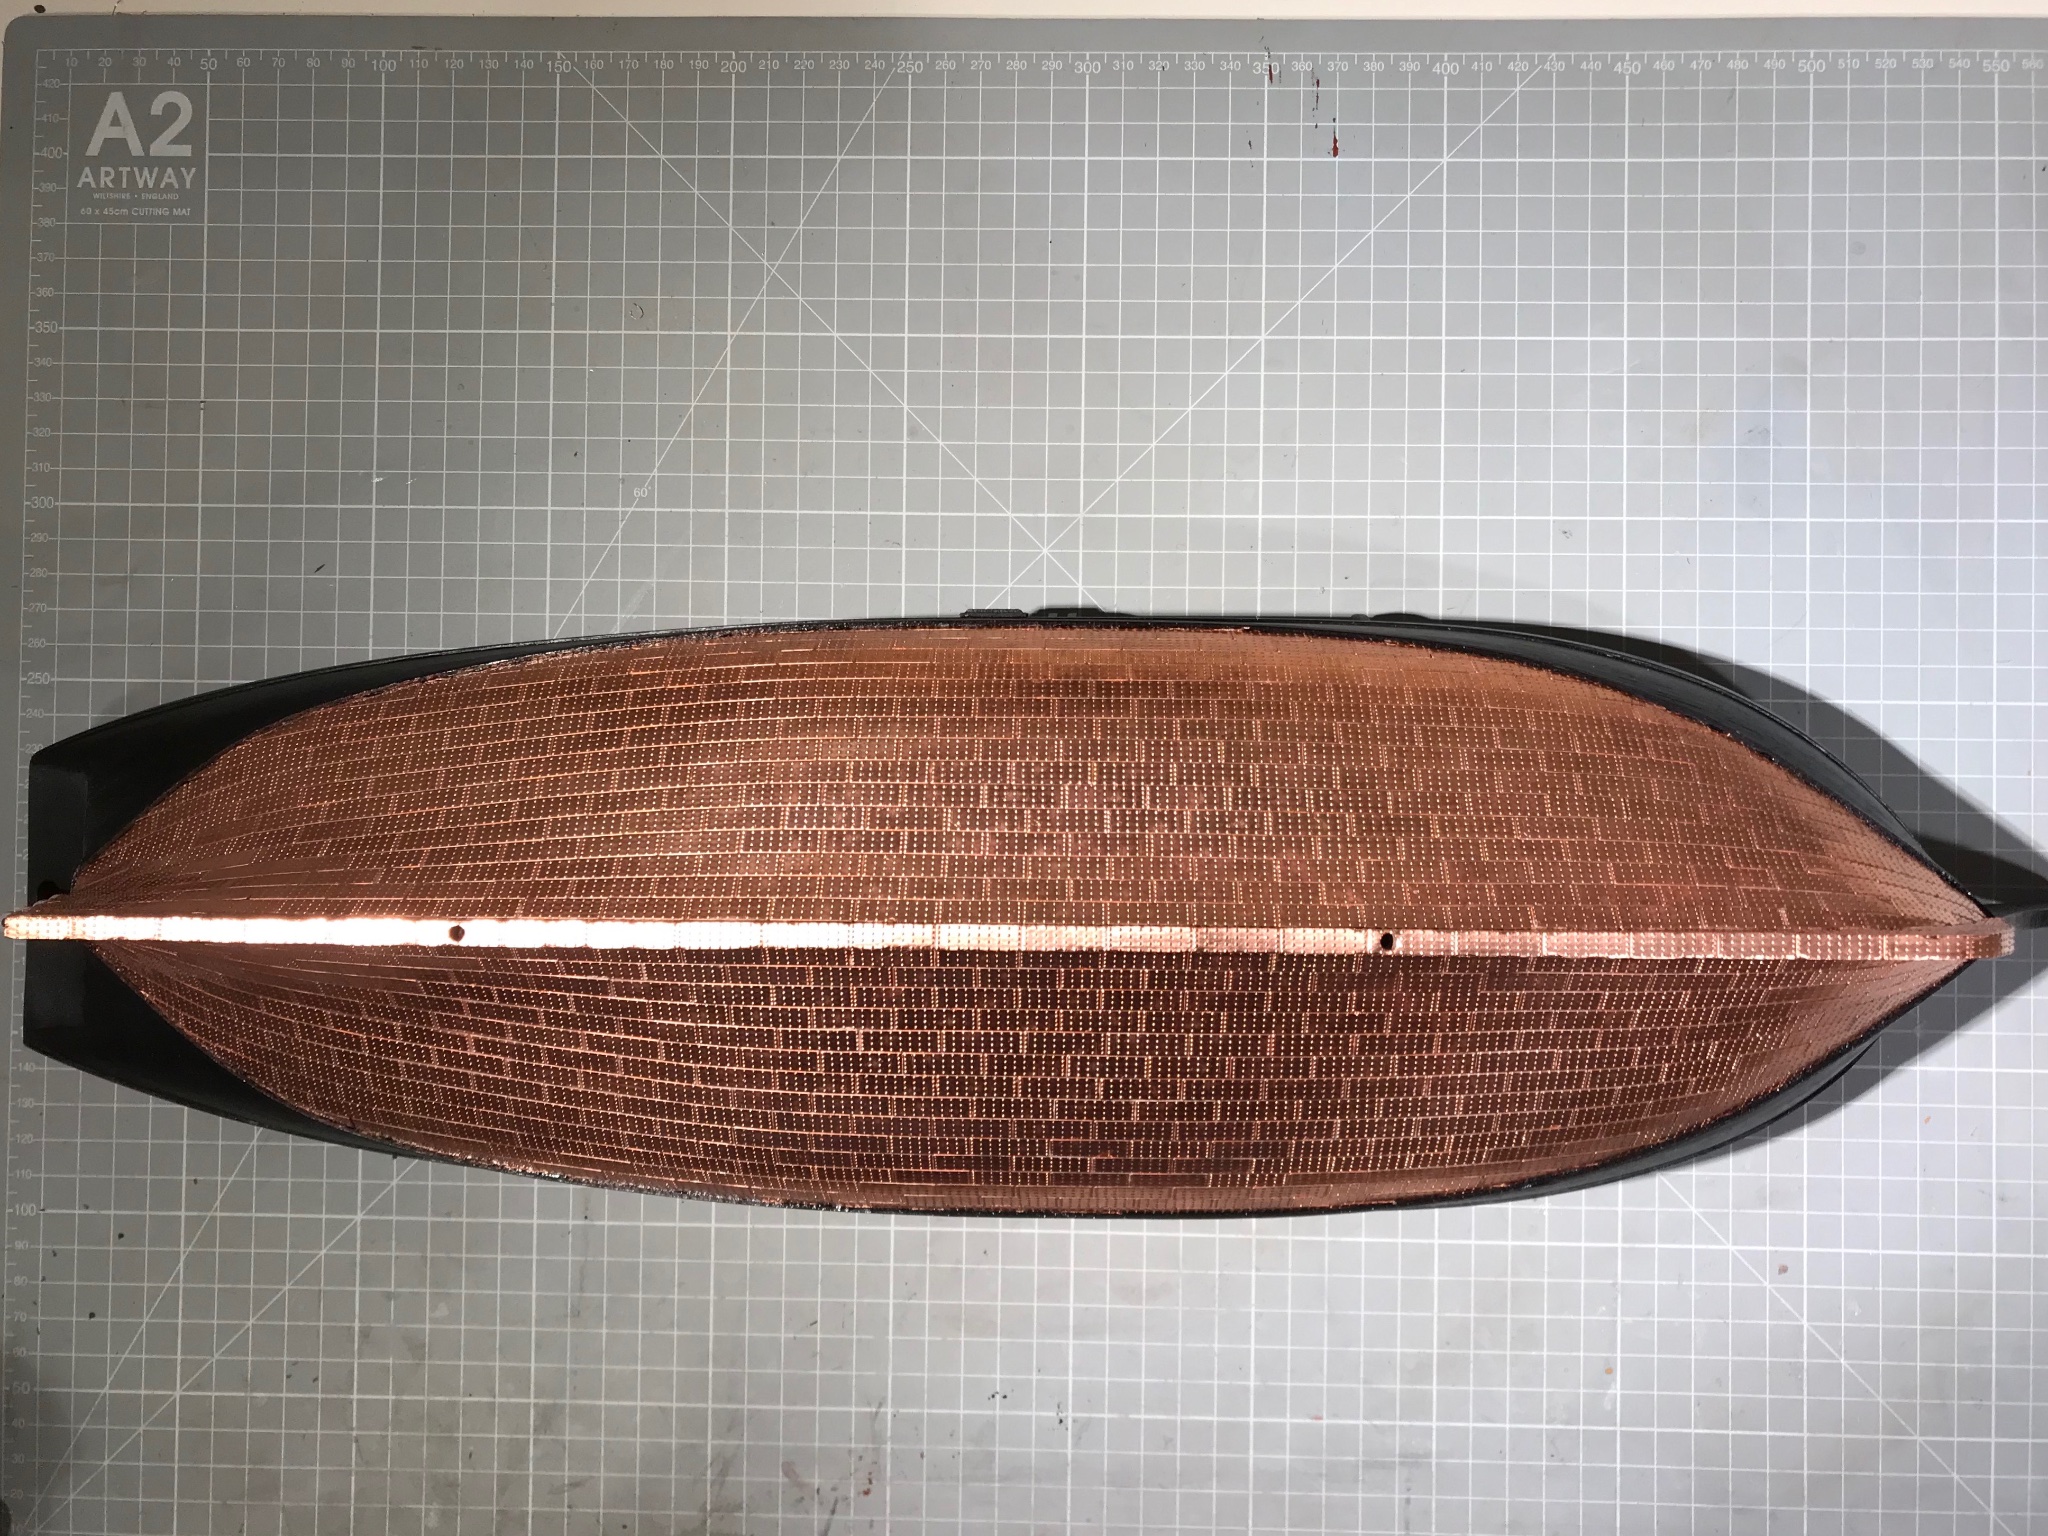
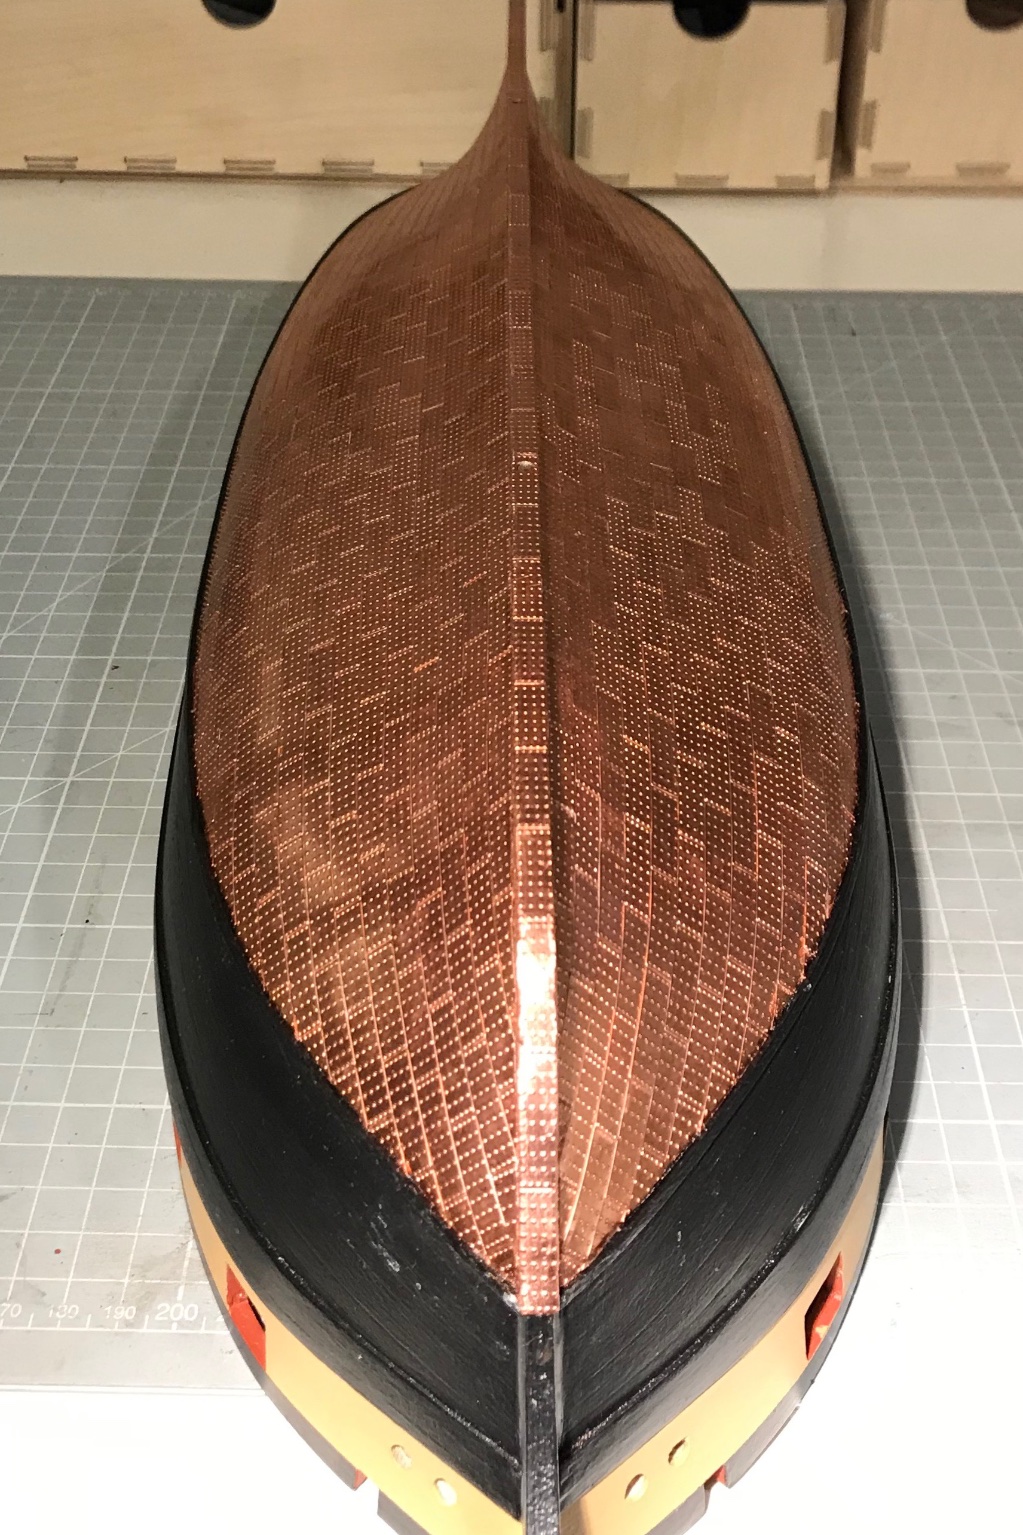
This gave a very shiny uniformly coloured copper finish. Which is what I want. To keep that finish I then applied two coats of acrylic satin varnish.
Here are the results:


-
Well, what a beauty. And absolutely worth the wait for the update. I was telling myself that I would wait for the model after Sphinx (since Snake has some time to go). But now I'm not so sure, she is so damned beautiful. I think we should all recognise that detail and quality of the kind you are offering won't be cheap, but I certainly hope there is high demand and decent margins for you, meaning that making this your full-time job becomes realistic. Just imagine what choice we would have then!
- chris watton, DelF, Richard44 and 2 others
-
5
-
On 2/20/2021 at 4:40 PM, Beef Wellington said:
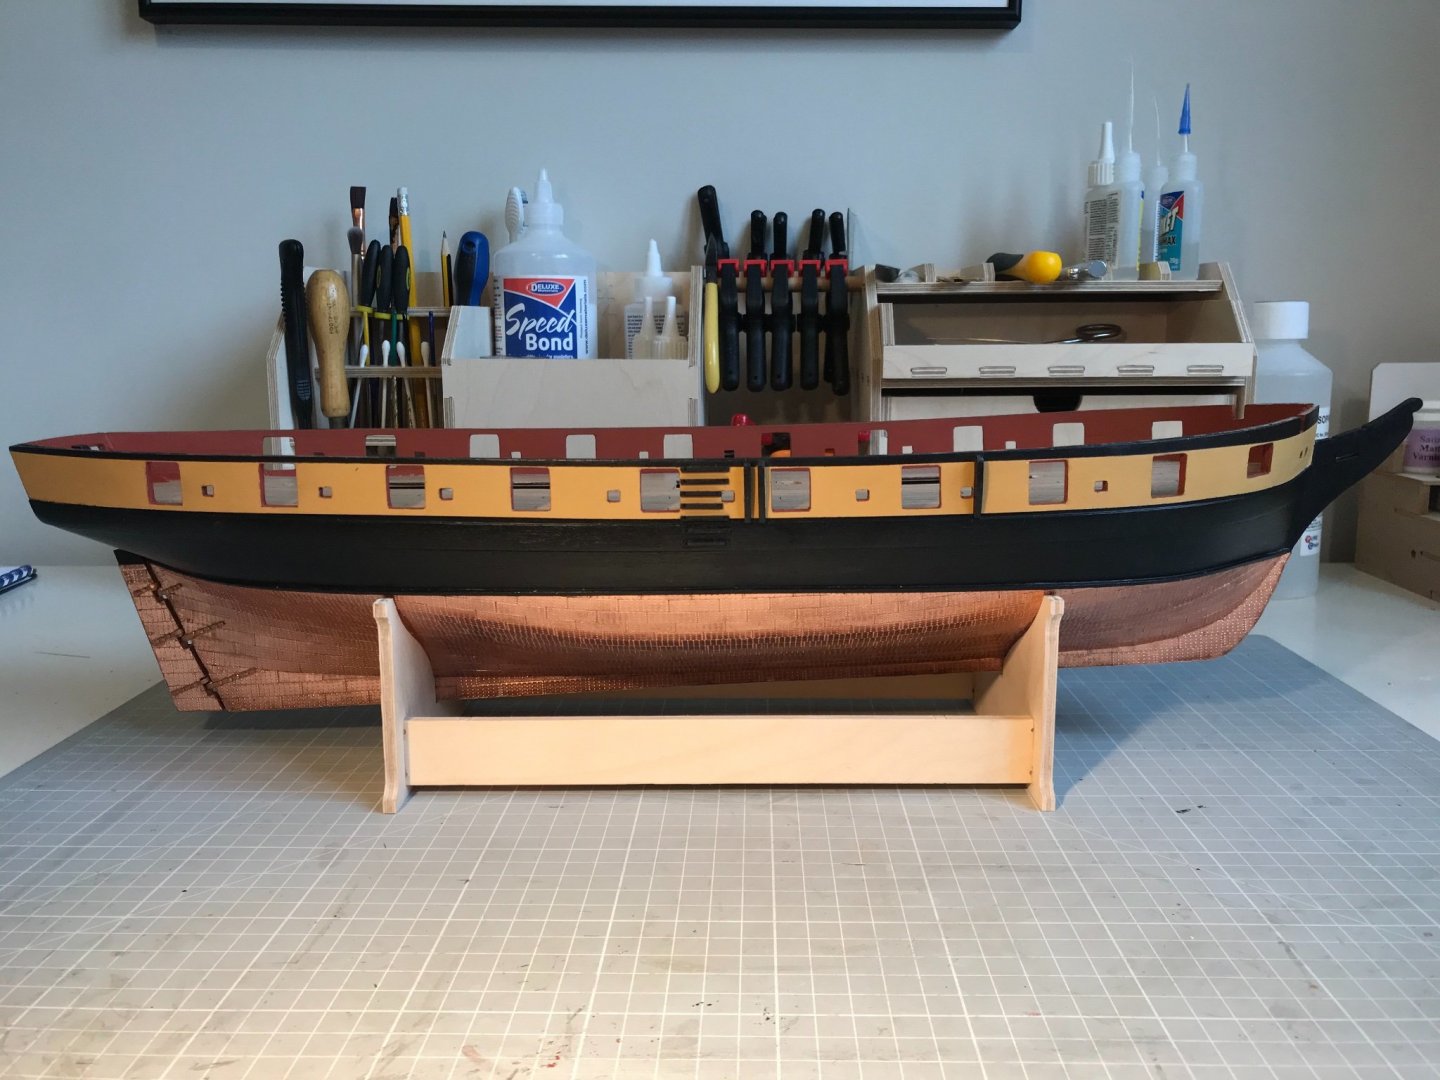
Just a quick comment after doing quite a bit of research on this before. The horizontal band (or bands) either seems to be a later development, and/or something used by other non-Royal Navies. I believe the USS Constitution currently has the horizontal band of copper plates in this fashion (open to correction here), but many contemporary references for RN ships indicate that the line of the plates around the hull continues up to the water line with no horizontal band. The copper pattern on Trincomalee also represents this, but of course this is not contemporary either.
Thanks Jason. I’ve carried on following the natural line. It looks fine where it meets the waterline. It had occurred to me that I could stick a horizontal band on top, but doubt I’ll be tempted.
-
What a beauty. And how you find the time while working, I cannot imagine.
BW Mike
- BobG, mtaylor, chris watton and 1 other
-
4
-
4 hours ago, chris watton said:
I am here, but I have no internet or phone line until at least next Tuesday. We bought a pay as you go wi-fi dongle thingy, so I could at least reply to emails and book all orders to be posted.
I am still working long and hard on Sphinx. All photo etch designs will be complete within two weeks, and I am hoping the laser cut designs will be complete very soon. This is a lot more complex than the other kits, and requires a lot more development time.
Hoorah! I’m sure you are steaming along, so we’ll just have to wait until bandwidth arrives.
- Ryland Craze, Canute, chris watton and 1 other
-
4
-
5 hours ago, James H said:
He's told me to tell you he has been without internet/phone for a couple of days, and his business relies on it of course.
In his area, even the mobile telephone signal is really poor too.
All should be sorted early next week.
Thanks James - of course I’ve also got used to building boats at super-human speed.
- mtaylor, Canute and chris watton
-
3


HMS Endeavour's Longboat by Dougal Mack - Artesenia Latina
in - Kit build logs for subjects built from 1751 - 1800
Posted
After you insert the photo just hit the return key.