


DocBlake
-
Posts
1,811 -
Joined
-
Last visited
Content Type
Profiles
Forums
Gallery
Events
Posts posted by DocBlake
-
-
-
-
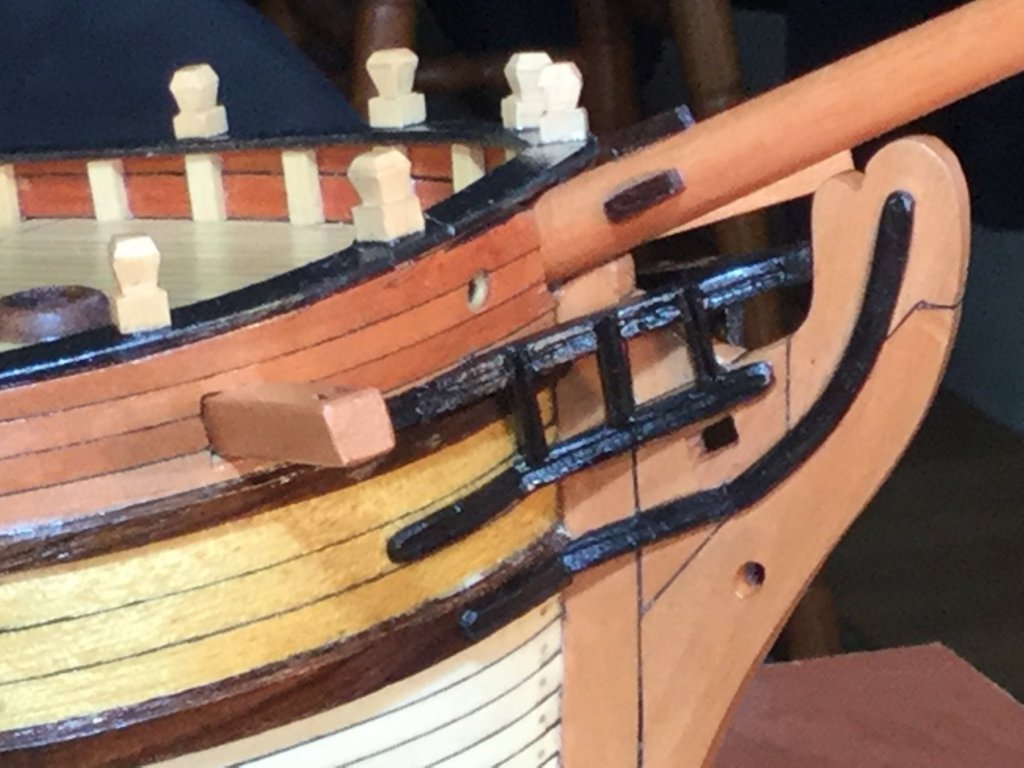
I spent the weekend working on the head rails. Since this is a small, simple vessel, I opted for simple head rails and no figure head. I dyed the rails black and applied a coat of poly. The glare of the light makes the rails look shiny. Much less so in real life.
I really sweated the head rails, but I think they turned out OK. I just broke the whole thing down into individual parts and it wasn't as hard as I thought

- Tigersteve, coxswain, Ryland Craze and 7 others
-
 10
10
-
You're making great progress...although those tiny boats look like they are tedious to make!
-
Waiting for more, Don!
- Old Collingwood and Canute
-
2
-
-
-
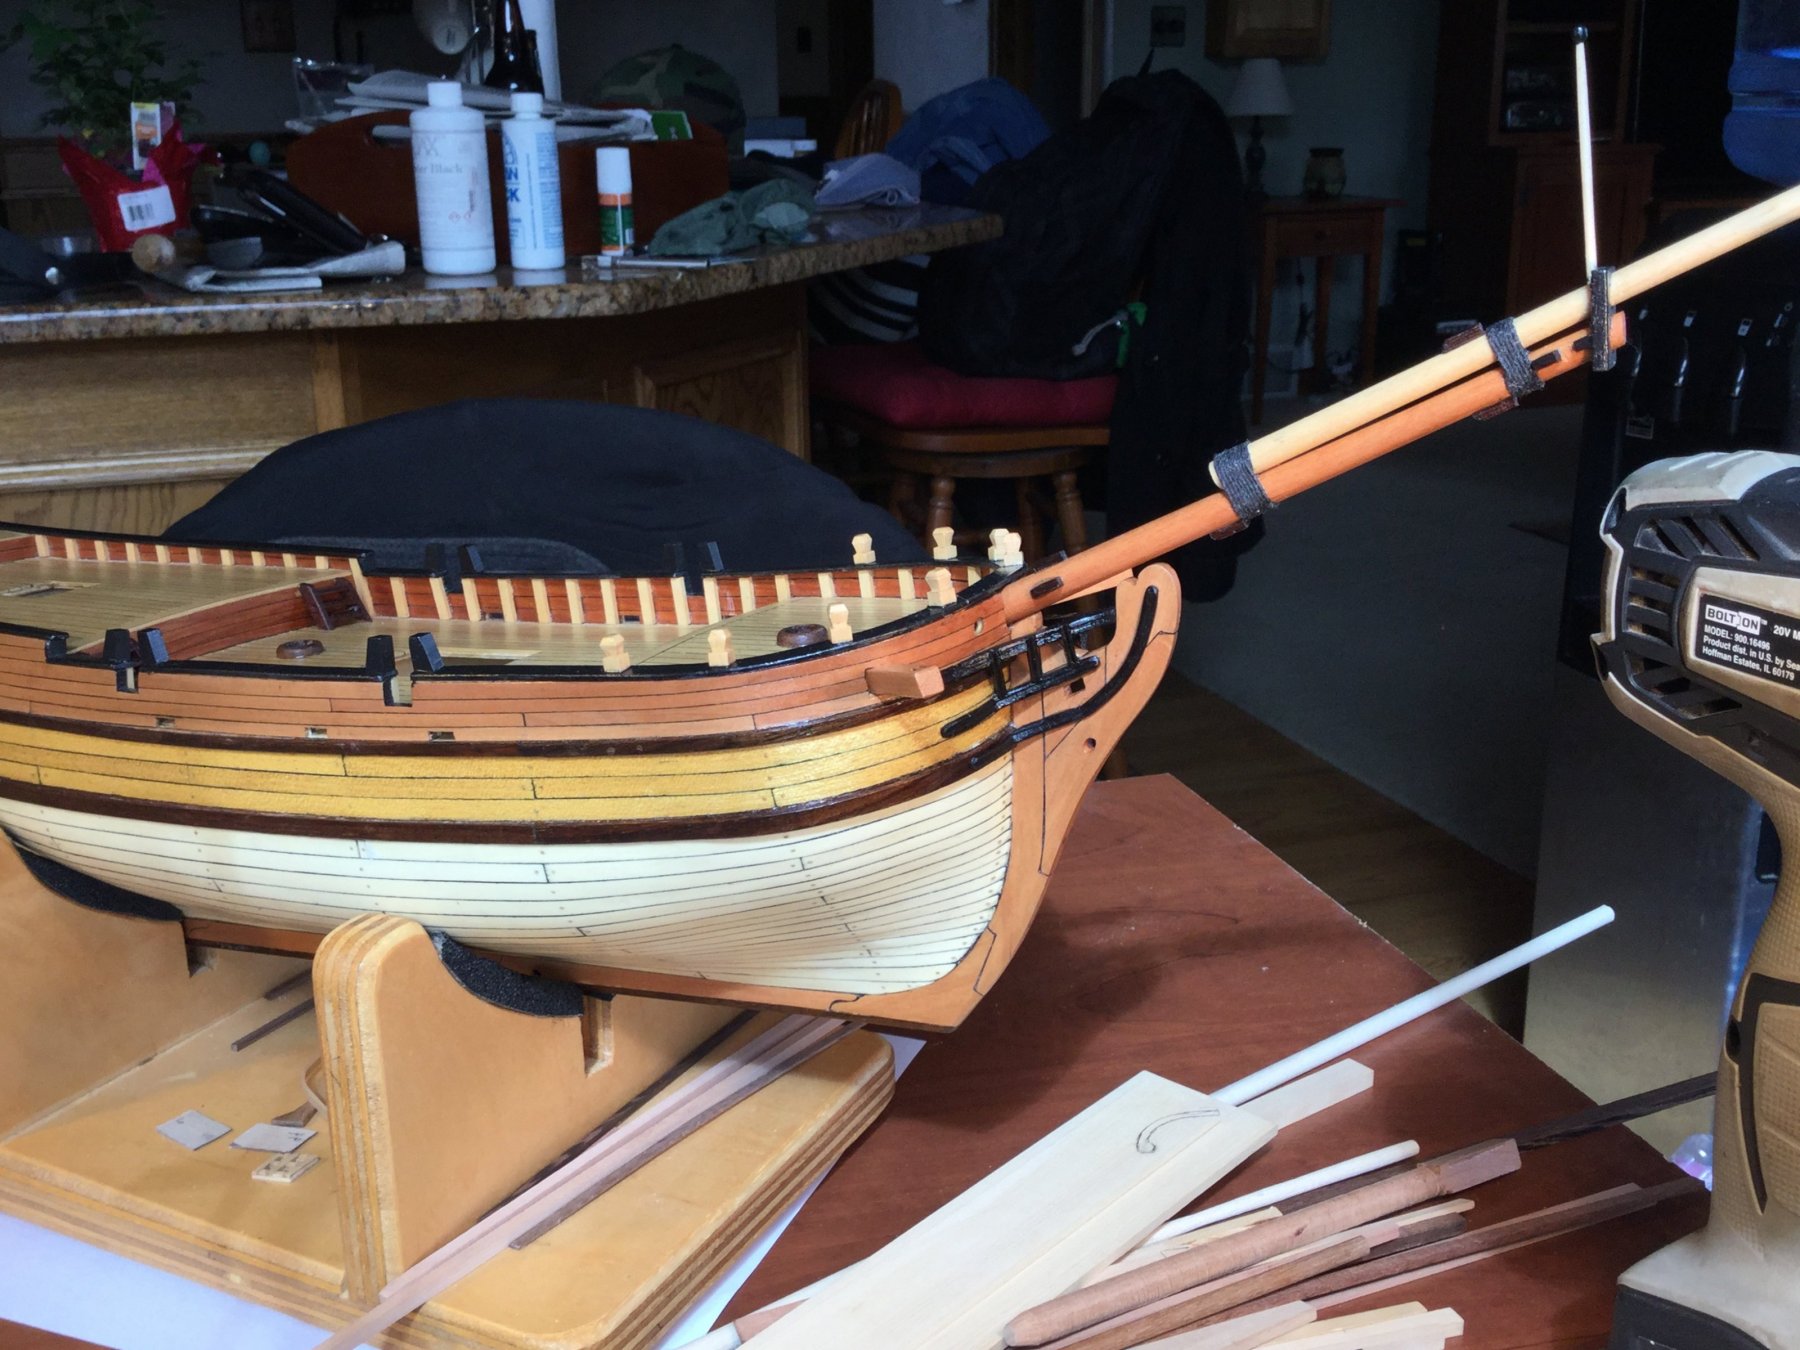
I have a few tasks left before moving on to the rigging. The masts, sprit, boom and gaffs are complete. I need to finish the yards. The plans call for the fore mast to have a topsail yard and a crossjack yard, but the main mast has no yards! Both Halifax and Sultana had both yards on both masts and I'm moving in that direction. On the hull I need to complete th quarter deck/poop deck rails, the channels and the swivel gun supports. I also need to add the head rails.
I've been avoiding the whole head rail problem, because I can't find an easy solution to constructing them. The kit parts are crap (the scroll work on the stem is metal, again!), so I need to start from scratch. Since this is a fictional vessel I'm not bound by any convention in how I construct the rails. Is anyone aware of a good log or tutorial on constructing head rails from scratch? I can't bring myself to leave them off, because they really do help define these schooners, but I'm having trouble getting my head around how to construct them.
-
Michael: I've used a Dremel cut off wheel to free parts from the billets with good results. With the very small parts you need to go super slowly and cautiously, and always cut with the grain...but you already know that! I can't tell you how many parts for my LSS Armed Virginia Sloop I had to remake because i damaged them removing them from the billets.
-
-
-
-
-
Great stuff, as usual, Don. Excellent craftsmanship.
Snow??? We have blue skies and temps in the upper 60's F!! You really are in the Great White North
 !!
!!
- Elijah, zoly99sask, John Allen and 4 others
-
7
-
-
Michael: That compounding of tiny errors has bitten us all at some point. Hang in there. It's something to learn from and I know that you will recover just fine.
-
-
Thanks, Brian. I think I'm going to go with a building board and right angle jig for construction. I cut my false keel way long, and the keel and keelson long, also. I'll glue the false keel to the keel and this will give me plenty of room to screw the false keel into the building board to keep the component in place. When the build is done, the false keel gets cut off, freeing the model from the board.
I finished rough sanding the frames inboard and outboard. There should be very little final fairing, and only smoothing to do once the frames are set...assuming the rebates for the keel and keelson are right on each frame! No pictures yet!
In looking at the full build Triton plans, I noticed there is a scarph in the keel between frame O and frame B. The scarph is in the vertical plane and I plan to include it in the model. In fixing it's location, I noticed that there is a discrepancy between the full build plans and the cross section plans. In the cross section, the frames are labeled 5, 4, 3, 2, 1, 0, A, B, and C. The identical frames on the full build plans are labeled 4, 3, 2, 1, 0, A, B, C, and D. Does anyone know why the discrepancy?
-
This model is being built in 1/24 scale: a scale that introduces a lot of problems in terms of scaling. For example, the layout lines for the parts and the profile views etc. are about 1/32" thick, leading to a lot of potential error especially in terms of room and space layout of the frames on the keel. What I'm wondering is if anyone can help me out with some pointers on building the jig to construct the model. How do I size the upper portion, with the cutouts for the frames, given that the frames are curved? How do I account for the slight curvature of the frames moving aft in the plan view? How do I keep consistent space bewtween fromes, given the thickness of the layout lines?
I'm almost thinking of not using the 2 tiered jig as many have employed. Instead, after screwing the keel/false keel assembly to the building board, I'd set the first frame on the keel, use a standard precut spacer for the space between it and the second frame, then set the second frame. Using the standard spacer again, I'd set the third frame and so on. I would need to make a right angle jig to keep the frames square to the keel and their tops level, but I could avoid the upper tier of the jig. What do you think? Any advice or tips? Thanks so much for any help you all can lend!
-
-
I missed that this is a retrospective log, but that's OK. At least we're assured the result is successful!
- mtaylor, thibaultron and Keith Black
-
3
-
Huge task, but you seem to be making progress. This will be interesting to follow. Best of luck!
- thibaultron, Keith Black and mtaylor
-
3
-
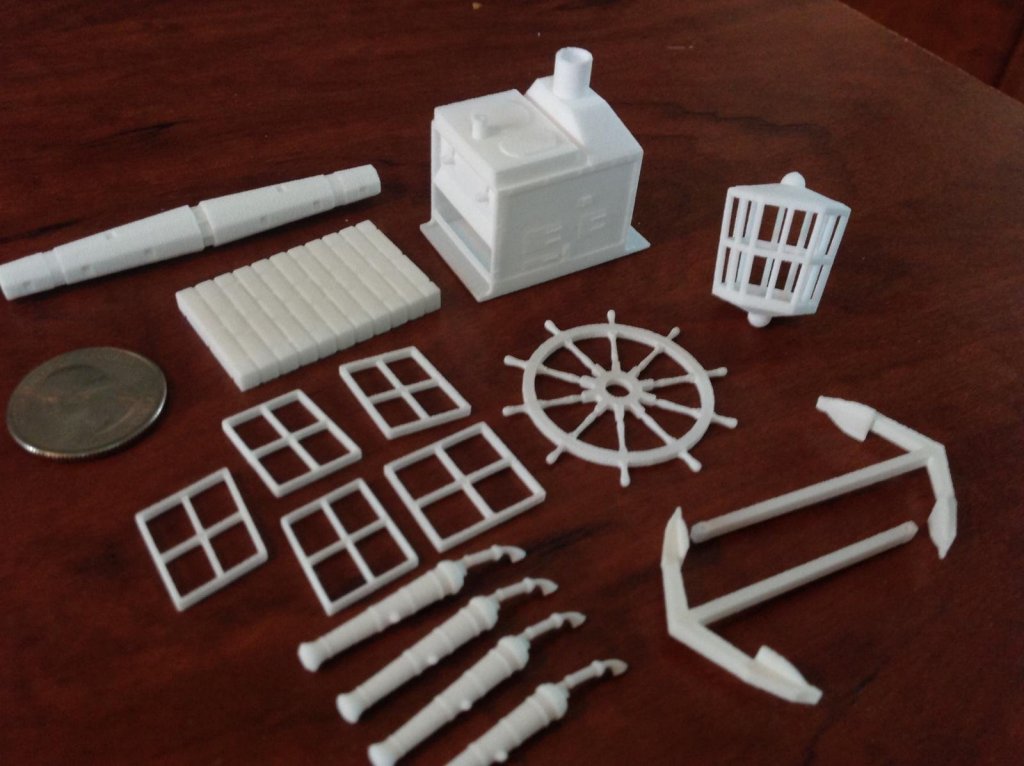
3-D parts are already being produced. My AVS "Patrick Henry" had parts included. I didn't use them for a variety of reasons, but they were actually quite nice. Here's a photo. Parts are available at shapeways.com. Search for "model ship parts".
- thibaultron, Canute, MEDDO and 4 others
-
7
-


USS Constitution by JSGerson - Model Shipways Kit No. MS2040
in - Kit build logs for subjects built from 1751 - 1800
Posted
Very ingenious, Jonathan! The cleats look great!