HOLIDAY DONATION DRIVE - SUPPORT MSW - DO YOUR PART TO KEEP THIS GREAT FORUM GOING! (Only 20 donations so far - C'mon guys!)
×

Gregory
-
Posts
3,141 -
Joined
-
Last visited
Content Type
Profiles
Forums
Gallery
Events
Everything posted by Gregory
-
I'm happy with the Proxxon FET, that Hyuda looks like it would be worth a try.. Better than doing without if you can't spring for Byrnes at this point.
-

which table saw to get??
Gregory replied to kronvold's topic in Modeling tools and Workshop Equipment
I bought mine from Amazon a few months ago. I'm not sure about the version. I'll see if I can find a date stamp on it. The plastic parts are all quite robust and don't appear in danger of failing any time soon. I find the fence to be very accurate and capable of very fine ( micrometer-like ) adjustments. I believe the arbor is 10mm, but you can use this 1/2" arbor adapter from MicroMark and use the excellent blades available from Malco Saw. No doubt the Byrnes saw is the Rolex of small saws, but I find the Proxxon to be very capable. -
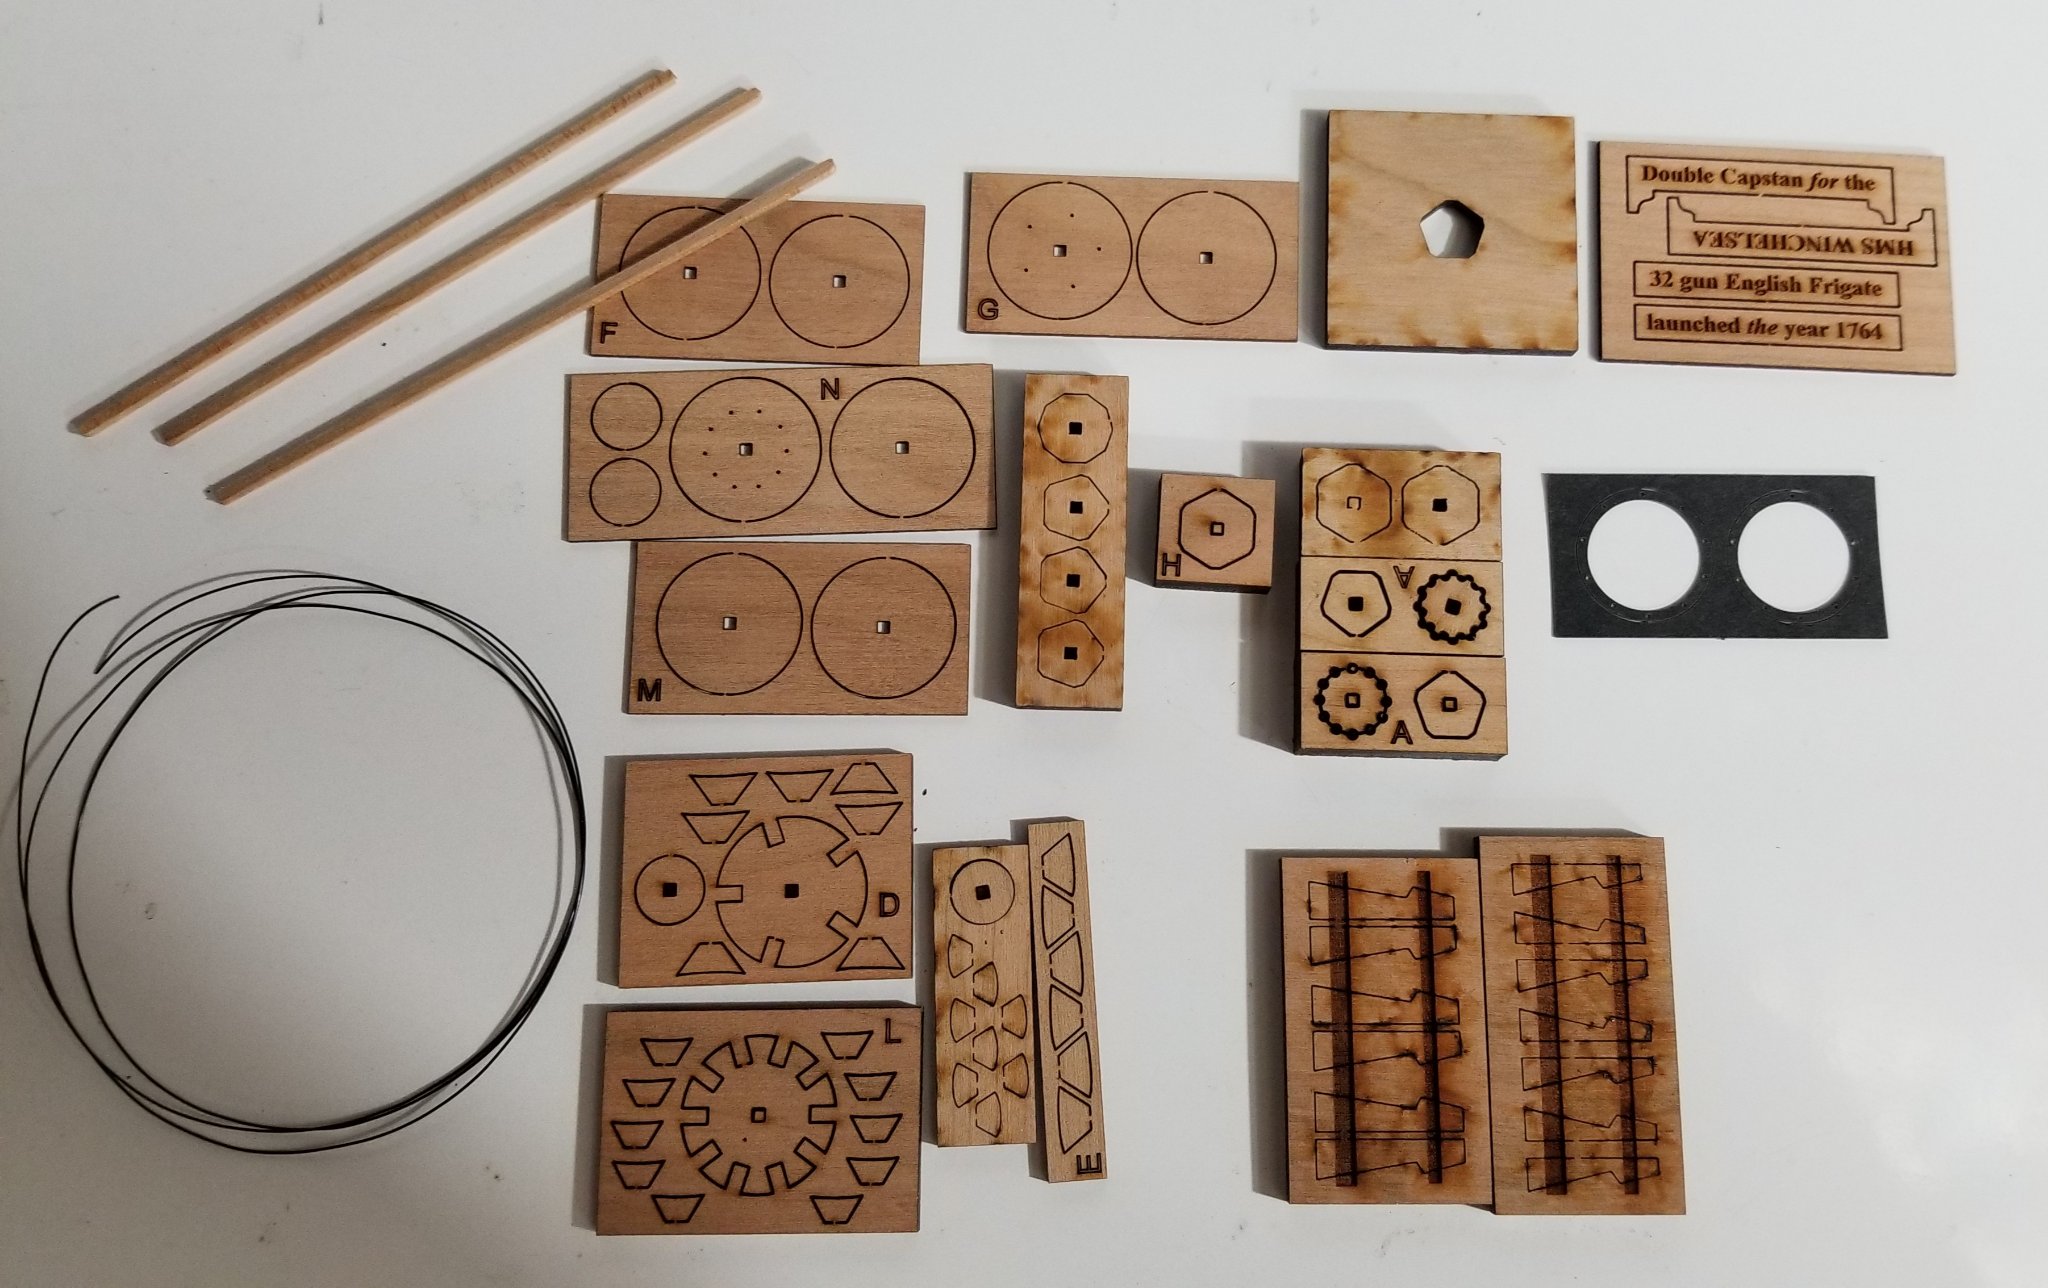
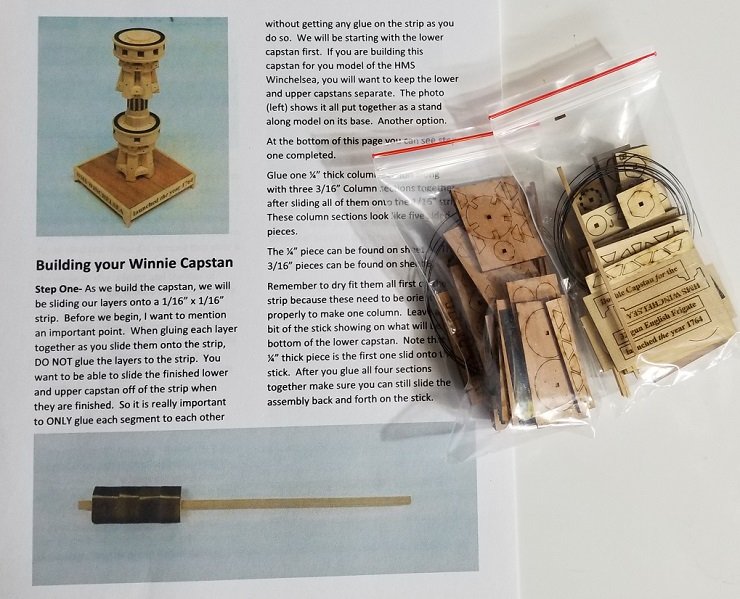
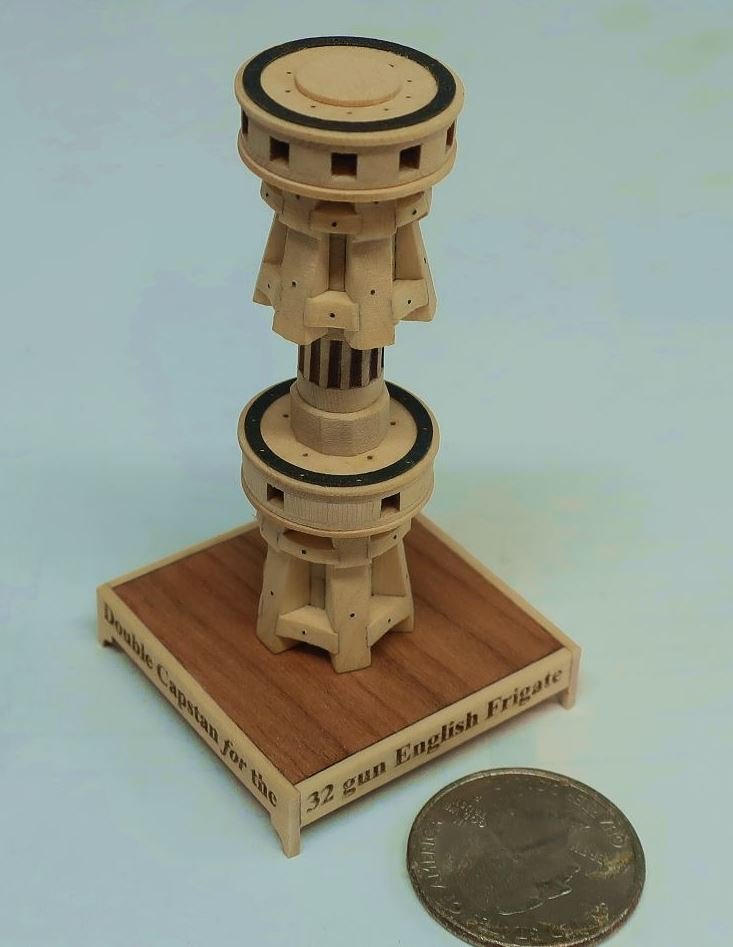
I feel fortunate that I am able to be the first to show off this beautiful little kit from Chuck and the Syren Ship Model Company I know quite a few Winchelsea builders already have this, because I had to stand in line for a couple of weeks to get mine. Here is the no frills packaging ( I ordered one each of the cherry and Alaskan yellow cedar versions ) next to the comprehensive assembly instructions, available for download at Syren. Winnie Capstan Instructions Here is the cherry version spread out. The wood is as high quality as I have ever seen. It reminds me of pear, in that there is very little noticeable grain. However, having worked with a lot of cherry lately, I look forward to the color I know will pop out with a very light finish. Chuck has provided five different thicknesses of material, from 1/32" to 1/4". The attention to detail is what you have come to expect from Chuck and Syren, with the included black monofilament to simulate bolts and the black laser board ring detail. There is just nothing else out there, kit or molded, to compare to the realistic look of this kit. Sure, we might see a 3D printed one any day now, if they are not already out there, but they will not be wood, and we will know it.. I can't imagine how Chuck found the time to design this and bring it to production. He never sleeps. At $23.00 it is a steal.. It will be a great addition to any 1:48 project, and in an historically accurate way. The design and look of these things did not change much over a 100+ year period. I don't have any plans to build the Winchelsea, but I have a couple of projects in mind where this kit will fit right in. The quality and completeness of the kit is fairly self explanatory, so I don't know what else I can say at this time. Please hit me with any questions you have. I plan on putting it together in the next few days and will create a build log to document the experience. I hope I can get close to the bar Chuck has raised.

- 4 replies
-
- 13
-

-
- capstan
- winchelsea
- (and 1 more)
-
which table saw to get??
Gregory replied to kronvold's topic in Modeling tools and Workshop Equipment
I am very pleased with the Proxxon FET. I have made a lot of strips as thin as .5 mm from a variety of wood. I particularly like the very precise fence adjustments. The tilting feature is also great to have. If you decide to get it, you may want to explore getting some finer blades than those Proxxon provides. -
There are various cure times depending on available moisture and the formula of the glue itself. Often it can be instantaneous. Acetone dissolves cured CA, and can be used to clean up unwanted residue, and when approached proberly, to break a cured bond. Of course acetone will also dissolve most varnish and paint, so you may have to do some refinishing if it ends up in spots you don't want.
-
It's a good thing Moab isn't planning on using veneer..
-
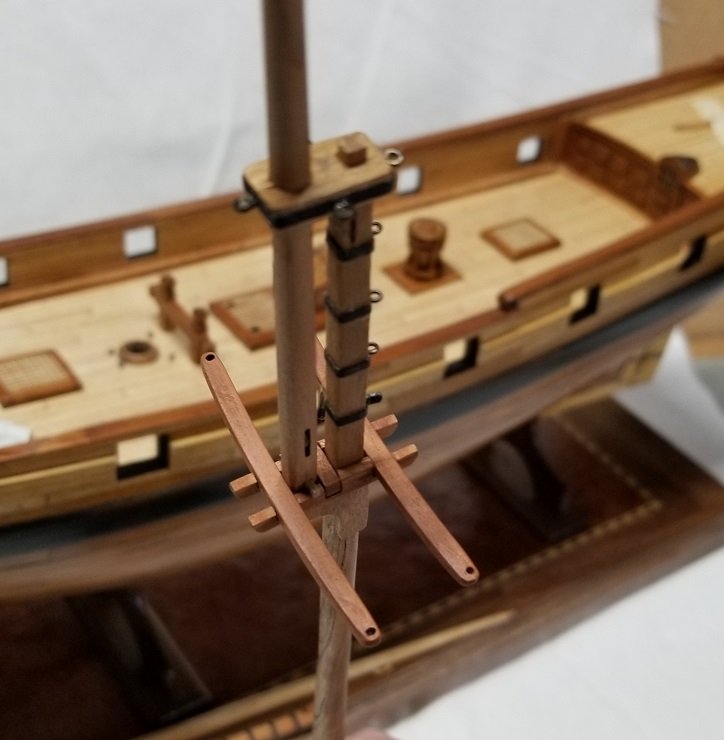
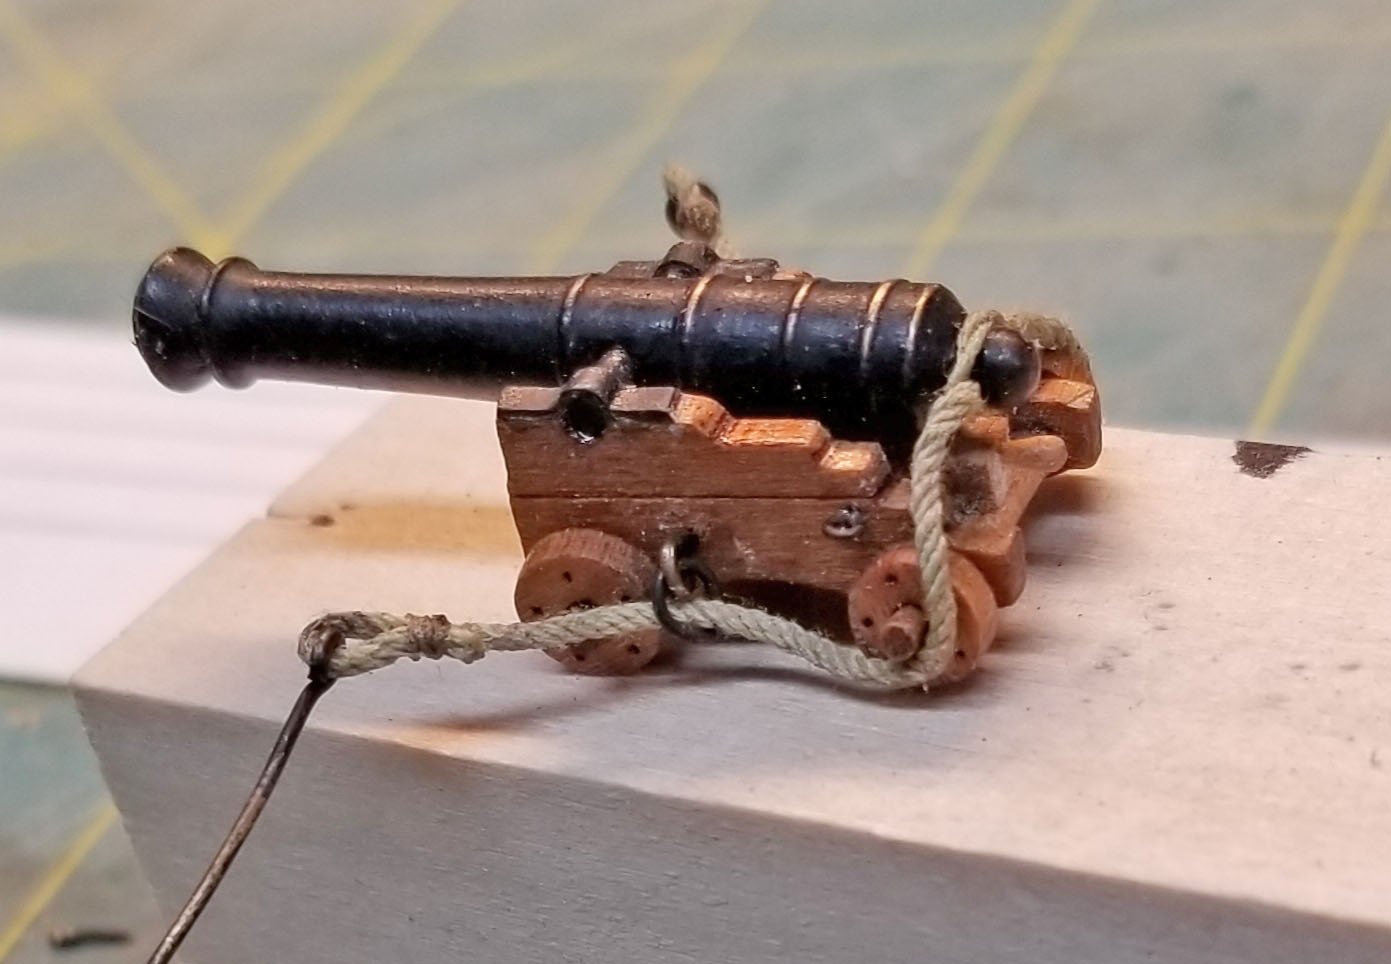
Here are my boom jaws.. Fresh from the laser on the left, and finished up on the right.. I have the mast and topmast broken into smaller parts that make it easier to shape the pieces, rather than try to shape one long part. It also makes it easier to make a new part if something goes wrong. it should look something like this eventually.. Still working on cannon. This breaching rope looks frayed because I did a lot of twisting and untwisting. I hope to come up with a cleaner look.. Stay tuned..

-
That may be one way of measuring it, but I have bought 1/32 sheets, usually 4" wide and various lengths from any number of places including Syren Shi Models. Syren sells .025 inch yellow cedar. It's very workable depending on what one is doing. It does take care, but it is not as fragile as most veneer.
-
I will be interested on the pricing for a special order. I have bought quite a bit of the listed sizes.. Say, compared to 1/16 x 4 x 24 cherry for $3.40 ..
-
Getting 1/32 milled pear, apple or boxwood would be a challenge. I suspect the pricing would be interesting as well. Those would certainly be my first choice if they could be had, and if I wasn't going to paint or stain it. I'm thinking Moab is wanting to get something to work with in the near future.. I hope that when someone finds a good source for any of those, they will let us know right away..
-
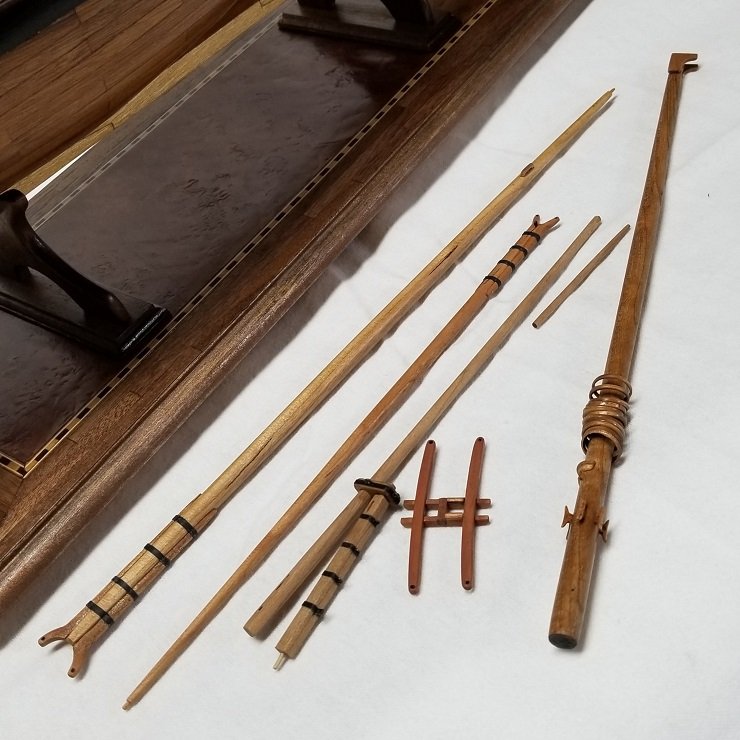
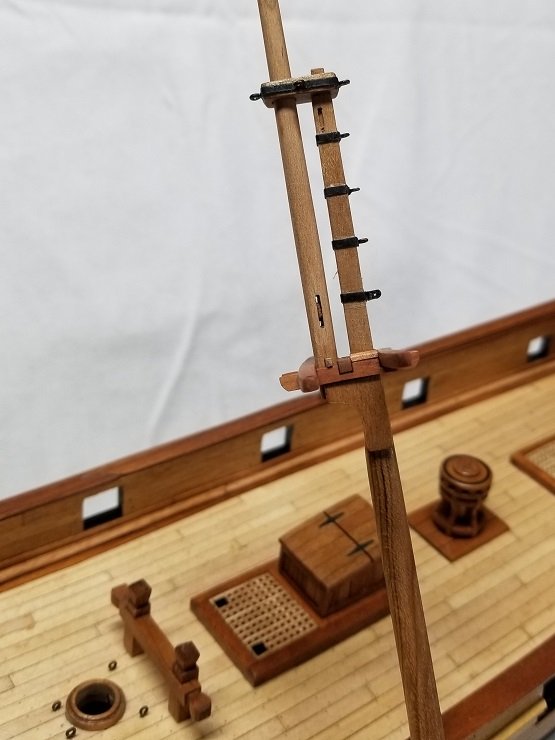
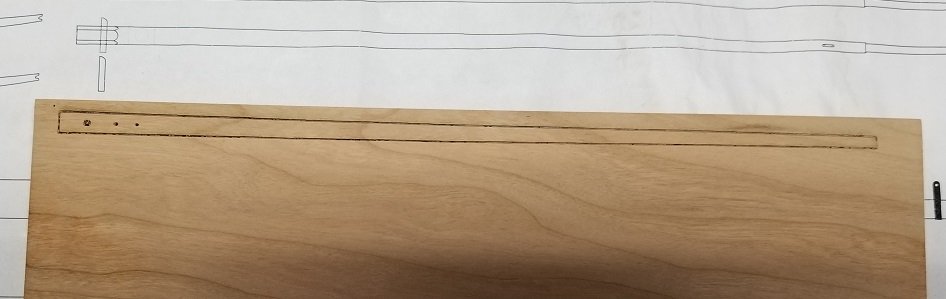
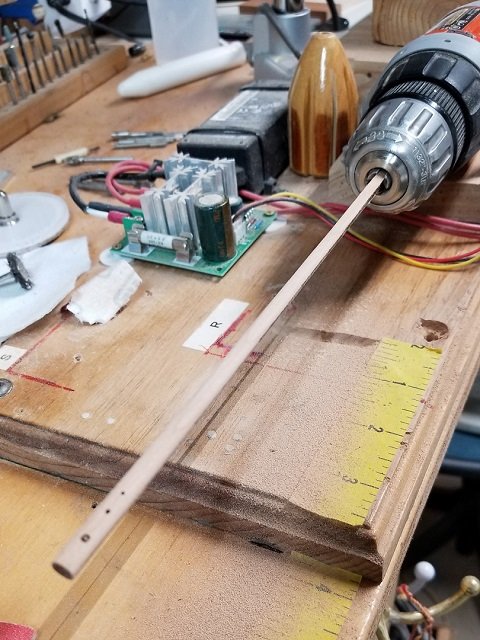
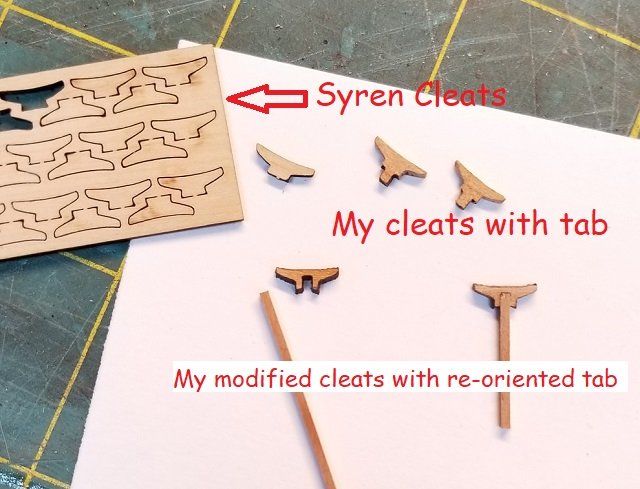
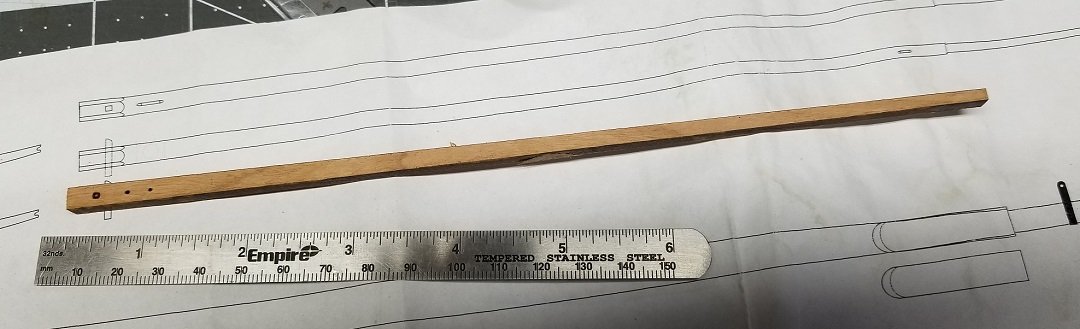
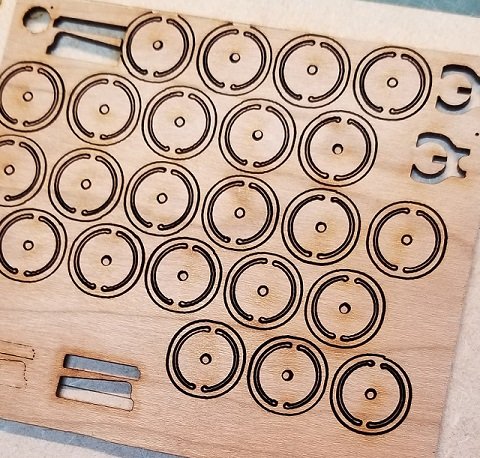
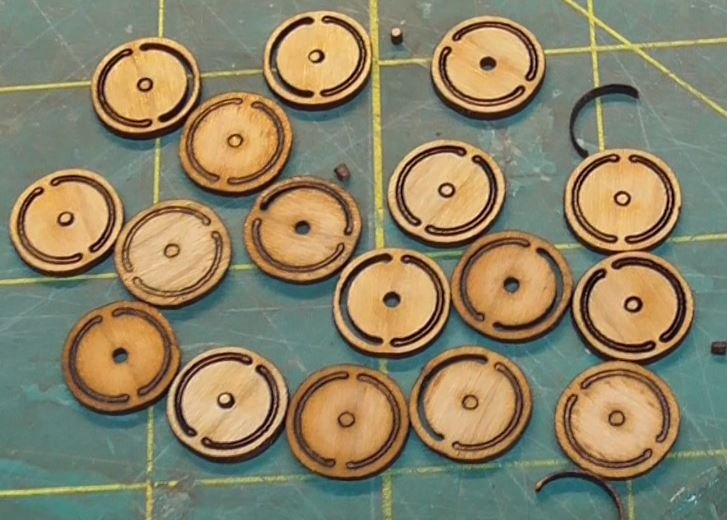
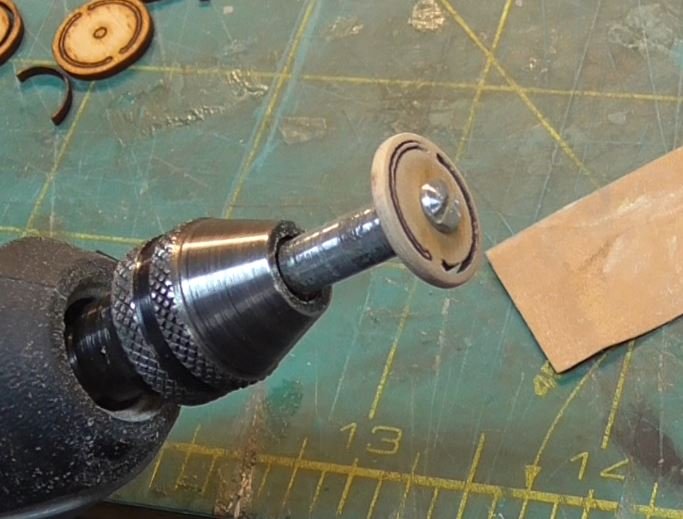
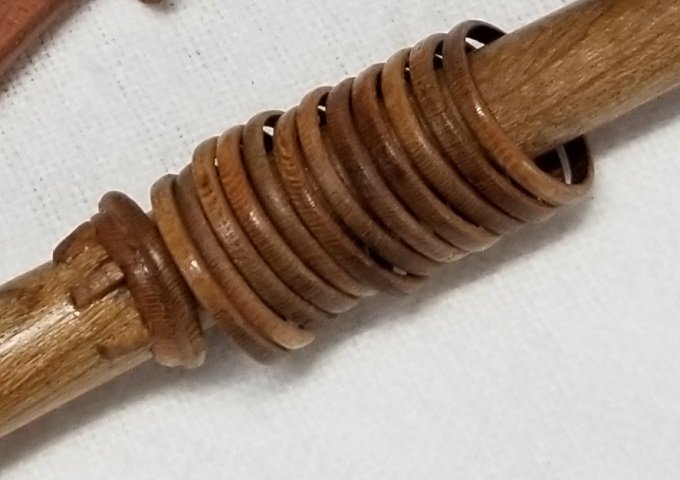
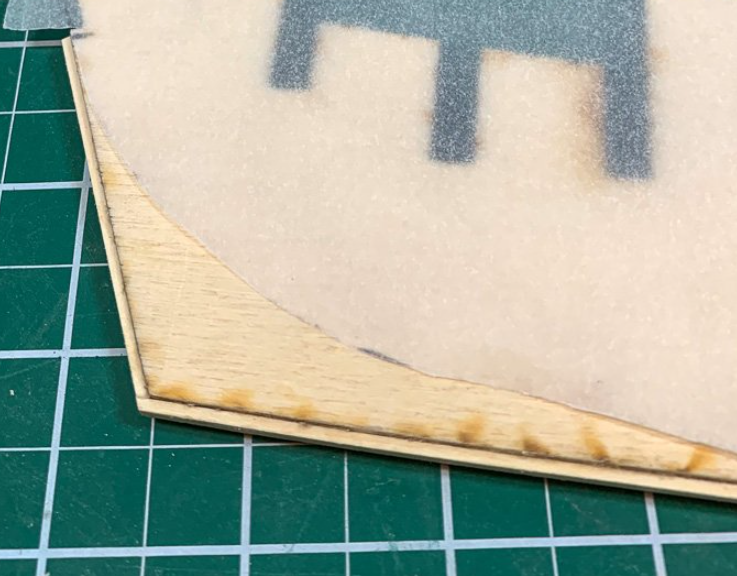
Contrary to some rumors, I have not been sleeping on the job. I have been working on the masting and some other odds and ends, as well as some non modeling projects that have been taking me away from this one. A little of my technique and results follow I refer to my laser a lot, and here I chose to take care of the initial tapering of the topmast by cutting it with the laser. If the plans look familiar, I'm taking some ideas from my Cheerful plans. I follow up with my Black & Decker unimat, which also drives my disk sander and ropewalk. A couple of other things before I show the almost-finished mainmast/topmast assembly. I have some nice Syren cleats that are the right size, but I wanted to stay with cherry as my main wood of choice for fittings on this build. I cut them out, but found the little mounting pegs broke off too easily because of the grain orientation, so I made a modification that makes for a strong mounting peg. The joint will not be very noticeable when rope is in place. Next up, some mast hoops that will need to go on the mast before it is assembled. I made these from cherry, with a method that Chuck demonstrated with Cheerful. I spin them and finish them on the rotary tool. Who wants to guess how many of these I started with to get the few that ended up on the mast? I like the way the cherry looks.. ( No, I did not hide any breaks on the hidden side of the mast ..😁 ) I need to take a break tonight, but I will have a few more pictures of mast details tomorrow ..
-
I would recommend Ocooch Hardwoods as a source. Their prices are very reasonable. They ship very quickly and they communicate very well. They don't list 1/32 on their site, but it is my understanding they will cut it for you if you send them an email. Keep in mind, tight grain might mean they are more difficult to stain. My choices would be cherry, maple, beech, ash and poplar, not necessarily in any order. You may get some more informed and educated opinions than mine..
-
Royal Caroline rigging lines & blocks
Gregory replied to rvmer2's topic in Masting, rigging and sails
What is the basis of your model? Kit ? Scratch build? The only legitimate kit is the one from Panart; perhaps someone here could give you a block count from the plans. However, I would not rely on it for being accurate. The rigging lines are another matter. The kit will not have a list of the " number of lines " .. I see in another post that you have the AOTS book. That would be the best source for determining the type and number of blocks, as well as the size and amount of rigging line you need. -
Oh no.. That is the shape that blends with the rudder..
-
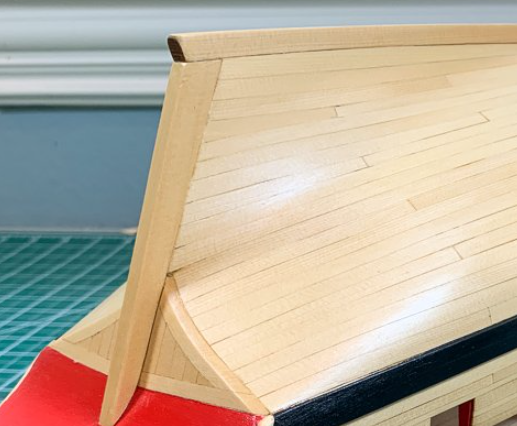
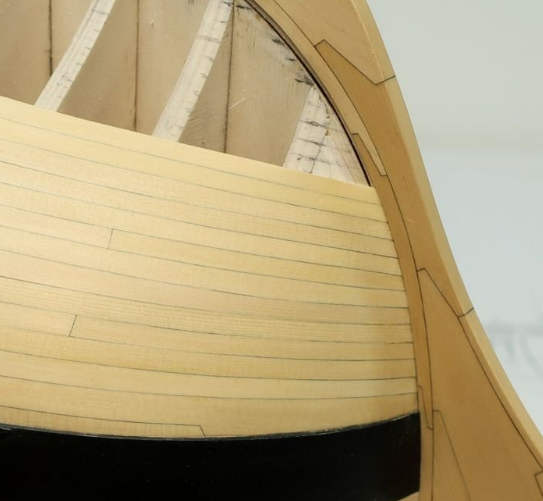
No trial and error.. It stays the same from front to back Using the rabbet strip, at the stern, the bearding line is made flush with the rabbet strip.. ( GBarlow's Cheerful ) At this point, very little, if any of the thickness of the planks has been removed.. At most a small amount of beveling on some edges. ( Thanks to Glenn for providing a lot of detail in his build log.. )
-
I guess a lot of our members feel that it is complicated, because we get a lot of questions about these things.. That is why we depend on the more experienced members like yourself, to give us ideas that have worked for us.. AL might have a good method but they do not give detailed instructions that would provide a nice looking outcome.. Rabbet and bearding line do not seem to be part of their vocabulary, but are essential to well finished planking on ship models.
-
Do you plan on offering the gun carriage jig in the store like you did for the grating jig?
- 1,784 replies
-
- 1
-
-
- winchelsea
- Syren Ship Model Company
- (and 1 more)
-
If you want to try something just use the Dremel mandrel and cut out your own with some kind of rubber backing.. I don't think you will find anything ready made that is very robust..
-
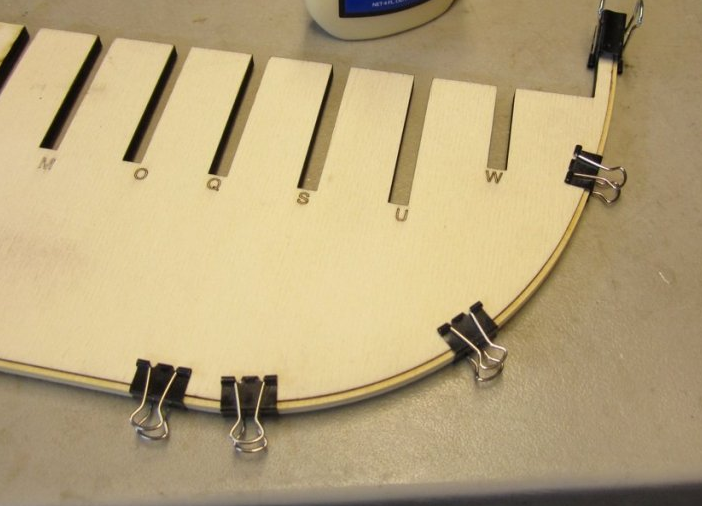
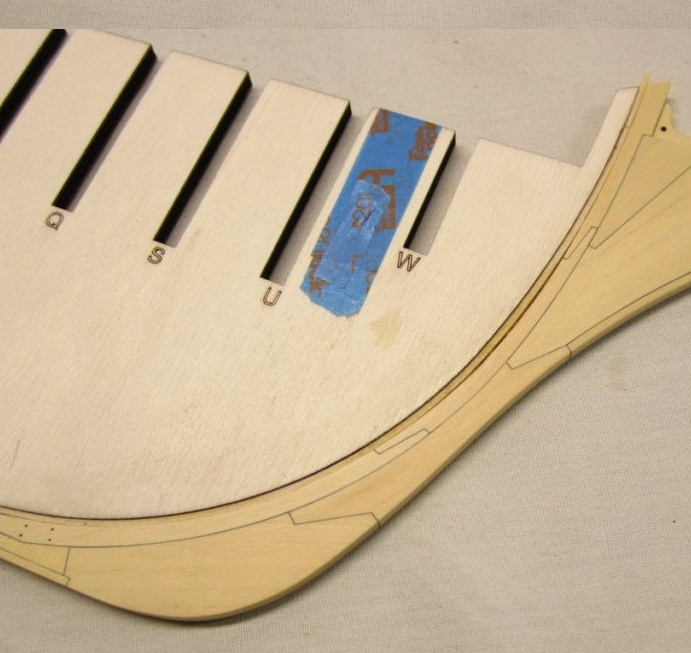
Here is something that works really well for most kits, and should work in your last example, with a back-bone type keel, where you add the separate keel, and stern post: You add a 1/16 ( smaller or bigger depending on the size of the model ) square strip along the center of the piece. As seen here on Chuck's Winchelsea. This serves as a groove in which to fit your planks, and serves the same purpose as the rabbet.. It only adds a fraction to the dimensions of your model and should not cause any problems, while making the fitting of the planks easier and better looking.. So, instead of something like this: You get something like: This! Gregory
-
Roughen the surface to be glued and re-apply CA If it is a very small area, use a very small bur with a rotary tool.. The glue needs to penetrate the area. I would use medium CA.
-
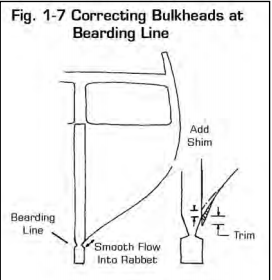
On the models where the planks appear to fit flush there is a sort of groove called the rabbet, and the edges of the planks are inserted into this groove. At the stern , there is a recessed area called the bearding line, where the framing is recessed to be less than the thickness of the sternpost and keel so that the planks are flush with the sternpost and keel. Most kits don't provide this detail, and you have to add it as you go along. At this point it would be difficult to add to your model. In the future you will need to access some of the planking guides here at MSW.. Here is a simplified illustration of the bearding line and rabbet..

-
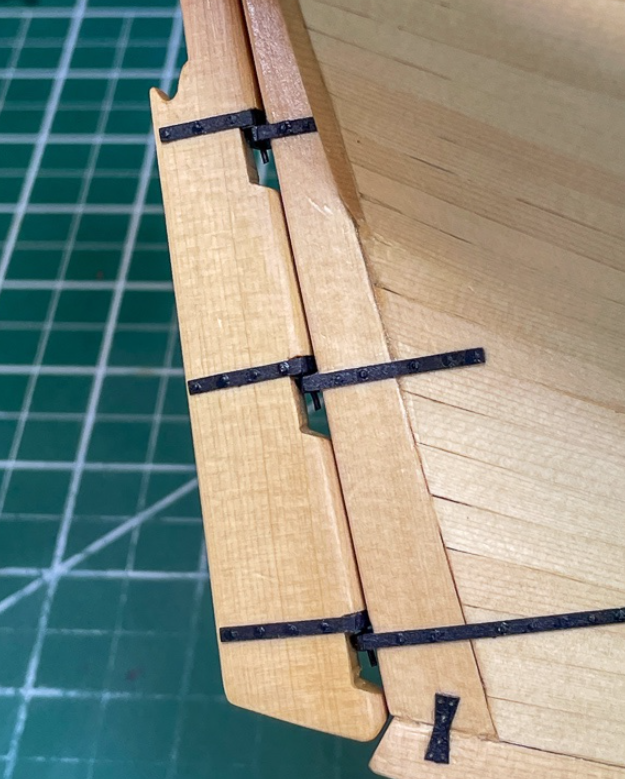
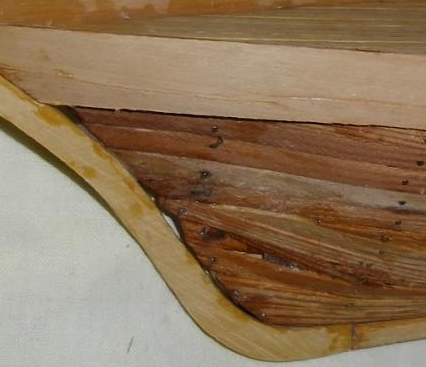
If it comes loose it is because there wasn't a strong bond to begin with. A good bond with CA depends on both surfaces being rough or porous. If either surface has paint or varnish that is smooth, it will not bond well, except to the paint or varnish, and will separate easily taking the paint or varnish off with it. 1. A good CA bond should last many 10's of years if not indefinitely. It forms a layer that is essentially plastic between the two surfaces. 2. You could have used epoxy, it tends to adhere to non-porous surfaces better than CA. However, if used on finished surfaces, it can break apart, taking the finish with it. The pieces may have been fastened with hidden nails or pegs.
-
HMS Bounty by AdamA - 1:48
Gregory replied to AdamA's topic in - Build logs for subjects built 1751 - 1800
I hope you will excuse me to ask a question, but are the drawings for your stem pieces from the Hahn drawings? I am curious as to piece number one and the gammoning slot. It seems that the long horizontal joint would have been a weak point considering the forces present from the gammoning. I have seen a similar configuration on another Hahn design for Rattlesnake.. I am certainly no expert, but other plans I have seen would have the gammoning slot in a piece that extended deeper vertically into the stem. Perhaps someone with more knowledge than me could shed more light on this. -
Choosing the best kit. The Mantua Panart or the Caldercraft.
Gregory replied to Roy Harran's topic in Wood ship model kits
There is a reason it's so expensive.. The cheaper kits require you to be more innovative.. Consider your own skill set.. You might wait for the new 1:64 Amati Probably more than Caldercraft, but then, maybe Caldercraft will go down..