-
Posts
3,170 -
Joined
-
Last visited
Content Type
Profiles
Forums
Gallery
Events
Everything posted by Gregory
-
-
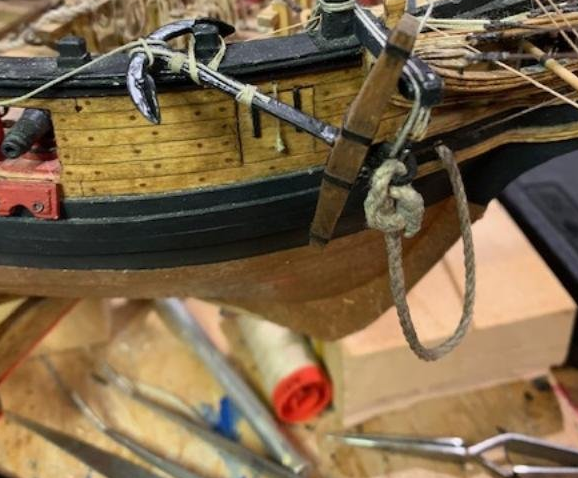
The plans you show are severely lacking in the amount of anchor cable required, and it would not be coiled on the weather deck as shown.. It is stored below the main deck. How it gets there will vary.. My Bounty references do not show it, but at the least it would pass down through the hatch near the windless, or further back near the capstan...
-
The extra rope will not be on the gun deck.. It will always be below .. No coil..
-
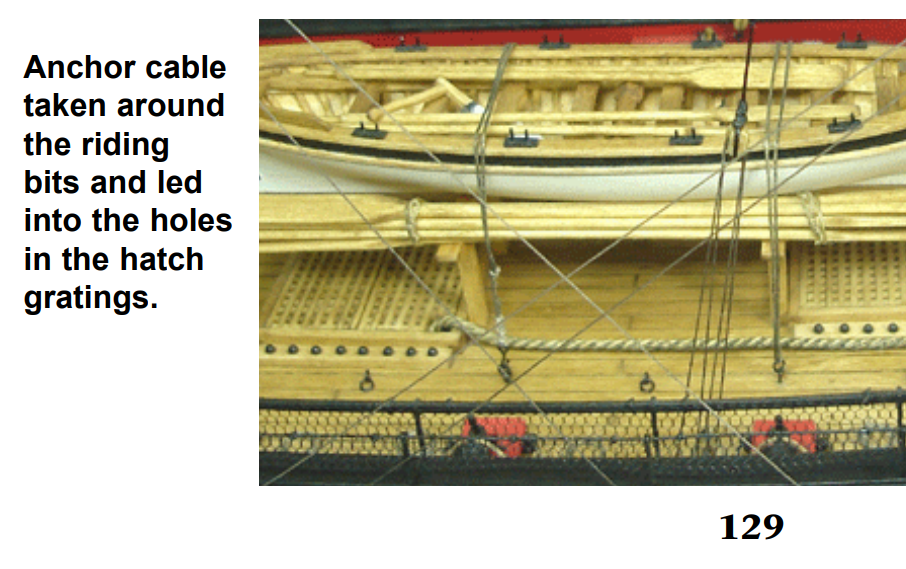
Not seeing how you have the rope laying across the deck.. According to the instructions, the rope should pass down into the lower decks through a hole in the gratings.. Modeling the rope being hauled in by the capstan would take a different approach..
-
The extra rope would be below deck, so all the extra rope you show should be saved for another project...
-
Symmetry
Gregory replied to Don Case's topic in Building, Framing, Planking and plating a ships hull and deck
Who's going to know? But now that you mentioned it, we'll be watching... 😁 -
Looks like a very nice start..
-
What I want to know, is why Jack hasn't been commissioned to make some boxwood figures at $100 a pop?😁
- 1,784 replies
-
- winchelsea
- Syren Ship Model Company
-
(and 1 more)
Tagged with:
-
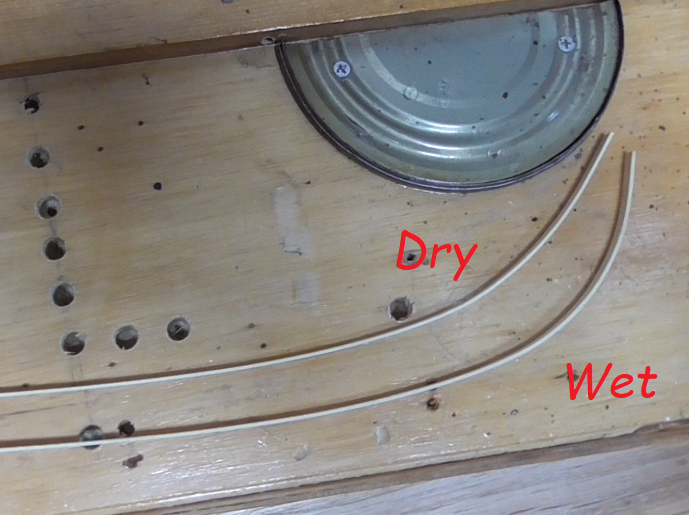
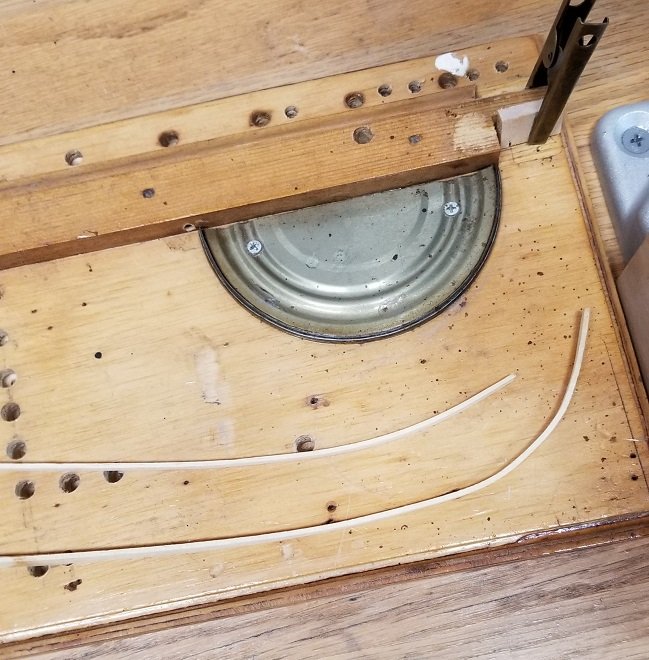
Getting back to you.. I've modified my jig a little since the pictures i posted earlier.. Still works the same way. First I tried some 1mm Alaskan Yellow Cedar. You can almost tie this stuff in a knot without it splintering or breaking. One piece was dry from my stash, and I soaked another piece in plain water for about 10 minutes. I think 2 or three minutes would have been plenty, but I was doing other stuff. The wet version clearly held the bend better. The blow dryer ran for 5 minutes, and I let the pieces sit for 10 minutes before removing from the jig. Here is the typical wood that comes in kits for 1st planking.. Not sure of species.. Lime, ramin, bass? It is 1.5 mm. This particular strip did not seem prone to splintering.. I don't even know how to identify ramin, but I have some bass billets that I could cut strips from for a more definitive experiment. Dry is at the top and we can see the wet piece has retained the bend much better. There could be a lot of variables of heating method, application and cooling time. Depending on the desired end result, I think some of the more involved methods of steaming , boiling, microwaving or whatever , might be a waste of time.. Let me know if you have more questions or observations.
-
I can. I will even run a test to check the difference and report back.. As I said, the water helps transfer the heat.. The hair drier doesn't make steam, but it dries any moisture pretty fast. The amount of bending without snapping or splintering varies with the type and thickness of the wood and the soaking doesn't affect that much, if at all. I appreciate the interest..
-
Nice finish on the fiddle blocks.. i wasted some of those before I got it right..
- 778 replies
-
- cheerful
- Syren Ship Model Company
-
(and 1 more)
Tagged with:
-
If you have a low rpm rotary tool, you can chuck those pins up and get a nice shape on the top part with sanding sticks, etc.. Don't worry about changing the bottom, as it won't be visible unless it's an unused pin.
-
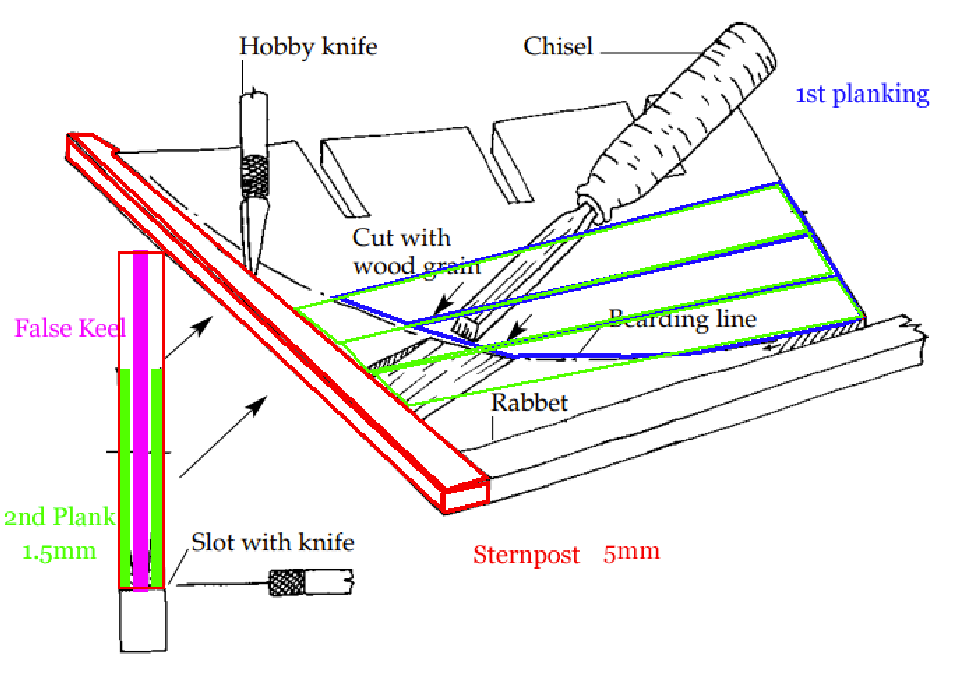
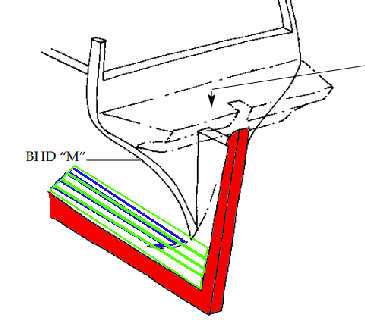
The false keel will be full thickness at the blue line where the 1st planking will end. The ends of the first planking ( blue ) will be tapered ( faired ) into the false keel so the maximum thickness there is still 5mm. ( my measurements ) The false keel will be tapered to 2mm from the blue line to the stern post. At the stern the false keel (viewed end on ) will be 2mm from top to bottom. The fitting of the planks will be a little more involved for the counter and the transom.. If you want to hold out for more illustrations, I can see what I can do later.. No trouble, it's what we are here for.
-
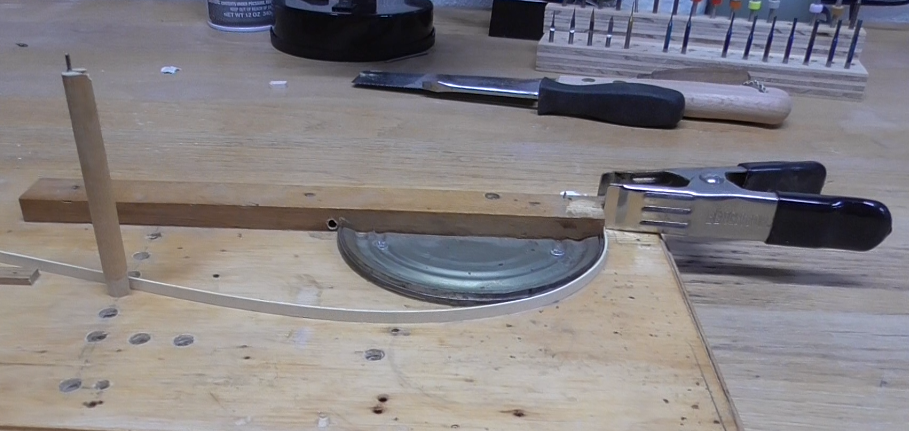
Here is the bender I use for long planks. The soaking is not to soften the wood, it's to better transfer the heat when applied. In my method, after the plank is completely dried after heating, letting it sit in the jig till it cools, it will stay bent when you remove it. In your example you can bend both ends... The jig doesn't have to match your bend perfectly. In fact, a little over bending will cause it to grip the bulkheads when you glue it up. You can see how one could adapt the principle to different jigs with pegs and such. The key is to heat the wood while it is bent, and keep it bent while it cools.
-
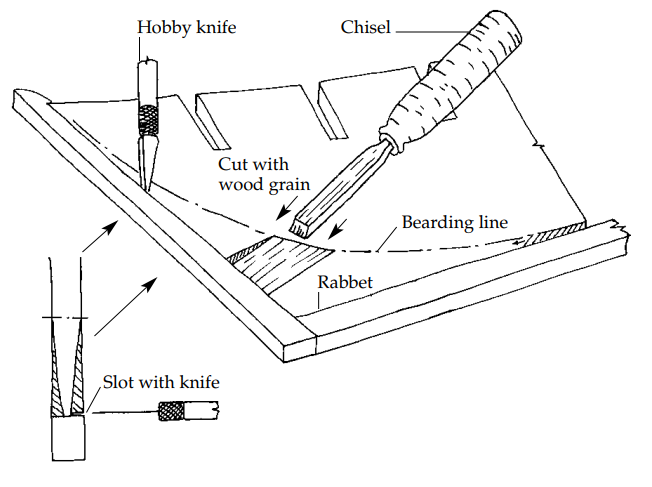
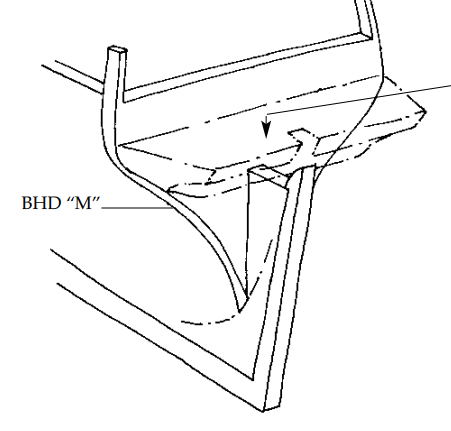
Here are a couple of images from the ModelShipways Rattlesnake that I will proceed to mark-up and hopefully explain things. They show the keel and sternpost in place, but I prefer to do the bearding area on the backbone piece ( some call it the false keel ) before the keel and sternpost have been added. It's easier for me to do with sanding tools than a chisel. Here is my attempt at illustrating planking to the bearding line for a double plank POB kit. Your numbers may be different. If the sternpost is 5mm thick, and the 2nd planks are 1.5mm, taper from the bearding line to make the false keel 2mm at the stern post. This will make the 2nd planking flush with the sternpost. I also end the 1st planking at the bearding line and sand the ends so they blend into the false keel at the bearding line. The 1st planking does not show in the end-on view. Of course this is simplified and the finer details of how everything blends together have to be worked out by the builder. But hopefully this will answer the basic question of: Let me know if I made it worse or if I can try to clarify something. Here is a build log where Jobbie does his bearding line. It may help to better visualize things. Note, he accounted for the thickness of the first planking all the way to the stern post resulting in a very thin false keel. If you just run the 1st planking to the bearding line, this won't be an issue. P.S. I noted by reading further into jobbie's log that he got a tip about taking the first planking to the bearding line, and followed through with that..
-
I don't know if this will work without pictures, but what you want is for the ends of the planking, both layers, to fit flush with the stern post; with that in mind you want to shave the bearding area to account for that. To some extent you can blend the 1st planking into the bearding area short of the stern post, so it won't necessarily be necessary to shave the bearding area to the total depth of both layers of planking. If you need more info just say so and i will try to round up some illustration.
-
HMS Bounty - Artesania Latina model
Gregory replied to Drew Mackay's topic in Masting, rigging and sails
While not the AL kit, Dave Baxter's log of the Amati Bounty is very informative. He has asked lot of questions in other topics and his build reflects a lot of research. If you also look through his forum activity, you will see where he asked questions and got a lot of good answers. Dave Baxter's Activity -
Chris, your kits present a challenge to get more detail than already provided .. You have set a very high standard..
- 355 replies
-
- vanguard models
- Sphinx
-
(and 1 more)
Tagged with:
About us
Modelshipworld - Advancing Ship Modeling through Research
SSL Secured
Your security is important for us so this Website is SSL-Secured
NRG Mailing Address
Nautical Research Guild
237 South Lincoln Street
Westmont IL, 60559-1917
Model Ship World ® and the MSW logo are Registered Trademarks, and belong to the Nautical Research Guild (United States Patent and Trademark Office: No. 6,929,264 & No. 6,929,274, registered Dec. 20, 2022)
Helpful Links
About the NRG
If you enjoy building ship models that are historically accurate as well as beautiful, then The Nautical Research Guild (NRG) is just right for you.
The Guild is a non-profit educational organization whose mission is to “Advance Ship Modeling Through Research”. We provide support to our members in their efforts to raise the quality of their model ships.
The Nautical Research Guild has published our world-renowned quarterly magazine, The Nautical Research Journal, since 1955. The pages of the Journal are full of articles by accomplished ship modelers who show you how they create those exquisite details on their models, and by maritime historians who show you the correct details to build. The Journal is available in both print and digital editions. Go to the NRG web site (www.thenrg.org) to download a complimentary digital copy of the Journal. The NRG also publishes plan sets, books and compilations of back issues of the Journal and the former Ships in Scale and Model Ship Builder magazines.


