

Gregory
-
Posts
3,168 -
Joined
-
Last visited
Content Type
Profiles
Forums
Gallery
Events
Everything posted by Gregory
-
 The video at the top of your link is " How to faux burl wood-Artisan Rooms " Is that the one. If not, do you think you could click on the video , then paste the link here?
 -
Do you have a specific video in mind? Your link takes me to a page with several.
-
spare parts for hull
Gregory replied to Bo Button's topic in Building, Framing, Planking and plating a ships hull and deck
Is that the Occre kit? Someone having just the hull parts to spare is unlikely. Your best shot would be finding a kit someone wants to sell. -
The builder can make as much visible as they want to.
- 355 replies
-
- 4
-

-
- vanguard models
- Sphinx
- (and 1 more)
-
You might look in on the Winchelsea build. It would be similar.. How much is going to be visible when the build is complete?
-
Dying/coloring rope; sources for purchase of quality rope
Gregory replied to Tomculb's topic in Masting, rigging and sails
In this topic, Chuck said: Hard to argue with that.. -
Dying/coloring rope; sources for purchase of quality rope
Gregory replied to Tomculb's topic in Masting, rigging and sails
I suspect Chuck sold thousands of feet of the stuff. We should have some feedback on the sag factor.. -
Dying/coloring rope; sources for purchase of quality rope
Gregory replied to Tomculb's topic in Masting, rigging and sails
I feel like the baking tones that down somewhat.. -
Dying/coloring rope; sources for purchase of quality rope
Gregory replied to Tomculb's topic in Masting, rigging and sails
How much time? Isn't just bout any material going to change with humidity if it is not sealed in some way? -
Dying/coloring rope; sources for purchase of quality rope
Gregory replied to Tomculb's topic in Masting, rigging and sails
Thanks for checking it out and reporting back. -
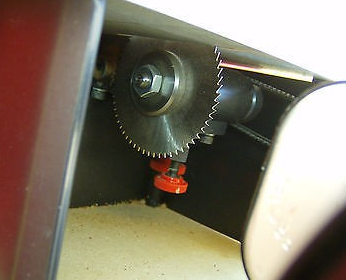
Here is an image I found.
-
What kerf are you looking for?
-
Why do they have to be metal?
-
The one on the right is looking good.. Just take care to remember the holes are square, so the battens should be shaped to make that happen.. I'm not sure what the pluses and minuses are for the increased tooth count.. Someone with more info would have to chime in..
-
While I am well aware of the qualitiies of boxwood, the cedar has more of a glow. I look forward to seeing how it ages.. I wouldn't want to wait 200 years for the boxwood to take on the amber look that looks so well.😁
- 1,784 replies
-
- 5
-
-
- winchelsea
- Syren Ship Model Company
- (and 1 more)
-
Allan, I think Don is looking for a source.. Do you have one? I would be interested also.. Thanks
-
I get the cutting blades from Malco. On my last orders a few months ago, they have required $100 minimum order. I don't see any thing in the 200 tooth range. I know I have made super fine cuts with teeth in the ~100 range. Byrnes also sells blades Not sure about the arbors, but they also sell arbor adaptors.. For the gratings look for a thickness that suits your job.
-
Cutting pre-scored deck
Gregory replied to Stevinne's topic in Building, Framing, Planking and plating a ships hull and deck
At that scale, and with all the fittings and deck furniture, I don't think the center line will be all that obvious. However, I understand how that sort of thing can eat at you. -
Importing STEP files from ServoCity
Gregory replied to Ian_Grant's topic in CAD and 3D Modelling/Drafting Plans with Software
Have you tried changing the file extension to .STP and see if Tinker can see it? You might consider installing the free version of Fusion 360, import the STEP files, then export them in a format TinkerCAD can use.. Meanwhile you might want to up your game by playing around with Fusion360.. -
While you are here.. Have you heard of Meshcam ? While it targets CNC users, it is a very powerful tool for refining STL files.. It is not free, but some might find it a worthwhile investment. Here is a demo video of what it can do.. Meshcam Video

-
Do you mean Blender ? Blender seems to be more about 3D animation rather than creating objects for 3D printing. Fusion 360 might be more of a go-to for parts creation. It's free for hobbyists.
-
Dying/coloring rope; sources for purchase of quality rope
Gregory replied to Tomculb's topic in Masting, rigging and sails
I'm revisiting this in response to the original post. There was a discussion about staining/dyeing boxwood where it was agreed boxwood doesn't take some stains very well. One or more people mentioned dyeing with an alcohol based stain. I proceeded to get some Fiebling's dark brown shoe dye to experiment. It actually worked pretty good to make my boxwood blocks darker. I had thought, and mentioned above, that I didn't think synthetic/polyester would take dye very well, with the idea that it was like trying to dye plastic and wouldn't stick. Well, I was wrong. On a whim, I dyed some of my home made polyester rope with the above mentioned dye and it really worked pretty good. Top is before, bottom is same rope dyed. ( Please ignore the unravelling.. That happened before I baked my rope.. ) Getting the color you want could take a lot of experimenting, and have a lot to do with the color you start with. For home rope makers, I see it as a way to avoid getting different colored thread for standing and running rigging.. Find a good light color you like for running rigging, then dye it dark for the standing.. Note: The dye can be very messy, but it cleans up pretty easily with alcohol, depending on how long it sits before you get to it..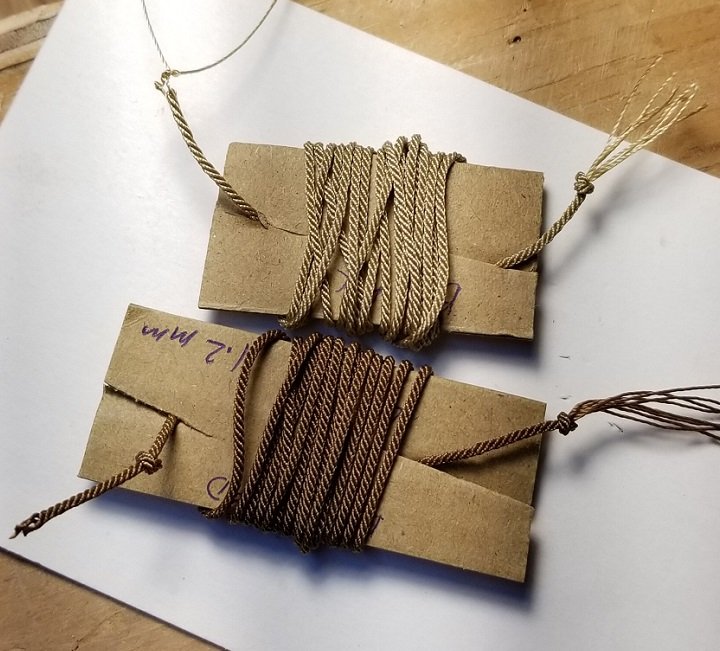
-
Bow & Stern blocks
Gregory replied to DaveBaxt's topic in Building, Framing, Planking and plating a ships hull and deck
When I described extra bulkheads, they don't have to extend to the backbone like the original framing. All you are looking to do is fill out the outer profile to provide a surface for planking. Just add what amounts to shims to the edges of the existing bulkheads. Create as many layers as you feel necessary. It is a lot like adding blocks, but laminated so you can reduce the amount of shaping needed.
-
Bow & Stern blocks
Gregory replied to DaveBaxt's topic in Building, Framing, Planking and plating a ships hull and deck
I would use bass. I personally wouldn't go for a solid fill. I would add what amounts to several additional bulkheads, using maybe 3/16 -1/4 sheet. Use the plans/existing bulkheads to interpolate the shape.. -
I'm going to toss this out here.. I can make what I feel is very acceptable model rope.. However, I do not think I want to go into the model rope making business.. If someone has a particular project, with details in color and size, I would enjoy working with them to provide the rope they need. The cost would basically be postage and materials. I do not have the space to create 20 foot lengths like Syren used to do. It would be more in the 4 to 5 foot range. Of course, I could provide as many 5 foot pieces as someone might think they need. I never made anything for my own use that was more than a couple of feet. No one line in a project was ever longer than that. Send me a message if you would like to discuss this or get a sample..
- 355 replies
-
- 3
-
-
- vanguard models
- Sphinx
- (and 1 more)