Gregory
-
Posts
2,727 -
Joined
-
Last visited
Content Type
Profiles
Forums
Gallery
Events
Everything posted by Gregory
-
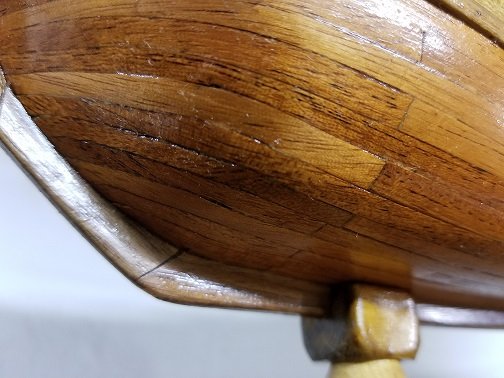
 At the risk of hijacking your thread ( please let me know and I will delete ), I am working on a Mary, and in the rigging stage. I didn't document well enough for a log, but I hope to present in the Gallery soon. I was using veneer for the 2nd planking and did some spiling at the bow. I thought I achieved a pretty good effect for my first attempt at this, though it is a little rough in spots. It takes some wide stock to do this. Up to three times the width of the plank, not to mention the waste from practicing.
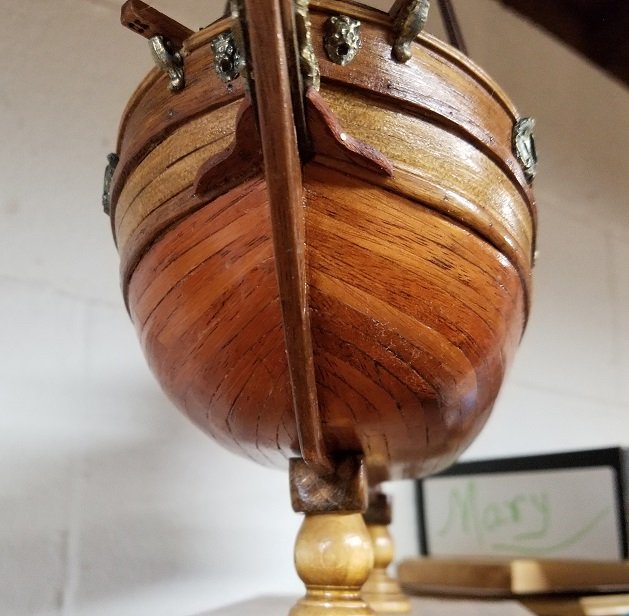
-
Rigging Question - Virginia Privateer
Gregory replied to David Lester's topic in Masting, rigging and sails
David, I see where I totally missed the boat on that, assuming it was a square sail ... Here is what Mondfeld shows. Your examples look like a flying configuration to me. I don't see going aloft to set those sails..
-
Rigging Question - Virginia Privateer
Gregory replied to David Lester's topic in Masting, rigging and sails
It looks to me like it is in fact a topsail yard, with some kind of attempt at perspective in the drawing. I think you would be hard pressed to find any kind of rigging plan that included a yard/boom as drawn.. Here is a link to what appears to be the same model, which sports a topsail, and a top gallant. Not a lot of detail but, using standard practice should get you by.. http://www.pielcraftsmen.com/ordimages/salemodels.htm P.S. There are reasons to be critical of some of the details in Petersson's Fore & Aft rigging book, however this over-all view of a similar rig, might give a basic idea of a rigging plan.
-
Model Shipway Ratline tool
Gregory replied to fnkershner's topic in Modeling tools and Workshop Equipment
One way to address this, would be to make the shrouds before setting up the deadeyes on the channels. -
Keep in mind, you don't really have to know why/how about every line on a ship. As the number of masts and sails increase, you have the same basic principles repeated over and over. Just pick a mast and a type of sail; main, top, stay, spanker, etc., and the basic principles, with a few exceptions will always apply. This is not to say there won't be variations among countries and periods, but a 'lift' , a 'brace' a 'shroud' or whatever, won't really change that much, because the work to be accomplished will be the same.
-
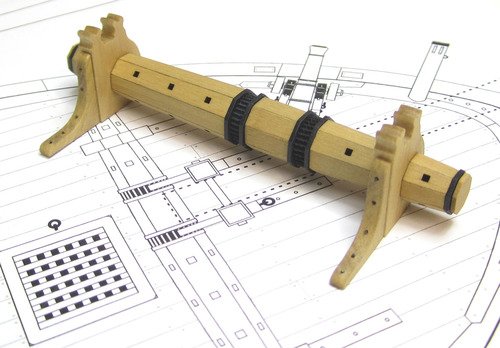
Detailed wood parts would really drive up the cost of a kit. I have looked at a lot of kits over the years, and I don't recall any kit, at any price, that included detailed wood parts. The closest thing that I am aware of, are the kits that Chuck sells at his store. Syren Ship Model Company He has items such as this Windlass which is part of the ' Cheerful ' package, but would not be out of place on a lot of ships at the same scale. There are tons of ideas on this Forum for fabricating your own parts.
-
Model Shipway Ratline tool
Gregory replied to fnkershner's topic in Modeling tools and Workshop Equipment
I apologize for my rush to judgement, without taking a closer look. Now that I have seen your instructions, it clearly addresses any shortcomings that I wrongly assumed. -
Model Shipway Ratline tool
Gregory replied to fnkershner's topic in Modeling tools and Workshop Equipment
It doesn't appear to allow for setting up the shrouds properly on the mast. How does it differ in principle from the (in)famous Loom-A-Line? -
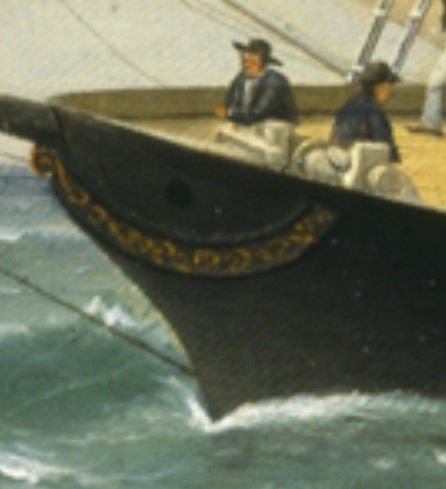
I don't know if this painting is included in "The Low Black Schooner", but it is a contemporary painting located in the Peabody Essex Museum. There is some limited zoom functionality at the above link, and the trailboard shows some scroll work, not apparent in the Bluejacket and other plans..
-
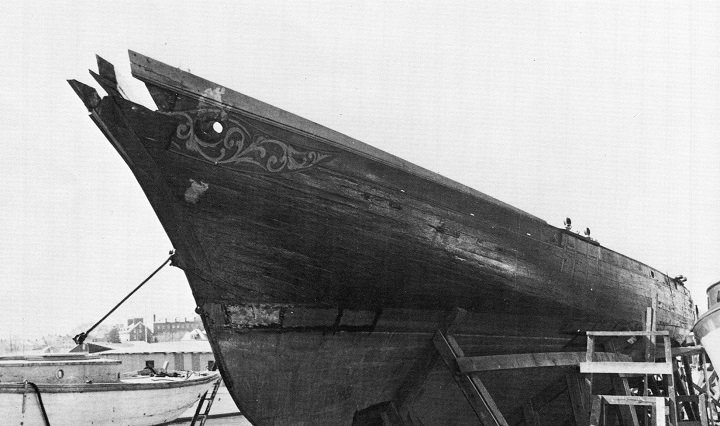
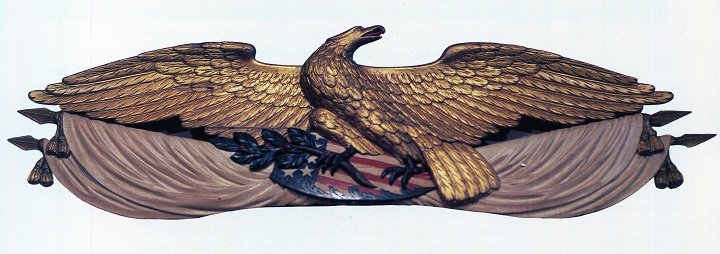
Nice work.. The design is typical of the various plans I have seen. I have seen numerous contemporary paintings, with insufficient detail to determine how accurate the design is. Here is a photo from 1940. I suppose it is the result of modifications after 1851. FWIW, Here is an image of the actual stern decoration that now resides in the New York Yacht Club
- 162 replies
-
- 3
-

-
- america
- BlueJacket Shipcrafters
- (and 1 more)
-
Larry I concur with Allan. Your wood is looking a bit grainy compared to what I have come to expect from good boxwood. I don't see the sharp edges on the carving, that you should expect.
-
Rigging lines located inside of shrouds?
Gregory replied to Mickgee's topic in Masting, rigging and sails
Can't be too sturdy? Consider that the shrouds are essentially tow ropes, pulling the ship through the water... Think about it.. -
Good find! From the synopsis:
-
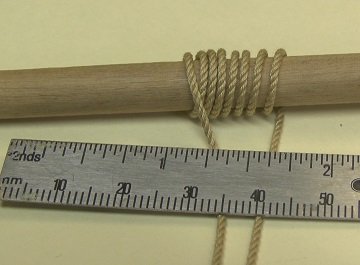
Ropewalk
Gregory replied to Worldway's topic in Rope Making/Ropewalks's Rope Materials and parts resources
Don, I don't know the brand. It's a spool ( in picture above ) I picked up some time ago.. May have been Walmart or a sewing store. I believe it is 100% cotton. It is made up of three strands. -
Ropewalk
Gregory replied to Worldway's topic in Rope Making/Ropewalks's Rope Materials and parts resources
David, Thanks for the interest and kind words.. The larger line is 18 threads. Made with three groups of 6. The smallest line I can make is with 2 threads, ( smaller line in the picture ) and determined by the size of the thread itself, which I don't have the particulars on. Of course, finer thread would yield some smaller line..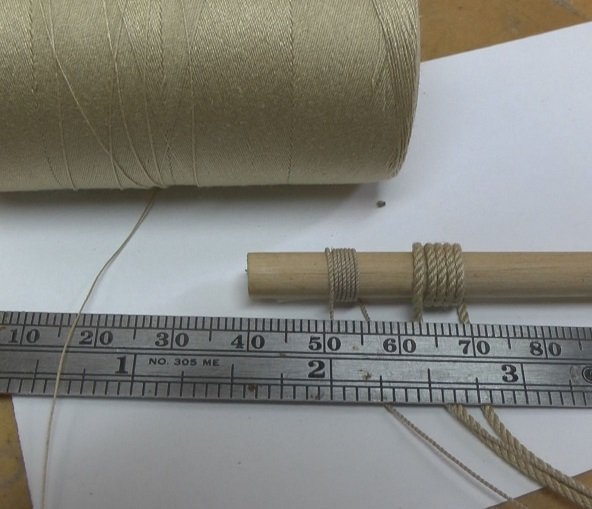
-
Ropewalk
Gregory replied to Worldway's topic in Rope Making/Ropewalks's Rope Materials and parts resources
Not sure why you have a problem with ' sewing ' thread.. It is typically what I use, with satisfactory results..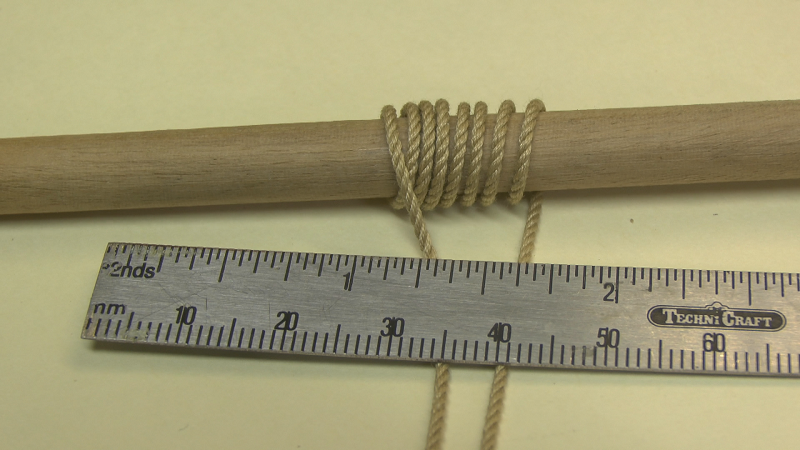
-
Hope you get it to market before it shows up on eBay as the Peking Rope Dragon... It looks like it would be a nice upgrade from my home made version...
- 5 replies
-
- 5
-
-
- serv-o-matic
- serving machine
- (and 1 more)
-
Rigging lines located inside of shrouds?
Gregory replied to Mickgee's topic in Masting, rigging and sails
No way to know without a rigging plan.. They could be any number of lines.. -
Scottish Maid rigging pt2 - spanker sheets.
Gregory replied to gthursby's topic in Masting, rigging and sails
On models such as this, making bands of this type can easily be made with black card stock. A little matte varnish and you are good to go. -
Scottish Maid rigging pt2 - spanker sheets.
Gregory replied to gthursby's topic in Masting, rigging and sails
The tackles with a hook and an eye bolt in the bulwark would not be out of the question, but the rig pictured looks like it would go afoul of the deck house as shown. Placing the standing end closer to the transom would make more sense. The running end would belay to a nearby cleat. Here is a picture of a contemporary model from the National Maritime Museum.. It appears that a single tackle is attached to the transom, with lots of rope to allow the boom to travel. Another configuration would be with a traveler, where the tackle is hooked onto a steel rail that allows it to ' travel ' from side to side.
-
Thanks for the pics... Love the idea!
-
Can everyone else see the images?
-
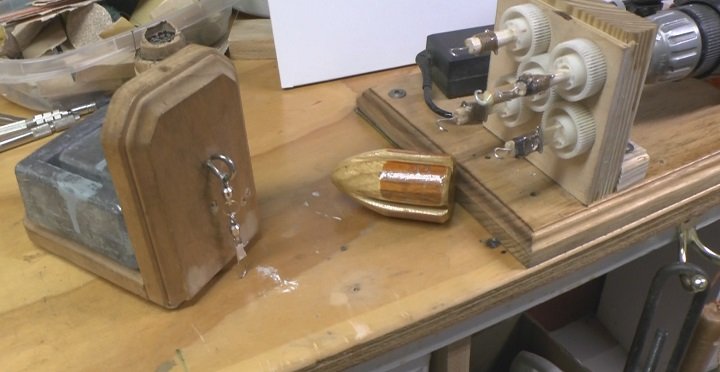
Ropewalk
Gregory replied to Worldway's topic in Rope Making/Ropewalks's Rope Materials and parts resources
FWIW, to show what can be done on the cheap, here is my first rope machine along with some product. The upgraded version:
-
What works best for me is to scan the plans, then use a Bézier pen in Corel Paintshop to plot the outline of a bulkhead or other part on a separate layer. I then save that layer as a .bmp which works with my laser engraver. I believe some free programs like Inkscape will convert .bmp to vector drawings, if you need to convert for your CNC.