

(1)(1)(1)(2).jpg.a128ea4d7b02ebfc5d5eb6547e92106f.jpg)
PRS
-
Posts
372 -
Joined
-
Last visited
Content Type
Profiles
Forums
Gallery
Events
Posts posted by PRS
-
-
-
Looks very nice!
Doesn't that yellow cedar look great?
-
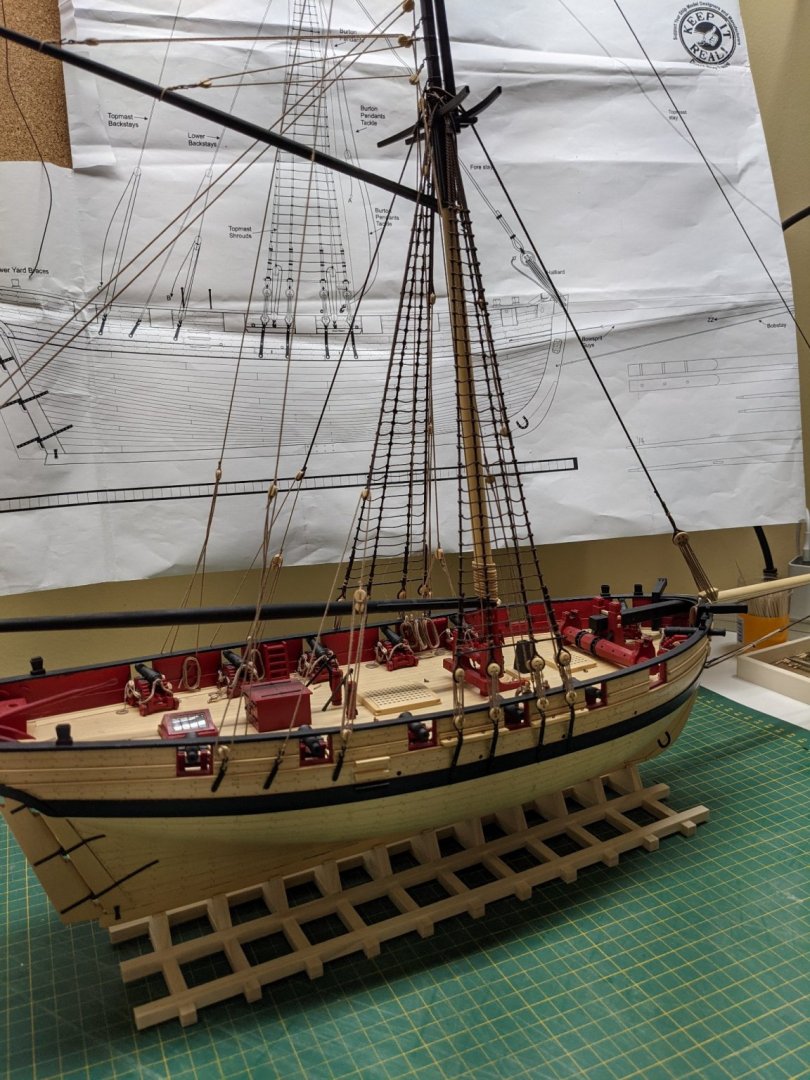
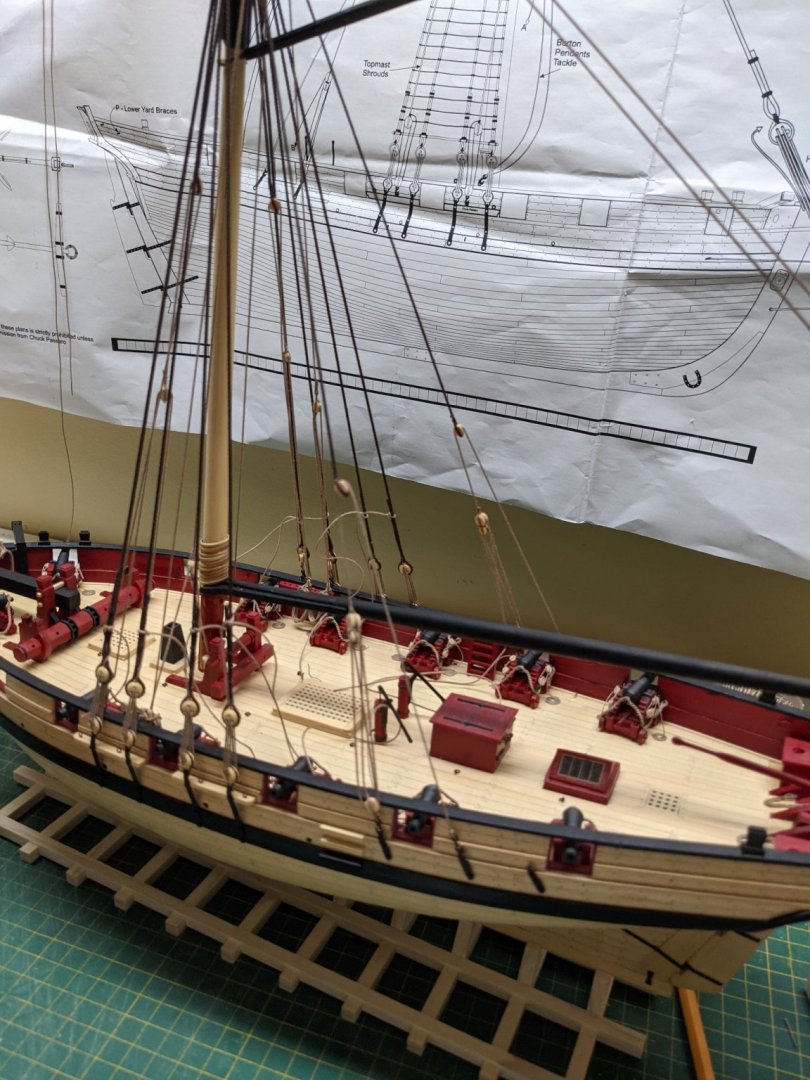
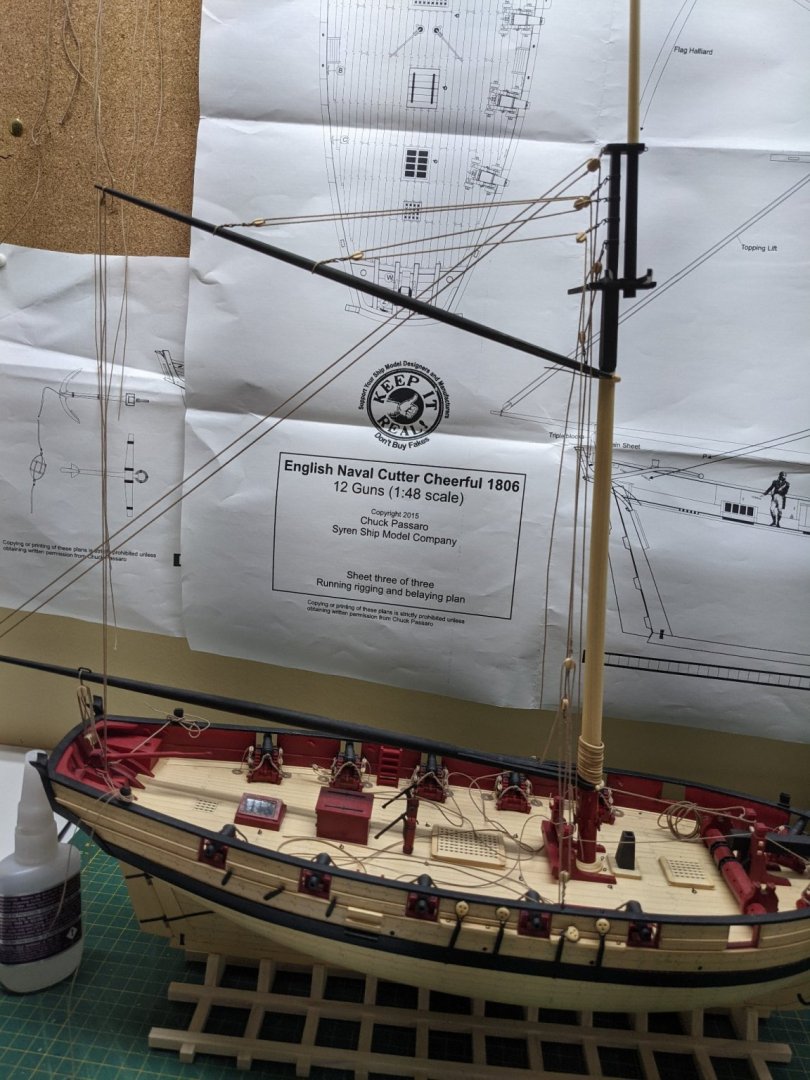
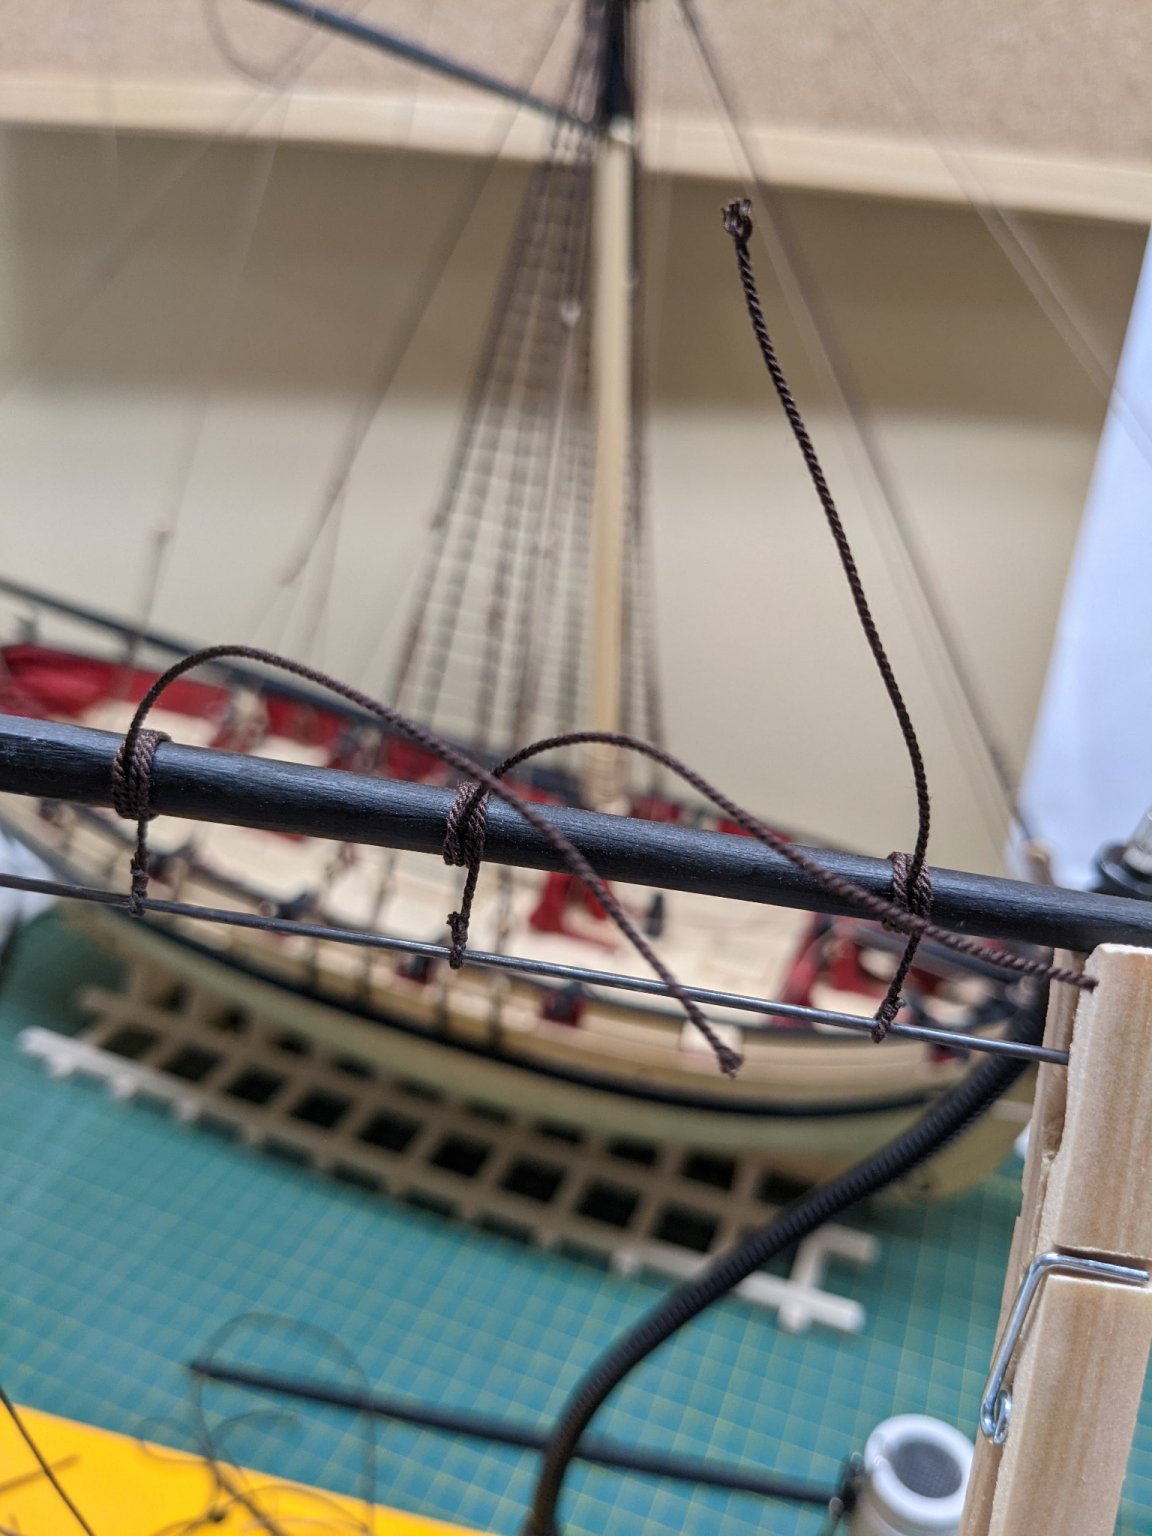
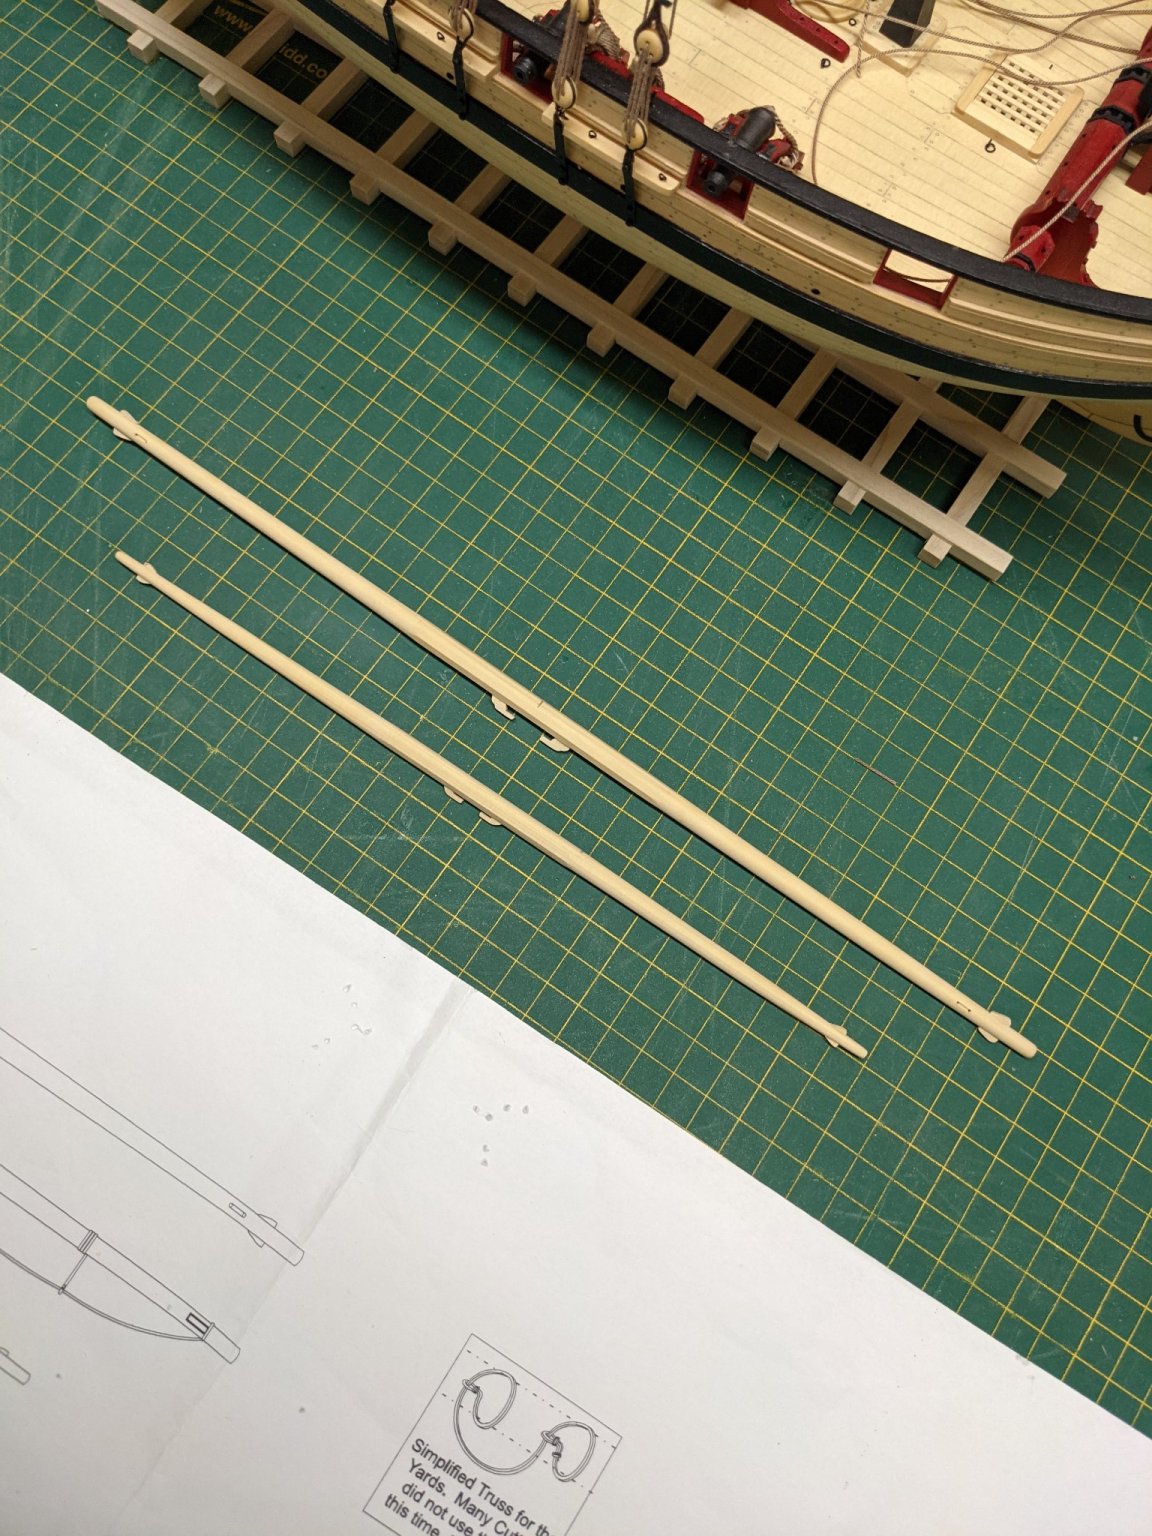
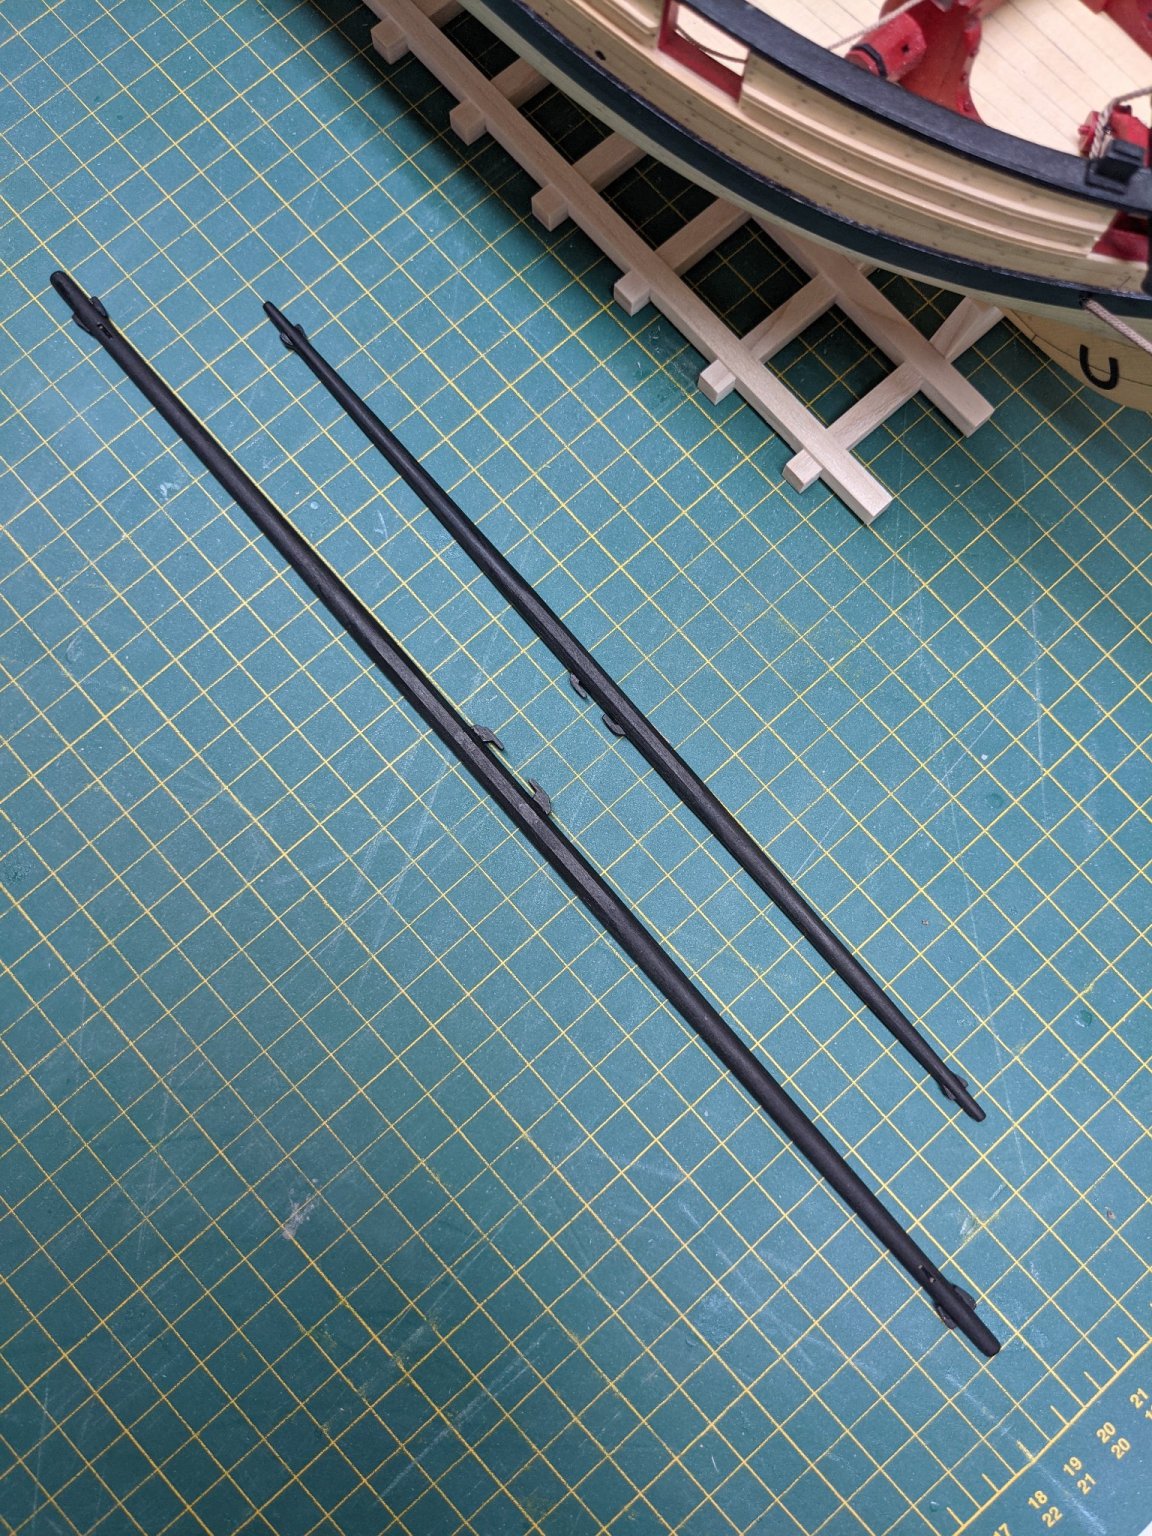
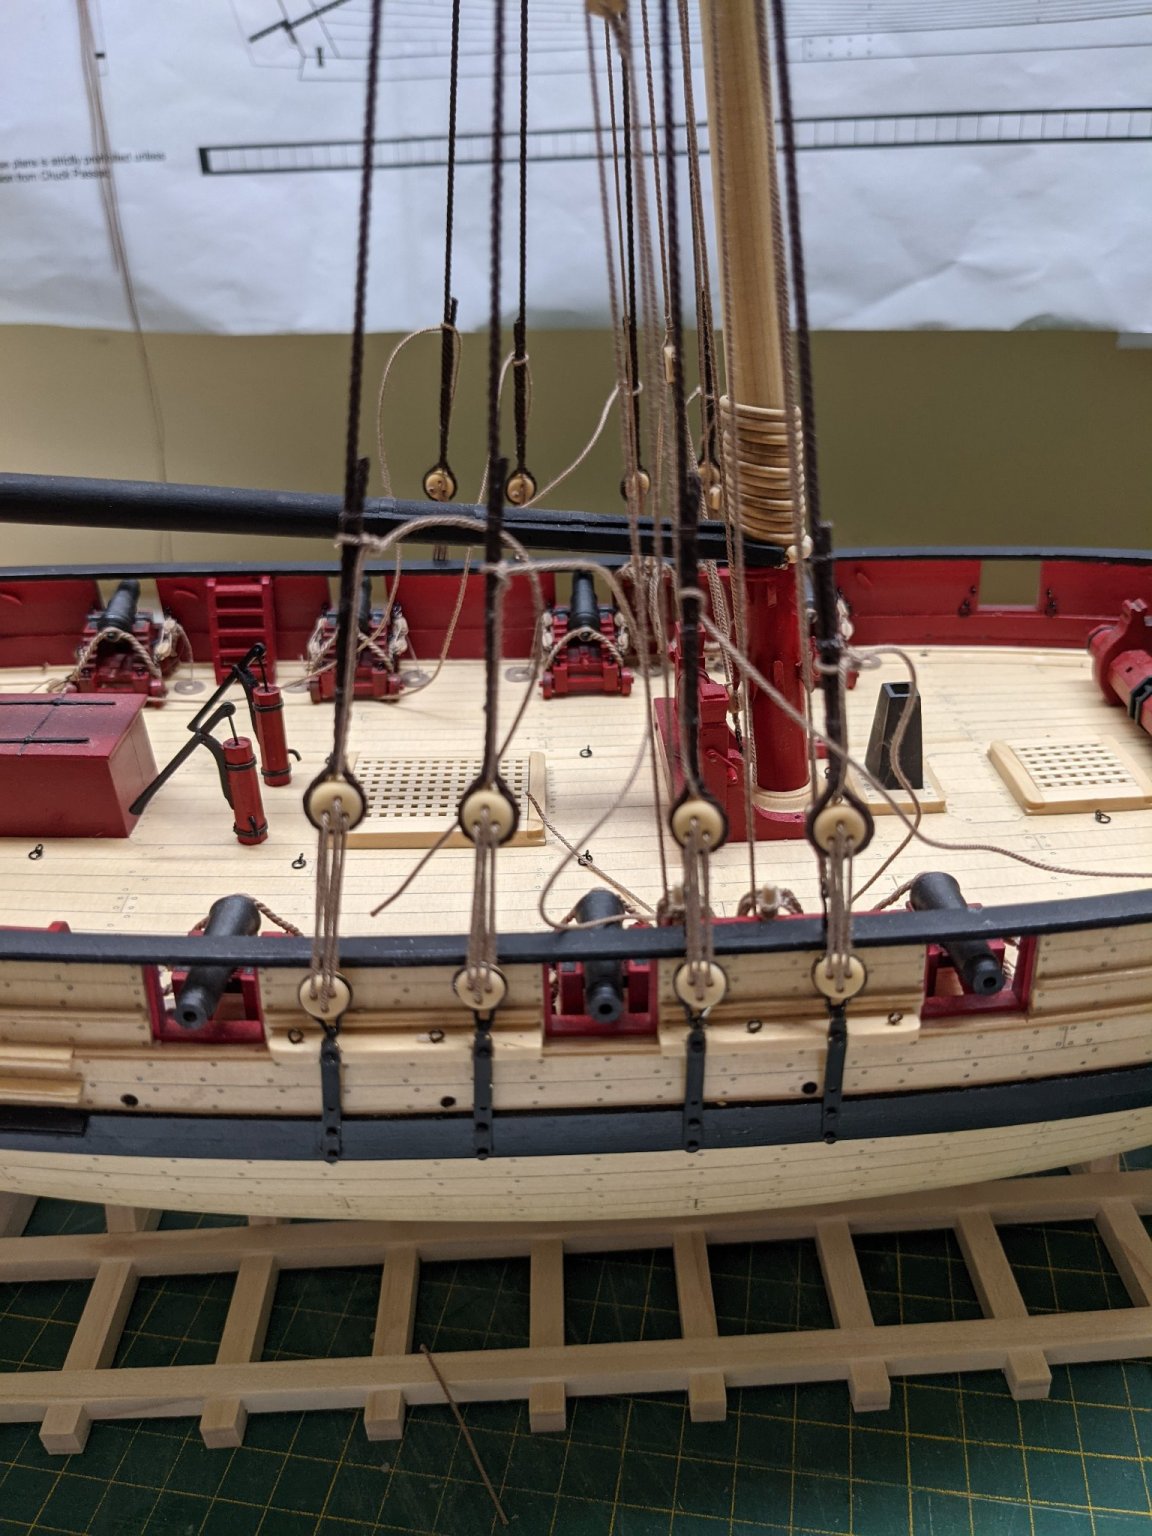
Rigging the lower yard.
I used a length of piano wire to get everything lined up and wrapped to the yard.

Then ran the rope under the last wrap as so.

Once I used some diluted PVA and trimmed the ropes and wrapped the outer edge of the rope I have the yard hung in place.
This took a lot of time to do but looks nice at the end.
The more I do rigging the easier and better it gets and I am still working on my rigging skills. I do struggle with seizing blocks trying to get them to look right.

-
-
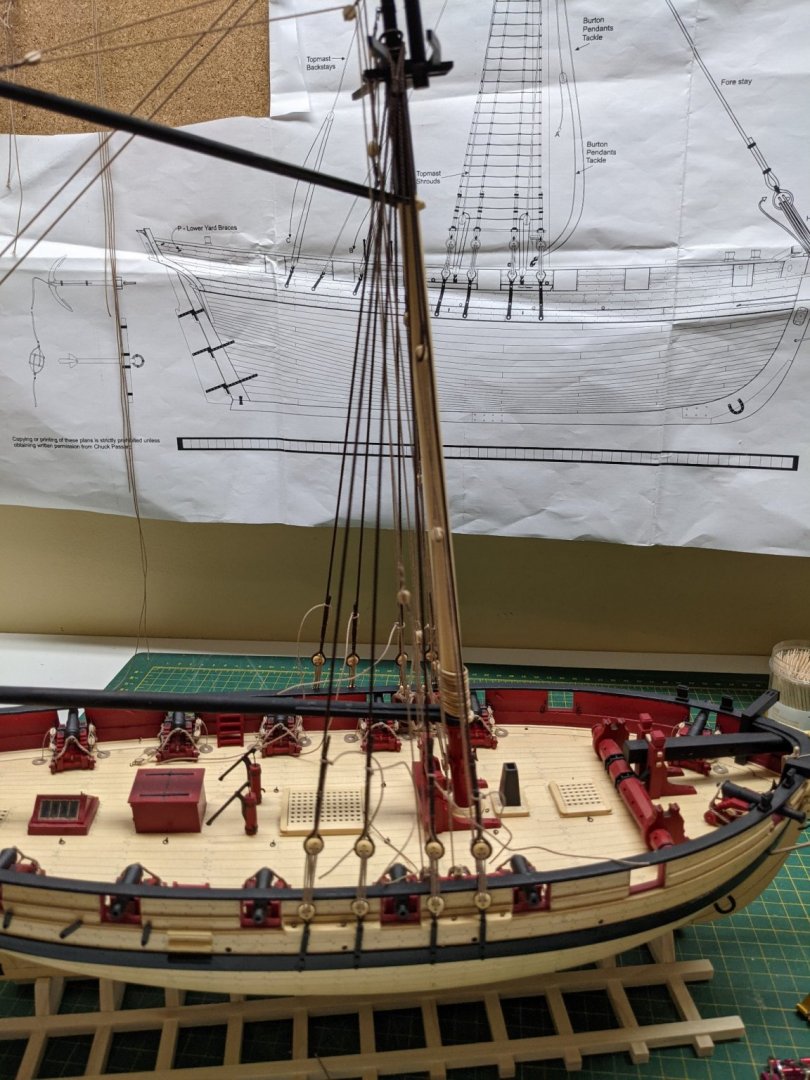
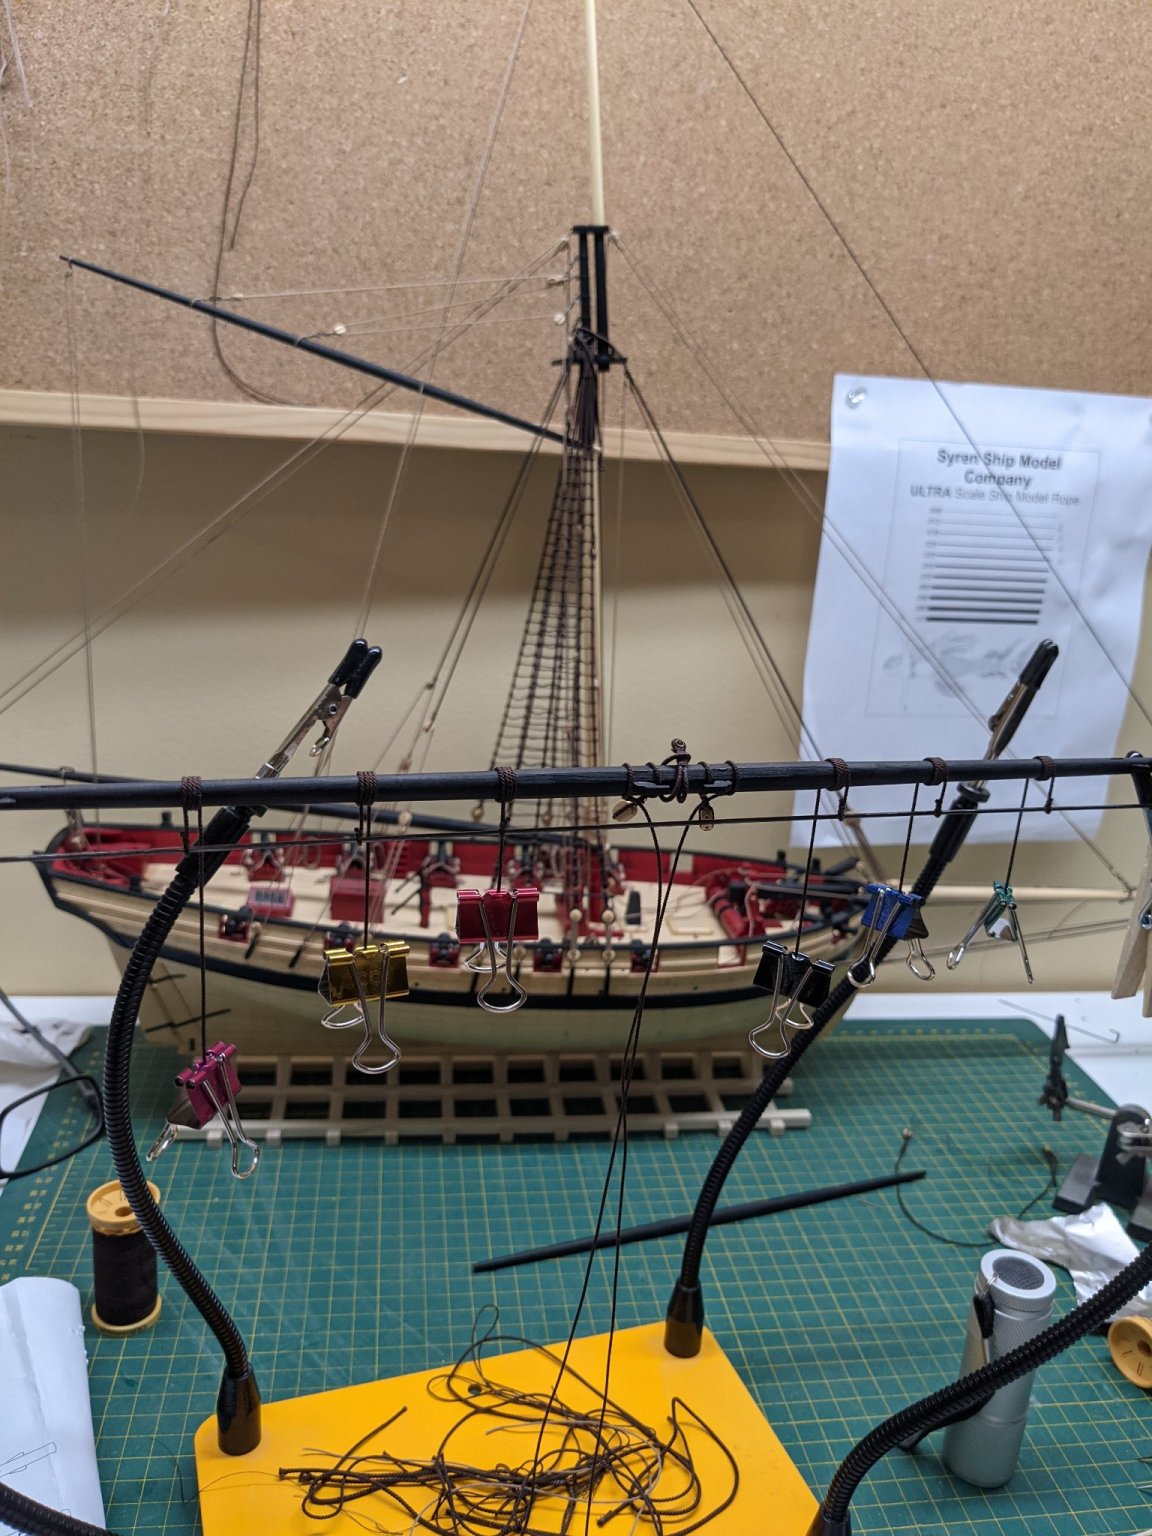
I have the rigging done for chapter 13. It is getting harder to photograph and I get some weird black lines from my overhead lcd light and did try some flash pics also and they didn't turn out any better.


- Ryland Craze, JeffT, scrubbyj427 and 7 others
-
 10
10
-
3 hours ago, glbarlow said:
Looking good Paul, so near the finish line now. That has to be the world's cleanest work mat.
Thanks Glen.
My wife is a quilted and I get her hand me down mats. Evidently they get worn where they cut all the time. (and I steal her needles and also get the hand me down scissors
")
-
-
Looks nice. I like the painter figure myself.
- FrankWouts and Ryland Craze
-
2
-
On 10/2/2021 at 1:57 PM, BobG said:
Very nice work on the rigging, Paul. The rigging really brings the model to life.
Thanks Bob.
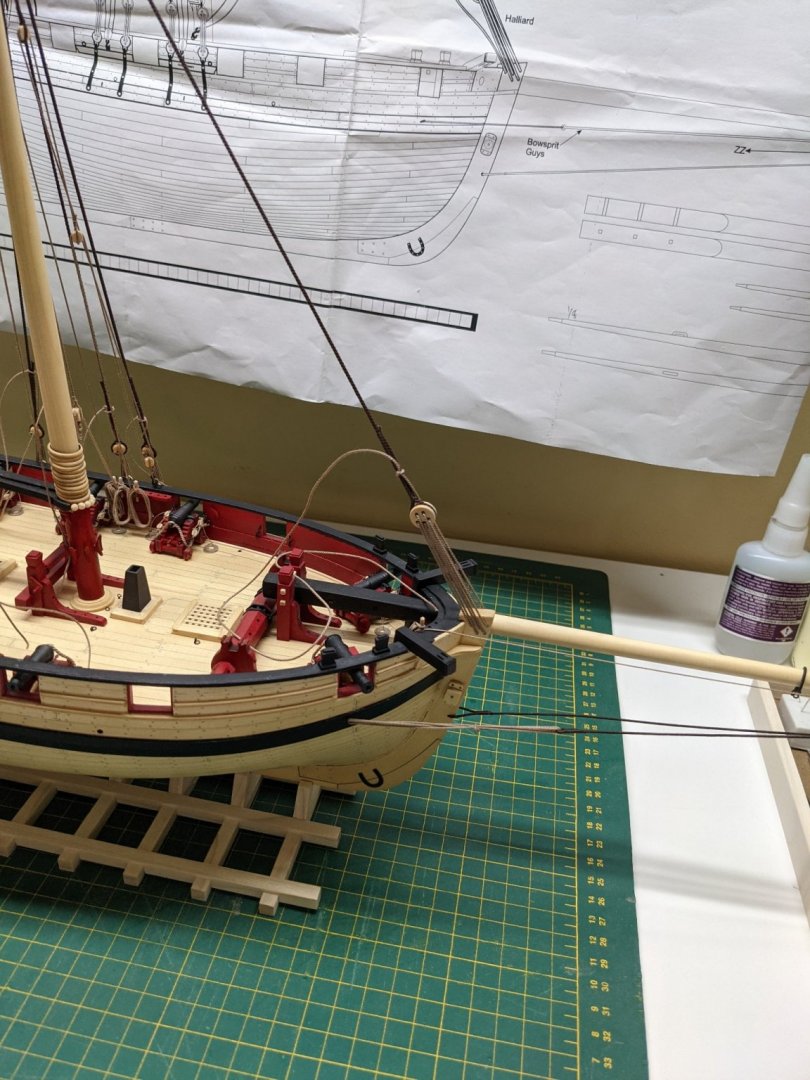
Finished up the ratlines. Will have to look at another log for the forestays to see how they are attached at the front and the base of the mast.

- Captain Poison, Chuck, BobG and 7 others
-
10
-
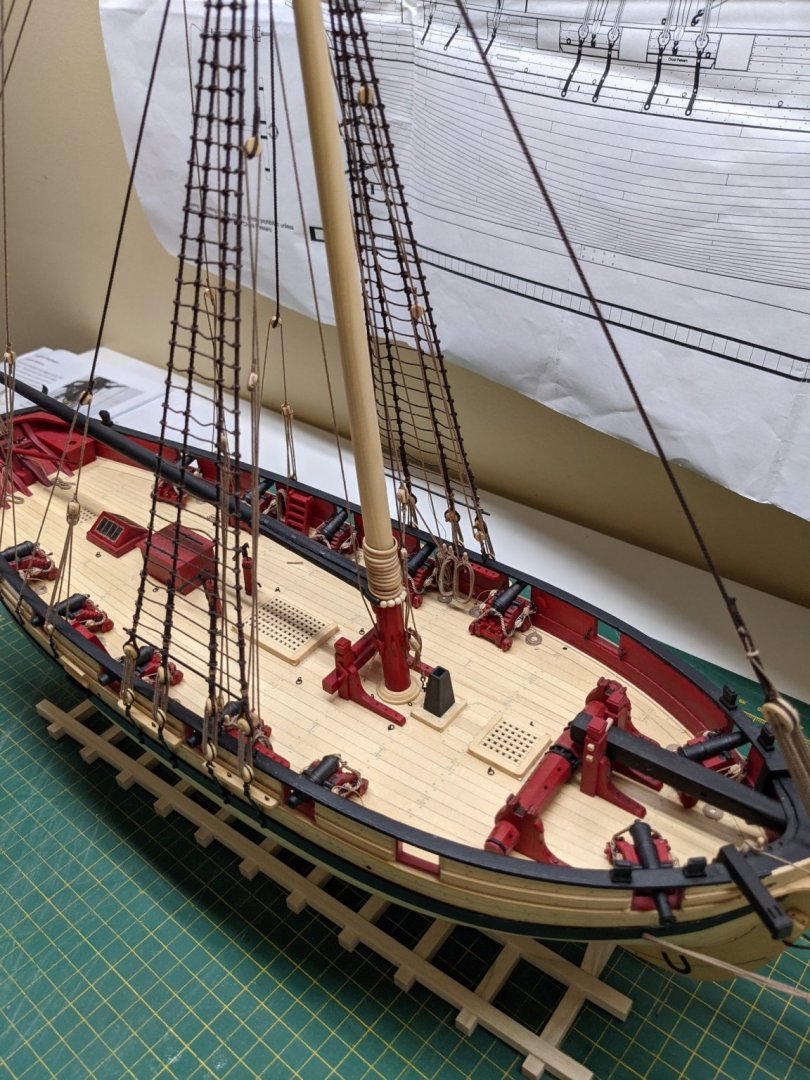
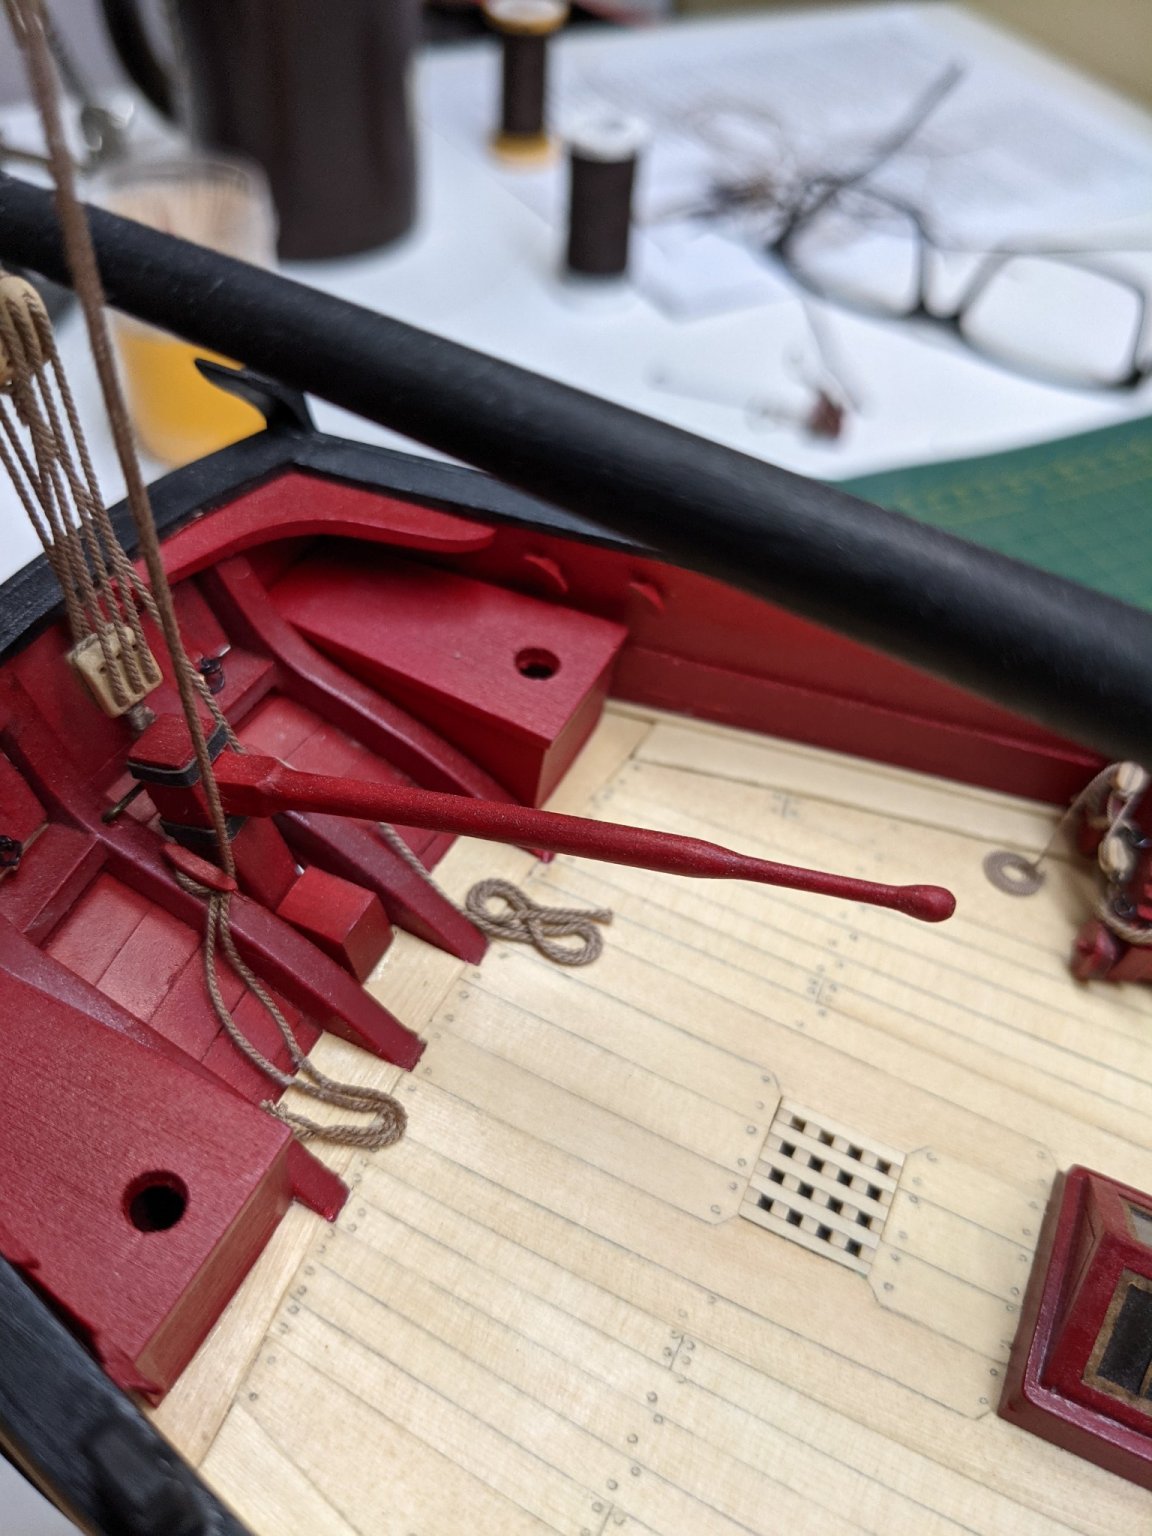
I have to forestay and sling rigged. Now to go through and tighten all the rigging before doing the ratlines.

- GrandpaPhil, Nunnehi (Don), JpR62 and 5 others
-
8
-
17 hours ago, bartley said:
Paul,
I like the look of these jigs. The only thing I would say is that 26 mm is a pretty big coil. When these are made in practice one holds the rope in each hand then stretches the arms out letting the rope slide through then bring the hands together to make a loop if this makes sense. The point is that the diameter of the loop is about half of your arm span. On our boat our coils were around 800 mm give or take, so you can work out what this would be at scale - around 16.5
Anyway, your model is looking great. A step above mine, I think
Regards,
John
Good to know. I was thinking of sanding the coil template down a bit to make the coils narrower at the top so will measure and correct the length.
Thanks
-
On 9/29/2021 at 3:02 PM, glbarlow said:
Nice work on the shrouds, they can be tricky little things.
Thanks Glen.
They were tricky wrapping them at the mast as there was not a lot of room. I probably should have done these before doing the top mast.
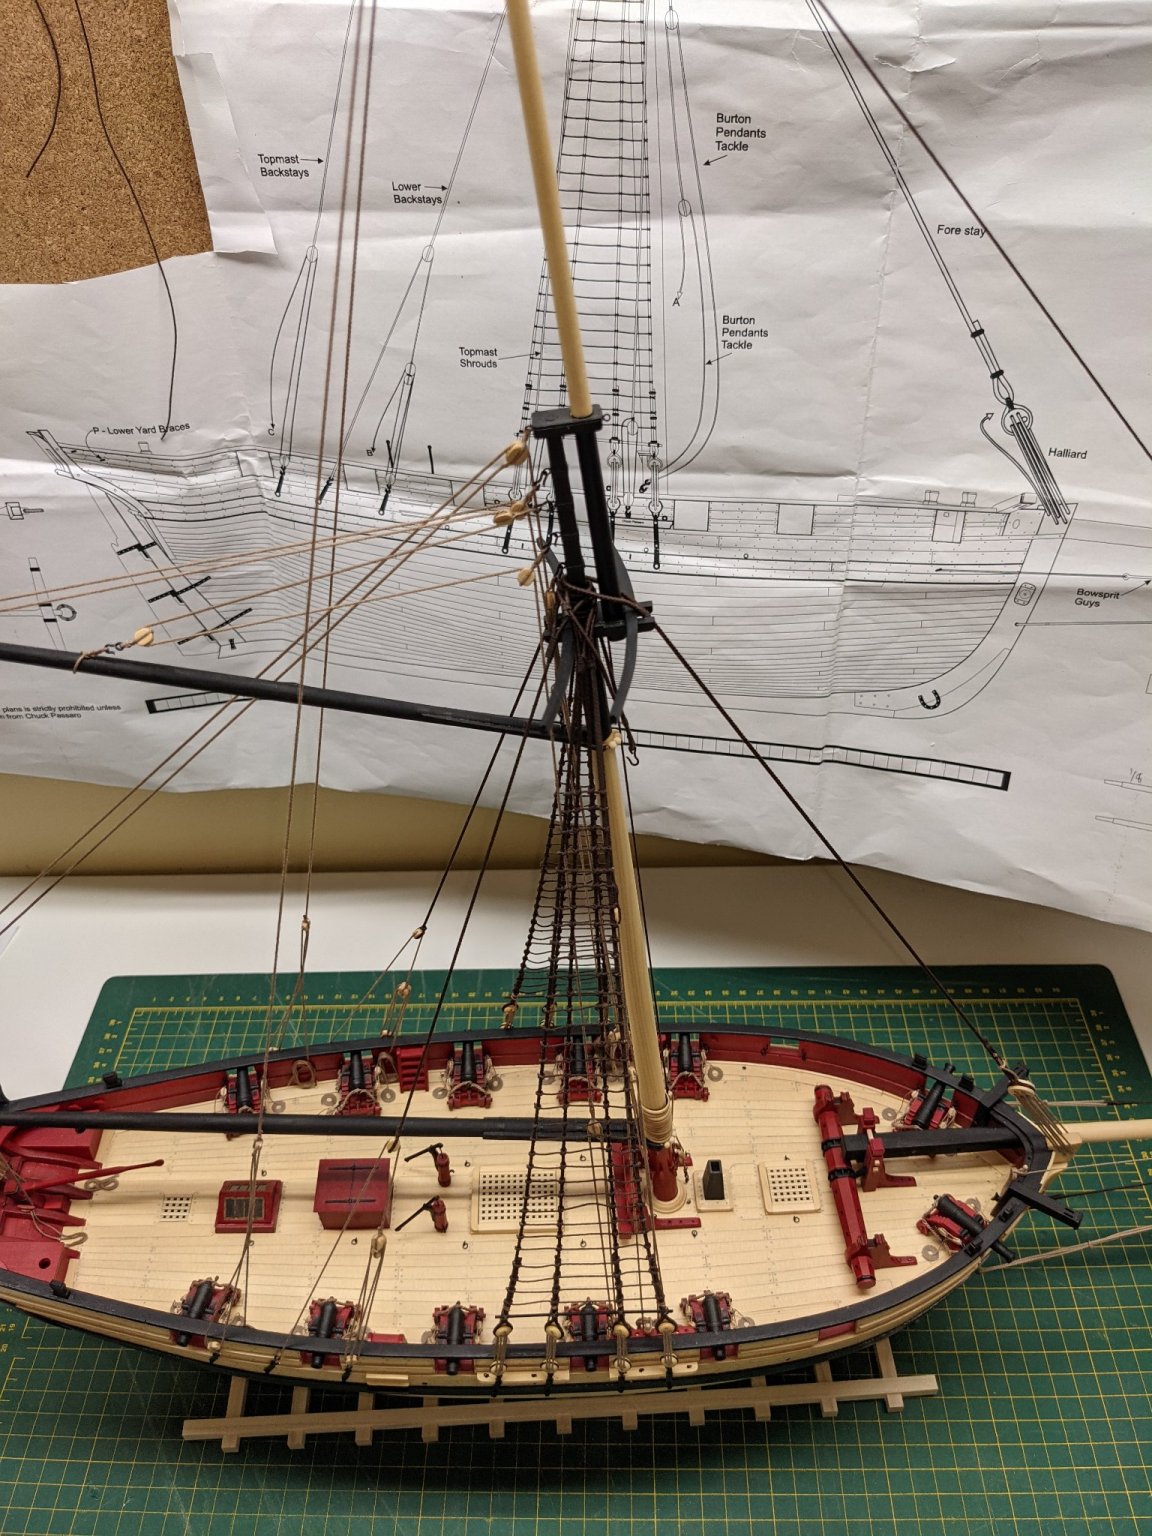
Speaking of tricky. I did the backstays and they were fun to get them both even. Still have to tighten them up and once I do the forestay I think it will be time to tighten the shrouds also.
My photography isn't the best using my phone. Sorry about that. I will see if I can try to focus better.

- niwotwill, Gregory, Ryland Craze and 4 others
-
7
-
Going to steal that sanding jig for my next one
-
-
Thanks all for the comments and likes.
I have the shrouds deadeyes rigged. Going to let them settle in and do the backstays and forestays before I do the final tightening.
I have had some issue with diluted PVA leaving a white residue so I am experimenting with modge podge diluted to see how that works for rigging. If that doesn't work I might try some different white glue as maybe what I have is bad as it is old.
Anyways...Pics or it didn't happen.
- Nunnehi (Don), muratx, BobG and 8 others
-
11
-
-
29 minutes ago, Egilman said:
That is an interesting piece, but it's not a subject I'm interested in unfortunately... (but, miniature figures are the biggest draw to 3D modeling at this time) I'm more into traditional modeling of real world things... And I've found a test piece that fits all the conditions I set up for my second test.... A rose, (in Anycubic's slicer) I'm doing two of them at the same time, they will have parts that need to be glued together... A better test of my intentions...
The Anycubic test cube has finished and has been washed and is getting it's final UV cure.....
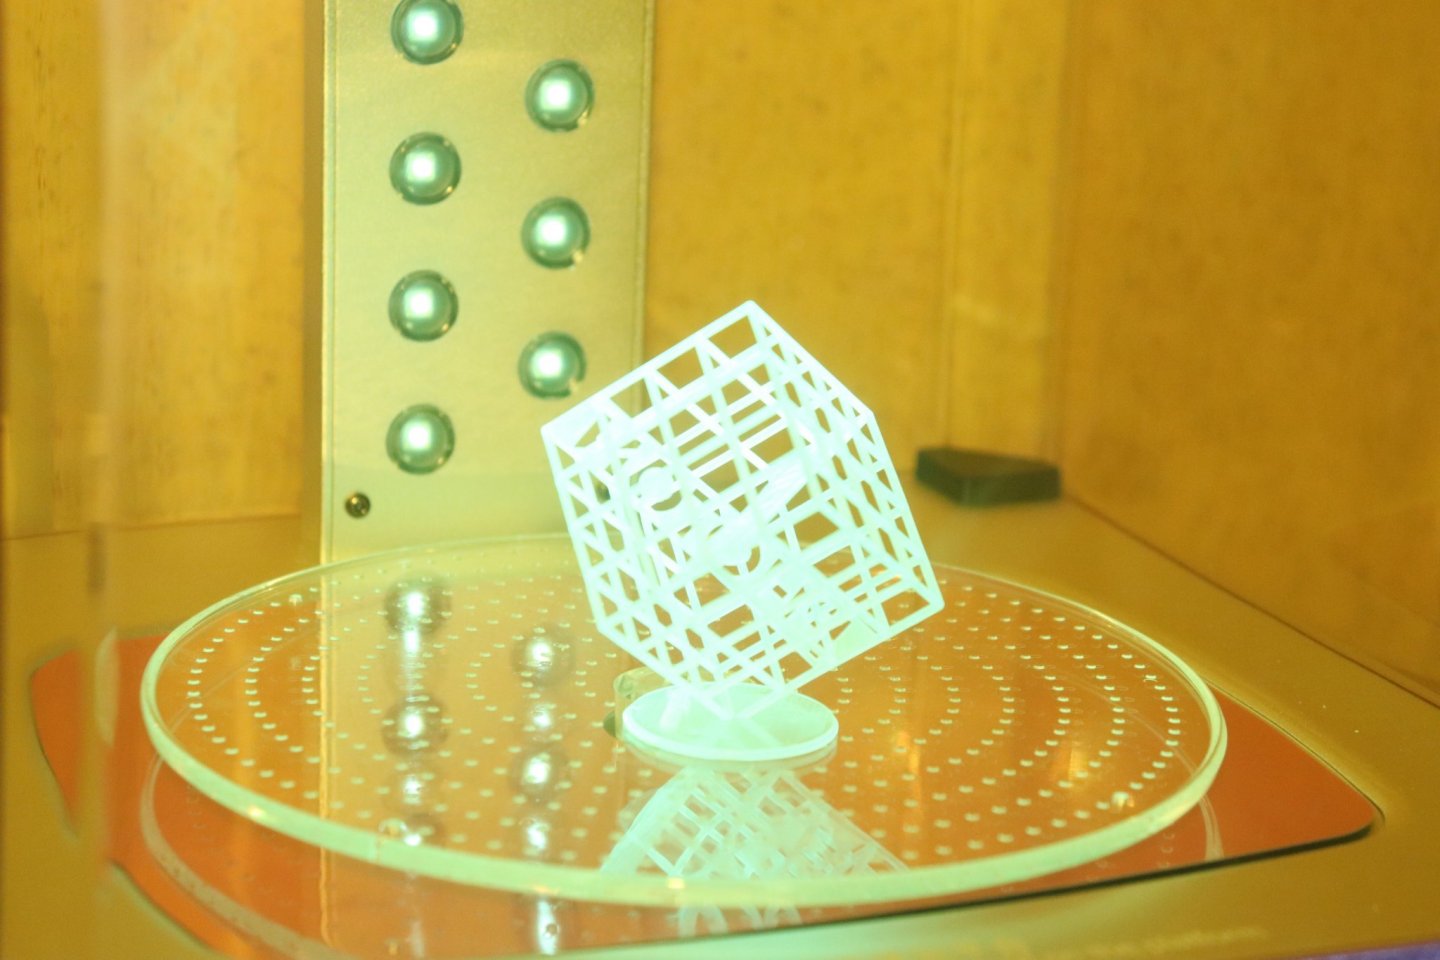
Complete and sitting on my desk....
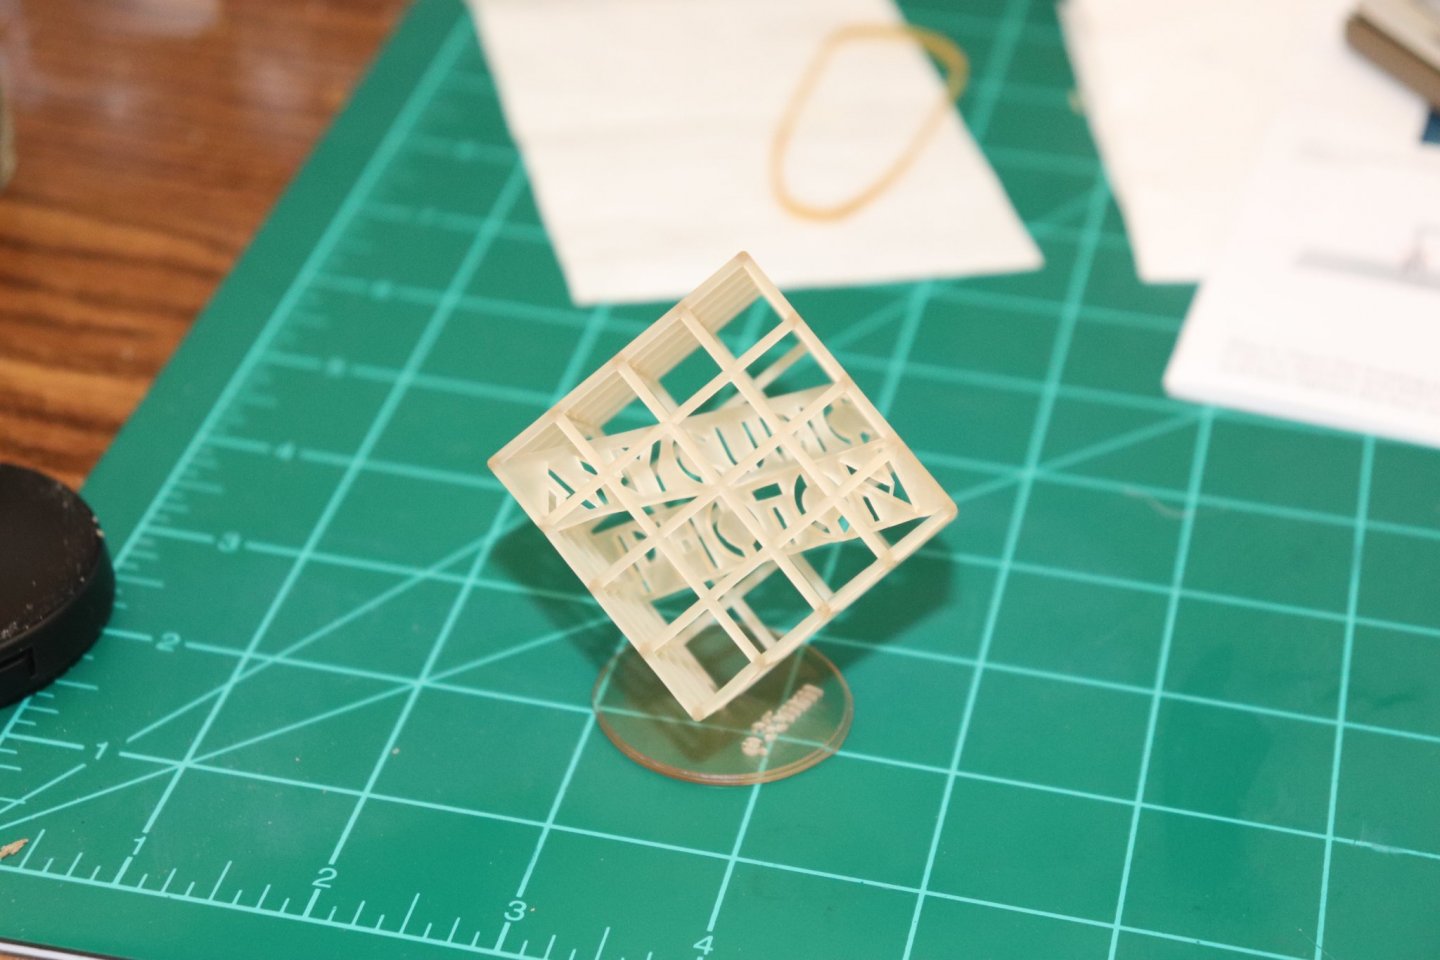
This is the neatest thing since the Exacto knife..... Damn impressive if you ask me...
I've got the rose printing now, another 4 hr print, the turnaround from finish to starting the next print is all of abut 15 minutes and that was my first time...
I'm very impressed... A very easy process....
EG
Very interesting...
So how is the smell when you are printing?
I think if I pull the trigger and get one of these I will stick to using the water washable resin so I don't have to deal with the IPA in large quantities.
Easiest way to find files is search from Yeggi. https://www.yeggi.com
You can find stuff like this: https://cults3d.com/en/3d-model/game/canon-gribeauval-6x-servants-et-cuirassier-enbonus
- mtaylor, thibaultron and Egilman
-
3
-
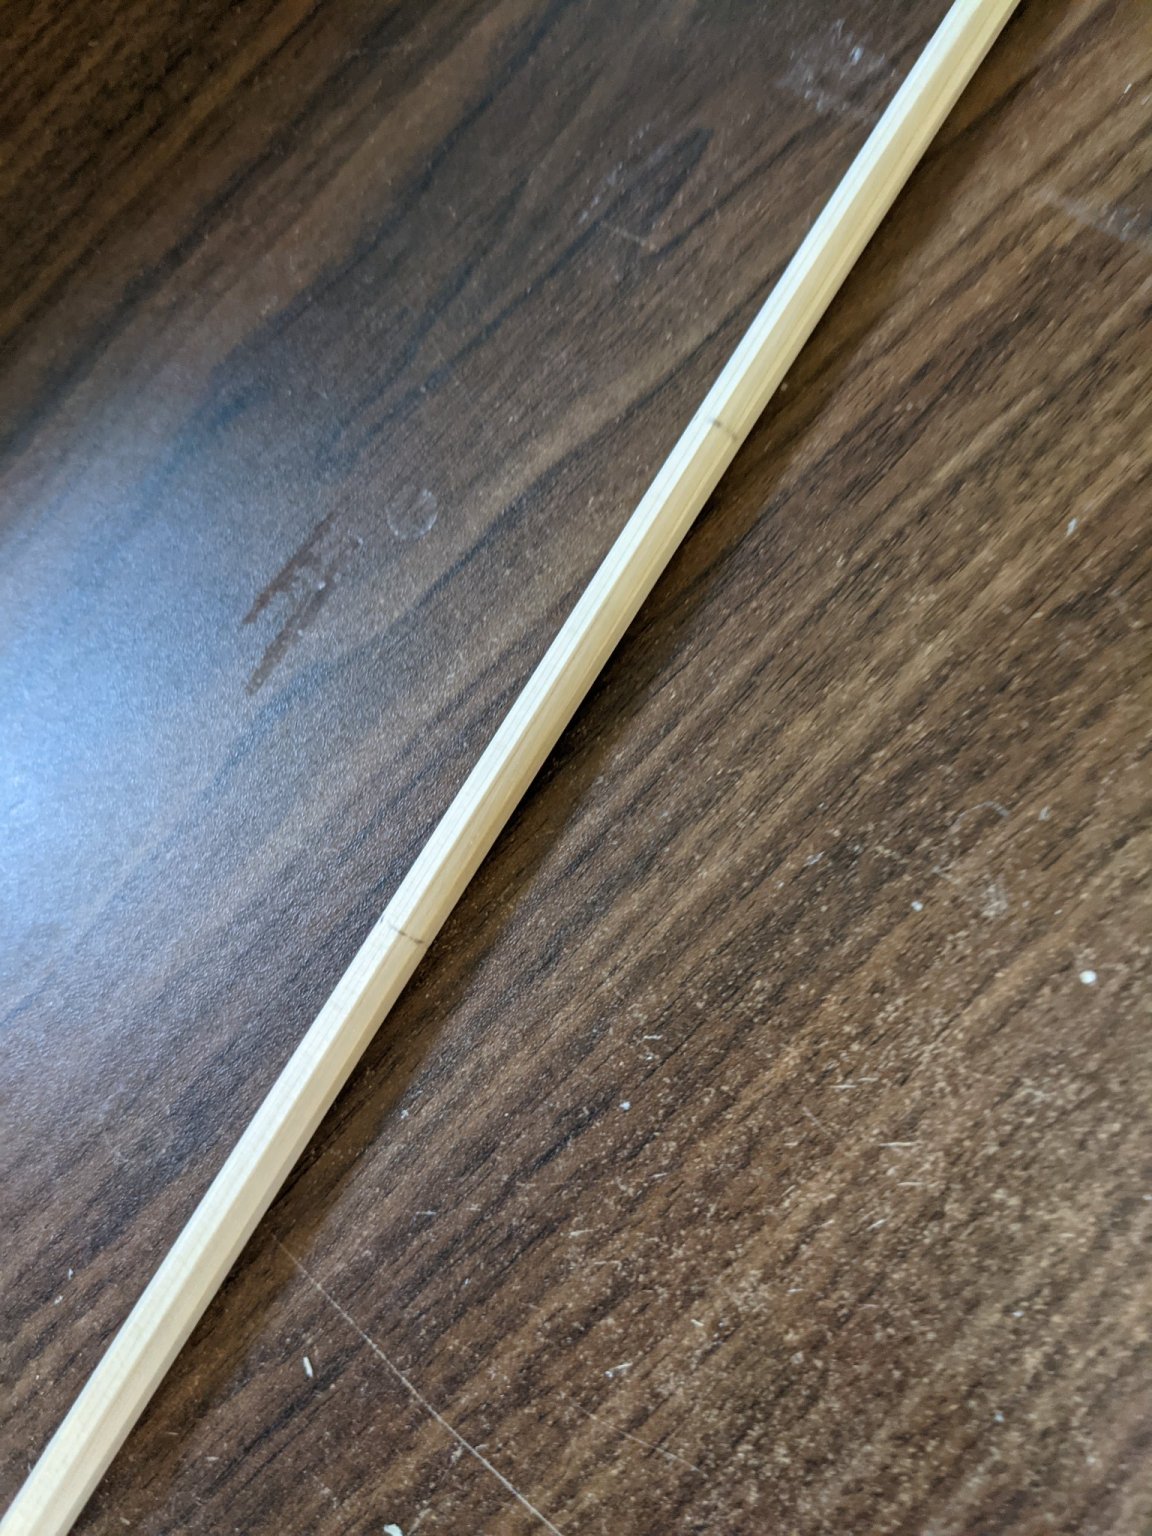
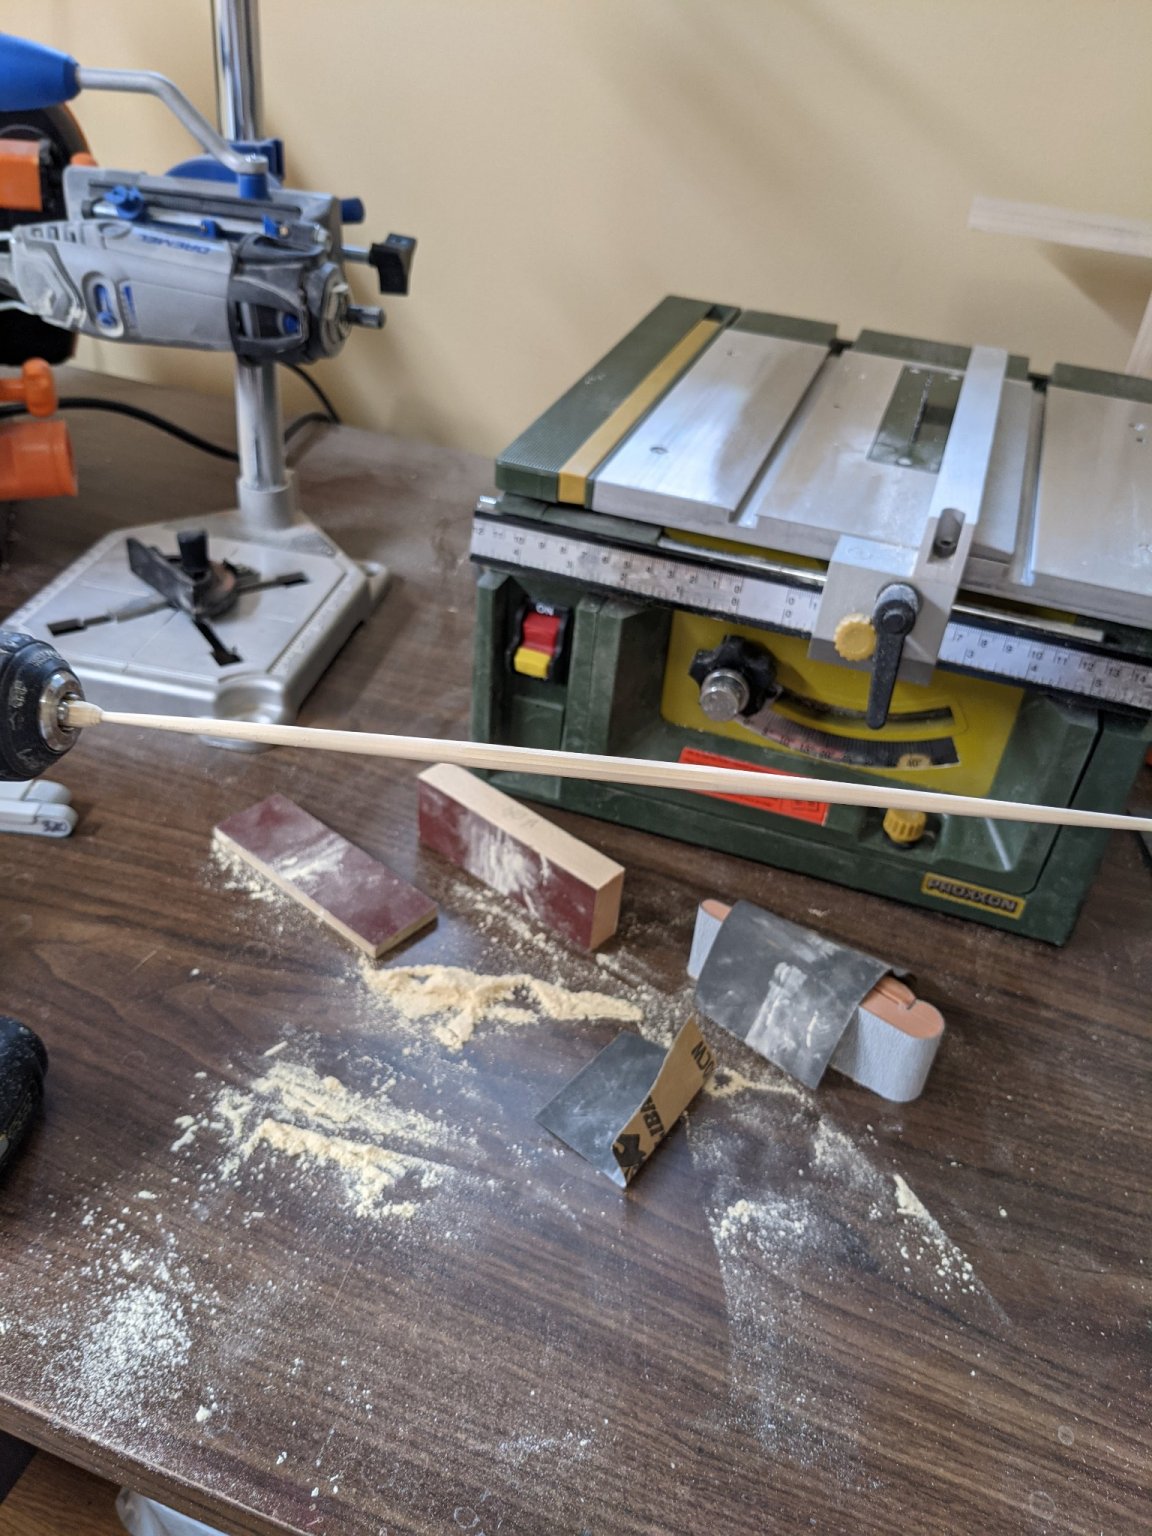
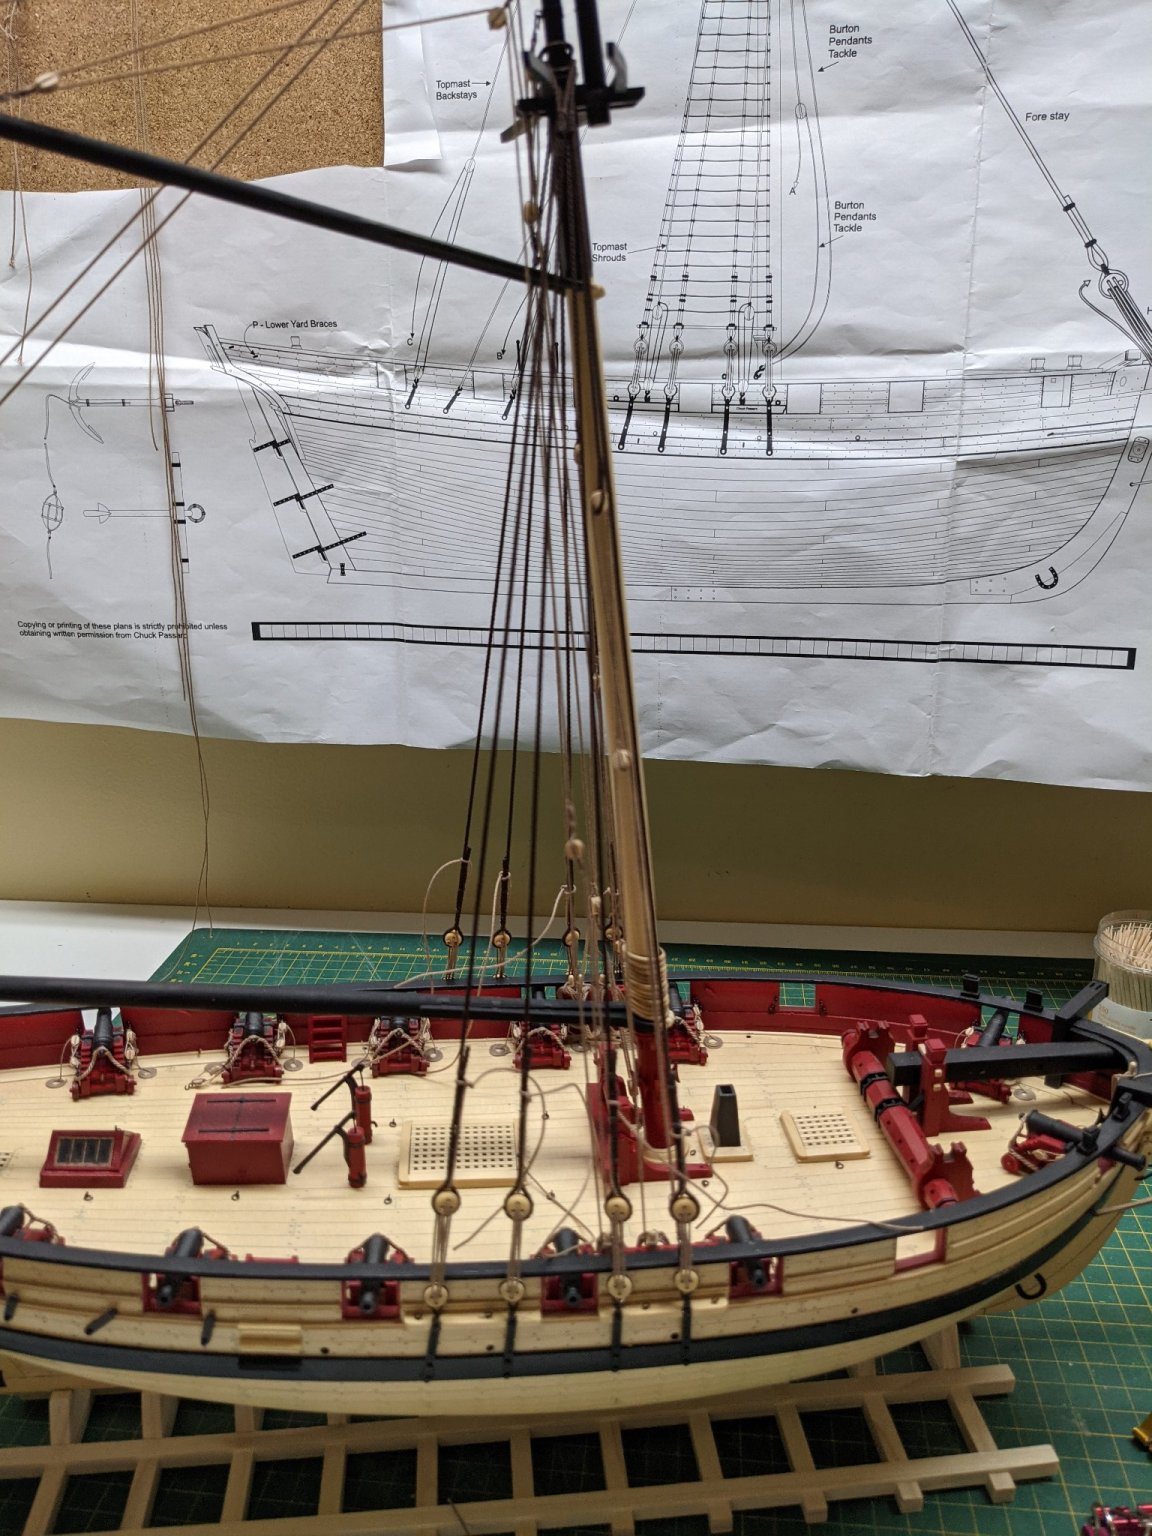
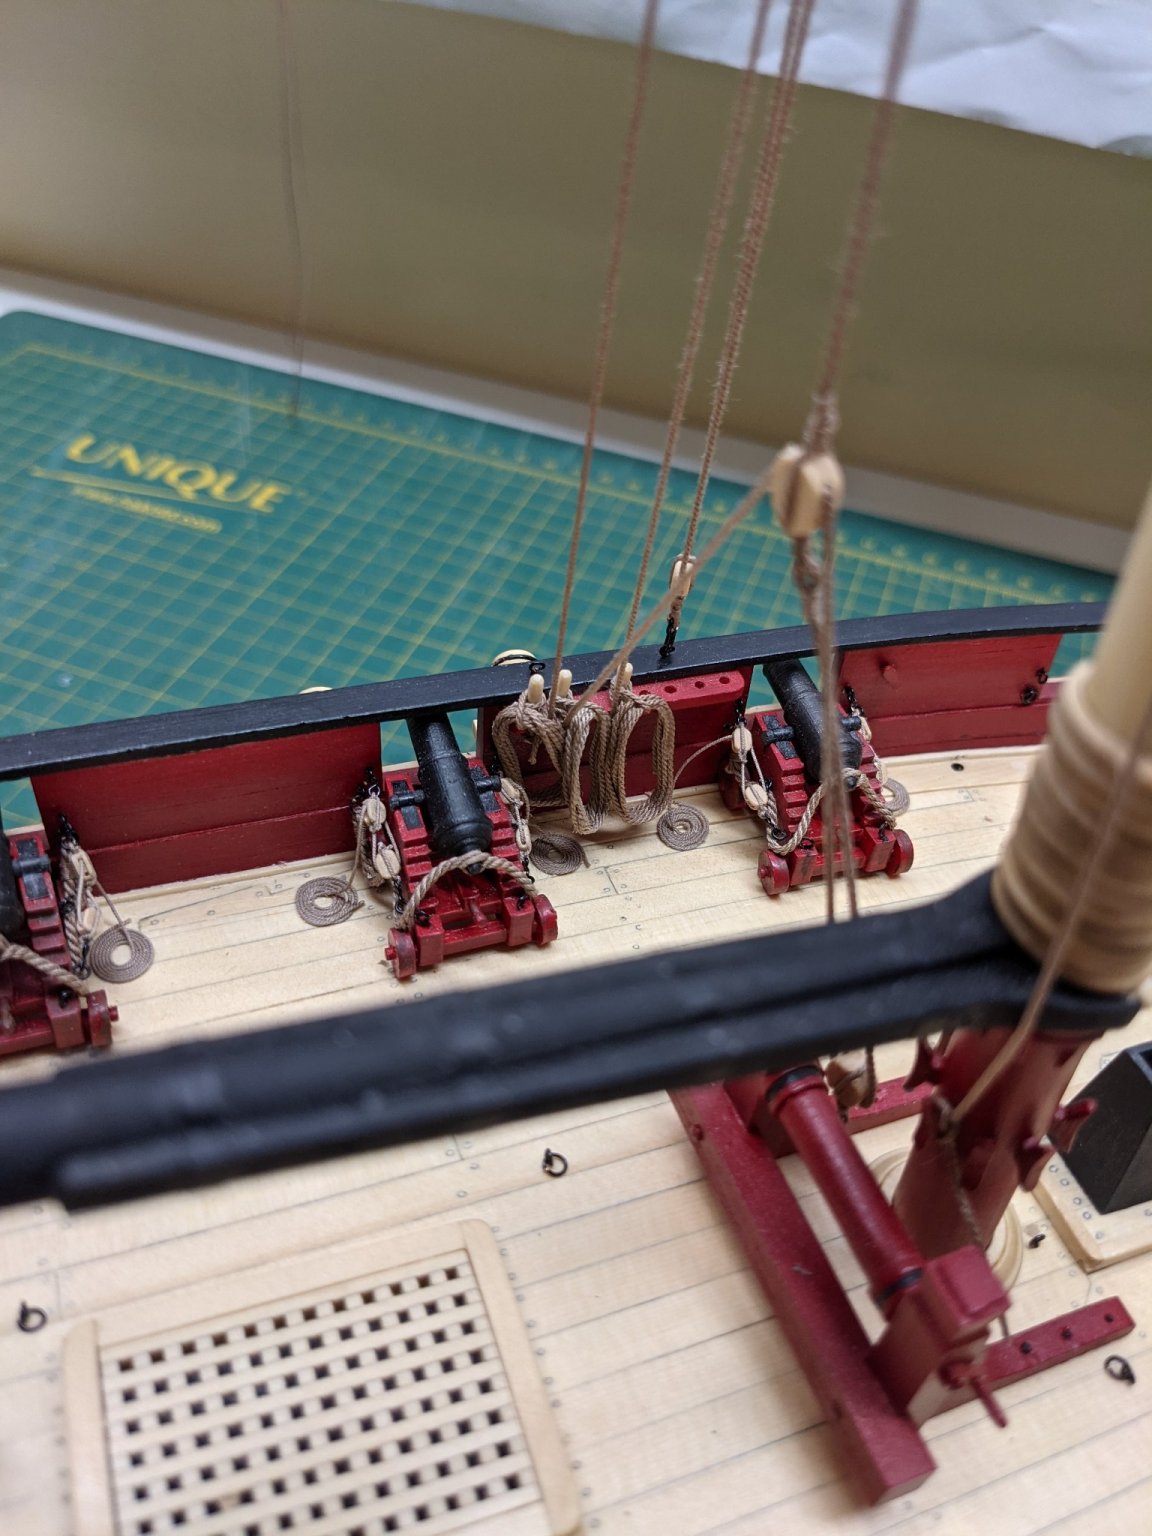
Before going further I had made some new belaying pins out of 1/16 square boxwood and then tightened the rigging I had and placed the rope coils.


-
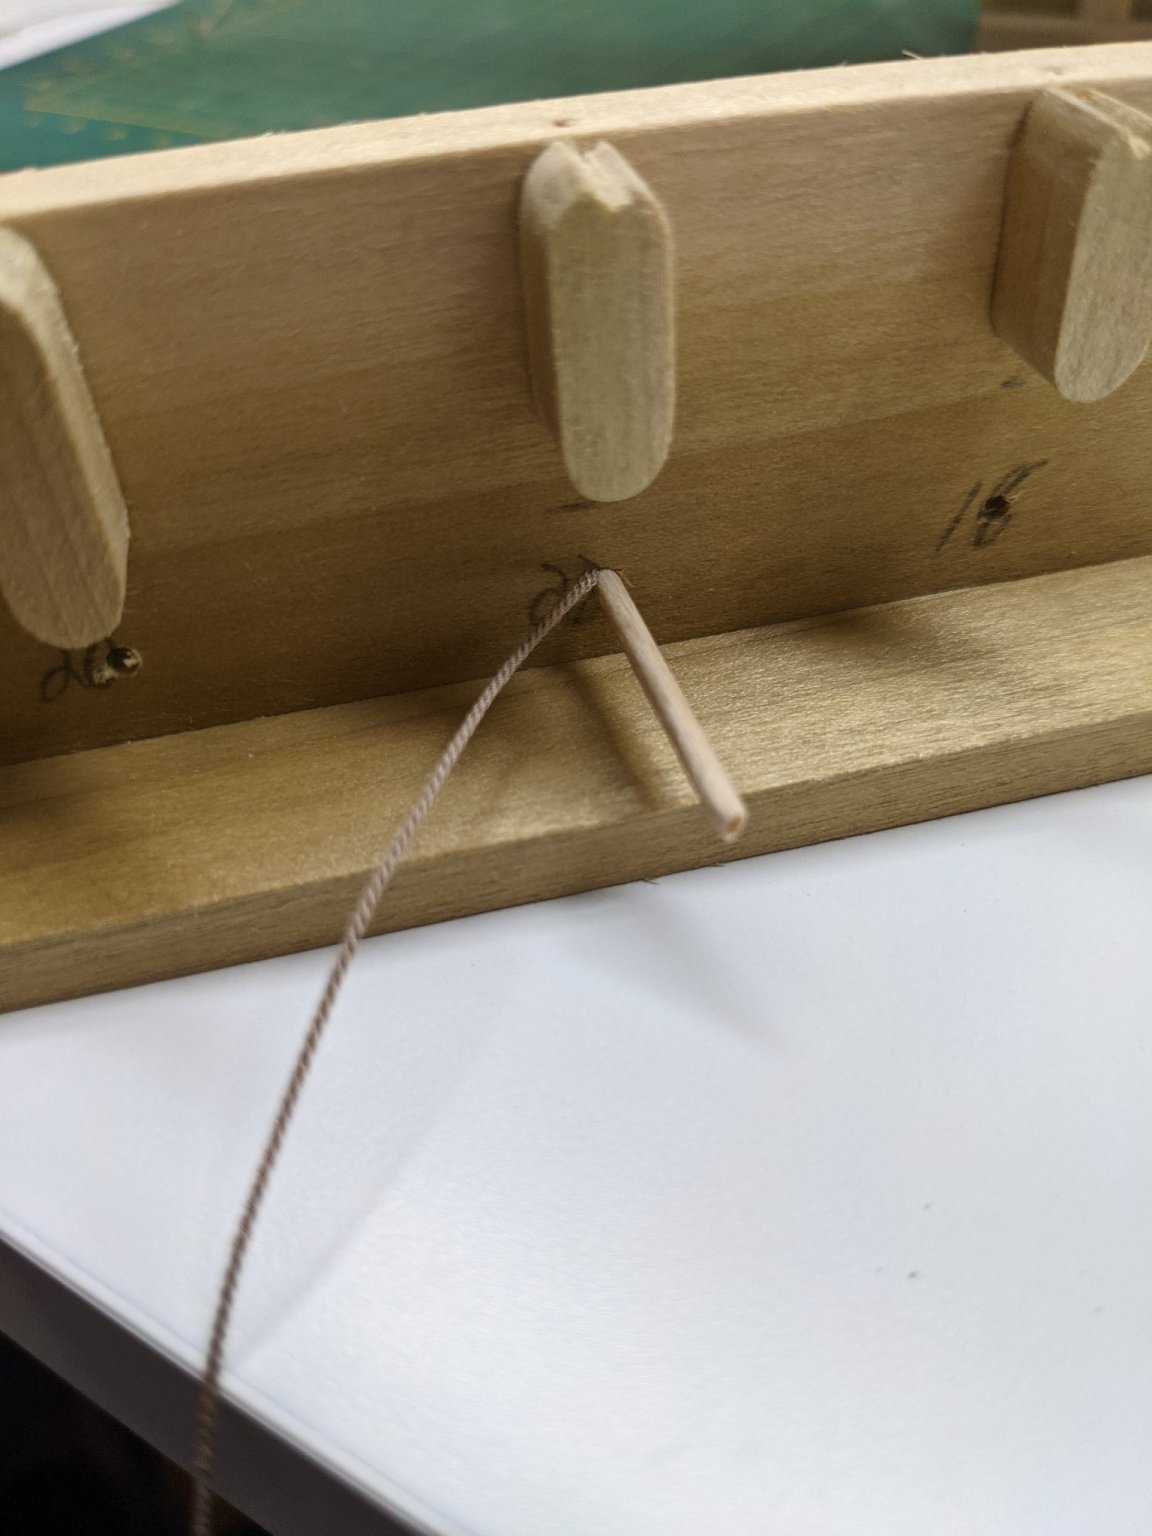
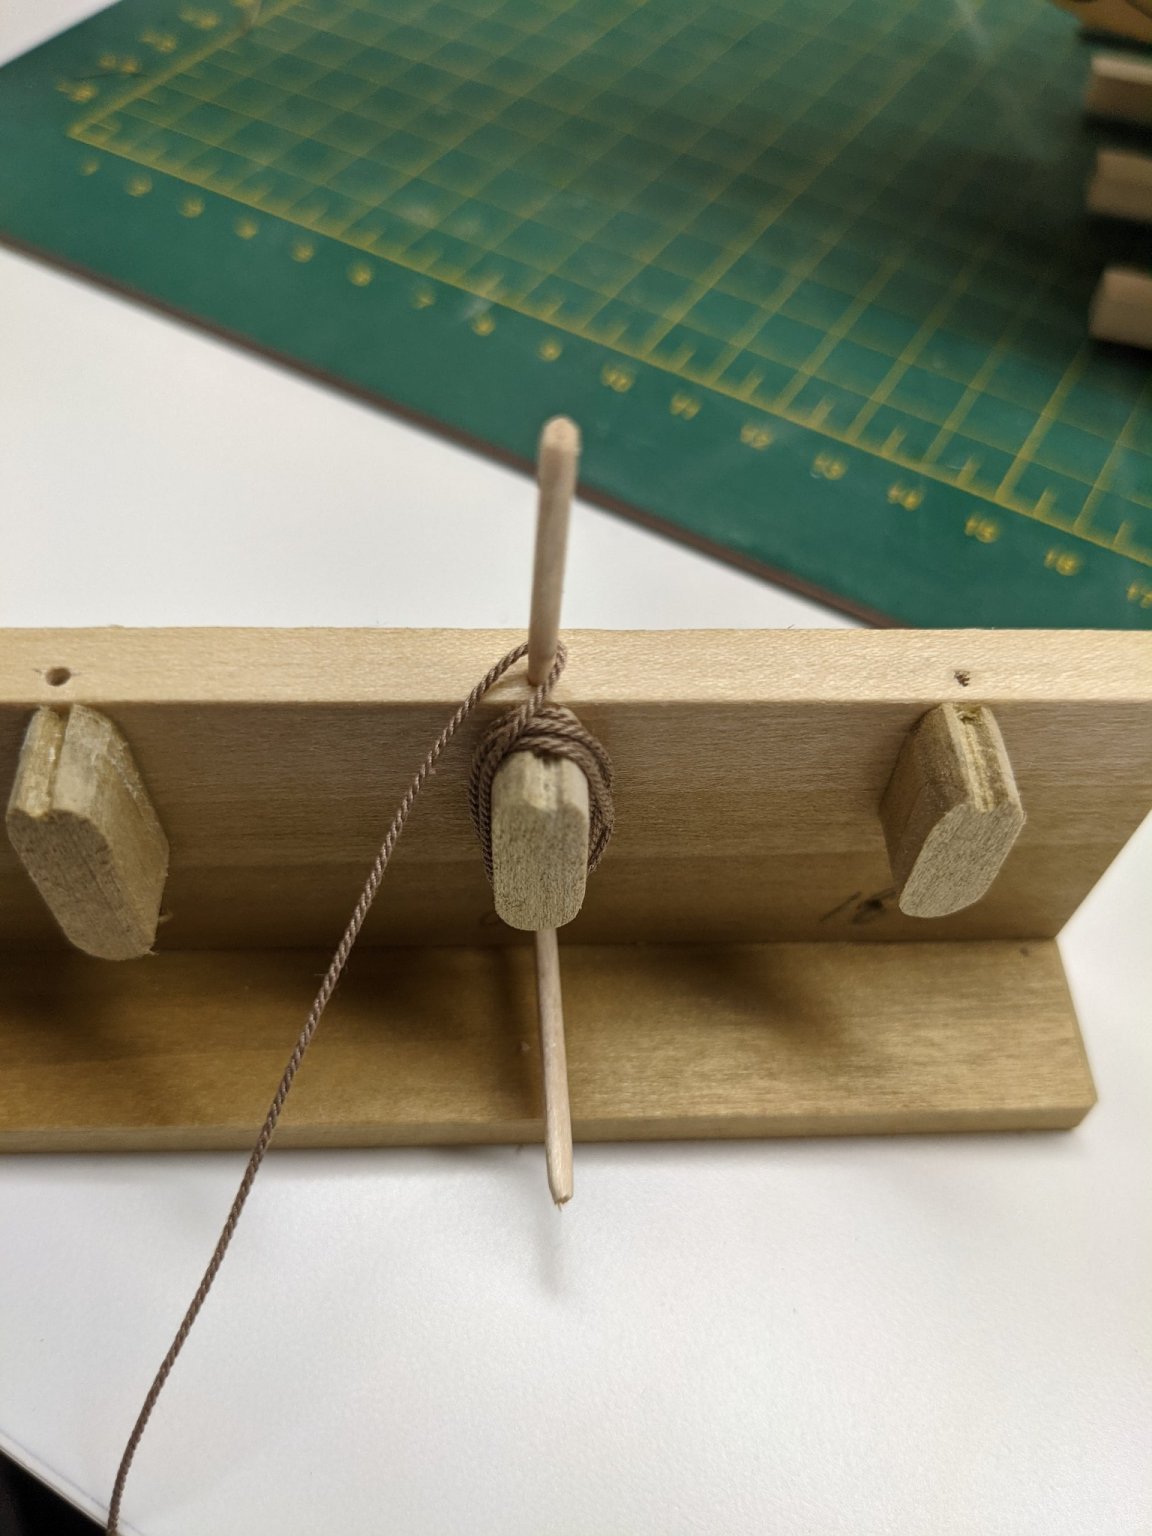
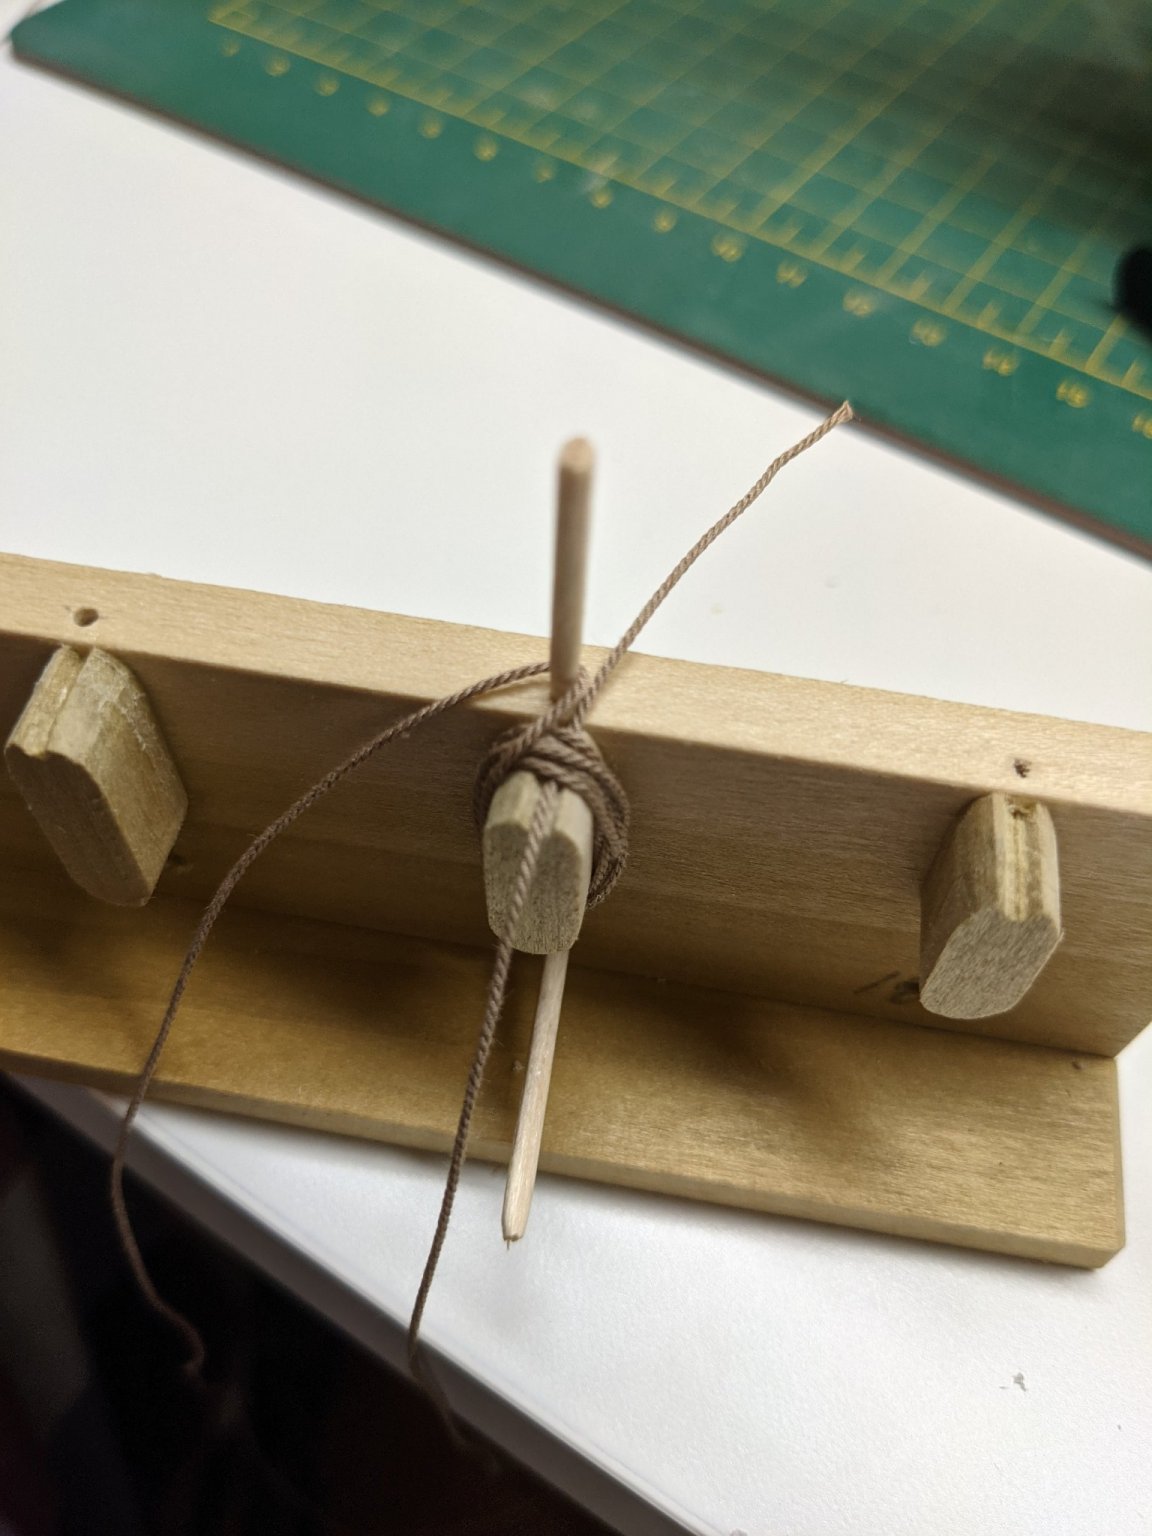
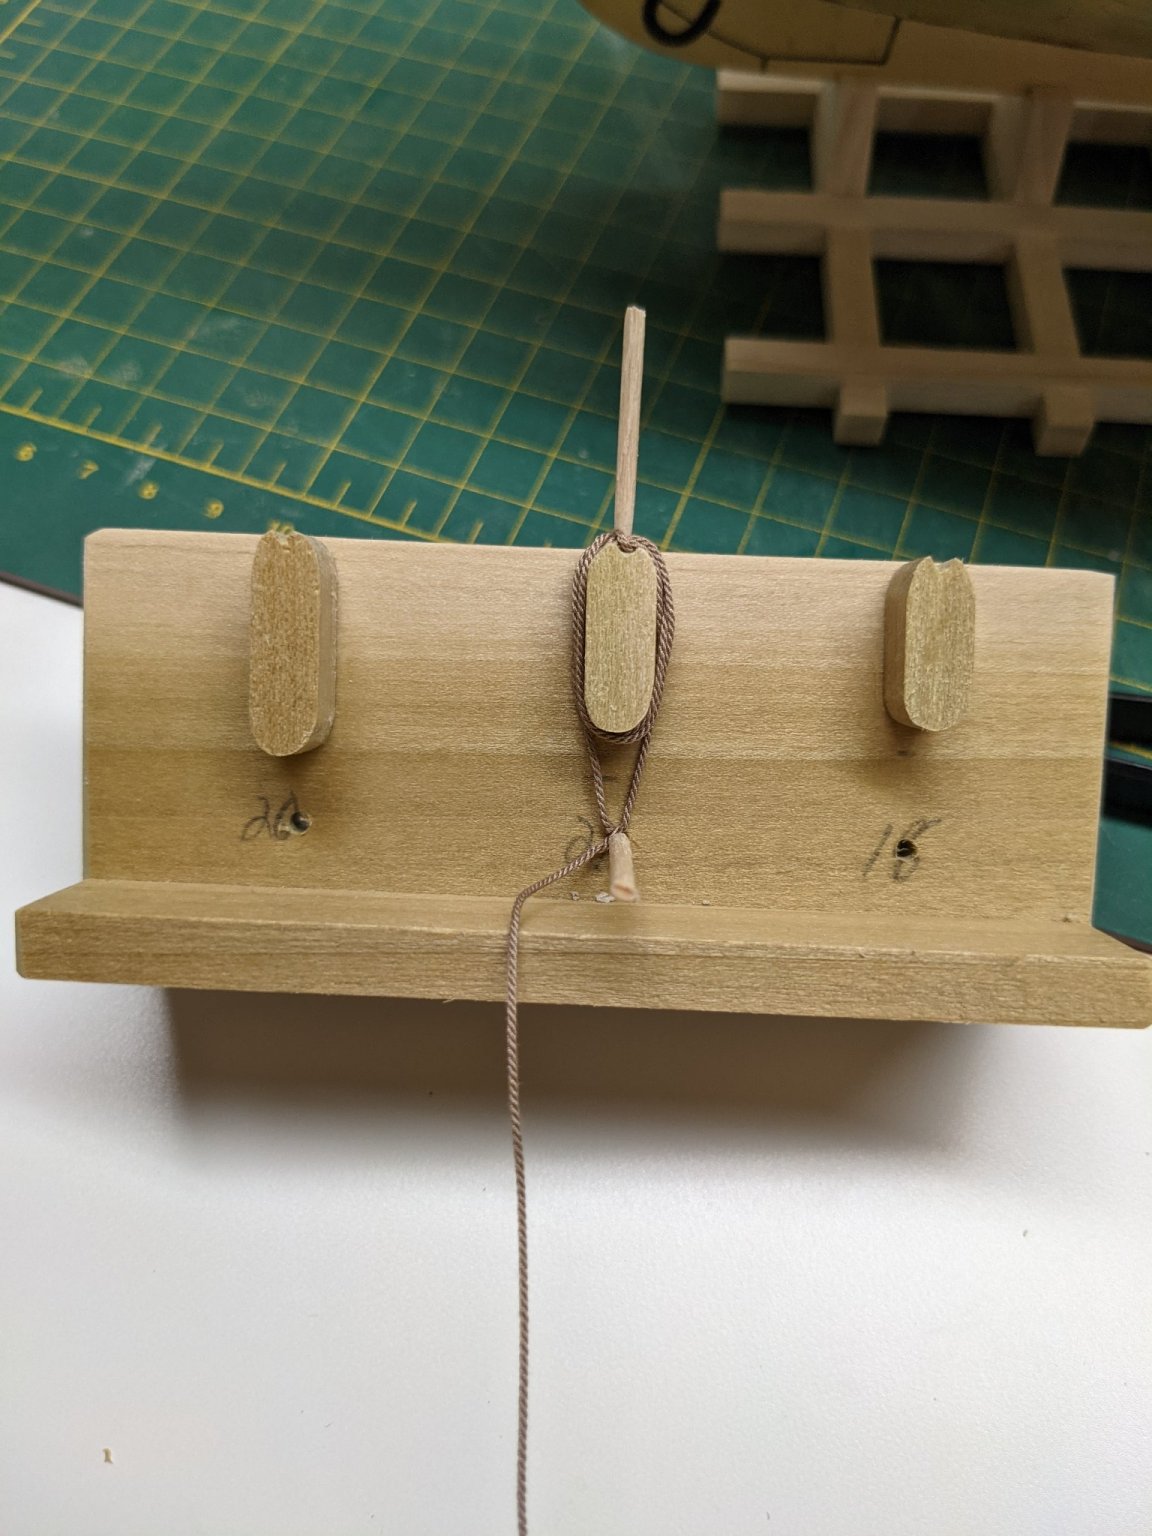
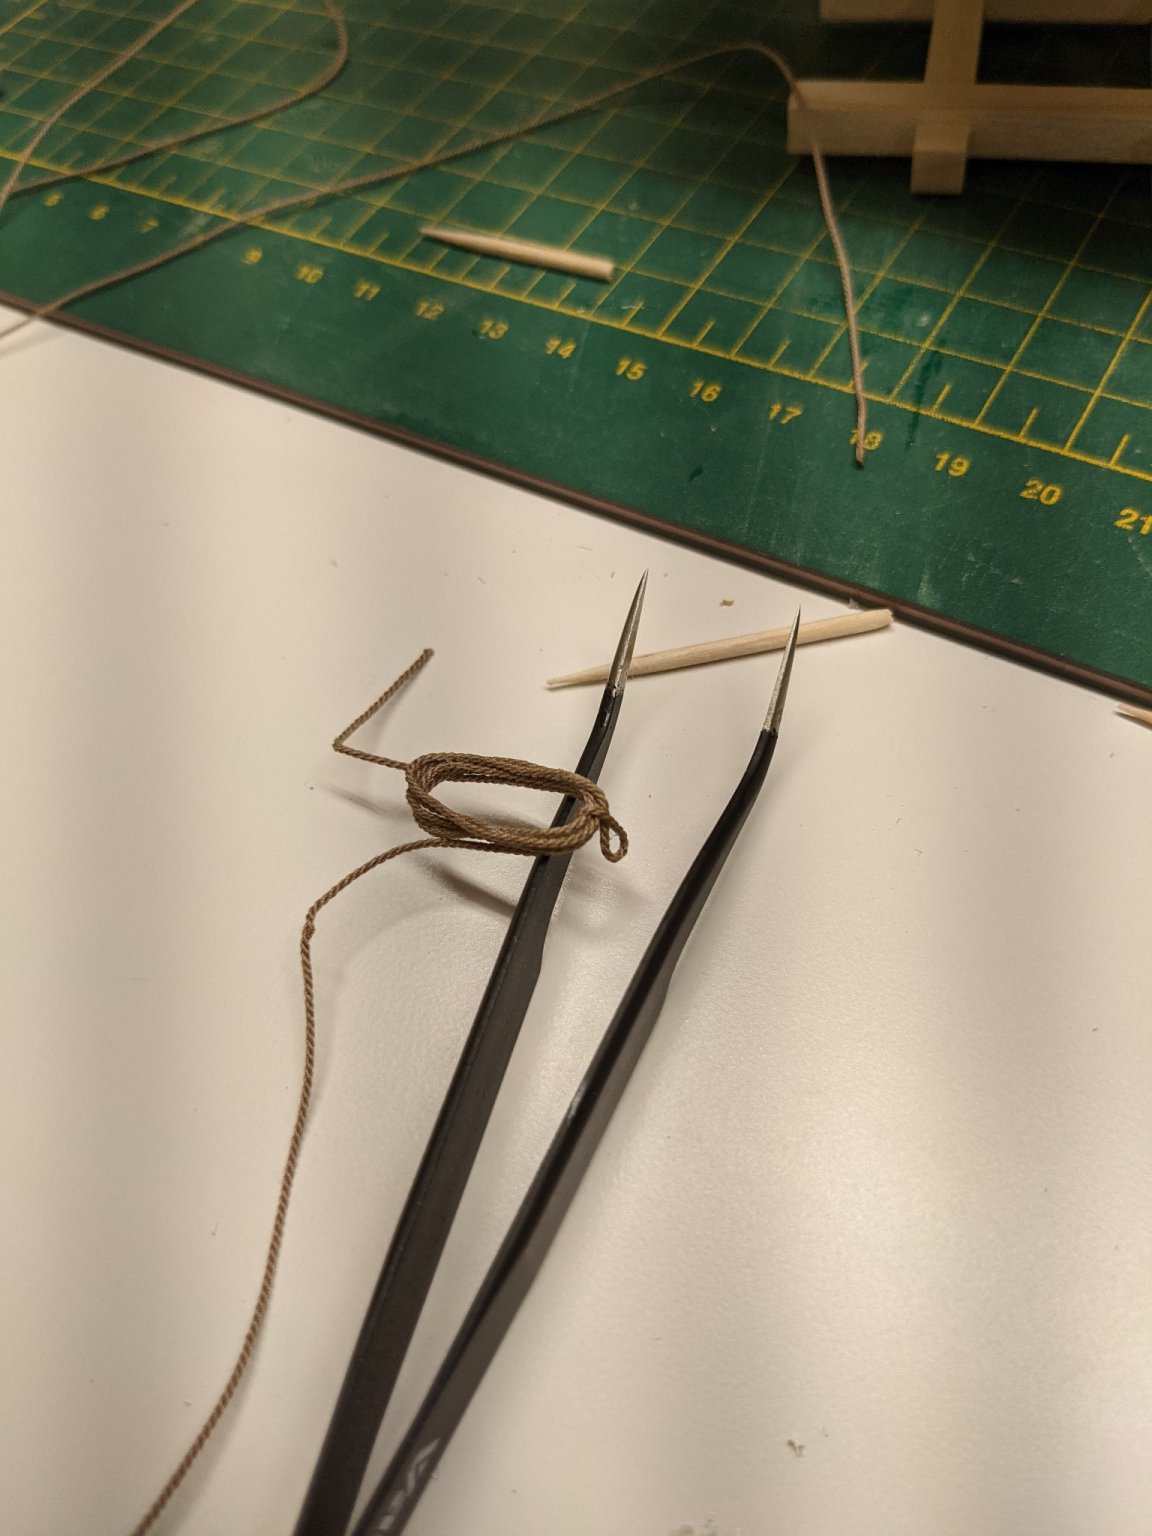
At this stage I made myself a jig for making rope coils.
There are three different sizes.
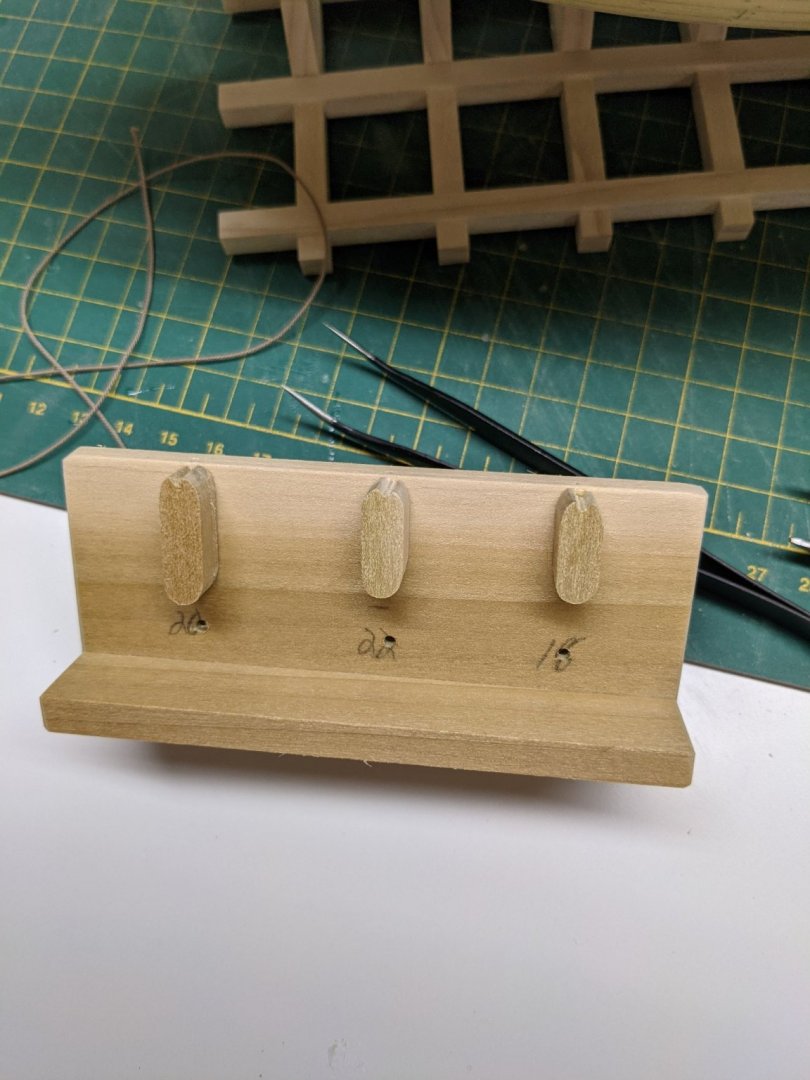
First put a rope end in the bottom hole and hold it with a toothpick.

Wrap the coils around and then using another toothpick at the top.
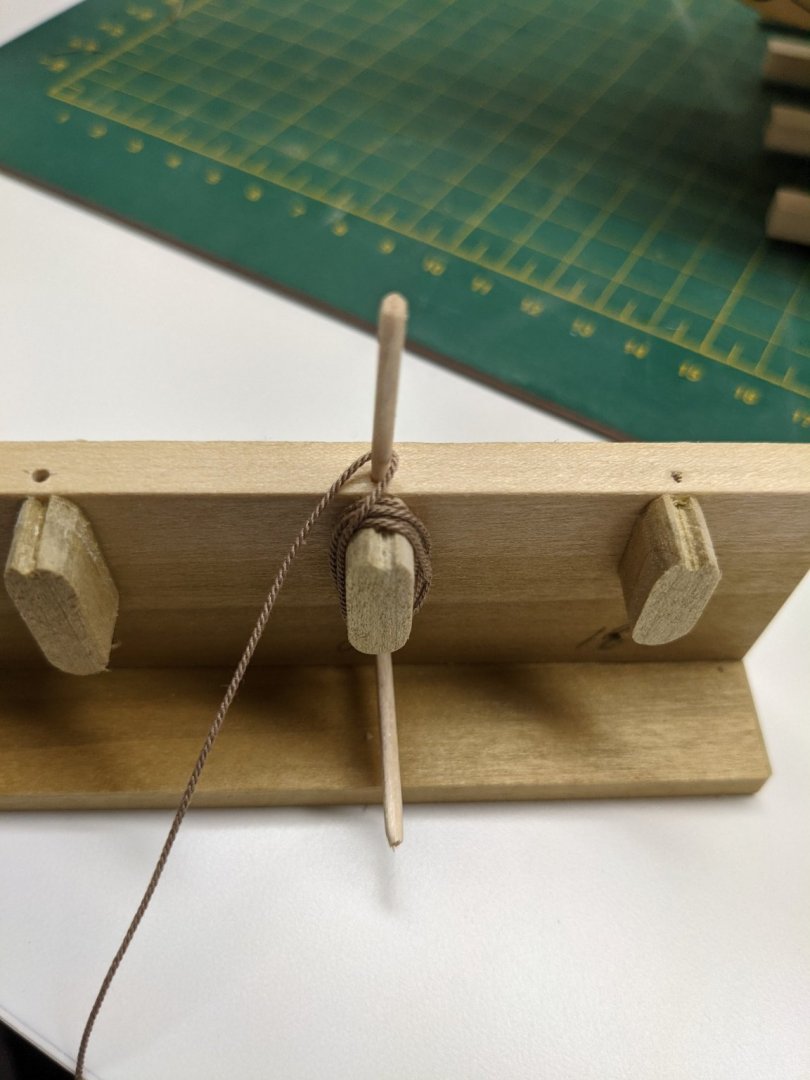
Then feed the end through the slot and finish wrapping.

Once the wrap is done feed the end through the bottom hole, Brush on some thinned PVA and then hit it with a hair drier to speed up the curing of the glue.

Slowly work the coil off with tweezers and final shape it.

You can then trim the ends off.
-
15 hours ago, niwotwill said:
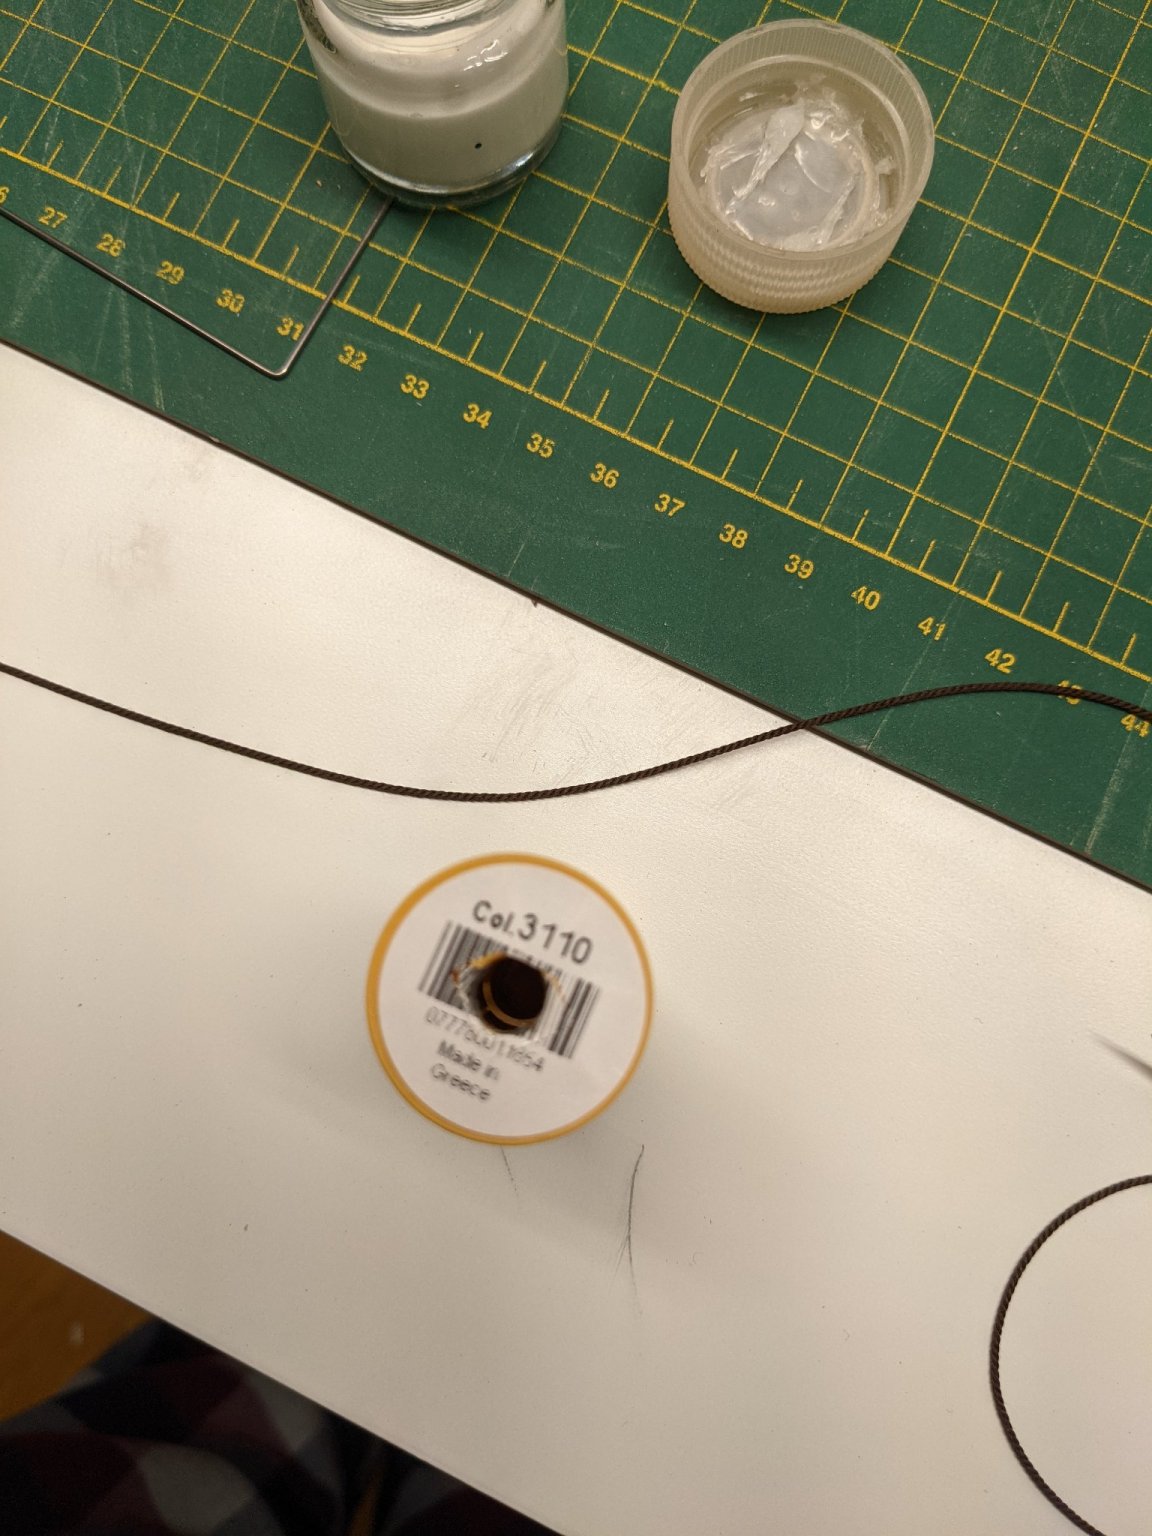
Paul what weight cotton thread do you use for serving?
It is NE 50 thread.
12 hours ago, bartley said:Sorry for hijacking Paul's thread but I tried to give some guidance on serving issues here. It looks like Paul is using Gutterman 50 wt but lets wait to see if he confirms that/
Regards,
John
Post 53 is exactly what I need!
-
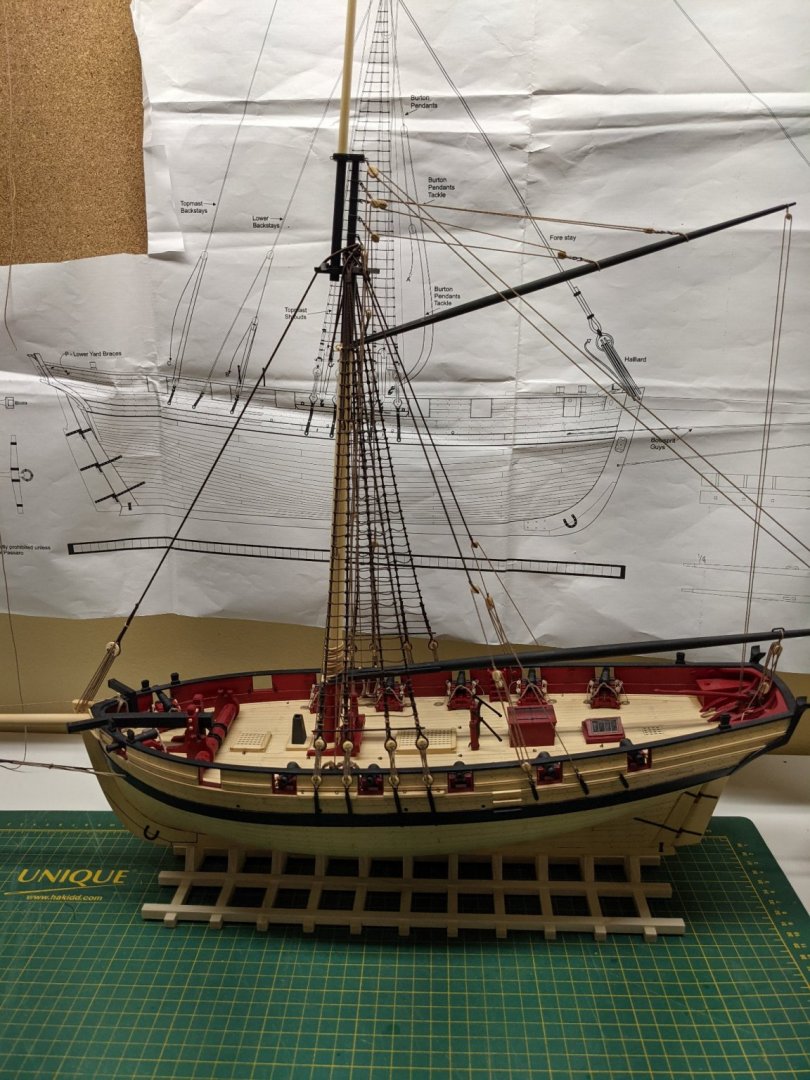
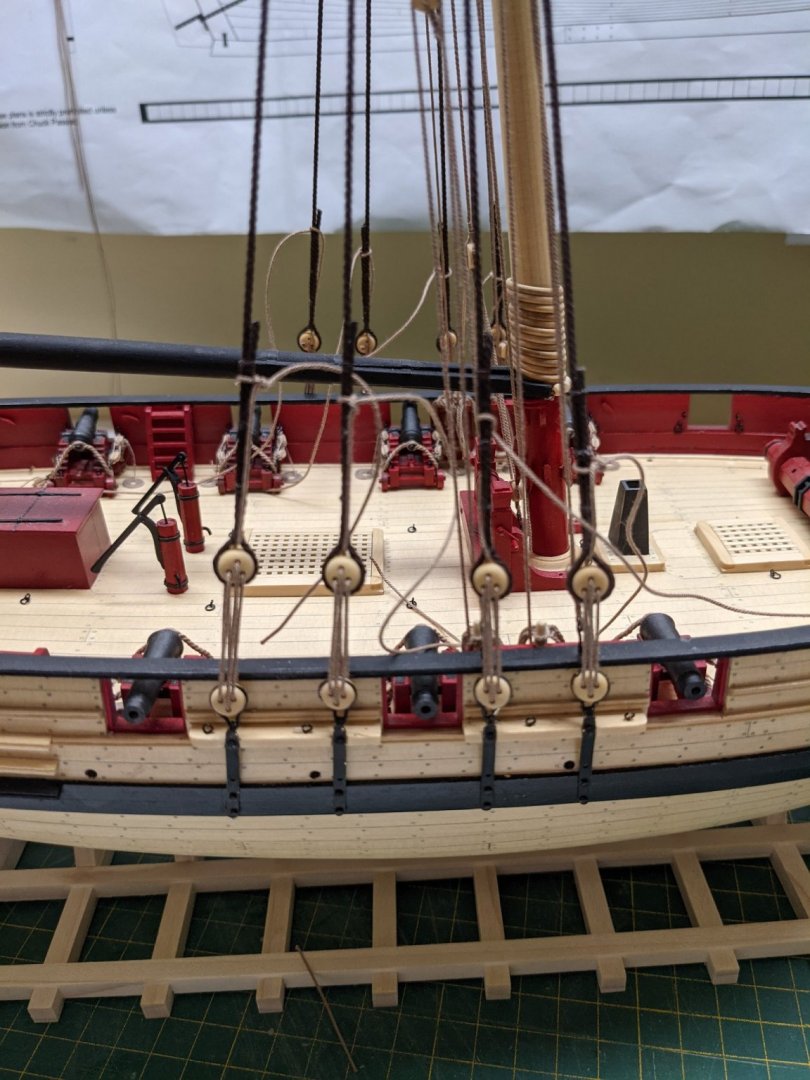
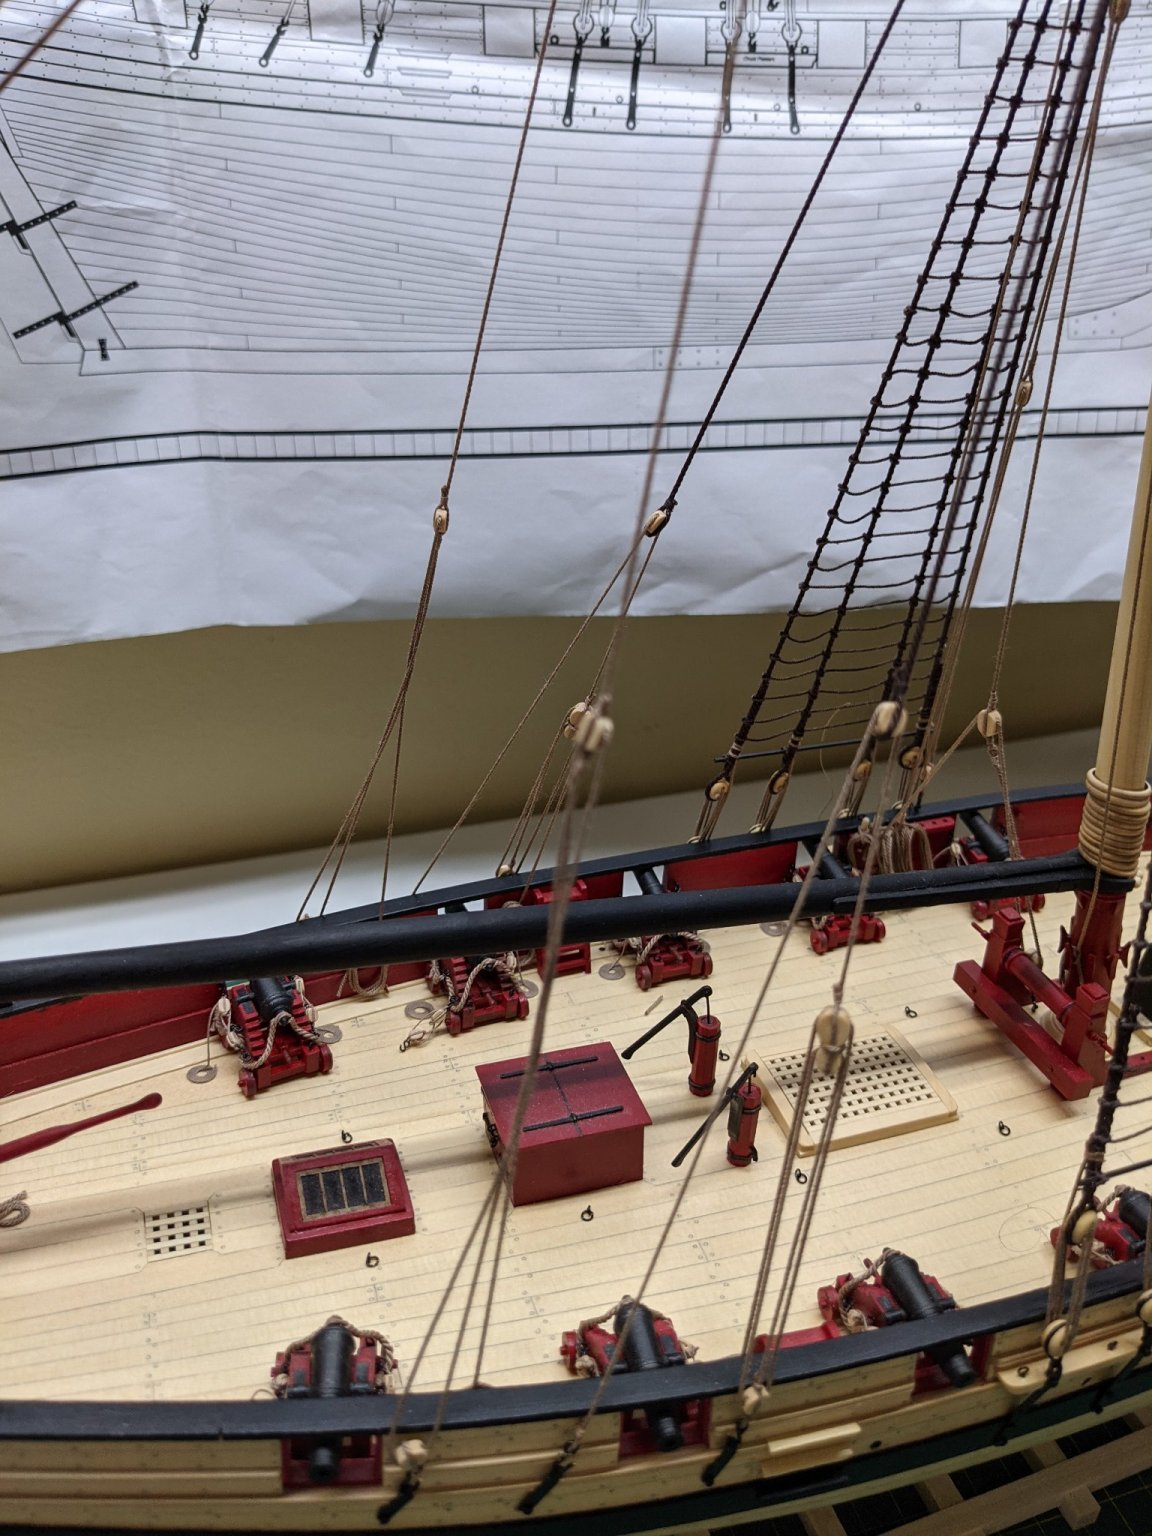
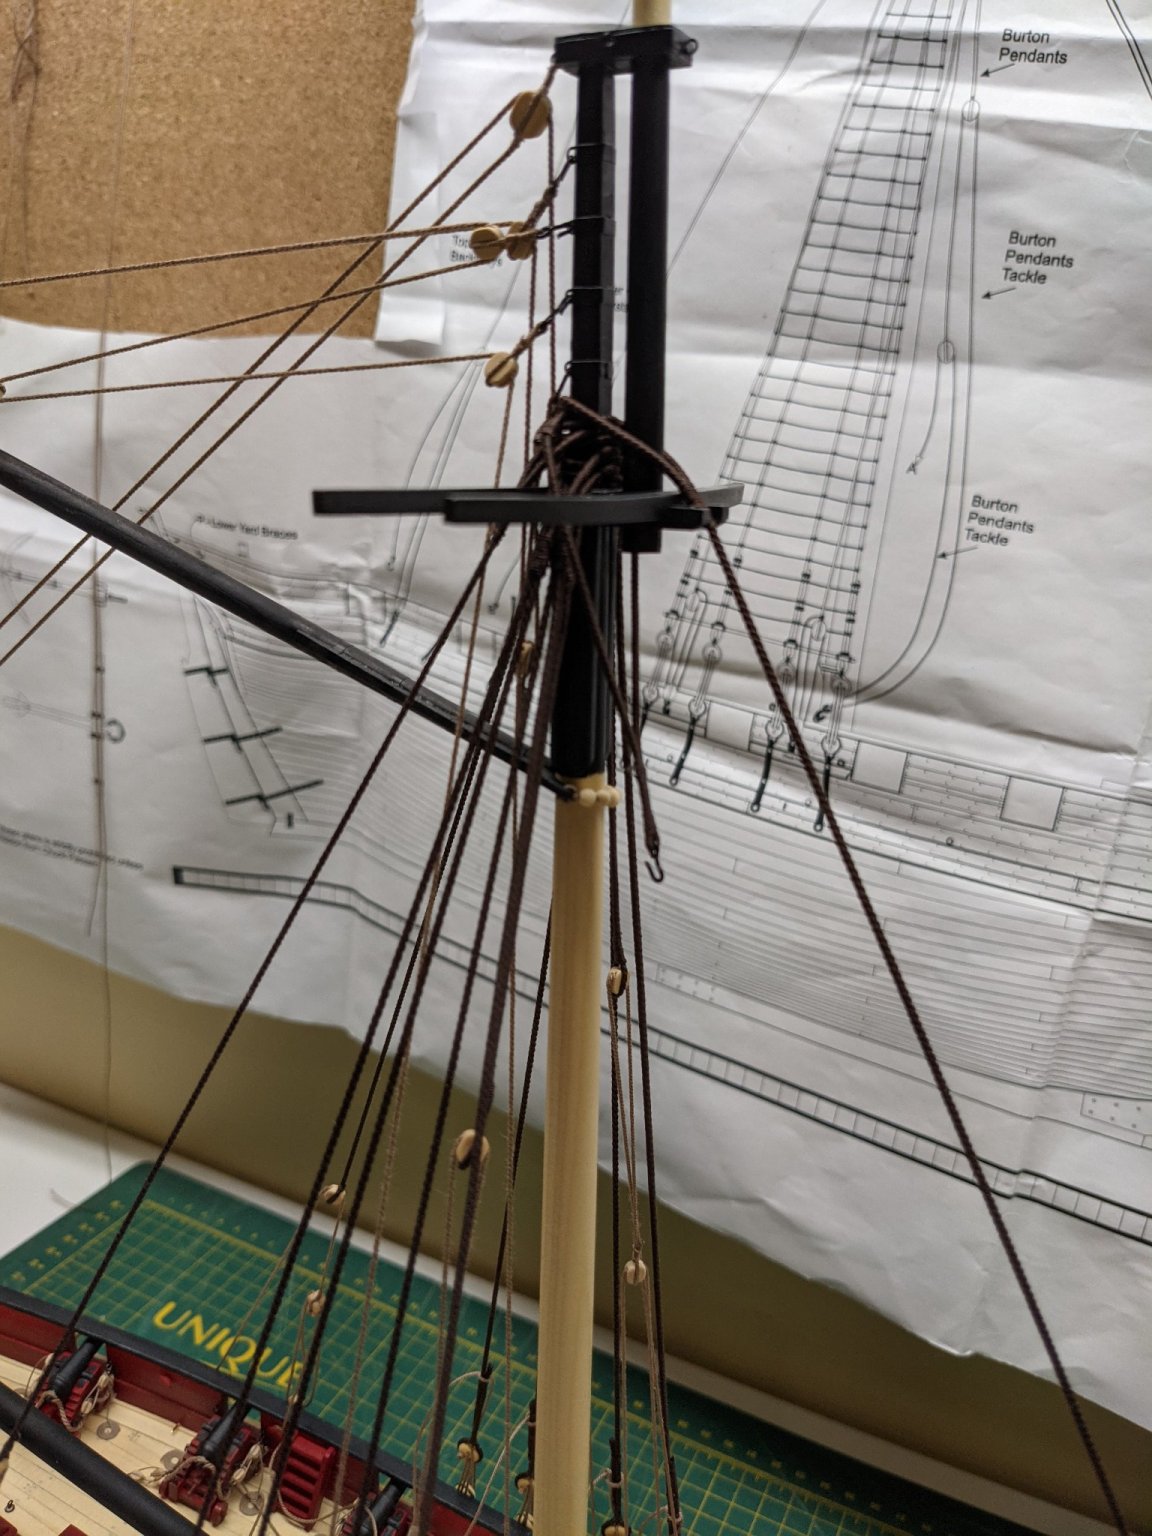
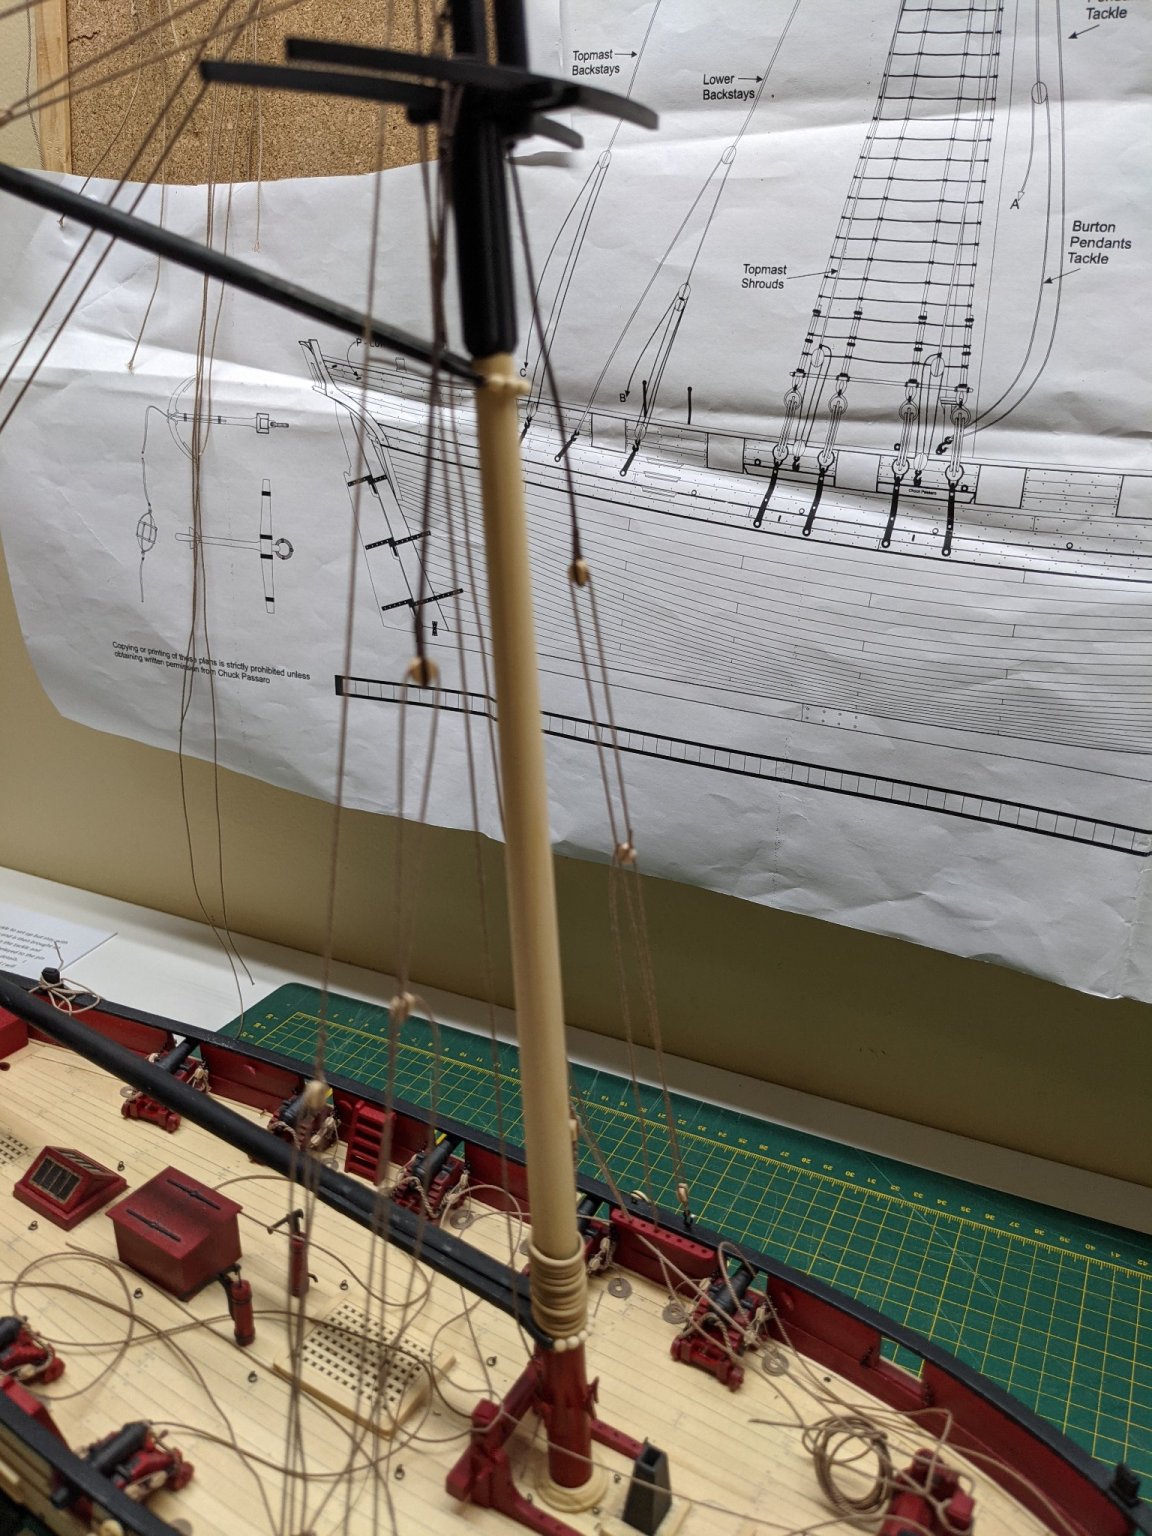
So making the Burton Pendants I first siezed the rope the full length and then siezed the block onto it. This didn't look right to me so I redid them.

I then did the whole seizing after putting the block on and then wrapped the rope from the block up. Was a simple matter to tie some rope on the block to hold one end. I am hoping this is the right way for these.

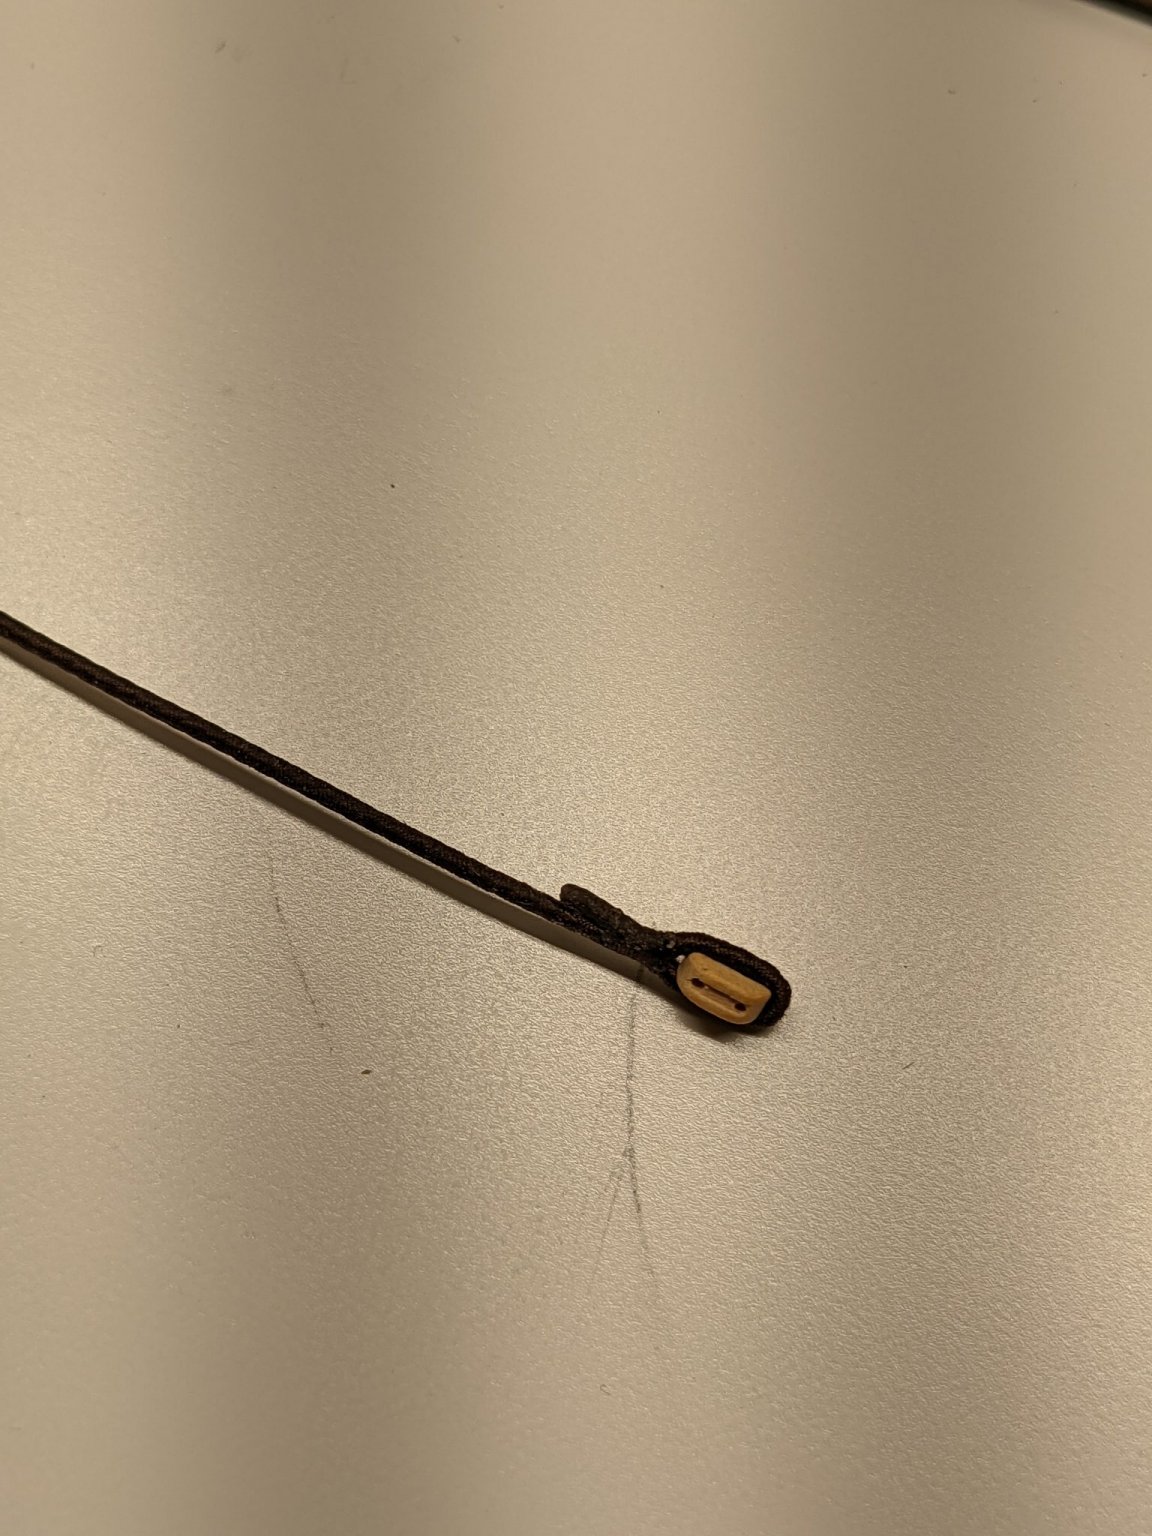
Here is the color of the cotton thread I am using.

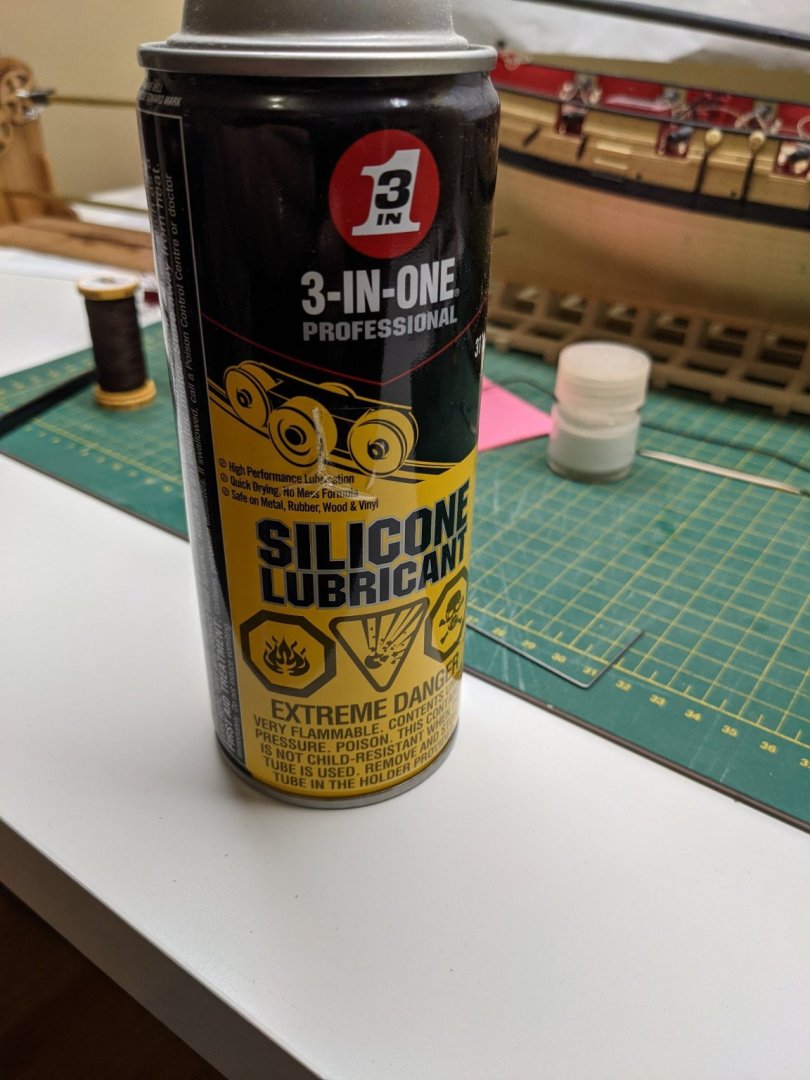
Now I have been having trouble with my serving machine as I wasn't real careful when assembling it and it was binding and squeaking. What solved it was to spray the gears and also the joint with this silicone spray. Now it is slick and I can turn it with one finger.
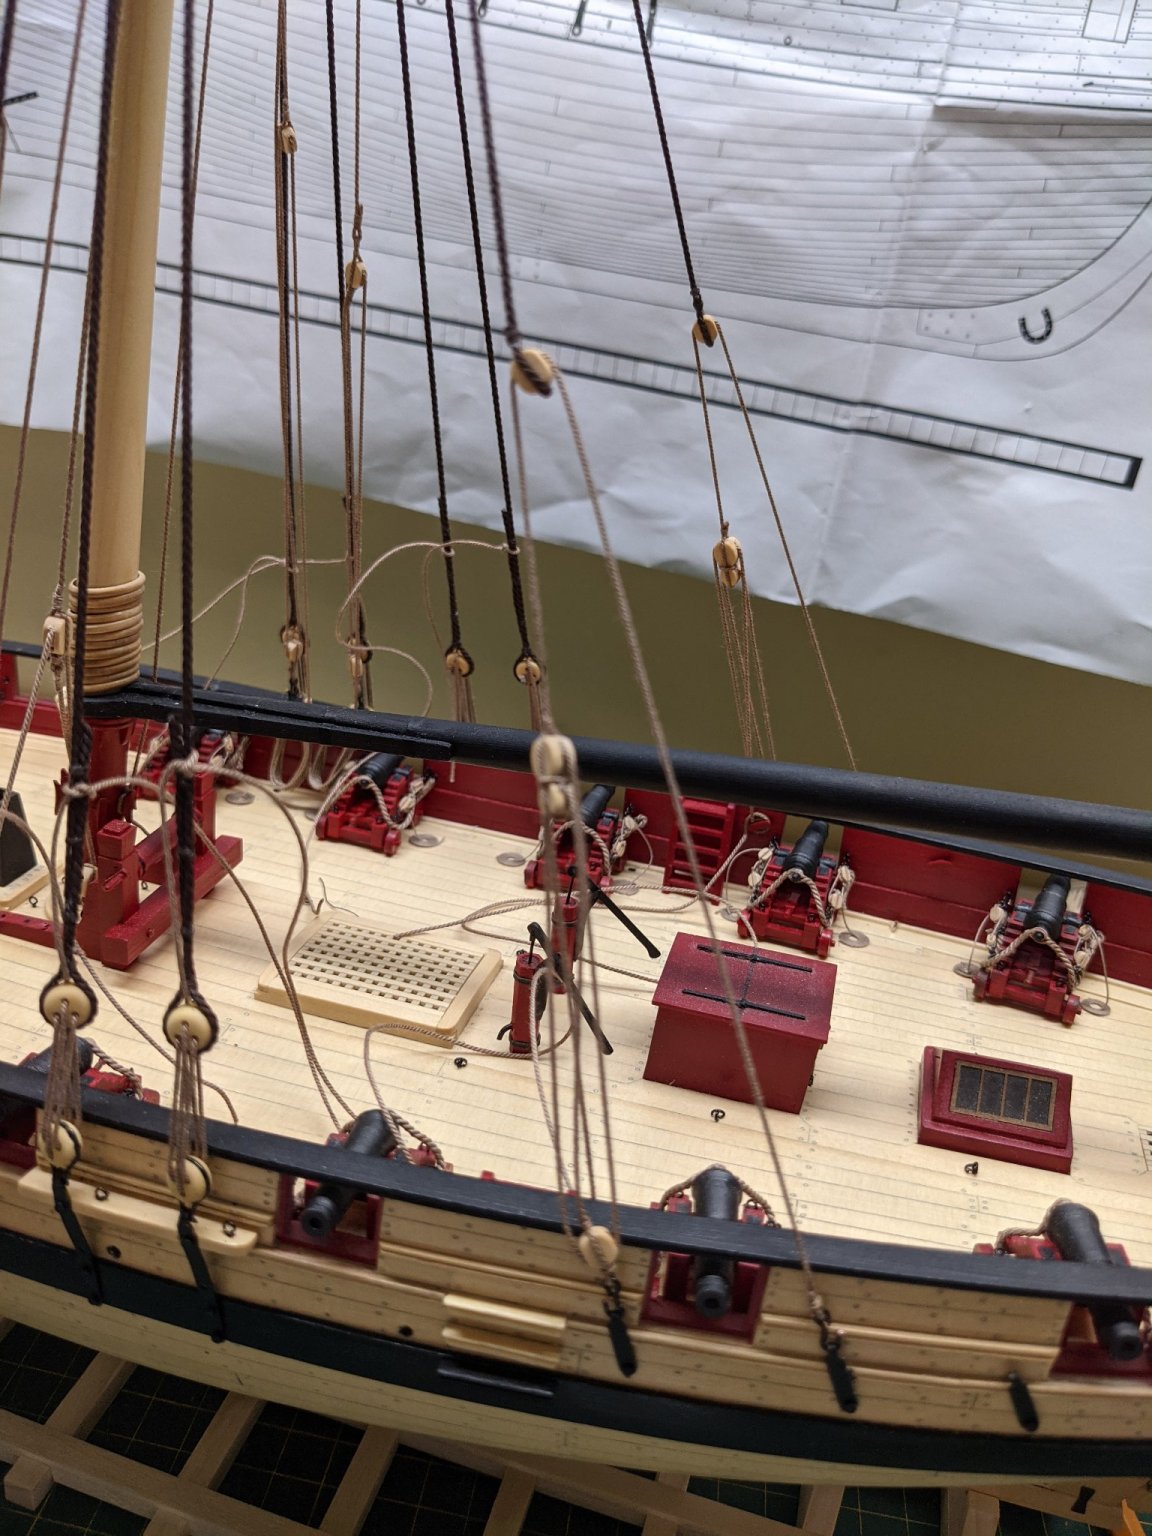
The pendants are all rigged but not tightened yet. I sure have a mess of rope on the deck I need to take care of soon.

- niwotwill, glbarlow, Nunnehi (Don) and 6 others
-
9
-
I have also been eyeing up the mono and can see there is a huge difference in the printing quality of a resin printer. They are reasonably priced now and want to see how everyone makes out with the Anycubic Mono.
The wash and cure station looks like a necessary piece also.
I am a little concerned about the smell during printing though and the Admiral has a keen sense of smell
- Jasseji, mtaylor, thibaultron and 2 others
-
5
-
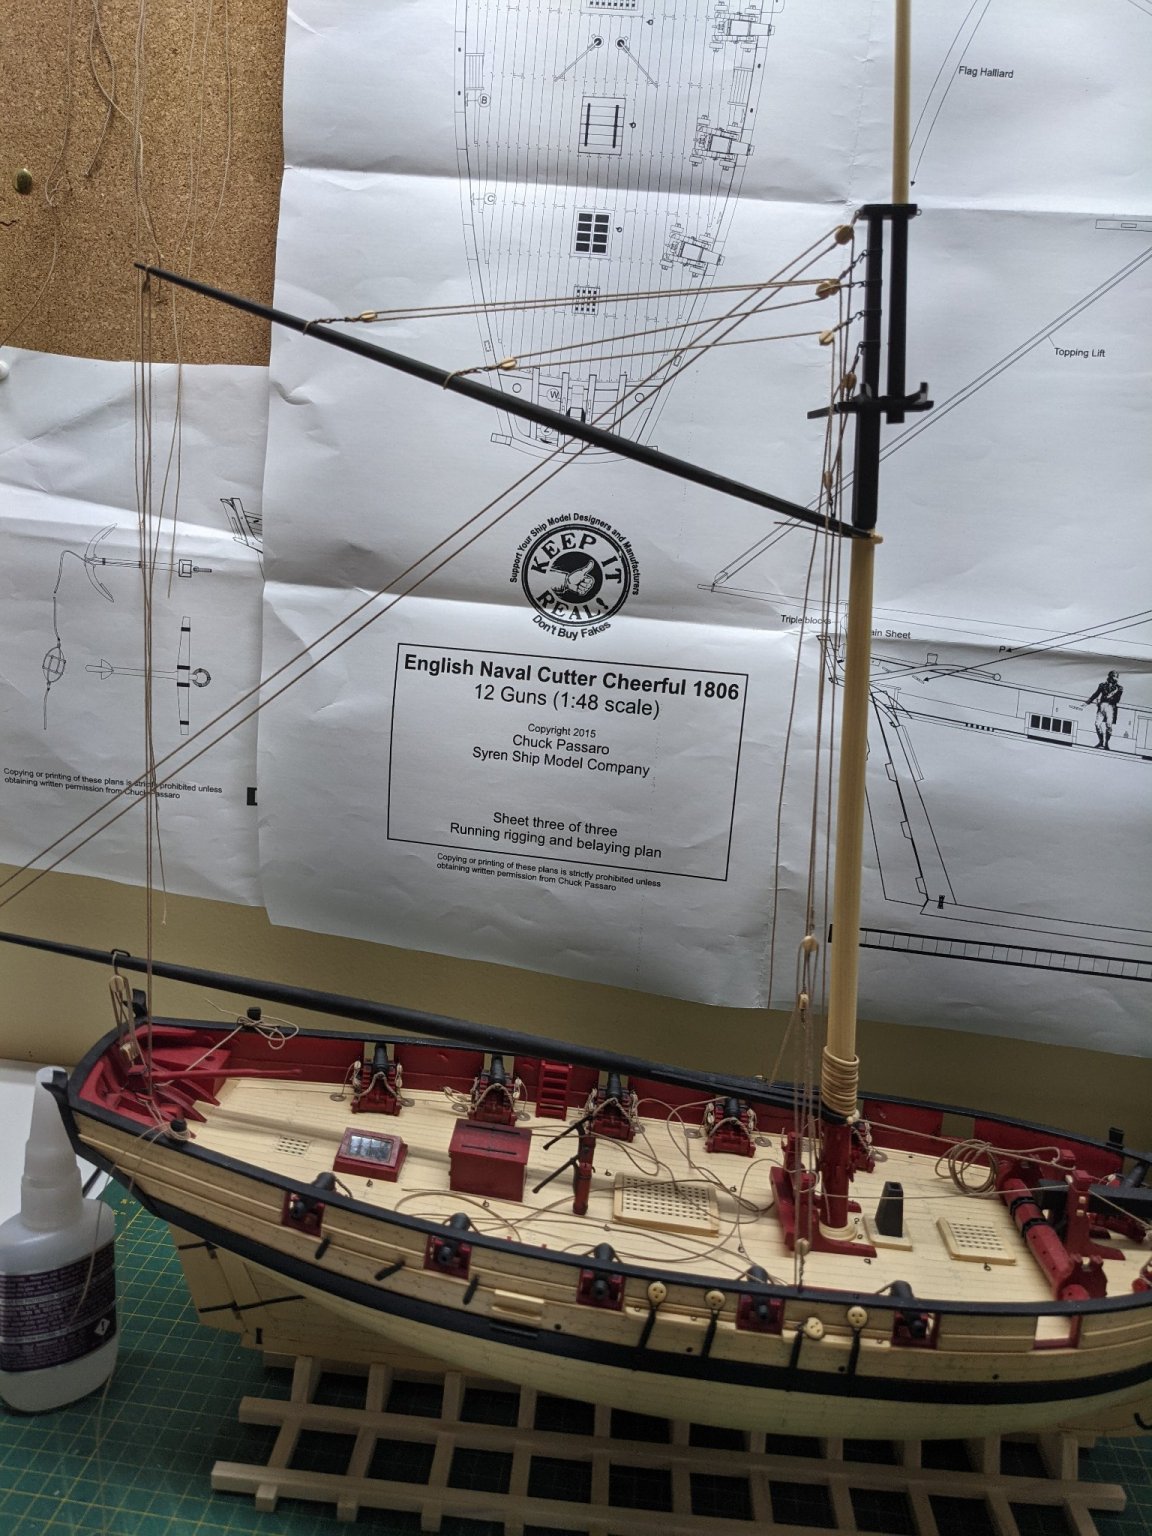
Gaff is rigged and lines not tied off yet. I am going to also redo the belaying pins and see if I can get them more even this time so they are not in place.
- rafine, muratx, Ryland Craze and 5 others
-
8
-


3d printing process
in 3D-Printing and Laser-Cutting.
Posted
So I received my Mars 2 yesterday and been having fun learning and am amazed with the detail of the prints.
Couple questions:
1-Is it OK to leave resin in the vat when not printing for a few days?
2-If you are printing something and it finishes while you are away or asleep can you leave it and clean it later?
Also I tried to use chitu slicer and found it is not as user/newbie friendly as Lychee. Will stick to Lychee as it has nice presets for the different resins and has a better interface for slicing in my mind.
I am using Elegoo water washable black resin and it works pretty good. Will post some pictures of some prints later.