
HOLIDAY DONATION DRIVE - SUPPORT MSW - DO YOUR PART TO KEEP THIS GREAT FORUM GOING! (Only 24 donations so far out of 49,000 members - C'mon guys!)
×


allanyed
-
Posts
8,149 -
Joined
-
Last visited
Content Type
Profiles
Forums
Gallery
Events
Everything posted by allanyed
-

Rigging an anchor - mid 1700's to late 1700's
allanyed replied to LyleK1's topic in Masting, rigging and sails
Not sure, but perhaps Lavery or Goodwin have some details. The photos of the contemporary models in Lees' book are pretty detailed. Again I am stuck without my books while away on vacation so not much help. Below are some photos of contemporary models at Preble Hall that I took some years back that may help you. Allan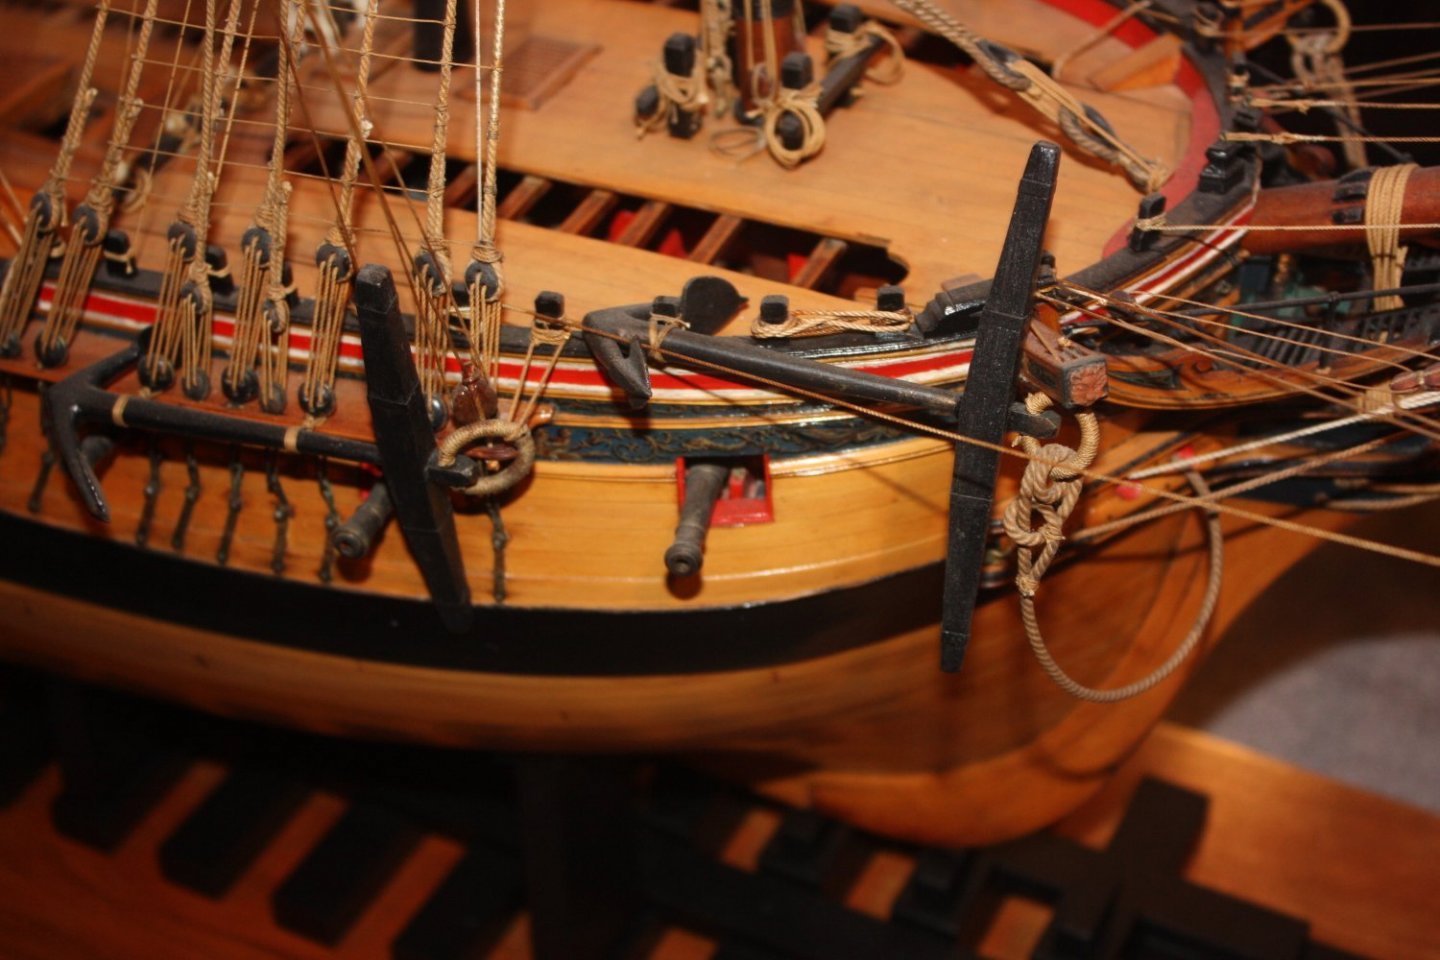
-
Rigging an anchor - mid 1700's to late 1700's
allanyed replied to LyleK1's topic in Masting, rigging and sails
Which anchors Lyle? I believe there should be four at the bow, two port, two starboard. There are a number of detailed drawings, photos and text in David Lees' book for one. I am not near my books or would give you some better explanation. Hopefully some member can help with some details for you without violating Mr. Lees copyrights. Allan -
A method for making panelled sails using paper
allanyed replied to Cathead's topic in Masting, rigging and sails
Cathead, You of course are totally correct. This is a hobby to bring enjoyment, and if art rather than realism is the goal, that is a great thing. Whatever gives joy is what counts, and there is probably as much variation in what brings that joy as there are members here. Regarding a goal for accuracy, mine is for 100% but I know full well that will never happen. But, the challenge and of course the frustration that comes with such an unreachable goal remains until I will have to hang it up one of these days. Cheers, Allan- 49 replies
-
- 5
-

-
- sails
- sail panels
- (and 1 more)
-
Something new everyday! 😀 It appears to be a combination of a framing disposition and planking expansion. Very interesting when compared to the more common disposition and expansion drawings like those found at https://commons.wikimedia.org/wiki/Category:Ship_plans_of_the_Royal_Museums_Greenwich#/media/File:'Aquilon'_(1786),_(also_spelt_Aquillon_or_Acquillon)_RMG_J7958.png and https://www.rmg.co.uk/collections/objects/rmgc-object-83495 which shows both inboard and outboard planking details. Allan
-
A method for making panelled sails using paper
allanyed replied to Cathead's topic in Masting, rigging and sails
I believe Eberhard is totally correct, and take it further to say any kind of sewing on sails at scales smaller than 1:24 or possibly 1:36 is a great way to ruin an otherwise fine model. Allan- 49 replies
-
- 2
-
-
- sails
- sail panels
- (and 1 more)
-
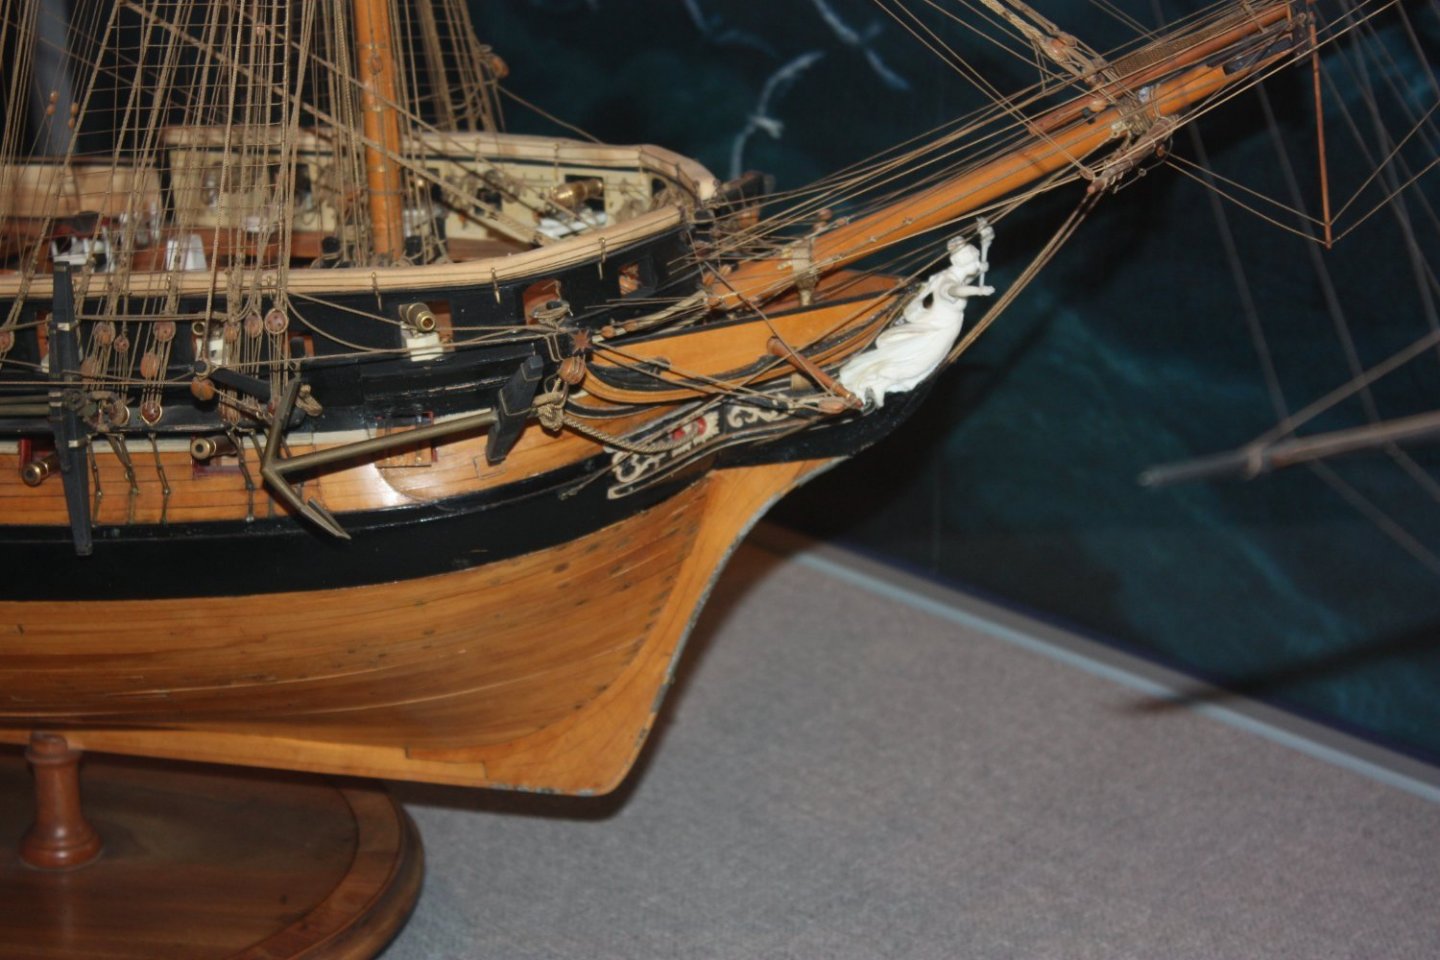
My God what a disaster that must have been with the majority of ships having lions for a figurehead. The poor guys getting a few too many ales in them ashore must have surprised a lot of other sailors when they got in the right hammock on the wrong ship! Allan
-
Over the top!! You are leading us on a ride that is more fun than anything at Disneyland!!! Regarding the hinges, did you make the hollow tube in which the pins go or were you able to find hollow tube stock from which to work? Are the plate and tubes and plate and pins soft soldered or silver soldered? THANKS Allan
-
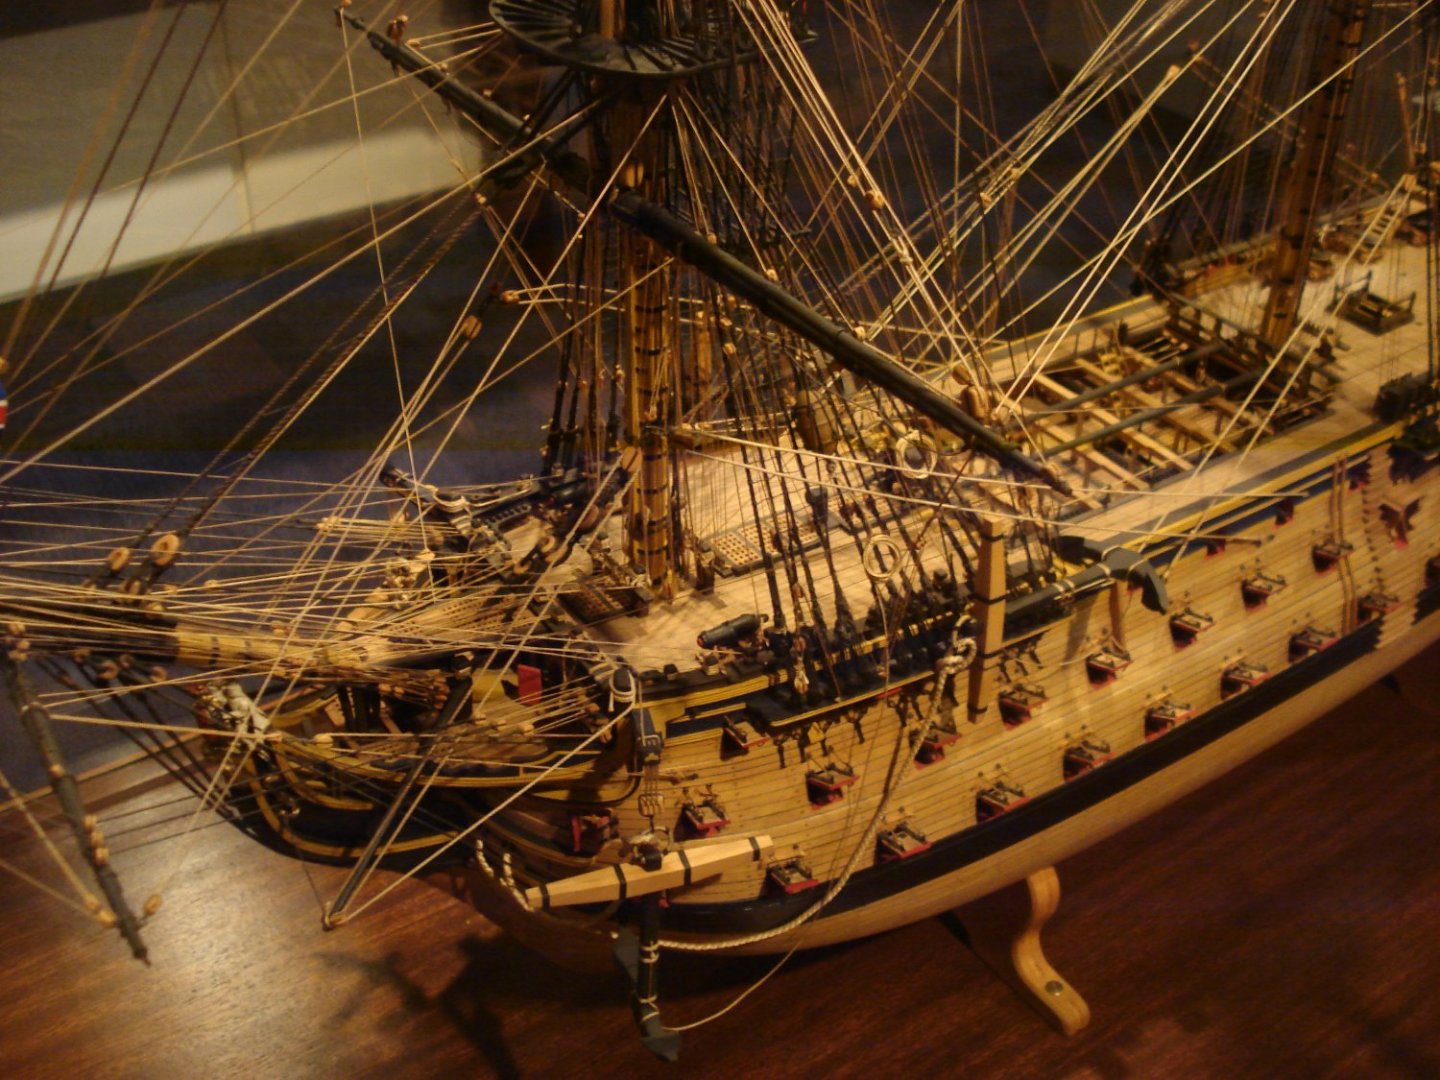
Hi Peter, What ship? I know you were building Endeavour but not sure if that is the case in this post. Petersson's book is based on one contemporary model so it may not be useful for other ships and periods of time, including Endeavour. David Lees' book covers a span of time that is more useful and includes several diagrams and descriptions of belaying points for the running rigging. I would look up what he shows but am away from my books for a week or so. Allan
-
Gary, Thanks for posting. The contemporary drawing you show is from the RMG and can be seen at both https://www.rmg.co.uk/collections/objects/rmgc-object-86382 and at the Wiki Commons site as you mention https://commons.wikimedia.org/w/index.php?title=Category:Ship_plans_of_the_Royal_Museums_Greenwich&fileuntil=Experiment+(1774)+RMG+J3479.jpg#/media/File:Endeavour_(1768)_RMG_J2052.png and is clearly showing the beams resting on the clamp, not going between frames. Allan
-
Johnathon, a warm welcome to the fray. Good for you doing a build log on the first build and seeking advice. You will likely get more advice than you hoped for, but we are all well intentioned even if sometimes not in agreement. Question every piece that comes out of the box before securing it place from planking to gratings, cannons to sails. Looking forward to your progress Allan
- 83 replies
-
- 4
-
-
- Lady Nelson
- Amati
- (and 2 more)
-
Starlight Thank you very much for your response. Doing 3D to make STL drawings seems very daunting to this old fool, but maybe something to practice while the glue dries. I agree it is a great alternative choice for a number of things, including barrels, cap squares, hinges and other things. Regarding your comment about the Amati guns, having looked at many of the build logs, the cannon barrels are only the beginning of the parts they try to pass off as accurate and good quality. The truly sad part is that they succeed in convincing so many people to spend their hard earned money for this stuff when there are two or three excellent kit designers from which to choose. Please keep in mind I have never had any affiliation with any kit maker, but even these old eyes can see the difference between really good and terrible designs and materials. Allan
- 82 replies
-
- 2
-
-
- Fly
- Victory Models
- (and 2 more)
-
Further to the post by Jaager, a few minutes research will turn up plans of framing dispostions and scantlings from which you will find the R&S for different ships and eras. You can find a number of framing distribution drawings that may be similar or possibly the same as Endeavour at the RMG Collections site. Two pages to try are https://www.rmg.co.uk/collections/objects/search/5th rate framing plan and https://www.rmg.co.uk/collections/objects/search/6th rate framing plan For scantlings that also give the R&S, look at the 1750 Establishment or Shipbuilder's Repository scantling folios where the R&S scantlings are similar for a fifth and sixth rate, 27" . You can find all the scantlings from the Establishments, the SR, and Steel in the folios in Scantlings of Royal Navy Ships from Seawatch Books. In addition to the R&S, the floor and futtock sidings are also given in the scantlngs so you can determine the siding of the wood and the spaces between to match the R&S. Allan
-
I understand a challenge, but why go with an inaccurate, poorly designed kit when there are several brands that offer accurately designed and great quality materials, Syren, Model Shipways offerings from David Antscherl's designs and Vanguard? Allan
-
I print on label paper so I have no need to glue the drawing onto wood. Just peel of the backing and stick on the wood. Paper that is wet with glue can stretch and kink at times whereas label paper is much easier to work. Allan
-
Rod, If you really want to fix this you would not be the first modeler to rip out the awful materials most kit makers provide and replace it with more appropriate material. Whatever you are happy with is all that matters in the end. Allan
-
Great point Johnny. I believe the deck was 3" thick so it would likely take some time to get it down to a need for replacement. Probably had more problems with replacing due to rot before thickness became an issue. Allan
-
I really like that you decided to forego some of the stuff from the kit, especially the cannon and associated parts. Of the three barrels you show, your 3D printed are the best IMHO. The kit barrel is really strange looking compared to reality. The Syren barrel is really quite fine, but with the 3D barrel I know it is the easiest way to have the cipher on the barrel on the 3D drawing and thus on the 3D printed barrel compared to trying to make and attach one to turned brass barrels. It is also the least expensive way to have an accurate barrel made. FYI, when I had several sizes of barrels 3D printed, the trunnions were part of the printing so they were the exact proper length and no need to make them separately. Have you, (or any member reading this) had Blomefield guns made with a 3D printer in resin? I just wonder how the breech ring came out in the process. Allan
- 82 replies
-
- 1
-
-
- Fly
- Victory Models
- (and 2 more)
-
Waldemar, Thanks for your response. Sorry for the confusion. I meant that the Navy Board style and room and space are not the same thing. R&S is a dimension, not a style as you wrote: From Franklin it appears that R&S dimensions apply to both NB and fully framed construction. His descriptions are indeed highly detailed. Cheers Allan
-
Hi Waldemar, I may be wrong on this but I don't think R&S has anything to do with style such as fully framed style or Navy Board styles which are two different things. The reason I mention this is that I had only seen R&S referenced as a dimension not a style. The fully framed style as shown in the Marquardt framing disposition drawing above is nothing like what most refer to as Navy Board style framing. FWIW the R&S for many/most British ships can be found in contemporary contracts, the Establishments, The Shipbuilder's Repository and Steel's Elements and Practice of Naval Architecture. Allan
-
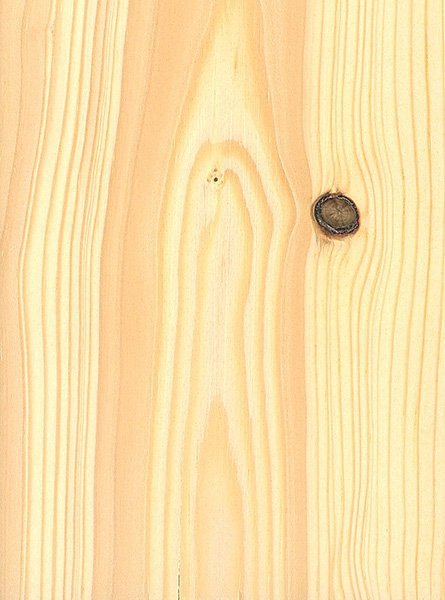
Hi Jaager Do you think the different types of wood the museum names for each deck might be from past times and southern yellow pine that you mention would be the wood they used when she was rebuilt in modern times? The reason I ask is that the use of two different species on the same deck that they describe had not occurred to me even though this was not uncommon on British warships. I studied the John Lord cross section drawing which anyone building a model of Connie should reference but it does not appear to show the species of the deck planking, only the ceiling, hull planking, treenails above and below the water line and the deck beams. The verbal description of the decking given on the museum site is below but might they have it wrong? RMG is not without errors on their site, so the Connie Museum description might be in error. Thanks Allan USS Constitution has four complete decks–spar, gun, berth, and orlop–that combine to make her about the height of a four-story building. The spar deck, or top deck, was originally made from a combination of white oak planking (to support the heavy weight of the carronades) with Carolina pitch pine flanking the hatches. The gun deck just below was similarly made of a combination of white oak and pitch pine. The berth and orlop decks, however, were made exclusively of the strong yet light-weight pitch pine.
-
If you look at the USS Constitution museum site you will get a detailed description of the deck planking. https://ussconstitutionmuseum.org/2016/07/14/decks/ To quote them Holystoning In the 18th and 19th centuries, Constitution‘s sailors began their day by cleaning the ship with the unwelcome task of holystoning the decks. A hand pump wet the deck with seawater, and men with buckets cast sand over the planks. The watch then scoured away the previous day’s dirt and grime with soft white stones and stiff brushes. Some believe “holystoning” got its name because scrubbing sailors looked as if they were kneeling in prayer. Smaller stones were called “prayer books” and bigger stones were called “bibles.” This was the “most disagreeable duty in the ship,” wrote Samuel Leech, a sailor aboard during the War of 1812, especially “on cold, frosty mornings.” Once finished, the men rinsed the decks and left them to dry in the sun, or flogged them dry using bits of rope or a “squilgee,” a T-shaped implement with a leather-edged crosspiece. This constant abrasion of the wooden decks left them a pale cream color and “so clean that a handkerchief might be swept over them without soiling the whiteness.” If the wood is light in color, use it as is. If it is too dark, and as you want to look authentic forget using the wood that they provided in the kit and get some holly planking materials or some stock and cut your own planks. This will be the closest in color to what the decks looked like without need to stain the wood. The weather decks were a combination of mostly white oak but a few strakes of pitch pine around the hatches. Photos of pitch pine and holly are below. Allan
-
Thanks for posting the drawings Waldemar! On what ship and year are those drawings based? Are the drawings of a merchant vessel or naval vessel? A good question or two may be, was Endeavour framed as a merchant ship or like a typical Royal Navy vessel, and what are the framing differences, if any? If like a navy vessel, there is no room between frames for a deck beam even at the top of the top timbers. Very interesting topic!1 Allan
-
Harold Hahn method
allanyed replied to Essayons's topic in Building, Framing, Planking and plating a ships hull and deck
Shipman, You make a sensible and arguable point, but I am with Gary, I get joy out of doing the innards. I am still baffled as to why I do it myself at times😀 MAYBE on a future project I will leave off sections of framing on one side to show those internal things for others to see. As with so many things with this hobby of ours, to each his own. If I am building for myself, saving some time and money on materials are not parts of the equation. On the other hand when I am building for a client and there is a time constraint, then POB and no internals works for them and for me. Allan -
Chris, I discussed the need for Volume I with Mike the other day and getting with the printer is on his to-do list. Allan


