allanyed
-
Posts
8,149 -
Joined
-
Last visited
Content Type
Profiles
Forums
Gallery
Events
Everything posted by allanyed
-
Bonjour Michel/Mike :>) Per the post from Henry, if you could identify the ship you have in mind or at least size/type/year/nationality, details can be shared more easily and accurately. Allan
-
 Hello John, Welcome to MSW. Please consider starting a build log on your model, it will avail you to thousands of helpers here if you run into any other questions or problems. Looking at the photo you posted, I would go with a two, or even better, a three piece rail on each side, scarphed together. You can get various sheet wood at local hobby shops or on line, depending on the type of wood you want to use. CLOSE grained is best, such as pear or Castello and quite a few others you will see discussed in the Wood Discussion forum here. Allan
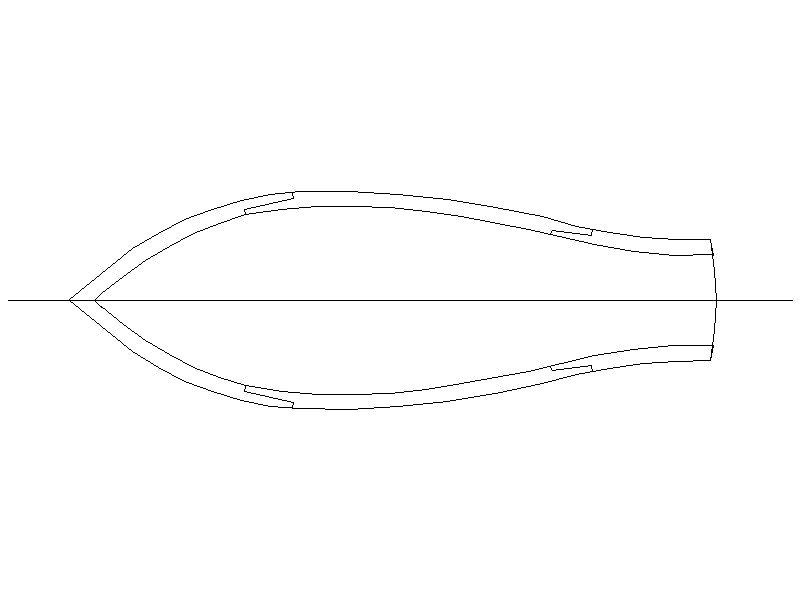
-
The photos you posted are incredible. Thanks for sharing these. Allan
-
Bruce, I don't know if the second sketch from Goodwin is correct or not, but it is consistent in the layout and I assume it is correct. Sorry, but I keep looking and still do not see any error in the rows 1 and 2 in the lower sketch. Note that this is the same pattern in the TFFM Swan class series for the upper deck. The three butt shift pattern does not form a straight diagonal of seams like the 4 butt shift, but the pattern that is shown does repeat along the length of the deck. And then things can get a little more difficult for the four outer most strakes if top and butt planking is used for strength to support the guns. Fun stuff. Allan
-
Bruce, Not sure what you mean by a fail in the second sketch. Do you mean the butts are incorrectly spaced? Sorry, not sure I see this. Can you make a sketch to explain? Thanks!! Allan
-
For me at least it would have been a little easier to decipher if the drawing carried over a few more beams and strakes as I have added on the sketch below. Allan

-
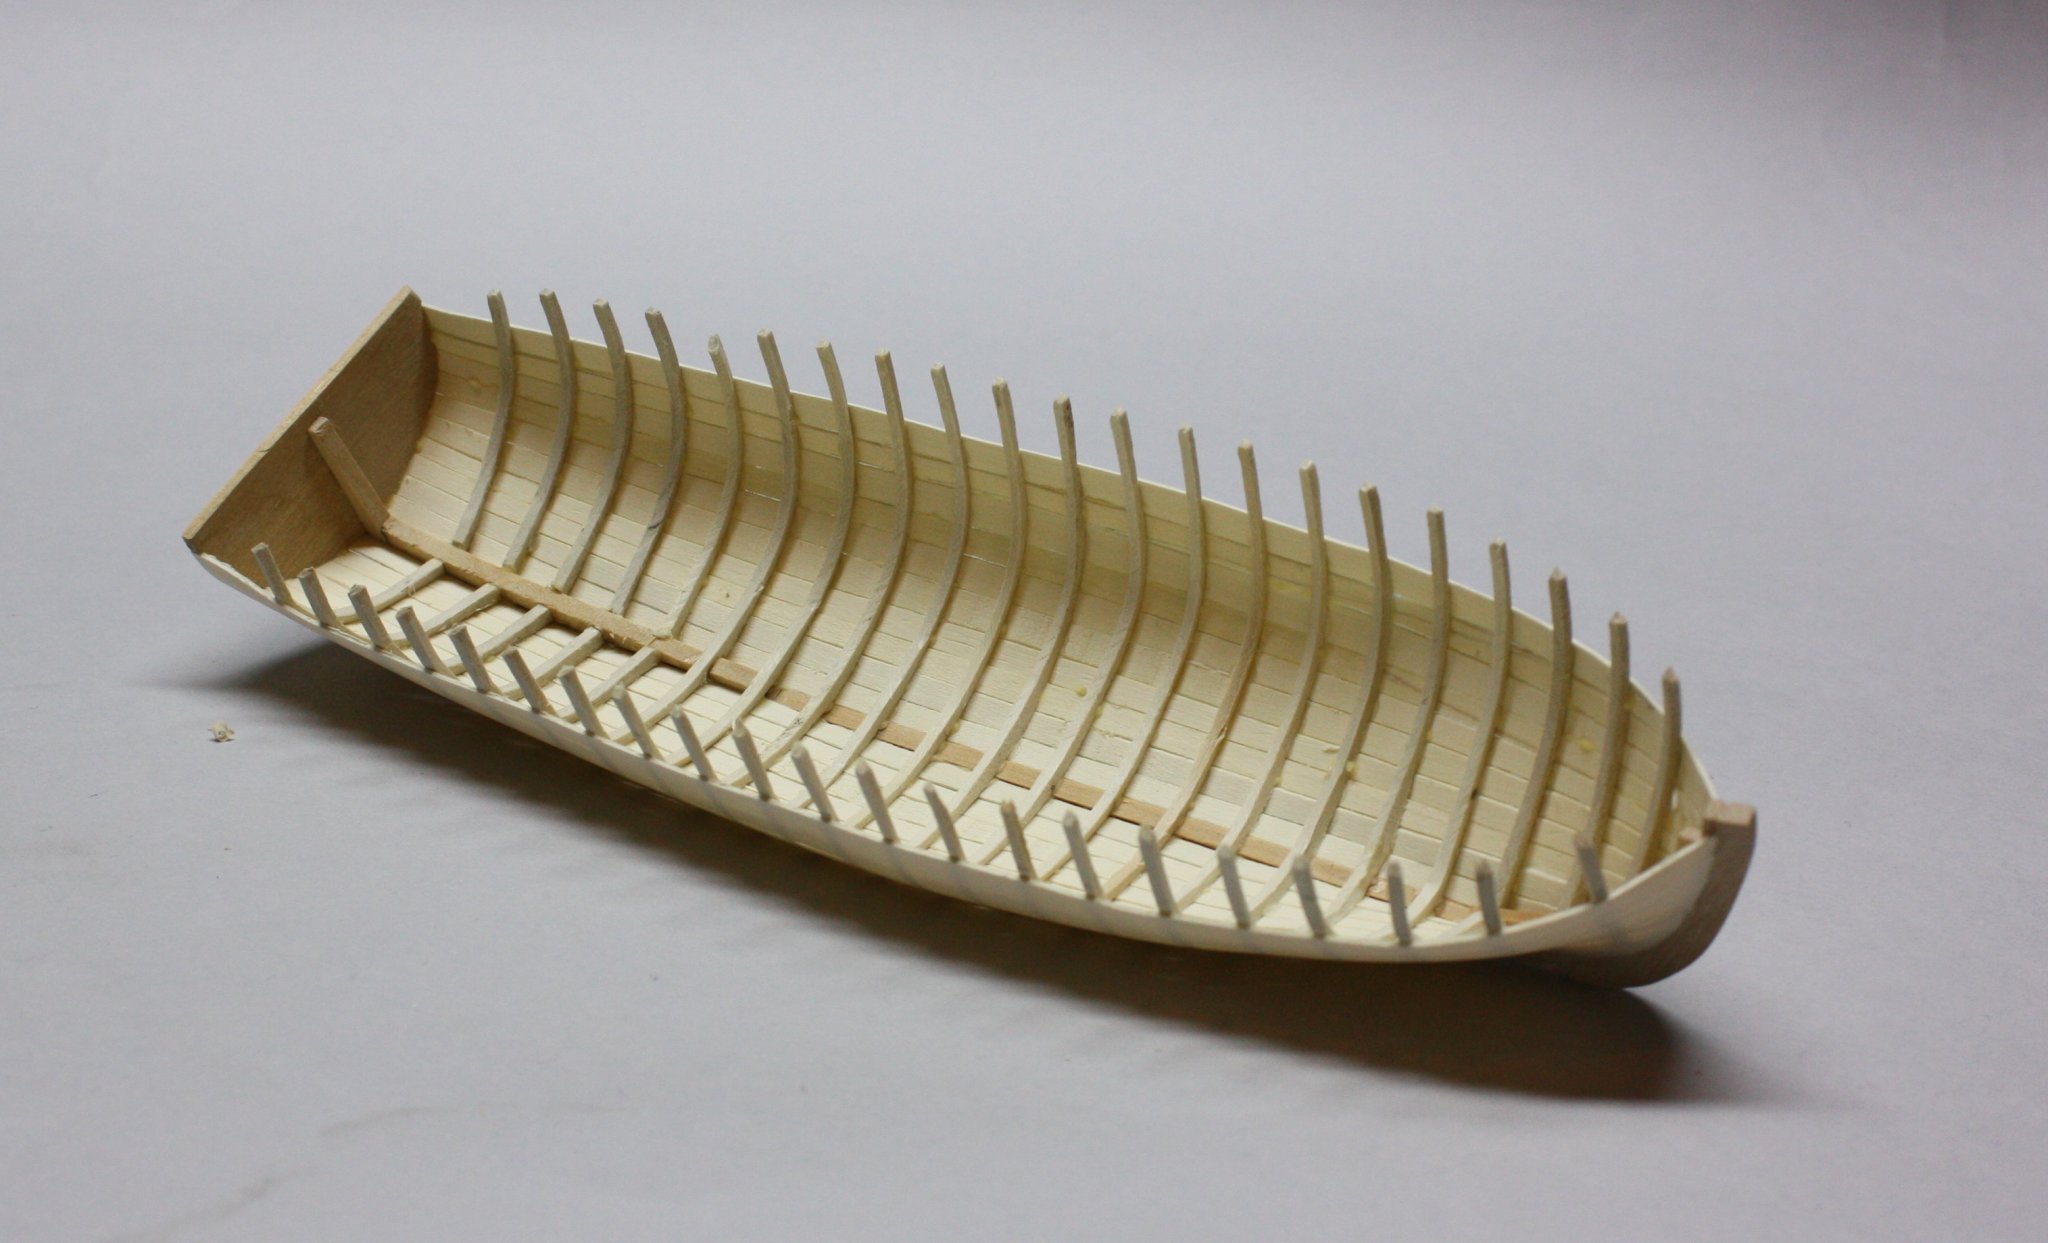
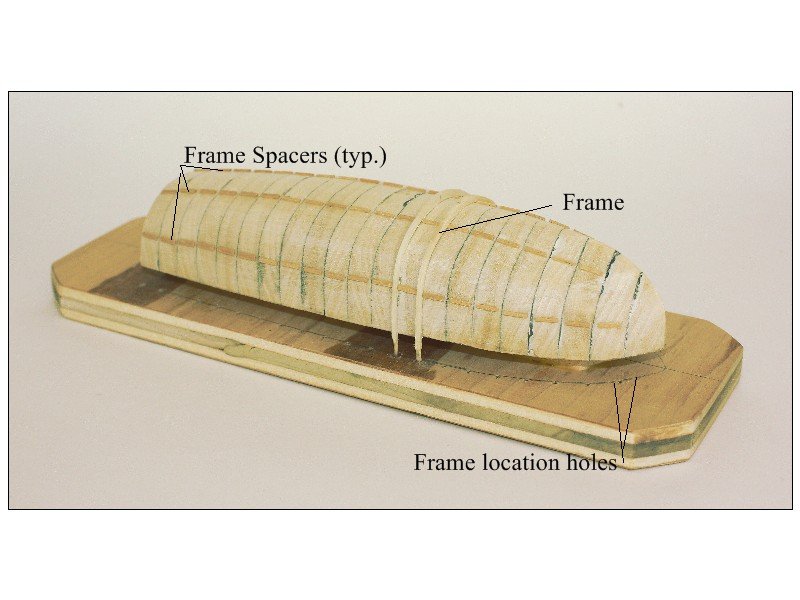
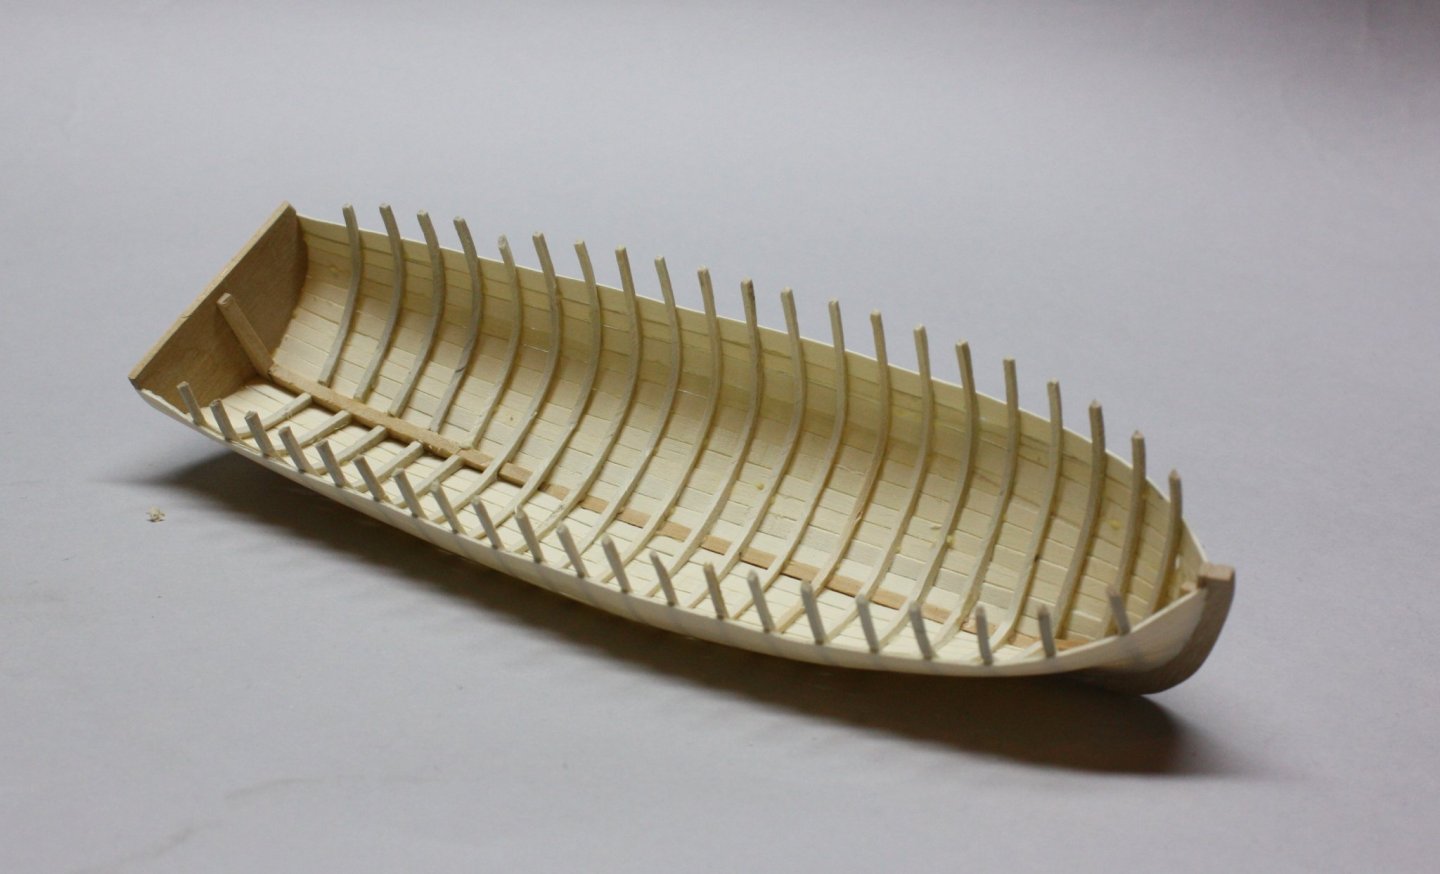
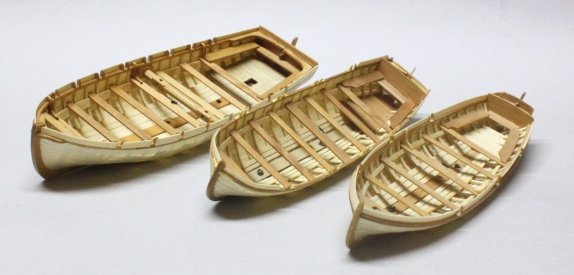
I am with Druxey in not using grooves. They tend to be graves for errant frames if you want to place the frames first. I make a similar mold shaped to the inside of the frames, then glue tiny spacers to keep the frames in place. Holly is great for the frames as a minute soaking in water will allow them to be bent without splitting (95% of the time). Couple photos to give you a better idea of what I mean. Allan
-
Hi Barry, A big welcome to MSW! As this is your first post, perhaps you could post an intro about yourself in the new members section as well. Have you checked the other Panart Victory build logs here on MSW? Again, a warm welcome to the fray. Allan
-
Welcome aboard Dan. There are over 30K members here and probably as many opinions based on each one's personal experience. No wrong choice if it works for you, but each choice has limitations and consequences. My own take. Any CA glue such as Krazy glue has very limited used in wood working and there are better formulas to use so not needed. Carpenter's glue (yellow aliphatic such as Elmers and Titebond) is all around the best for wood. It is strong and cures relatively quickly. I never thought that speed should be a factor in a hobby, but that's just me. I am often looking for instant gratification, or so my dear wife keeps telling me, but not in all things, one being model building. Downside, it is not water proof. Upside, if there is a mistake, water or Ispropyl alcohol will loosen a part so can be fixed. Contact cement, never used it, but epoxy is a good thing to have handy when gluing/attaching metal and wood. While it takes time to cure, it is super strong. Sandpaper. Several grits including low numbers like 120 or lower for rough sanding, and fine paper such as 600 as you have for finish sanding. I urge you to start a build log which will have folks checking on your progress and will give you a chance to voice concerns and ask questions. Good luck with the build. Allan
-
Rattlesnake vs syren both by model shipways
allanyed replied to Georgiabush's topic in Wood ship model kits
I second Mark's suggestion. There thousands of mentors, teachers, helpers here for you. Allan -
James, I am sure there are members that will help you on this one. Just wanted to say welcome to MSW. Allan
-
PVA has always been my go to, but I used epoxy for metal to wood. I am not a fan of CA for wood joints, (but it is great in place of a suture on a cut finger :>) If you can I would cut the faces of the rabbet in the keel pieces before gluing it in place. It will be far easier getting the angles correct on both faces of the rabbet which are dynamic along the entire length. Allan
-
Jeff, Great question and I bet there are several ways folks here have found that work for them. If you have a Dremel or similar drill, they are far easier to control. For the mast holes, you can make a guide out of scrap wood with the angle that you want to drill a pilot hole, then follow it up with your larger drill as the Dremel or such won't take more than about a 1/8" drill bit or perhaps a larger bit with a 1/8" shank. Pilot holes are always a good idea when the final diameter is to be up there in size. For the hawse holes, not so easy, but again, a Dremel type drill and pilot holes should help. Allan
-
Panart Royal Caroline Rigging Help
allanyed replied to lesser160's topic in Masting, rigging and sails
Alan, Trust me, we ALL can!! -
Panart Royal Caroline Rigging Help
allanyed replied to lesser160's topic in Masting, rigging and sails
Alan, While the Petersson book is useful for a ship built circa 1785, as well as having some great detail work, it is may not always be appropriate for the Royal Caroline which was launched 35 years earlier. The best source IMHO is Lees' Masting and Rigging. Allan -
Panart Royal Caroline Rigging Help
allanyed replied to lesser160's topic in Masting, rigging and sails
Lesser, Truss pendants superceded parrels on the lower yards in about 1760 so parrels were likely used on the lower yards of Royal Caroline (1750), possibly with three rows of trucks . Parrels with two rows of trucks were used on the topsail yards and topgallant yards up to about 1806. The mizen yard also used parrels with two rows of trucks until about 1773 when they were replaced with a truss parrel. Hope this is some help. Lees' Masting and Rigging has a lot of details on how the trucks are rigged along with the yards' jeers, halliards, and ties as appropriate for the era and ship size. Allan -
Mike I built the Victory in 1978-80, but as I could not afford any kind of kit at that time, I bought only the plans from one of the kit manufacturers, (might have been Mantua but I don't remember) Those plans and a used copy of the Anatomy of Nelson's Ships by Longridge got me started into scratch building. I bought plywood for bulkheads, and other woods for the rest of the model, including poplar and maple from the local lumber yards and cutoffs from a local cabinet making shop. I had a cheap table saw for power tools, everything else was files, chisels, blades, hand saws and sand paper. Just one alternative to a kit that some might want to consider. Allan
-
Timerheads on the Smuggler
allanyed replied to GSege's topic in Building, Framing, Planking and plating a ships hull and deck
The simple sketch below may be easier to understand than a verbal description. Both POF and POB are shown. Allan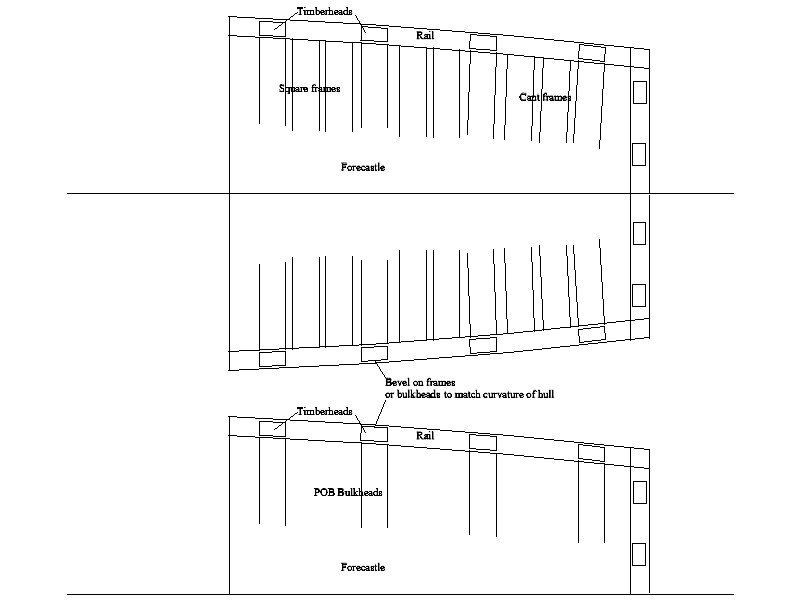
-
Hi Wefalck, You may be correct about sources of information being from Sweden, but in the book's introduction Petersson explains at some length that his source of information is from a contemporary model of the British ship Melampus in the Bristol Industrial Museum in England. He also credits guidance from Lees' work, the NRG and a few others but for some reason makes no mention of, the Stockholm Maritime Museum as a source of help or information. Allan
-
David The rigging of the stays varied over the years. Abridged description from Lees' Masting and Rigging English Ships of War ---- Deadeyes were used up to about 1690 rather than any type of heart. Closed hearts came into use about 1690 followed by the use of open hearts for the forestay from 1773 on. From 1840, some ships used thimbles in place of the hearts, but this was not general practice. The rigging of the hearts changed as well depending on which stay, ship, and year. If the ship had open hearts, according to Lees on page 169, ……This type of heart was used on the fore stay and fore preventer stay collars to allow the collar to go round the bow sprit, leaving room for the jibboom, which jives with the picture you posted from Petersson.. Note that this does not apply to the main stay. I could not find any snaking between the stays and preventer stays in Petersson's book. While this was common practice during war time in the 18th century and into the 19th century, it was not always used, so inclusion is up to the builder, but makes a nice touch if appropriate for a ship built and used during any of the war years. As England was at war with France from 1793 to 1815, the snaking would be appropriate if you are referring to your build of Diana 1794.. Allan
-
Michael, I checked photos of contemporary models at Preble Hall and none of them have caulking between planks on the hull. That is not to say there are none there, but I did not find any in my collection of photos. These models are at 1:64 or 1:48 scale. What scale are you working with? If you are at 1:98 or thereabouts, IMHO there is no need to show caulking, especially if you have a dark grainy wood like walnut. Can you post some photos of the models that you found that have caulked hull planks, I am really curious to see what these models look like? Maybe something to consider for my own future projects :>) As to methods of caulking, I prefer black tissue paper, but as you do not want to go that route, Mark's comment is spot on, soft pencil or black marker. If using a marker, as thin as the second layer of planking normally is on the kits, be careful the ink does not wick into the wood and/or get over the edge. Test pieces as Mark suggests is always a good idea. Allan
-
For those who own this book, is there anything included that is not covered in the tutorials here at MSW? Thanks Allan
-
My wife ordered a copy of this book for my birthday and I am VERY happy to own a copy. I second the comments by Mark in his March 31st post above. In addition to the detailed information Richard Endsor has included, there are photos of a model that Phillip Reed built based on the drawings and scantlings in the book, so know that there is sufficient information to build an accurate model of Tyger, Mourdant, or perhaps other similar fourth rates in the time period covered. Allan
-
Welcome aboard Ernie. Very nice intro to who you are, and appreciated. Sounds like you may be able to help a few folks here with a sideline in airplane habits. Know that you will have a lot of help available to you on your ship project. Allan
-
Bienvenue dans notre groupe amical PJ. Bonne chance avec votre projet. Allan