HOLIDAY DONATION DRIVE - SUPPORT MSW - DO YOUR PART TO KEEP THIS GREAT FORUM GOING!
×


Rustyj
-
Posts
2,530 -
Joined
-
Last visited
Content Type
Profiles
Forums
Gallery
Events
Everything posted by Rustyj
-
 That looks great!
 -
Thanks for the advice on the Crafty Sailor. I went on their site last night and ordered up some belaying pins. 44 minutes later I received an item shipped email. Such fast service I thought I accidentally ordered from Syren! I agree Glenn. As far as the wheels go after 96 of them sanded down to remove the char the tips of my fingers will have all the "char" removed from them too! Thanks everyone for stopping by and all the likes.
- 642 replies
-
- 5
-

-
- winchelsea
- Syren Ship Model Company
- (and 1 more)
-
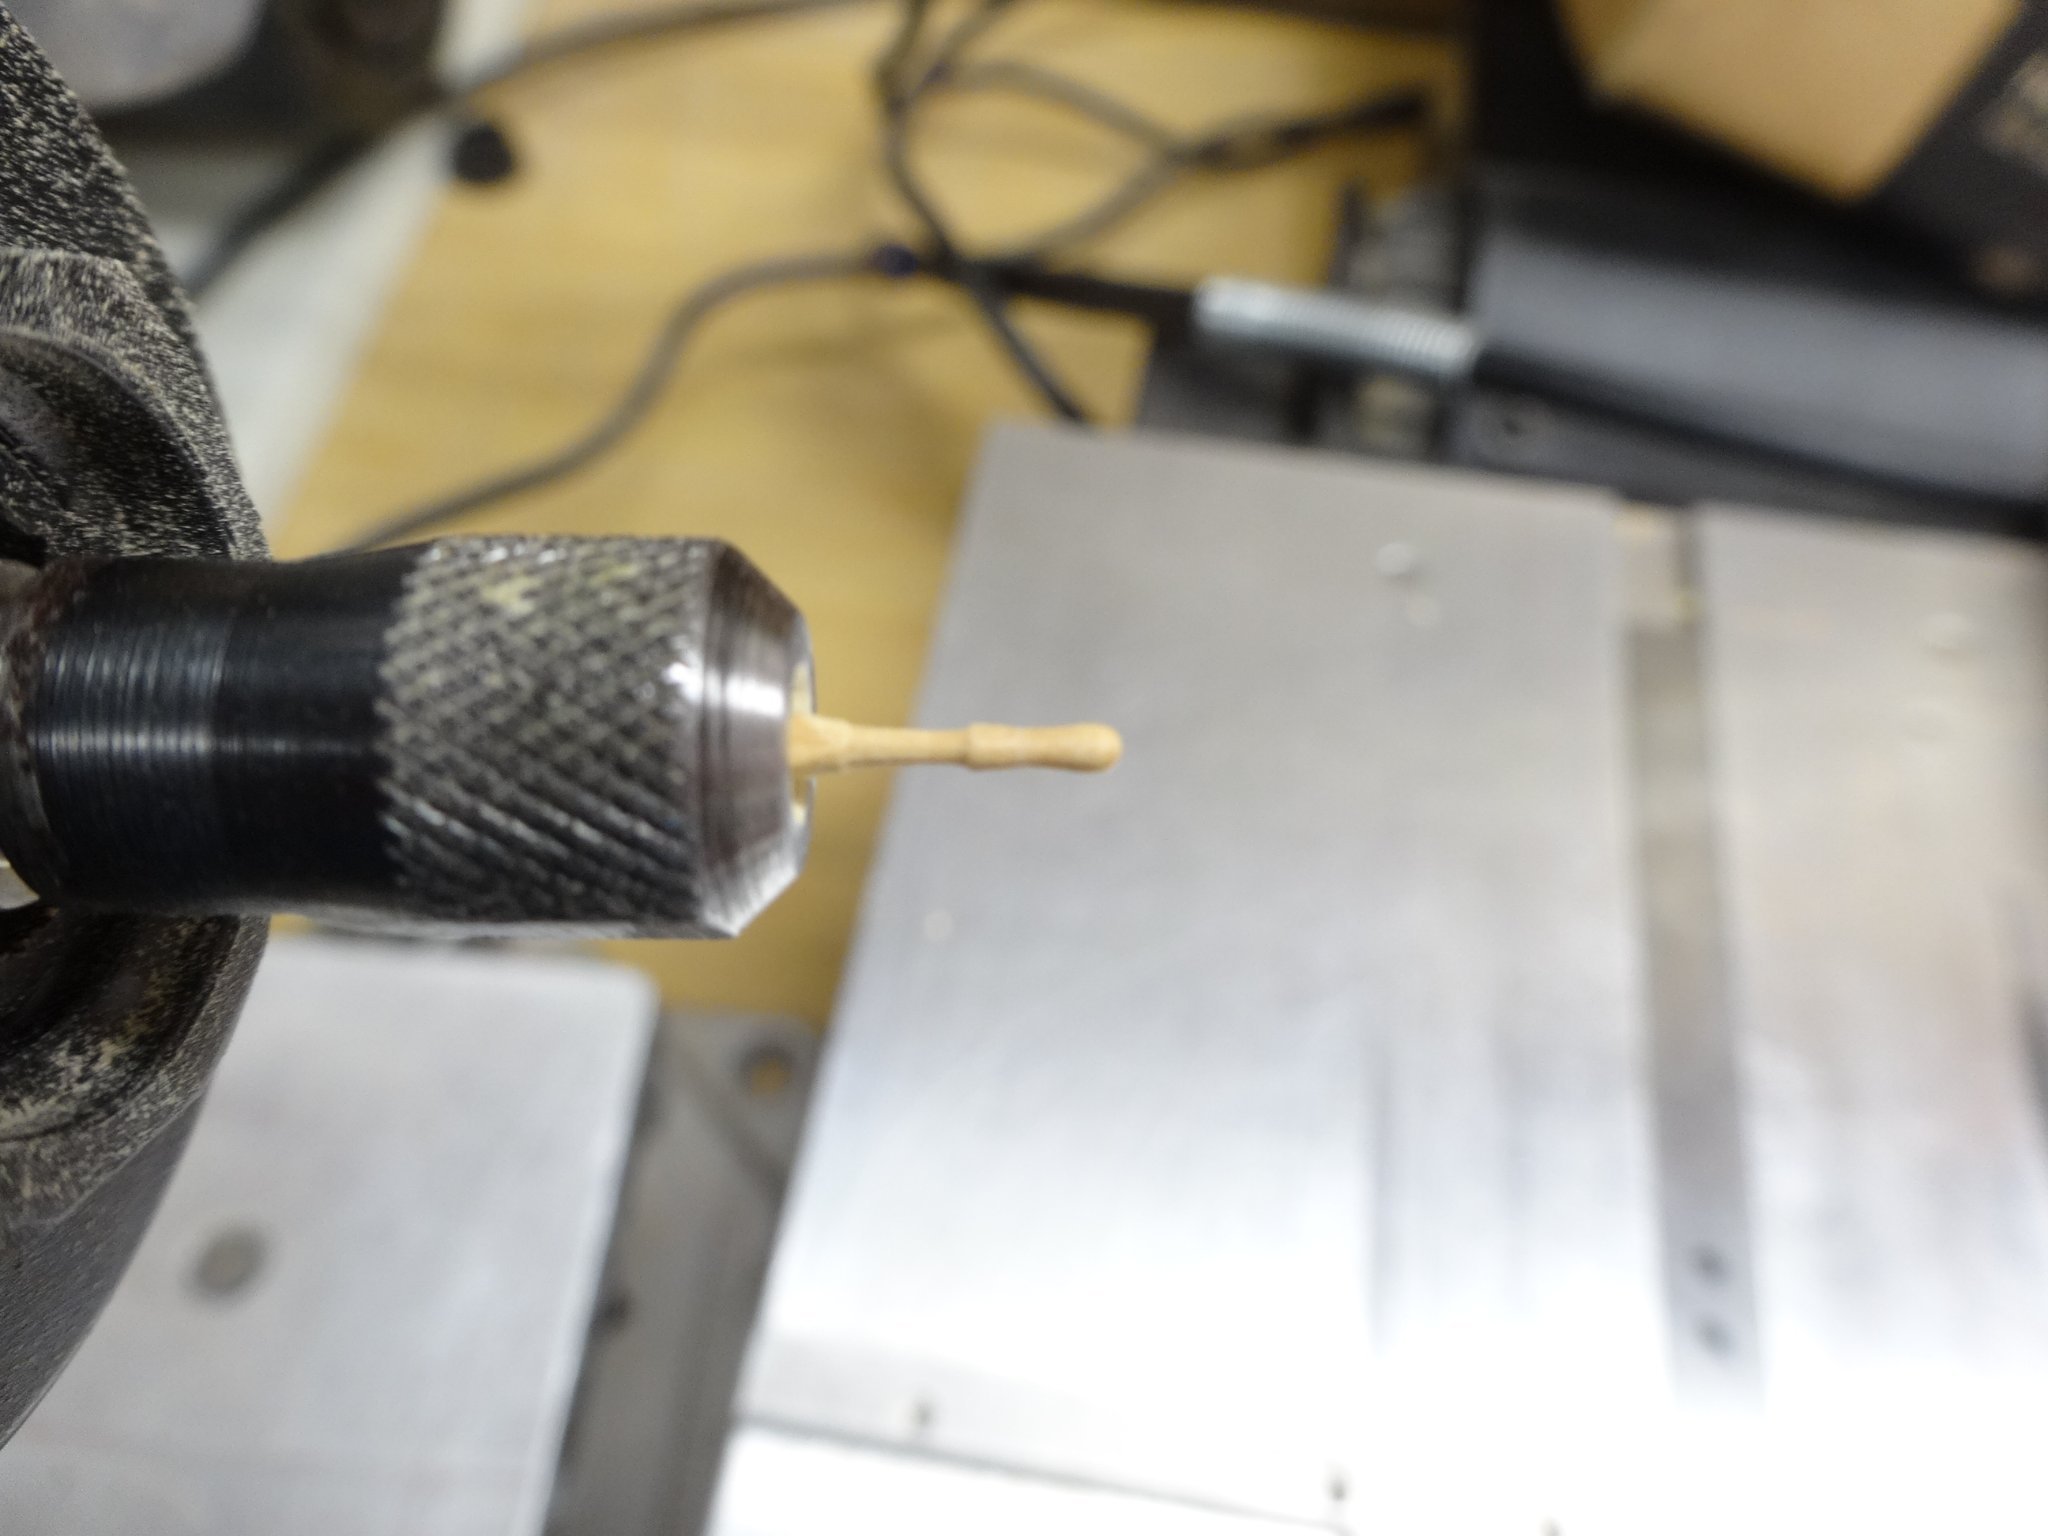
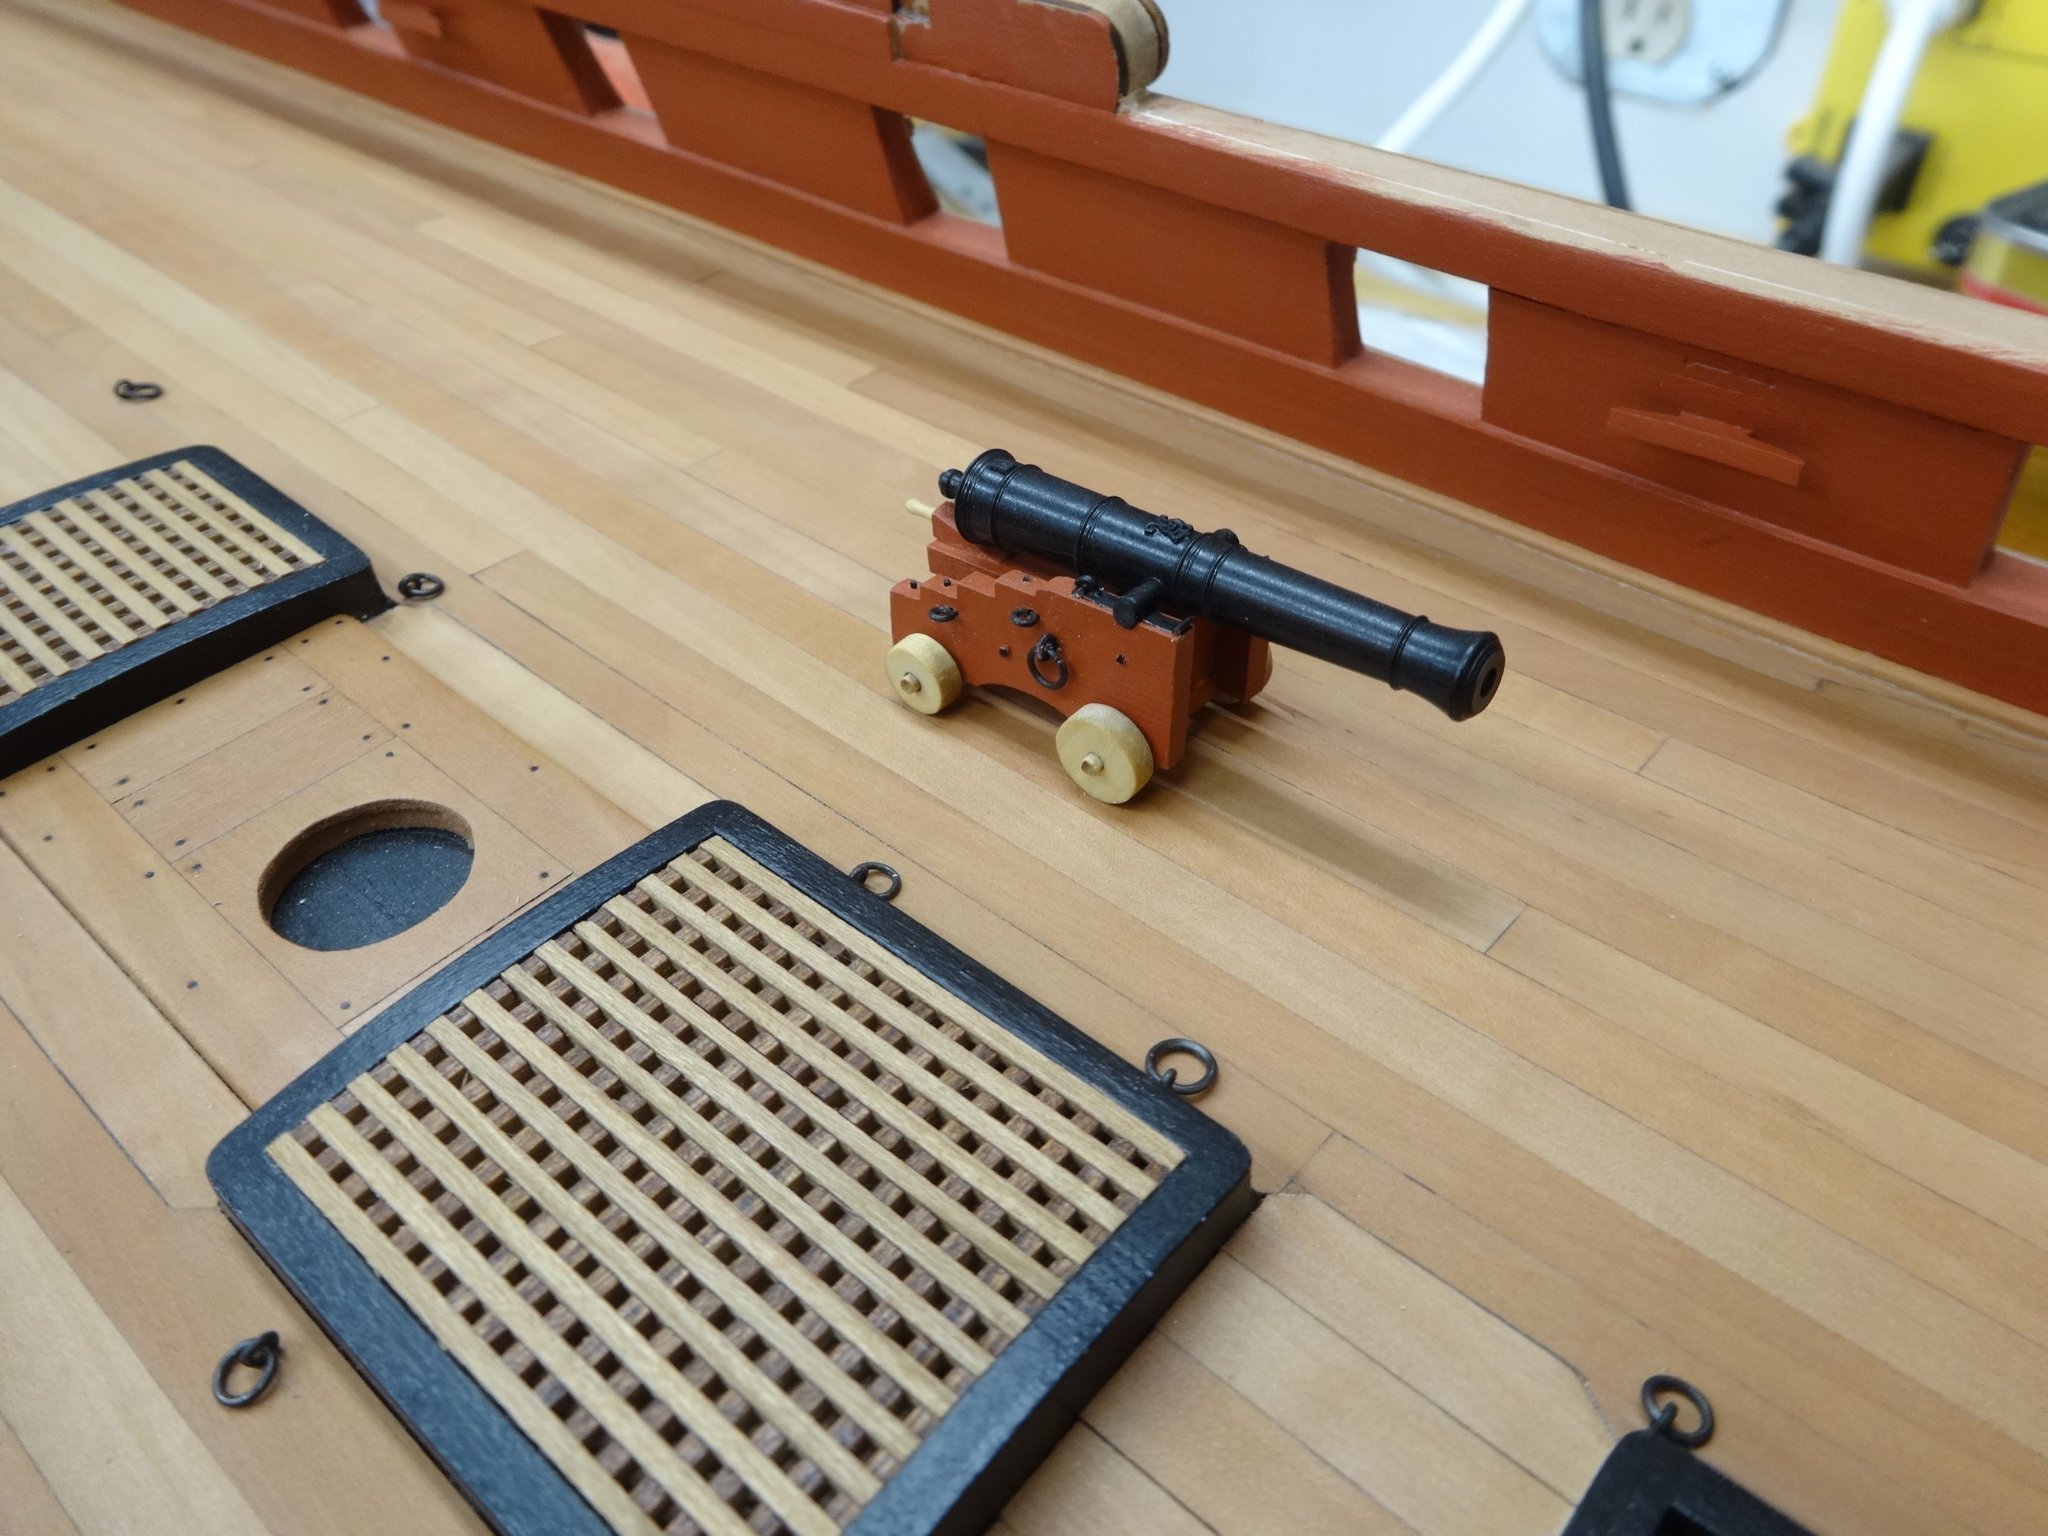
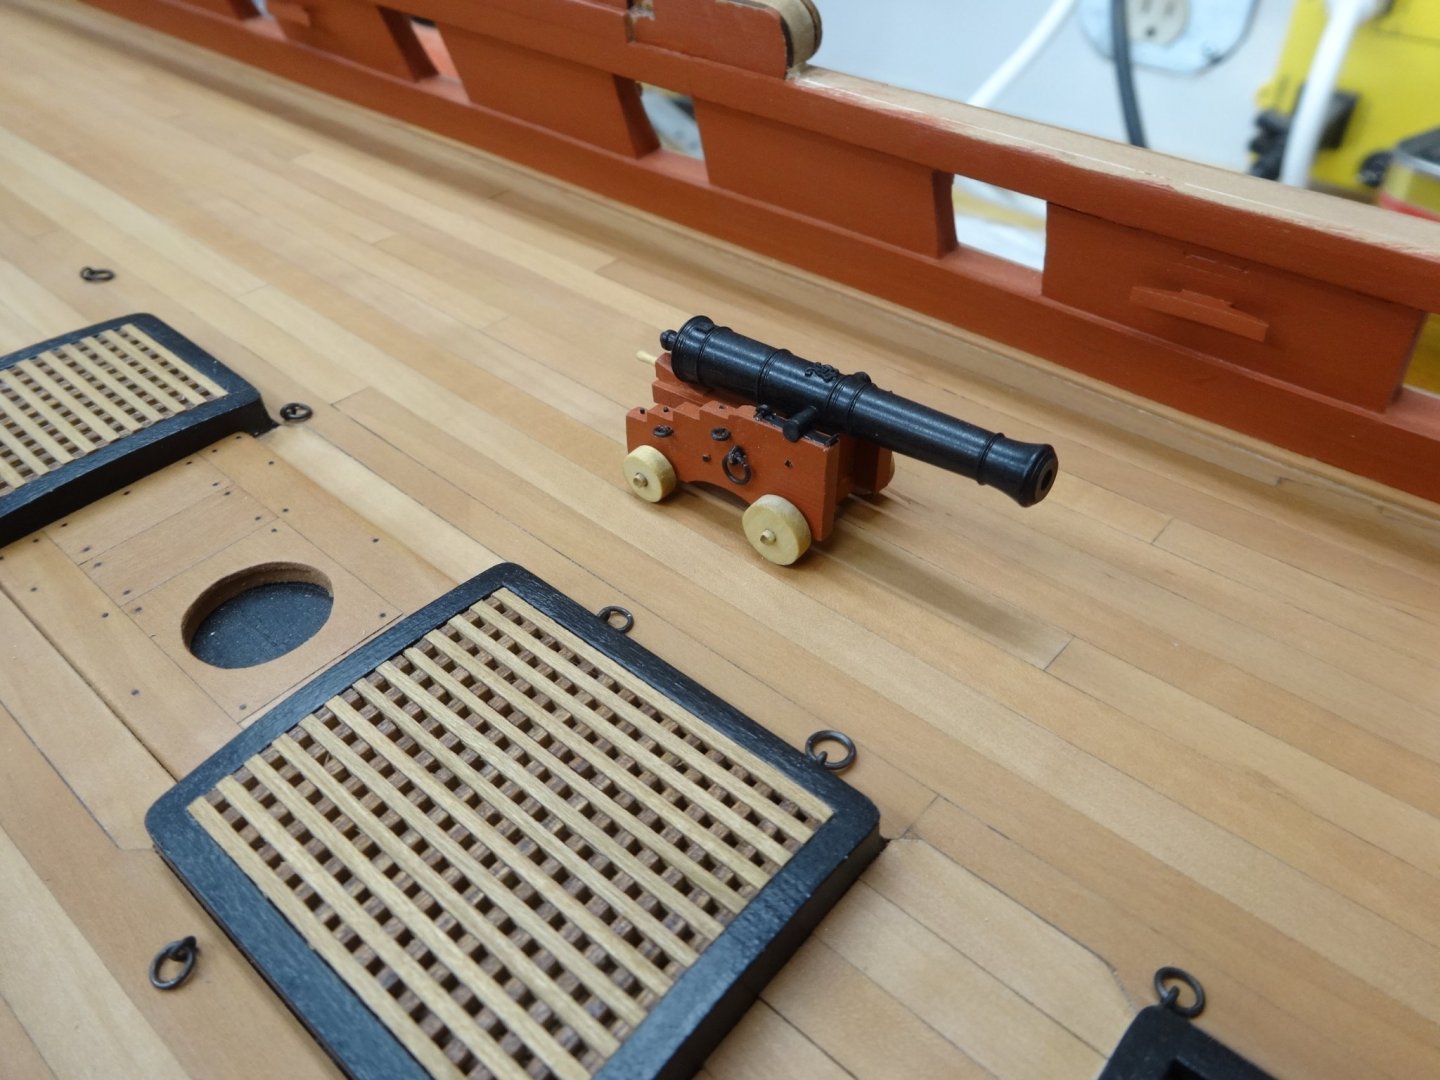
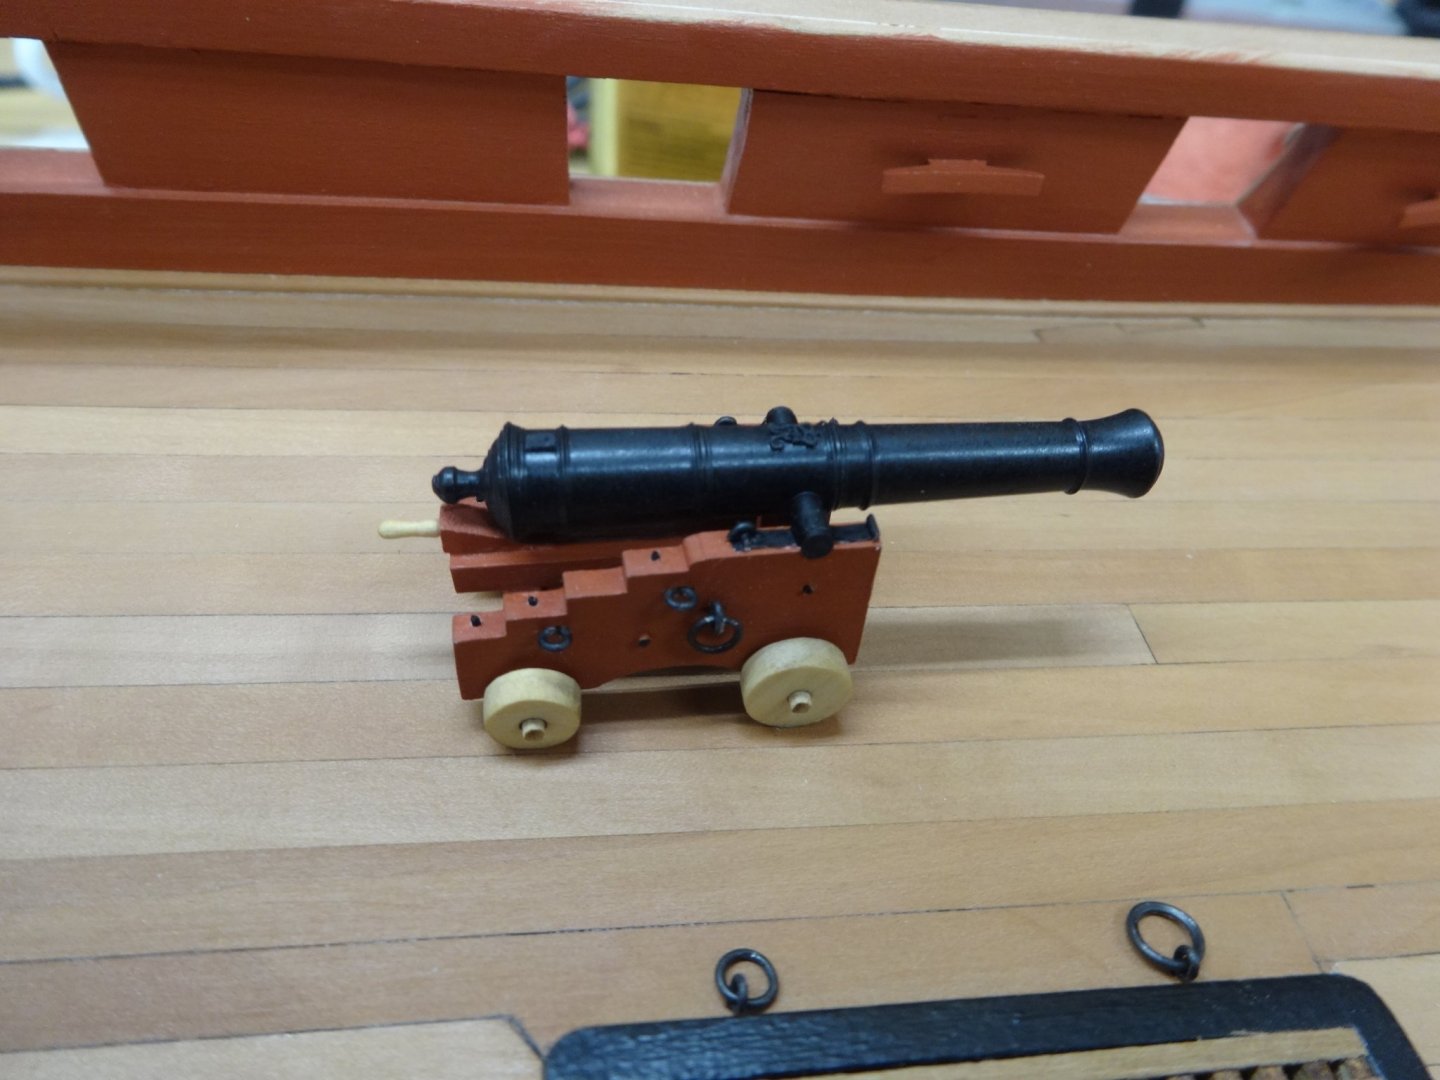
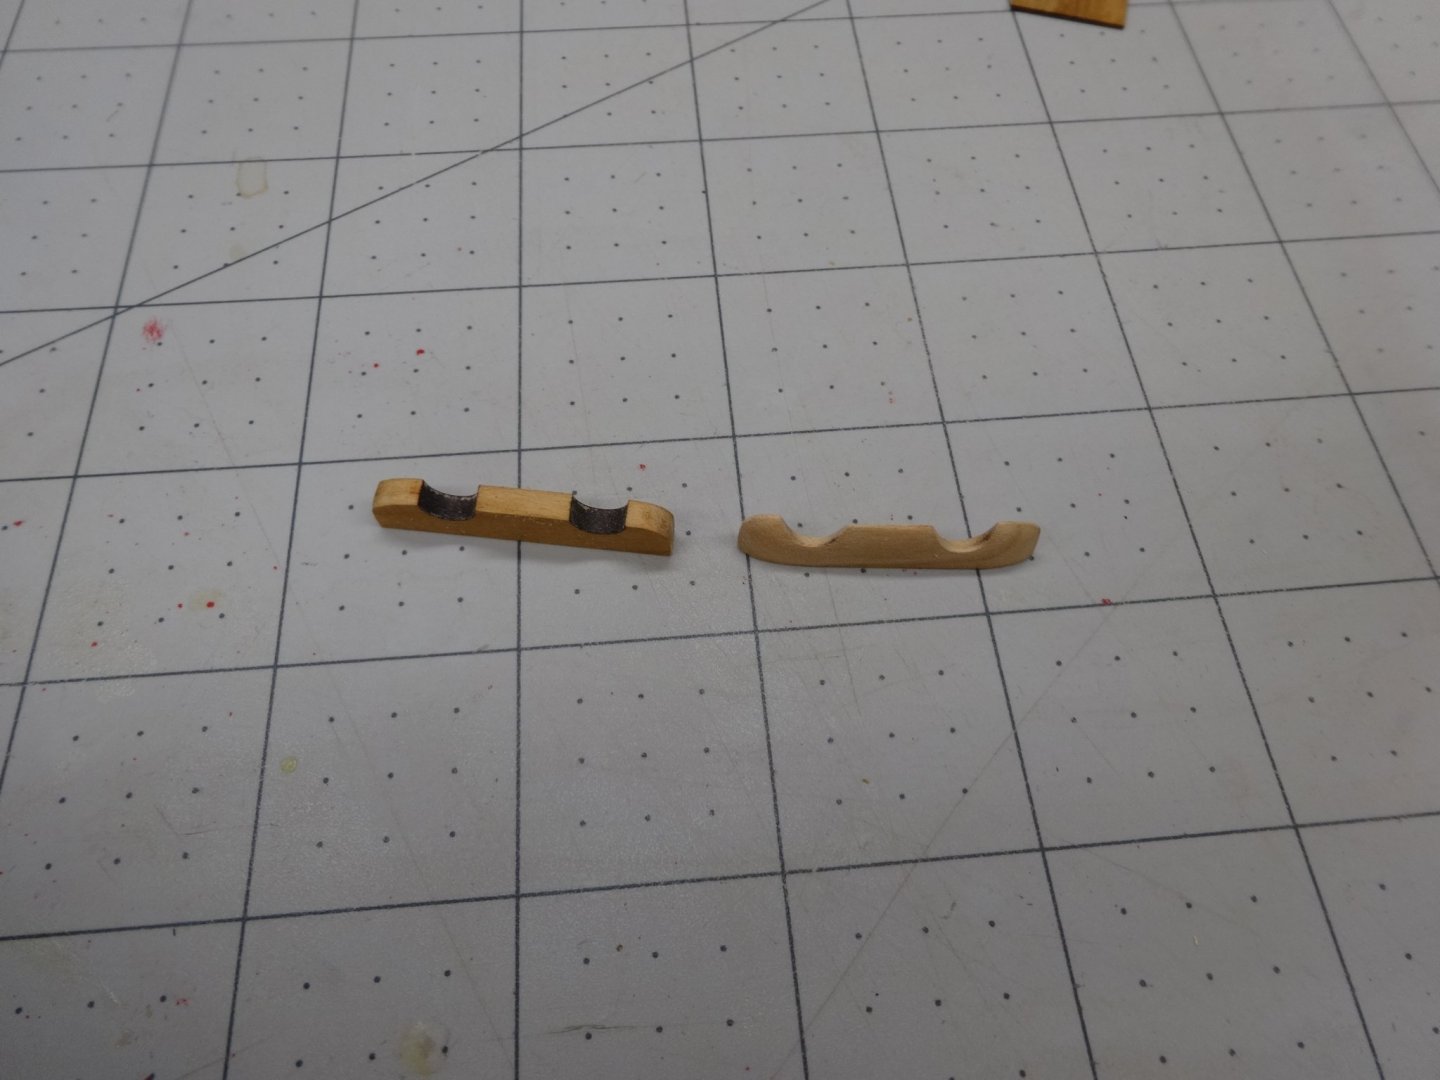
Hi All, I've completed one cannon! 25 to go. I wanted to do one from start to finish just to see how it goes. The rest I'll work my way through assembling them in stages. The carriages and black resin barrels are from Syren of course. Once the carriages were assembled I turned the supplied 3/64 x 3/64" boxwood strips to form the quoin handle in my dremel. Using miniature metal files I shaped them. I tried miniature diamond files but they were too course. Now I'll have to replicate them 25 more times. The barrel was cleaned up and sprayed with dull coat, weathering powder added and then another coat of dull coat. Once dry I added to the carriage and then made the cap square. You will notice the split ring for the breach rope. It has not been glued in place as I'm still contemplating adding it. If I do that will be the only rigging I'll add to the guns. This is how it all turned out.

- 642 replies
-
- 13
-

-
-
- winchelsea
- Syren Ship Model Company
- (and 1 more)
-
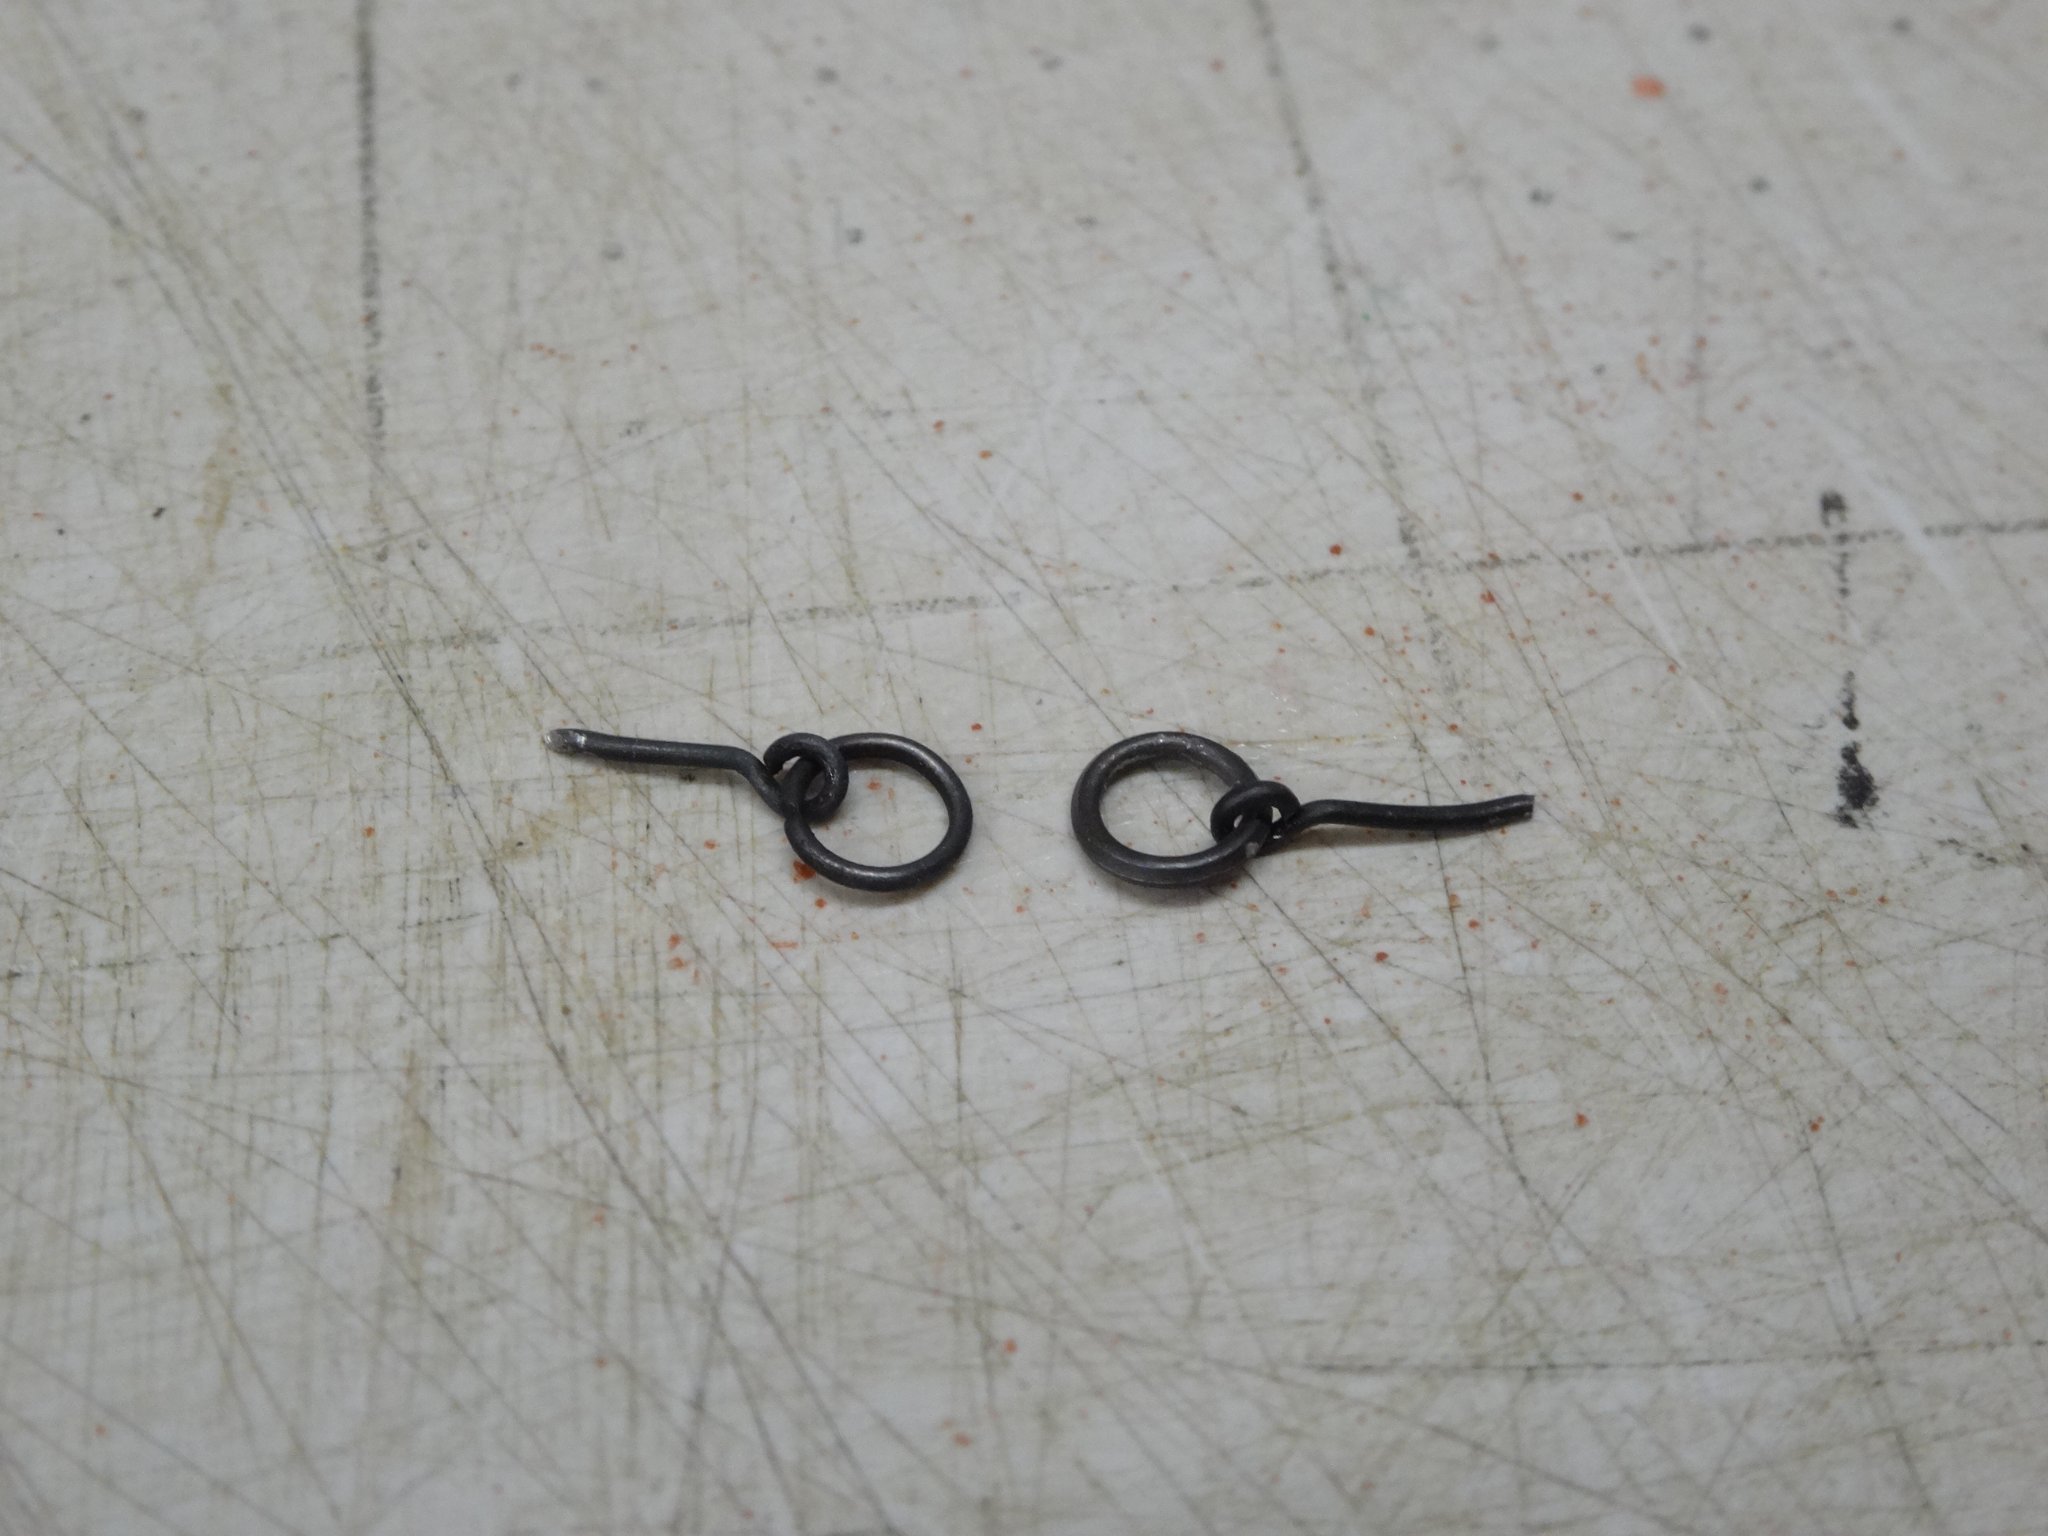
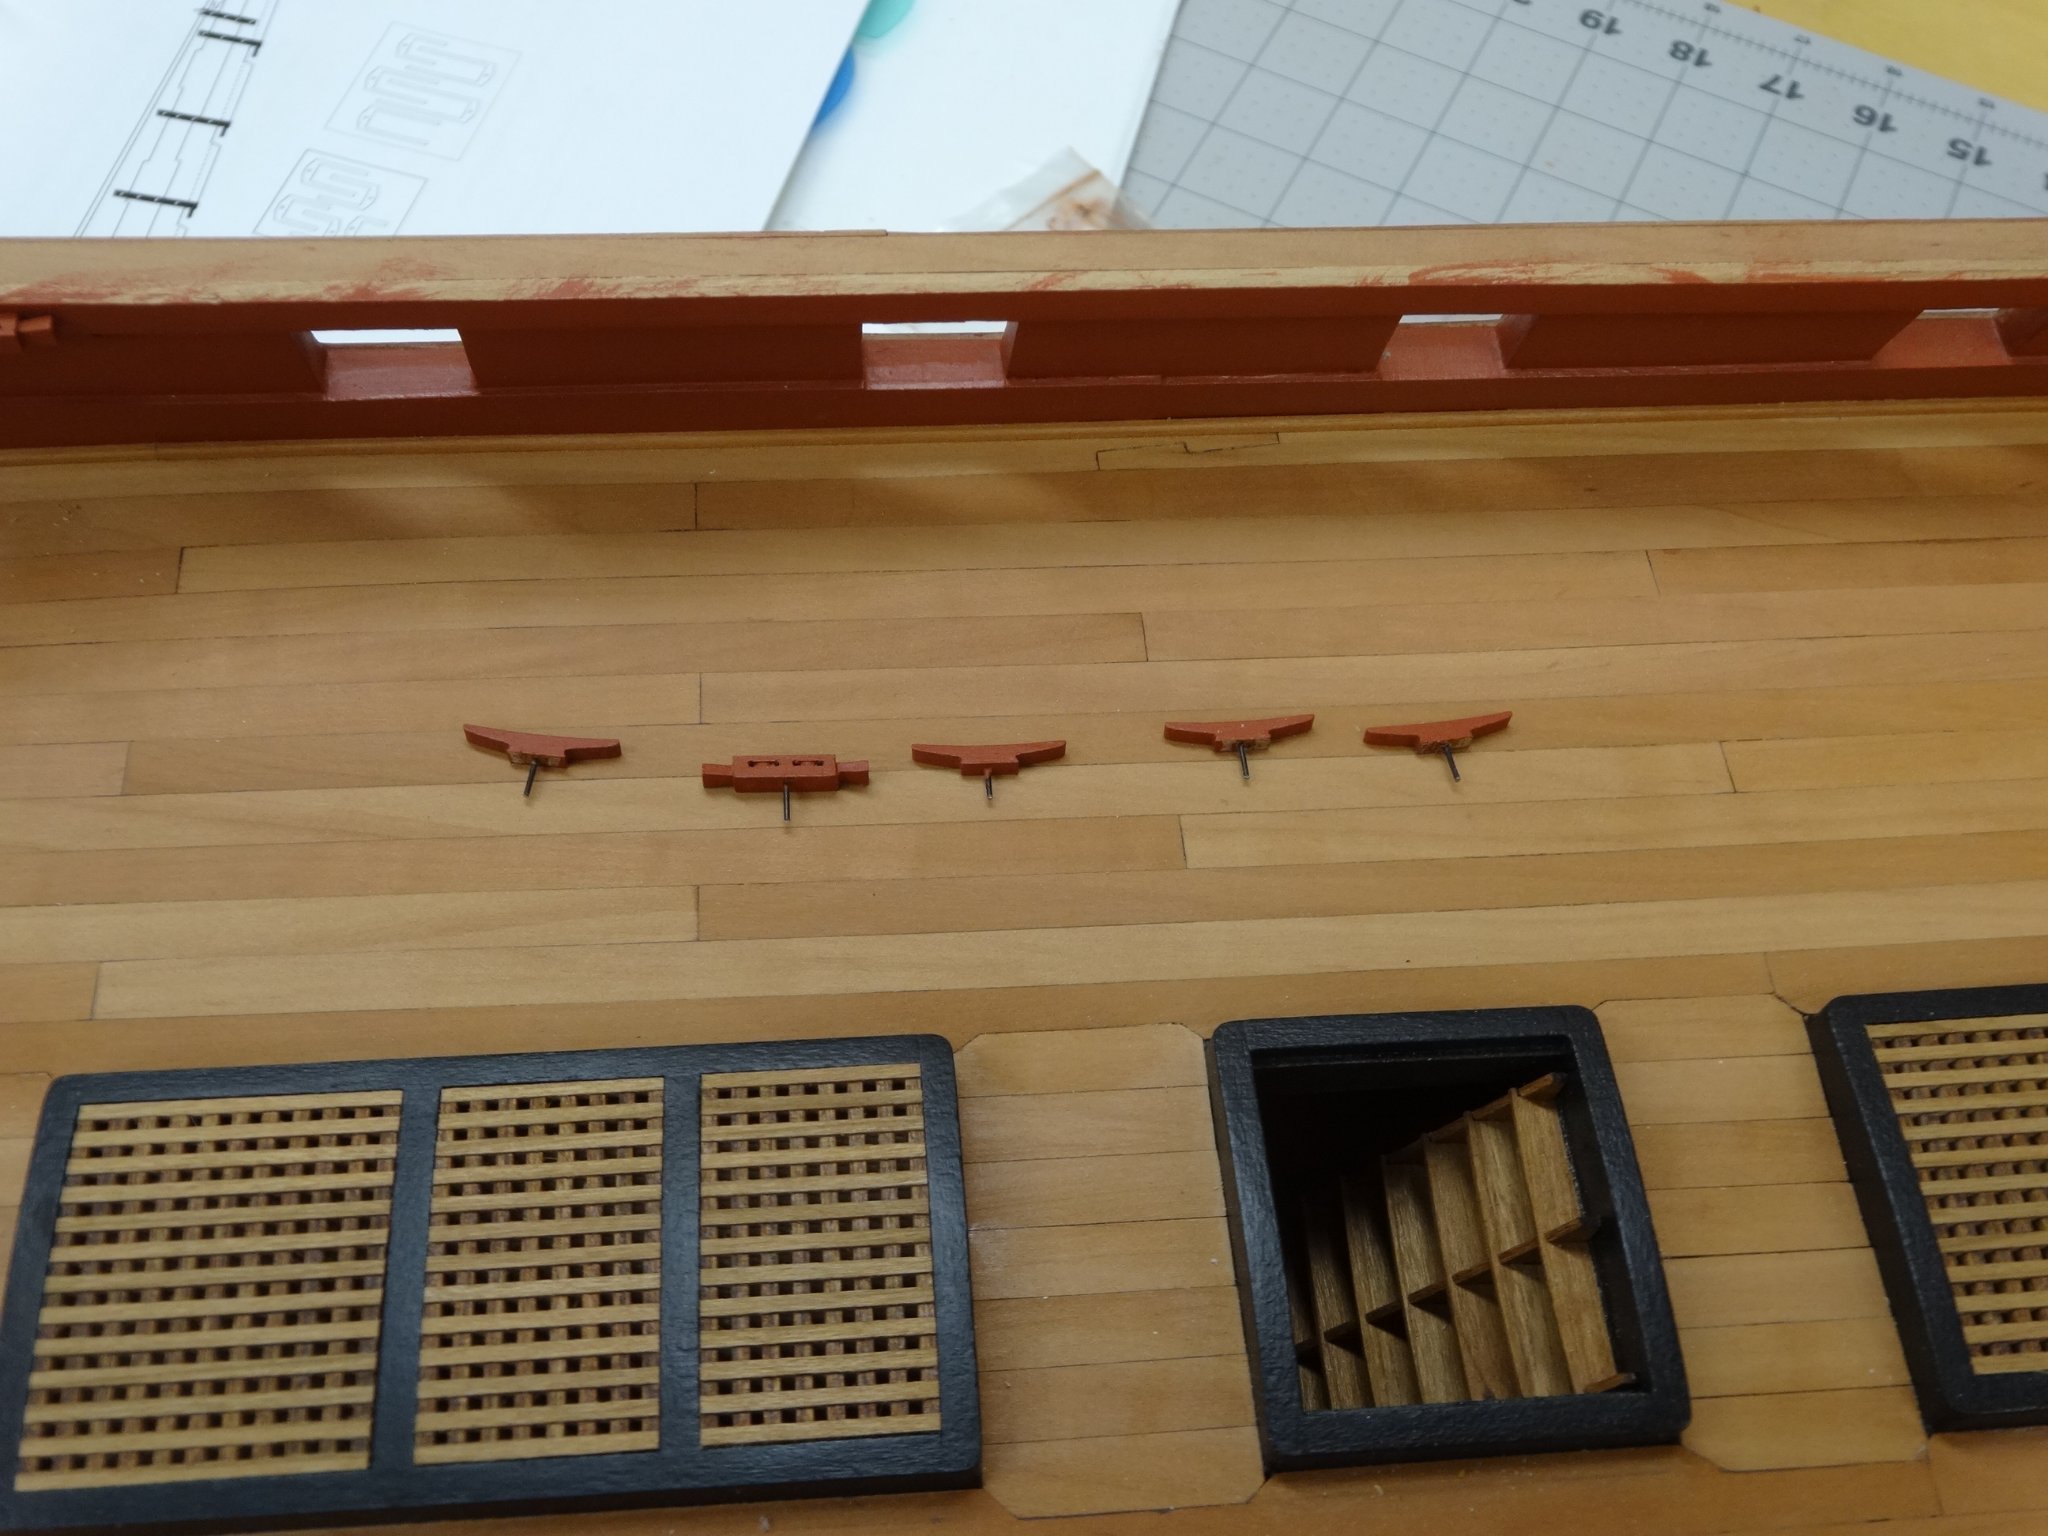
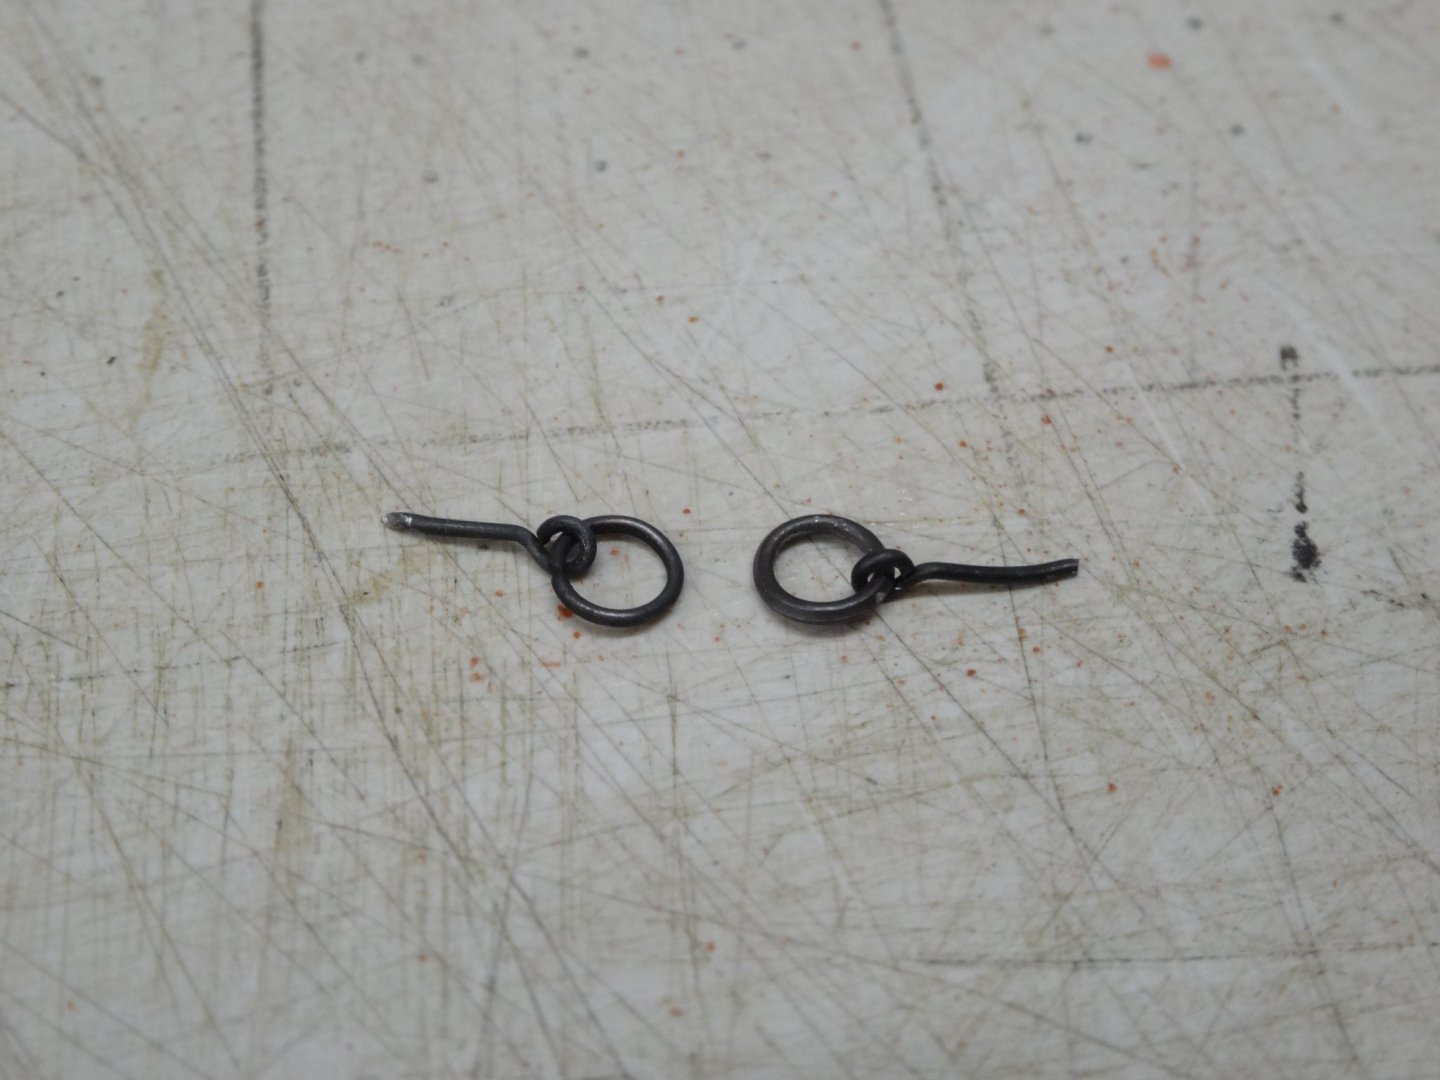
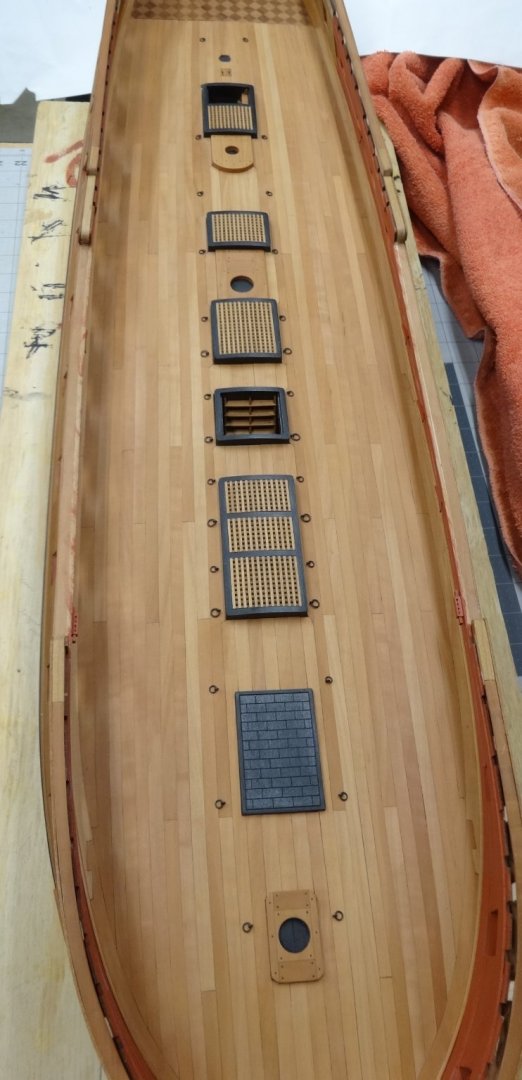
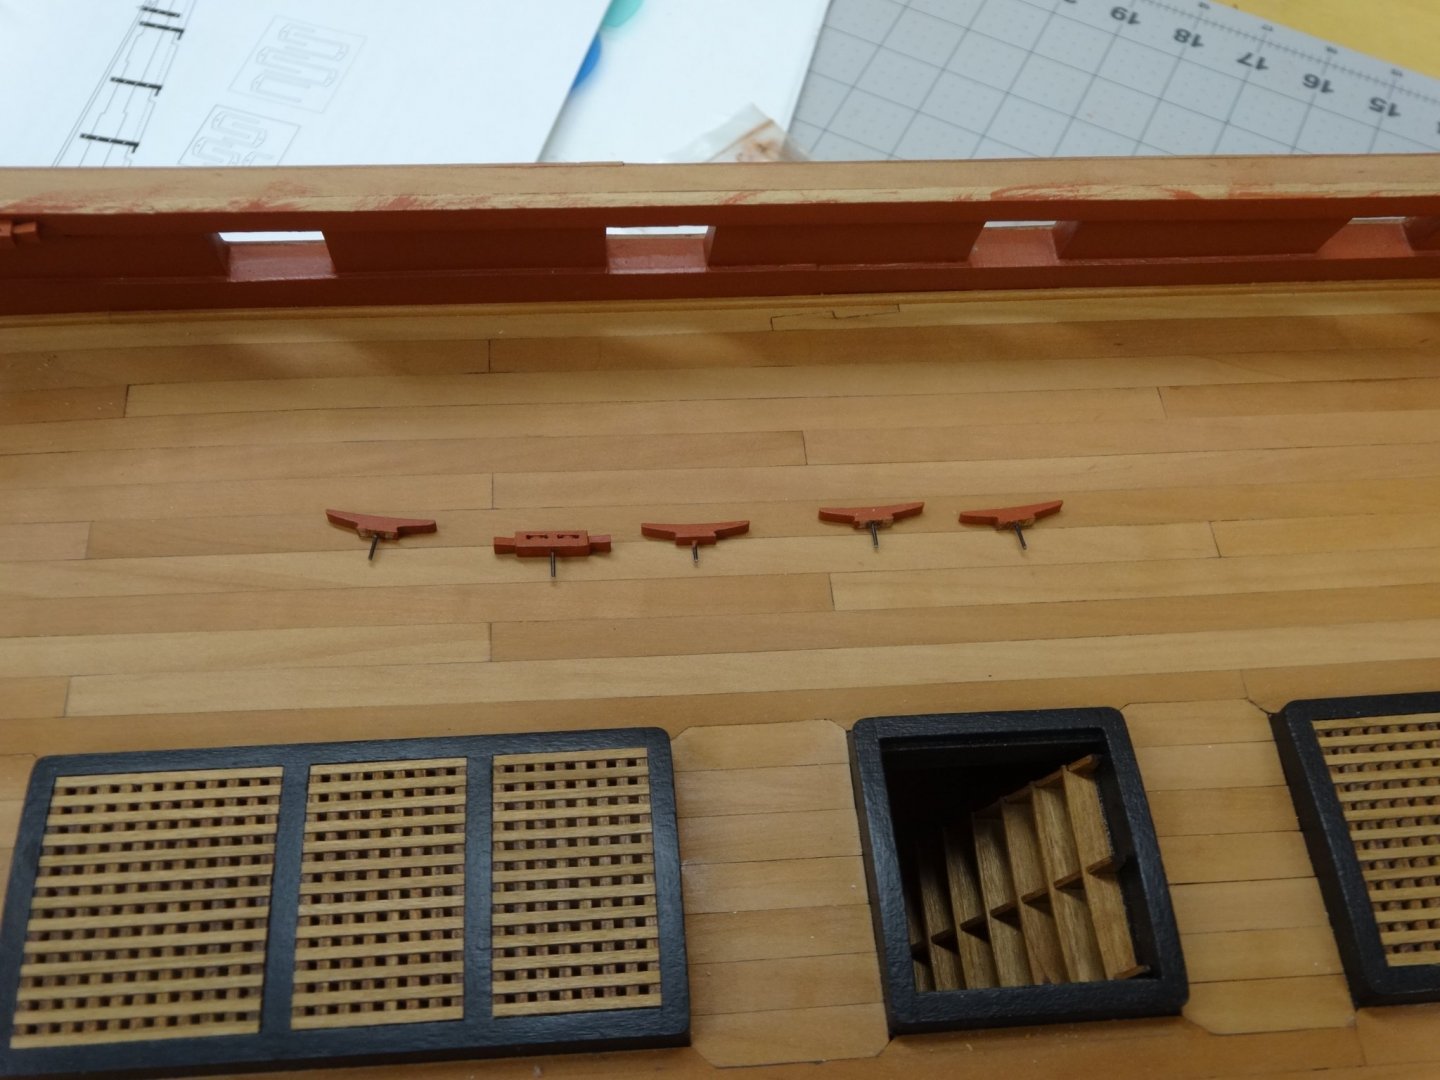
Good ones I'm sure! Should we be talking about rhythm method?😉 If I had to make these for a living I'd have to charge so much It'd cover the cost Chuck's next model! Making these was a real pain in the.........hands. 😂 Well while I was at it I figured I should make the larger ring bolts for the deck. There are 8 of them and Chuck used a #31 drill bit. I did not have a #31 drill bit so I looked up what size it is and found it to be 0.120. The closest I had was a 1/8" bit that is 0.125". Close enough for me. So I started to make them with the 24 ga. wire when I remembered that they needed to be made out of 22 ga. The one on the left is the 24 ga. You can see it is a noticeable difference. And here is the deck with the ring bolts installed. Nothing fancy just followed the plans.
- 642 replies
-
- 15
-
-
- winchelsea
- Syren Ship Model Company
- (and 1 more)
-
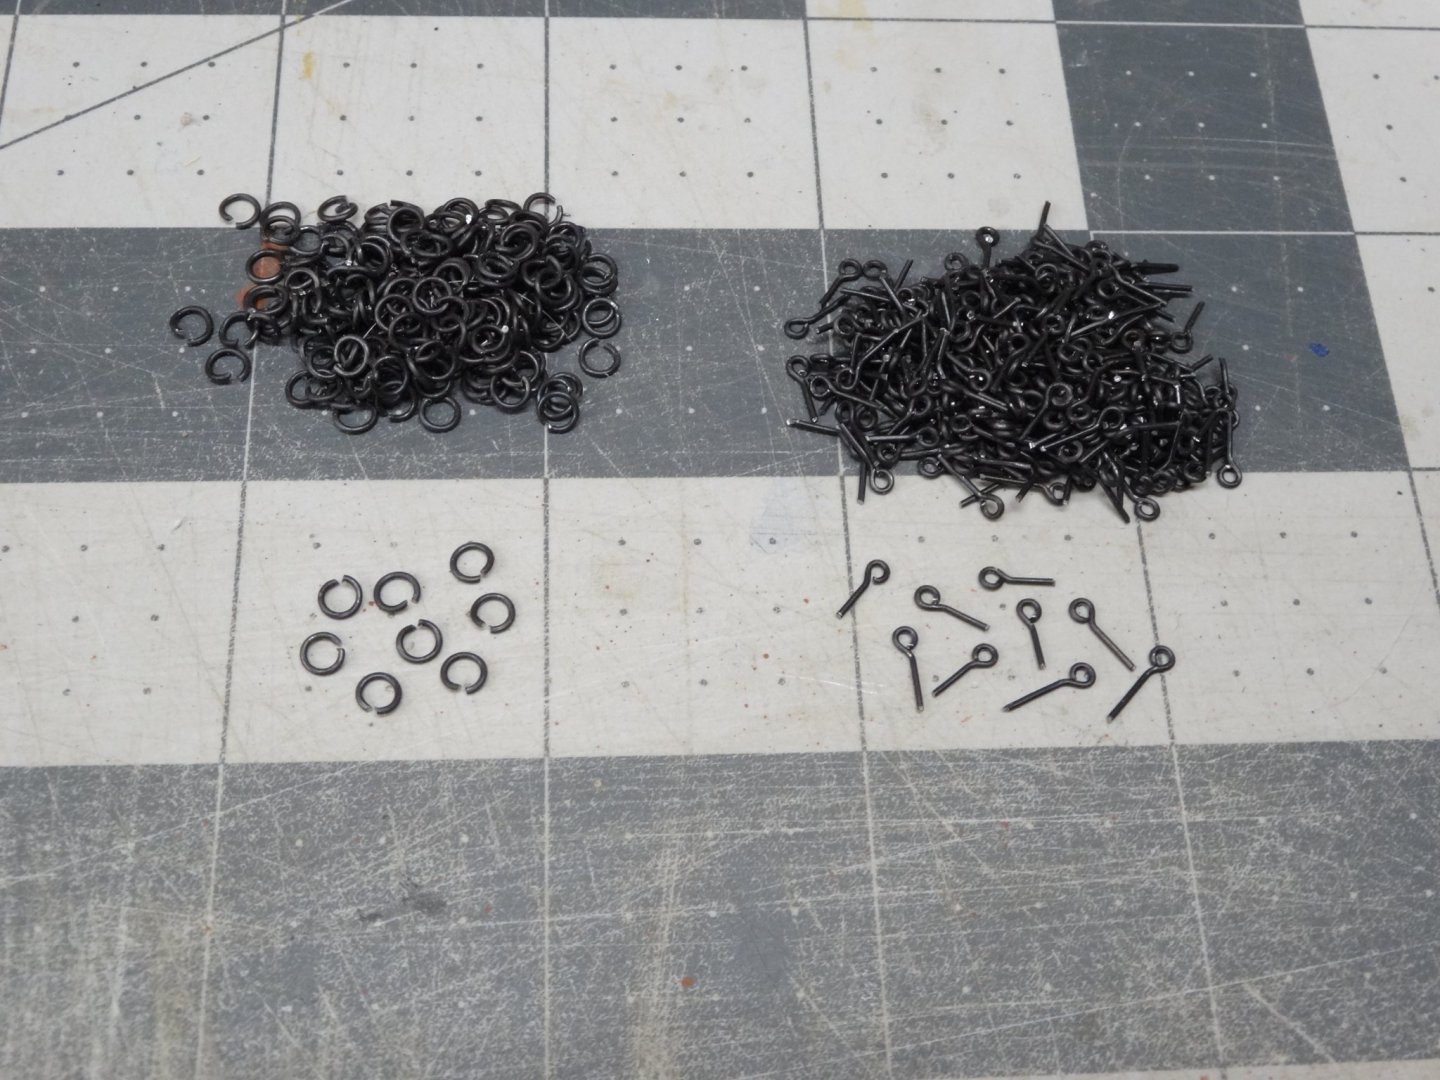
Here are the piles. All the split rings and eye bolts were made from 24 gauge wire. On the left are around 140 split rings. They were formed around a #41 drill bit. On the right are around 315 eye bolts. The eye was formed around a #61 drill bit. Now the work on the carriages can commence.
- 642 replies
-
- 14
-
-
- winchelsea
- Syren Ship Model Company
- (and 1 more)
-
Thank you, Vladimir. Nothing much to show right now. I've been spending the last few days making 150 eye bolts and 100 split rings. I want to concentrate on these and get them out of the way before I start on the carriages this weekend.
- 642 replies
-
- 2
-
-
- winchelsea
- Syren Ship Model Company
- (and 1 more)
-
I think that the yellow ochre will look really good but don't rush it. Good luck on your surgery! You'll be as good as new afterwards. I got a new valve 6 years ago and all is good now.
- 505 replies
-
- 9
-

-
-
- vanguard models
- Sphinx
- (and 1 more)
-
Thanks Bob! Also thanks for all the likes too.
- 642 replies
-
- 1
-
-
- winchelsea
- Syren Ship Model Company
- (and 1 more)
-
Thanks JJ, Looking forward to when you can unpack your Winnie! Thanks Chuck, The stern and head rails were some of my biggest concerns coming into this build and relived they are finished. I'm just glad we're not doing a 1st rate guns! Thanks Glenn, Knowing your workmanship and dedication your model will be one many will reference for guidance!
- 642 replies
-
- 3
-
-
- winchelsea
- Syren Ship Model Company
- (and 1 more)
-
That is some great workmanship! Beautiful.
-
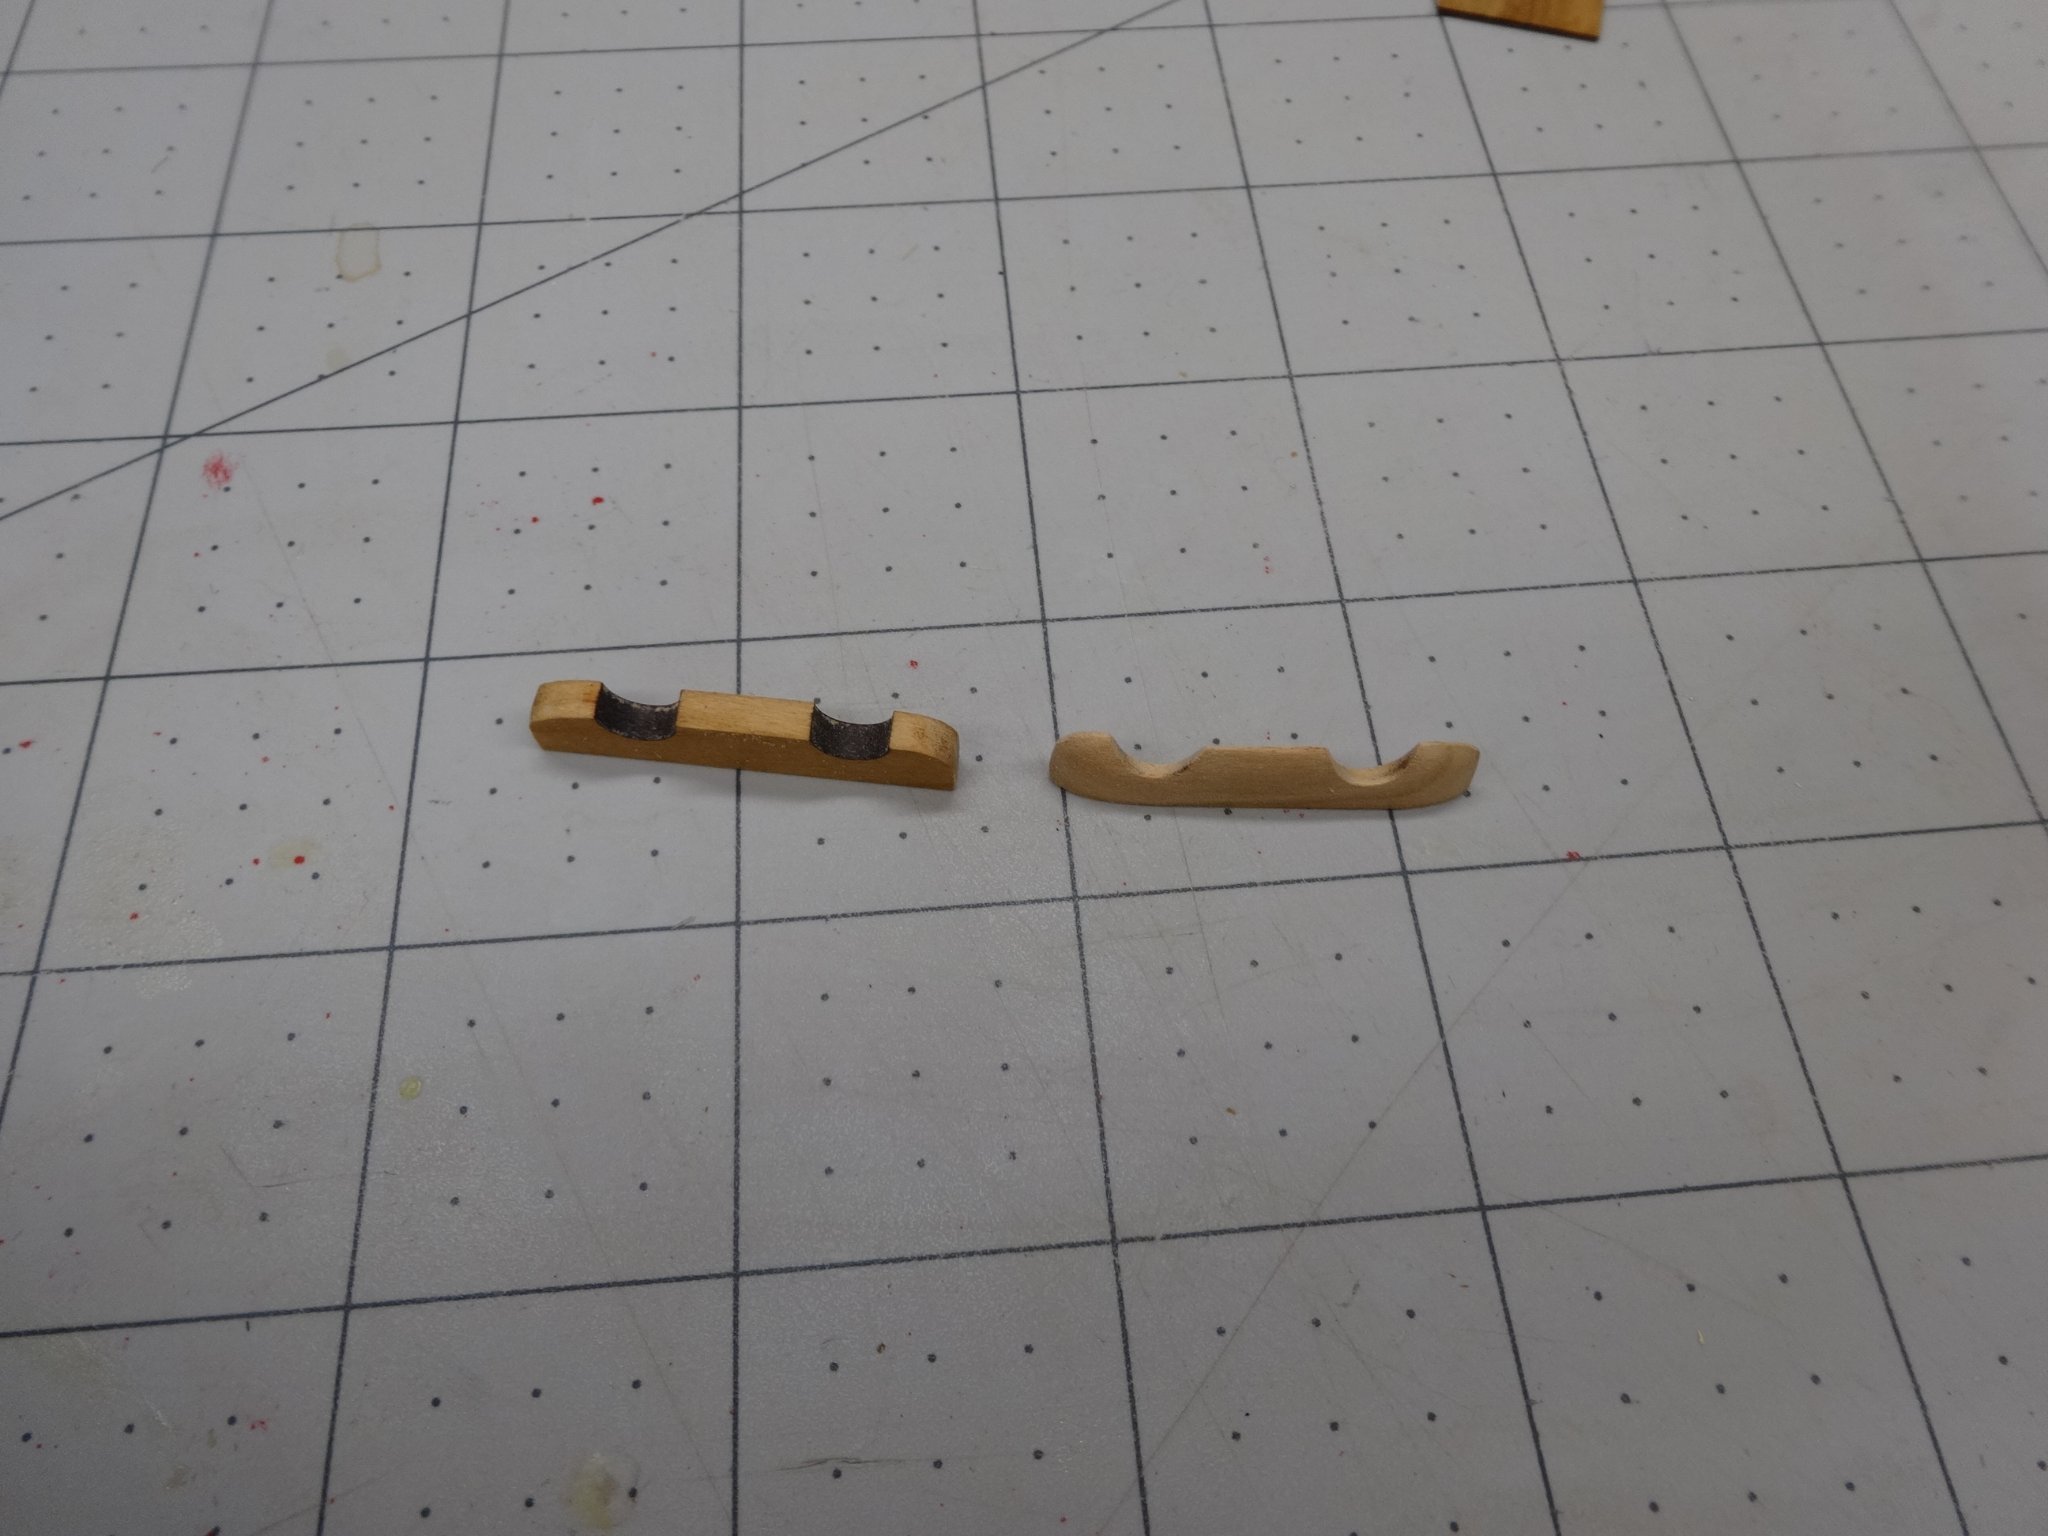
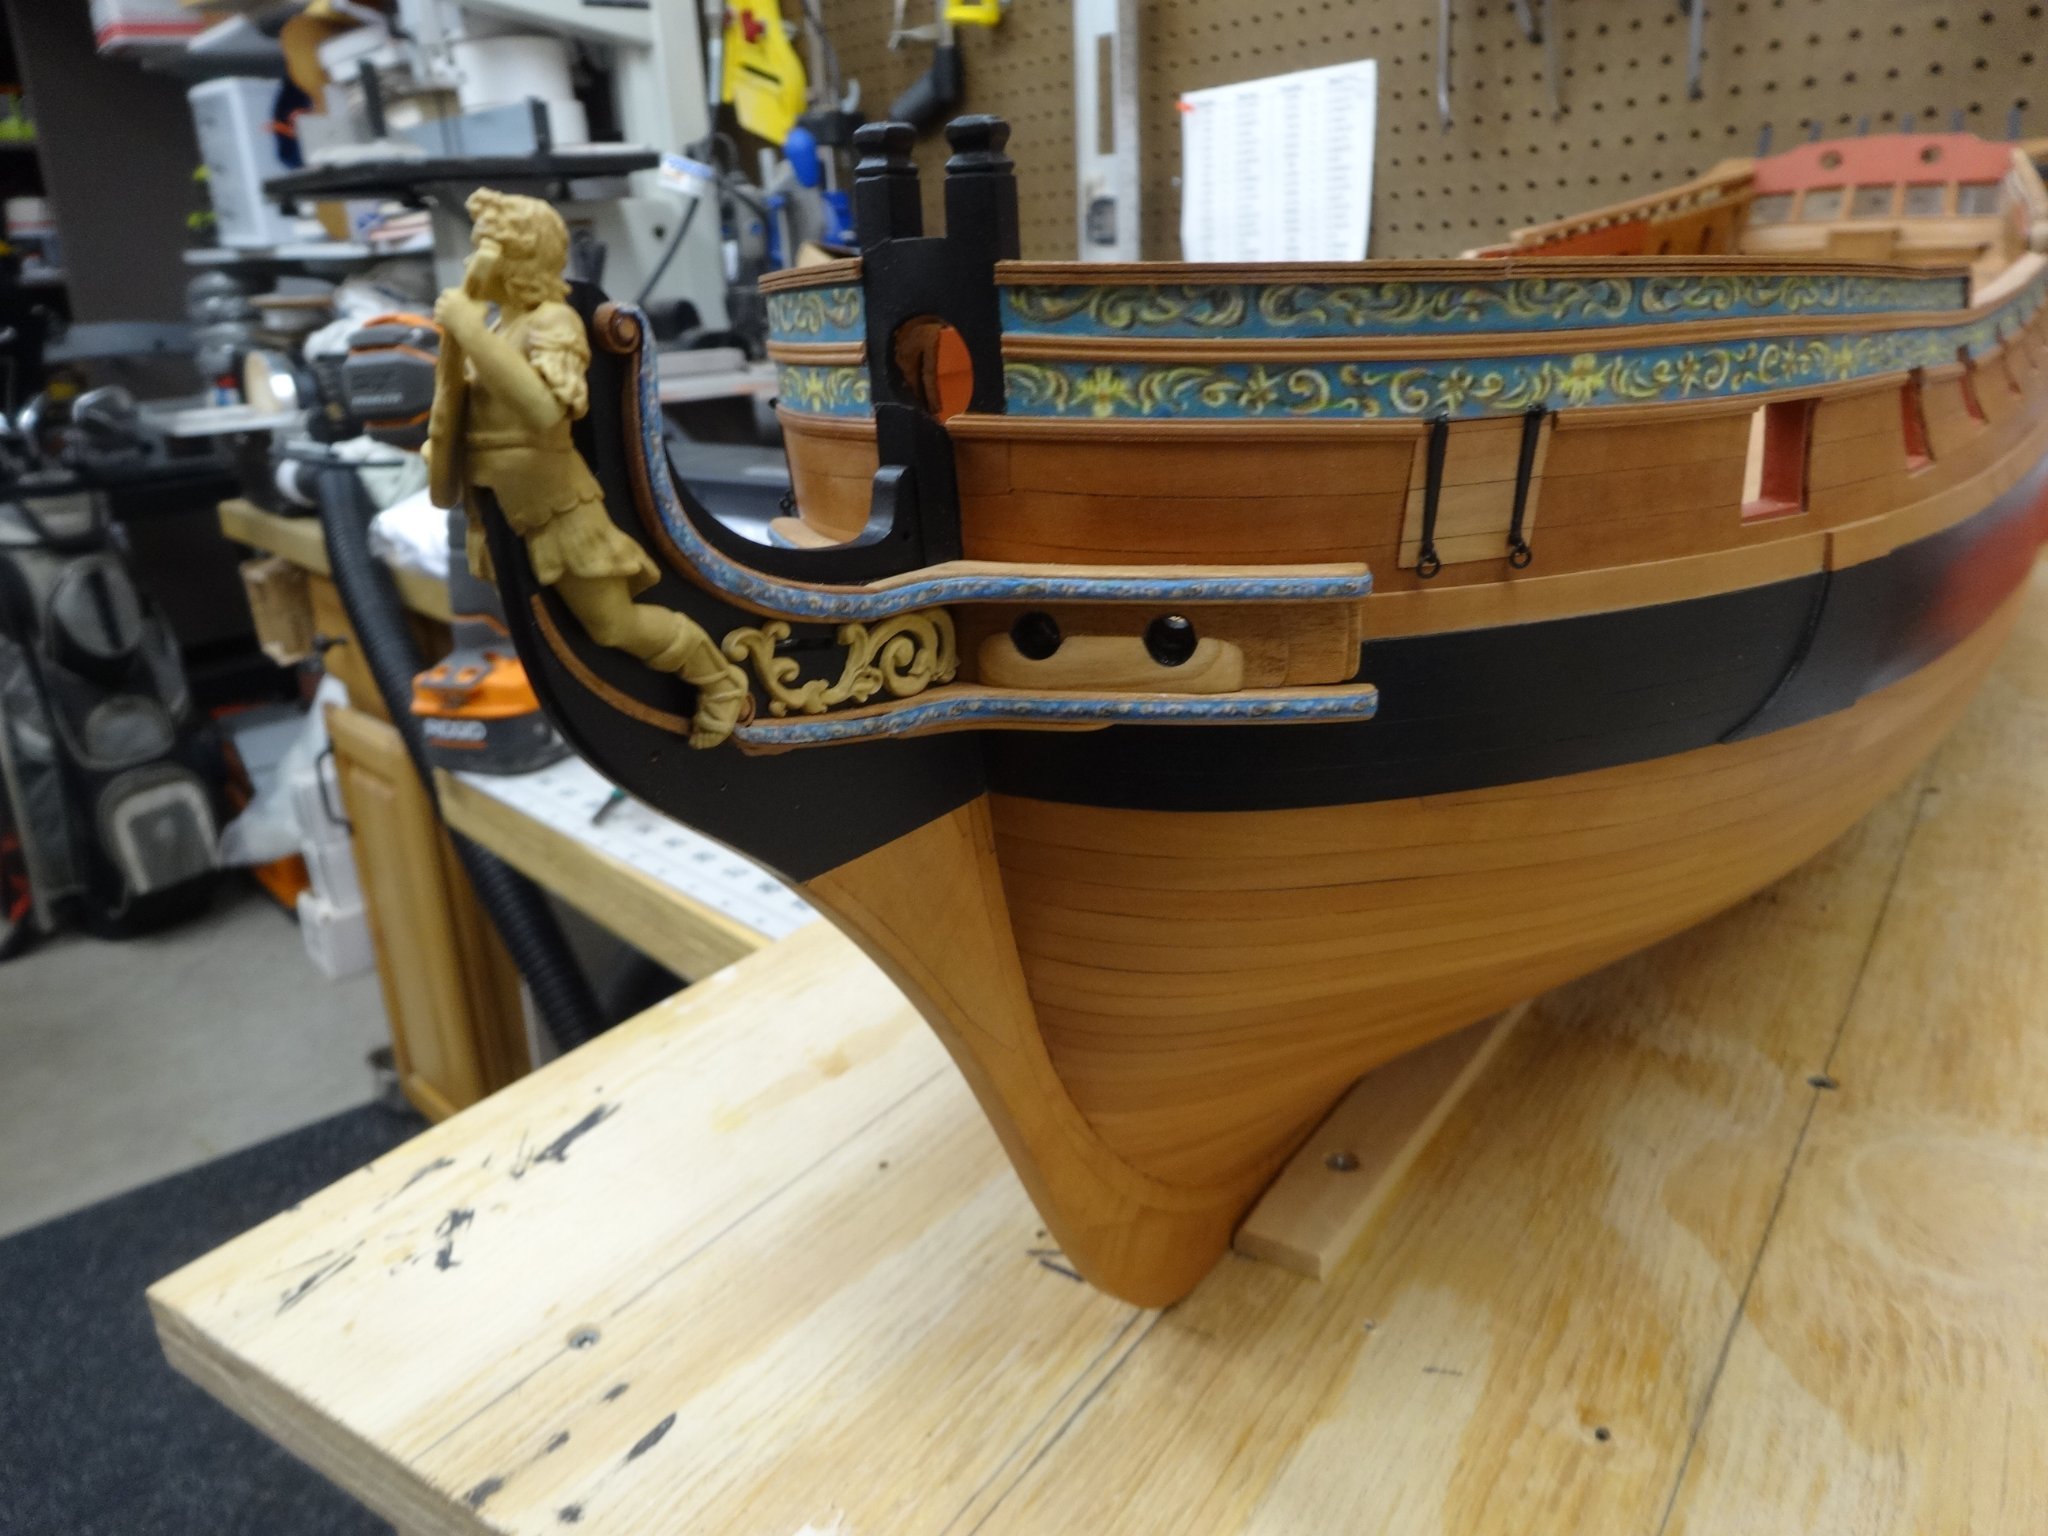
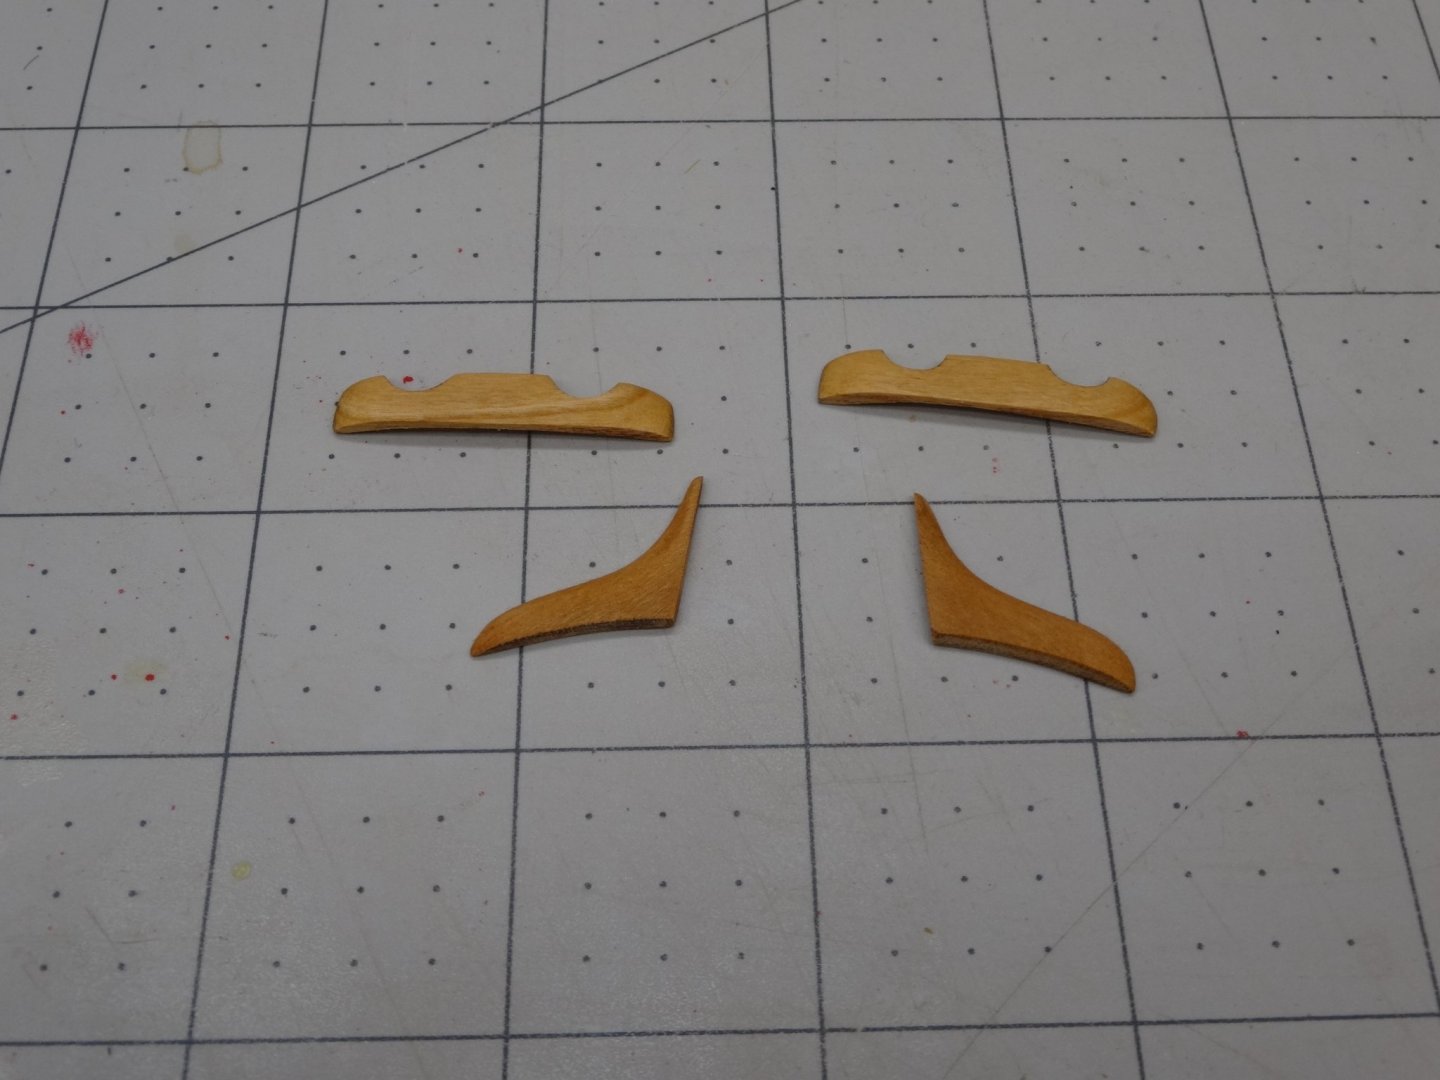
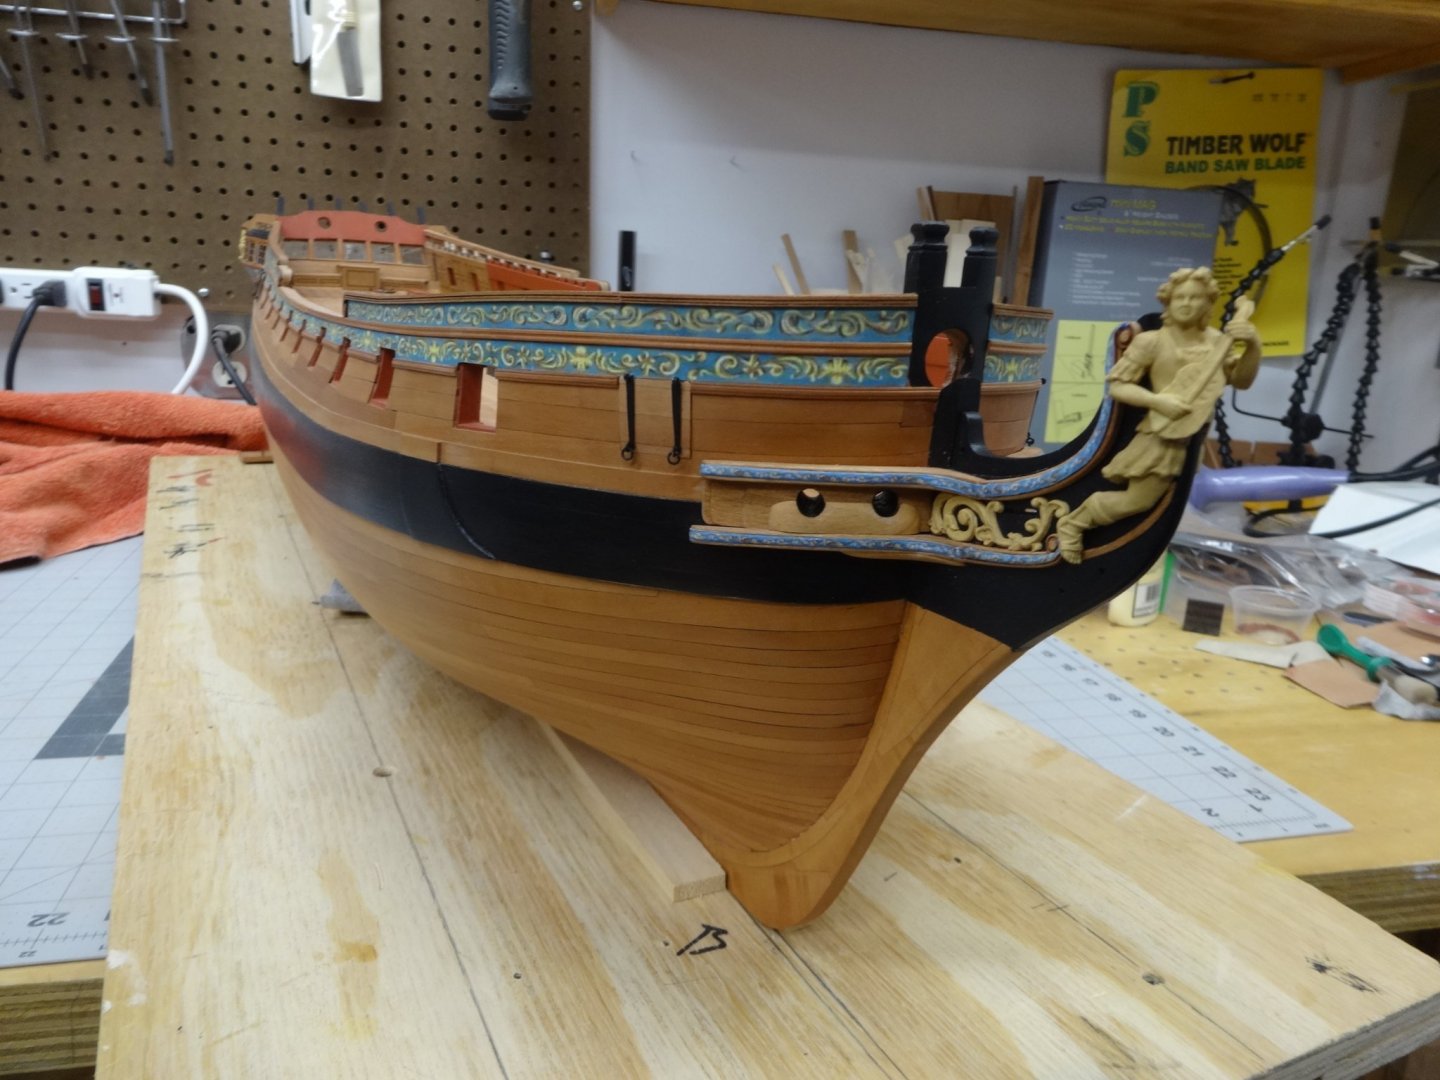
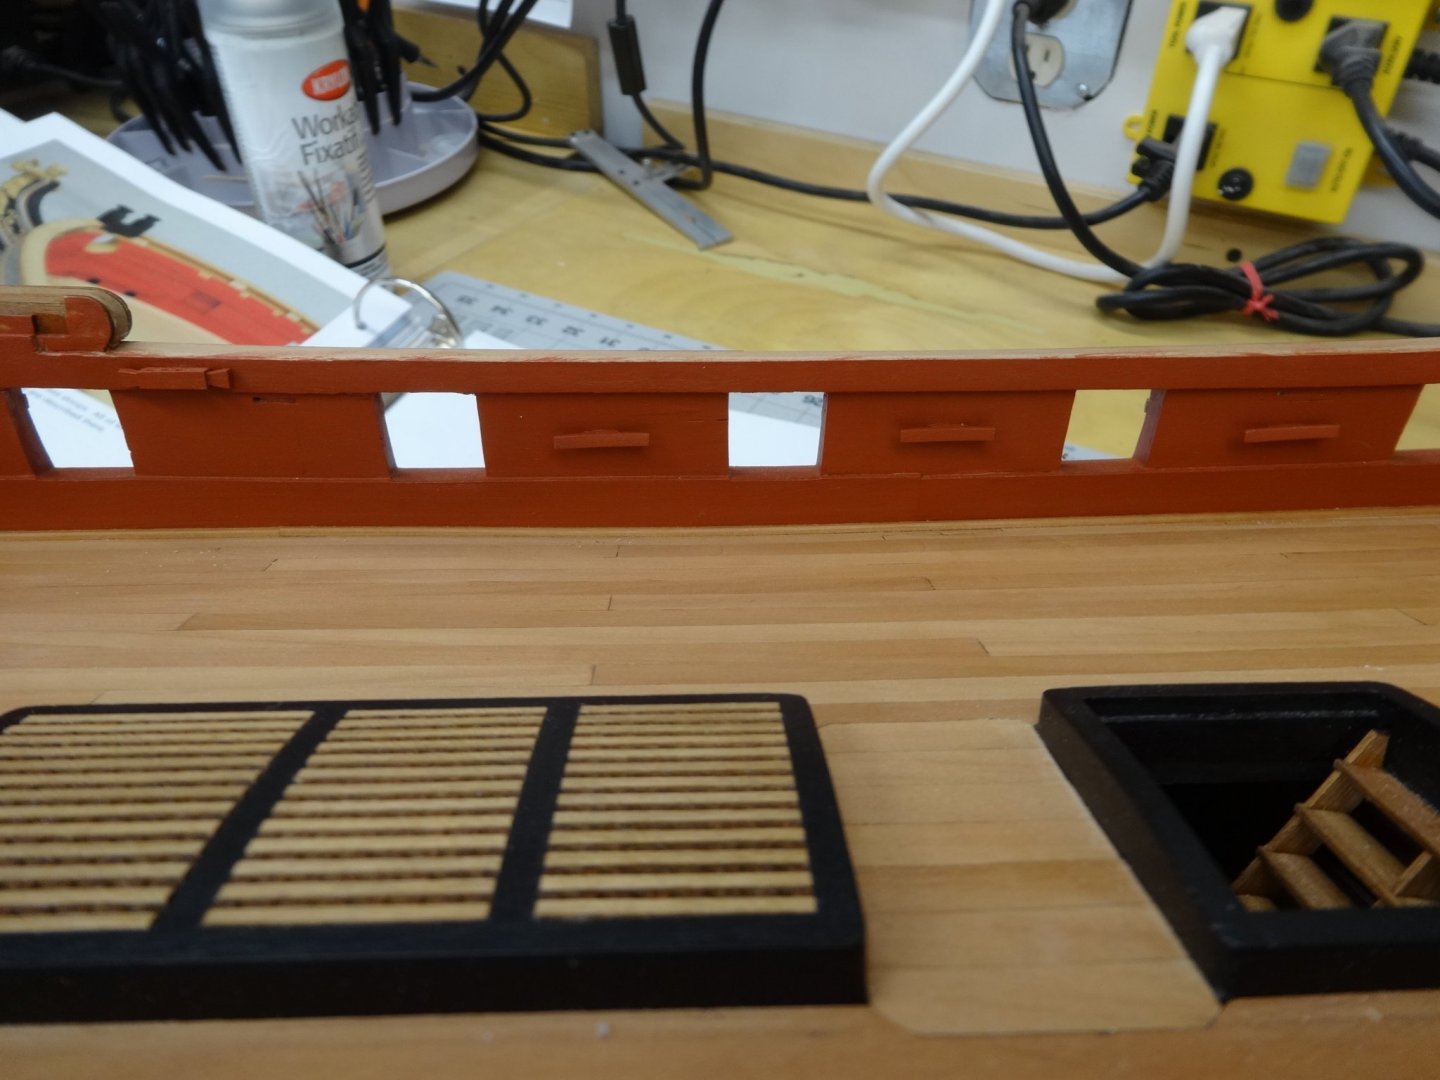
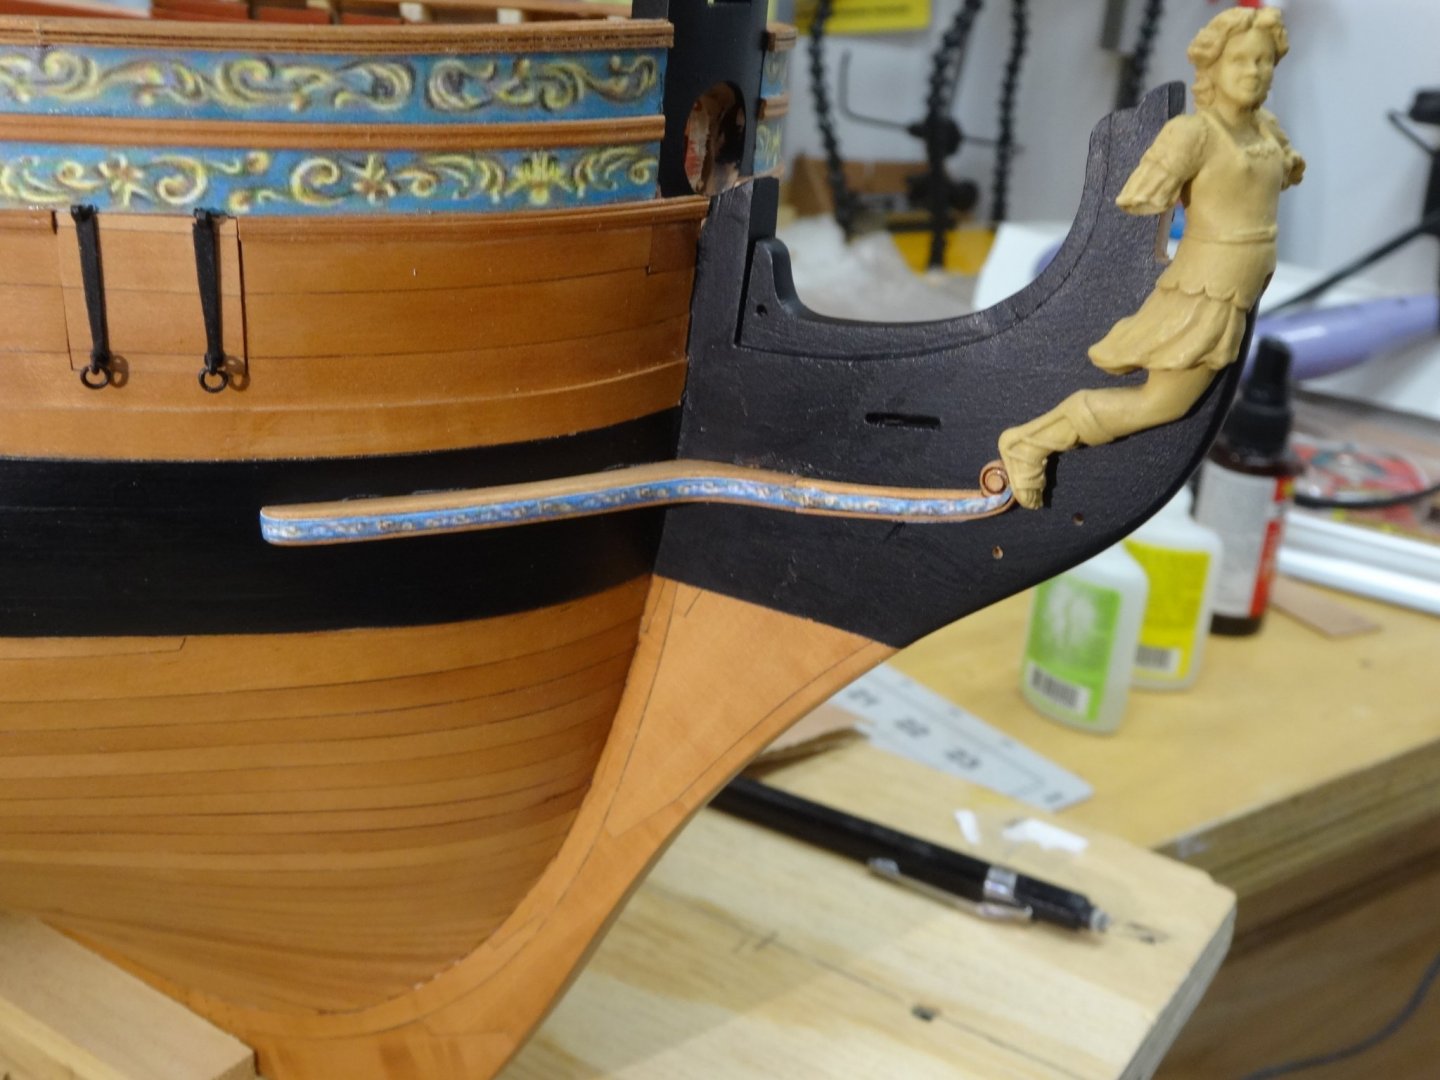
I've shaped the bolsters for the hawse holes and wash cant for under the lower cheek. Also the decorative molding that is on the stem in front of the figure head was added. Drilling the hawse holes was next. I drilled a small pilot hole on an upward angle from outboard in. If you drilled straight you would be way to low. After I was happy with the location and angle with the pilot hole I used a 1/8" bit in a pin vice. I then used a round file to enlarge the holes. The inside of the holes were painted black and then pencil graphite was used to to simulate the lead pipe. Lastly the the large knee was added inboard above the hawse holes. Lastly I did the inboard cleats and stag horn. I thinks that completes chapter 5! On to Chapter 6 and 24 gun carriages to build.


- 642 replies
-
- 22
-
-
-
- winchelsea
- Syren Ship Model Company
- (and 1 more)
-
Looks really nice Ben. The stern was a lot of fun to do.
- 399 replies
-
- 2
-
-
- winchelsea
- Syren Ship Model Company
- (and 1 more)
-
I already have the Speedwell book and plans and is on my to do so I'm very interested. Binnacle looks great too!
- 1,784 replies
-
- 3
-
-
- winchelsea
- Syren Ship Model Company
- (and 1 more)
-
Very innovative and nice work Derek. I’ve switched to almost always using heat and pressure to bend now and not soak in water. Well done!
- 345 replies
-
- 3
-
-
-
- Duchess Of Kingston
- Vanguard Models
- (and 1 more)
-
Nice work and recovery. Test fit the PE over the window. I believe it will cover up the replacement nicely.
-
Very nice Derek. I wish I'd thought to do that!
- 345 replies
-
- 1
-
-
- Duchess Of Kingston
- Vanguard Models
- (and 1 more)
-
Like Mike said very light coats and gently buff it off. I think I used a finger, not sure which one, and also dry brushed it. Two coats sounds right.
- 642 replies
-
- 3
-
-
- winchelsea
- Syren Ship Model Company
- (and 1 more)
-
Ah the first of several sore arm moments! Very nice and also dusty shop is a happy shop!
- 840 replies
-
- 5
-
-
- winchelsea
- Syren Ship Model Company
- (and 1 more)
-
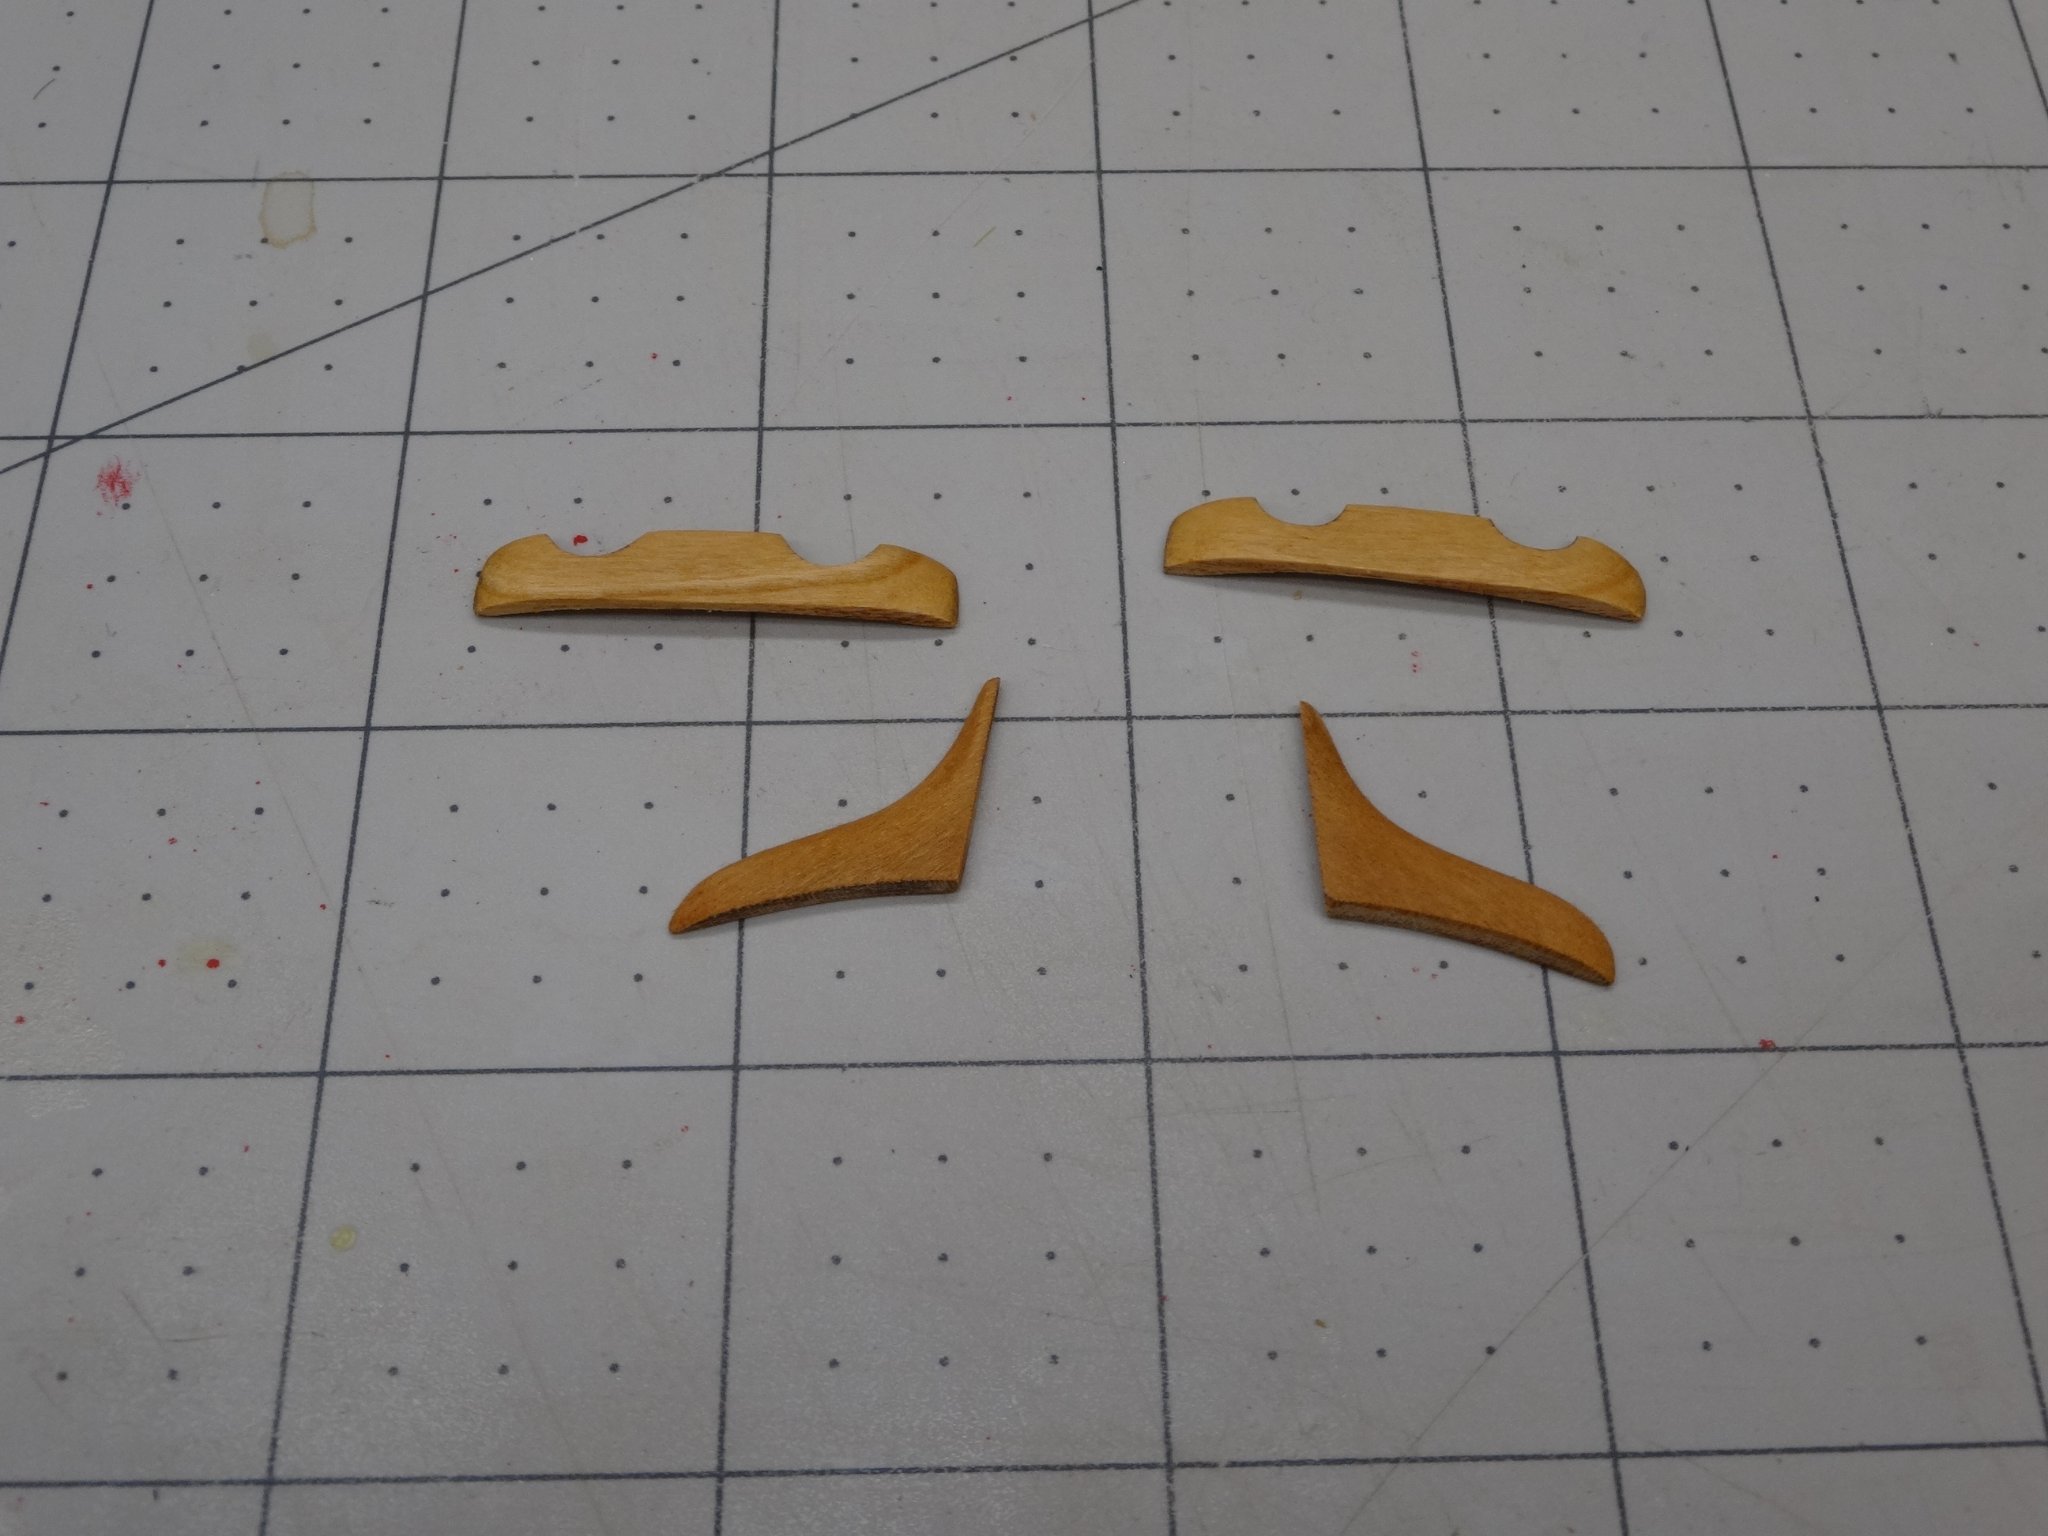
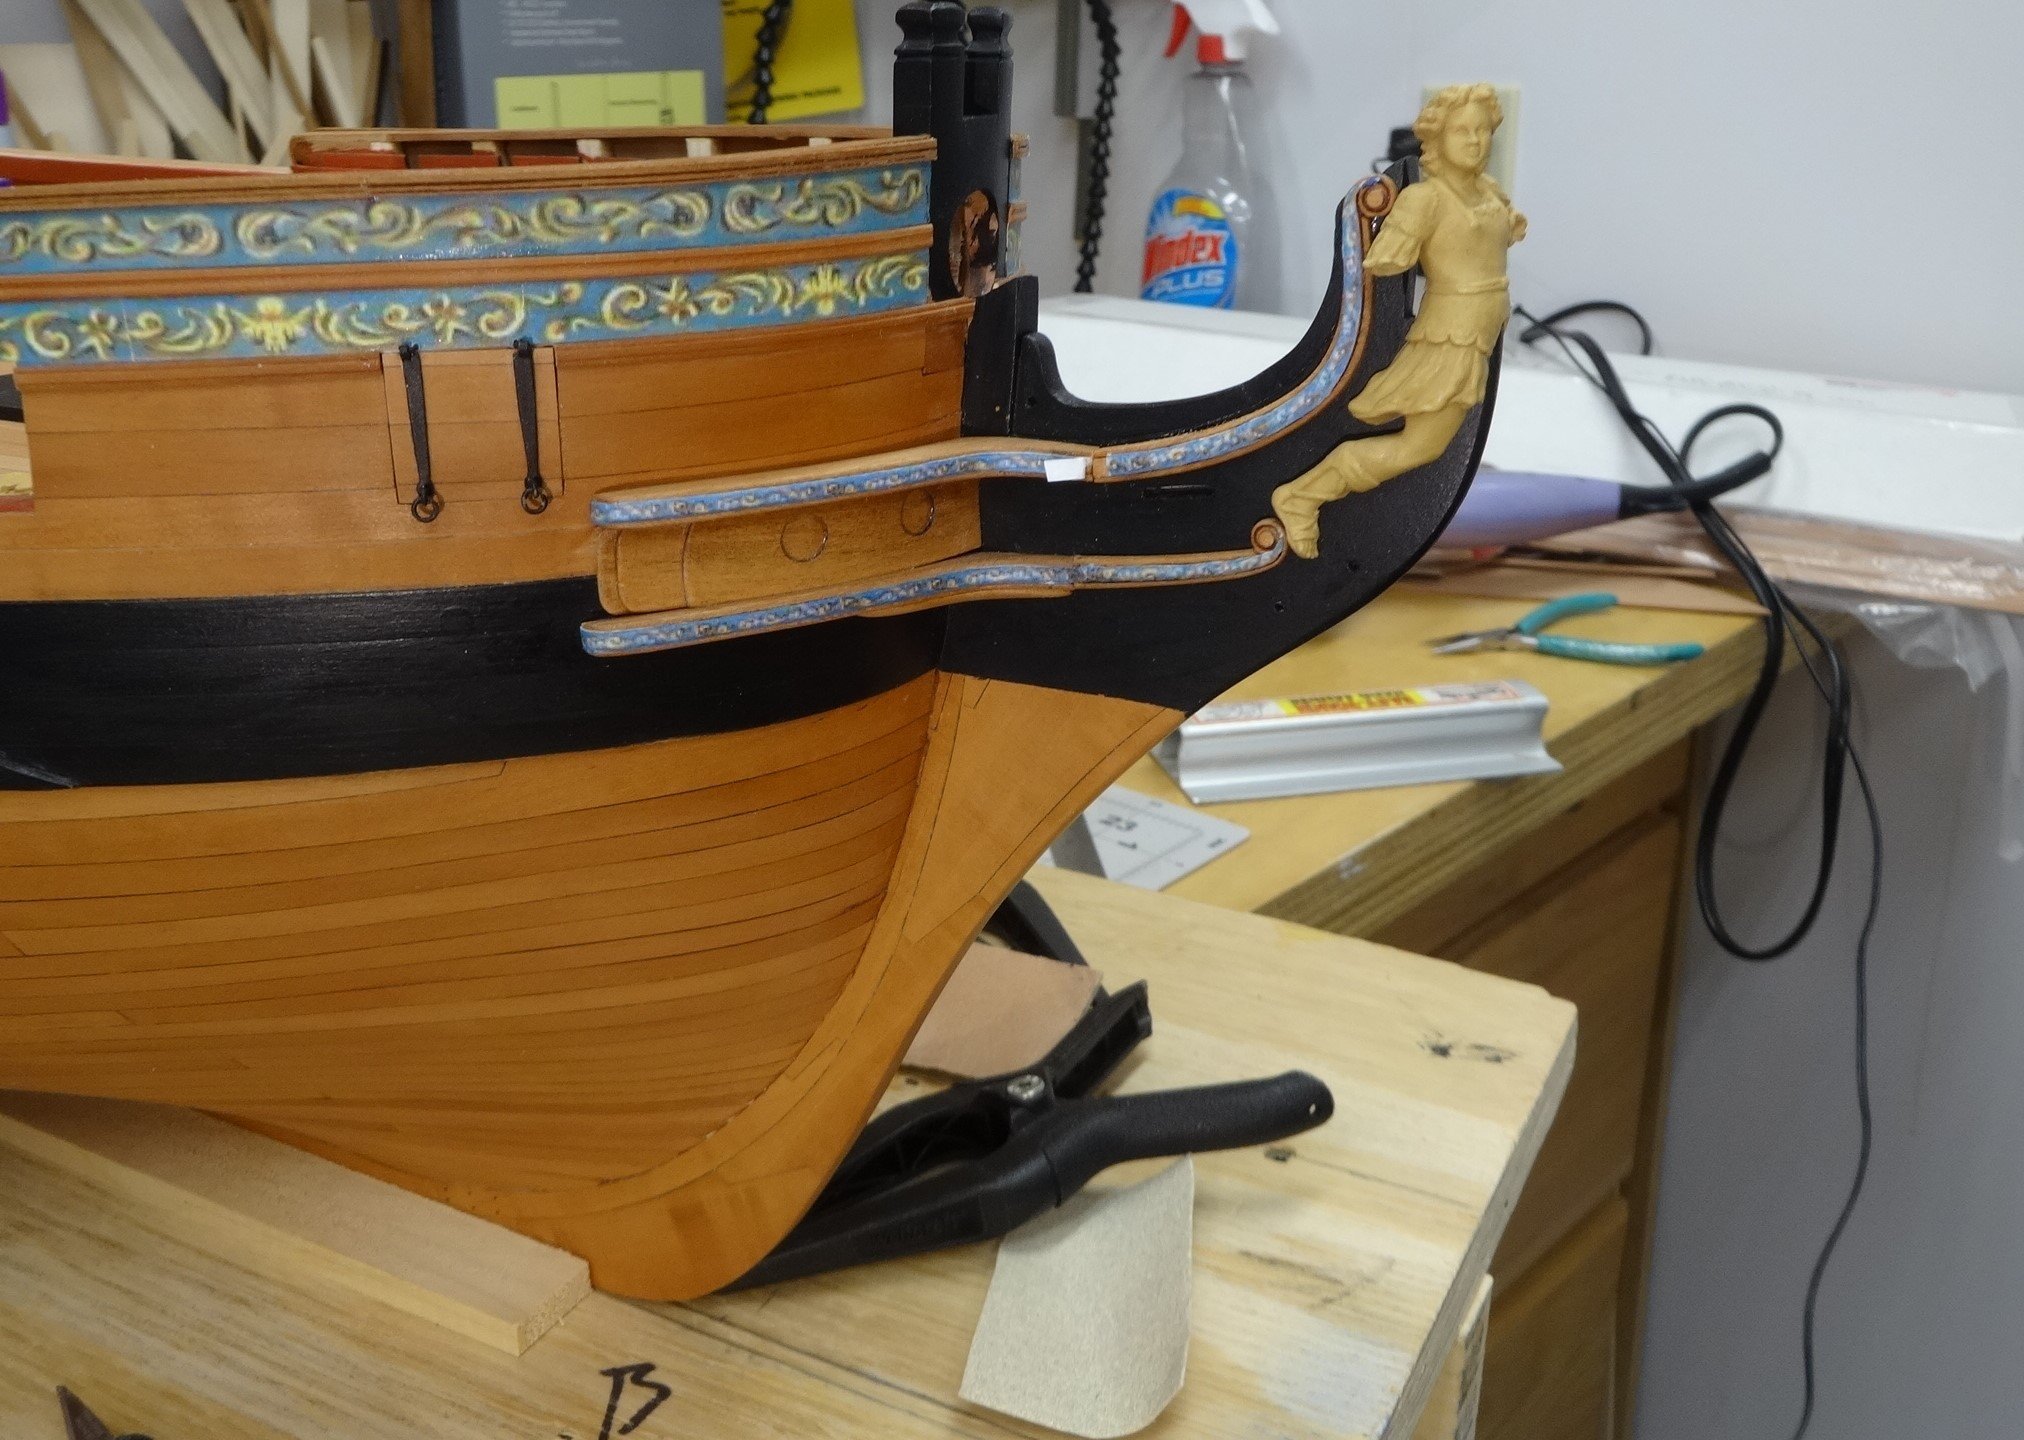
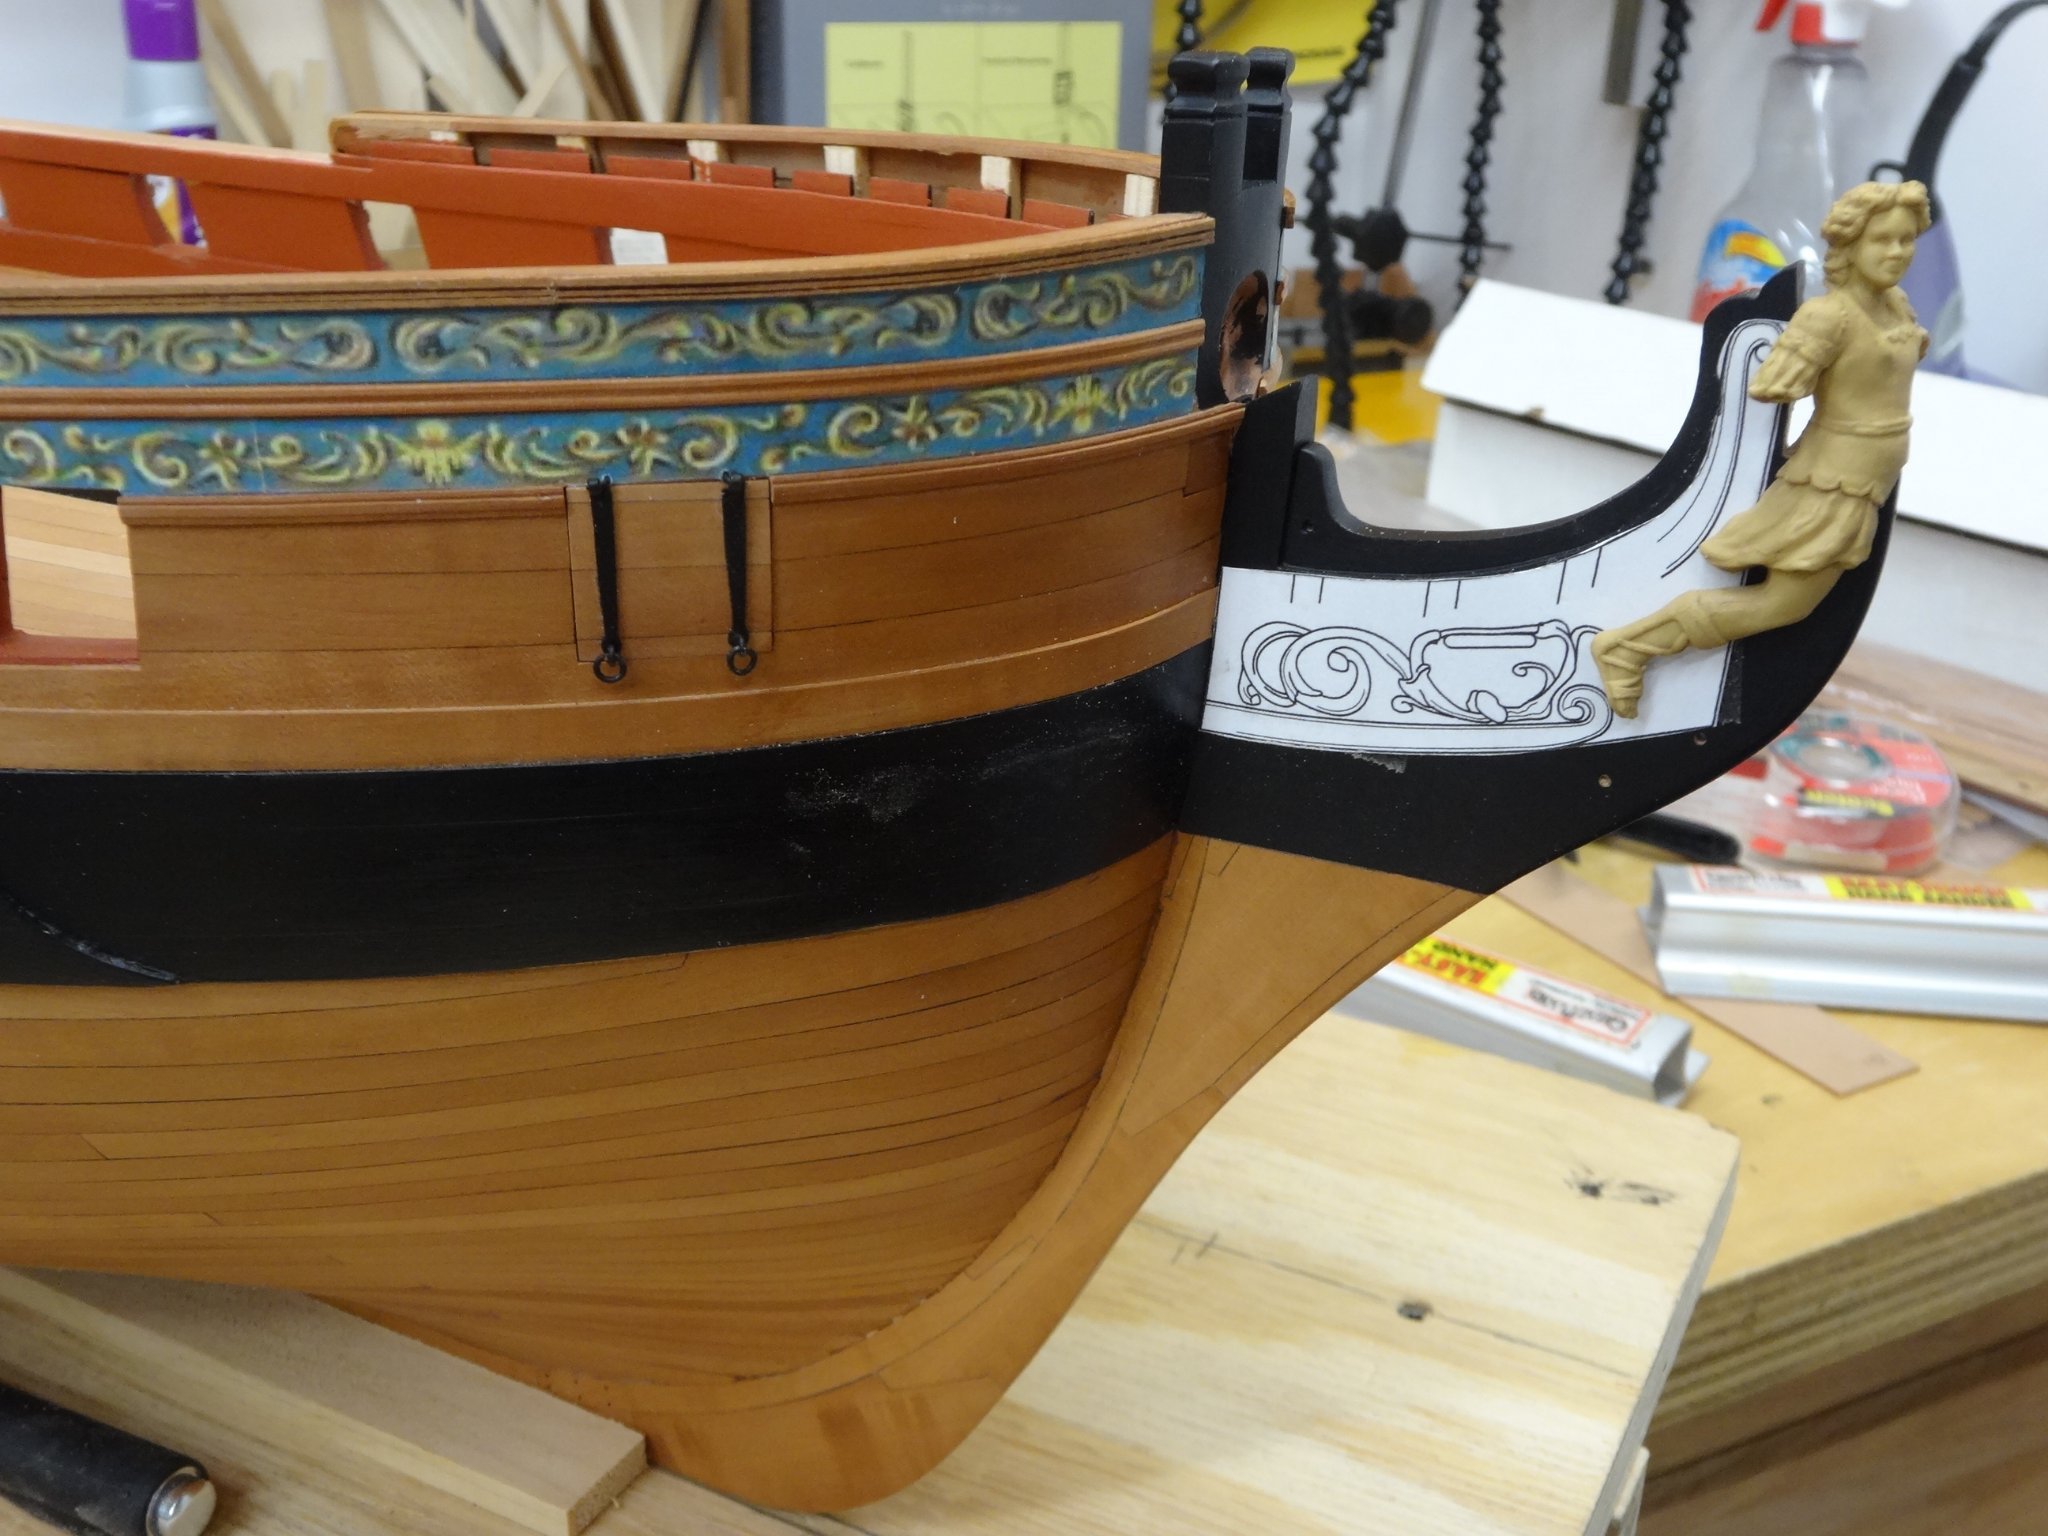
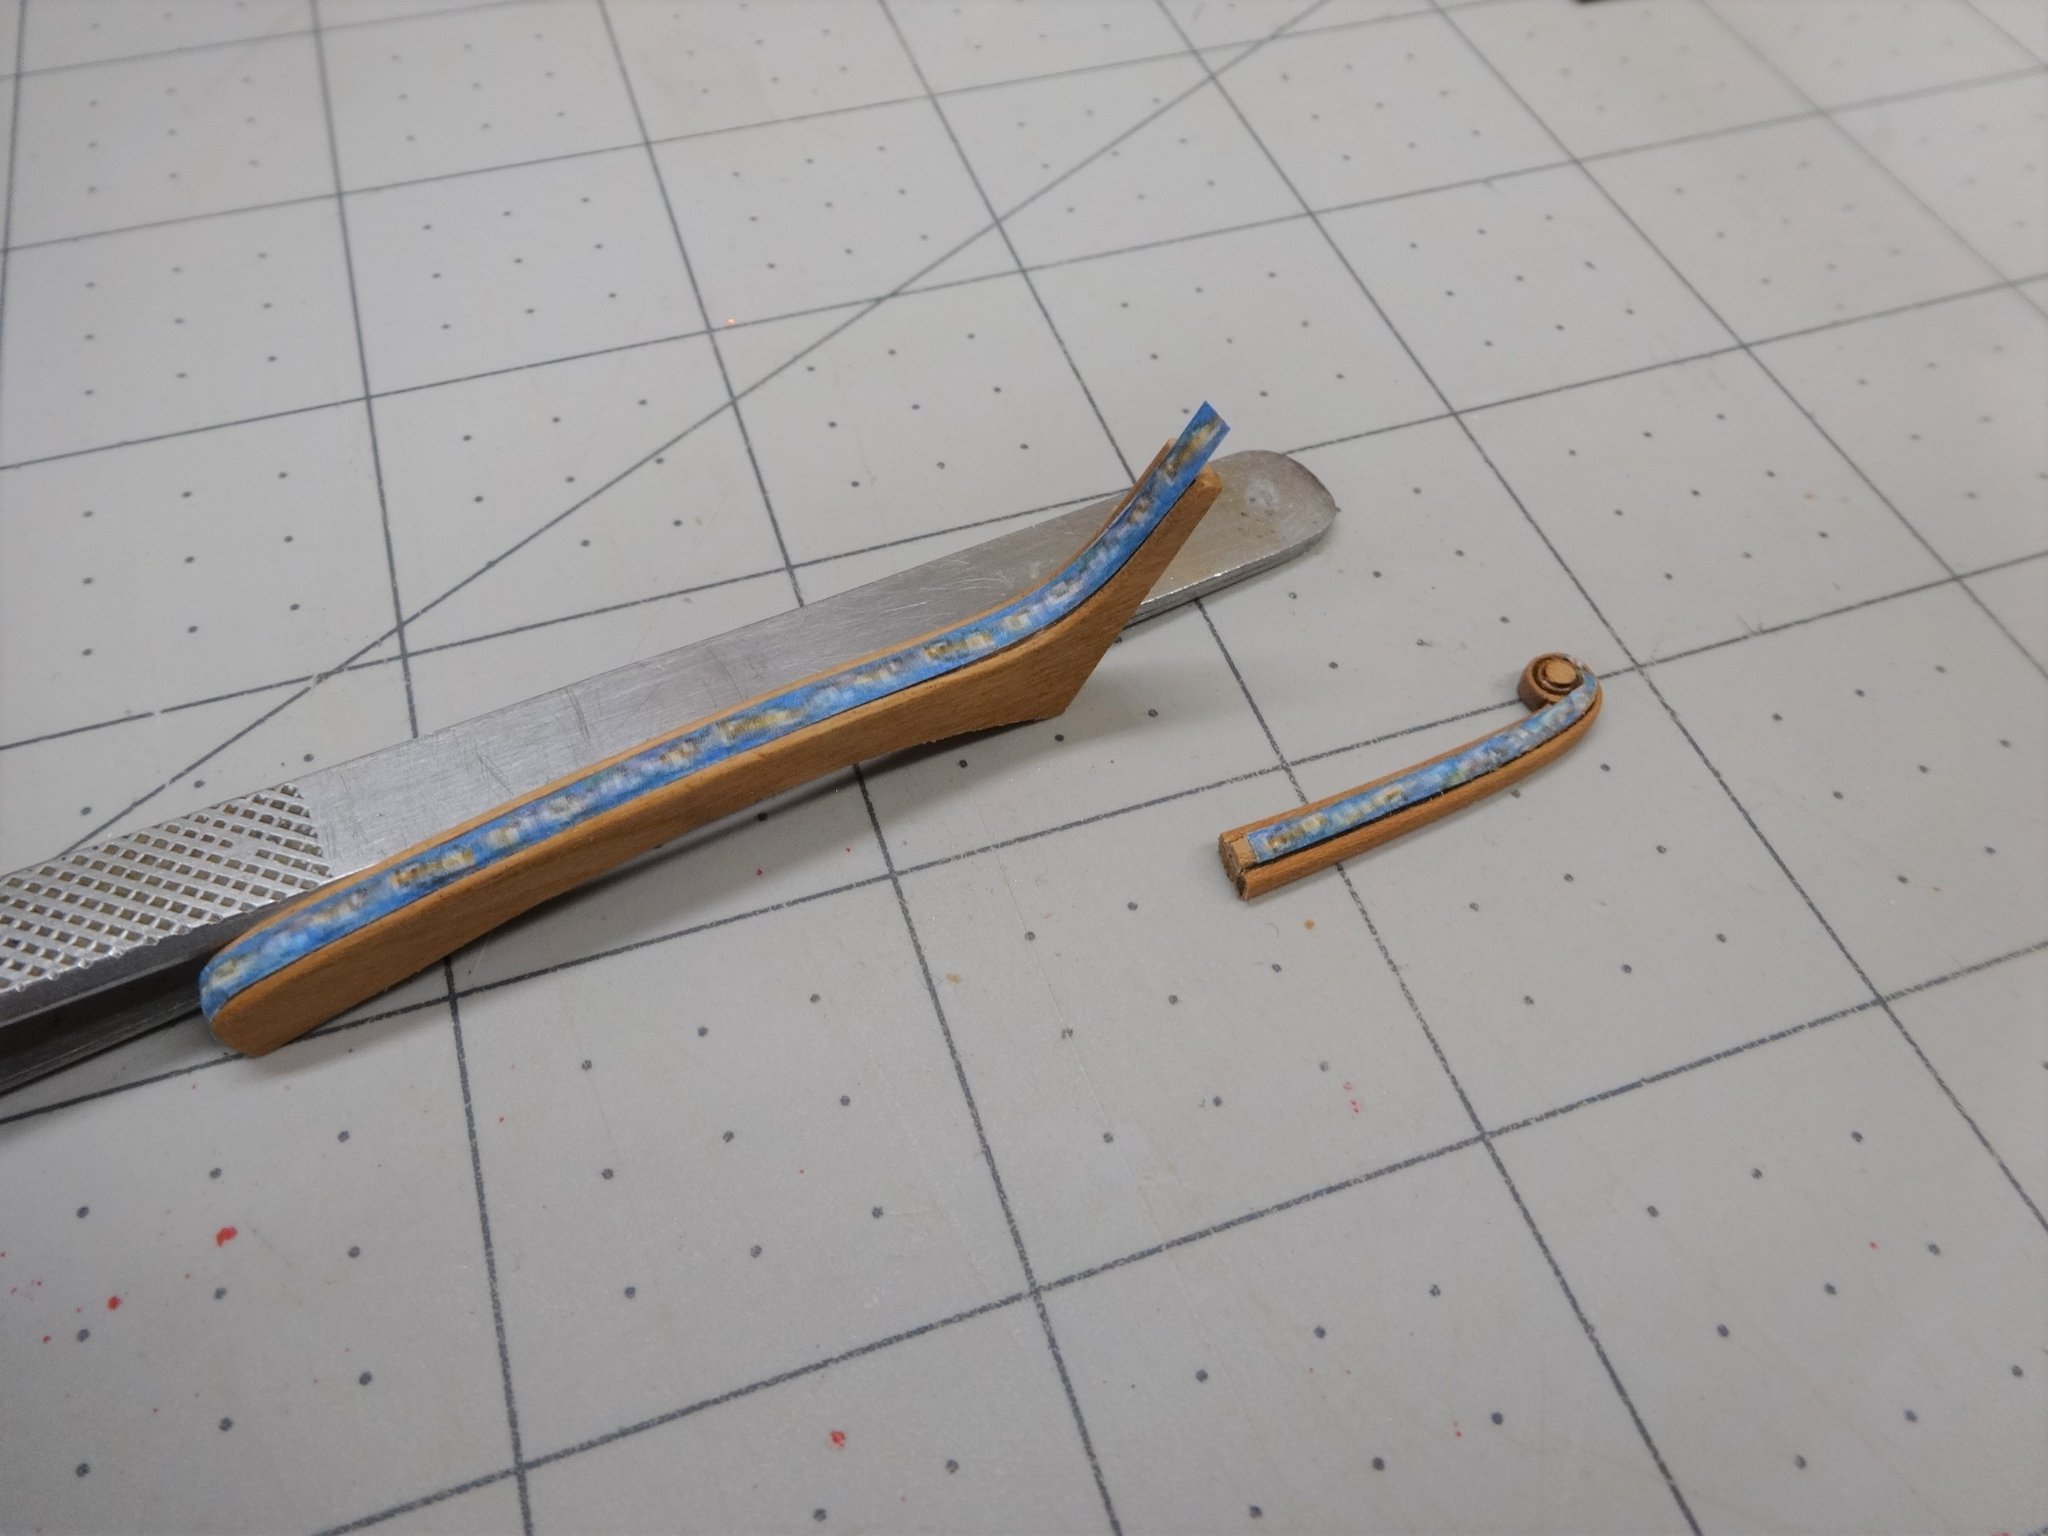
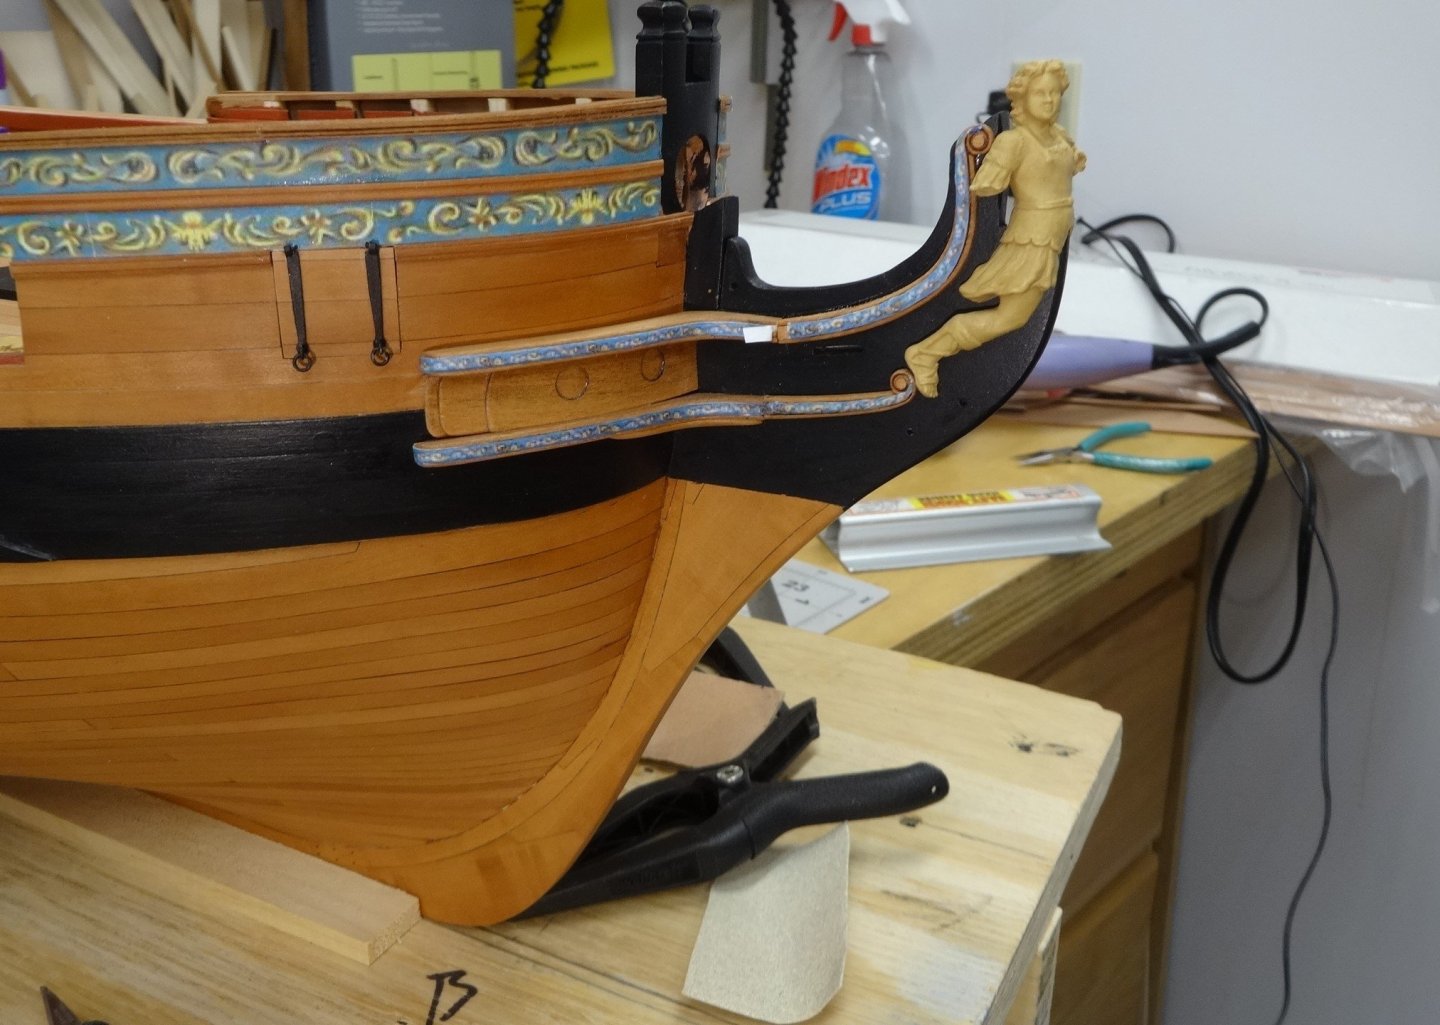
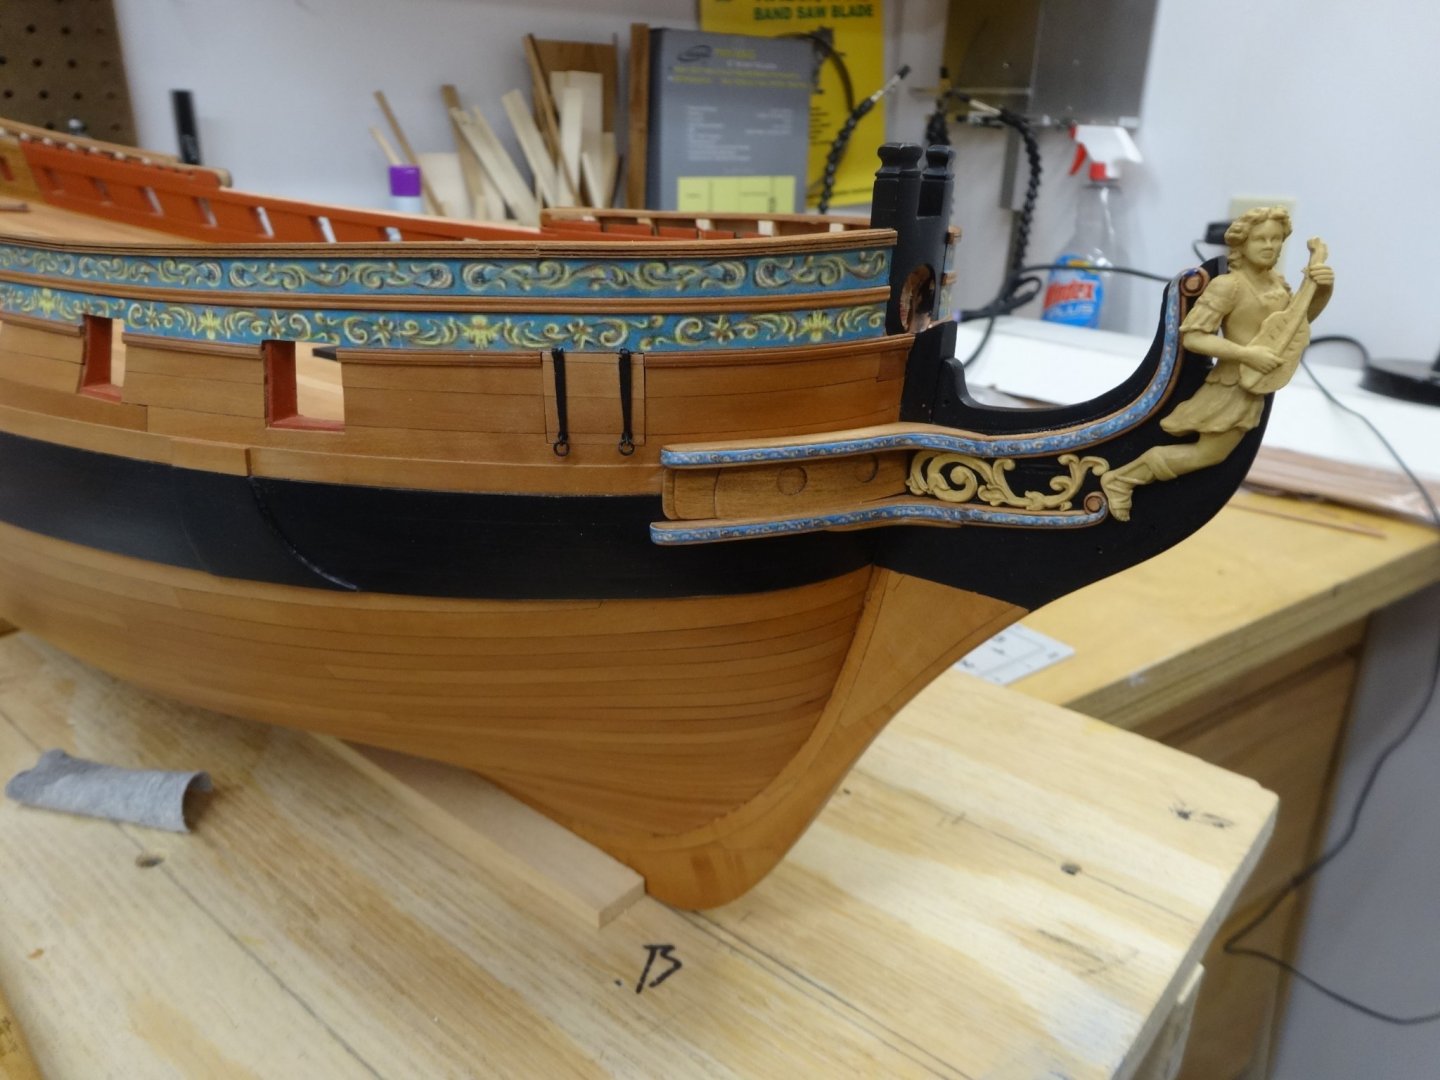
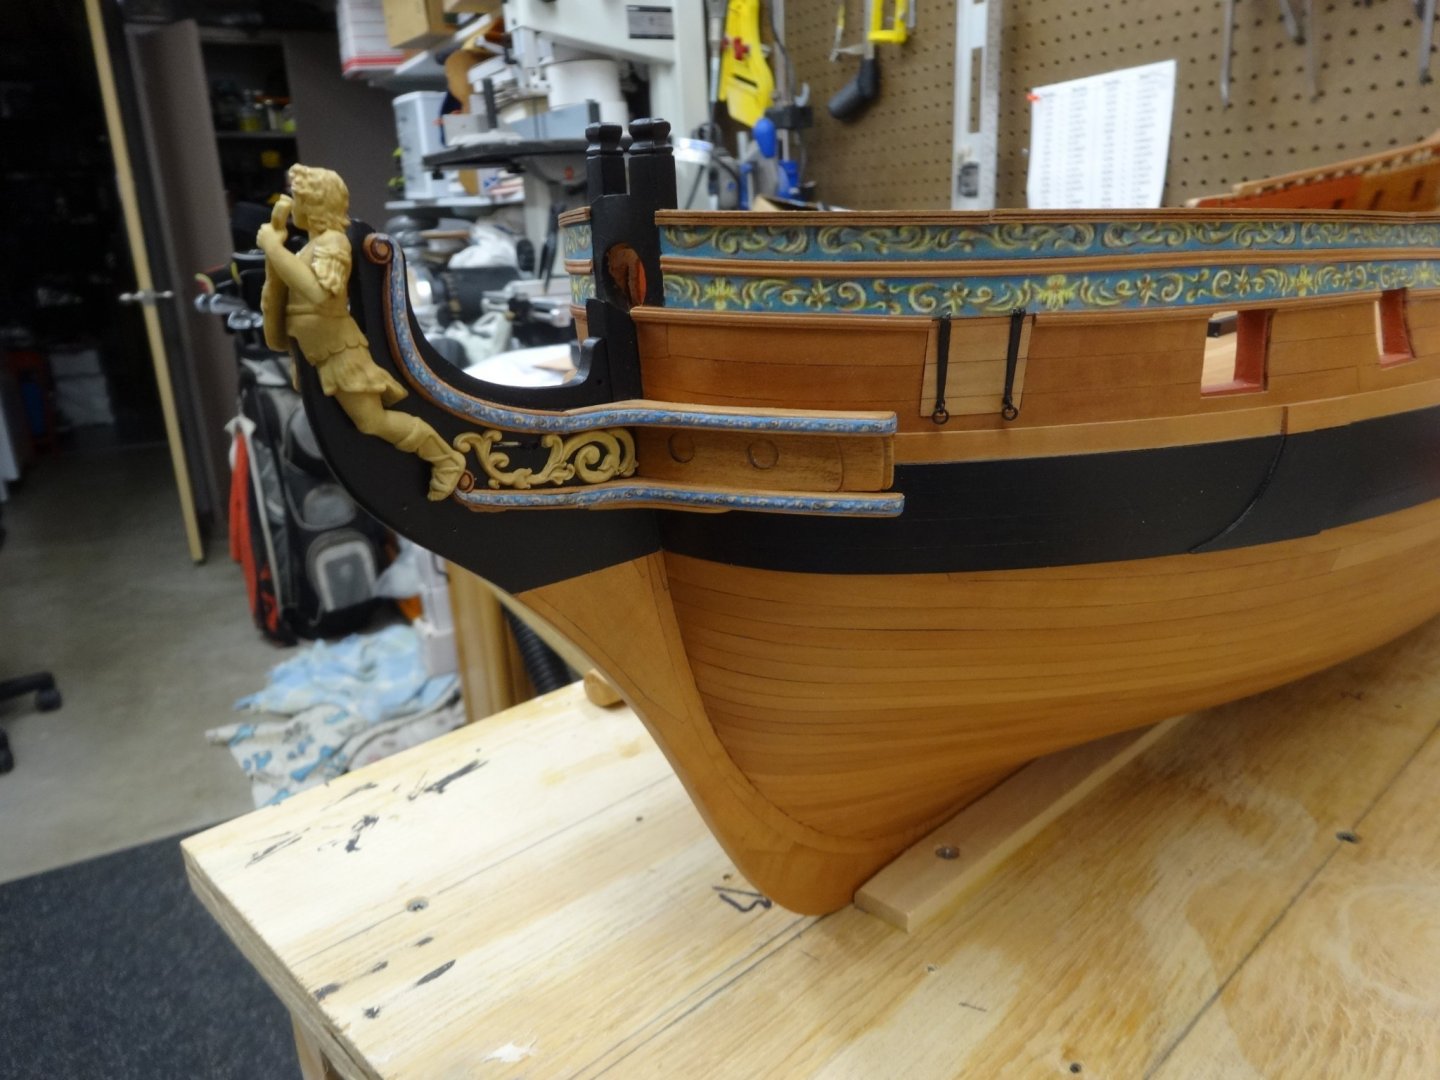
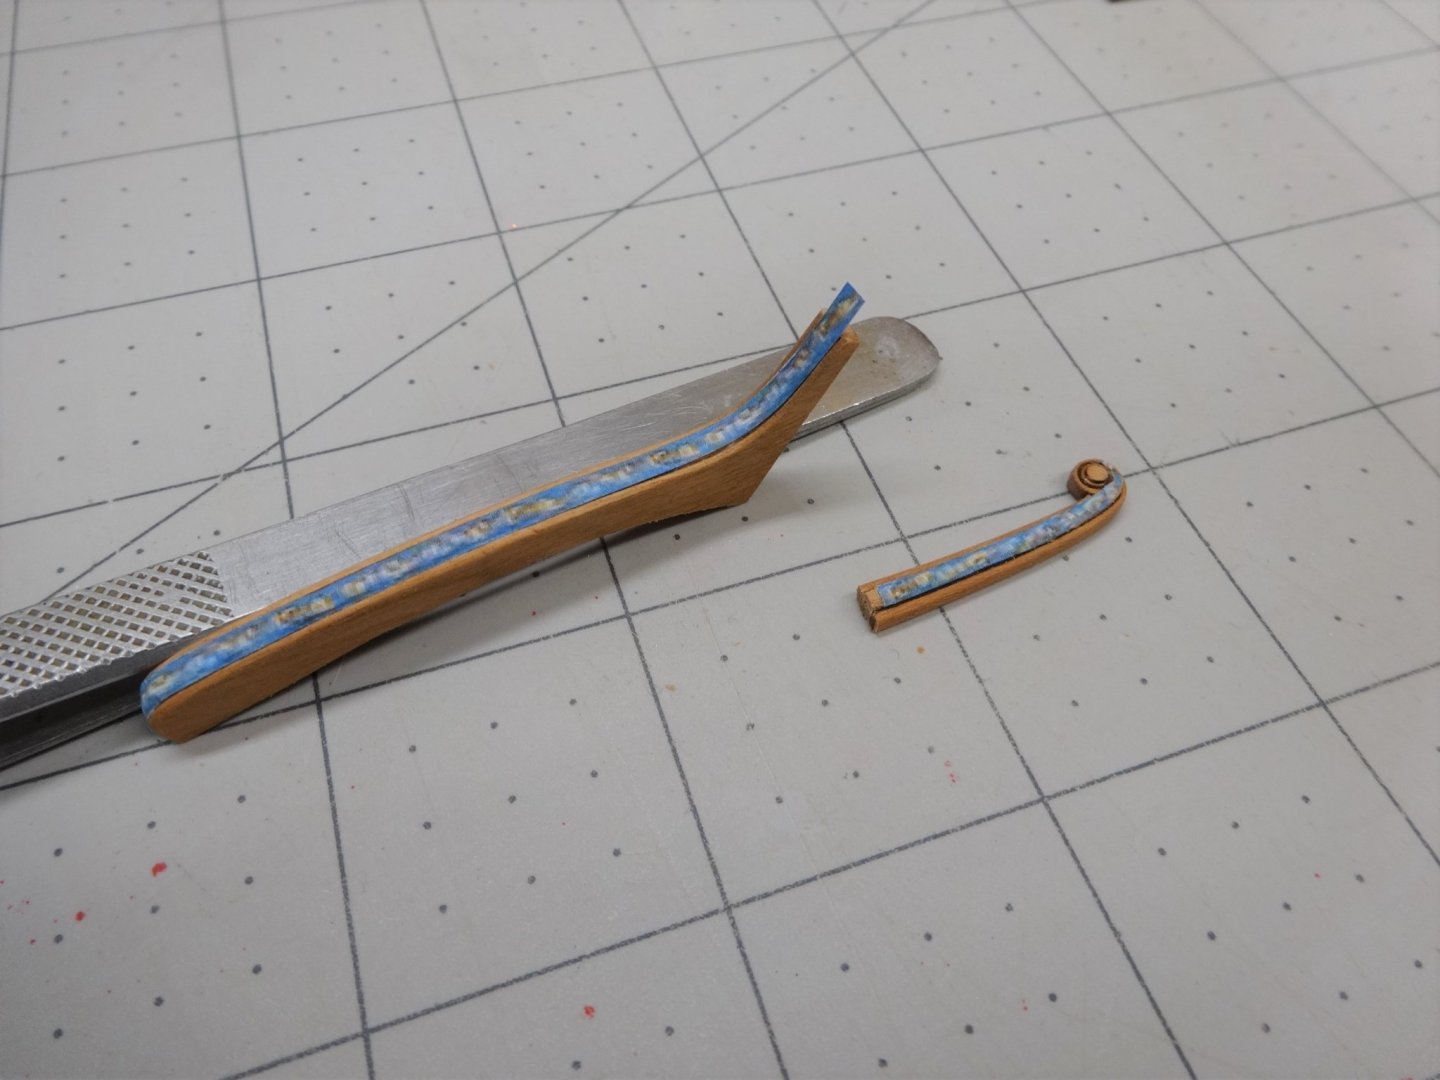
Thanks Maurice. It's all to the excellent design. Well I must say I had more time in the workshop these last three days than I did in the last two months. It was wonderful! There are 3 layers to the hawse hole area. They were clamped on the model and heated to set the curve. After shaping and gluing them in place I sanded the upper cheek and hair bracket to fit the hull curve. You can see how I left the frieze longer than needed. I then over lapped it and using a sharp scalpel blade cut it to match and glued it in place. You can see the completed overlap and the scroll also added. I have to yet permanently attach the figure head as I'm worried I'll do some sort of damage to it. Next I'll shape the bolster, drill out the hawse holes and add the knee above the hawse holes. What a great weekend!

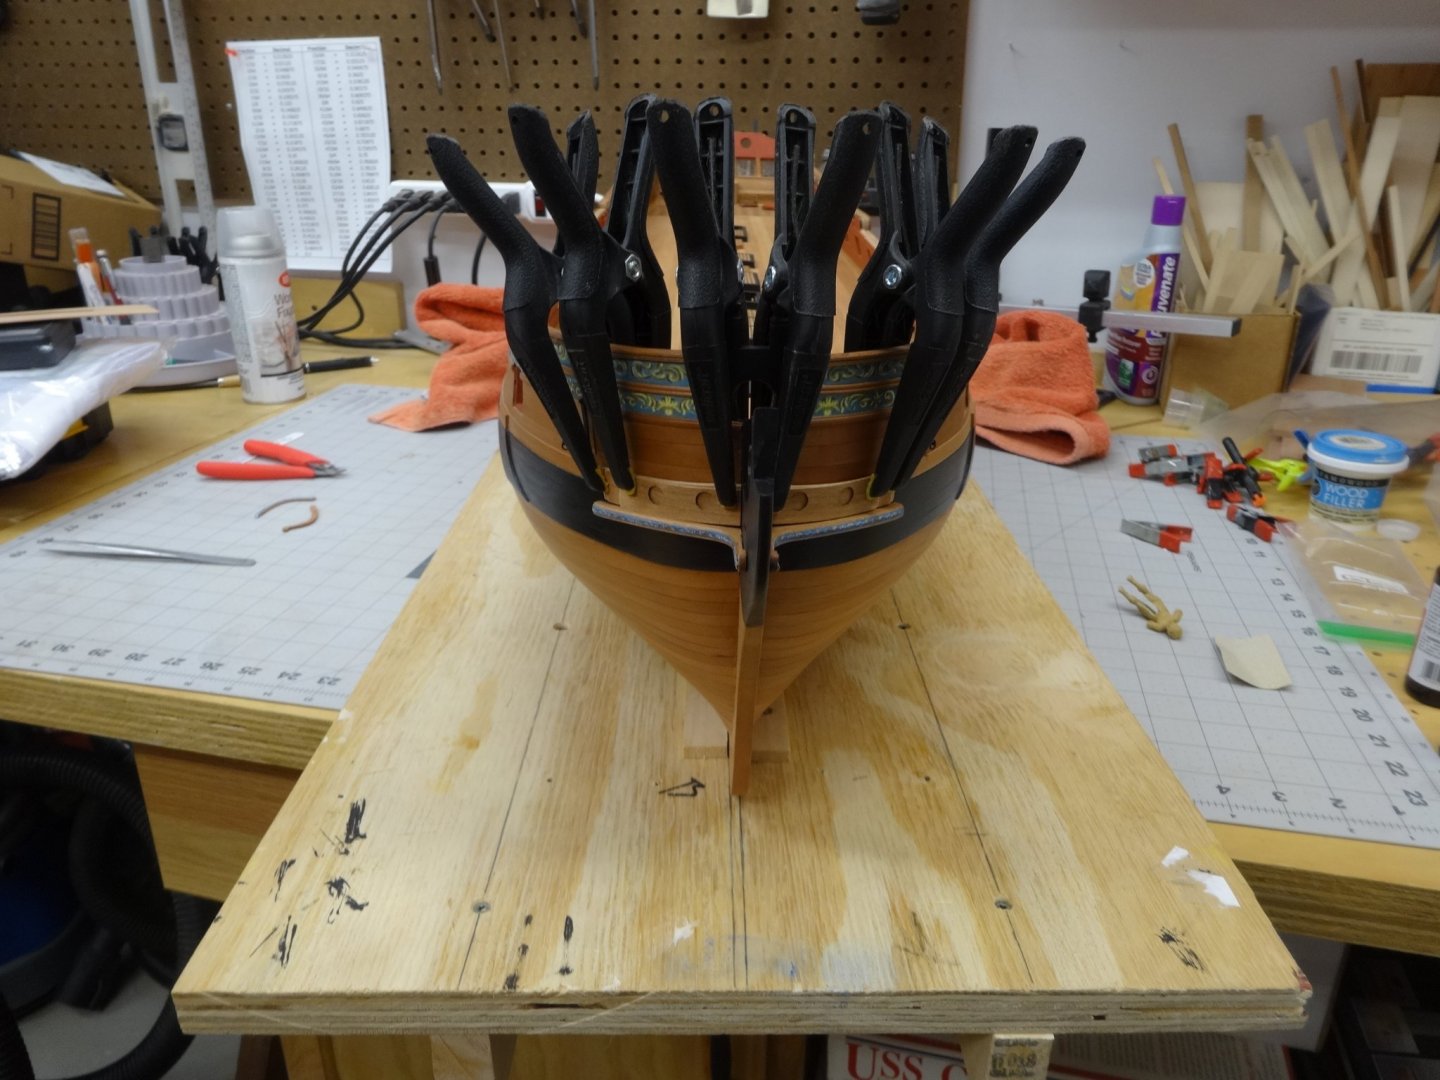
- 642 replies
-
- 8
-
-
- winchelsea
- Syren Ship Model Company
- (and 1 more)
-
Yes Chuck slow and steady it is! Also thanks, JJ and Vladimir ands all the likes.
- 642 replies
-
- 2
-
-
- winchelsea
- Syren Ship Model Company
- (and 1 more)
-
Oh man that's a tough one Tom. Take your time and I'm sure you can get it back in shape.
-
So far so good I think. On the starboard side I used temporary double sided tape to attach the template. With this I was able to mark off the location of the cheeks and hair bracket. I had to make some minor adjustments to the stem and figurehead to get everything in an alignment that I liked. The frieze on the checks was left a little long to overlap onto the hair bracket. Once the hair bracket was in place I used a sharp scalp blade to cut the frieze. There will be a lot of cleaning and paint touch up once I'm finished. On to the port side now.

- 642 replies
-
- 19
-
-
- winchelsea
- Syren Ship Model Company
- (and 1 more)