Rustyj
-
Posts
2,535 -
Joined
-
Last visited
Content Type
Profiles
Forums
Gallery
Events
Everything posted by Rustyj
-
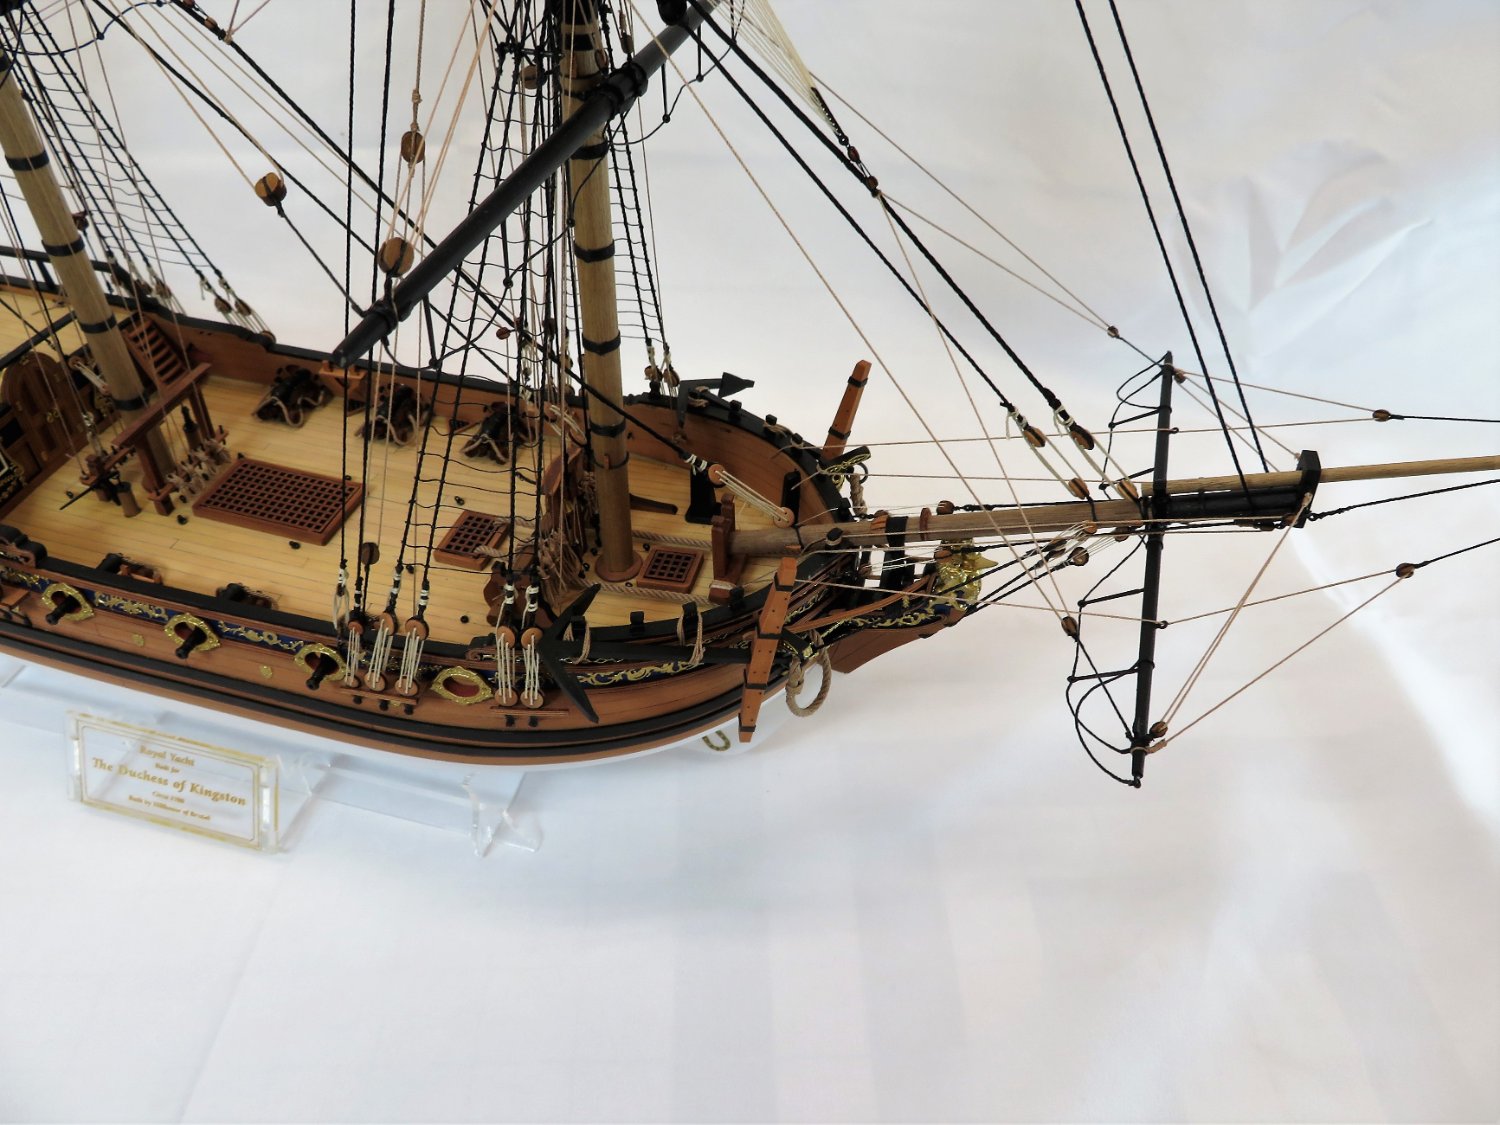
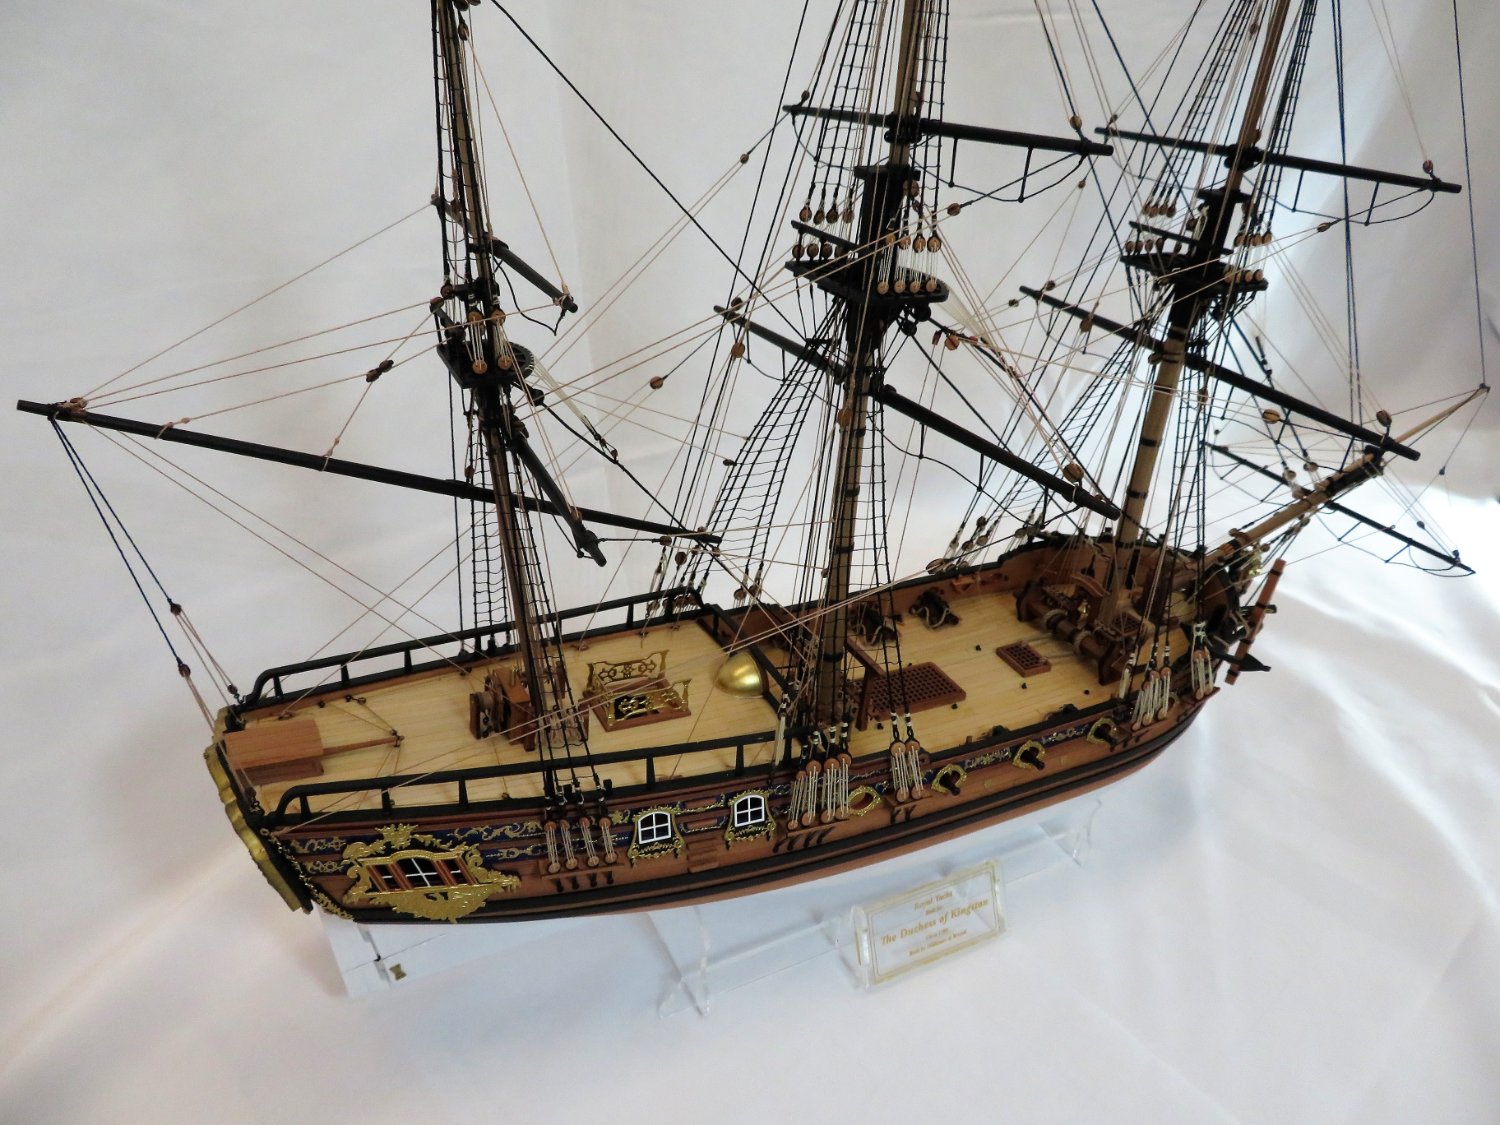
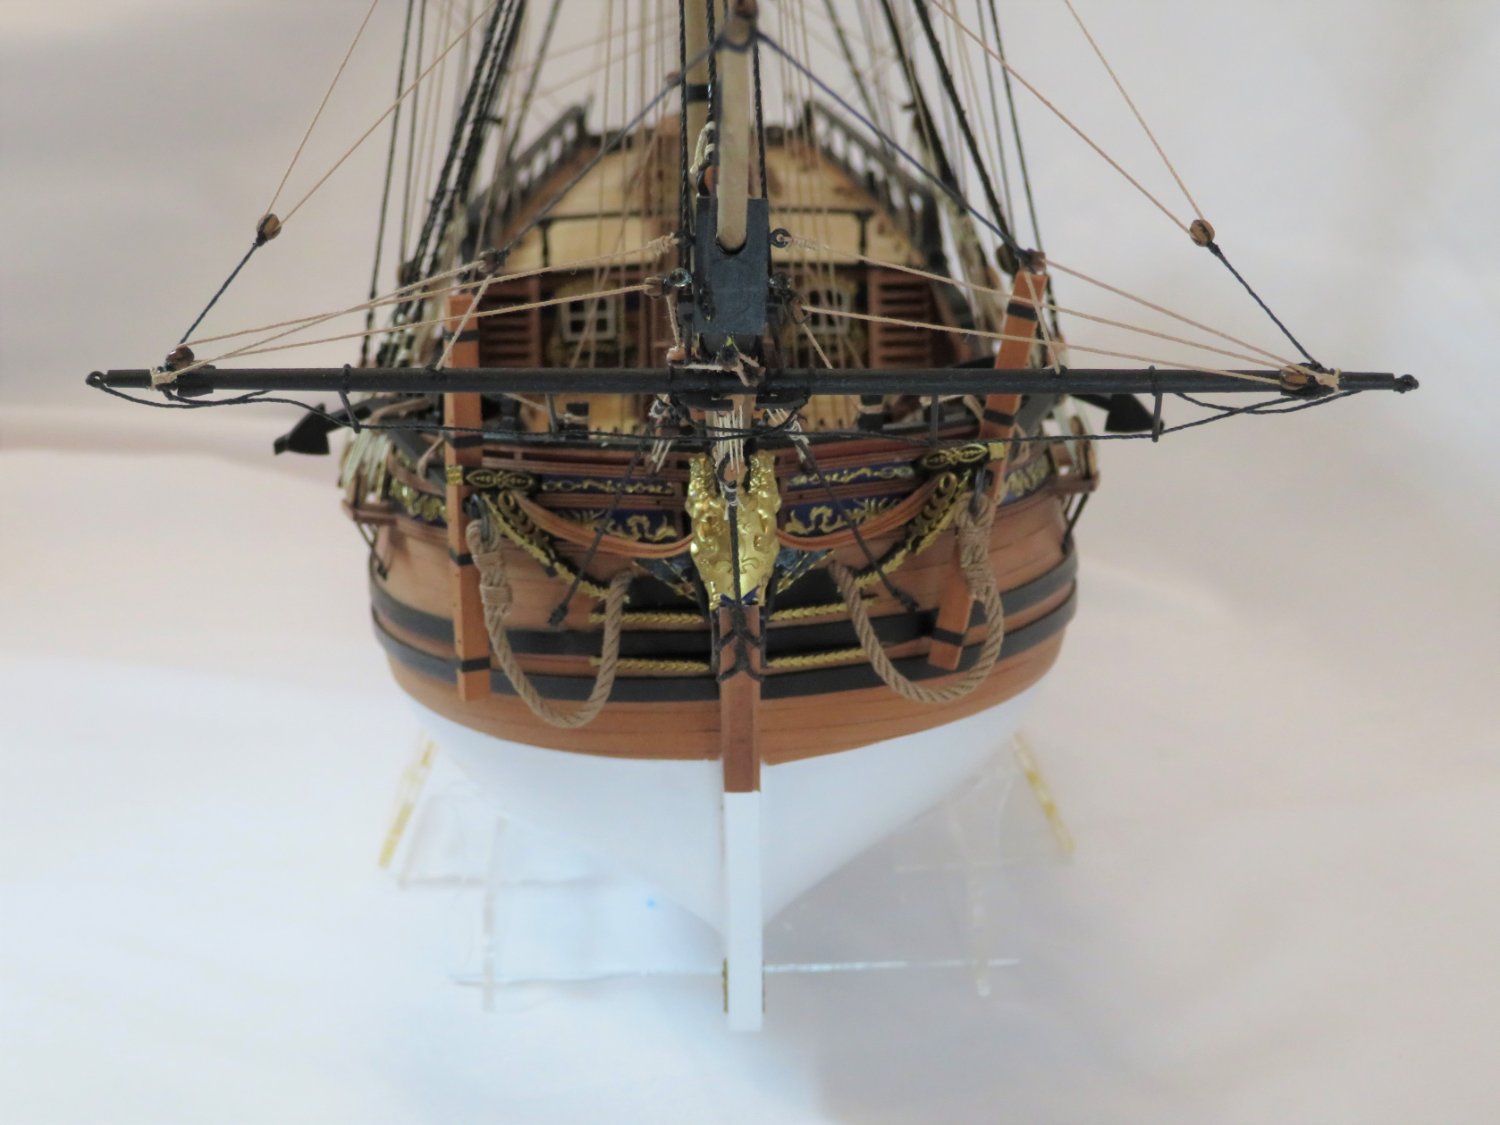
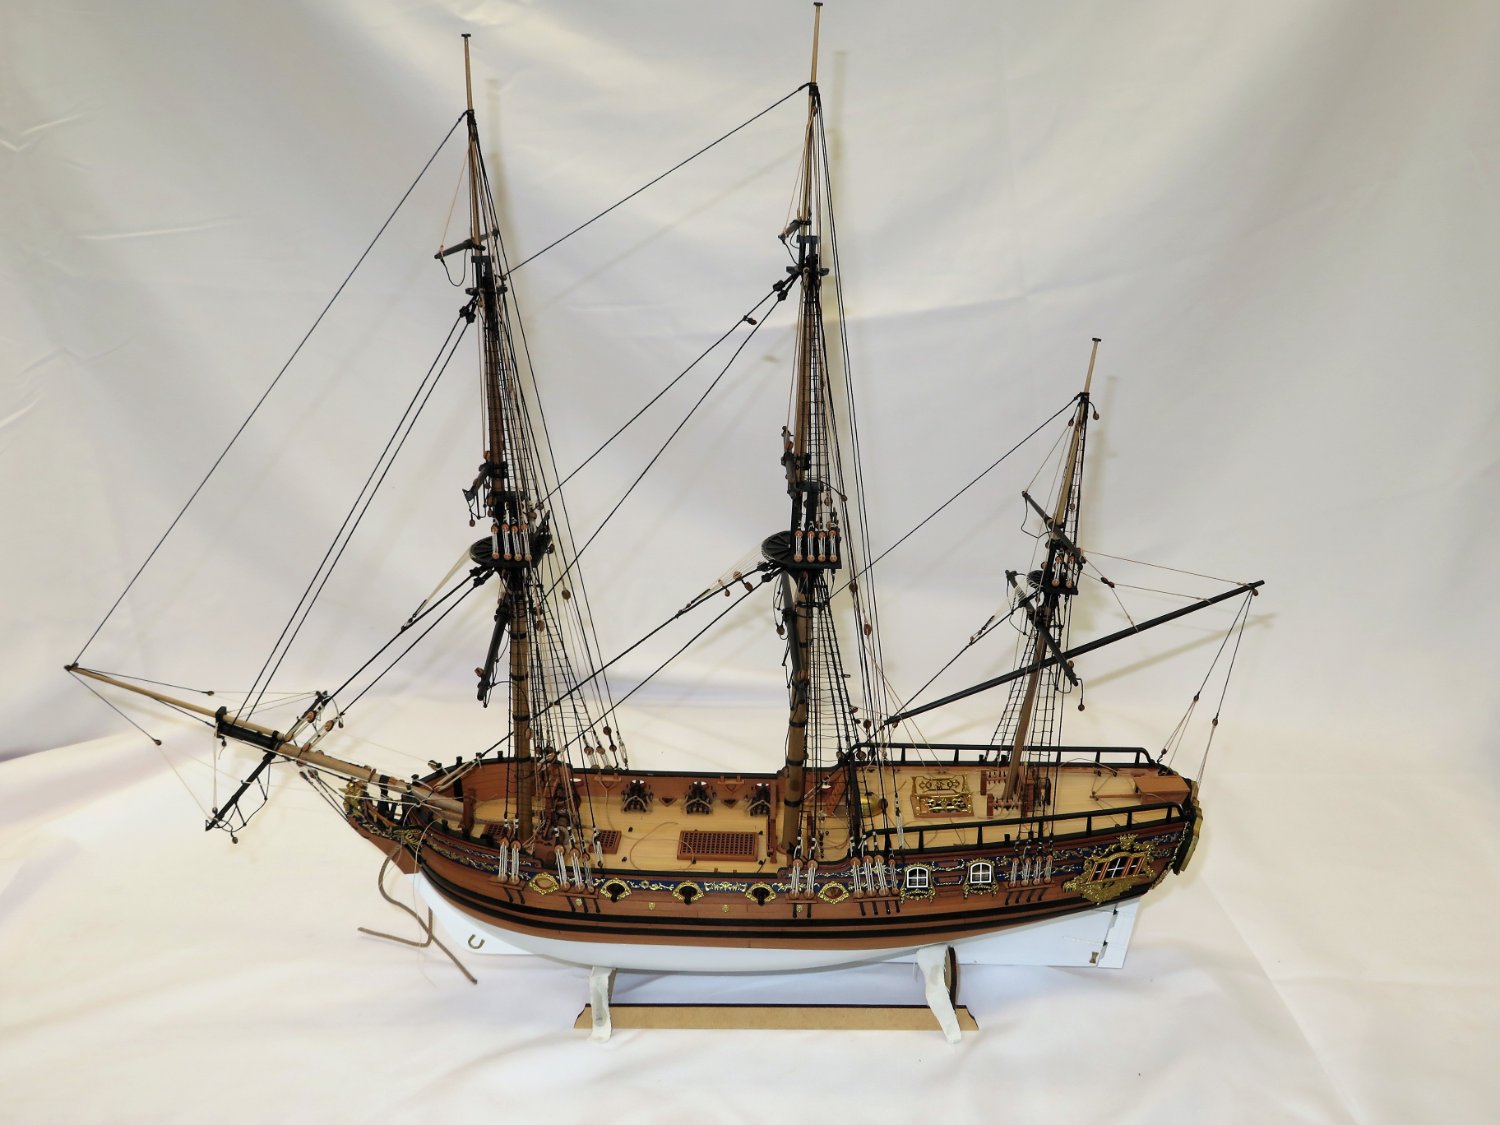
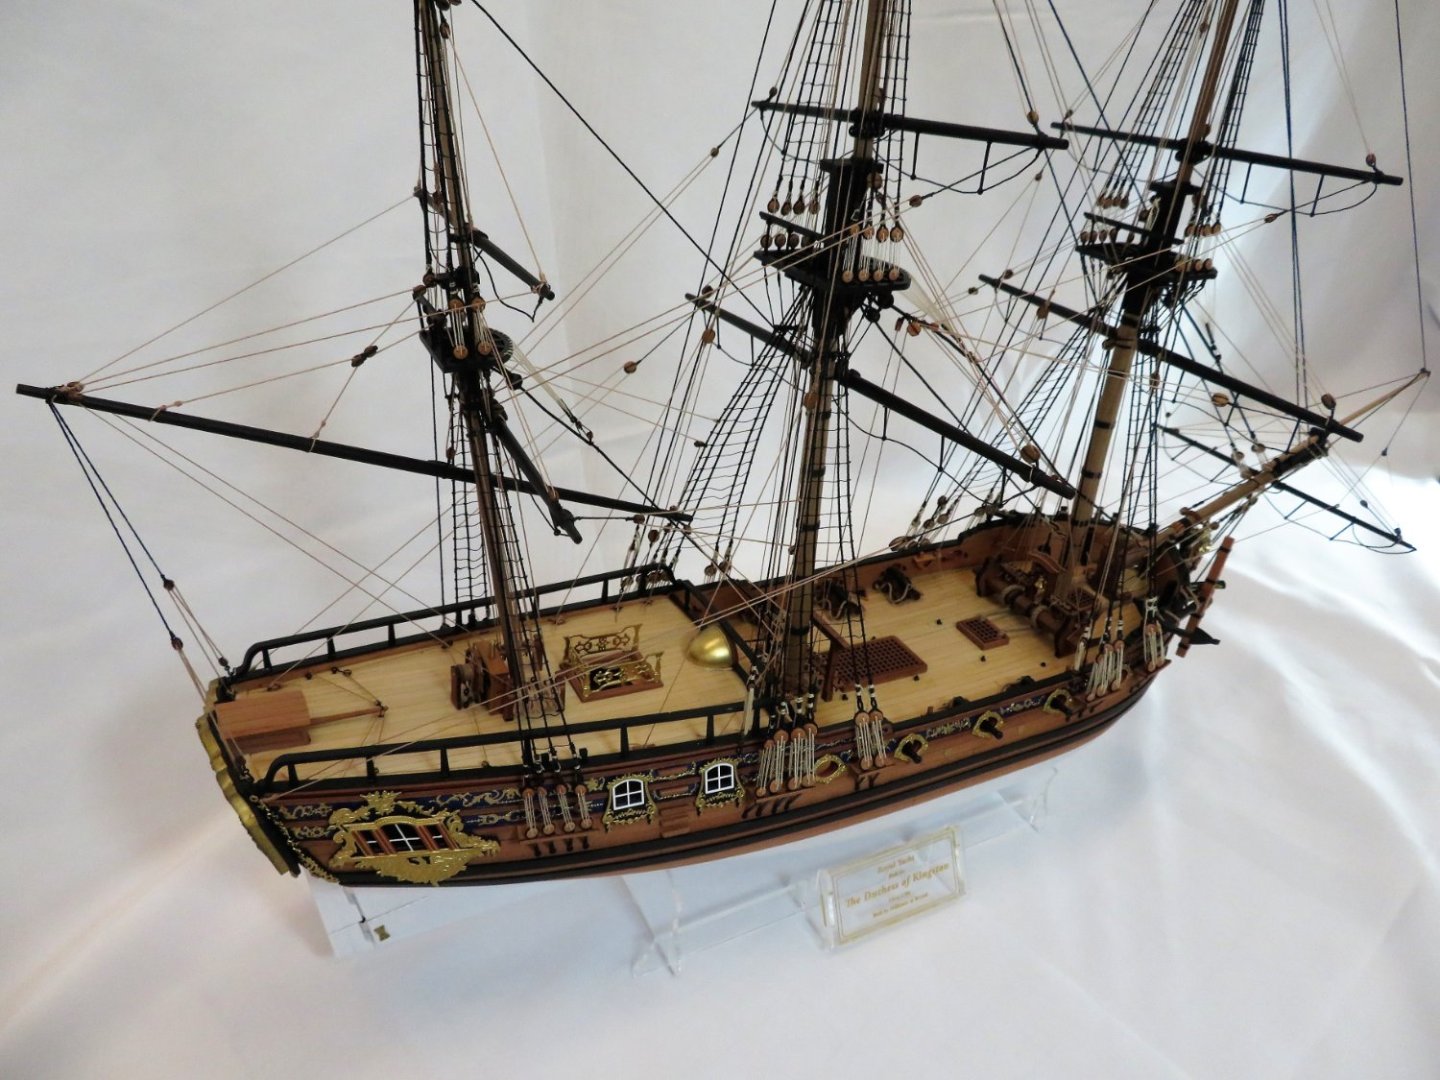
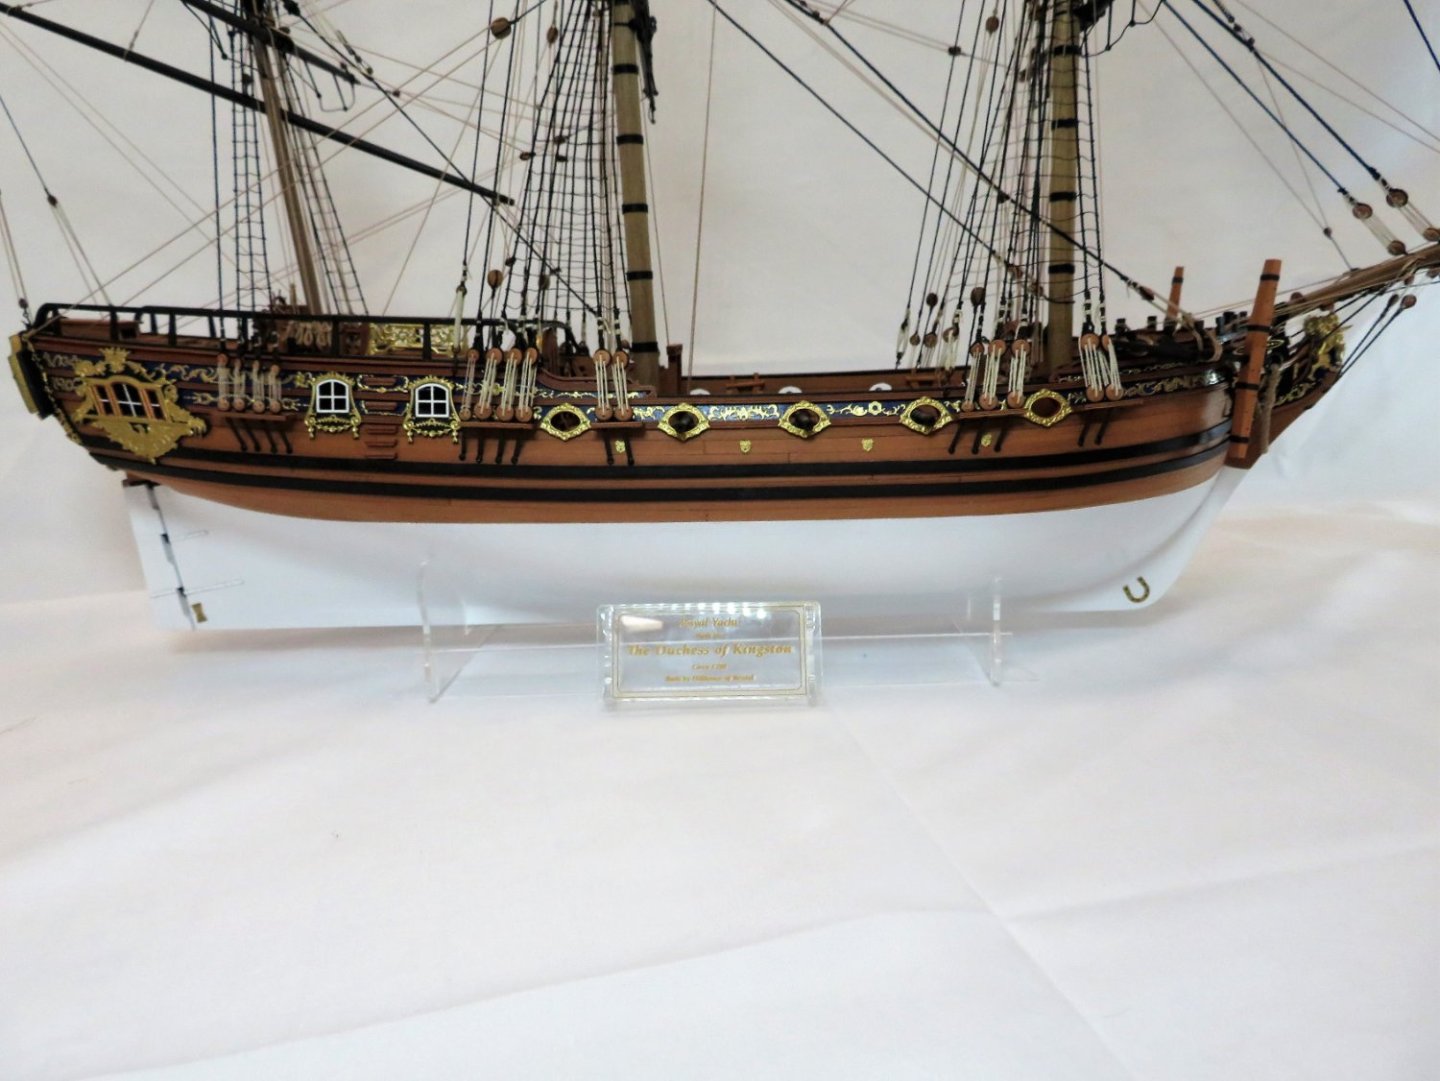
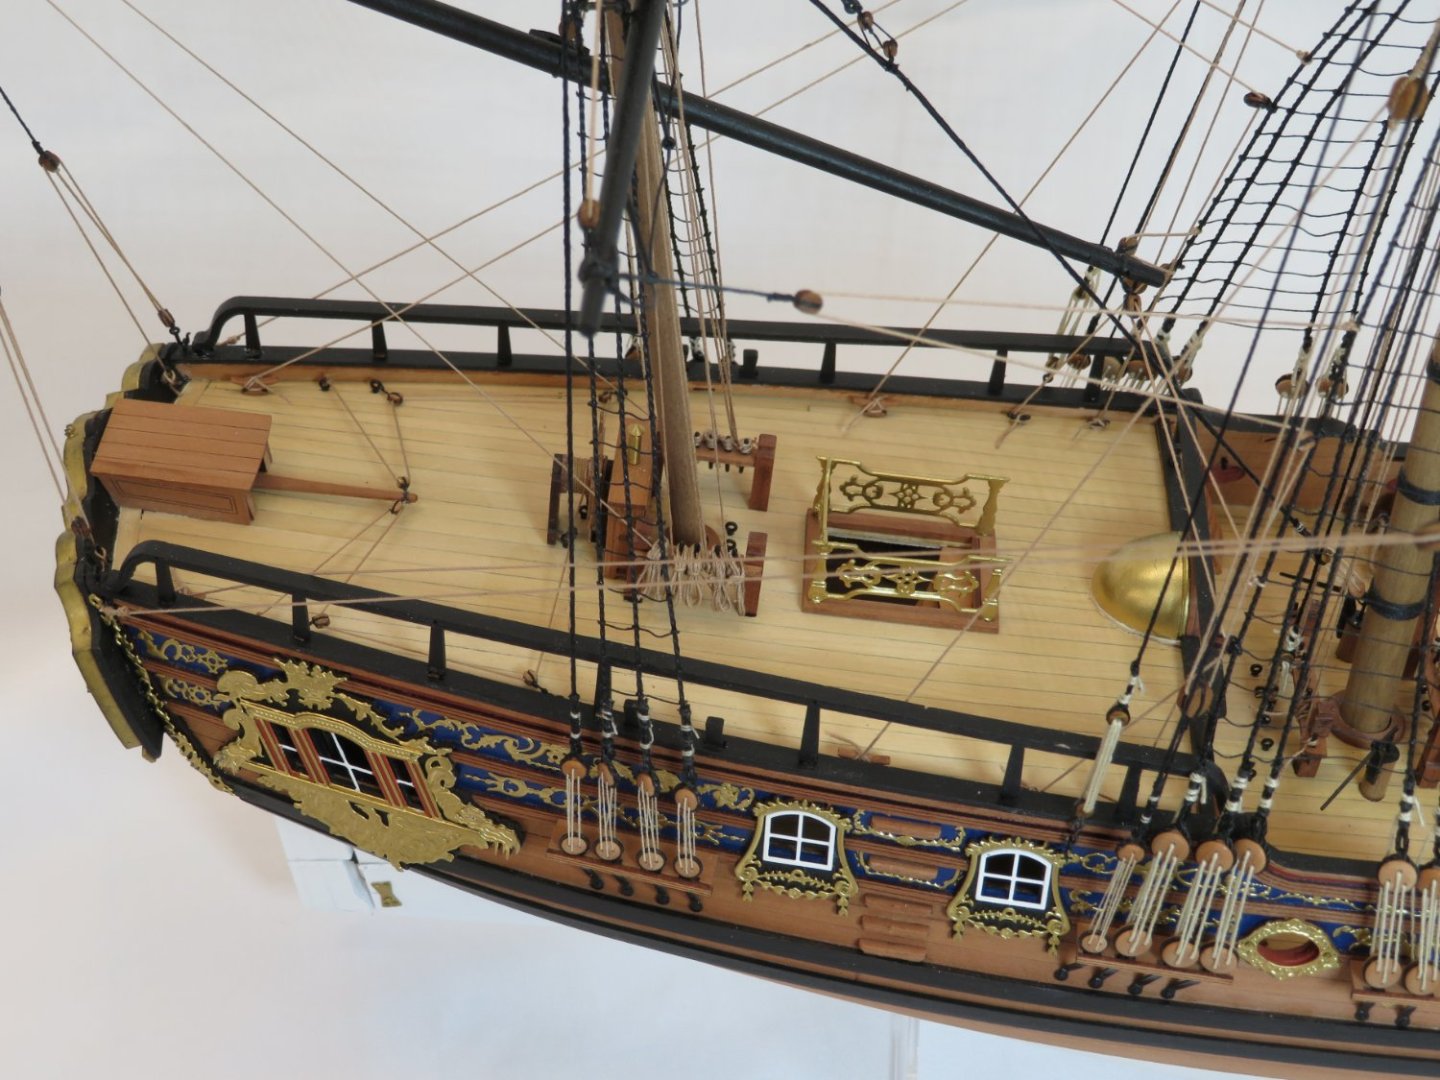
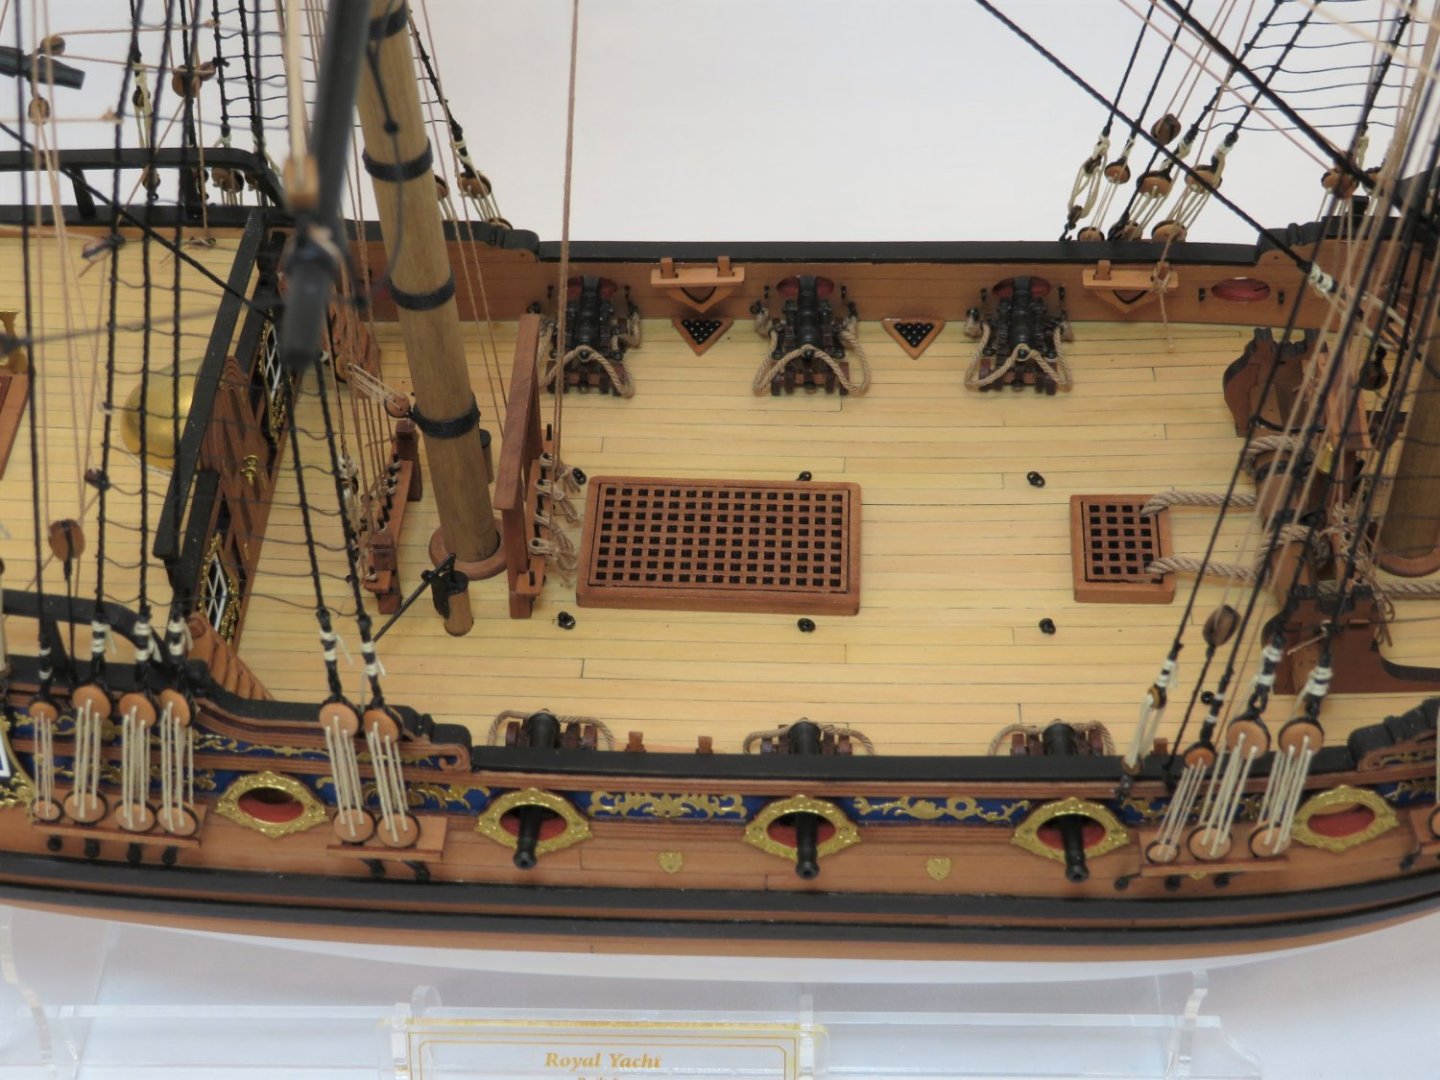
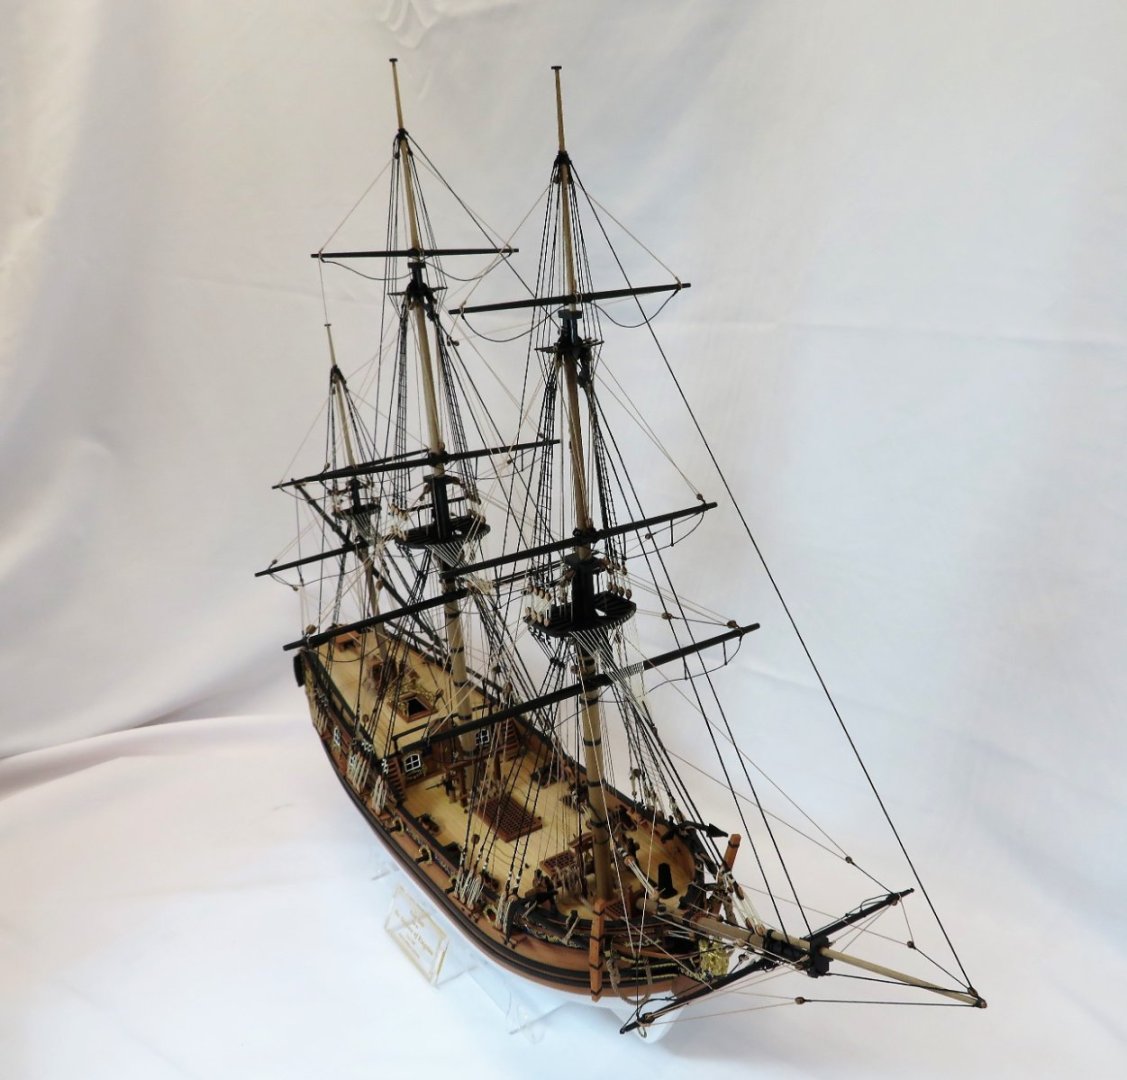
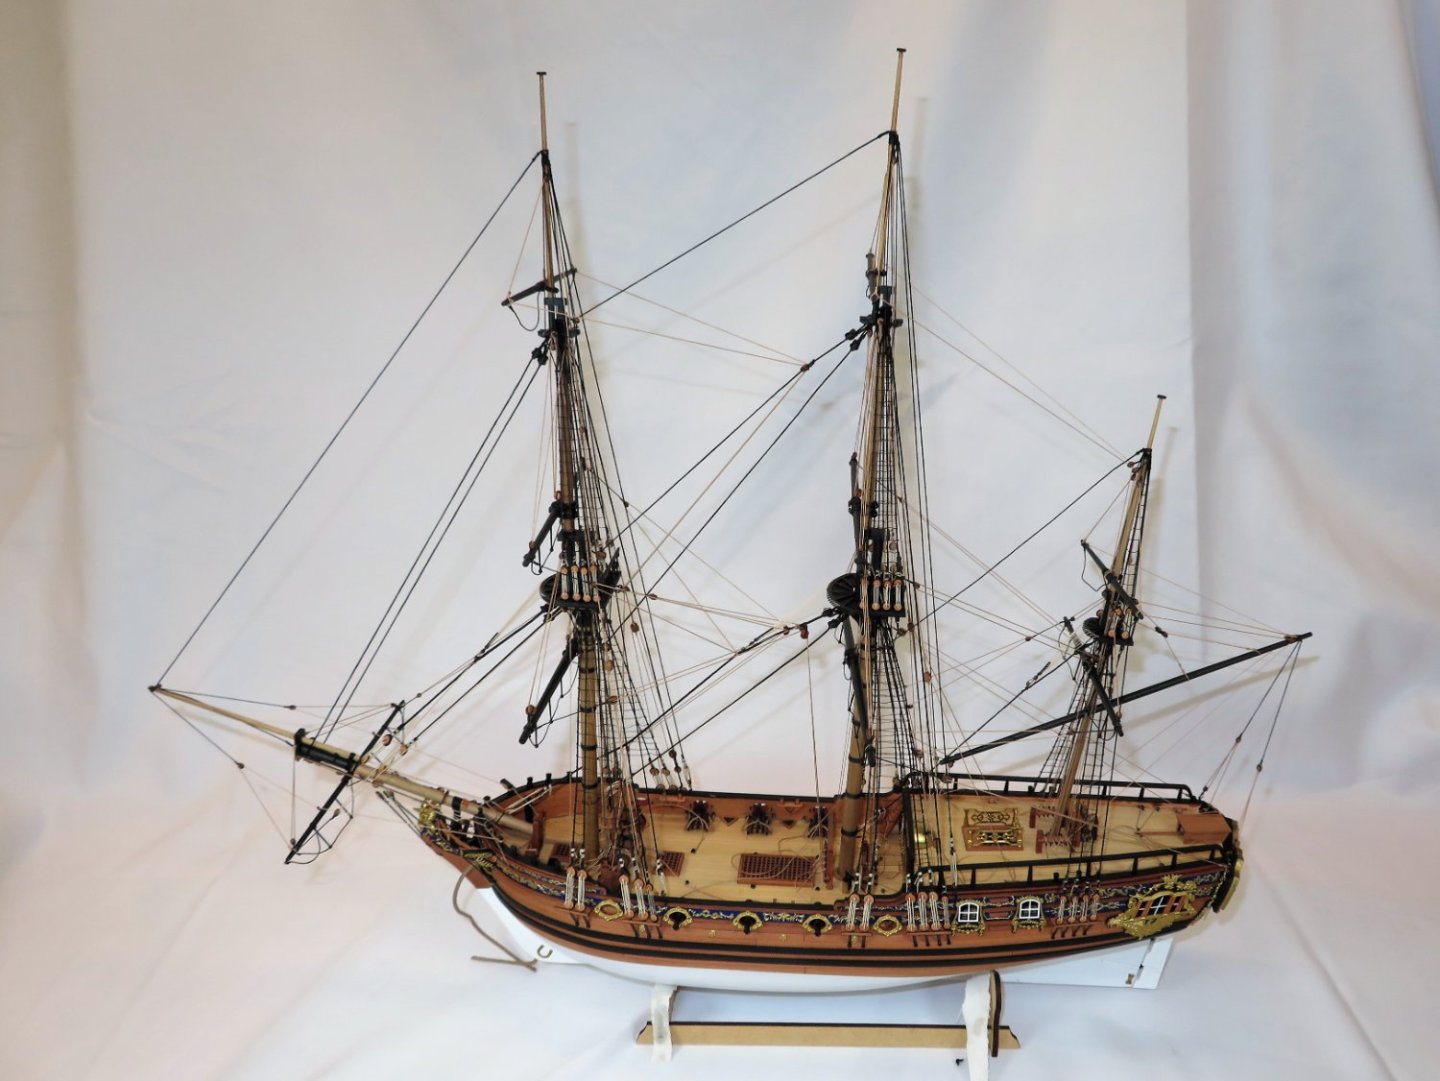
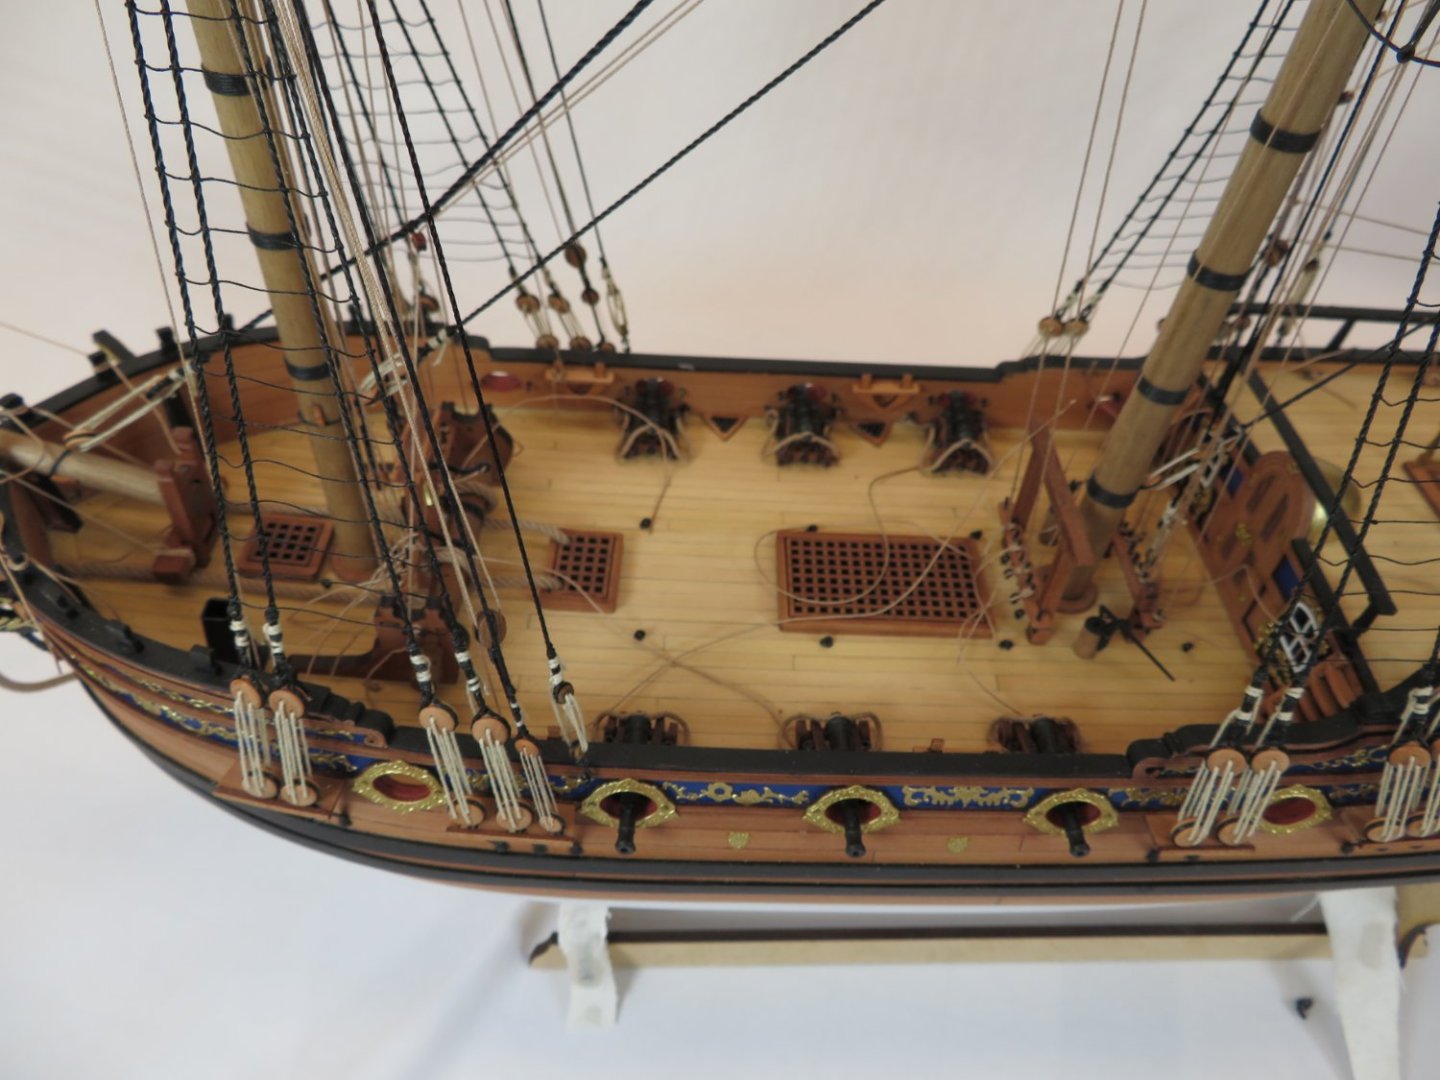
 Hi All, Well, the Dutchess of Kingston has officially been finished. It took me some time to finish working around my other builds, but it was well worth it. I want to commend Chris Watton for producing such a wonderful kit that looks great and is a pleasure to build. I look forward to some of Vanguards future releases and trying to figure out what one I want to build next. To those who built the Duchess before me thank you for your logs. They saved me more times that I can count. Thanks to all of you for your comments, support and likes. It was deeply appreciated.
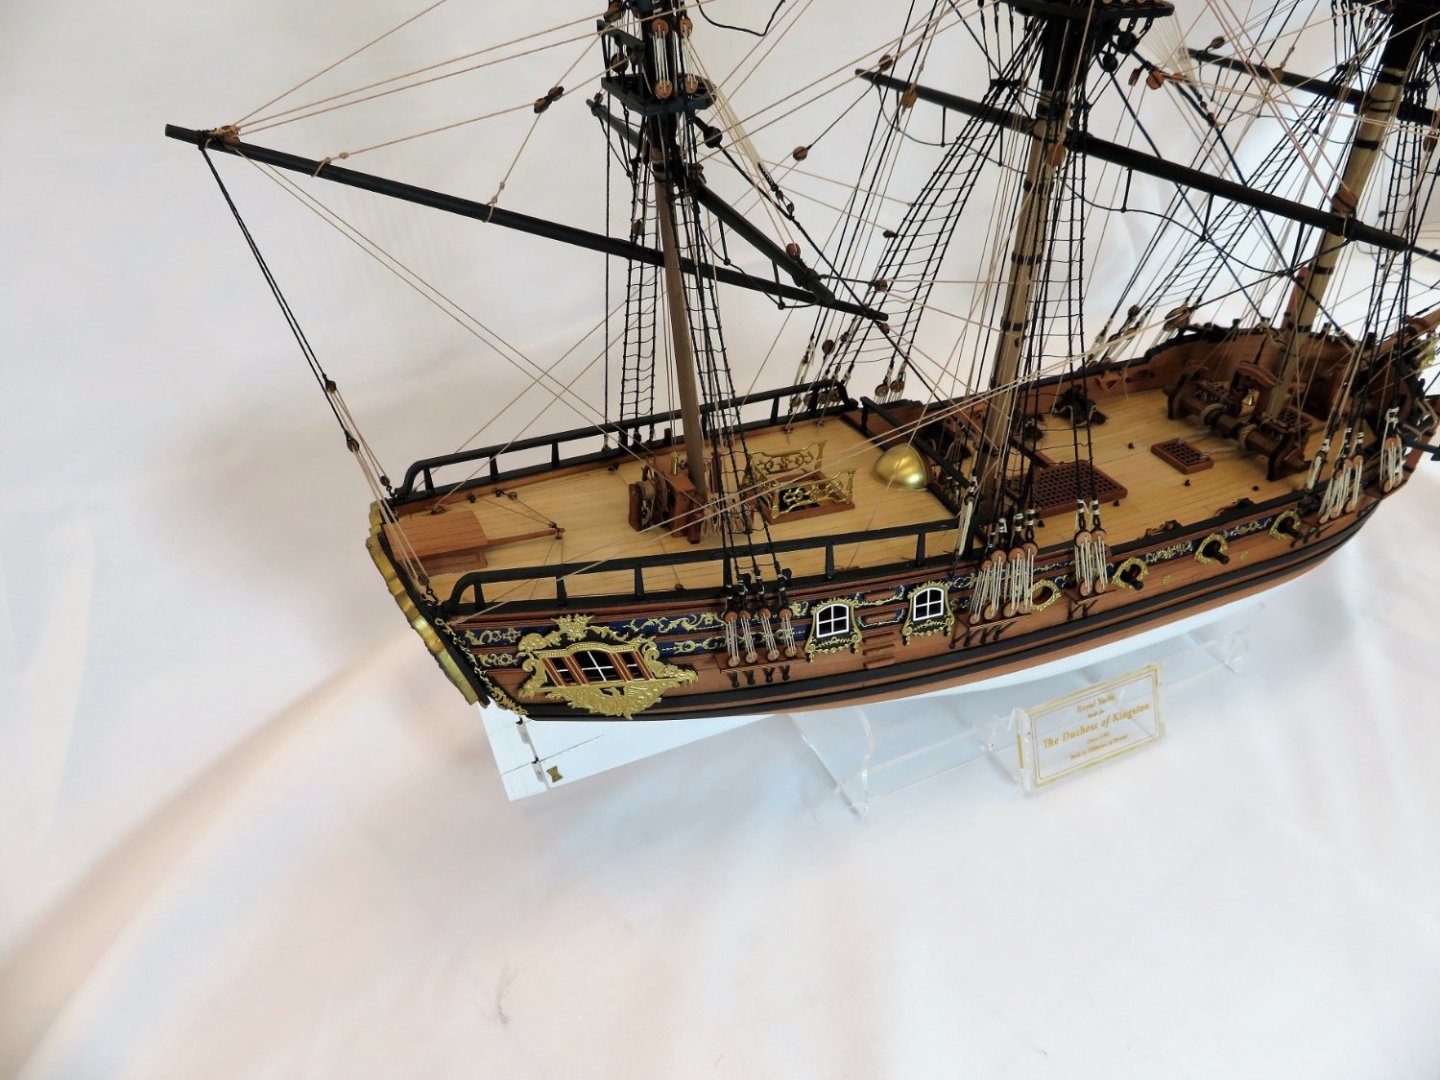


- 201 replies
-
- 21
-

-

-

-
- Duchess of Kingston
- Vanguard Models
- (and 1 more)
-
Very inventive. That looks like it'll be a lot easier than carving from one piece!
- 1,784 replies
-
- 2
-
-
- winchelsea
- Syren Ship Model Company
- (and 1 more)
-
This was a pleasant read before starting my day. Excellent work Glenn.
- 840 replies
-
- 4
-
-
- winchelsea
- Syren Ship Model Company
- (and 1 more)
-
Thanks Joe, I'm in the middle of my three weeks of 14 hour days. The poor girl is covered on the bench awaiting my return.
- 642 replies
-
- 3
-
-
- winchelsea
- Syren Ship Model Company
- (and 1 more)
-
Hi B.E. I love the look of the pinnace. Excellent workmanship. I too like the challenge making them.
- 857 replies
-
- 4
-
-
-
- Sphinx
- Vanguard Models
- (and 1 more)
-
Thanks Glenn, the fine design really helps create a nice looking model. Thanks Ron, it's kind of a love hate relationship.
- 201 replies
-
- 2
-
-
- Duchess of Kingston
- Vanguard Models
- (and 1 more)
-
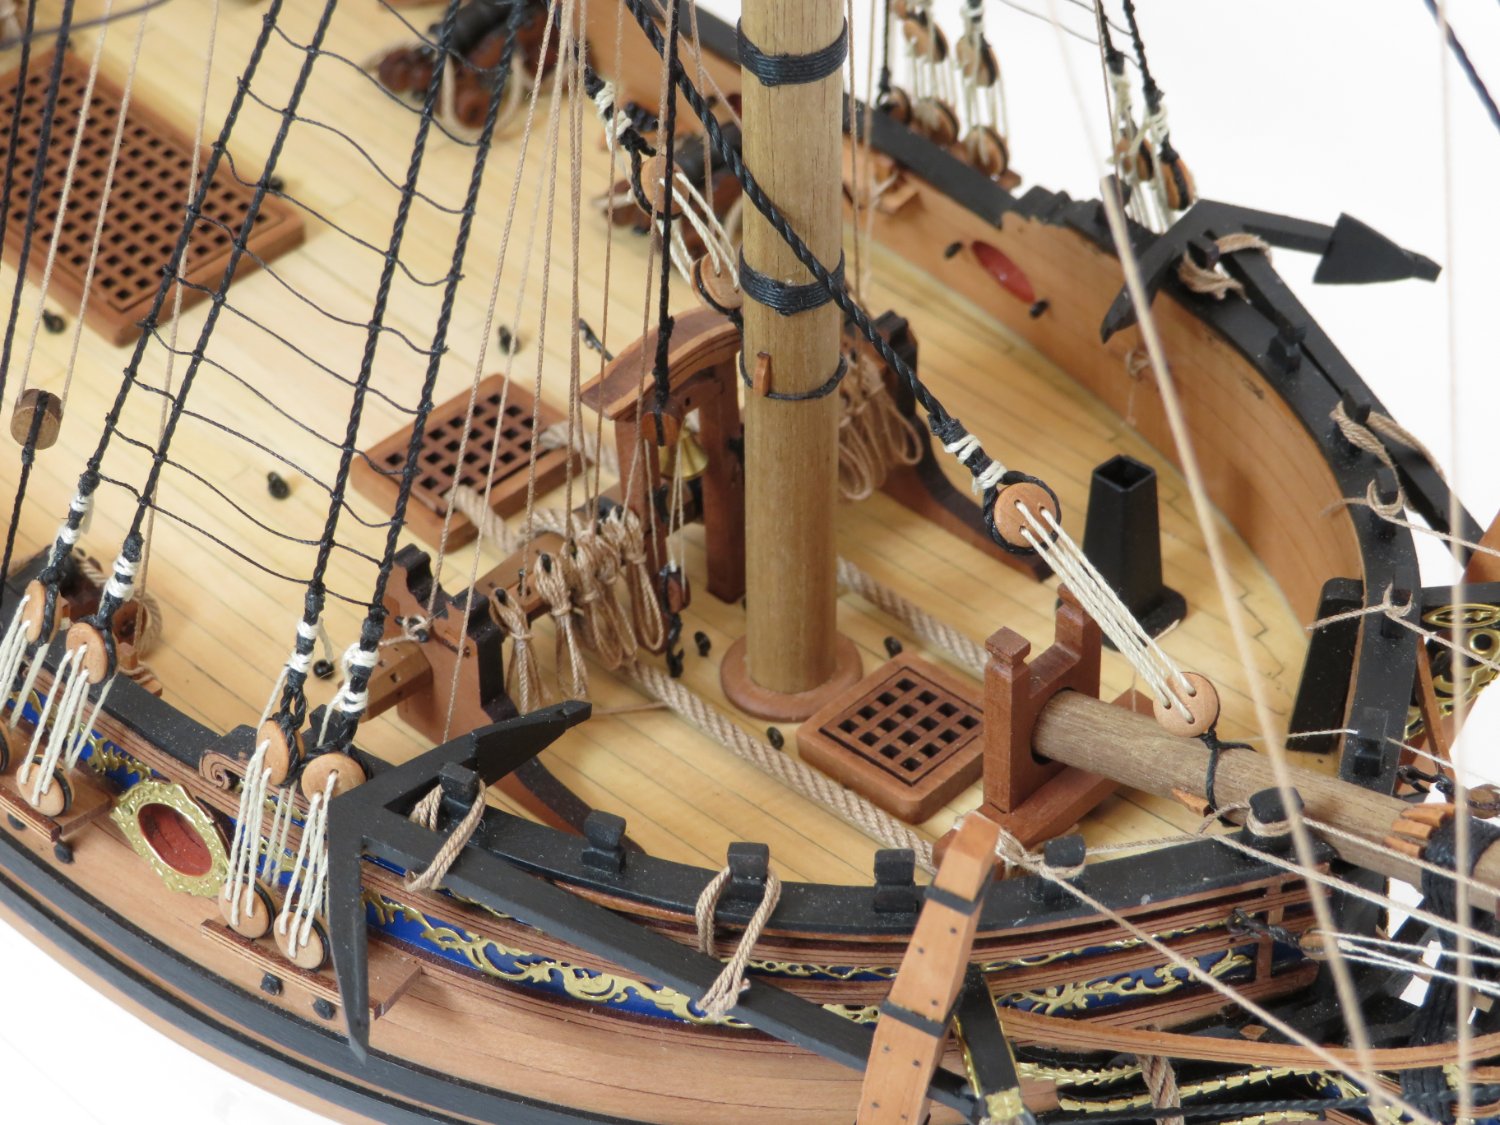
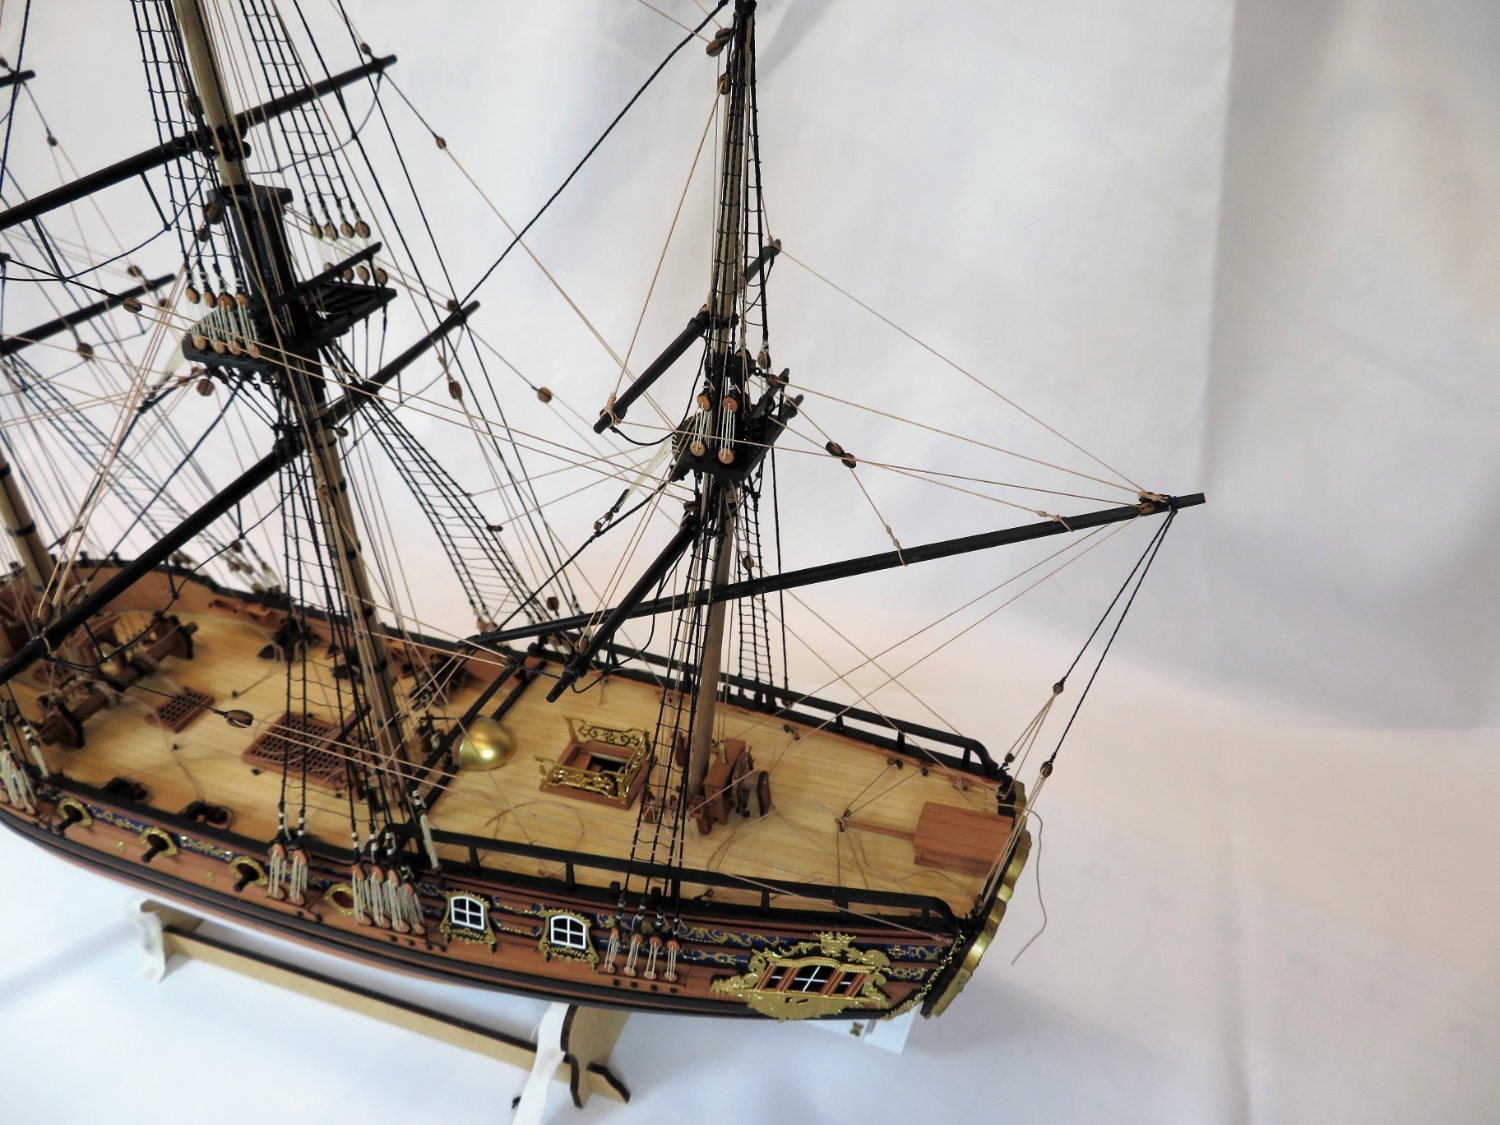
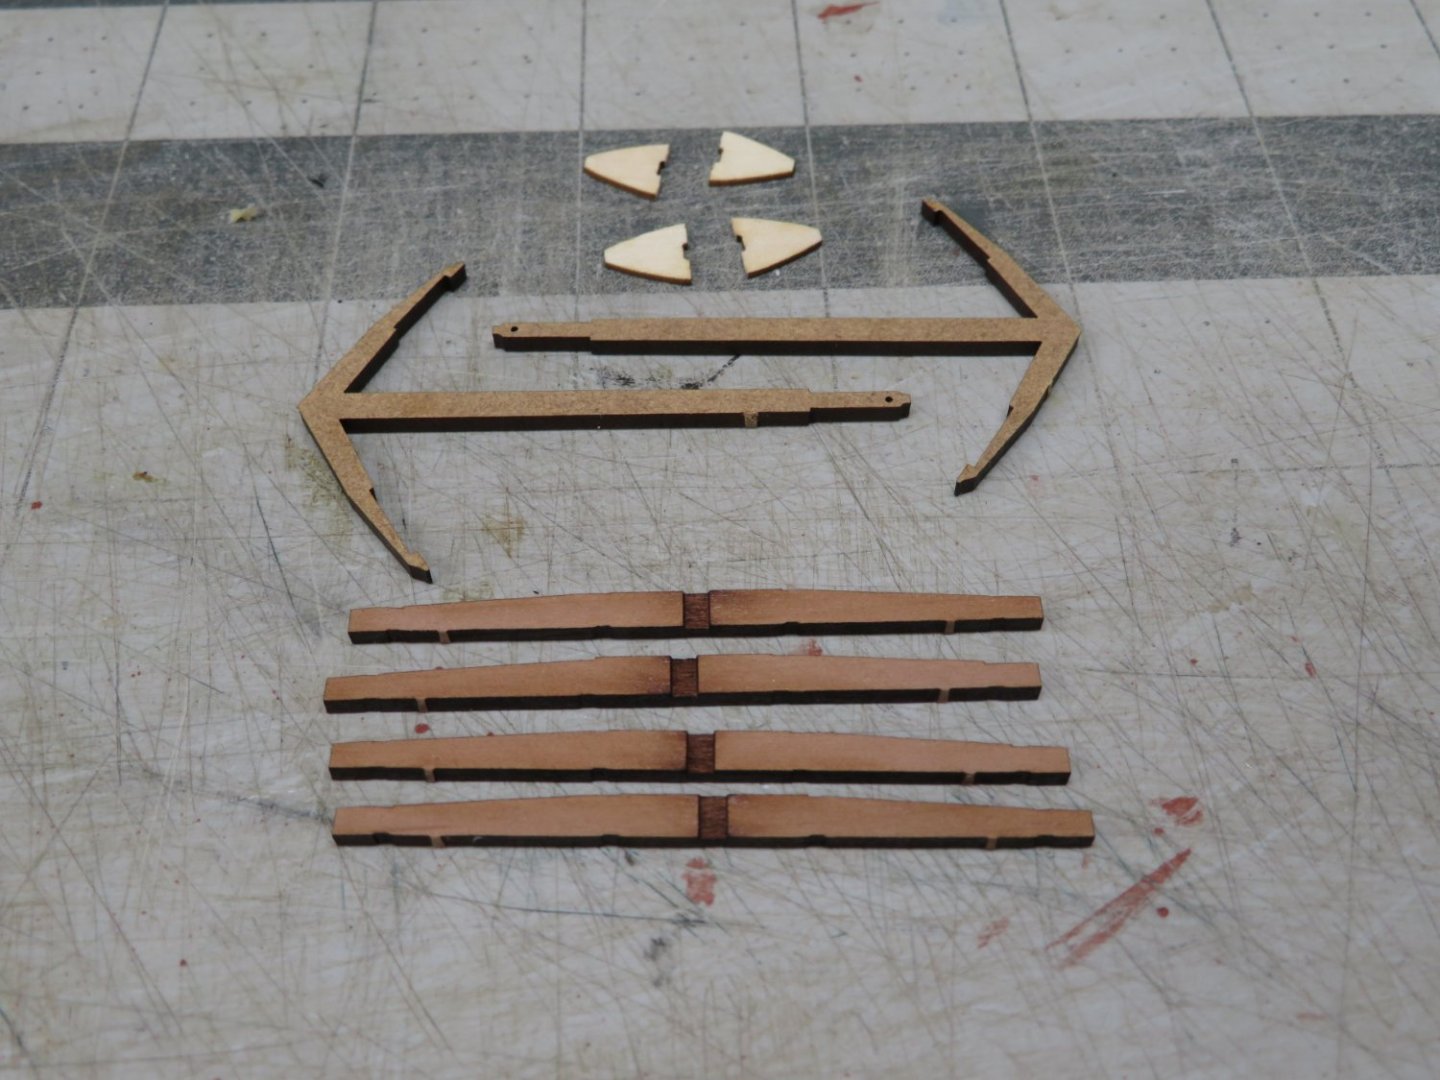
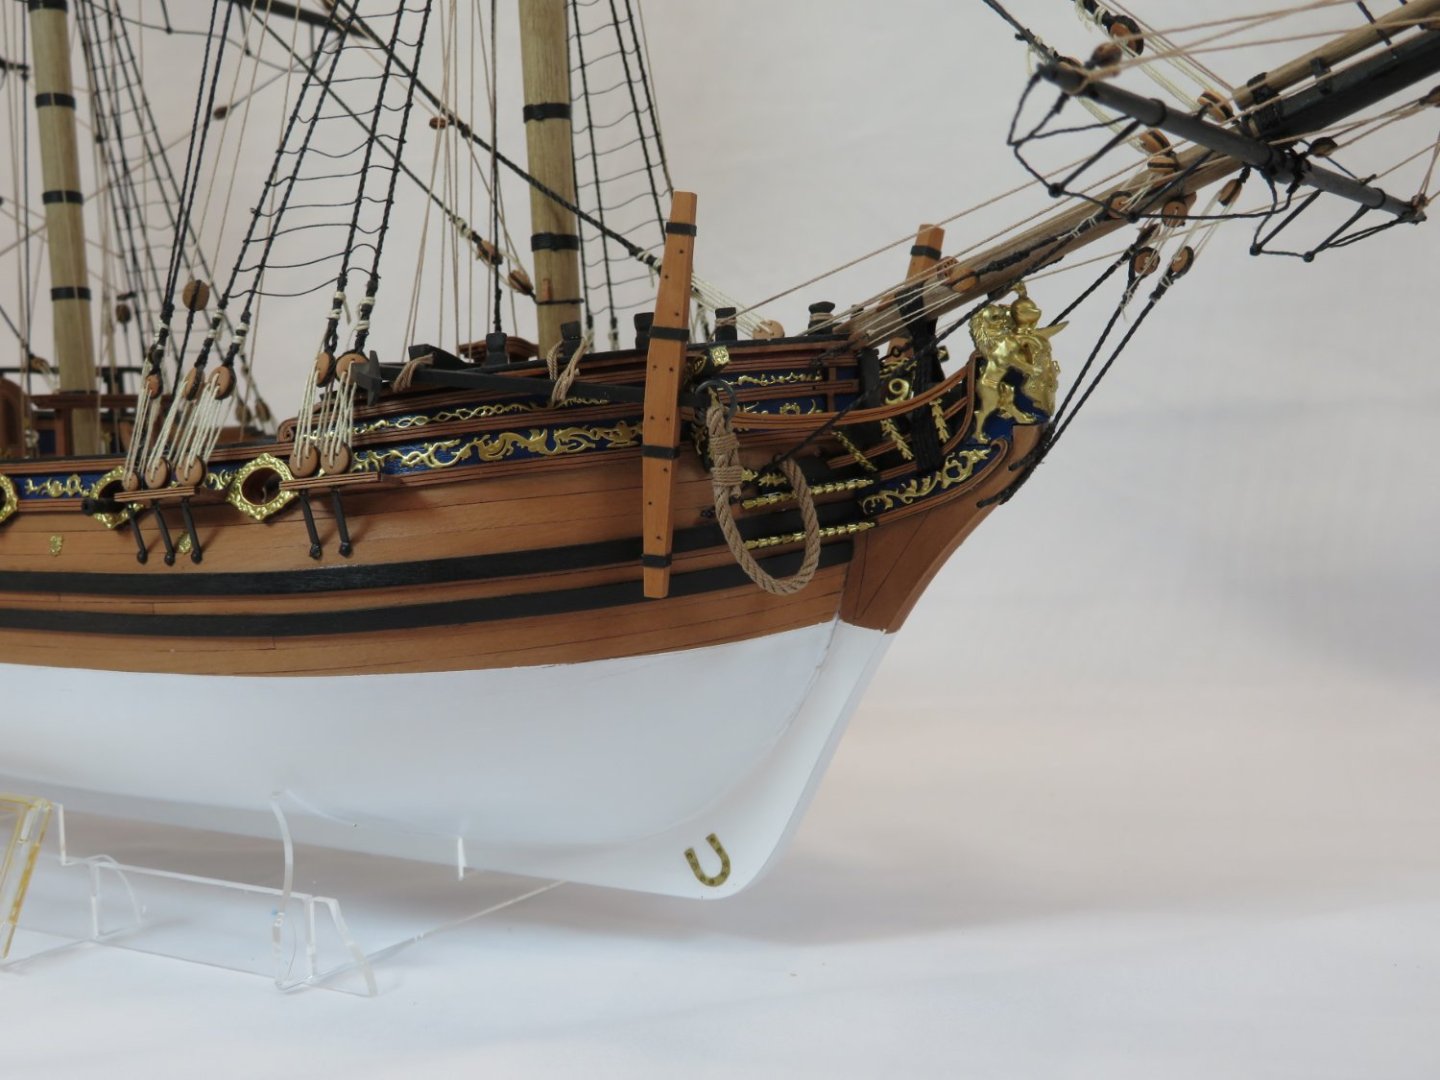
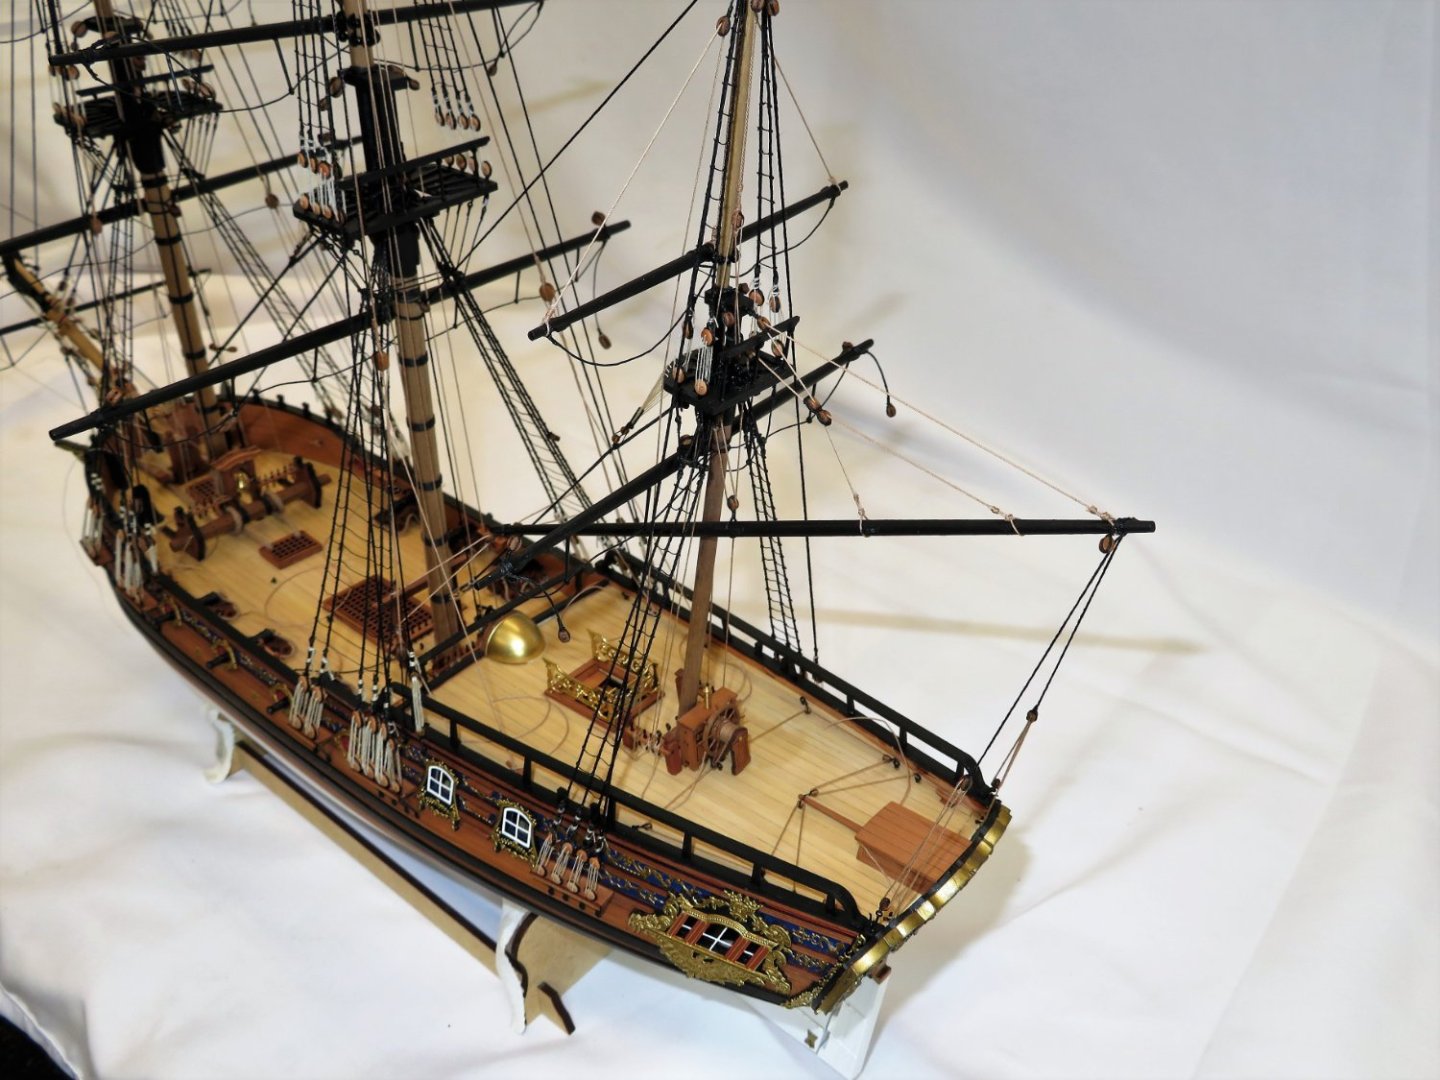
The anchors have been made with a minor modification on my part. The stocks are two parts and when I put them together and started sanding them, I was not happy with the way I could make them look. Not the parts fault. I was not as careful putting the together and the seam just didn't look good to my eye. Because of this I cut some stocks from pear I had on hand. Now with the anchors in place I just have rope coils to make and check the lines to ensure they are snug, and we'll be finished. That happy sad moment is rapidly approaching.

- 201 replies
-
- 13
-
-
- Duchess of Kingston
- Vanguard Models
- (and 1 more)
-
Excellent workmanship and description Glenn. A perfect example of planning and patience!
- 840 replies
-
- 2
-
-
- winchelsea
- Syren Ship Model Company
- (and 1 more)
-
Wonderful work on the lights as well as the stove and pumps.
-
Thanks Rob and Glenn. It took me a bit to get into the proper mental mood but once I took the plunge it went pretty well! Starting on the anchors then rope coils. Thanks for all the likes too.
- 201 replies
-
- 1
-
-
- Duchess of Kingston
- Vanguard Models
- (and 1 more)
-
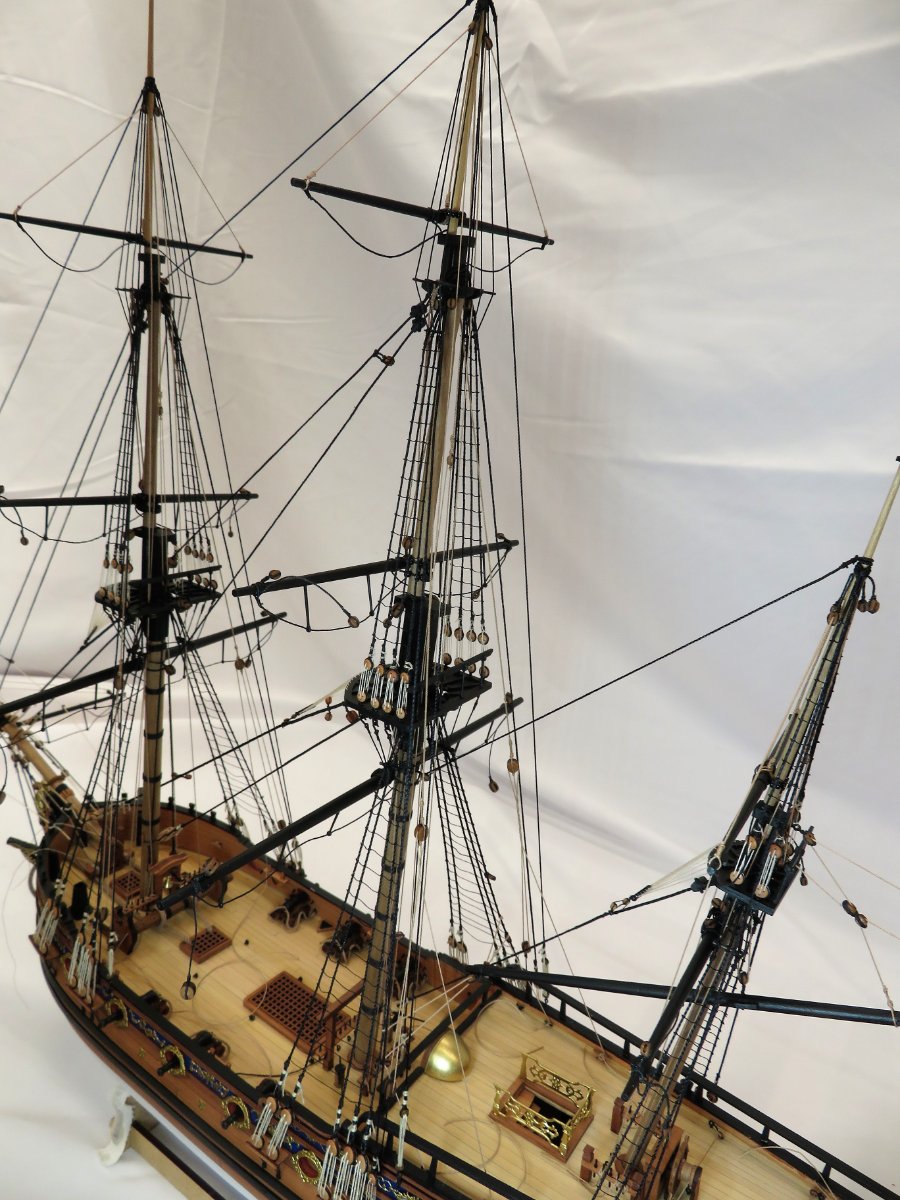
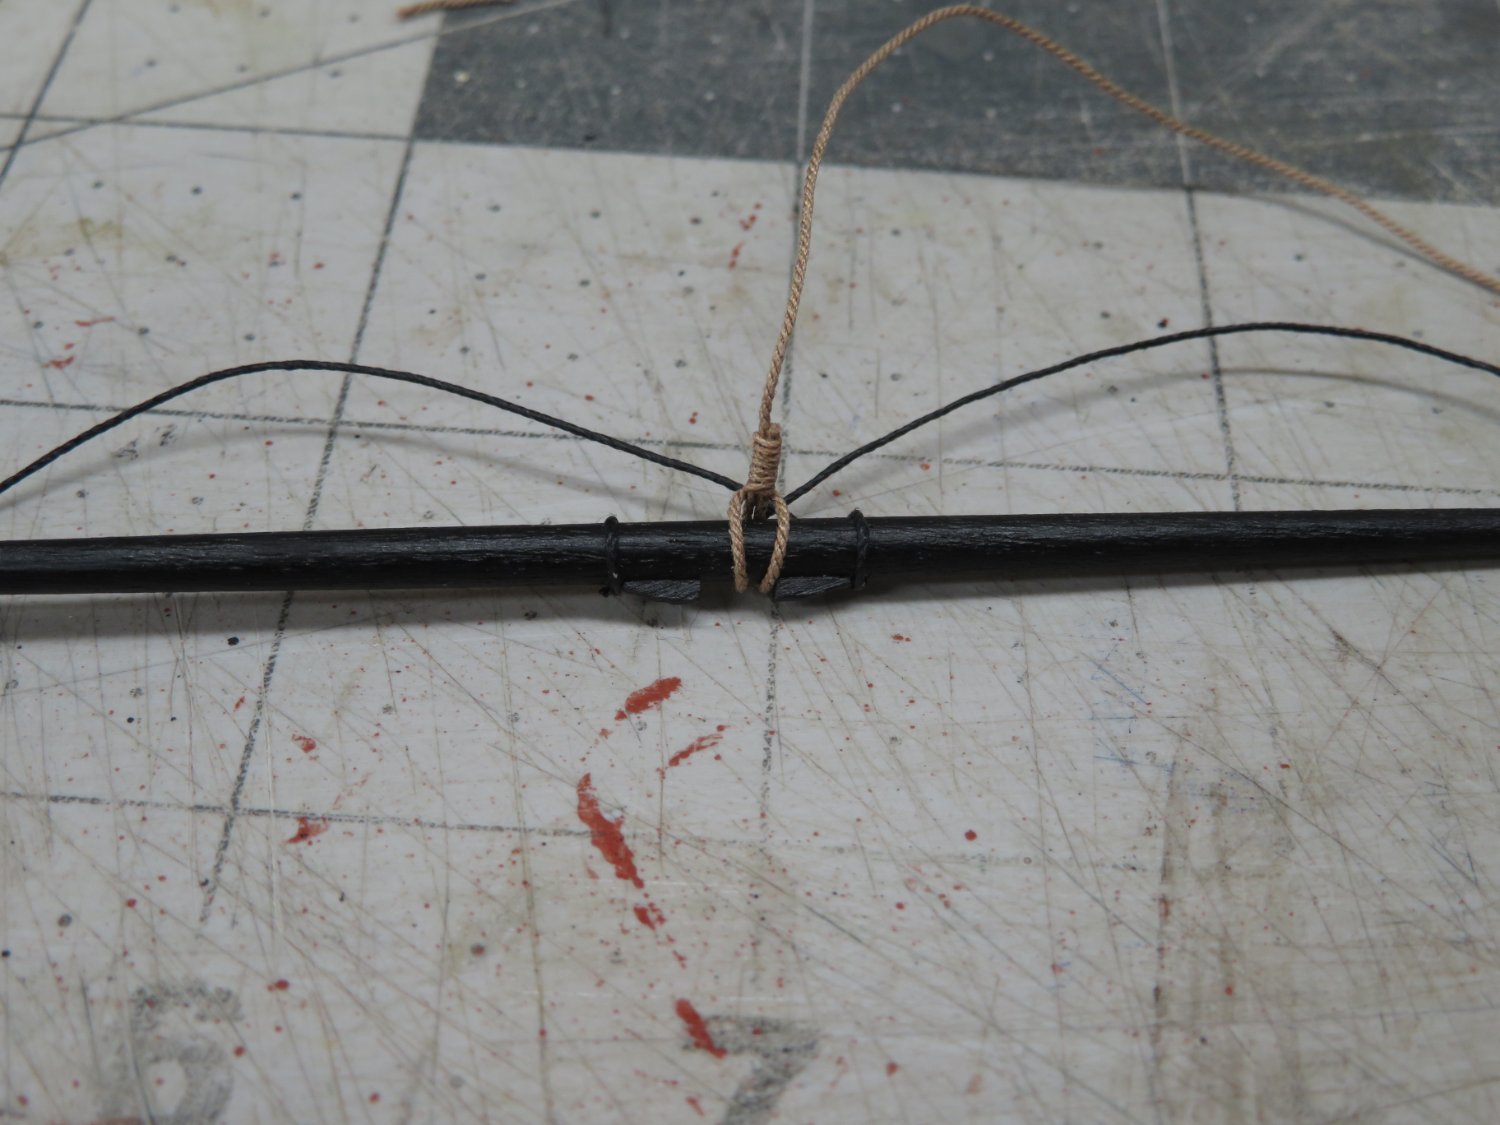
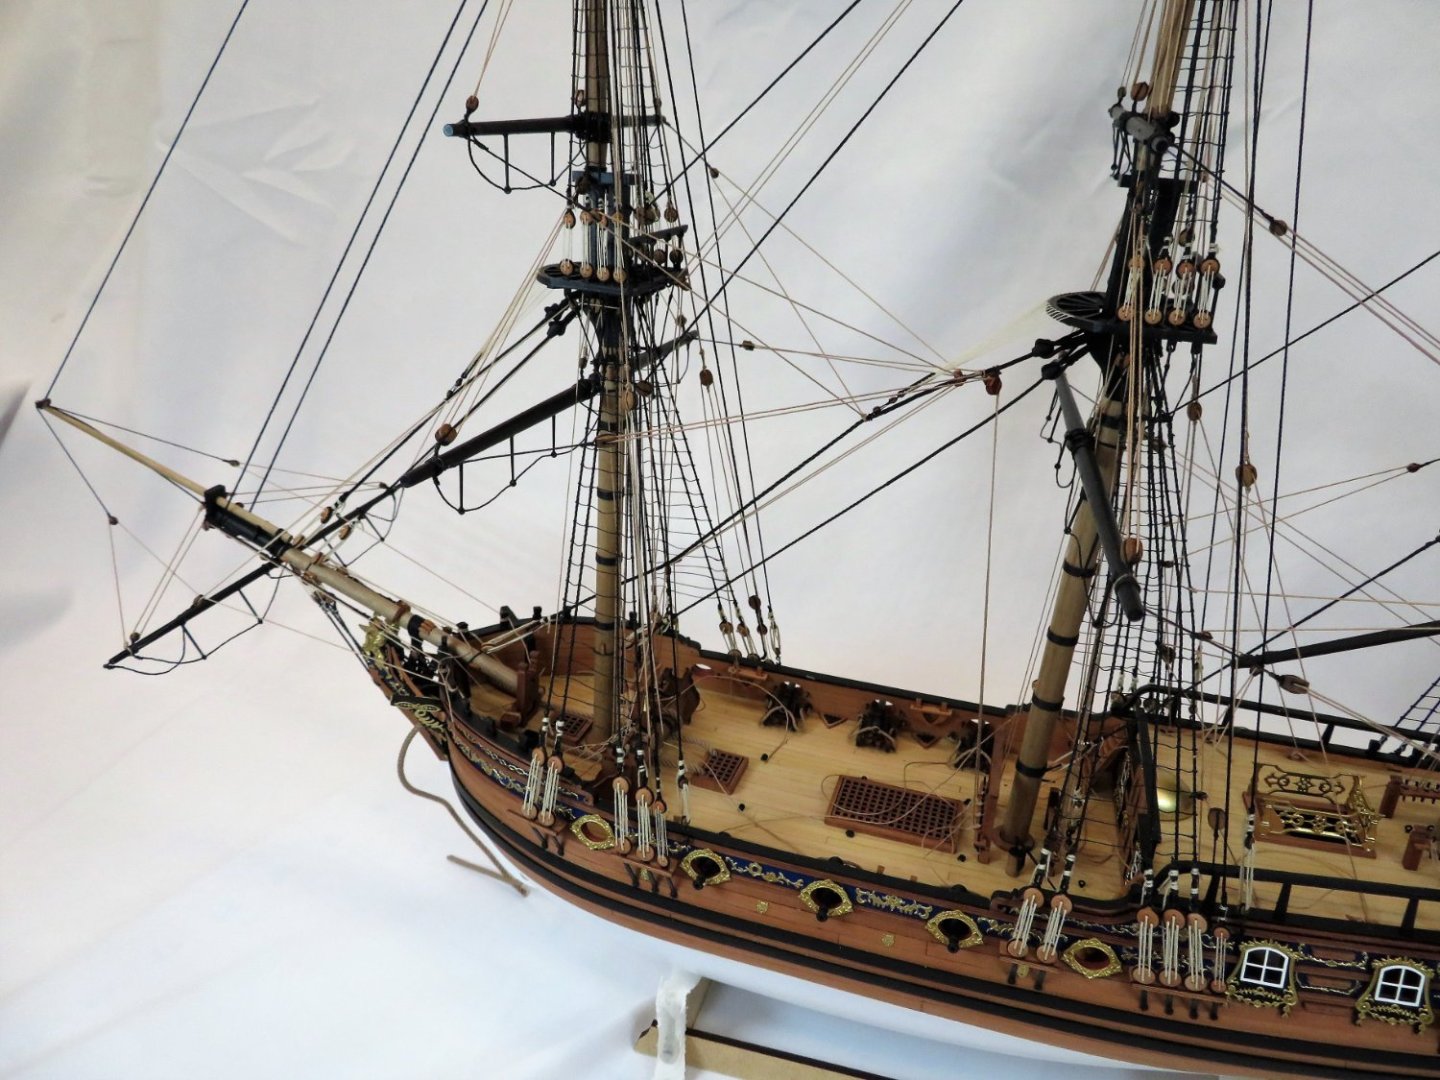
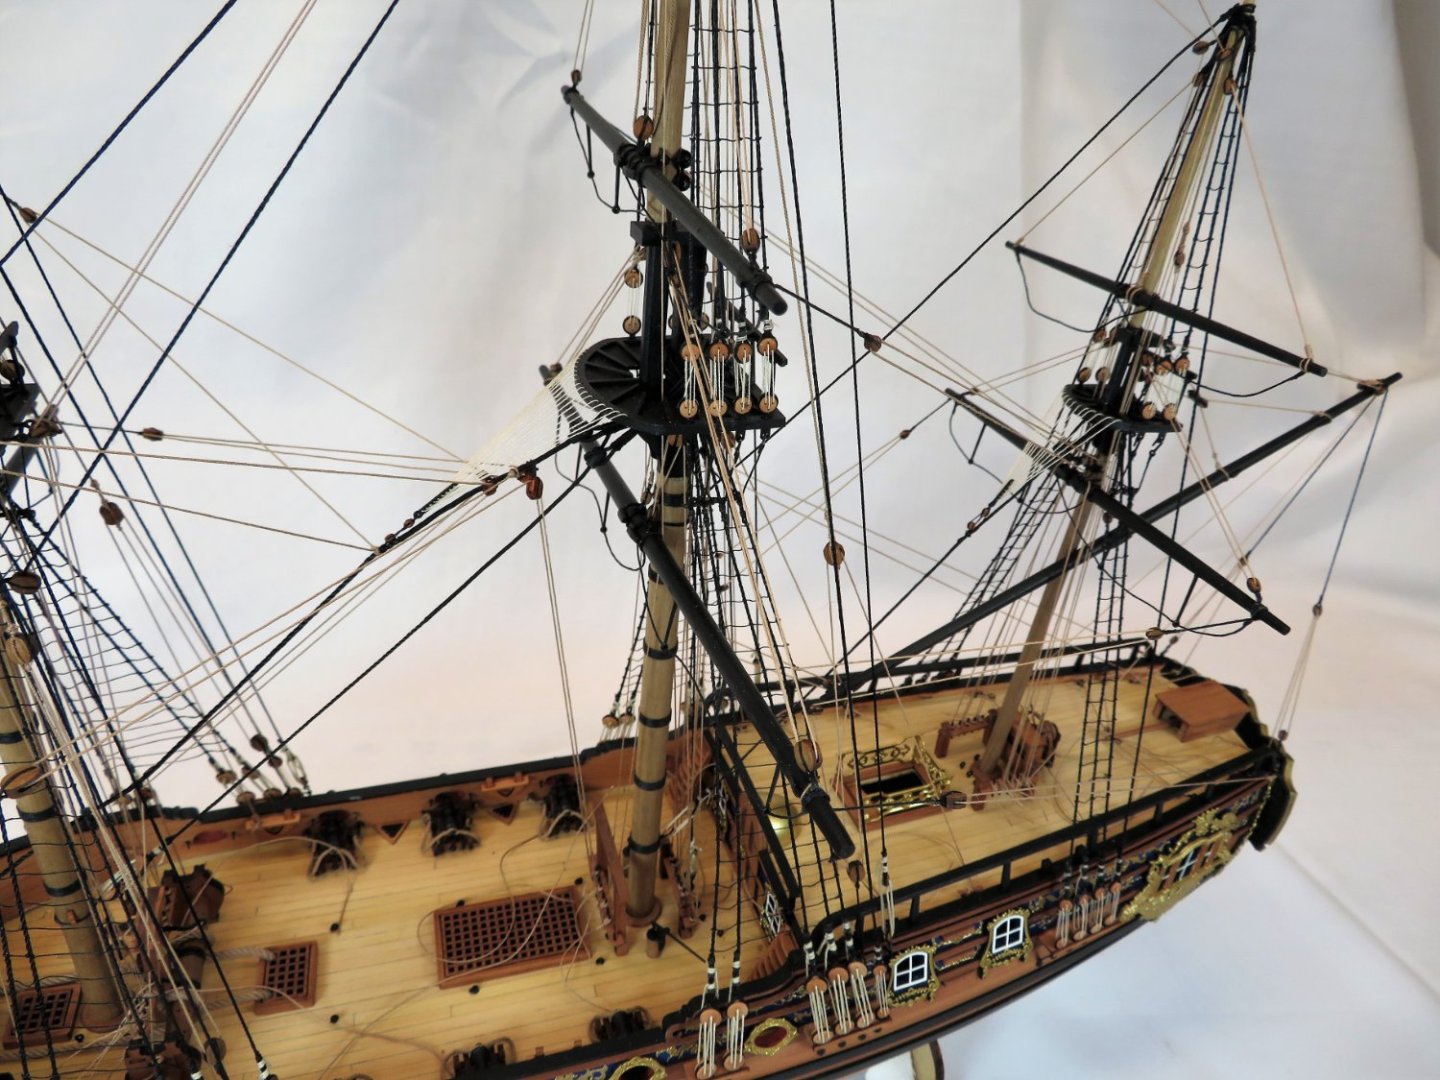
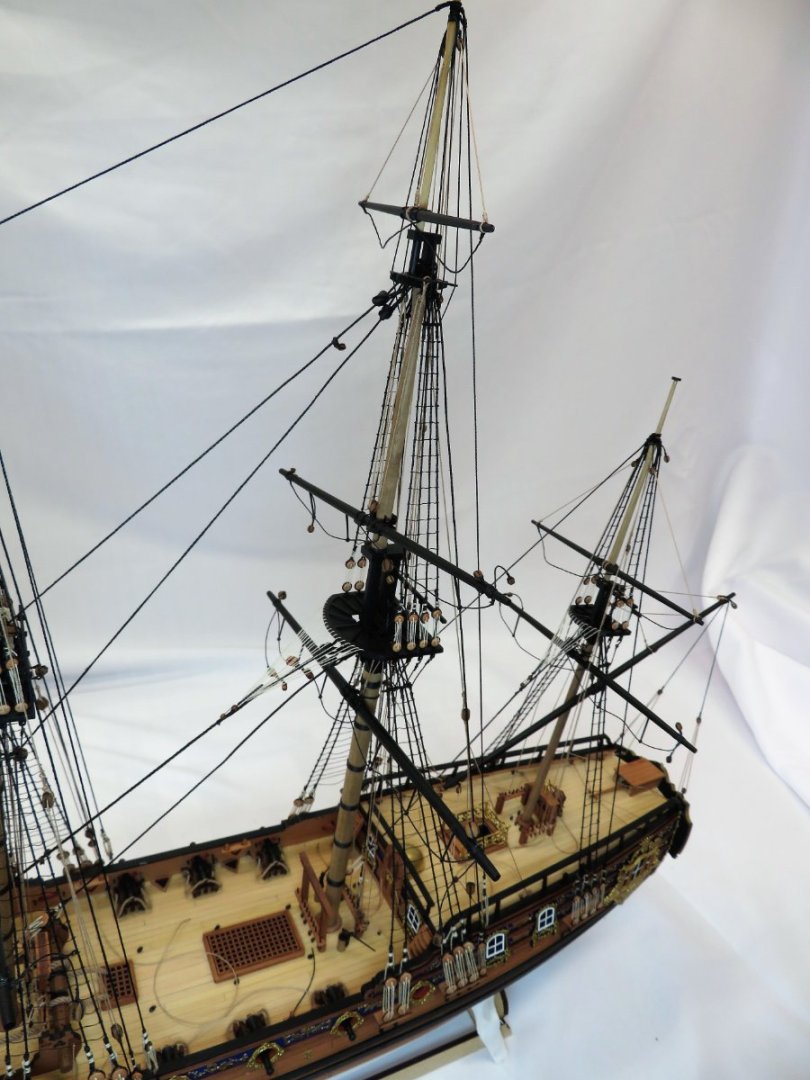
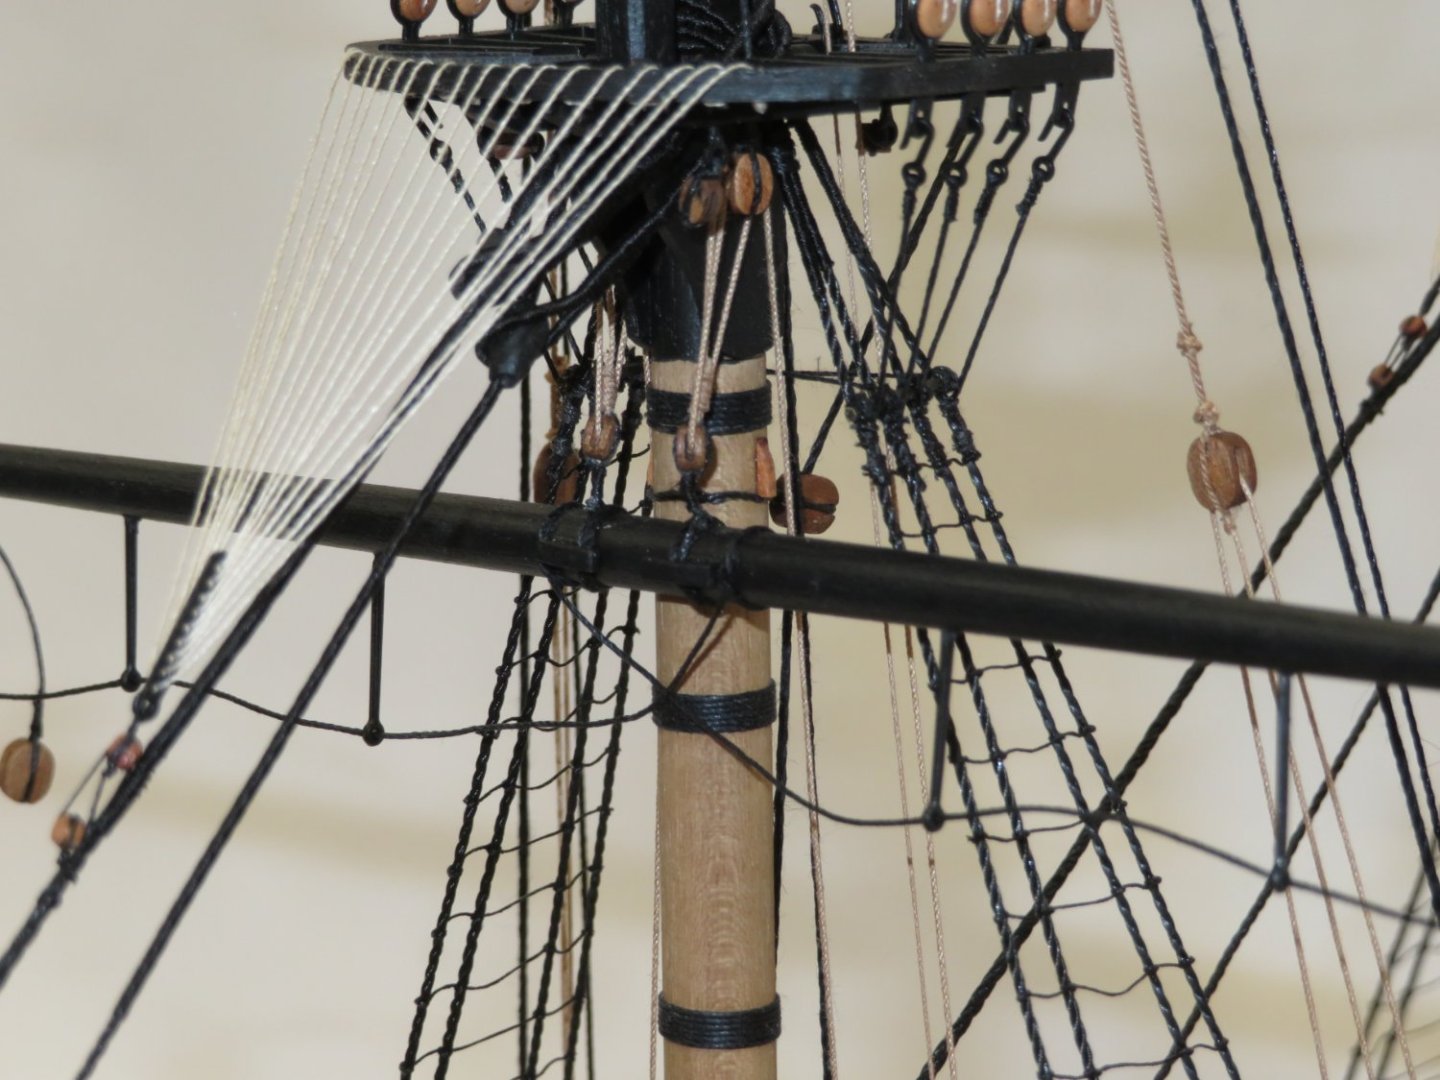
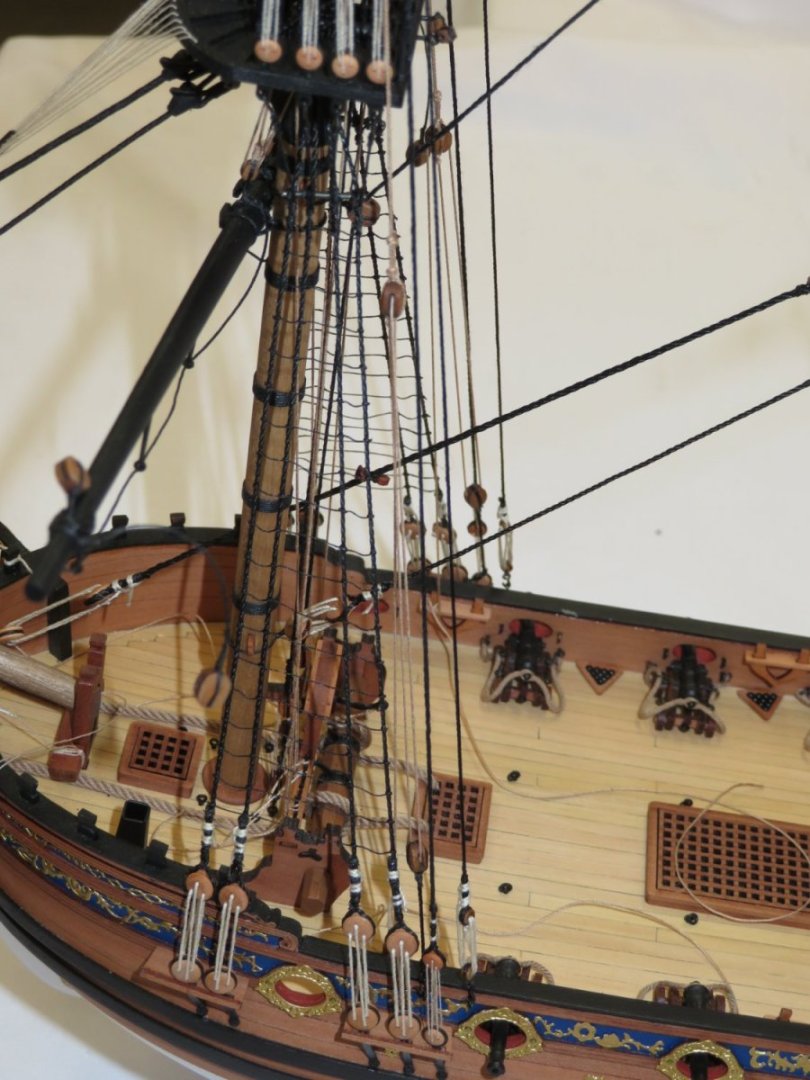
Well if I've not missed anything all the stays, jeers/tyes and braces have been added. I'll have to go back over everything and make sure the lines are all snug. Then I'll have to clean up all the belaying points and add the rope coils. Here's what some of the mess looks like.


- 201 replies
-
- 17
-
-
- Duchess of Kingston
- Vanguard Models
- (and 1 more)
-
Everything is looking really nice Glenn. You and I must fair alike. Your quarter gallery stern window piece fit pretty much just like mine!
- 840 replies
-
- 4
-
-
- winchelsea
- Syren Ship Model Company
- (and 1 more)
-
Wonderful work Bob. I love it when I get to catch up on your progress!
-
That's looking nice Joe. Sometimes you just have to jump in and have at it!
-
That's some very nice workmanship Ben!
- 399 replies
-
- 2
-
-
- winchelsea
- Syren Ship Model Company
- (and 1 more)
-
Thanks Glenn and Bob. There's a lot of rig some lines, oops lines are crossed, swear, re-rig some lines oops wrong belaying pin, swear again, re-re-rig and on and on! Also thanks for the likes!
- 201 replies
-
- 3
-
-
- Duchess of Kingston
- Vanguard Models
- (and 1 more)
-
Thanks Reg. Also, thanks for the likes! I've completed attaching the yards to the main mast and mizzen mast like I did on the fore mast. With all the yard jeers and tyes now attached I'll start on the yards lifts and braces. The spider web of lines is really starting to grow.


- 201 replies
-
- 14
-
-
- Duchess of Kingston
- Vanguard Models
- (and 1 more)
-
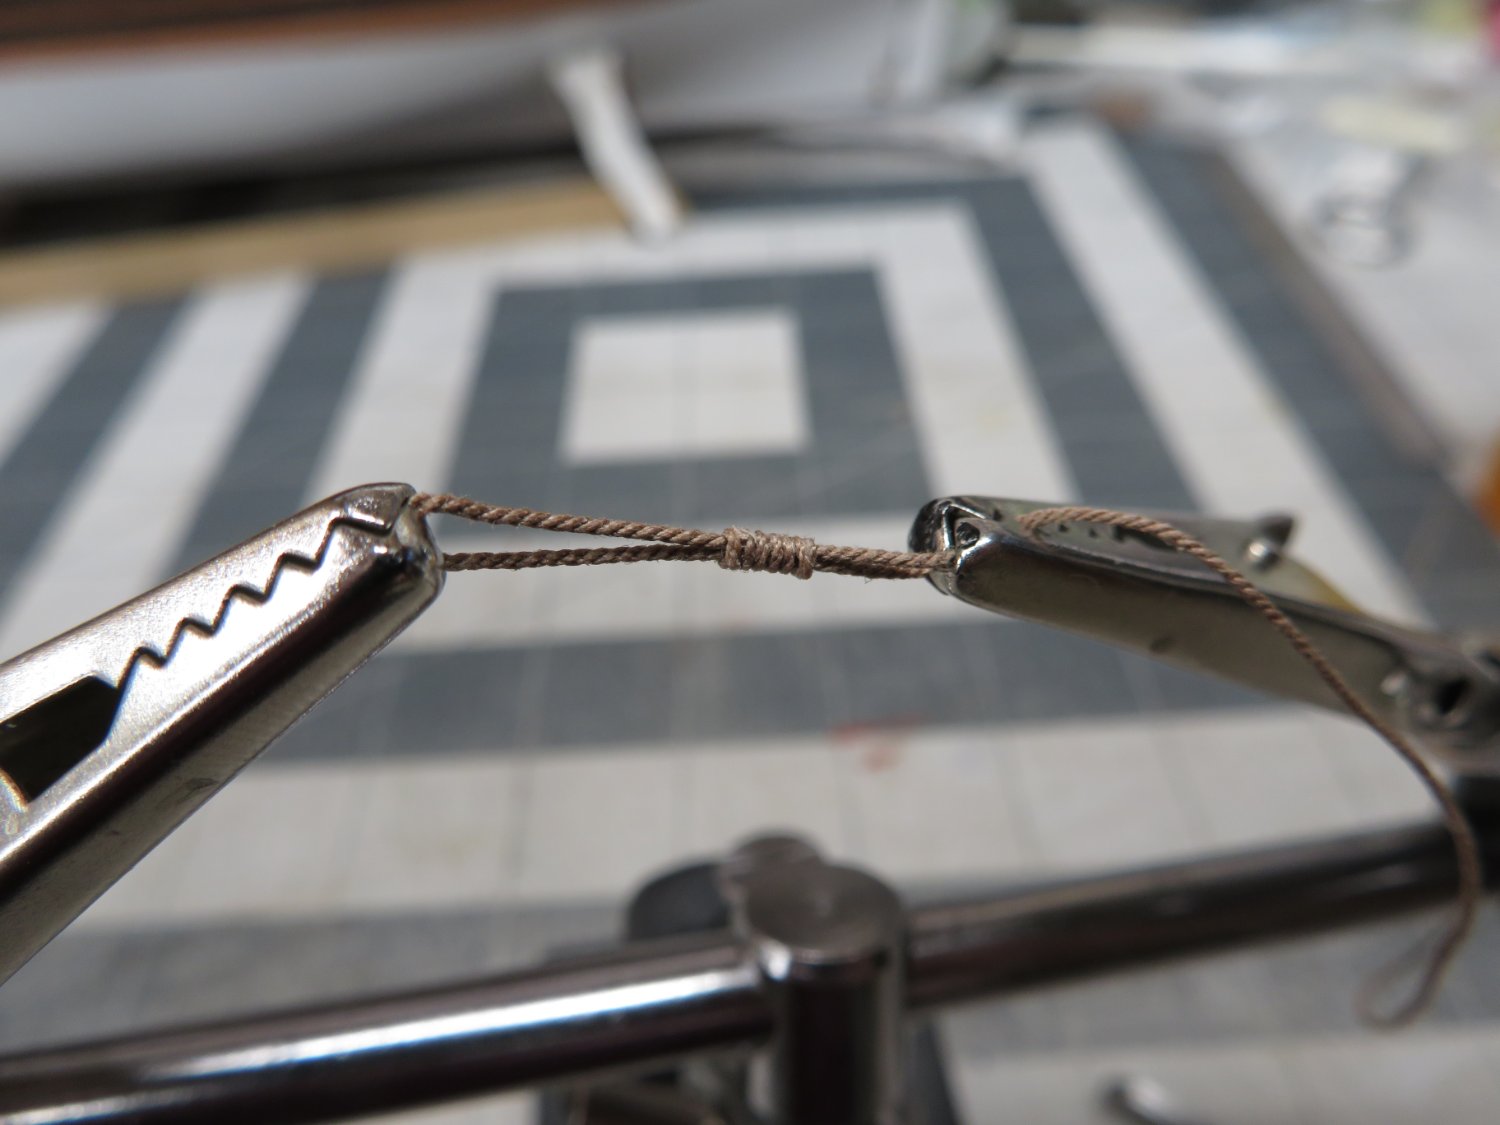
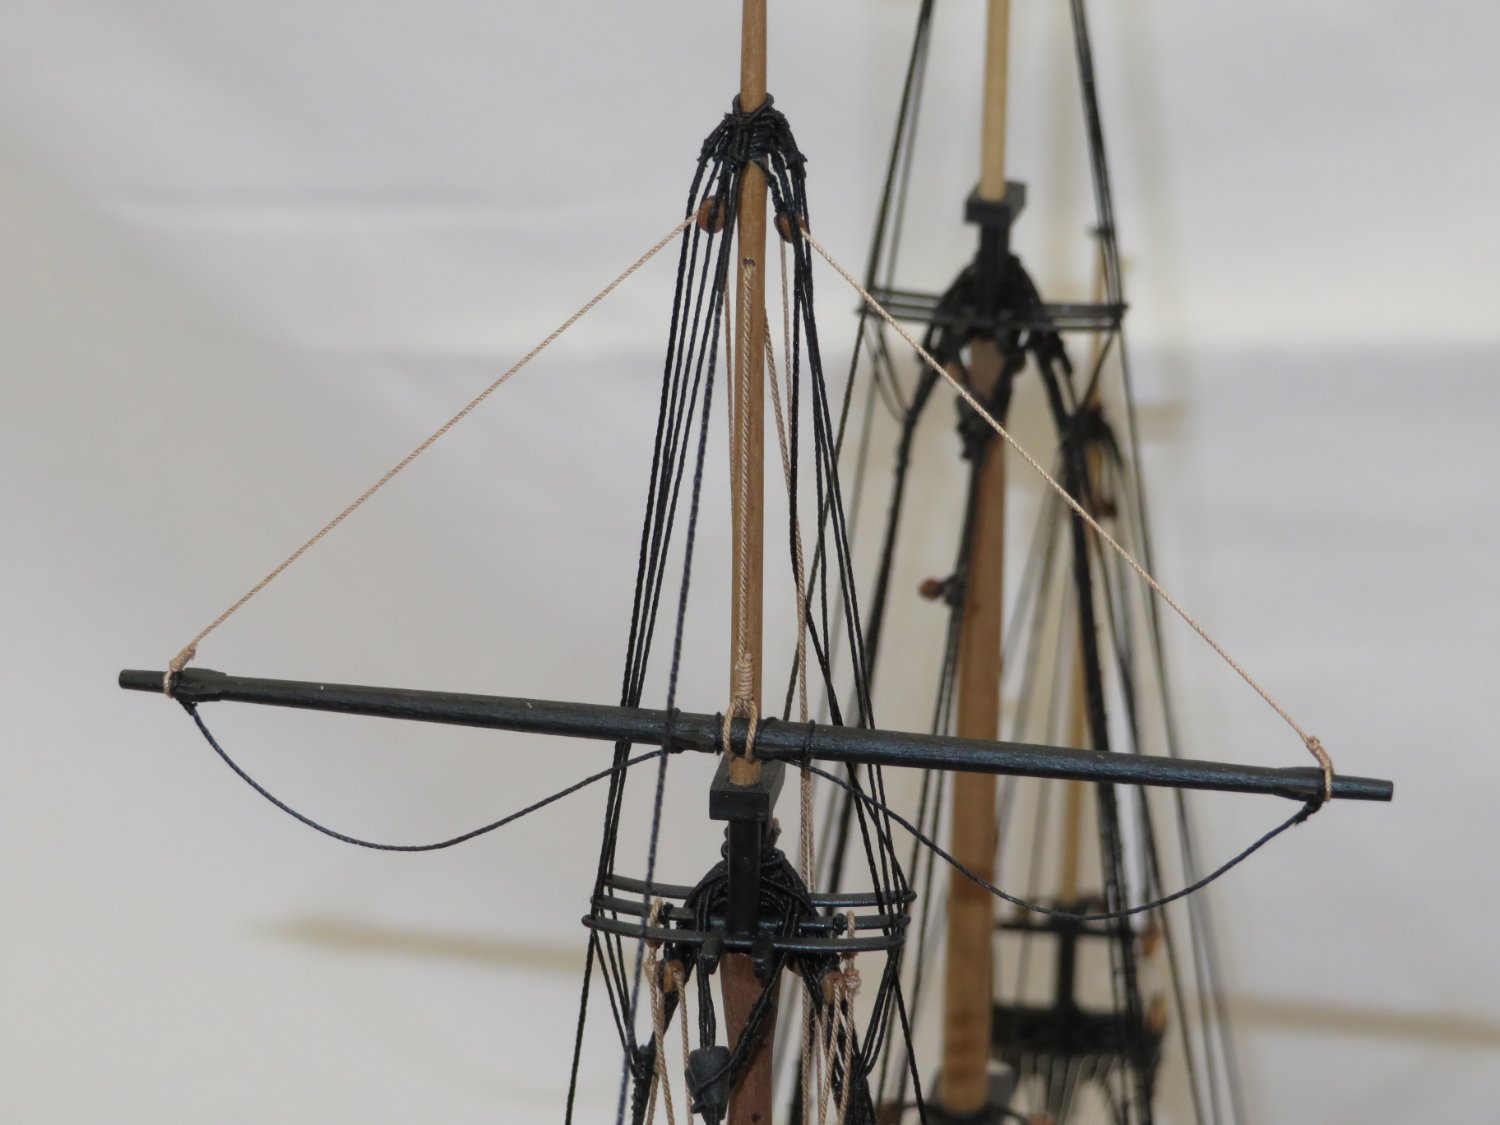
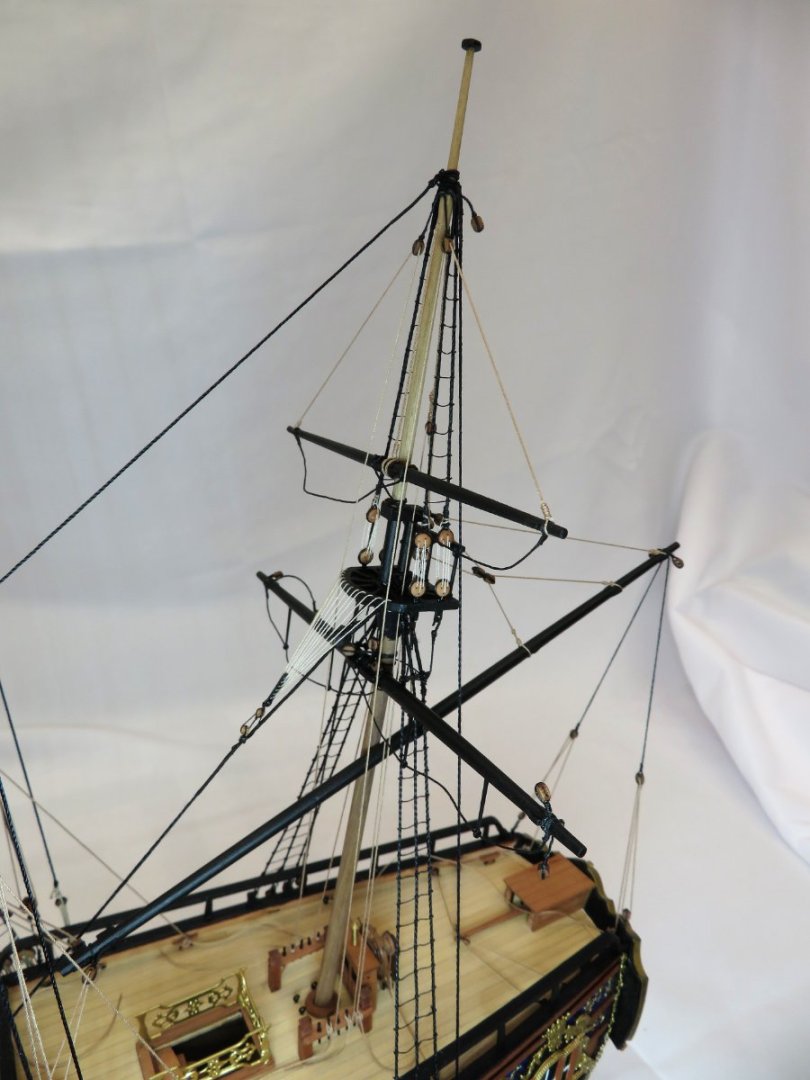
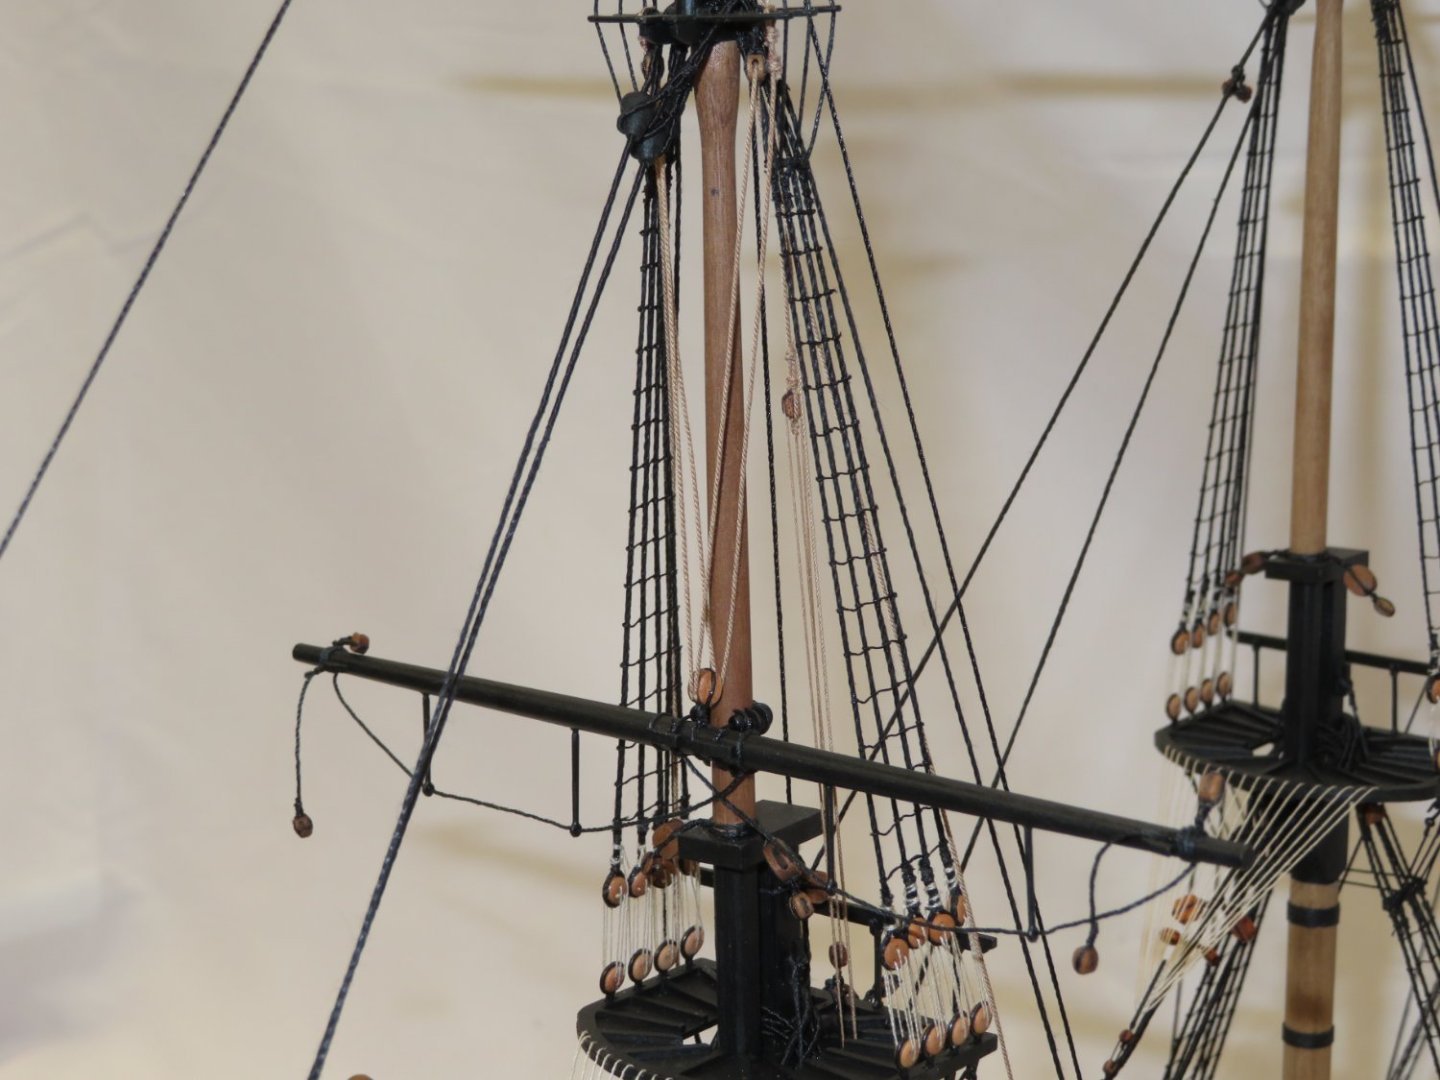
I've started to add the yards and the yards jeers/tyes on the fore mast. For the fore topgallant yard the plans showed the line attached like this. I then pinned the yard to the mast and secured it with a strand of parrel beads. The fore topsail yard was also pinned to the mast and secured with a double strand of parrel ribs and beads. And finally the fore yard was added pinning it to the mast and then rigged per the plans.


- 201 replies
-
- 13
-
-
- Duchess of Kingston
- Vanguard Models
- (and 1 more)
-
Just caught up with your build Glenn! Excellent job on the planking. It's a perfect example of Chuck's "slow and steady" approach!
- 840 replies
-
- 4
-
-
- winchelsea
- Syren Ship Model Company
- (and 1 more)
-
Thanks Rob. I'm chugging along looking at the plans, other logs and just trying to make it look good. I look forward to seeing your progress.
- 201 replies
-
- 2
-
-
-
- Duchess of Kingston
- Vanguard Models
- (and 1 more)
-
I know what you mean. I love this build but I'm exhausting all of my patience to finish up the DOK's rigging!
- 201 replies
-
- 1
-
-
- Duchess of Kingston
- Vanguard Models
- (and 1 more)