


Rustyj
-
Posts
2,452 -
Joined
-
Last visited
Content Type
Profiles
Forums
Gallery
Events
Posts posted by Rustyj
-
-
Looks great Ben. Glad to see you back at her!
- mtaylor, Canute, billocrates and 1 other
-
 4
4
-
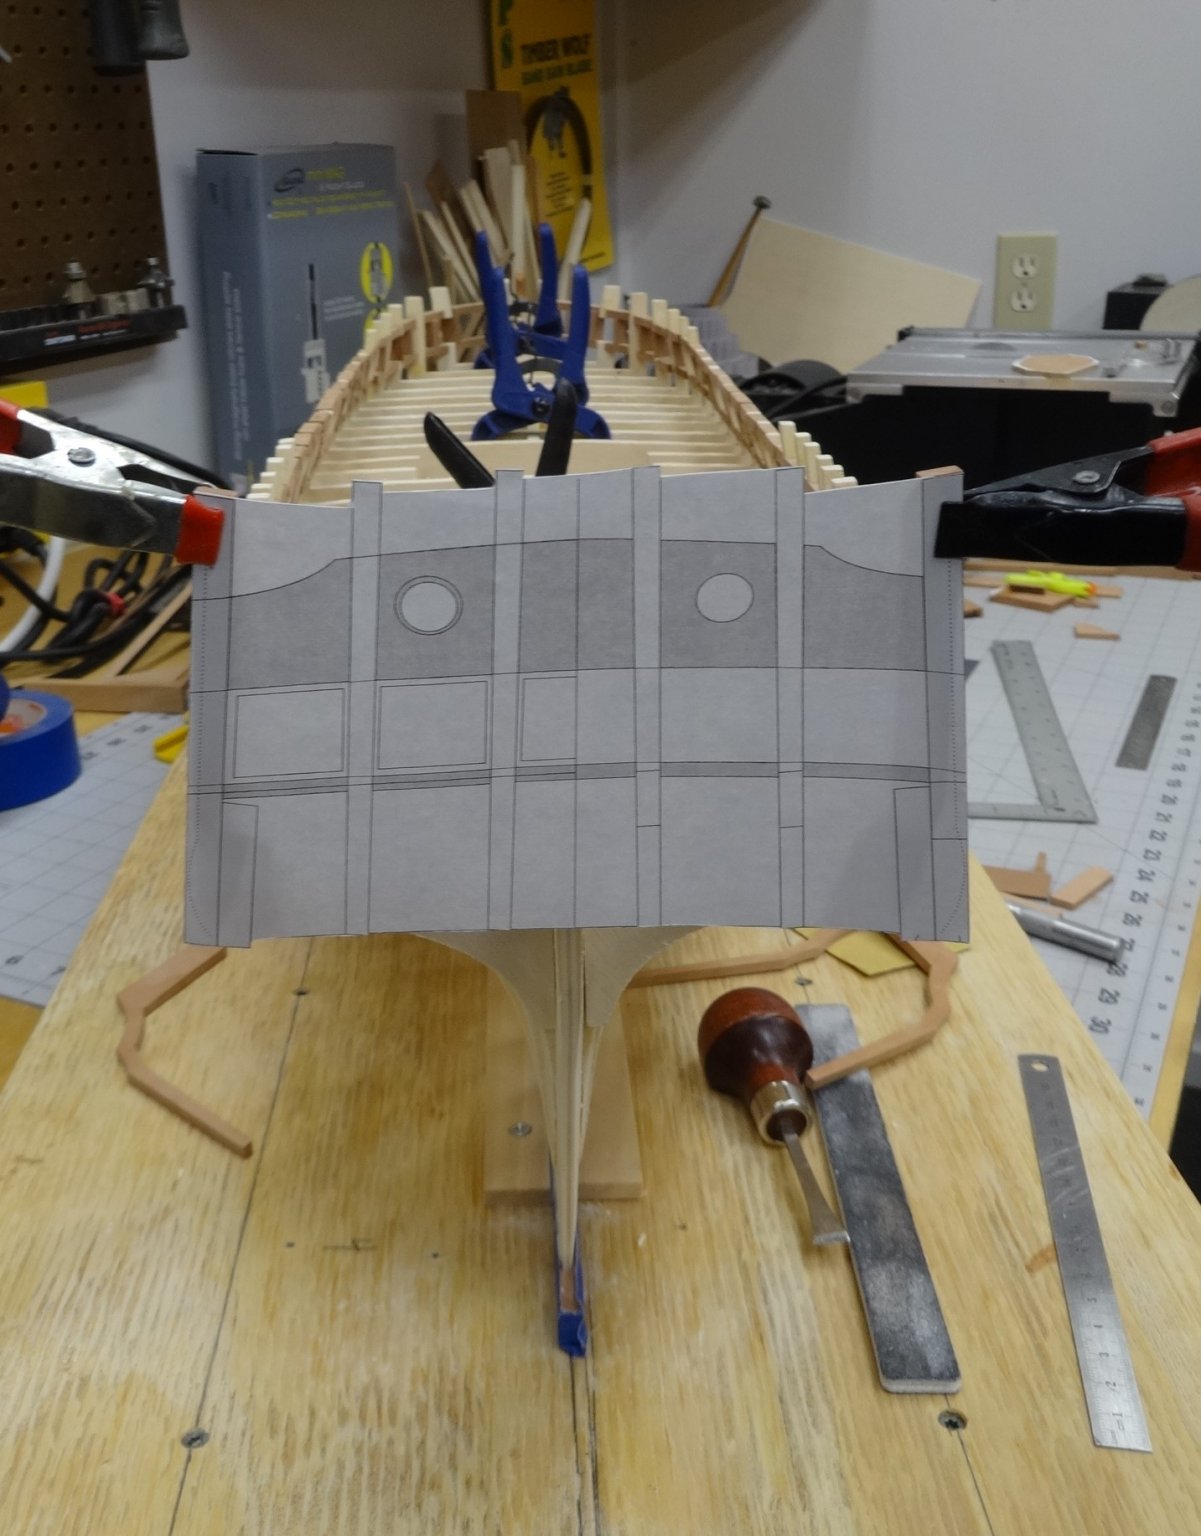
Thanks Chuck,
Your framing guide and window template really made it come together well.
Also I forgot to add one picture to the original post which I just added. Oops!

-
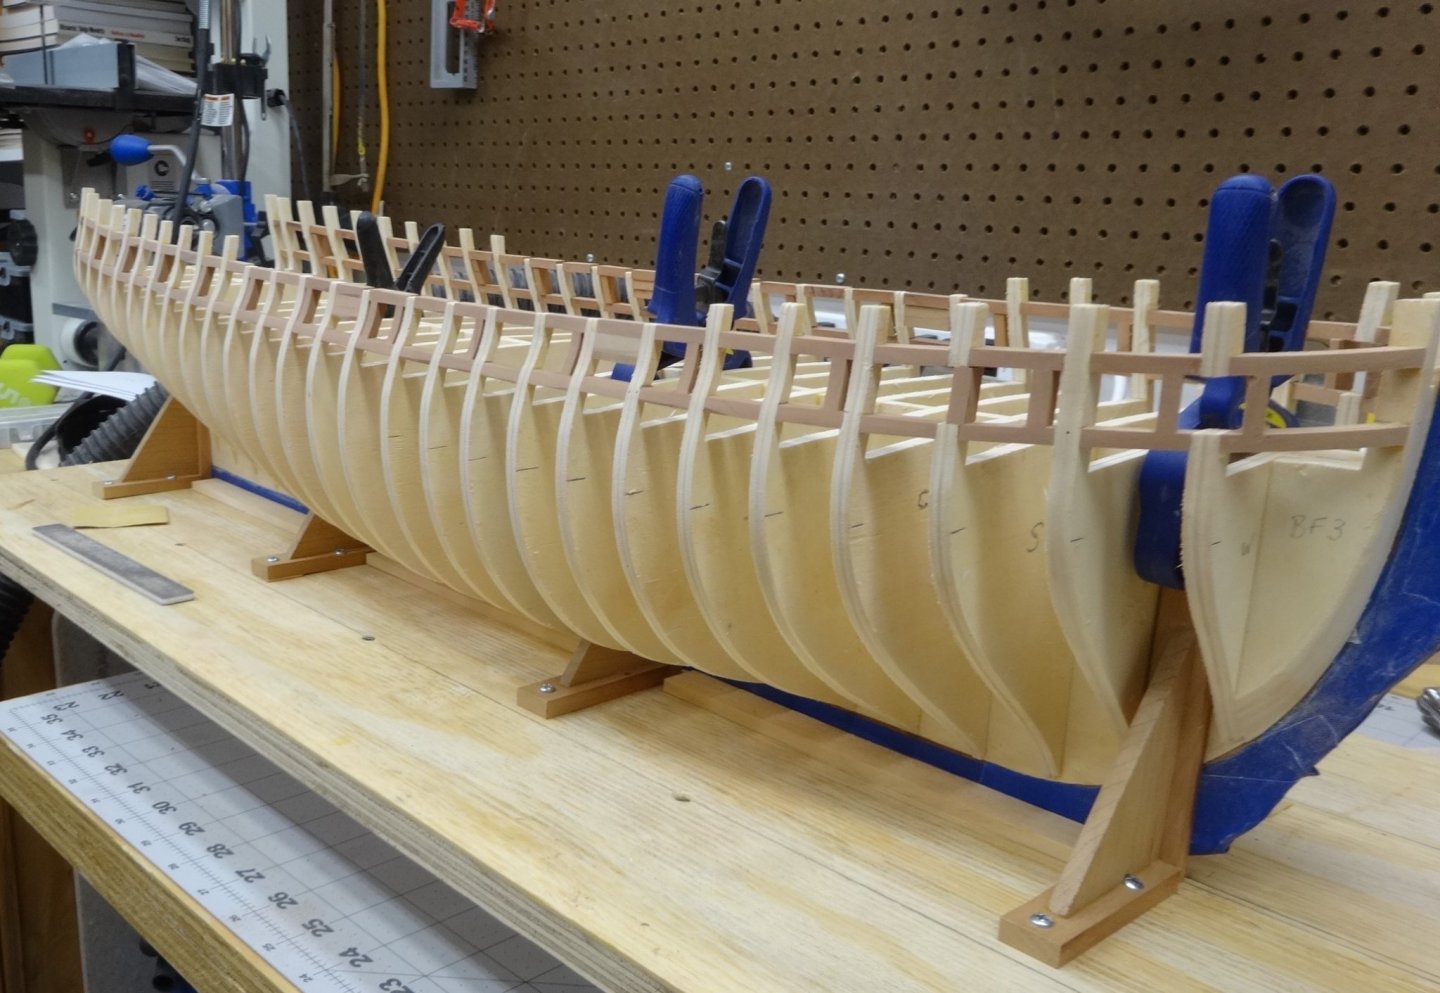
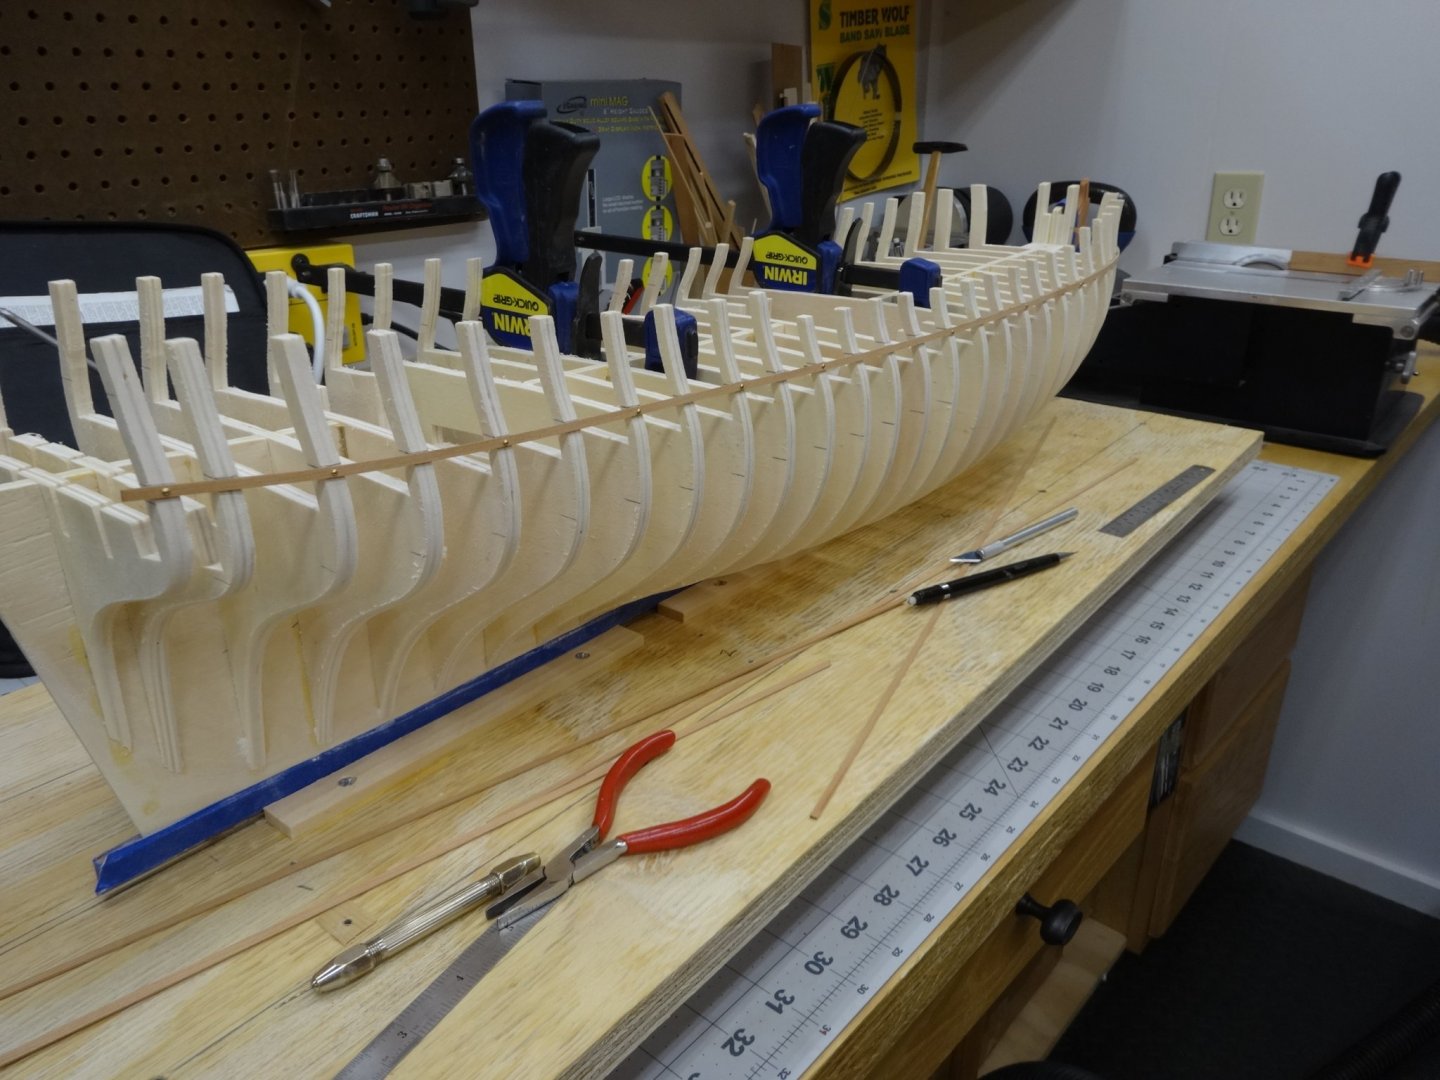
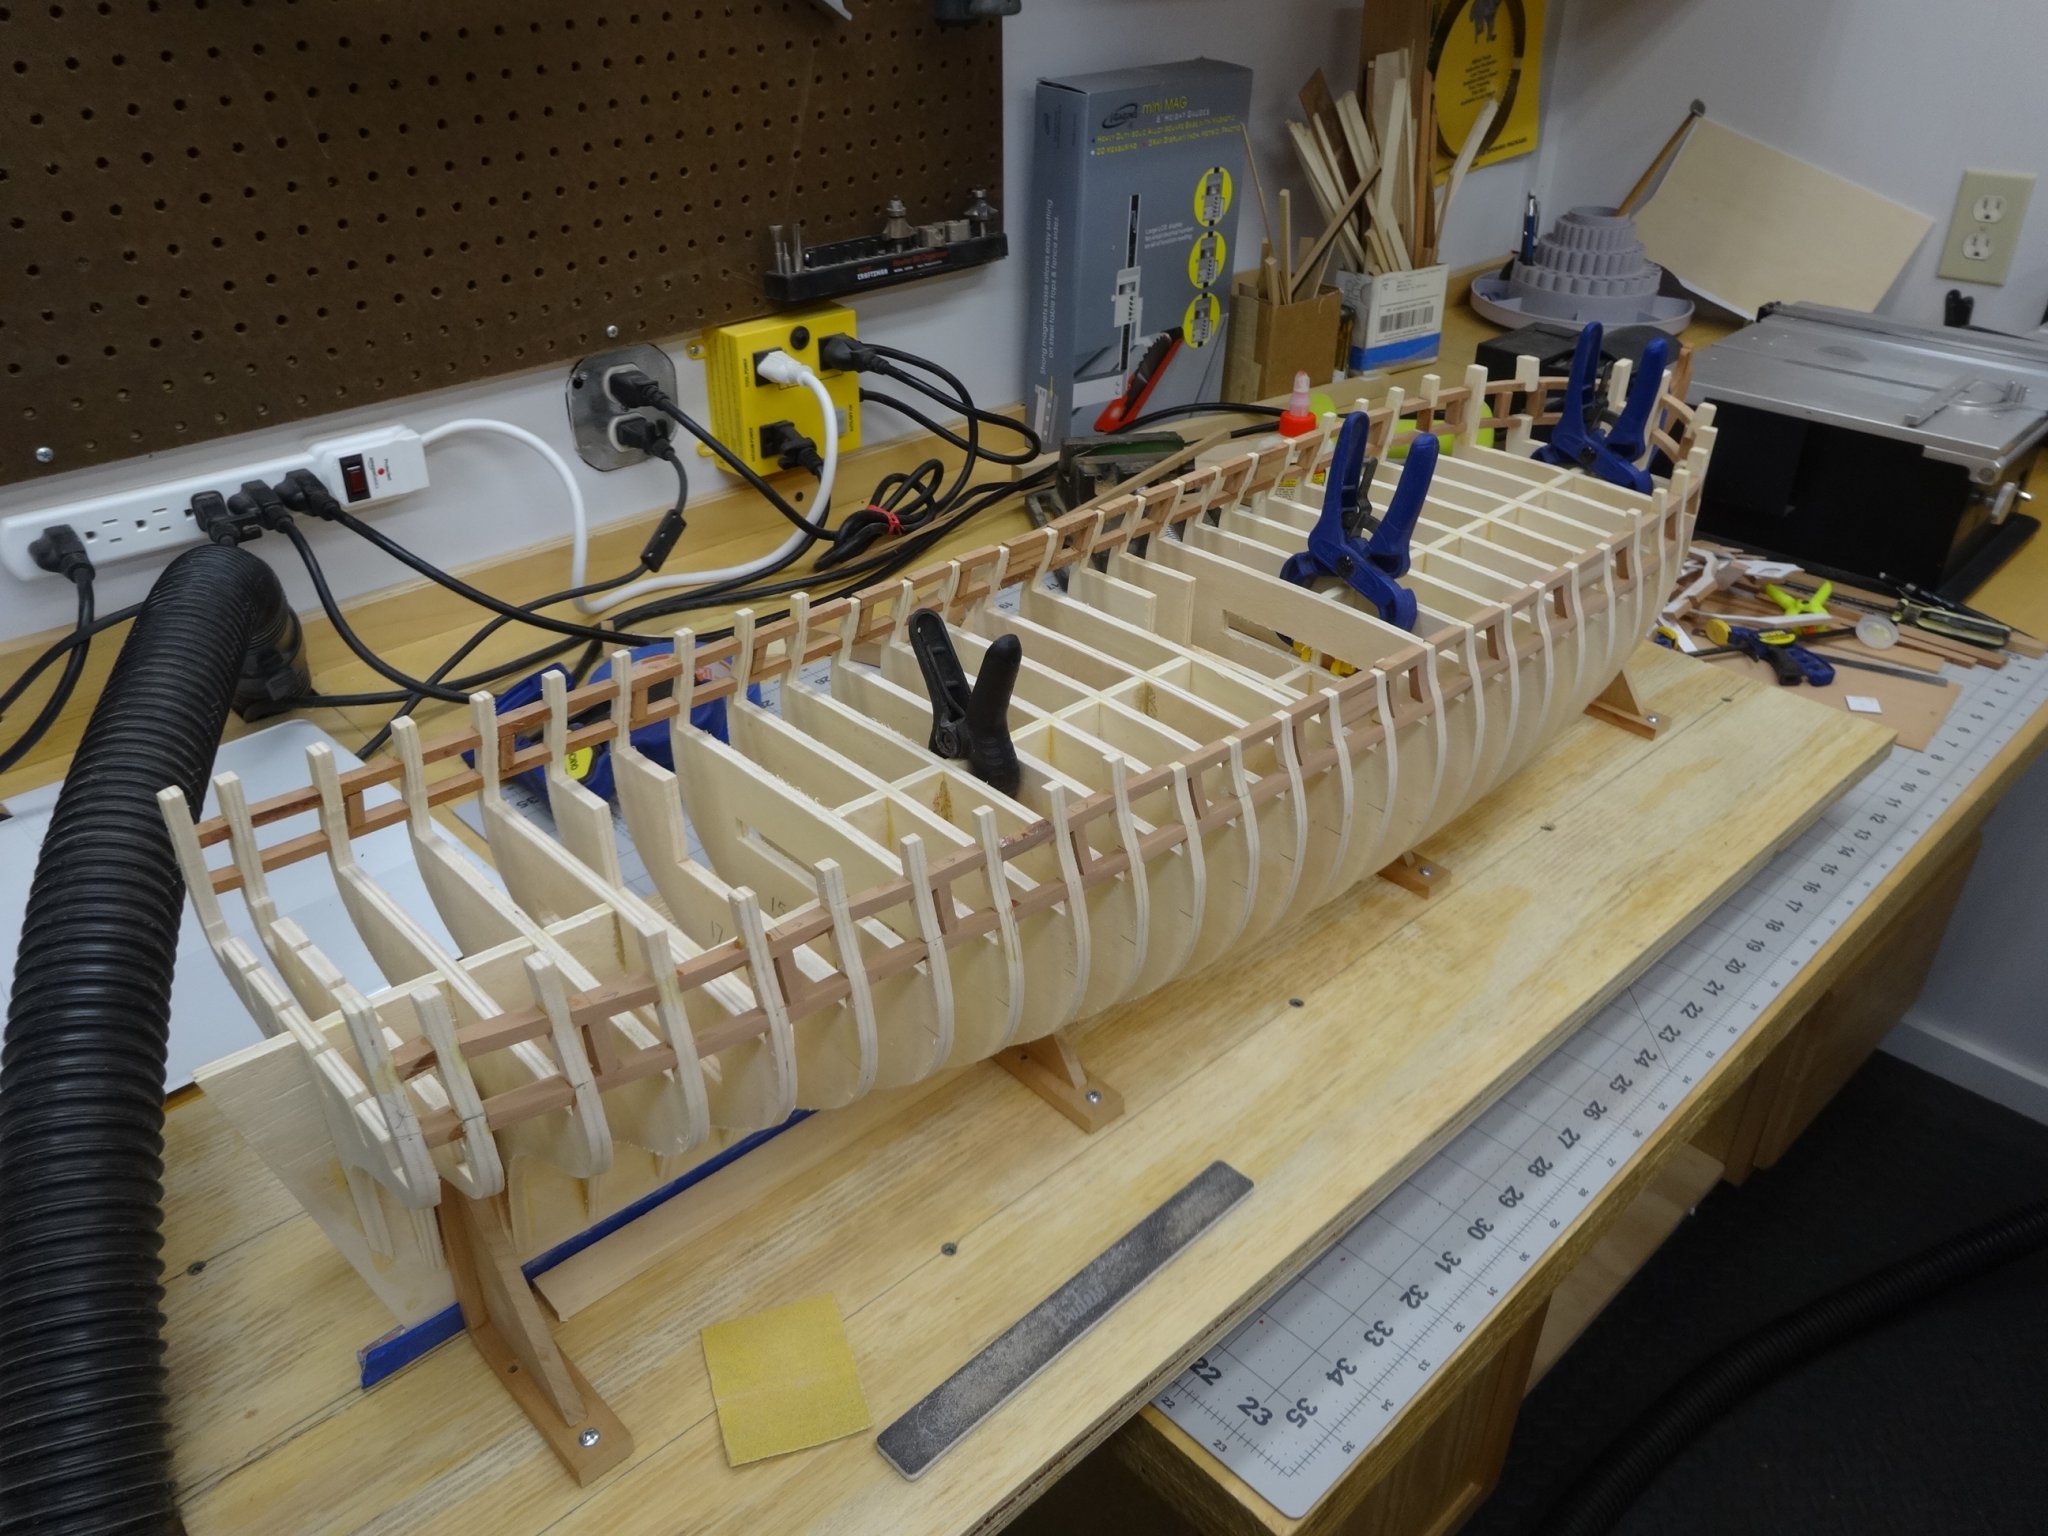
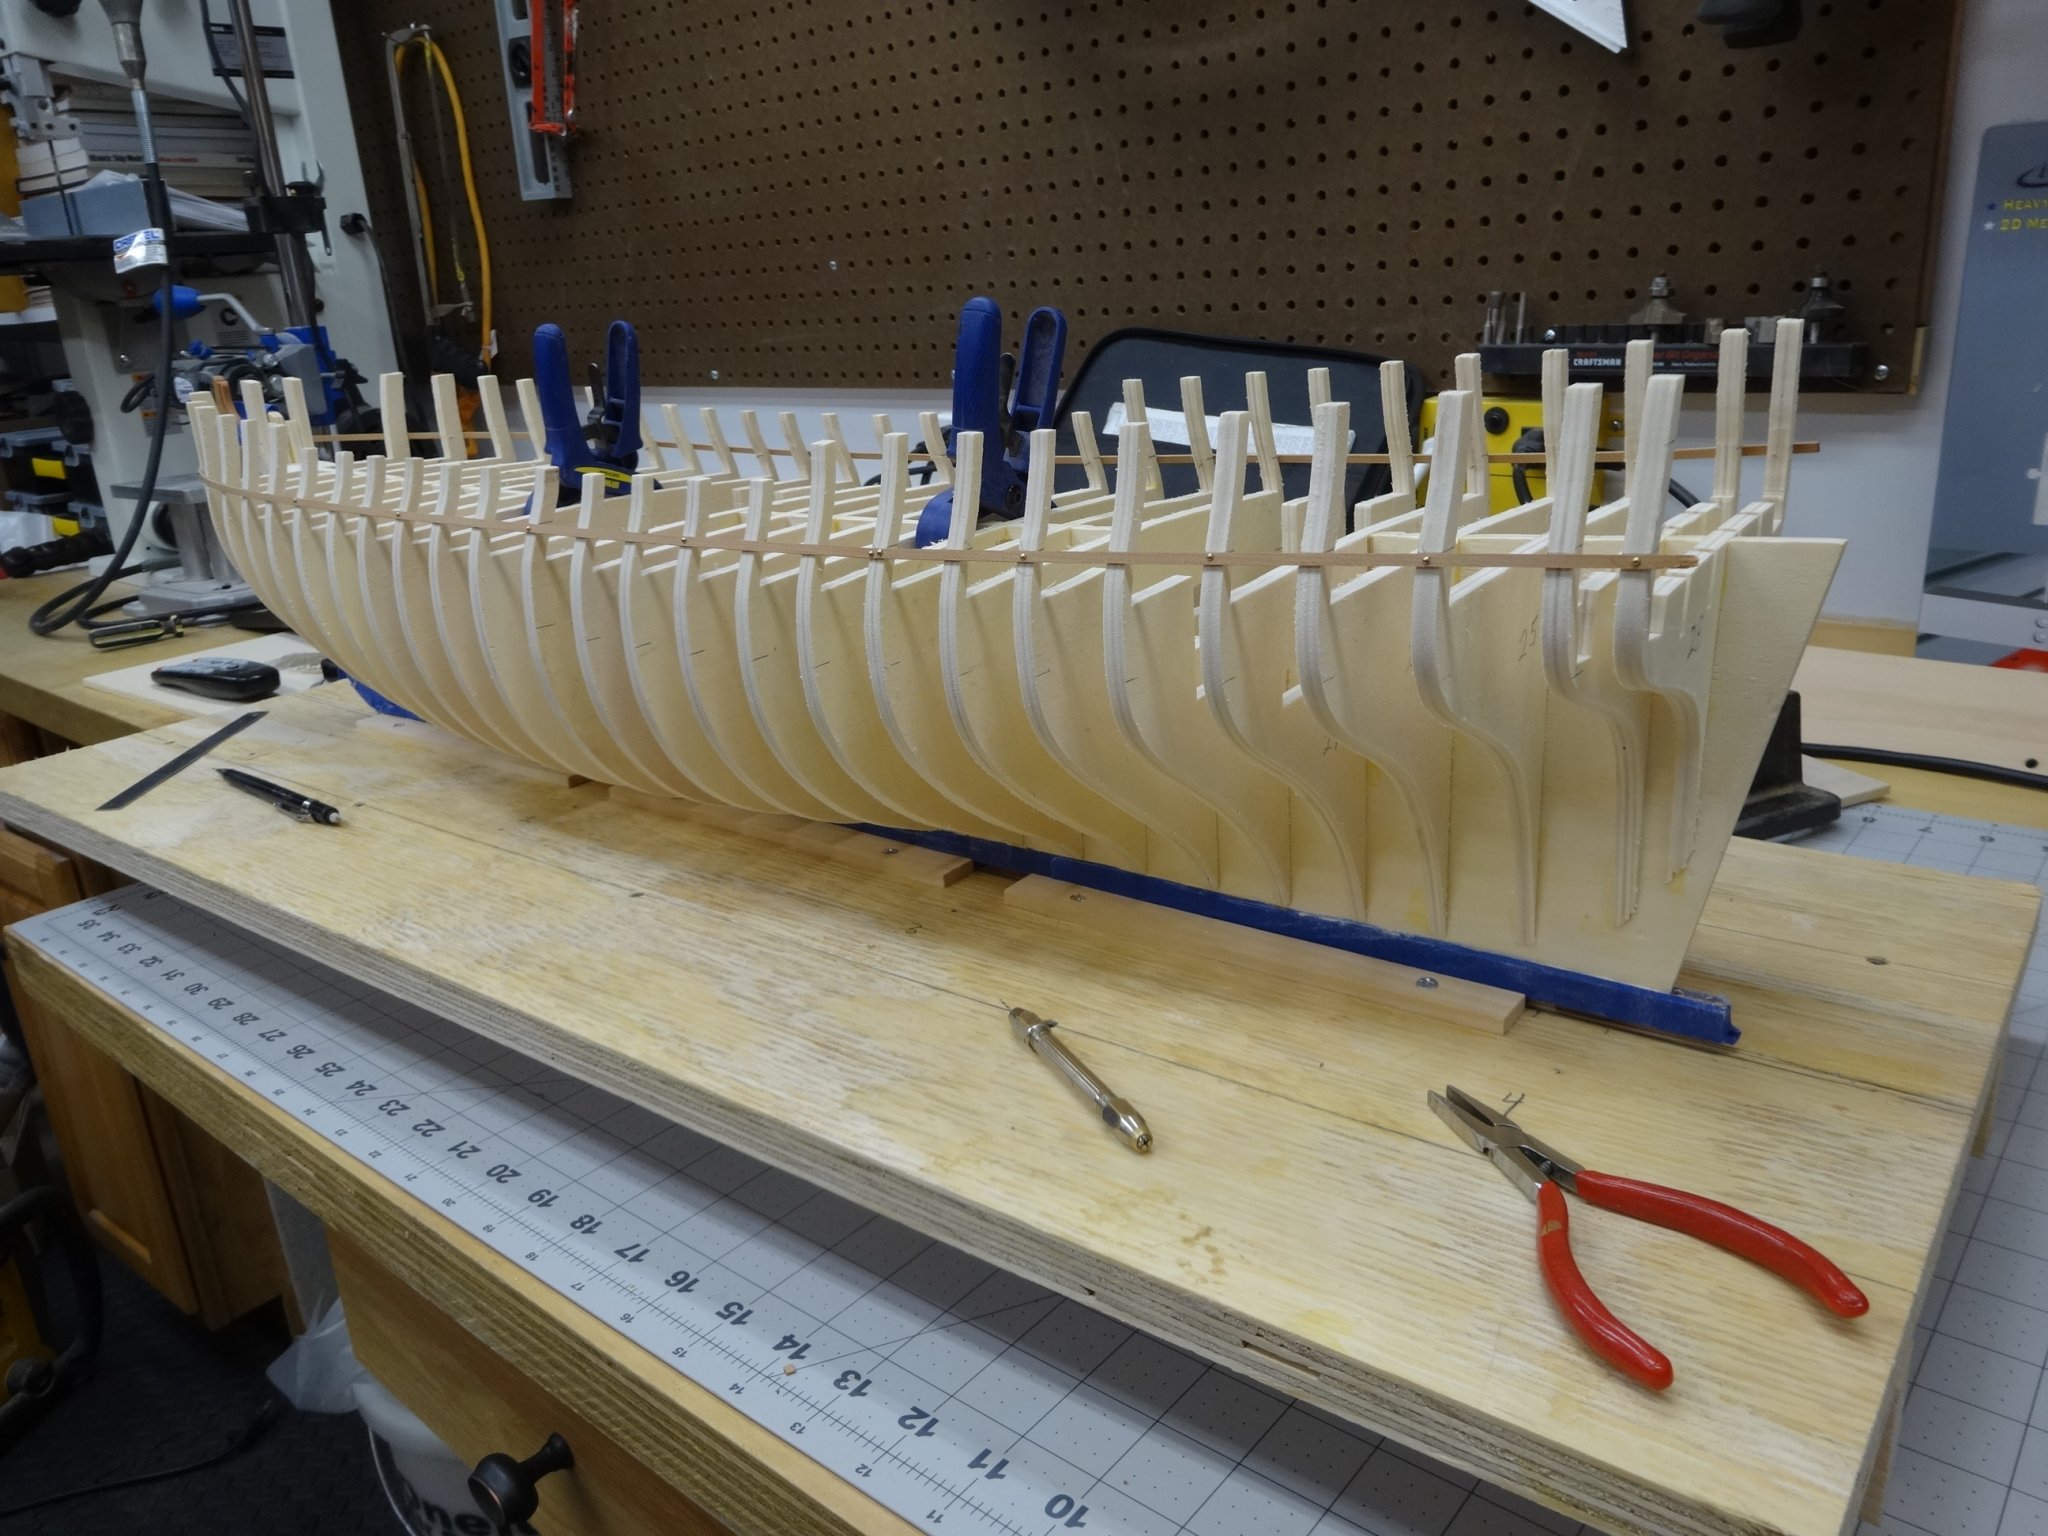
Here's where I am at right now. The stern frames have been completed and I started installing them.
First I placed the outer most frames , parts ST-C and ST-D, and then placed the stern framing plan
over them to confirm the correct width.
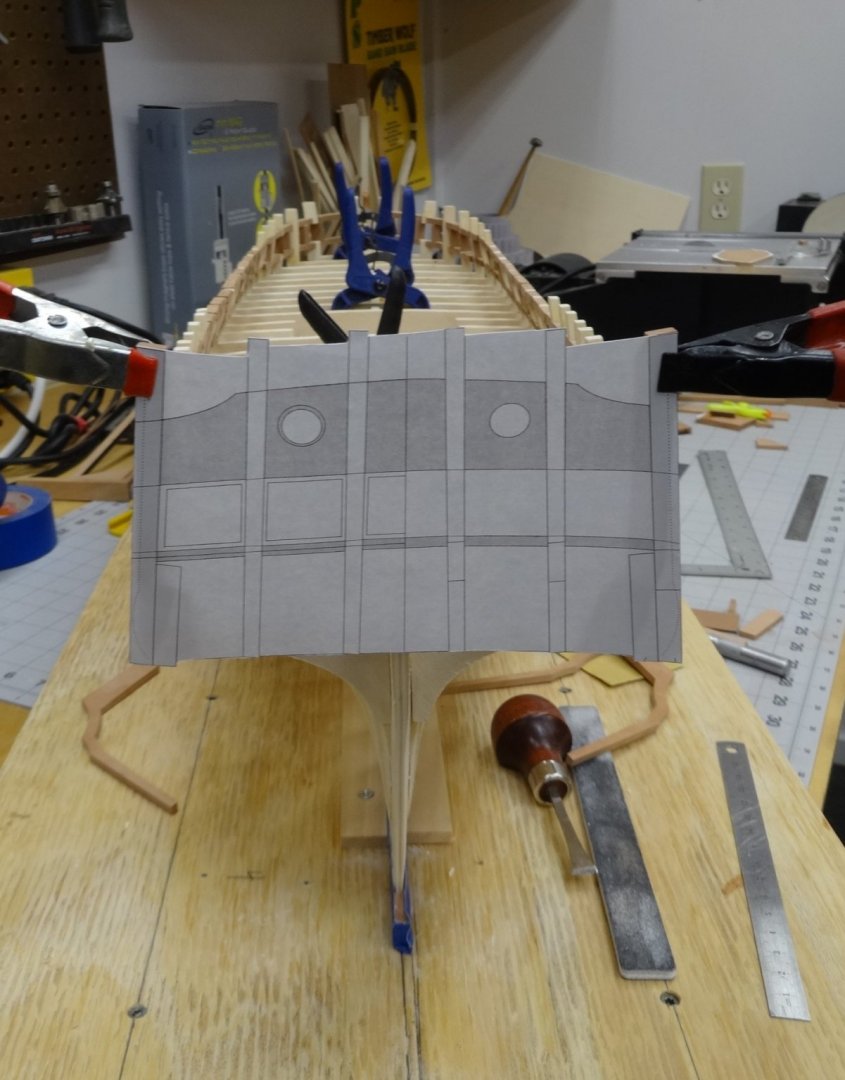
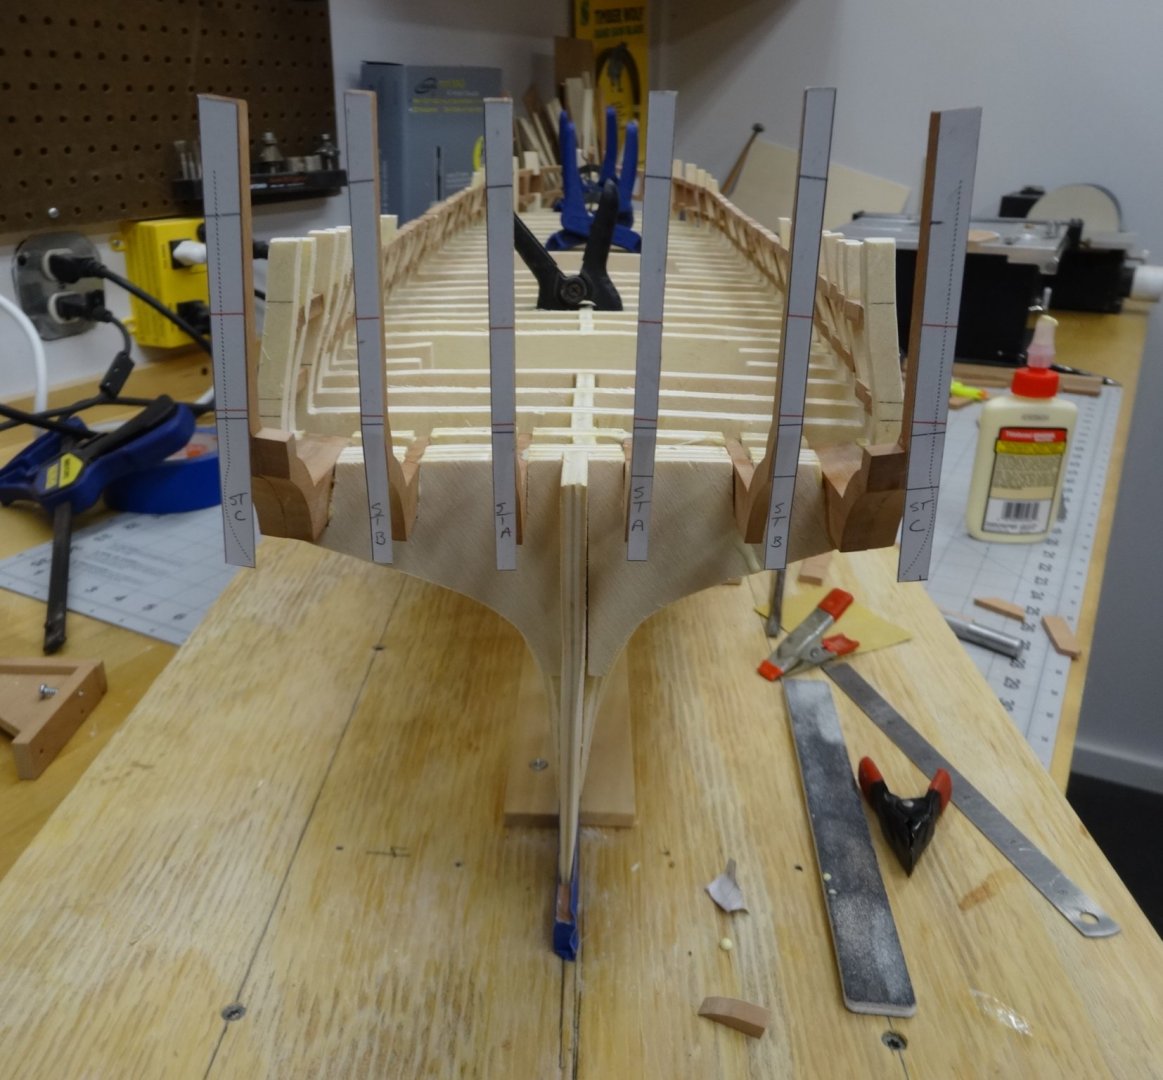
Following checks marks and using the spacers here is the assembled stern with some light sanding.
A lot more sanding is needed to clean it all up. Oh I've also finished the preliminary sanding of the port side port framing.
Time to ice down my shoulder.
")
-
Thank you Matthias. Very much appreciated.
-
Thanks Matt. Also thanks for all the likes!
-
Thanks Chuck, I started dry fitting last night and notice the curve.
Looking at the picture and the optical illusion had me scratching my head.
Won't be the last time either.
")
- Stuntflyer, Ryland Craze, Chuck and 1 other
-
4
-
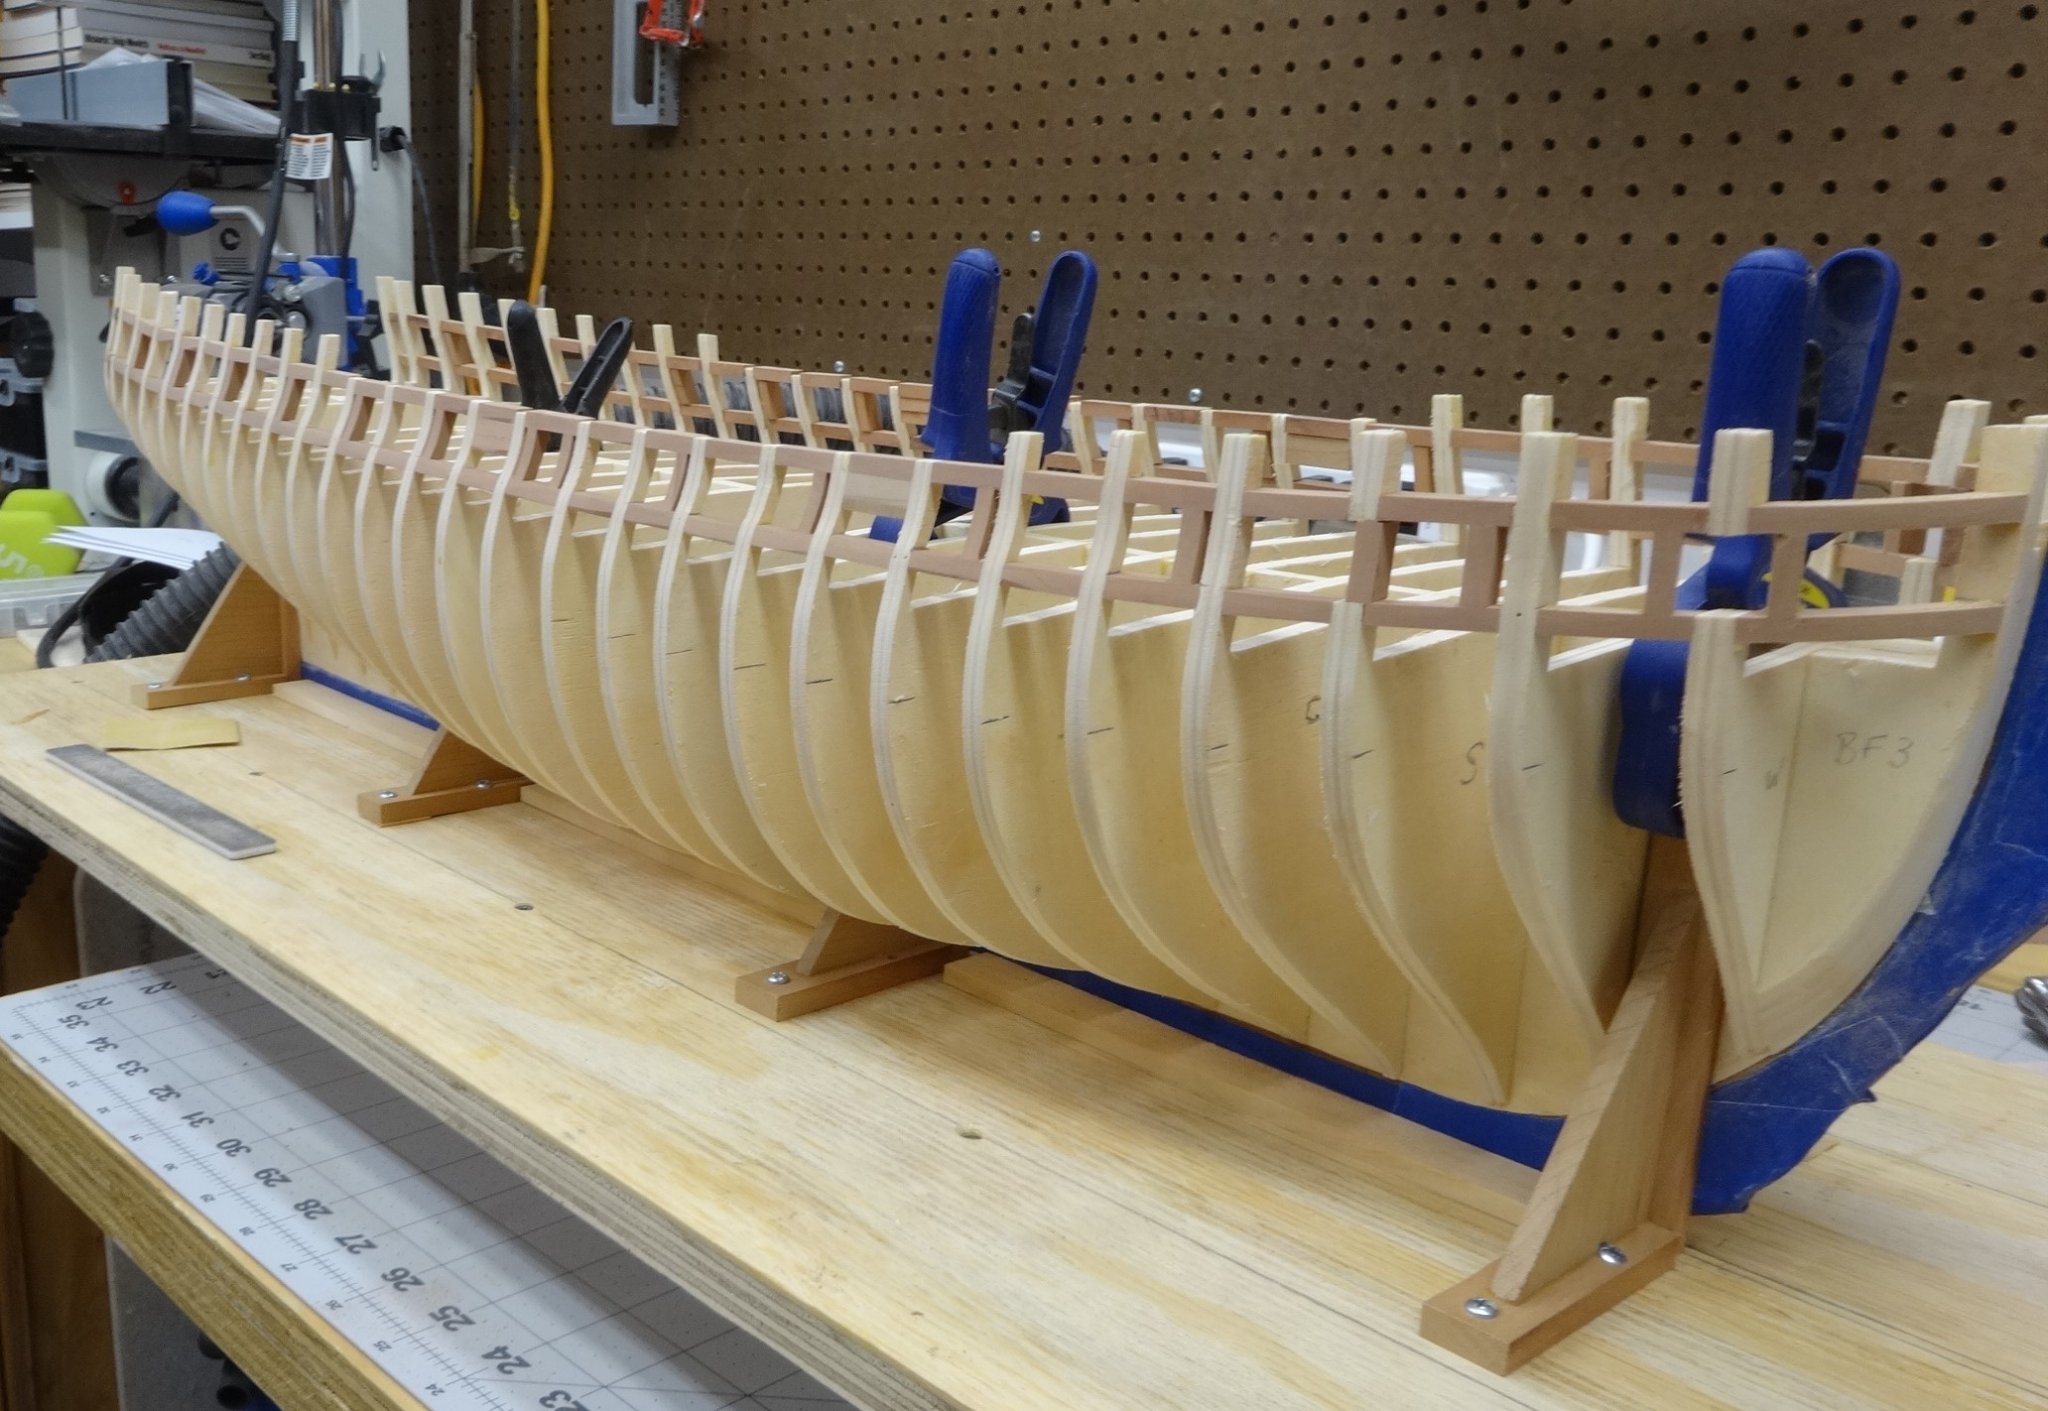
She's looking really good. One question. The stern looks flat in the photo.
Is there a subtle curve from the center to port and starboard or is it flat? Thanks
-
I can't begin to put into words how nice that looks!
- VTHokiEE, FrankWouts, RichardG and 1 other
-
4
-
Thanks Chuck. Took the words right out of my mouth!
-
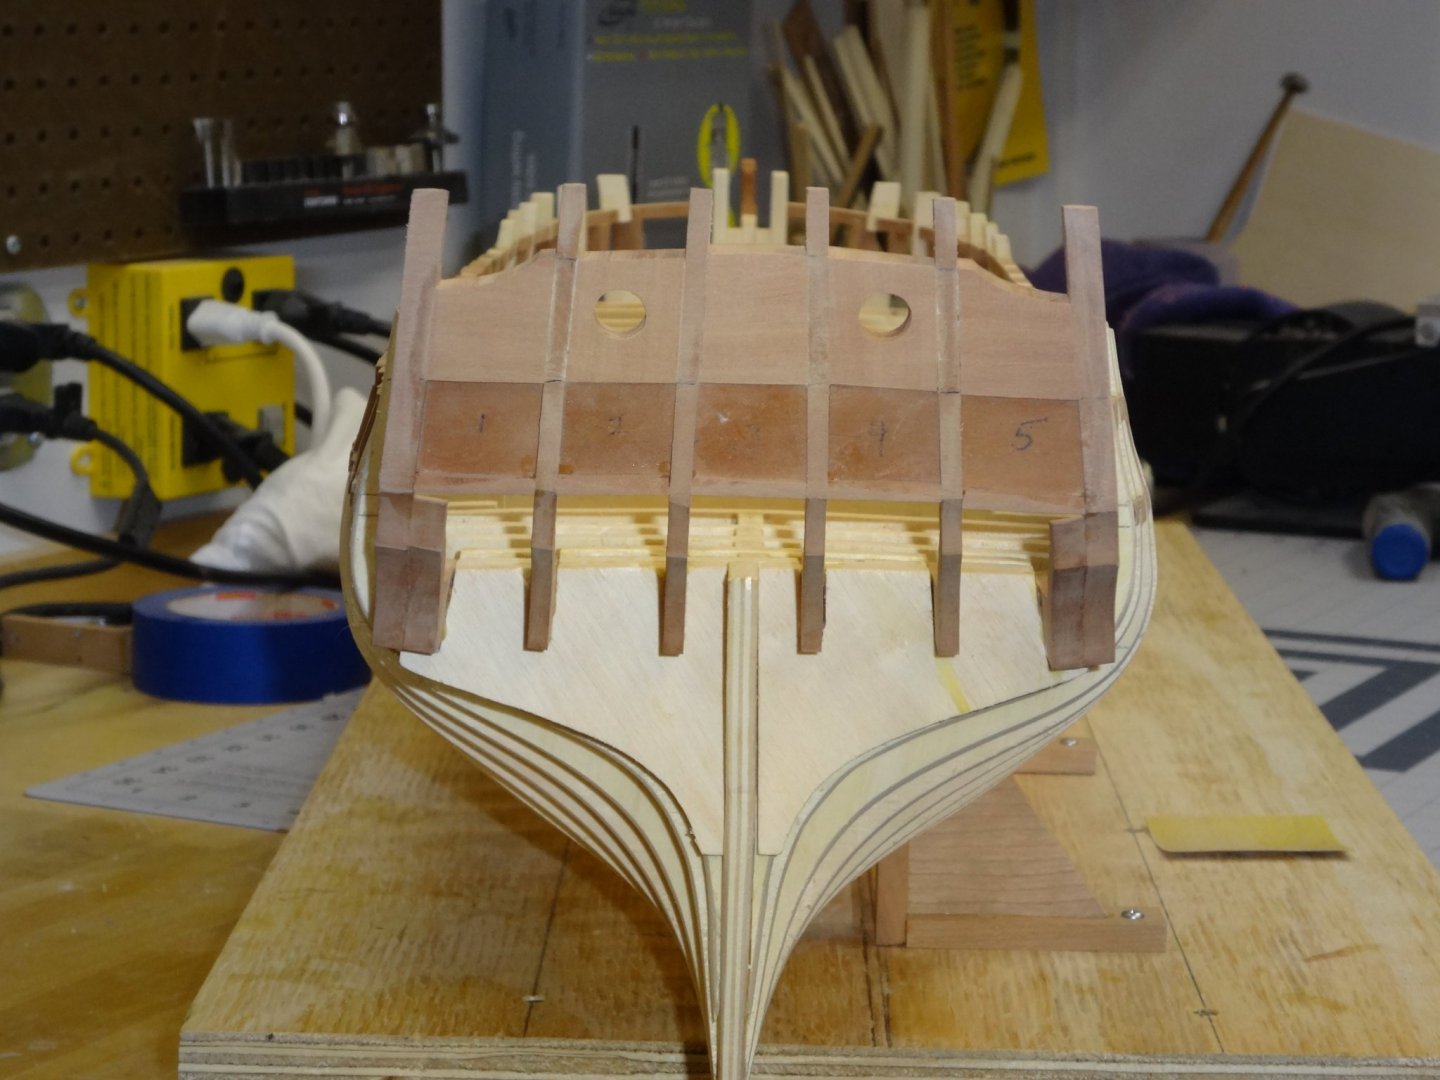
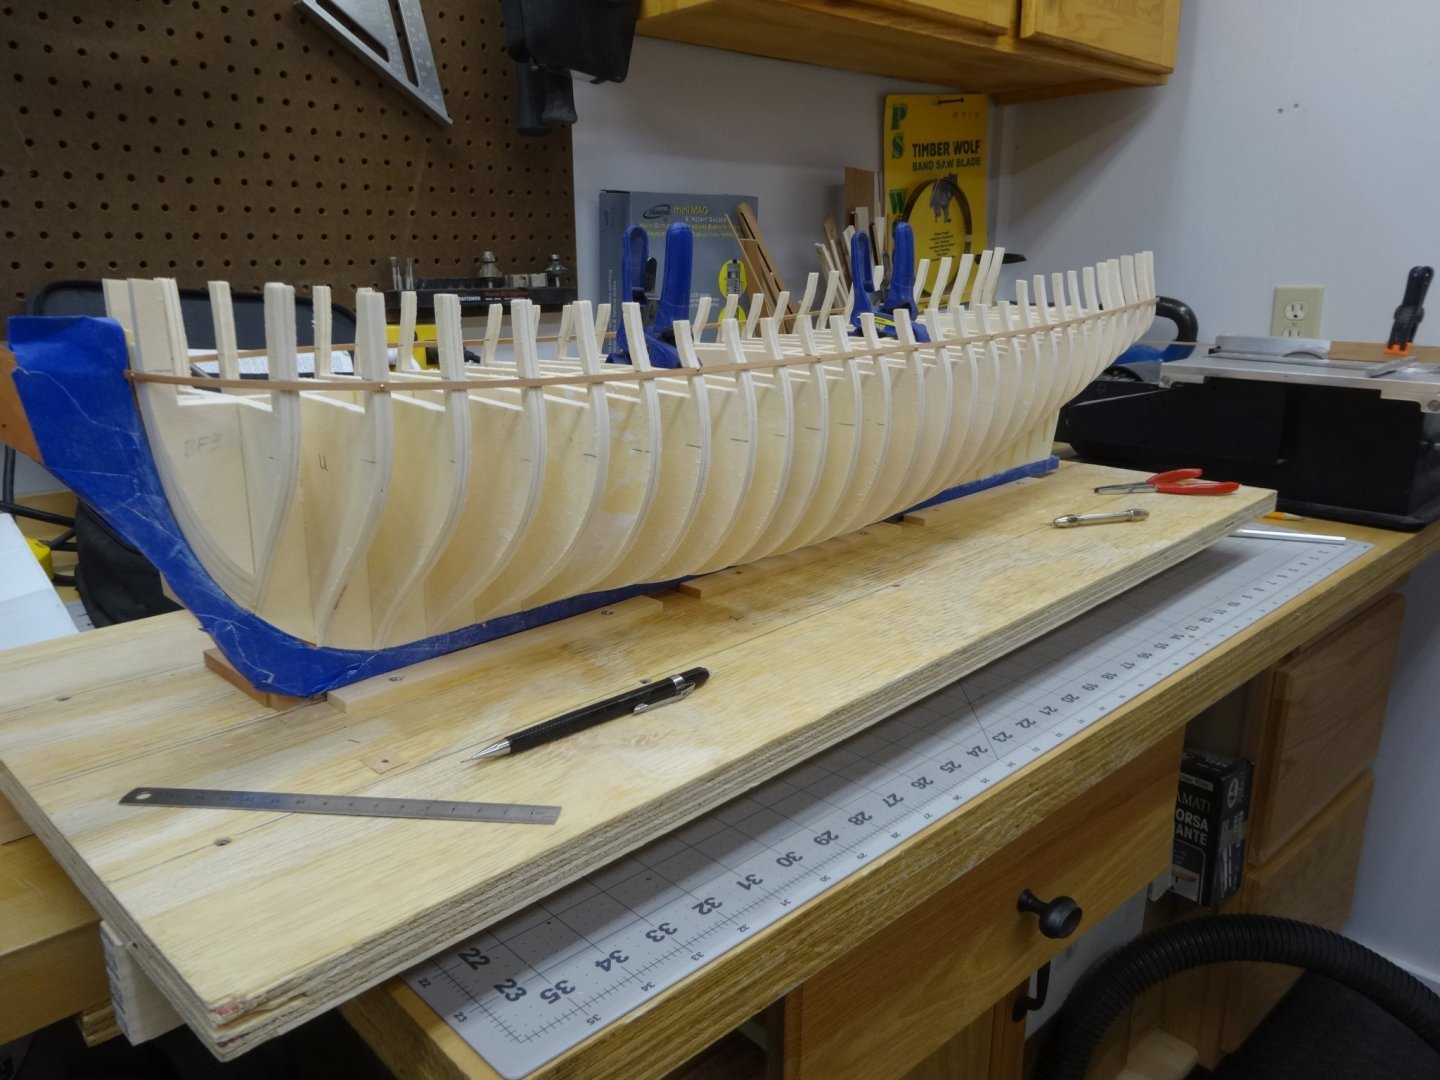
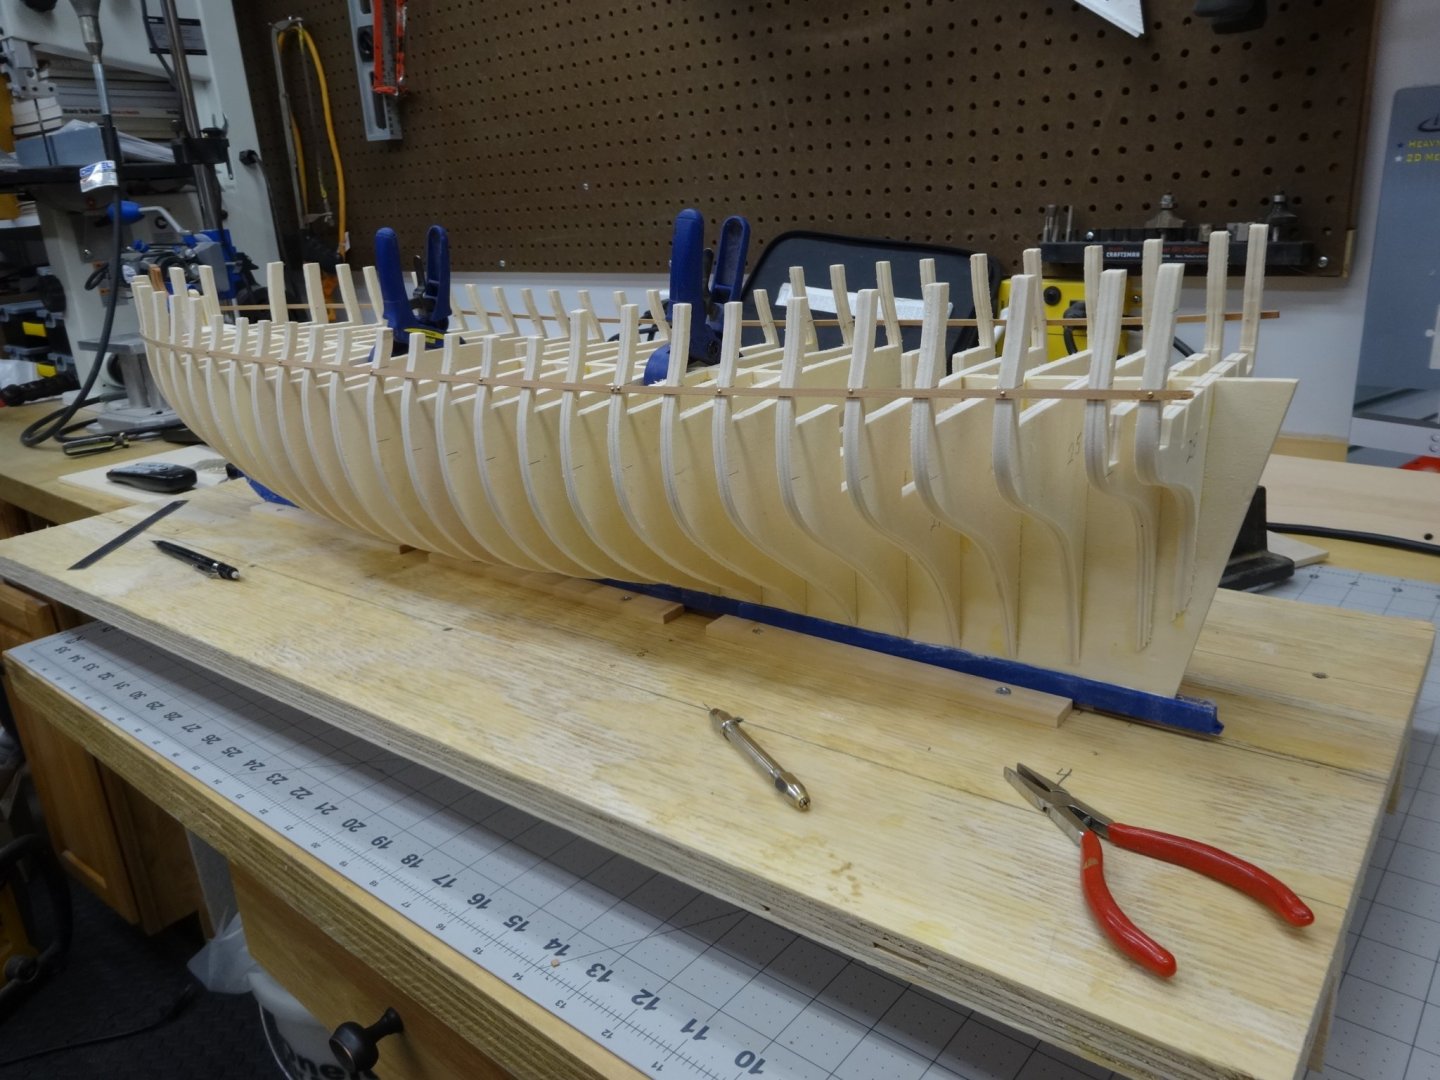
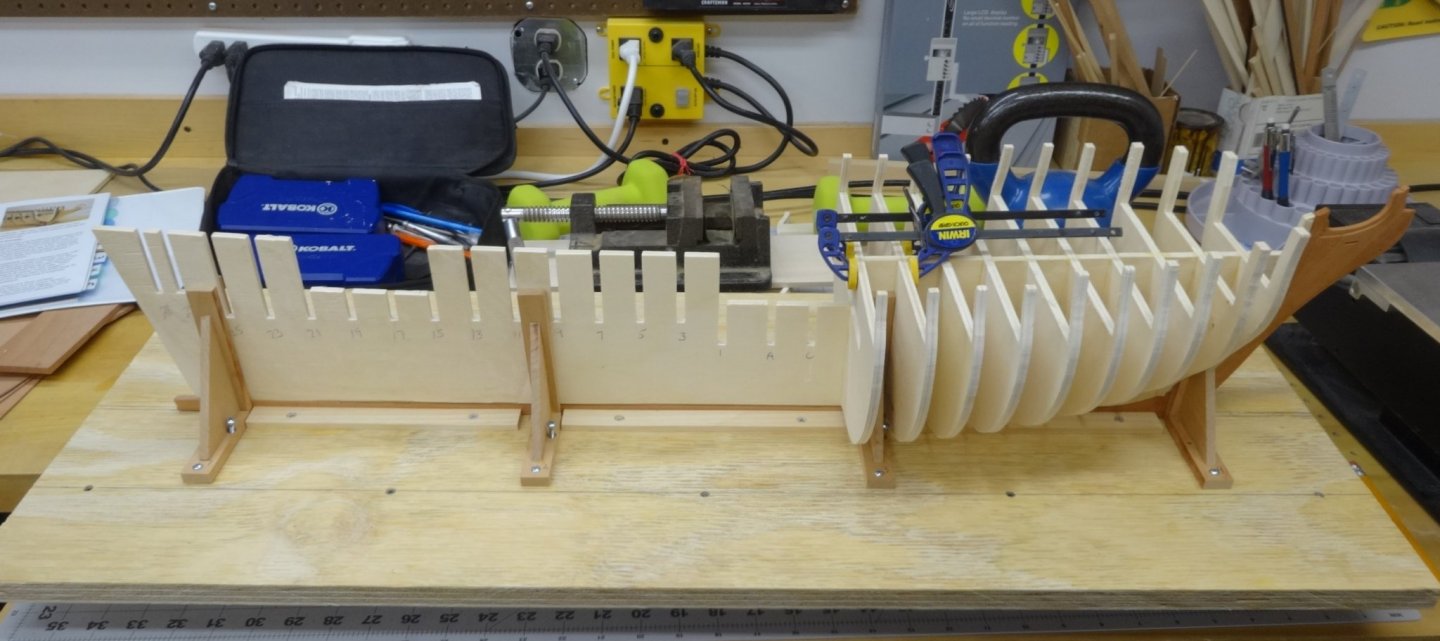
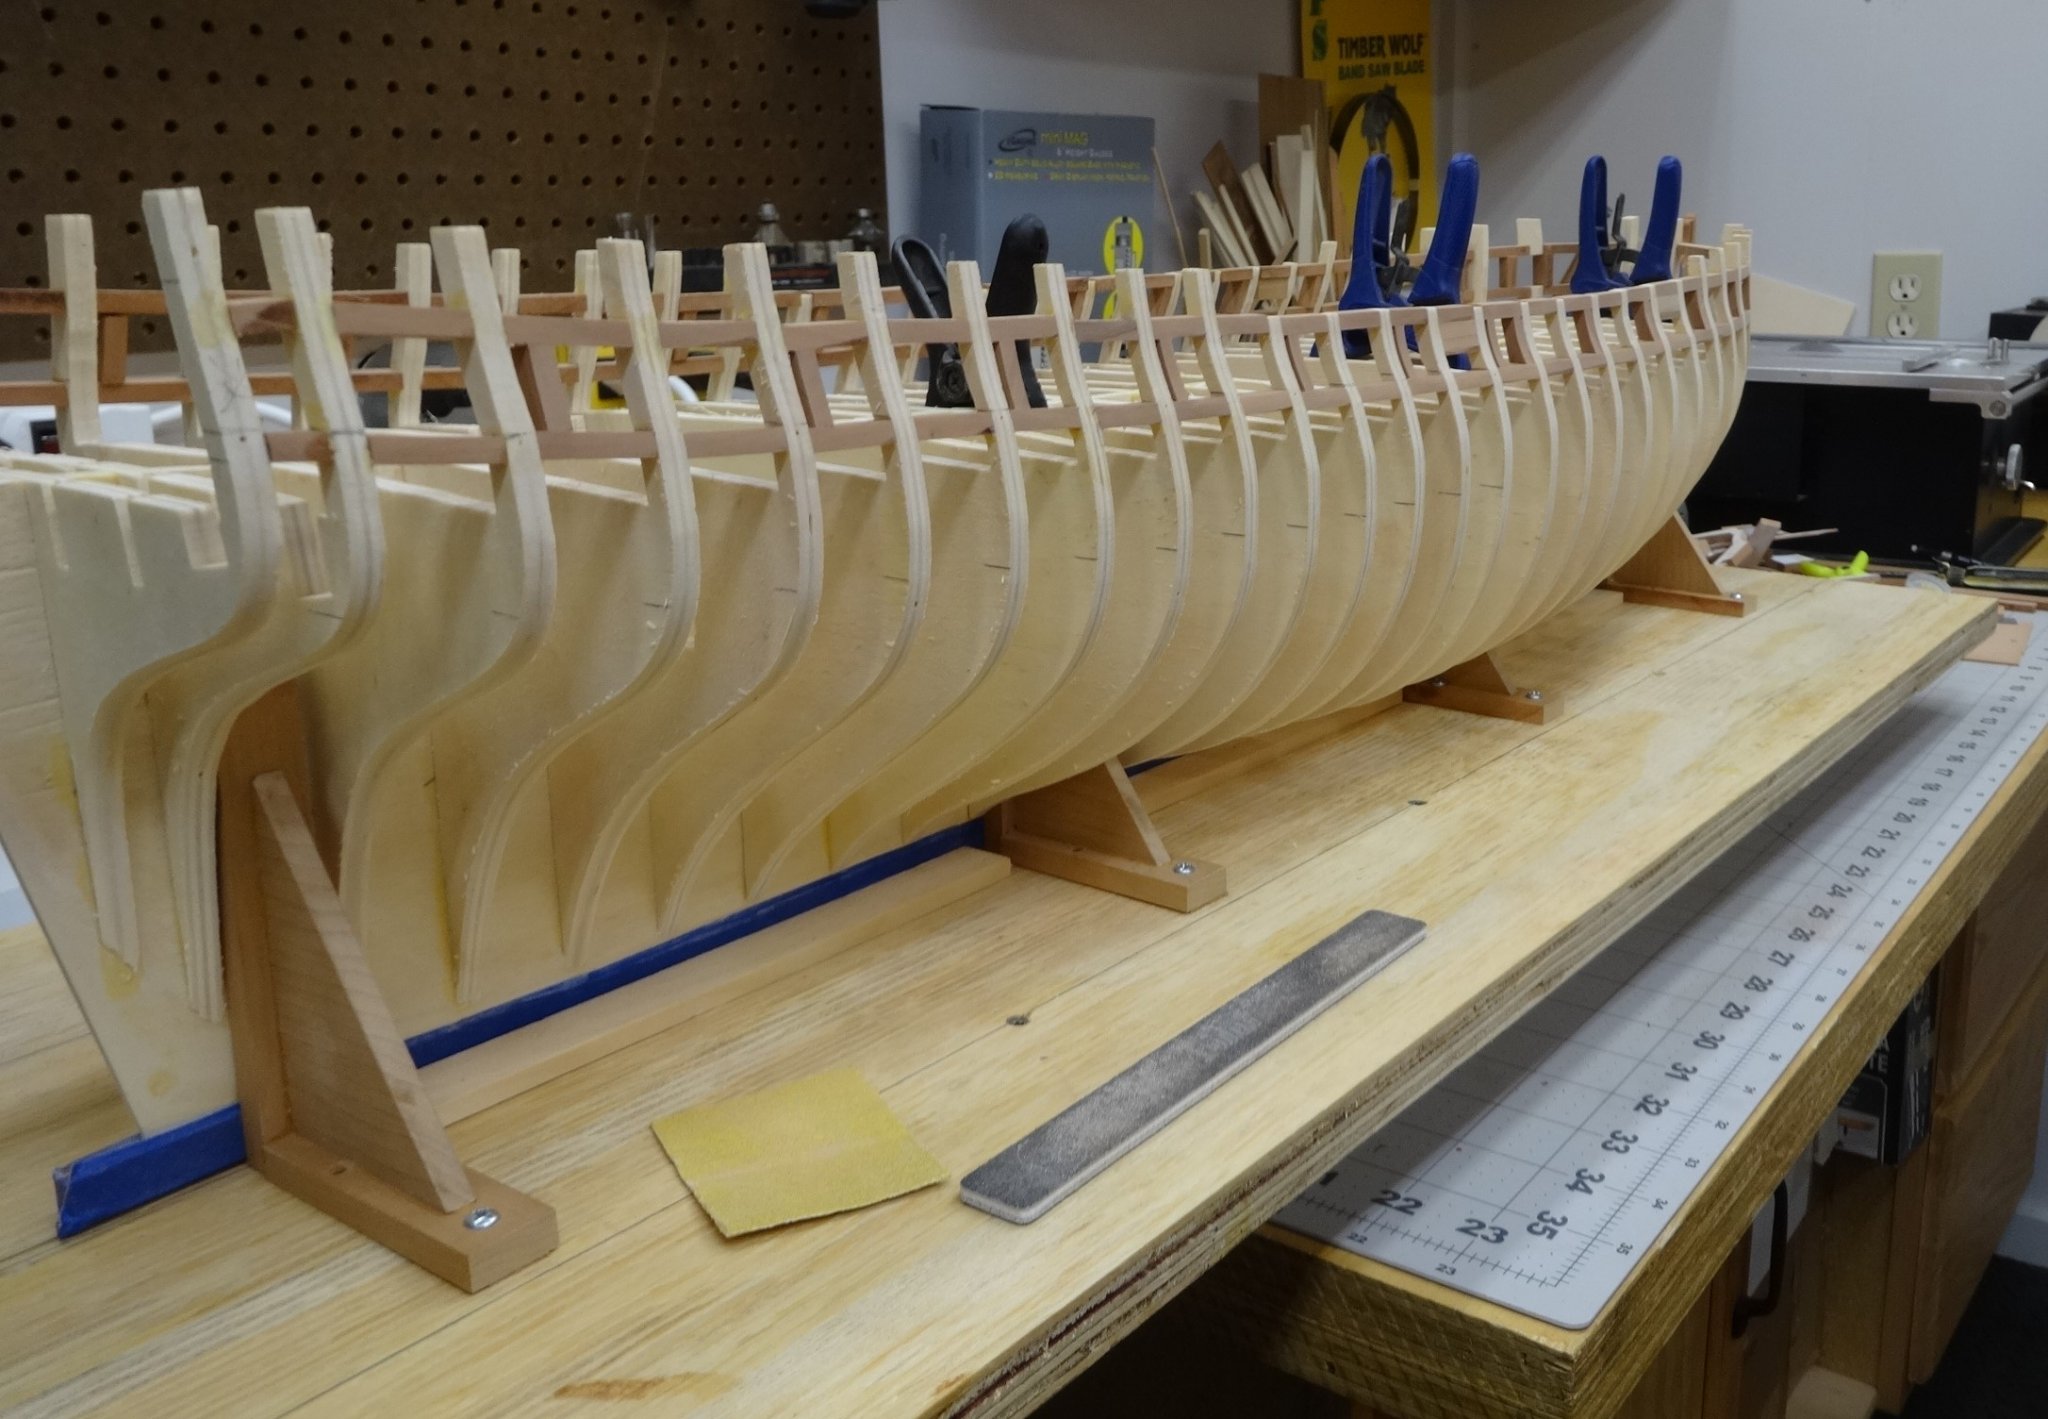
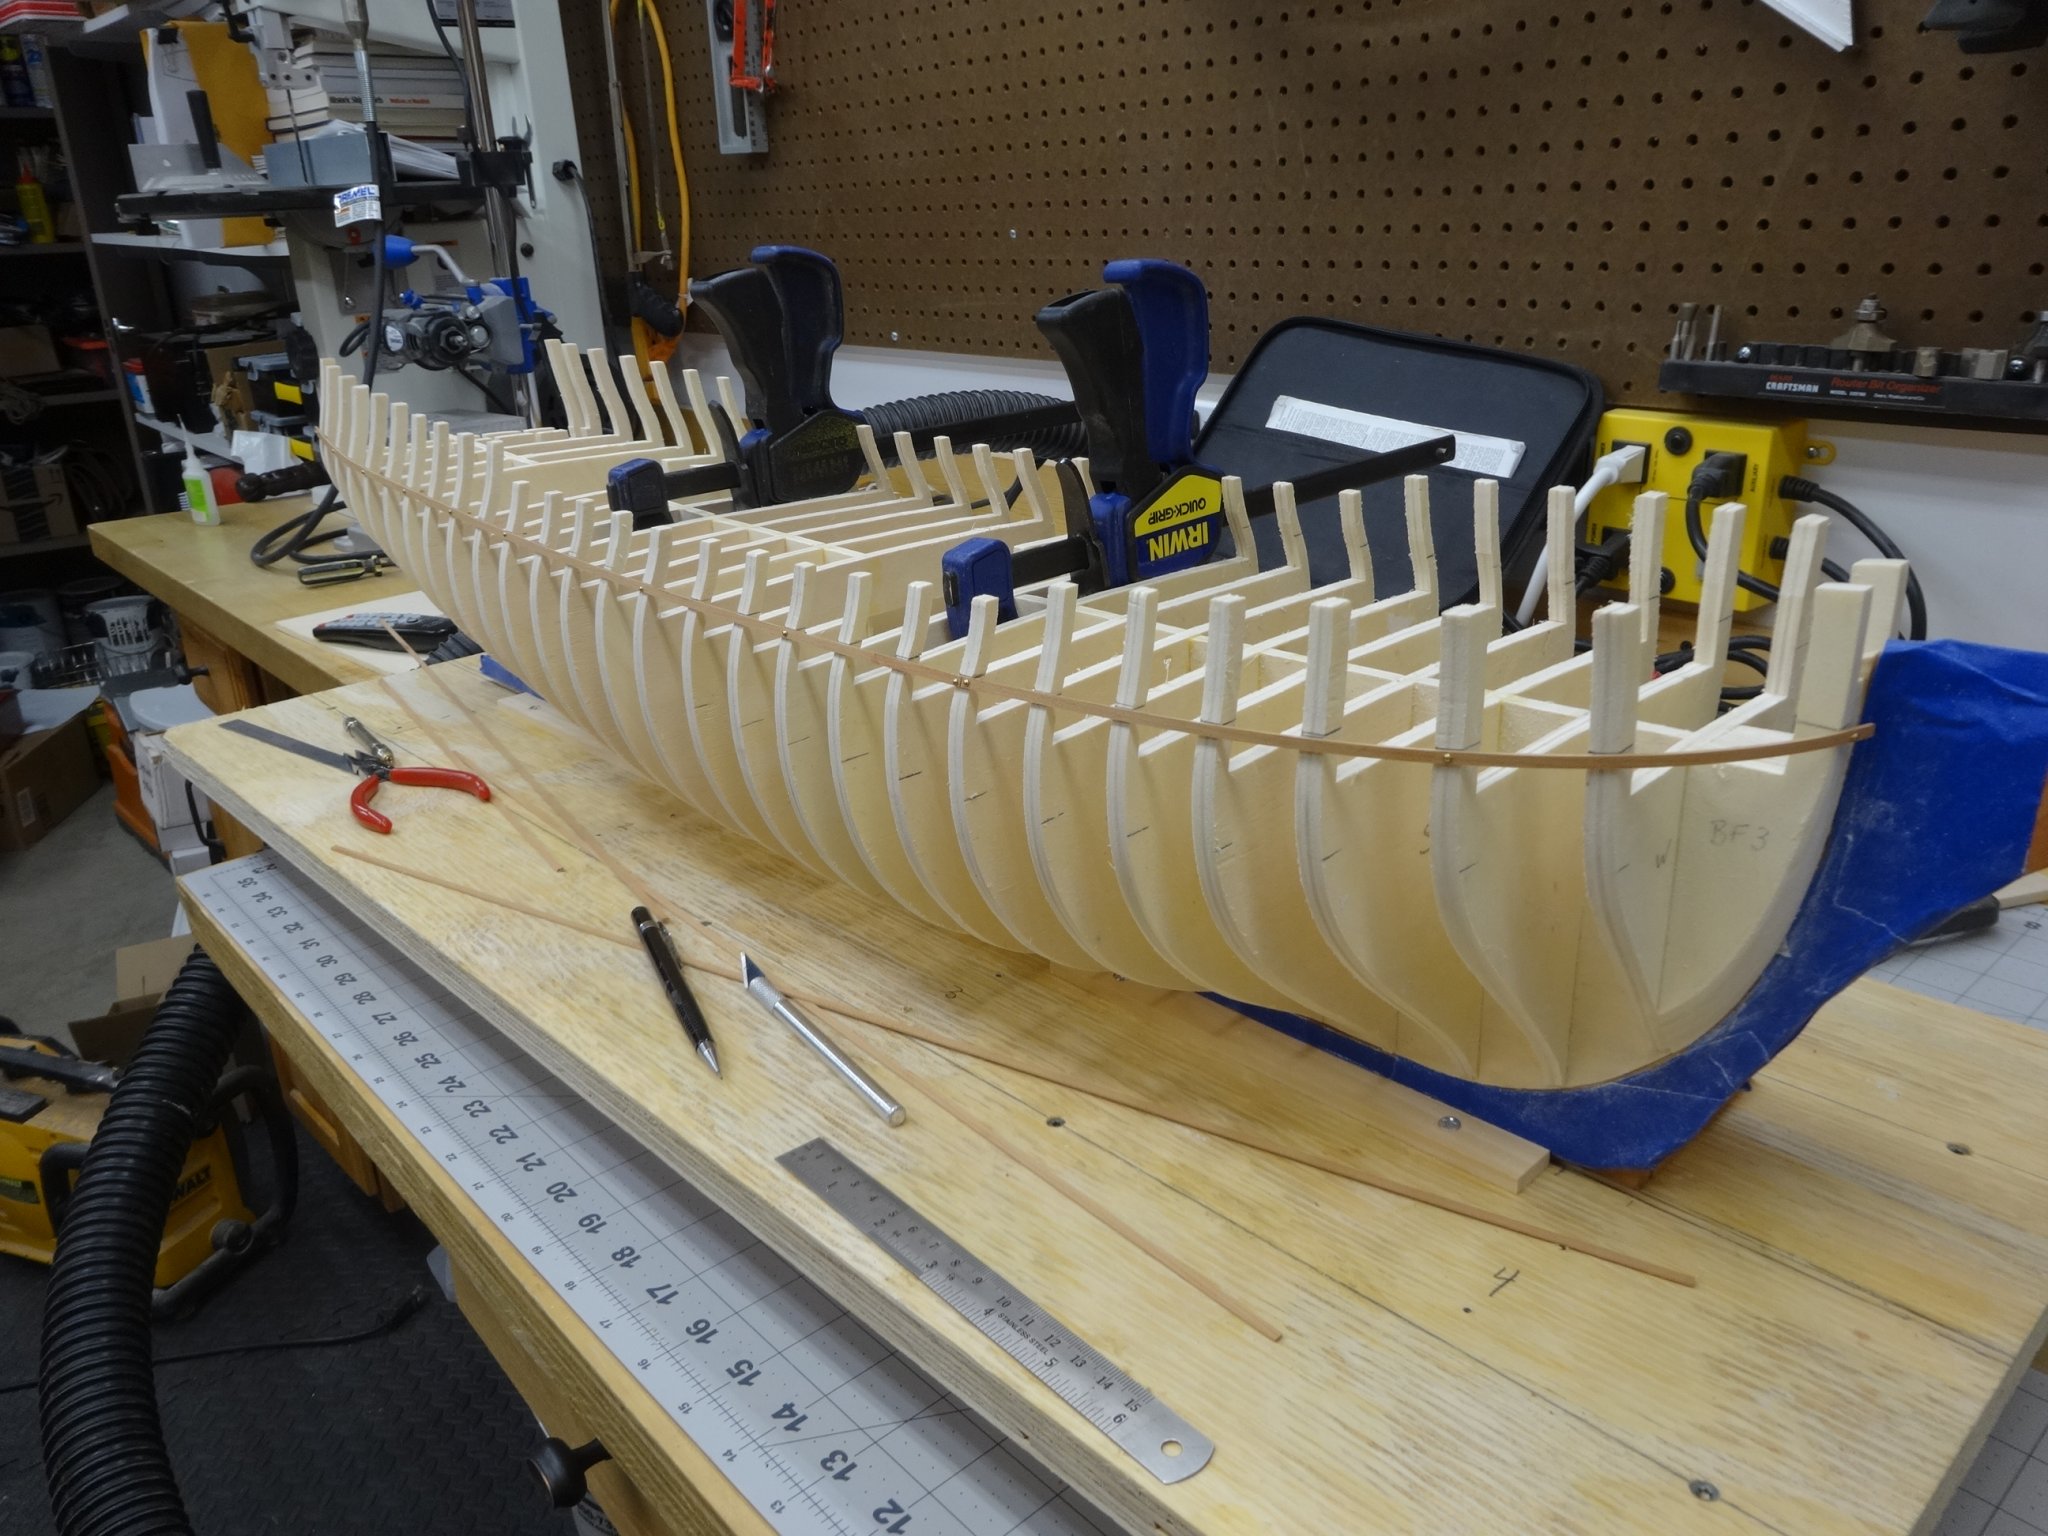
The port framing has been completed on both sides. The starboard side has also received preliminary fairing.
After viewing these pictures I noticed the most aft frames lintel is not installed correctly. I'll rip it out tonight and reinstall it!

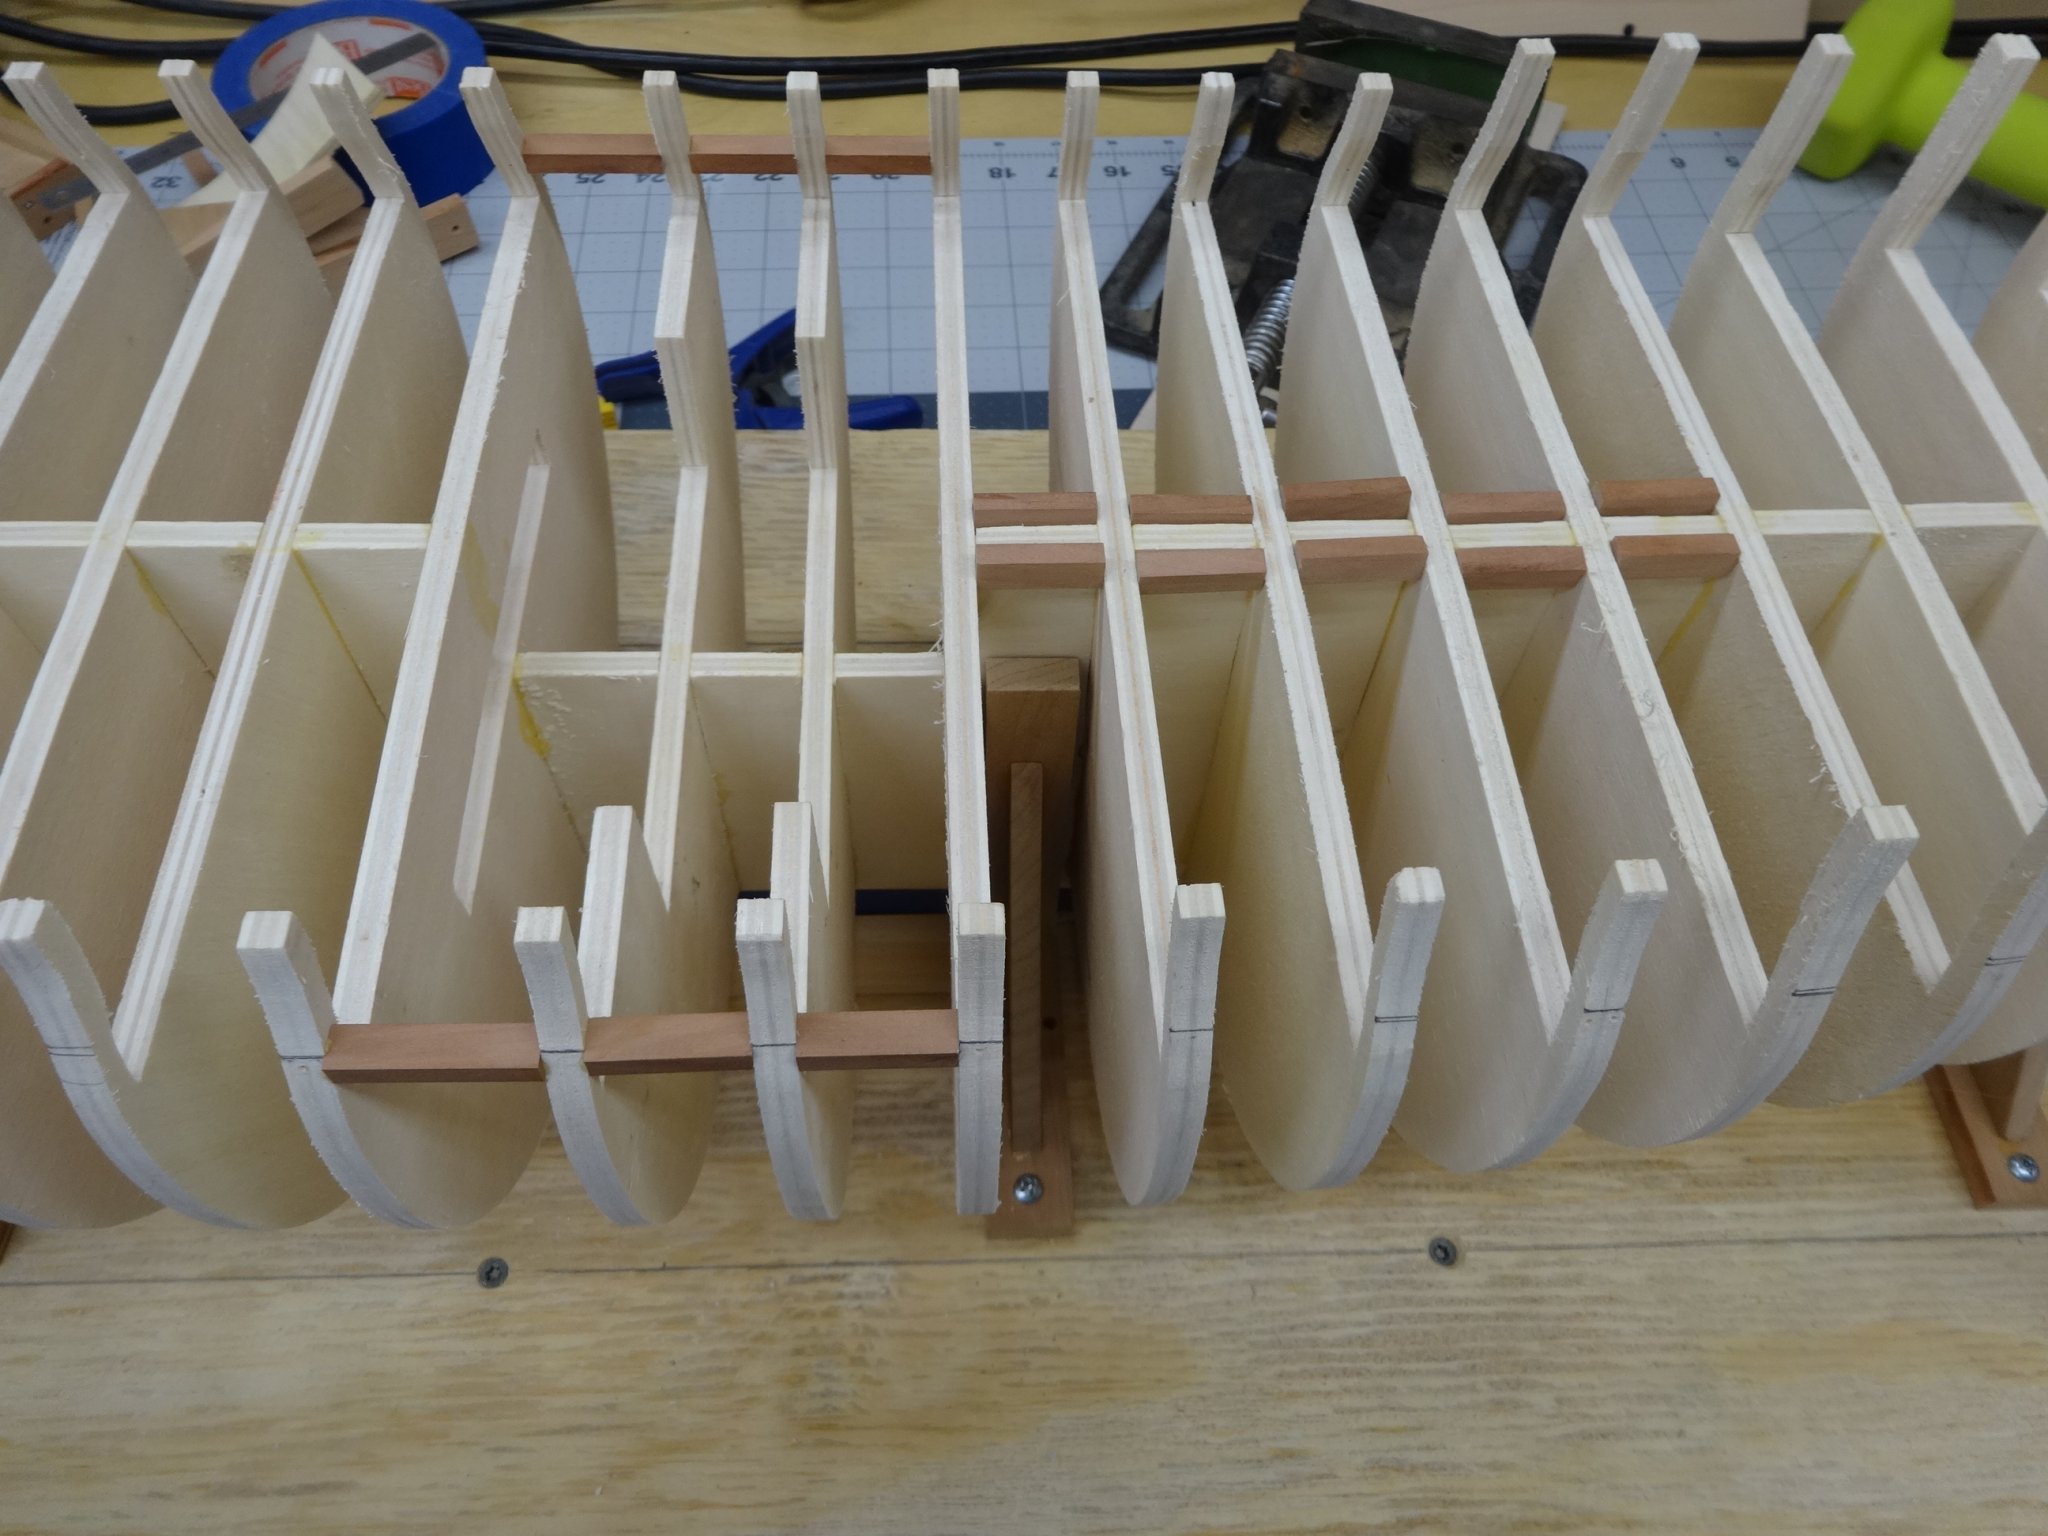
As I needed to give my shoulder a rest I spent yesterday cutting out the stern pieces.
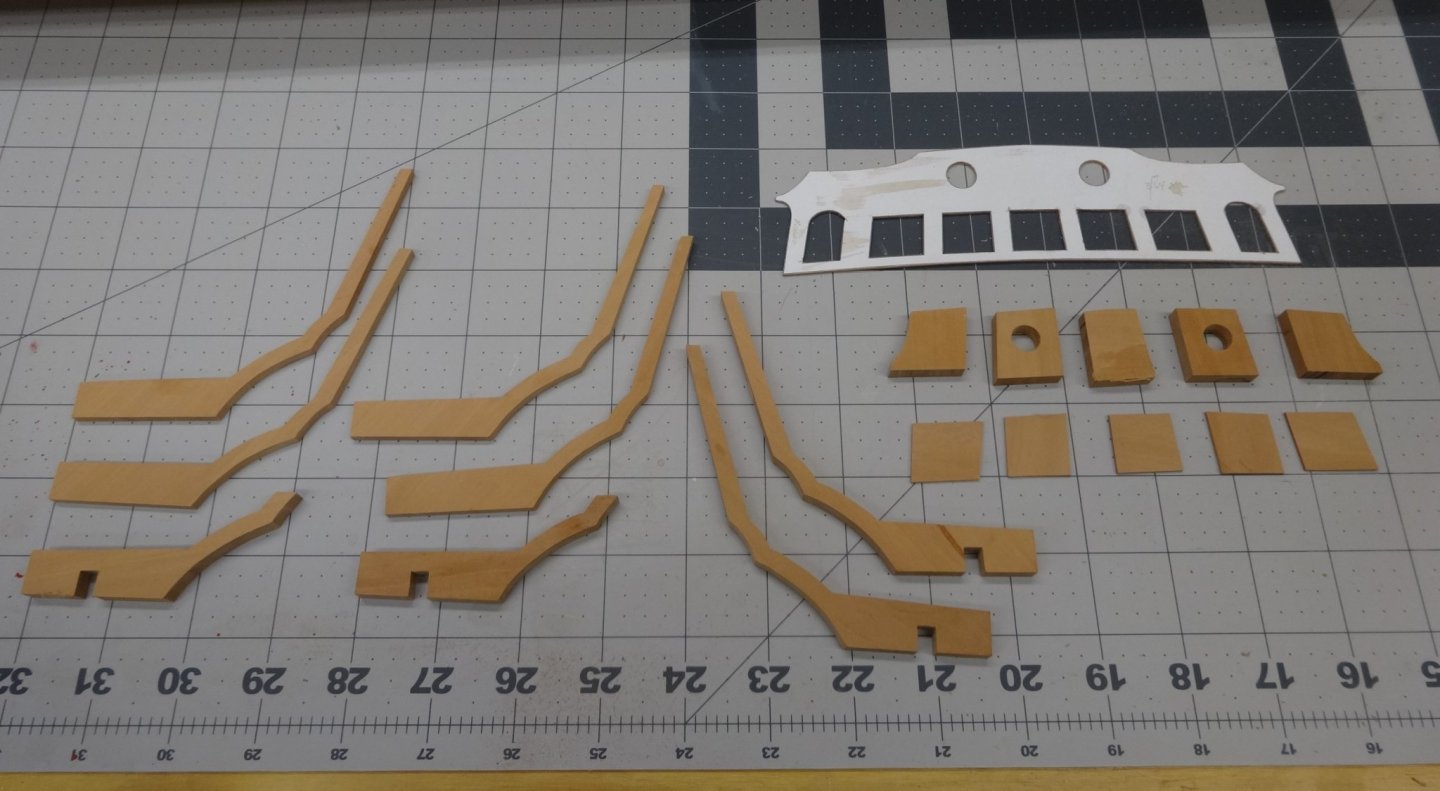
All the pieces have been roughly sanded to shape and will receive a final sanding just prior to installing them on the model.
Hopefully I'll have the stern assembled by the end of next weekend. That is the family permitting.
")
-
Welcome aboard! You'll have a great time with it. You've picked a fine project and your taste for a
westie is good too! My 9 year old westie is my shop supervisor and she runs a tight shop!
-
Great job adapting the model to what you like.
Always love to watch your "changes".
-
Good luck Jim.
Staples printed mine with no scale and they came out right.
-
-
Thank you Jean-Paul. Yes she is a beauty.
Thanks Jeff, Tigersteve and Chris and all the likes too.
Jim I really haven't given any thought about using a stand or pedestals or whatever way I'm going to mount her.
Thank you for bring that up as it would be smart to reinforce for pedestals before planking the hull.
I think I would locate them somewhere between bulkheads G, I, K and 9, 11, 13. No real reason other than
it looks like a nice distance from the bow and stern.
Thanks Bob. Yes I do remember how much "fun" sanding the interior of the Confederacy was so this
will be even more fun. My shoulders hurt already.

-
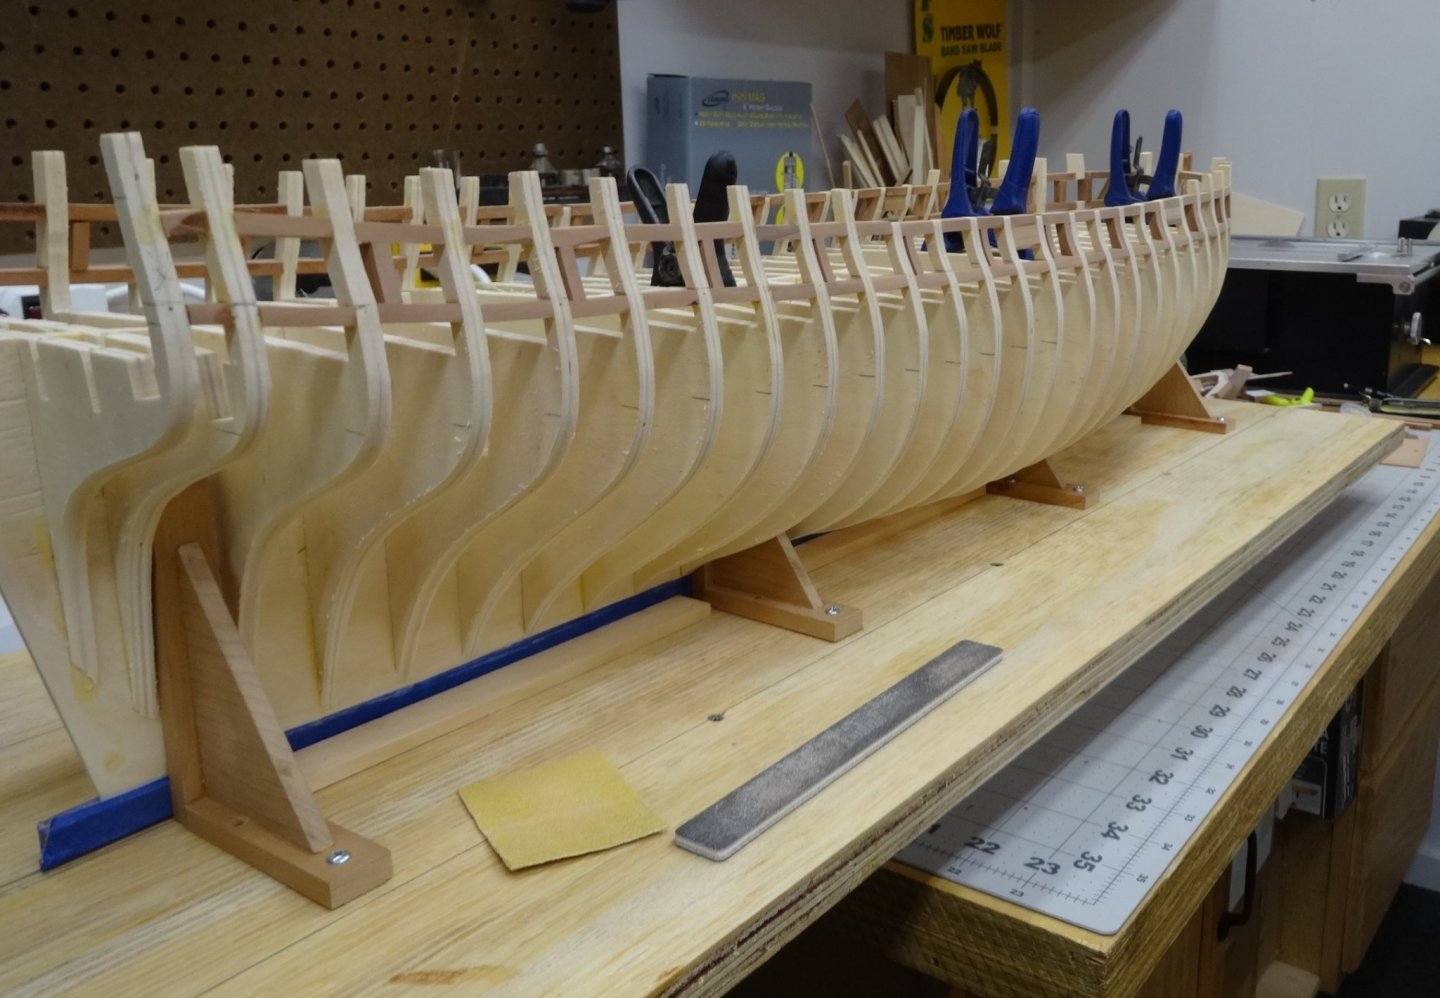
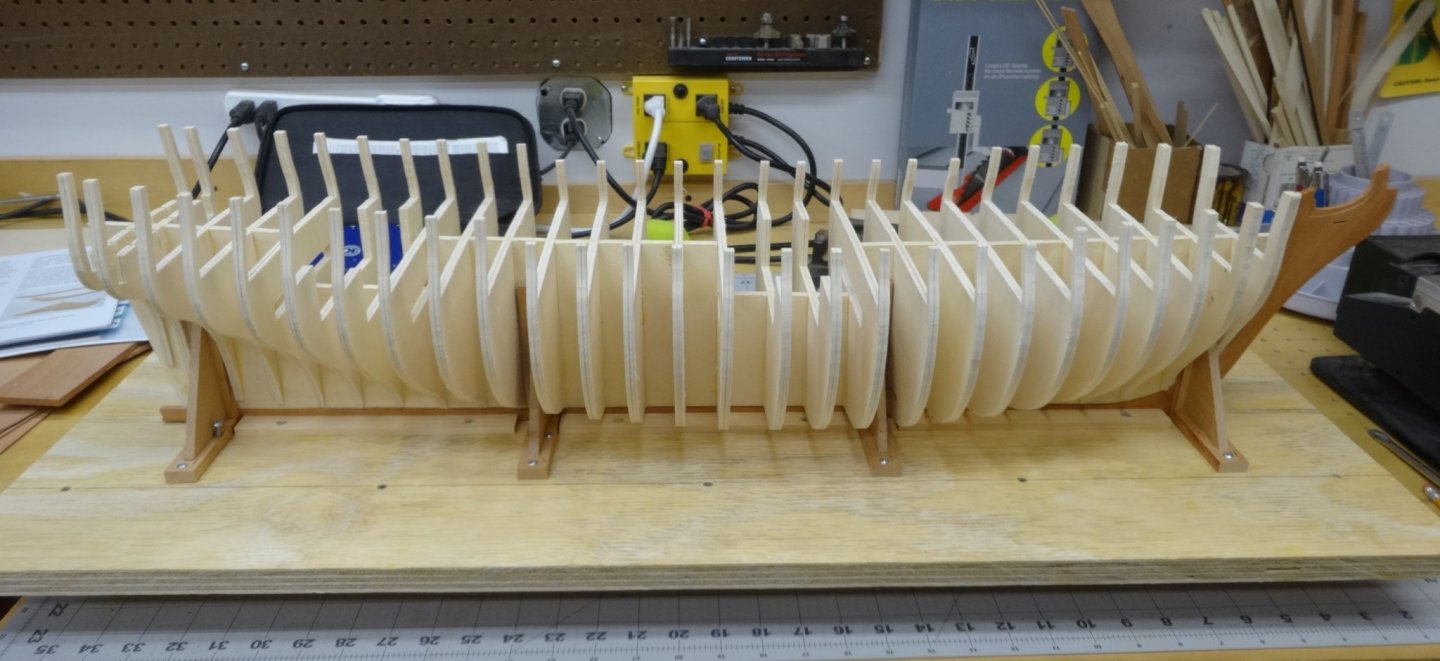
After several days of sanding, numerous sheets of sand paper and sanding sticks later the hull is roughly faired.
I estimate I have 12-15 hours of sanding and more than a few Aleve tablets into the hull so far.
After the port framing is completed more fairing will be needed.

Here I've started to place the port framing. I would cut and fit several at a time and then leave them next to the former
until I glued them in place. This way I could make several at a time and then glue several in place.
This method helps me not mix them up and keep them in the correct order.
I'll work to the bow and then to the stern. No real reason why just the way I'm doing it.

-
Beautiful workmanship Ben. Very well done.
-
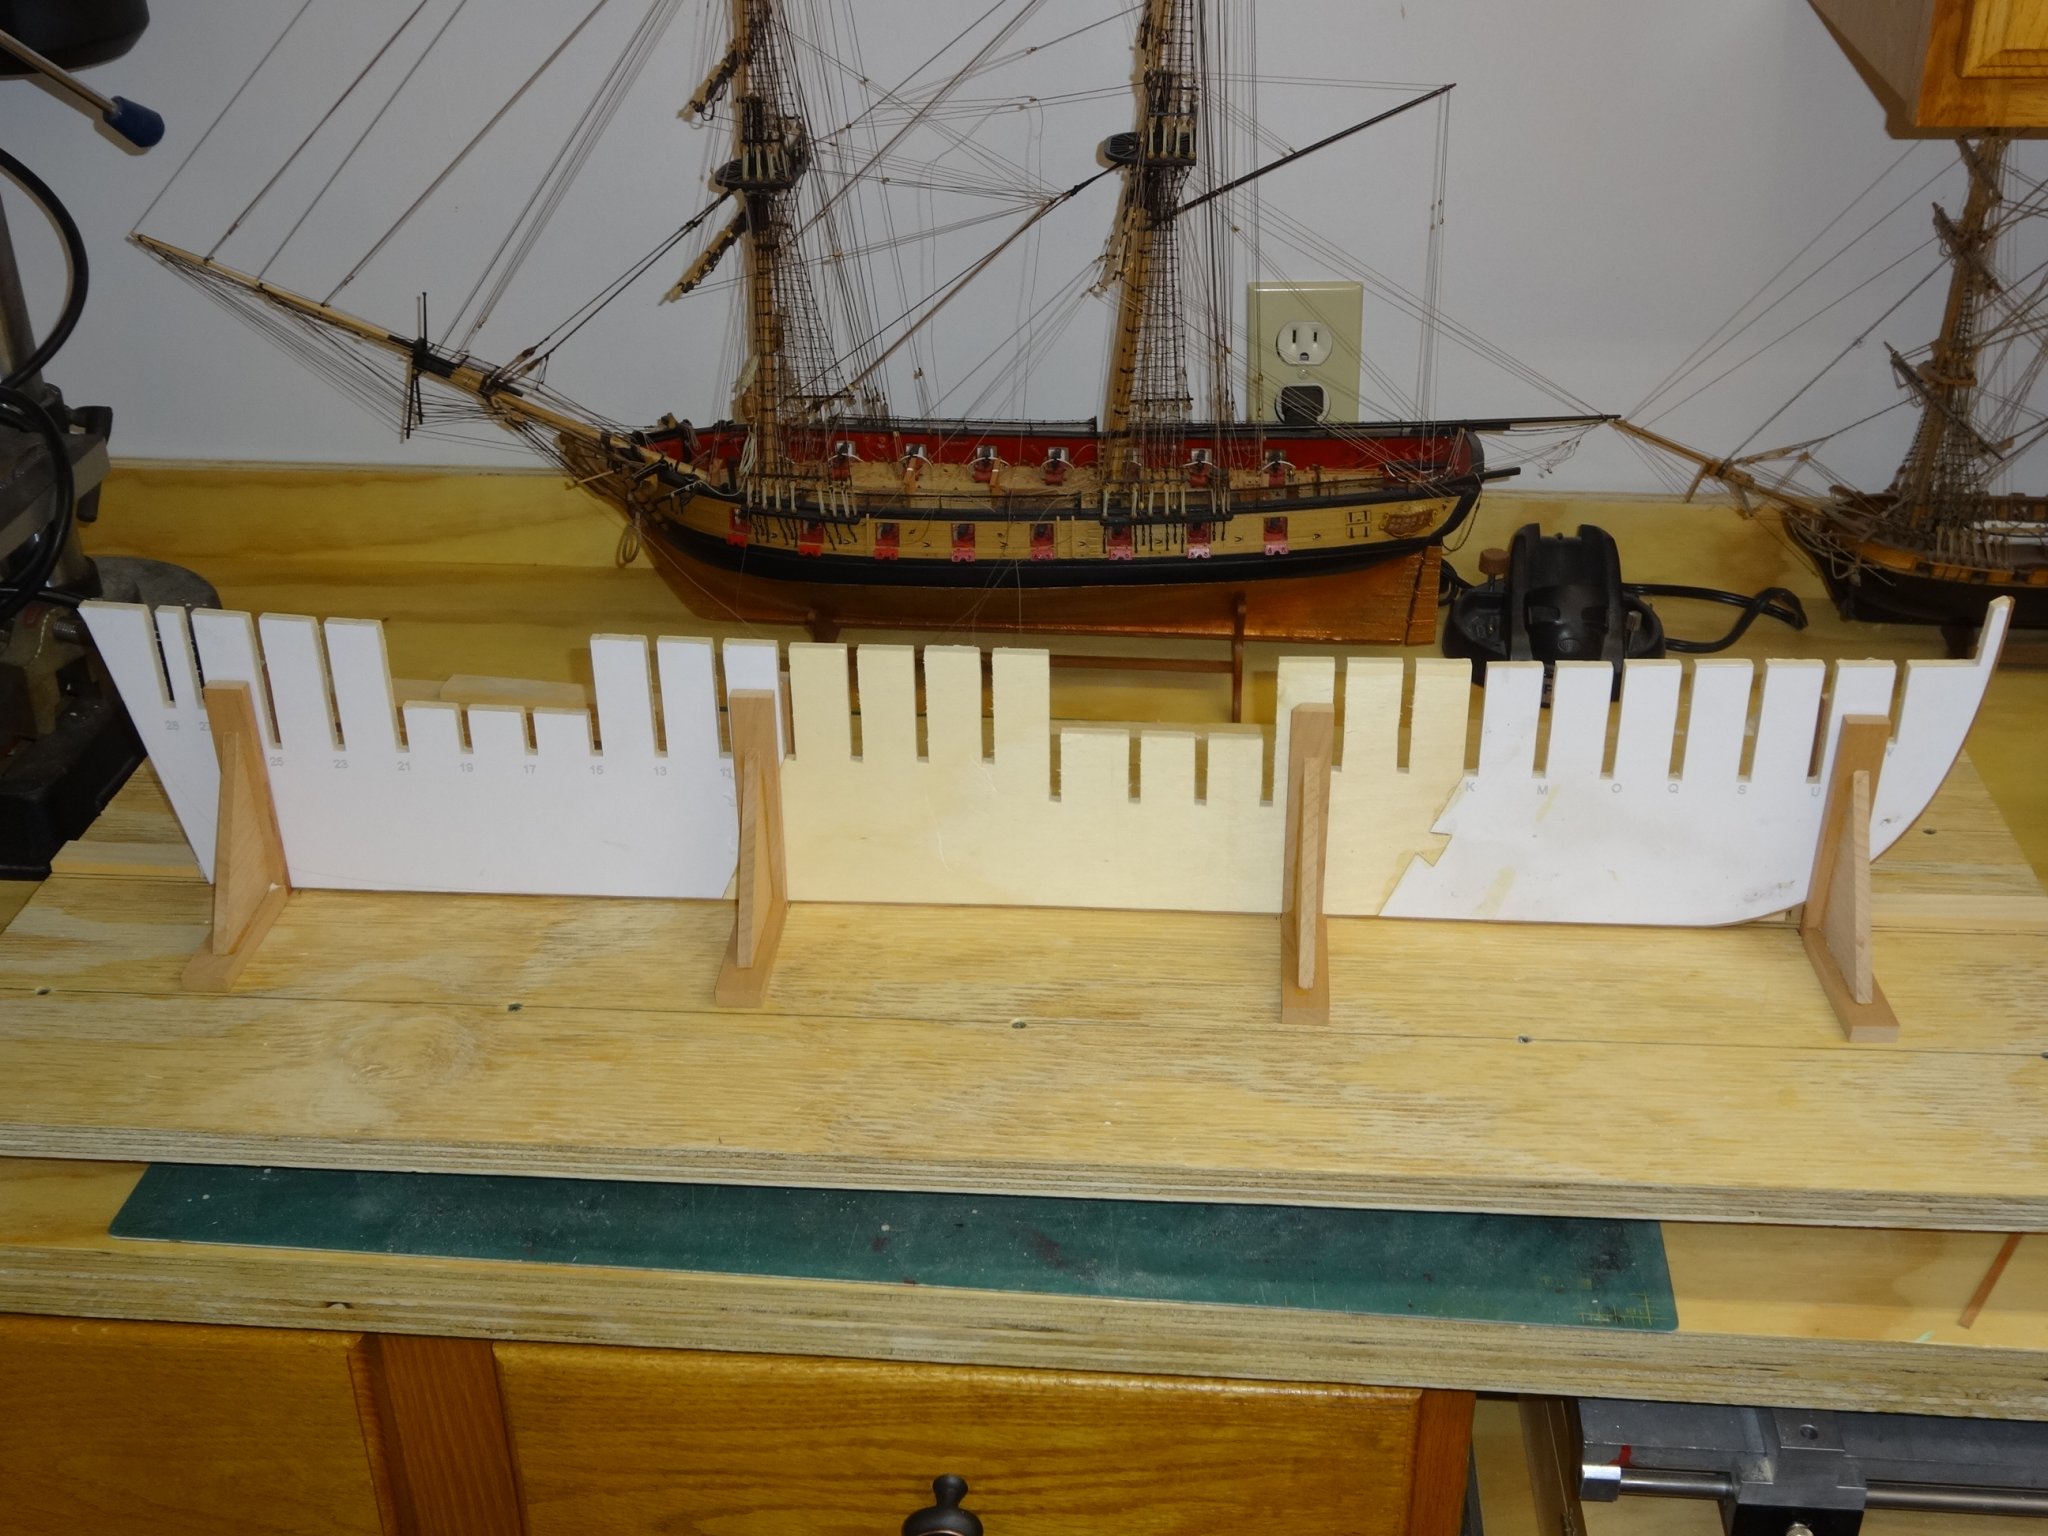
Hi All,
I've assembled the stem, keel and bulkheads. Now you're probably wondering where the pictures of the assembled stem is.
Well that makes two of us. Somewhere in cyber space I would assume. Seeing that the stem and keel are now covered with
blue painters tape I can't take another picture. Sorry we'll just have to wait until the hull has been faired.
Limbering up the shoulders and hands for the numerous hours of sanding.
- FrankWouts, Saburo, Chuck and 13 others
-
16
-
Great job framing her up. I agree that the fairing at the counter and under the stern is challenging.
I too continue to "adjust" the fairing as I move along. I know you'll do a great job on the bollard timbers too.
- Martin W and FrankWouts
-
2
-
That's a beautiful model and what a great opportunity. I can see why you didn't want to leave.
Thanks for sharing those wonderful pictures.
- BETAQDAVE, mtaylor, Edwardkenway and 3 others
-
6
-
Thanks shihawk. I know there are two camps on this. One is the same color above and below the wales and the other is using two different woods. I'm in favor of whatever you think looks good.
- shihawk, FrankWouts, garyshipwright and 1 other
-
4
-
Hi Ben,
That sounds like a really nice way to do it. Right now I'm thinking stem and planking all in pear.
- FrankWouts, Saburo and Trussben
-
3
-
Hi Chris. So far pear it is. I thought about Cherry but I had more pear on hand. Thanks for all the likes too!
-
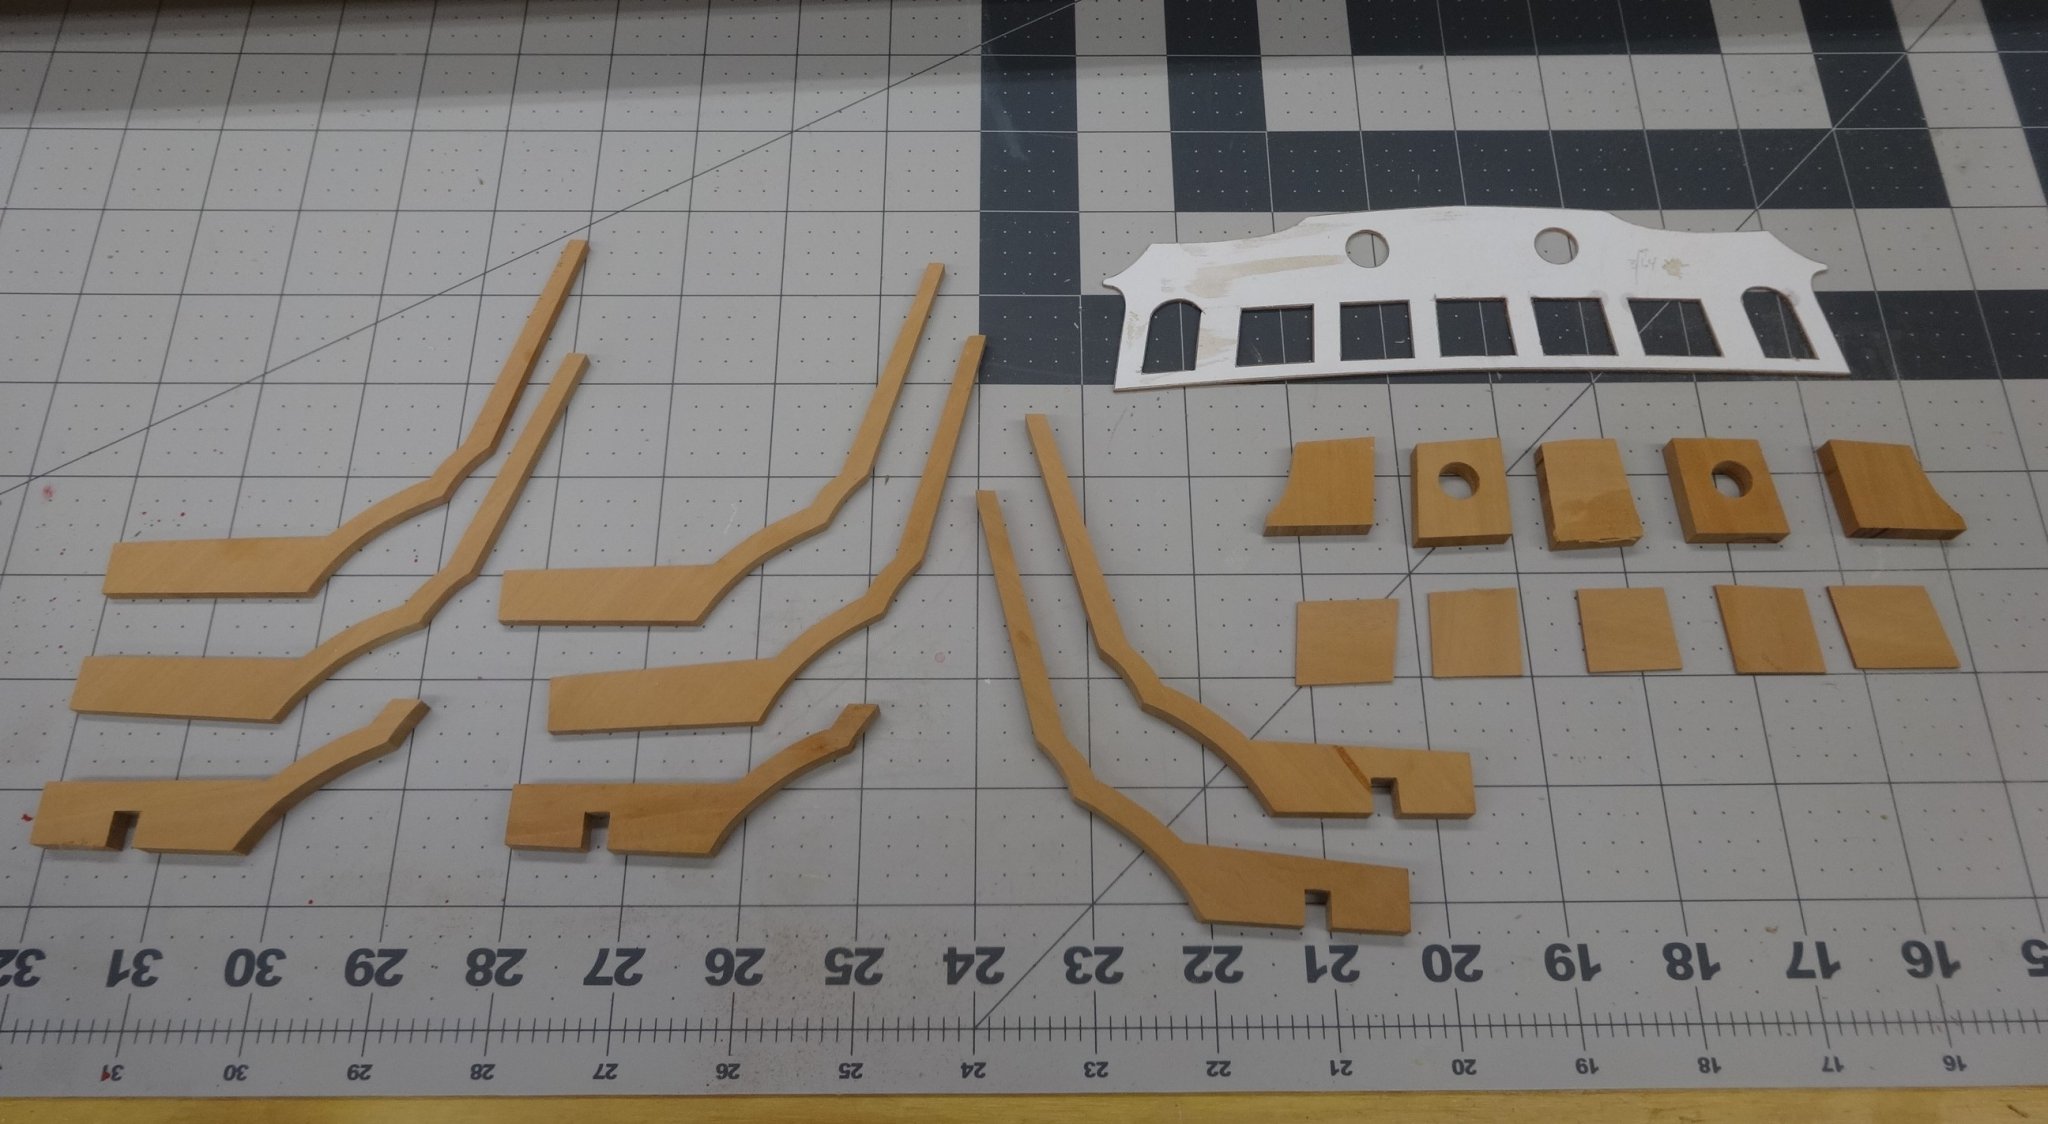
Progress continues,
The former has been cut out and the rabbet strip attached.

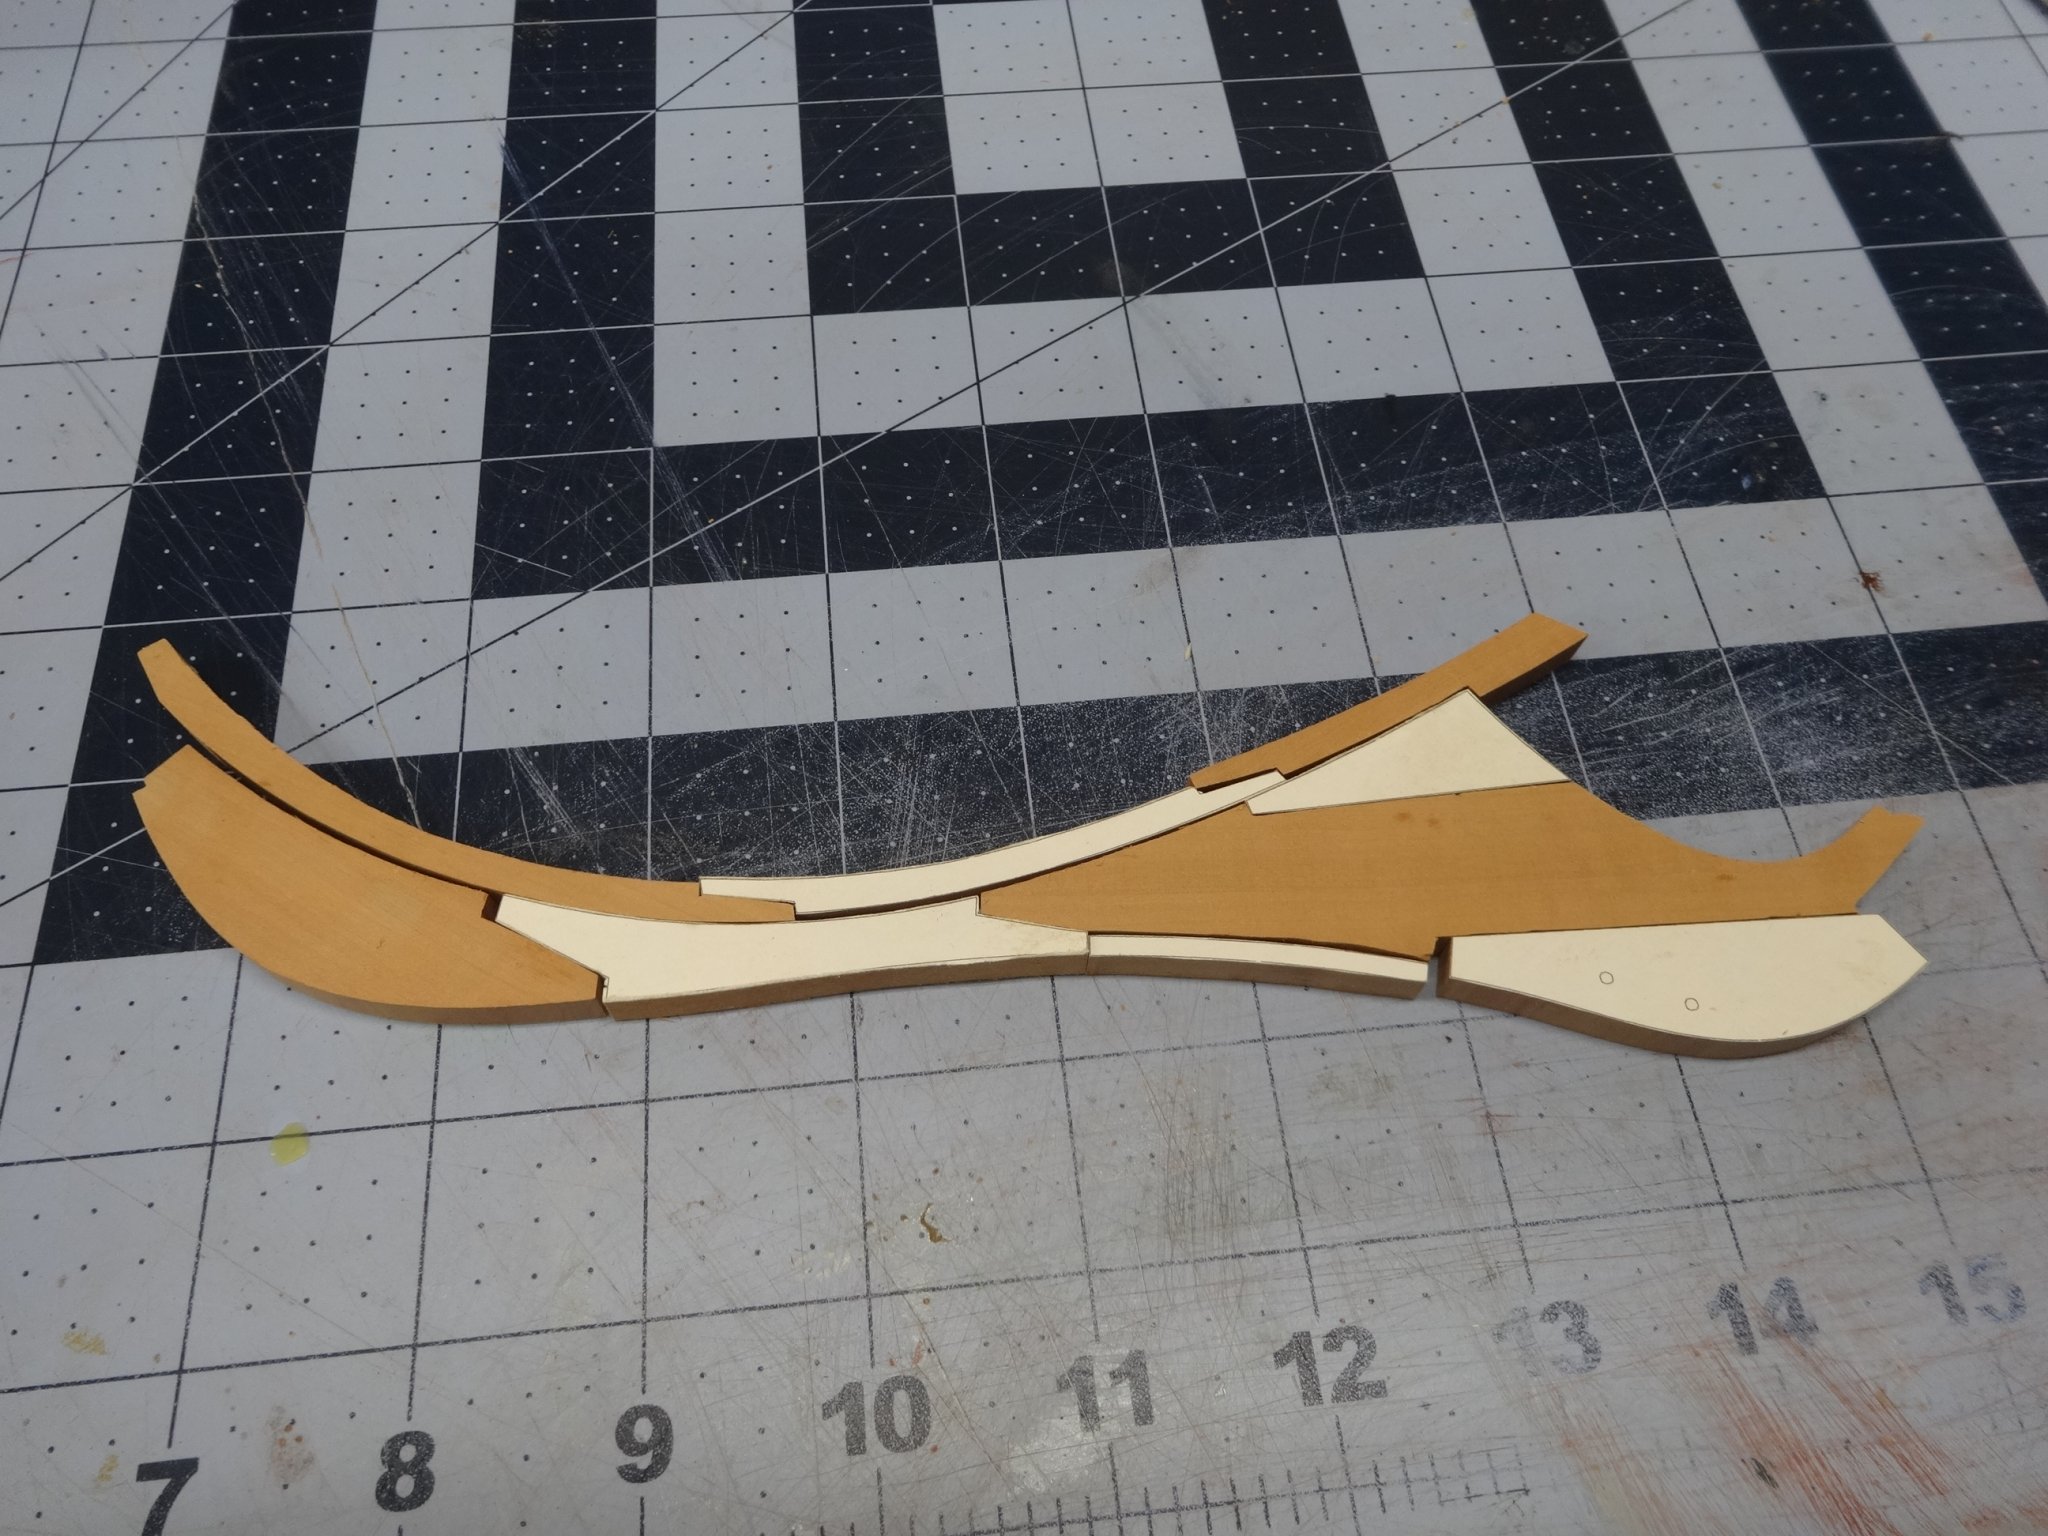
Next is to cut out and assemble the stem knee assembly and keel.
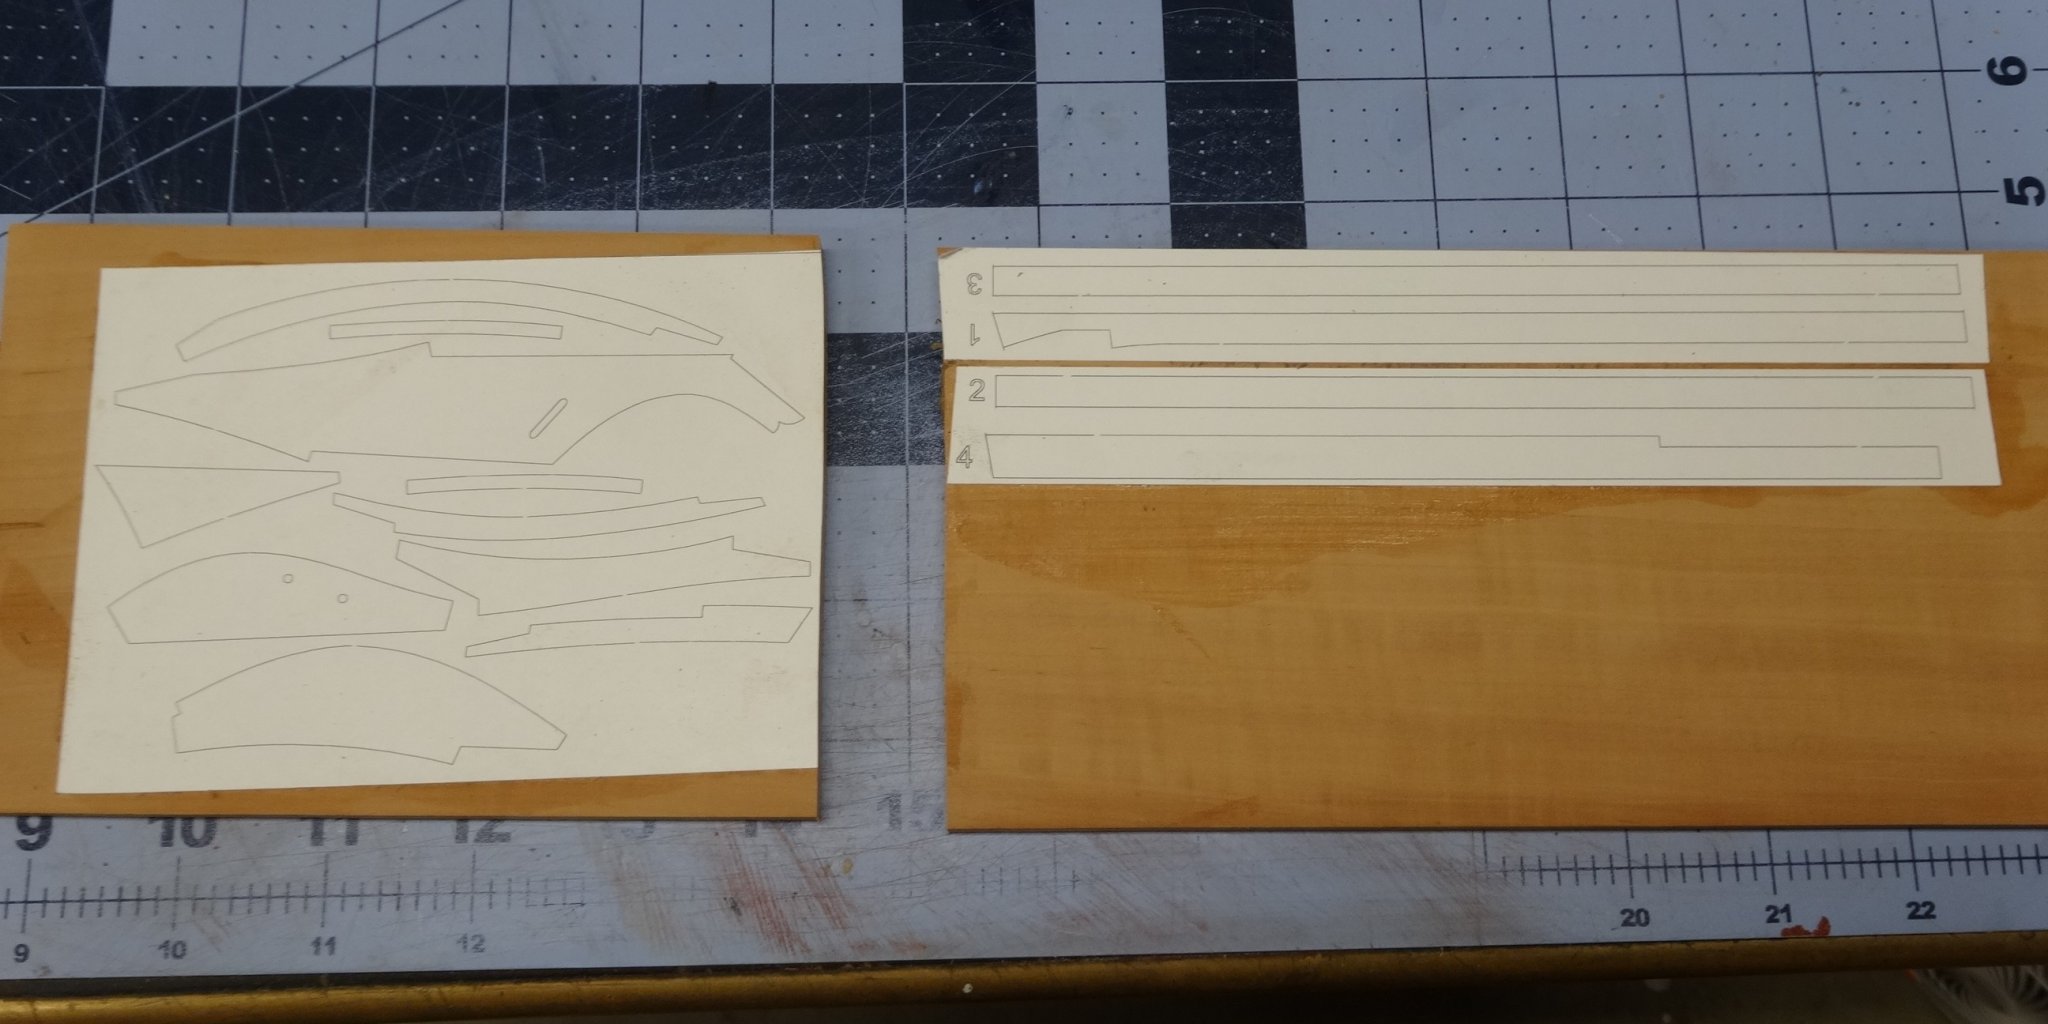
Here are the parts laid out on swiss pear.

Here is the stem knee cut out and ready for fitting all of the pieces together.

The fun is just beginning!!!!!
- Chuck, Edwardkenway, Tigersteve and 19 others
-
22


HMS Winchelsea - FINISHED - 1764 - by Chuck (1/4" scale)
in Member Build logs for the HMS Winchelsea
Posted
I believe he's referring to applying a coat of wipe on poly or using a sanding sealer.