MORE HANDBOOKS ARE ON THEIR WAY! We will let you know when they get here.
×


Rustyj
-
Posts
2,528 -
Joined
-
Last visited
Content Type
Profiles
Forums
Gallery
Events
Everything posted by Rustyj
-
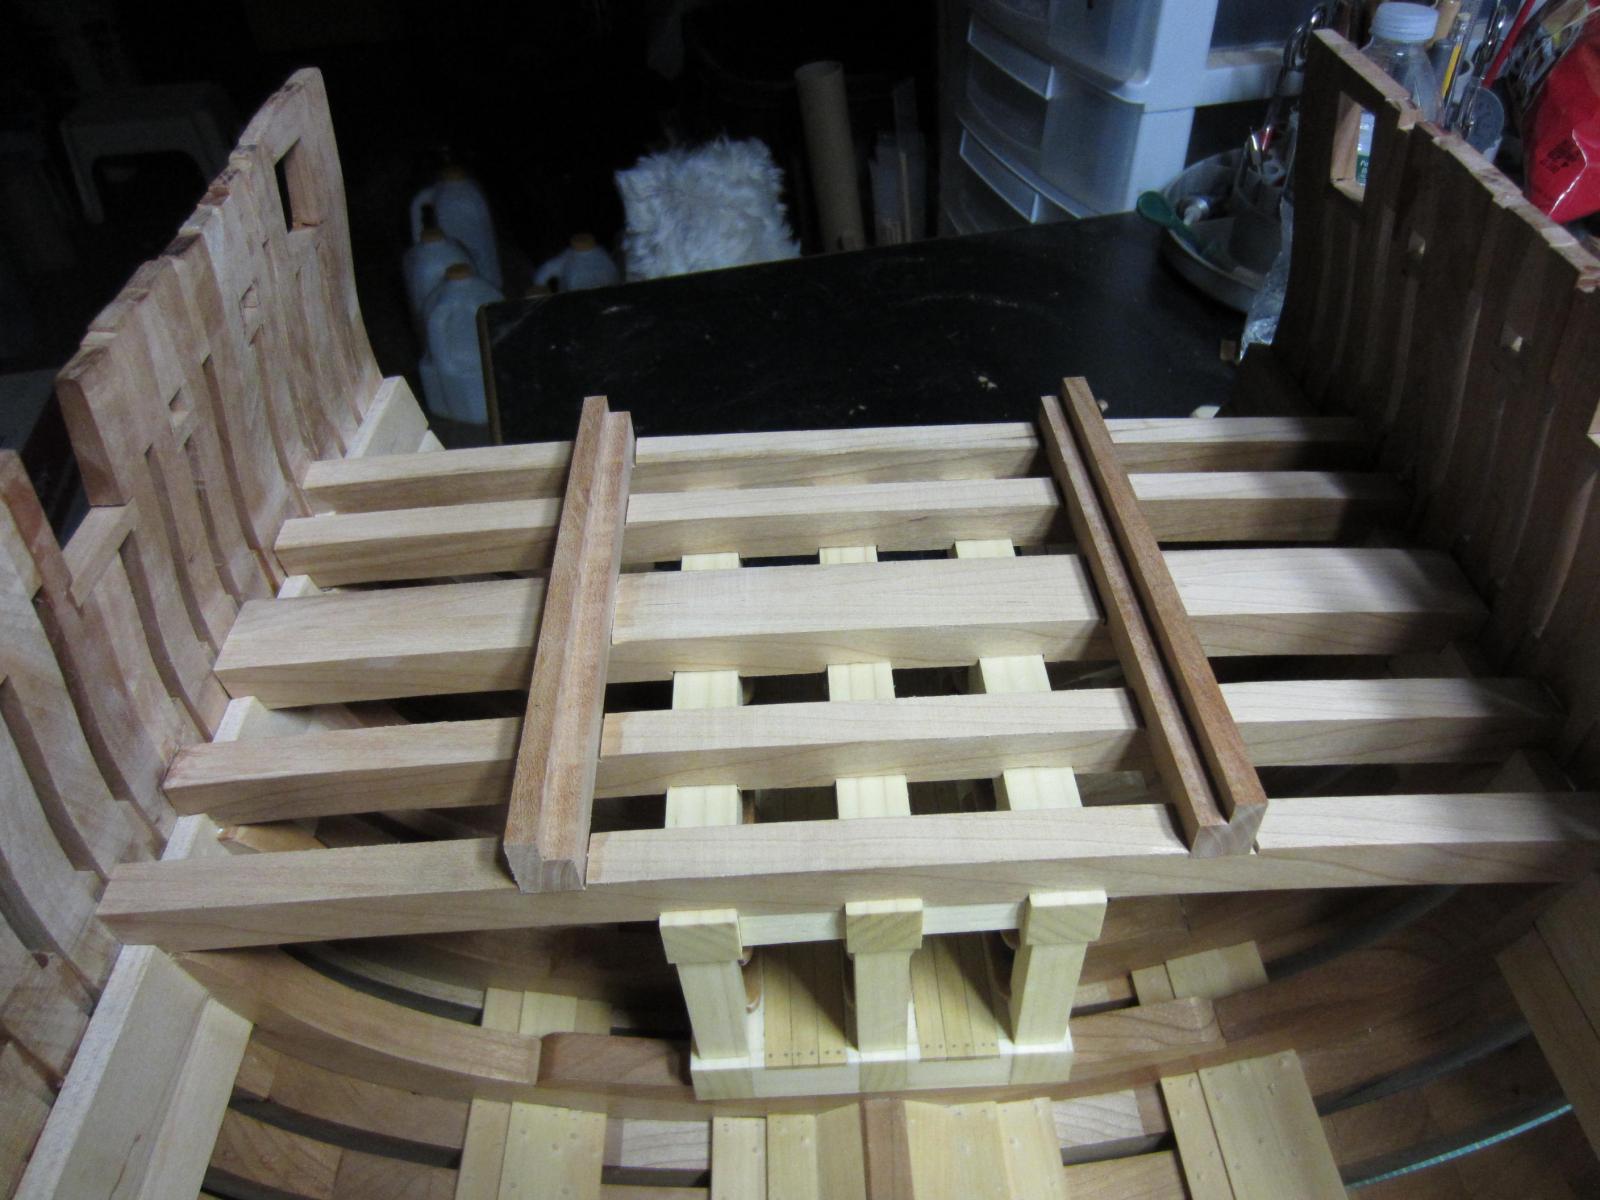
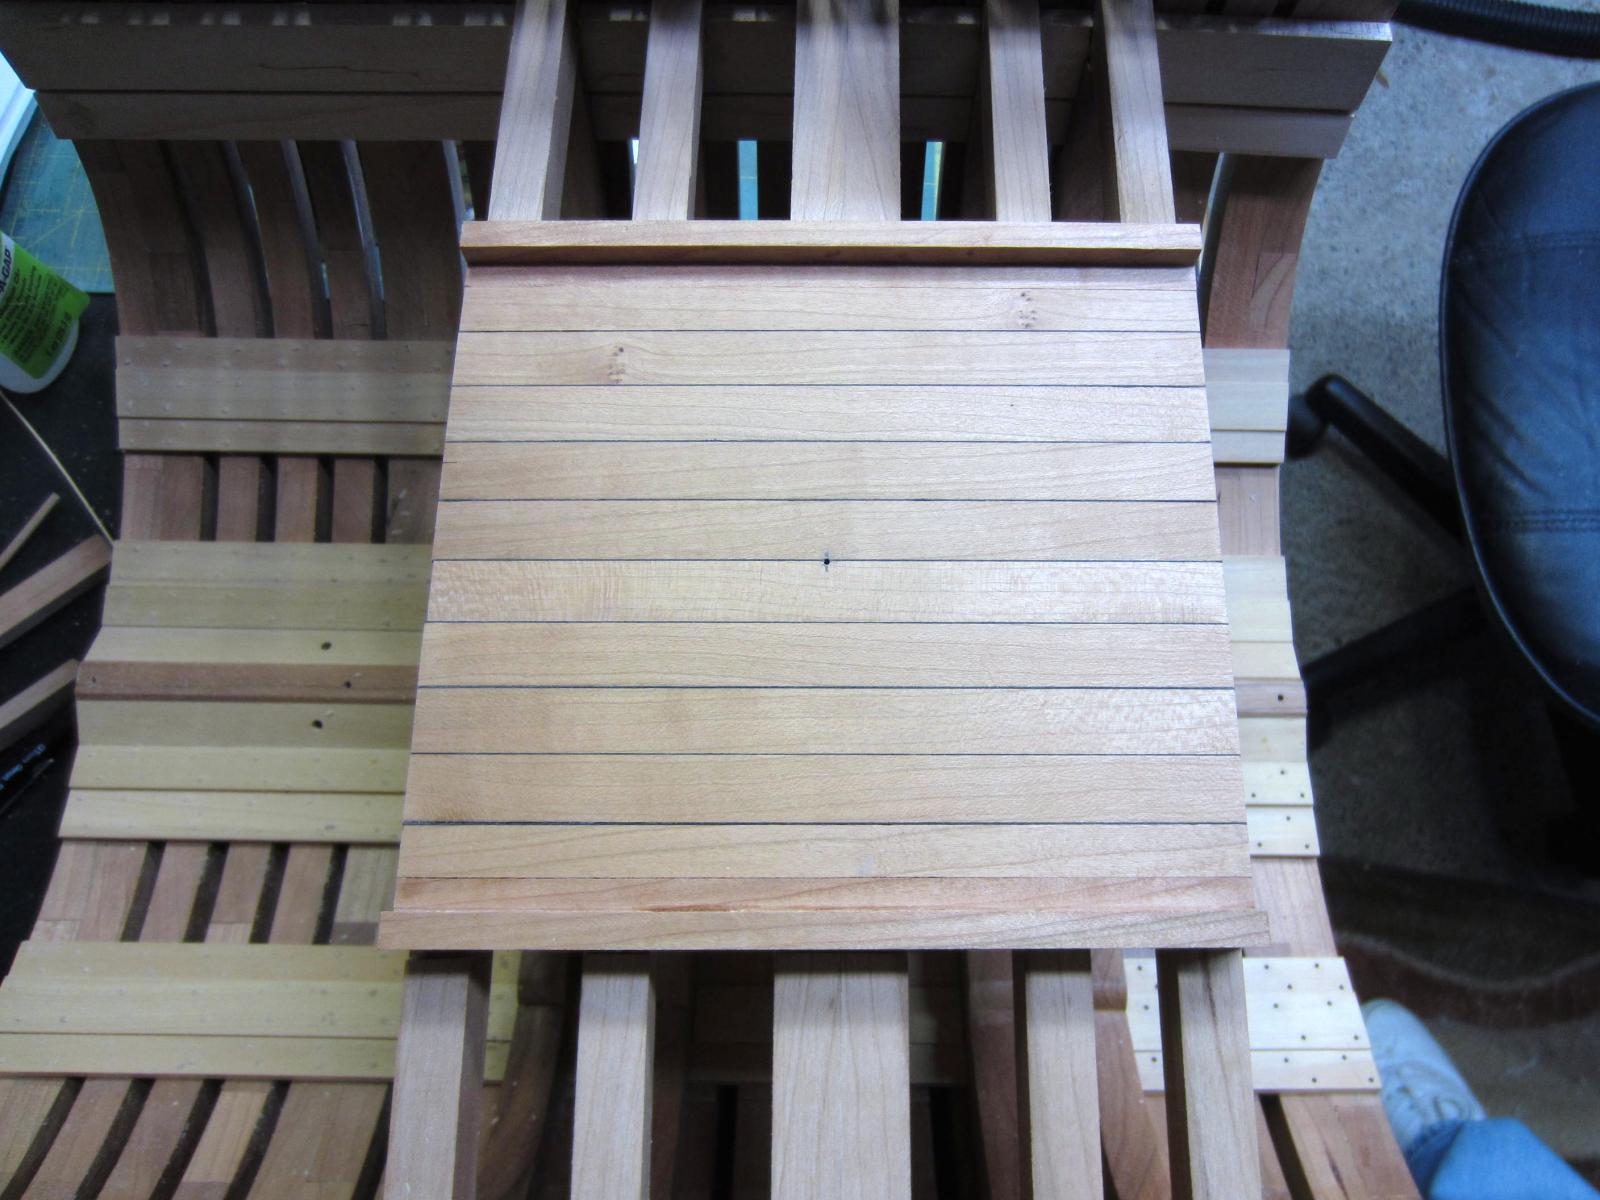
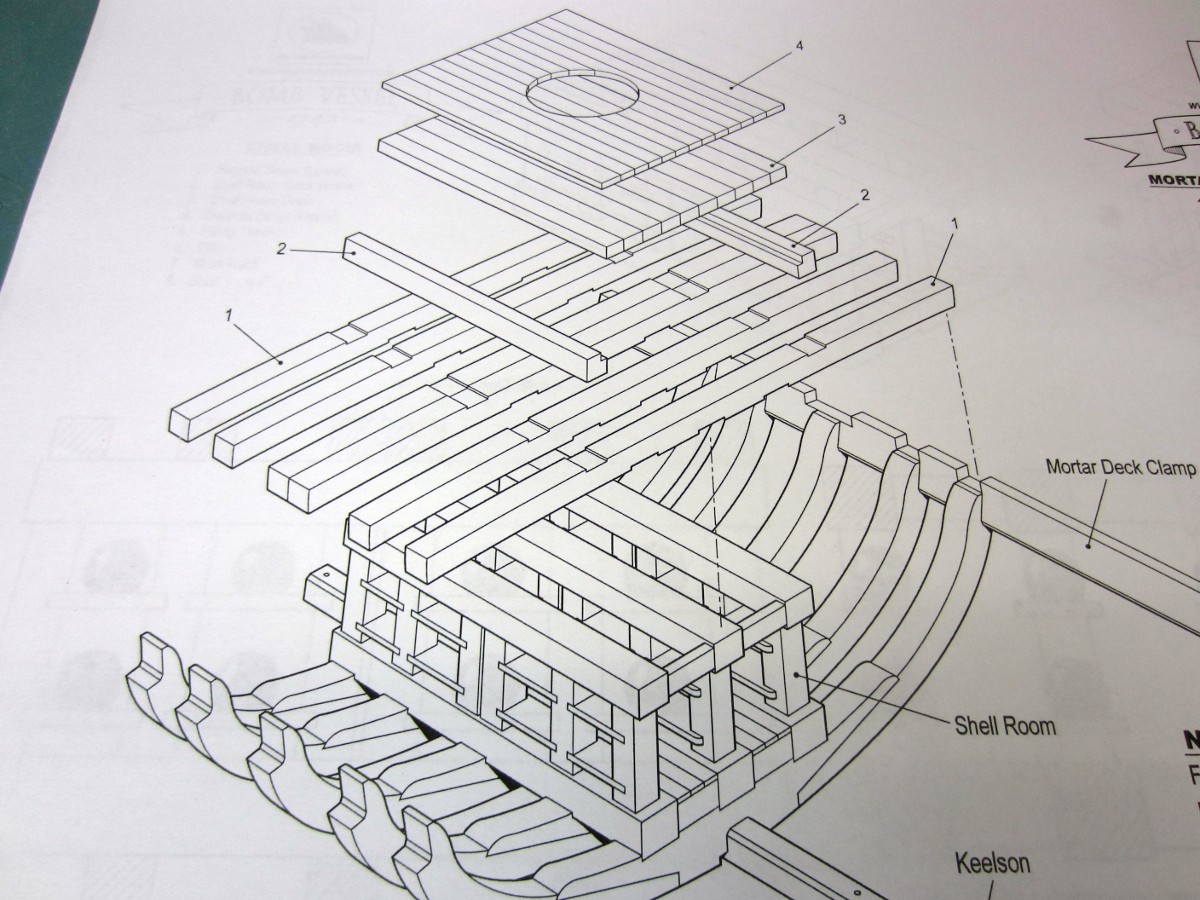
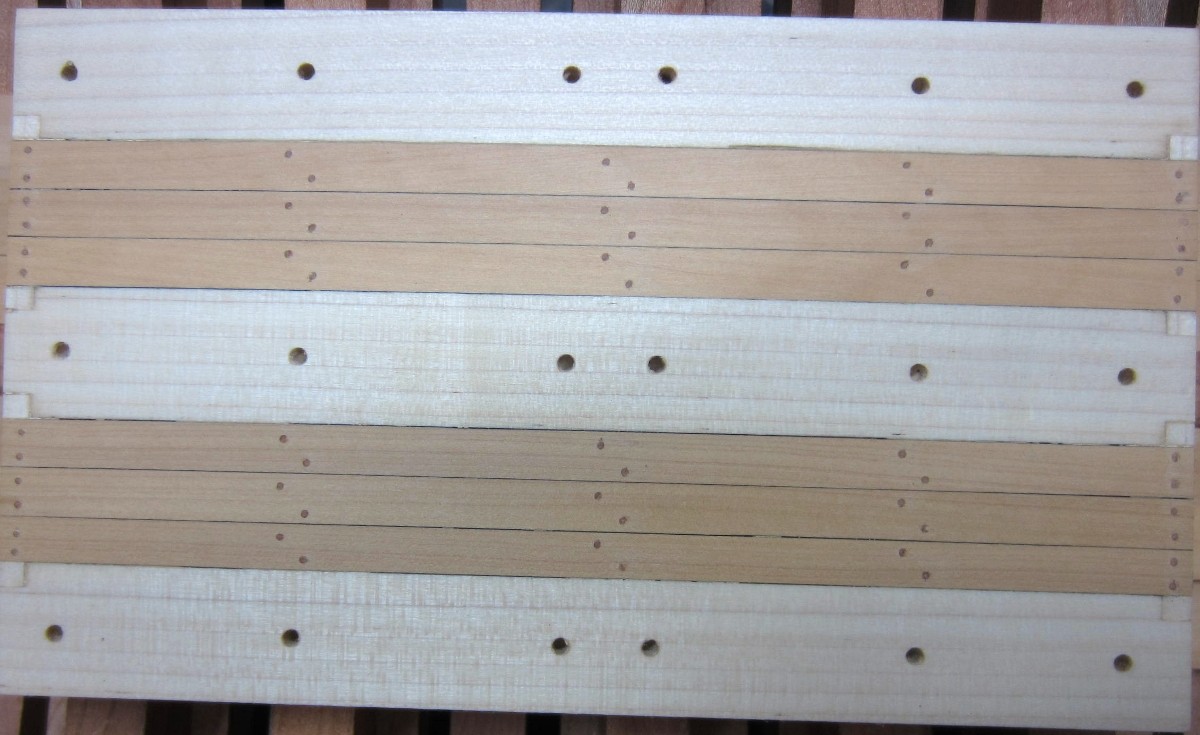
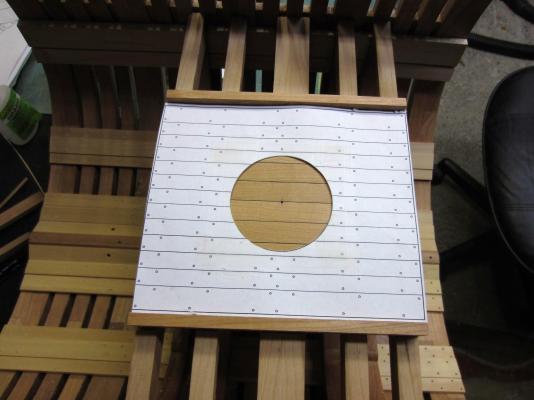
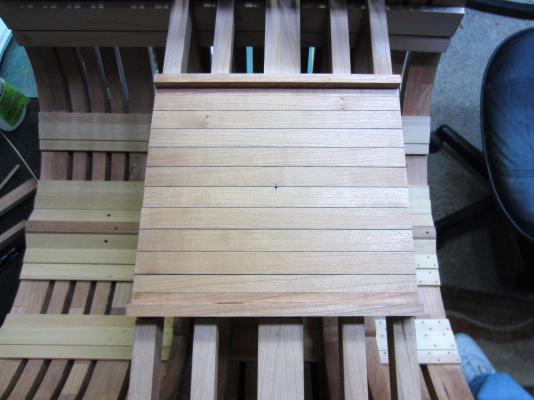
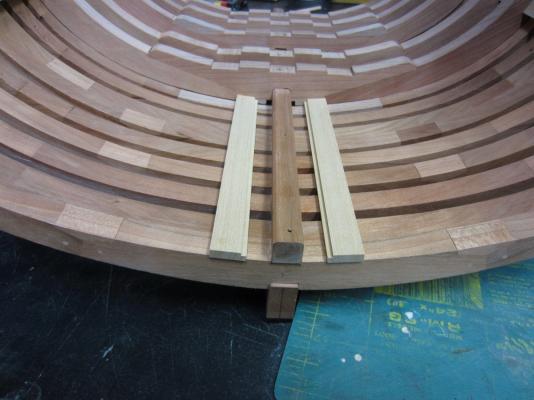
 Thanks Michael and welcome aboard. I’ve cut and fit the mortar pit boundary timbers. Between these two timbers will be a first row of decking. It is cut from boxwood and the calking is simulated using black construction paper. Doing the pencil on the edges just looked too thin at this scale. Here I’ve cut out the plans showing the second layer of planking that will go right over the top of the first. You will notice that a nice circle is formed in the middle for the mortar. Seeing I don’t have a drill bit that big it should be interesting getting the hole round. Well this will be the last post for awhile. We are off to the land of oranges, alligators and a talking mouse with the grand kids. Should be interesting to see how steady my hand is when we get back. You all be good now while I’m away! No slacking off or rum rations will be cut!
- 421 replies
-
- 12
-

-
- granado
- bomb ketch
- (and 2 more)
-
Hey Chris I hope you gave a great Birthday!
-
Oh my thank you all. You are too kind.
-
Seeing some more of your fine work is a great way to start my day! Thanks.
- 1,477 replies
-
- 1
-
-
- essex
- model shipways
- (and 1 more)
-
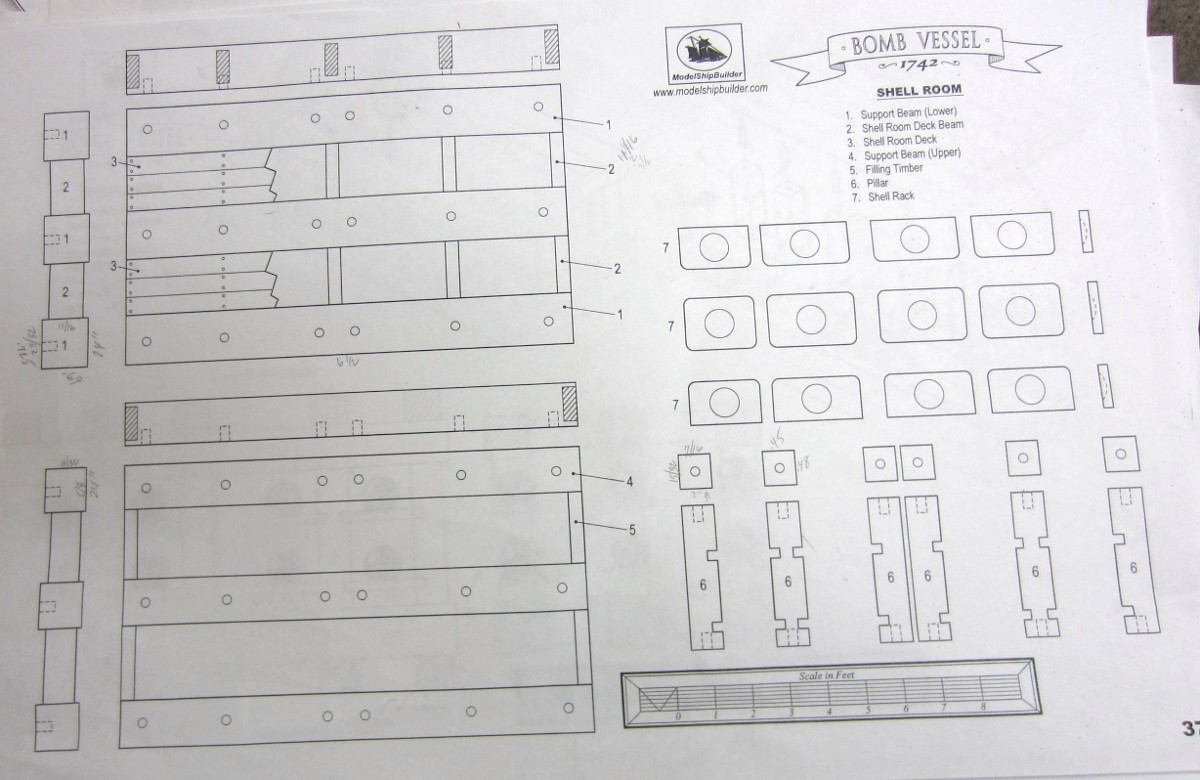
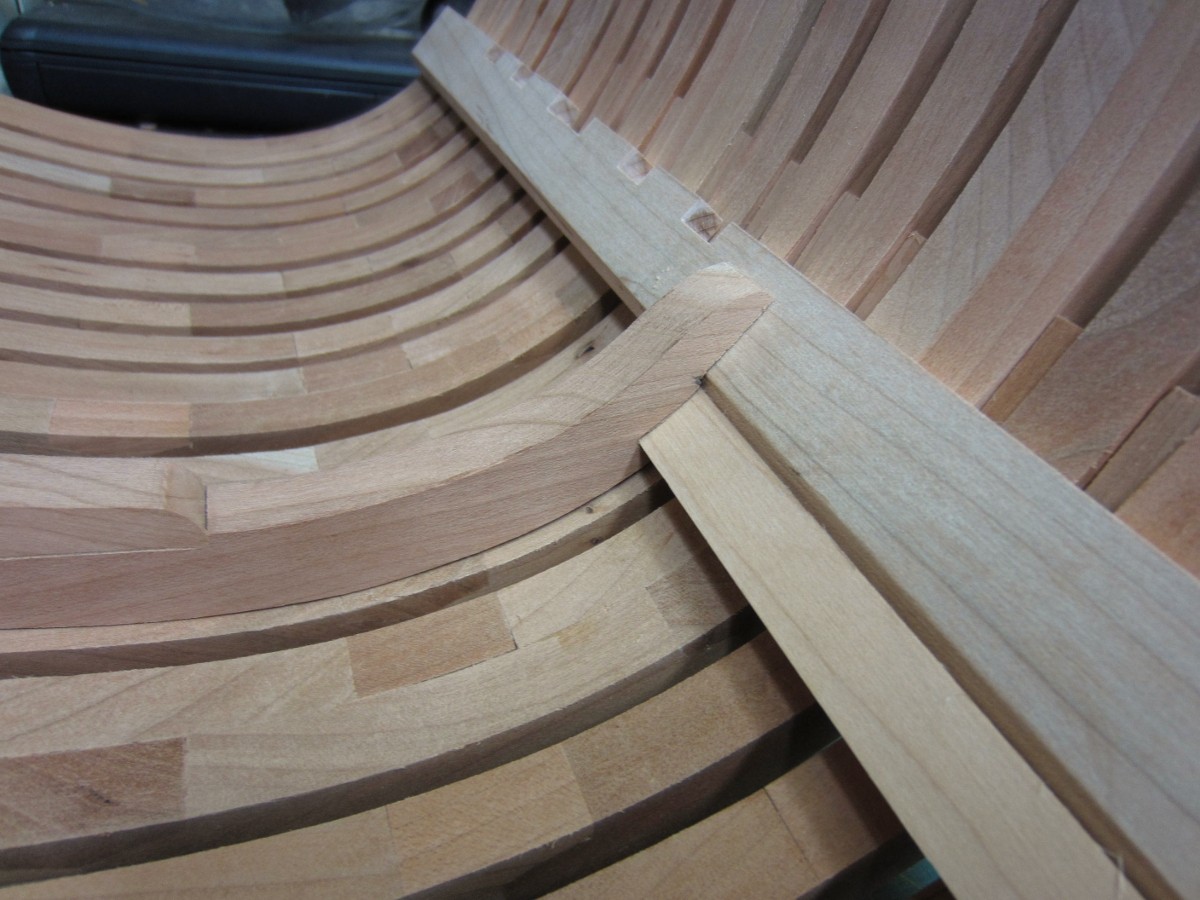
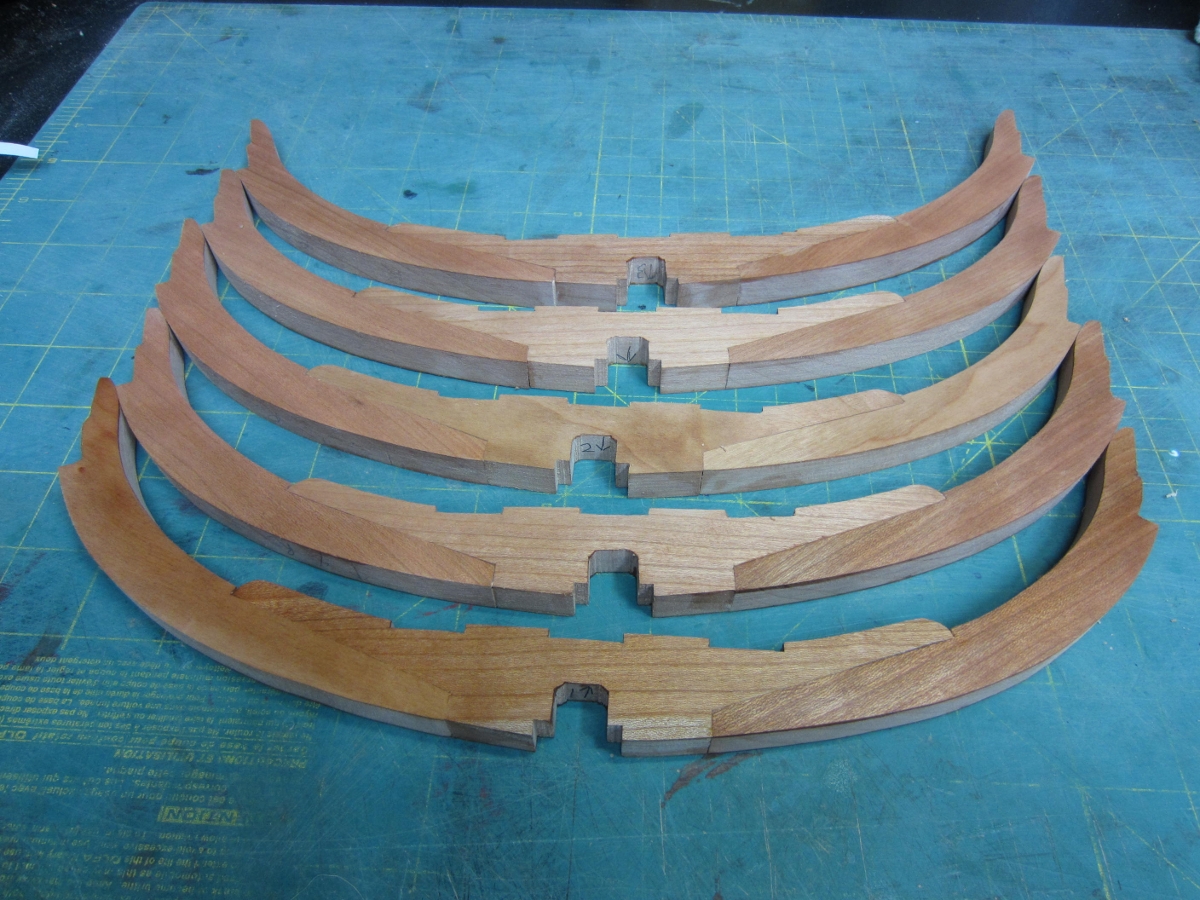
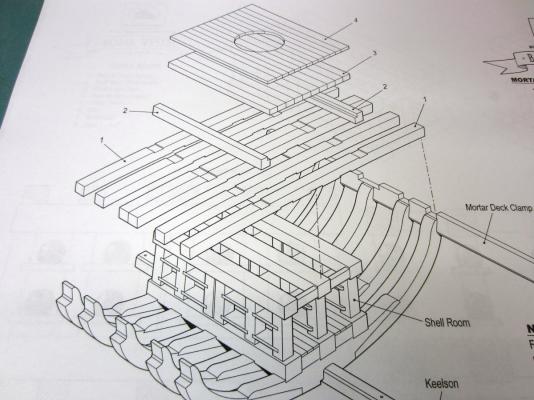
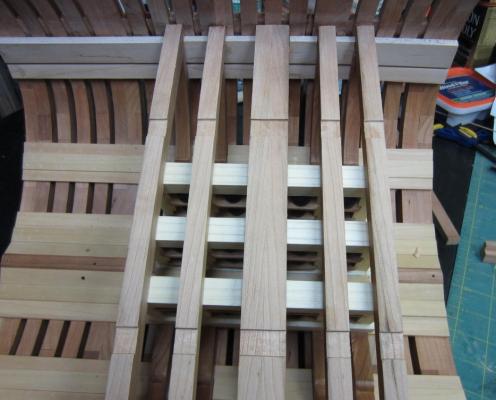
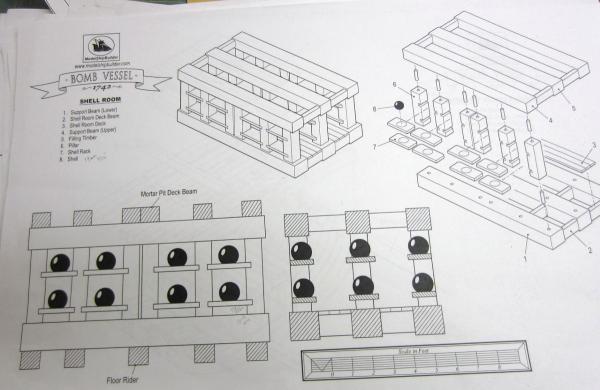
I’ve assembled the two other rows for the shell room, glued the cannonballs in place and set all three rows in place. I then added the top beams just like the bottom beams. Here you see the plans for the mortar pit beams and planking as well as the beams cut out as per the plans. The mortar pit beams have been cut and test fit into place on top of the shell room. The bottom of each beam is notched to fit over the top beams of the room. Here you see the notches cut into the tops of the mortar pit beam and ready to accept the mortar pit boundary timber. Thanks for stopping by!


- 421 replies
-
- 12
-
-

-
- granado
- bomb ketch
- (and 2 more)
-
Thanks Joe, I'll keep the picture coming, that is when I remember to take them! Hi Grant, I am too brief sometimes. Sorry about that. I took a 3/8" (9.5mm) drill and used it to make a small depression in the center of the shelf. I then used 100 grit sandpaper on the tip of my finger and just kept turning it in the depression until I had it the way I wanted it. I then finished it with some 220 to smooth it out. Kinda like sticking you finger in your ear and twisting back and forth when it itches!
- 421 replies
-
- 1
-
-
- granado
- bomb ketch
- (and 2 more)
-
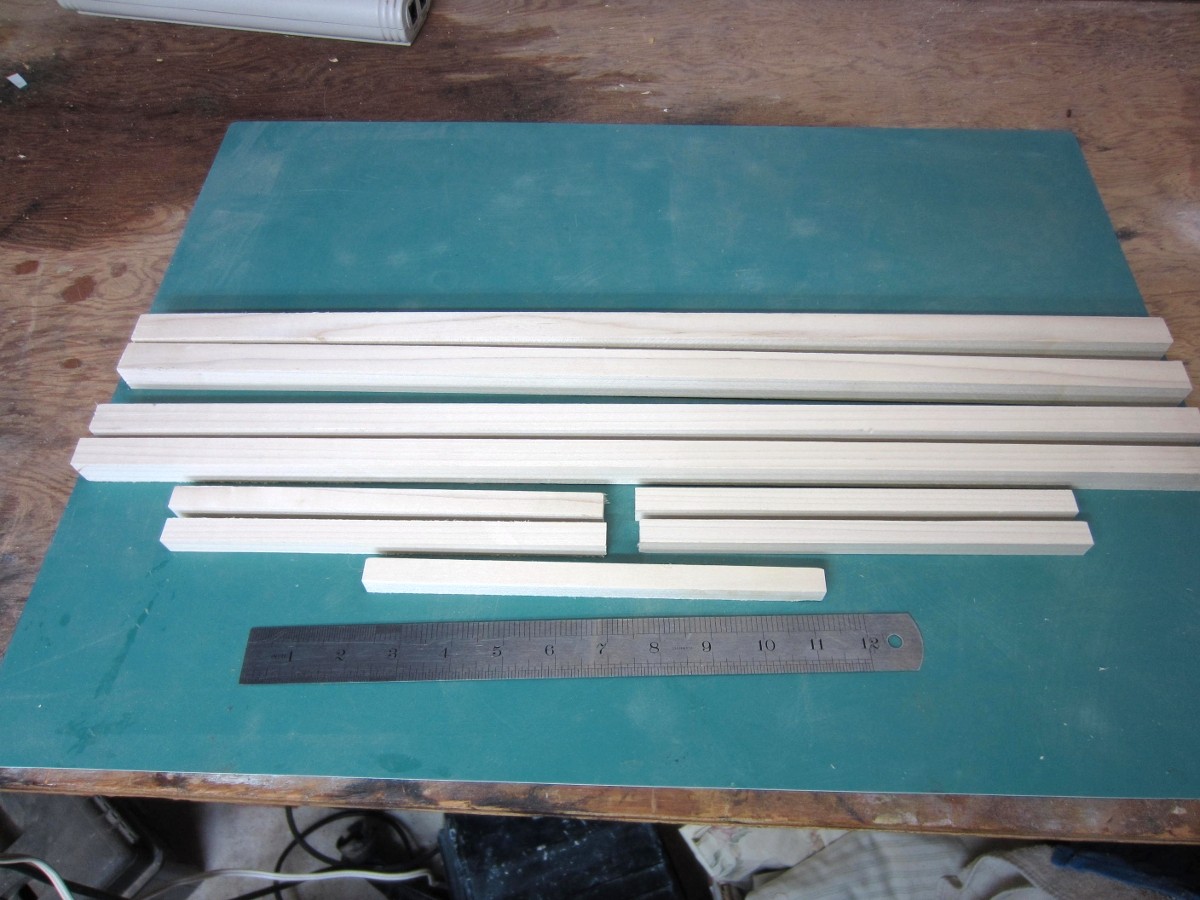
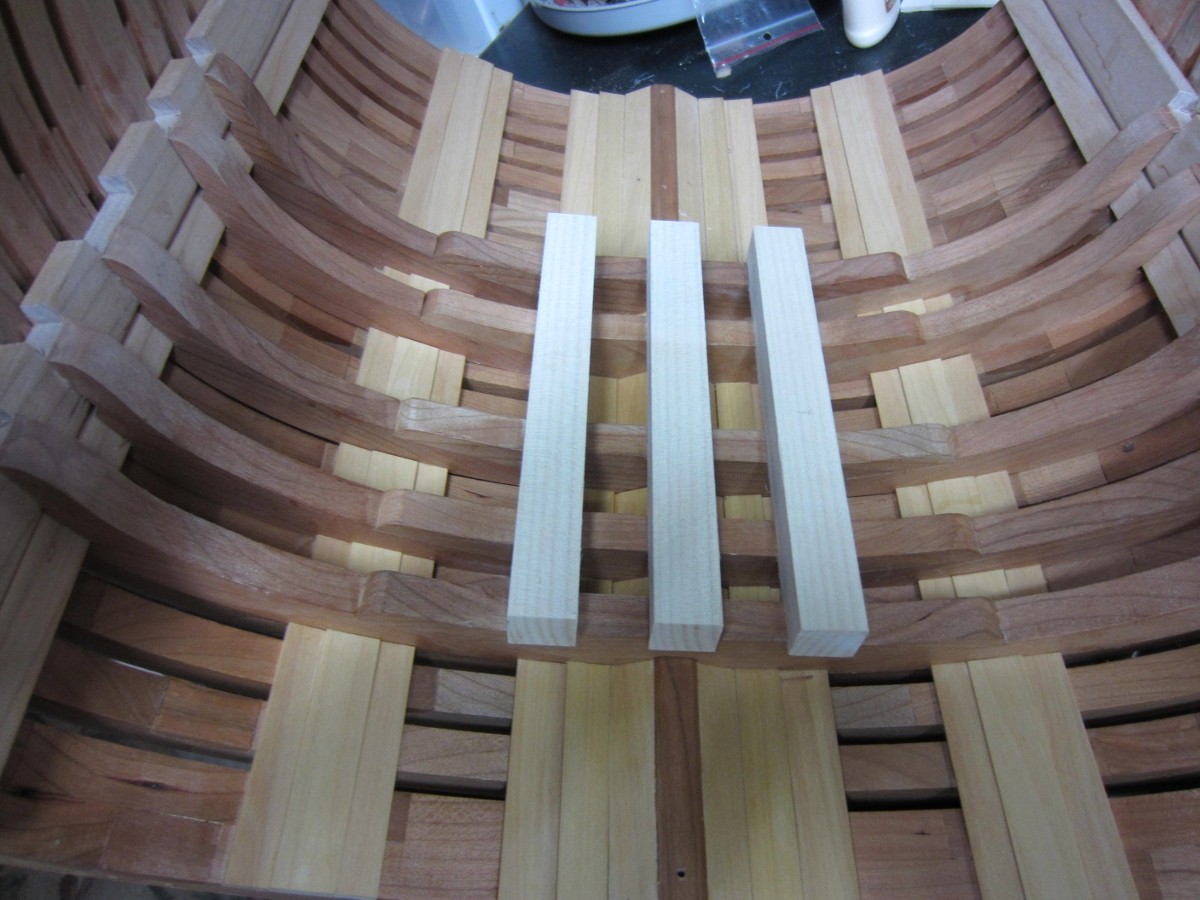
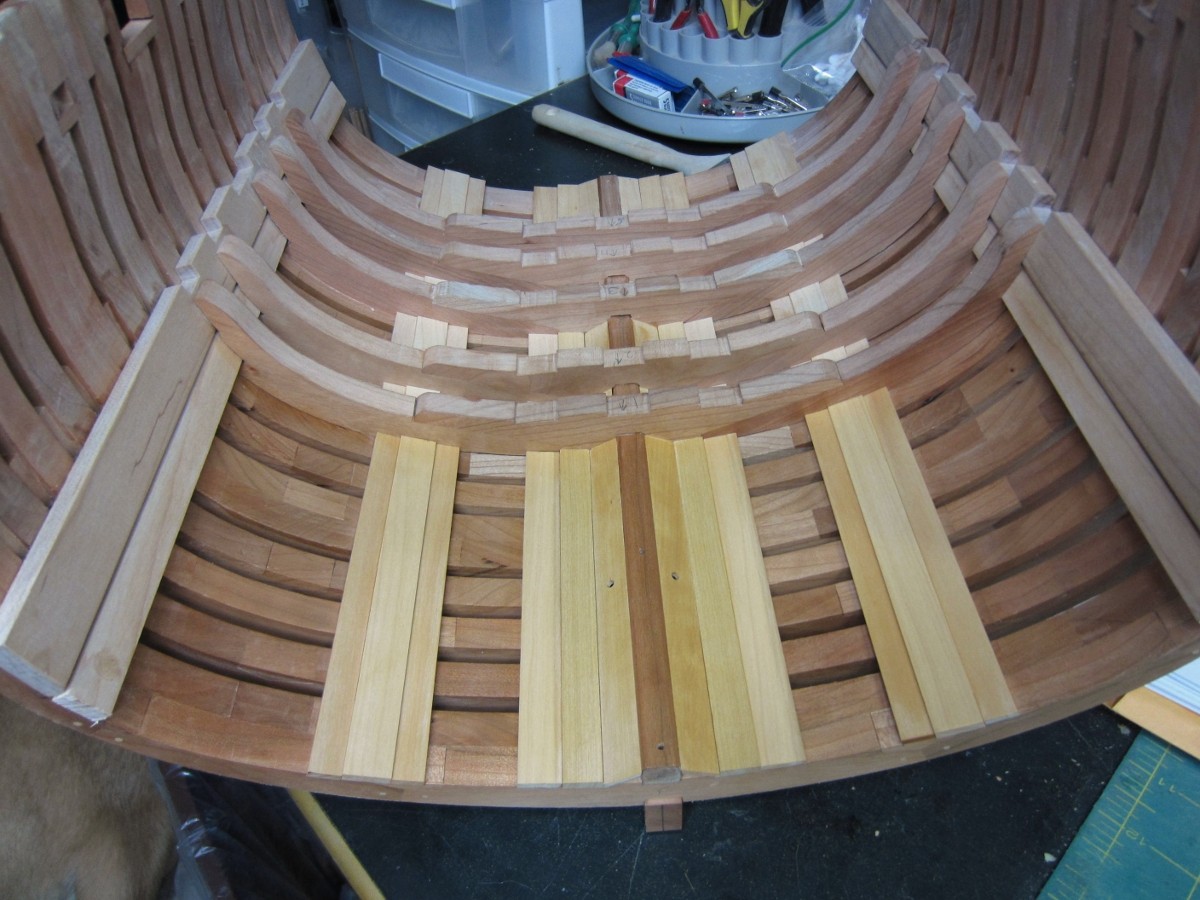
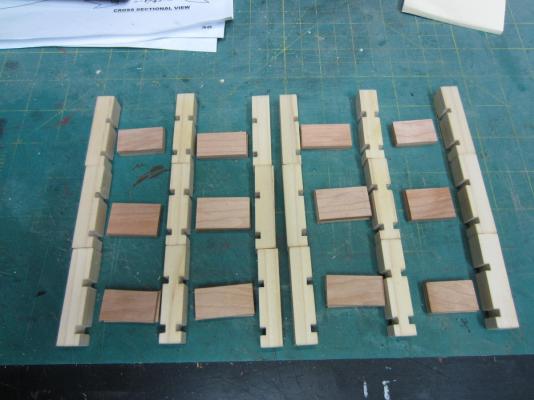
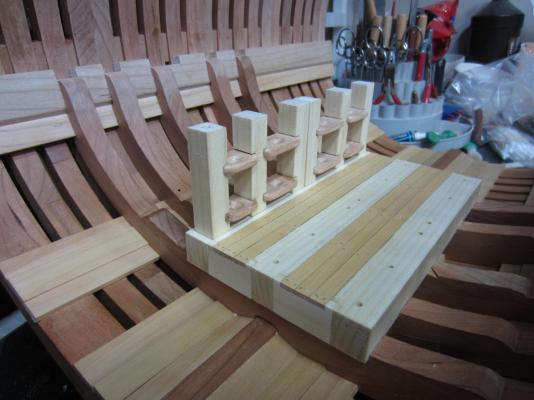
Thanks Chris, It's great to hear from you. The cutting out of the parts and the assembling of the shell room is progressing. The shelves are made from cherry and the posts from poplar. Each shelf will have a depression sanded into it for the mortar shell to set in. Here you can see one row set in place for a test fit.
- 421 replies
-
- 15
-
-
- granado
- bomb ketch
- (and 2 more)
-
Thanks Bob and Joe, It's sure different than anything else I've done and a nice change. It will be interesting to weight it when I'm all done as its getting heavy already.
-
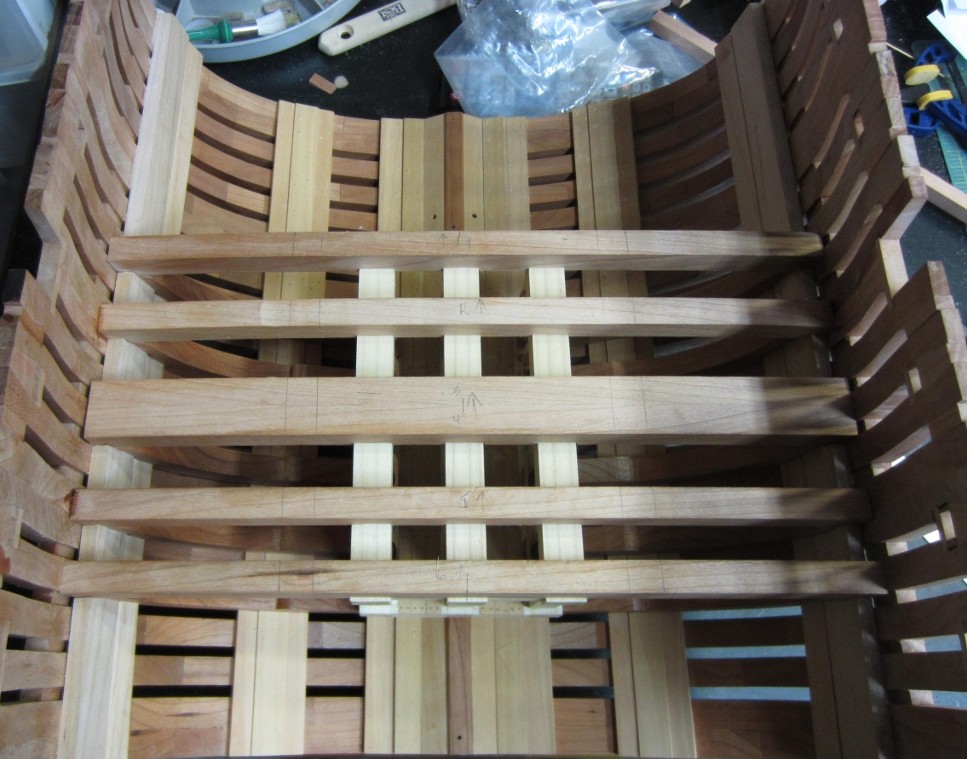
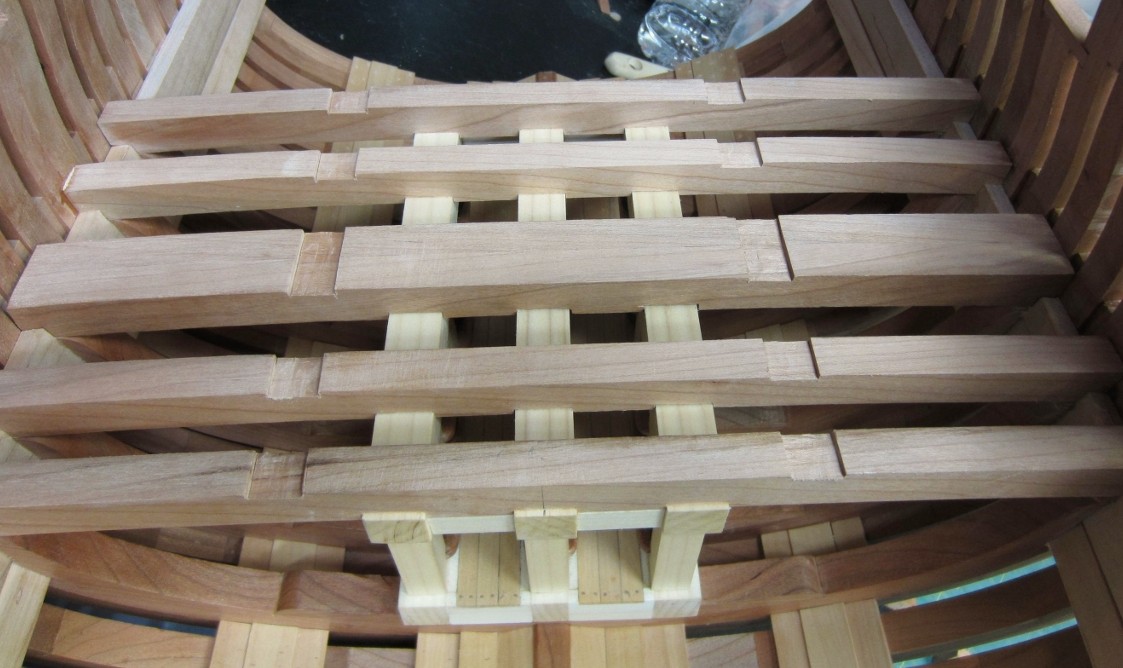
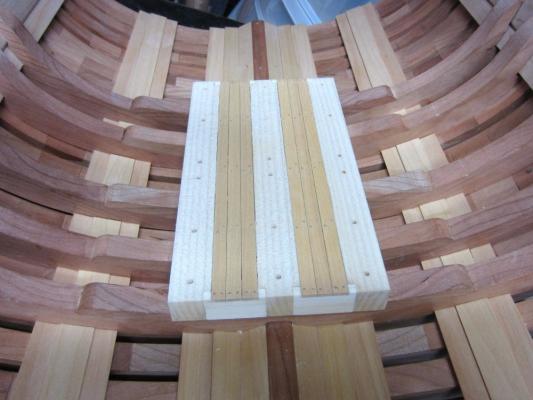
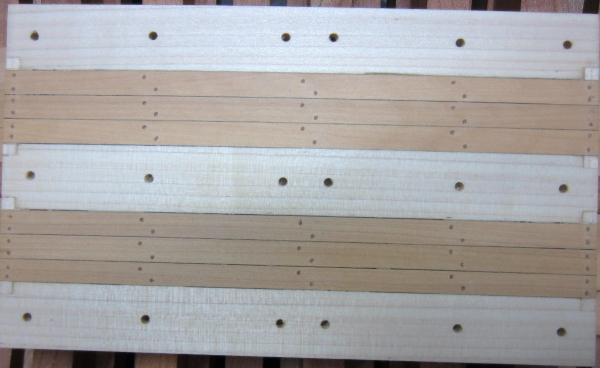
Now that the floor riders are in I’ve started the floor for the shell room. All of the beams are cut from some white poplar I had kicking around. The beams and posts will be sealed with a natural stain prior to the application of wipe on poly. Here are the shell room floor beams test fit. And the completed floor with the beams and walkways which are made with boxwood.


- 421 replies
-
- 8
-
-
- granado
- bomb ketch
- (and 2 more)
-
Ouch, That really sucks. Well I guess you have something to look forward to doing during your visits.
-
Hi Augie, You’re moving along nicely. The planking of most of the hull is straight forward. Just remember to pre bend the planks at the bow and stern like Chuck describes and you won’t have any problems. Might take a looooong time but no problems. Adrieke, The practicum it around 170 pages.
- 2,191 replies
-
- 1
-
-
- confederacy
- Model Shipways
- (and 1 more)
-
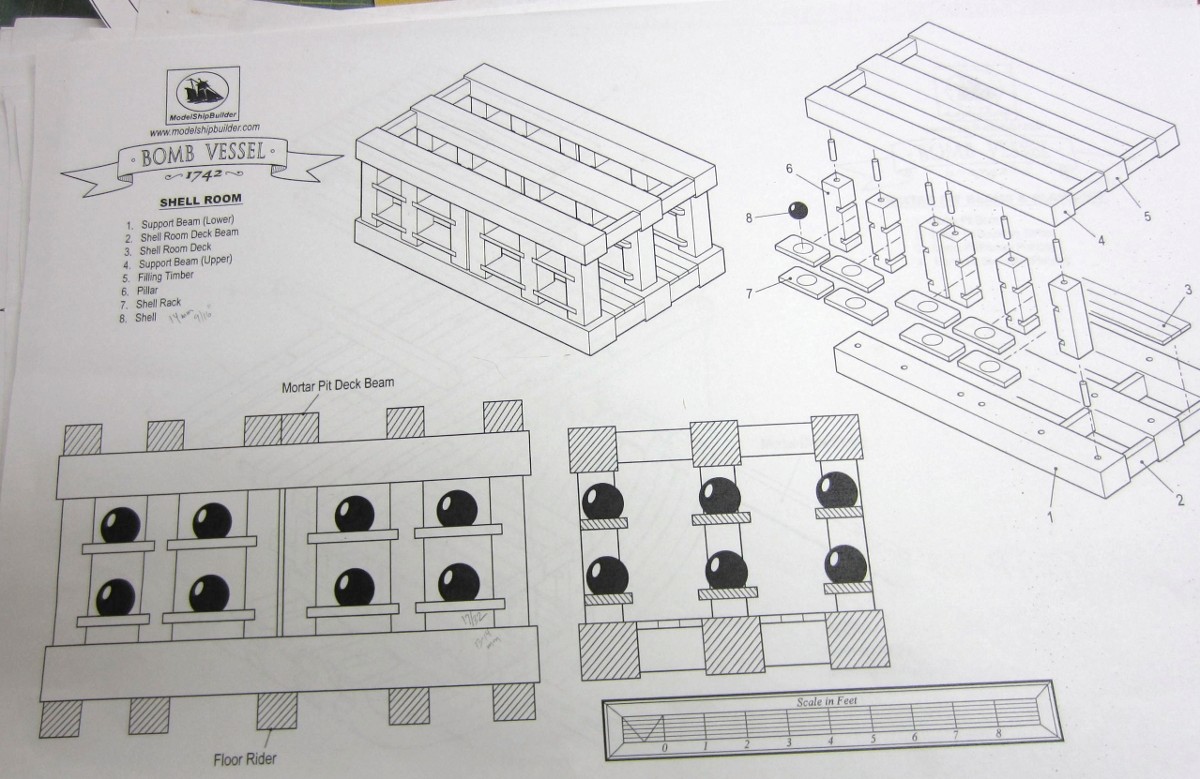
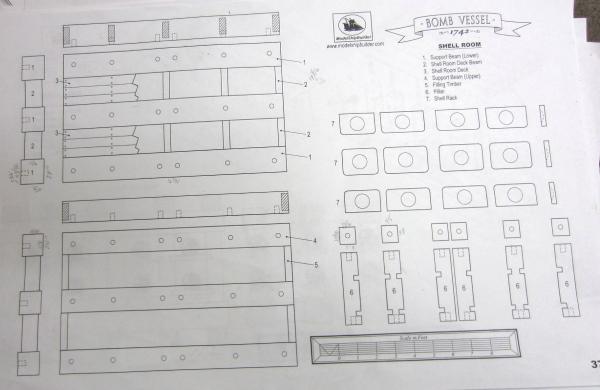
The inboard hull planking below the motor deck clap has been installed. I still have to drill it for the treenails and then it’s on to building the home for the cannon balls. Here are the plans showing the assembly and it’s placement.
- 421 replies
-
- 8
-
-
- granado
- bomb ketch
- (and 2 more)
-
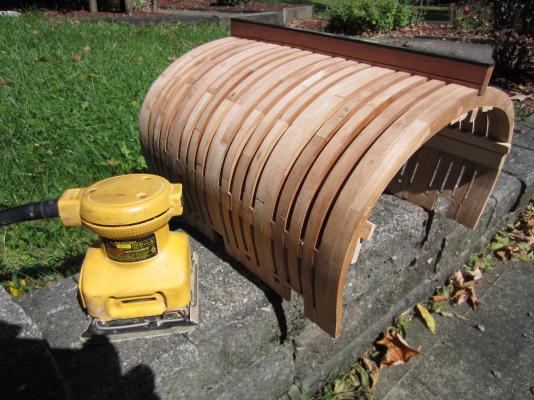
Hi Ben, Yeah I thought it was kinda neat. I had set the sander next to it while getting more paper then thought it was a good reference to the size. Thanks Mark, I guess “different” would be the correct word. The size throws off what we are used to doing. When doing joints a little flick of a chisel or knife would fix a bad fit. Here a little off requires the removal of a ½” wide piece of wood! On the plus side there is a lot more to hang onto so the tips of my fingers have suffered less.
- 421 replies
-
- 1
-
-
- granado
- bomb ketch
- (and 2 more)
-
Well said Remco and your work is still an inspiration.
- 1,207 replies
-
- 3
-
-
- sloop
- kingfisher
- (and 1 more)
-
Miniature Spindle Sander
Rustyj replied to ChrisLBren's topic in Modeling tools and Workshop Equipment
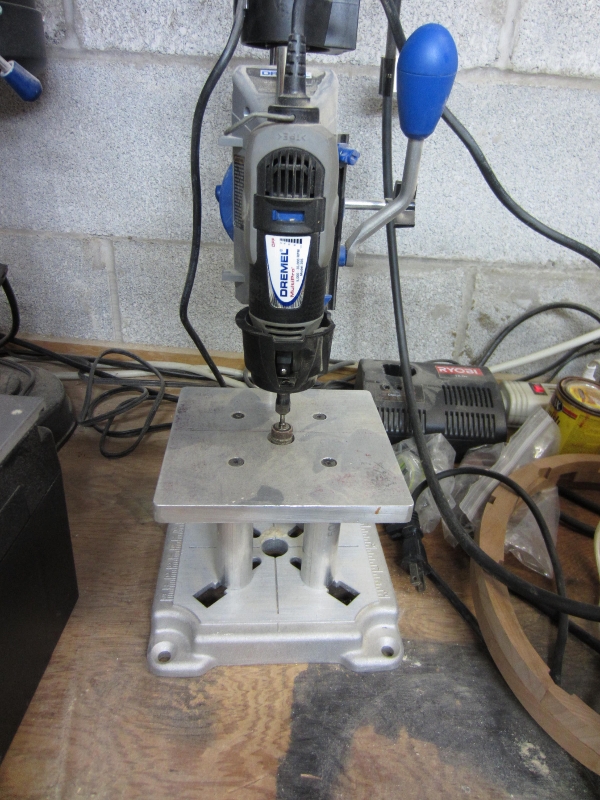
Hi Chris, I've used a dremel in the dremel drill press for many a year and has worked well for small items. My brother made a raised bed for me but it is not necessary. It is an option for you until Jim Byrnes builds one.
-
Hi Augie, Just got caught up and you are doing a great job. Just wonderful. I too am eagerly awaiting your planking but I am also very sympathetic too! Don’t fret it though. It may be a large task but your methodical approach and attention to detail will serve you well!
- 2,191 replies
-
- 2
-
-
- confederacy
- Model Shipways
- (and 1 more)
-
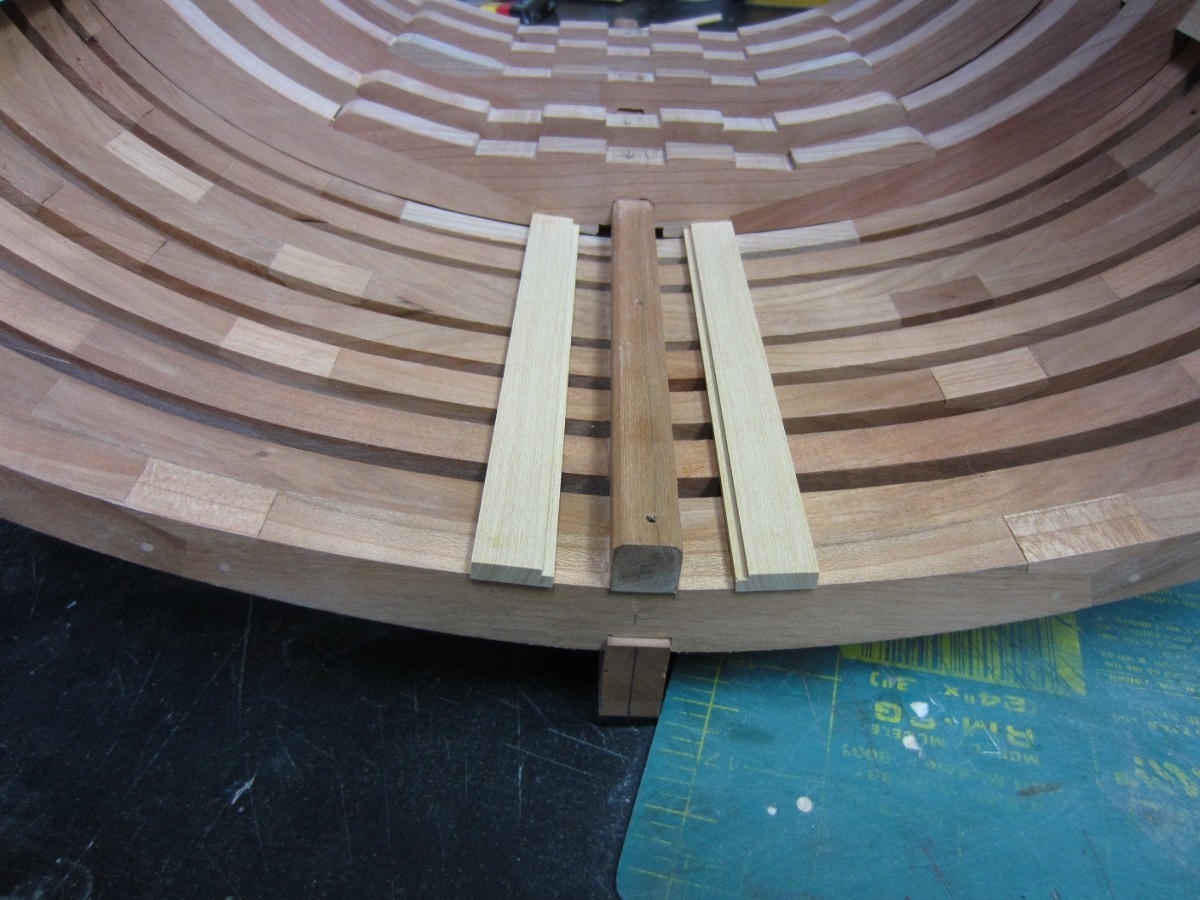
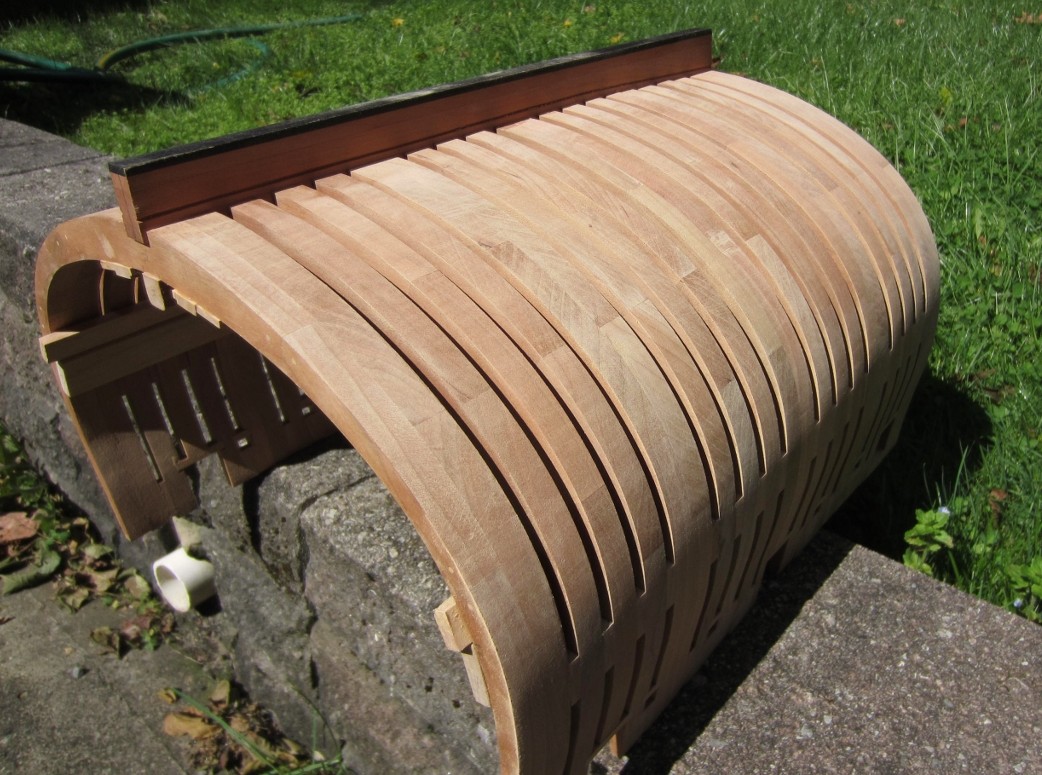
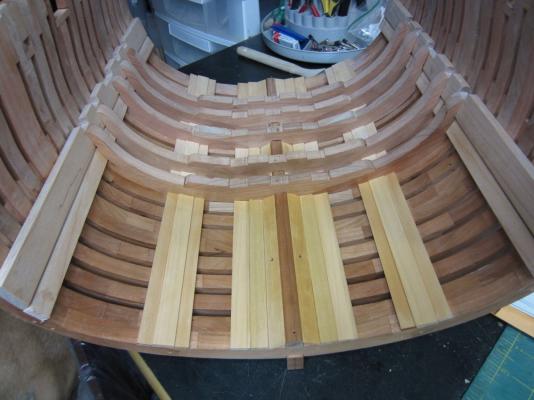
Hi Ben, Thanks for your continued support. I’ve done a couple of admiralty style POF’s already and I’m not sure when I will do a full one again. So many things to build. Well the floor riders have been shaped and installed along with the motor deck clamps. I’ve also placed the first of the inboard planking between the keel and the deck clamps. The channel has been cut for the limber boards too. Seeing that the clamps and riders are installed the framing is stable enough to fair the outer hull now. So I took her outside and seeing she is so big I was able to use a palm sander I normally use on full size work to rough her in. Here you see one side has been done with 80 grit. I’ll work out to 220 grit for now.


- 421 replies
-
- 13
-
-
- granado
- bomb ketch
- (and 2 more)
-
Hi Chris, How could they not like it? Besides I think large portion of MSW members would send along some "encouragement" if they didn't! Have a safe trip and I'm still saving my money for when they decide to produce it.
-
Thanks Bob, very appreciated.
-
I agree! Very nice.
-
Thanks Ryland!
-
Thanks Greg and Grant. Greg I owe it all to you from when you showed how to use the disk sander and chisels on the Echo Cross Section!
-
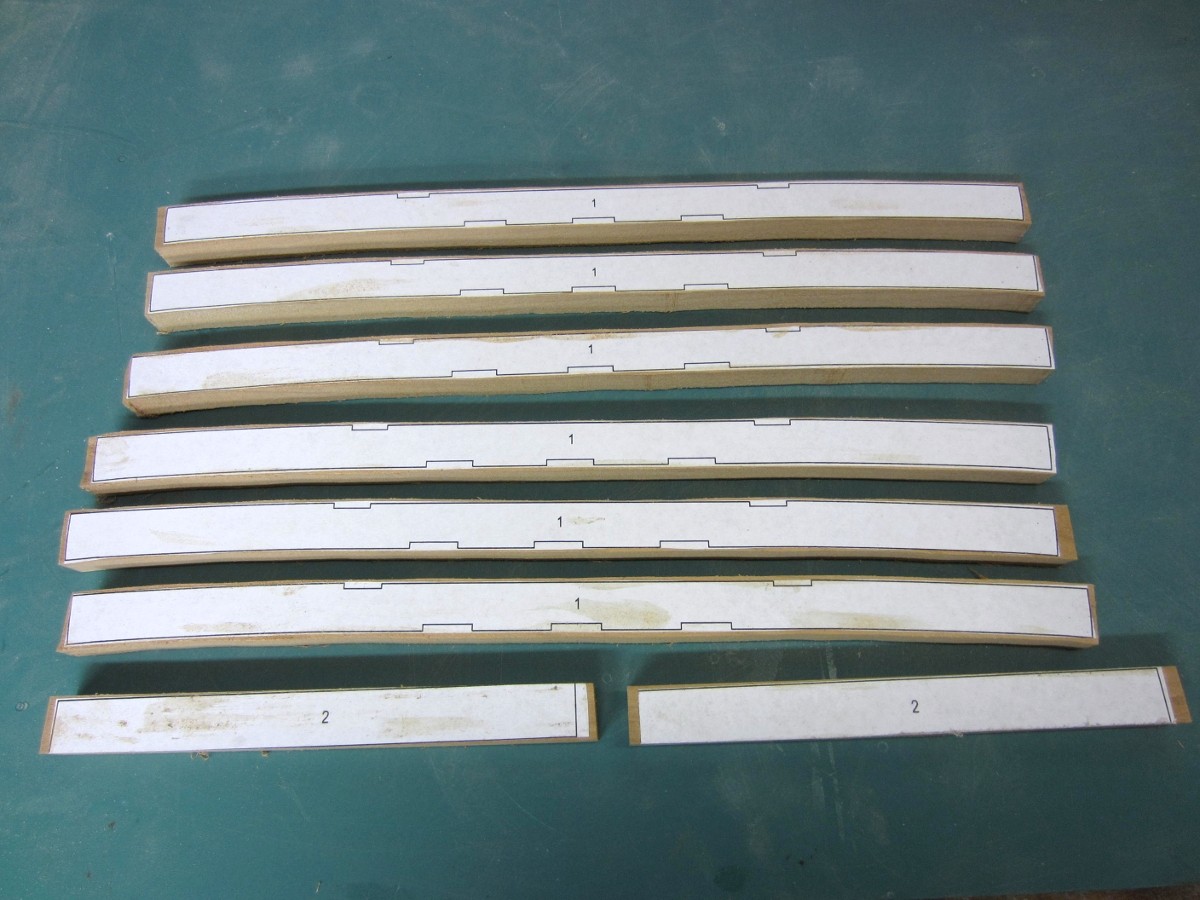
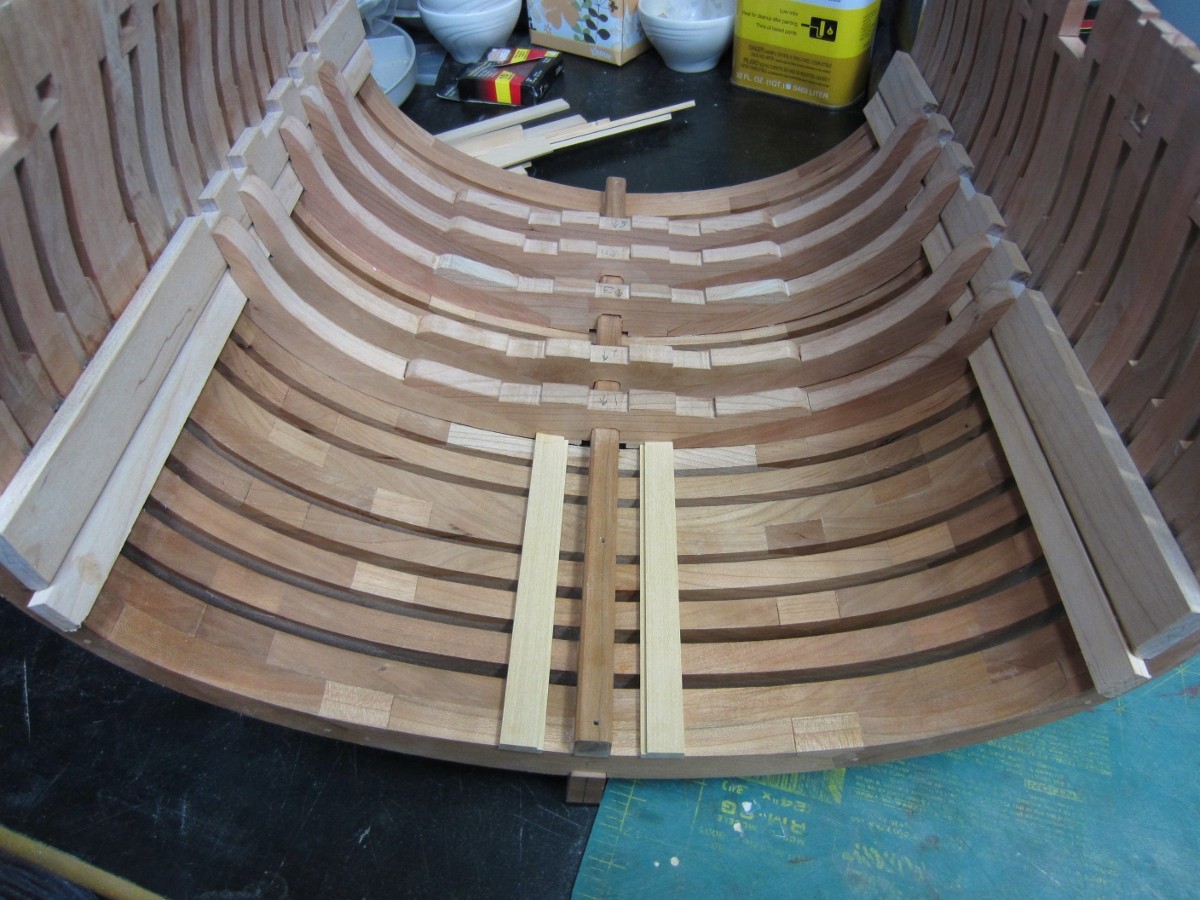
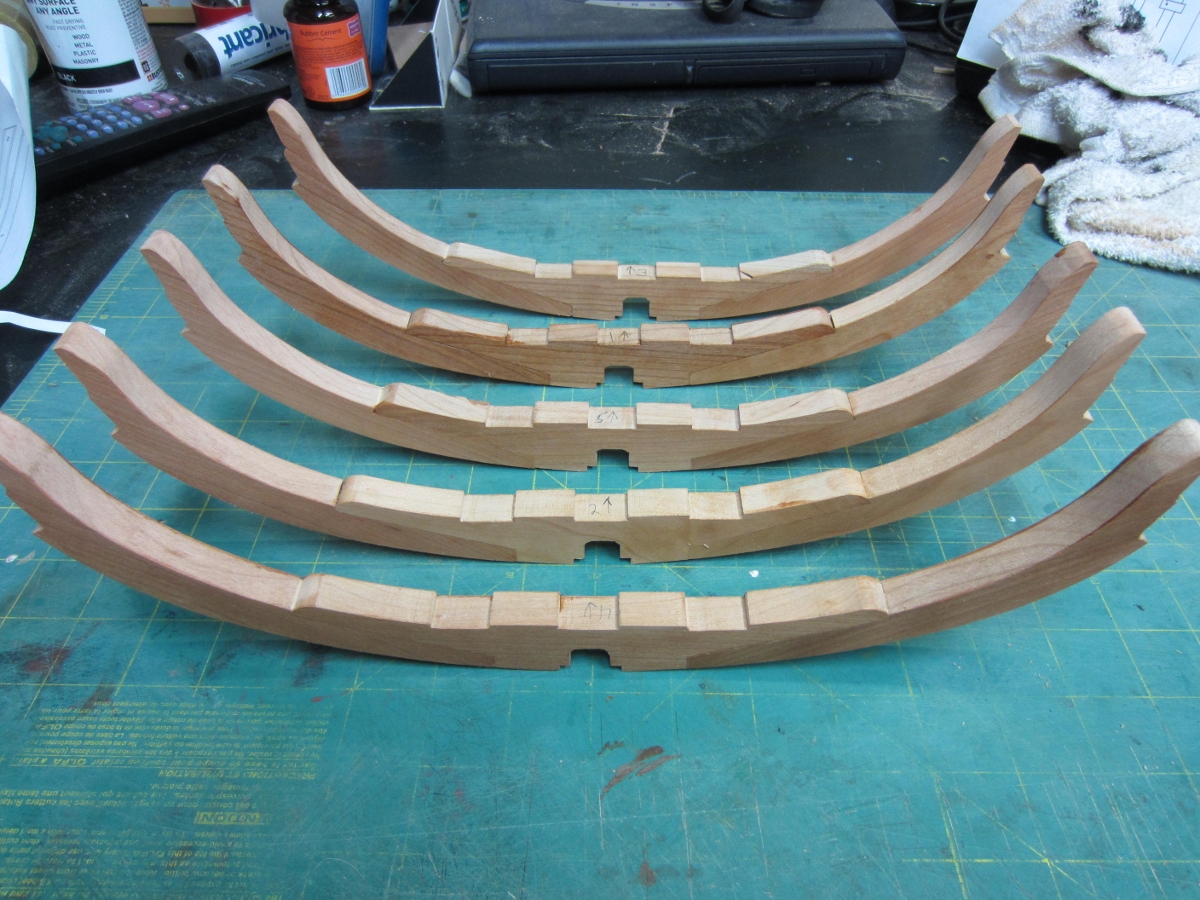
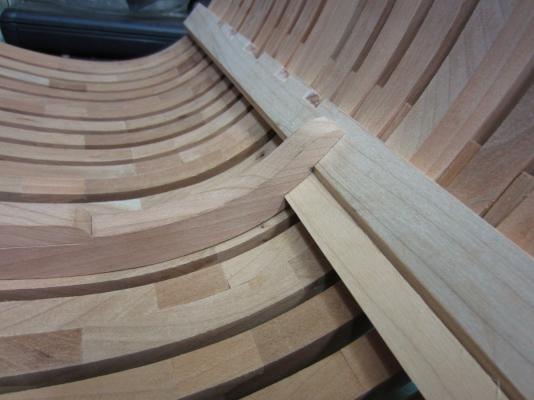
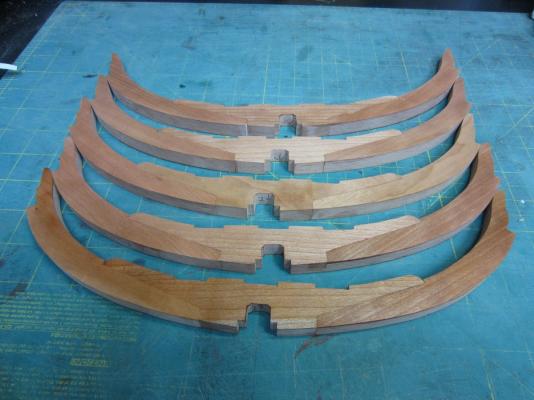
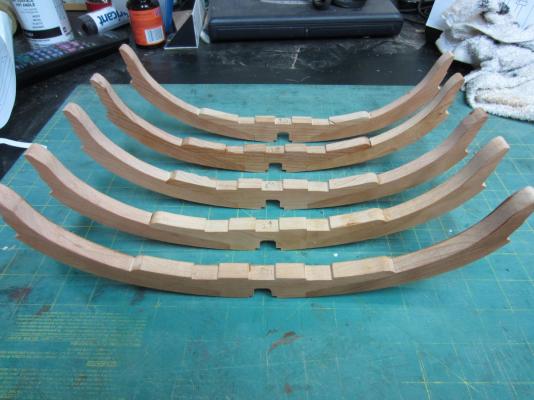
Hi Ben and thanks. It was good to see you back at the echo cross section but no nothing from me on the echo right now. That’s a story I’ll have to post there sometime soon. Here are all of the floor riders constructed. Then I took and numbered each one as they would be unique as I'm sanding them to fit both the hull frames and the mortar deck clamp. Once they are finished and in place it will time to put the limited inboard hull planking.
- 421 replies
-
- 9
-
-
- granado
- bomb ketch
- (and 2 more)
-
Hi John. Nice choice and it will be a lot of fun following along.
-
ebonizing boxwood
Rustyj replied to Kurt Johnson's topic in Painting, finishing and weathering products and techniques
I have not used the dye ...yet.... but I have used swiss pear and for me it has similar bending characteristics as boxwood.