


Jasseji
-
Posts
604 -
Joined
-
Last visited
Content Type
Profiles
Forums
Gallery
Events
Posts posted by Jasseji
-
-
-
10 hours ago, Vane said:
We have all heard about the Chuck method for planking.... it was abit to hard for me so I decided to come up with a more simple version... I give u the Vane method... PM me if u want a lesson. I only charge 1$ per hour 😛
Well, i did the same on my LN below the Waterline, only i upped the lazyness factor by using 2 Layers of 0.5mm thick strips instead of one layer 1mm thick.
It wont be seen, focus on the visible stuff, good work
")
-
-
On 8/31/2021 at 6:42 PM, James H said:
Yes, I varnished as I went along.
I part-varnished the deck, excluding an inch along each side. When the cannon were glued down to the bare wood deck, I then infilled those areas in varnish. A little time-consuming, but quite easy. I didn't want to glue anything down to an already varnished deck, for the sake of joint integrity.
and you used Matte Varnish, right ?
-
42 minutes ago, Blue Ensign said:
I think Glenn and me are in accord on this one, Jacek.
Cutting the legs would introduce a weak point, and could subtly affect the angles
Different approach for show deck stuff, but sufficient for the lower deck.
Cheers,
B.E.
rgr, Enjoy the fresh air at the Coast
- mtaylor and Blue Ensign
-
 2
2
-
-
-
14 minutes ago, chris watton said:
Will look at that again for next reprint, but to be honest, the plans for the hull are for the most part just complementary to the manual. The only plan numbers that matter are the mast and rig plans.
I figured that much, just a tiny nit-pick on a Perfect set

- mtaylor, Canute and chris watton
-
3
-
39 minutes ago, myxyzptlyk2003 said:
Hello all
I've reached step 131. Getting ready to attach the upper hull side patterns. Construction to date has been very straightforward with parts fitting very well.
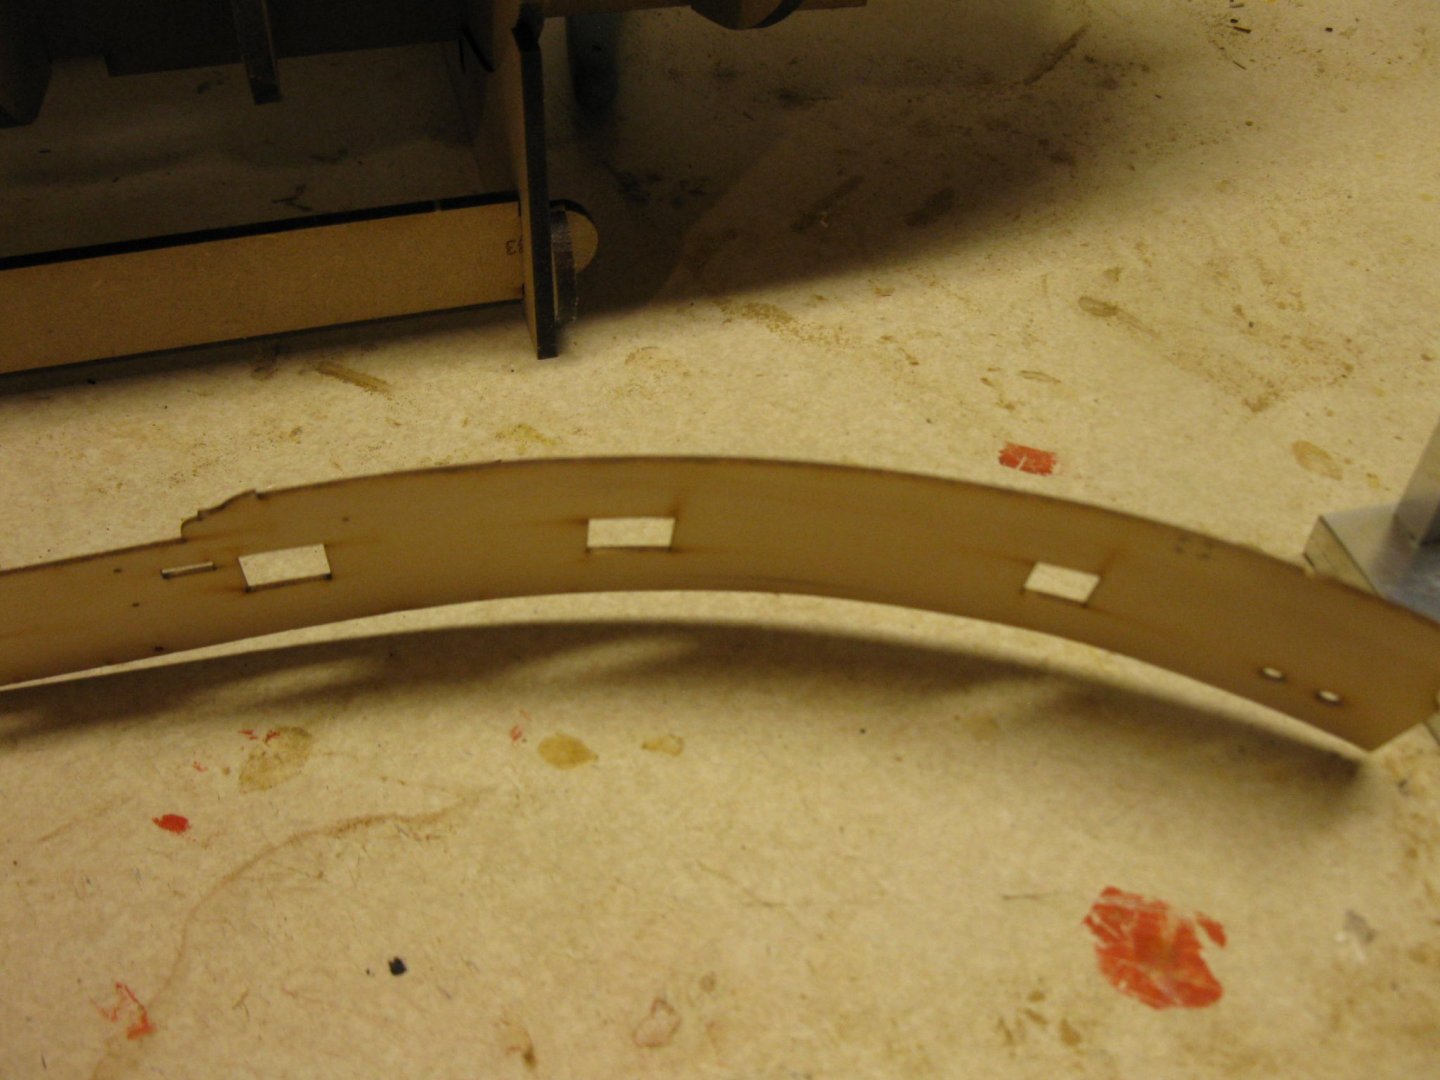
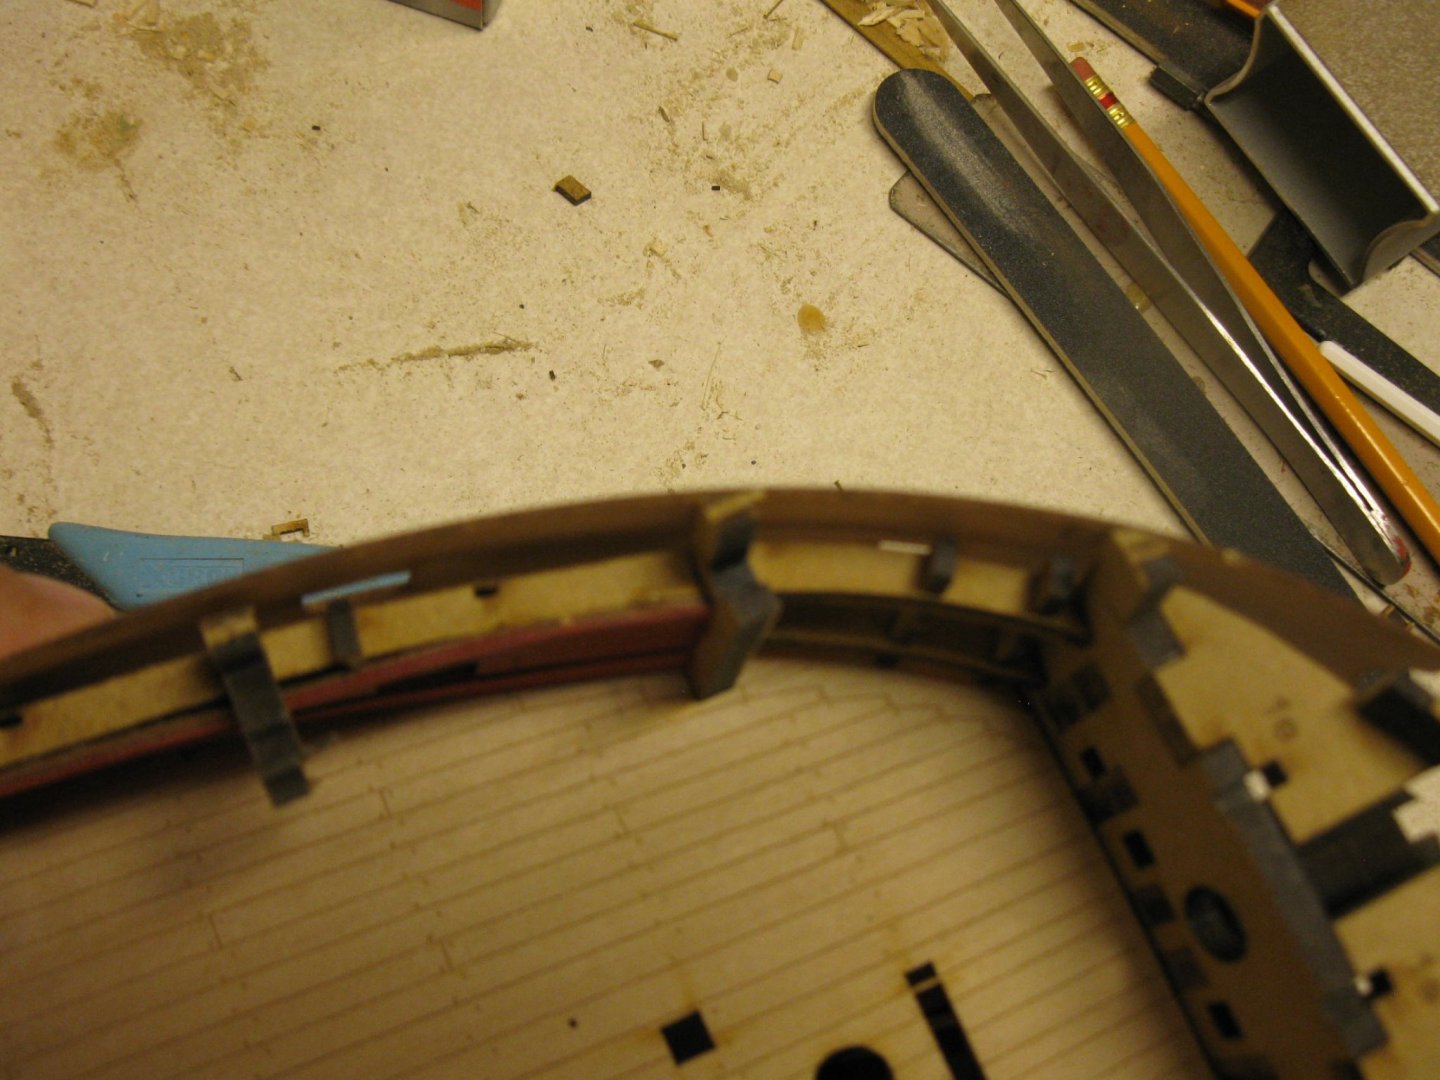
With this step I am deviating a bit from the suggested method. I have this bending tool that will allow you to bend lots of types of wood without soaking in water or heating. (See the pictures. Note the second picture is the partially bent hull side pattern). To date I can bend just about any strip wood that is less than 2mm in thickness. I haven't tried anything thicker. For these side patterns you start at a point where you are just barely able to get the piece to flow through. After the first pass you tighten the upper screws just a bit. Maybe an 1/8th turn and then refeed the piece. After about 10-15 pass throughs the piece is bent perfectly. See the pictures. That last picture has the piece up against the hull without clamps. Fits perfectly.
One word of caution with this device. Don't be in a hurry. If you tighten the screws too much you can cause the wood to break. In general with any plank bending for hulls it should take about 10-15 passthroughs to get the bend you need.
This unit is so nice because you don't have to spend time soaking and drying wood.
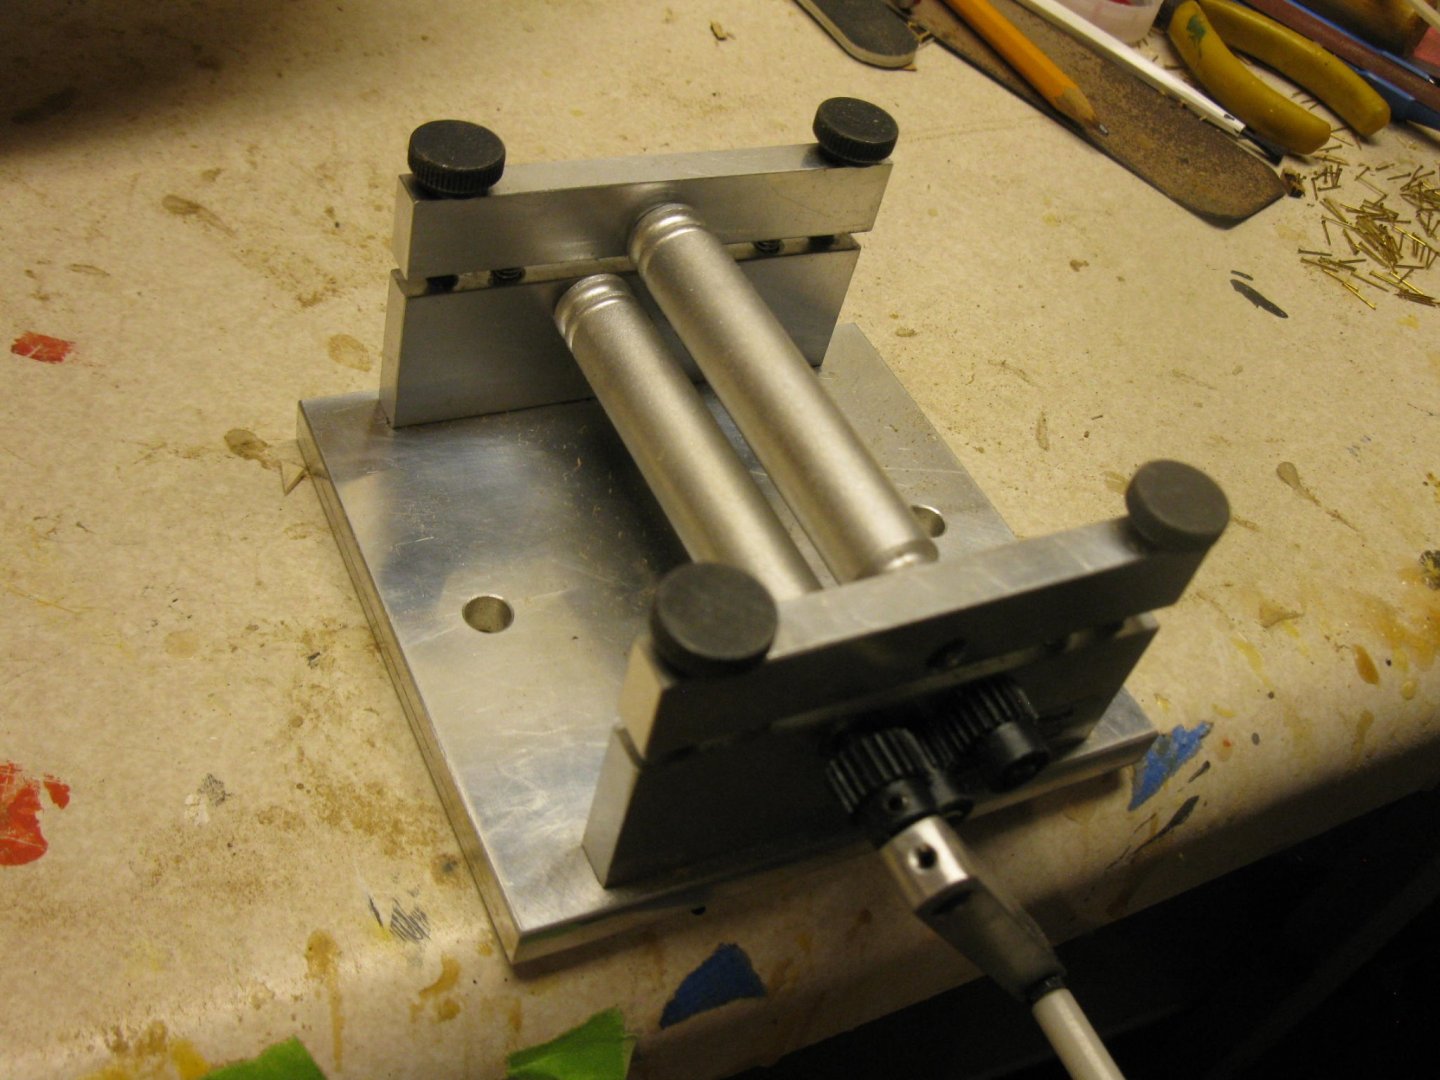
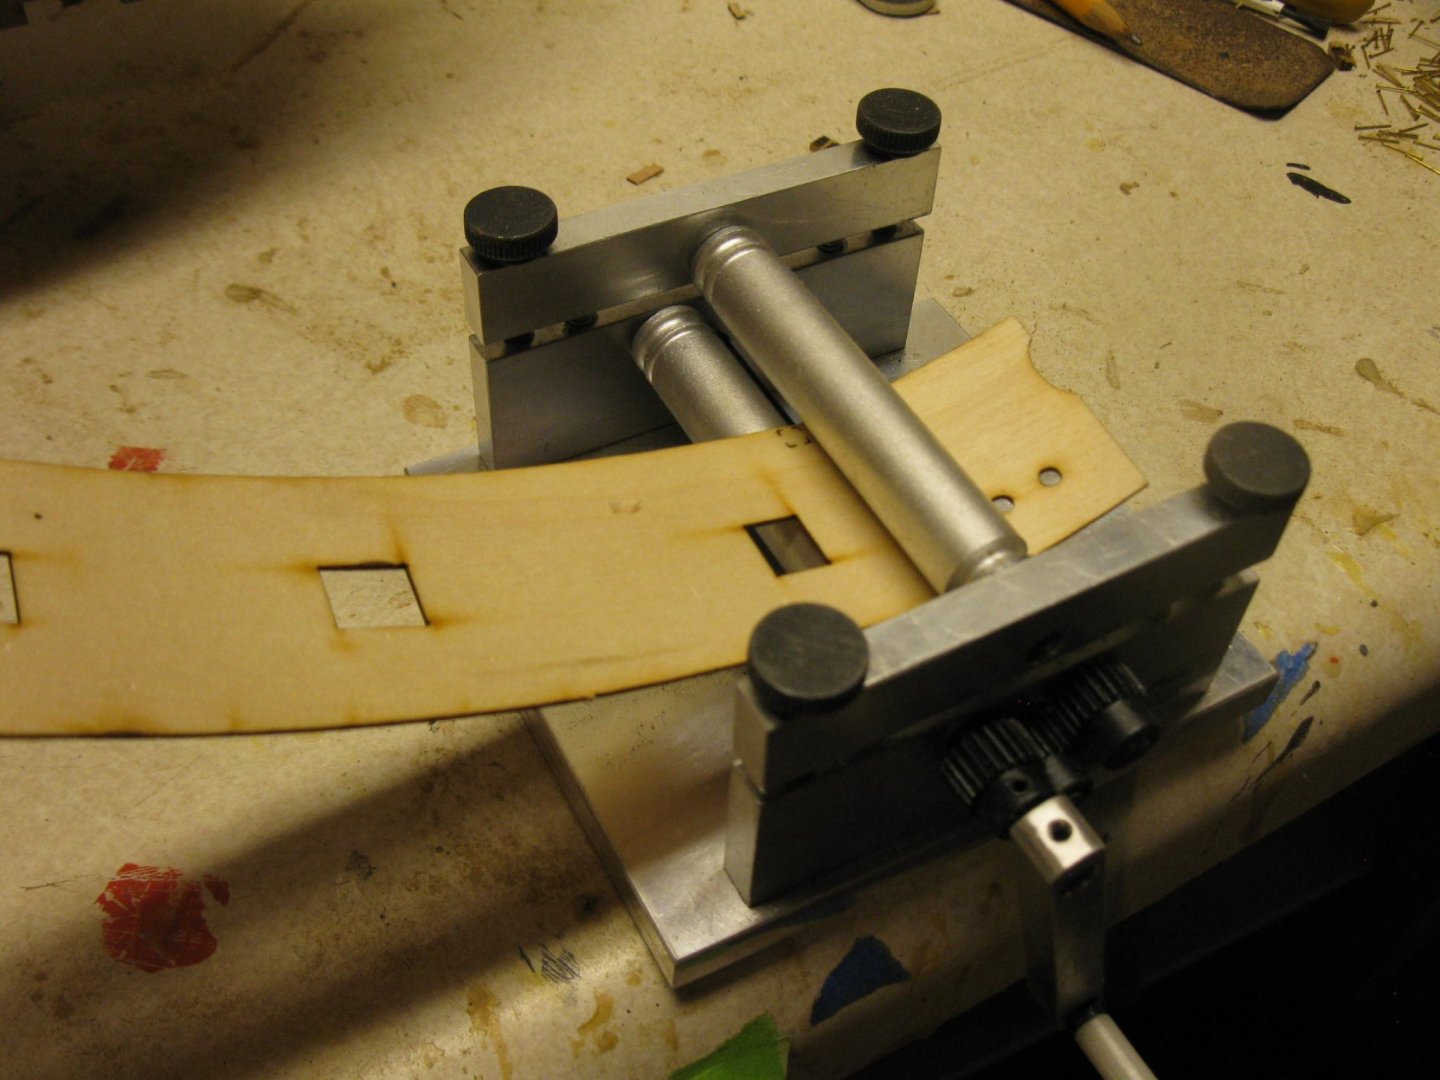
where did you get that bending tool ? any particular name for it ?
-
Uh, i am looking through the Plan sheets and something is confusing @chris watton
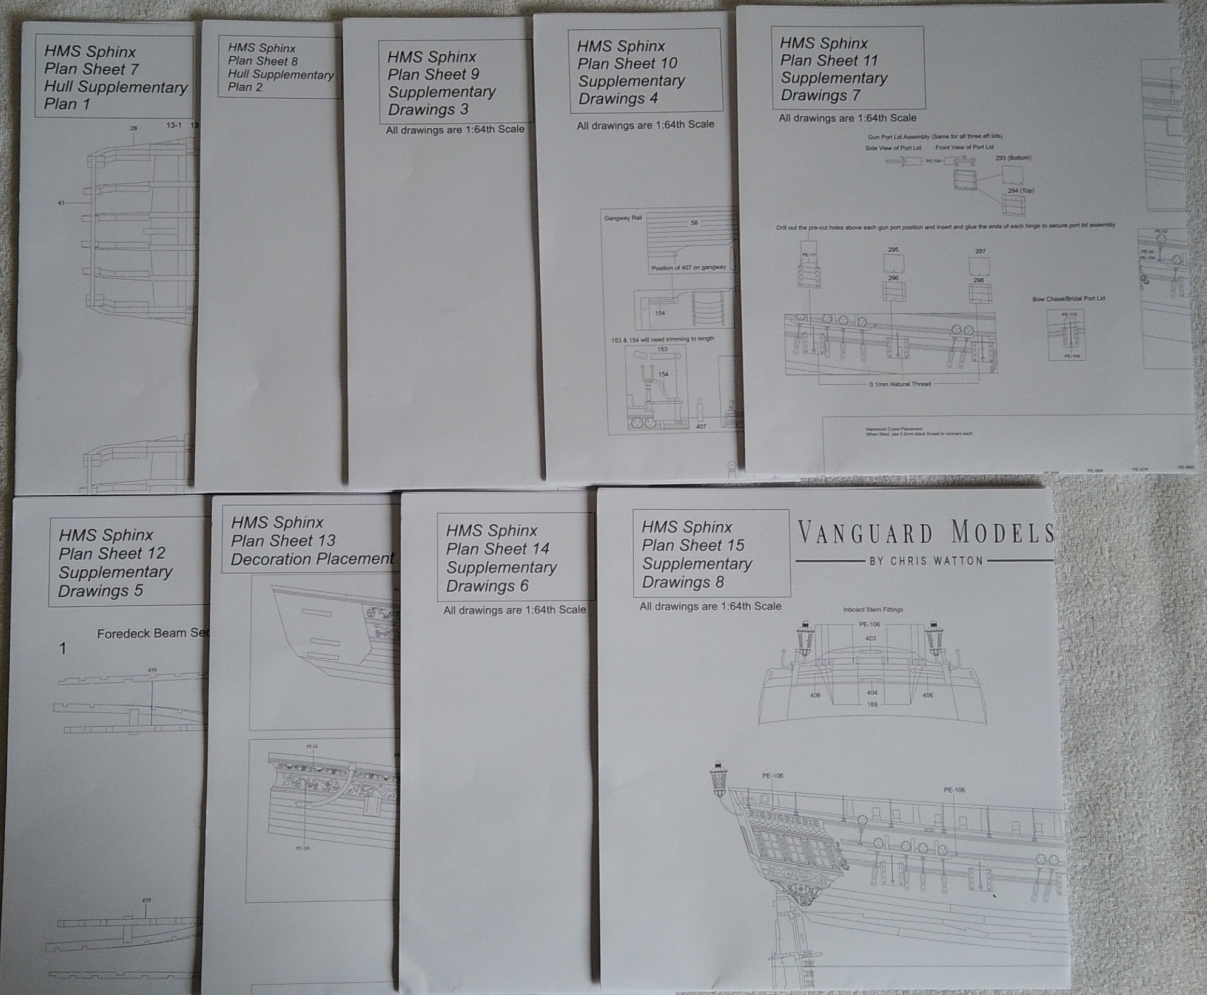
Is this a misprint ? The "Plan Sheet" Numbers dont align with the "Supplementary Drawings" Numbers. It propably doesnt really matter, as the Manual lays out the sequence to follow, but is a bit weird
-
-
15 hours ago, mtaylor said:
Regarding the build up bulwarks. I have suspected that ships with carronades operated at closer ranges and therefore very susceptible to small arms fire. The built up bulwarks offered a bit of protection or at least concealment and some degree of comfort to those on deck serving the guns.
That would be a consequence of this, mostly i would think you need to fasten the tackles and breeching ropes somewhere.
Small Arms fire could be defended against with tighly packed hammock nets, you wouldnt really need bulwarks for that- Canute, chris watton, mtaylor and 1 other
-
4
-
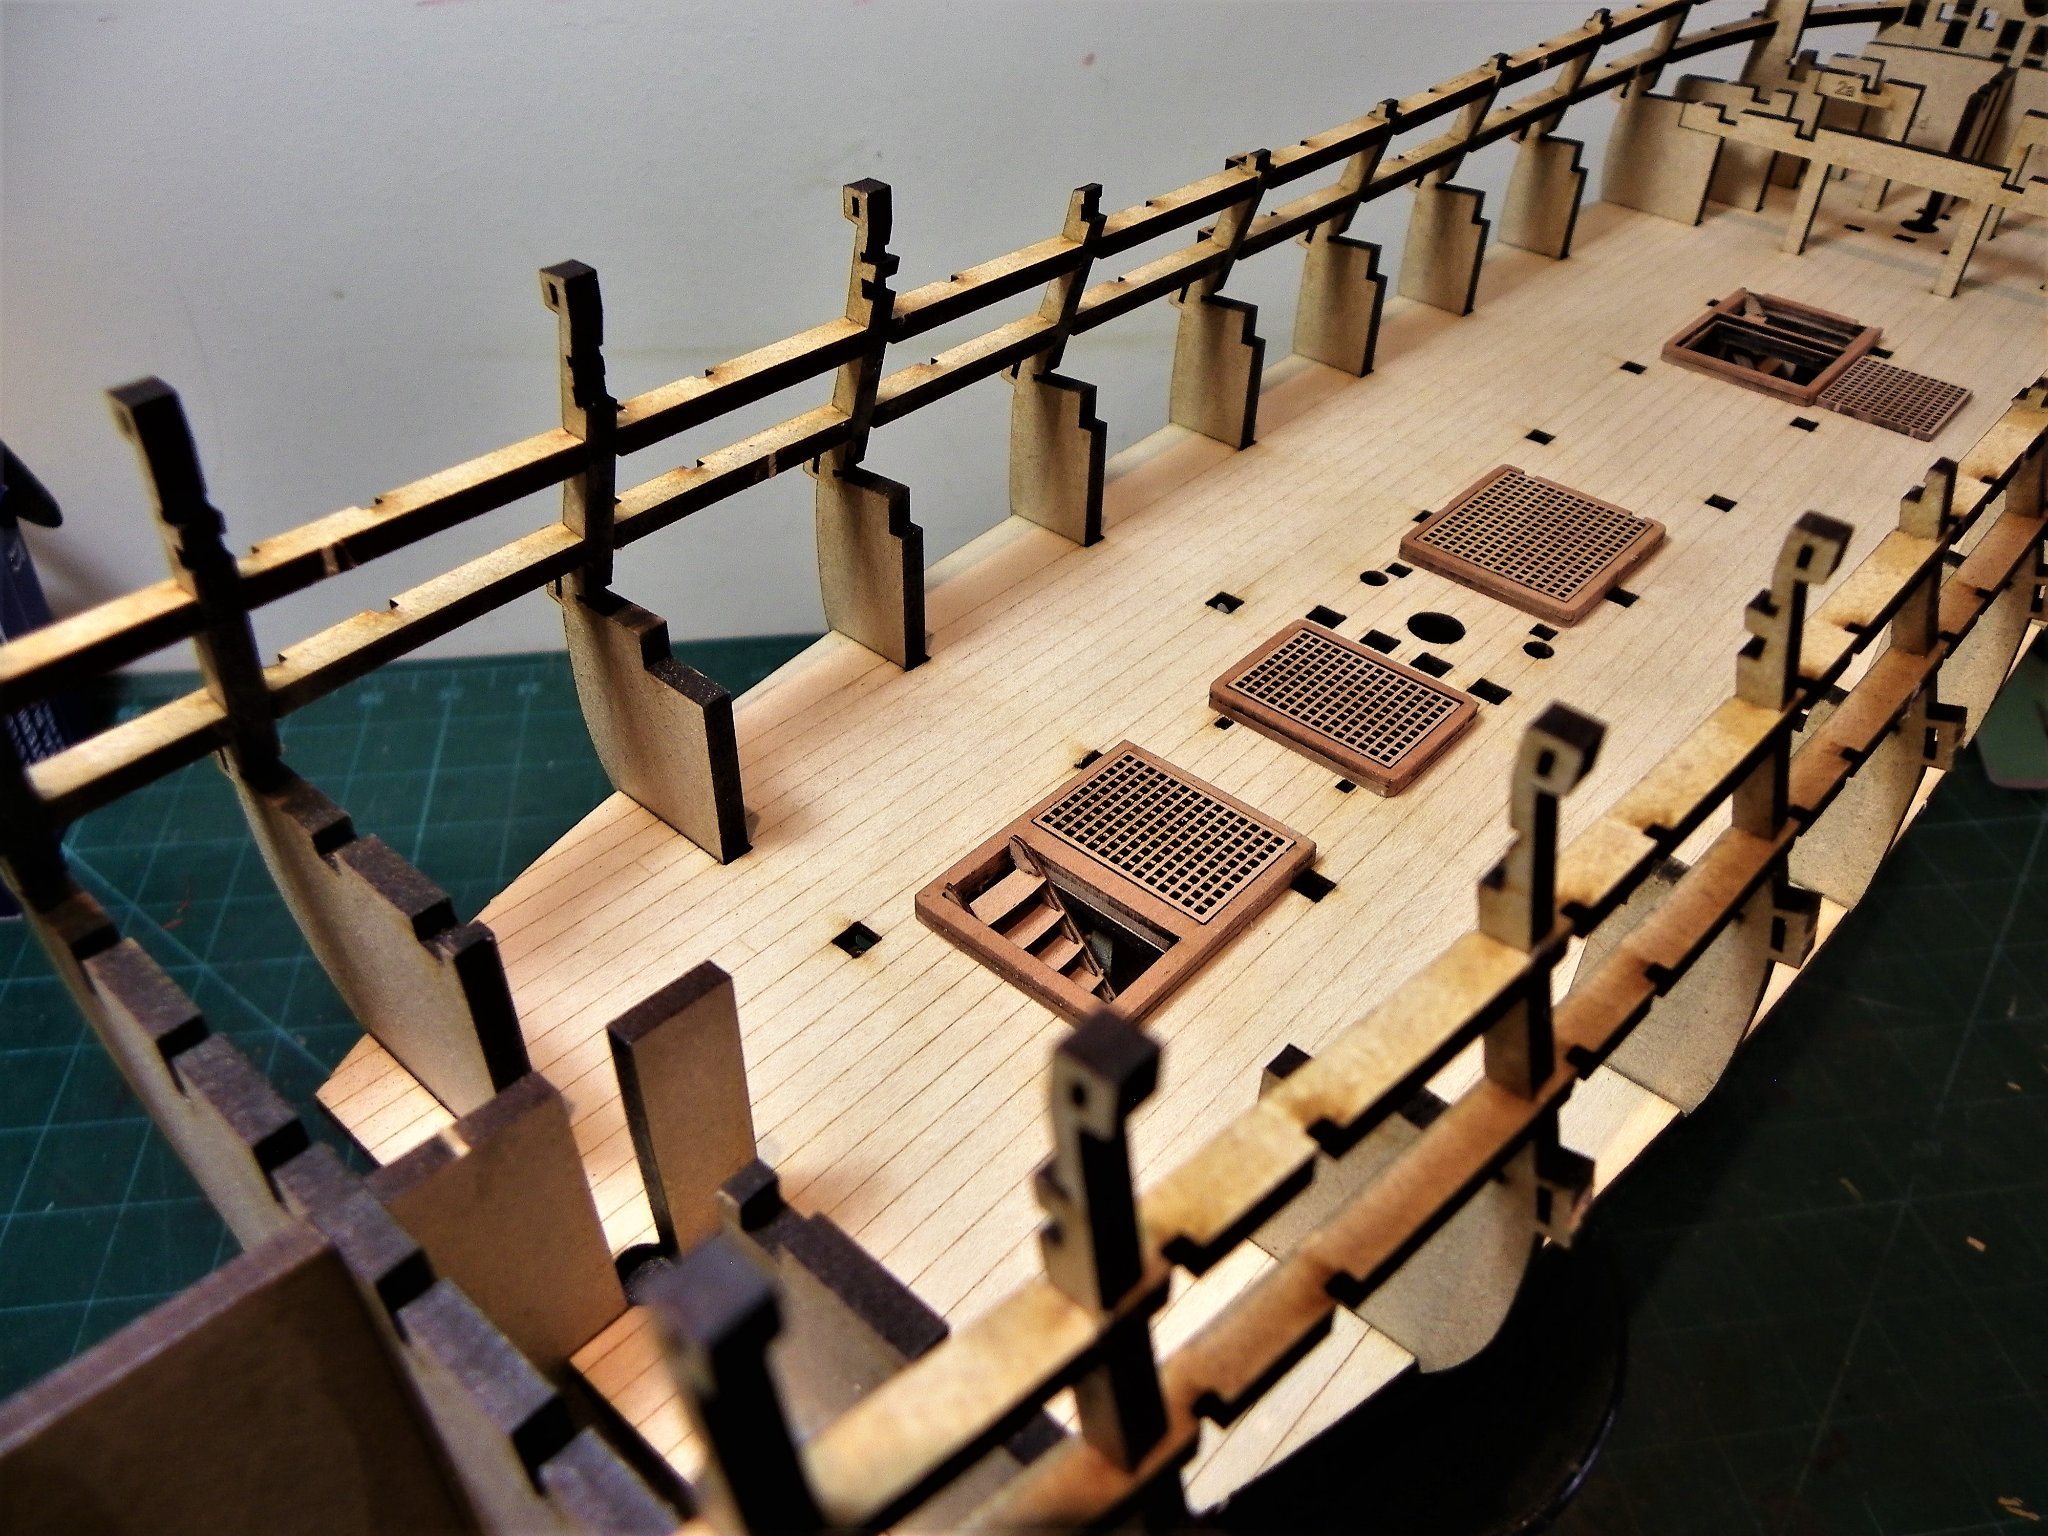
10 minutes ago, Blue Ensign said:
Post Seven
Gunport patterns
These fitted perfectly in the slots altho’ there was a little spring in the patterns which gave me cause to think about the diluted glue joint brushing approach. I did it, but light clamping was required for several of the slots.
TheY feel very delicate and soft hands are required to fit them, whilst ensuring the rails fully fit into the slots.
.thumb.JPG.846b5f897ea25c51787c014d564b9ad8.JPG)
03902(2)
To my annoyance the port side extension at the top end of Bulkhead 12 came away. (It’s the one with the yellow tape on it)
Nowt to do wi’ me Gov, I swear it fell off on its own accord; re-glued, but it remains to be seen what subsequent stresses it will be subject to.
With the rails in place the hull is beginning to look the part and with the glue set it is now a rigid structure.
Still need to be careful with those bulkhead extensions in the Quarter deck area.
03903
Finally, I removed the infill from Bulkhead 13. I took this very slowly and ensured that I could slip a scalpel blade between infill and bulkhead before I applied any pressure.
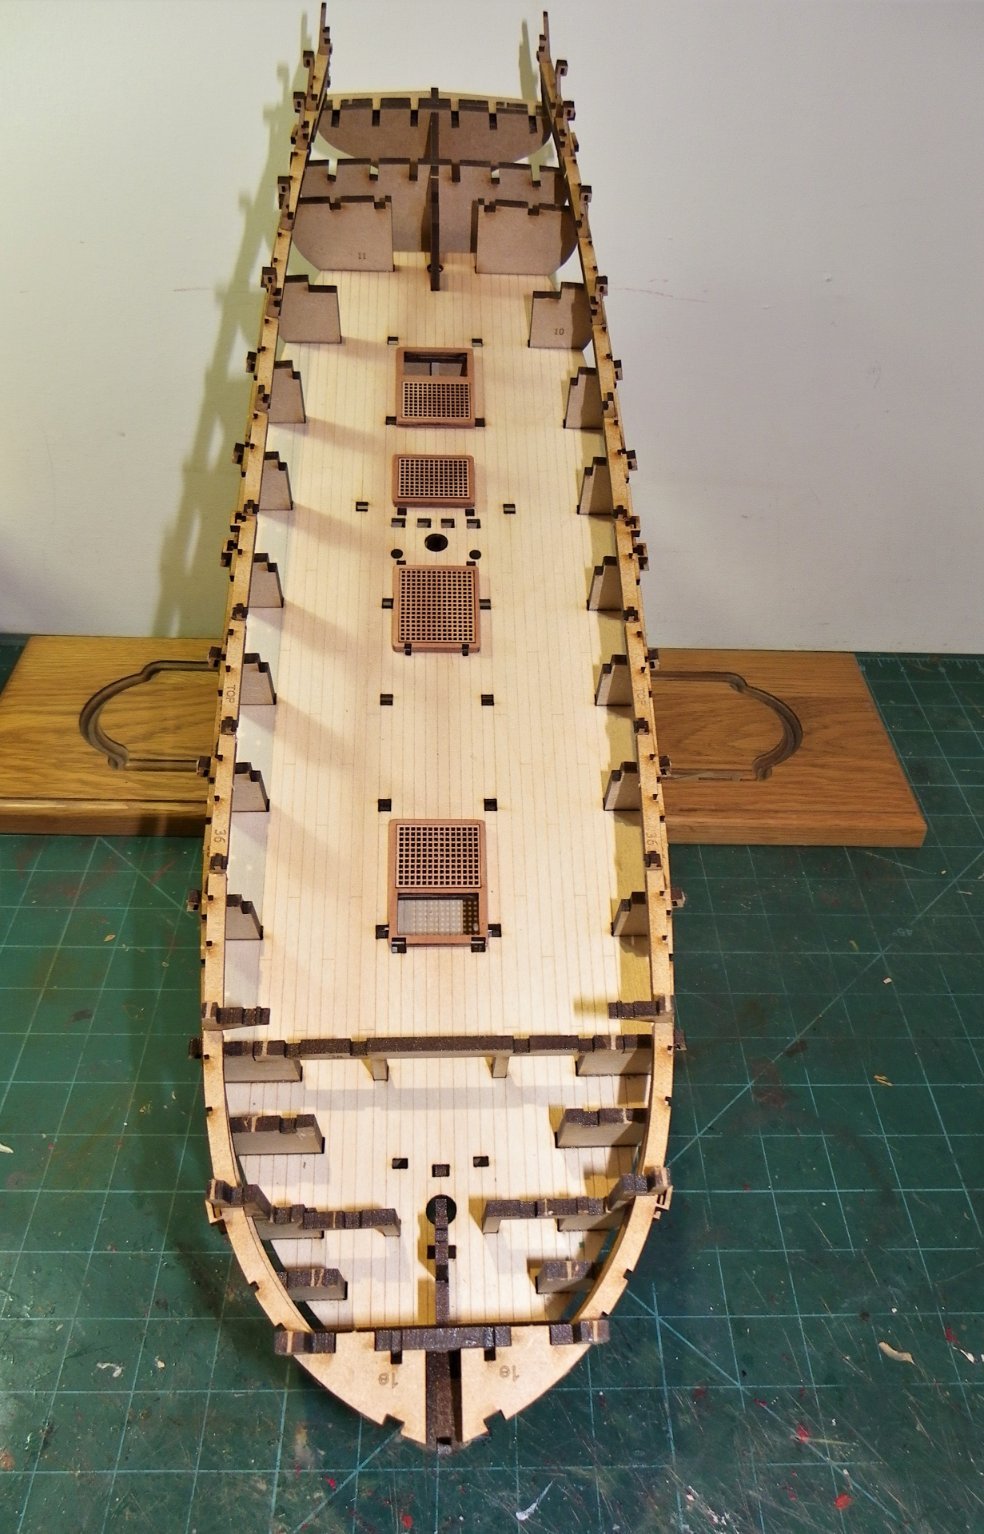
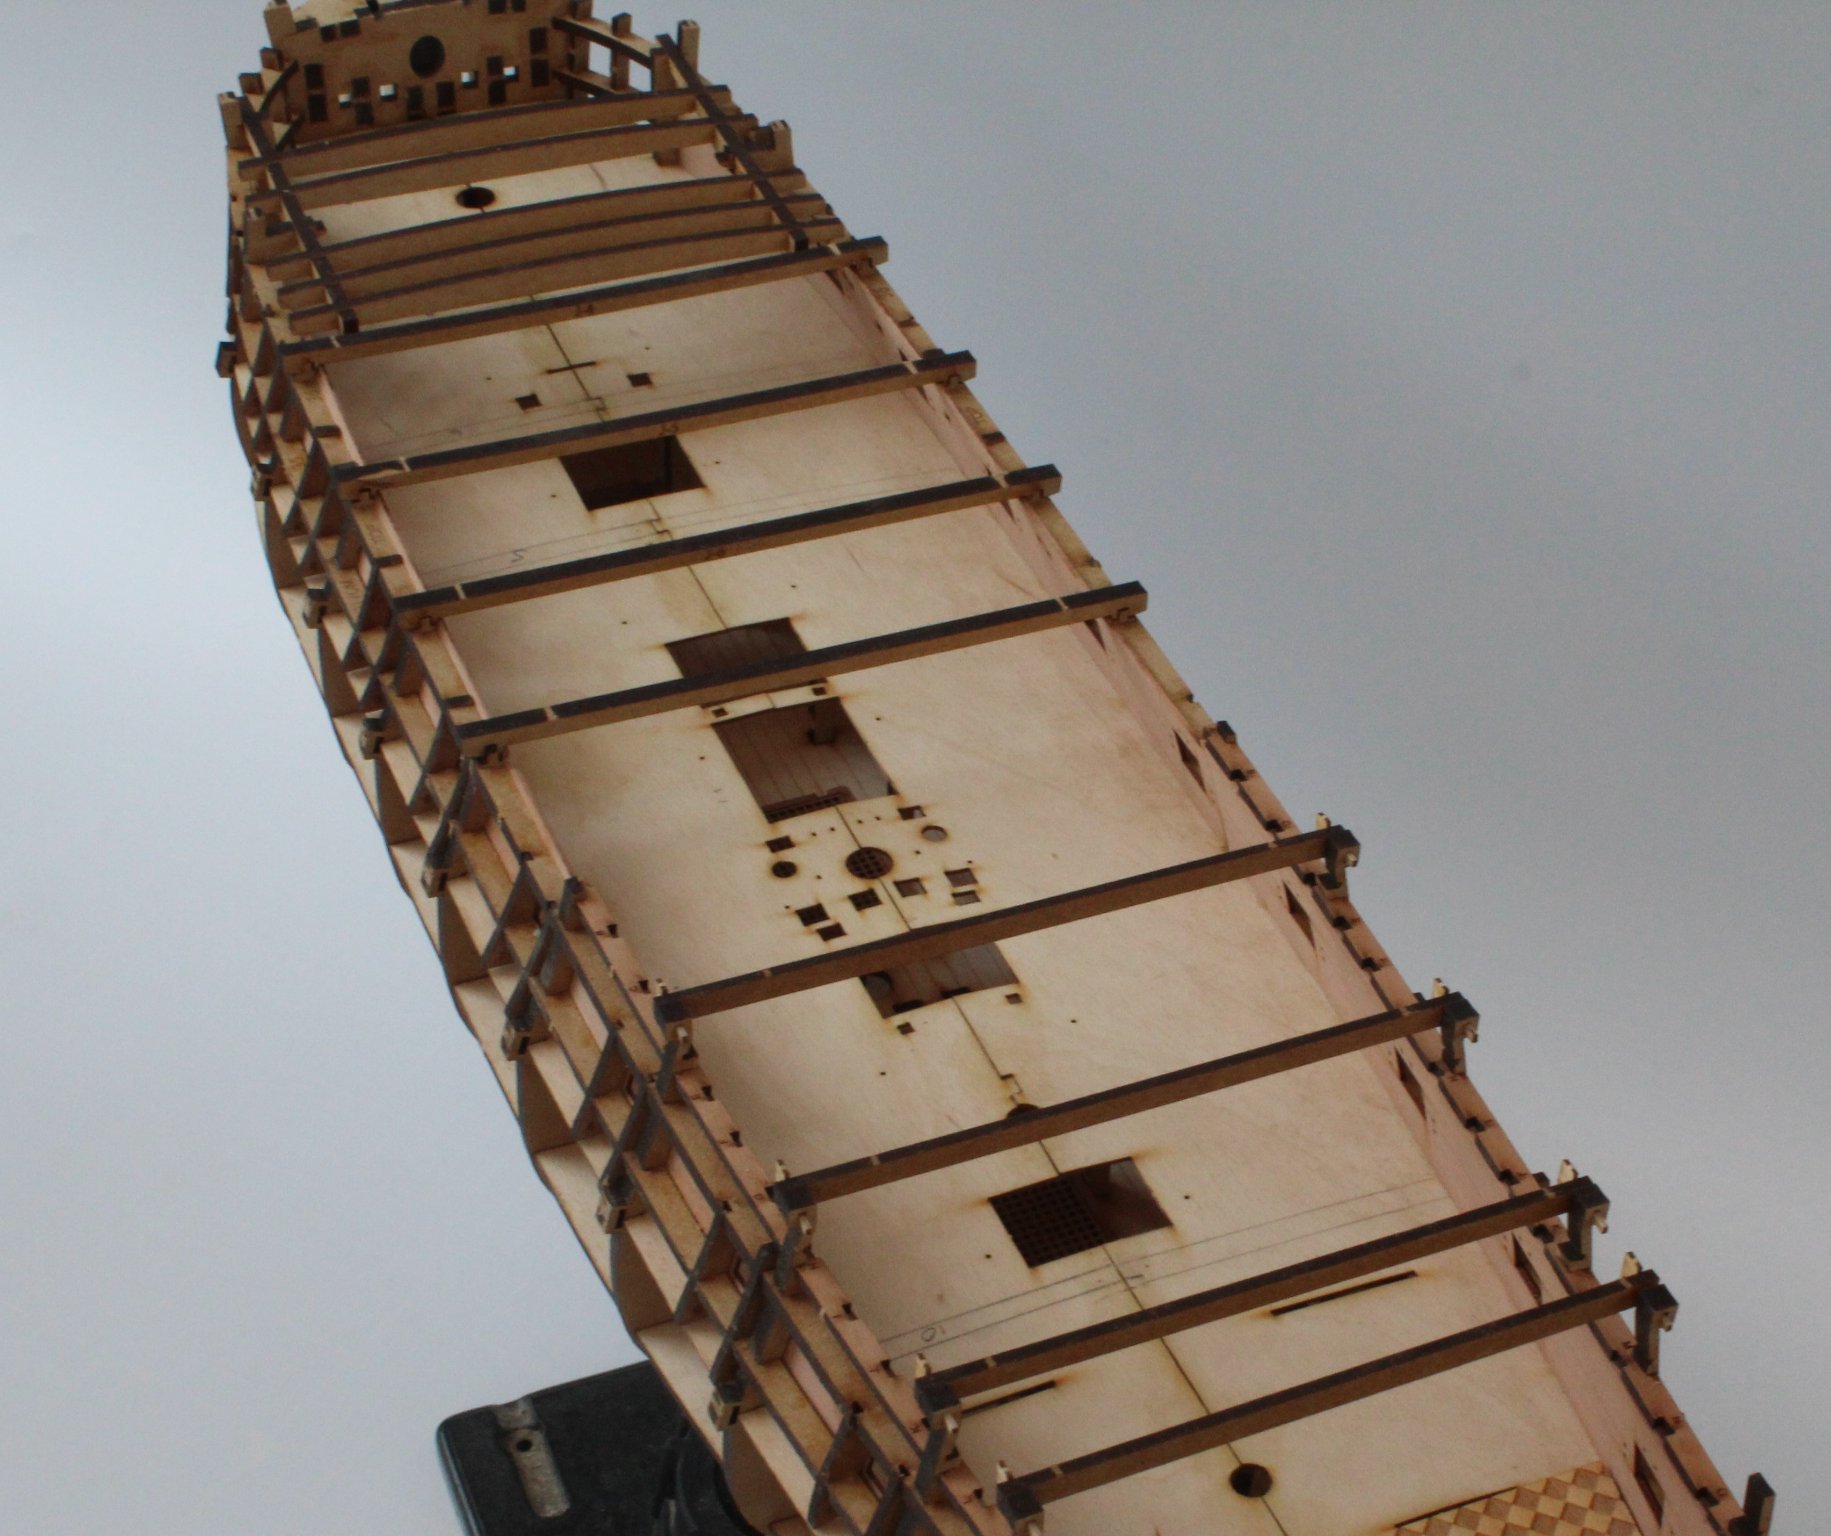
Fitting out the Lower Deck
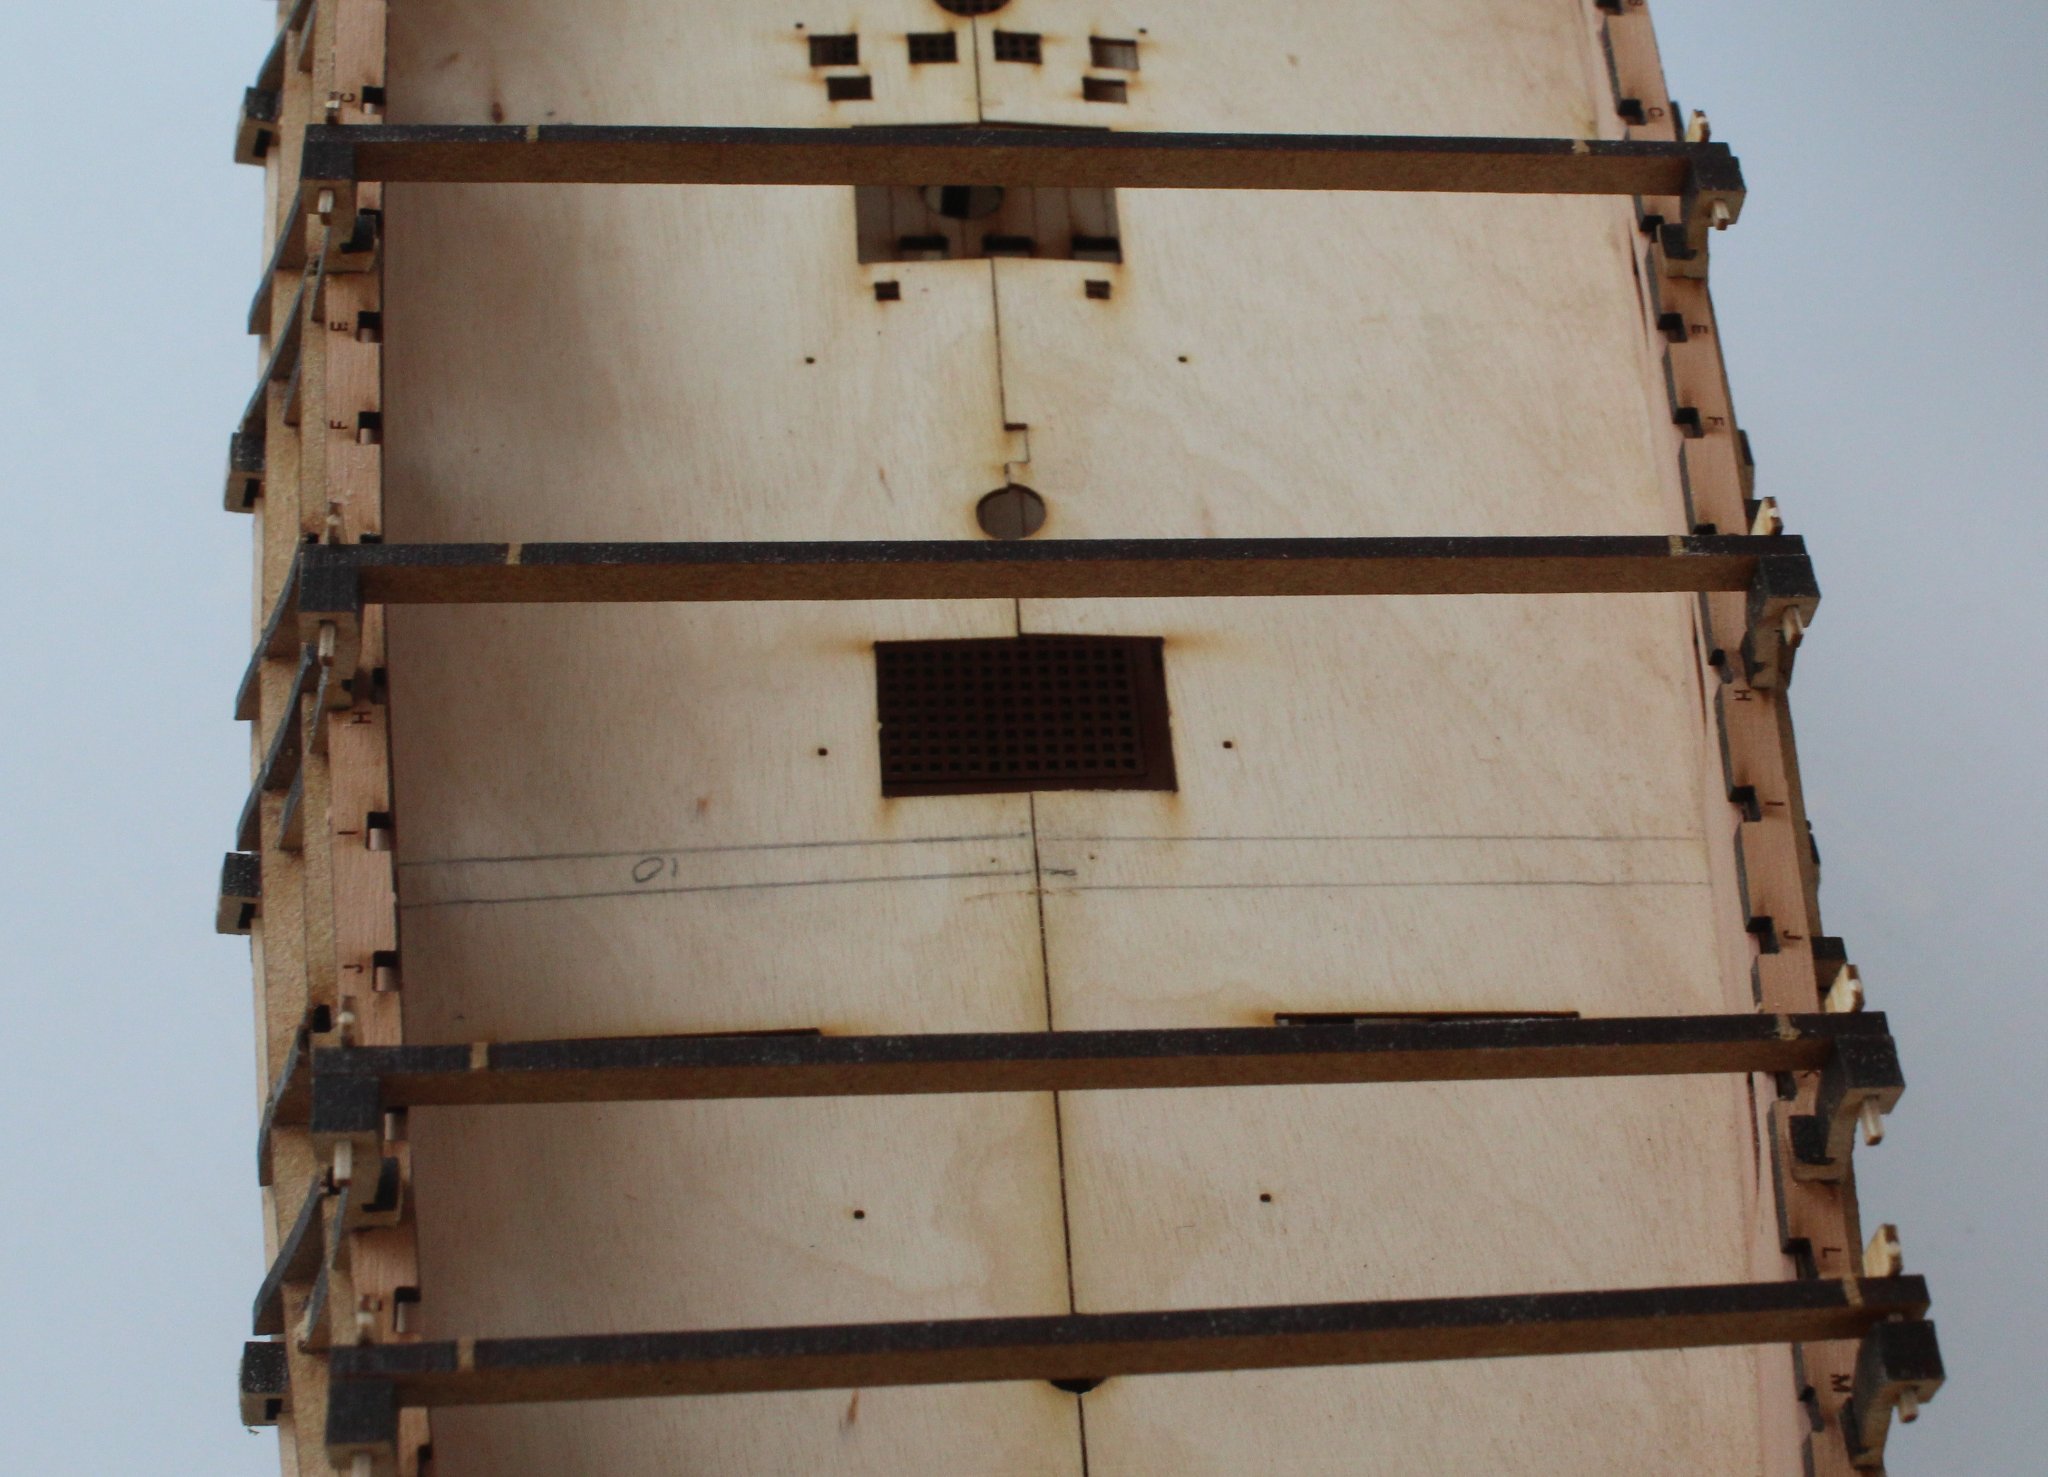
I will be using the provided coaming/grating sets for the lower deck; they will only ever be viewed from above once the upper deck is fitted.
I note that there is no round-up to the head ledges, which appears to follow some of the drawings in the AotS book on Pandora.
Some of the general isometric and deck plan drawings in the book also show picture frame corner joints to the coamings, hmmn.
🤔
The cross section drawings do appear to show a round up, so this is an area I will re-visit when I get to the Upper deck fittings.
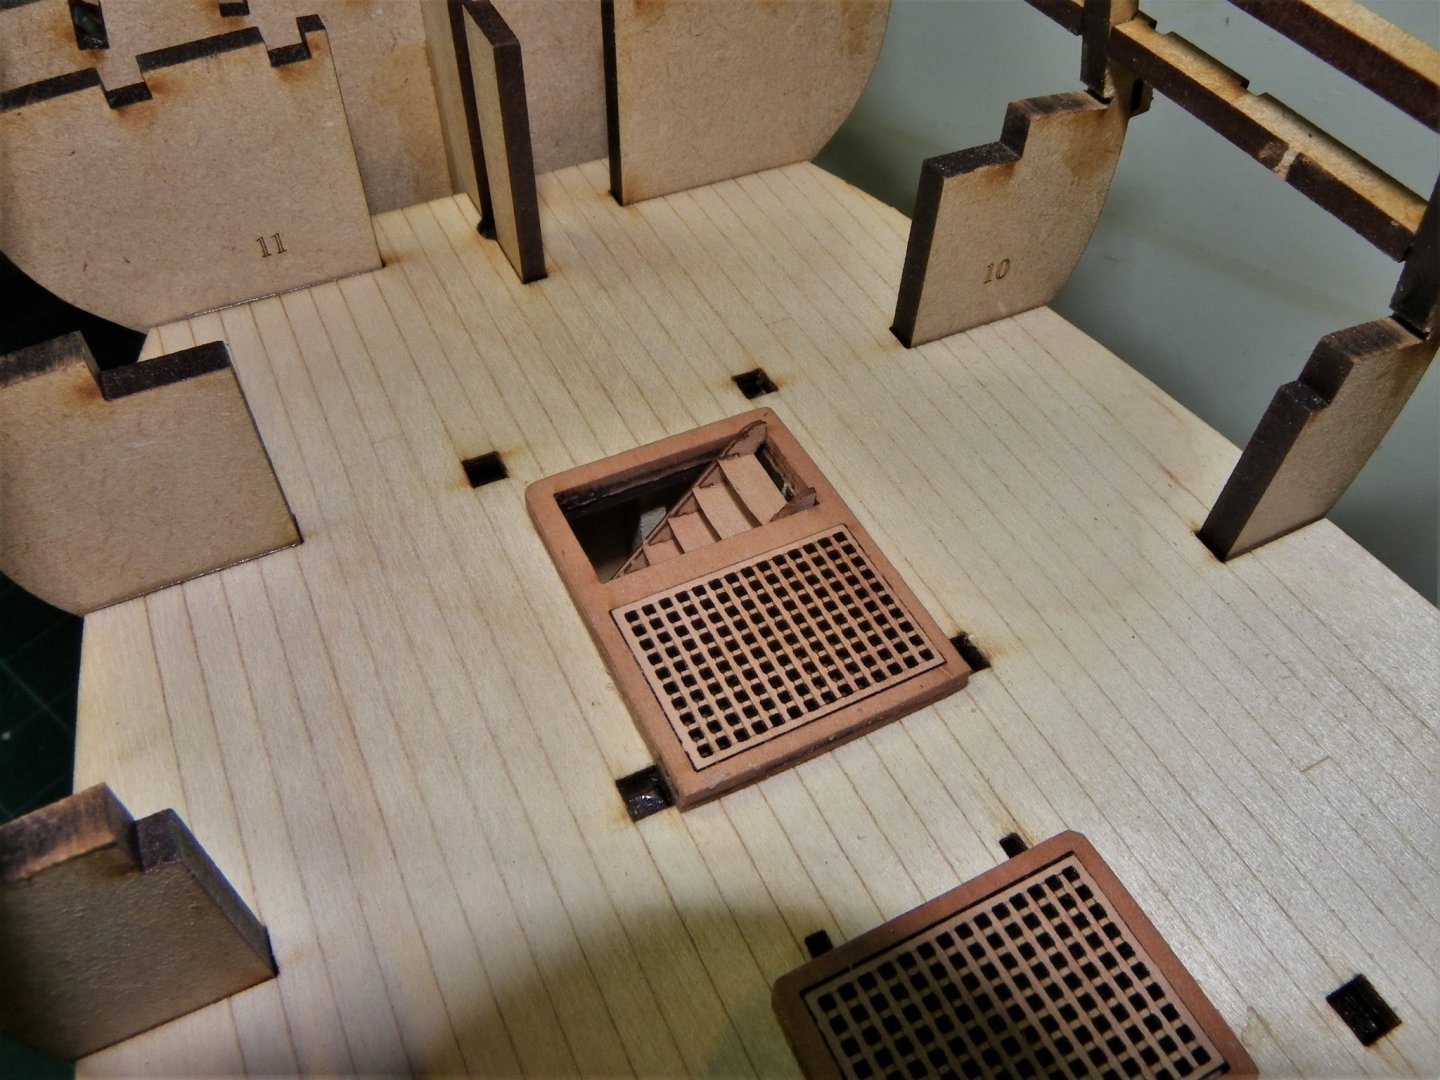
The Pearwood Laser cut coamings are cleanly cut, remember to apply glue to the top half of each set, helps to keep glue off the grating rebate.
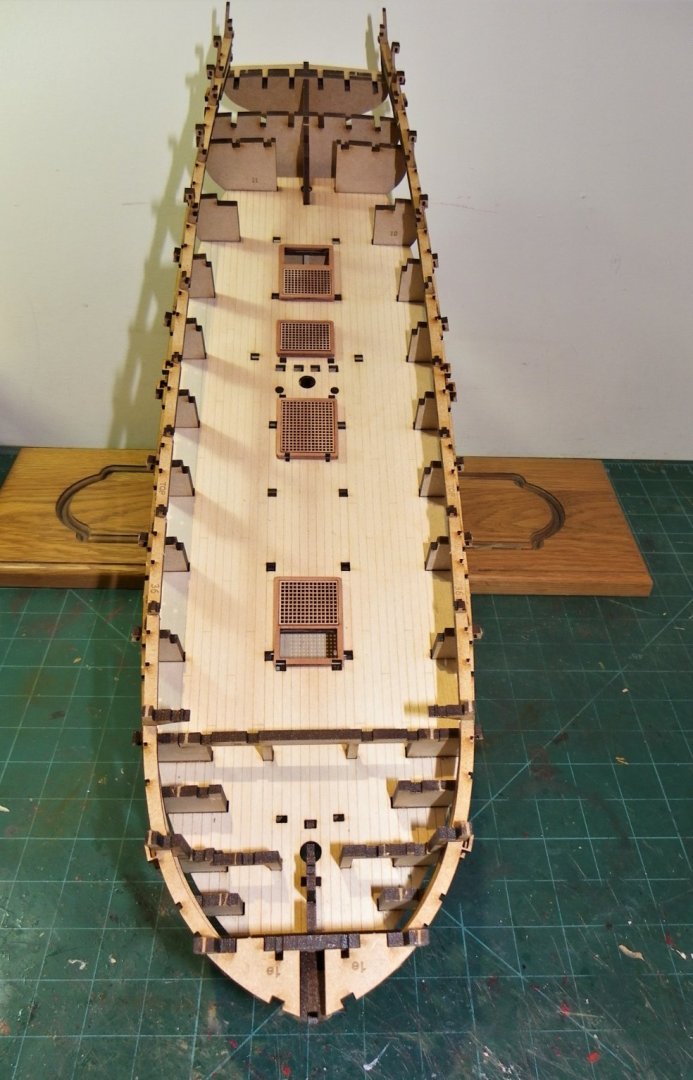
0197
The gratings are accurately cut and are a perfect fit to the coamings.
At this point I can also add the ladders down to the Platforms.
I had run out of generic ladder sets and considered buying and converting the Pearwood set supplied for Speedy.
.thumb.JPG.ab6aeef2dd55188e21592321a2ff3aa9.JPG)
0190(2)
Chris was kind enough to knock me a set out from earlier Sphinx plans he had when he considered fitting out the ladderways.
He does not intend to generally include these as separate fittings but will supply them on request. (He tells me)
.thumb.JPG.39d8855fb91701061b9fc10f9675cace.JPG)
0194(2)

0201(2)

0205
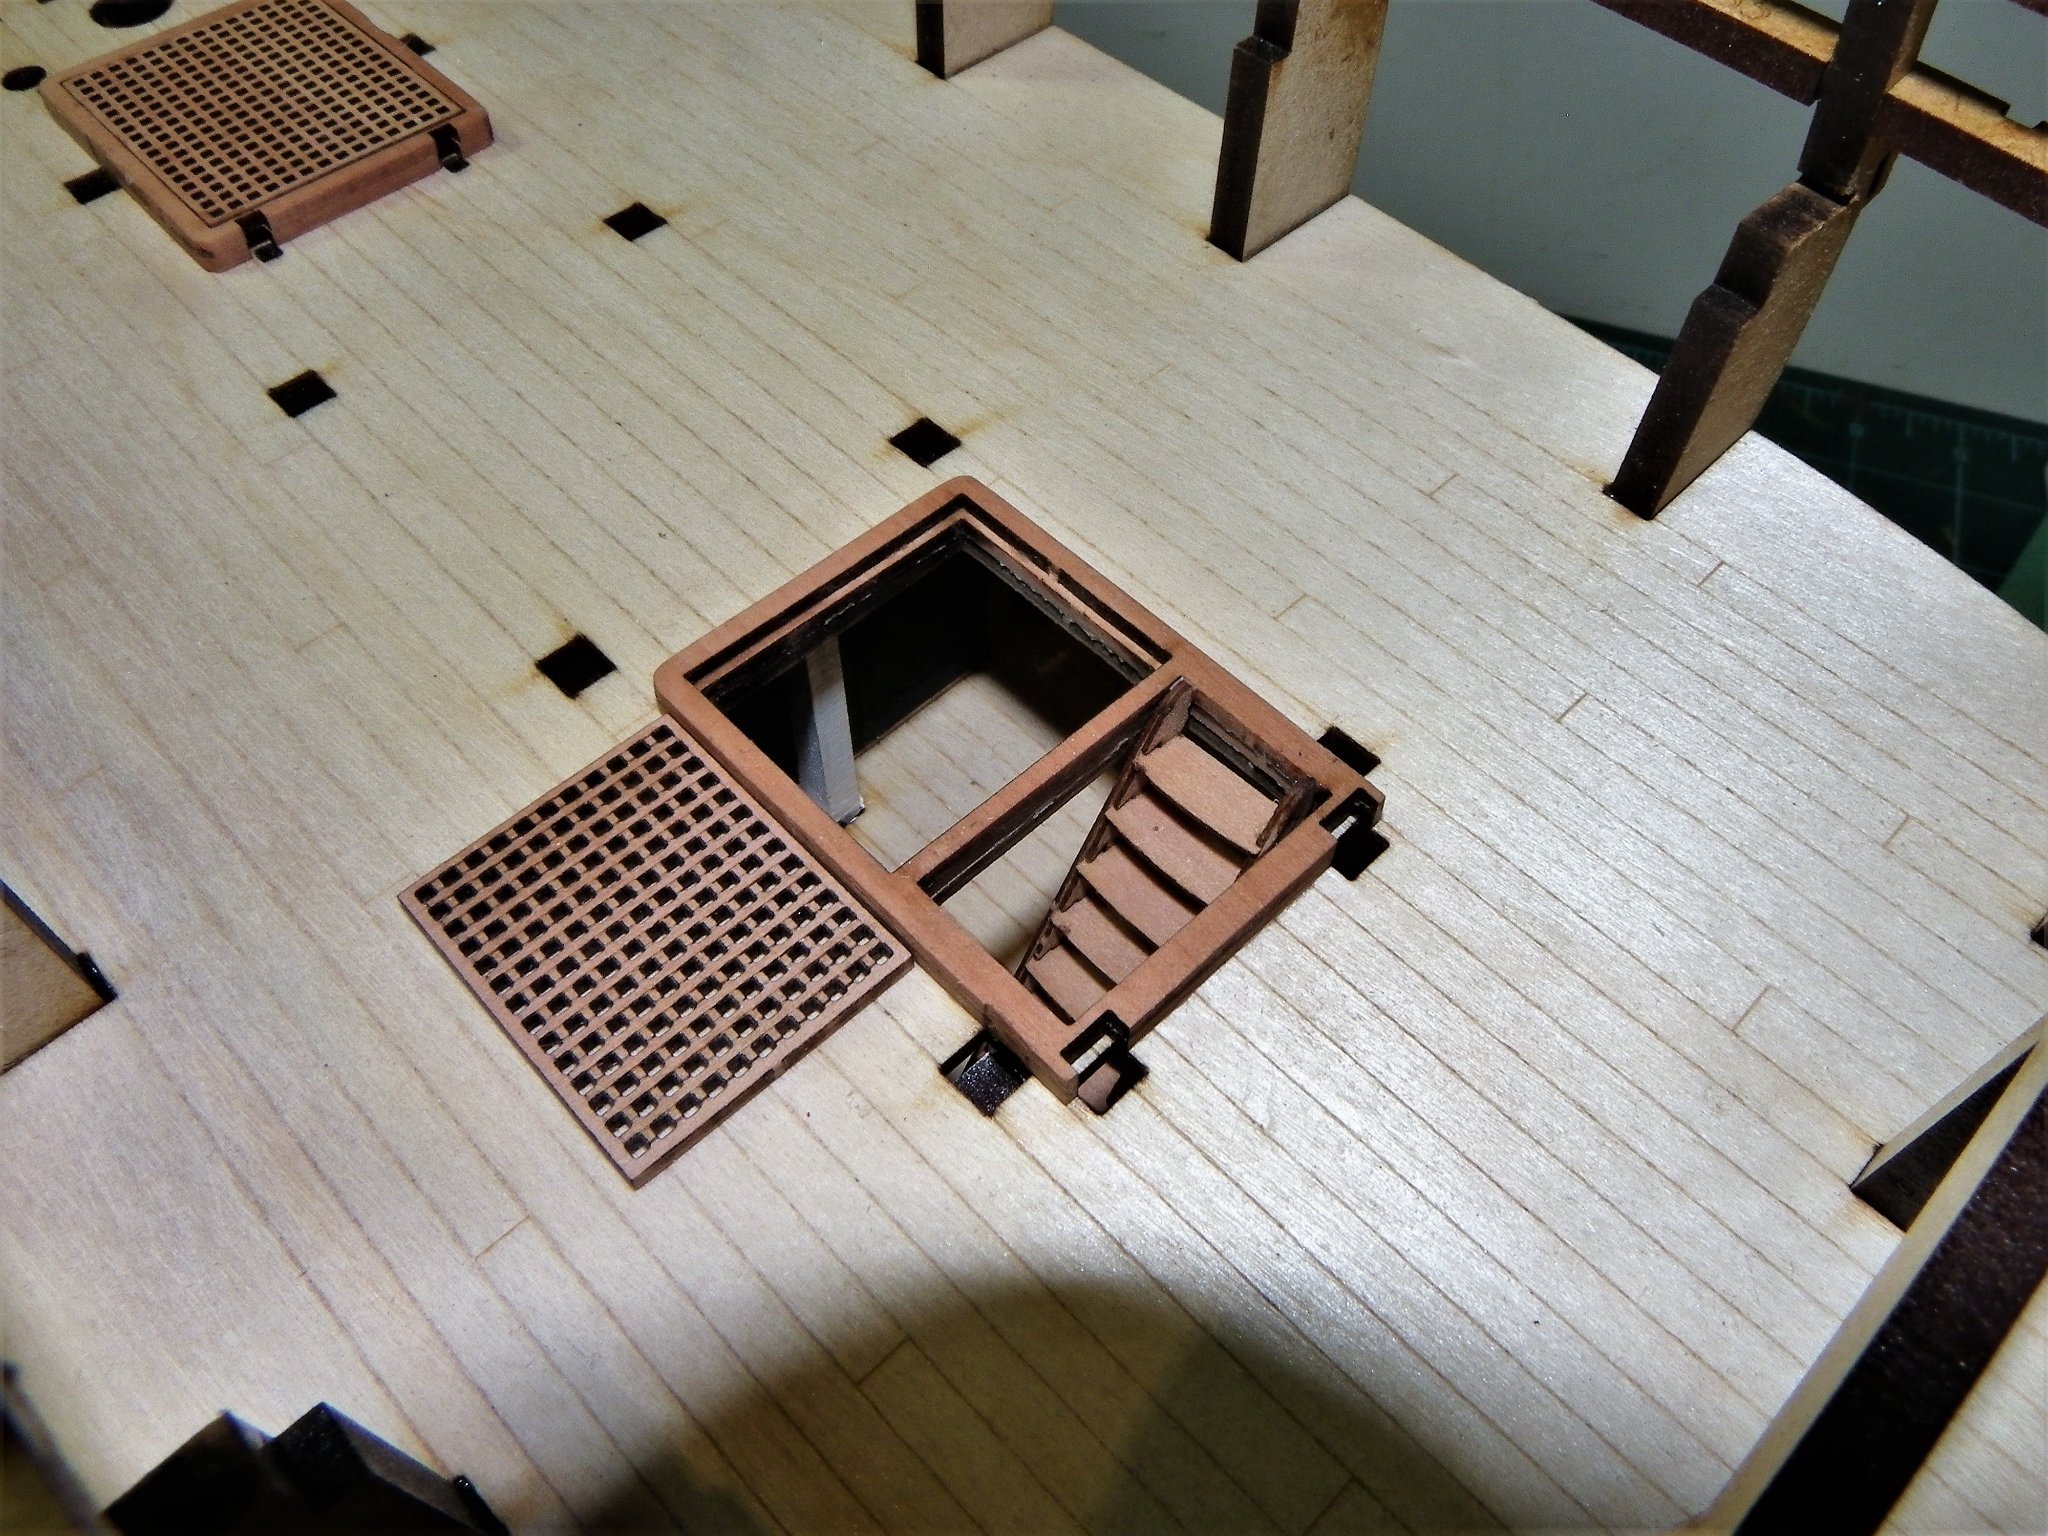
Fore hatchway
.thumb.JPG.2c3c8367ae67c96a23ff5521fe7bee99.JPG)
0213(2)
I will leave the Fore lower deck hatch open.

0209
There will be a view of the Fore Platform down thro’ the Upper and lower decks and it will enhance the impression of a fully fitted out model.
0206
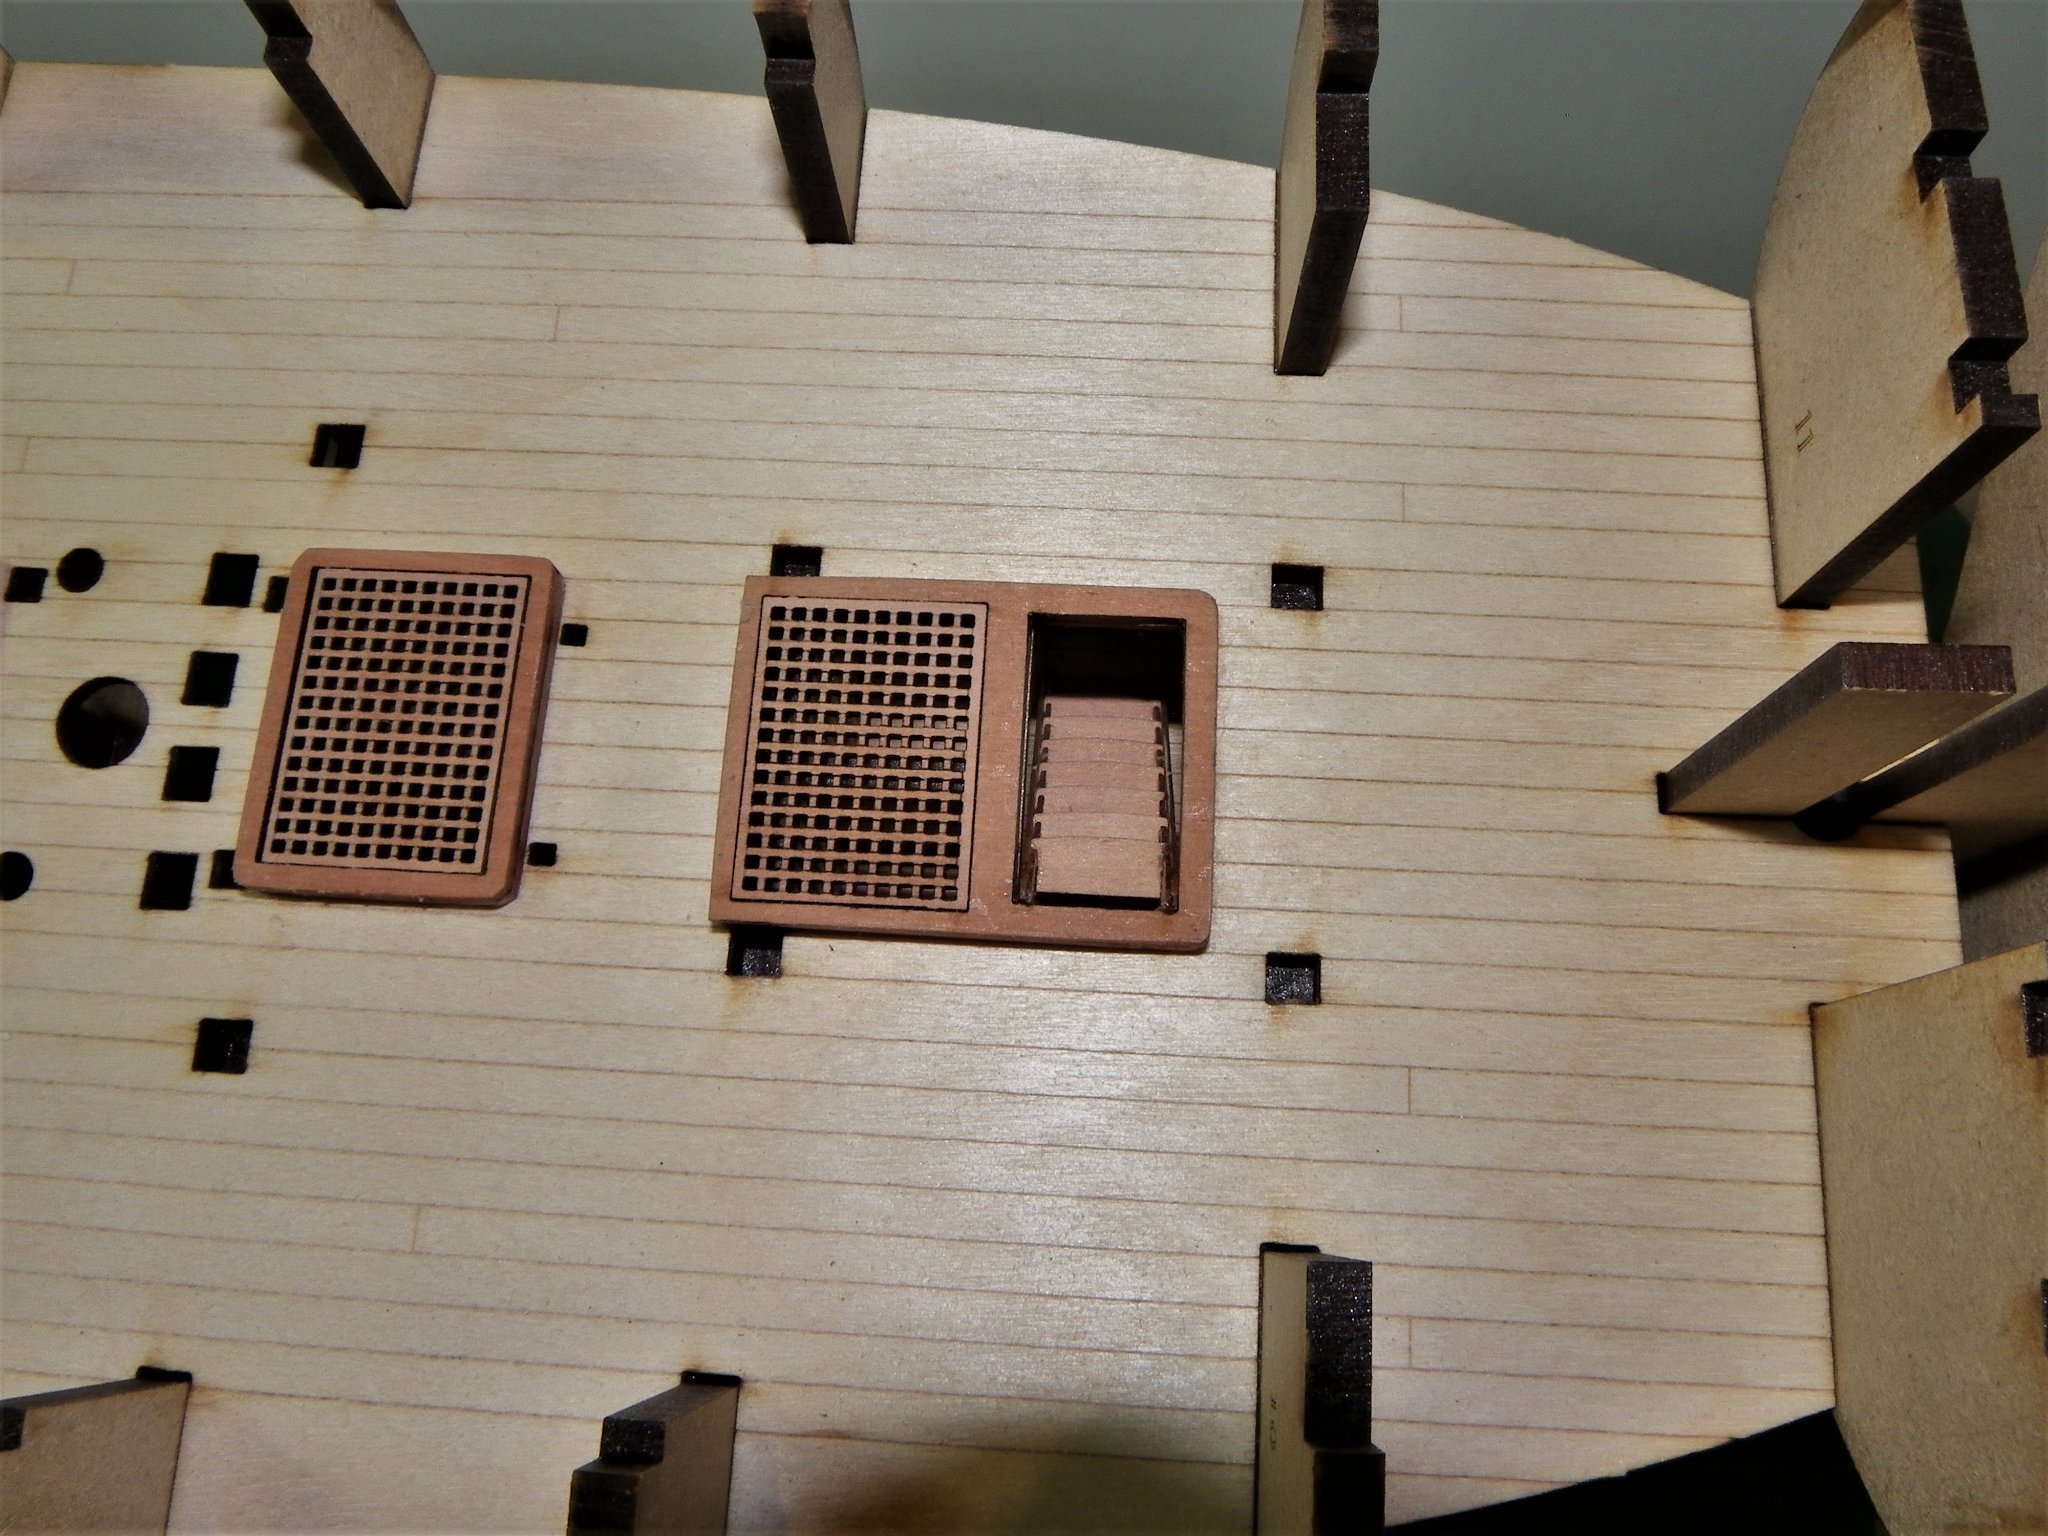
Aft hatchway.

0210
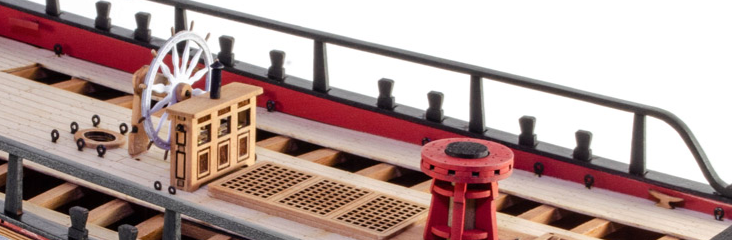
Here the grating will remain in place as it sits below the Capstan, and there is no open space below it.
Less will be seen of this ladderway as the Upper deck ladderway sits above it.
B.E.
31/08/21
You are really tempting me to get those ladders from Chris, really adds to the model
But i'm a bit scared to cut the Bulkhead and keel tho
-
2 minutes ago, chris watton said:
Yep - Also, if people want to model the vessel as she appeared later in her operational career, the quarterdeck bulwarks would be solid, not open. This applies to the forecastle too, if carronades were to be positioned there.
You're referring to the railings, right?
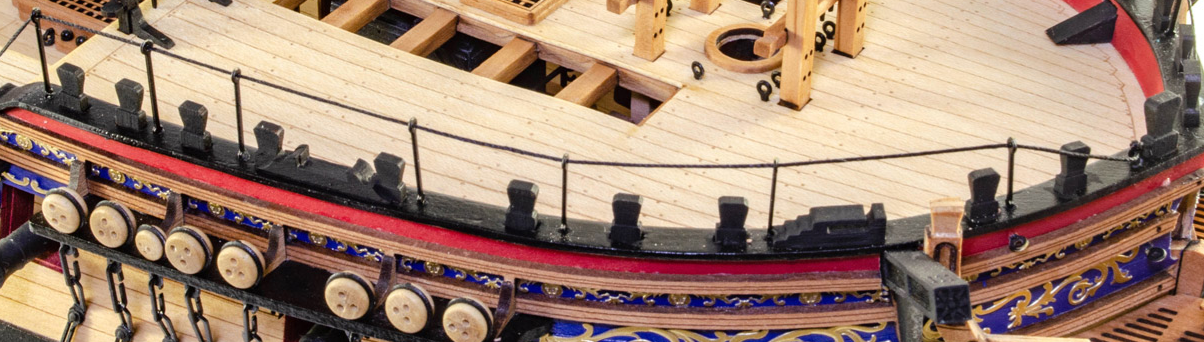
I was considering Quarterdeck Carronades and at least chasers on the Forecastle, but at least in the case of the Quarterdeck this might require closing off the Deck Openings (havent measured it yet tho)
- thibaultron, mtaylor and Canute
-
3
-
49 minutes ago, glennard2523 said:
I have jumped a few steps in the build process for this very minor build task, a very simple task but I have included in my build log for completeness.
JIGS FOR HULL
BUILD MANUAL STEPS 123 - 127
Tools Used
Craft knife
Flory sanding stick
Titebond original glue
Old paint brush
Gathering the materials required
The following kit parts are required for this section of the build:
J0 (x8), JU, JV, JX, JY, JZ, J4, J5, J6, J7, J9, J10, J11, J12, 30 (x2)
Assembly Process
The various jigs are to help ensure the correct hull width spacing is maintained. They are not to be glued to the hull as they will discarded later in the build process.
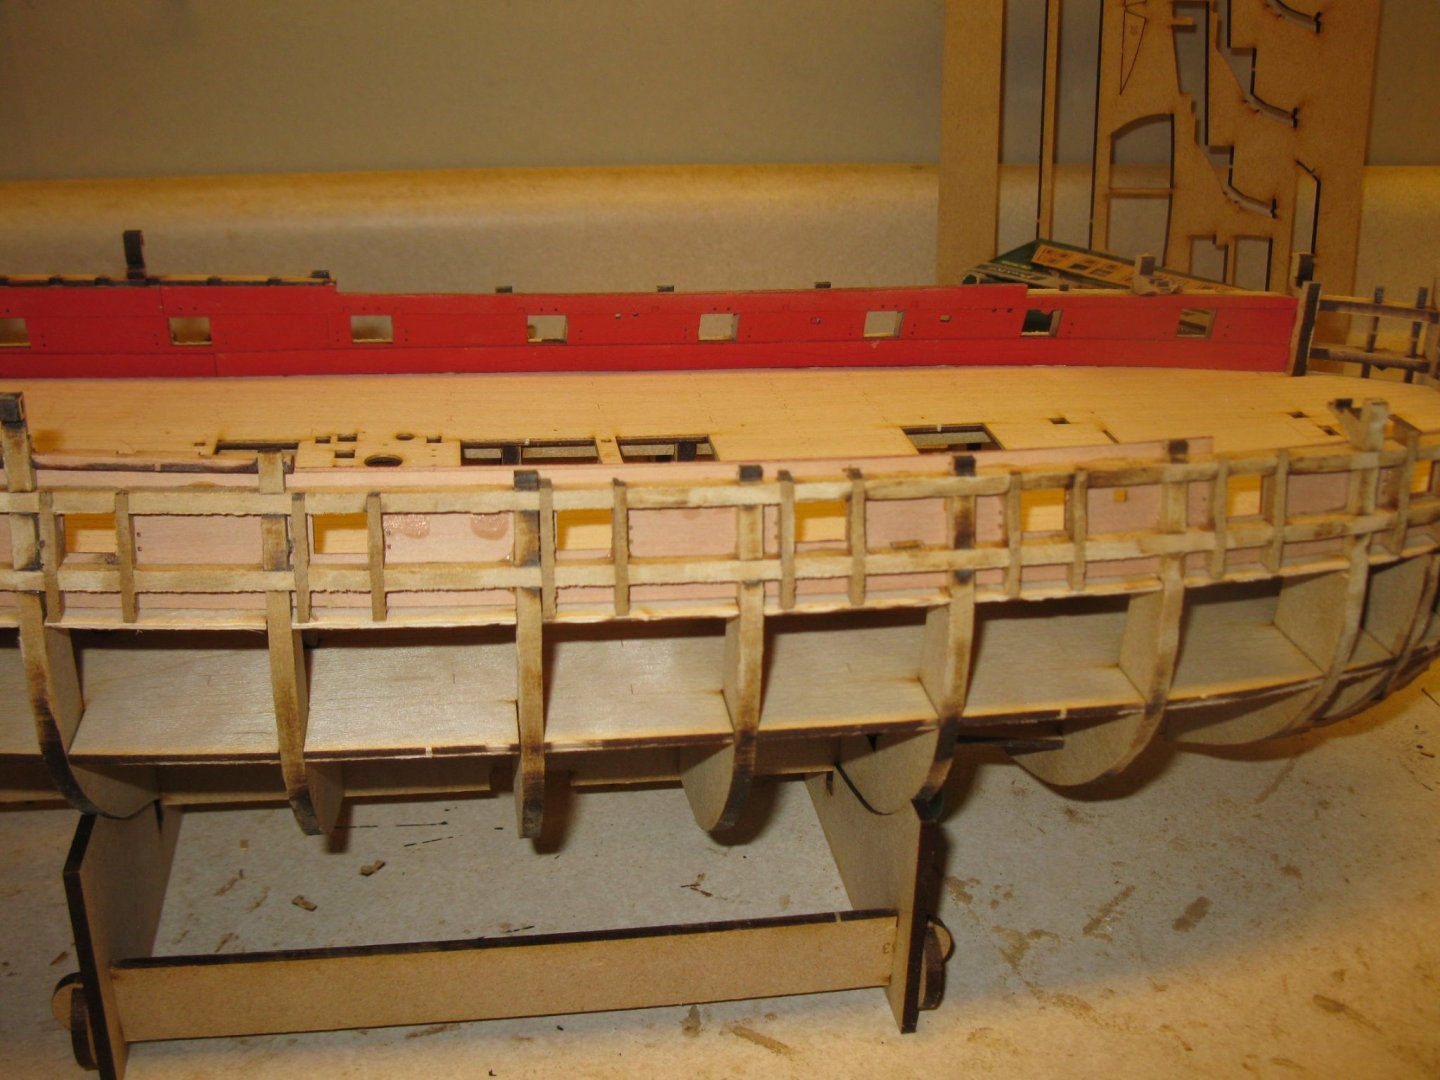
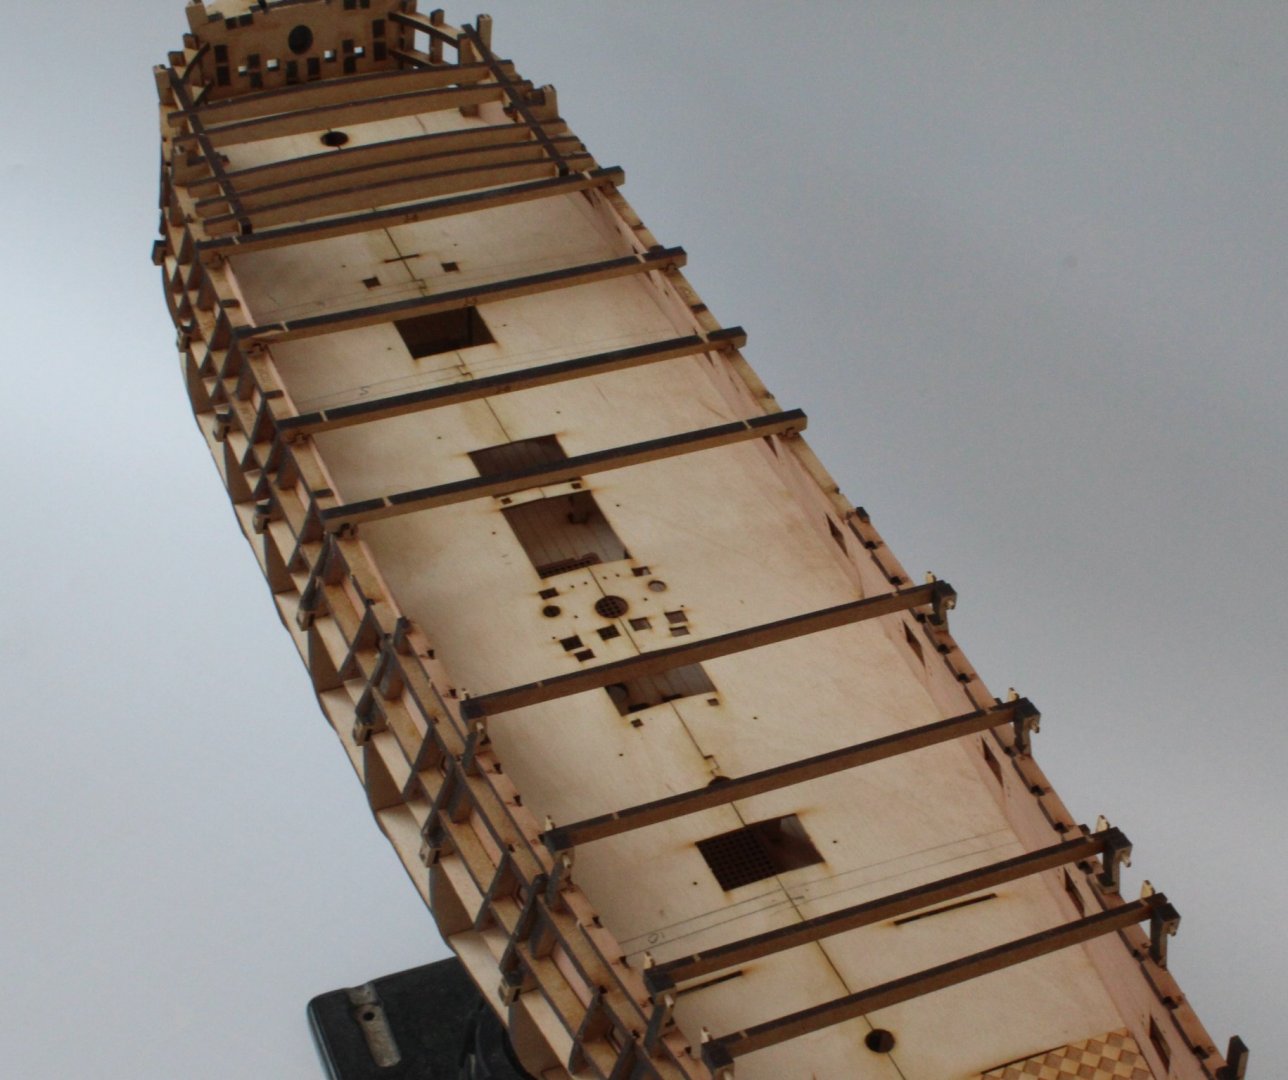
The jig beams JU- JV were glued into the respective slots of the 2 off longitudinal jig beams. The completed forecastle deck jig frame was then test fitted without any problems, as can be seen in the photo below.
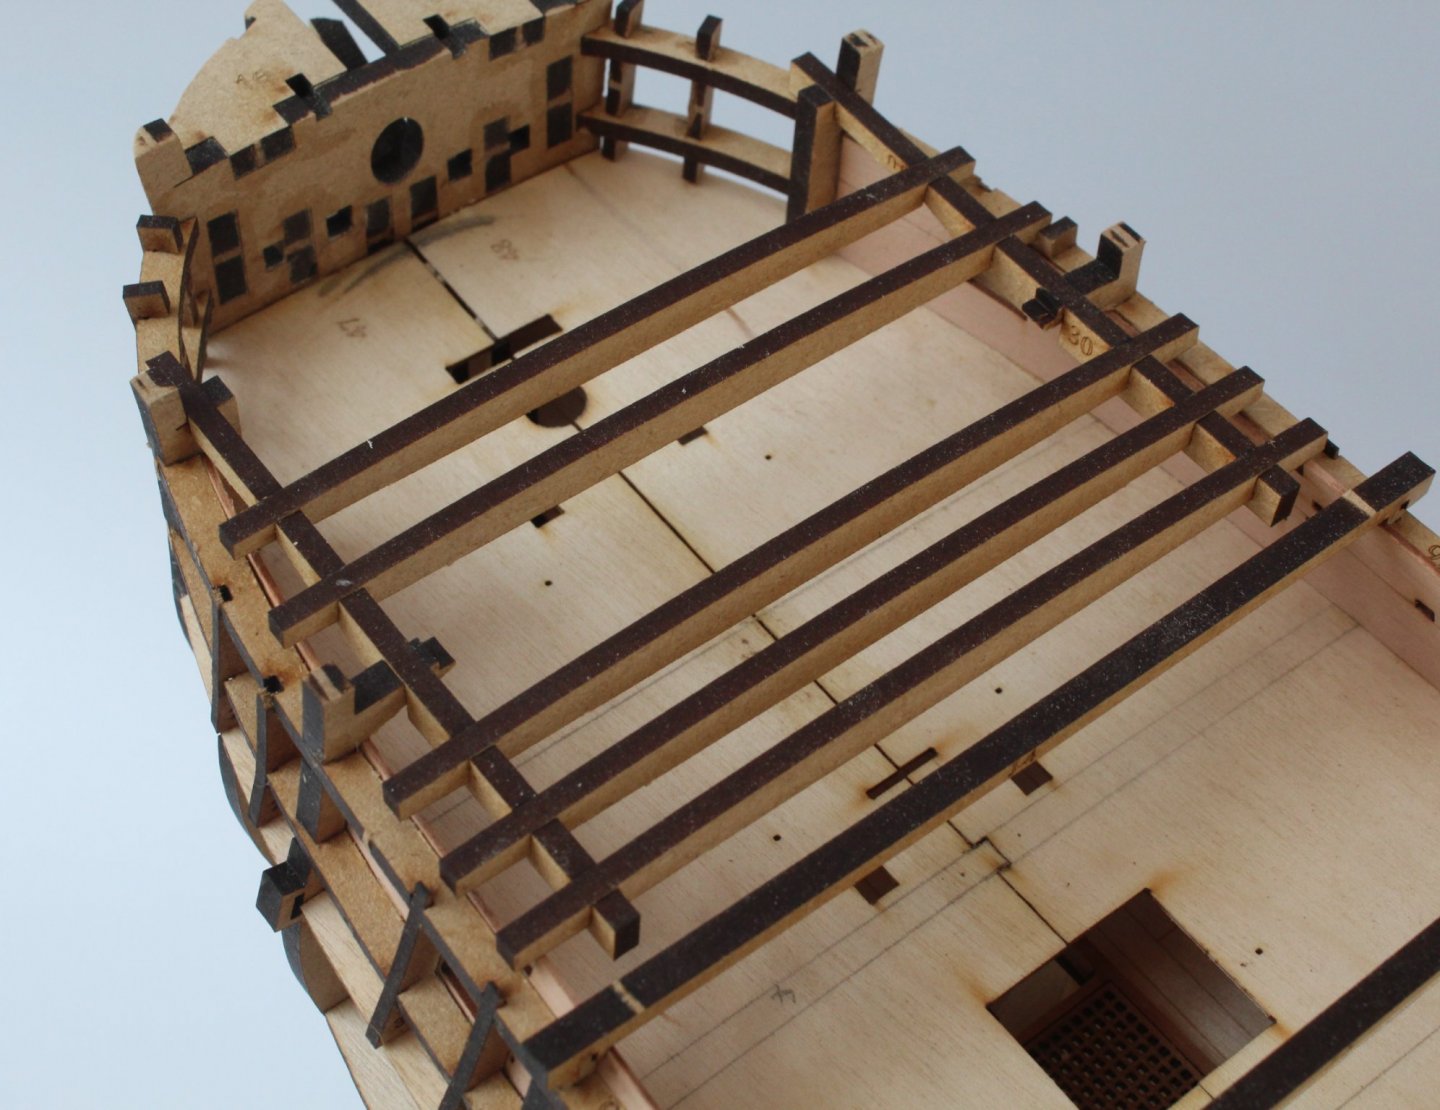
Jig beams J4 – J7 were test fitted and proved to be a perfect fit, as can be seen in the photo below.
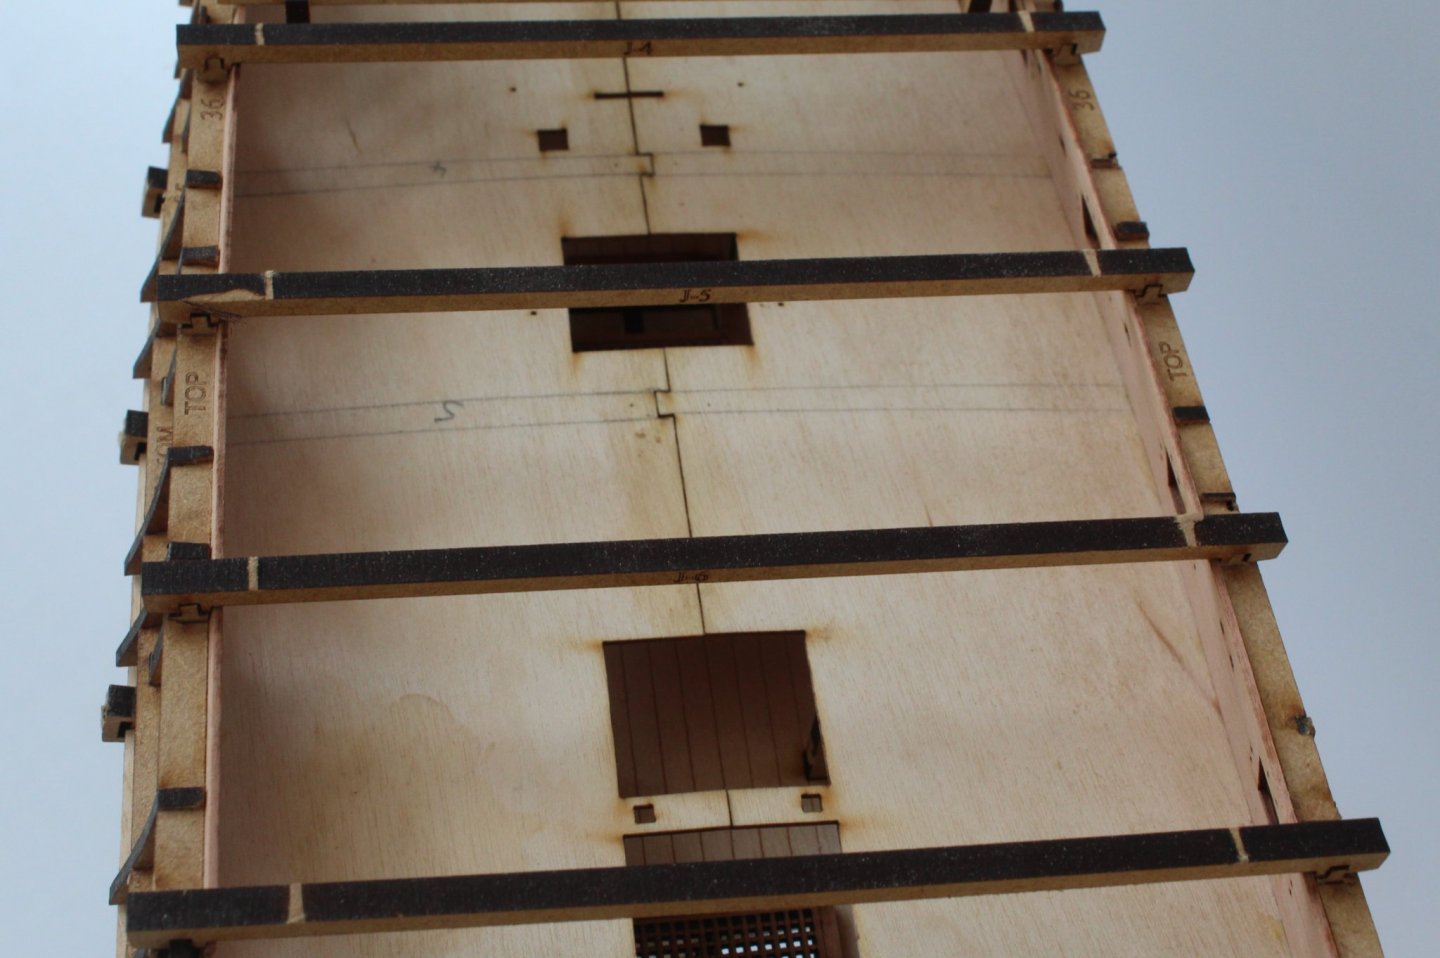
Jig beams J9 – J12 are secured in their respective bulkheads using pegs. I found it necessary to remove the laser char from the pegs to ensure a smooth fit.

A photo showing all the jigs in place.
Indeed, this might actually be done even earlier in the build to test-fit and verify if all is properly aligned.
I'm thinking of actually starting with the jigs to have them on-hand through all the initial stages just to make sure i dont screw up somewhere
-
1 hour ago, Vane said:
Regarding Sphinx, would it be completely wrong to do built it with copperplates?
I do believe the HMS Camilla was mentioned to be re-coppered at some point (hence she would have been coppered initially), also those ships starting 1794 were fitted with 12-24pdr Carronades (4 or 6 of them: 0 or 2 on fcsle and 4 on the quarterdeck) so that might be 2 "Upgrades" worth considering over the kit
- thibaultron, hollowneck, mtaylor and 2 others
-
5
-
-
10 minutes ago, wefalck said:
The gentleman, who runs http://www.schiffsmodellflaggen.de/ is in his nineties and only sells remaining stocks, as he wants to close down his business. Hence, not everything may be available anymore.
Hm, maybe he wants someone to take over, i live quite close by
-
-
34 minutes ago, glbarlow said:
Yes. Lay the next plank down up tight to the one above it at midships and run your finger forward. There is a point where it won’t lay flush and wants to cross the plank above it. Mark that point, it is where your taper starts. It varies as you move down the hull, not a single spot.
It has to be done from the start, it won’t fix a severe mistake, to do that you have to over-correct a lot, can’t explain how on that one, or start over. Lining the hull is more work but keeps you on track,. For LN being such a small hull you can skip that and measure the height of the stem from the keel to the master plank (a full width plank generally about equal to deck level) and divide by the number of full width planks at midships. The result (like 2.3mm for example) is the width of the plank at the stem. So taper from the mark you made to 2.3, plank bend it to conform and do the next one. Recheck your stem measurement every 4 planks or so to update the stem width, hard to be perfect. If your line gets wavy either your mark or your measurement is incorrect so adjust.
it’s your first model, it won’t be perfect. My advice is to try to do it right, shortcuts won’t help you on the second model.
Oh i'm not touching the Starboard side, i consider it finished and the Wave will be hidden under paint.
I missed somewhere the info about "the point of tapering", i was under the impression, that the taper should start immiedately from the widest bulkhead (so bulkhead 5 in case of the LN).
On the portside i only have the 2 untapered Wale Strakes fitted by now, i will do the tapering there as you describe it
-
4 minutes ago, glbarlow said:
The wavy walnut line is a tapering issue along with plank bending shortfall. Basically you started the taper too far back from the stem. H We’ve all been there.
You can paint over dry Wipe On Poly, I don’t know about oil, I wouldn’t think acrylics and oil go together
You mean this wavy line ?
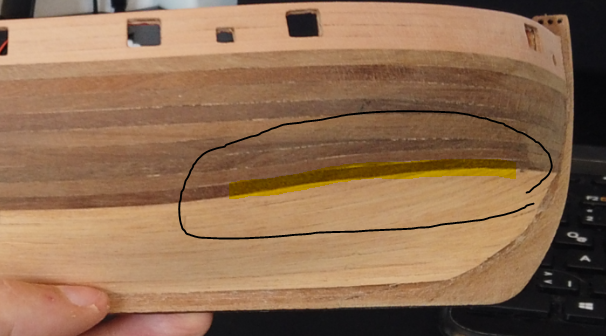
So, the taper should be started more forward (in the area of bulkheads 3/4 ) instead of starting from Bulkhead 5 ?
I will attempt changes on the other hull half, one of the sides will never be visible when on display anyway so i can choose which side looks better
-
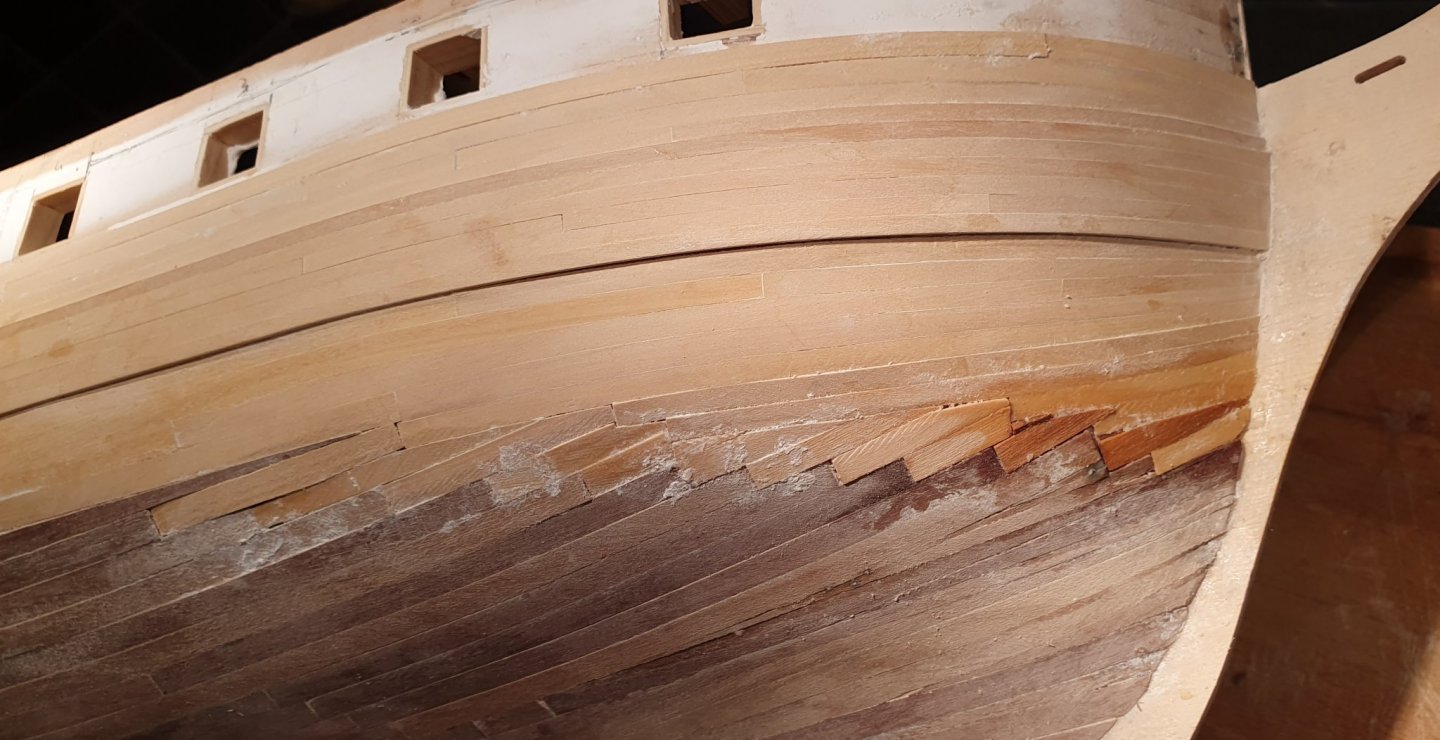
Decided i dont want to fight with the Walnut anymore (still need to for the 6 port strakes until the Waterline tho) so i used Tanganika and took a shortcut.
Using the Shortcut meant, i could finish the Starboard Hull in between actually working at work.
Sake of Sanity really in a place which will be covered by a layer of Paint
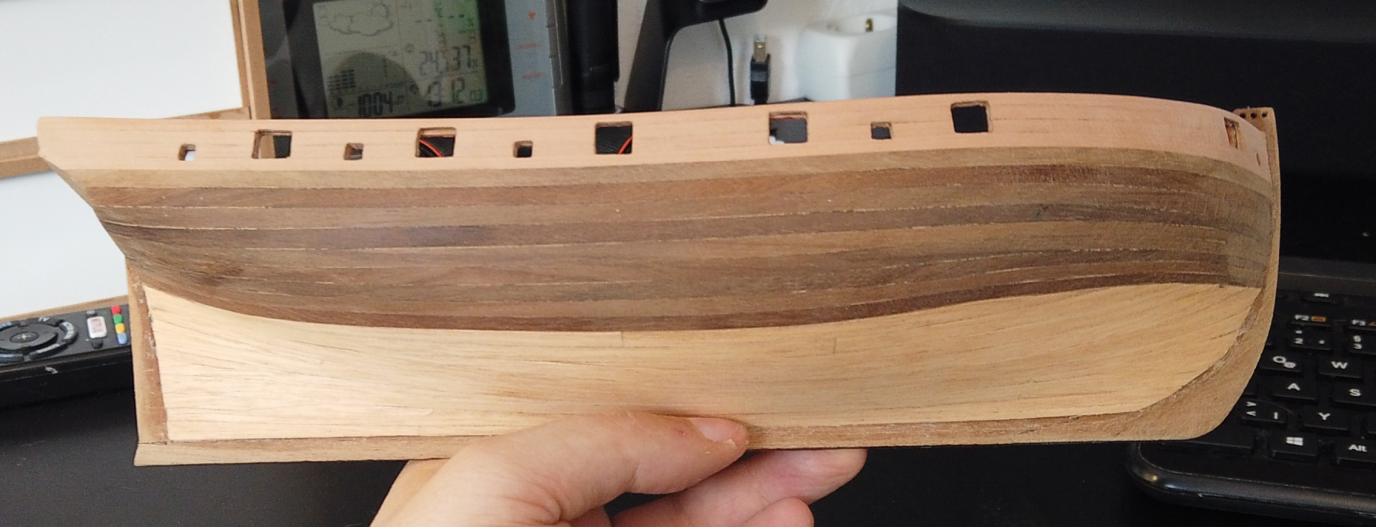
Still need to do the port side, 6 strakes walnut until the waterline, rest will be the Tanganika i have (which means finding a day when i can get rid of the Kid and wife for a few hours in one session)
Question: does acrylics stick to oiled wood ? I wanted to see how it looks when i oil her
- GrandpaPhil and yvesvidal
-
2
-
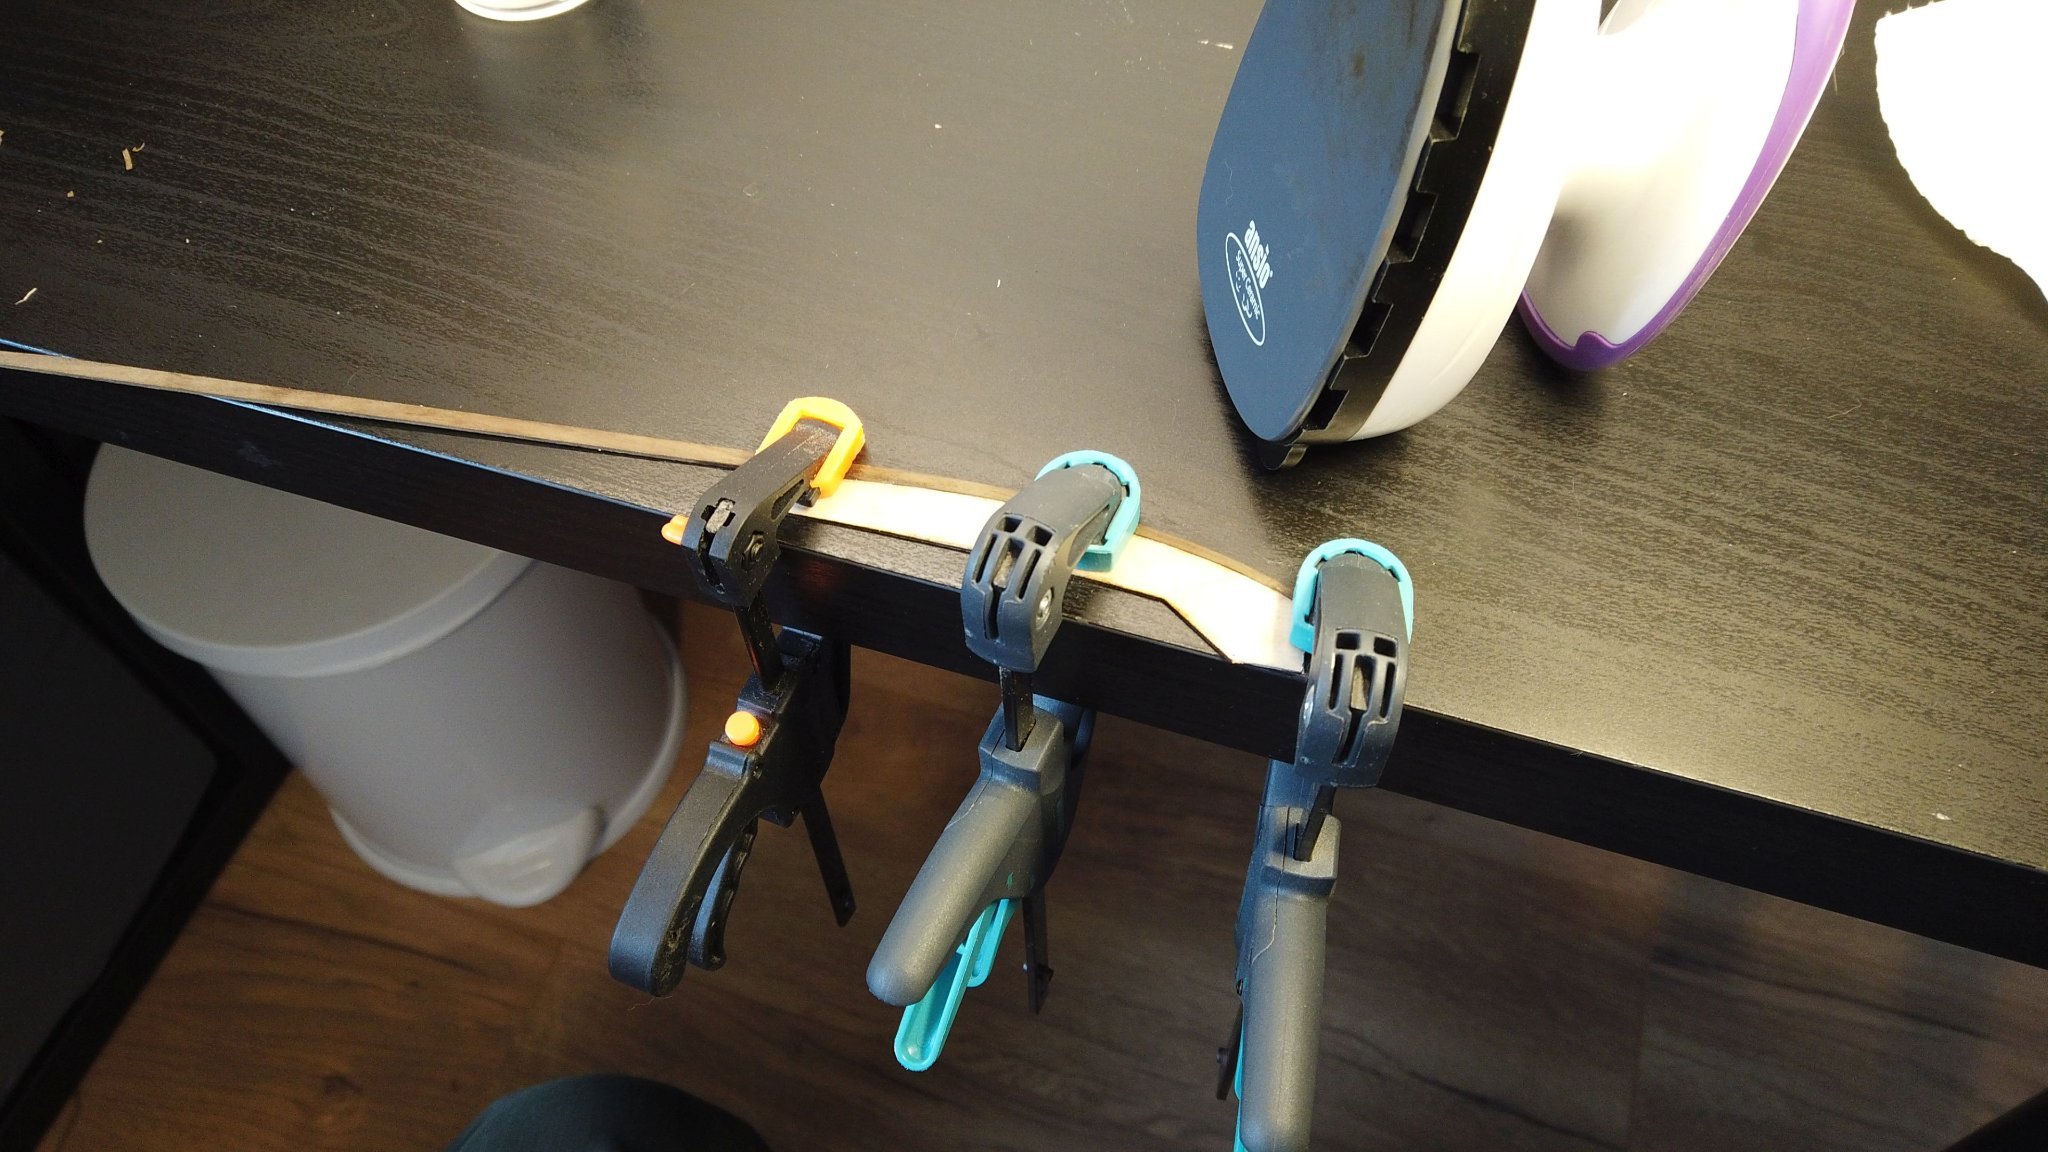
35 minutes ago, glbarlow said:
With that clamp in the middle and just the table to iron on not sure how you’re heating enough or long enough to hold the curve.
oh, that middle clamp i have added at the end, after ironing for around 2 minutes
-
Like this:

still, they refuse to keep the shape, also they tend to snap back to weird curves after i do the bending to fit around the hull.
Anyways, i have already decides, that the hull will be painted, now i am experimenting with a cheat-Technique below the waterline which is very fast but definitely not how it should be


.JPG.3d0f6da2b8cba67a9ce70d67df8537a7.JPG)

.JPG.00901fbfd5d7876efa48518aa4caf585.JPG)
.JPG.51dd1be1b7aa85b1e8f54c638abc97cd.JPG)
.JPG.31cf926ac4b169e2b52af67b337eadb9.JPG)


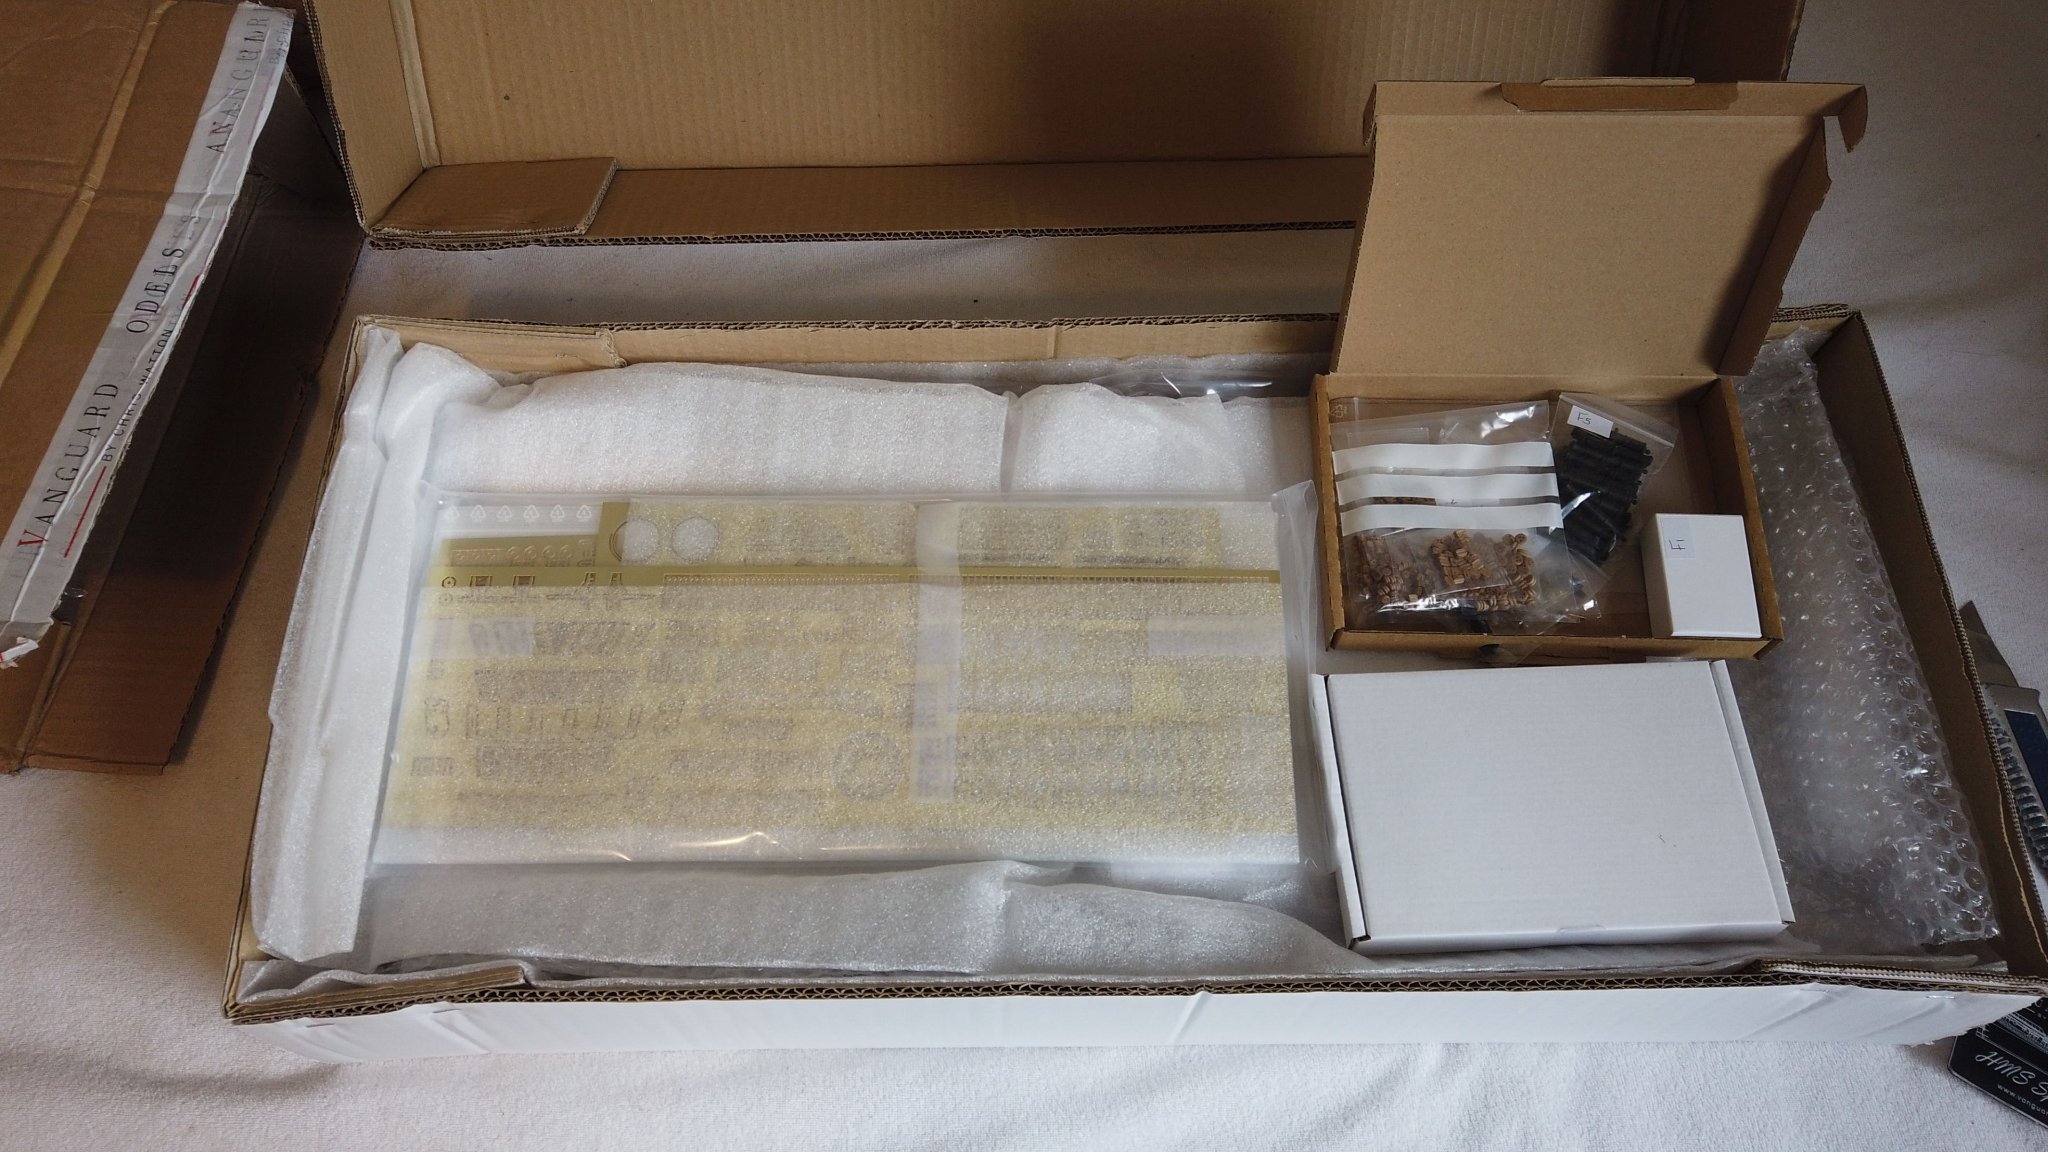
Chris Watton and Vanguard Models news and updates
in Traders, Dealers, Buying or Selling anything? - Discuss New Products and Ship Model Goodies here as well!!
Posted
that")