


Jasseji
-
Posts
604 -
Joined
-
Last visited
Content Type
Profiles
Forums
Gallery
Events
Posts posted by Jasseji
-
-
42 minutes ago, Richard44 said:
When I was a kid, we used to make cannons out of empty .303 cartridges, drill a hole in the end, put in gunpowder from a firecracker plus a wick add a ball bearing, light the wick and let it rip!!!
Could we do this with the Sphinx cannons? 😆
i think if you use swiss ffff black powder it could work, although getting a thin enough match for the touchhole might be a problem

- chris watton, Canute, Old Collingwood and 2 others
-
 2
2
-
 3
3
-
4 minutes ago, chris watton said:
Have sold 39, so 11 left - but these were originally kept back for trade (35 for direct sales and 15 for trade ). However, I am releasing the rest of what I have left and will do another batch as soon as I can. Already ordered another batch of PE. Looks like I will be living in the laser room for a while, not that I mind!
Make Sure to use good Goggles while in the laser room
")
-
14 hours ago, glbarlow said:
Not sure where you heard that, Pear is excellent for planking, I’ve not heard of using beach wood. You can see pear used on any Vanguard build log as that’s what Chris supplies with his kits.
Ye i Just noticed in the Sphinx manual and the materials list, Not Sure where i read it (i think it was in the colored planking guide PDF here on MSW). So pear it will be even tho my Strips are 1x3 instead of the 1x4 - maybe they'll be easier to bend even
-
6 minutes ago, chris watton said:
Yes, there are only 2 lots of planking strip, the 1x5mm limewood for first planking, and the 0.8mm pear for second planking.
ah, yes, mixed it up
- Canute, mtaylor, Old Collingwood and 1 other
-
4
-
19 minutes ago, chris watton said:
I would say it is a kit most could build. BUT, they need to take their time at every stage and not rush anything.
The batch of 0.8x4mm pear strip I ordered for these kits is the best I have seen, nice and light, too, so will look fantastic under the blue and gold upper works. If I were building it again, I would use the planking under the upper half of the pre etched and cut sides.
Pear for Planking you mean ?
- thibaultron, mtaylor, Canute and 1 other
-
4
-
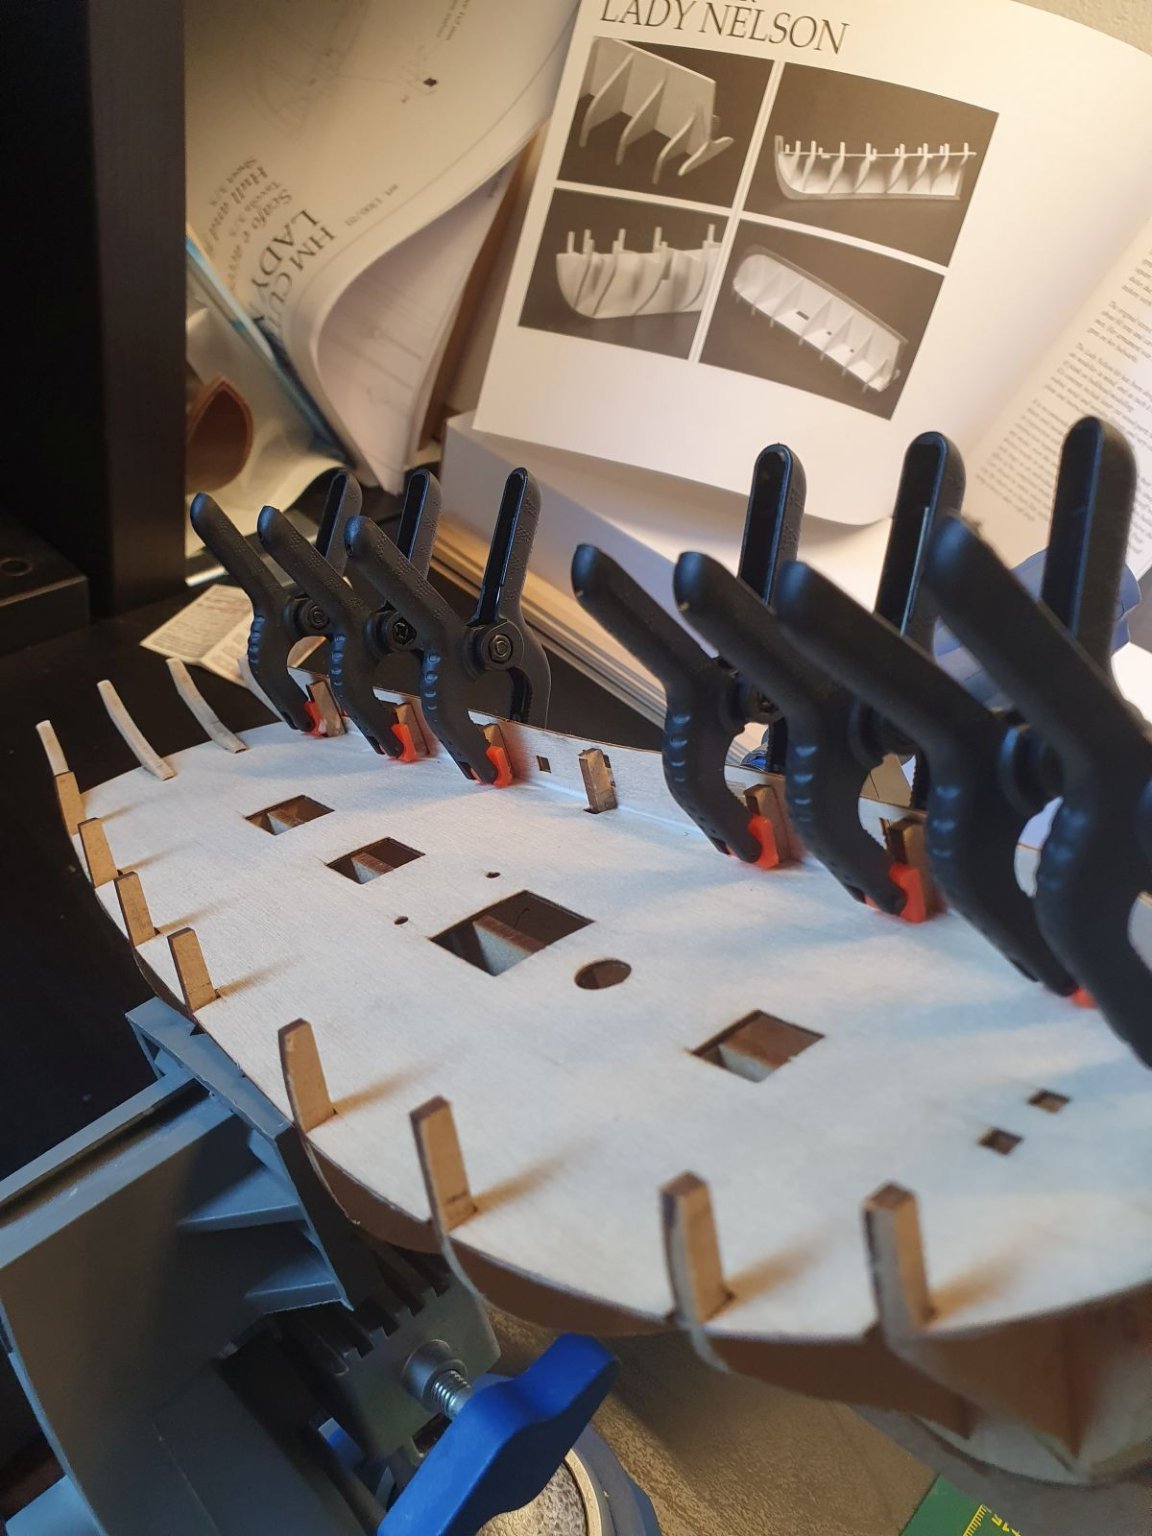
20 minutes ago, Thukydides said:
I love dollar store clamps. If the break you can always just get more.
i got a set of 8 for 3EUR so i now have 16, looking for those steel clamps with the rubber tips tho, cant find them anywhere locally.
PS: Travel Iron arrived in time for second planking, although i am still waiting for Beechwood strips (or i can use Pear but somewhere i read it is not good for planking - comments ?)
Sanding, ding, ding
-
By Looking at the Manual, this Kit should be rated at Advanced Beginner and not Intermiediate (might drive the Sales up even more :P)
The amount of shortcuts implemented to ease the build seems enormous

-
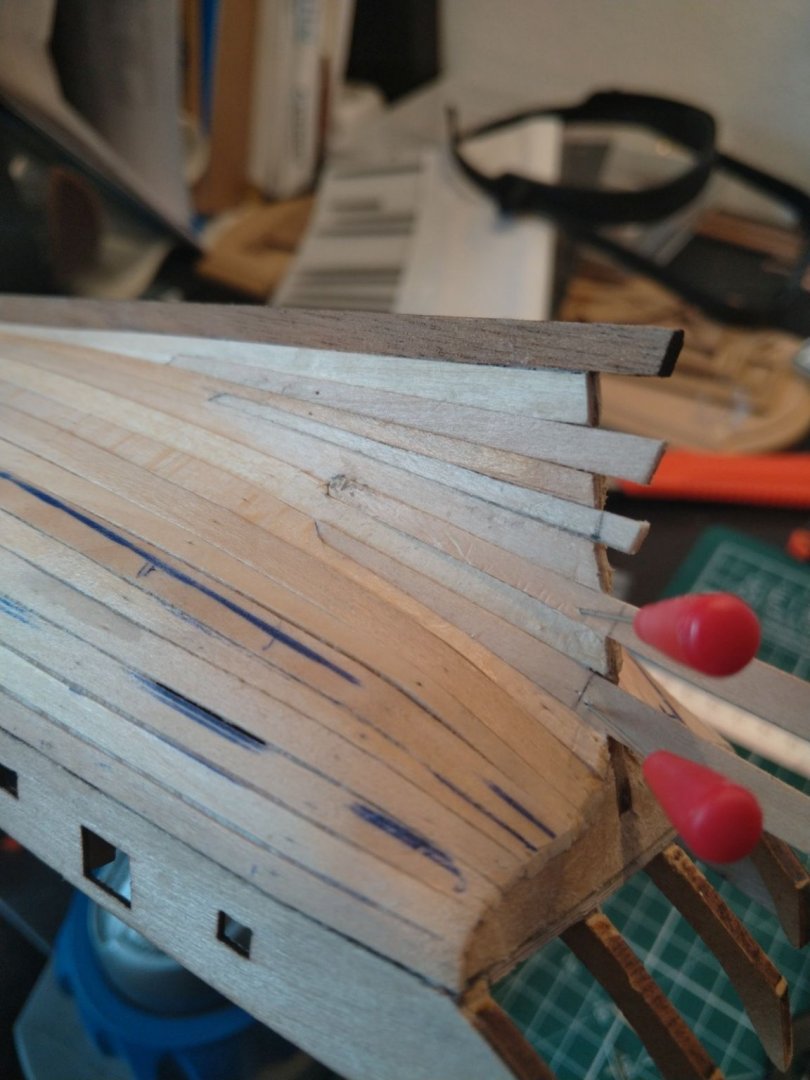
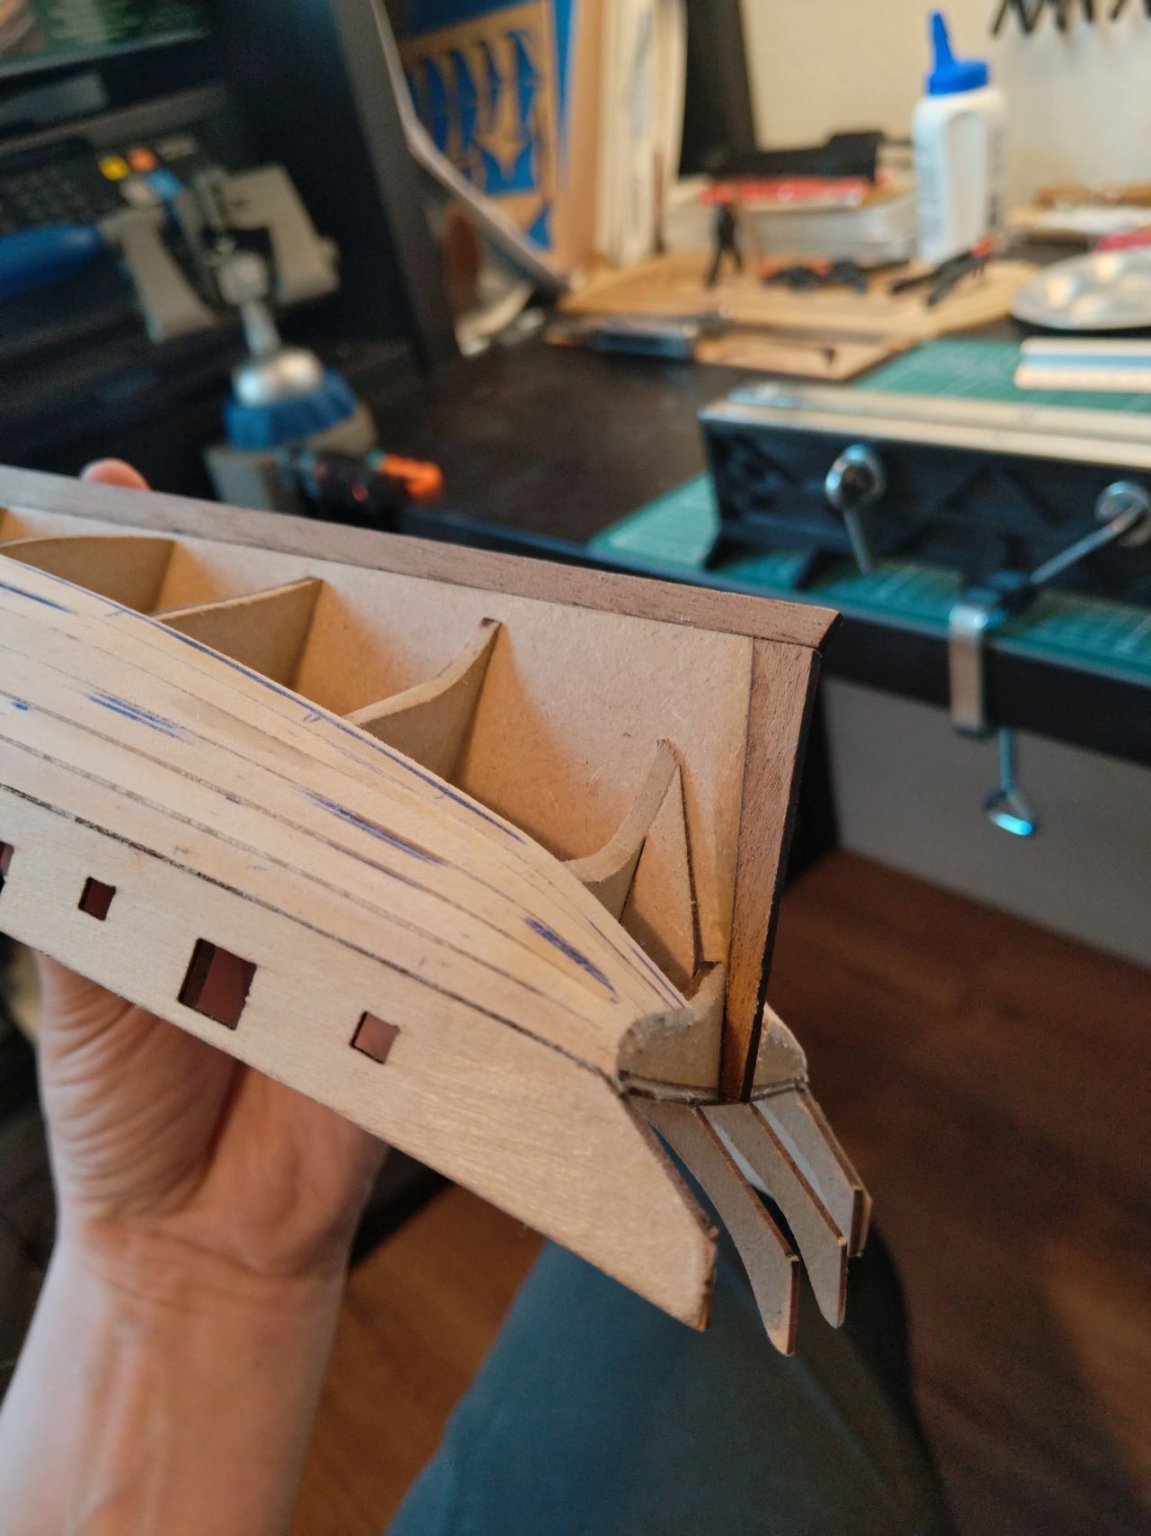
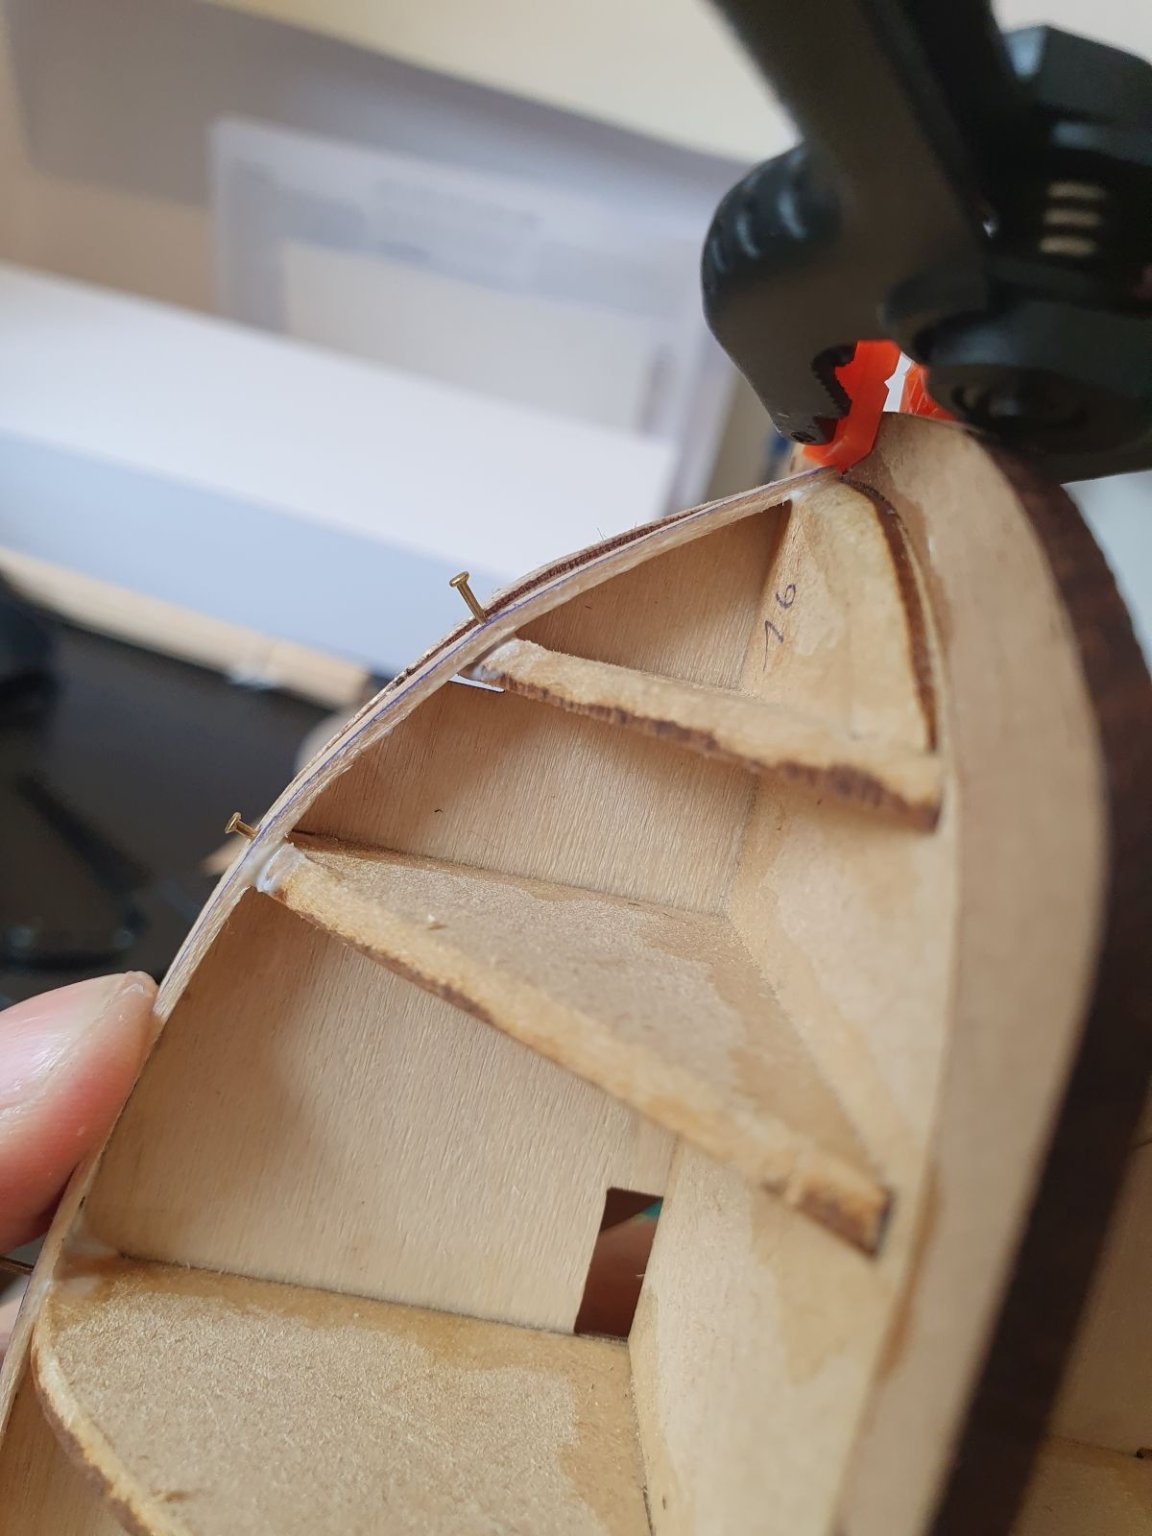
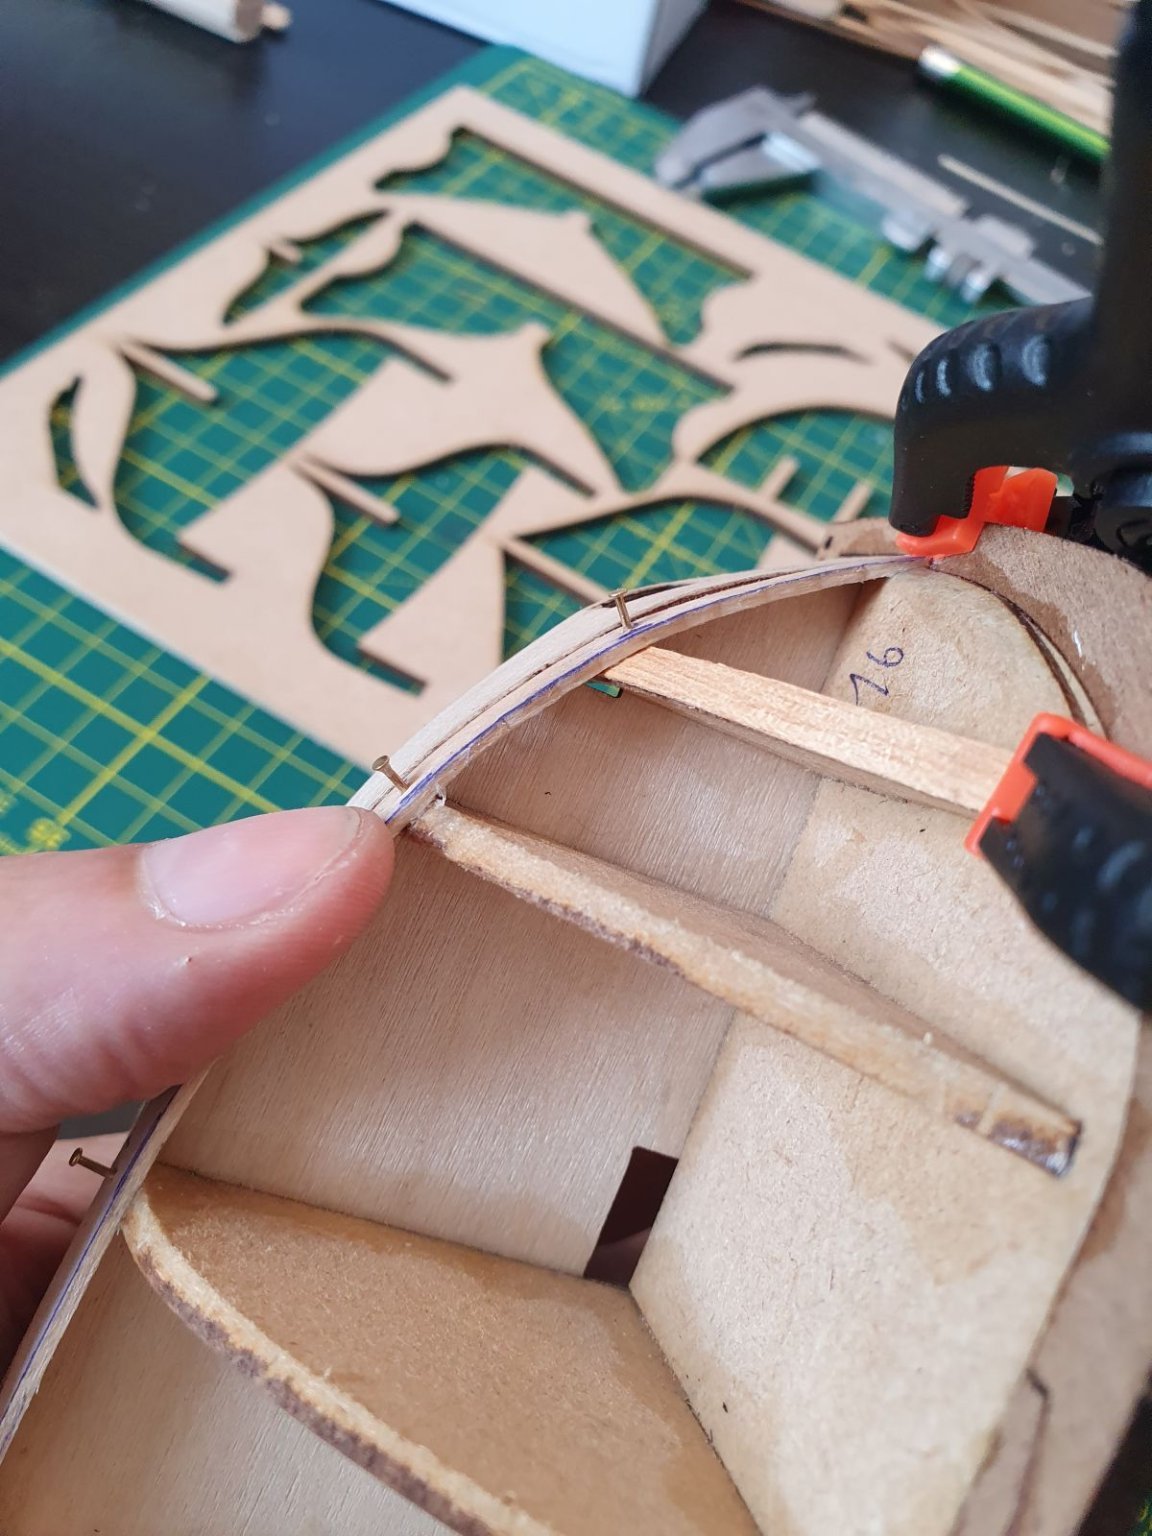
Installing Stealers to the stern, ready for Sanding:
- Gregory, CiscoH and Overworked724
-
3
-
-
35 minutes ago, allanyed said:
You have been given a lot of great advice. Regarding the proper amount of tapering, be as accurate as you can in marking off the run of the planks on the first layer before starting the second. This will show you exactly how much taper anywhere along each strake of planking.
Allan
Yes, and i am attemting to follow and adapt along the way
-
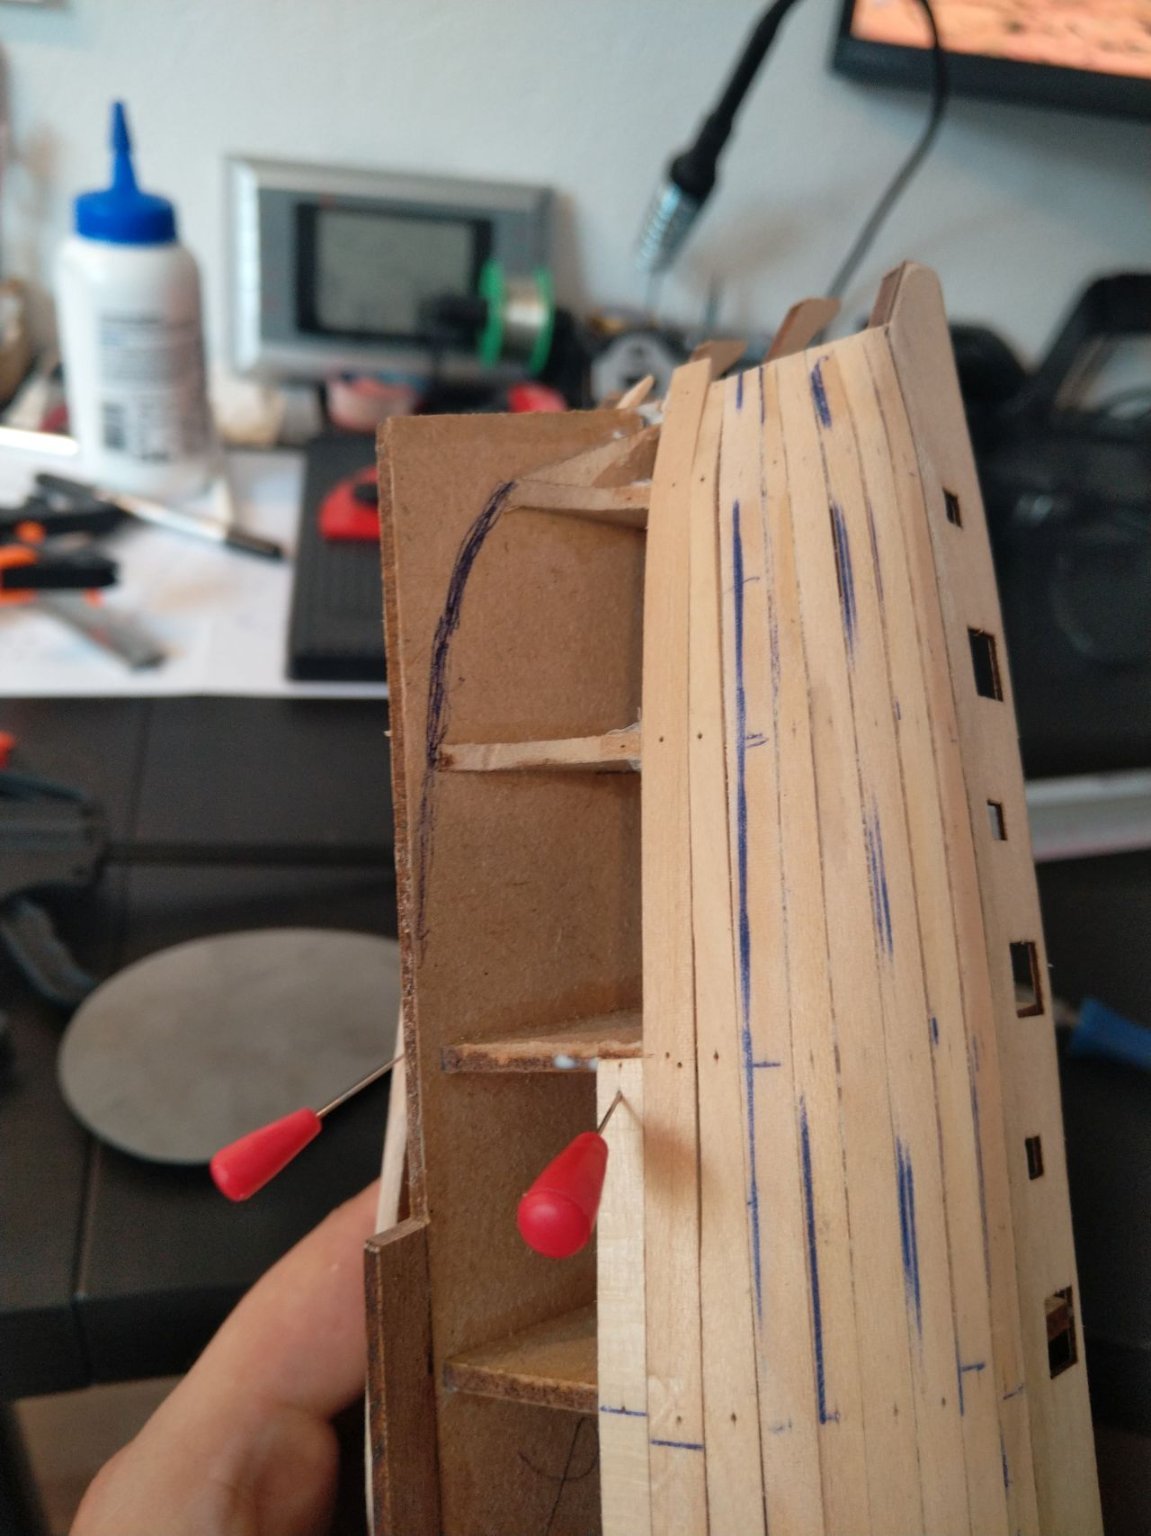
i decided to cut out the Sternpost and keel and draw a berading line.
I thinned it a bit too much at the stern, but this will be covered by planking in the end and i think i can make it square when gluing the post back in

Edit: Also, my clinkering seems to be gone on the Bow, by the time i finish the first planking, i should get into a good rhytm for the second
-
In the meantime, the Mantua Strip Plank holder is doing it's job, i was able to produce 2 sets of 2 planks each with consistent taper.
I am still soaking the wood however, as i find it's easier to cut the planks then.
Is there any downsides to using Lime as an outer Planking layer ?
I was thinking to lighten up her colors a bit but cant get Beechwood locally.
Or any other tips for some bright nice-looking wood for the outer bulwark (Sapelly?) ?
-
7 hours ago, drjeckl said:
I highly recommend getting a travel iron for the edge bending. The following is popular here:

Yup, just ordered.
-
48 minutes ago, drjeckl said:
As to the edge bending, the practice is that one needn't soak the plank before using the iron. After you set the plank under the clamps, just dip your finger into the water source and rub it over the area you're bending. That's all you need to do.
I am using a hair dryer at the moment, so dipping not soaking ? (i have a metal tool thingie with curves which i use now to get a shape)
48 minutes ago, drjeckl said:And I agree with Paul; just glue the broken pieces together and sand down the seam, And who cares whether they were supposed to left unpainted or not. I actually planked the stern counter and it looks nice. Be creative!
ye, or redo it in Lime, i have a lot of lime strips lying around and was actually thinking of doing the upper bulwark in Lime
45 minutes ago, Gregory said:Actually, with this hull form, the planking fans out at the stern for several planks..
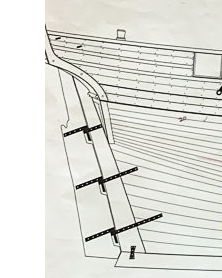
This is a snip from the Cheerful plans drawn by Chuck..
Without wider planking stock this is not possible.
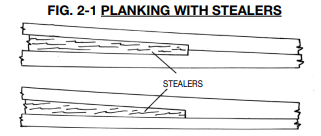
Your plans may show what are called stealers that are used to fill in gaps that
would develop if the uniform planking strips are used..
that's what i was thinking, now that i am at the 8th Plank, i will leave the stern untapered, stealers will need to be added anyway
Got to the Hobby store and bought more clamps (+Pins with Thick heads - i LOVE Those)
-
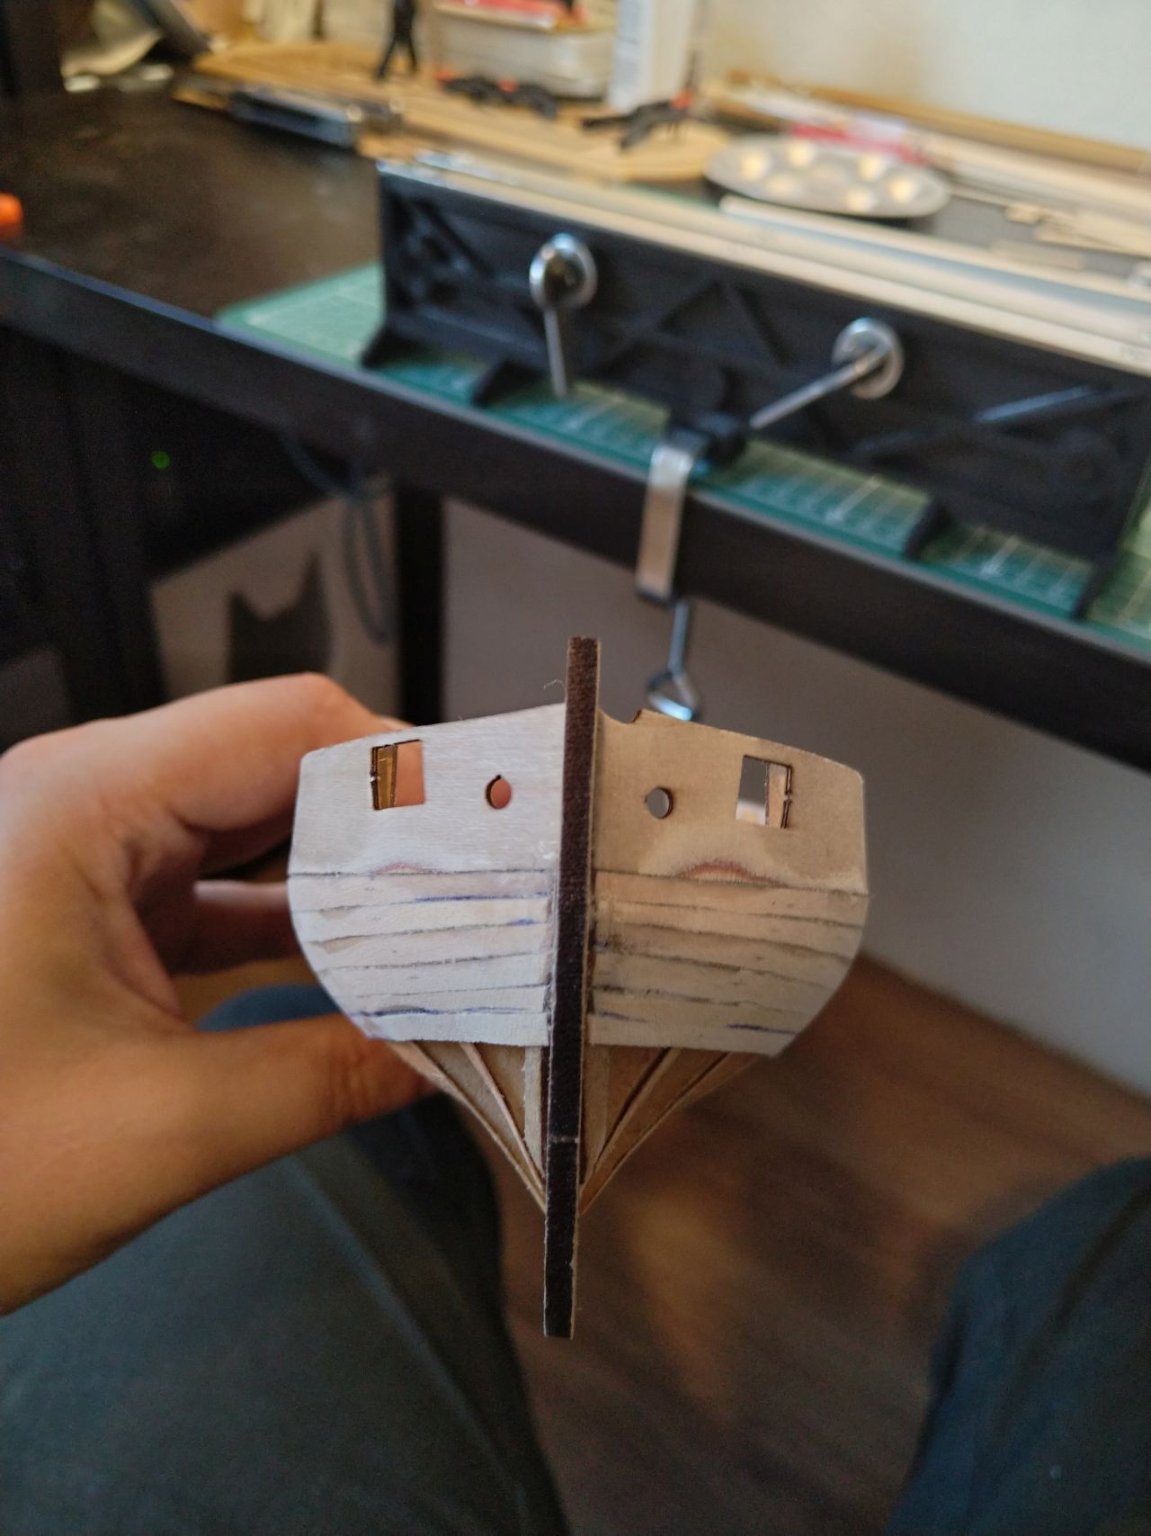
Did a bit of test-sanding to see how bad it turned out, despite my inconsistent plank fabrication, they did line up in the end
6 Planks done, 7 to go (the consistency has to improve, now i have the plank cutting vise so...)

Stern:

-
Pre-Ordered (Please no Royal Mail anymore
- Joke)
- mtaylor and chris watton
-
2
-
1 hour ago, PRS said:
You could just glue them together and sand down the glue seam.
might try that actually, we'll see how it works out
-
The Damaged parts i was talking about initially, i will have to figure out a way to fix them or redo them
I do have some 0.5mm Abachi Veneer so maybe glye them on it and sand down ?
What you think - the Gaff/Boom Jaws will be painted anyway but the sten conter and fascia were supposed to be left unpainted (actually painted from the Inside so i could fit them so the Abachi faces the inside of the ship and then paint it when i paint the inner bulwarks red)
Brainstorming ?
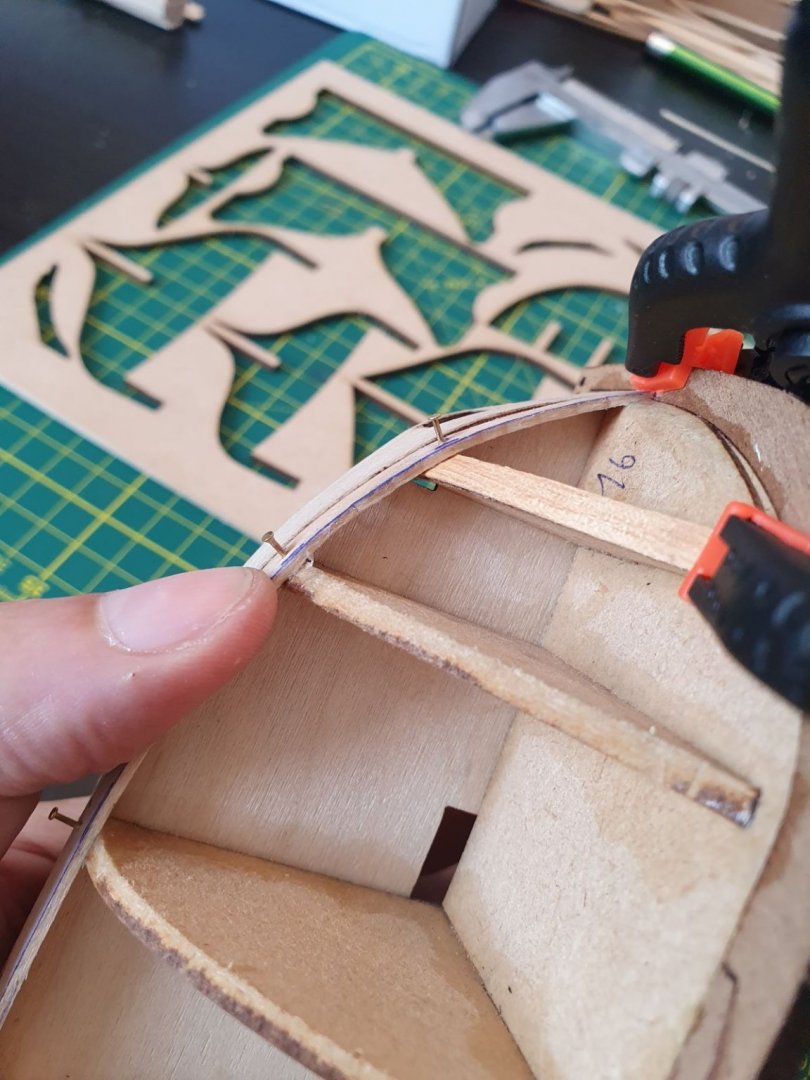
I SEEM to get the hang of the edge bending after several attempts, finally got some planks which decided to stay in shape
Edit: Should i taper the planks on both ends ? I saw 2 approaches even for the LN - @PRS didnt, but on the still-motion video someone posted there was taper at the stern as well, i got mixed feelings now
-
2 hours ago, drjeckl said:
Jacek,
I had the same problem, clinkering, with my LN. I was advised by the more experienced builders here to watch Chuck Passaro's video's on planking, especially the 3rd one on edge bending of the planks. Once I started doing that, the clinkering was drastically diminished. I highly recommend that you watch them. You can get the link from here:
Yes, i did watch them, somehow my planks dont want to stay in shape, i think my heating method after soaking is bad, i need to invest in a travel iron,
2 hours ago, glbarlow said:Have you looked at the other Lady Nelson build logs? They are a great source to see what others have done and benefit from what they learned. Are you tapering your planks? No more than the first two van be full width. May I suggest your fairing needs work. You should be able to smoothly lay a batten (a very thin strip of wood or even paper card) from front to back and make smooth contact with every bulkhead. The front bulkheads seem to have an angle to them verse a curve.
Those gun ports often buckle a bit at that spot, you’ll be able to sand it down quite a bit after the first planking.
LN is a good model to learn with, I hope you have fun building it and supporting your son’s hobby store trips.
I do taper every plank (not perfect width on each tho but i ordered the planking vise which should arrive today, cutting them with a knife doesnt produce best results). Also the battens seemed to lie ok initially.
Oh and i try to limit my Son's Hobby store trips, he's 5 and full of "Ooooh that's Cool, let's buy it"
The clinkering seemes to have diminished on the starboard side at least:


-
18 minutes ago, BenD said:
Get more clamps! You can never have too many. I've found even the dollar store ones work ok. Binder clips are also really good for ship building.
Local stores dont deliver and getting to any Hobby store with my Kid is a Pain (he wants to buy all the stuff... Cant blame him, lot of cool stuff there)
In the meantime, i am getting a bit of "clinkering" in the planks, my bending seems to be inadequate, will leave the 1st 4 planks on each side and try to figure out some better way for the rest
-
39 minutes ago, PRS said:
Nice fix and looking good!
so/so but i dont think i can do more at this point
-
I think i overdid the fairing here, first plank doesnt want to follow the bulwark line

Need to find some balsa or maybe wood filler when sanding ?

Edit:
Following Statement might be NSFW:
Going to the toilet helps come up with ideas
Gluing a strip of 0.5mm Tanganika i had lying around to the edge of the bulkhead seems to have fixed the problem:
- GrandpaPhil, BenD, CiscoH and 1 other
-
4
-
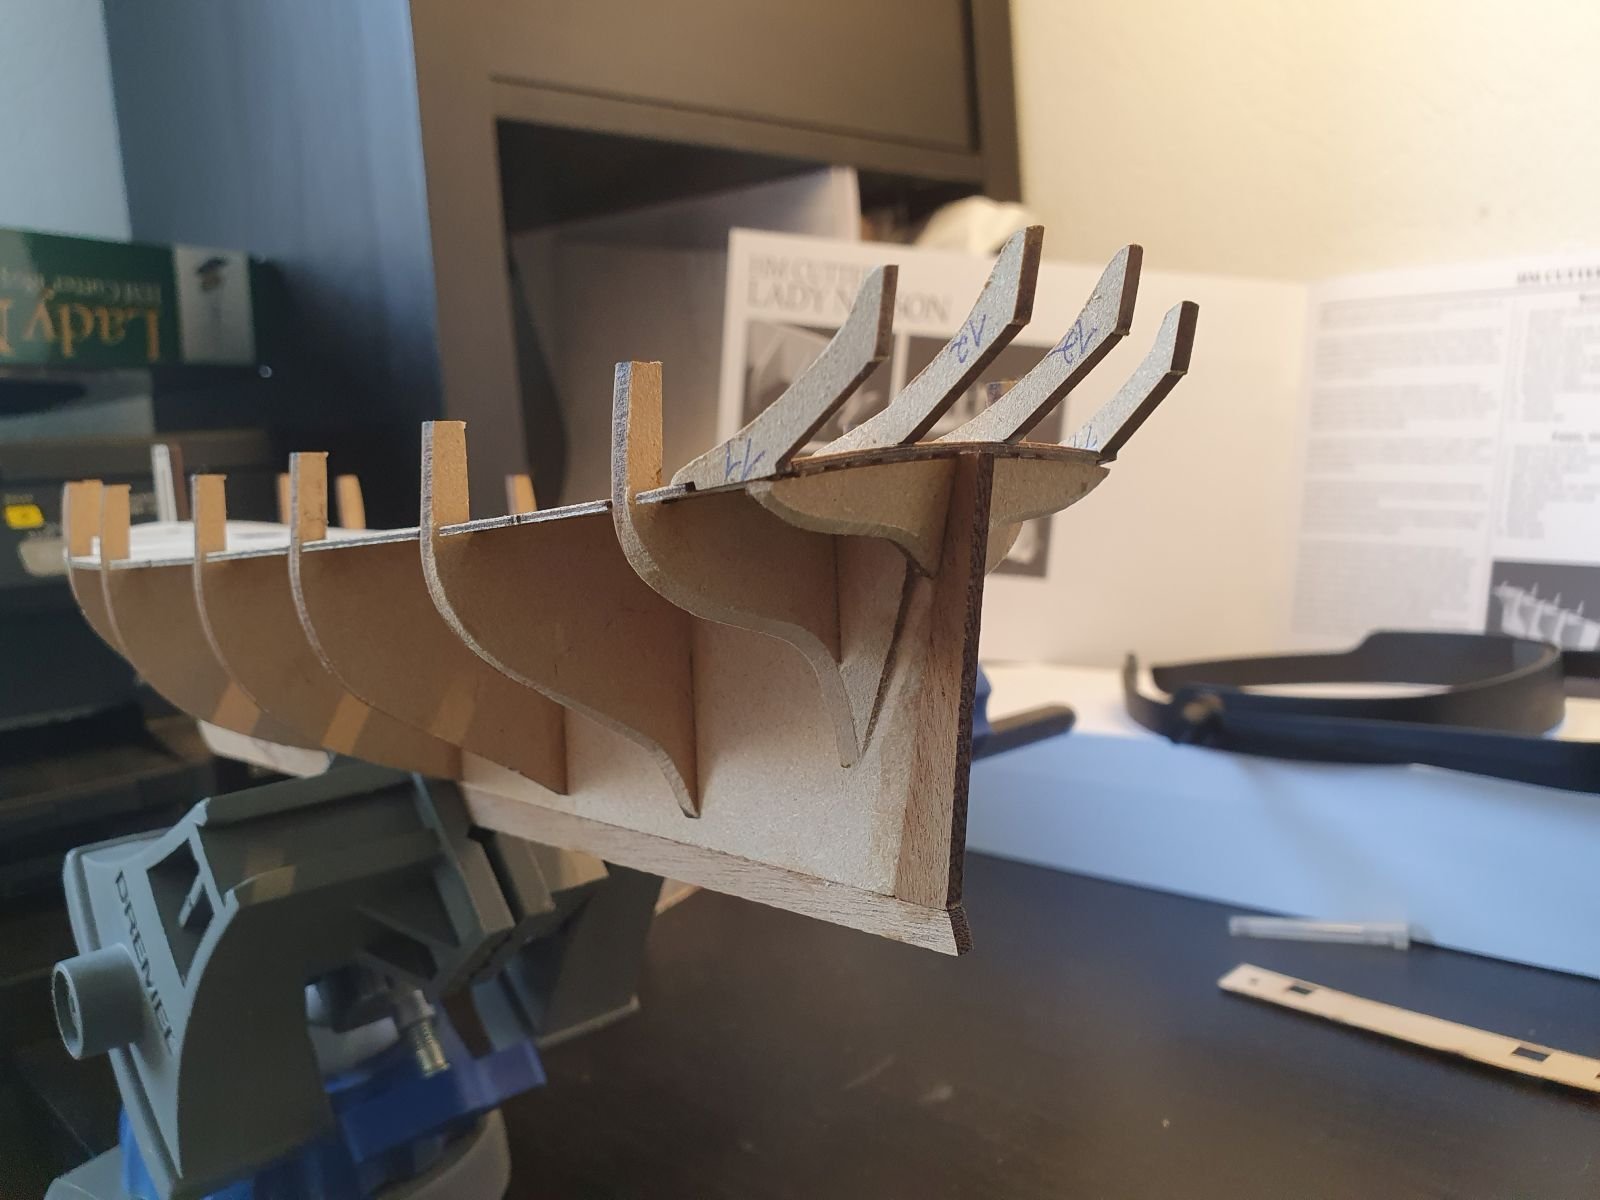
Another batch of pictures.
Bow sanded down:
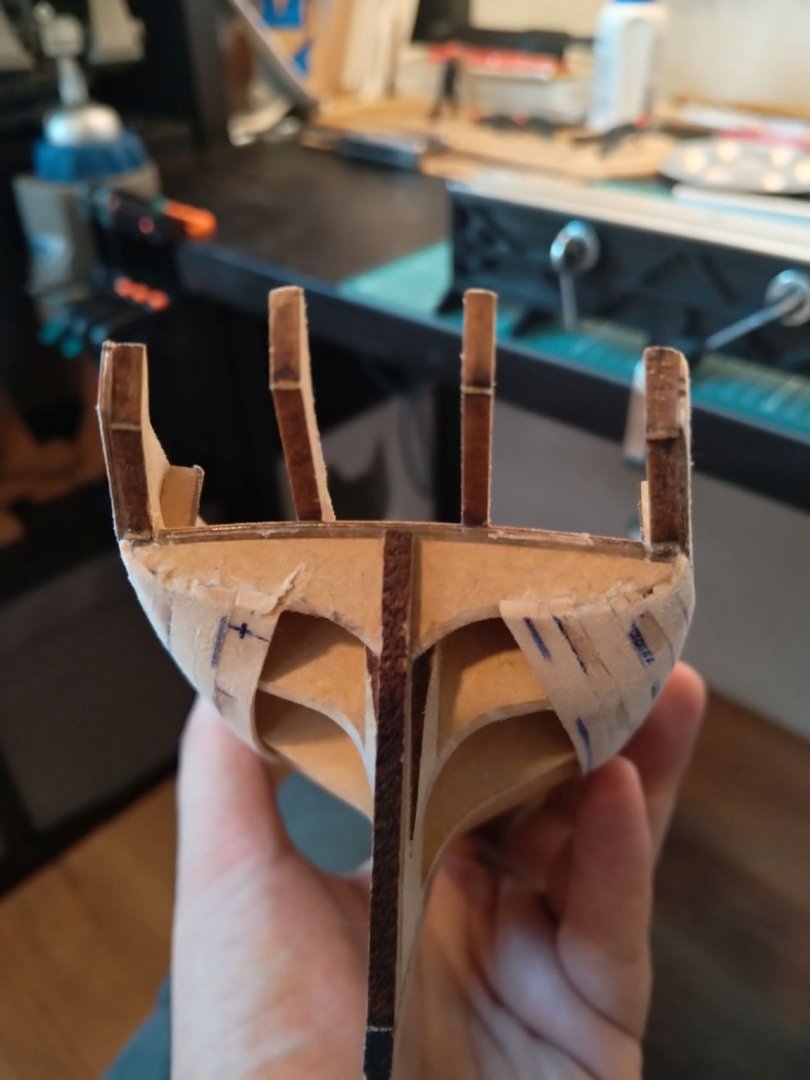
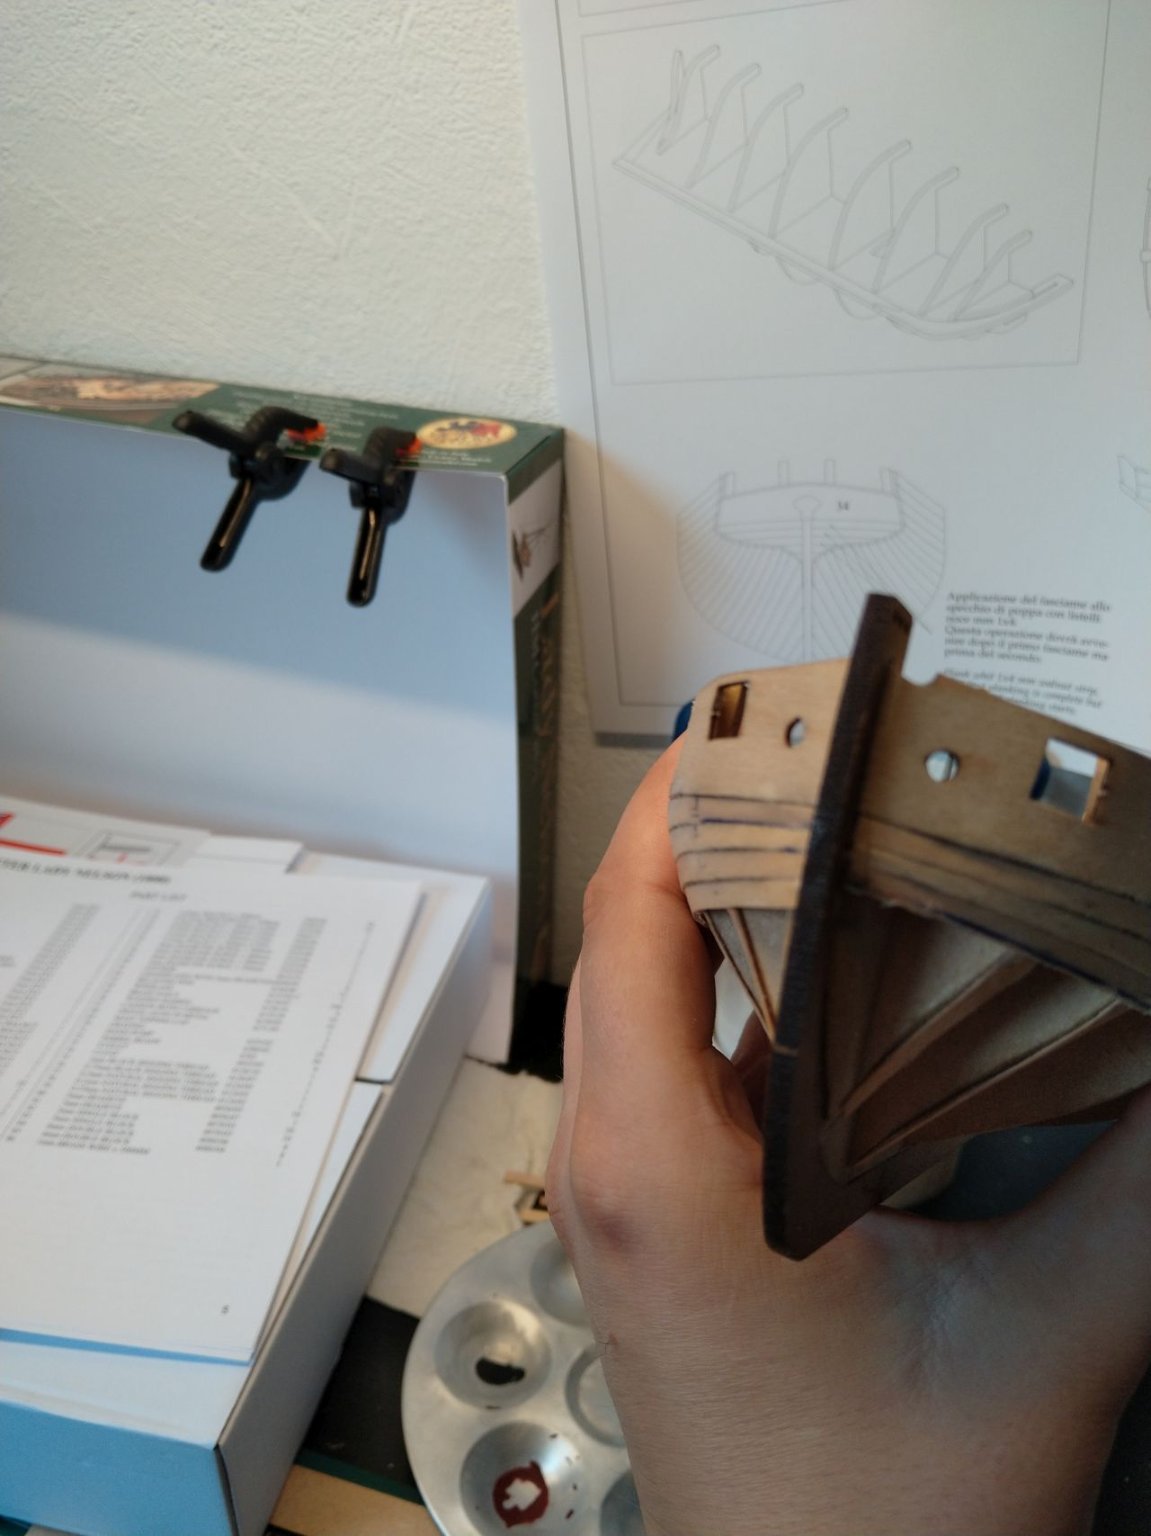
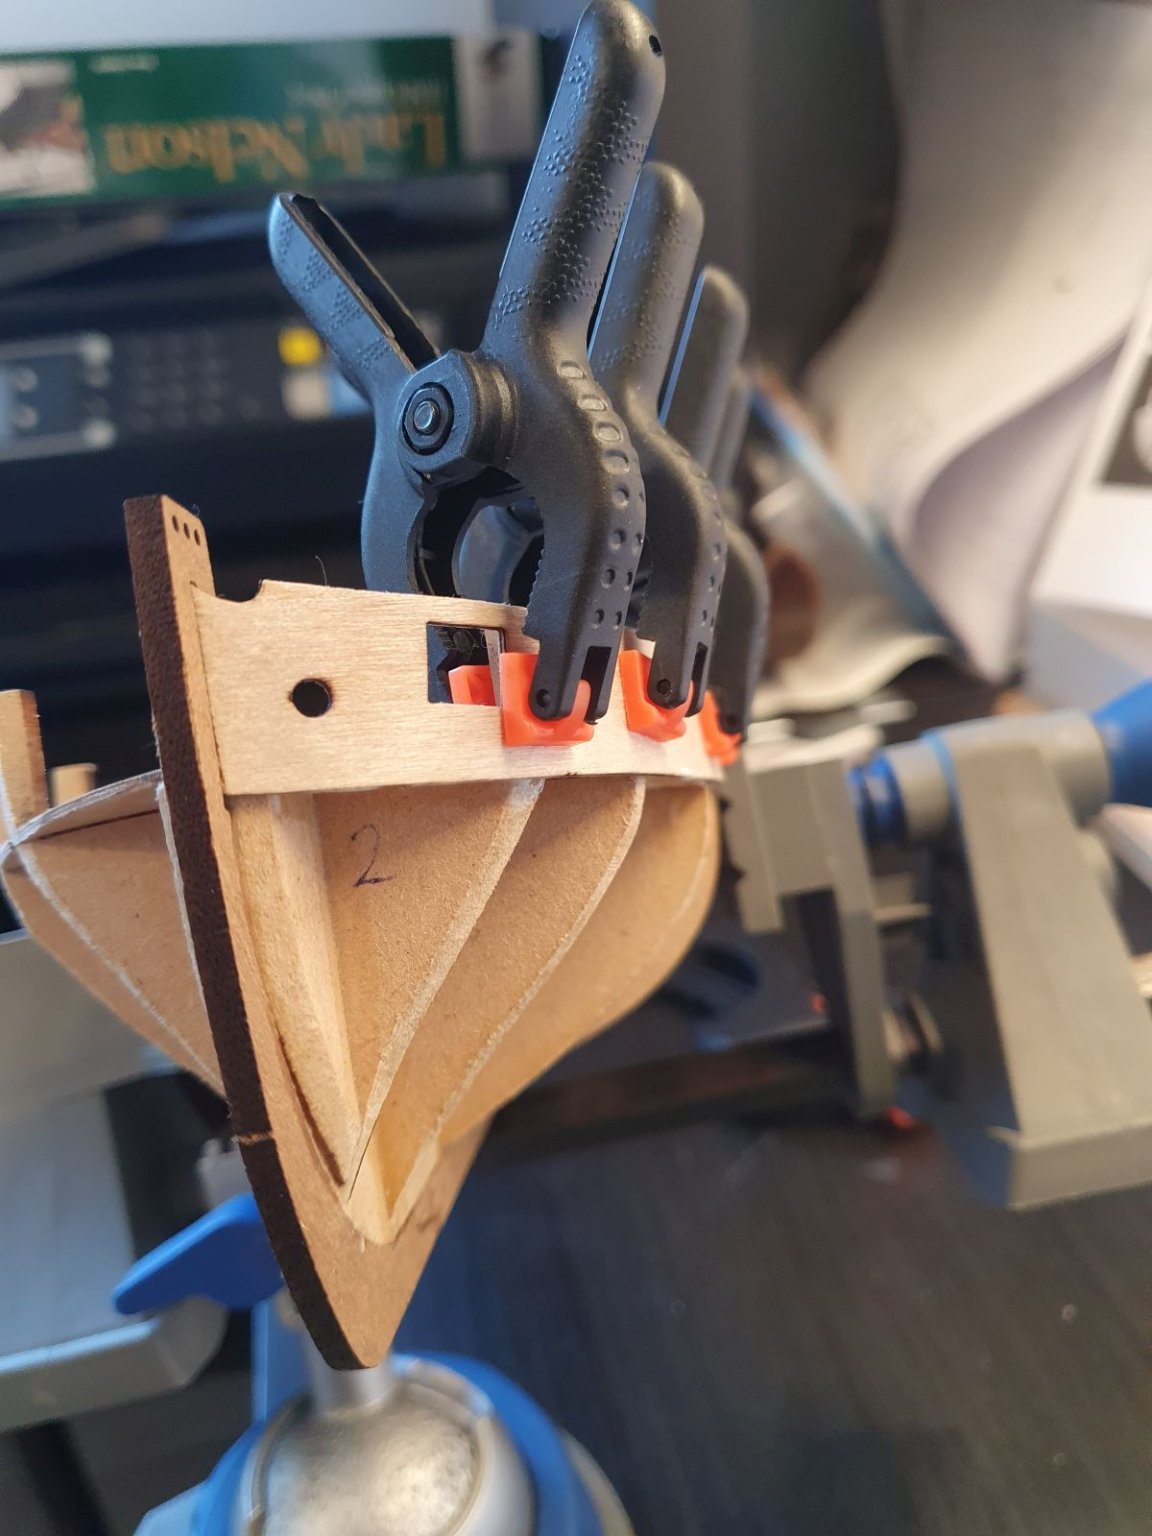
Prow, Keel, ruddr Post + Stern Counter Frames Glued (Yes, i did forget the Rabbet and deadwood sanding, tried to work around it after glue cured but decided to go another route later on):

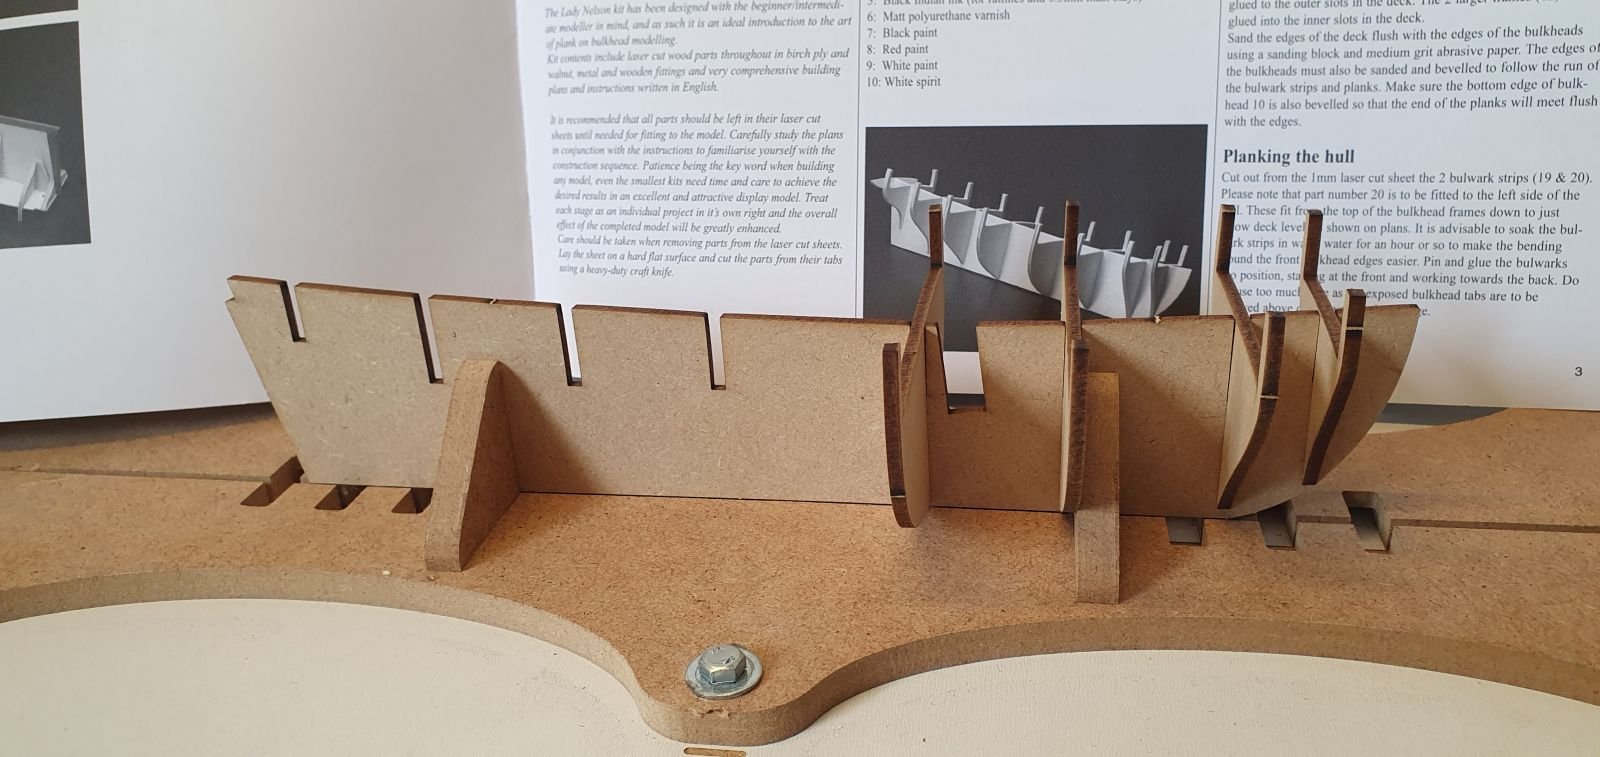
Bulwark Fitting (one at a time, i dont have enough fasteners):


Waiting for the Glue to dry and will try the other Bulwark

- GrandpaPhil and VTHokiEE
-
2
-
So, after 1 mostly successful and 2 unsuccessful builds in the past, i decided to get my hands on something smaller and easier.
Now that i have the space and prospect of not moving anywhere for the next few years at lest, i decided to try this little cutter.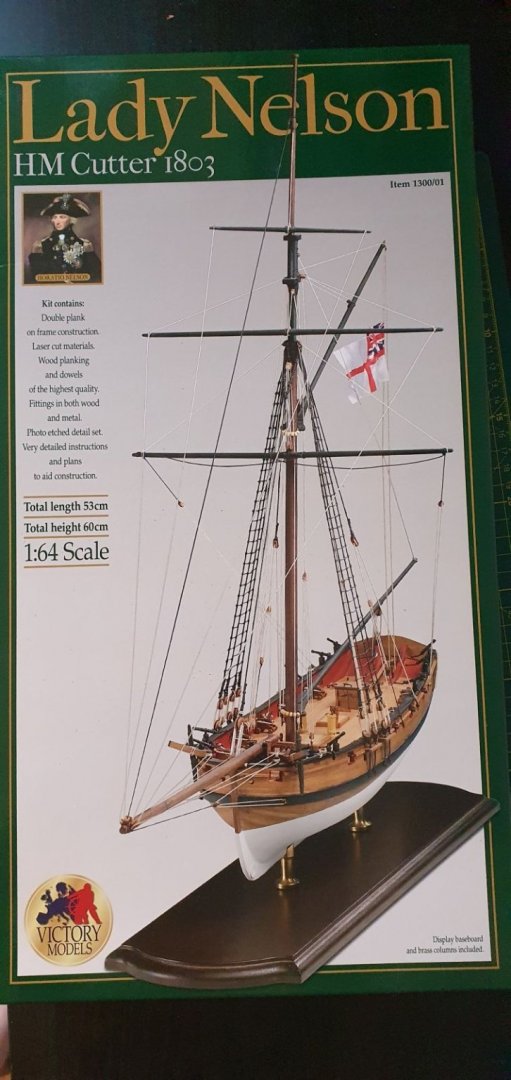
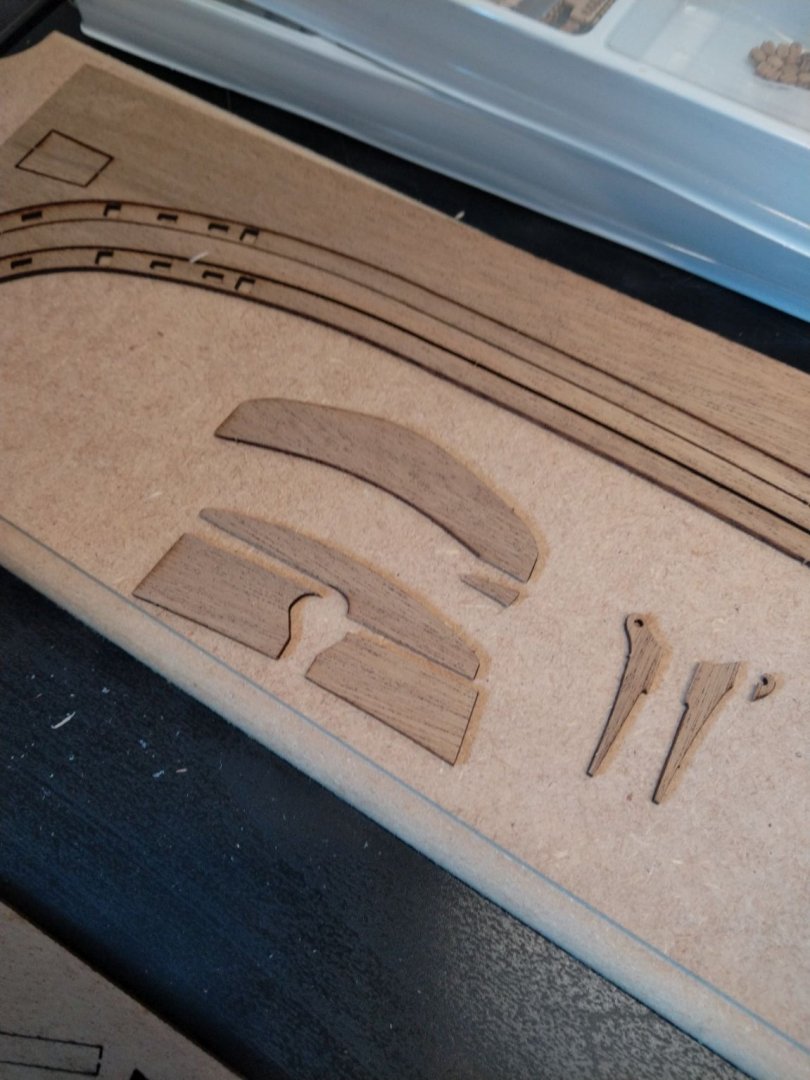
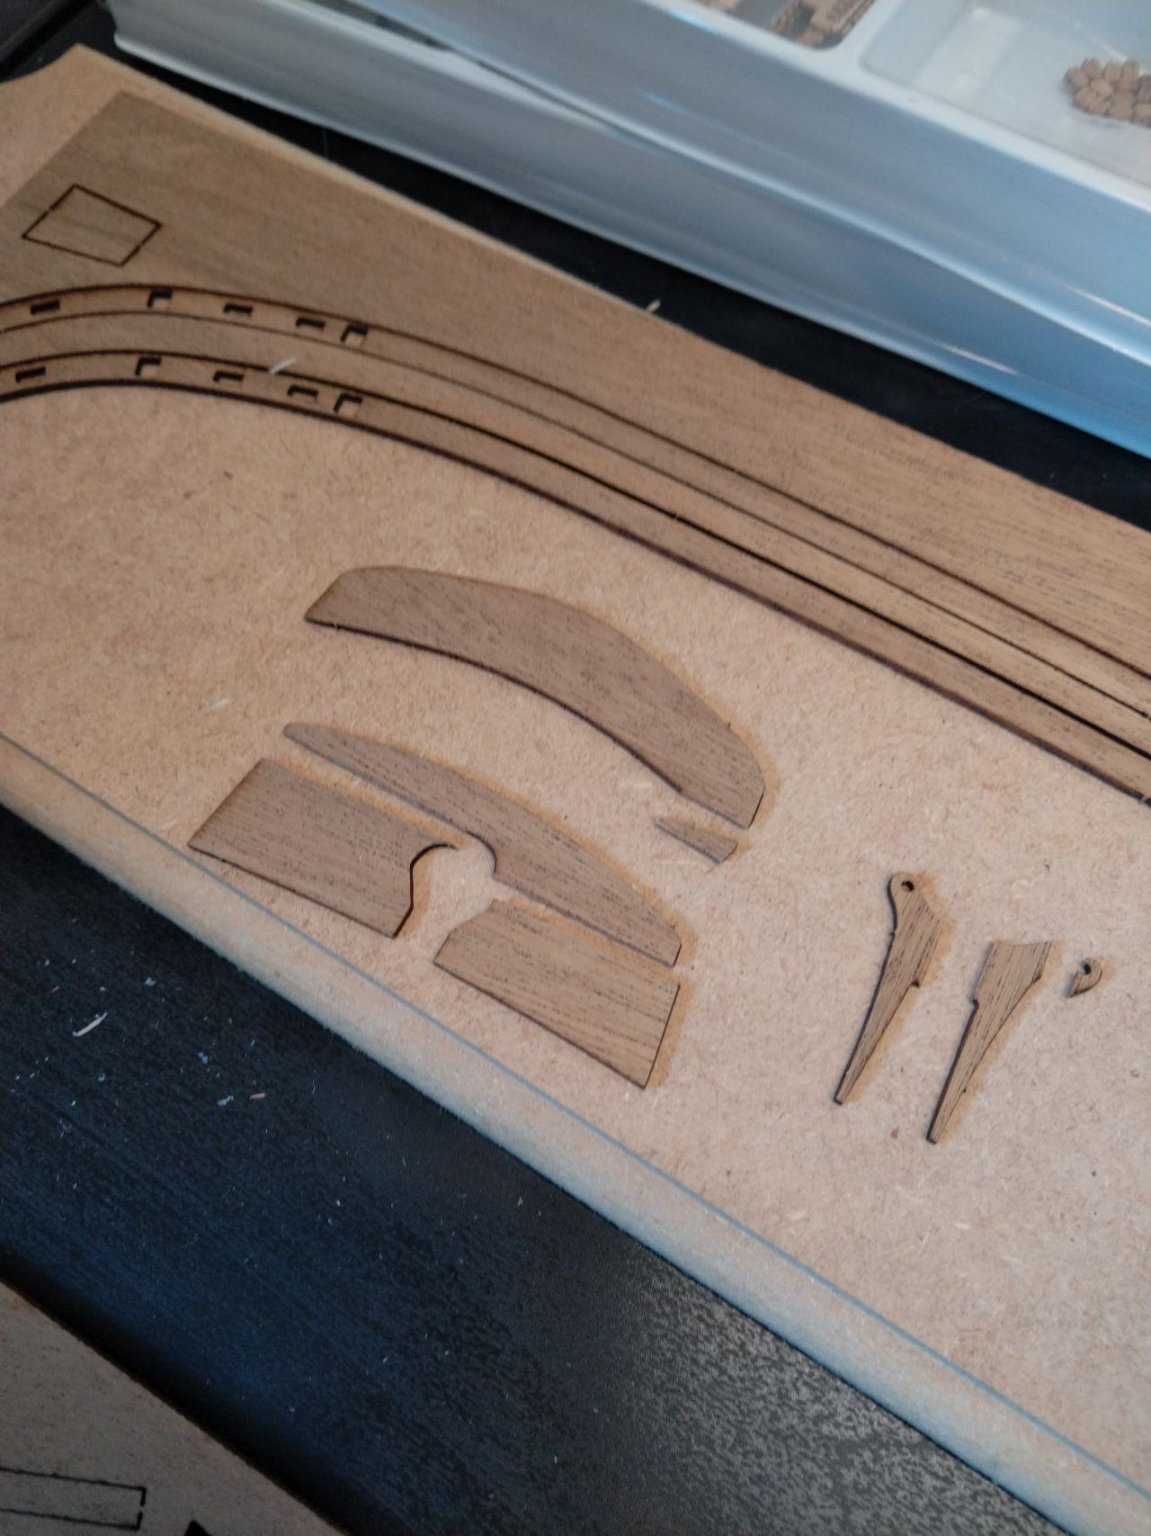
Some bits in the Box were damaged during transport (the laser-cuts of the Stern counter and the thingies which are used to attach the booms to the mast, i will post pics later when i come to it but i think i can fix them with veneer).
So, started on the HZ Slip i have and found out it's too big for the Cutter
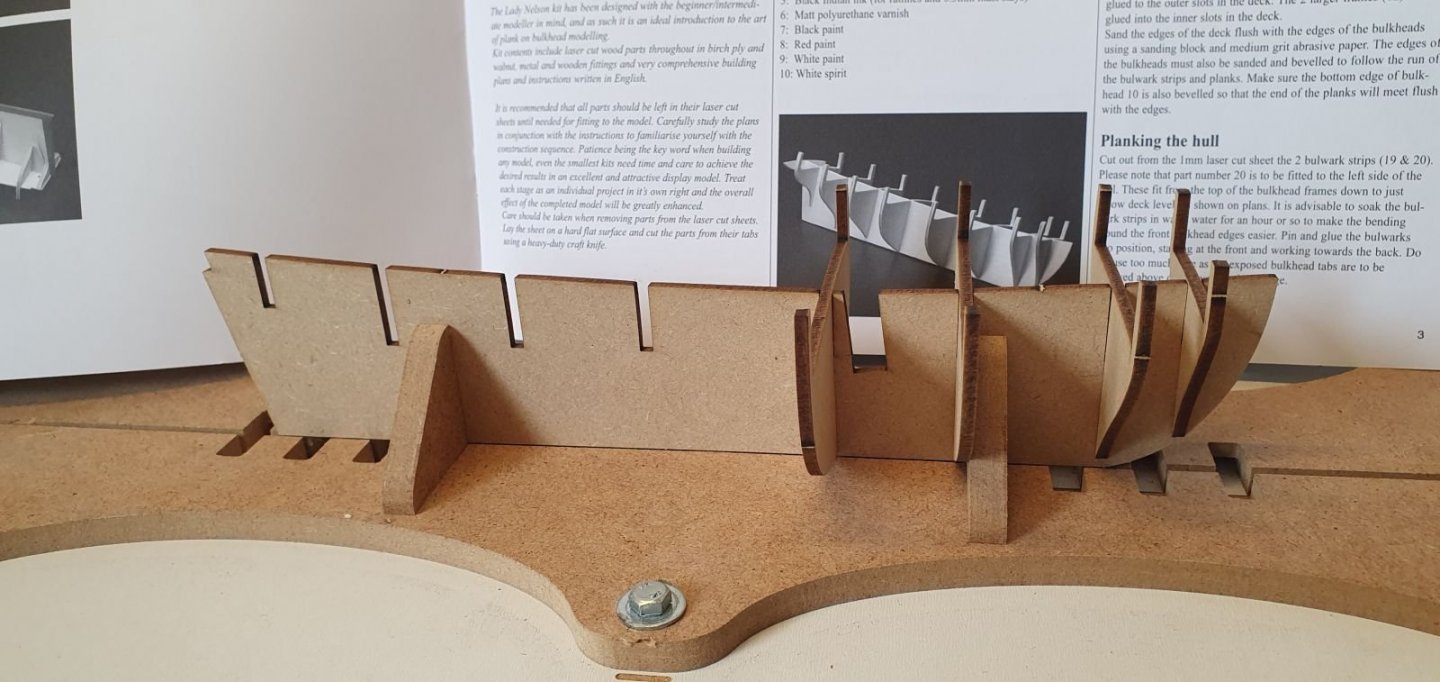
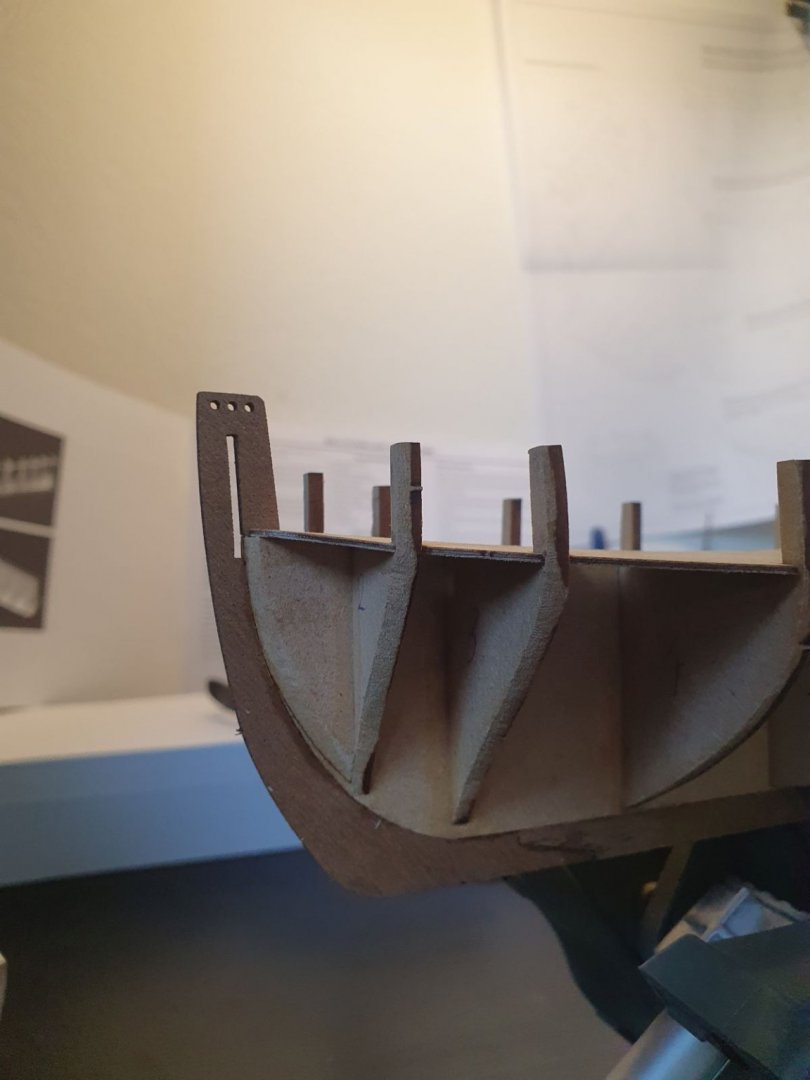
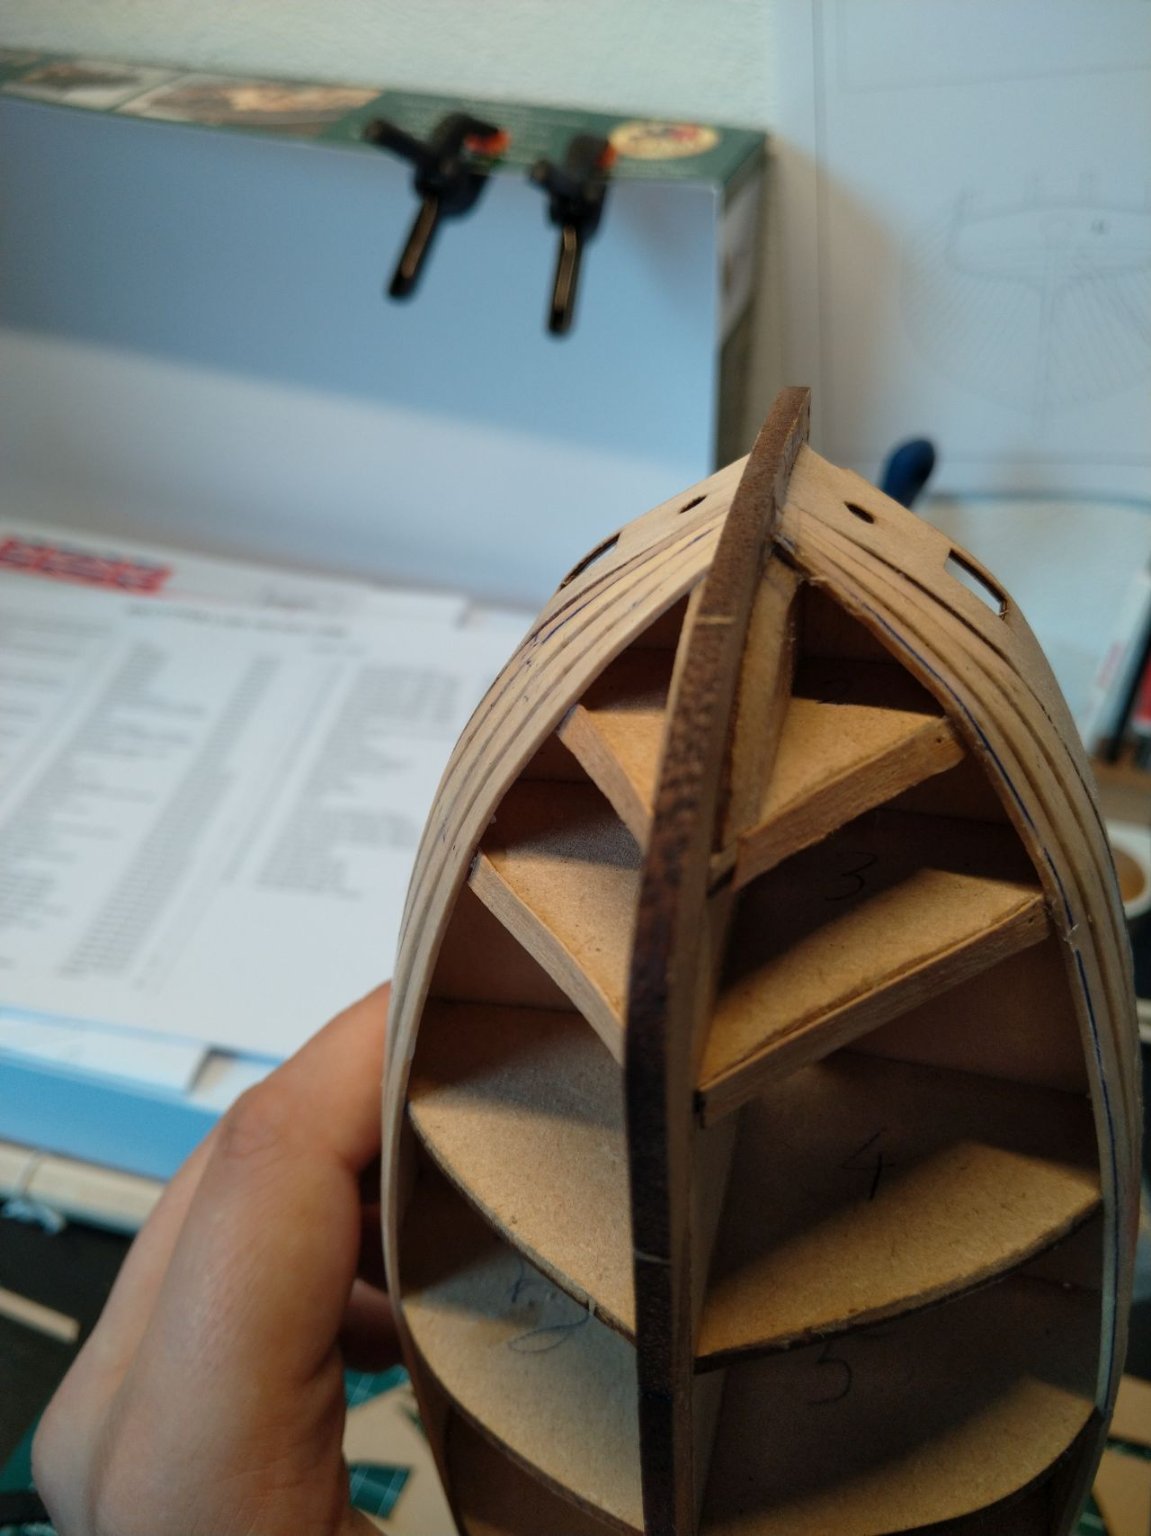
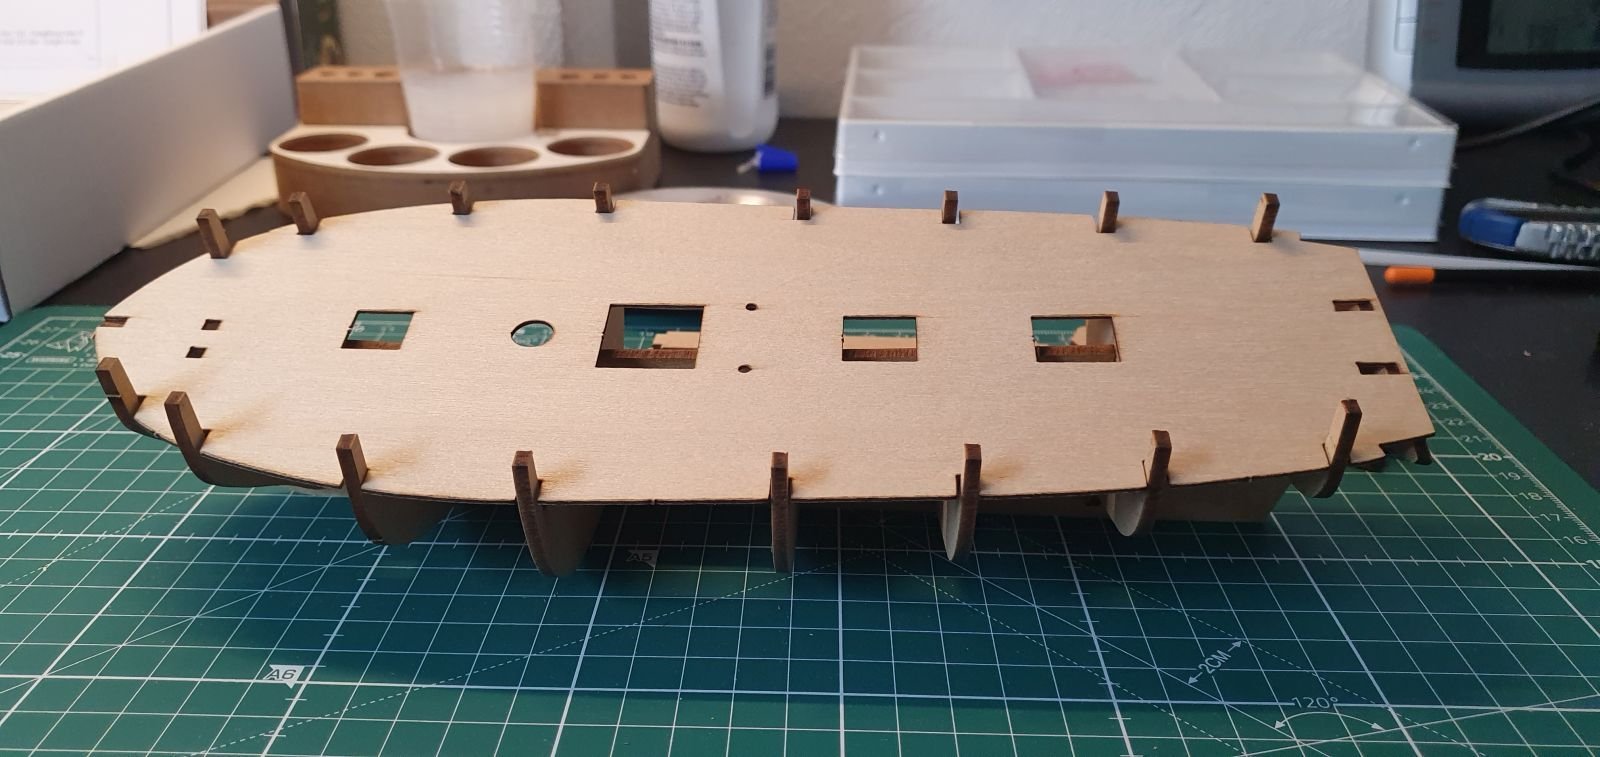
No big Deal tho, managed to fit all frames and the False deck:

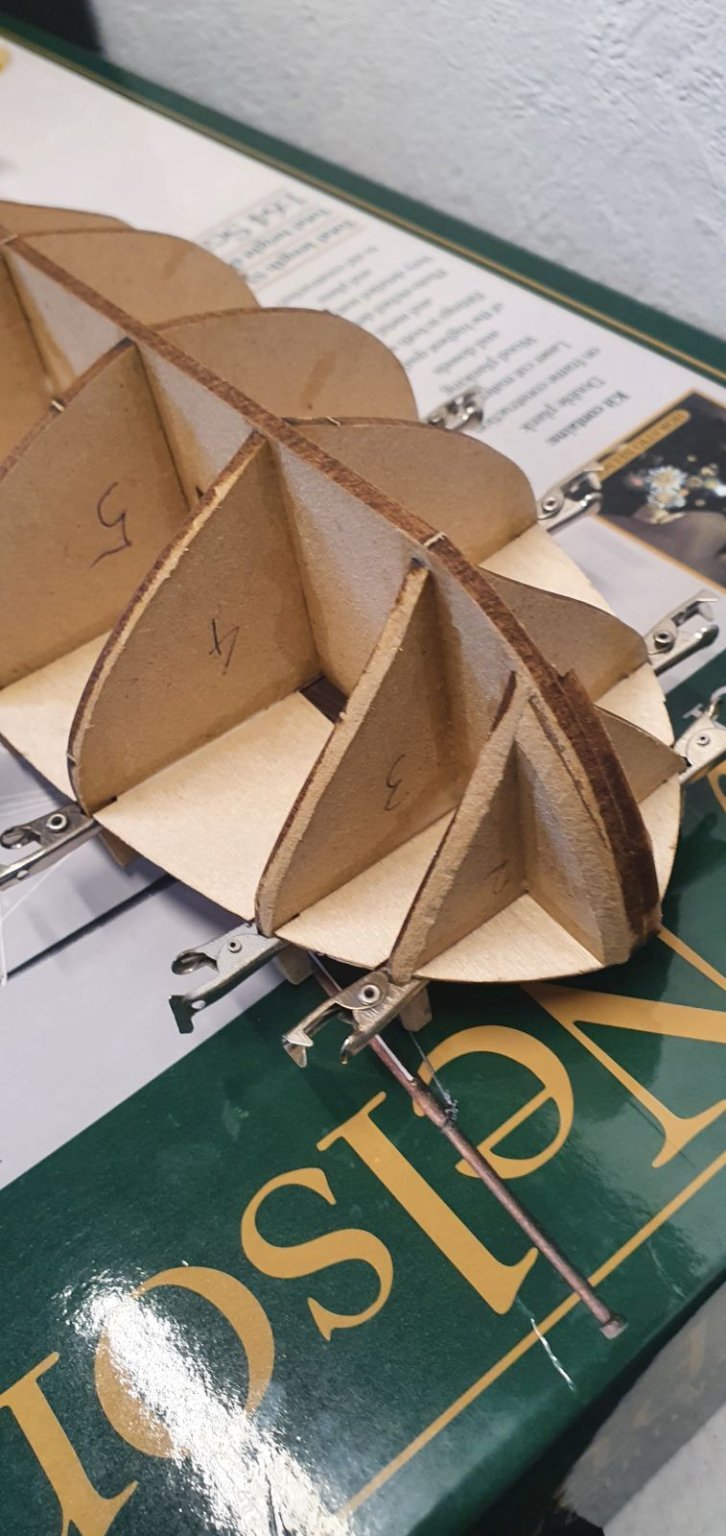
Frames Squared:
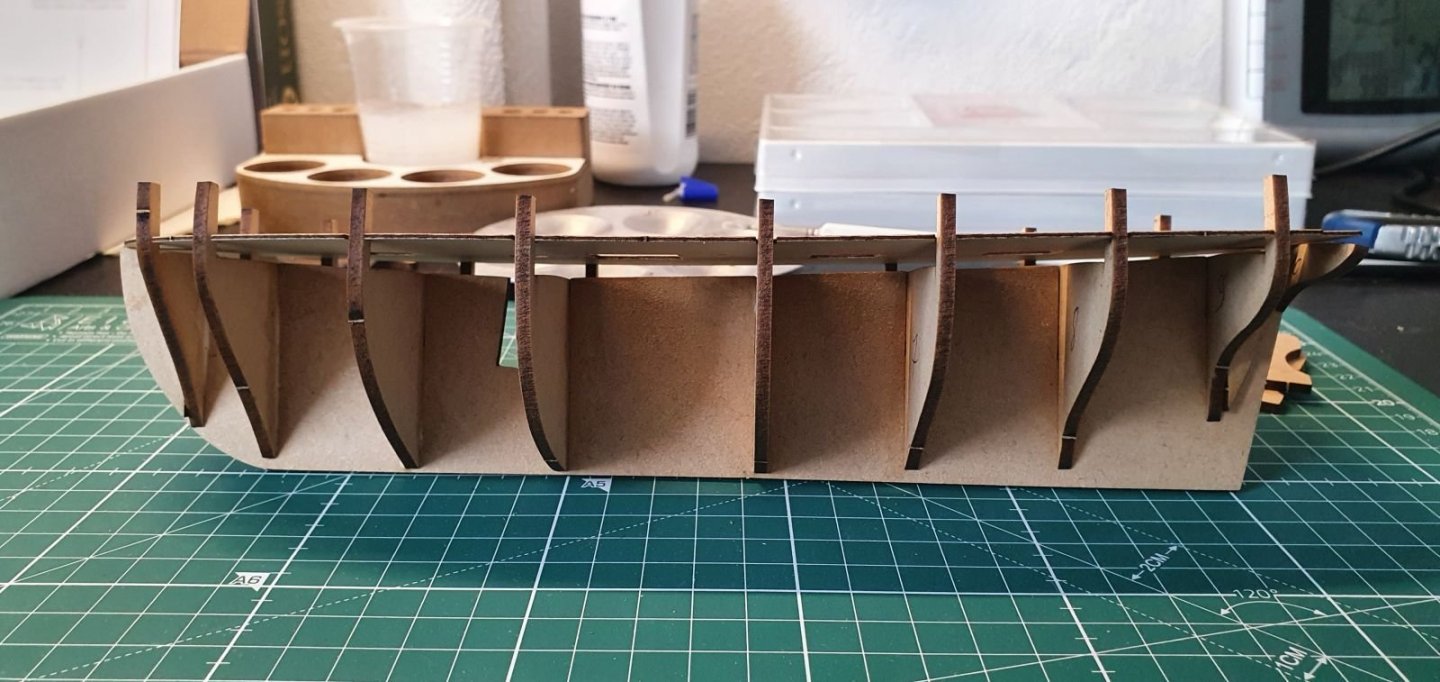
And started sanding them down:


I think i did damage the front Bulkhead a bit with the file so now i am waiting for my Wife to get home so i can make a quick trip to the Model Shop to pick up better files (i dont really want to take my Kid to the Model Shop - i would be able to leave without more toys for him :P)
Let's hope this build will not suffer the fate of the last- CiscoH, PRS, GrandpaPhil and 3 others
-
6


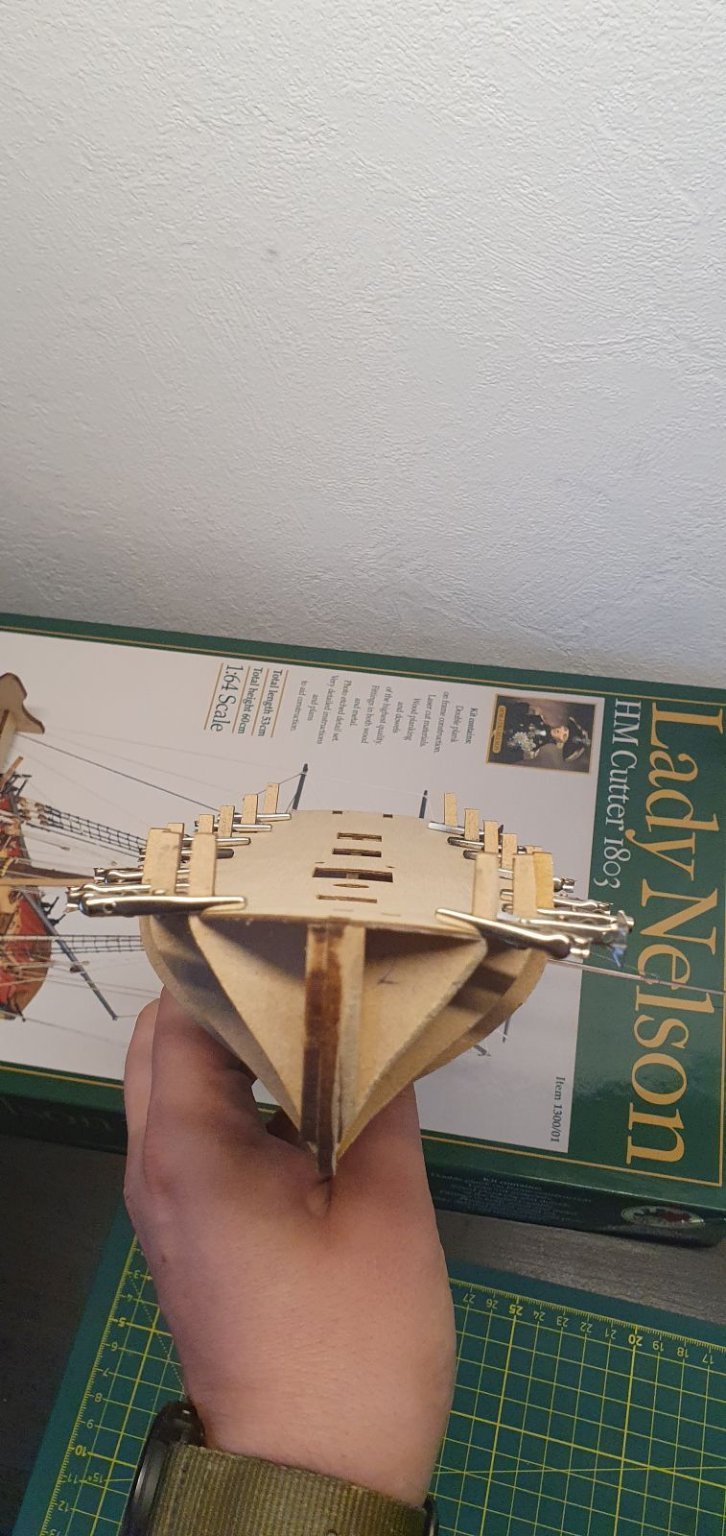
Lady Nelson by Jasseji - Amati/Victory Models - 1:64 Scale
in - Kit build logs for subjects built from 1801 - 1850
Posted
i'm done with the sanding, i dare not to go further (i oversanded the port side at one spot, luckily below the waterline, i hope the second planking will hold it together)