


Jasseji
-
Posts
604 -
Joined
-
Last visited
Content Type
Profiles
Forums
Gallery
Events
Posts posted by Jasseji
-
-
5 minutes ago, James H said:
Thanks for that. Depending on application, you could well be right. This is a pretty flexible system and the hardware can be changed around to accommodate the model. It's easy enough to remove and rotate these parts, thankfully. I also find it easier to drive the bolt from the socket, instead of the nuts.
indeed, but i have my doubts how often i can do that before the socket is damaged, you dont need to take out the nut (only buy more nuts)
")
Anyway, i am looking now to replace all the screws with butterfly-screws
- thibaultron, tkay11, Keith Black and 3 others
-
 6
6
-
I actually have a Comment on the instructions @James H, regarding steps 7, 12 and 20.
I have placed the Nuts in the Hex-Holes same as in step 8, this way it seems easier to remove the screw if repositioning of the clamp is needed - perhaps for the holders from step 7 and 20 it is not that important, as you would only unscrew them a bit to change the angle/position but in case of the front and back holder (step 12) i would rather suggest to place the nuts in the cutouts - this screw will be more often taken out and you might damage the socket if you do it a few times.
Also you can see on this pictures, that's how Wojciech has it on his site:
- Scottish Guy, Keith Black, mtaylor and 1 other
-
4
-
@czabel i personally would take at least the running rigging apart, especially due to the fact, that you need access to fix those tops, yards and booms.
Also i think part of the standing rigging should be corrected - the masts seem to be misaligned so at least the stays should be checked.
The Shrouds themselves are most painful to redo because of the ratlines but they seem fine, might need to be tightened a bit but you can do that on the chainplates or deadeye lanyards (that's what they are for actually)
-
-
-
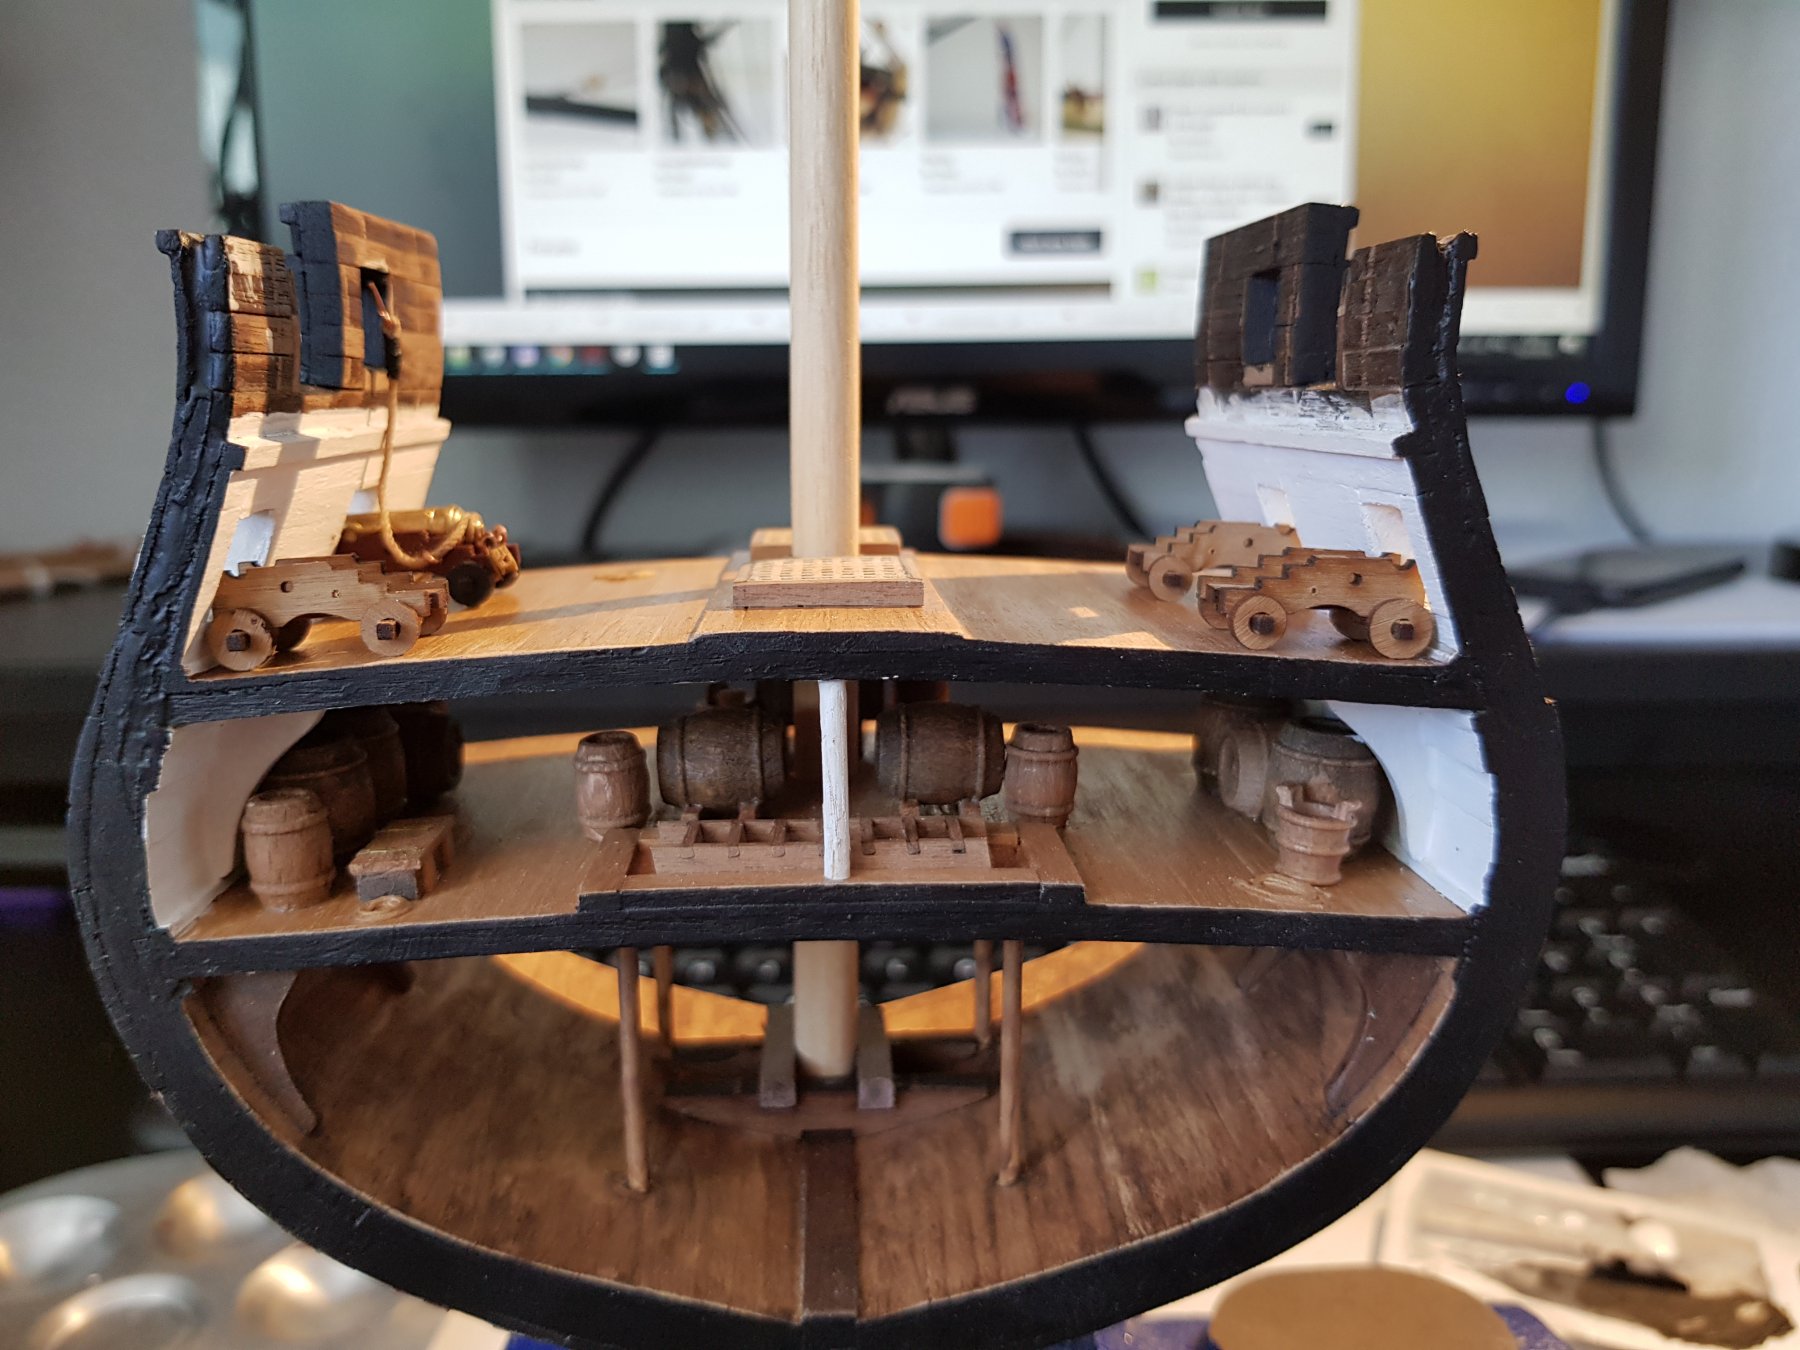
Although i do not really like how some things turned out, i made few mistakes which i cannot correct now without dismantling the Gundeck, i am determined to finish the decks though but i am already looking forward to make another cross-section (the Triton especially) and i hope next week i can start a full POB Build (depending if i can get the frames by then)
-
2 minutes ago, puckotred said:
It looks great! Have you decided what to do with the mast? I would do only the lower mast. It's just a piece of the ship so why not do a piece of the mast as well?
On the Götheborg the inhaul tackle was not attached when we fired the cannons....
yes, we did the same during a re-enactment in Danzig, the Tackle was once used during a misfire (well, tackle-ish thing)
I did not plan to do the full mast, i am still deciding if to do the full lower mast or just a cut section.
These are the options i am thinking about:
1. Lower mast with Top, Shrouds, futtocks, main yard (or cut section of main yard)
2. Only lower mast without top and no shrouds
3. half of lower mast with some reinforcement rings
-
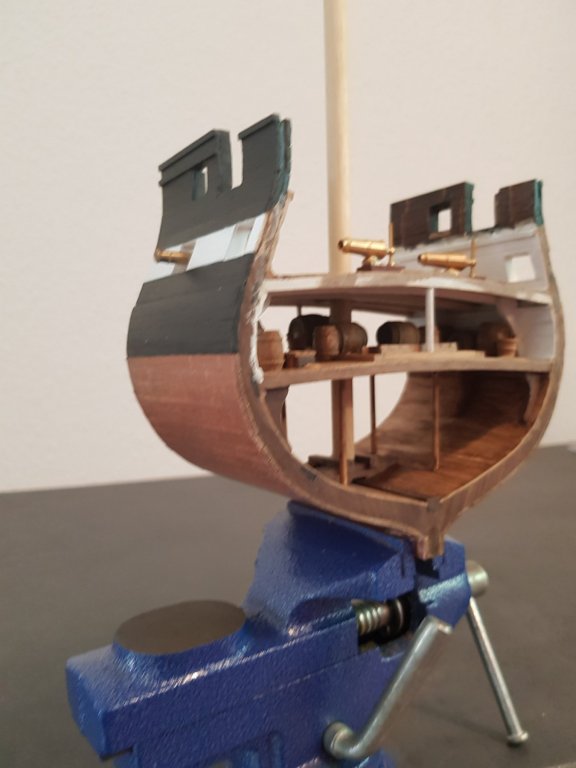
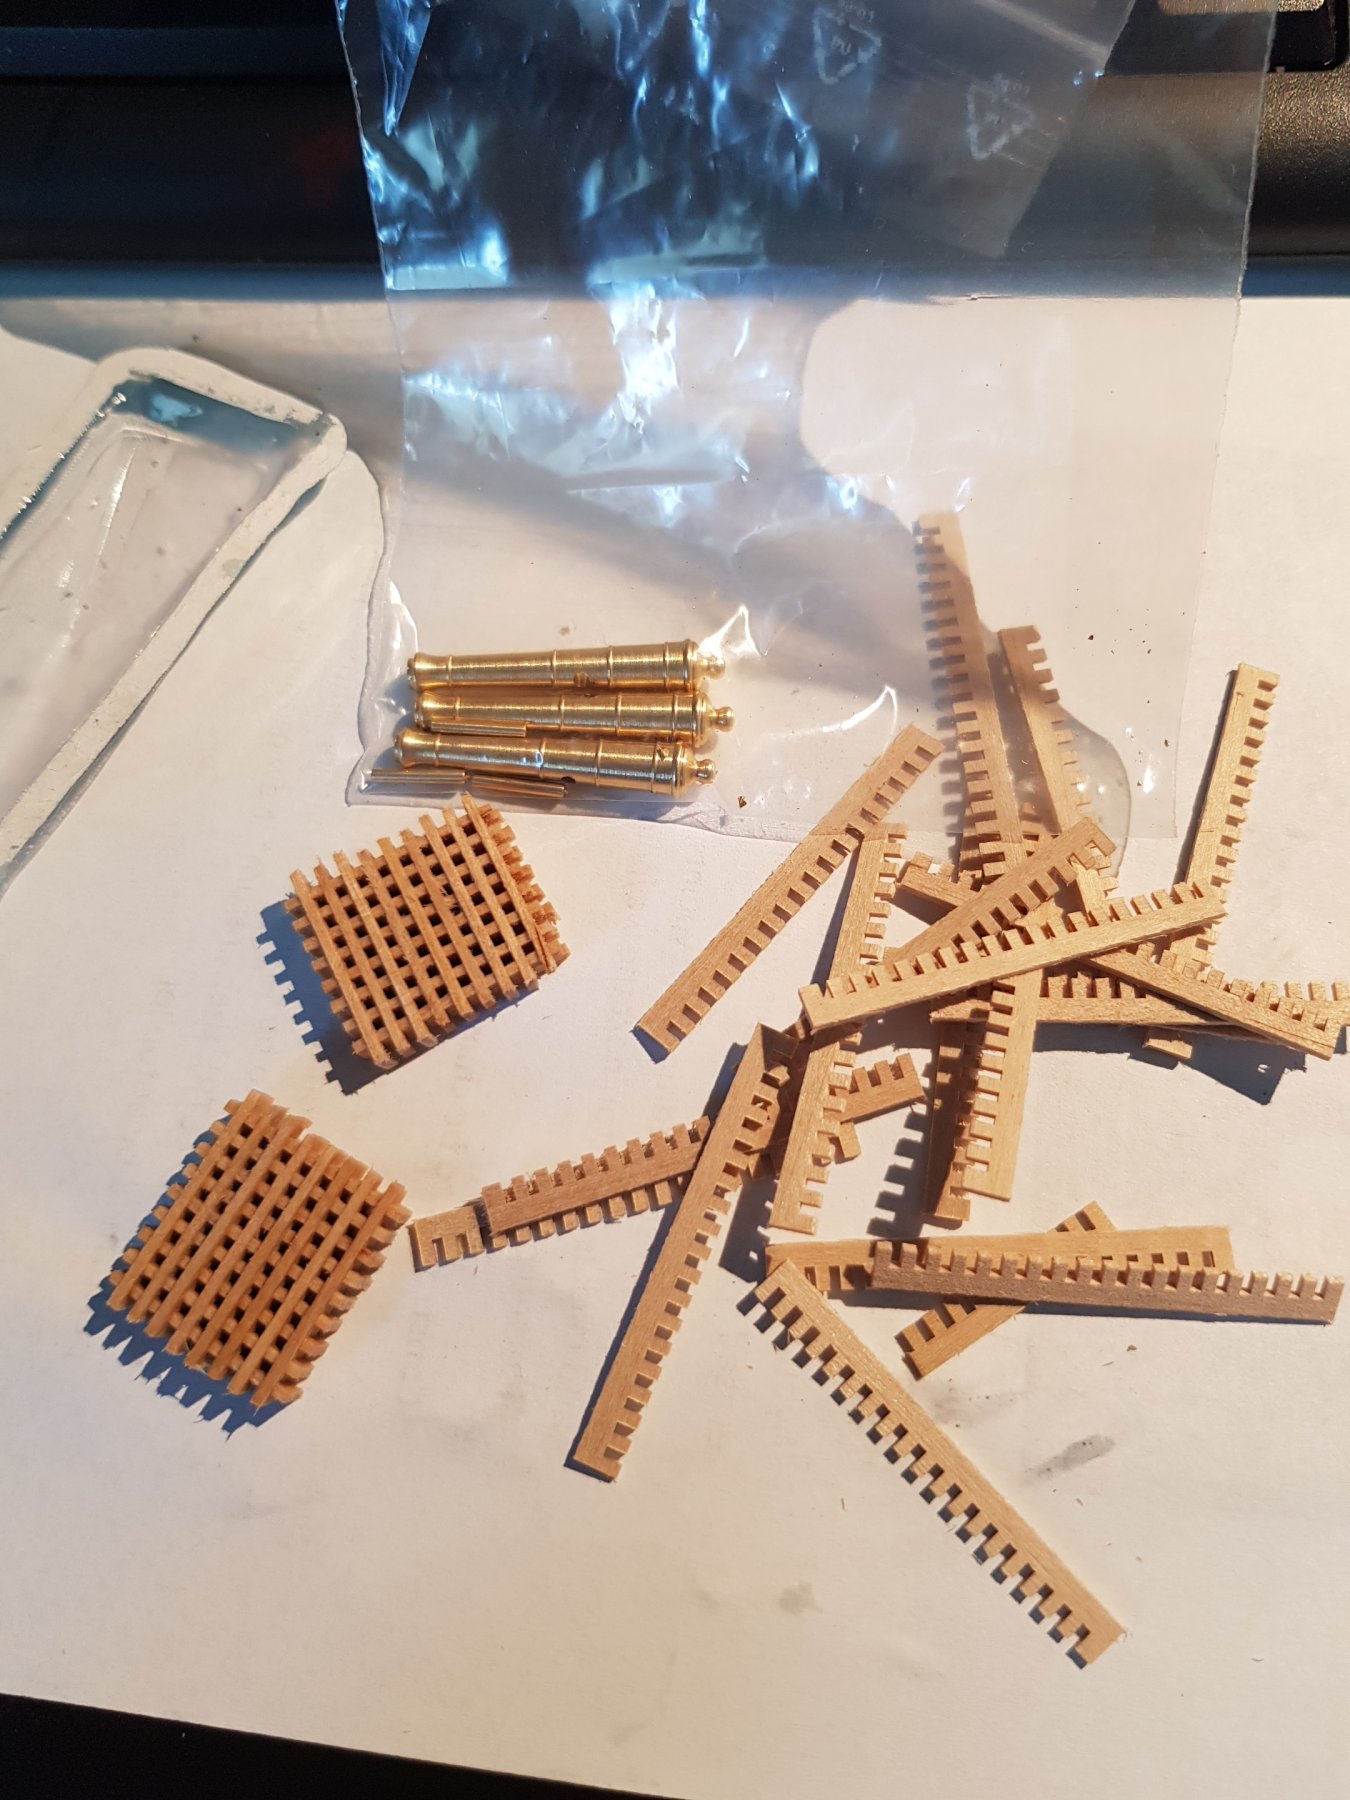
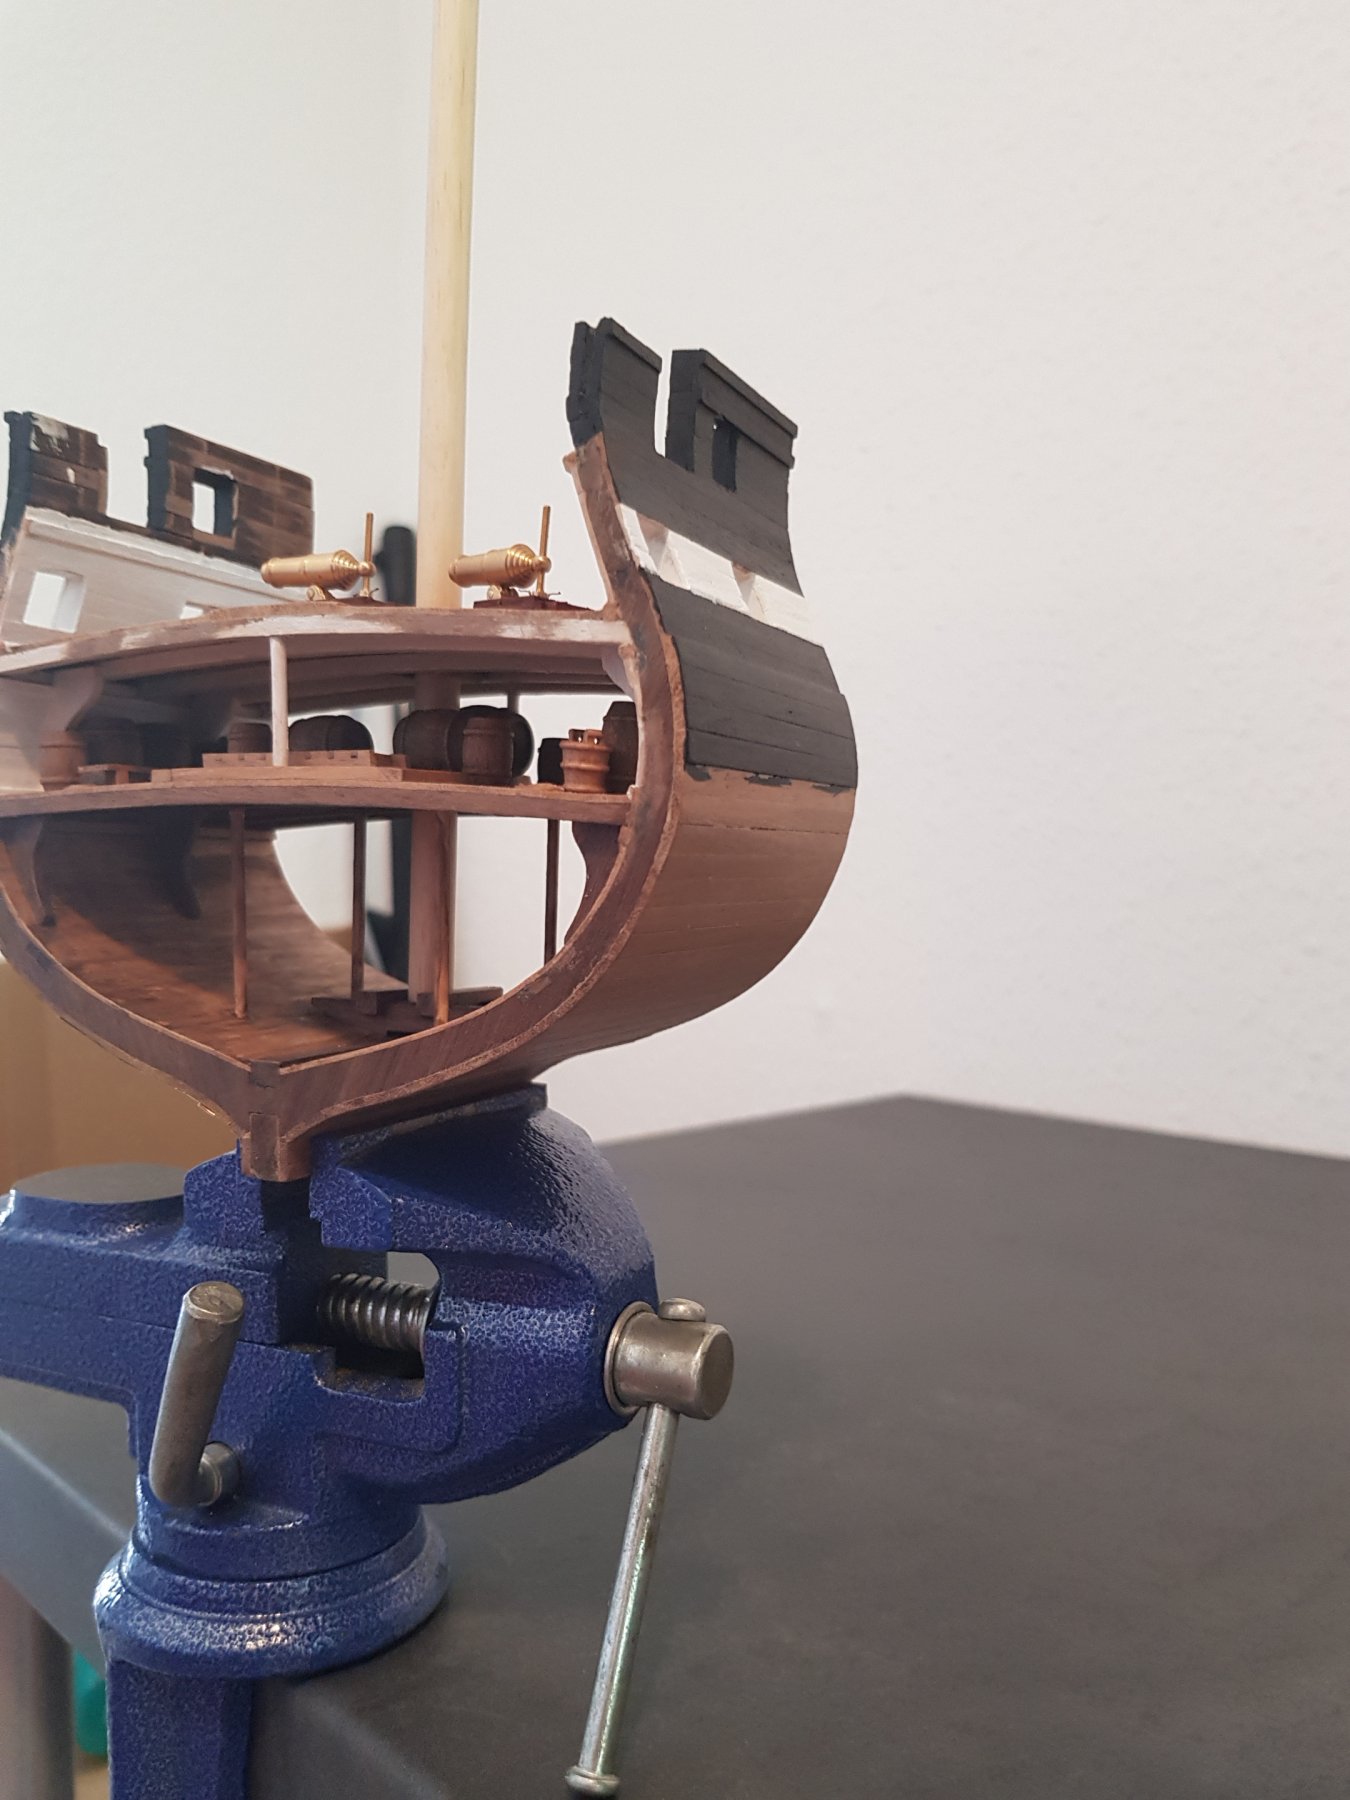
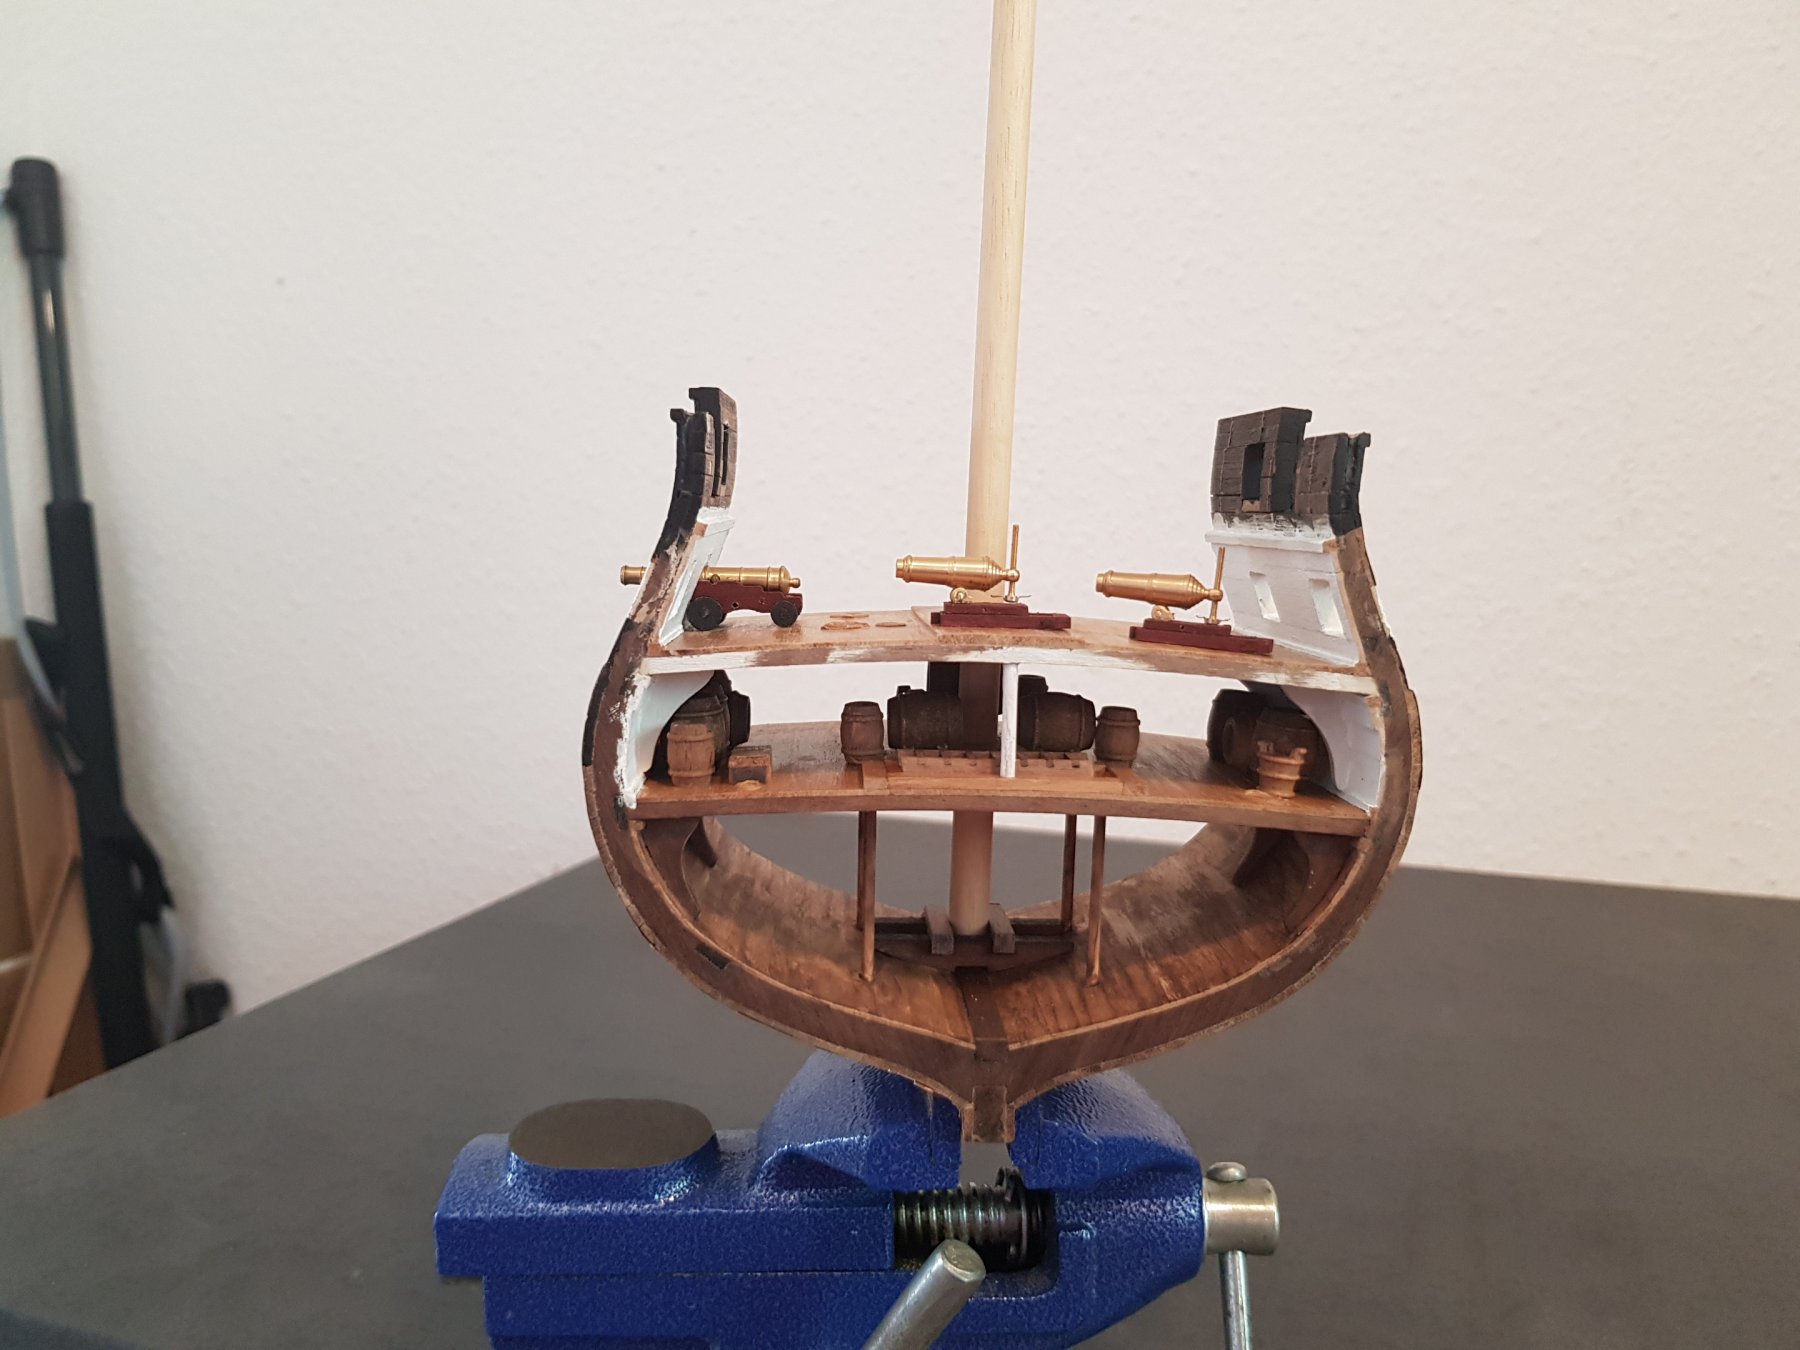
Gratings ready, cannon Carriages glued and prepared for painting

- JpR62, Canute, Fernando E and 1 other
-
4
-
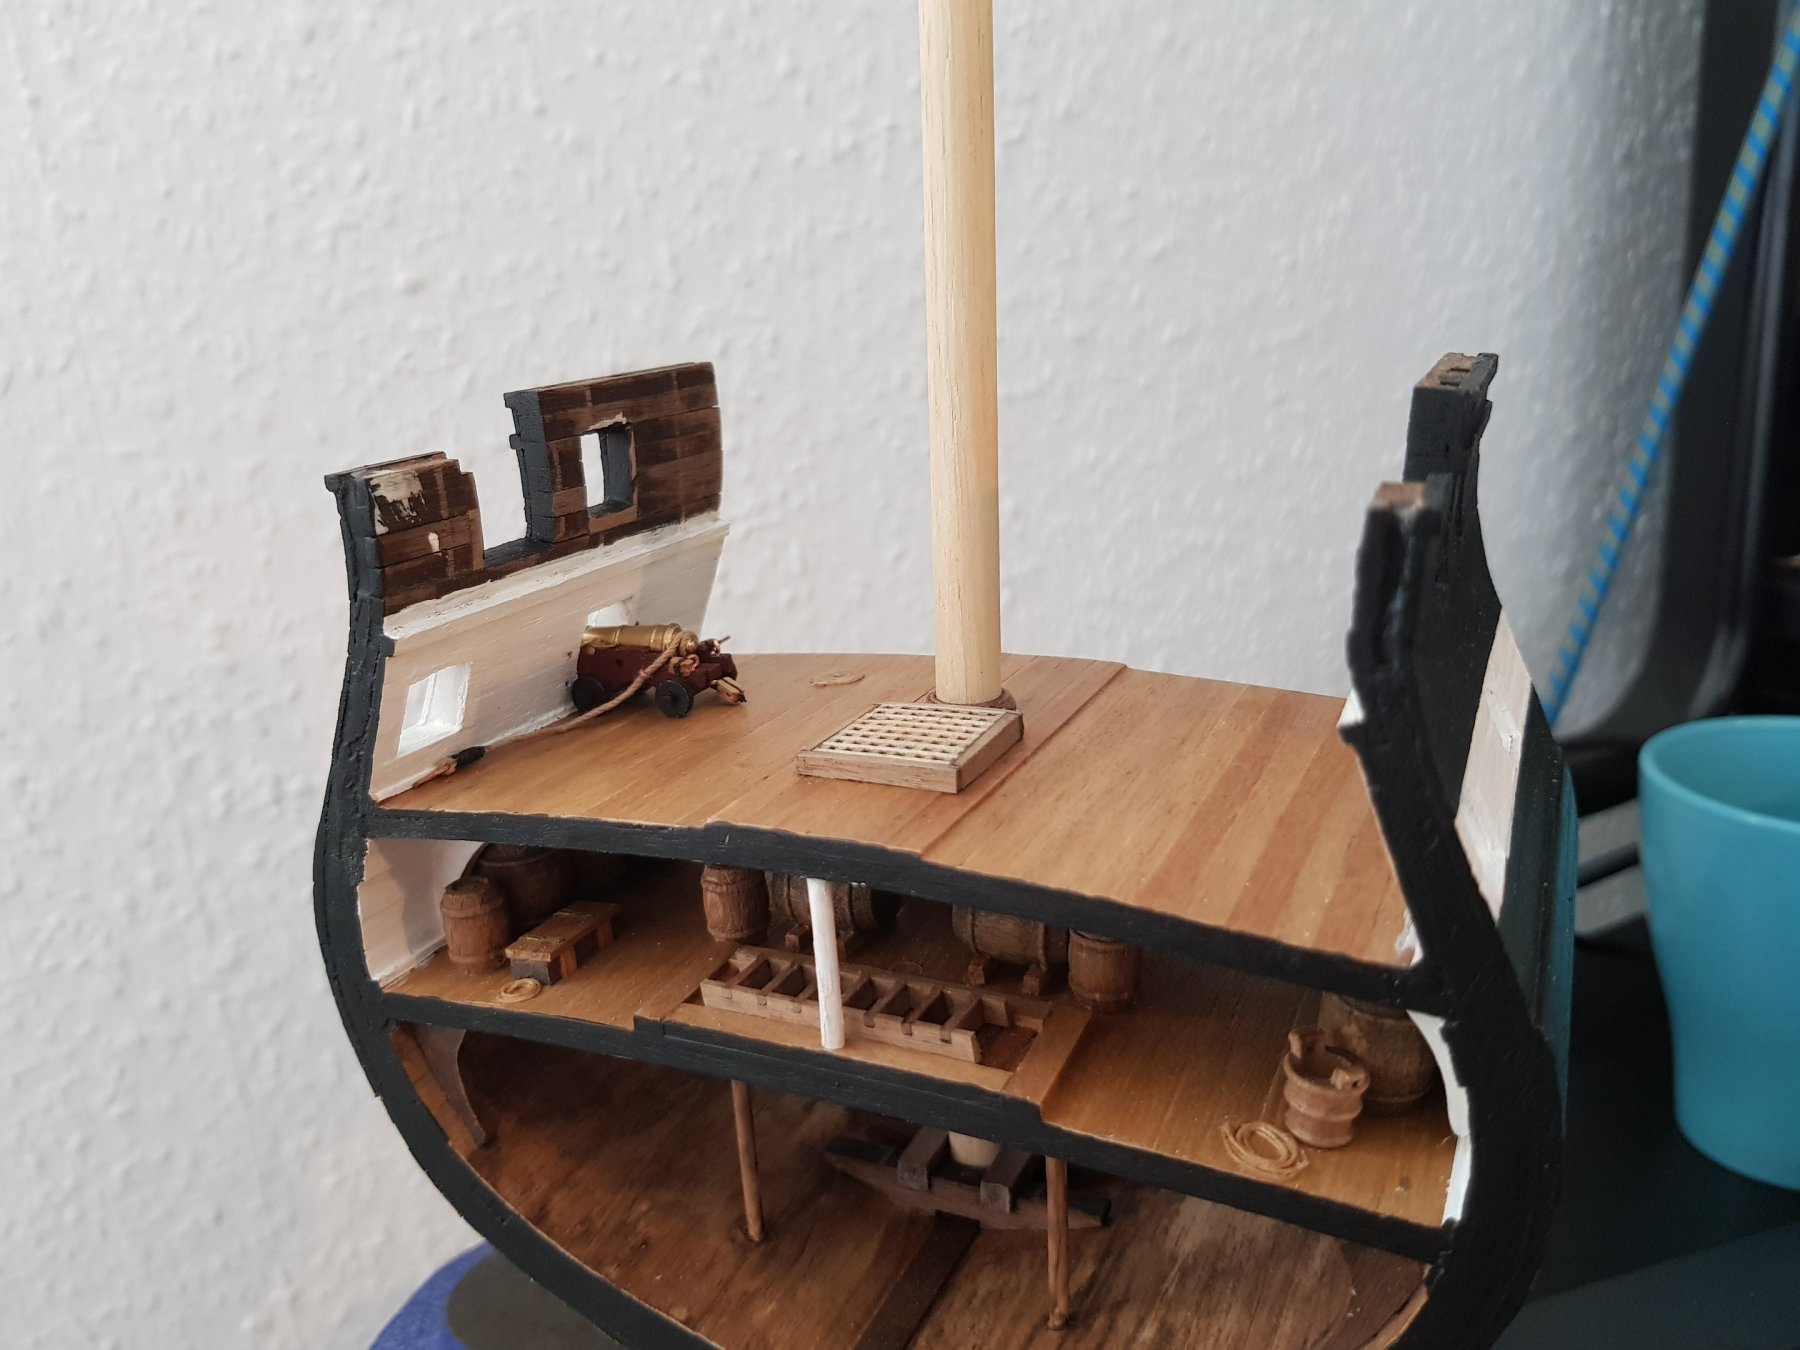
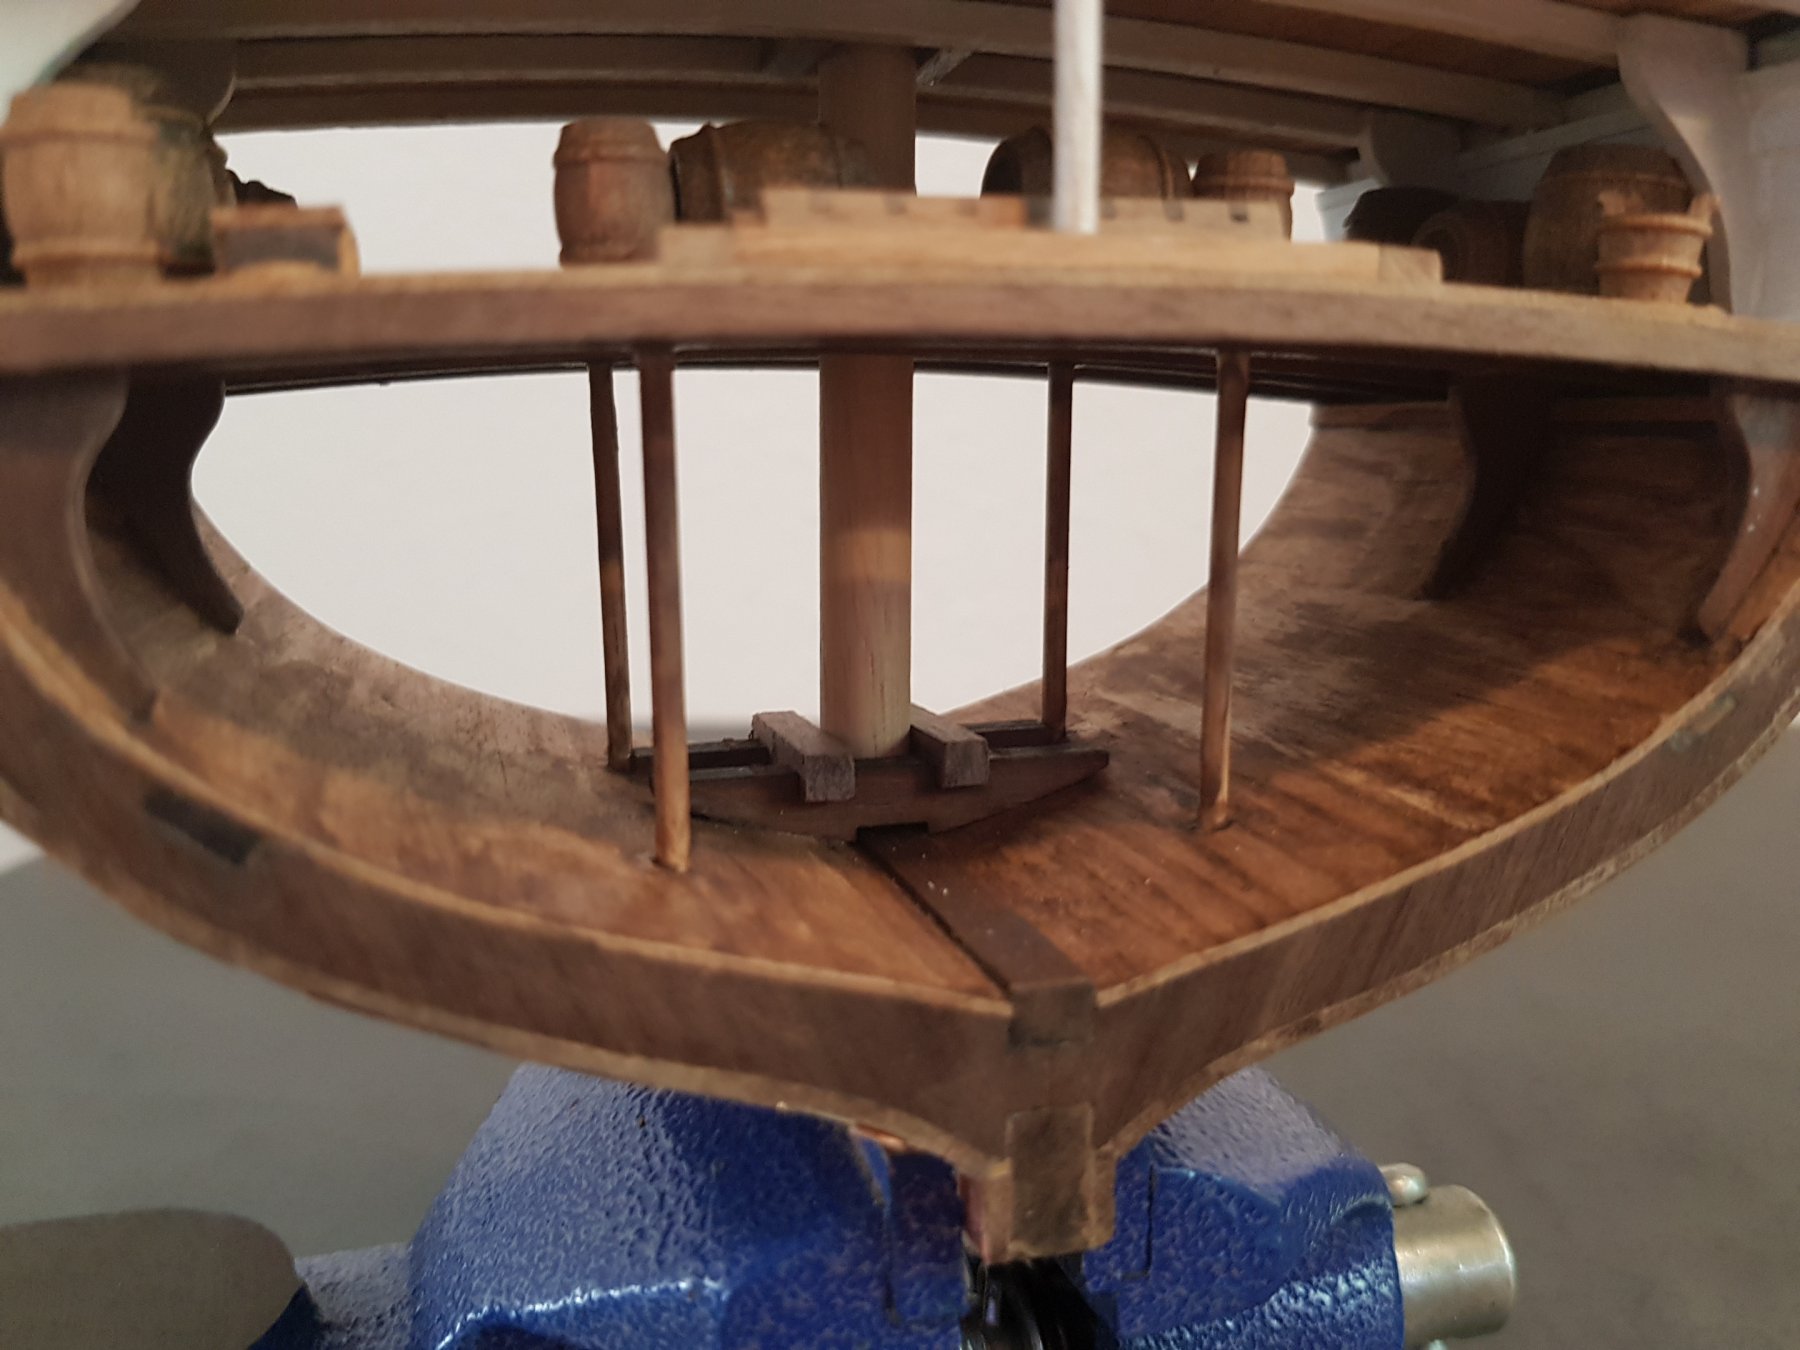
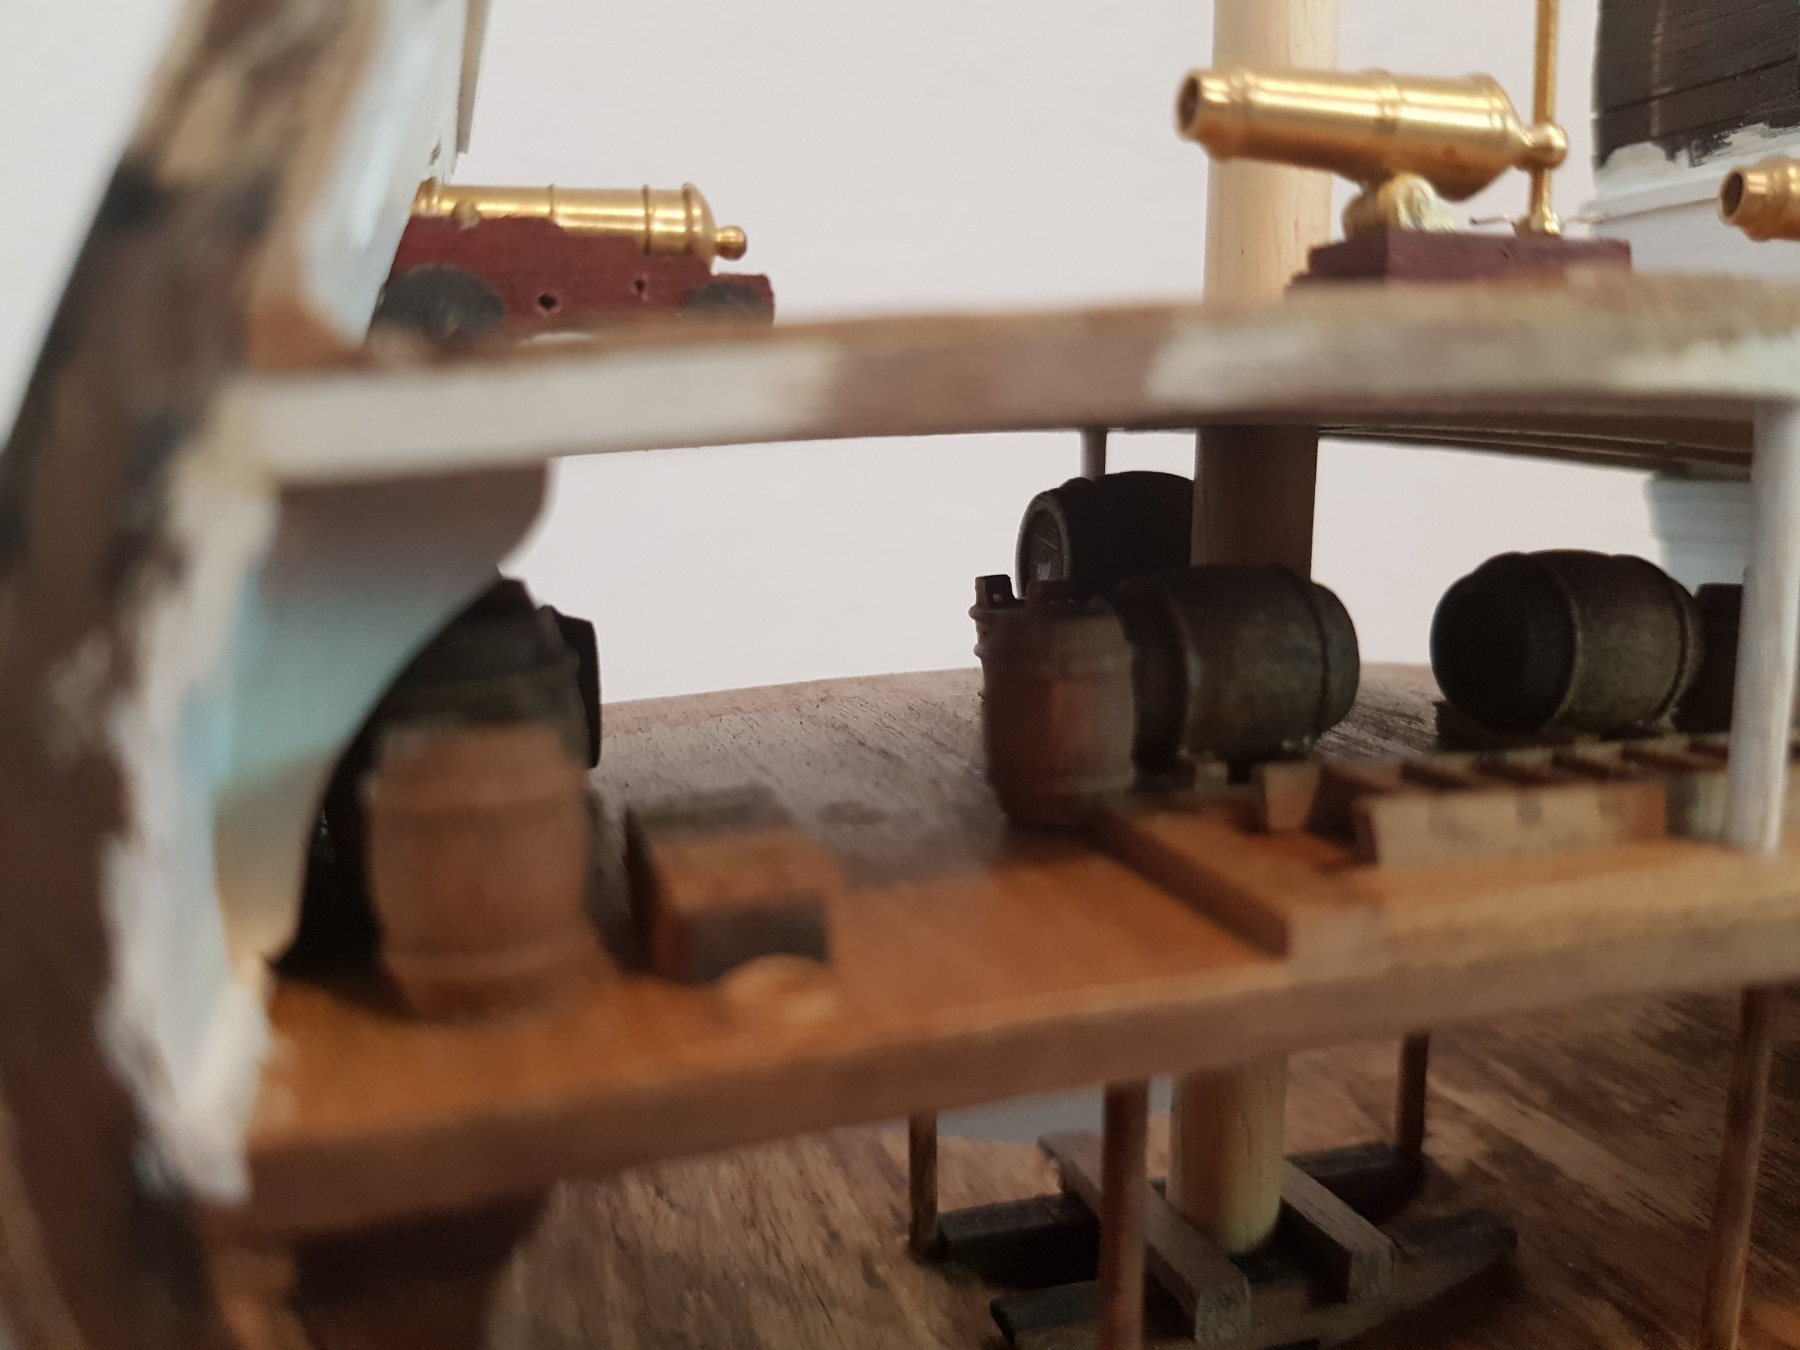
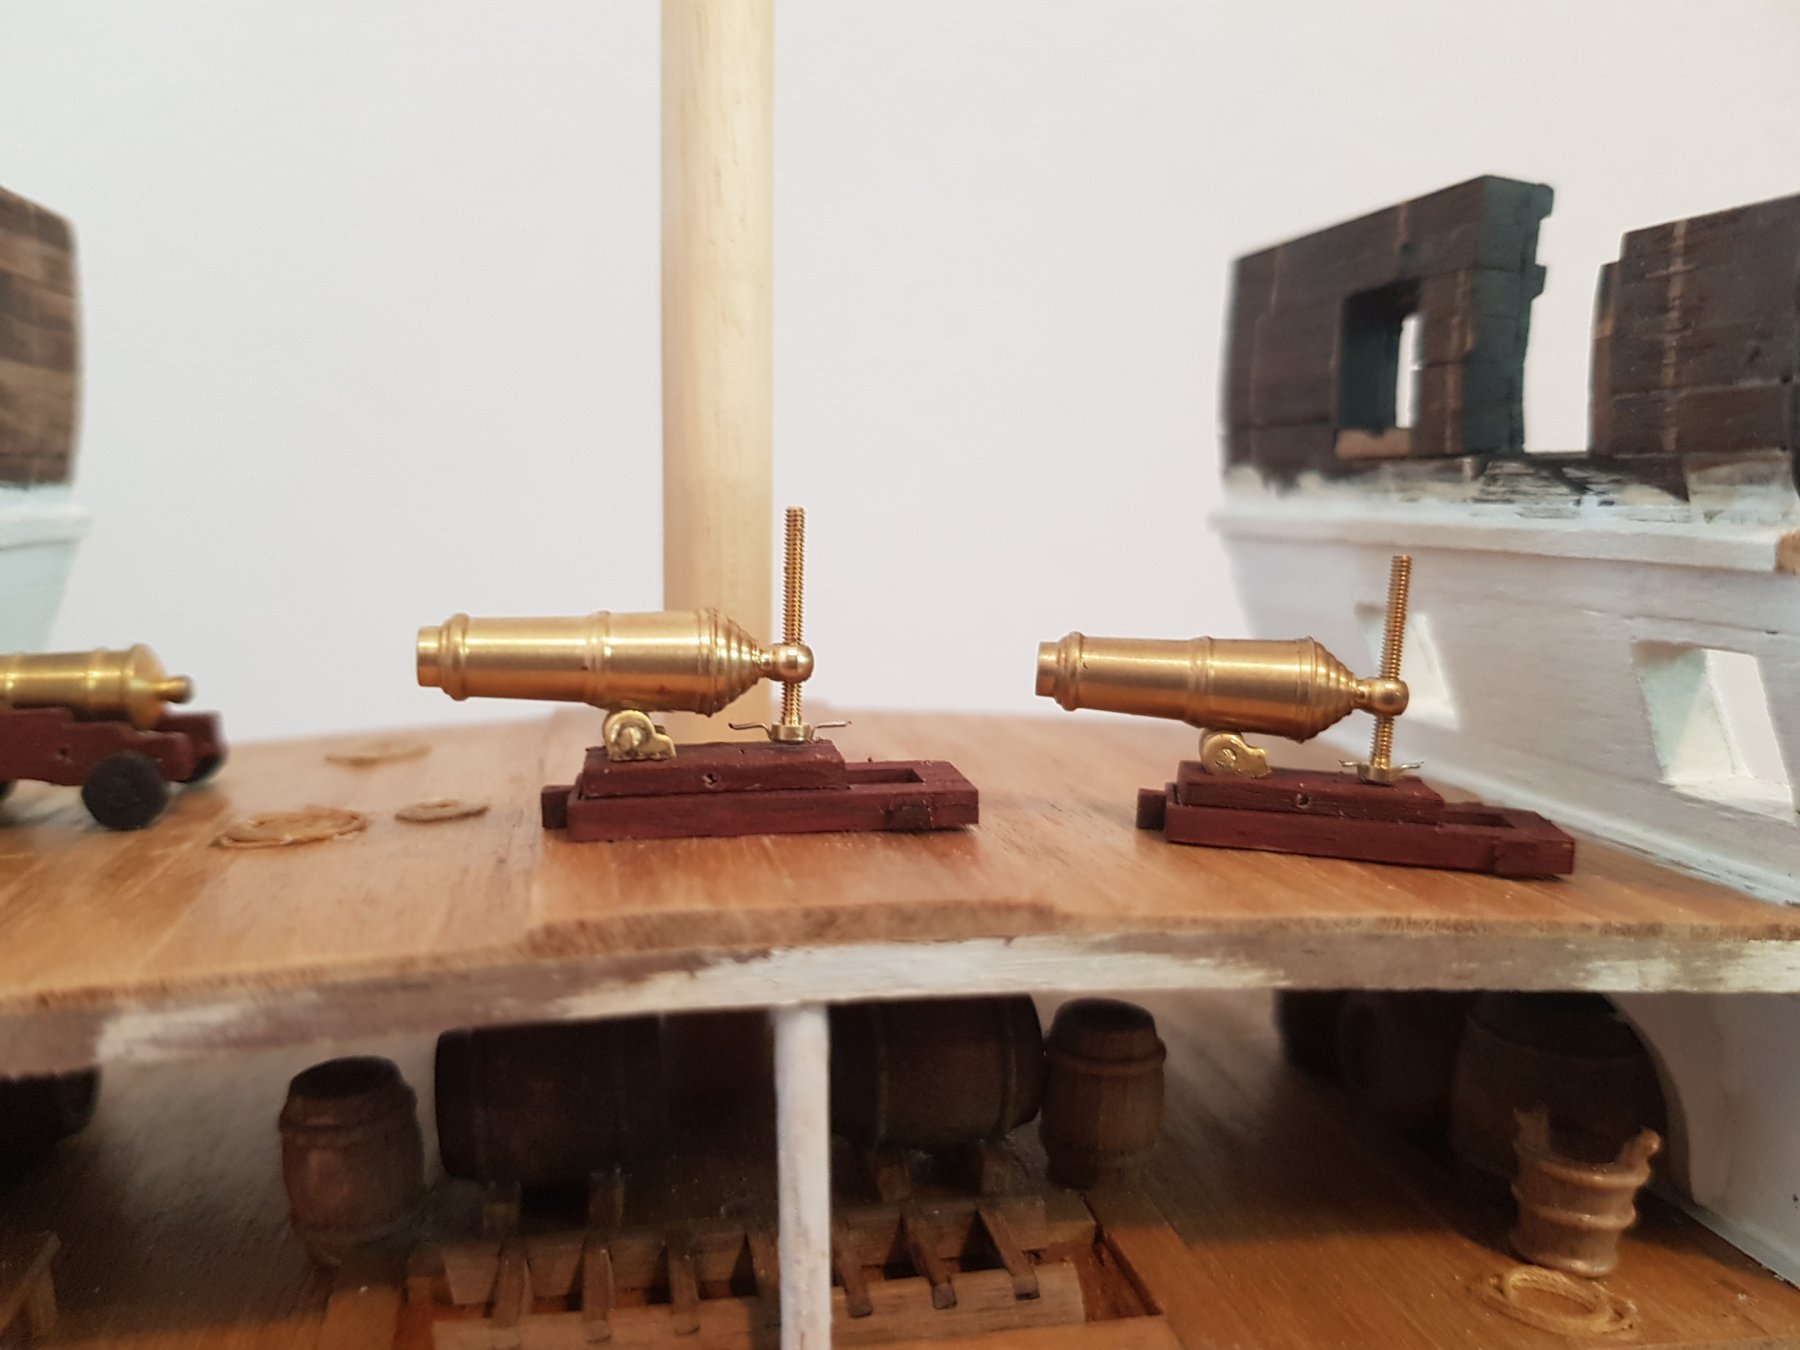
First Grating in place of Pumps and one cannon re-rigged.
Opinions please !!!

Also i am wondering, should i attach the inhaul tackle ?
As logic and experience with guns dictates (i am a Re-Enactor dealing with artillery, 17th century and Napoleonic Eras) the inhaul tackle would get entangled during normal operation with recoil, and i would personally only attach it when i really need to pull the gun in (misfire, firing aborted, need to close gunports due to weather etc.)
I saw a discussion somewhere on this but cant find the topic now
-
-
8 minutes ago, dziadek4444 said:
Tłumaczenia językowe są okropne!!!
Tak, faktycznie, to stanowi problem (chodzi o budowę według instrukcji oraz o tłumaczenia - jakby co to służę pomocą przynajmniej w tłumaczeniach)
Back to English:
dziadek4444 is building it for the Polish deAgostini Catalogue and has to follow the instructions as stated
-
42 minutes ago, Backer said:
Then the instructions are totally wrong about this point.
Hubac's Historian is right. It is indeed advisable to correct this error.
Ps
Otherwise very nicely done.
yes, indeed they are, you can check the Plans Online:
https://www.model-space.com/gb/build-the-vasa.html
Part 6, Page 280
-
Hello, i am wondering if this will be the right section, i am planning a build based on a POB kit.
Some parts of the kit will be used (framing, laser-cut stern and false decks as i lack the machinery to cut large parts) but all the Planking, fittings, masts, rigging will be replaced - is this still considered a kit, Semi-Scratch, or even maybe Kit-Bash ?
-
Sorry guys, let me jump in with Polish here.
@Hubac's Historian i checked the instructions, and indeed they tell you to do the planking on the whole keel, stem and sternpost
Witaj @dziadek4444,
Przede wszystkim powiem, że wspaniała robota to plankowanie, naprawde kunszt
")
W instrukcjach DeAgostini, zeszyt numer 4. elementy numer 81-84, od strony 240 i potem dalej zeszyt 6 od strony 280 punkt 4 do 9.
Jest to ewidentny błąd w instrukcjach, jeśli by ci się udało w jakiś sposób usunąć to plankowanie i spróbować nakleić przynajmniej na dziobie i rufie pojedynczy płat drewna, to byłoby to chyba wykonalne ?
Ewentualnie w Marketach budowlanych są dostępne pasty do zaklejania dziur w drewnie (trociny drobne lub miał drewniany wymieszane z klejem lub żywicą) to możnaby tym zamalować i potem przeszlifować żeby sprawiało wrażenie jednolitego kawałka drewna.
-
6 minutes ago, James H said:
At least you only have one mast! 🤣
indeed, but that makes the model (even with display-case) totally unstable - imo too tall, so IF i do the mast, i will only do it up to the top and MAYBE add the Main Yard.
I have another project in view, this was just a warmup
-
38 minutes ago, James H said:
Nice to see this being built. Always fancied doing a cross section, and this appears to be coming along real nice.
Thanks James, i appear to be on a good track to finish this at least up to the Weather Deck,
 will see about the Mast&Rigging
- Canute and Fernando E
-
2
-
-
-
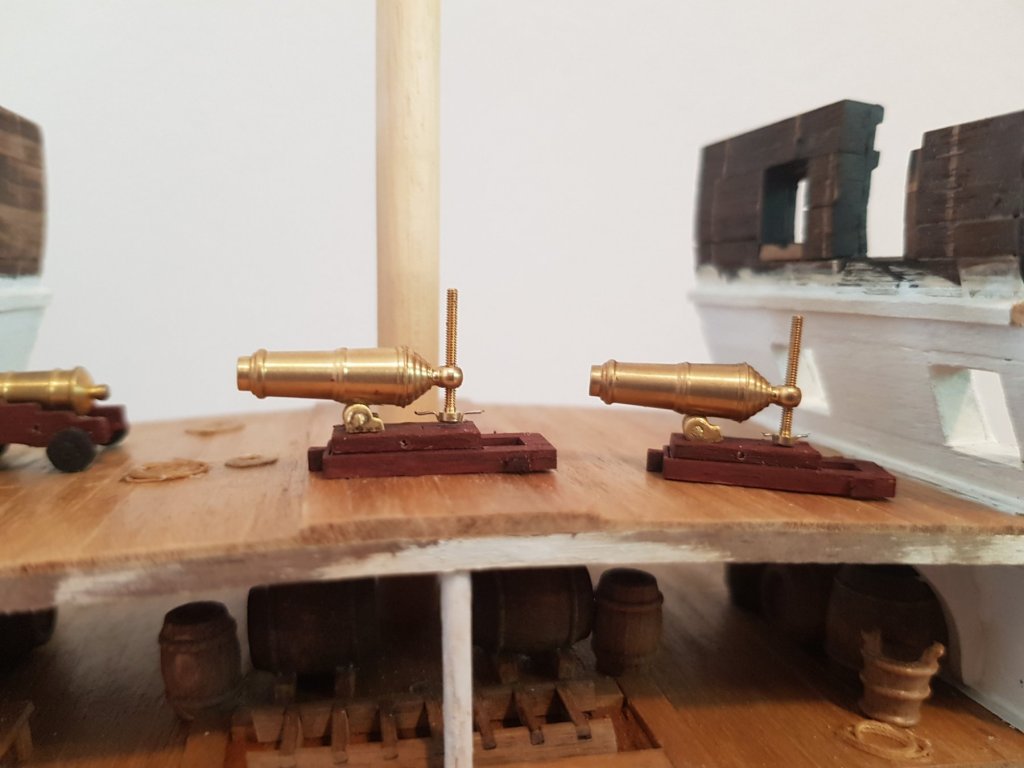
Tiny bit of progress - finished the outer hull and started coppering, i am waiting for Gratings and more Cannon barrels to be delivered.
The Carronades are a kitbash from Mamoli Carriages and Caldercraft Barrels


- Fernando E, Jdiaz, AntonyUK and 1 other
-
4
-
-
-
-
-
Nice Start, keep it up


USS Constitution by SawdustDave - FINISHED - 1:60th Scale
in - Build logs for subjects built 1751 - 1800
Posted
nice work on the belaying pins and good idea for the "lathe" for yard turning