HOLIDAY DONATION DRIVE - SUPPORT MSW - DO YOUR PART TO KEEP THIS GREAT FORUM GOING! (Only 13 donations so far - C'mon guys!)
×


mobbsie
-
Posts
1,493 -
Joined
-
Last visited
Content Type
Profiles
Forums
Gallery
Events
Everything posted by mobbsie
-
 Hi Druxey It most likely would but I haven't used one yet, I have seen one on Amazon but unfortunately that's in French which is one of the many languages I don't speak, I'm afraid I only do English and Profanity. I have checked out "U TUBE" which has a few Bawley's but unfortunately none showing the deck in any detail. I will need to see what our Library has in stock and get one from them. Thanks for the heads up though I do appreciate your input. Be Good mobbsie
 -
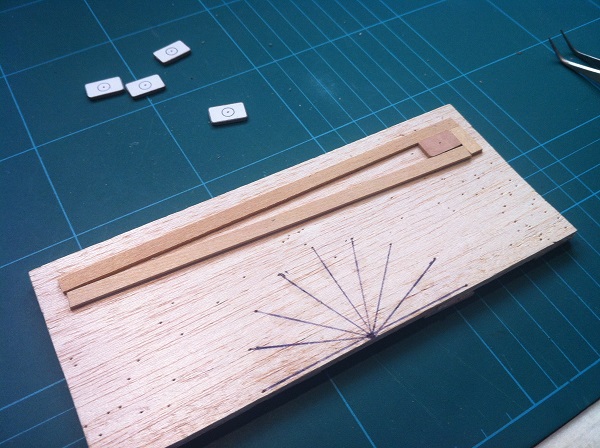
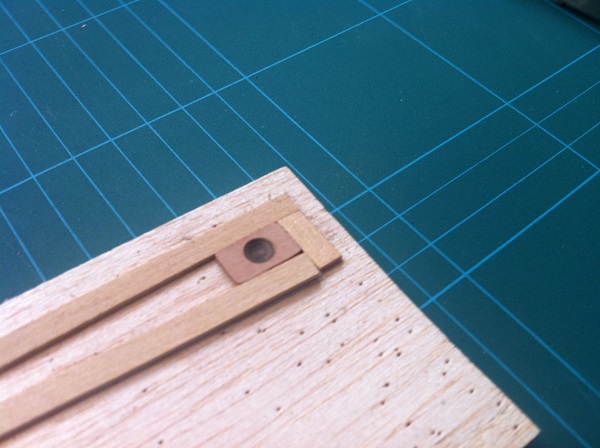
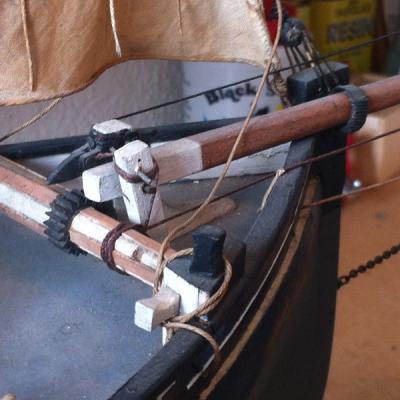
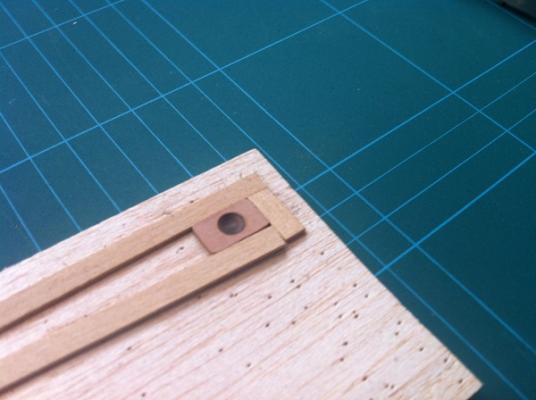
Thanks Guys, I just hope I can live up to your expectations. I have now stripped all that will come off of her and I have a question, hopefully you will be able to steer in the right direction. This boat is not planked and so I will be planking it with a veneer of 0.60mm, this is so I don't take up the height from the bulwarks, also looking at an image I found on the net shows the planks were not joggled so that leaves me with just one question at the moment. My question is that with a boat of 38ft in length would the deck planks have a staggered butt joint or just cut and nailed to the same bulkhead on each row. There is no deck plan for this boat and I cannot find anything on the net. Hopefully one of you gents can advise me on this issue, all suggestions will be considered. I will post some more pics later on today to show where I am.
-
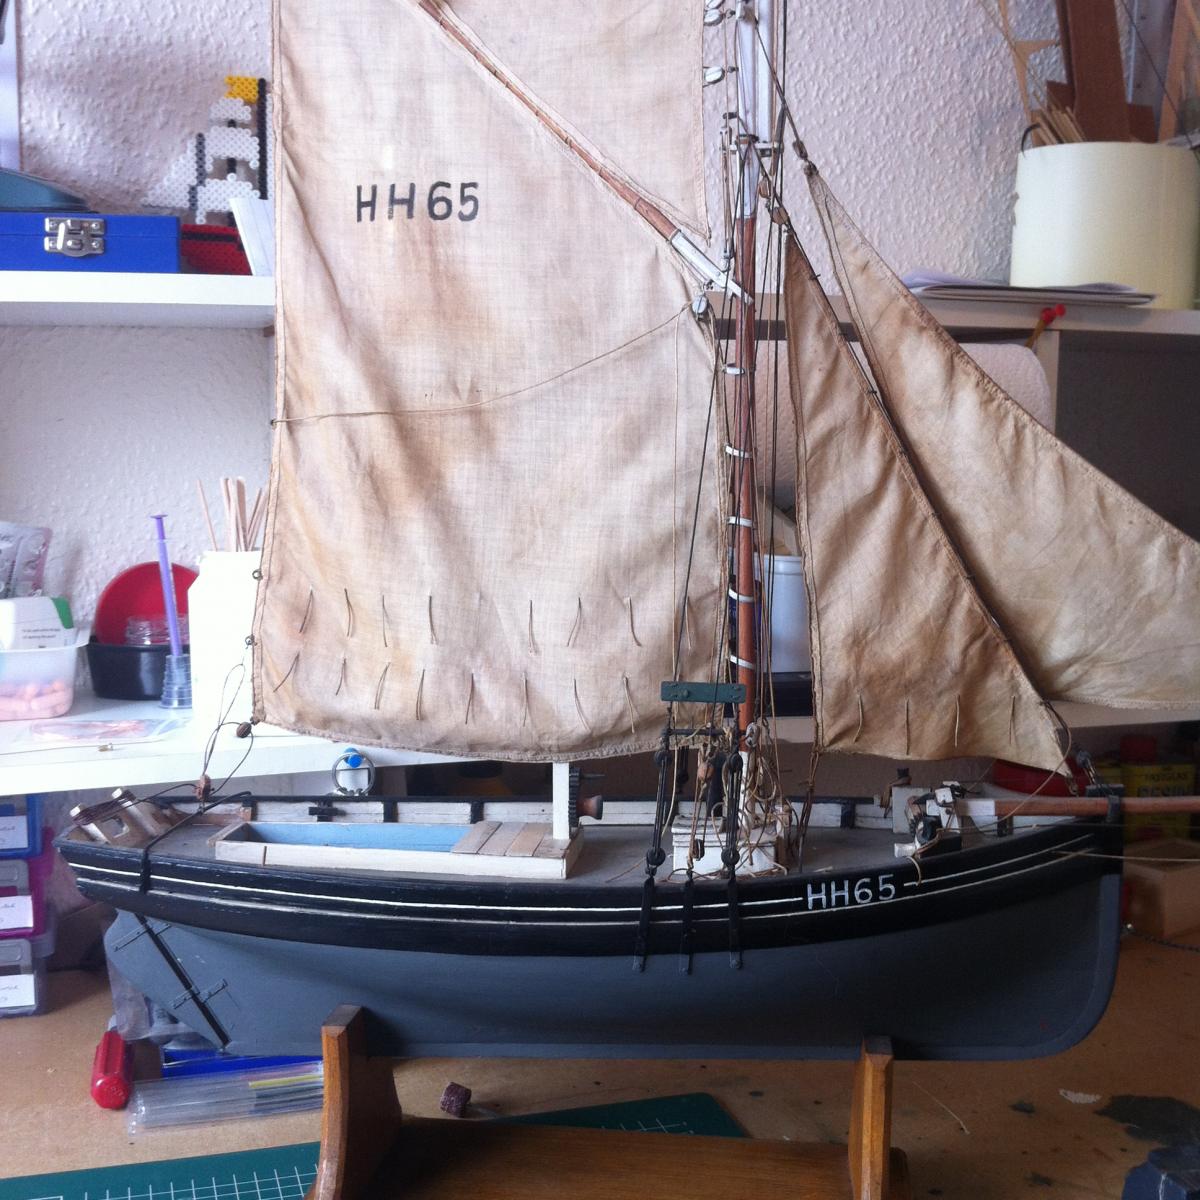
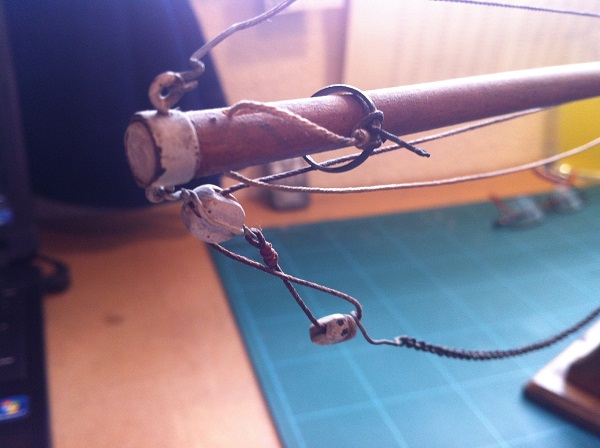
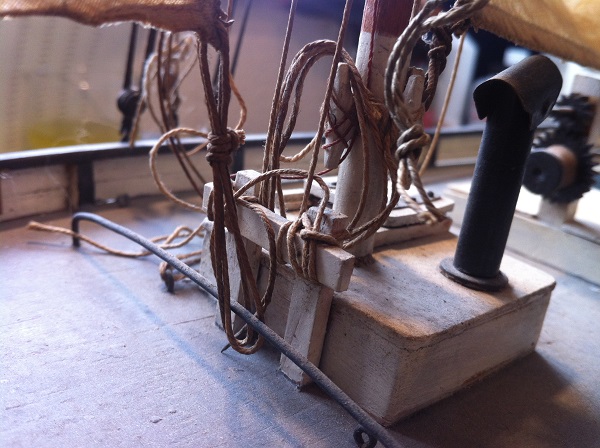
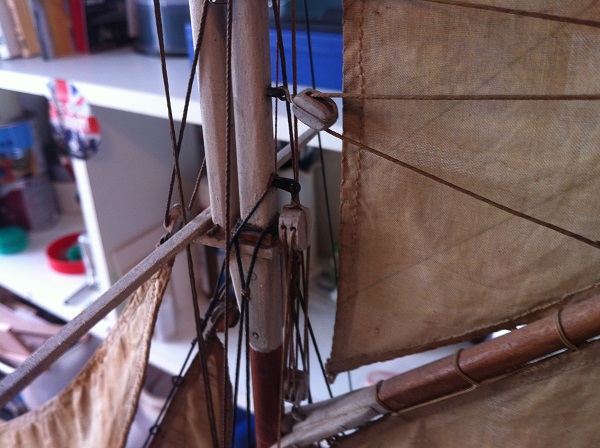
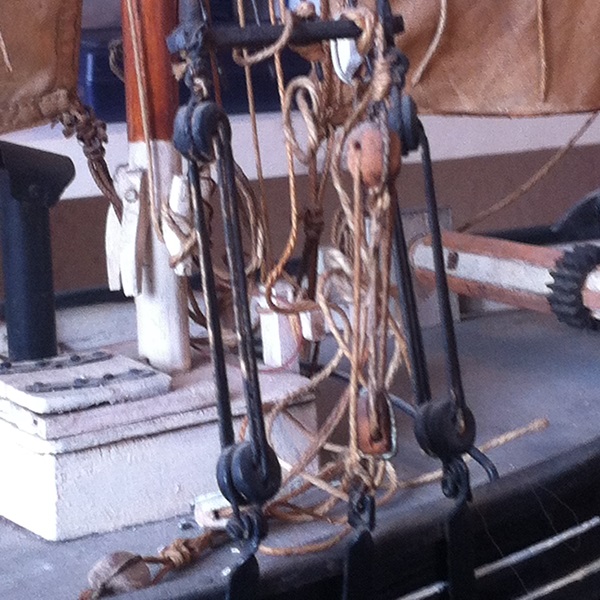
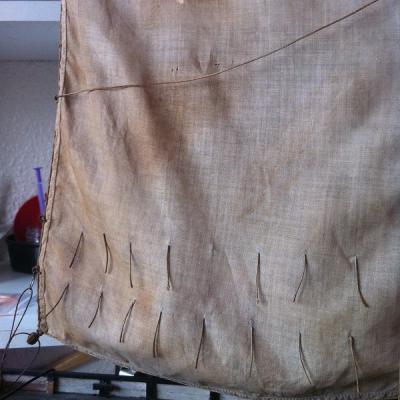
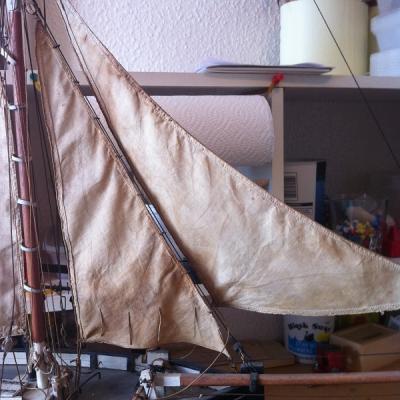
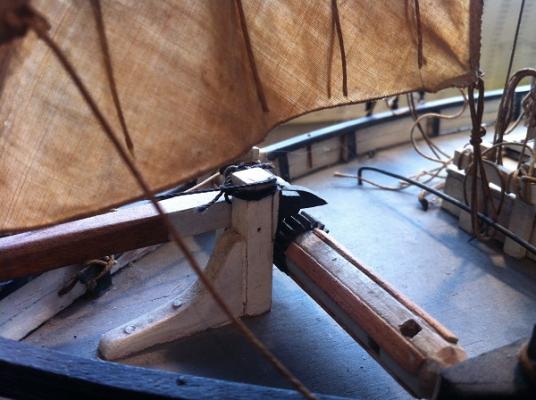
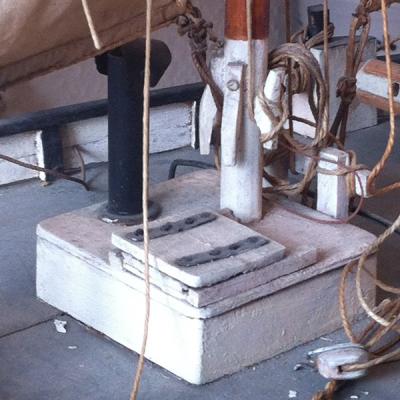
Hi Guys, This is a first for me in that I have taken on the task of restoring a Harwich Bawley. The boat must be getting on for 20 - 30yrs + and it is not in the best of conditions. A Harwich Bawley is a shrimp fishing boat built around the turn of the century, they were built in and around the Harwich area hence the name, this particular boat was built by Cann's of Harwich who are the same builders of my Thames Barge Edme. It is approximately 38ft long excluding the bowsprit with a beam of 14ft, there was a boiler in the hold which was used for cooking the shrimp so they where able to go to market directly from catching. The shrimp were caught by means of a beam trawl. The Maritime Museum was contacted by a guy in Enfield nr London who was offering the boat for free and so off we went and picked it up. When I got the boat home I found the sails were just falling apart, you only had to look at them and a tear appeared, also most of the rigging just parted mid run with the slightest of touches so a lot of the work was going to be the top half. I have a few pictures. The Sails, as you can see they are in a dreadful condition Some other parts of the rigging A little more There are more but they will have to wait for now. I'll post more very soon. Be Good mobbsie


- 62 replies
-
- 10
-

-
- harwich bawley
- fishing boat
- (and 2 more)
-
AHH THE LIST, looks to be completed from what I can see. Yet another great addition to a wonderful little boat, I reckon the finish line is beckoning mate. I'd shoot those bloody birds though, they've pooped all over your boat. Be Good mobbsie
- 625 replies
-
- 4
-
-
- bounty launch
- model shipways
- (and 1 more)
-
Hi Wayne, Good to see you back my friend, motivation can be a real bugger to get. Sometimes you just have to pick up a tool and play with it, it takes time mate but it looks like your getting there. I'm afraid I cant help you with your dilemma mate, I know nothing about this little boat but I know you will sort it somehow. Good luck with you employment search my friend. Be Good mobbsie
-
Good to have you back Andy, you've been missed mate. Hopefully you'll be able to find some time to spend on your ship and let us all start enjoying your masterpiece again. Be Good mobbsie
- 382 replies
-
- 2
-
-
- stadacona
- sylvan scale models
- (and 1 more)
-
Absolutely brilliant Denis, regards to your Admiral. You may want to fill the small crack on the piece of dowel on the starboard side that runs thwart ships just below the mending plate . Just a very small split. Hope you don't me pointing it out mate. Be Good mobbsie
- 956 replies
-
- 3
-
-
- andrea gail
- trawler
- (and 1 more)
-
John she is looking absolutely splendid mate, lovely Margin Planks mate, inspirational. Be Good mobbsie
- 745 replies
-
- 1
-
-
- francis pritt
- mission ship
- (and 1 more)
-
Thanks guys for your kind remarks and comments and also for all who hit the like button. Mark, Thanks for the good word mate and yes when I'm ready to open a new log I will indeed put them in the Scratch section. Jack, This repair and restoration will definitely slow me down, it really doesn't matter where you are on the build mate just so long as you are enjoying the journey. Again thank you one and all. Be Good mobbsie
- 255 replies
-
- 2
-
-
- granado
- bomb ketch
- (and 2 more)
-
Hi John, You deserve all of the above plaudits and more beside mate, she is simply stunning. Be Good mobbsie
- 745 replies
-
- 1
-
-
- francis pritt
- mission ship
- (and 1 more)
-
It's slowly coming together Wes, carry on taking your time mate, it's working and looking real good. Be Good mobbsie
-
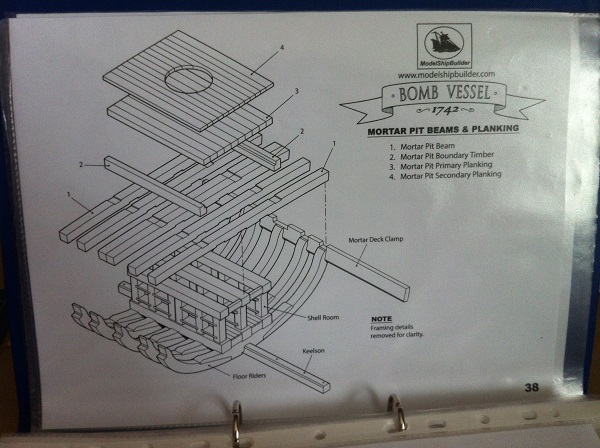
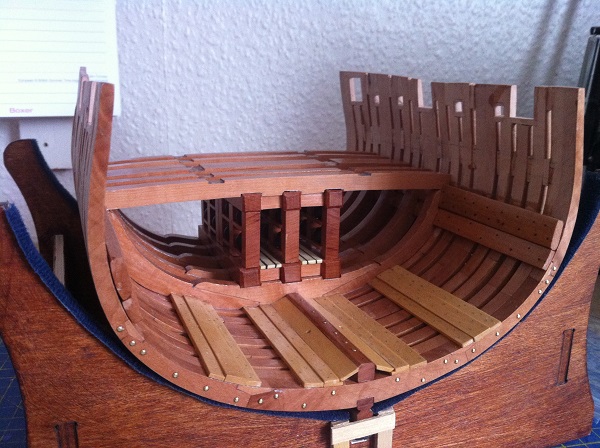
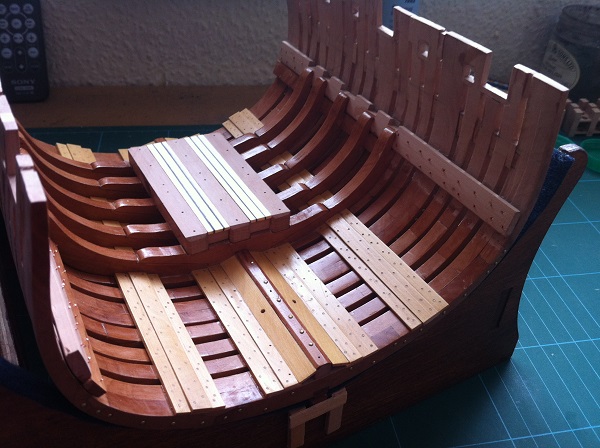
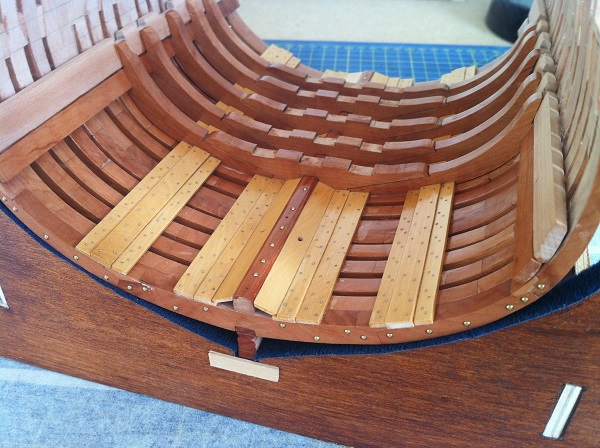
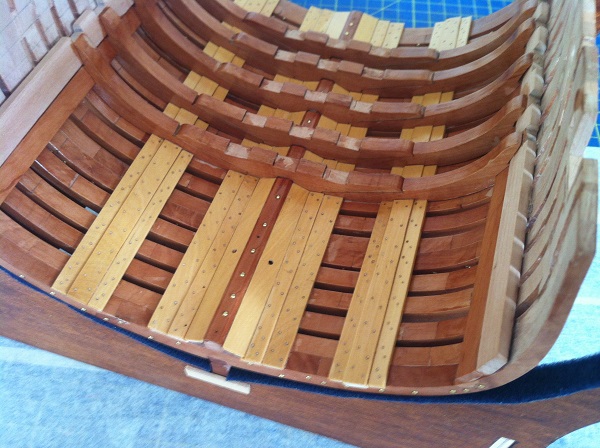
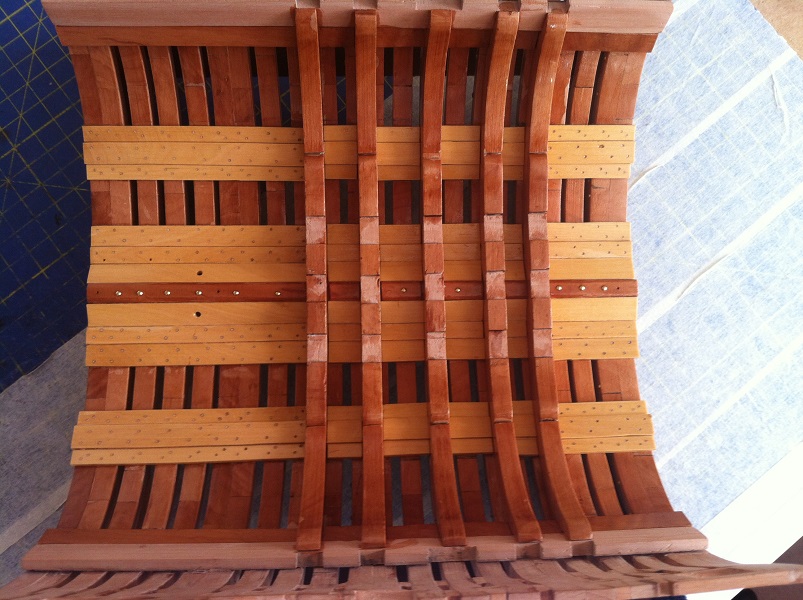
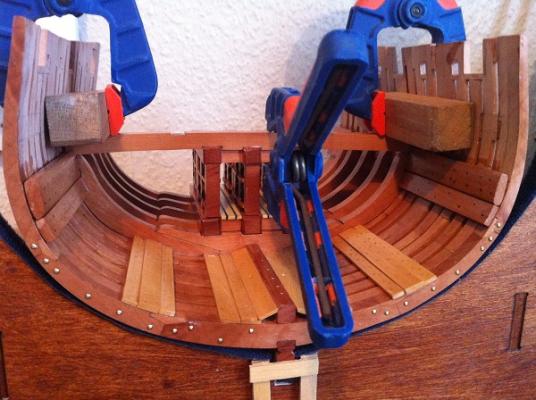
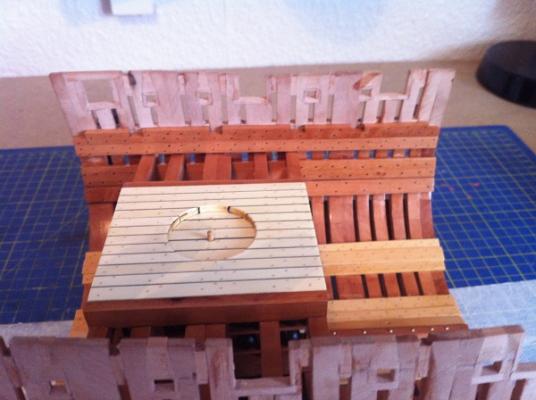
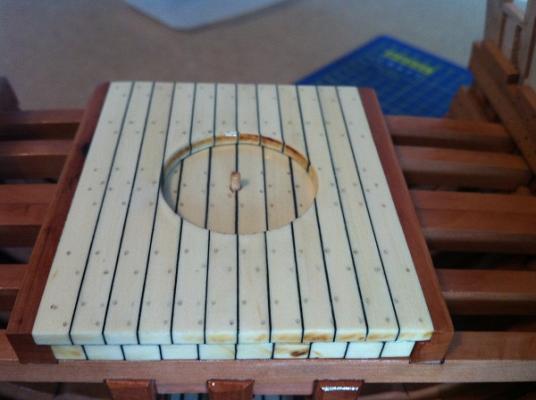
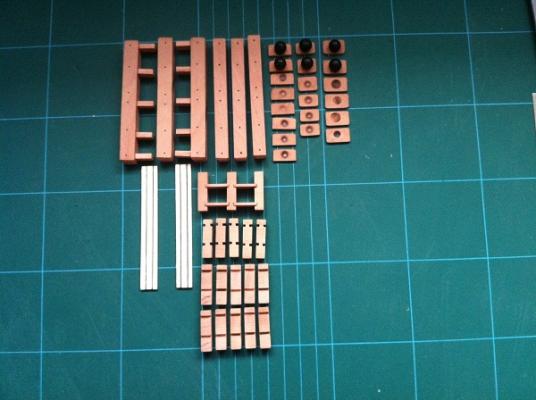
Hi Guys, Been a bit backward in coming forward with my latest update I'm afraid, all I can say is that it's been an eventful couple of weeks and this old geezer doesn't usually do eventful. Things have moved on a step or two since my last post and I can be accused of getting carried away, I promised to show the making up of the Shellroom but unfortunately this is now not possible. So I'm afraid we have from component parts to completed item in two pictures, If anybody wants to see how the Shellroom is constructed then may I suggest you pay a visit to Grants log in this section and he will most likely show how it's done, he's very good at that sort of thing. So, we now have our Shellroom completed and all polyied up it's on to the next stage. First up is the make up of the Mortar Pit Beams and Planking, it strikes me that with the dimensions of the Planking they should be referred to as Boards, they are quite substantial pieces of wood when taken in scale. Here are the component parts for the Mortar Pit Beams and Planking The Beams are not difficult to make up and are pretty straight up unless your me that is, the cut outs for the Shellroom supports were not quite lined up and so each had to measured up to fit, not difficult but a lot of too-ing and fro-ing. This shot is of the Beams being glued into place. All Beams are now firmly glued into position Next up we have the Mortar Pit Planks, These are made up of two different size Holly Planks, the Primary Planks are made from 1/4 x 3/16 and the Secondary Planks are 3/16 x 1/8 with the outer Planks being 1/4 x 1/8. I also used black paper for the caulking.The centre of the Secondary Planking was cut out using a hole cutter, the Treenails were drilled and made up from dust gained from sanding down the planks and using the slightly darker material, I think it works. The two planking's offered up to each other The Mortar Pit Boundary Timbers were made up from 5/16 x 1/4 Pear and routed on my trusty Proxxon Router. The Primary and Secondary Planking have now been fitted into the cut outs on the Boundary Timbers and the Upper and Lower Deck Clamps have been glued into position. So there we are guys, your right up to date now. It seems a pretty good place to stop for the time being as I have now been given the job of restoring a Harwich Bawley which is a Shrimp Fishing Smack. I was looking for a secondary build and now I have it. I also have to repair my Thames Barge which was damaged by the decorators during pre season work at the museum. I will be starting a new log for the Bawley and hopefully restarting my old log for the barge, if it still exists, the damage to the barge is quite extensive and will require a full breakdown of all masts and rigging. Oh deep joy. Hope you enjoy the update guys. Be Good mobbsie


- 255 replies
-
- 21
-
-
- granado
- bomb ketch
- (and 2 more)
-
Coming together nicely mate, I like the use of black paper for caulking, it gives a nice tidy finish, I used paper instead of card for the Mortar Pit Planking and am well pleased with the result. One thing I did find when sanding down the Pit Planking was that the dust produced was slightly darker than the wood, obviously from the black paper, it makes for a slightly darker shade for treenails, I mixed it with a bit of white filler for what think is a respectable finish. Keep up this lovely work mate. Be Good mobbsie
- 456 replies
-
- 4
-
-
- finished
- bomb ketch
- (and 2 more)
-
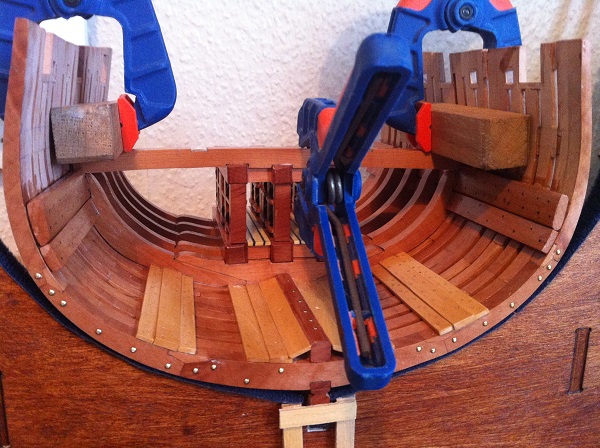
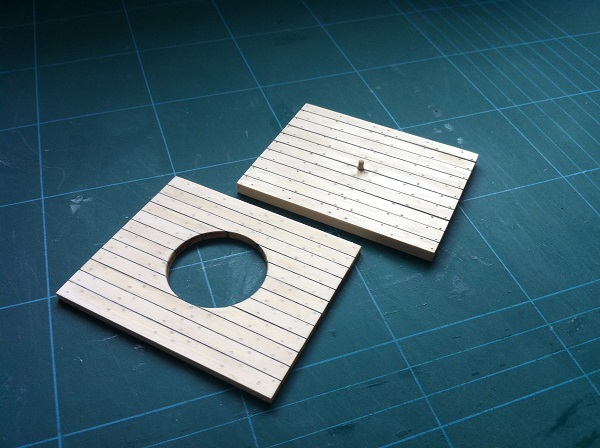
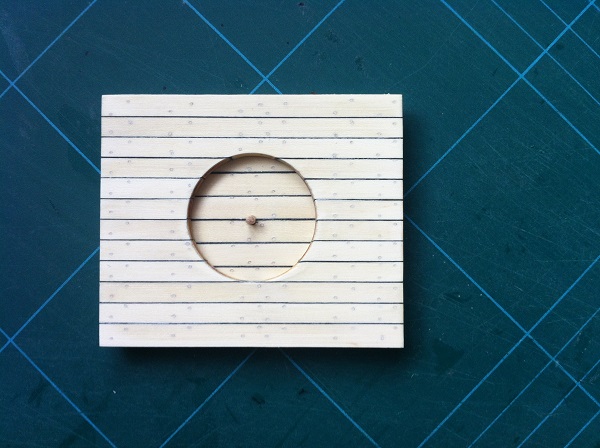
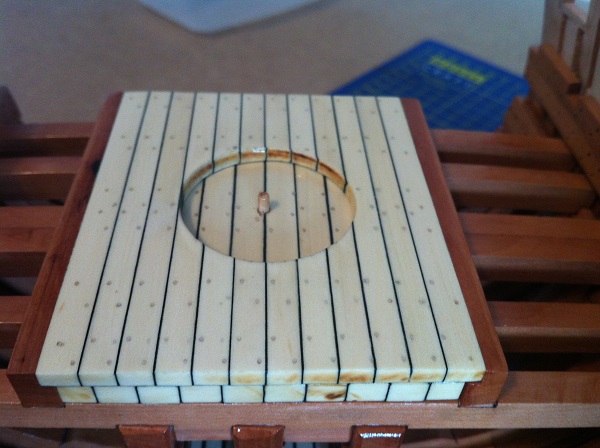
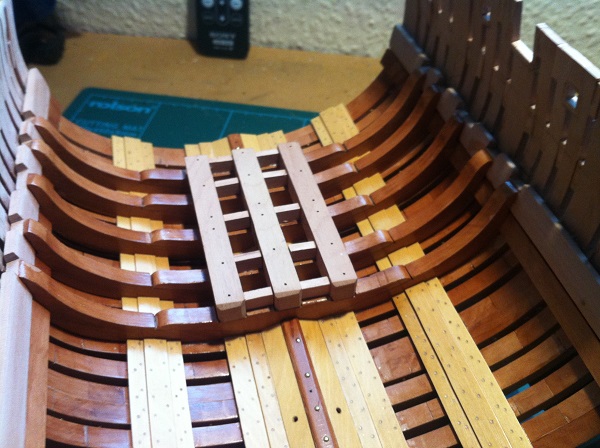
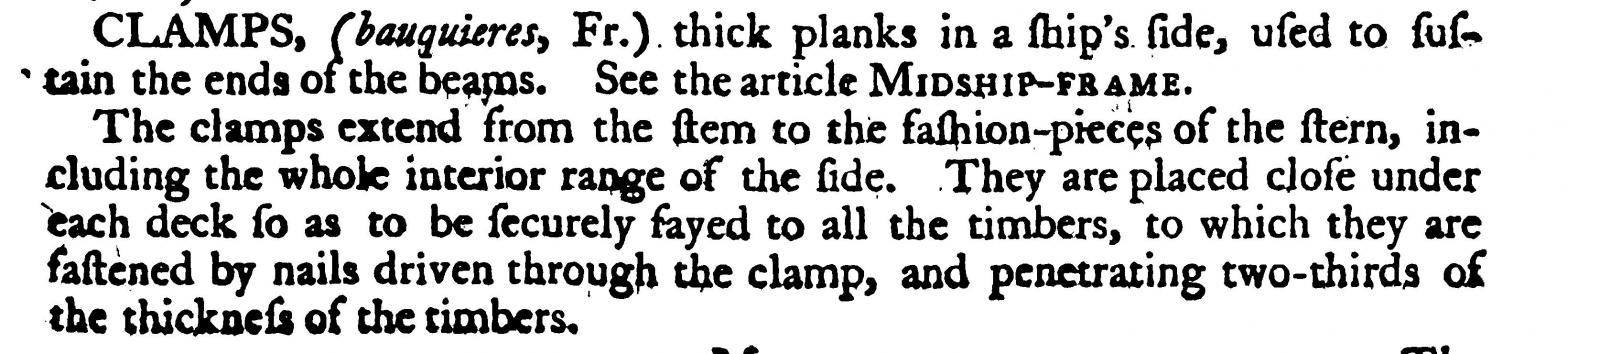
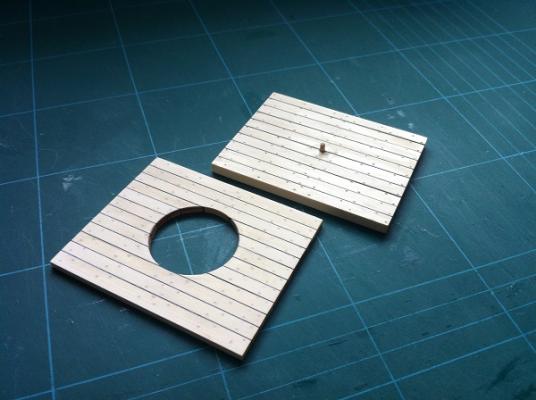
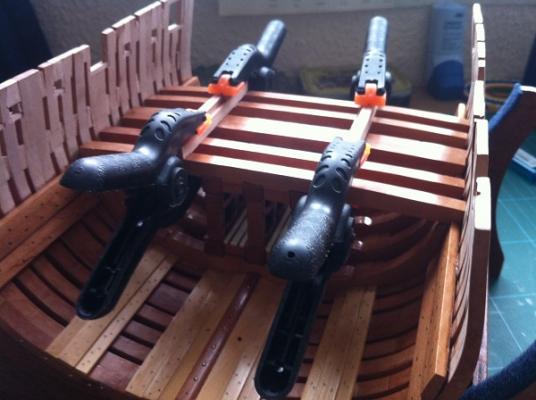
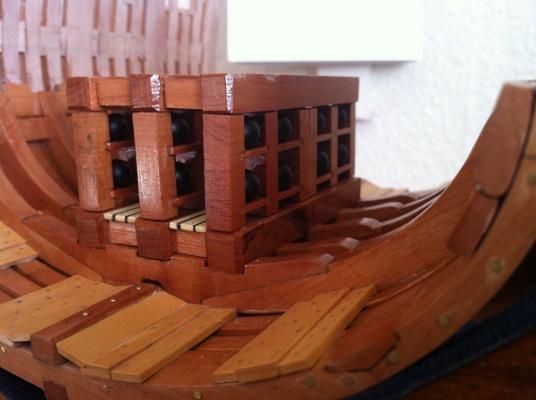
Hi Guys, Time for a quick update. Work has continued on the Shellroom. The deck support beams were cut from Swiss Pear and placed in their location, you got it, they didn't fit, so a little adjustment was required to the Floor Riders, not with a little trepidation I took a razor saw to the Riders and trimmed off the excess, this time all was well and with a bit of gentle persuasion they fitted. Next up was the Bomb Racks, very simple and gave no trouble, these were made from Swiss Pear, I made a very simple vice to hold them so that I could grind out the dip for the Bombs to sit in, this worked a treat and they were turned out in no time. The Pillars gave me a little more trouble because I had to mill them in three's because my vice wouldn't open wide enough, some irregularity seeped in and a few cuts didn't line up, these had to be recut, they took me the best part of a day to complete. Next up, the Shellroom deck, I made this from six pieces of Holly, I used black card for the corking, each deck has three pieces and once glued together they were sanded down to size. On refection the card is not the correct size, it's too big, but I quite like the effect and so it's going to stay. The Support Beams, Deck beams and Deck were glued in position and given two coats of Poly. The racks were made up and also given two coats of poly. The Bombs were made from a child's bracelet ( not my Granddaughters ), my Admiral bought them but they were silver, dilemma, what was I to do, the remit for the build was for no paint to be used, sorry guys I failed in this area, the Admiral bought some spray paint and so the bombs were duly painted ( GOLD ). Didn't check the tin did I, so this time I got it and duly sprayed the bombs. The Bomb racks have been made up but I don't have any pics of them just yet, but another update will be following shortly. The Upper Support Beams were cut so all that needs to be done is the actual construction. Some pics My simplified vice for holding the flat stuff Most of the parts that make up the Shellroom still to be given a coat of Poly Support Beams and Deck Beams in place Support Beams and Decking placed and given two coats of Poly So that's it for now, next update will be soon. Be Good mobbsie


- 255 replies
-
- 16
-
-
- granado
- bomb ketch
- (and 2 more)
-
What Frank said + 2. Sooooooooooooper. Be Good mobbsie
- 956 replies
-
- 4
-
-
- andrea gail
- trawler
- (and 1 more)
-
I wonder how you can live with yourself Jack, how can you leave those sanding marks on those bolts, should be ashamed of yourself. Simply superb mate, I take my hat off to you. Be Good mobbsie
- 60 replies
-
- 4
-
-
- granado
- bomb ketch
- (and 1 more)
-
Glad your back in the yard Denis and feeling a little better. If anybody can come with the right solution to a problem it's you mate, you have in the past and you will in the future, If you didn't have problems you wouldn't do this hobby, its in your blood. I do like what your doing mate, keep it up. Be Good mobbsie
- 956 replies
-
- 3
-
-
- andrea gail
- trawler
- (and 1 more)
-
Nicely done mate, that's another big job out of the way. Be Good mobbsie
- 1,616 replies
-
- 2
-
-
- caldercraft
- agamemnon
- (and 1 more)
-
I cannot offer any advice Mark, only admiration for the quality and amount of work you've done so far. Well done mate Be Good mobbsie
-
Not Quite mate but it wont be long. Be Good mobbsie
-
Hi Guys, Thanks to one and all for your very kind comments and hitting the like button. A very happy birthday David ( scratch ), hope you get whatever it is you want mate. Wayne, thanks very much for input on this matter and the information. It's leading me to believe that Nails were used rather than Bolts or Treenails. I shall be following Grants method and sizes and to be honest there is no difference between Bolts or Nails. Cheers Grant for steering me in the right direction. Once I get my LoS I can carry on with them but not for just now. I will however be working on the Shell room and I must thank Rusty for the heads up on the need to be extra vigilant on the measurements with regard to the Shell Room and Mortar Pit Beams. Thanks Guys and Be Good mobbsie

- 255 replies
-
- 10
-
-
- granado
- bomb ketch
- (and 2 more)
-
Hi Grant, Your test piece has come out really well mate, I reckon you should go for it. I'm going to be a little controversial here and say that I think nails were used rather than bolts and certainly not treenails. When you consider the weight the clamps had to take plus the shock and pressure applied when the Mortar was fired, nails would have a tighter grip and a lot less play over time. Bolts or Nails it makes no difference at this scale as they will be the same size and the same system will be used. I shall be a little ways behind you for a while whilst I wait for my LoS to arrive. Be Good mobbsie
- 456 replies
-
- 5
-
-
- finished
- bomb ketch
- (and 2 more)
-
Take it easy Captn, softly softly and all that. Great toothpick idea, works a real treat but unfortunately I'm unable to assist with your rigging plan but I wish you good luck. Be Good mobbsie
- 625 replies
-
- 4
-
-
- bounty launch
- model shipways
- (and 1 more)
-
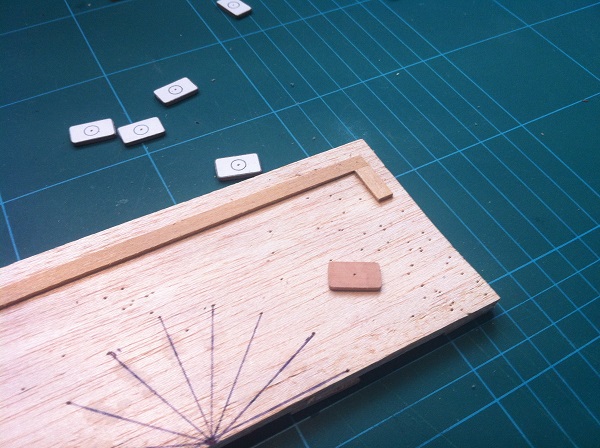
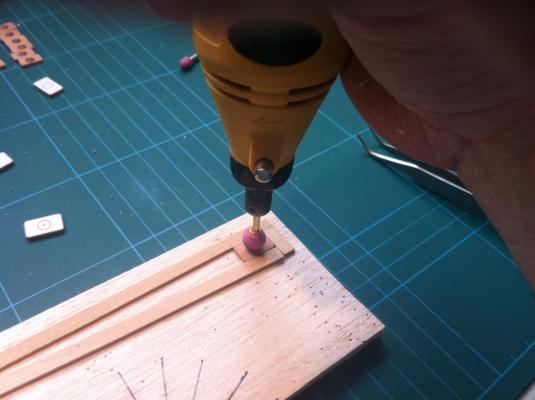
Hi Guys, Thanks for all the comments and likes guys, much appreciated. Treenails are now complete but I'm not totally happy with them. They are on the large side, but in my defence they need to be because somebody's stolen the front and back ends of me boat. Seriously, the mistake I made was at stage two, ringing the holes with pencil, I drilled the holes 0.5mm which is still slightly larger than scale but when I ringed the hole with pencil the hole was stretched even more, I hadn't considered that. I used filler No 4, which was Plain white All Purpose Filler, Lime sawdust, Walnut sawdust and some Nut Brown fence stain. I'm not disappointed with the colour just the size of them but their here to stay and have been given two coats of Poly. Pictures So now your right up to date, I welcome any and all comments guys, you know the score. Be Good mobbsie


- 255 replies
-
- 18
-
-
- granado
- bomb ketch
- (and 2 more)