HOLIDAY DONATION DRIVE - SUPPORT MSW - DO YOUR PART TO KEEP THIS GREAT FORUM GOING! (Only 13 donations so far - C'mon guys!)
×


mobbsie
-
Posts
1,493 -
Joined
-
Last visited
Content Type
Profiles
Forums
Gallery
Events
Everything posted by mobbsie
-
 Just breezing past Denis, excellent fix mate and a good finish. Your upper deck detail is a work of art and looks superb so you should be very pleased and proud of her. Well done buddy. Be Good mobbsie
- 956 replies
-
- 3
-

-
- andrea gail
- trawler
- (and 1 more)
-
Your gonna wish you never asked this question mate. I like both but seeing them oiled up has made me change my mind, MAPLE. Whichever you choose will look good. Be Good mobbsie
-
Simply superb John, ,another milestone reached, well done mate. Be Good mobbsie
- 2,250 replies
-
- 1
-
-
- model shipways
- Charles W Morgan
- (and 1 more)
-
Carry on like this Frank and she gonna have to go back into the shipyard for a refit Simply AWSOME mate. Be Good mobbsie
-
Hi Patrick, For me it's the Holly, it gives a more scrubbed look and is slightly lighter in colour. I know you asked for opinions mate but it's your choice, your the skipper. Your making good progress mate, keep it up. Be Good mobbsie
-
Great idea Grant. I see what you mean about the fogging of the lens mate, perhaps you could polish it out, they look like tiny scratches to me. Either way they look pretty damn good from where I'm sitting. Be Good Mobbsie
- 339 replies
-
- 4
-
-
- dumas
- Chris-Craft
- (and 3 more)
-
Forgot to wish you a great Australia Day, enjoy the hols mate. Mobbsie
- 745 replies
-
- 1
-
-
- francis pritt
- mission ship
- (and 1 more)
-
That's a really nice job John, well done on reaching your milestone. Good progress mate. Be Good mobbsie
-
Thanks very much Grant, and for hitting the like button guys. What on earth are you doing up at this hour, it's way passed your bedtime, come on, off to bed with you and get some beauty sleep, you need all you can get mate. Be Good mobbsie
- 255 replies
-
- 2
-
-
- granado
- bomb ketch
- (and 2 more)
-
Hi Ken, Thanks mate, I just never thought I'd be extra scratch building over scratch build plans. This really is a good learning curve and well out of my comfort zone and it makes me realise just how skilful other scratchers are, A new found respect. I have to give the credit to Spanion for the rubber bands, it was his idea I just pinched it. Be Good mobbsie
-
Hi Denis, Just catching up mate and boy have you ever shot forward. Your work is simply outstanding. I have just one question, When do you sleep, if your not building your busy checking out other logs and that's gotta take a good bit of your time, then there's work, you do that sometimes too. It's all to much for me, I'm going for a lie-down. Be Good mobbsie
- 956 replies
-
- 3
-
-
- andrea gail
- trawler
- (and 1 more)
-
Absolutely a great finish on those gauges mate and nice inserts, they will look brilliant when fitted to the dash. You must be well happy with them. Me thinks a high standard is going to happen here. Be Good mobbsie
- 339 replies
-
- 3
-
-
- dumas
- Chris-Craft
- (and 3 more)
-
Hi Mate, NICE, bulkhead looks good mate. Have you tested the Main Mast in it's housing, if not it may be a good idea to do it before planking. Looking forward to further updates. Speak soon. mobbsie
- 1,616 replies
-
- 4
-
-
- caldercraft
- agamemnon
- (and 1 more)
-
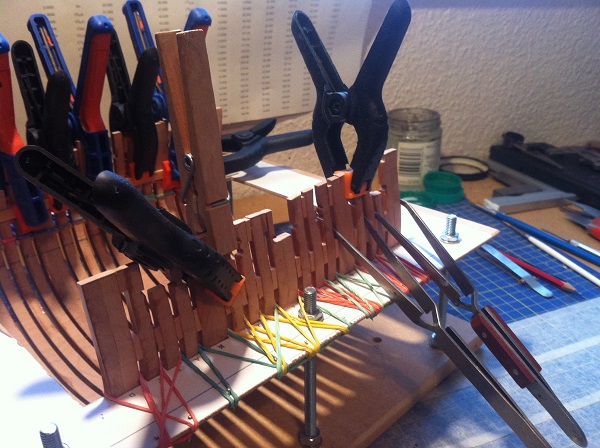
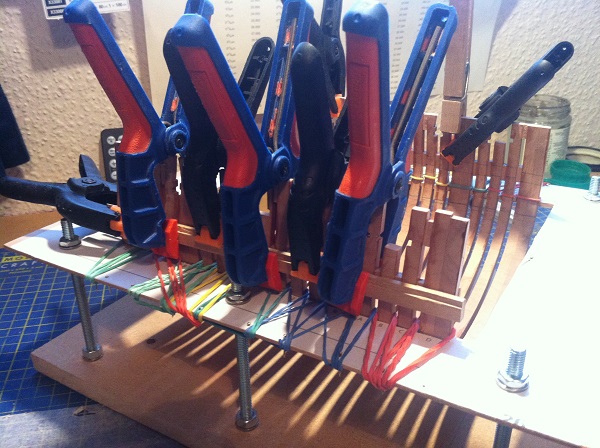
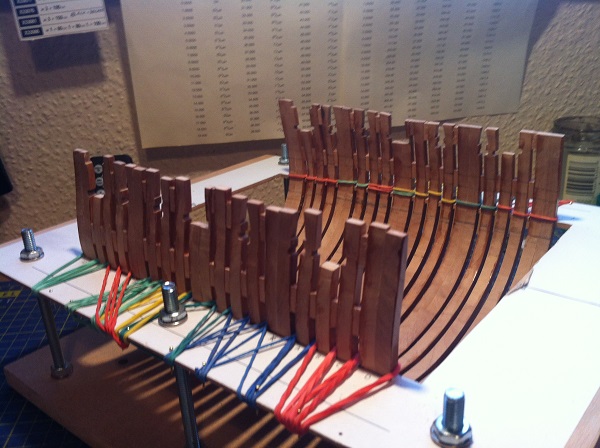
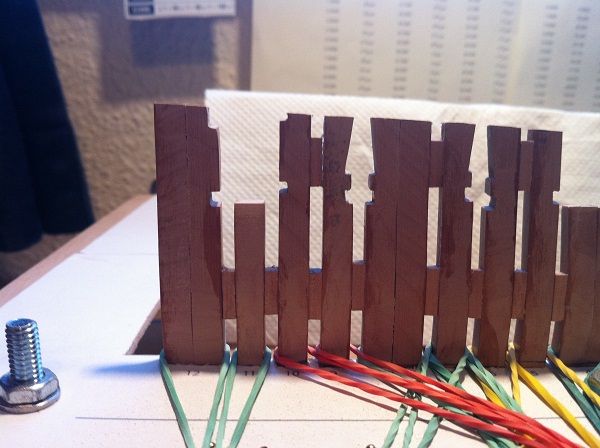
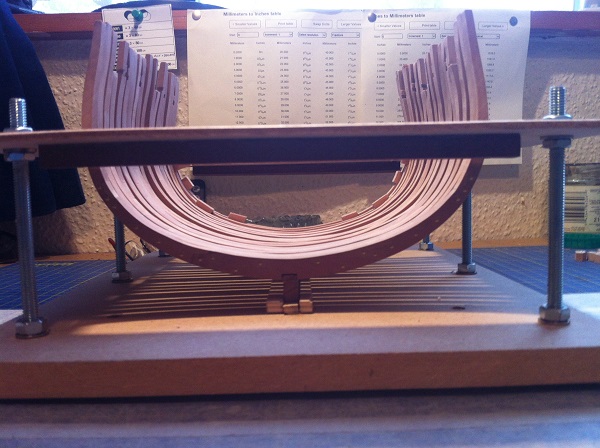
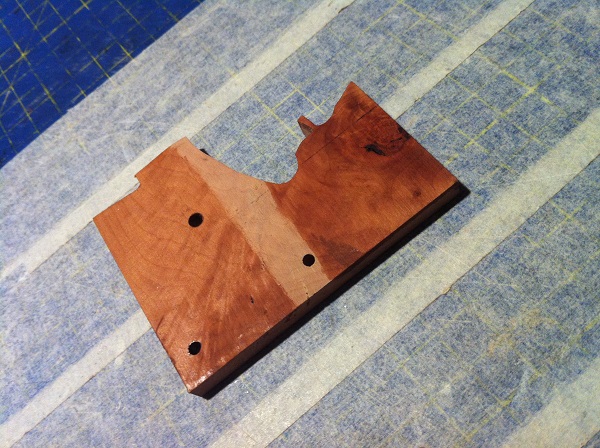
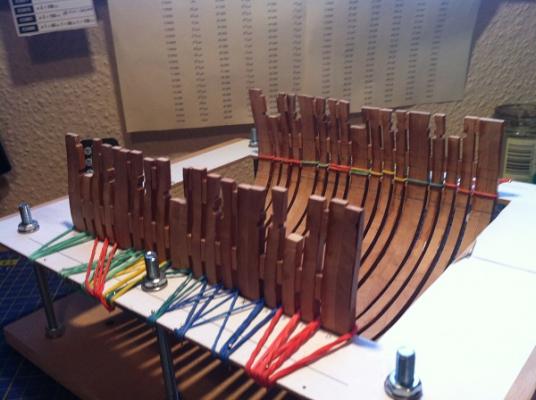
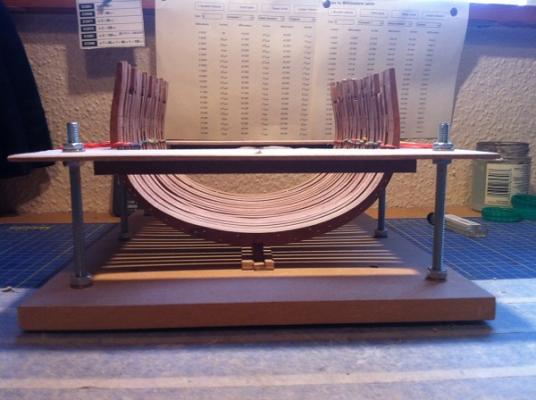
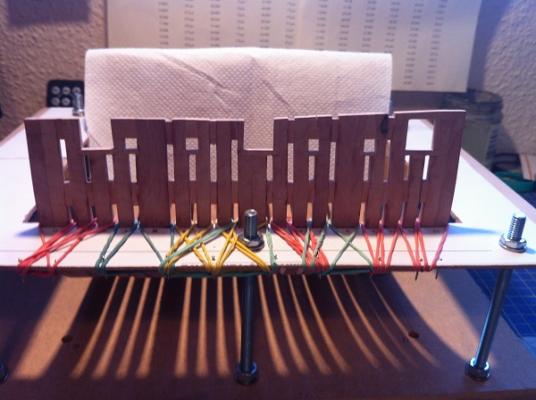
Hi Guys, I thought it was about time I put pen to paper and came up with an update, just to let you know I haven't fallen of the planet. All the frames are now glued onto the keel and that showed my first problem, not all the frames fitted the jig fully, a few were as much as 2mm in from the outside of the jig, this presented a problem when it came down to sanding the inside of the frames, they need to be tight so there is no rocking when sanding. The problem was solved by using Spanions method which is to place elastic bands around each frame and fix to a point of your choosing, this holds the frames tight to the jig edge. I chose to drill the jig from the top and place round head pins in, the bands were then pulled tight around the pins, great, until you don't pick the jig up by the sides, I now have nicely punctured finger tips. I glued the first 8 frames and when the glued had dried they were sanded down, I have one frame which is a little out of line and it was a case of either cut the Futtock Rider to fit or make up a new frame, I tried adjusting the Rider which worked well so that worked out ok. Once the first 8 frames were sanded I then fitted the final 4 frames and fared them down. There is a small rise in frames 9 to12 and they have to be sanded at a slightly different angle. With the inside completed I turned my attention to the outside, first job was to mark the height, frames D1 TO 4 ( 9 frames ) are level and flat, frames 5 to 12 are sloped with frame 12 being the highest. There is still a fair bit of movement in the frames which needs to be reduced to virtually nothing, this was achieved by placing 2.5mm blocks between each frame at a point above the water line where the hull planking will cover them up, the tops of the frames were also blocked at this time, this also served to strengthen some of the weaker frames. Next up was the Gunport Sills, Sweep Sills and Filling Lintels, more problems, these were down to my c--p joinery skills and not the drawing's. If I put the sills in place without any work they would end up looking like a mountain range, so measurements and levels were taken and out came the sanding sticks and files which were applied to the Port side. The Sills were the first to receive the treatment with new levels being made, most of the notches which had been pre-cut were sanded back, so with all the mistakes removed the Sills and Linings were added to the Gunports and Sweep Sills, The Filling Lintels were next to be attacked, as it happens they turned out to be quite easy to make and so in they went. A little more sanding and an acceptable finish was reached bearing in mind that this work will all be covered with planking. The Portside took 3 days to repair so I have the same to look forward to on the Starboard side. Whilst waiting for glue to dry and the need to change tasks I made the following, Keelson, Mortar Pit Deck Clamps ( Upper and Lower Strakes ) and the Upper Deck Clamps ( Upper and Lower Strakes ). I also cut out on the scroll saw the Futtock and Floor riders, these are not finished yet because they will require fitting individually. At this point I want to thank Grant for keeping me on the right track regarding the timber, I got a little confused with what timber to use and so consulted my mentor, things were explained and backsides kicked, thanks mate. At this point mate I decided to keep you on. I should imagine your about ready for some pics, if your not suicidal by now. Portside clamped up waiting for the glue to dry on the blocks Just a few more clamps on the Starboard side. This is Spanions method of holding the frames. Profile of the frames prior to sanding down. You can see the nature of my problem. The finished Portside, bearing in mind it is to be planked over. So there we are guys, your right up to date. Next job is to finish the Starboard side, fit the Keelson and work on the Futtock and Floor riders. Be Good mobbsie


- 255 replies
-
- 20
-
-
- granado
- bomb ketch
- (and 2 more)
-
Hi John Boy do I know that feeling, it's so frustrating. Patience has never been one of my attributes either. Still your making good progress mate, she's looking every bit the lady. Be Good mobbsie
-
Hi Sjors, Just to let you know mate I haven't given up on you yet, the offer still stands should you wish to take it up. Be Good mobbsie
- 1,616 replies
-
- 2
-
-
- caldercraft
- agamemnon
- (and 1 more)
-
Well done Mike, that is one beautiful build and definitely on my shopping list. The level of detail you've put in is outstanding and your friend really is a very lucky guy, does he know it's coming or is it a surprise, either way he will be smitten. :im Not Worthy: :im Not Worthy: Be Good mobbsie
-
Hi Mike, She's coming along nicely mate and as stated the 1st planking going to get covered. Have you tried using Push Pins to hold the planks instead of pinning direct into the actual plank. These pins have a collar which when pushed home actually holds the plank with the collar, they reduce the possibility of the planks splitting and also leave the planks with no holes in. Just a thought mate, hope you don't mind me mentioning it. Be Good mobbsie
-
That's a fine piece of work Augie, she's looking absolutely gorgeous. Be Good mobbsie
- 2,191 replies
-
- 1
-
-
- confederacy
- Model Shipways
- (and 1 more)
-
Gonna pull up a ringside seat on this one mate, she looks to be an interesting boat with so many firsts for you. Good Luck with her mate. Be Good mobbsie
- 339 replies
-
- 3
-
-
- dumas
- Chris-Craft
- (and 3 more)
-
Lovely work on the frames mate, coming along a real treat, only 9 more to go. The colour although subtle is discernible and looks good, certainly lighter than my Polyurethane. Rocket looks splendid but the Tenders on backwards. Be Good mobbsie
- 456 replies
-
- 1
-
-
- finished
- bomb ketch
- (and 2 more)
-
Hi Mate, done a good job there mate, nice to see a decent length on the breech ropes, now let the fun begin. 2mm blocks, I remember them well. They are indelibly printed on my mind. Good luck mate and have patience. Be Good mobbsie
- 1,616 replies
-
- 2
-
-
- caldercraft
- agamemnon
- (and 1 more)
-
Nicely done Jack that's a great start. I must say your shipyard looks to be very impressive mate. Be good mobbsie
-
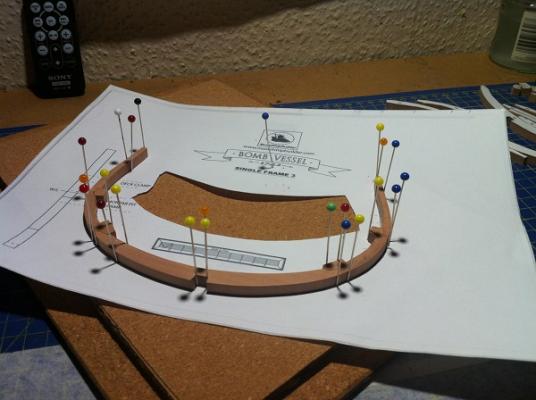
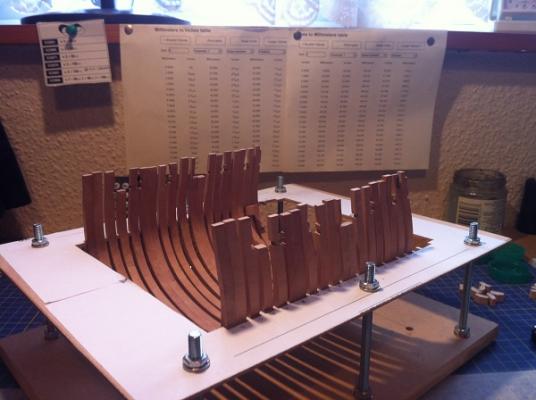
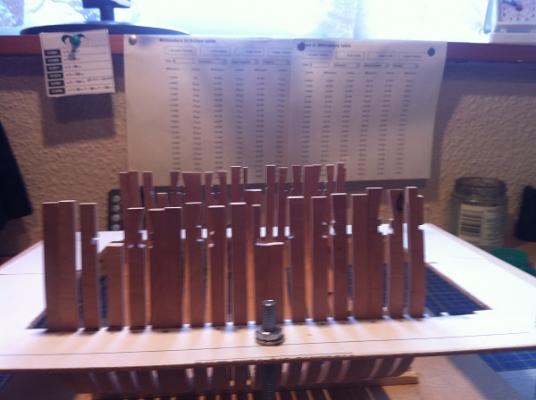
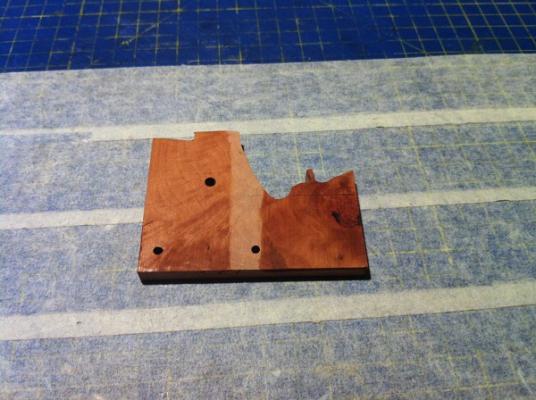
Hi Guys, About time for an update, it's been a while. Now what was I doing ? Ahh yes that's it, FRAMES, well frame production is still going on all be it slowly what with the holidays and all but I'm pleased to say I only have 1 single ( 11 ) and 1 double ( 12 ) to do, they are all cut out and ready for final adjustments and making up. Talking with Grant there has been a change in the method of holding these frames while being constructed, where I used pins to hold the pieces in place I am using Grants method using double sided tape. This method allows for more frames to be made at once because no pin board is required, I only have a single pin board. I don't have a picture of the new method but should anybody want to see it Grant has posted some in his log. I also had a problem when the frames were placed direct onto the template in as much as I was getting ink in the joints when gluing the frames together, I got around this by using a piece of celotape over the template joint. This has cured that problem so all I need to concentrate on is getting a good fit with the wedges, (still trying to get them right ). Grant and I were also discussing which finish to use because each stage will need to be finished before moving on. Minwax Satin seems to the favoured choice but unfortunately it's not sold in the UK, at least to my knowledge, so I thought I would use Tung oil, I applied some to a practice frame made from Swiss Pear and although it looked OK it is quite dark, I looked to see what is the UK equivalent to Minwax and it turned out to be Clear Polyurethane, I already had some of this and tried it out although it was gloss and I wanted satin, it's a lot lighter and does look better so another trip to the hardware store and that's now sitting waiting to be used. I only have a few pics mainly because frames are frames and have been shown before. My old system of frame holding The next 3 pics are where I am at the moment On the right is the Tung oil, left is Polyurethane So that's it guys, a bit disappointing really, I will post again when all the frames are complete although there will still be a fair bit of work to do on them before moving onto the next stage. Be Good mobbsie


- 255 replies
-
- 17
-
-
- granado
- bomb ketch
- (and 2 more)