HOLIDAY DONATION DRIVE - SUPPORT MSW - DO YOUR PART TO KEEP THIS GREAT FORUM GOING! (Only 51 donations so far out of 49,000 members - C'mon guys!)
×


Jim Lad
-
Posts
9,504 -
Joined
-
Last visited
Content Type
Profiles
Forums
Gallery
Events
Everything posted by Jim Lad
-
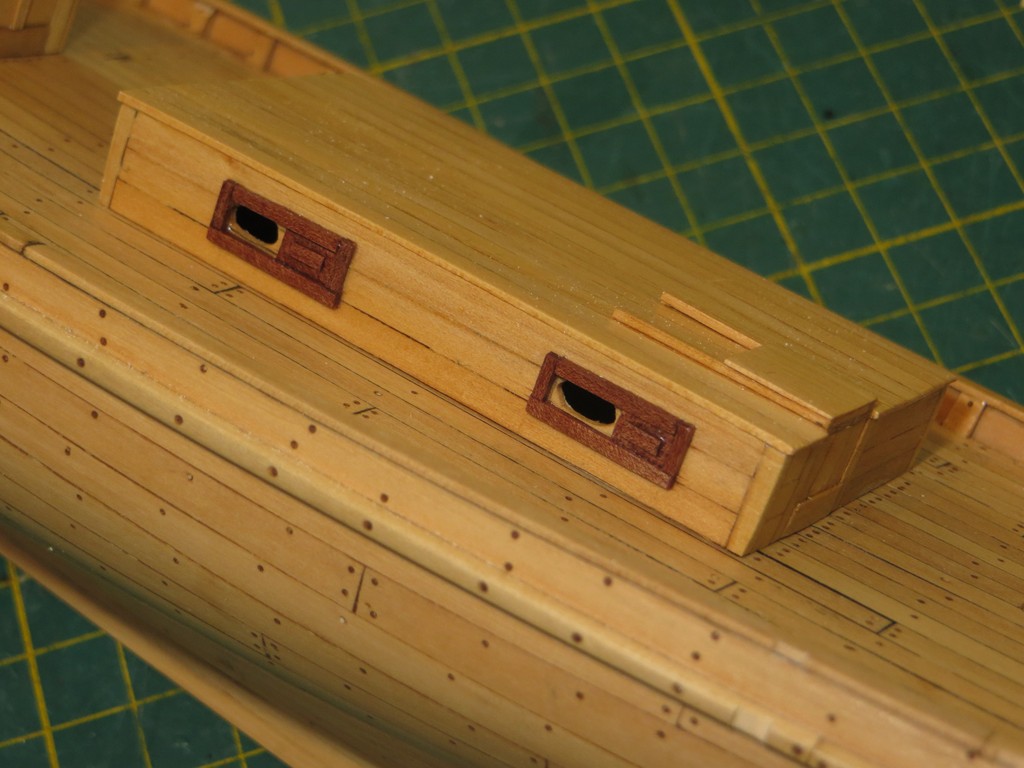
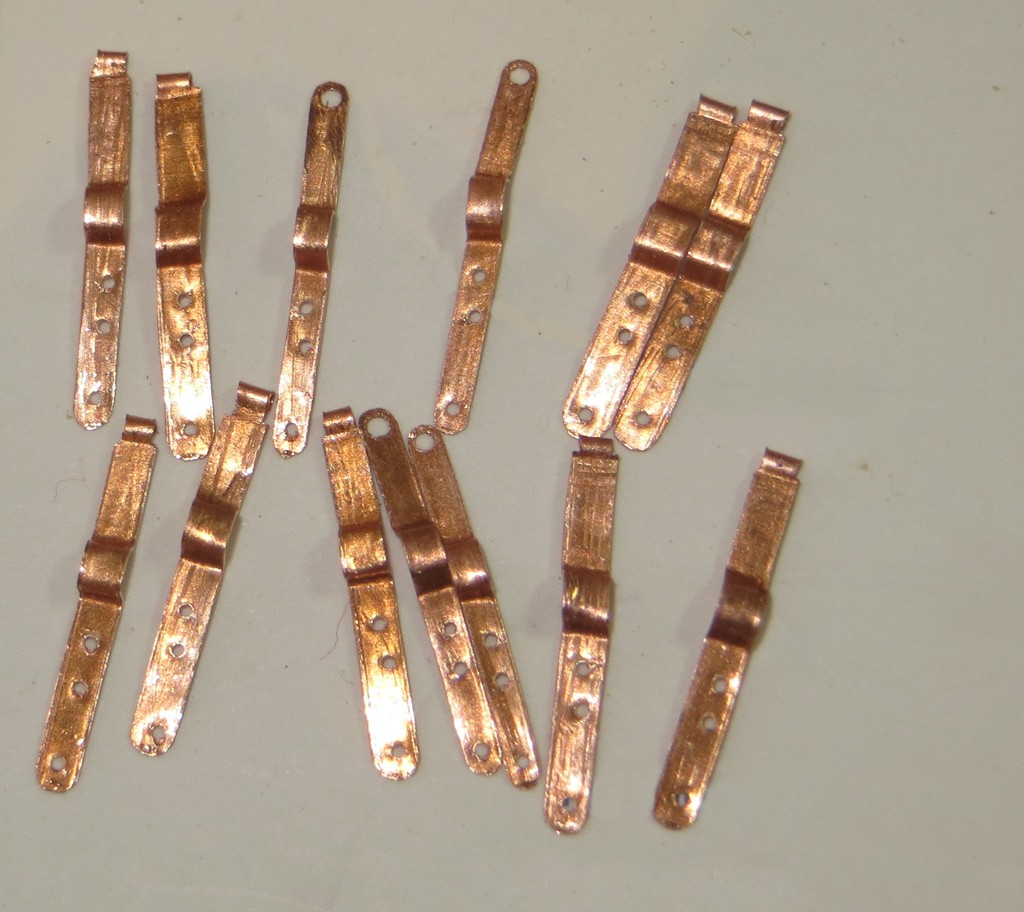
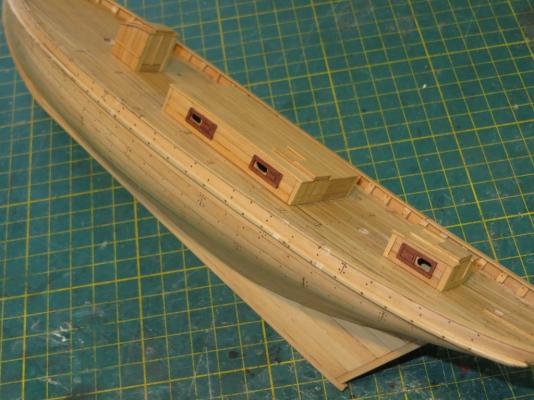
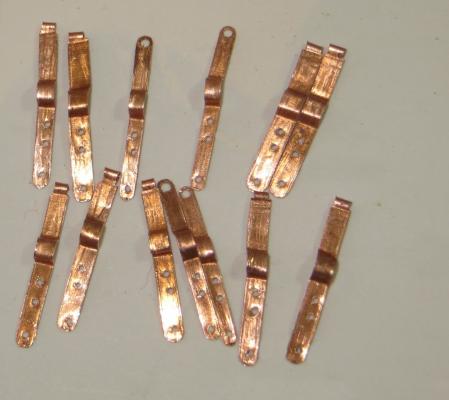
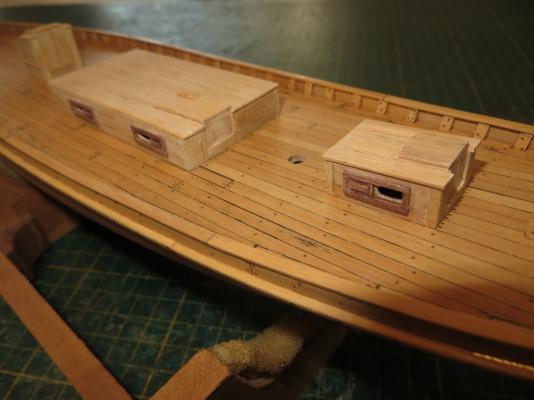
 The 'Pritt' advances. The deckhouses have now received a couple of coats of 'Polly' and are pretty much complete except for some black card inserts behind the windows to keep the dirt and bugs out. You might notice that there are no door handles - this is because the 'doors' were simply timber slides that fitted into grooves on each side of the opening. I have now also fabricated the chain plates (two types) and they are now ready for soldering and finishing once I've made the deadeye straps. I originally thought that the mizzen shrouds were secured by lanyards, but closer inspection of the available photos reveals that they also have deadeyes. The chain plates with holes in to tops are for the running stays amidships and the main topmast shroud (which is secured by a lanyard). John


- 745 replies
-
- 28
-

-
- francis pritt
- mission ship
- (and 1 more)
-
She's really coming along nicely, Popeye. I hope there's going to be flowers in that window. John
-
Glue's hardly dry on the last one and this one is already half planked! John
- 129 replies
-
- 4
-
-
- armed launch
- panart
- (and 1 more)
-
Take the plunge to the dark side, Bug - you'll never look back! John
- 745 replies
-
- 6
-
-
- francis pritt
- mission ship
- (and 1 more)
-
Continental Frigate Hancock by wyz
Jim Lad replied to wyz's topic in - Build logs for subjects built 1751 - 1800
Looking forward to the re-birth, Tom. John -
She's already a ship. Lovely workmanlike lines to that hull. John
- 348 replies
-
- 4
-
-
- pequot
- cable ship
- (and 1 more)
-
An interesting idea for the windows, Popeye. John
-
Life boats
Jim Lad replied to bluenose2's topic in Discussion for a Ship's Deck Furniture, Guns, boats and other Fittings
On merchant ships (peacetime) it was normal to leave the plugs out whether the boats were covered or not. John -
Life boats
Jim Lad replied to bluenose2's topic in Discussion for a Ship's Deck Furniture, Guns, boats and other Fittings
Les, It would depend on the Master's preference, but uncovered at sea would be the norm. In port, it would really be six of one and half a dozen of the other - the Master and Mate may very well have liked them covered to keep them clean and to prevent theft of boat equipment. John -
Frank, I'm afraid I haven't been following along with your build, but I must say she's turned out a real beauty - a job very well done. John
-
Beautiful decoration work on the stern, Nils. John
- 2,625 replies
-
- 4
-
-
- kaiser wilhelm der grosse
- passenger steamer
- (and 1 more)
-
Looking good, Cathead. Because of the open nature of the build you should be able to get something in there to measure the missing stack position pretty accurately. John
-
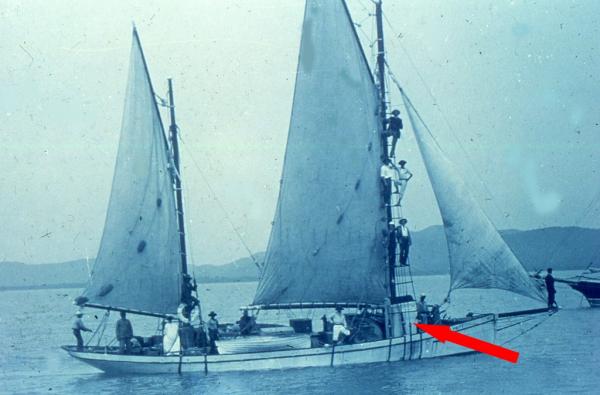
Hakan - 12 men and a woman in that photo. Most of them would have been passengers of one sort or another. Luggerite - The structure on 'Francis Pritt' is at least 5' 6" high. The is a good clear photo of her unloading at the Roper River in 1908 which was taken from the port side and clearly shows a full door - pretty sure it's the dunny. John
- 745 replies
-
- 3
-
-
- francis pritt
- mission ship
- (and 1 more)
-
G'day, Hakan. Dunny - Australian slang for an outside toilet. That's it there behind the main shrouds. John
- 745 replies
-
- 13
-
-
- francis pritt
- mission ship
- (and 1 more)
-
The real north, Michael - heat, humidity, cyclones, mangrove swamps, crocodiles, swarms of mozzies, etc. etc. John
- 745 replies
-
- 4
-
-
- francis pritt
- mission ship
- (and 1 more)
-
There's just no stopping you, is there? John
-
Again, thanks for the comments and 'likes' one and all. Michael - screens? screens? In those days, if you worked in the north you put up with the conditions of the north! John
- 745 replies
-
- 4
-
-
- francis pritt
- mission ship
- (and 1 more)
-
Just catching up, Alexandru - everything looks up to your usual very high standard. John
-
Thank you all for your comments and for your 'likes'. The oval ports with wooden shutters are 100% Australian pearler design. They had no glass in them and the cabins must have been horrendously hot and stuffy (as well as humid) during the wet season with the shutters closed. John
- 745 replies
-
- 5
-
-
- francis pritt
- mission ship
- (and 1 more)
-
Just had another thought, Mark - will she be ready for this year's Sydney/Hobart? John
-
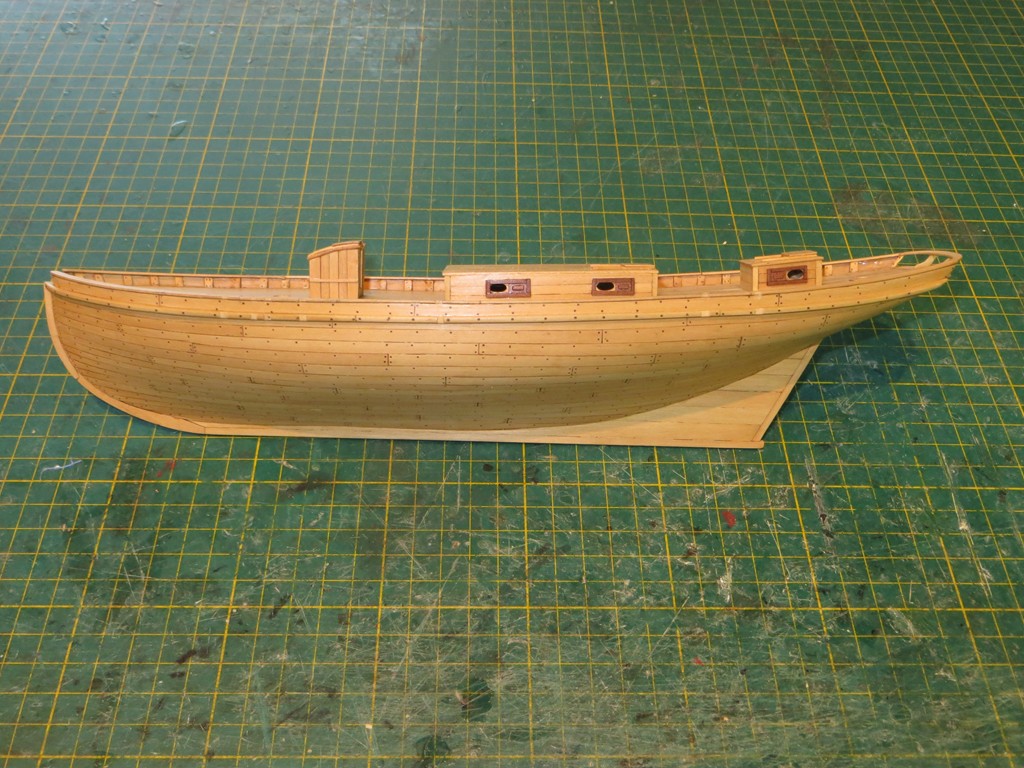
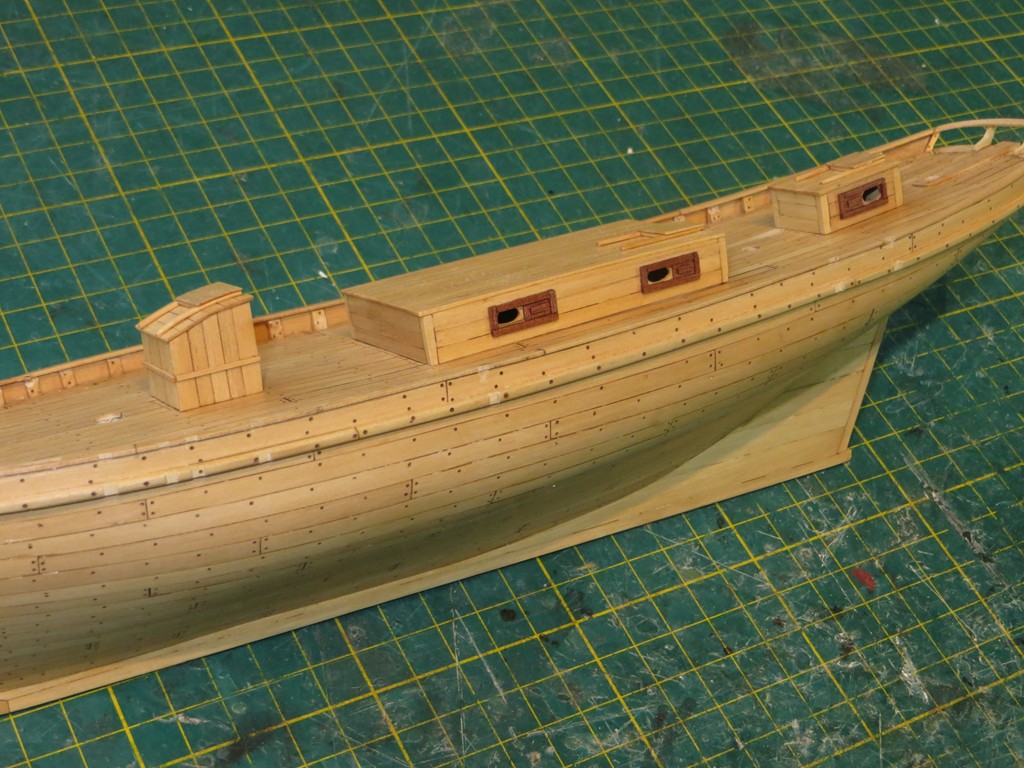
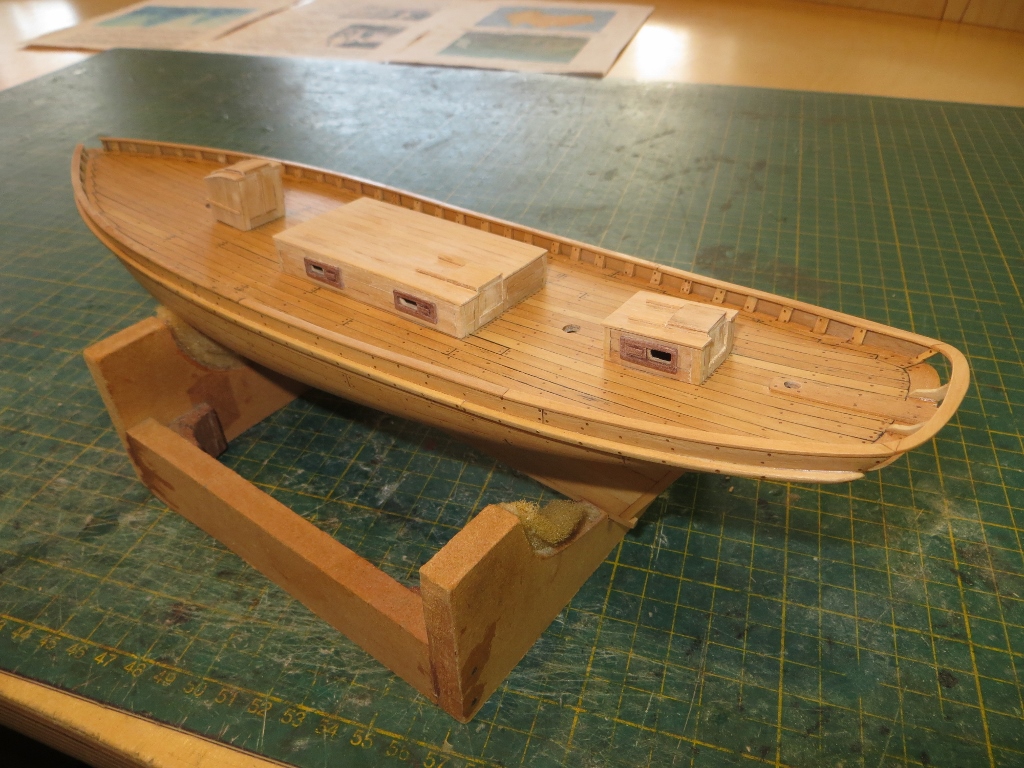
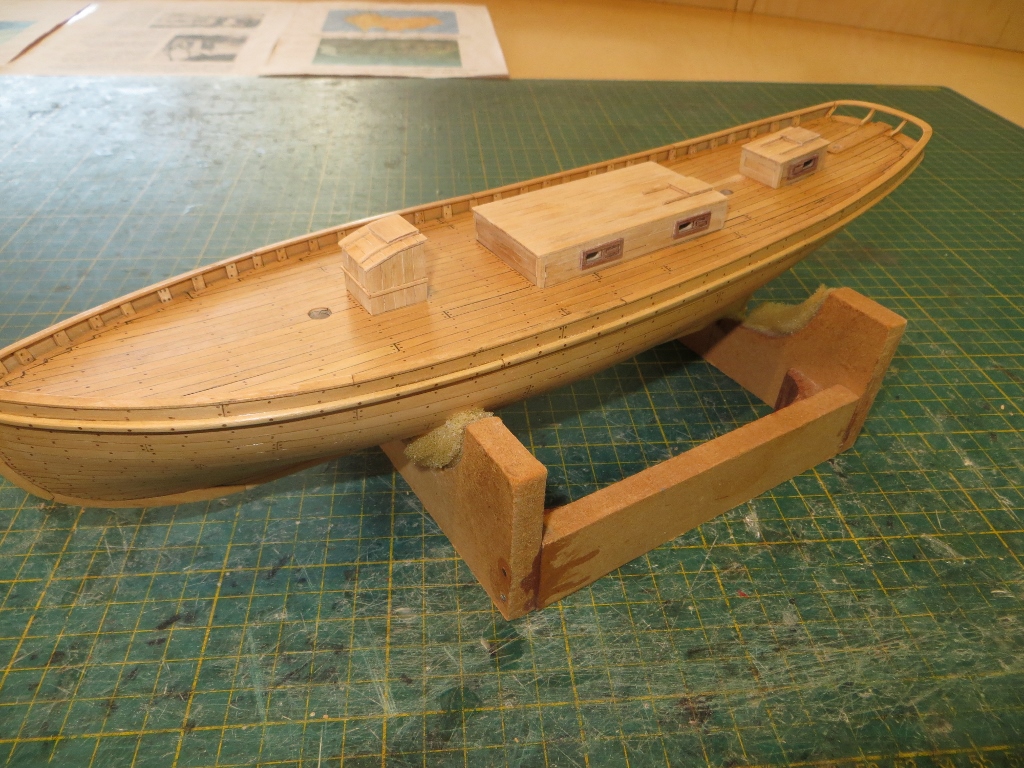
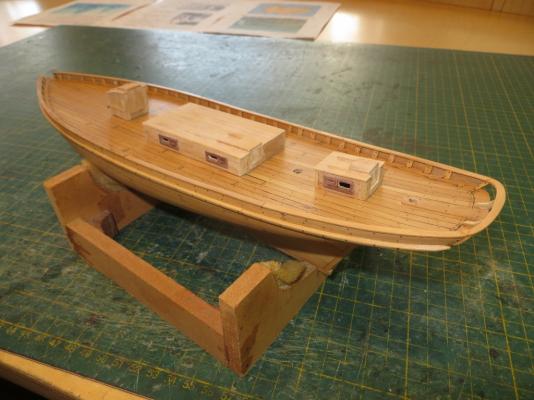
And so she proceeds. The main deckhouses are now finished (apart from final cleaning up) and have been brought home for a couple of coats of wipe-on poly. They won't be finally fixed until all the deck details have been completed so I have more room to work around the deck. The only deckhouse to be made yet is the 'dunny', which was a definite addition to her when she was converted to a mission ship and can be left to very close to the end. Pearlers didn't have such woosy structures, but when you're carrying families some concessions to the niceties of life have to be made. John

- 745 replies
-
- 25
-
-
- francis pritt
- mission ship
- (and 1 more)