


dvm27
-
Posts
2,469 -
Joined
-
Last visited
Content Type
Profiles
Forums
Gallery
Events
Everything posted by dvm27
-

ROYAL CAROLINE 1749 by Doris - 1:40 - CARD
dvm27 replied to DORIS's topic in - Build logs for subjects built 1501 - 1750
I'm happy that you've created a new view of Doris's work. Though I suspect shee is done with ship model making her work deserves to be preserved gere forever as a resource. I would hate to lose it if some sort of crash occured.- 883 replies
-
- 2
-

-
- royal caroline
- ship of the line
- (and 1 more)
-
Your work is truely inspirational Johann. Could you have worked the thimbles into the pendants prior to installing them under the shrouds?
-
The problem with such meticulous work is that the joint is barely visible when completed. Lovely work!
-
While watching your video and your bowsprit problem I was going to suggest checking the stieve of your bowsprit vs. the plan. But you came up with this on your own. Your solution worked out well though. You could have worked in a set of beams on either side afore beam #1 but it will be hidden so not really an issue. You mentioned the "as built home plan" vs the architect's original plan. I'm sure you're aware that many ships plans were labelled "as built" and differed from the original plans as well, likrly for the same reasons.
-
Hemostats, by nature, are designed to securely hold and crush tissue for hemostasis. The box section is rivited and there is no way to modify it for a looser grip (that would defeat their purpose). While I've not used them for ship model making you may want to try Doyen intestinal forceps. They have longitudinal groves designed to hold tissue but not damage it. As an example https://universalsurgical.com/product/doyen-forceps/. I think the 7" version might work well for your needs.
-
Tally Ho by AntonyUK
dvm27 replied to AntonyUK's topic in - Build logs for subjects built 1901 - Present Day
Love Leo's build and yours as well. I'll bet if you e-mailed Leo he would send you a piece of timber you could incorporate into the hull. I have corresponded with him in the past and he is indeed as nice as he seems- 34 replies
-
- 3
-
-
- mixed materials construction
- Albert strange design
- (and 1 more)
-
I look forward to your new build, Chris. Had to laugh at your "smaller scale of 1:48" comment. I'm currently rigging a French warship of that era and the masts and spars are massive! Boudriot's rigging plans are superb though.
-
Yet Another Pandora 3D build
dvm27 replied to herask's topic in CAD and 3D Modelling/Drafting Plans with Software
Lovely work, Denis. Do you have a copy of "Building the Wooden Fighting Ship" by james Dodds & James Moore? It gives some very detailed illustrations about the workings of the shipyard at each phase of the constuction -
Yet Another Pandora 3D build
dvm27 replied to herask's topic in CAD and 3D Modelling/Drafting Plans with Software
What a treat to find this Denis! Very much looking forward to this build. Pandora is a great choice and the Anatomy series, though not always 100% accurate, should give you lots of details. Any way you could insert Pegasus into the building slip? -
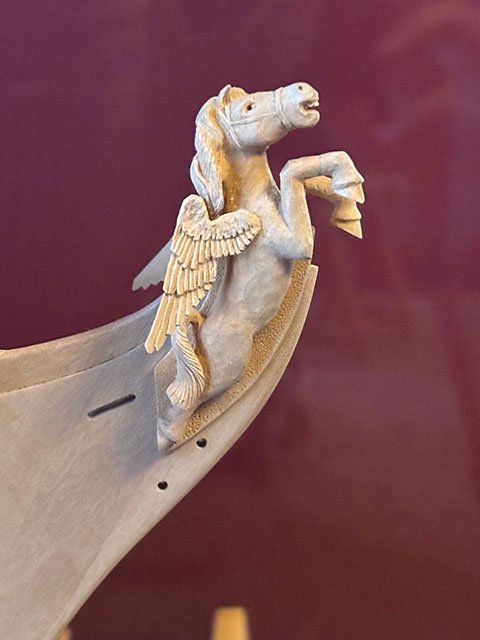
I have no doubt that your figurehead will be magnificent Giampiero. I do fear that that extended right leg will be amputated over time though. Perhaps that's why when horses rear up both fore legs usually are pulled in (see David Antscherl's pegasus below).
-
A great tip from Druxey I learned is to tie every fifth ratline first. This insures proper spacing and non-pinching of the shroud lines. Then add every third ratline. Finaly, fill in the rest. This technique has the added advantage of seeming to be faster then the Sisyphean task of filling in from the bottom up.
-
I can offer no help in this area Mark but isn't it humbling to know that some craftsman, over 250 years ago and under candle light, was able to form this precision detail with likely nothing more than a fretsaw and files?
-
Great to have you back Remco. My holly from that era has also toned down to resemble the boxwood. I imagine at some point you will touch up those wales. I would encourage newcomers to this log to check out remco's earlier work. It's amongst the best you'll find on this forum.
- 1,215 replies
-
- 5
-
-
- sloop
- kingfisher
- (and 1 more)
-
HM Cutter Cheerful 1806 by Erik W - 1:48 scale
dvm27 replied to Erik W's topic in - Build logs for subjects built 1801 - 1850
Lovely work Erik. Those tricky lower bibb details are especially well done -
They must think you are building an important model to be so accomodating. I agree that there must have been sheaves in those slots to redirect the rope or the chaffing would result in frequent replacement. I'm betting that the builder of this model had rigging fatigue at this point and probably just wanted to be finished. He never counted on a Johann to scrutinize is work centuries later!
-
Lovely work Valeriy. May I ask where your splendid models end up? Museums?
-
This is an area that is so often done wrong when re-creating these warships. I don't really understand all the geometry but intuitively your version just looks right. The eye truly is the best judge here.
-
Well Bill, if leaving them overlong "kind of makes you ill" then you really have no choice but to modify them (assuming your sources are correct). It should be fairly easy to scan the sails and reduce them in size proportionally. Or you could just leave them as is and noone else would be the wiser (except you). But if you plan on making more model ships you should get in the habit of correcting inaccuracies whenever possible. It's an important step in becoming a semi or scratch builder. Loved our annual visits to Baguio in the 1970's during university breaks!
-
Swan class 3D model in progress
dvm27 replied to dvm27's topic in CAD and 3D Modelling/Drafting Plans with Software
Thank you Denis for taking this amazing journey with us. You've managed to bring our 3D model to life and helped many Swan class modelers along the way. Best of luck on your future modeling.- 141 replies
-
- 1
-
-
- pof swan series
- swan
- (and 1 more)
-
That is a gorgeous ship model, Ben. Did you give any thought to adding stump masts? I look forward to your new work of your Swan model in the upcoming year(s). Greg
- 399 replies
-
- 4
-
-
- winchelsea
- Syren Ship Model Company
- (and 1 more)
-
My advice would be to remove the bulk of the material prior to mounting on the keel. But, as Druxey points out, you need to be super careful not to exceed the frame margins fore or aft. Thus, I leave 1/16" material proud of the bevel lines. Doing this on the table sander is perhaps not ideal. The reason is that the bevel is constantly changing from extreme to narrow as you go up the frame. If you're going to build many models you may wish to invest in an oscillating spindle sander, It is fantastic for outside and inside curves and for bevel work as well. You control the angle of the bevel, not the machine. with a little practice you can bevel very precisely and in very tight areas. As an alternate, consider using a Dremel rotary tool with their different sanding sleaves. You can remove the bulk with their 80 grit and progress to 180 as you approach the bevel lines.
-
Fantastic video Giampiero! Silver solder will not work if gaps are present. Is this the same for resistance soldering?
-
Very sorry for your loss, Rusty. I'll always remember Callie, my beloved Golden, leaving my workshop in the evenings covered in a fine layer of sawdust. Used to drive my wife nuts! I'd imagine many of us are at an age where we ponder if our next pet would actually outlive us?
-
I believe that is a very workable solution Johann. It is, of course, preferable to use the contemporary model as a primary source but I think sometimes we take these models as gospel. It is possible that the original builder made errors, took time saving shortcuts or omitted details because of any reason you could think of that is just as relevant to us modern builders. Perhaps, being near the end of the rigging process he just wanted to be done and chose this quick and easy method to end the line. I do know that, in 150 years, someone making a model of your model will have the most complete and well researched Creole model ever built.