-
Posts
2,302 -
Joined
-
Last visited
Content Type
Profiles
Forums
Gallery
Events
Everything posted by dvm27
-
By my calculations you have rigged your magnificent model in less than a year. The speed and accuracy with which you work is inspiring (and intimidating)! Do you spend a full day in the workshop or is this just part time for you?
- 589 replies
-
- le gros ventre
- cargo
-
(and 1 more)
Tagged with:
-
A simple "like" won't do here Rusty. Congratulations on the completion of your exceptional build. I'd hardly call this a "kit" model but your choices in wood and finishes makes it unique.
- 642 replies
-
- winchelsea
- Syren Ship Model Company
-
(and 1 more)
Tagged with:
-

Next NRG Conference
dvm27 replied to YankeeClipper's topic in NAUTICAL RESEARCH GUILD - News & Information
I agree with Roger with regards to a regular NRG meeting in Mystic (or Newport News or Annapolis). But to be fair I would think it could alternated with a West Coast NRG meeting. If memory serves me well all the largest NRG meetings I've attended have been on either coast. Perhaps not fair to our interior members but we need to attract as many members as possible to our annual meeting. -
I think this would be a simple detail to add. After all don't most kits require shaping the mid/keel section to a bearding line? But the problem I foresee is that the tapering goes across the part of the stem where the figurehead sits and any reduction of this area would lead to a loose fit of the figurehead.
-
I do it mostly side to side. This keeps both sides parallel athwartships and prevents gouging on one side. It is essential that the tops of the frames are parallel or the plankshears (top rails) will cant in or out. Until I get very close to final dimension I usually pin one side of the sanding stick with my thumb and swivel sand the opposite side over a couple of inches. Then repeat in reverse. Sneak up to the line with 120 grit then finish with 180 grit. You'll notice that the char is gone on Chucks forecastle and QD toptimbers and this is a pretty good indication that it is fair.
-
Congratulations Chuck on achieving this milestone! For fairing the toptimber line the sanding sticks are invaluable to insure the line is fair both at the top and athwartships. It's very hard to far the line when just working on one side at a time. I use 8 inch or so sanding sticks with 120 and 180 grit glued on and sand across the ship keeping a careful line on the toptimber line on each side as I go. I use much smaller widths near the hances.
-
Look's terrific Mark. When you are fairing the deck if you add a little white glue into the joints those small gaps will disappear. I don't do a lot of full sized carpentry but I believe it's standard practice to cut the dovetail first then the recess for it. Much easier to trim the joint to receive the dovetail.
-
Had a similar problem until, after positioning as you have done, I painted them with a diluted white glue solution and placed a weight against the bottom, This holds the bent over lower part in position while the glue sets.
- 111 replies
-
- Cheerful
- Syren Ship Model Company
-
(and 1 more)
Tagged with:
-
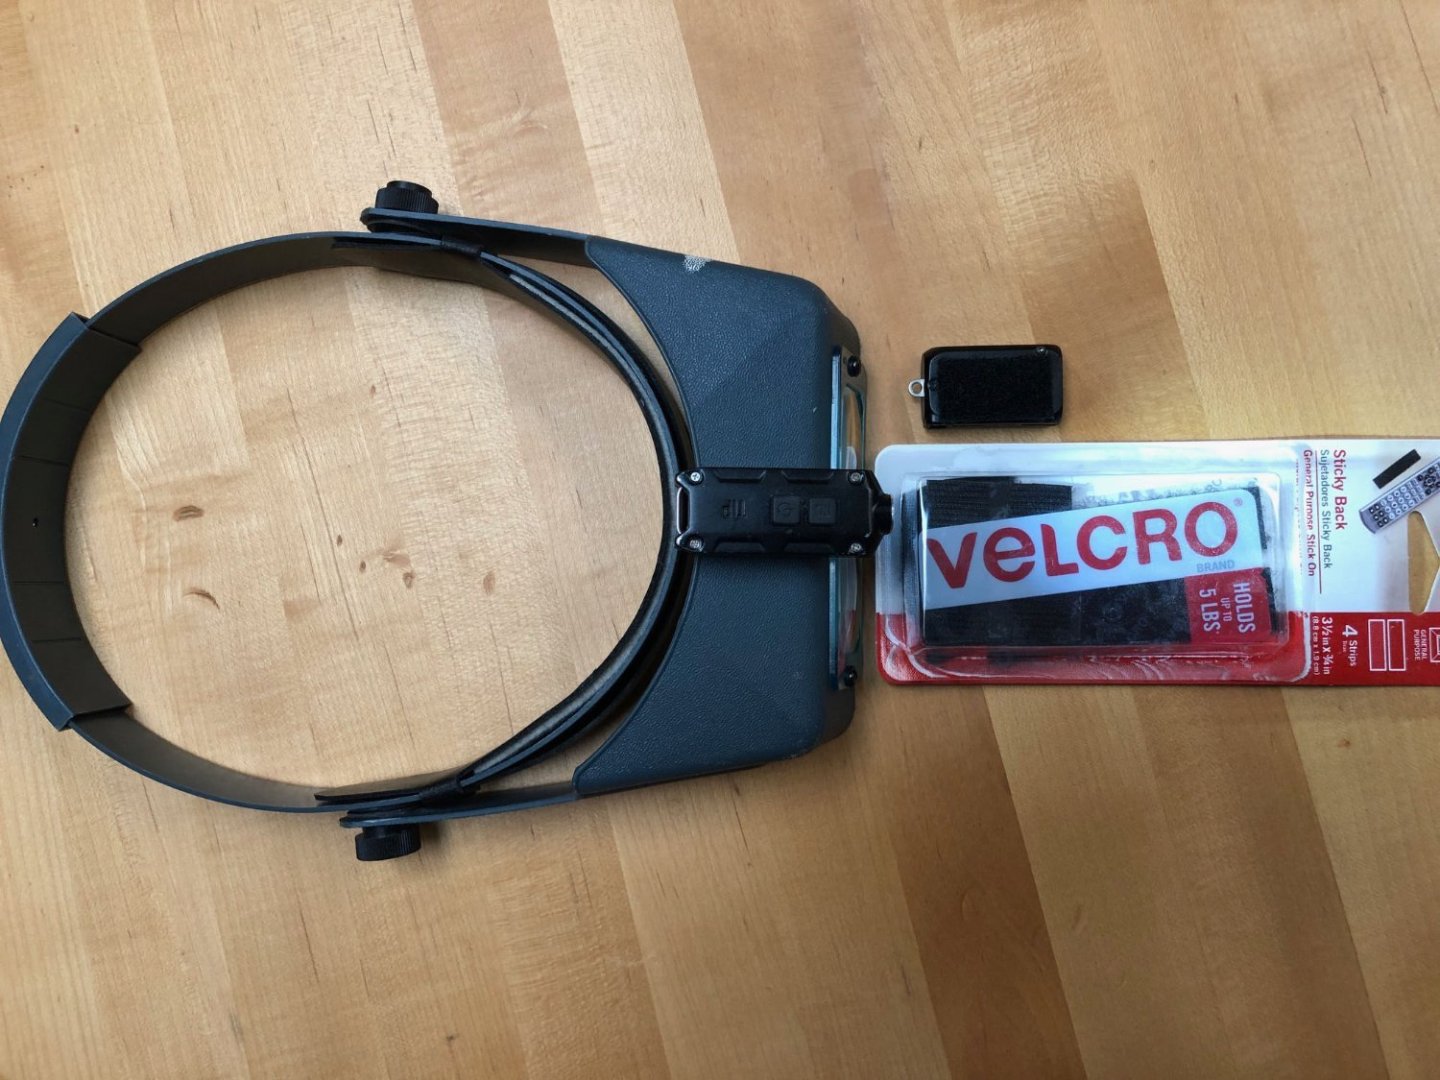
No need to wait Allan. The Velcro has a sticky part which gets mounted to the visor and the clingy part which is adhered underneath the light. Light is perfectly centered and weighs next to nothing.
-
I use mini LED keychain lights. They're lightweight and rechargeable. I just use Velcro to secure them to the top of my Optivisor. This keeps the beam centered on my work. Of course I have two, so one is always charging. - https://www.amazon.com/WUBEN-G2-Flashlight-Rechargeable-Brightest/dp/B09WY6WBD5/ref=sr_1_3_sspa?crid=25X8AWG6AVDIM&keywords=mini%2Bled%2Bflashlights%2Busb%2Brechargeable%2Bsmall%2Bkeychain%2Bflashlight&qid=1681702648&sprefix=mini%2Bled%2Bflashlights%2Busb%2Brechargeable%2Caps%2C120&sr=8-3-spons&spLa=ZW5jcnlwdGVkUXVhbGlmaWVyPUEzRVQ3OVg2RThLMzlZJmVuY3J5cHRlZElkPUEwMDE5MDUzMlJIRVBaRTFFUjhGQyZlbmNyeXB0ZWRBZElkPUEwNjk2MTIwMk9CUTBJSEMxQVA2TSZ3aWRnZXROYW1lPXNwX2F0ZiZhY3Rpb249Y2xpY2tSZWRpcmVjdCZkb05vdExvZ0NsaWNrPXRydWU&th=1
-

HMS EURYALUS by Matiz - FINISHED - scale 1:56
dvm27 replied to matiz's topic in - Build logs for subjects built 1801 - 1850
Your pictures are literally worth a thousand words but we'll make do with "Hi". Perhaps someone could point us to another forum where you describe some of these construction techniques. Auto-translate works pretty good these days.
About us
Modelshipworld - Advancing Ship Modeling through Research
SSL Secured
Your security is important for us so this Website is SSL-Secured
NRG Mailing Address
Nautical Research Guild
237 South Lincoln Street
Westmont IL, 60559-1917
Model Ship World ® and the MSW logo are Registered Trademarks, and belong to the Nautical Research Guild (United States Patent and Trademark Office: No. 6,929,264 & No. 6,929,274, registered Dec. 20, 2022)
Helpful Links
About the NRG
If you enjoy building ship models that are historically accurate as well as beautiful, then The Nautical Research Guild (NRG) is just right for you.
The Guild is a non-profit educational organization whose mission is to “Advance Ship Modeling Through Research”. We provide support to our members in their efforts to raise the quality of their model ships.
The Nautical Research Guild has published our world-renowned quarterly magazine, The Nautical Research Journal, since 1955. The pages of the Journal are full of articles by accomplished ship modelers who show you how they create those exquisite details on their models, and by maritime historians who show you the correct details to build. The Journal is available in both print and digital editions. Go to the NRG web site (www.thenrg.org) to download a complimentary digital copy of the Journal. The NRG also publishes plan sets, books and compilations of back issues of the Journal and the former Ships in Scale and Model Ship Builder magazines.


