dvm27
-
Posts
2,404 -
Joined
-
Last visited
Content Type
Profiles
Forums
Gallery
Events
Everything posted by dvm27
-
 That looks much better! I noted the cheeks looked funny but figured it was the camera angle. I was about to send you a PM but your friend beet me to it.
 -
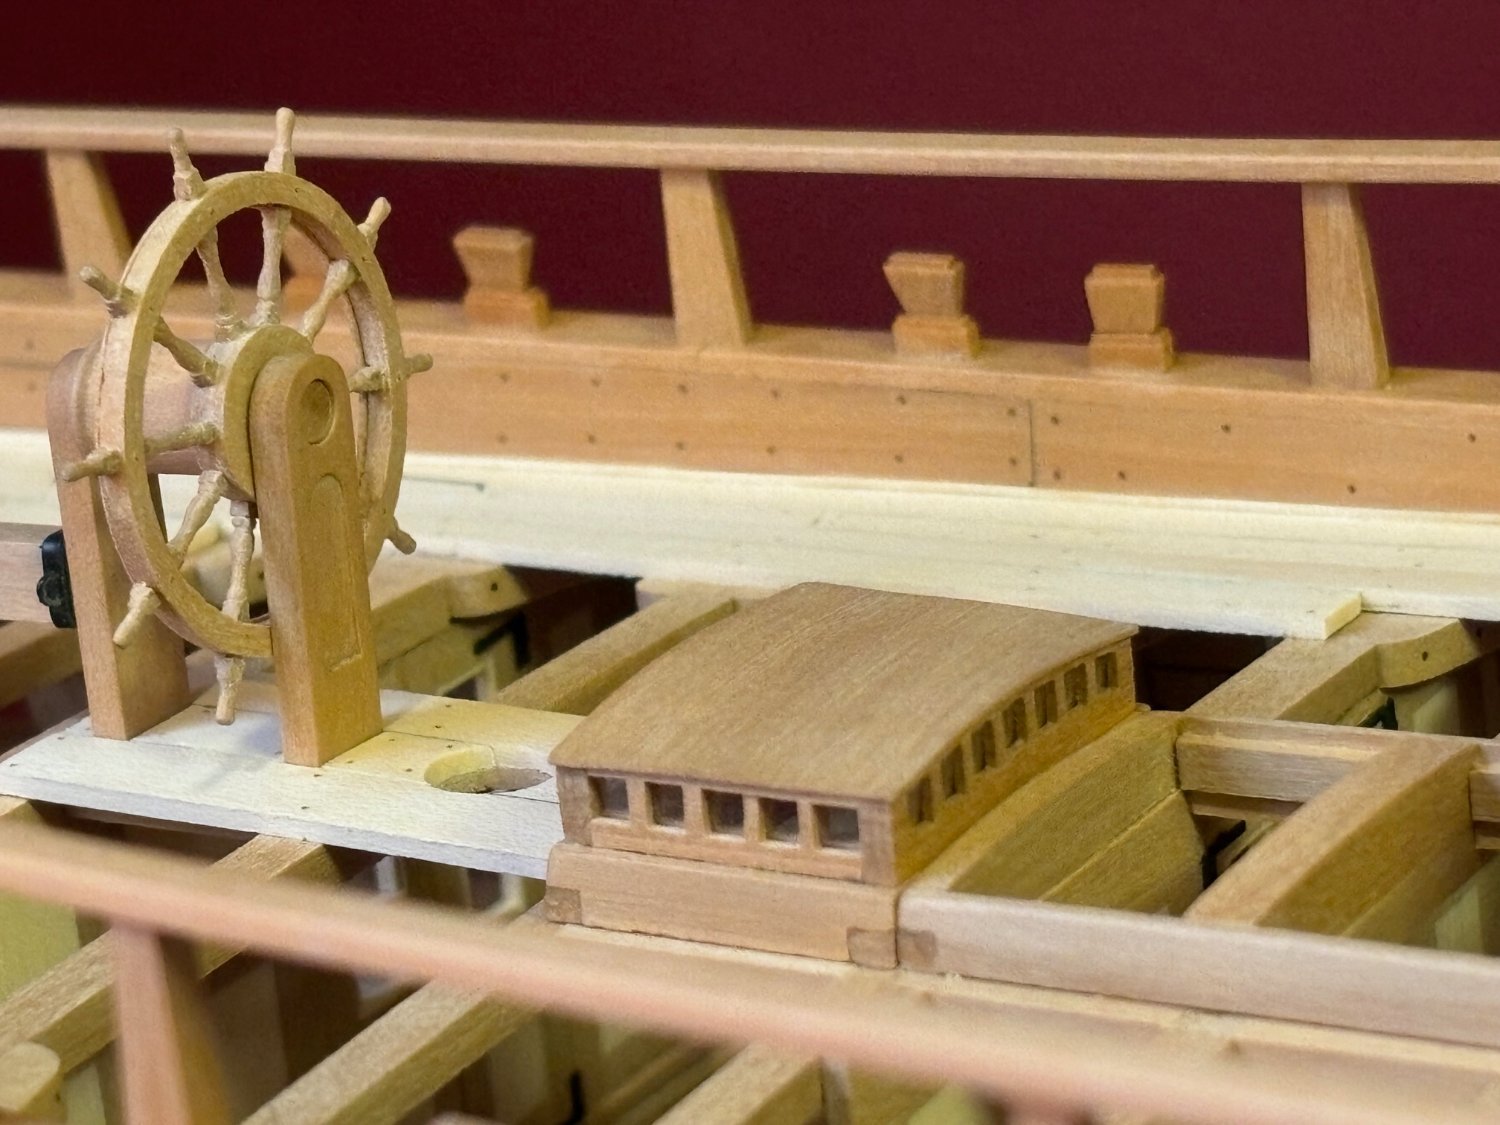
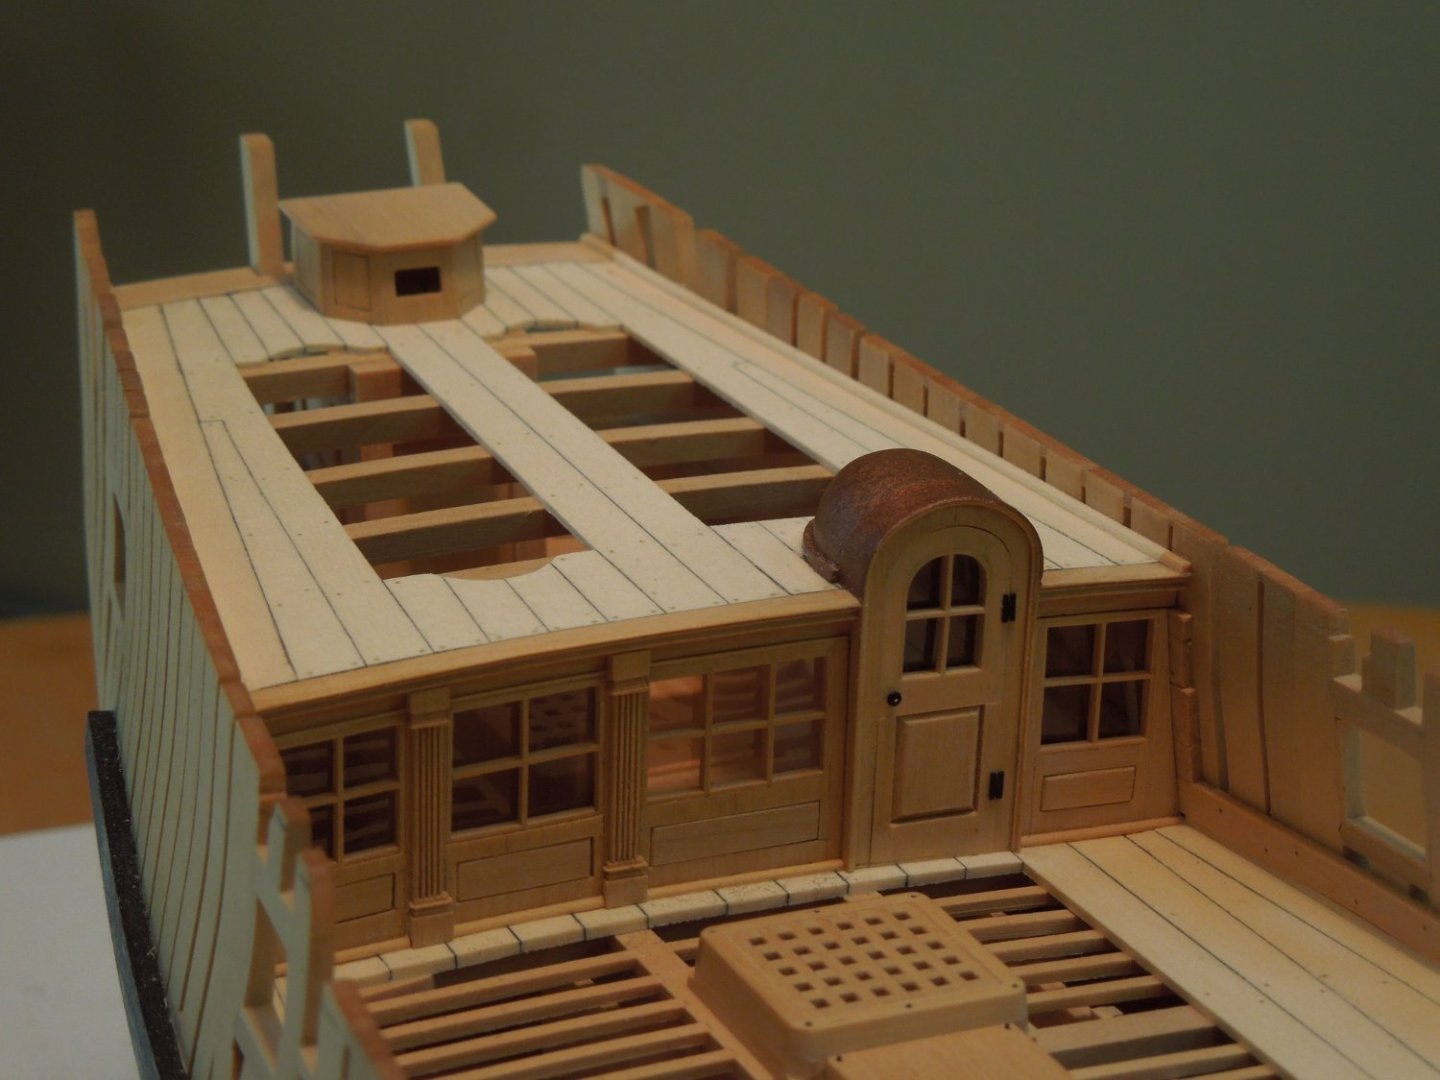
I have dozens of Speedwell NMM photos but curiously, not one of this area. I'm posting a photo of my completed Q'deck so people can see what you're shooting for. It's not as elegant as yours but should give people an idea of how it all comes together.
-
Very well thought out Chuck. This a very distinct feature on the model and you are off to a great start. Maybe show a photo of the contemporary model so folks can see what you're after?
-
That kid belongs on the Gerber baby food bottle!
-
That is a dream workshop Gianpiero. I love the way your bench power tools slide out for easy access. And you have your very own museum to boot! Speaking for everyone else here - we're jealous!
-
David Antscherl, in The Fully Framed Model, Volume 11, discusses this issue and concludes that either a grating or clerestory-style companionway would be appropriate for a 1779 vessel of 300 tons. On my Pegasus model I opted for the more visually interesting clerestory-style companion.

-
Doing as much rigging off the model as possible is a great way to proceed Tim.
- 142 replies
-
- 2
-

-
- alfred
- solid hull
- (and 2 more)
-
That is a beautiful windlass! For those unfamiliar with drilling holes through round stock (especially metal) it helps to mill or file a small flat across the top of the round before drilling. This prevents drill creep. As well, if you can find a small enough center drill to start the hole that is ideal. They come as small as 000 (0.020") for example - https://www.msdiscounttool.com/catalog/product_info.php?csv=gg&products_id=79381&msclkid=3ac069efe4721a7a936a0c285f7a13fd&utm_source=bing&utm_medium=cpc&utm_campaign=**LP Shop - Drills %26 Screwdrivers (1) - %240-9.99&utm_term=4587780989952351&utm_content=79381 | 000 HSS Combined Drill %26 Countersink (Aircraft) | %242.64
-
Loved the video! Is there anybody more enthusiastic about naval history than Grant? Whether for an audience of one or twenty he never disappoints.
-
Which one is the best ropewalk machine?
dvm27 replied to modeller_masa's topic in Modeling tools and Workshop Equipment
Thanks for the link to Lloyd's latest model. I note that all of the rigging is done in silk. In my opinion it lays beautifully with a natural catenary. Several members of this forum have disparaged its use due to potential deterioration and biologic degradation. I find it hard to believe Lloyd would use a material in his model that might disintegrate in the near future. As well, there are many contemporary models (and flags) in the Rogers collection in Annapolis with their original silk rigs and examples of silk garments from hundreds of years ago from the far east. So, my question is has anyone here actually used silk in making their rope? If not, is there really a concern that it will disintegrate in 50 or 100 years? Can we reasonably expect any rig, whether linen, polyester or other to survive a century without needing repairs or rerigging? -
Very happy to have found this log! I love the built up stump mast in post #2. Congratulations on a beautiful sectional model.
-
Lovely start Matthias. While the framing is difficult the real challenge on this model will be the carvings. Will you do this by hand, CNC milling or other technique?
-
Maybe the carpenters were using the hearth to keep warm while fitting out the ship in those cold winter months?
-
When installing beams on a platform I usually install the fore and aft beams in their positions first. By placing a couple of planks across the span it is easy to determine the crown of those remaining intermediate beams. Their ends are trimmed until the crown touches the plank. I have also seen an adjustable beam length jig which measures the distance between the frames where the beams sit. But this is only as accurate as the marking out. Chuck's jig for doing this looks very simple. Mark - there is no easy way to do this. I'm sure most of us have a scrap box full of failed beams, frames etc. Starting with the longest one is a great strategy as you can always use it for another shorter beam if you screw it up. The platforms are the hardest ones to frame, in my opinion. The upper decks all have clamps which make placement of the beams very easy.
-
I've always had trouble free handing those sheaves Alan. I just create a slot with the appropriately sized end mill then turn the sheave on the lathe, part and insert.
-
Holy cow, John. If that first frame fit the template perfectly six weeks ago and looks like that now your wood is certainly alive! Was it cut just before you started the model? Has it had time to acclimate to the workshop? About the only solution I can offer is to glue battens spanning each frame directly after the frame it is completed and fits the pattern perfectly. Either across the top or on the fore face would be fine. That should keep them from bowing in or out. Once you've completed all the frames you can fair them then add the wales. After this they should be held in place fine and you can remove the battens. Or you can make a Hahn-style jig and build the model upside down as this locks all the frames in place.
-
Pulled the Trigger == Lathe coming
dvm27 replied to kgstakes's topic in Modeling tools and Workshop Equipment
For those inexperienced in using the lathe there is a series for beginners by You Tuber Blondihacks https://www.youtube.com/playlist?list=PLY67-4BrEae9Ad91LPRIhcLJM9fO-HJyN. While her series is concerned with metal work on the hobby lathe the techniques are applicable to wood as well. As machinists usually work to closer tolerances than woodworkers mastering these skills will probably improve your results in wood.- 49 replies
-
- 11
-
-

-
Congratulations on this milestone Chuck. I read through the first chapter instructions and they are phenomenal. Between your laser cut materials and step-by-step instructions there's no reason why the average ship model builder cannot build a lovely plank on frame ship model. It may not be 100% as nice as yours but it will be a far cry better than anything else out there in the market.
-
I can find no three jaw chucks for Atlas sold by Sherline. But on a hobby thread they have a discussion on this same topic with lots of possibilities. https://www.garagejournal.com/forum/threads/please-help-select-a-new-3-jaw-chuck-for-10-atlas-lathe.520445/. Is there something wrong with the current three jaw chuck on your lathe? Maybe it just needs a bit of TLC?
-
I do love my Sherline lathe with it's extended bed (17" between centers). Not sure if the smaller version with it's 8" distance between centers would be worth the additional cost. However the hole through the headstock can accommodate a no.1 morse taper so I often use this to turn longer stock. I guess you need to figure out what scale you would like to work in. While the Sherline is essentially a metal workers lathe I use it for turning wood all the time. Their T-rest works just fine and is not expensive.
-
Byrnes tablesaw compares with Proxxon FET tablesaw
dvm27 replied to kgstakes's topic in Modeling tools and Workshop Equipment
I certainly hope that is the case Mike. Jim was not only an incredible machinist but also a staunch supporter of our hobby. He'd be a tough act to follow. -
Byrnes tablesaw compares with Proxxon FET tablesaw
dvm27 replied to kgstakes's topic in Modeling tools and Workshop Equipment
No disrespect intended KG. I was just pointing out that Jim's saw is also being marketed to other hobby groups (machinists, horologists) where tight tolerances are more important than in ship model making. Apologies if my statement appeared disparaging. -
Byrnes tablesaw compares with Proxxon FET tablesaw
dvm27 replied to kgstakes's topic in Modeling tools and Workshop Equipment
Probably a mute discussion as the Byrnes saw will most likely be discontinued due to Jim's recent passing. I would say in general that the Byrnes saw is machined to much tighter tolerances than the Proxxon saw. For example I found the Byrnes fence is virtually impossible to deflect while in use and their extended fence is a press fit with four steel pins. My Proxxon had a slight bit of wobble when the fence was pushed. Perhaps such tight tolerances are not essential to the average ship model maker but keep in mind that many other hobbyists (such as luthiers) require .001" tolerances and I don't think you could repeatedly achieve these on the Proxxon without some modifications. -
If you're looking to develop your scratch building skills then a cross-section is a great introduction. You may wish to check out the Echo. The plans and building instructions are available for free from our Admiralty Models website https://admiraltymodels.homestead.com/Tips.html. There are also several builds on this site if you do a search for "Echo". Triton is another good choice (as suggested above). A scroll saw and the ability to thickness your own wood would be useful for a scratch build. Otherwise there are some interesting x-section kits on the market. Alaskan yellow cedar is a much less expensive alternative to boxwood and easy to work with.
-
Nice job so far Darren! The ballast they supplied you looks like it came from an aquarium store though. Shingle ballast should be the size of a small ball. If you are able to remove the ballast visible fore and aft and replace it with small smooth pebbles (such as you could purchase from a store that sells diorama supplies such as Woodland Scenics (https://woodlandscenics.woodlandscenics.com/show/item/BAL-G) it would provide a much more realistic impression of this area. Their gray ballast (medium or coarse) would work fine here. You place them where you want and apply layers of dilute white glue until they are fully adhered.
- 8 replies
-
- 3
-
-
- Sirius
- cross-section
- (and 1 more)