


jud
-
Posts
1,171 -
Joined
-
Last visited
Content Type
Profiles
Forums
Gallery
Events
Posts posted by jud
-
-
Believe the intent of those u shaped devices, 'cranes', were to hold hammocks, Netting would have been used and canvass would have been in place to protect those hammocks from the weather, nothing like wet cold hammocks and blankets. I Also would expect that if heavy lines were in place to secure the netting to, it would have ran full length without knots at each station but held in a notch or on a support with small stuff. Think a quick search would result in much better knowledgeable references and techniques by searching this site than I offer here.
jud
-
Nils; The elusive chocks have suddenly appeared, thanks. Have been looking for some reference to such devices for a long time, common sense and experience at sea indicated, at least to me that such things were needed but scorned when mentioned. As you noted, there were more than one way to secure guns at sea. The one common feature of everyone would be the solid contact and securing to a ship structure to prevent the beginning of the tiniest movement from starting by overdoing the lashings. Having chased a fork lift back and forth across the tank deck of an LST and 365 pound 8" projectiles around the shell deck of gun turrets I have had some experience in what is required to secure for sea.
-
Look up Mooring Line Stopper. The image shows what I have used to hold bow lines when taking the line from the Capstan and securing the single to the bits aboard a Fletcher Class Destroyer. That hitch you show looks like it would be a slow way to make a quick release hitch, release by grabbing the bitter end and jerking out of the loop should release it, might try it but there are other ways that are quicker to make. The Stoppers we used were made from line about 3/4 the mooring line size and were tapered down to a small size by removing fiber with about a 6 foot working length. Quick and easy to put on and remove, After looking them up you should see some other methods, I never used them but see some advantages especially if lifting an anchor and using 2 tackles for the lift. Stroke, no thanks, had one, lost the right eye.


-
A row of half hitches,' could rig it like a stopper attached to a Bit for a mooring line'. would do it and if working two rigs, as soon as the tension was taken up by the new purchase, simple to cast off the half hitches and pull the block forward for a new purchase.
jud

-
On 5/8/2018 at 9:15 AM, trippwj said:
According to Steel, a sloop of 200 tons burthen would have 3 anchors of 15 cwt each and one kedge anchor of 3 cwt.
He also offers detail on the vsrious cables, hawsers etc. for each rate.
112#s per cwt, yep, be it a windless or capstan, they had something to handle the mass of anchor and cable plus the weight of the water soaked into the cable above the waterline as it came aboard.

-
A serious craftsman always has something healing up, keeps the body in practice. A good Doctor should recommend a weakly cut or scrape as a preventive medicine routine, kind of like taking a flu shot. Glad to see you are coming along well in several areas, your painting, looks like eyes were on your mind. Suspect when you return to the Cutty there will be a flurry of activity.
- keelhauled, Omega1234, Piet and 3 others
-
 6
6
-
Glad to hear that you are still kicking and things are looking up. That Junk was looking good with your additions and lighting, will be watching you getting her under sail. Welcome back.
jud
-
-
Thanks, interesting Piece.
jud
- Canute, mtaylor and thibaultron
-
3
-
Perhaps air Shields, to protect all but the intended sail, a fine mist of water and starch and a fan, might need to start wet, not just damp. Finnish up with the exhaust from you vacuum cleaner, hose and crevice tool to put the air where needed. might think about fabricating a Y between the hose and tool to bleed off and control air volume acting on sail.
Good luck, this will be interesting.
jud
- mtaylor, John Allen and Canute
-
3
-
Many ships are equal, it is the crew, seamanship and luck that collects honors. The question can't be answered, you will find a thousand answers, each different and each correct and a disagreement with all.
- Canute, John Allen, Landlubber Mike and 2 others
-
5
-
-
Safe to assume that the Laws of Physics remained constant during the years in question as they do today and knowing how much effort went into building and outfitting a ship, avoidable damage was not the norm. Bumpers on the Bulwarks or rounded contact projections on the carriages with a sacrificial contact point at every port only makes sense. Thanks for the continued research you have done. You have filled in the missing link that has been bothering me about the common depiction of gun ports. jud

-
360°/32 = 11.25° or 11° 15'.
- Canute, paulsutcliffe, Jack12477 and 2 others
-
5
-
-
Looks like a secure and quick way to secure a lid closed with a moderate amount of closing pressure. Such a setup would allow some oakum to be placed around the sill, port closed against it and the board, hooks and wedges taped into place, making a seal from the oakum that would not cause binding on lid or port as sealing the sides might do.
jud
-
Have seen the references of the bottom boards of gun carriages extended forward and convex to the gun, so they could rest against the sides and keep the wheels free of the side allowing the training of the gun to be smooth, even then I would expect a sacrificial rub block to be mounted on the bulwarks. Those training tackles would be problematic if the gun needed to be trained forward or back with the gun resting on its flat face then bouncing around one wheel as the gun was pointed. The idea of the waterways holding the wheels clear of the bulwarks when training it around using tackles is against the laws of physics, the wheel will run up the slope or jump the curb running it's sharp corner into the bulwarks and causing damage at the contact point. No, the gun needs to be stopped before the wheels come in contact with the sides and that stop must allow for the training of the gun around without jamming a wheel into the bulwarks. If the gun was restricted so both front wheels and it's carriage face contact the bulwarks at the same time a stop or buffer would also be needed, but they are required to be aimed, probably through a 30° arc. The buffer makes sense and fulfills a missing link in gun handling through gun ports. Would expect the contacting surfaces to be lined with harness leather.
-
I have been looking for these stop beams for a long time now. Having experience at sea and with guns and how it all works together, I have been very discomforted with no stop beams or a similar provisions being in place for the gun carriages to rest against and allow sideways aiming through the ports. Poorly received when asking about such bumpers, Unable to turn the focus from the configuration of the Gun Port fitting, to the Gun and its need to prevent damage to the port, Bulwark or the often noted Waterway. This stop or Bumper has nothing to do with the Gun Port Lid or it fitting into the sides of the ship, but that Bumper has a lot to do with protecting all of it, it probably was so common it was hidden in plain sight and not mentioned. Takes an 1798 wreck to bring common sense back where it can be seen and where protection from damage to the ship is so clearly needed. Gunner at 13, had to roll my own.
-
Might try a Jewelers supply outlet, last one I bought was years ago, it is about 0.15' open and 4' long, used it to mount a solid core hospital door I bought from a, now defunct, salvage outfit on a steel desk that was Boeing surplus I still use as a drafting table. Threw some sources in the mix, might trigger something you can use in your quest. Good Luck
jud
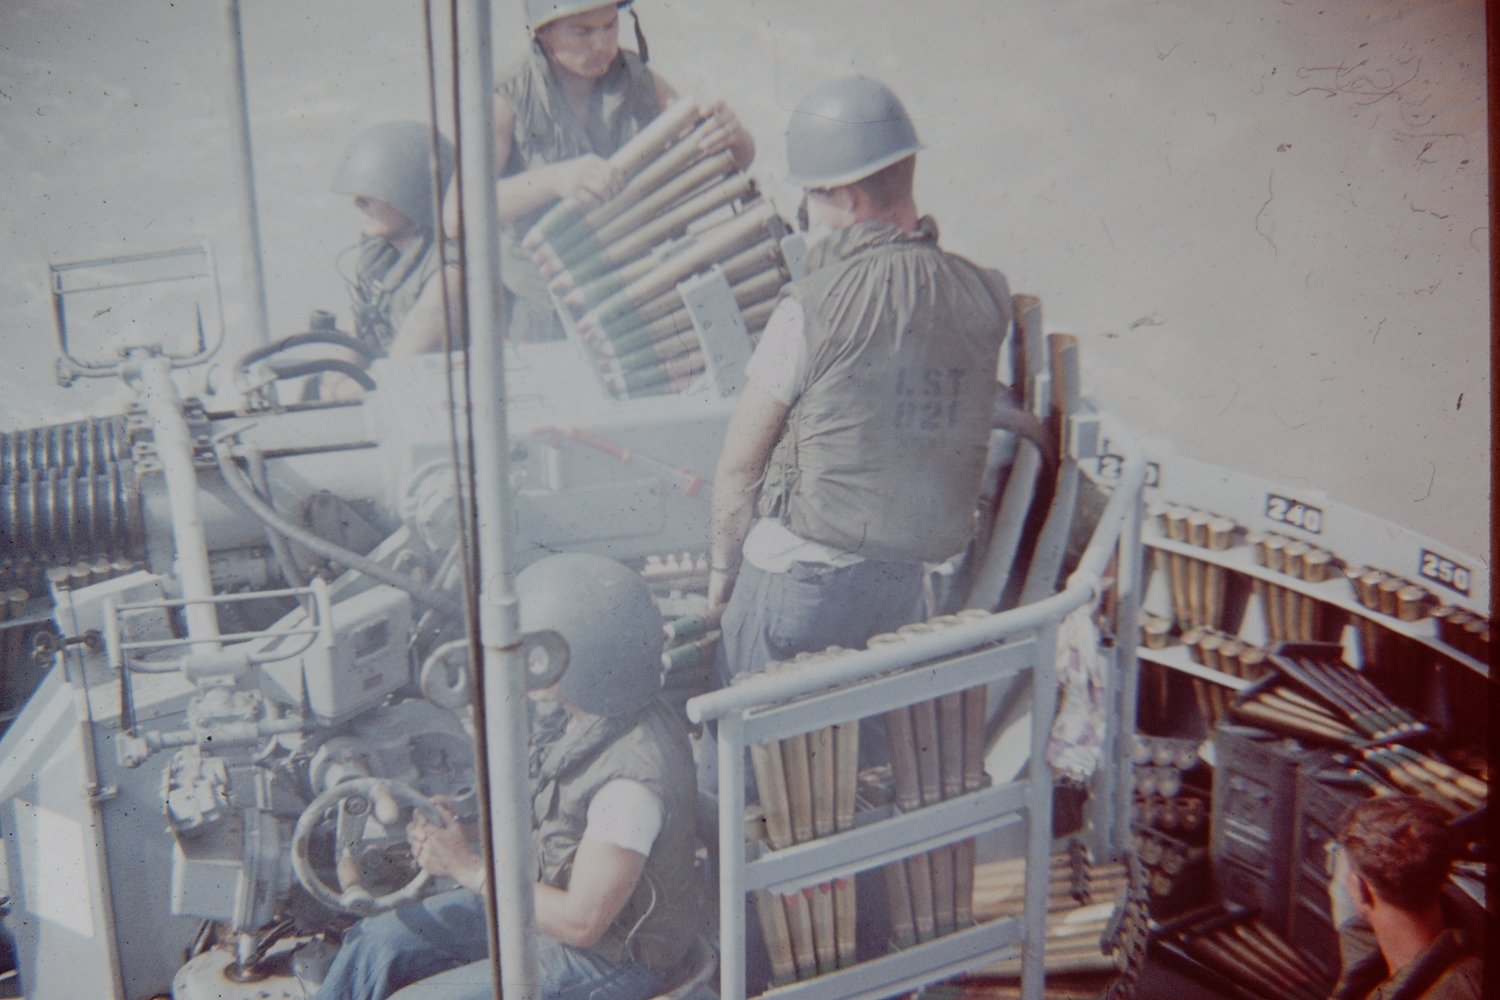
-
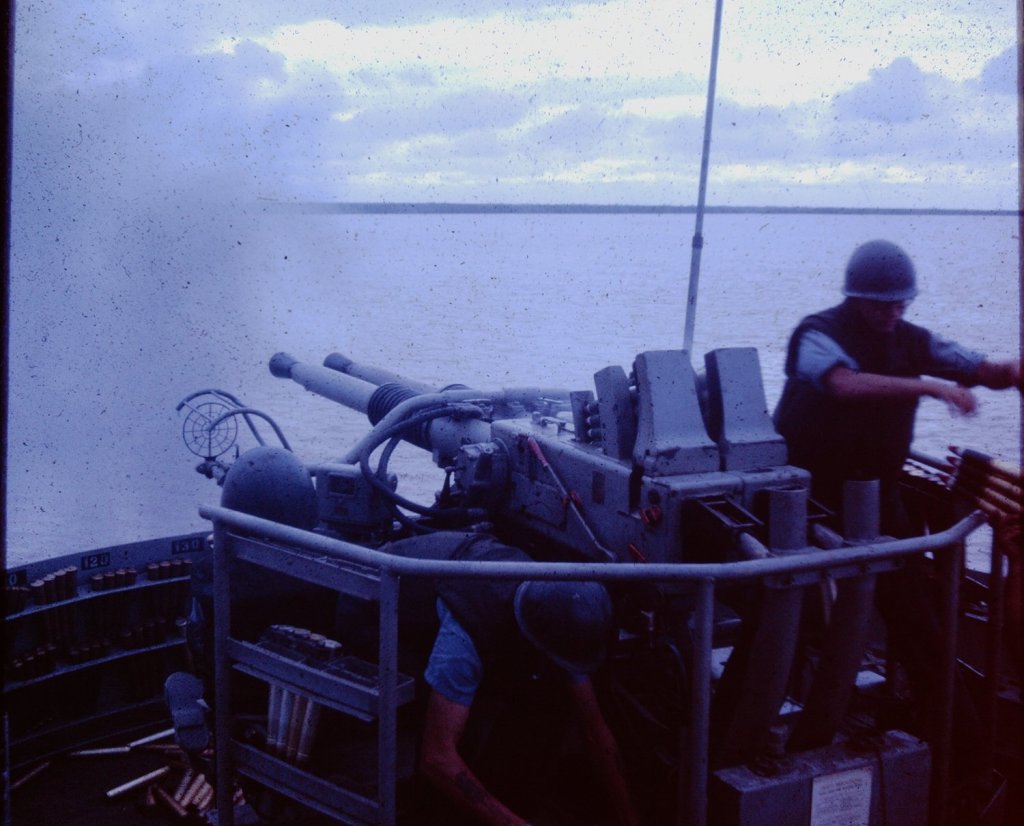
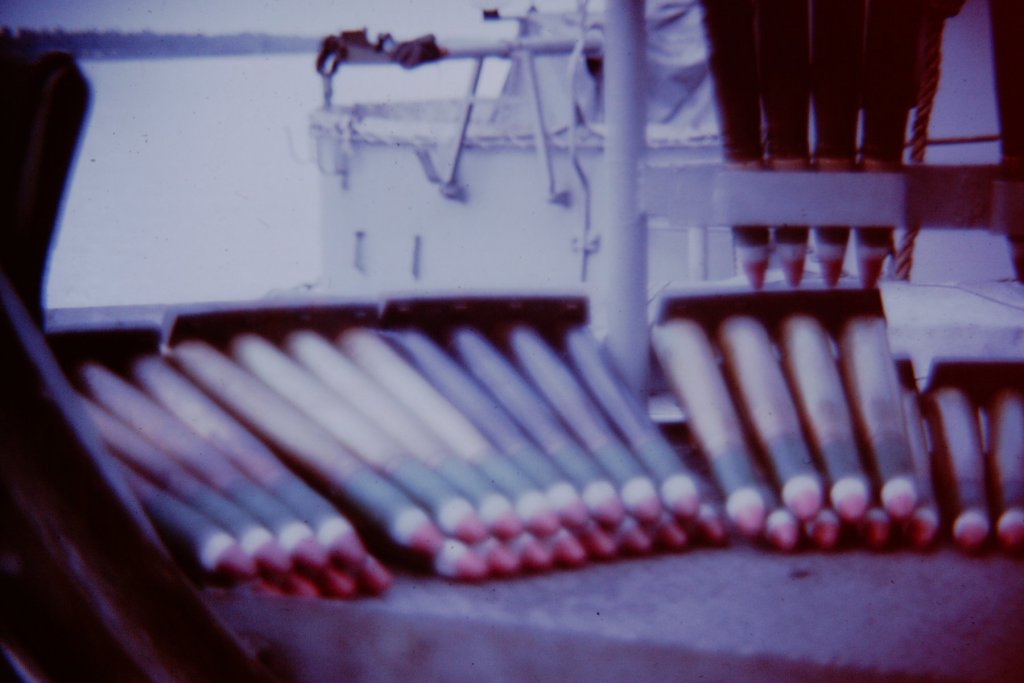
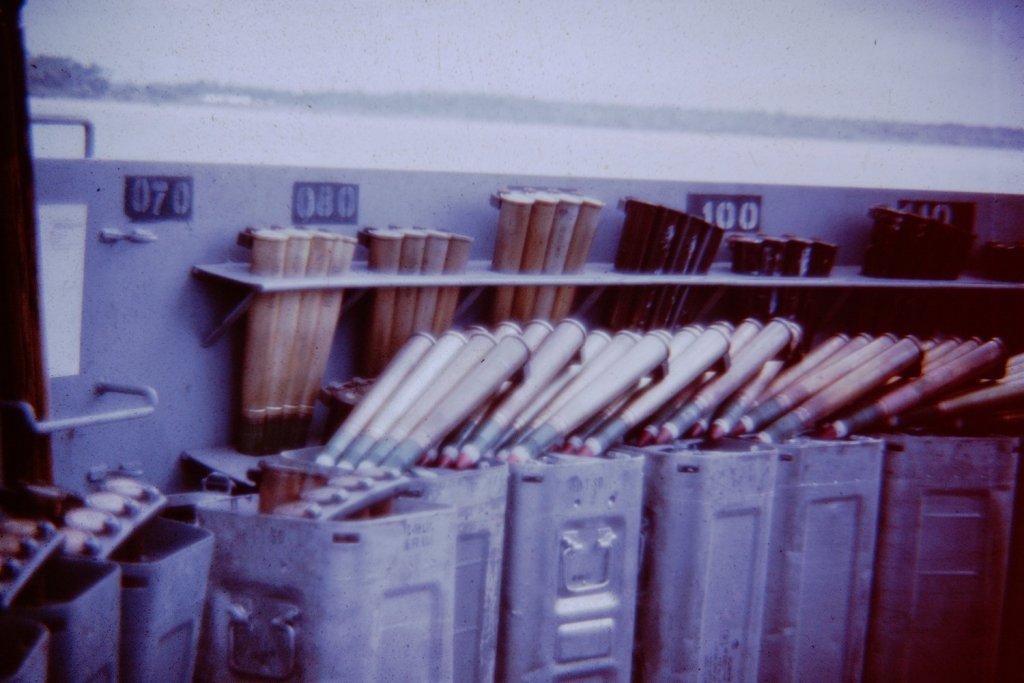
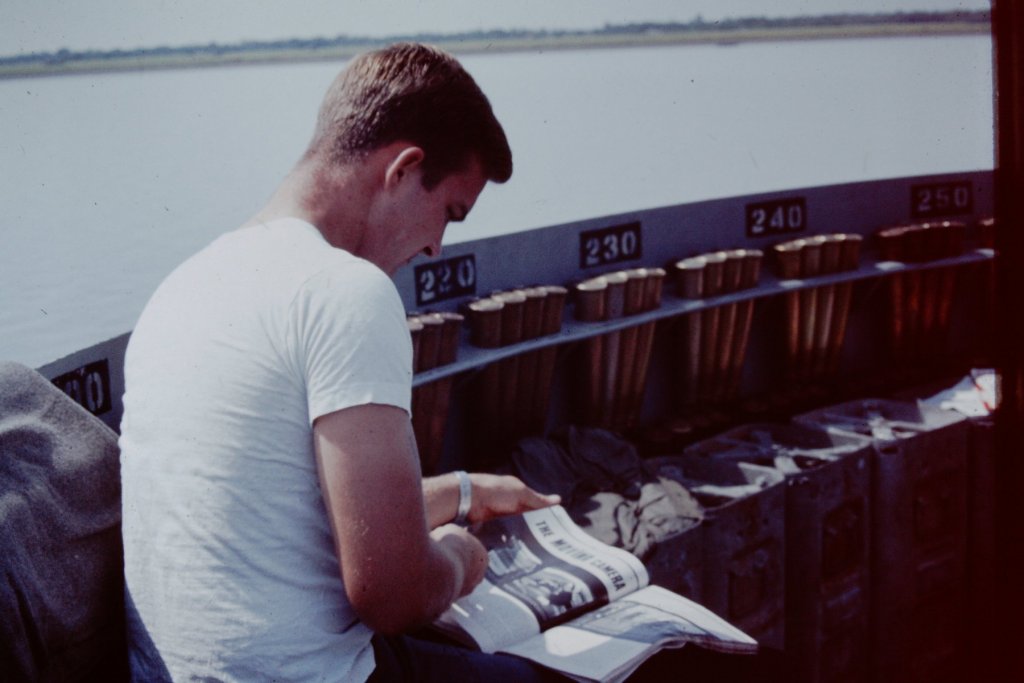
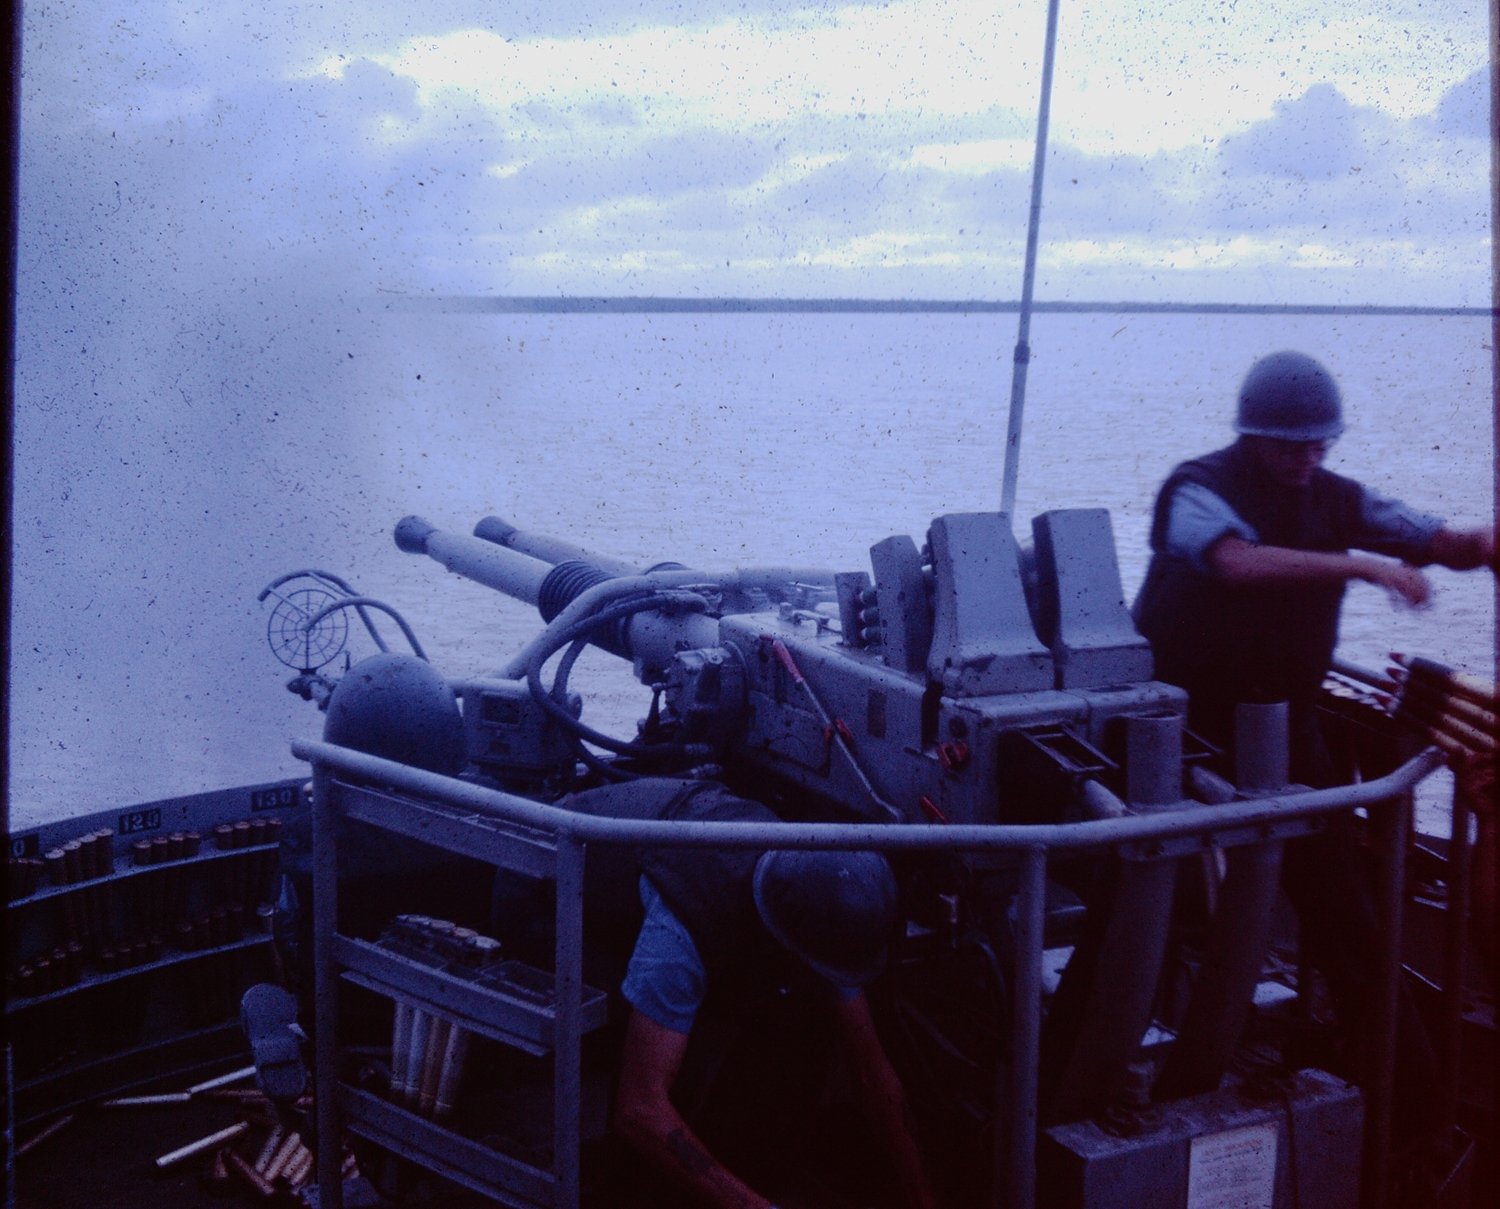
This is how we did it. Our magazines were full and we went through lots of ammo, not the approved method of storing ready service ammo, but demands for fire support were met. Don't know how they did it aboard the Cheerful, probably different.


- JohnB40, mtaylor and John Allen
-
3
-
Find a 4 or 5 foot section of cotton rope, (clothesline rope), 1/4" will do 3/8" if you can find it and start tying the hitches and bends, you will have 2 ends so bends can be tied to see how they work. You can use broom handles, chair backs any number of thing around the house to learn your marlinespike seamanship, actually 3 or four different bends and hitches is all you really need. There are books and some sites on line that will show you how to make any knot, hitch, bend or splice you need, heck next month you may be trying monkey fists on the ends of heaving lines to hang around your model. Learning this stuff can be fun and some of us use much of it in real life, ashore or afloat.
jud
- wefalck, Altduck, John Allen and 1 other
-
4
-
Exceptional work, one of the better of this model I have seen on this site.
jud
- thibaultron and Canute
-
2
-
The decks on the Helena were scrubbed with a concoction of Salt Water Soap, Scouring Compound, Boiler Compound and I don't know what else. It was mix the day before in a galvanized Garbage Can and let to work over night, the can came out shiny. That was what the decks were scrubbed with ahead of the Holy Stone. The stones were a sandstone brick, oversized like some fire brick. A half brick was used, a dimple was chipped into one side so the end of a swab handle had a socket to ride in. Wet down, scrub using long handled scrub brushes then holy stone the wet decks. Seamen would line up on a board, place their stone on it and their swab handle in the socket, bend over and grab the handle with one hand, reach over with the other and grab the forearm and hold the handle against the shoulder at the same time. a Chantey was used to keep the timing,'one a rock, 2 a rock, 3 and a 4 a rock building up to the number of strokes wanted, then Shift a board was entered into the chant and start the count over. 10-12 men could holy stone fairly quickly, most chose to be bare foot with pants rolled up. Salt water was used from the fire mains, fresh water on a Steam Ship is not used to clean weather decks. Our decks were Teak. Can find some data on line to fill in and add and perhaps correct what I observed.
- mtaylor, Roger Pellett and Canute
-
3
-
Vast difference between how commercial and military vessels are maned. That difference is reflected in upkeep , maintenance and appearance. A military vessel depicted as weathered and worn out would reflect a long time in combat or sickness, a long voyage of a military vessel maned with enough men to fight her would still be clean, painted and taring kept up. Sail and lines may even have been taken down and drug to whiten them and prior to being seen by a Senor or Pears in port, a Skipper would insist in a through cleanup and paint touch up took place, even today. Depicting a military vessel rusty and dirty is not what you would have found in history except, after long hours standing at general quarters or exceptionally heavy weather right up to the harbor entrance. Military Store ships would have large crews to defend her, to handle the stores quickly and have the crew to do fleet maneuvers, unlike a small crewed commercial vessel sailing alone and watching expenses, even then when on long voyages, often long runs without handling sail would take place if weather allowed, maintenance would have been the rule of the day. Poor maintenance and extreme weathered appearance reflected hard use and neglect, no exceptions. If that is what you are modeling, weather them hard, if not, go easy on the weathering or do none and let time create the look. My opinion, each his own. That Troller, ( Cape Race, wood hull ), I rode to Alaska and back after fishing for 6 months, looked as good the day we returned to Belingham as the day we left, we worked the boat long hours and hard, her decks were painted haze grey.
- John Allen, BANYAN, Canute and 2 others
-
5


Hr. Ms. Java 1925 by Piet - FINISHED - Pacific Cross Roads - 1:350 - PLASTIC - Light Cruiser of Royal Netherlands Navy as she was in 1942
in - Kit build logs for subjects built from 1901 - Present Day
Posted
Looking good, gun smoke in those days was fairly dense and was not flash-less, going to be difficult to reproduce. I suspect the guns were free to fire when loaded, director aimed but locally fired so broadsides in a ship to ship unlikely, perhaps a director controlling a couple of guns firing in unison, but not the whole battery, also there will be stoppages and a gun or two may be slow. Doing an great job on the whole project, all I could add would be to say the shell splashes could be larger, shell near misses, often soaked those on the bridge of Cruisers, but you don't want them that large, it would hide way too much. The Japanese used die markers on their projectiles for spotting purpose's, would expect to see reds, greens and yellows in all shell splashes and in the water after the splash collapsed. Glad to see you are keep-en, keep-en on.
jud