HOLIDAY DONATION DRIVE - SUPPORT MSW - DO YOUR PART TO KEEP THIS GREAT FORUM GOING! (Only 13 donations so far - C'mon guys!)
×


augie
-
Posts
4,669 -
Joined
-
Last visited
Content Type
Profiles
Forums
Gallery
Events
Everything posted by augie
-
 She's a big girl. I'm sure you'll work out the little section of filler/finish. One day, you and I need to build a double planked model
 -
Hey, you have probably already survived 'plank the hull on both sides'. You're almost at the finish line
- 773 replies
-
- 1
-

-
- san francisco ii
- artesania latina
- (and 1 more)
-
I see you're not wasting any time. Looks good from here.
-
May as well burn some midnight oil
-
I have the idea that if Bob wanted a Confederacy, he'd scratch build one. There was some guy named Rusty who did that . His trailblazing on Essex, especially considering it's teething pains, should be more interesting !
- 2,191 replies
-
- 1
-
-
- confederacy
- Model Shipways
- (and 1 more)
-
Thank you Chuck. Not really quick.....just a lot of days with no where to go. Plus good advice from Ben and Rusty. So far, so good. Now we flip her upside down for a few stern ports and fillers.
-
Jim- The 'management' of this thread accepts no liability for miscellaneous tool purchases and denies all culpability for any recommendations (implied or otherwise) as to the actual utility of the specified devices. But heck --- it works !!!!
- 2,191 replies
-
- 5
-
-
- confederacy
- Model Shipways
- (and 1 more)
-
Worthwhile if you can do it !
-
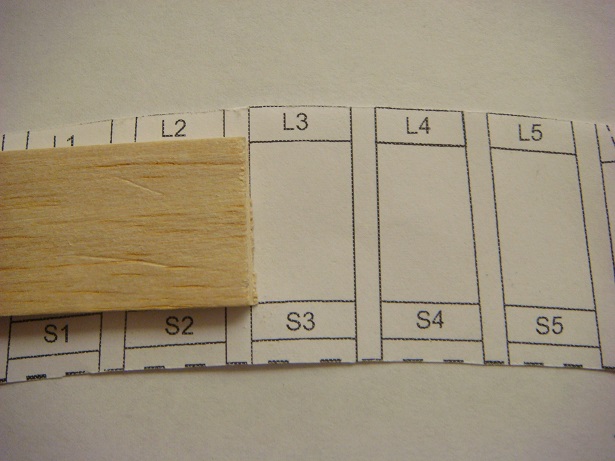
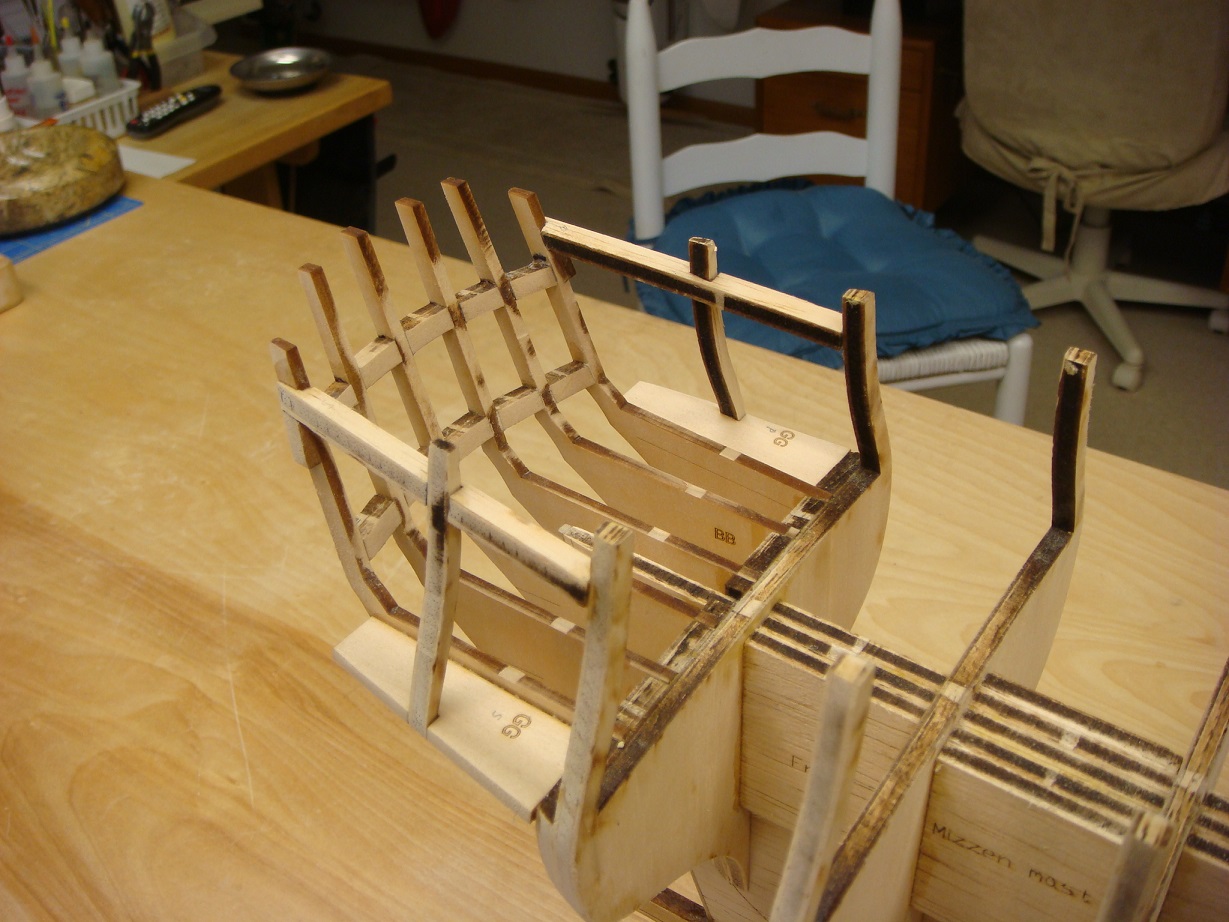
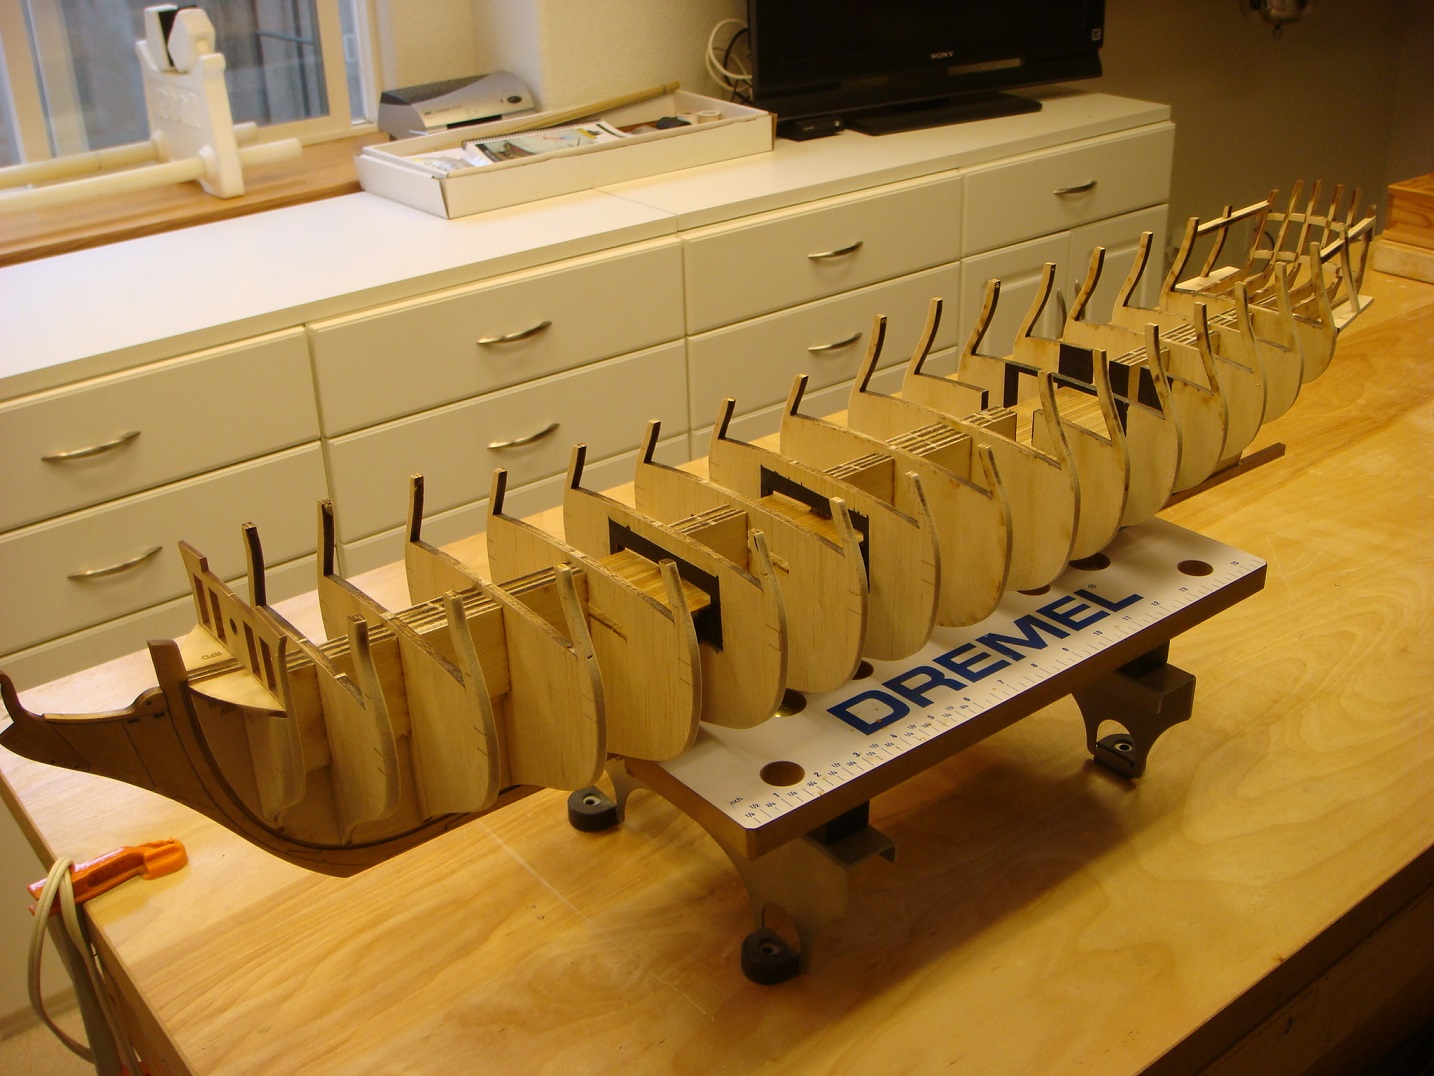
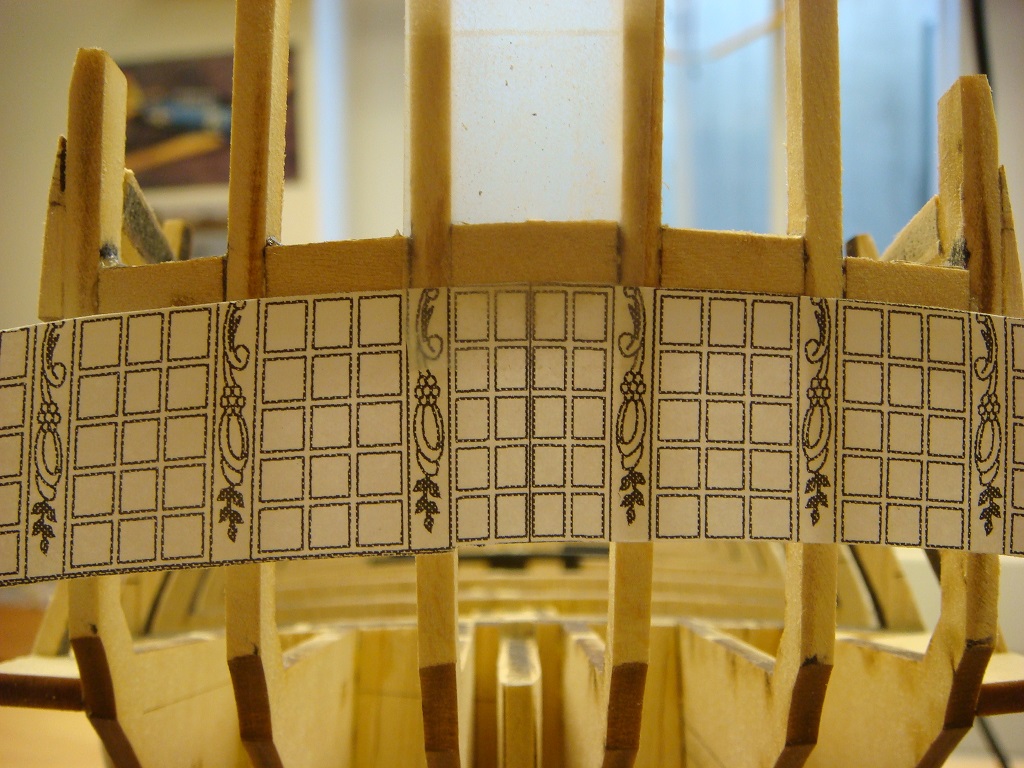
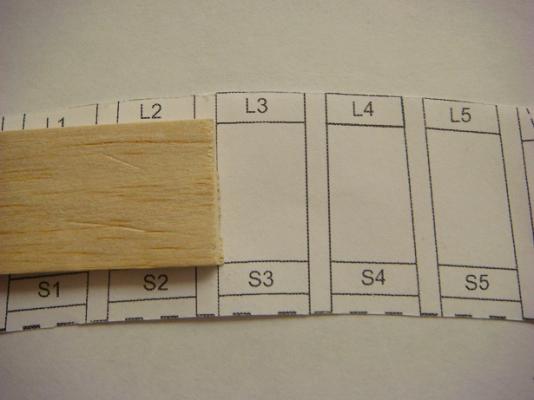
Some additional progress on the stern. Rather then fiddle with a paper template, I made a balsa spacer to set the height of the sills. This will determine the height of the windows: The sills were then installed. Once again the pencil sander was used to fair them to the transom .... inside and out. It has now been determined this tool IS the best thing since sliced bread: As a final check, another paper template was used to see if we're in the ballpark: Finally, here's an overall shot as it's been a while:

- 2,191 replies
-
- 17
-
-
- confederacy
- Model Shipways
- (and 1 more)
-
You're gonna need a bigger table
-
Are you considering 'pinning' the channels to the hull for extra strength??
-
Avast, mate. Shipping out is not a viable option
- 1,756 replies
-
- 3
-
-
- constitution
- constructo
- (and 1 more)
-
Really making wonderful progress there. And thanks for posting those photos.
-
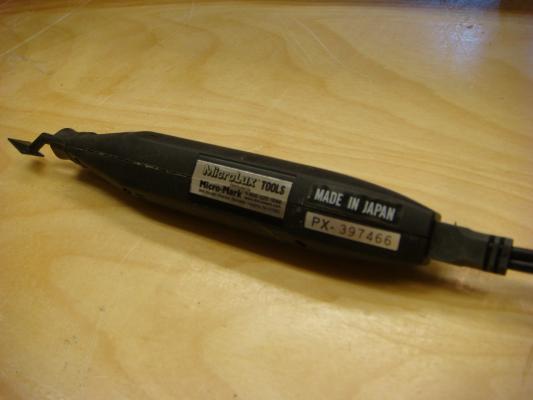
Thanks for the encouragement everyone. I've gotten some inquiries on the sander here and via PM. So here are some details. Got it from Micro Mark and here's a link to it: http://www.micromark.com/micro-sander,7704.html Those of you familiar with my 'brute force' technique know I avoid power tools like the plague. But way back when I was doing the ship's boat for Syren, there was a lot of sanding on the inside of the hull to thin it out (it was bread and butter construction). I figured there had to be a better way so I got this baby. The Dremel for these type of operations scares me....even with a flapwheel. So it's been sitting in the corner for 8 months and I finally decided to learn how to use it and give it a try. It reciprocates, one speed only. Comes with a variety of head shapes and stick on sandpaper to match. I have 180 and 240 grit. Did this job with the 180. It's slow and gentle and easy to control. I was amazed I could actually follow the curve of the transom and work from either side toward the center. Not cheap but I have one other Micro Lux tool (mini drill press) and their stuff seems to last forever. I'll see what else it's useful for. Sjors - I didn't break out the belt sander for this operation. Mark - I think your posts on using it finally got me to take mine out of the box
- 2,191 replies
-
- 6
-
-
- confederacy
- Model Shipways
- (and 1 more)
-
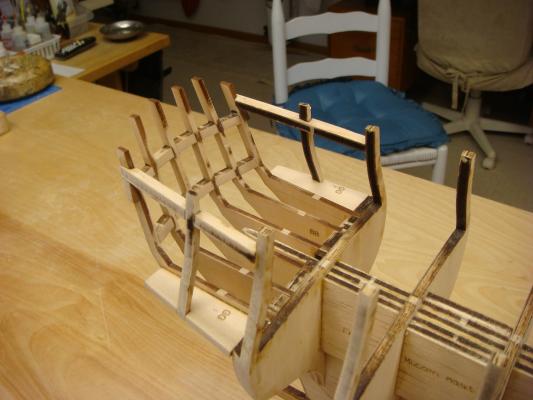
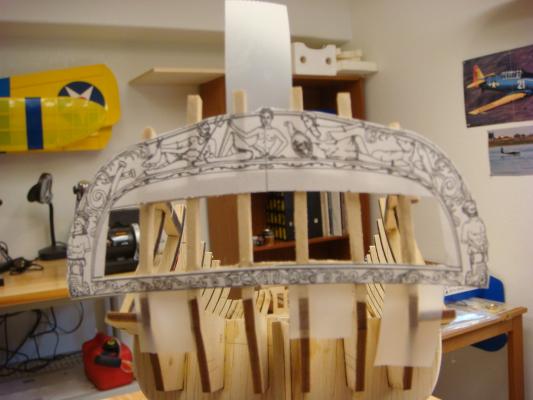
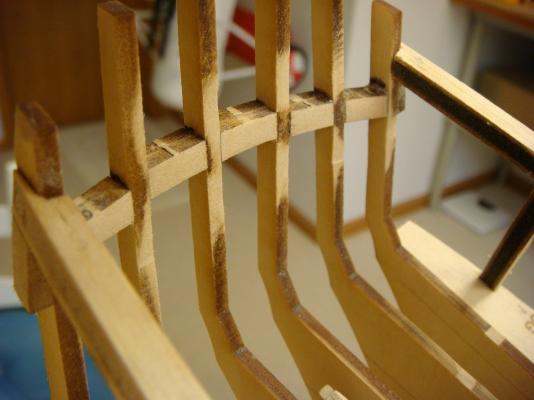
Framing of the stern has begun. The uprights are installed in pre-cut slots in the aftmost bulkhead which establishes the appropriate angle preliminarily. The final adjustment is carried out during the installation of the lintels and sills which frame the stern windows. I'm trying to be very cautious with alignment here as tolerances are tight. The lintels and sills are laser cut from 3/16" ply, 2 layers laminated together to form 3/8" fillers. In the first photo, the lintels have been installed and faired to the stern. I have taped a template of the windows to the stern for illustrative purposes: The lintels need to be faired inboard as well because of their thickness: Normally this inside fairing would be a chore around here. But I used a 'pencil sander' (?) I got from Microlux to do the job: I'm not certain this tool is the best thing since sliced bread but it just saved my butt. I foresee more uses in future. Tomorrow we'll start to get the sills installed and faired in a similar fashion. I'll post some long range shots then. Did I mention this is a lot of fun ??? 50 hours into the build.

- 2,191 replies
-
- 11
-
-
- confederacy
- Model Shipways
- (and 1 more)
-
My fingers are getting stiff from being crossed
-
Nice looking bow all around. You'll handle that 'sprit!
-
Staysails go on the stays like the mainstay and forestay. Generally triangular they fit between the masts in the same orientation as the spanker. Possibly more candidates for the repair shop !
- 240 replies
-
- 2
-
-
- supply
- caldercraft
- (and 1 more)
-
Nice catch!
-
Welcome home! Glad you had a good trip. I'm going to speculate you had enough to eat OK, I'm curious......what is that first fish you're holding? Now ---- back to the chess board!!!
-
I'm with Tom on this. I have 2 pair of those 'flip ups' I got in the fly tying shop. Wear the 2.0s mostly but the 4.0's do come in handy now and then. Think they were about $10 each. With pretty good shop lighting and an auxiliary free-standing high intensity light I'm in fairly good shape. Of course there's always the old 'hold the mini-Maglite in your teeth' routine
-
......and we are underway!!!!!!! Here's wishing for a great voyage. I'm here next to Sjors.
-
I have no experience with solid hulls but I'll say this...... you have picked a very nice vessel. Have a great maiden voyage. Start a build log and you'll find you can get all of your questions answered.
-
Wow....you should really be proud of the way she's shaping up. You ever going to fix the bowsprit