Check out our new MSW Sponsor Innocraftsman
×


ASAT
-
Posts
619 -
Joined
-
Last visited
Content Type
Profiles
Forums
Gallery
Events
Everything posted by ASAT
-
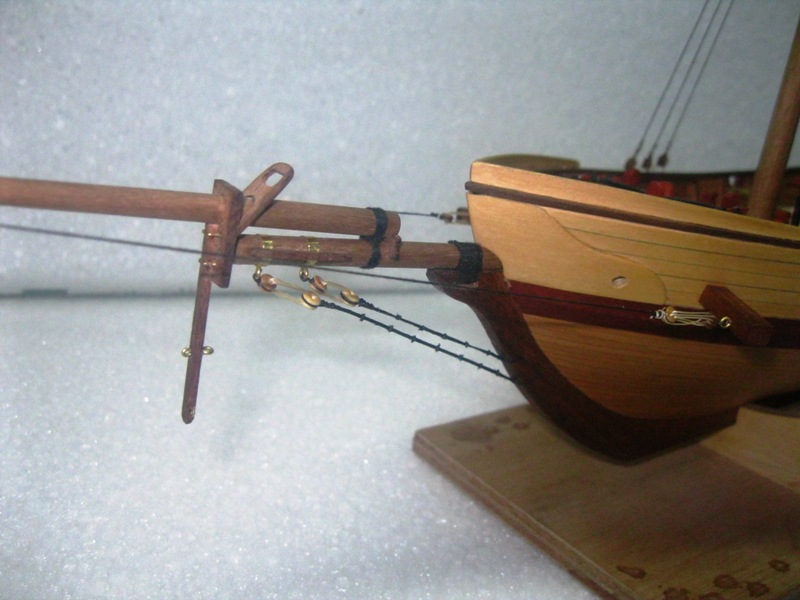
Blackie, I like all the little nuances in our builds, sort of a reflection of our individuality.... I keep bouncing between your rigging drawings and the POB plans, the bowspit is getting pretty busy..... The wire I used is .75mm and the sheet stock is .26mm
-
Richard, did you have to taper the bearding area and the stern post area or is the keel and sternpost wide enough to accept the planks? Like your decision not to use the patterns... Lou
-
Very nice AJ - Really enjoyed your Freisland build as well. I know you mentioned RA getting the best of you and only building a couple more ships... would it be any easier if you built in a larger scale? Like some of the 1/24 and 1/36 cross sections over in scratch built forum? I hope you can continue for a long time.... Lou
-
Thanks Bill, I can't wait to see your heart and soul revealed in your POB build, I know it's going to be great! Floyd, I set the rake at 9 degrees as indicated on Blackies foremast drawing.... I like it better than the massive 14-16 degree rake on POB. Get yours planked dude, it goes pretty quick from there.... Blackie and Krug are doing all the hard work for us.... Lou
-
You bet, I forgot to add that your bulkheads look symmetrical but you can check them by tracing their outline and then fold the tracings on the centerlines. That would give you a reference to shim or trim depeding on the shape on the plans. I pretty much forego that step anymore as I usually do all of my shimming and trimmingduring the fairing process before planking, but it does reveal any gross disparity. Is the bearding line depicted on the plans? If not, just flow a nice curve where the rabbit and bulkheads start deviating at the last few bulkheads. The sternpost joining area is the critical dimension so you have enough clearance to run the planking fair into the sternpost. Lou
-
Bill, thatmuch varience is to be expected, plans will shrink / expand depending on humidity. The bearding line can be set with reference to the bottom of the bulkheads and corresponding to the plan, just fudge them a bit to cover the discrepency and you will be OK... Lou
-
HMS Druid by Krug - FINISHED - 1:48 - Hahn
ASAT replied to kruginmi's topic in - Build logs for subjects built 1751 - 1800
Wow Mark, those blocks (v2) look real! Where do you get your ideas from? I need to start a file on all the great techniques here on MSW. I think your figurehead idea is spot on as well. Lou -
Ron, that binnacle is at least half the size of the one I made andI had a heck of a time with some of the smaller pieces. Well done and very pleasing to the eye. The skylight is off the hook! Hinges? I am in awe!! Lou
-
Elia, beautiful as usual, that yellow stripe has got to be tiny! I don't see it wavering in the pics..... Your metal work is just awesome - those details are what set you and Ron and a few others on here apart from us mere mortals... great to see you back at it! Lou
-
Thanks Elia, good to see you back on the Arethusa.... Blackie - if you want a mini how to on those "tricky" chainplates, check out Elias metal work on his Arethusa log. Lou
-
Your planking looks great AJ, nibbing them looks great too but if you mess it up, you rip out the waterway and start over. Plus they are a pain to cut accurately..... Nice build!
-
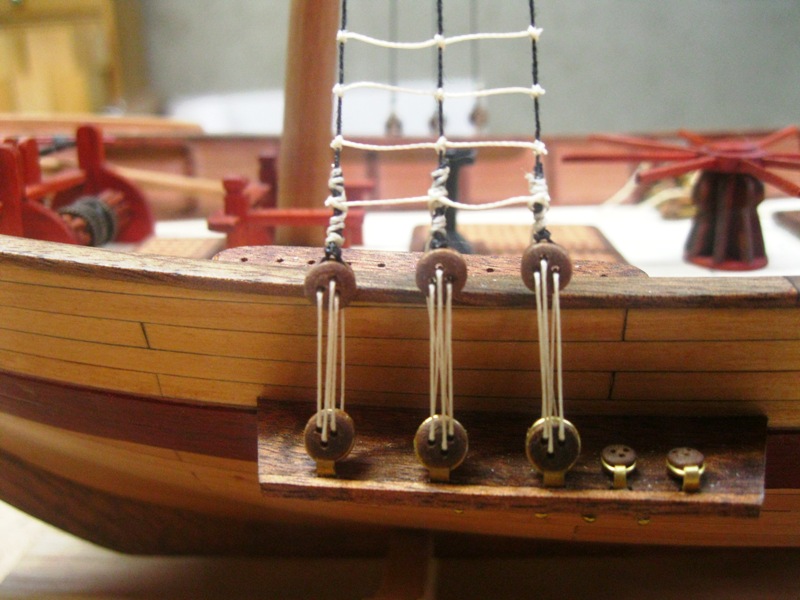
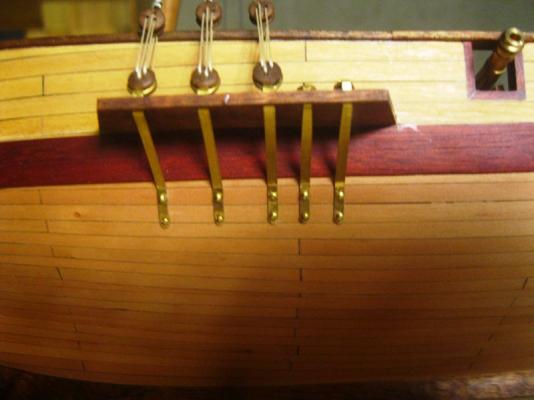
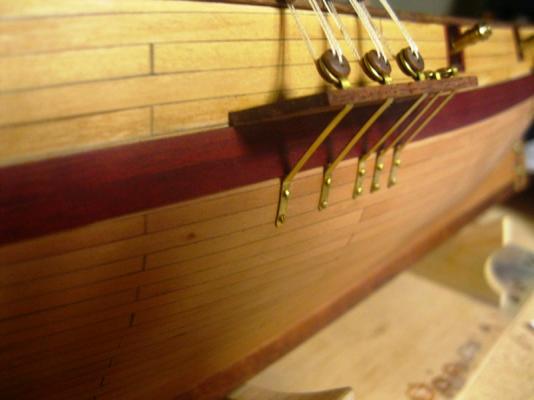
Channel and chain plate close up....
-
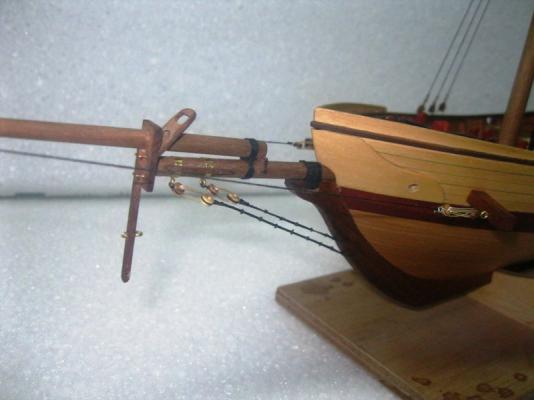
Blackie, I used brass strips and brass wire rings - bent them to sort of follow the POB plans. I will take a picture and post it....
-
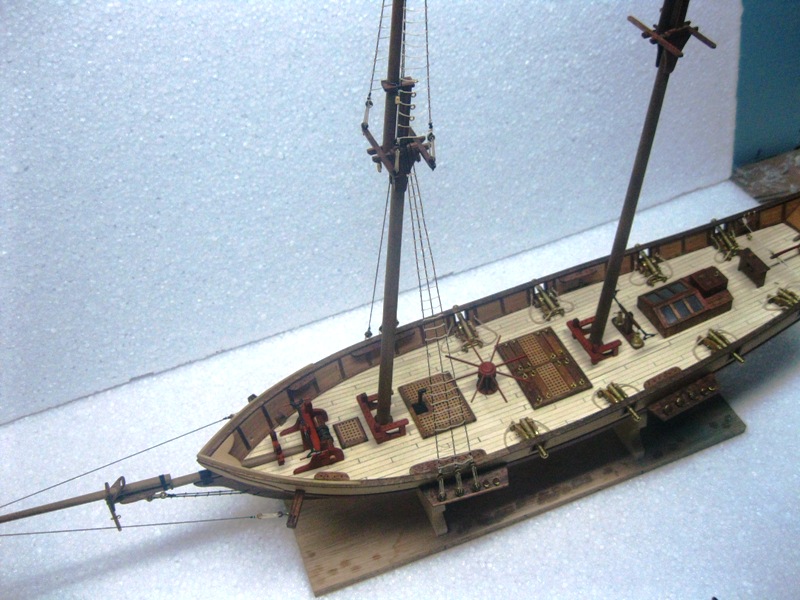
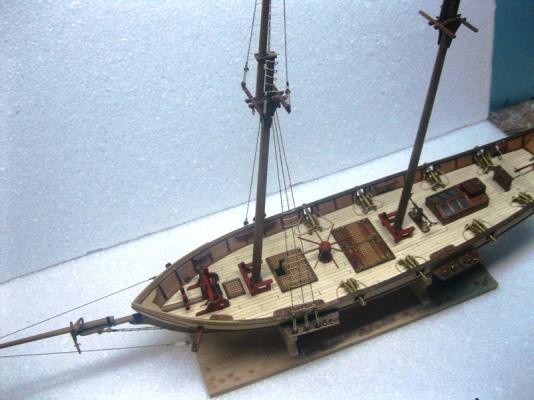
Another overall shot and started on the fore gaff.... close up on deadeyes...

-
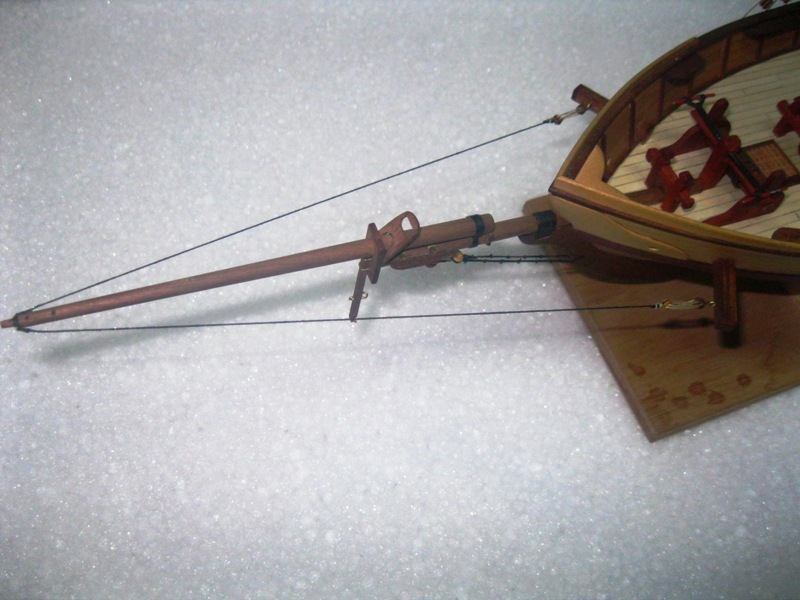
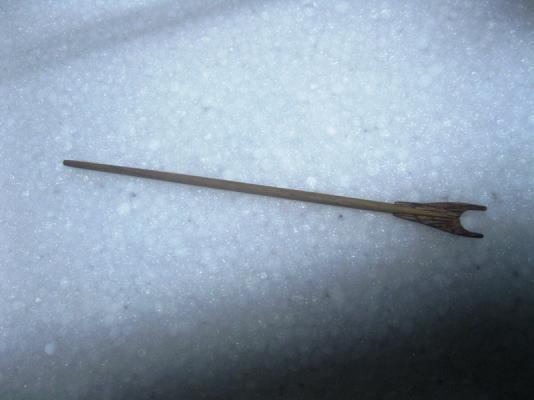
Been doing some rigging..... decided not to install the bowsprit spacer as I had already chamfered the deck end of the bow sprit, been tying a bunch of ratlines which I do not relish - don't know how you guys persevere on those three master's....


-
Bill, as to the bulkheads - get some basswood or equivalent ply at your local hobby store and make some new ones... much easier than fighting the wood. The Wenge does have some pretty large grain - I prefer walnut, bubinga, or many of the rosewoods depending on the color scheme I am trying to achieve for Keel, stem, top rail, etc. but in the end it's your ship so go for what you like... Lou
-
Sherry, nice work.... maybe a nice golden oak stain and then some satin poly? Chuck P. has used that combo on basswood and it seems to give it a nice amberish hue as well as help to highlight (darken) the more recessed areas. Might give it some color as well as intensify the excellent carving work. Lou
-
Thanks for those drawings, I will be using them as I progress, starting on the bowsprit now... Lou
-
I have used it for planking on my Syren as it is a nice yellow color - I try not to use paint on my models when wood will suffice. It is a nice hard wood that stays straight after milling, sands and machines well and has very little noticeable grain so it is perfect for a lot of applications in ship modeling - framing, fittings, planking, masts and yards etc... I get mine form Macbeath Hardwoods but I have a store 40 miles from me in SLC - it is a reasonably priced wood for an imported exotic..... Lou
-
Ron, I have an Onieda kit that I abandoned several years ago. I bought the Pau Marfim framing wood and damn that is some hard wood.... I broke the stem off during interior sanding and despite several attempts at trying to fair the square frames with various sanding devices I gave up trying to get it faired. When I got close there were several frames that I had to cut the spacers and re - position. I just got frustrated with the lack of experience and the holes in the Lumberyard instructions. At the time Elia was building his and tried to encourage me but I just felt like it was over my head... I have been reading your log and you have given me new hope, this log is light years ahead of the Lumberyard instructions and the level of detail that you have gone to is making me think that I might be able to resurrect the effort plus I have a few more years of experience under my belt. I only have the square frames attached to the keel so far, would you recommend a framing jig to position the cants and half's or do you think a gantry type framing board would be effective for this build? I really think some sort of jig or a more accurate way of framing this should be the norm. I haven't decided if I want to fully plank one side, I originally was not going to but after seeing Elia's and your builds - I am re thinking that decision. I have not incorporated a rabbit but the stem is still separated so it may not be too hard to incorporate. Keep up the great posts - your build is inspirational and encouraging - Thank you for the thoroughness of your log - success and failures and how to persevere...... Lou
-
Glenn, make that 3 or 4 I am really liking your approach to this build - kind of laid back and enjoying the ride vs. sweating out all the details. I plank pretty much the same way you do, except I do try and use scale length planks but probably would not if it was going to be coppered. I have at times thought that I lacked discipline to do it absolutely correct but I have come to realize that it's just ship modeling and I do it cause I like it - and to relieve stress, not create more. I like the paint scheme - it seems more natural and flows better than the Nelson scheme and your finishes always make me envious... I have not painted a model yet but I am getting closer to trying it, it gets stressful trying to do everything in different colored woods. Did you use an airbrush? How did you paint the cannon? Someday I really hope to do a ship of the line.... Keep posting Glenn, I always enjoy your work. Lou
-
Wow Blackie, those drawings are great! I see what you mean about the bowsprit needing a saddle, I will incorporate that as well. Is the yoke affixed (wrapped) to the sprit with a line? I think now that I see the drawing, your picture looks like you chamfered a groove to accept the line, at first glance I thought it was a plywood piece from your kit..... I may have to re do that on mine - I did not see it before attaching to the sprit. I will have to re make my jibboom collars as well but thats not a big deal. Do you have any revised drawings for the Fore and Mainmasts? The kit I have shows a fighting top on the foremast and I did not think that was correct so I built it like the main with crosstrees and trestletrees instead and there is no real rigging plan just a single side view with the sails covering most of the rigging... very poor. As you can probably tell, I am not very well versed at rigging, I can follow plans and instructions but my knowledge on it is minimal. I am in awe of the amount of talent and willingness to share that is available on this site. I would love to have the spreadsheet you offered, I will PM you my email.... are you drawing plans for anything else? I am looking for a good scratchbuild project and your plans are a lot better than some I have been looking at.... You know, maybe a 1/64 Ardent Class or something easy like that... :) Thank you again, between you and Kruginmi, I have been able to turn this kit into a fair rendition of the genre Lou
-
Blackie - I was planning on cutting a slot in the stem and installing some cleats on the sprit and do a twisted gammoning and lashing the gammoning in the middle, also am going to gammon the jibboom to the sprit but no twist on that one. I have referred to your drawings repeatedly during my build, I appreciate you uploading them and I hope you continue to post them as you do your rigging.... they are way better than the single pictorial rendering I received with my version of the kit. Very little detail and almost no help as far as the rigging goes. Lou
-
Green Graphed/scaled work bench mat
ASAT replied to Bill Hime's topic in Modeling tools and Workshop Equipment
Bill, Tower Hobbies carries various sizes of the green graph mats, I think their 9x12 is only 6 bucks or so, I think they are the hobbico line Lou -
Very nice, excellent metal work on that mast, glad you are back to your harvey, I have been stealing some of your ideas on mine and I am starting to rig mine as well. Keep those pictures coming! Lou