DONATION DRIVE - SUPPORT MSW - DO YOUR PART TO KEEP THIS GREAT FORUM GOING!
×


ASAT
-
Posts
619 -
Joined
-
Last visited
Content Type
Profiles
Forums
Gallery
Events
Everything posted by ASAT
-
Grant, very nice work, and I know exactly what it took to get you there! I think I prefer the black with the pear wood.... If the wood were lighter like my Anigre or even boxwood I think the bright would be better, but the darker bolts seem to resolve better with the overall look of the darker wood.... Keep placing that bar just that much higher and we all shall have some very nice builds to display!! Lou
-
Fudge factor, that way if you really mess up it rhymes with the next words out of your mouth Rusty, I noticed your files do you use cheapo ones like me and replace them often or are they nice ones that stay shrarp?
-
OK - first screw up (I think) I made the second frame D for the first double frame and after pretty much following the procedure I used for the first I put them in the jig together and they fit pretty nice, not perfect but then I realized my mistake..... I did not leave any meat on the frames for fairing them together so now if I start sanding on them they will be too narrow in places... Oh well, I guess it was good practice to make a couple frames.... So I will re do the frames and plan to fair the outside of the frames fairly close so they will fit in the keel and jig correctly but leave the inside fairing until every frame is in the jig and glued in place..... I also plan to glue the double frames together before fairing either side - any drawbacks to my plan that I am not seeing?
-
I thought you said you needed to up your game?? Those frames look great to me!! So are you bolting all the double frames? i looked at the aots and I am even more confused, the chocks are not in the same locations and the chocks themselves are treenailed / bolted? It looks like the bolt heads inmy scale would be 1.2 mm or so.... Wher did you source your pins? I do love the effect of them though....
-
Thanks guys, I appreciate the comments. My profile notifications was changed, not sure why but I put it back. Mobbs, I am still undecided on the treenails although I love the look of those brass ones ever since I saw the russian modeler's doing that. Maybe if I could see a pic of a frame with them it would help me decide? (hint, hint) I think the brass would look good with the black joints and the wood contrasts. Are you trenailing the chocks and the frames? Which figure are you refering to in the aots book? At any rate I have some time to decide as now the challenge is to repeat this frame's sucess 21 more times.... I already have to re-do a couple futtocks do to slipping on the sander and one I cut too close with the scroll saw and didn't leave enough wood to sand... So it's not so much "lifting your game" as much as not being willing to settle for something less than the outcome you desire to achieve. Besides, you have shown great perseverence by completing your Aggy - and a great example as well!
-
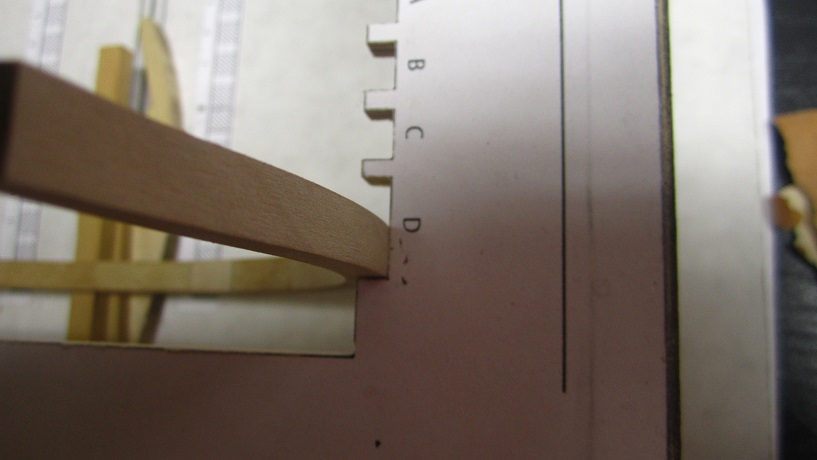
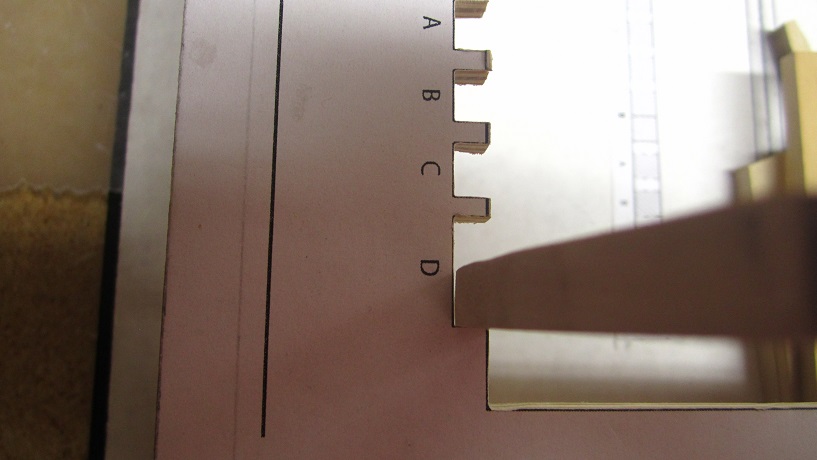
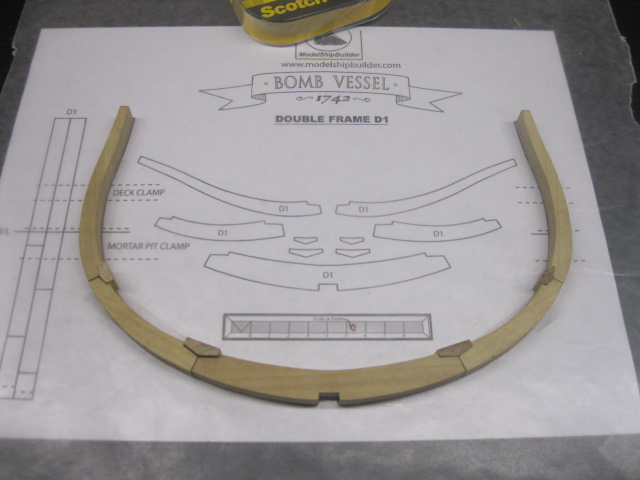
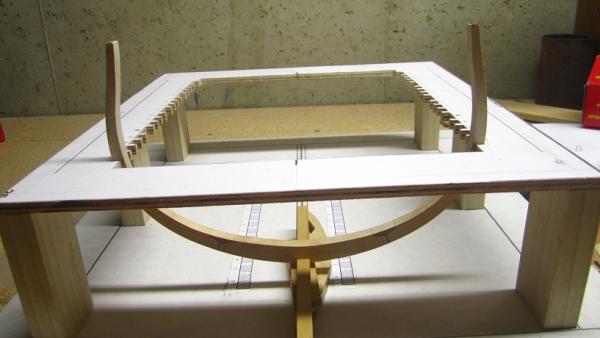
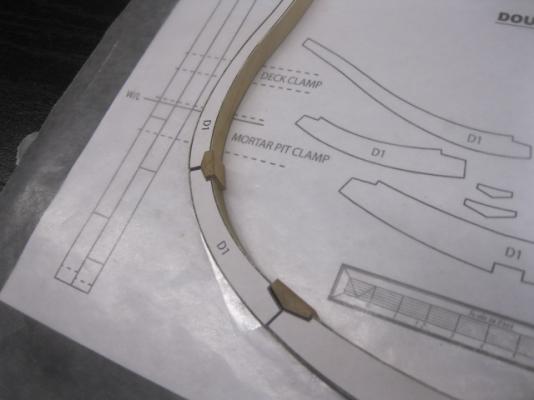
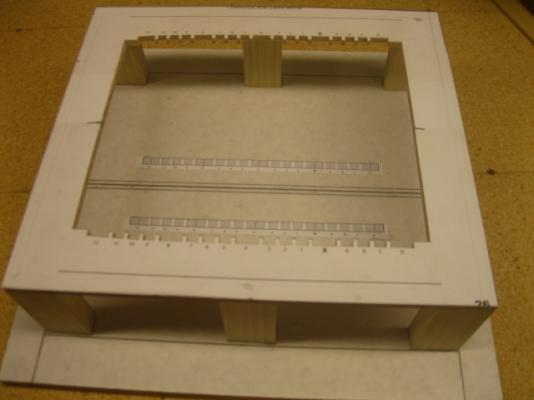
I then test fit the frame into the jig. I haven't made the keel yet so I had to shim up the keel fit piece with some scrap - the shims came out about 1.5mm too high but it looks like I have a good fit.... there is a slight gap on the starboard side of the frame but I am hoping it's the height difference - at any rate it is only about 1/64" so I am OK with that..... By the way, I just noticed all the "Likes" as I was posting this - so Thanks to all of you that posted them.... weird that I didn't get any notifications but I appreciate you guys looking in..... Lou


-
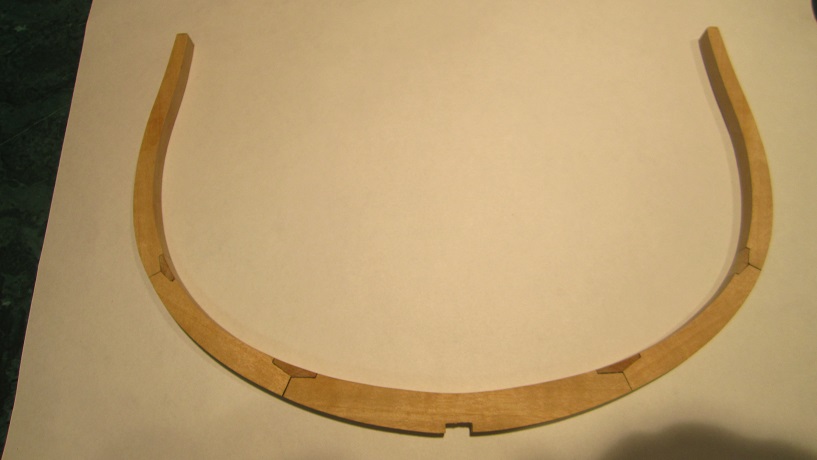
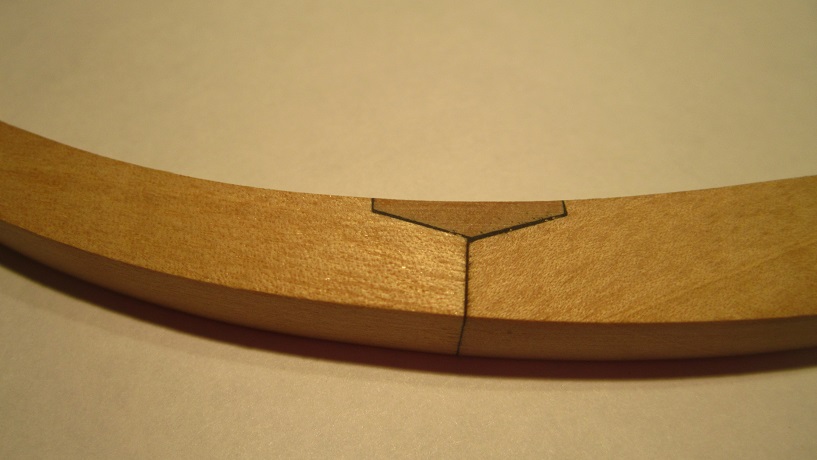
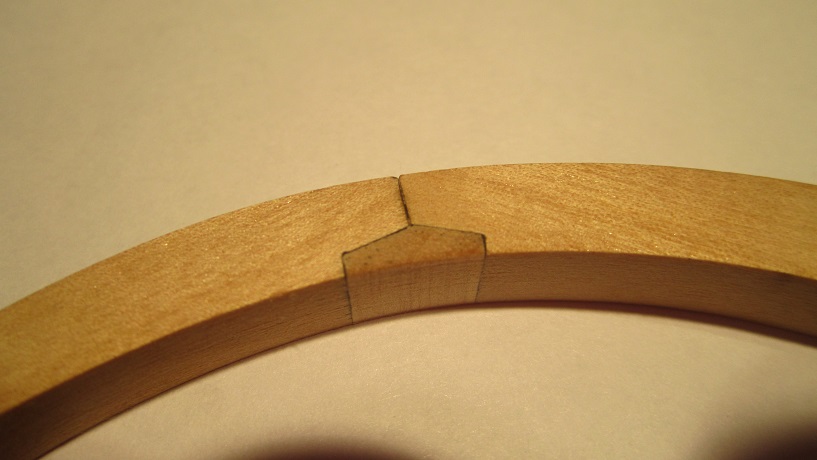
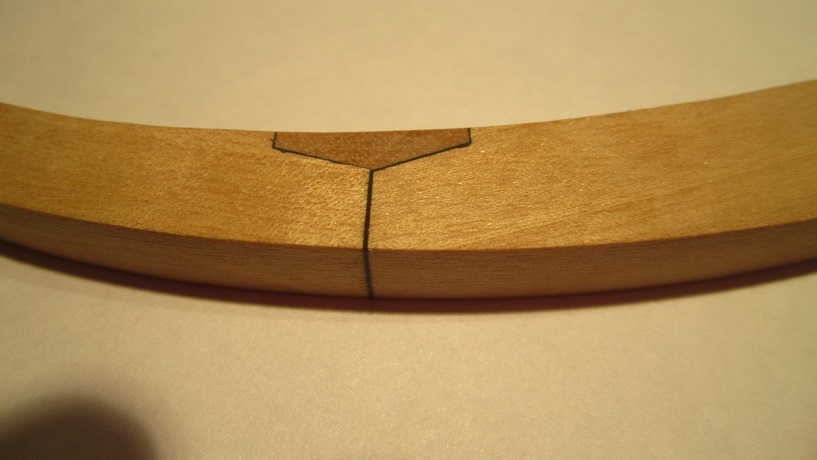
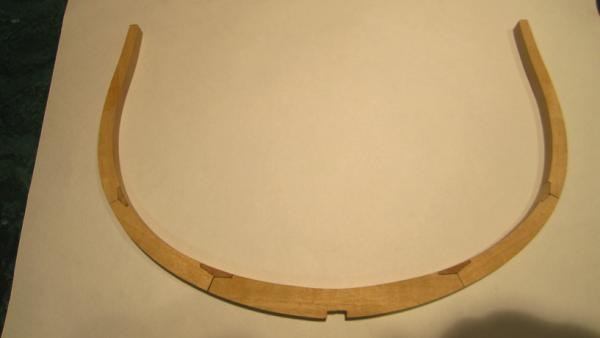
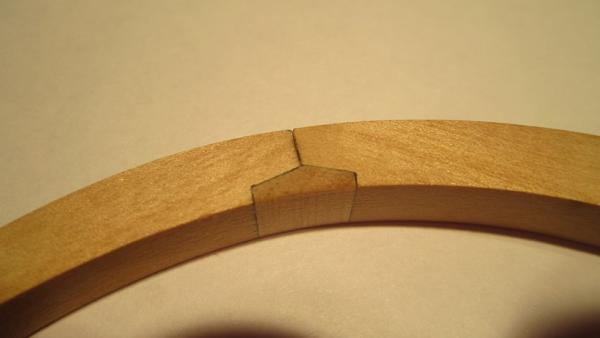
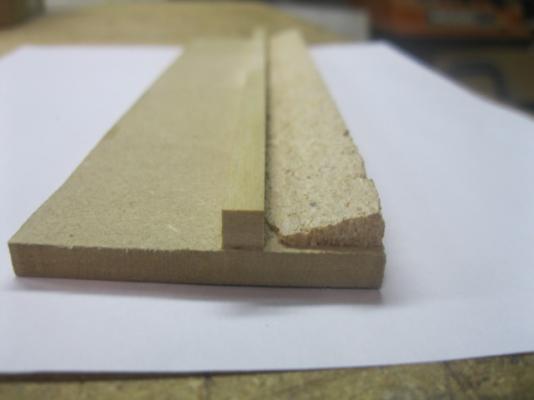
Thanks Grant, I cant take the credit for the Chock Jig - I got the idea from a post on ModelShipBuilder - I think it was Ed Bardet - he did a nice build log on the Granado Cross Section and it has some great "what not to do" stuff in it as well. Good resource. So here is the final result of my first frame ever.... I really like the Anigre wood, these pics are just the bare wood - no wipe on poly yet, and I like it's finish and the way it holds an edge. I removed the paper templates and used the 5 min. epoxy with graphite dust to dye it black. I like the way the joints are showing using the graphite colored epoxy, I'm happy with the way the joints turned out although it is time consuming to get them right. I like using the 5 min. epoxy as I don't have to clamp the joints and I can get the joints very tight by holding them in position just as the epoxy sets hard. It gets a bit messy but I clean it all up with the final sanding anyway.... The only thing I am not sure about is the color contrast of the chocks, since I milled the chocks with the end grain of the wood showing it turns out like a totally different type of wood - a lot darker than the rest of the frame. I would appreciate some input on that - should I orient the chocks grain so that it is the same as the frames or keep them as is? Any idea what was done with respect with grain orientation in the actual build process? I don't mind the contrast, I actually like it but I don't want it to be an obvious error if it is not supposed to be that way.

-
Just beautiful Rusty, your results are outstanding!!
-
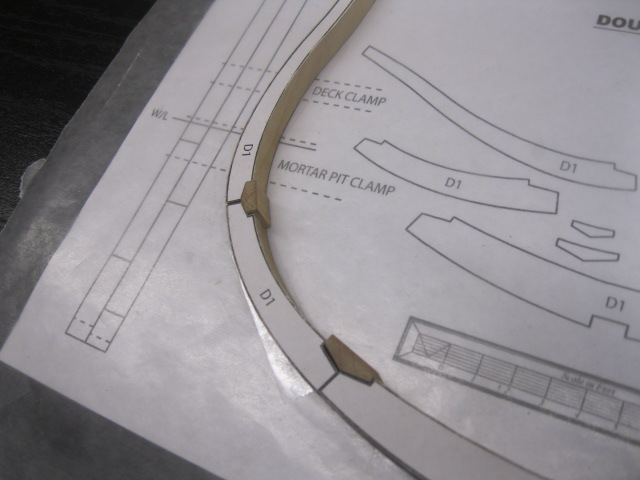
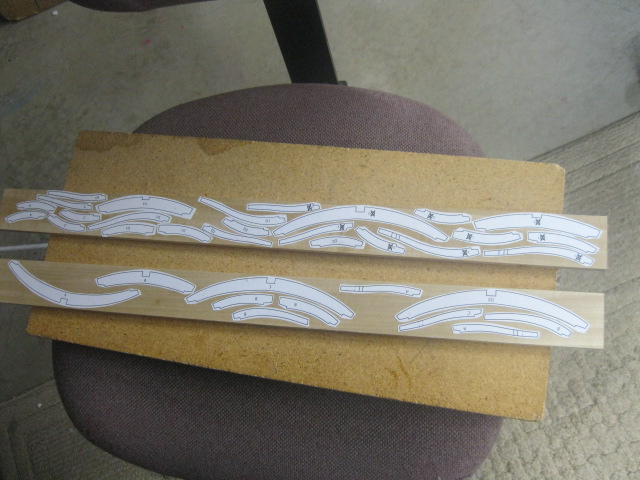
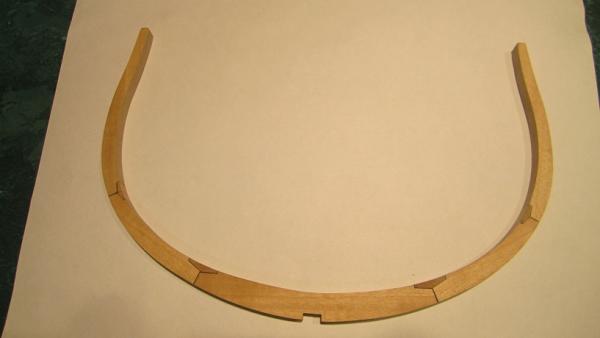
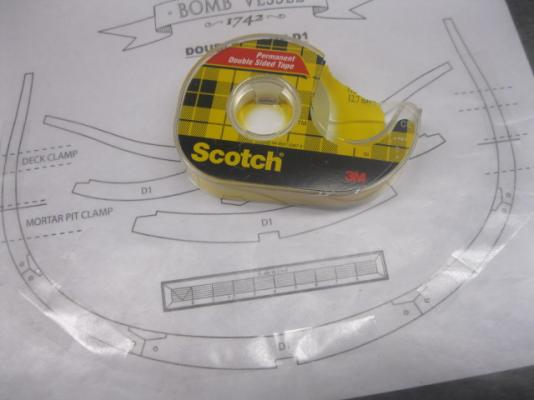
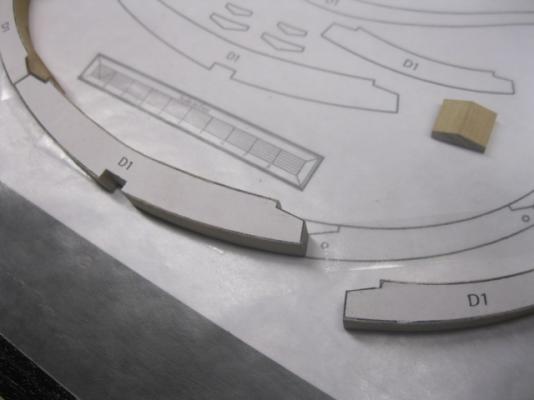
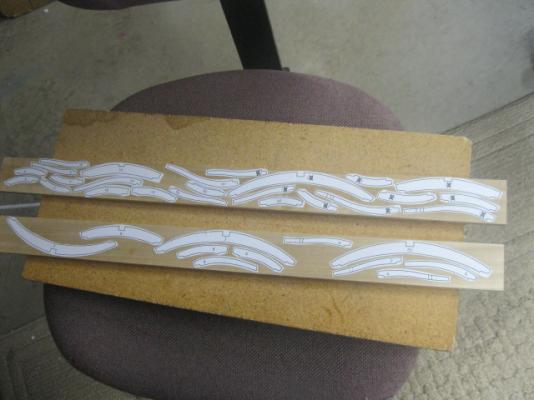
I then taped down the frame template to a straight piece of melamine MDF and covered with wax paper - I use double sided tape for each of the futtock sections to hold the pieces on the template - I massage the chocks to fit each joint and check the fit from front and back of the frame. I am not sure if I should remove the paper from the futtocks before gluing? I could always transfer any lines I need after gluing the frame together but any help would be appreciated. When I do glue them up I think I am going to try 5 min epoxy tinted with graphite to glue everything together as I can wait till it almost goes off and hold the futtock pieces together very tight until the glue sets.... Maybe??
-
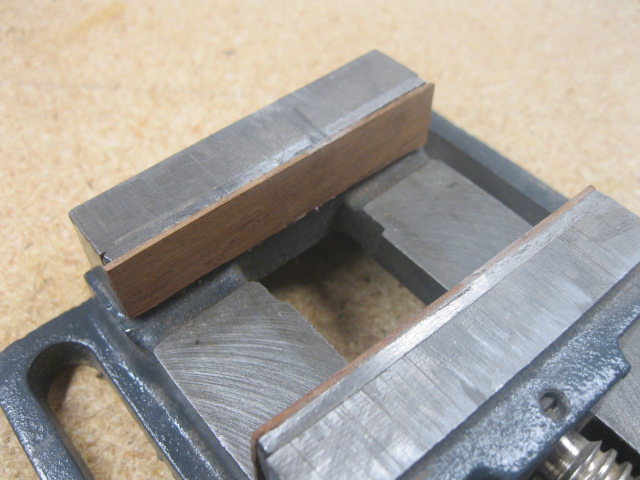
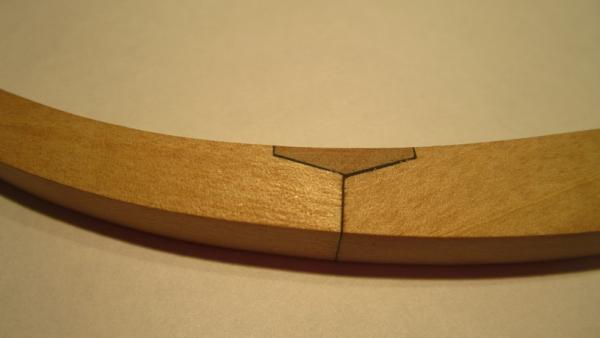
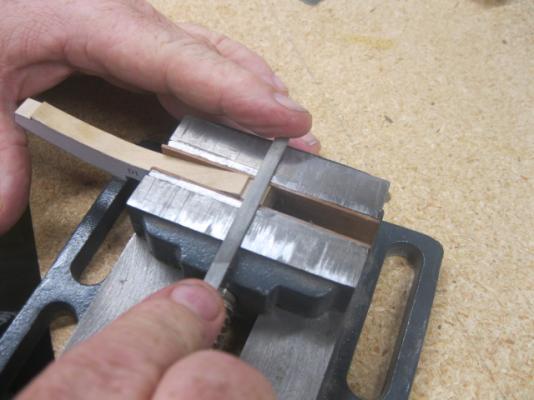
The sander works great for the basic outline of the pieces but I still needed to shape the joint areas and fit the chocks by hand with as much precision as possible (for me) I again took some advise from Mobbsie and am using a vise as a sanding / filing guide. I glued some hardwood to the insides of the jaws on my vise to protect the wood and provide a visual guide between the work piece and the vise. while this produces a fairly accurate product, it is slow and tedious work and requires a lot of file, remove, fit, repeat...... I am considering trying to use my MF-70 mill but I will need a larger end mill as the largest I have is 3mm at the moment and I would also need to come up with some kind of jig as well to hold the piece at the angles needed.

-
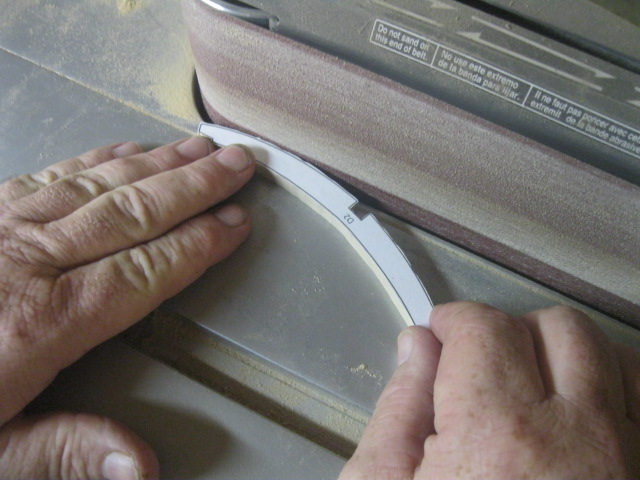
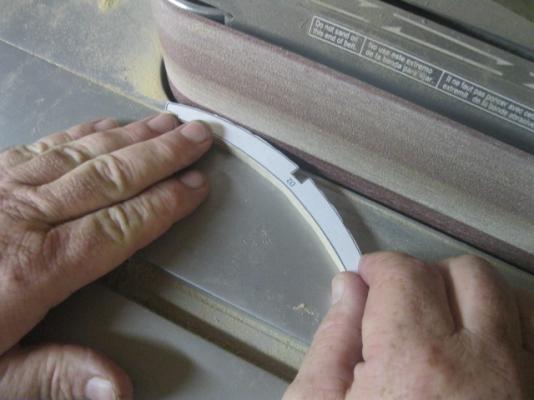
After cutting out the futtock pieces I used my oscillating belt/spindle sander to shape the pieces to the correct outline - I really like this tool as you can do the inside curves on the curved edge of the belt and the outside lines on the flat of the belt. I need to rig up some kind of dust remover for it though. I also found that if I sand the lines to just the outside edge and then "rub" the paper template back downonto the piece with my thumb I could get really consistent with taking the piece down to the inside edge of the line with subsequent passes - I rub the paper down on the edges as it tends to "roll" up as the sander oscillates up and down.

-
Elia, masts and spars are looking great, cant wait to see some more of your awesome rigging talents. I was always blown away by your Oneida realism.
-
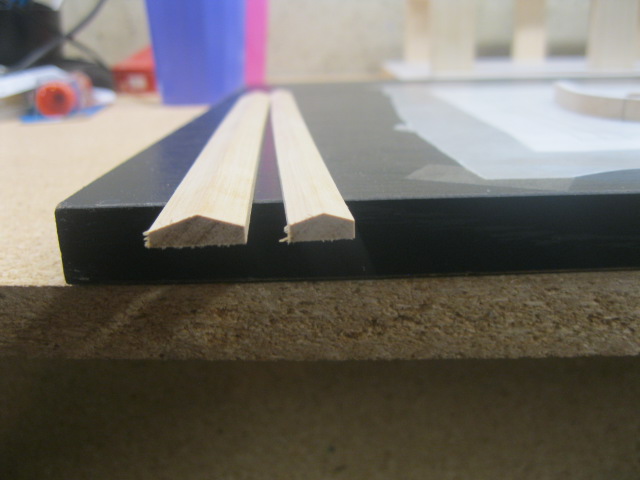
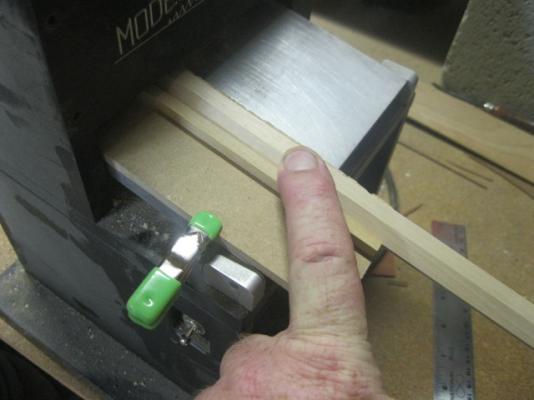
After much discussion with Grant and Mobbsie (did I mention the great support they have going through a multi member PM system?) I decided to make the chocks for the frames as consistently as I could so I rigged up a jig to use my thickness sander to shape the profile of the chocks - cutting a "shim" piece out of some MDF at the angle of the chocks (approx 18 degrees) and then adding a straight edge guide piece I glued both on to a piece of 1/4" MDF and then clamped that into the sander to "mill" in the angles you just run some rectangle stock that is as wide as the chocks through the jig twice - one for each angle.... then I will cut off pieces as I need them and final shape as needed by hand.....

-
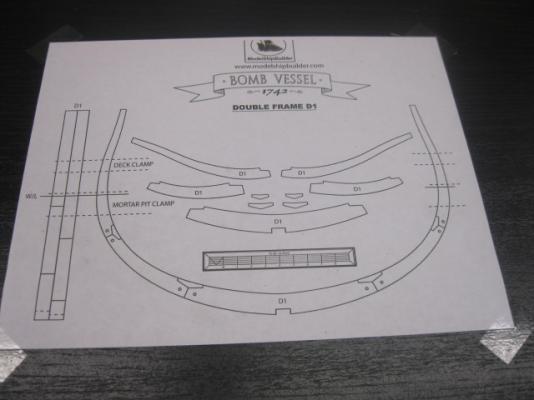
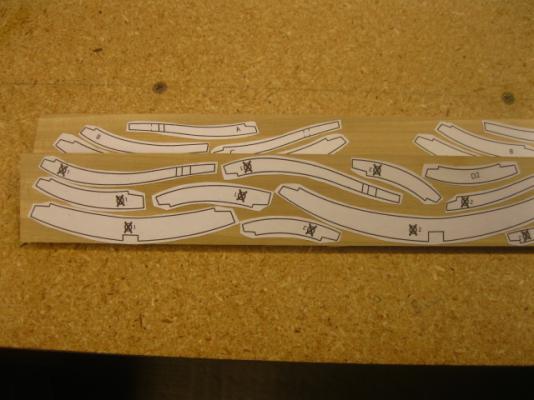
I then proceeded with the first 5 frame futtock pieces - I use 3M 77 spray adhesive to adhere the paper on to the wood....
-
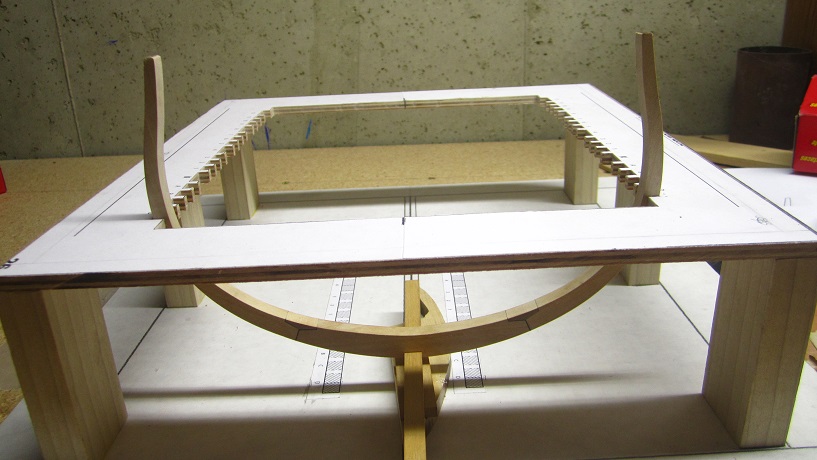
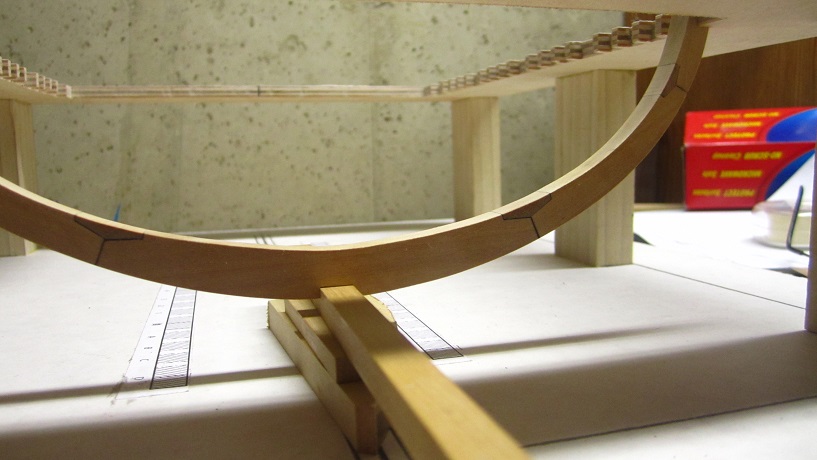
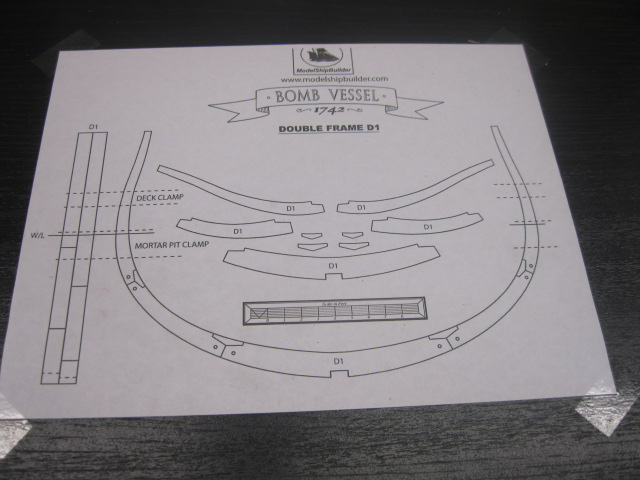
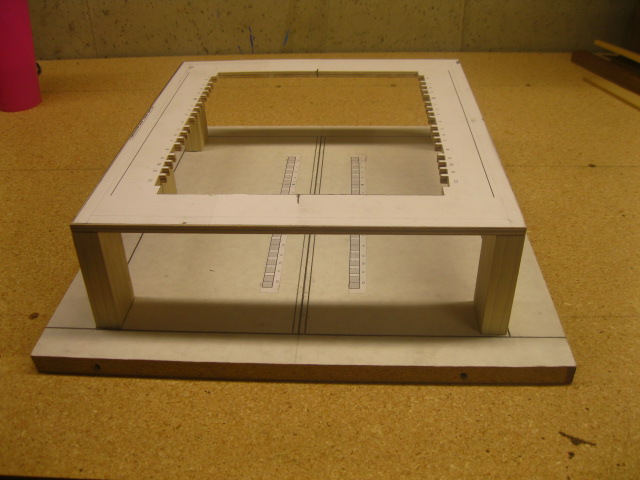
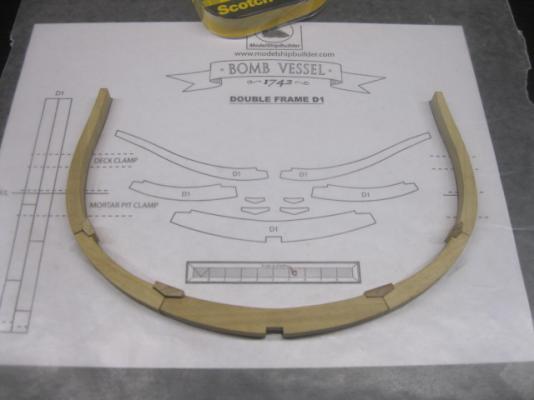
This is my log of the Granado Cross Section scratch build using the plans from Jeff Staudt and Modelshipbuilder.com. The plans are awesome as has been attested to by everyone that has posted their builds on MSW and elsewhere I am undertaking this project as part of an impromptu group build that I horned my way into. I think it started as a combined effort by gjdale and Mobbsie, and then JackP joined in and then I invited myself into the mix. I have to say that I appreciate the efforts of Grant and Mobbsie and their efforts are making my build much smoother than it would have been without them and I also appreciate their gracious invitation and welcoming attitude as I joined the build. I am sure that when Jack gets started he will find the same thing to be true. There is a wood package available from Jeff at the Hobbymill- not sure how much longer as he has announced he is closing down the Hobbymill soon. I however have chosen to mill my own wood as I have the capability and lots of nice wood stashed away as well as a couple of new woods that I wanted to try out (some Anigre and Makore) and this will be a great test bed for that as well as learning some new techniques as this will be a first attempt at building a POF from scratch. I chose 1:38 scale because I wanted the cross section to be bigger than the 1:64 full model and 1:48 seemed too small while 1:32 was too big - 1:38 turns out to be 25% larger than 1:48 and all the plans still fit on letter size paper so there it is! I have done a few intense kitbashes and I have been scratchbuilding the Granado POB using Victory Models plans but this is the first time for a POF for me and it has already proven to be quite the challenge. I am using starting out using some Anigre for the frames - I wanted to start with the frames as they seem to be a difficult joinery challenge and I want to practice on those first. The Anigre is nice to work with, it kind of reminds me of costello boxwood although it is a bit softer and seems to dull the scroll saw blades fairly rapidly as I cut out the frames. I made the framing jig utilizing the templates provided and used some birch ply with poplar uprights sitting on a piece of 3/4" mdf coated with a melamine suface. I was going to use some 1/4" nuts and bolts for standoffs but I had the poplar 1x2 and its just a small jig so....

-
Chuck, looking good. Still planning to release the plans after you plank the hull or are you going to wait till she is further along?
-
Soooo..... What is your technique?
-
Mark, I was reefering to using the cross bracesto establish the centerline ( c/l)
-
Looks great Mark, those upper spacers (ribbands?) should help keep everything nice and true, are you using them to determine the c/l of the frames as well?
-
Looking great Chuck! I like the Surly scheme, then I can use redheart and dyed pear when I do mine.... There just isn't a good blue wood! :-)
-
Mark, the full model turned out great! You really pulled off that figurehead carving - I was wondering how that was going to turn out - great execution throughout and that has to be the best looking basswood model I have ever seen!! I am going to do the Granado cross section from MSB so I am hoping to steal some of your awesome techniques from this build. How is the Lady Anne coming? I finished my Harvey - guess I should update that log.... I am hoping to do a couple of Hahn's models after I retire as well, I have the Cromwell and Confederacy plans - did you do the full model using separate futtocks also or did you use the traditional method? if you did the stacked frame blanks can you give some comparison for both methods? I was wondering how it would be to build the frames up using the futtock method but still leave the extensions on and use the upside down method for framing. Are you going to build up the frames in two halfs and then glue the halfs together or are you going to layer them up as you build up each futtock? Also how did you determine where to section the futtock lines? Did you use the frame blank drawings from the plans or use the TLAR method? Keep up the great work and the great detail you provide in your logs, I learn a lot from referencing your work and the beautiful results you achieve motivate me to continually improve my own efforts. Thanks for sharing your passion for perfection with us.... Lou
-
Very nice Jack, awesome execution and detail. Your cross section is going to be epic!
-
Mark, great work, I have seen an article or book mentioned that descibes the Hahn method including making framing stock and jigs - can you point me to the reference? I have Ships of the American Revolution, am I missing it or is there a different book?
-
Thanks for the kind words guys, I have a long weekend so I hope to have more to show for it soon....
-
Thanks Mobbsie,you have a good eye- yes that is some yellowheart for the first layer of the wales -I like to define the wales with a good contrasting wood so I can follow the line easily when I add the second layer. The black is some black stain that I used on the edge of the wales so that when I add the second layer (which will be stained black pear) you wont see the yellowheart under the edge of the wale.